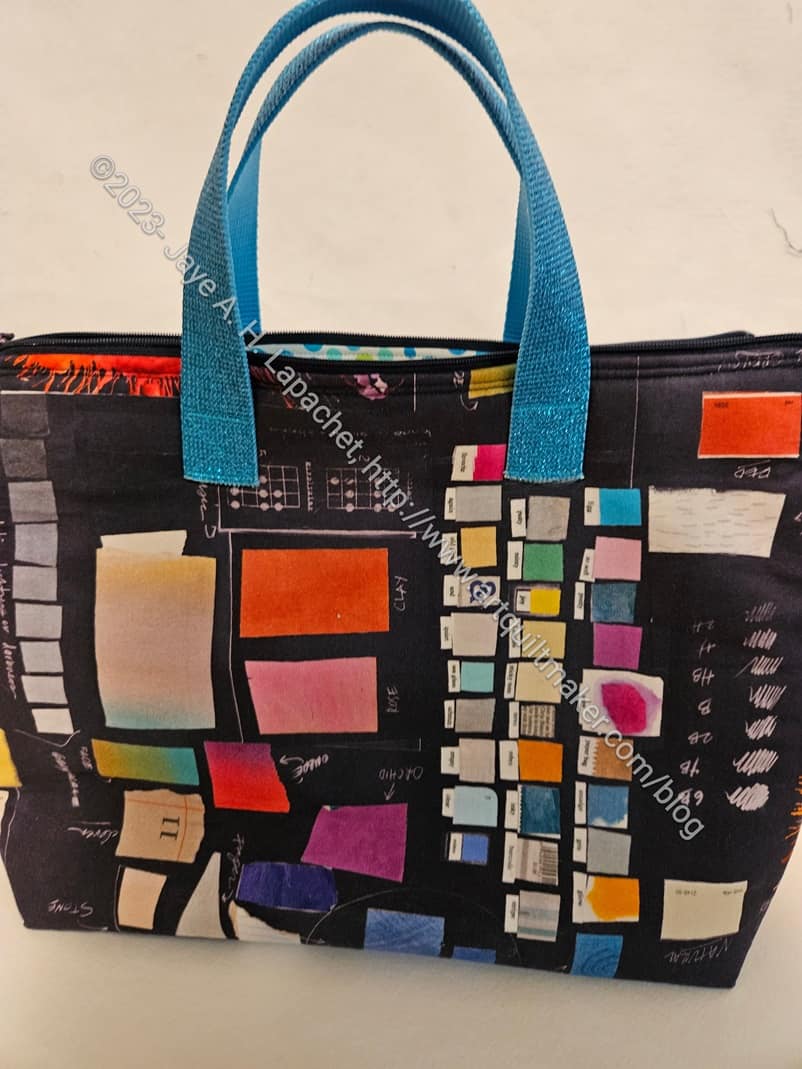
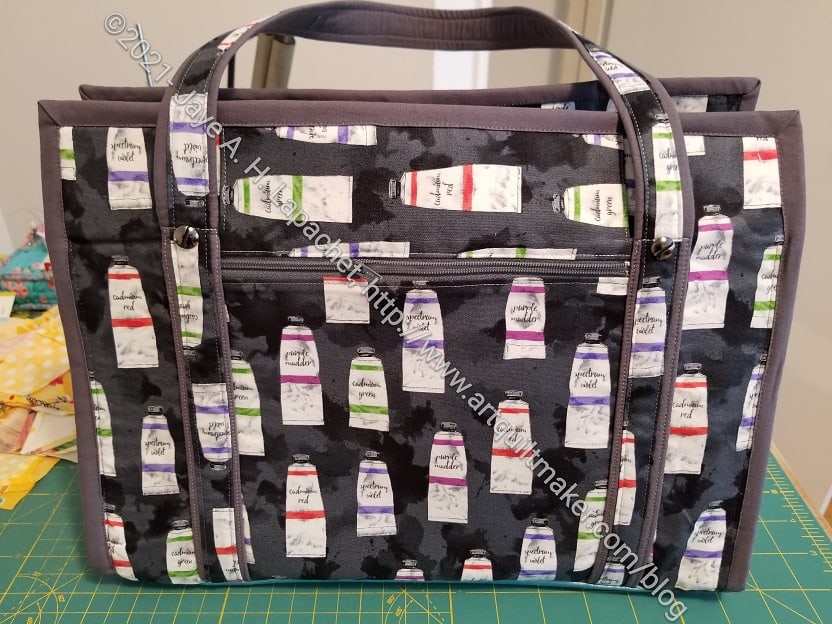
This the Kit Supply Tote I made for Carrie. It looks the same as the one for Sue, mostly because I used the same fabric for both of them. I highlighted the paint chips on this one and the color wheel on Sue’s.
We had a holiday lunch yesterday, which was super fun. I was hopping about the week before, because I could barely contain my excitement in giving these totes to them. I basically thrust the gift bags into their hands as soon as we sat down at the restaurant and made them open them. They seemed excited as well.
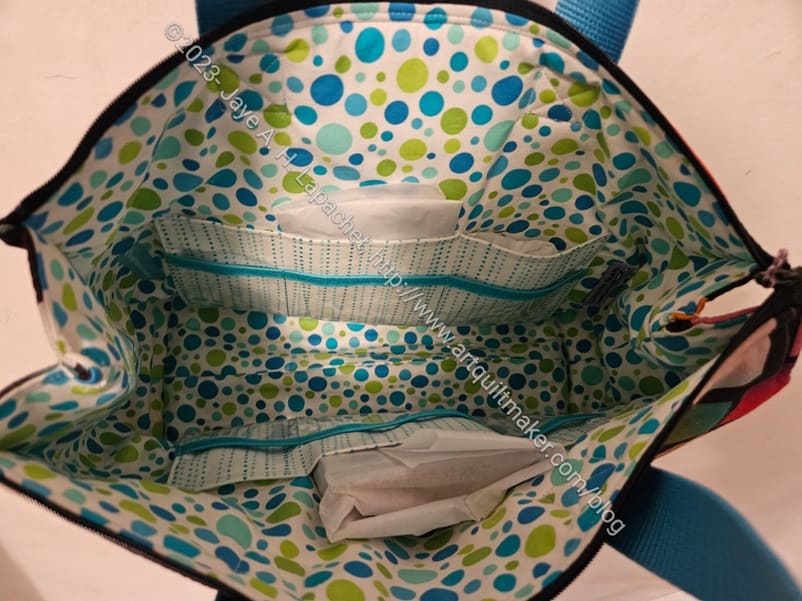
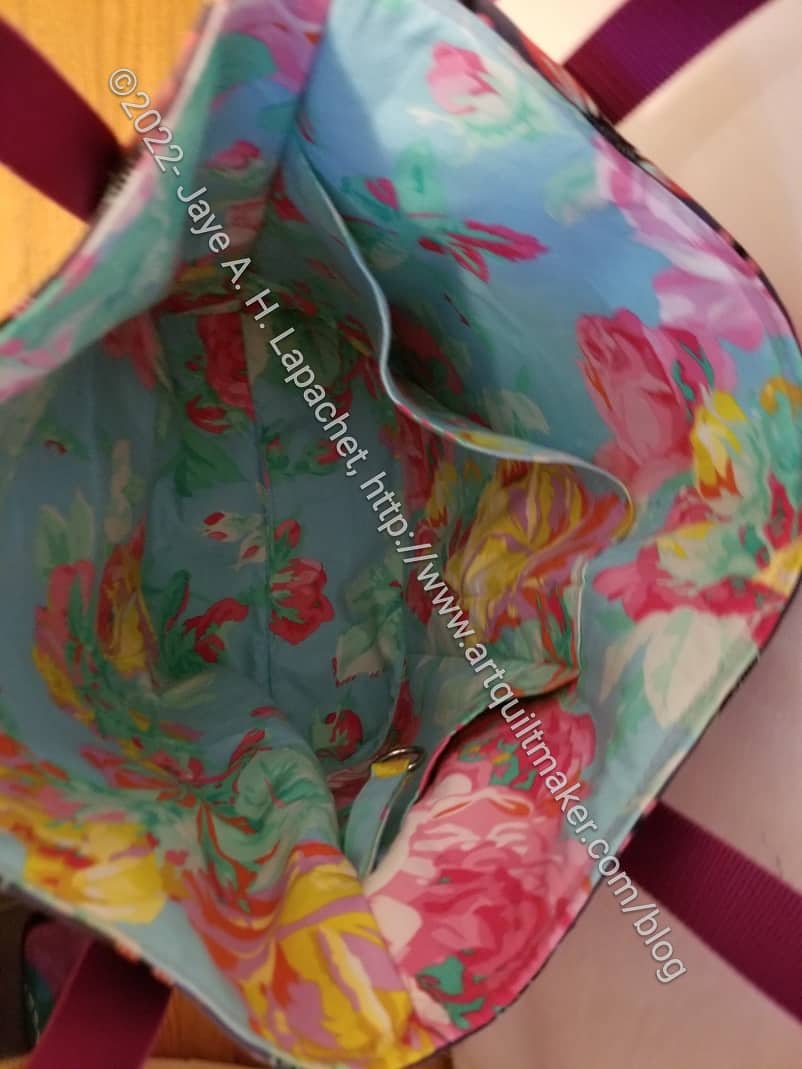
Kit Supply Tote: Carrie’s inside
I put a few small gifts in side just because I don’t like to give empty bags.
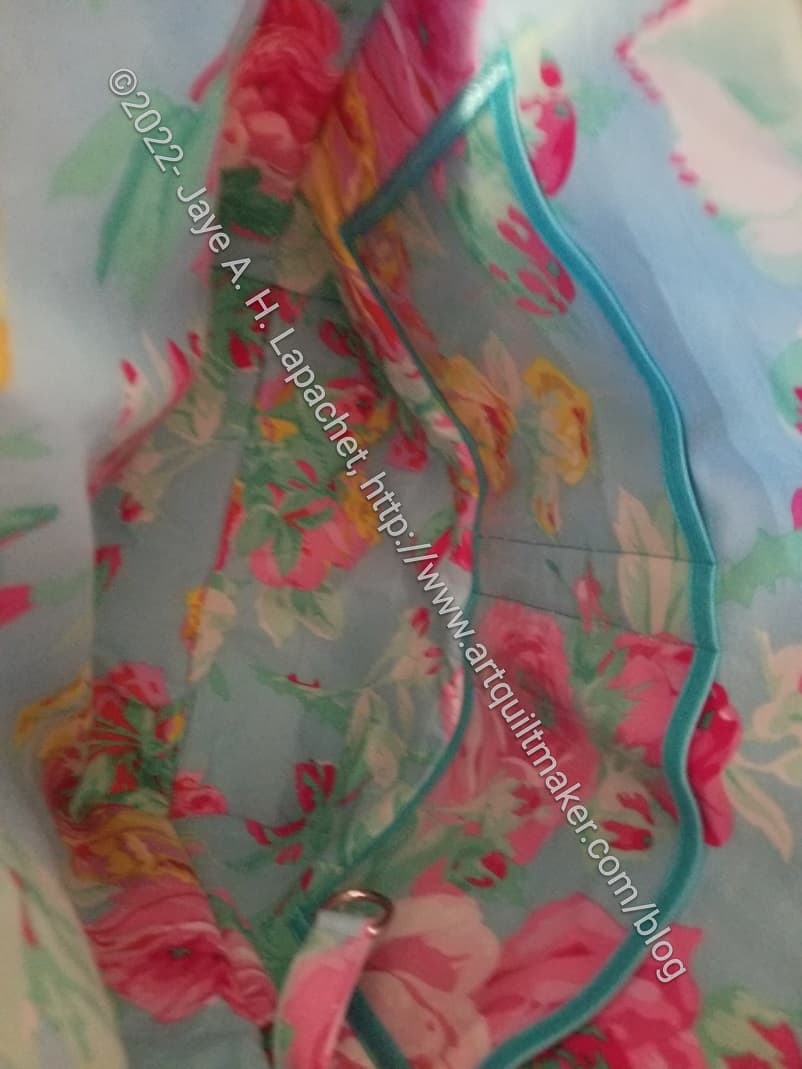
The insides are the same on both. I designed the pockets differently from the pattern as I wanted to put two layers of pockets for added storage. On Carrie’s tote, I separated the pockets more. Both have vinyl pockets on top of the fabric pocket. The vinyl pocket is edged with some turquoise doublefold elastic.
Carrie was super excited that this bag matched her Hackney bag. 😉
The other day when I wrote about this project, I was concerned that I wouldn’t have time to finish it before the Retreat. Despite some unsewing, I had no problem finishing it.
I realized while making this bag that one reason I enjoy making bags is that I still have a lot to learn. This bag is pretty good work and I am not ashamed to give it to someone at the Retreat, but the work could be better. It isn’t that my workmanship wasn’t good; it was that I wrestled with the 3D-ness of the bag while top stitching. I just need more practice.
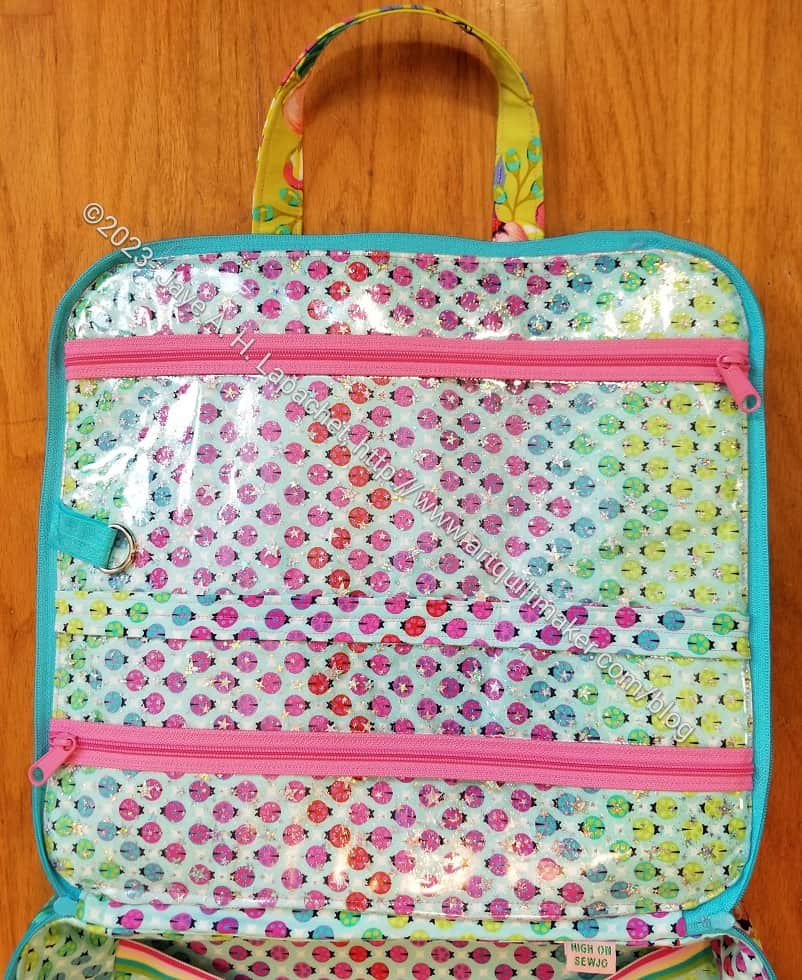
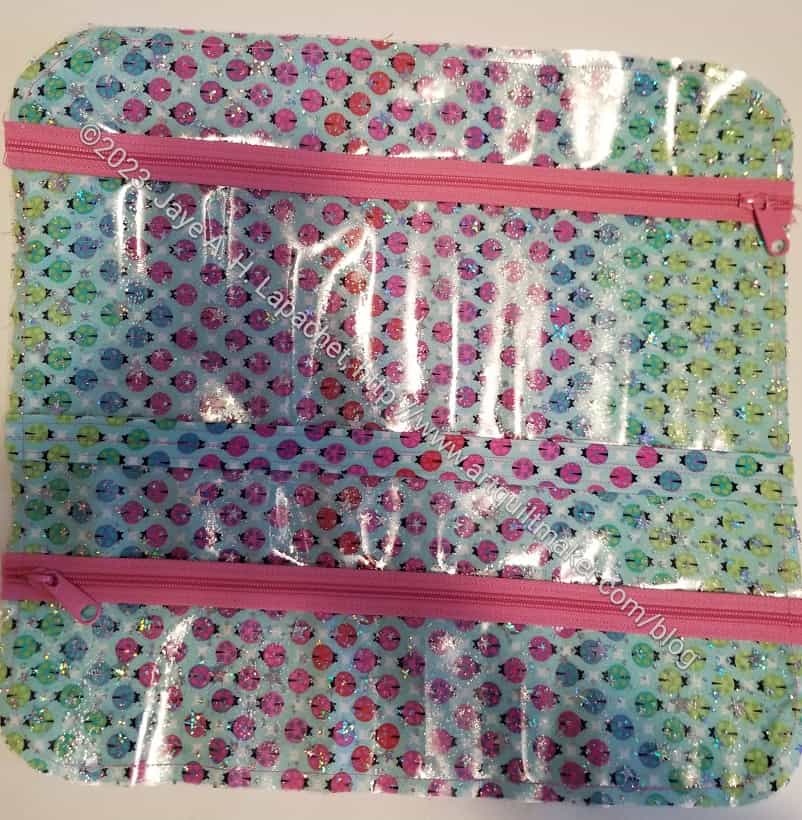
Amethyst Project Bag: inside pockets
I think the bag is more useful with the vinyl inside pockets. I talked about using the directions from the A Place for Everything v.2 bag as guidelines in a recent post.
You can see that I added a D-ring, as usual. I wanted to make an I Spy pouch to clip on to it, but didn’t have time. I also am not sure I have any more of the two fabrics. Maybe later.
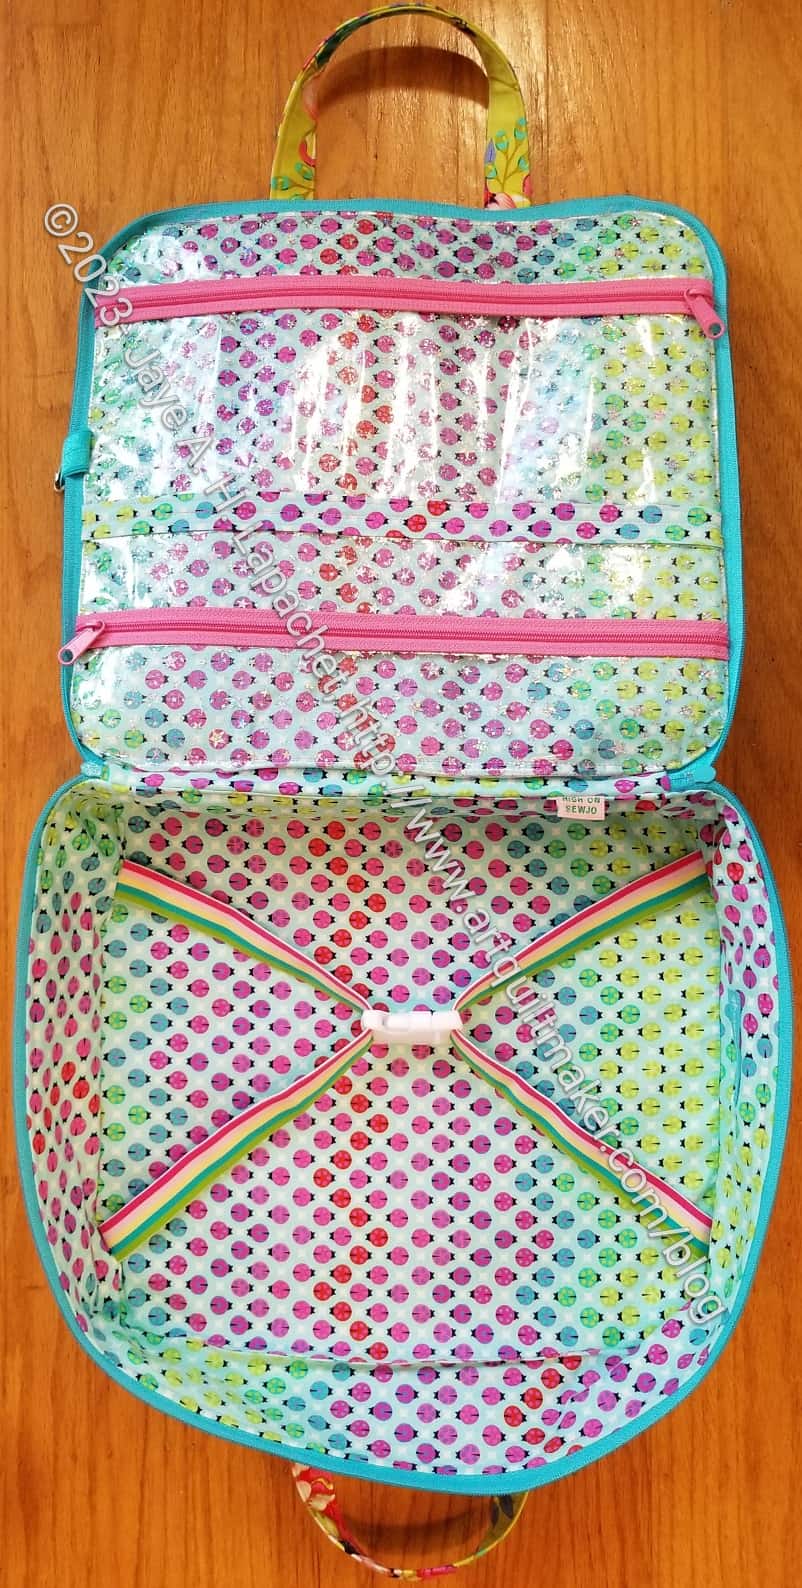
Amethyst Project Bag: bottom inside
The bottom section is where I installed the elastic. The dimensions of this bag are 14.5 x 13.5 inches, which is large enough for most quilt blocks. The elastic and parachute clip keep them inside. I think this could be used for rulers as well.
Amethyst Project Bag: inside
In general, and overall, the inside is very useful, I think. The lady bug fabric (from the Tula Pink Tiny Beasts line) looks really fun. There is a bit of movement in the fabric as well.
All of the Tula Pink fabrics are designed to coordinate, so I think the outside (Ka-Bloom) and the ladybugs go together. I suppose ladybugs crawl on flowers sometimes….
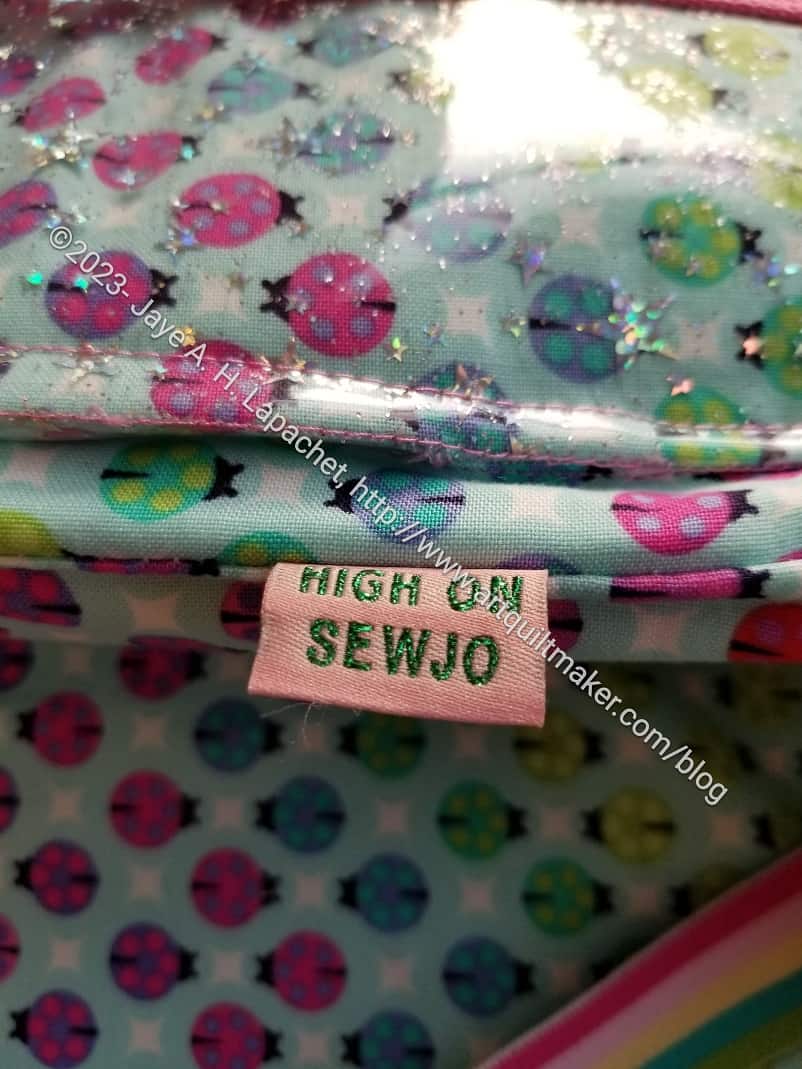
Amethyst Project Bag labelled
Finally, I used another one of the Advent labels. If I make one of these again, I’ll put it on the side. I am still trying to find the best place to attach labels.
This is not a Sew Sweetness Minikins pattern, but it is one that I have had for awhile. I am glad to finally be trying it out.
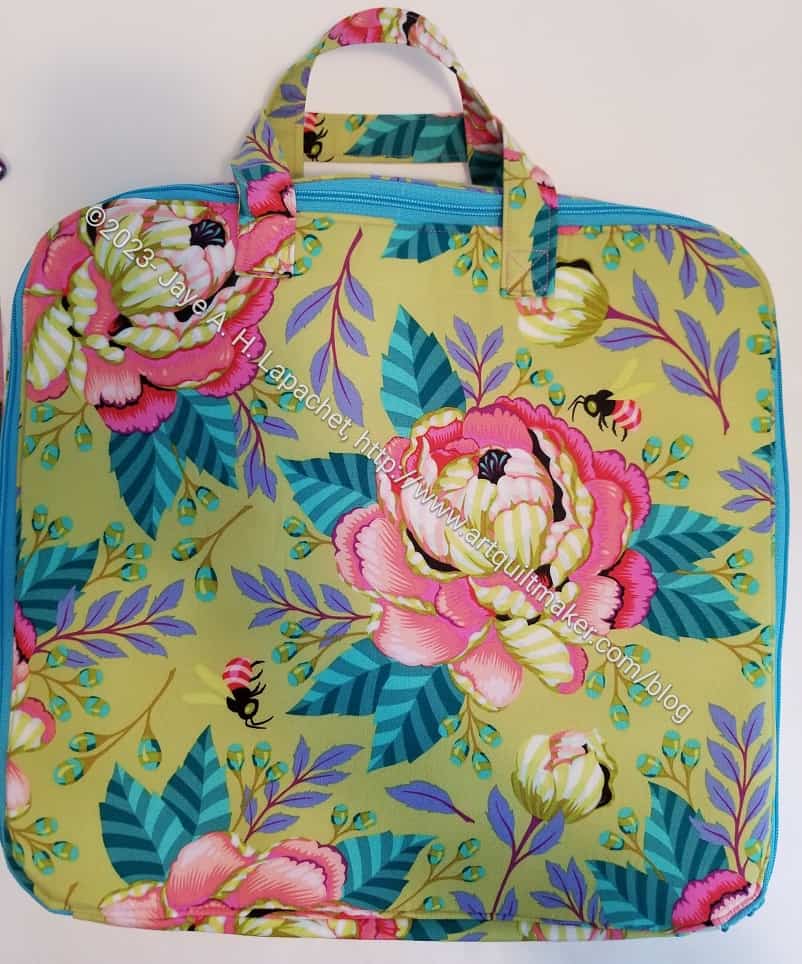
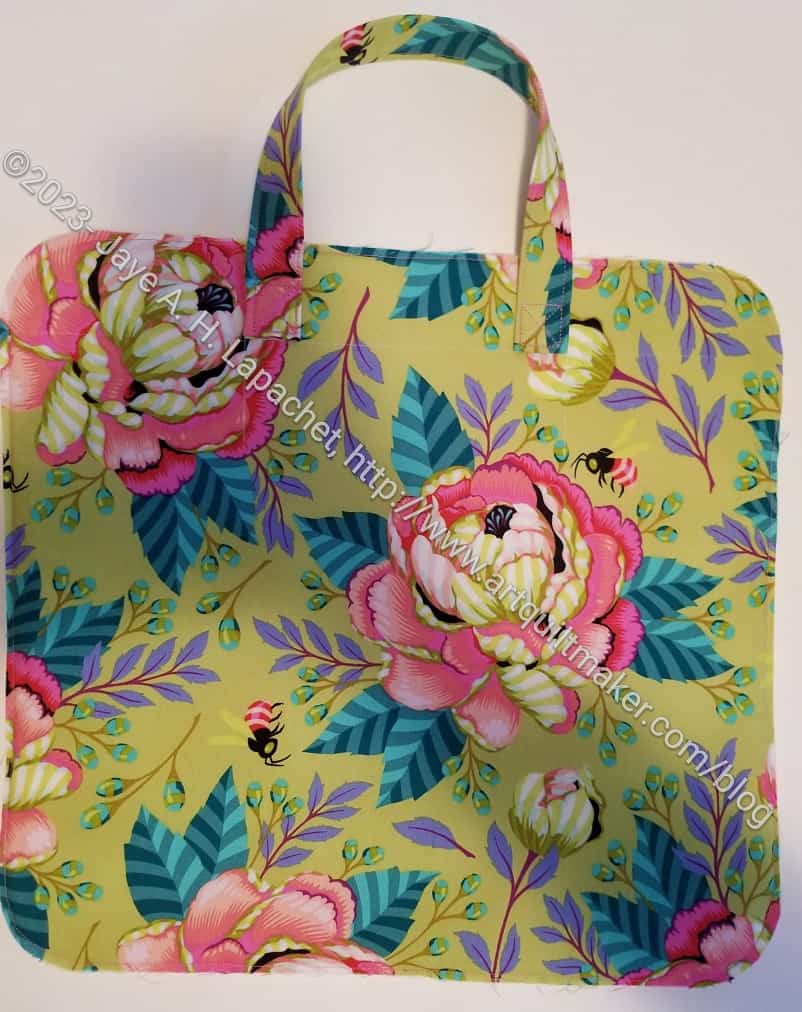
A long time ago, I promised Alison a bag to give away as a prize at the retreat. I thought I would finish the Brocade Peony Ultimate Carry All Bag and give that to her, but I ended up not doing that.
Amethyst Case – process – top
Finally, I decided to make an Amethyst Project Bag. This is a bag you can put pieces of a project into and keep them all together. It isn’t huge, so you can’t put yards and yards of fabric in there, but templates, most rulers and cut pieces would fit very well.
It is not a Minikins project, but it is a Sew Sweetness pattern.
Cutting bags at Sew Day
This is one of the projects I talked about cutting out at Sew Day. It is pretty amazing, to me, at least, that a project can move from a pile of cut pieces to something that is starting to look like a bag in a few hours.
Amethyst Case – in process – bottom
I haven’t finished. In fact, I have only made a start. I hope that I will have enough time to finish it before the retreat. Yes, I waited until the last minute, but I have had deadline after deadline I have been trying to meet. I know they are self imposed deadlines, but they are still deadlines for bags I wanted to give as gifts.
The bag is not exactly square. It is 14.5 x 13.5 x 3.5 (depth). I could only orient those giant peonies in two ways. I chose the other main panel for the top because one of the peonies was close to the center.
Amethyst Case – in process – inside pocket
I wanted to make a bag that would be appealing to the guild members. I hope this Tula Pink fabric appeals to many of them. I had planned to put some piping around the edge, but decided I needed to make one first before I started really messing around with the design.
Speaking of messing around with the design, I did make this inside front pocket instead of the short mesh pocket and the two pouches called for in the pattern. I like to see what is in my pockets. I am not sure this came out 100% perfectly, but I think it will work. I used the directions for the pages from the A Place for Everything v.2 bag as guidelines for this pocket.
I normally like to make the bag at least once first, but I don’t have the time.
I am preparing the door prize bag for the October meeting. I didn’t have enough time to make a bag myself, so I put a call out to my team. Mary C. came through and I picked up the bag at Sew Day.
It isn’t a shoulder bag, but would be great for carrying a magazine or a small hand project.
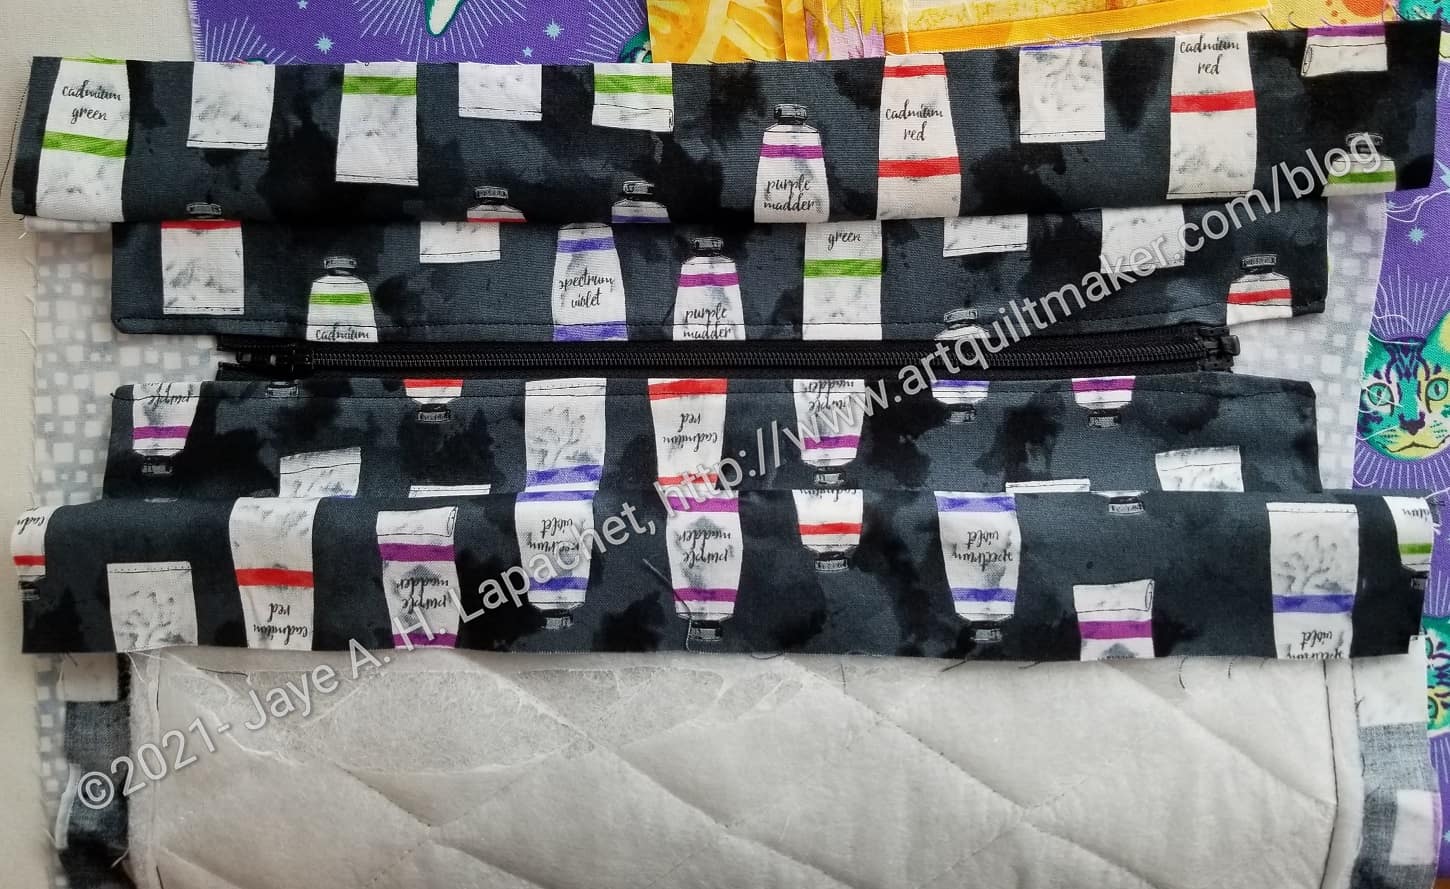
I was not able to find a 12″ separating zipper so I used a 10″ and it worked fine. you might be able to find one the right size at Wawak.
Use E8 pieces for this step. The zipper flanges (fabrics surrounding the zipper) should be exterior fabrics ifyou want them to match the outside of the bag.
Tutorial:
Use a 3/8″ seam allowance for this step.
You will be using the pattern starting on page 20. Use the exterior fabrics for the fabrics surrounding the zipper (E8-zipperr flanges). Match thread to those fabrics.
Take the zipper apart. Keep all the pieces oriented as if you are going to zip them back together.
Clip E8 to the zipper
Make a zipper sandwich
Lay 1 E8 piece right side up
Position the zipper tape along the center of E8 half an inch from the end (see photo above where clips are)
Clip fabric to zipper tape
Put another E8 piece face down to make the sandwich
Reposition the clips on the E8 pieces to encompass the entire zipper sandwich
Clip the top of the zipper (side where the stop will be when the bag is closed) so you can veer it and the top of the tape will be hidden. Sew Sweetness has a tutorial on veering a zipper.
Follow these directions for the second piece. You want to continuously check that the two pieces of the zipper are lined up so the zipper will work properly.
Look at the images on pg.20 of the pattern as they will help.
Install the zipper. Stitch to the end of the fabric.
Check the zipper
Stitch both short ends closed. You have, basically, sewn around the zipper lining/edges in a U shape so that the ends are closed and three sides are finished.
Make sure the end of the zipper is OUTSIDE of the seam allowance. You want to stitch as close as you can to the stop, then match the seam allowance on the second side of the zipper.
Turn the piece right sides out and press. Top stitch the U after you have finished the second side.
Throughout this step:
Remember that this zipper comes apart.
Make sure the two sides of the zipper are in the correct orientation and the ends are even the whole time.
Keep checking.
N.B.: Quiltessa Natalie calls these zipper tabs, but I have never heard of zipper tabs being applied to the sides of the zipper. I call them zipper flangesI have also never used a separating zipper, so who knows?)
Small Front Pocket Tutorial pt.2 – Clippy pockets (instead of badge holders)
Pocket information – post showing additional mesh pockets (not a tutorial)
**Obviously, you should shop at local fabric, knitting shops or quilt shops. However, if you can’t, please know that I use affiliate links. I may be paid for your purchase of an item when you click on an item’s link in my post. There is no additional cost to you for clicking or purchasing items I recommend. I do not recommend items I don’t like. I appreciate your clicks and purchases as it helps support this blog.
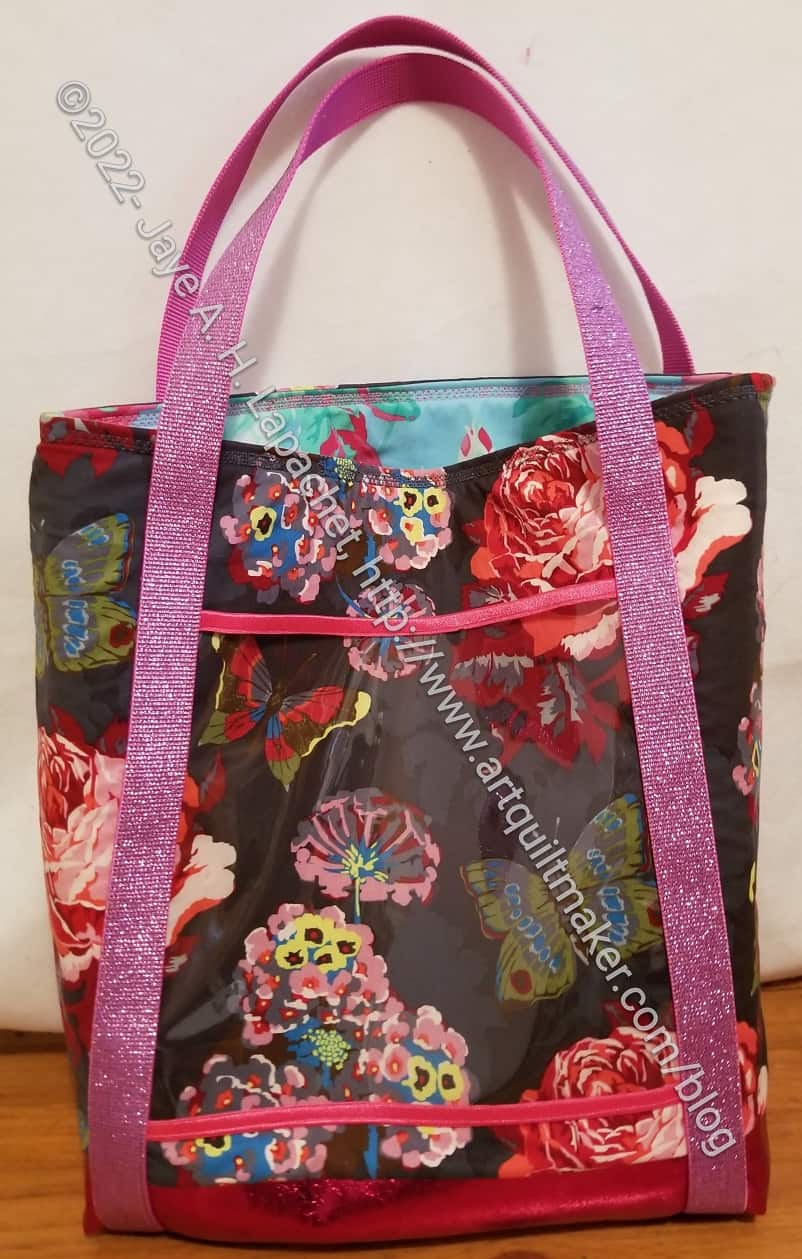
I finished the Essential Totes last week. I am really pleased with how they came out and am plotting when to make more.
Both totes are way more glittery than anything I normally make. I am kind of liking a little more glitter than normal in my life.
I have to give most of the credit to Natalie of SewHungryHippie. The pattern, Essential Tote, is designed by Natalie. It is my first experience with her patterns and I found it to be a really good pattern: clear, easy to follow, no stupid overly complicated steps, well written. I resisted buying it for awhile, but ended up purchasing it in the end. She had some Spanish Crimson soft vinyl and some glitter webbing in her newsletter and I couldn’t resist. Buying the pattern enabled me to make something right away with both unusual (unusual purchase for me) products.
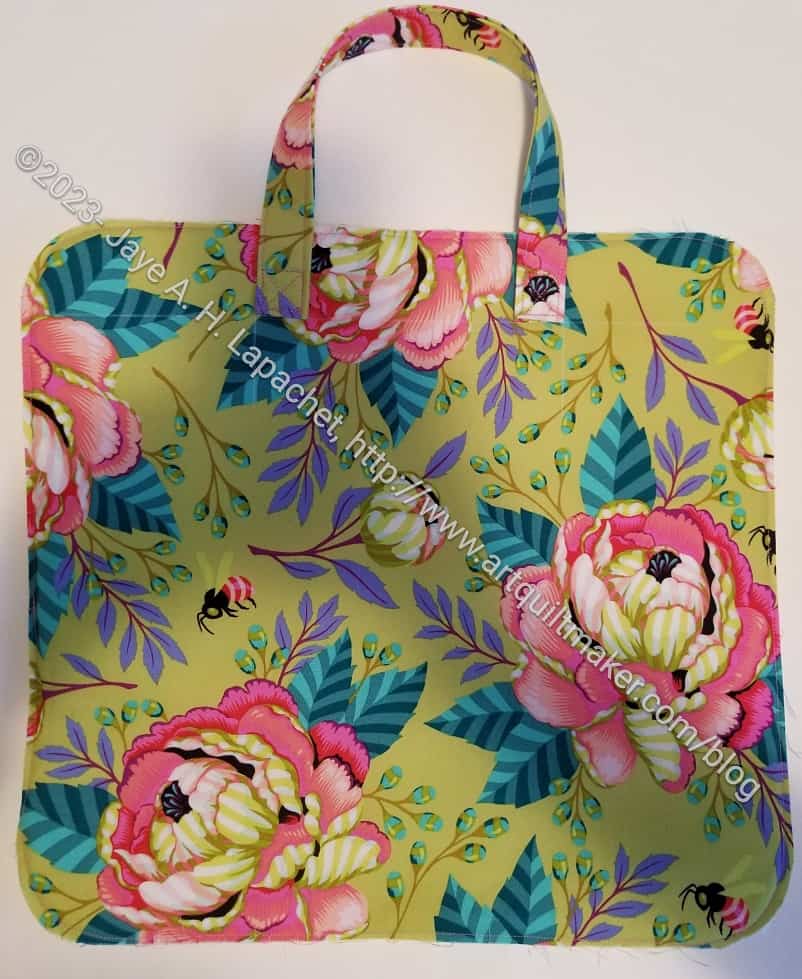
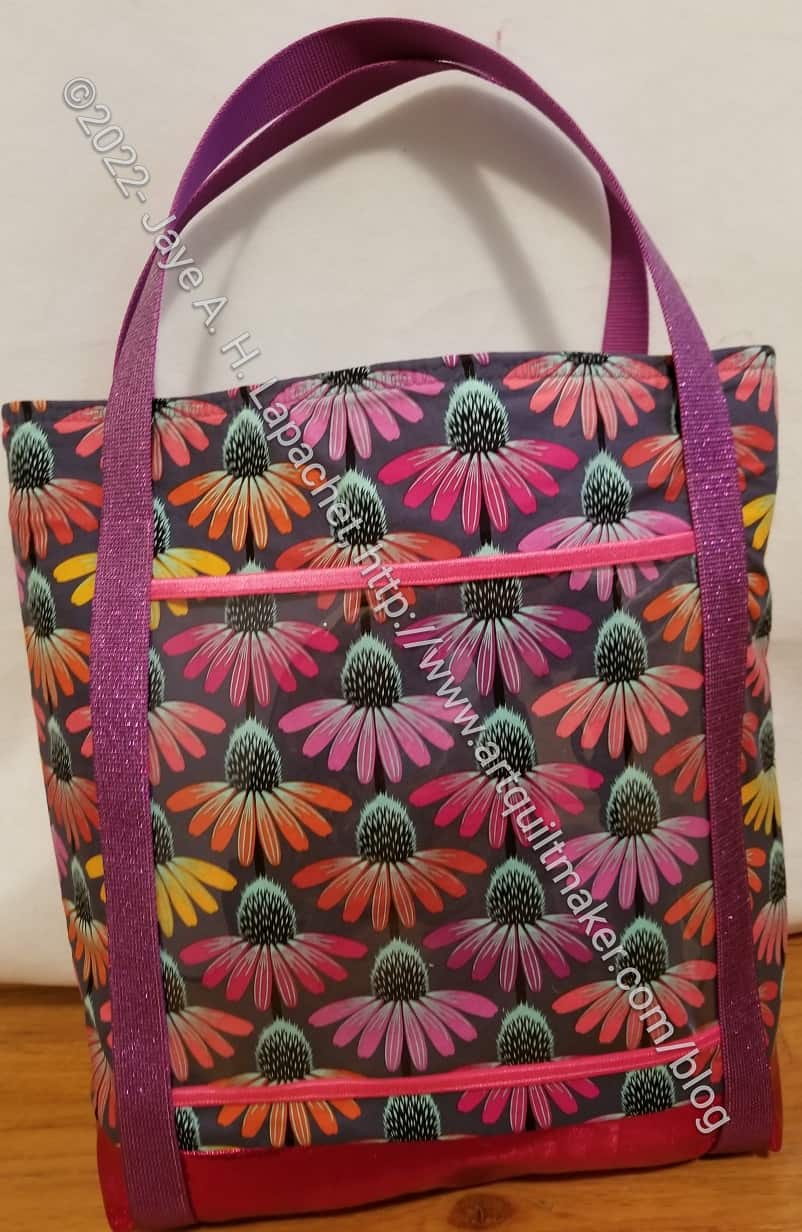
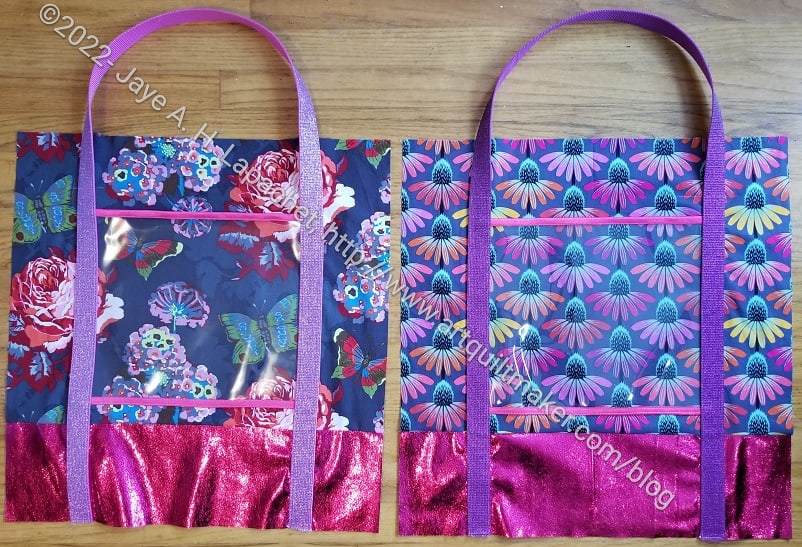
Finished Echinacea Glow Essential Tote
The exterior fabric I used on both is from Anna Maria Horner. One is Echinacea Glow and the other is Clippings. These are sturdy totes, as well, since both have foam lining.
The bag supplies call for exterior fabrics such as canvas. I used regular quilting weight fabric and it worked fine.
I did make some changes to the pattern. I used the Spanish Crimson soft vinyl for the bottom. This meant I had to change some of the cutting directions. I cut the exterior fabric 20 x 15.5 and the spanish Crimson soft vinyl for the bottom at 20 x 5.5. Then sewed the two pieces together to make one exterior piece 20×20, which I, then treated as one piece. 20×20 was the original size I was required to cut for the exterior. You could make the bottom larger by adjusting the cut sizes if you wanted. Make sure your final piece ends up 20 x 20 and everything will be fine.
I only put one vinyl pocket on the outside of each tote. Next time, I’ll put one on each side next time. I was just lazy about my cutting.
I think next time, if I use the same idea of a different bottom, I’ll make the vinyl pocket a little larger and have it sewn into the seam with the bottom fabric.
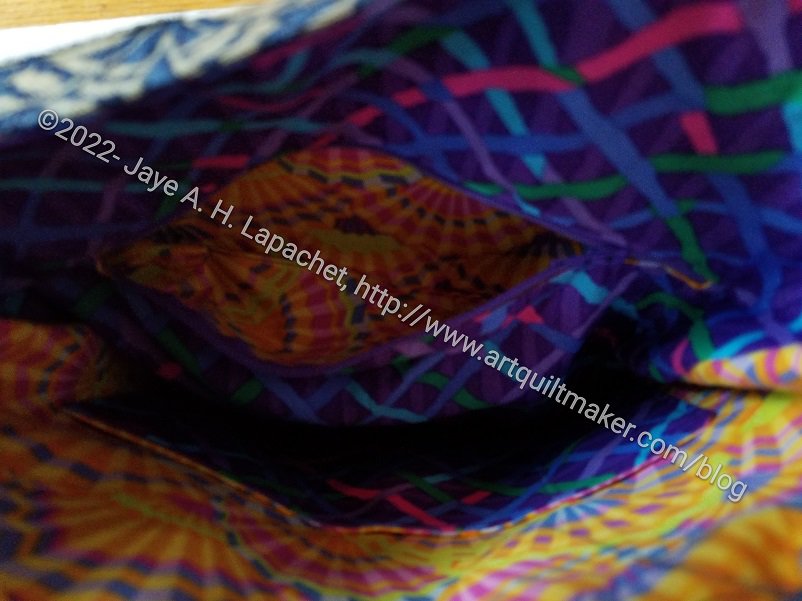
Essential Tote: Echinacea Glow Lining
As usual, I added a leash to the inside of both totes. You can see in the bottom of the photo, left. I never know when I’ll want to lash my keys or a pouch to my tote.
The pocket fit very well with the bottom boxed corners of the tote. I was impressed! I also used the measurements in the pattern, so mostly I was impressed that following directions actually worked. LOL!
Essential Tote: Clippings Lining
The pattern calls for vinyl interior pockets, but I was running out of vinyl (shocking! I bought a lot back a million years ago and I thought I still had a lot. Apparently not.), so I made a fabric pocket for one bag, which will be fine. I had enough vinyl to make a slightly smaller, vinyl pocket (photo, right) for one of the bags. The vinyl required that I cover all of the edges. It was a hassle, but the results are good.
I used that Philip Jacobs rose lining, because it makes me super happy.
Essential Tote lining bottom
I am pleased with the great sewing job I did. It isn’t perfect, but everything came together really well.
I showed Tim and he liked the bag. I also showed it at Sew and Tell. People liked it.
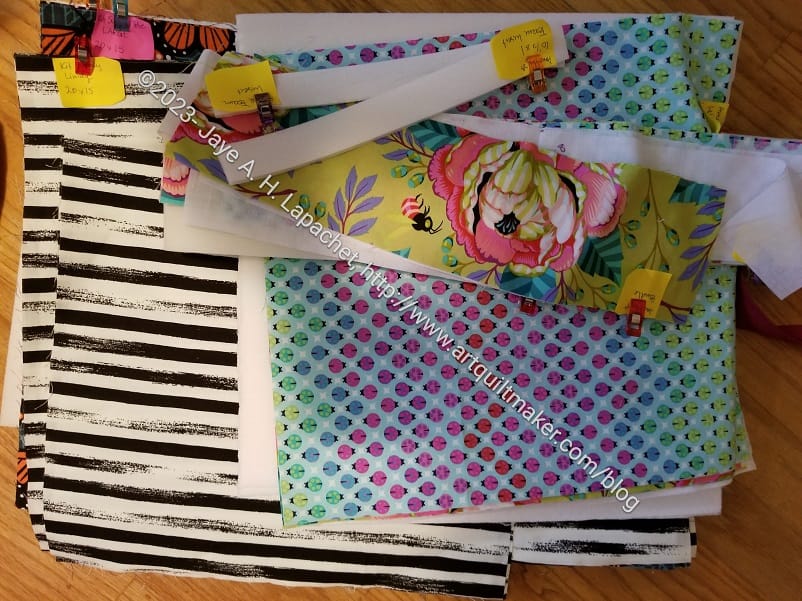
I spent one day over the weekend working on the Essential Totes. I had only cut them out and the two stacks of pieces had been languishing for a few days. First, I had to cut the exterior fabric. Yes, I finally got the Echinacea Glow fabric!
Cutting was no big deal and quickly accomplished. Then I started working my way through the pattern. It was very soothing to just work on a bag that was straightforward.
As I started to work I found that the pattern is really well written and easy to follow. It has images in the right places and enough explanation. I found the part on what to cut required that I get oriented to how it was written. I made a few annotations that will be helpful when I make this project again.
One thing I did differently was use foldover elastic** instead of binding to cover the edges of the vinyl. After so many ByAnnie patterns and all of their binding requirements, I had no interest in making more binding. One good thing about the ByAnnie patterns is that I now have a good system for making binding that isn’t as arduous as either of the techniques I have used in the past. Here I am talking about actual fabric and sewing technique not the math part. The math part is tried and true and I use that because it works every time.
The handles cover the edges of the vinyl pocket so the maker only has to cover the top and bottom of the vinyl.
I used the glitter webbing I bought from SewHungry Hippie. Total impulse buy, so I thought I would go with lots of glitter in these bags. The background of the exterior tones everything down a bit. The webbing is much stiffer than fabric handles, so I’ll have to make sure not to load them down too much. I sewed slowly and with a sharp needle and didn’t have any problem sewing through them.
I got interrupted before I could finish them and need to get back int he swing. Part of what I need to do is make more pockets. Somehow that step is holding me up.
**Obviously, you should shop at local fabric, knitting shops or quilt shops. However, if you can’t, please know that I use affiliate links. I may be paid for your purchase of an item when you click on an item’s link in my post. There is no additional cost to you for clicking or purchasing items I recommend. I do not recommend items I don’t like. I appreciate your clicks and purchases as it helps support this blog.
If any project required attention to process, this one did.
My friend has been talking with me about helping her make a bag. I have been putting it off because of work and other things. Since I have a break from a lot of responsibilities, I felt it was time to get the bag made.
I had hoped that I could convince my friend to use a pattern, but she was certain she wanted to copy the bag she took traveling. I am a good bagmaker, but beyond cobbling together some basic tote bags or modifying patterns, like the Petrillo hack I created, I have not had a lot of experience creating new patterns. I was concerned about the pitfalls I wouldn’t even know I was facing.
We met a few weeks ago and I was able to get a better idea of what she was thinking. That meeting and seeing the bag allowed me to think about the bag and process before we met the other day. I had a basic plan and figured that I would work things out as I went along.
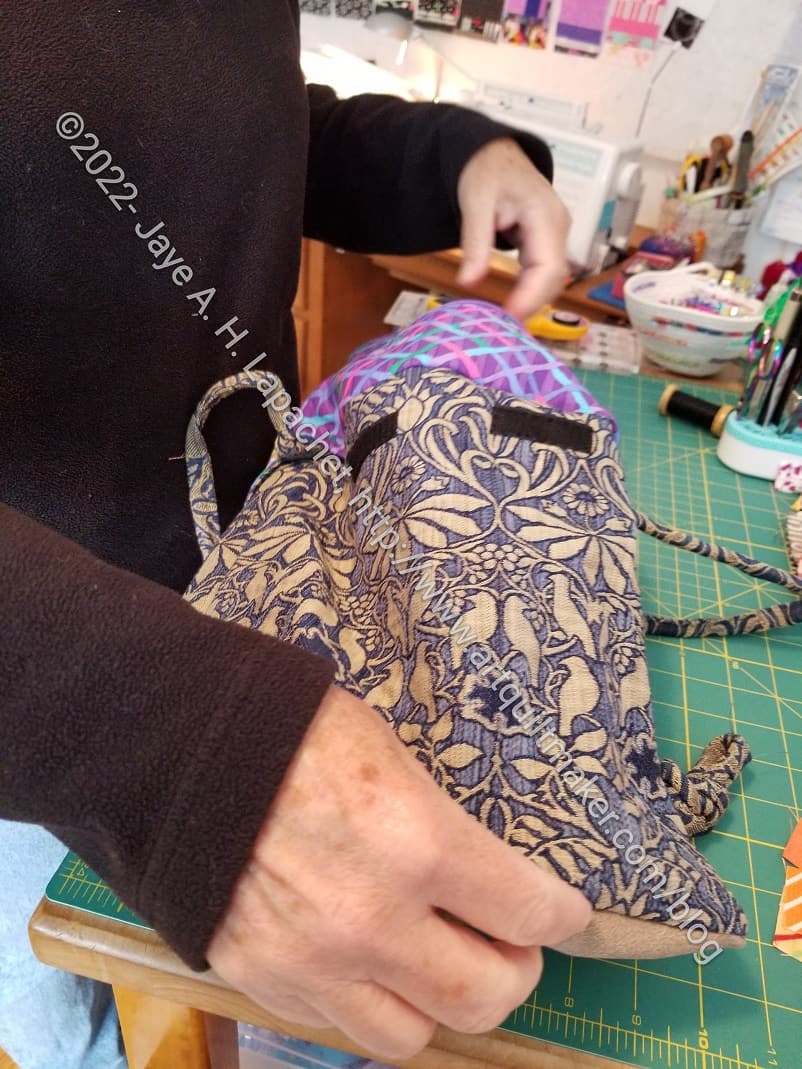
Cyndi B’s bag
The worst part was getting started. The best part was that my friend didn’t have many preconceived notions about how the bag would look. We kind of muddled along and resolved issues as they came up.
The first issue was the fabric. She has a limited piece of upholstery fabric that was leftover from recovering her living room chairs. I have done a few things with heavier fabric, but I can’t think of a project I have done with upholstery fabric, including a pencil roll, but this project was different in that I would have to deal with layers of upholstery fabric. I tried to minimize it, but wasn’t always able to.
Next was the bottom. My friend wanted to use a thin piece of leather (maybe suede) for the bottom. This made sense, especially since she wanted to use it for travel. My Microtex** needle was not happy. Shockingly, I had a leather needle**. I have never used these before, but did on the bag bottom and it worked.
Cyndi B’s bag: turning the lining
The lining was fairly straightforward. I knew what I wanted to do, which included adding an internal zipper pocket that I could use to turn the bag right side out.That worked perfectly, though I had to look up a couple of references to make sure what I had in my mind would work.
The turning of the bag is very satisfying, so I had my friend do it. It was her bag, after all and I thought she would get a kick out of the experience. She did.
Cyndi B’s bag: lining and zipper pocket
I used my friend as studio assistant. I asked her to mark the lines for the zipper pocket, press seams open and sew on Velcro. These are all tasks I didn’t want to do. She did a lot of pressing and marking while I did most of the sewing. I also wanted her to be involved and since she had not sewed since junior high, I preferred to do the sewing. It is my machine after all.
When we got to the handles, she brought out the idea of using rope (like clothesline weight rope) for the handles. I wouldn’t normally do that and really didn’t have a clue how to do it. After searching the web, I came up with a great tutorial that expanded my skills. The result was what my friend wanted, too.
I used the Cotton Candy pouch pattern to remind me how to put the outside of the bag together with the lining.
I used the The Complete Bag Making Masterclass : A comprehensive guide to modern bag making techniques** by Mrs. H for some information on attaching the straps.
I used the RsIsland Crafts video on turning a bag through the internal zipper pocket to remind myself how to do that.
I used the Seaman’s Mom corded handles tutorial to make the handles.
I am pleased with how the bag came out, though it is certainly not perfect and it is not a bag I would use. My friend was happy and that is all that counts.
**Obviously, you should shop at a local quilt shop. However, I use affiliate links and may be paid for your purchase of an item when you click on an item’s link in my post. There is no additional cost to you for clicking or purchasing items I recommend. I appreciate your clicks and purchases as it helps support this blog.
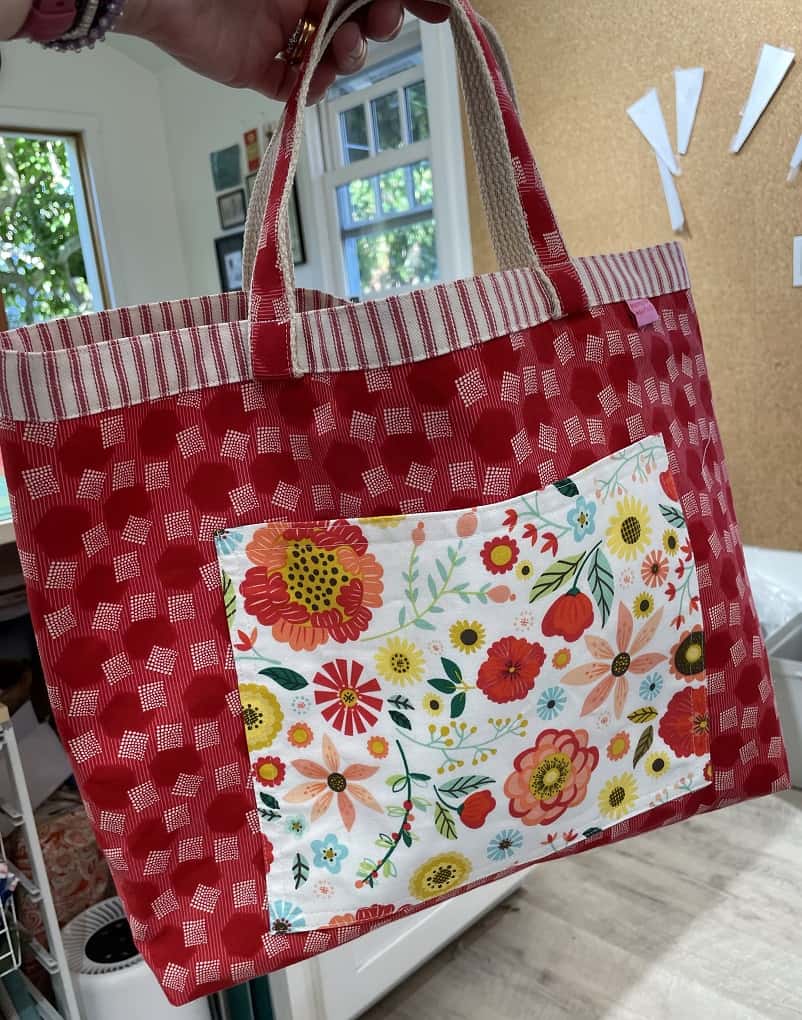
I haven’t gotten my act together for the BAM door prizes yet. I have a tote bag full of stuff ready to be sorted and nothing sorted. Part of the problem is that I only have canvas bags from a shop. I don’t have any handmade bags. I have several of the canvas bags and they are nice – thick and sturdy and great for something like the Farmer’s Market. I prefer not to give the same bag every month.
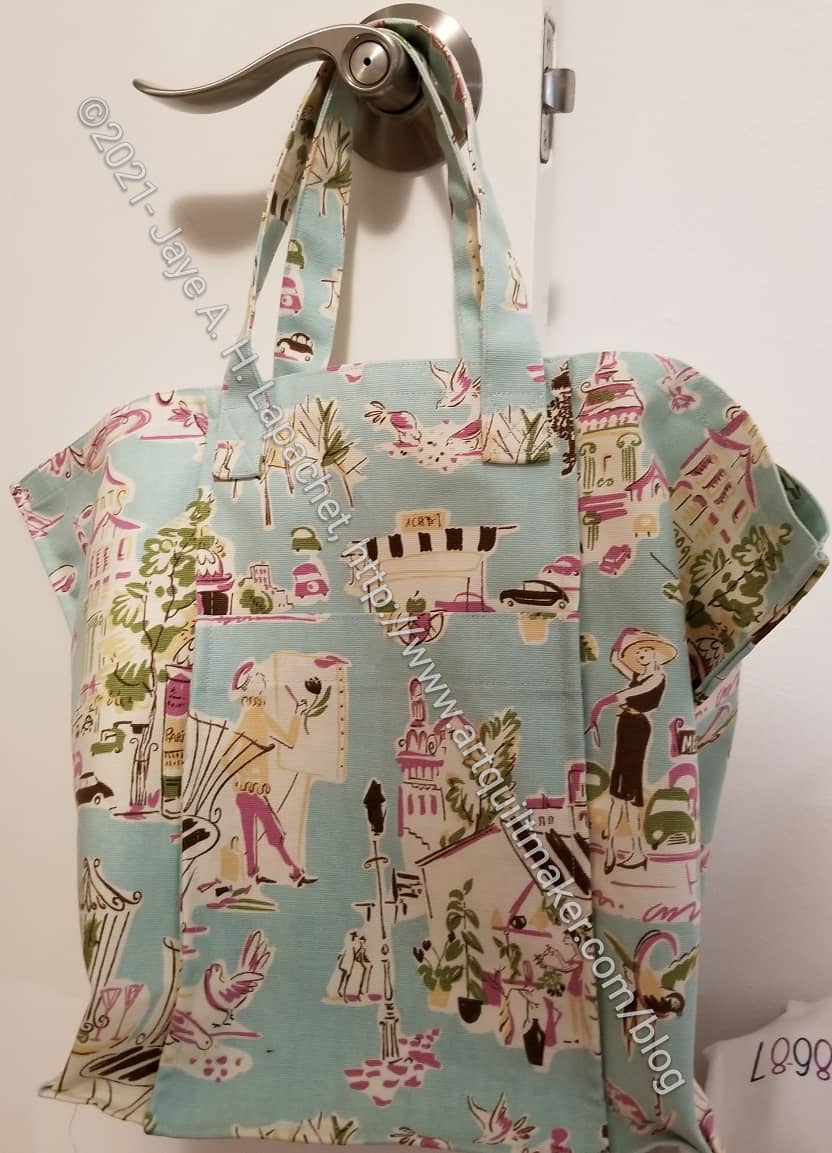
At the guild meeting the other week, Maria tempted me to take some canvas. The motif is a kind of Paris theme. I got out my Jane Market Tote pattern and this fabric and made some totes.
I didn’t use the exact pattern; mostly I just used the dimensions from the pattern. I didn’t want to line the tote, because the canvas was thick enough without a lining. That meant that I needed to sew French seams to make sure all of the raw edges were enclosed.
Canvas Jane Market Tote (innie)
With the first one, I enclosed all the seams on the inside of the bag. Enclosing the seams on the inside when very smoothly and the bag went together really fast.The bag came out a little smaller than the already small Jane Market Tote, but I think it is a cute size and different from many bags.
Canvas Jane Market Tote (outie)
After making the first one, I thought I would enclose the seams on the outside for the second one. I thought it would be an interesting design feature. This version also went together pretty well, but I had more trouble with the seams on the outside. I am not sure why. In this version, there is also a big lumpy seam on the outside of the bottom, which is not ideal.
So far I have made two and I think I have enough fabric to make at least one more. My sister might like one. The motif is up her alley. I think the size will work well for the door prizes.
I finally finished the A Place for Everything Bag. This bag is not for the faint of heart. If I had known what it would be like, I might not have made it, but I am glad I did.
I have a love-dislike relationship with ByAnnie patterns. There are a lot of them. Many of the bag shapes are interesting and useful. I can’t, however, wrap my mind around some of the directions. This is not a surprise to those of you who have been reading for a long time. My brain doesn’t work like others. Videos have been helpful. In this case, I found that Annie skips some steps that are considered very basic. After looking through the basics videos, I emailed them and they gave me some suggestions, but also said they don’t have enough resources to do full length videos for every project. Sigh. I blundered through.
I spent a couple of evenings hand sewing the binding down. I know that takes time, but I couldn’t stand the thought of cramming the bag through the machine. I had the time so I hand sewed the binding. I looks great.
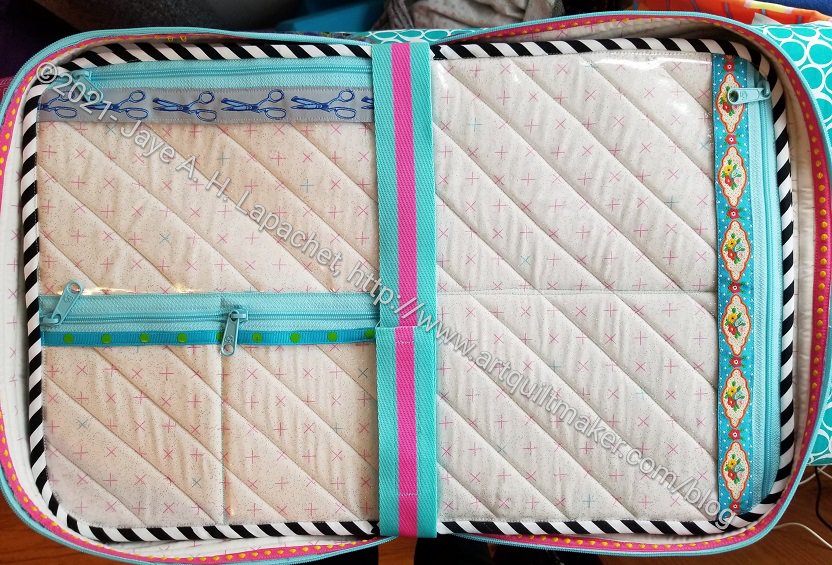
APfE: pages strapped in
The strap that keeps the ‘pages‘ in place was WAY too long. Instead of trying to figure out what was going on, I just cut it off, resewed the velcro and moved on with my life.
Despite the problems, I am pleased with the way this came out. I spent a lot of time on the details and it shows. The bag isn’t perfect, but it will be great for when I take the project to Sew Day next week.
After not working on this bag much on Saturday, I decided to do as much as I could on Sunday. I was quick to remind myself that there were too many steps and I couldn’t possibly finish.
A Place for Everything Bag almost finished
I was right, mostly.
I was not able to finish the bag, but I made really good progress and the bag is almost done. I have to finish the binding.
The product came out pretty well. ByAnnie patterns do come out pretty well, though I wouldn’t suggest this bag for someone who hasn’t made a lot of bags. There are videos, but Annie skips over some of the parts she considers to be basic or easy. Of course, those were the ones I had the most trouble navigating.
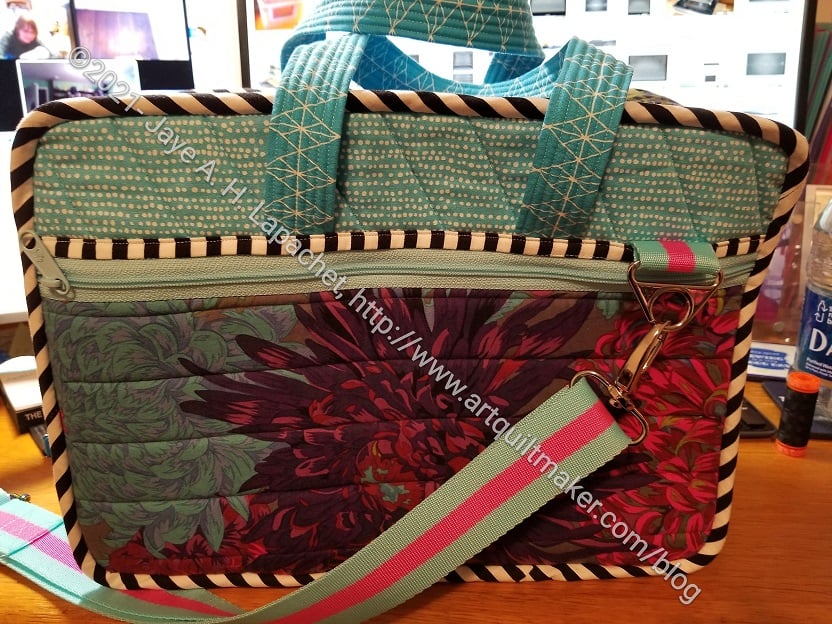
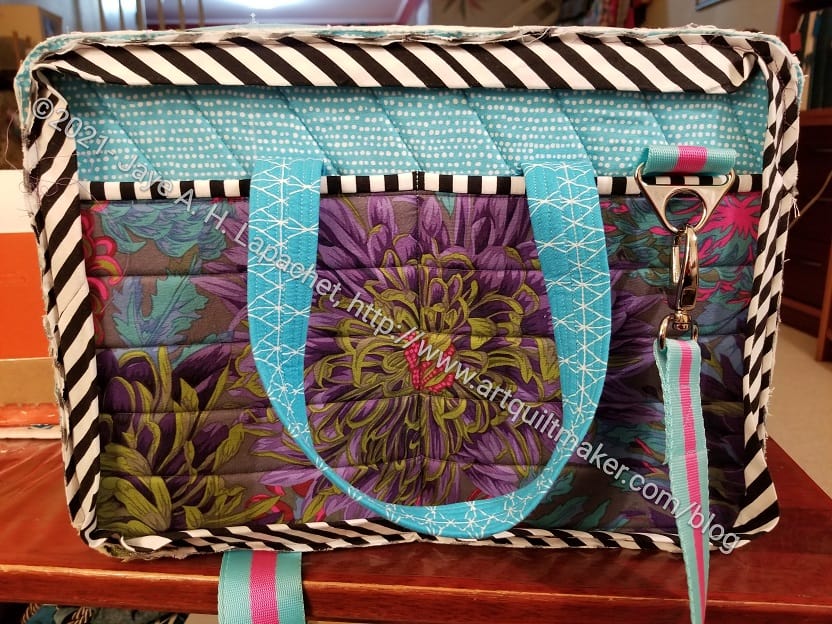
A Place for Everything Bag – detail
I know the picture above looks weird because of the binding, but I am really pleased with how the bag looks, e.g. the fabrics that I chose. I am also pretty happy with the webbing, though I did have to make up some parts of using it as I went along.
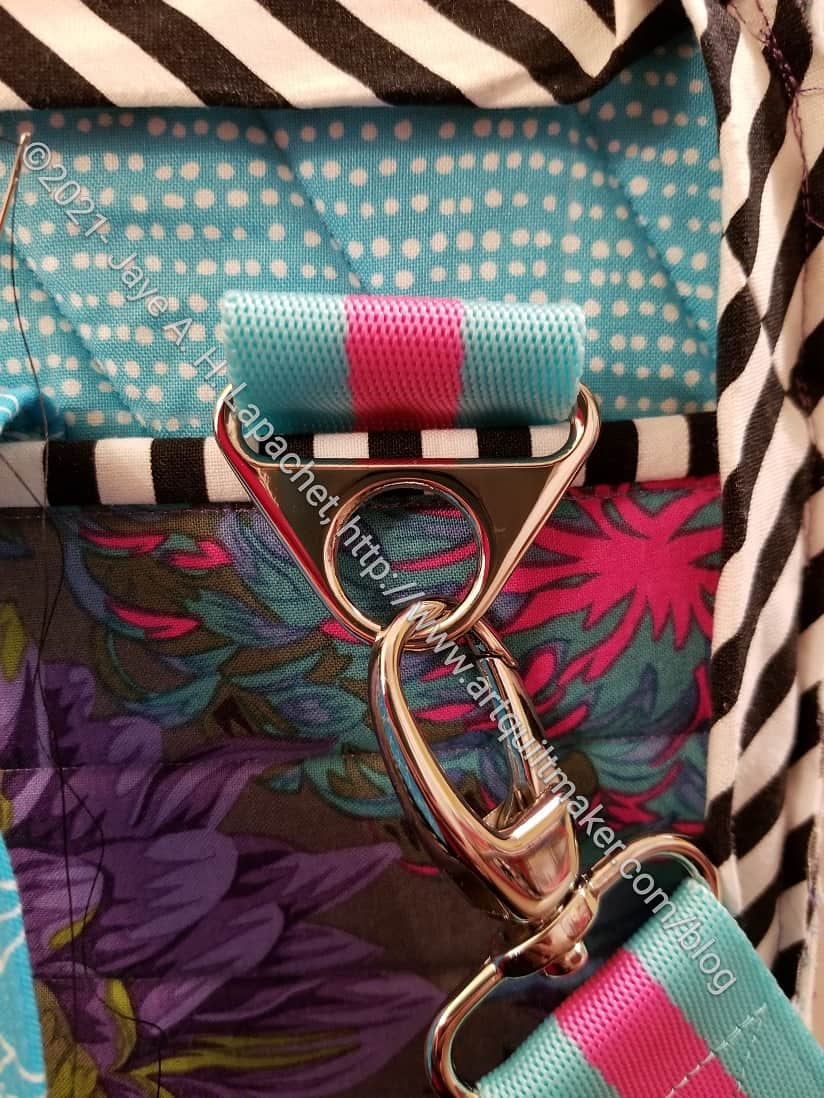
I love this hardware, especially, as I said, the triangle piece. I don’t think I really need the carry strap, but I wanted to make it. I can always use it for a different bag.
I am tempted to make a Take a Stand Bag that matches this one. I have to make one as gift, so I might as well make two, right? I need to finish some other projects before I do that.
I spent Sunday working on the A Place for Everything bag. I despaired at making any progress, because the handle instructions didn’t seem to make any sense.I know part of this was that I had lost momentum. It makes me think I need to make the Take A Stand bag that has been on my list while I am in tune with ByAnnie bags.
Fortunately, ByAnnie has a series of Handles and Straps videos, which were very helpful. I’d like to see a list of the projects that use the techniques included under the various videos. There may be a list, but I haven’t found it yet. It took me some time to sort through them to find the one I needed. I used:
#5-Making an Adjustable Strap Using a Widemouth Slider : Watch step-by-step as Annie shows how to attach a widemouth slider to make a strap adjustable for carrying over the shoulder or for carrying cross-body.
#6-Making a Detachable Strap : Learn to attach the necessary hardware to make an attachable/detachable strap.
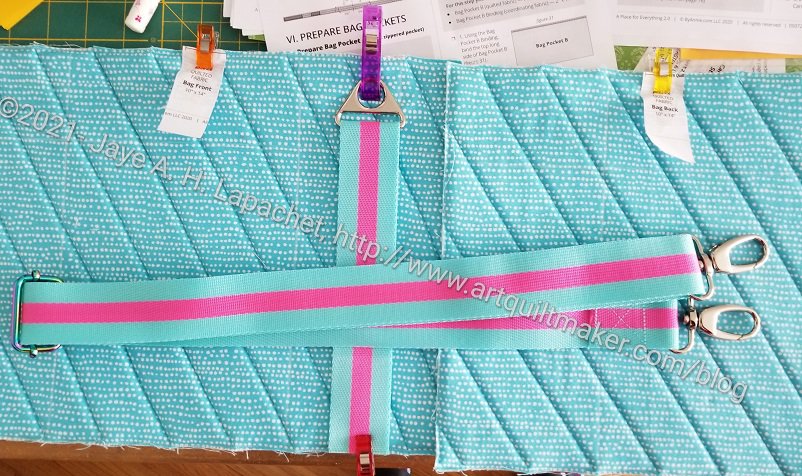
APfE: Adjustable Strap
I finally got the adjustable strap made and am pretty pleased with it.
I am also super pleased with the triangle hardware. I have known about them, but don’t think I have used them before. This won’t be the last time! They are great, because they don’t roll around after installation like D-rings. I am in the process of installing them on the bag pockets. Once the bag is finished I will be able to clip the adjustable strap to them.
Webbing ends show
I didn’t follow the handle and strap making directions, because I decided to use the new Tula Pink webbing. I ran into a few problems. First, I ended up making handles from fabric and Soft & Stable, because I didn’t have enough of the webbing. Second, there were no instructions on finishing the ends of the webbing. The webbing frays/shreds like crazy, so some kind of sealing process needs to take place. I couldn’t find any tutorials or even any pictures of what others have done. I ended up using Aleene’s Tacky Glue** on the edges of some of the pieces and L’Oreal Miracle Base Coat** on others. I wanted to see the difference. I considered burning the edges, but was reluctant because of the smell and, also, I didn’t want the edges blackened at all. The webbing edges will show, regardless, and I wanted them to be as neat as possible.
Both worked well. The glue took longer to dry, but I worked on other things while it dried. I would recommend cutting the end and sealing it immediately. The cut end seems to spontaneously fray. I covered my work surface with wax paper**. I like the wax paper because one side is slippery-ish. It is covered in wax and while the glue sticks it doesn’t bond to the wax paper. I haven’t tried it, but parchment paper** would probably work as well.
In general, I found the webbing easy to work with. I was able to sew through two layers plus fabric and Soft & Stable pretty easily. I did put in a new needle and sewed slowly.
This bag takes a long time. Stay tuned for more progress!
Tula Pink video on how she deviates from the pattern to make more design decisions
Tula Pink video on applying ribbon to cover ‘connections’
#5-Making an Adjustable Strap Using a Widemouth Slider : Watch step-by-step as Annie shows how to attach a widemouth slider to make a strap adjustable for carrying over the shoulder or for carrying cross-body
#6-Making a Detachable Strap : Learn to attach the necessary hardware to make an attachable/detachable strap
**I use affiliate links and may be paid for your purchase of an item when you click on an item link in my post. There is no additional cost to you for clicking or purchasing items I recommend. I appreciate your clicks and purchases as it helps support this blog.
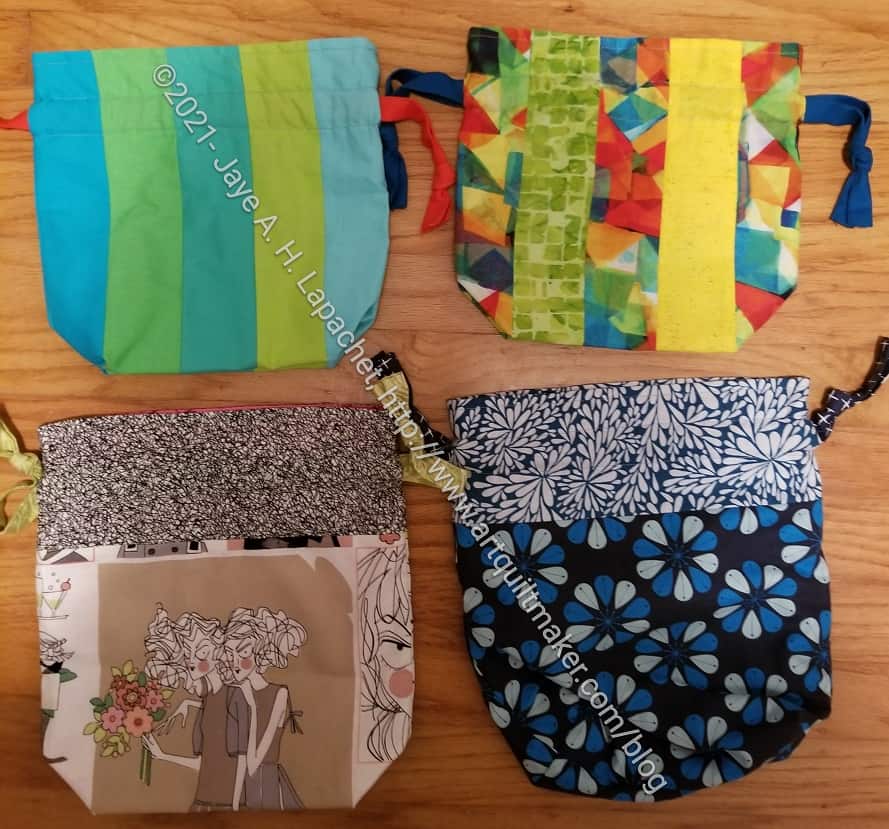
I received a small shipment of various items for the BAM 2022 door prize bags. Sue chose the In Color Order Drawstring bag pattern I have mentioned a few times and made some bags. We can use them for the door prize main bag or for holding smaller items.
I love the way Sue pieced some of the bags and also her fussy cutting. She said she will work on other projects for the door prizes in January.
I have to get myself together to organize the bags for the year. At the moment I have very few items to give away, but I can scrape together a bag for January. Then I’ll have plenty of time to worry about the rest of 2022.