It is so strange to think of these bags as pouches. I really think of pouches as the one zip things like the Cotton Candy Pouch pattern. Still, Sara at Sew Sweetness calls these pouches. She is way more experienced than me.
This is another one of the Minikins Season 3 patterns from Sew Sweetness, like the Percheron and the Piebald Pouch. People tell me it will fit a Switch gaming device, which is why I chose the large size. Also, for my first go round, it is easier to make.
I struggled with not having a free arm on my machine., as I did with the Moto Pouches. I need to think about that and whether it is time to upgrade my machine. I am ready for a fancy machine again, but I am not sure I want to spend the money.
I am planning to make another one of these pouches for a Christmas gift. First, I need a gift and the recipient will appreciate the complexity. Second, I want to try again.
I still need to sew up the lining and fix one problem, but I’ll be able to finish today.
I have a couple of nieces who have recently joined the family. I decided to make them each a pouch. I like to make some gifts “from Santa” for newbies in the family. It gives me an excuse to make more pouches and adds to their often anemic gift pile a little.
Eventually I decided on the Moto Pouch from Sew Sweetness. The Moto pouch is part of the Sew Sweetness Minikins Season 1. I cut the fabric for both pouches out at the same time, but I didn’t sew them at the same time, for some reason. Only one is in process at the moment. I’ll have more experience when I start the next one.
This pattern has a drop in lining, which people on the Sew Sweetness FB group don’t like as much.I am struggling a little as well.
The construction is similar to the Sidewinder pouches I made in 2020. The design itself is remarkably similar, though not exactly the same.
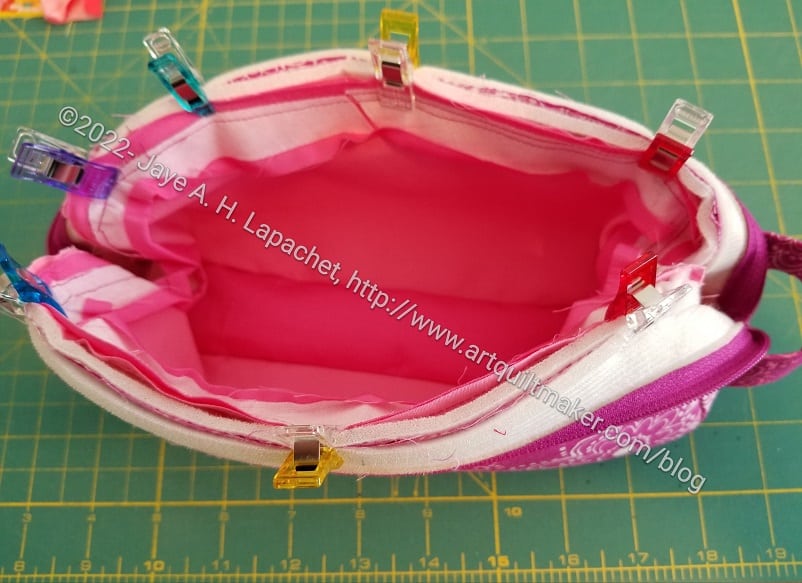
The Percheron (part of Minikins Season 3) by Sew Sweetness is classified as a pouch, but it is definitely larger than what I would consider to be a pouch. Remember I made one of these before? I wanted to make it again since I struggled with Mom’s. As mentioned, it was going very well and I think I mastered the hinge, which was one of the steps that caused me a headache.
Percheron assembling
It isn’t going as well as it was before. I am not quite sure what went sideways, but I have been really, really struggling with putting the whole thing together.
I know the picture of the whole thing makes it look very sad. I think I was in a rush. I don’t have to throw it out, don’t worry.
Percheron #2 lining
I just really fought and fought with the lining and the assembly. It looks really ugly in this picture. The saving grace is that I haven’t finished the last seam by hand, so there is hope that I can save it. I really don’t want to unpick it.
I can also give the thing a good press (this is where my small Oliso comes in very handy) and I am sure that will help, too.
Percheron #2 lining (bottom)
Is there always a point in my bag making where I despair completely?
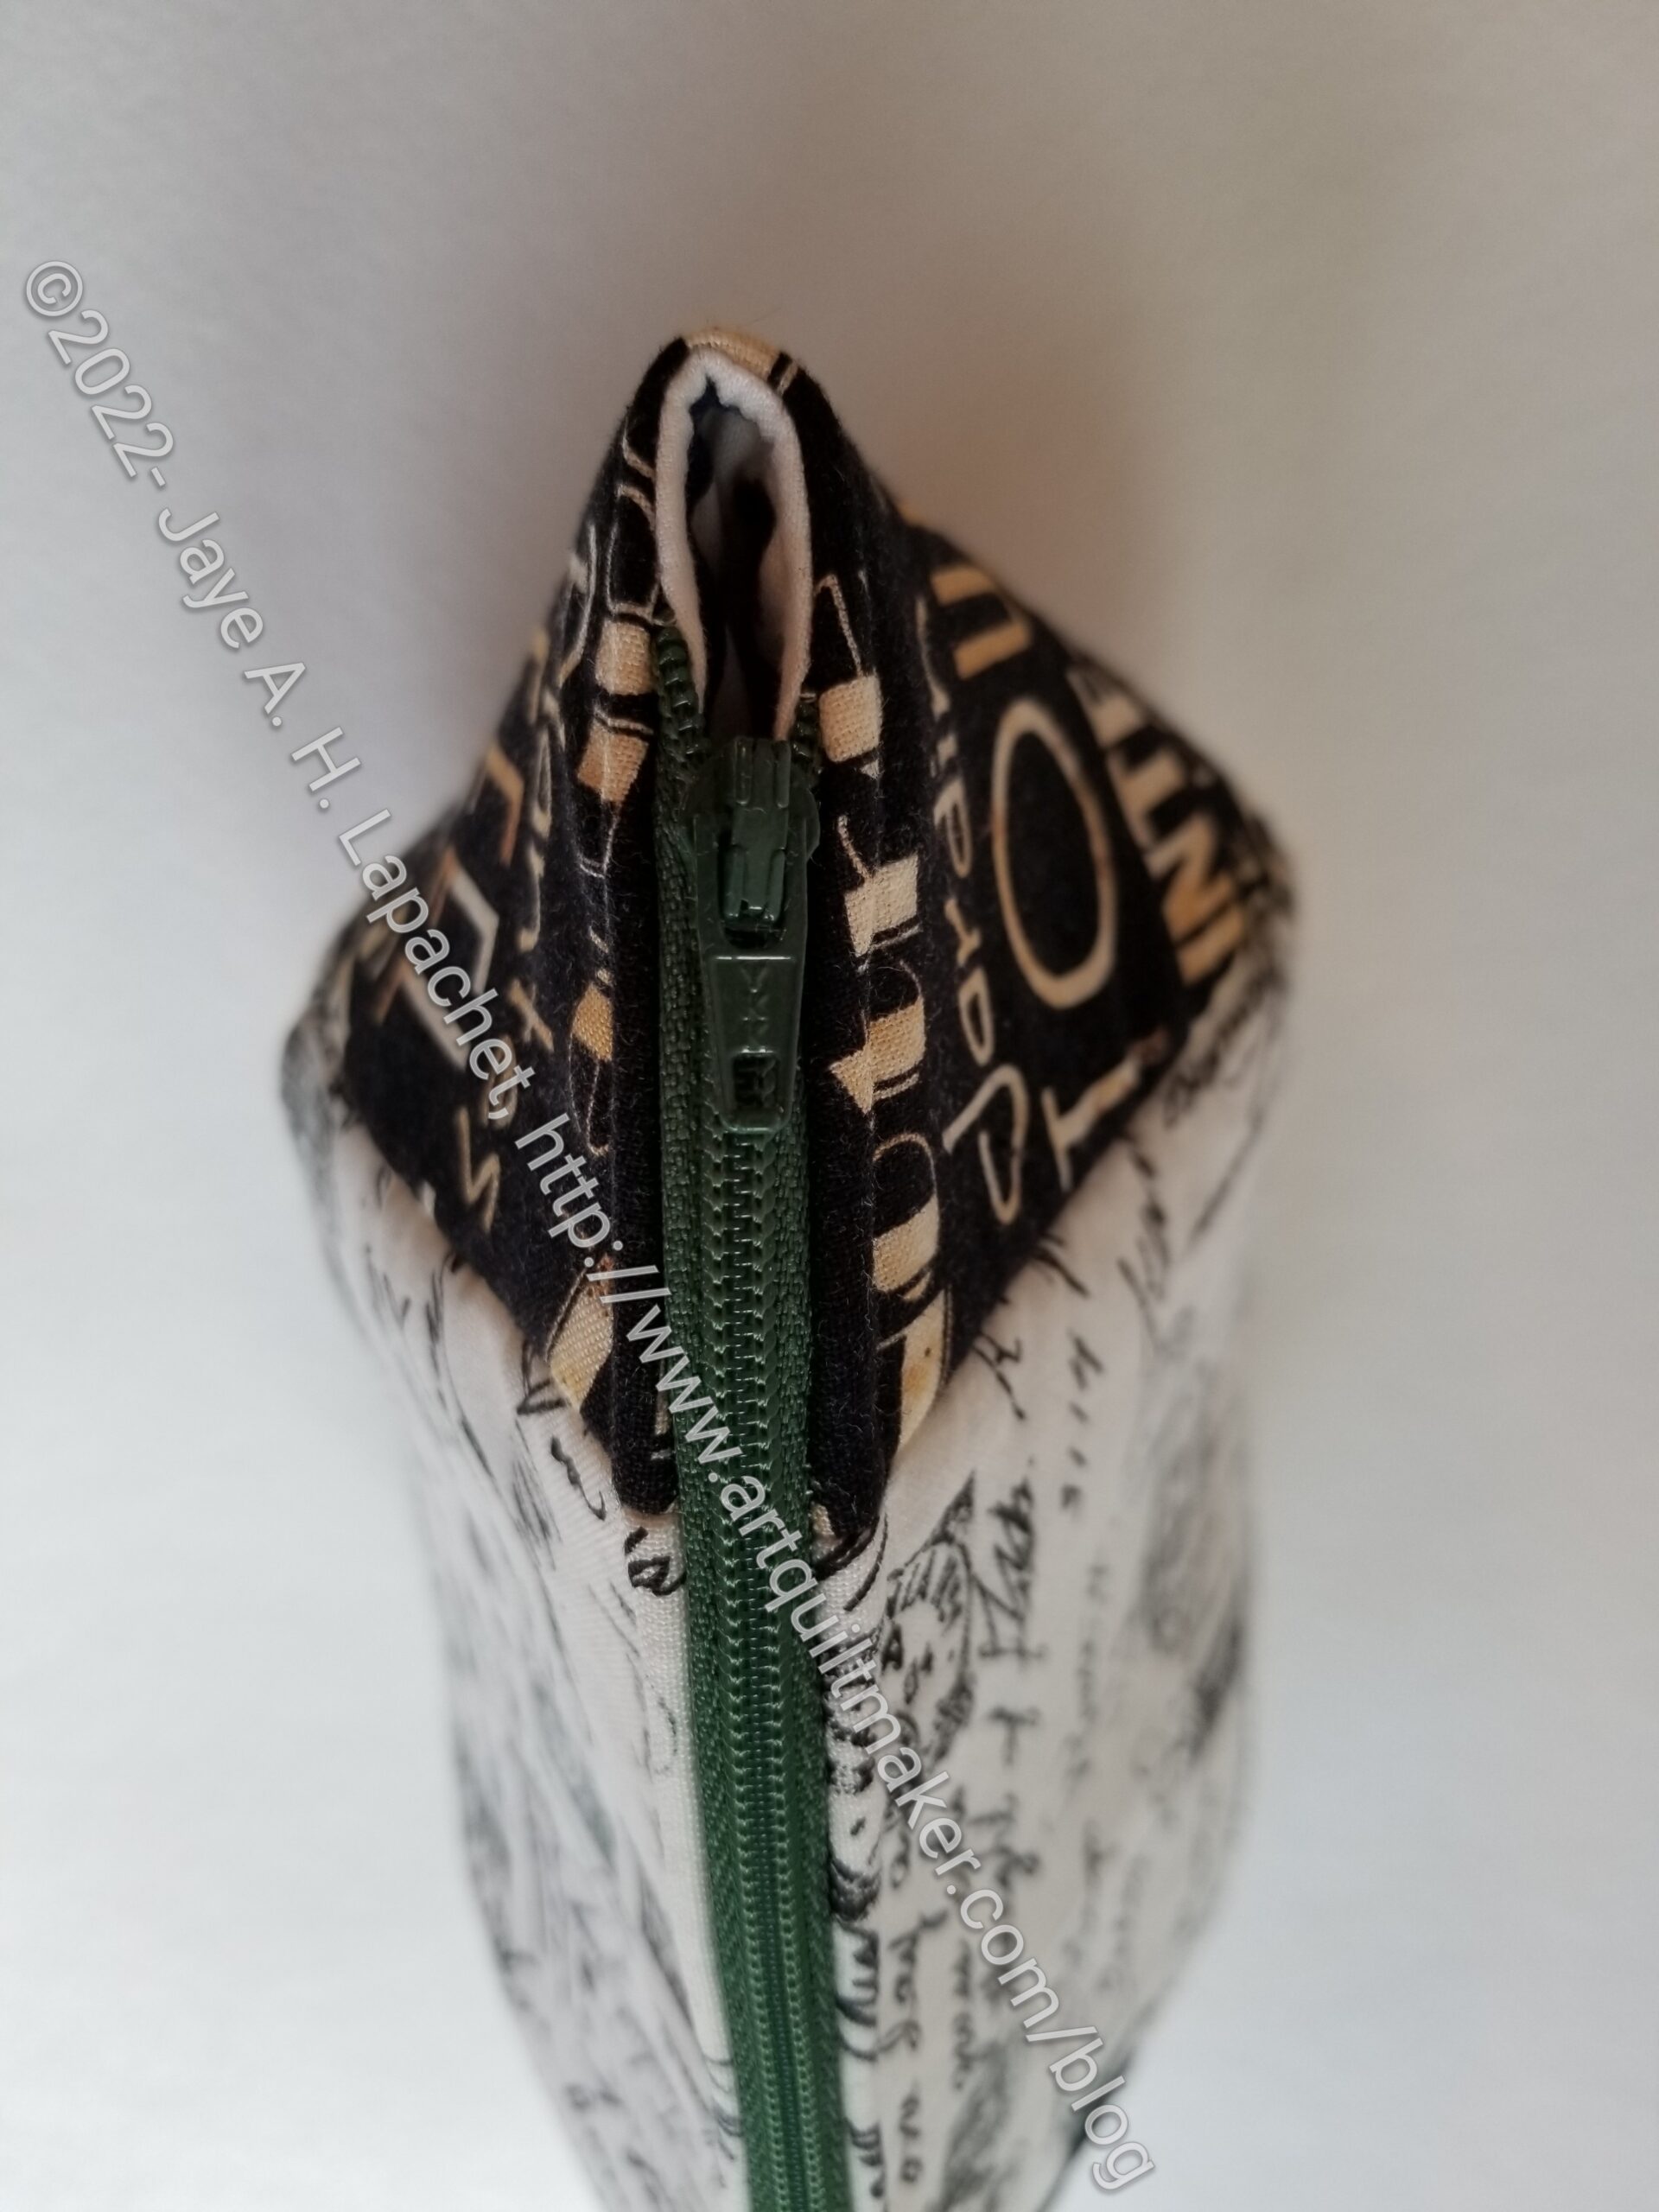
Now I need to remember to sew a Wunderlabel in it.
I am ridiculously pleased with how this Percheron Pouch (part of Minikins Season 3) is turning out.
The photo, left doesn’t show much to you, but the top has nicely fussy cut fabric and is pleasingly stiff. Granted, there is a lot of interfacing in the top. Still, I am super happy when it all works out.
I started working on this just to get a break from the Tarts. I didn’t expect much progress. When I made this pattern before, I just remember struggling. Still, I couldn’t get the pattern out of my mind and decided to make another one as a gift. Since I needed to rest my body from quilting, I thought it would be a good time to make a start. I had cut out all the pieces previously, so was ready to go.
Percheron Pouch: top is 3D
I worked along slowly, listening to my book and alternately ironing fabric for Stay Tuned. Suddenly, the top was made!
I am so pleased with how it came out. It is really 3D! The fussy cutting looks great and even the (IMO) ugly zipper fits really well with the fabric.
I quickly made another Cotton Candy pouch for my sister for her birthday. I am running out of Paris/France themed fabric, so I may have to do something else for her in the future. She likes the turquoise and brown combination and there is no shortage of turquoise around here.
French Cotton Candy pouch open
I have made this pouch a number of times, so it went together quickly. I still had to watch the video for installing the zipper, but for everything else I knew what to do. Something clicked in my mind with this pouch, which is a great feeling. I am very tempted to make some more of them just to cement the knowledge in my mind and to get some gifts for the latter half of the year out of the way.
French Cotton Candy pouch zipper end
One of the things that clicked was the end of the zipper. I understand more about the placement of the veering of the zipper. In this pouch, I didn’t get the ends close enough to the center of the side panel. The pouch is definitely still usable, but that is something I would like to fix in the next versions I make.
Now I have to find something to put inside the pouch and send it off, though by the time you read this, Lil Sissy will have this in her hot little hands.
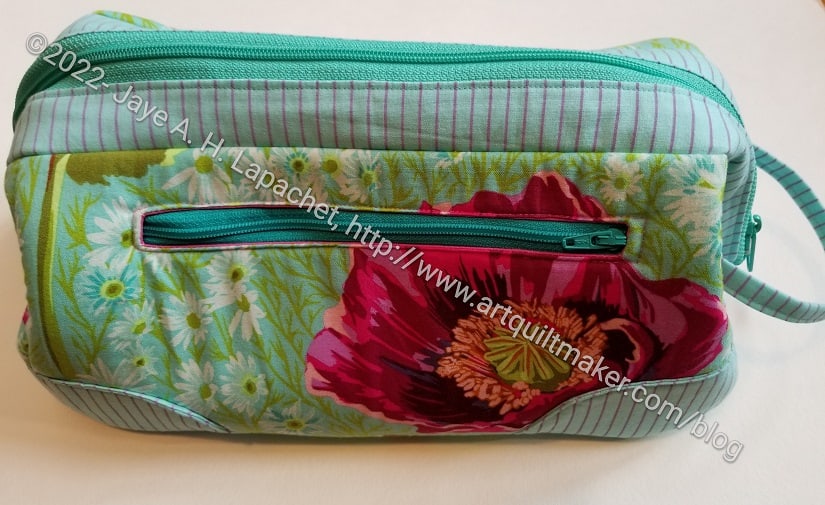
I was able to finish the Andalusian Pouch over the weekend.
It went together amazingly well. I barely used my seam ripper at all.
Andalusian Pouch- open/side view
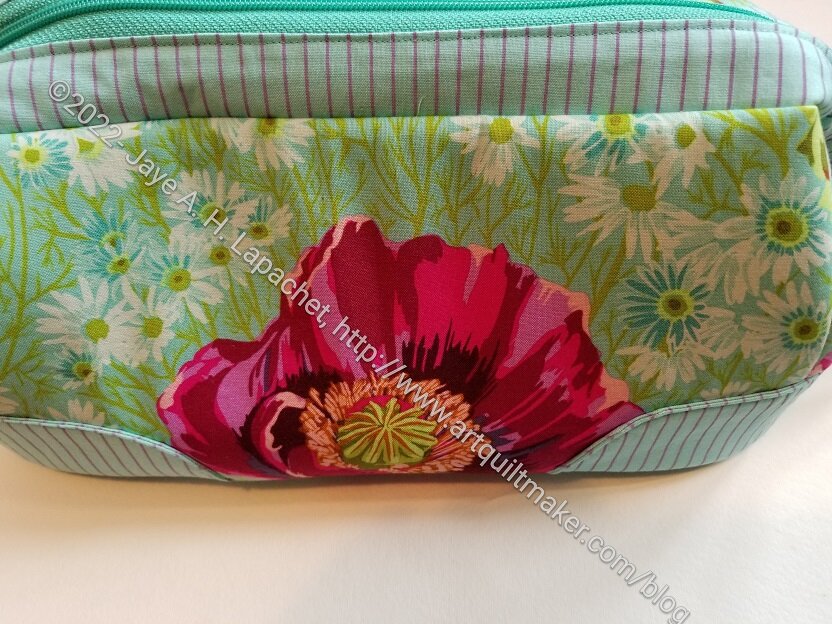
This pouch started because I had a fat quarter, cut a few pieces then put them away for later. I got more of the Anna Maria poppy fabric and decided to make the pouch for a friend who has been super helpful at work. I used one of the new True Colors fabrics for the accent fabric.
This pouch has rounded corners and those rounded corners made it so easy to put together! It was really a dream, which makes me want to make another one TODAY.
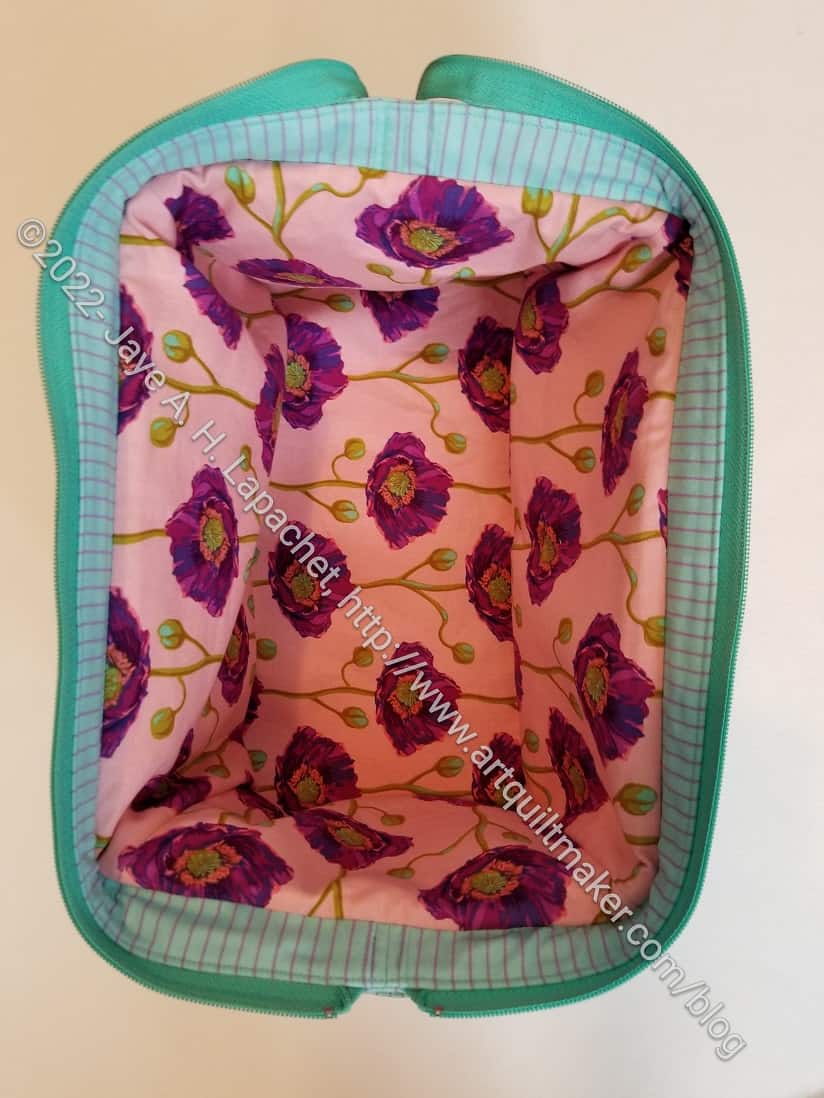
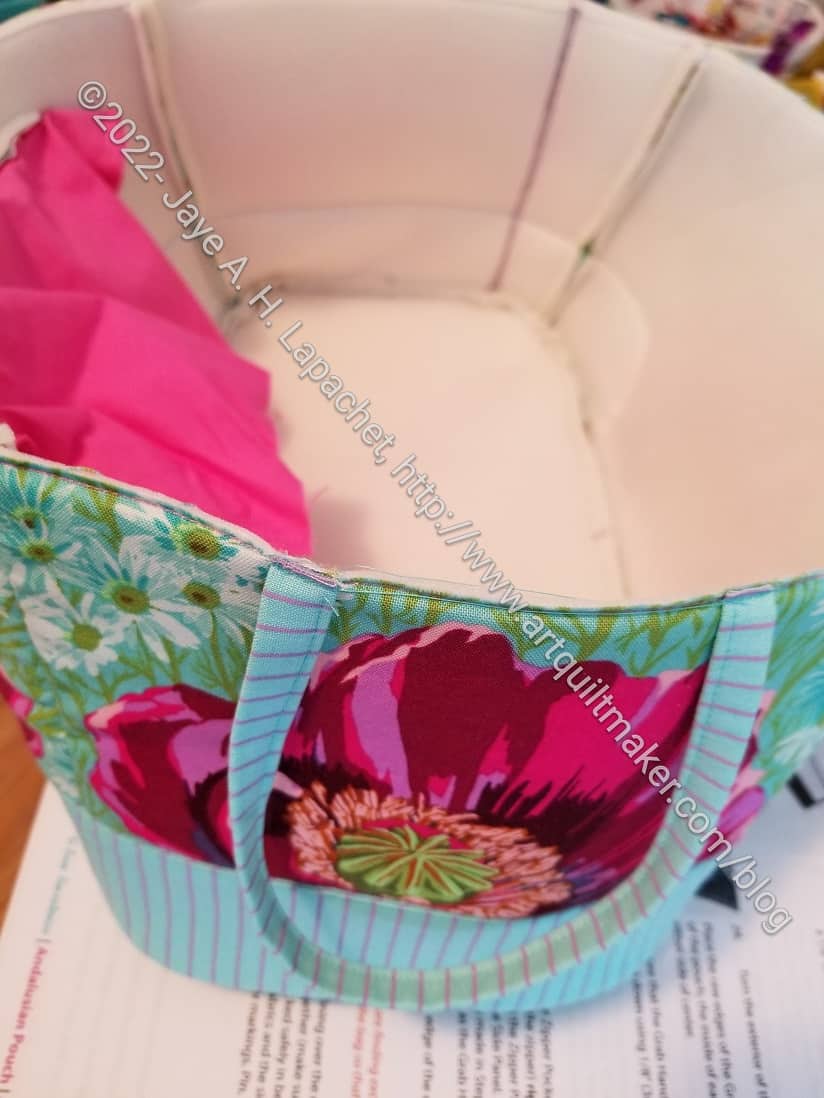
Andalusian Pouch- open/top view
The pattern is from the Minikins 3 series by Sara Lawson of Sew Sweetness. It comes out looking more like a man’s shaving kit when closed, but when open, it would be great to carry sewing supplies (one track mind, I know, I know!) to Sew Day.
The man’s shaving kit shape is a little weird, but I really like the open wide mouth that the frame provides. I like being able to see all of my stuff.
I am super proud of the way the zipper came out. Both ends of the zipper look like they are supposed to look.
Andalusian Pouch – zipper start
Andalusian Pouch – zipper end
The start of the zipper had the ends sewn at 90 degrees and it looks so finished. I really like it.
The end of the zipper required veering at the end. I think, after much practicing, I have finally gotten the hang of veering the zipper. I have to admit that I did watch that part of the video and followed the directions multiple times. I am still a little unclear on the exact purpose of veering the zipper. I plan to keep practicing so it will become second nature.
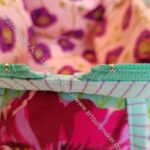
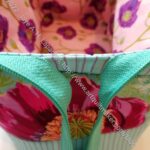
Andalusian Pouch – side zipper
My careful fussy cutting didn’t work 100%. I have never made this bag before so that was part of the problem/issue. The accents covered up some of the flowers. I knew there were accents were part of the bag; I just couldn’t judge where the flowers would end up. Still, I think it looks nice. I hope that my friend likes it.
I think if I make this again (and I do have another frame) I would use a fabric with an all over pattern, then use cork or vinyl for the bottom accents and the bottom of the bag. Sara has some turquoise cork that I have had my eye on.
I am making good progress on the pouch. I think I overestimated the time it would take to finish in a recent post. I made good progress, but the last parts seem to take longer than I usually anticipate.
I had to put the Zipper Panel pieces that hold the frame and the zipper panel together. These were a bit fiddly, but not too bad. I was in a good place when I decided to work on this project and it wasn’t too late in the day so I wasn’t tired.
I also ended up putting the grab handle on. I hope the thinness of the handle doesn’t prevent it from being useful.
I feel like I am making good progress and will be done soon.
Some weeks ago, I cut a few pieces of the Andalusian Pouch out of a fat quarter of Anna Maria Horner’s Meadow Bossy Poppy. I got the fabric from one of the Quilty boxes.
I was cutting something else out and decided just to use up the fabric. Of course, that was a boondoggle as I didn’t have quite enough to finish cutting out the exterior of the pouch so I ended up buying more.
Andalusian Pouch start
Over the weekend, I decided to make that pouch for a friend and I got to work finishing the cutting. If I hadn’t had to cut all of the pieces out, I would have finished the whole pouch. As it was I was just able to get a solid start.
I was able to get the pouch’s four sides sewn together as well as the side zipper installed.
I had some trouble with keeping the zipper in place and really should have used some washaway tape**. I was just lazy.
Andalusian Pouch with side accents
This pouch, one of Minikins Season 3, has some trim on it, which I think would be better in cork or leather or something heavier. As it happens, I didn’t think to use the faux alligator I used on Mom’s UCAB, so I just used some of the True Colors I received the other day. I think it looks good, but I wouldn’t add the side accents again If I have carefully fussy cut some great fabrics, because the motifs get covered up.
I hope I don’t jinx myself, but this is going together really well and I would consider making it again.
**Obviously, you should shop at local quilt shops. However, I use affiliate links and may be paid for your purchase of an item when you click on an item’s link in my post. There is no additional cost to you for clicking or purchasing items I recommend. I appreciate your clicks and purchases as it helps support this blog.
This was a great pouch. I can’t say I didn’t rip, but it still went together really well.
In a number of the FB groups in which I share my pouches and drool over others’ pouches and bags, people tend to point out the flaws. I always tell them their work is great and not to point to the flaws. Now I know how hard that is. All I want to do is point out the flaws in my work. What is that about people? Is that a way to add to the life’s drama?
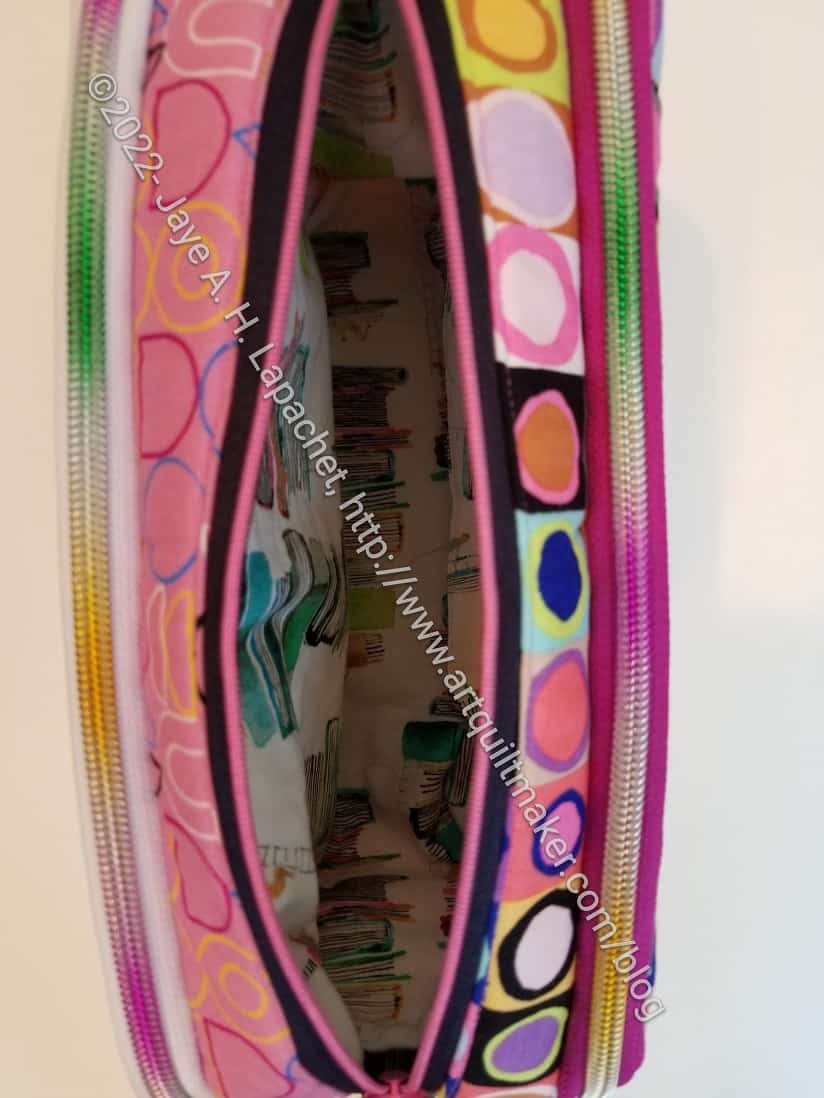
As I said before, one reason I made this particular pouch was to use the zippers Julie got me for my birthday. There are three different colors of zippers and two different kinds of zipper heads, so I tried to make the most of them.
Friesan Pouch center / inside
A lot of the fabric (maybe all) was purchased on my trip to Portland. I used two different fabrics for the outside to give myself a visual cue as to where something was. I also wanted to use my new fabrics right away.
I used book fabric (from Windham) for the lining as an homage to my librarian roots. It is hard to see, but I can see it when I use the pouch. The book fabric makes me happy.
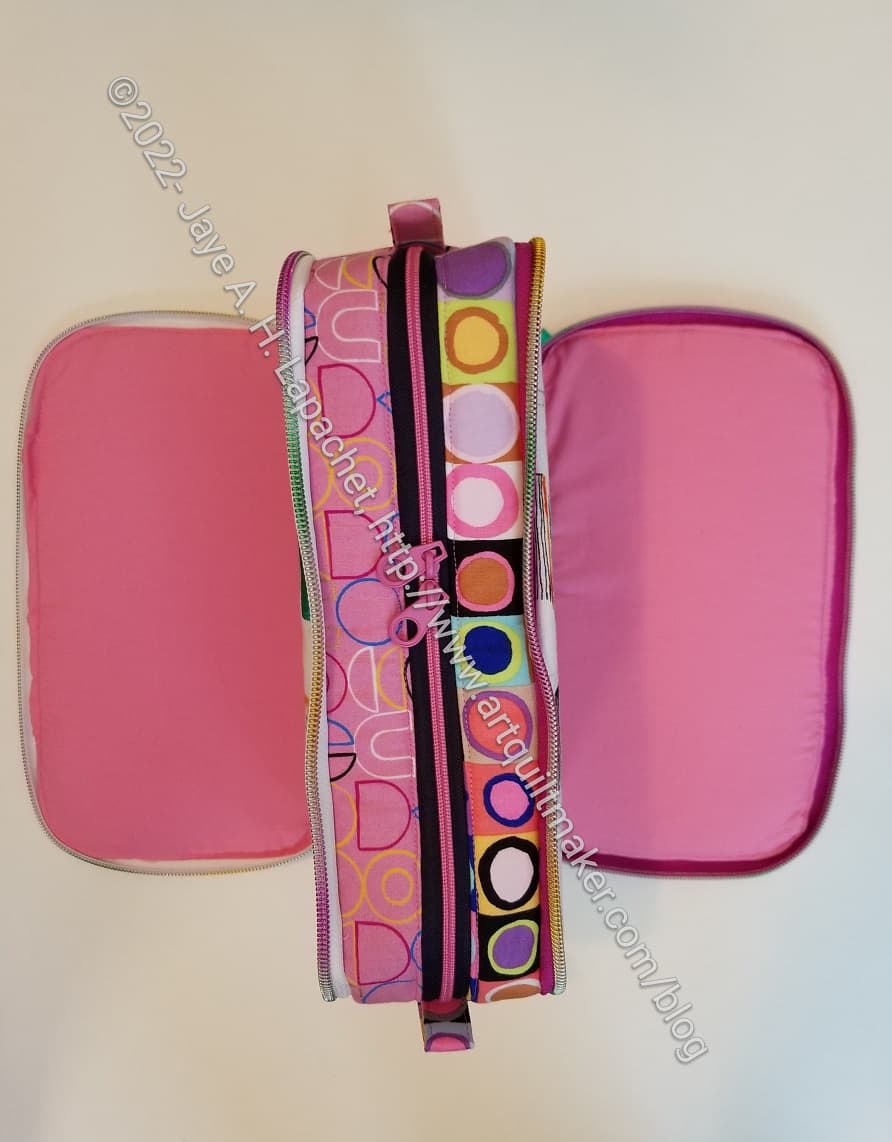
I like the stiffness of the bag. The center has foam to help it stand up while the sides have foam** and Decovil**. The bag stands up really well. I want to try something with more Decovil**, but I haven’t found the right pattern yet.
Friesan Pouch – sides down
One thing that makes this an interesting pouch, is that the sides fold down. I was inspired to use the AGF solid pink after using it to good effect in Gerre’s Retreat pouch. I wouldn’t use a solid again on the inside pocket. It just looks too stark even though I like that fabric. A print would give the viewer something to look at.
Also, I would probably put something to hold pens – elastic or mesh – to make those folding down sides more useful. It is hard for me to see what might be better for me in the design when I make a pattern the first time. As I have said before, I like to make things a few times before I get the true hang of them.
Overall I feel like this pouch came out really well. I am pleased. I made it for me. I am not sure how I will use it, but I will find some way to use it, I am sure.
**Obviously, you should shop at local quilt shops. However, I use affiliate links and may be paid for your purchase of an item when you click on an item’s link in my post. There is no additional cost to you for clicking or purchasing items I recommend. I appreciate your clicks and purchases as it helps support this blog.
What I wanted to do at Sew Day, since all of my La Pass month 9 pieces were basted, was cut out a bag. I had been thinking about the Friesan Pouch for awhile and I chose to cut the pieces for that pouch out.
As I have said, cutting out large-ish projects at Sew Day is great. The larger cutting table and space to spread out are very helpful.
I prepared everything I could at Sew Day, so I was ready to sew when I had time on Sunday.
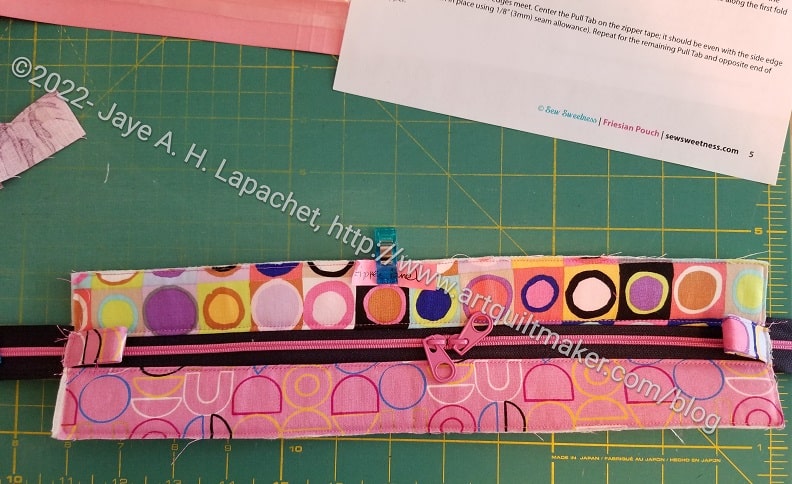
I basted all the pieces like Sara says to do instead of being lazy and wanting to get to the finished product. It took forever to get through the basting and making the zipper panel, but I had everything ready so it went very smoothly.
Friesan Pouch zipper panel
I used the zippers Julie got me for my birthday. I was able to put the zipper heads on (using my zipper head tutorial) with the zipper heads that Julie included in my gift and I think they look really good. I am ridiculously pleased with how the zipper panel came out.
I used two different fabrics (from my trip to Portland), one for each side of the zipper, because I used on fabric for each side of the pouch. I hope it comes out like I imagine it.
I am in the process of installing the zippers on the outside pockets.
I bought the templates to make this pouch and is coming up fast on my list.
Sometimes I buy a pattern and it languishes for awhile, then all of a sudden I have a bug in my ear to make it. This happens all the time with Sara’s patterns since buying a Minikins set means that I get 12-13 patterns at once. That is what is going on here.
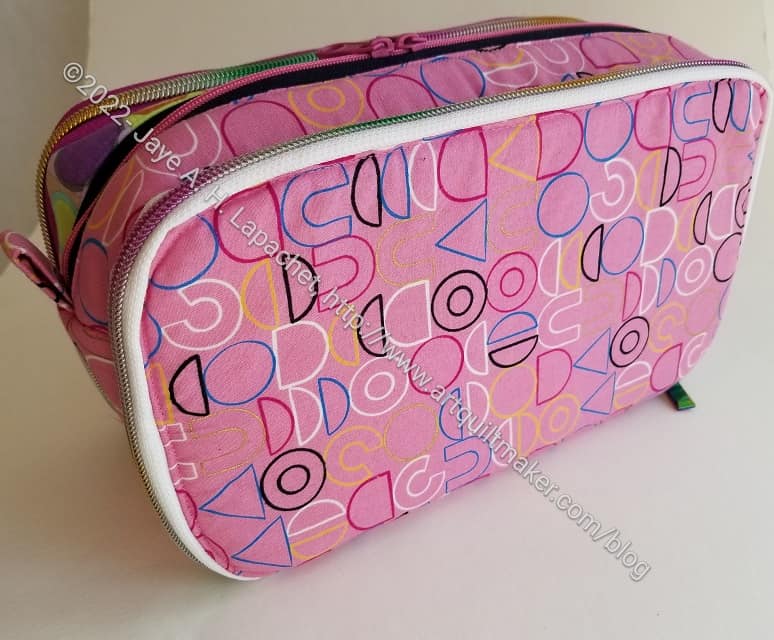
Fun Pink Zippers
This is an interesting pouch because of the way the two sides flap down when you unzip them. As shown in the photo, the front and back of the pouch would be a good place for fussy cutting some great fabric. In my case, I want to make one for myself and, possibly, use those fun pink zippers Julie gave me.There are some black zippers, too, so, maybe a pink and black theme? I thought of pink and turquoise to go with the A Place for Everything Bag, but I am not sure that Philip Jacobs fabric would go with the black zippers. I think I would really like those zippers to pop since they are so awesome.
This makes me think of the Pink Kaffe Quilt. That uses a lot of his fabrics and they go with the pink sashing. Perhaps solid pink for the center and some of the Philip Jacobs fabric for the outsides?
I might make two of these at a time – one for a friend who has been super kind to me lately. I could make few and get gifts ready for later in the year. We’ll have to see.
The pouch is from Sara Lawson’s Minikins Season 3 group of patterns. Sara Lawson owns the Sew Sweetness website and pattern company. She was kind enough to allow me to use her photo while I muse on fabric choices for this pouch.
I know that you know how much I like her patterns. You can see how many of the Minikins patterns I have made. They even have their own page!
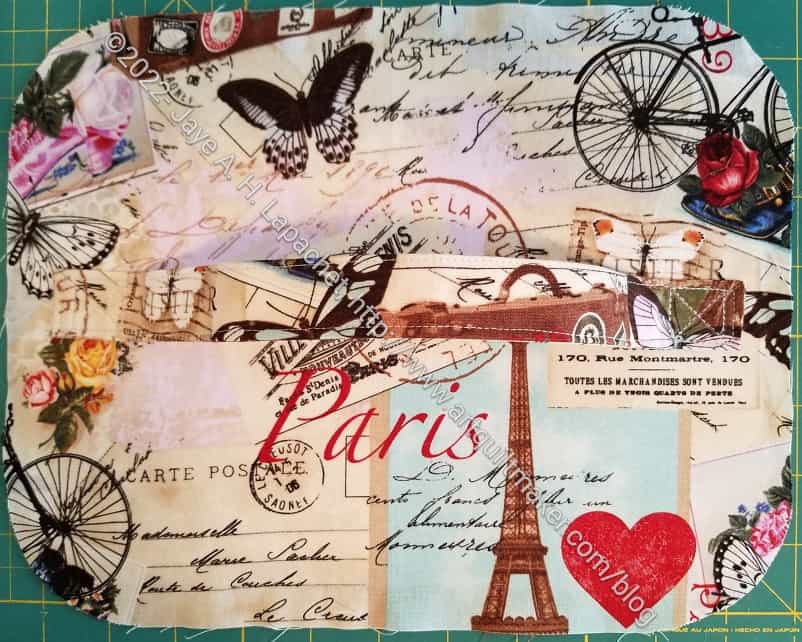
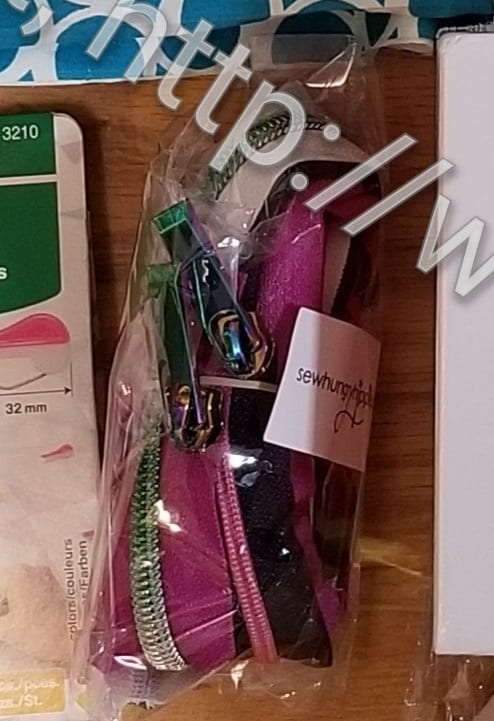
I finished the Percheron Pouch over the Thanksgiving Weekend, which was a great relief. I couldn’t show it because it was a gift for my mom and she reads this blog.
I gave it to her on Christmas and she really liked it. She filled it up with all of the other gifts she received.
I really liked the look of this bag, which is why I decided to make it for my mom. I like making her bags I think are interesting. She always seems to appreciate them.
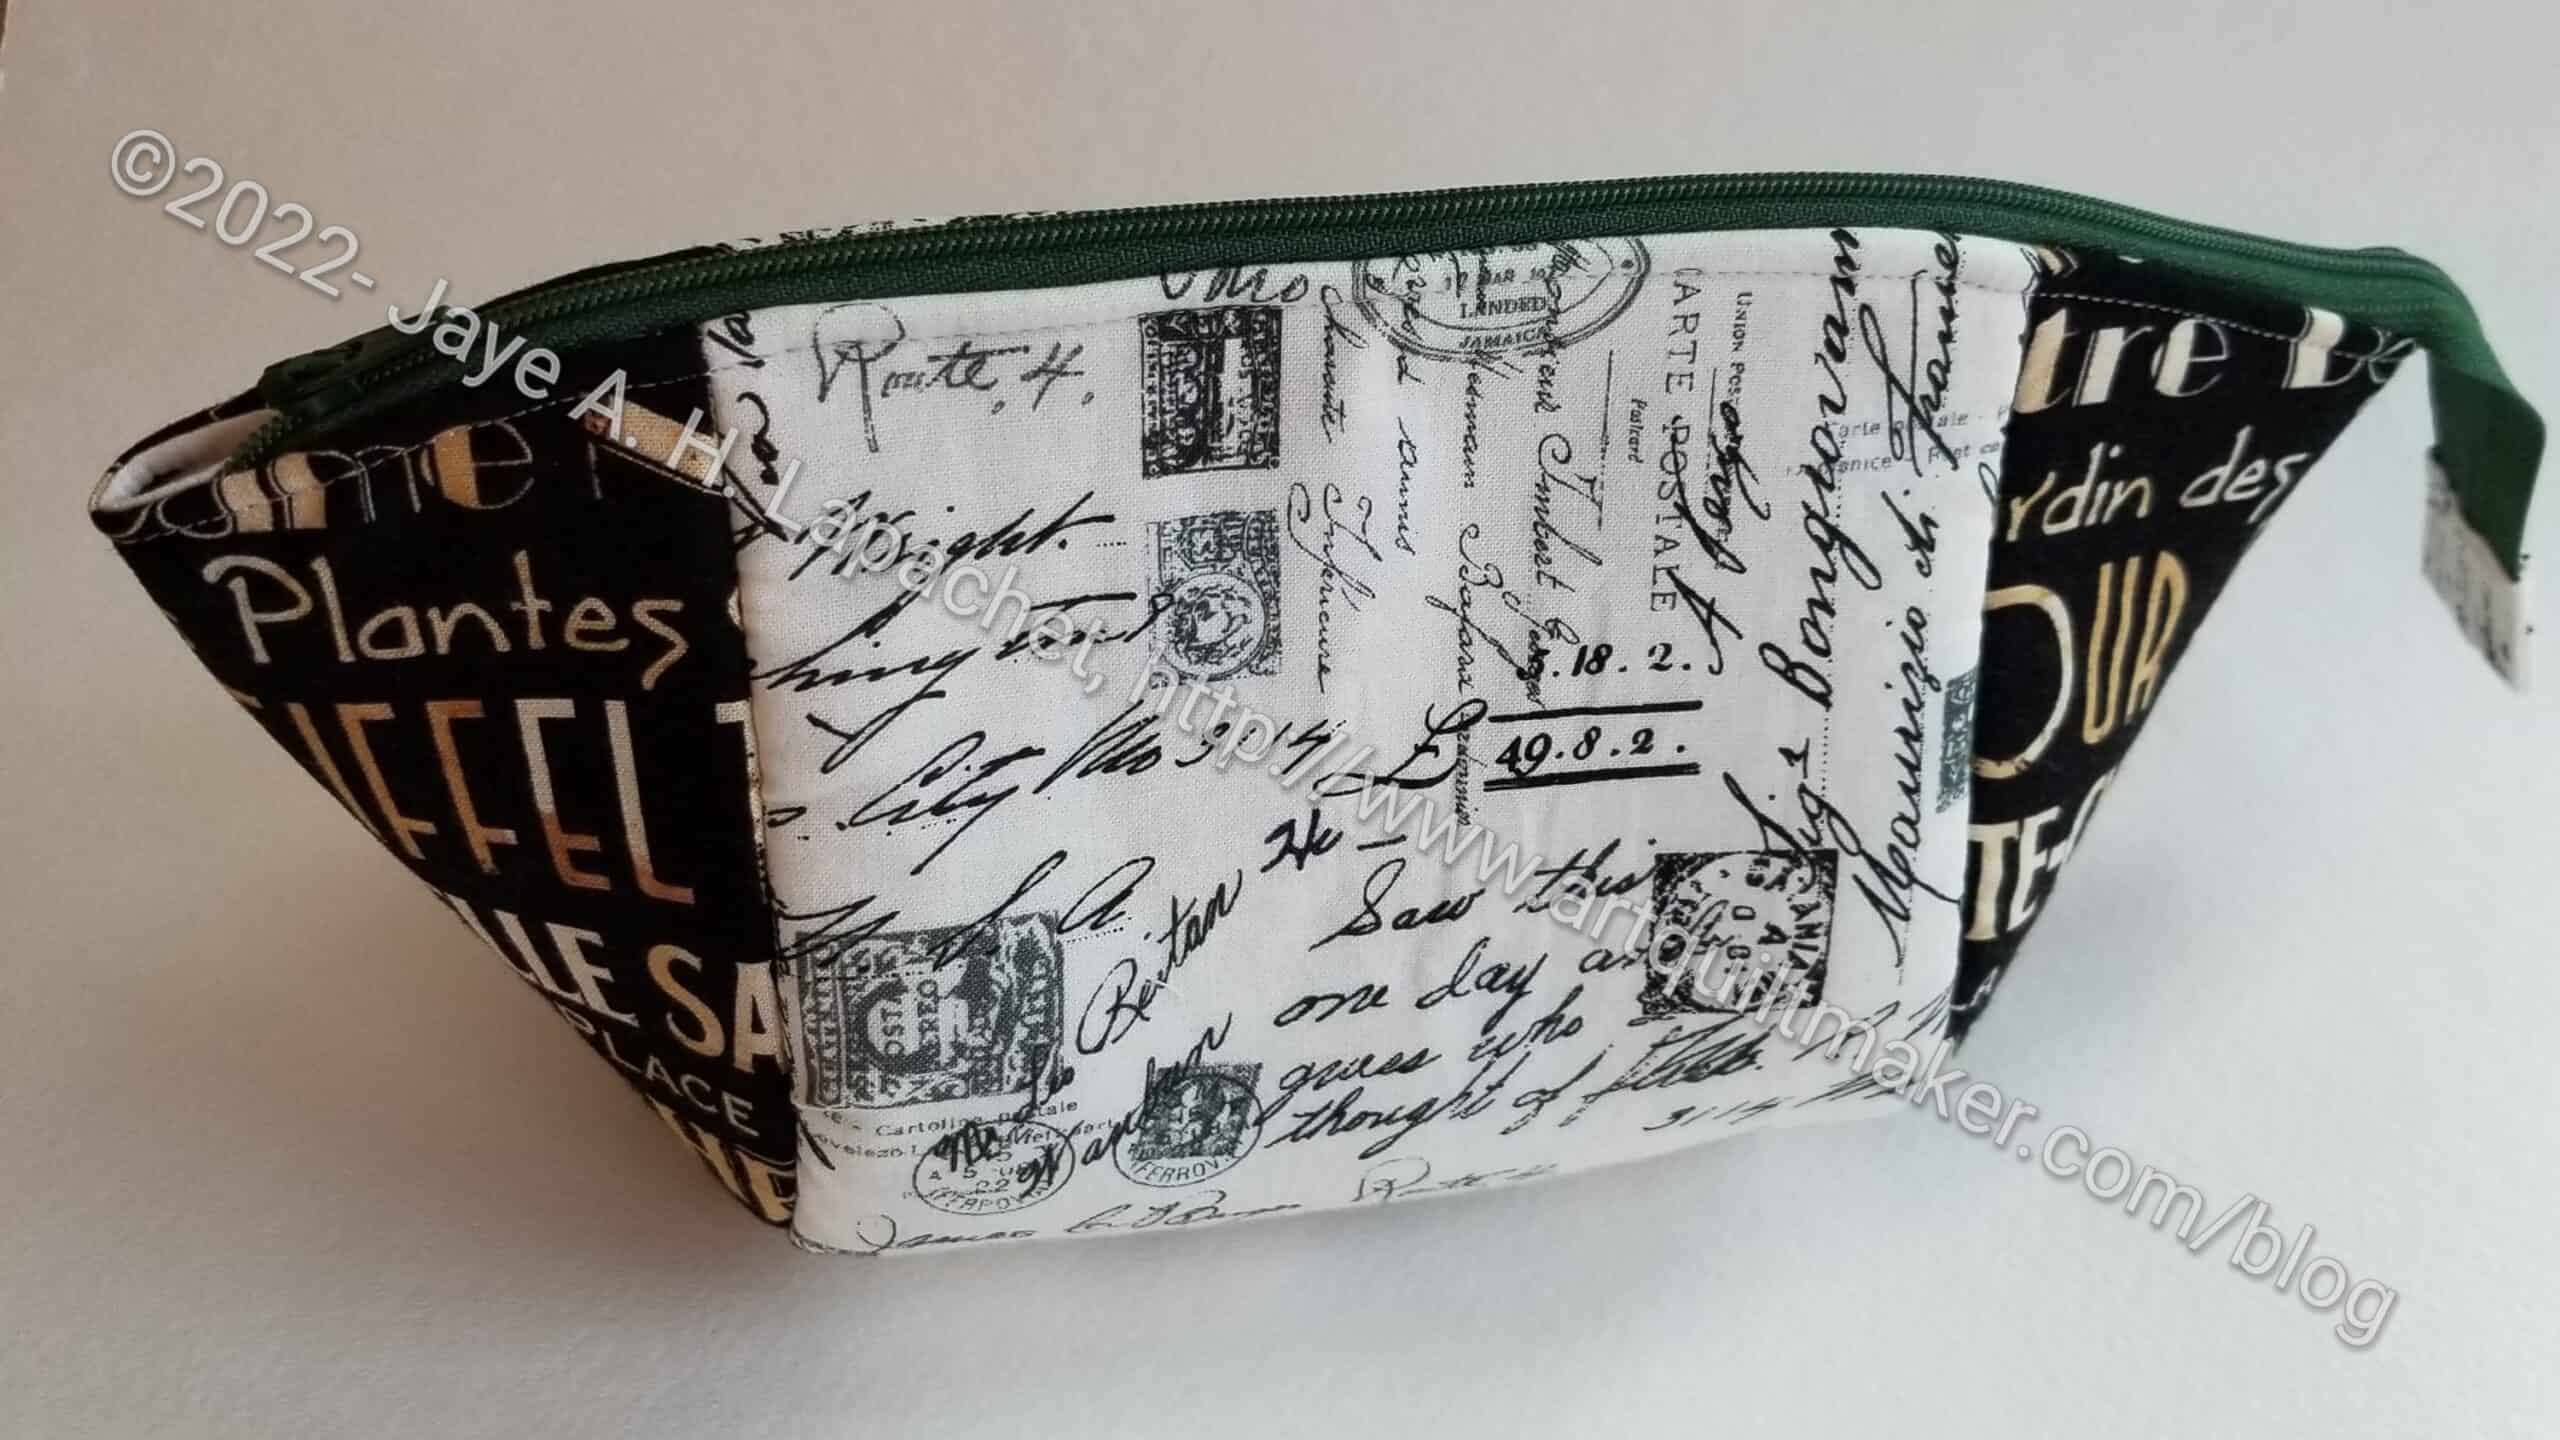
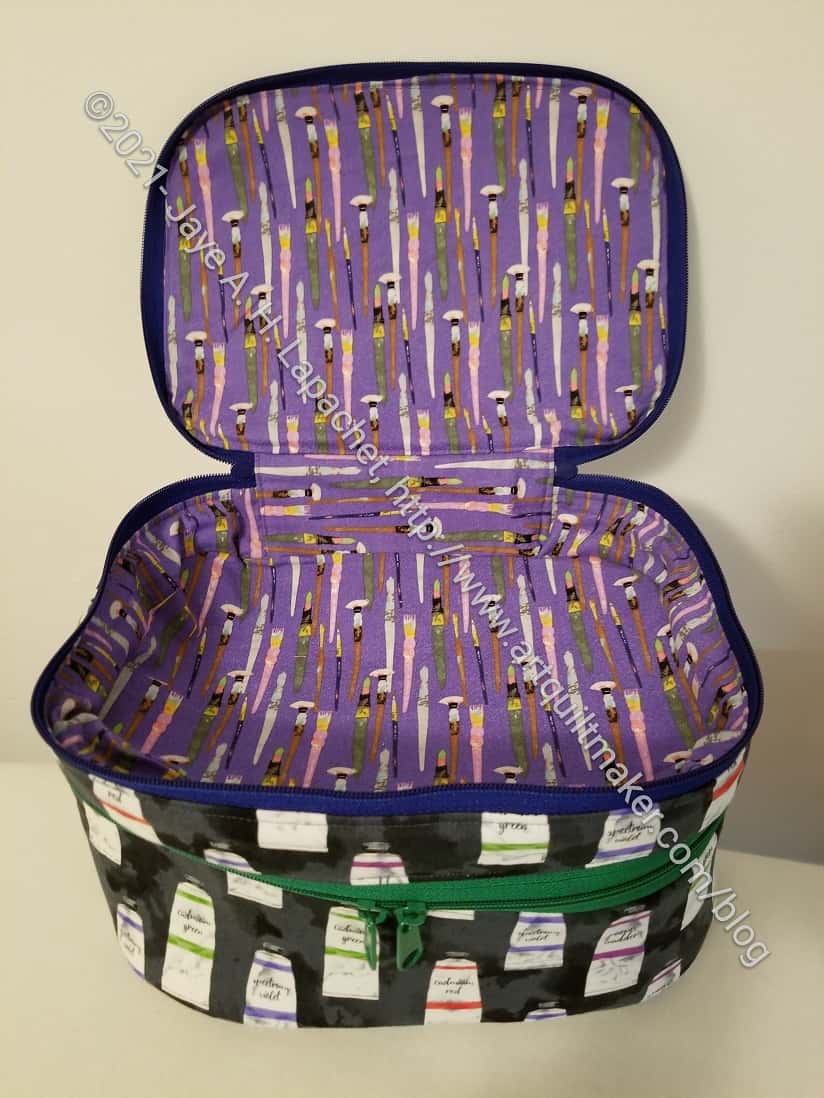
Percheron Pouch top zipper area
I really struggled with this bag. As I said before, I cut this bag out in June. Then it languished for all the same reasons that other projects languished: workroom upgrade and work.
I worked on it a little, but was frustrated with all of the sewing and ripping that I had to do. I don’t know what the issue was with this bag, but I struggled with the pattern and the video.
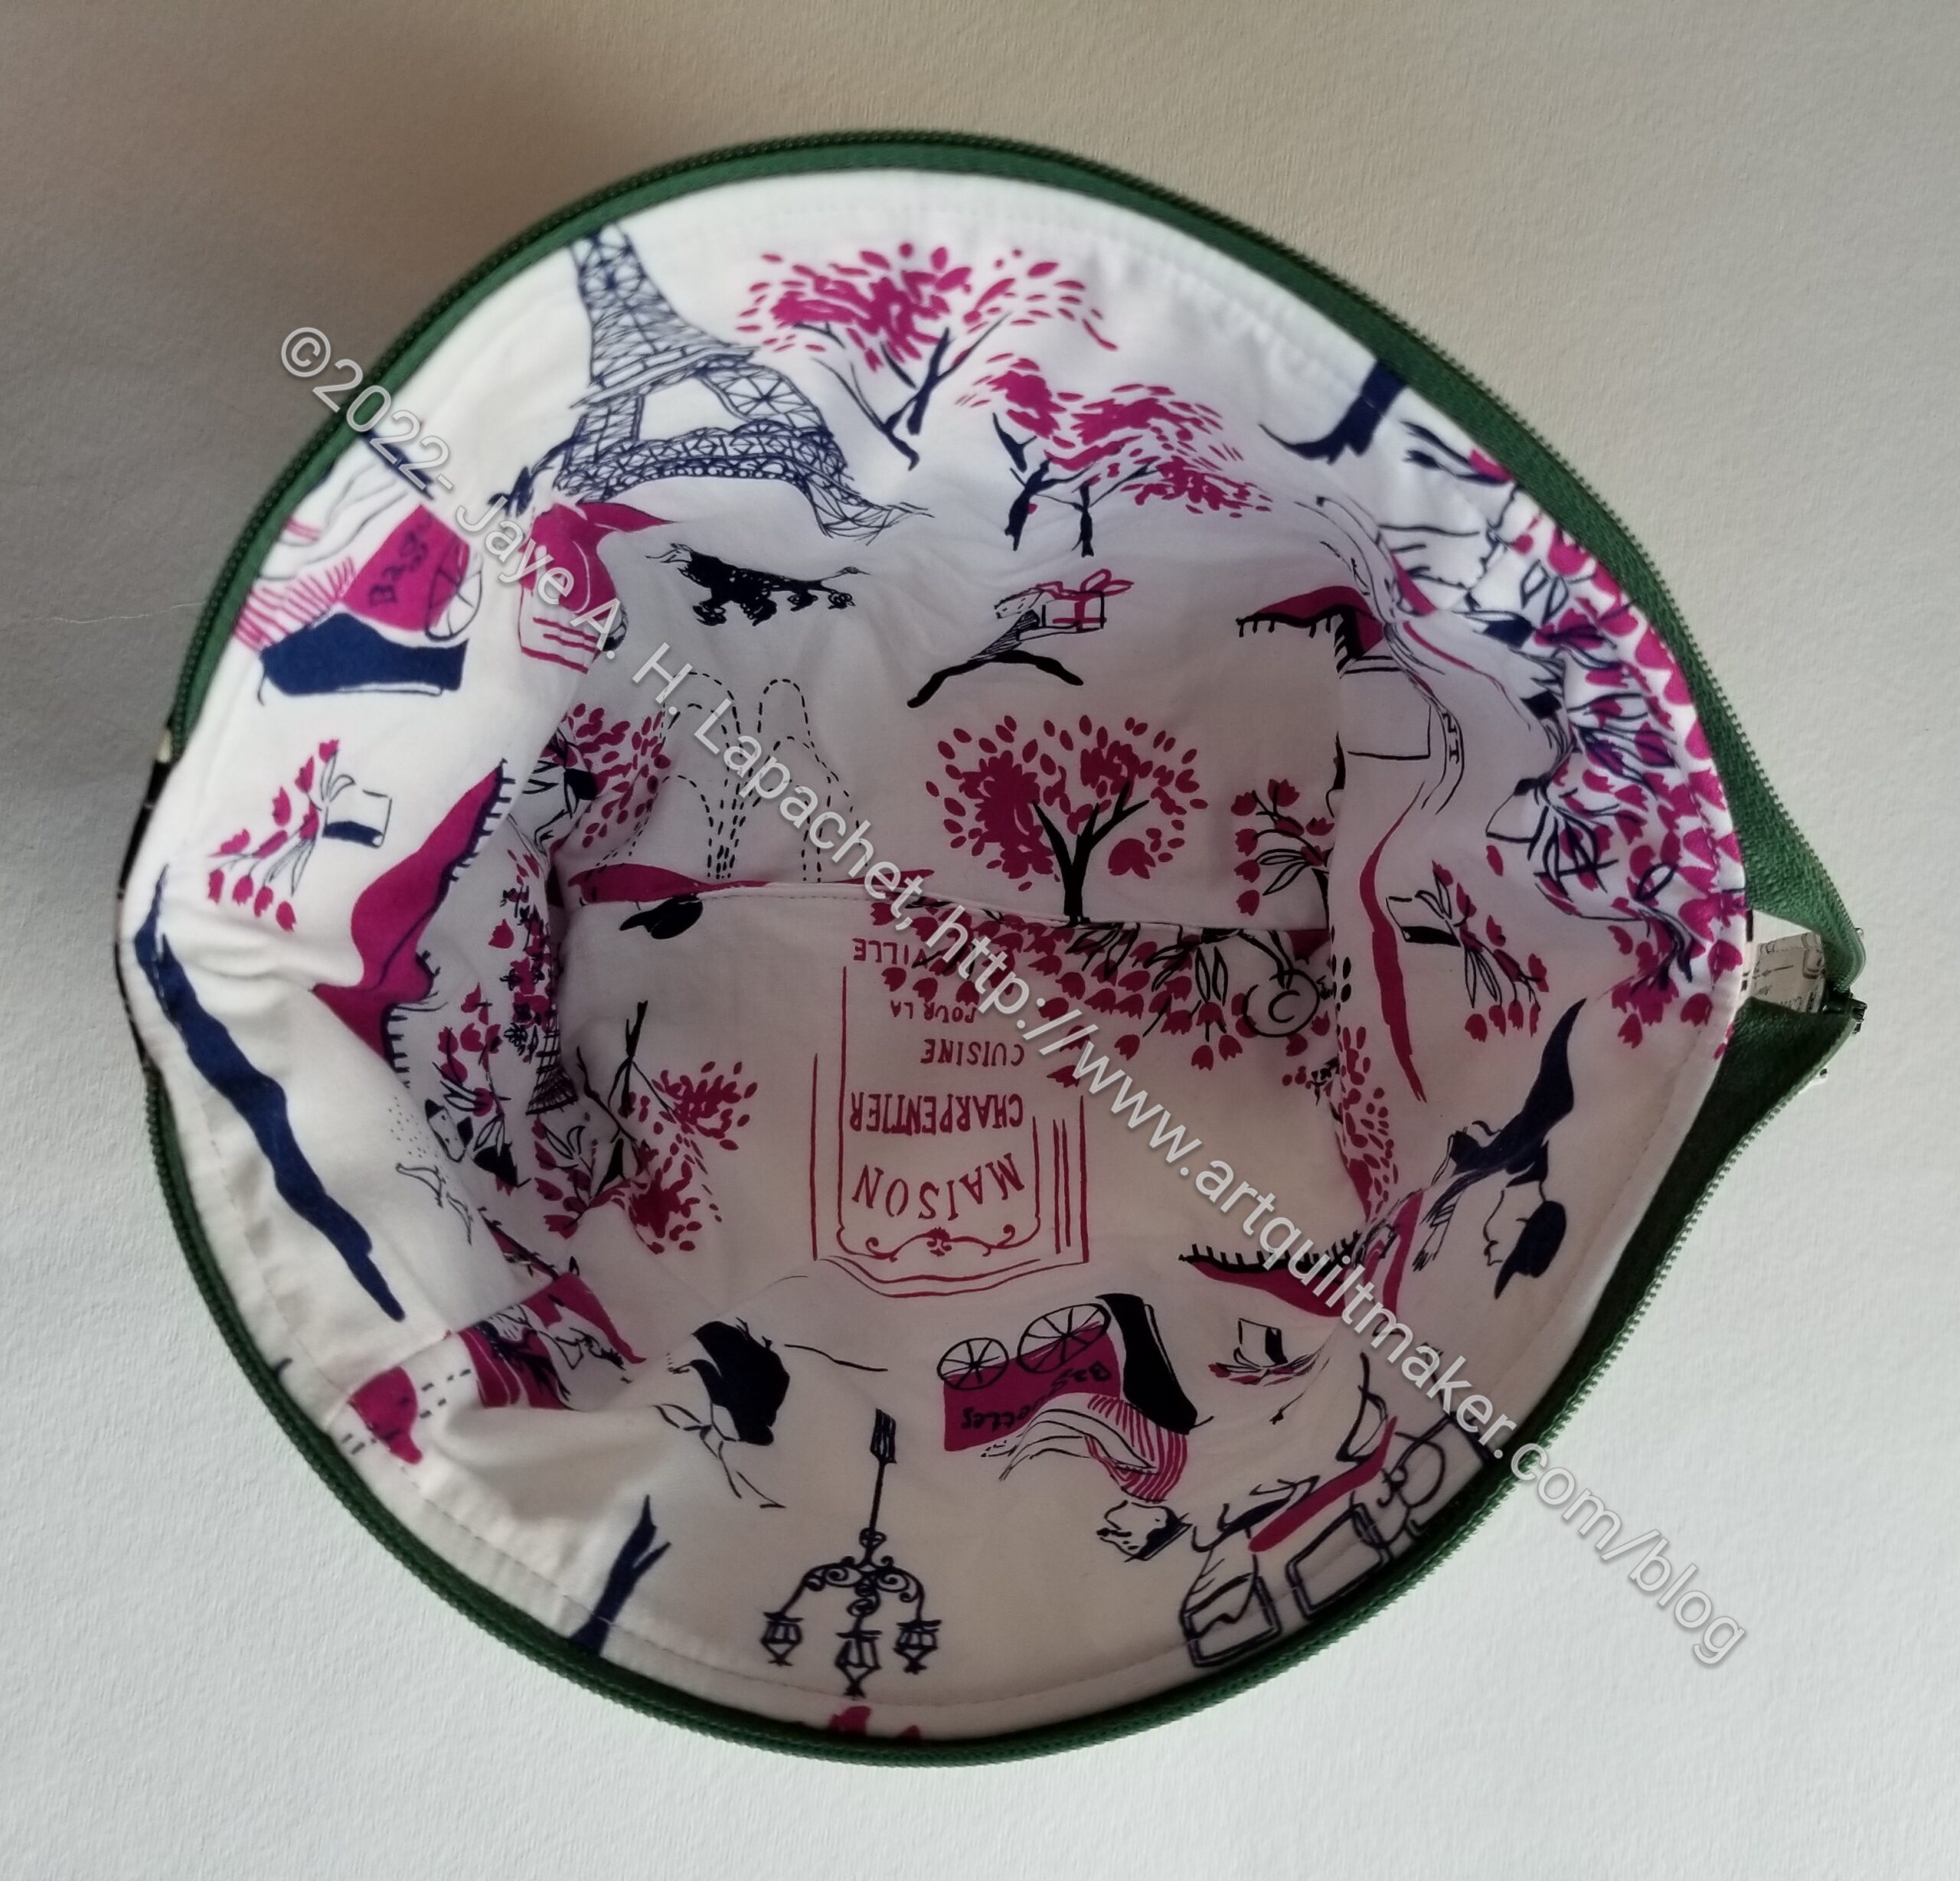
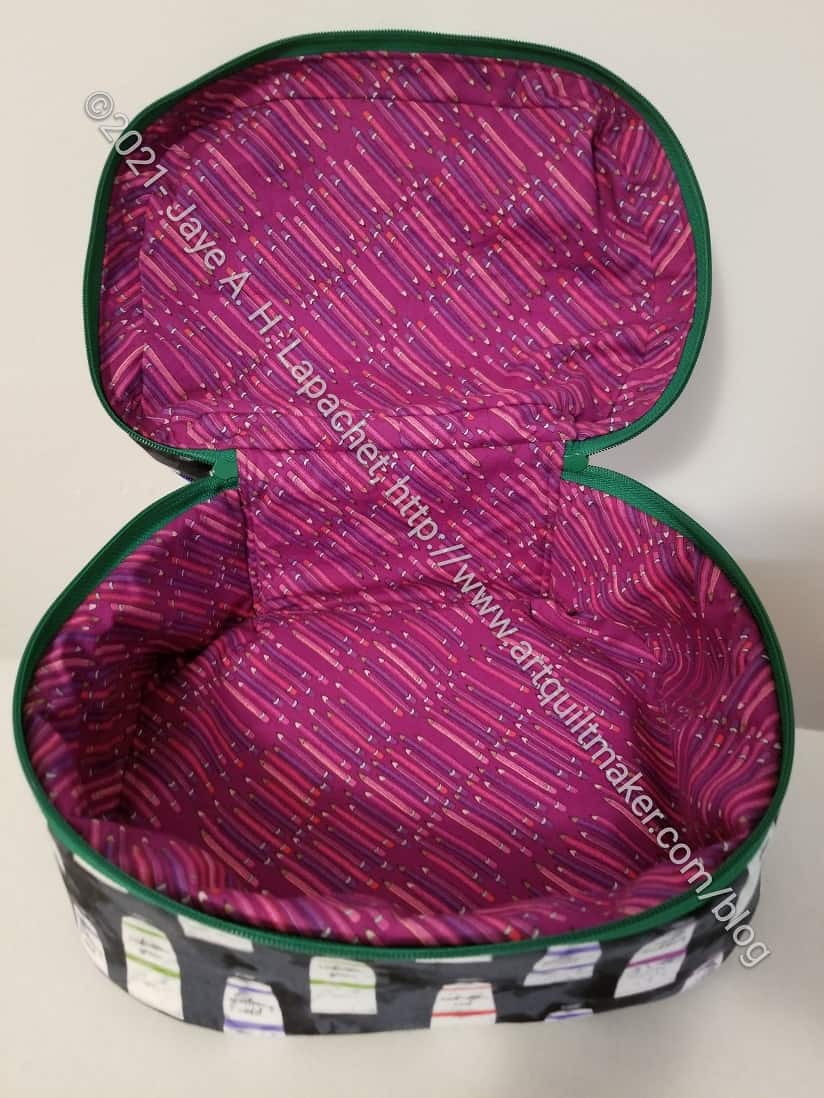
Percheron Pouch bottom zipper area
Finally, over Thanksgiving, I decided to work on it in earnest. Yes, I still ripped and sewed and ripped some more, but I was able to finish it.
I thought it looked good enough to give away even if it isn’t perfect.
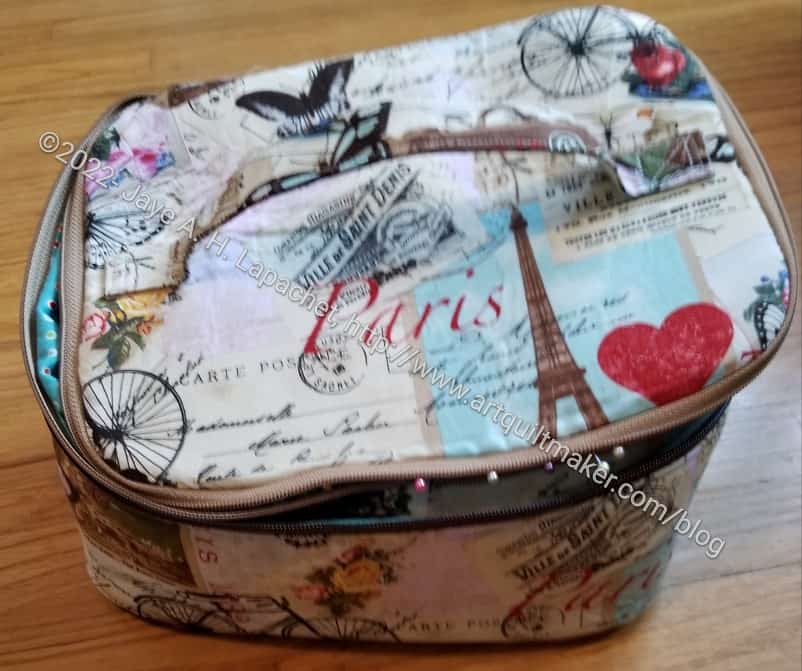
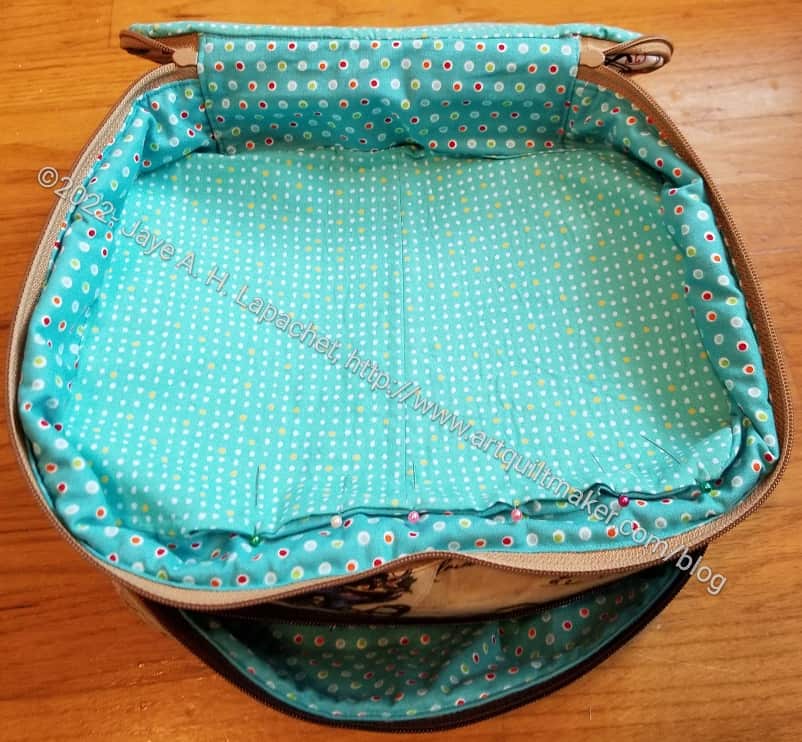
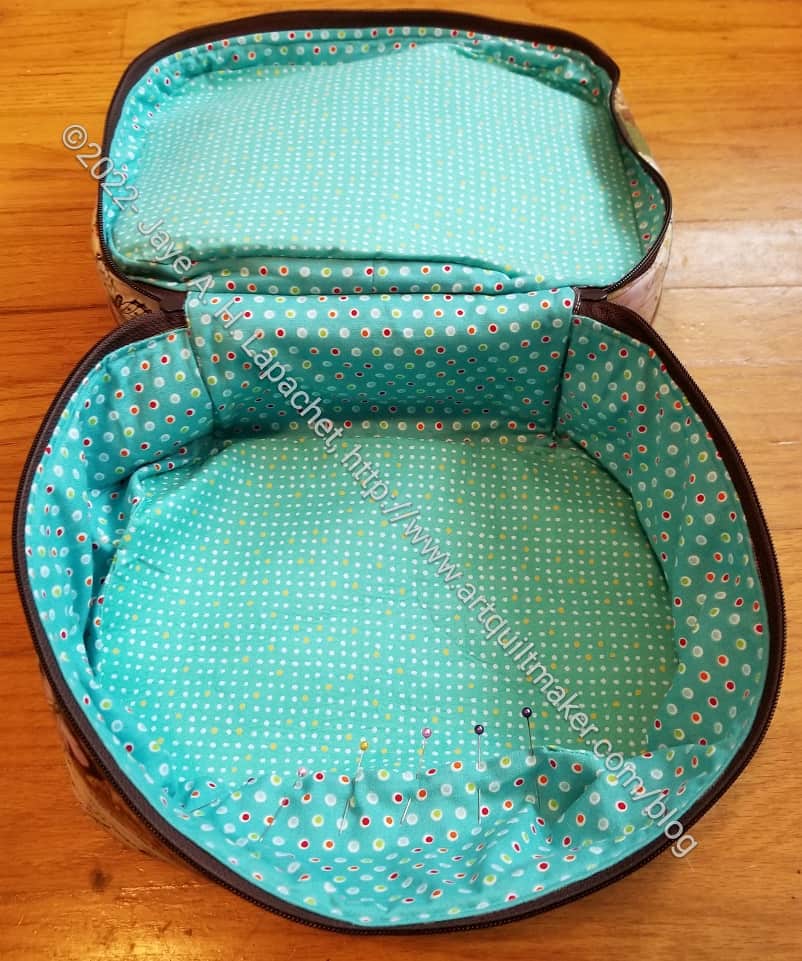
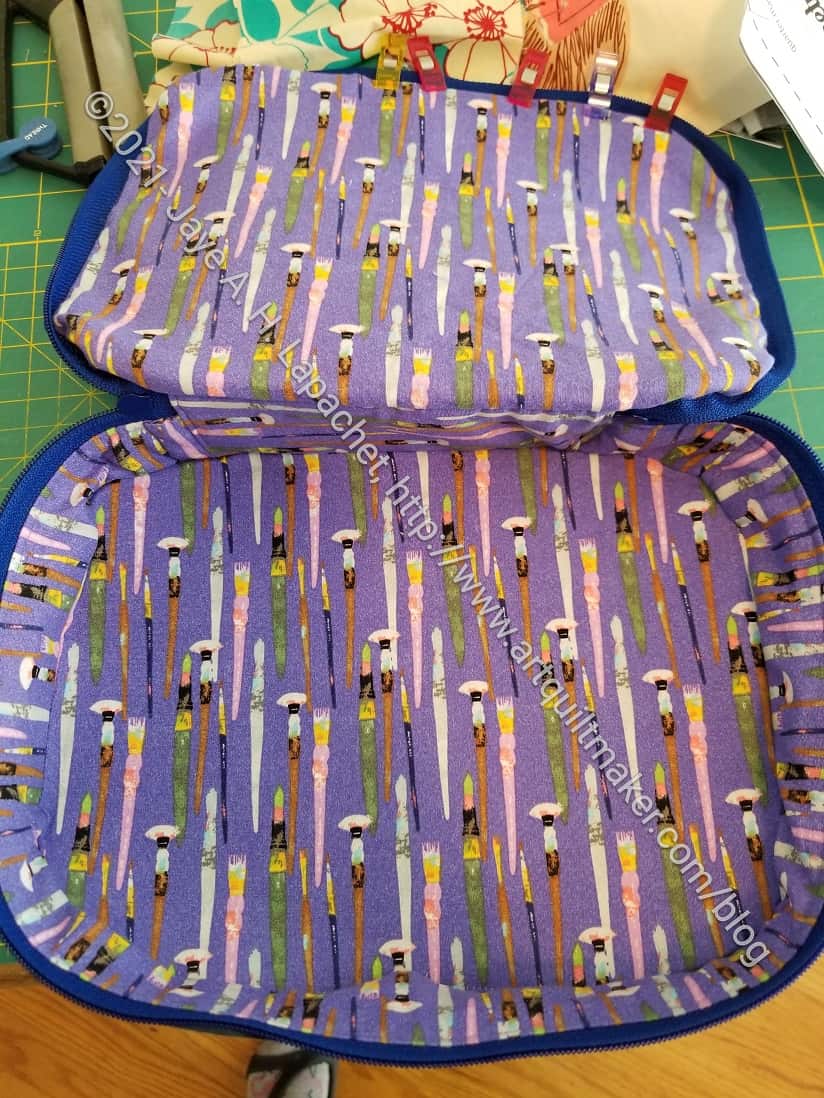
I am making slow progress on this pouch (which doesn’t seem like a pouch). The thing finally looks like something, but more of a suitcase than a pouch.
I like the finished look of this project, but I am finding it difficult to understand the directions. I know that is crazy when you look at the other complicated projects I have made, but it is true. This project is all sew, then rip, sew, then rip.
Yes, I am using the video. I just don’t understand it.
I started this project some months ago when Sara Lawson had the Percheron Pouch as a project of the month. I cut it out, did some interfacing and then put it away. After making the bowl cozies over the weekend, and moving the pieces of the project around my workroom 834 times, I decided to work on it.
The Percheron Pouch is part of Minikins Season 3. As mentioned previously, the Minikins are series of small pouches and bags that Sara releases periodically. Each series has 12 or 13 patterns and they are mostly great shapes.
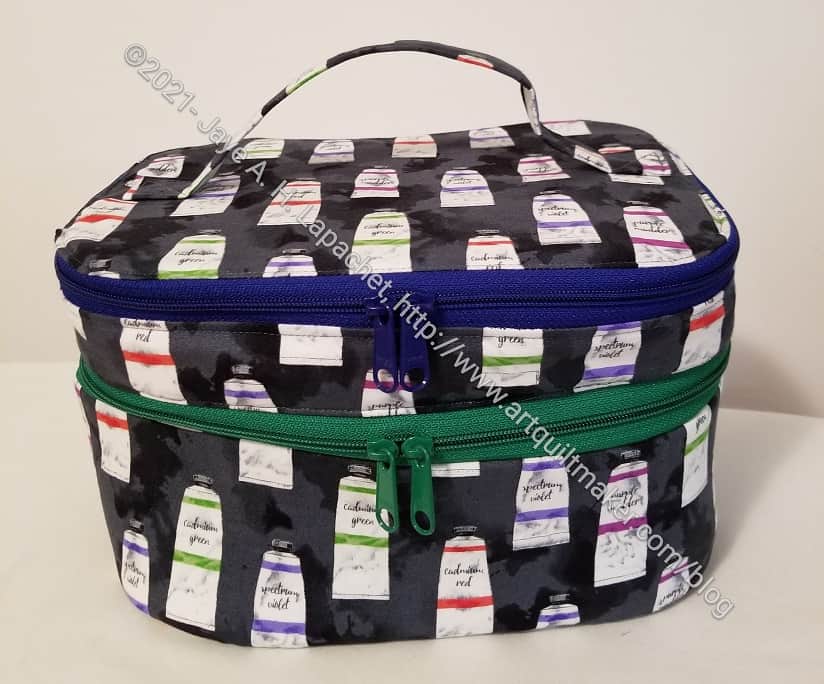
Samsonite train case
Samsonite train case open
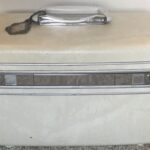
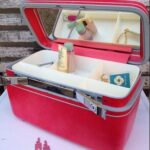
The Percheron doesn’t seem like a pouch to me. It reminds me of a ‘train case’. My mother had one. They were intended for cosmetics and small items and the bag was often included as an option with suitcase sets. The one I am thinking of was Samsonite.
I also took the opportunity to use Decovil. I never used this interfacing before and am not 100% clear on 525 vs.526, but so far I like how stiff it makes the top and bottom of the bag. Stay tuned for how it actually works in the finished bag.
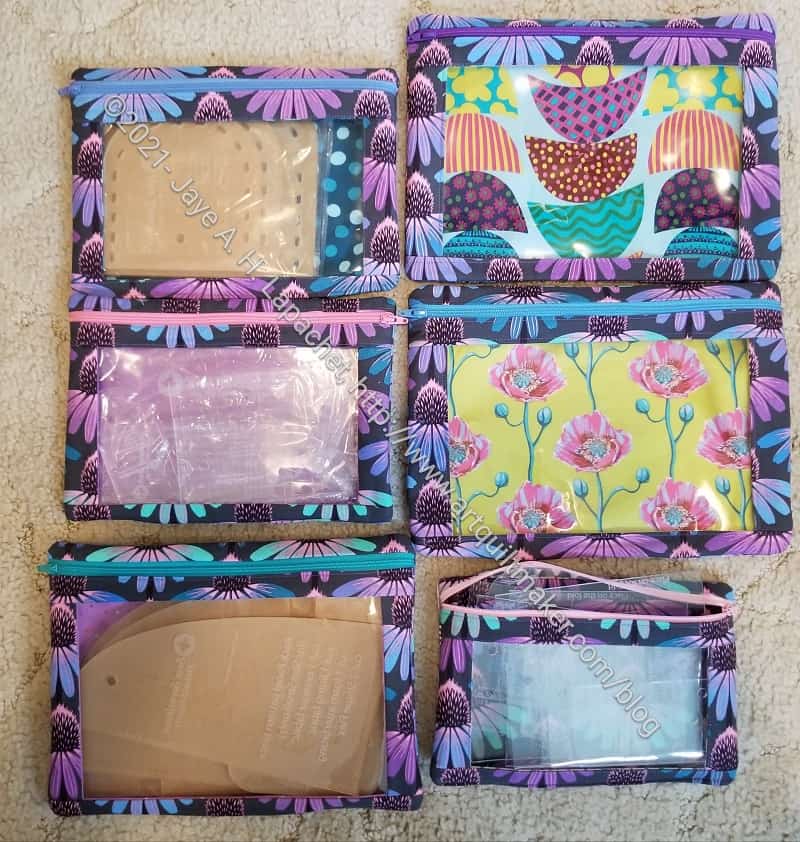
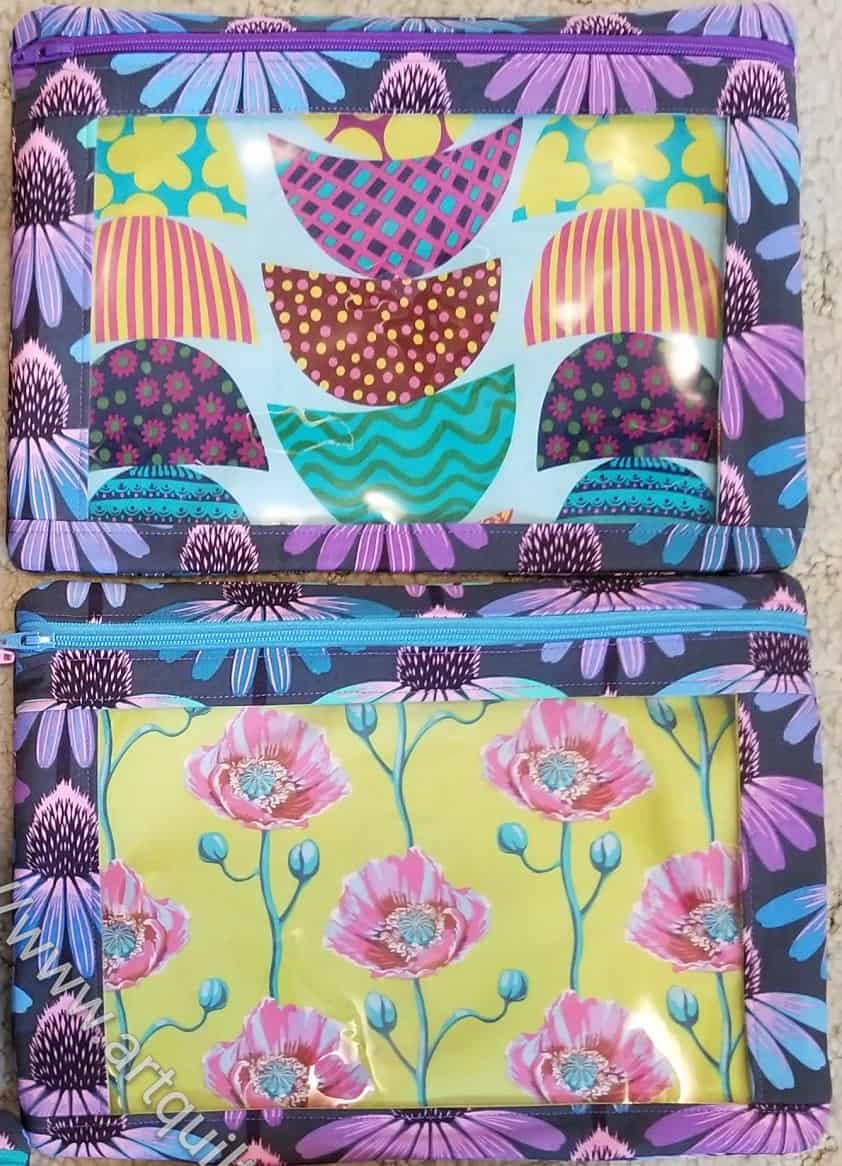
I used some of the Anna Maria Horner fabrics I received in the Quilty Box to finish some of the more recent I Spy Pouches. Once I finished the two large ones, I got all the pouches out and rearranged my templates.
I know it seems kind of ridiculous to make pouches for templates. On one hand, I like having them organized. I also like the fabric and enjoy using the coneflower print for something I am going to keep. Finally, the I Spy pouches are quick to make, so rather satisfying.
New Large I Spy Pouches
The two newest pouches are quite wild. I used a couple of the Bright Eyes prints. I didn’t really realize how exuberant the pouches would be using those fabrics. The fabrics clash a little with the coneflowers, unfortunately. Still, I like them and the coneflowers will show up when I put some templates inside.
I have a number of template sets that are too big for these pouches. I can use the same directions to make larger pouches. I just haven’t been up for that lately.