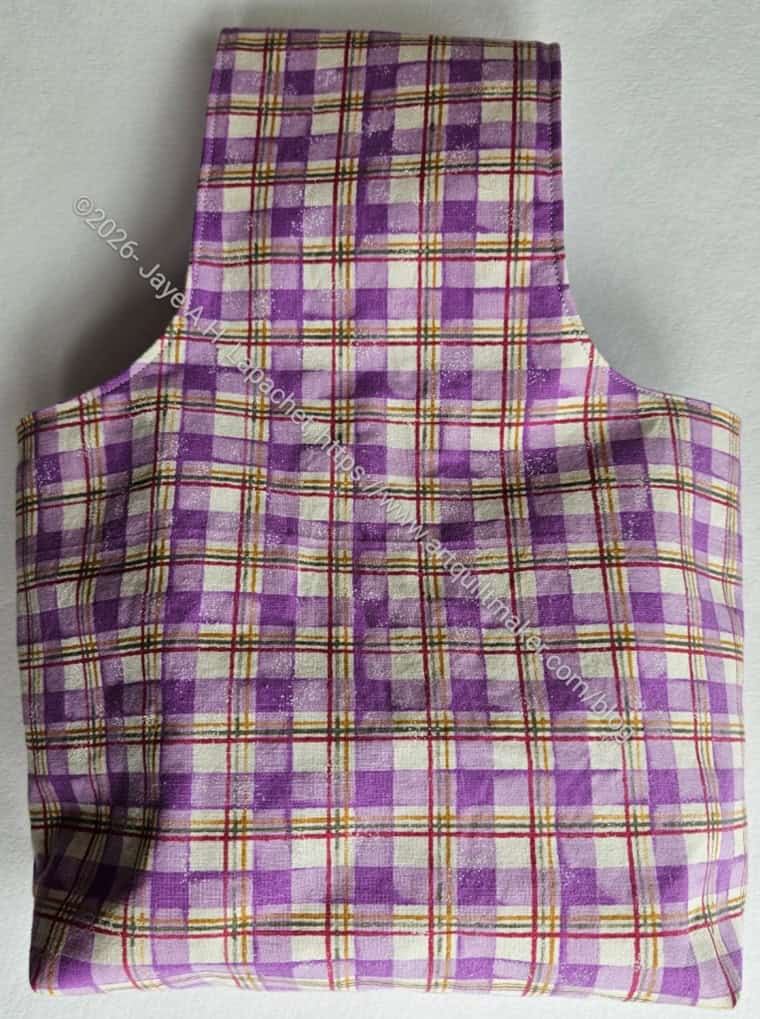
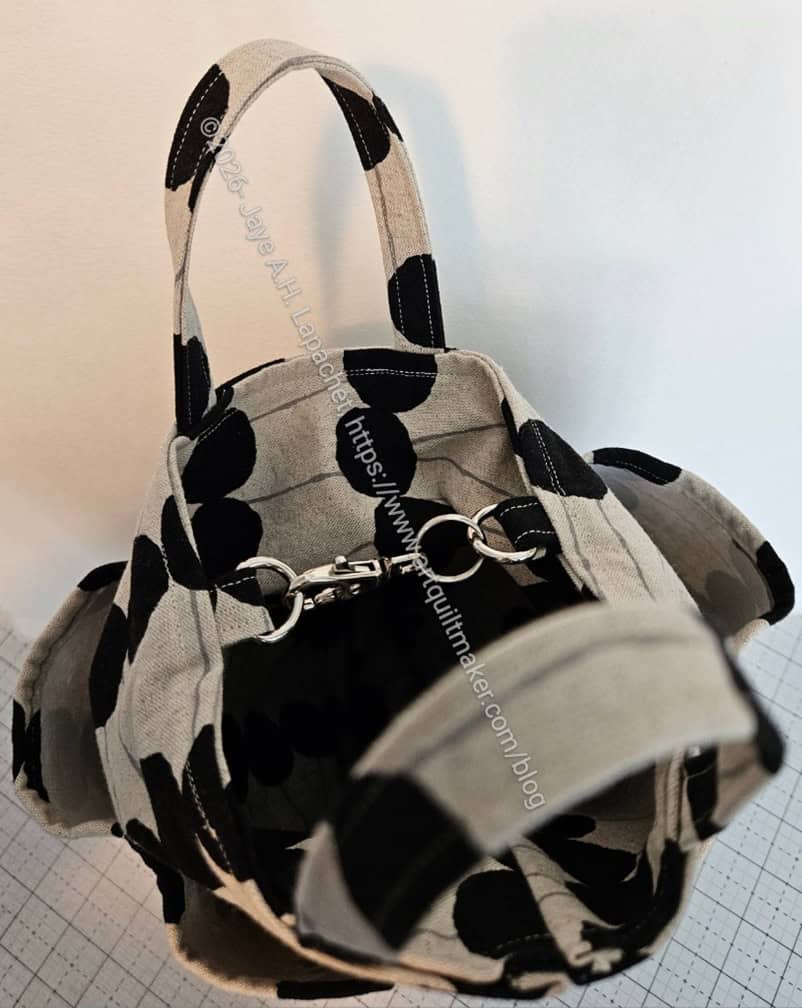
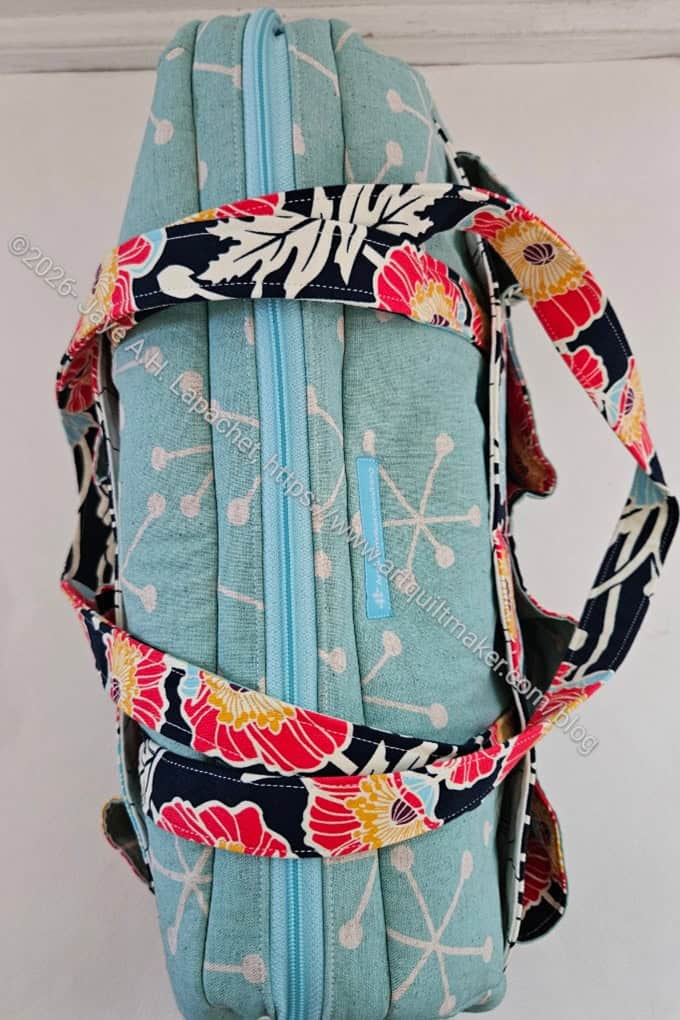
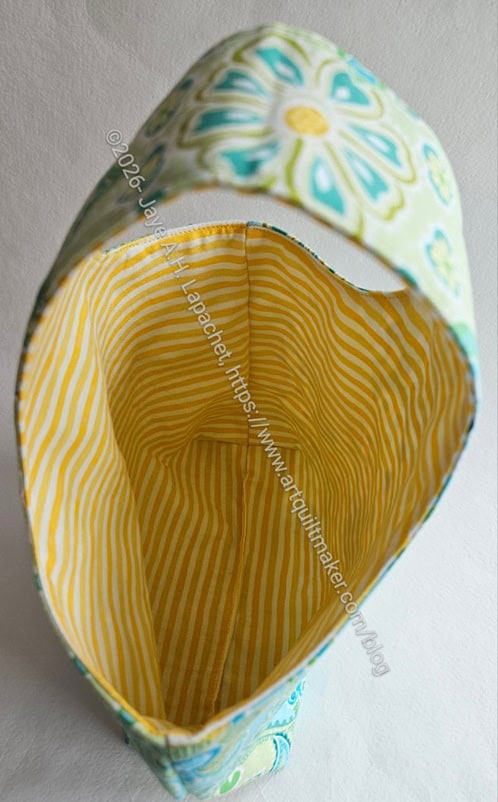
I came home from Sew Day the other day and made another Mini One Handle Tote. It has been awhile since I have made one, but it has been on my mind to make another, so I did. It really didn’t take me very long even though I had to search through everything to find the project folder. I still haven’t found it, but I had the tutorial, which made it easy. The worst part was that I had to make another handle template and I don’t like it as well. I think I need to adjust it a little, but it worked out fine in general.
Mini One Handle Tote #4
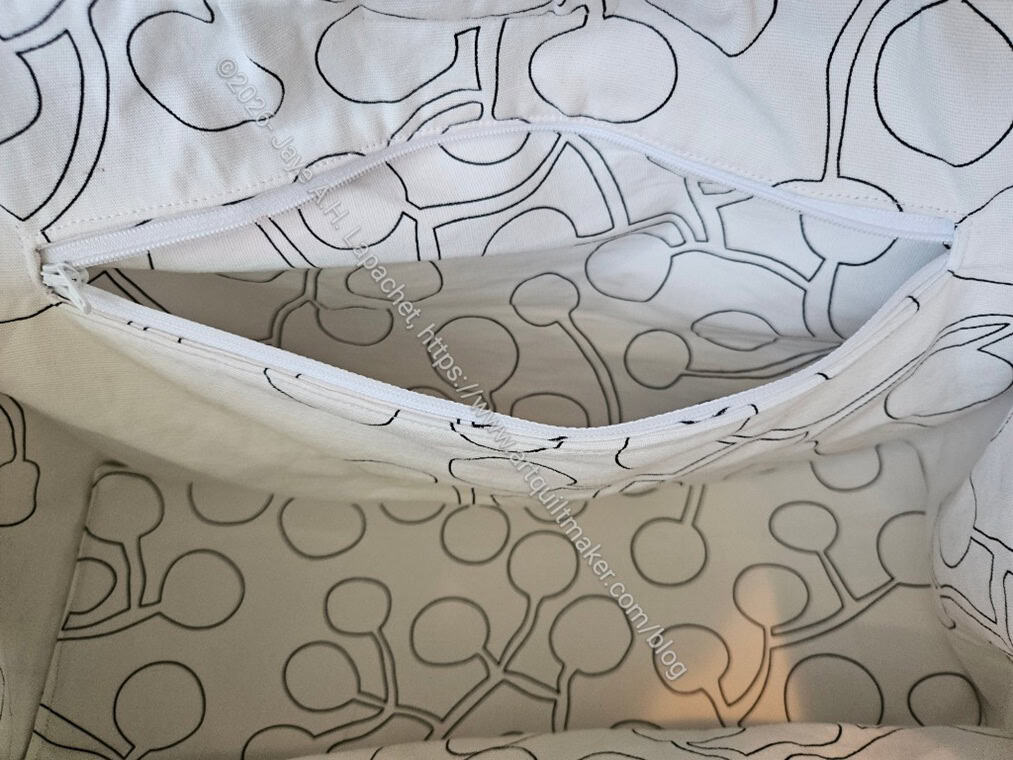
I haven’t tried a pocket yet, but I think I will on the next one. Fingers crossed I can figure that out.
I do want to make more. It would be great to find my original template. I am wondering if I didn’t make a project folder for this tote?
After posting about the free patterns, I started looking at the Kokka website multiple times. The site has really good bag shapes, both free and for sale. For some reason, the Round Bottom Bucket Bag got stuck in my mind. I think it is unique in that I haven’t made such a bag before. I make the Desktop Cube, which is kind of round. I can’t think of any other bags I have made that are round. I am sure the fabric also had something to do with it.
I printed the pattern and took it with me to Mary’s, but didn’t work on it. Then I took it to Sew Day and translated the metric into US customary measurements. Something seemed wrong or off to me, so I put it aside. After that I decided to make it using the metric measurements. That meant that I needed a metric rotary cutting ruler**. Do you know how hard it is to buy a metric ruler? The various sites kept insisting that US customary measurements were more usual in my location. DUH!
Round Bottom Bucket Bag- top
Finally, at a Sew Day with Tim and Cyndi, I cut it out. The pattern is a Japanese pattern and those patterns are much more basic than American patterns. A lot of knowledge is implied. I consulted with Tim and he said that when making the Japanese pattern he sewed he, basically, made up most of the steps. With that, I went for broke.
Round Bottom Bucket Bag- top, hardware
Part of going for broke meant diving down a rabbit hole of round bags to understand how they are put together. One problem I had was that most bucket bags have some sort of drawstring top. One of the things I like about the design of the Kokka bag is that it does NOT have a drawstring top.
Round Bottom Bucket Bag
The bag did not come out as expected. Mine looks more like a bottle bag than a bucket bag. I guess it could be used for a picnic for a bottle (wine or water or juice) and silverware in the pockets.
The short answer is that it is still usable and I plan to try again. I emailed with the support team at Kokka and they said to convert the measurements to inches. I am a bit confused as to how that would help, but I’ll think about it.
Round Bottom Bucket Bag- pockets
My current plan is 2 Pi r. That means Quilt Math. Finally, I am understanding all of those stupid 8th grade math concepts that I never understood. Let’s teach kids math by teaching them to make bags!
My plan is to create my own dimensions with what I think will make the bag come out like the Kokka was supposed to look, at least in my mind. I know how to do all the steps and can use the directions provided as a guide. I haven’t done it yet, but this the current plan.
I am giving myself permission to play a little. I don’t see the above bag as a complete fail, but it isn’t really a success either. I want to try again and see if I can make it better.
Resources/Some sites I looked at in my deep dive:
Jellyfish Report has a lot of sizes for round bags so you don’t have to do math.
Circle bag tutorial – this breezy looking tutorial shows you how to make a bag (handbag) in the shape of a circle.
Drafting a rounded rectangular base comment/tip – scroll down to find this tip. It’s not just all math; pictures are included to give you a good idea of what you are doing.
Drafting Manual: How to Draft Circular Bags. If you want to skip all the nonsense, this for-purchase manual ($10) tells you everything you need to know about drafting round bags. According to the site “When you purchase this interactive pdf, you will receive all of the tutorials and information needed to draft two styles of bag to your custom size and preferences.”
The Hexi Tote Project has the right exterior height compared to the height of the pockets.
How to sew a rounded bottom post – provides tips and tricks for sewing a circle.
The lined round basket project was the right ‘fatness’ for the bag I am envisioning. I thought I could use the same ratios.
Round Bag Calculator post – the site provides a list of sizes of circles and how big you would need to make the associated rectangle.
2 Pi R
9″ circle base, 10.5″ x desired height rectangle, Project example
**Obviously, you should shop at local quilt shops and small businesses. However, if you are too busy or can’t find what you need there, I use Amazon affiliate links and may be paid for your purchase of an item when you click on an item’s link in my post. There is no additional cost to you for clicking or purchasing items I recommend. I appreciate your clicks and purchases as it helps support this website.
I love seeing bags I have made in use and not staged for my benefit.
This was the case with the Cosquilla I made for my SIL#4 for Christmas last year. We visited them for dinner one evening and I saw the bag on a side table when I went to stash my handbag.
This also reminded me that I need to make sure I do a good job when I sew bags. They need to not fall apart as people will actually used them.
I struggled with the curve on this bag and am curious to see how the new machine will handle the curve.
After finishing the back panel, I started on the gussets. Before starting them, I looked through versions of this bag on the Sewfisticated FB group. I noticed one maker had made the back panel open wider by using the same instructions.
It is super helpful to see the different fabrics and modifications other bagmakers think up. I forget that I can do things differently. Although I have made a lot of bags and pouches, every new bag project feels unfamiliar.
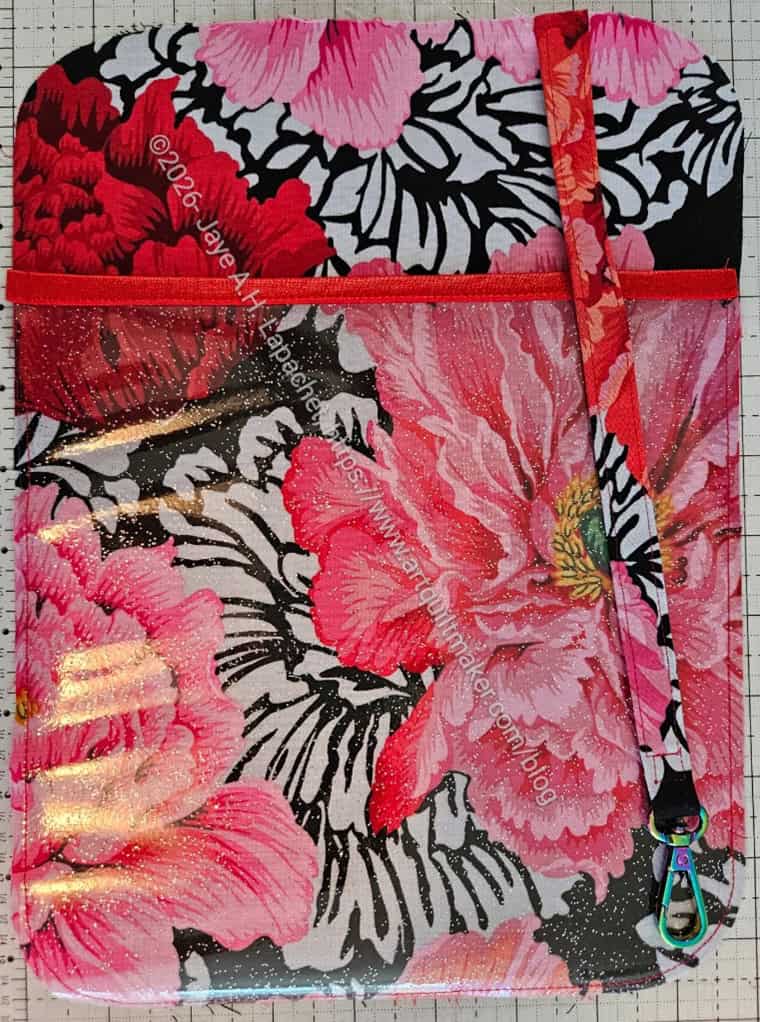
Pandora Charisma #2: front panel lining
One of the changes I am making on this one is a clear slip pocket instead of a fabric slip pocket. I thought about the utility of it and whether the vinyl would be a problem. I couldn’t think of one and I wanted to show off the lining fabric. In future I will use a plain fabric for the lining and a featured or printed fabric for the slip pocket.
Part of this step is the key leash. That is done as well. I love the way the flowers show through the glitter vinyl.
I am still having fun with this and the steps are going faster than I expected. Next is to make the mesh pocket. I have cut everything. I just haven’t sewed the zipper in.
Amazingly I have recently continued to work on the Pandora Charisma #2. I didn’t have a Pandora Charisma #2, really, but decided I would make another one with the front panel I sewed when testing the Elna.
It wasn’t a done deal that I would make another one as all I could remember was the struggles I had with the binding on #1. The win really made me excited about the project. Another reason I want to work on this project again (despite the hair ripping during the first one) is I want to see how the Elna does. I also think winning Best in Show made me want to try another one.
On Sunday, when I was done beavering away on other non-sewing chores, I really thought about the project I wanted to work on. Since I am sort of in between quilts, I am working on tidying up little tasks. I made a binding for the Warm Four Patch Fun, I processed a bunch of scraps and did a few other fabric related tasks. I wasn’t ready to start a new quilt or revisit a WIP yet, so the Pandora Charisma settled into my mind. I did really want to work on it. So I did.
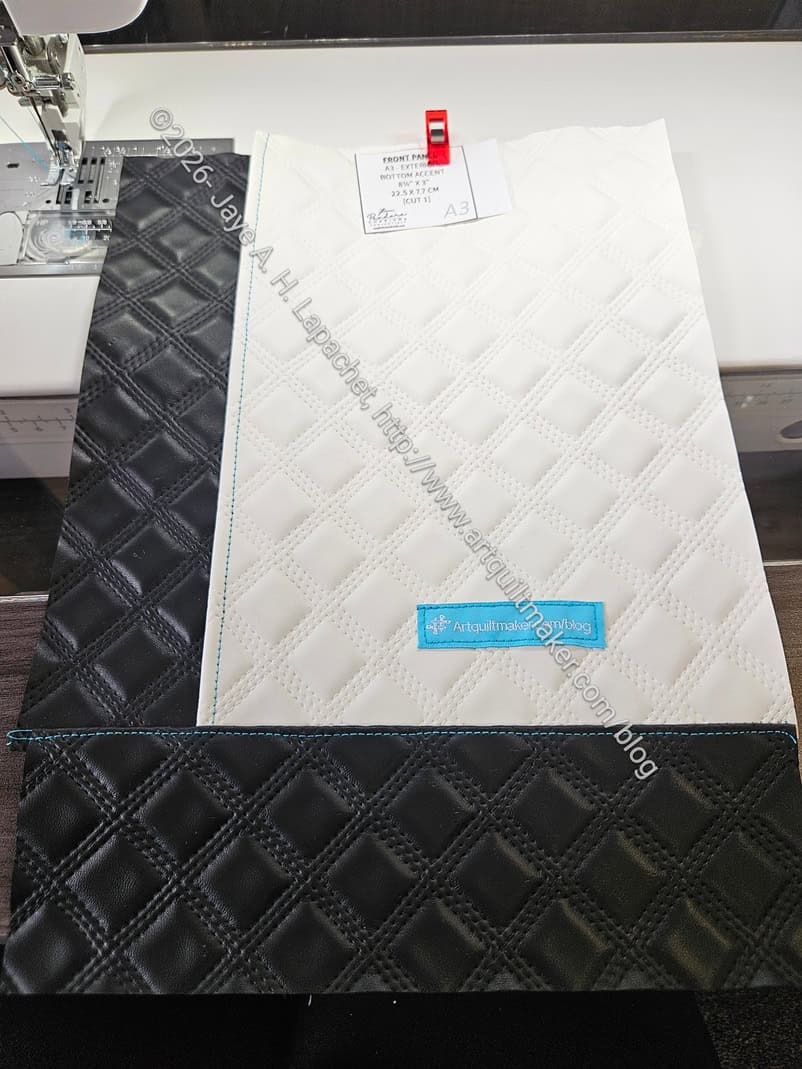
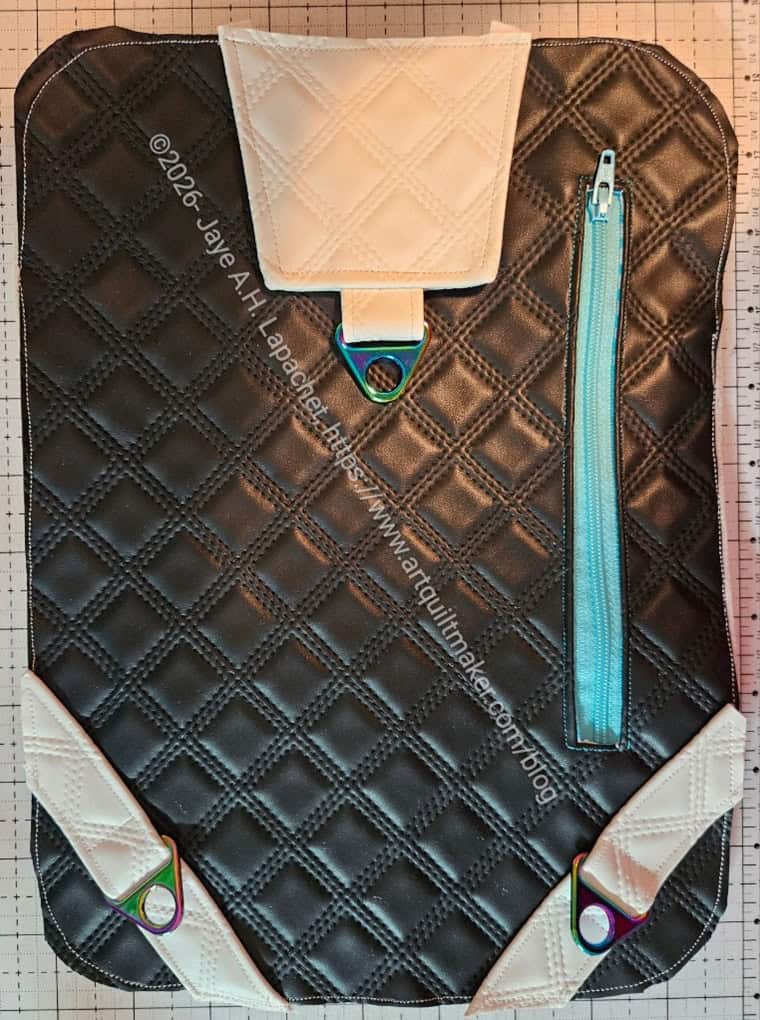
Pandora Charisma #2: back panel
I made the back panel. I didn’t scream through it like I did on the front panel, but I did make it. I found it didn’t take long at all.
So far so good. This piece uses the Diamond Quilted Vinyl that looks like pleather. I always refer to it as pleather as I think of vinyl as clear. Anyway, this stuff acts like vinyl, so I after 1 stitch put on the Teflon foot and needle plate. What a dream! Those two are a powerhouse combo! No issues with pulling or sticking.
This time I used regular (#3??) zippers for the hidden zippers in the front and back panels. So far so good, though it was a challenge to get the zipper surround to lay flat.
The next step is to make the gussets for the inside. It was a good stopping point. Stay tuned!
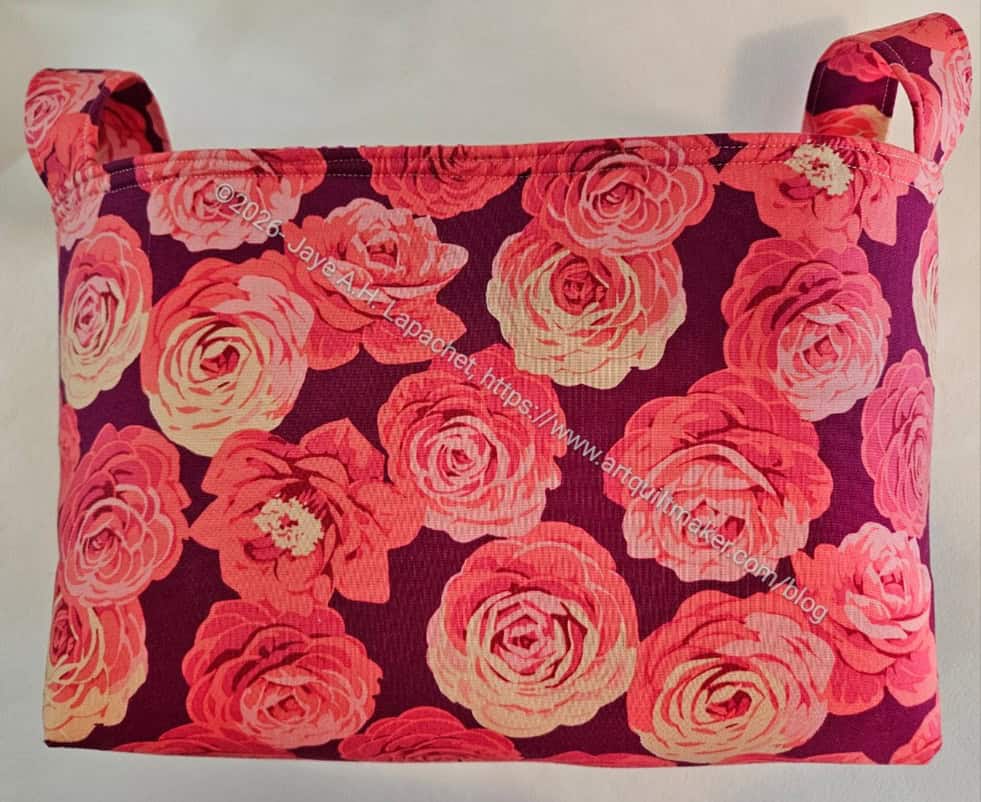
Mary and I talked about this pattern when I visited her. She had the pattern it was on her list to make. I saw it at Picking Daisies, as mentioned, and decided to buy it. Noodlehead patterns are pretty good and I was interested to see how the divided lining was created.
Continuing with the Picking Daisies theme, I used the roses fabric I bought during my visit. The front pocket fabric is an Alison Glass, I think. It was in my fabric closet.
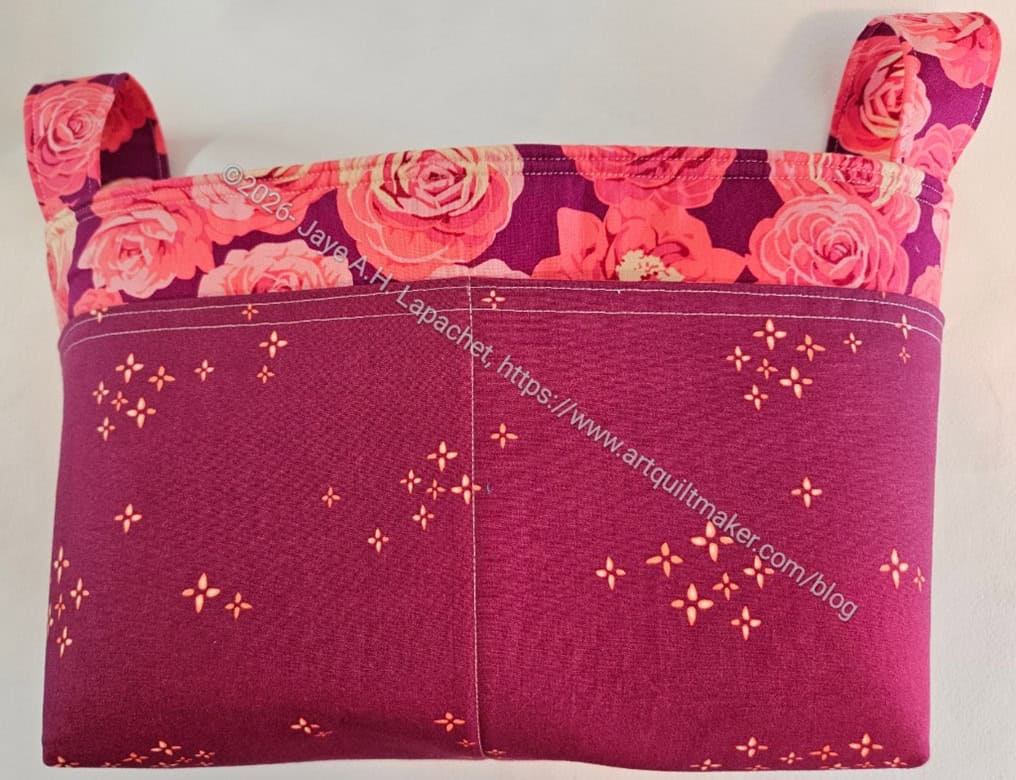
Divided Basket – back
I was surprised at how large this basket is. I did look at the dimensions, but I can never visualize them until I see the actual bag made. It would be good temporary storage for a bag project.
I thought, after I made it that I could place a pocket on the back as well for even more storage.
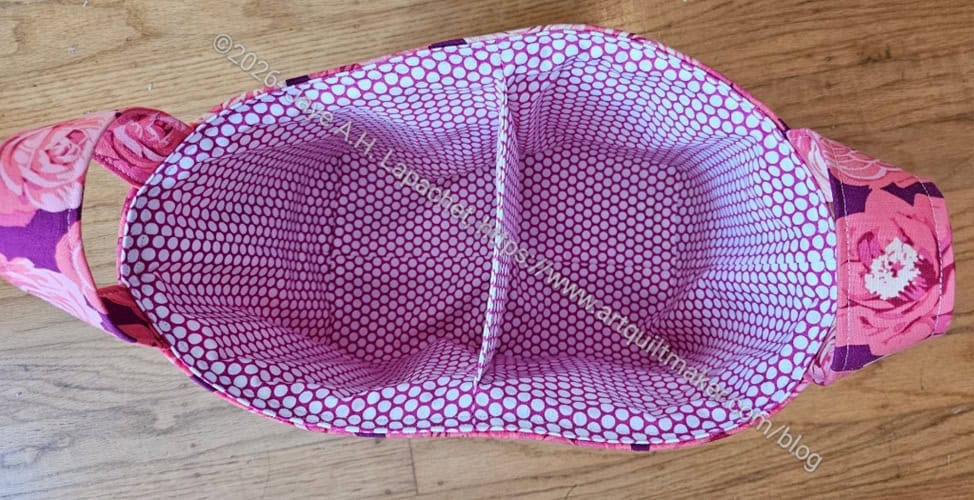
Divided Basket – interior
I was pleased to learn the technique for a divider.
I sewed the whole thing together, then realized I really should have anchored the lining, so I took the basket apart and anchored the lining. I was much happier after I did that.
I sent the basket off to its new home and hope the recipient likes it.
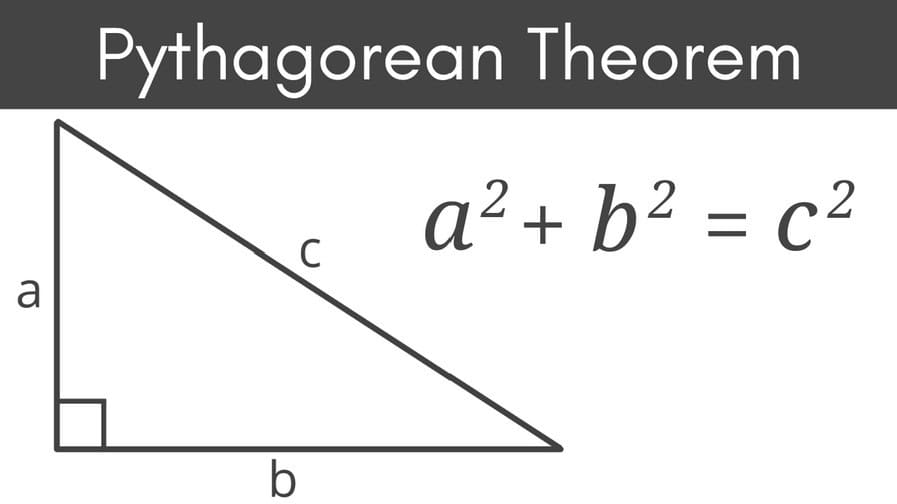
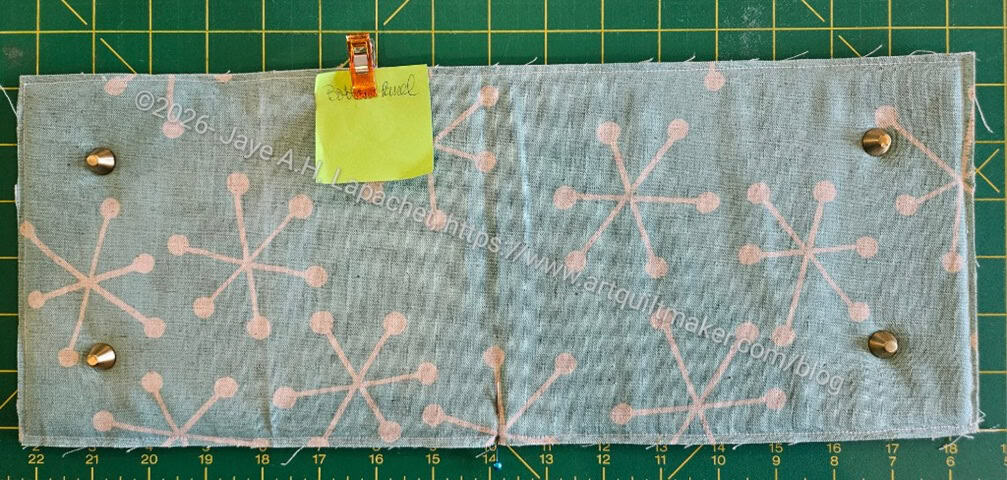
Do you know that feeling when you step into a hole and everything tilts. That happened to me, without the sprained ankle, when I asked DH a simple question.
I asked him how to find the number to cut out the box from the “lining up the seams and cutting off a bit” number.
DH said “Pythagorean theorem”.
Holy smokes!
That &*^%$ math! He showed me the theorem. We talked through it and I understood a bit more about how it worked. Am I an expert? No. No, I am not.
I am really annoyed, though. If I had been shown how to make a pouch, then given this problem I would have understood the concept. Instead math teachers throughout my education wrote lines of numbers and letters on a chalkboard that all looked like gobbledy gook to me. Now I get it. Years too late to do more than squeak by in every math class I ever took after 3rd grade. Sigh.
Thanks to www.inchcalculator.com
OK, so here it is. Remember, I am not an expert, so your mileage my vary.
The key number is the number Anna said to cut off after lining up the points. It was 4.5 inches.
The triangle has to be a right triangle, which means that one corner is 90 degrees. Your formula works like this:
a² + b² = c²
a=b
a² + a² = c²
2a² = c²
c=4.5 inches
In numbers this formula looks like:
4.5² =2a²
some math using the calculator
20.25 =2a²
10 1/8 =2a²
3.28=a
I looked at the number given in the small and medium sized Open Wide pouches and did the match. I came up with 4 (medium) and 3.5 (small). 3.28 isn’t a great number for quiltmaking or bagmaking, so I rounded. I found the Open Wides came out a bit of a weird shape. Still useful, but a little odd. I’ll have to play with the formula bit and I think rounding down might be the way to go.
In a way this post is an adjunct to my regular Various & Sundry posts. I did NOT buy these patterns. I just took pictures because there was something interesting about them. I have a record when/if I need the type of bag.
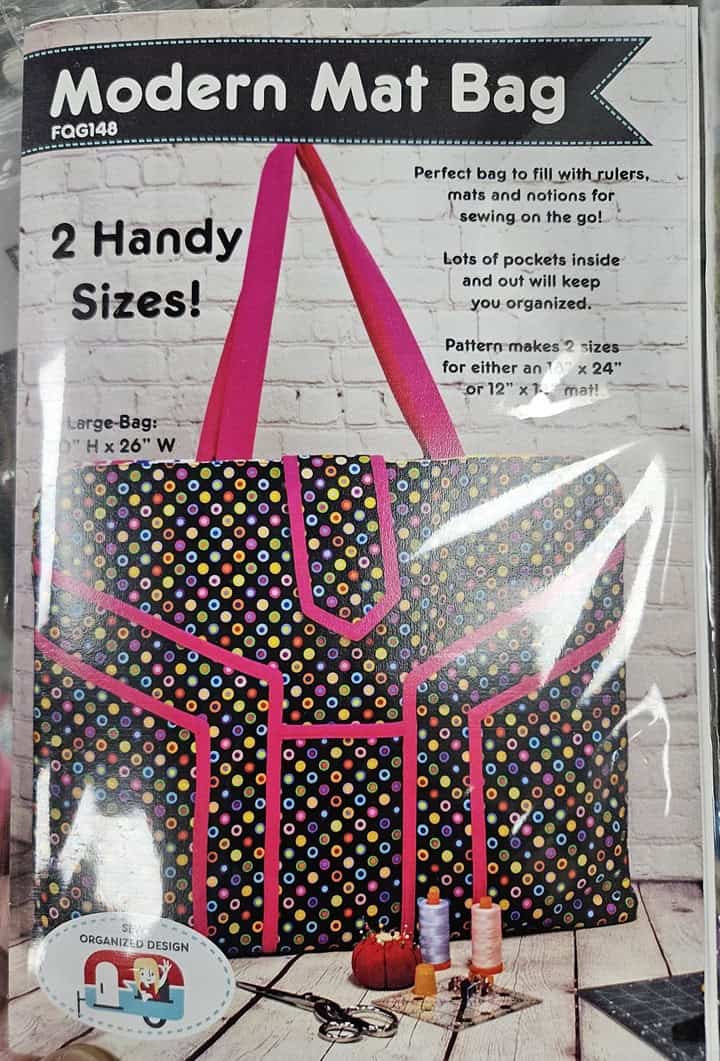
Modern Mat Bag
First was a Mat bag. It is called the Modern Mat Bag by Sew Organized Design. This is the most likely pattern I will buy. I have wanted to find a good Mat bag pattern to make as gifts for people I want to encourage to go to Sew Day.
Sew Organized Design is a company I have never heard of before. I went and looked them up and found they only have a few patterns listed on their website. All of them are on-the-go sewing related.
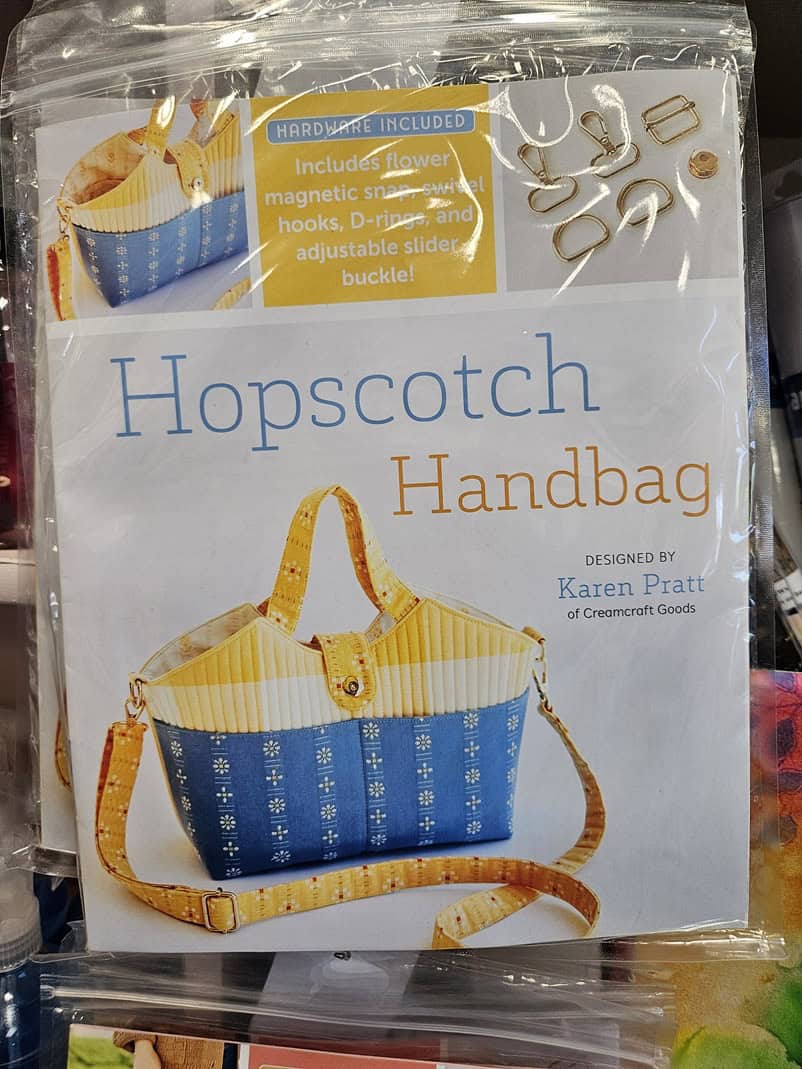
Hopscotch Handbag pattern
Next is the Hopscotch Handbag. It is designed by Karen Pratt of Creamcraft Goods. This another company which is new to me.
I liked the shape and design of this bag. I have to admit that the quilting on the top really adds to the look of the bag. I saw one site that sells this bag that had photos of the inside as well.
Karen has a nice blog post on another project called the Tri-Fold Journal Folio and Journaling tote.
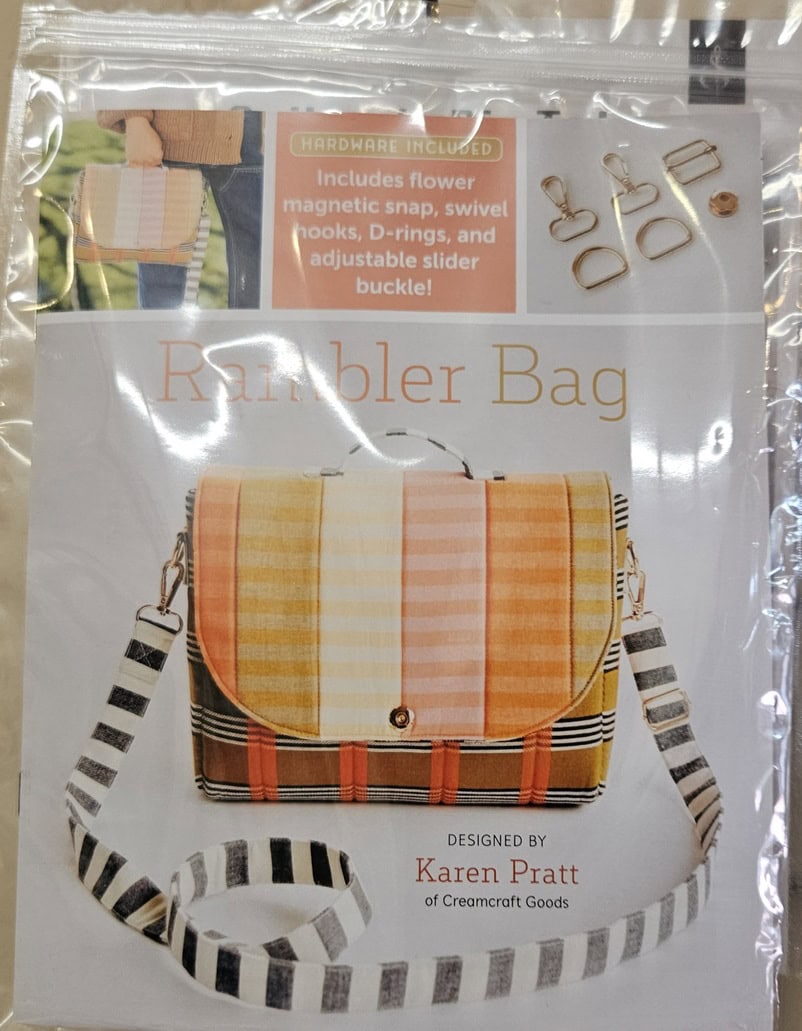
Rambler by Karen Pratt
As mentioned in the Picking Daisies post, I saw more Karen Pratt patterns at that shop. Don’t worry, I am not going to tell you about all of the Karen Pratt patterns. I just wonder about how her bags came out of nowhere for me. I also liked the look of the Rambler pattern. It is a small messenger type bag with inside pockets for your phone and other small items.
I think including the hardware is a good idea, especially for new bag makers, however it means you are stuck with the chosen color rather than selecting the hardware finish you like.
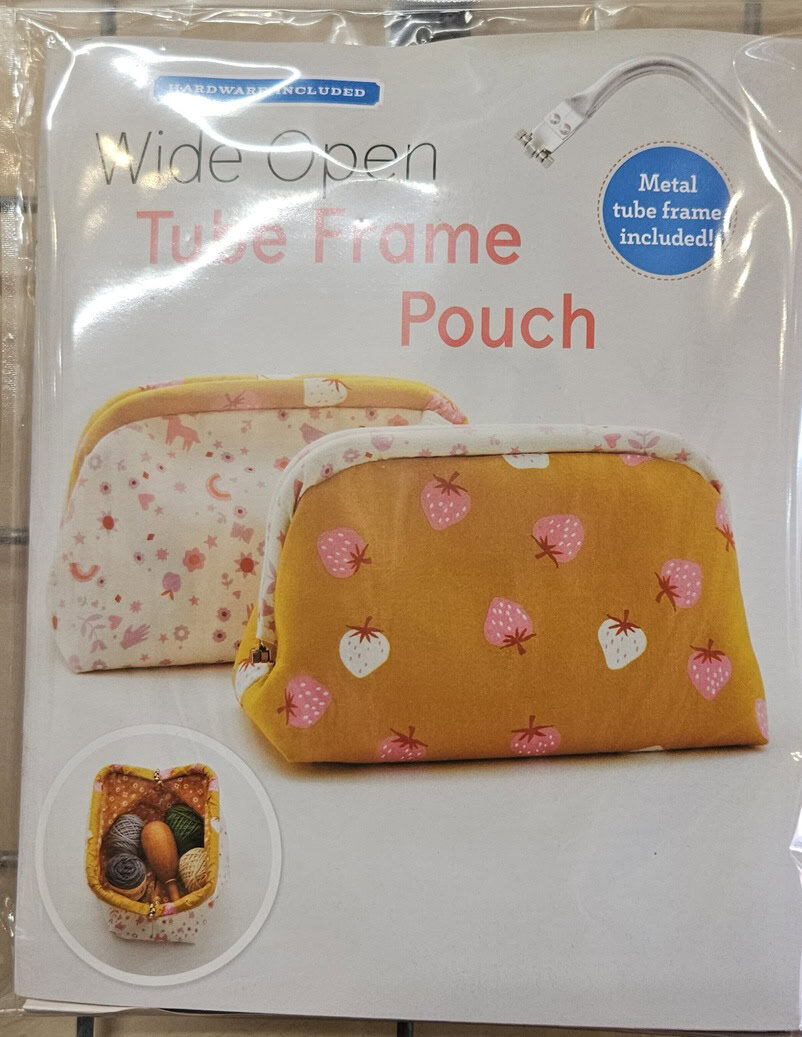
Tube Frame Pouch by Karen Pratt
The other pattern I saw at Picking Daisies was the Wide Open Tube Frame Pouch. Since I am enamored with open wide bags at the moment, this one caught my attention. This open-wide bag is in pouch form. As shown and described the bag opens fully so you can see everything inside. It would be great for a knitting project bag.
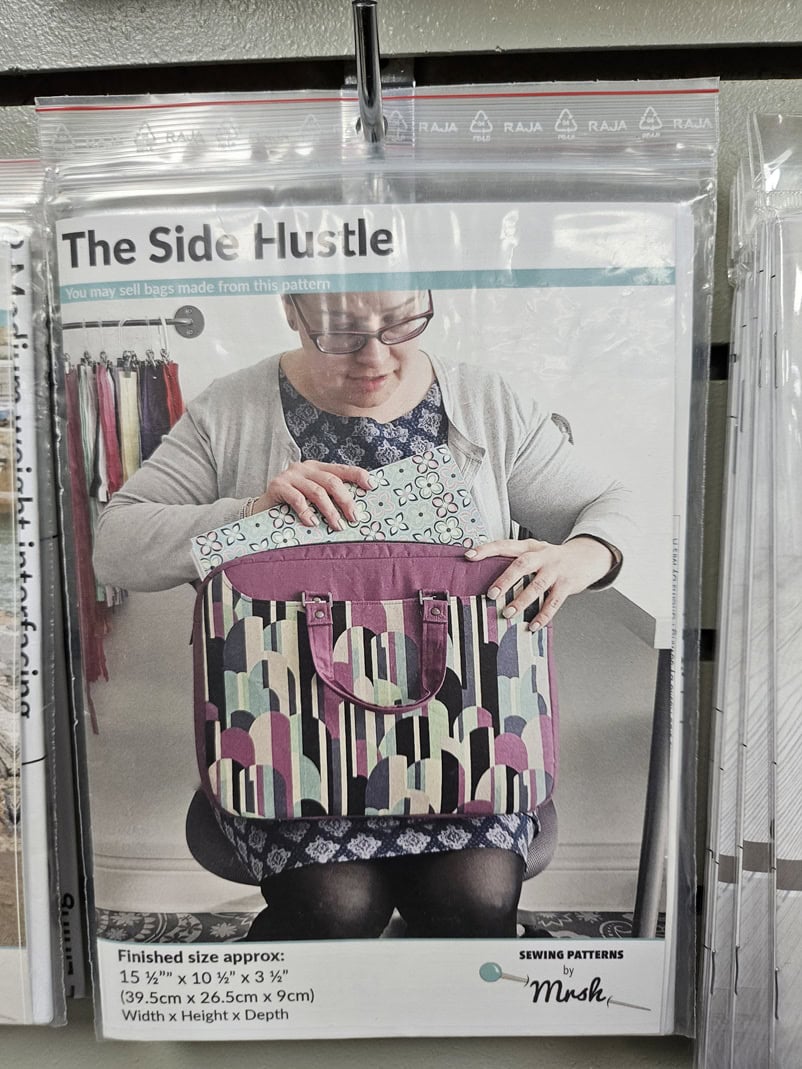
The Side Hustle by Mrs. H.
The Side Hustle is a Mrs. H pattern. Mrs. H has a lot of patterns, a bag club, a book and bag retreats. The Side Hustle is a messenger-style bag that is designed for carrying a laptop and files. I really like the name of this bag, but also that rounded slip pocket on the front in the photo.
These bags have really widened my horizons in terms of bag designers. I know there are only a few. This is another reason I like to visit quilt shops when I travel.
Finishing the Sheffield took longer than I expected. I thought I was done, then I had to make the false bottom, and add a label and…
No problem. I really enjoyed finishing it. REALLY! I realized that I have been anxious to get through the final assembly of recent bags, because that was the time when I fought with my machine. I didn’t even realize I was fighting with my machine until I used the new machine to put this bag together.
Sheffield: open wide design
The Sheffield has been on my list to make for a long time. Since I made Gerre hers, I wanted to make one for myself. The open wide design of this bag is very appealing.
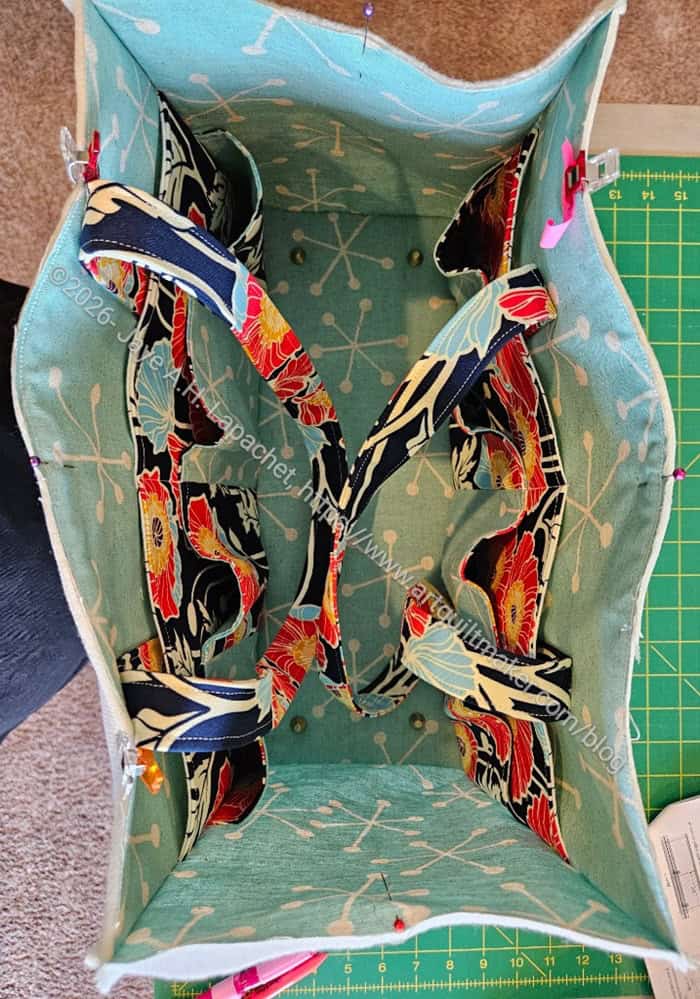
The interior is made from an IKEA lightweight canvas I picked up from the free table. My lining is a little saggy baggy, despite the larger seam allowance. The lining will not fly out since I used my hard won knowledge (thanks, Lynette) of anchoring the lining to the exterior. One issue I had is that the pattern pieces for this bag are not square. They are trapezoids. I think something might have happened, because the pieces are trapezoids, when I was sewing the lining together that made them larger than I would have liked. I don’t know.
Finished: Sheffield back
I finished most of the exterior pieces while visiting MaryM.
I did the final assembly at home after adding a leash and an interior zipper pocket. I wanted to add a slip pocket,but forgot in my excitement.
The handles on this bag are larger than the those indicated in the pattern. Sara has makers position the handles a half inch up from the bottom. This is so the handles clear the seam allowance. Beyond reducing bulk, I am not sure why. I would like to say I will try putting the handles in the bottom seam on my next one, but I am not sure I will make another one.
Finished: Sheffield top
I think I could have put the poppy fabric on the frame casing. I think it would have added a finish or border to the top of the bag.
Cutting for the frame pocket was confusing. I have to look at the directions again to see where the cutting went wrong. I wanted to have the exterior match the exterior and same for the interior. I ended up with extra lining pieces.
For now I am just excited about the bag. I don’t know for sure how I iwll use it. I am thinking about putting all of my metal tools in in: KAMsnaps, Snap Setter, awl, hammer, etc. If there is space, I could add in webbing as well.
The Sheffield is a joy to work on! I can’t tell you how much easier it is to work on a bag when I don’t have to fight with my machine. I didn’t even realize, really, that I was fighting with my machine.
To make this bag, I changed feet and needle plates pretty frequently, but it really helps use different feet.
Top stitching thick layers
I used the Bi-level foot to stitch the top stitching on the frame case and that was a breeze. I never used the Bi-level foot before, but now it is one that seems to be coming out of the box often. I am not sure why I didn’t use one before. Maybe I didn’t have one?
Anyway, I was amazed and pleased with how straight the stitching was using this foot. There are a lot of layers the machine is punching through in the photo above and I got good stitch quality, no broken needles or stuttering. Of course, I wasn’t being the demon speed sewist either. I sewed pretty slowly on this section.
Sheffield internal zipper pocket
I decided to add an internal zipper pocket, which is not part of the pattern.I didn’t have any trouble making it. I learned a bit from the second interior zipper pocket on the Pandora Charisma and that experience helped.
I also wanted to turn the bag through that zipper pocket, which is a technique that Tim taught me. I had to think about it for awhile, because I wasn’t sure if any bag could be turned that way. I didn’t come to any conclusion, so I just went for it. It worked out fine. I like this method, because it means that nobody can see where the bag was turned unless someone digs into the pocket.
I am not sure why I wanted a zipper pocket, but I did. I also added a leash, which I do for all of my bags.
Anchoring the lining
Finally, my next step is anchoring the lining to the exterior. I have started but need to finish.
I promise not to show every single one of these that I make. I am just so tickled that the directions from an IG video actually work!
The aspect I worked on in this version was making sure the lining wasn’t saggy baggy.
Bag sewn
I am pretty pleased with the way it came out. I veered to a 3/8 inch seam allowance when I sewed the lining part of the bag together and used a 1/4 inch seam allowance for the exterior. This all happens before the bag is turned right side out. The picture of the inside of the bag shows the different seam allowances! (enlarge the photo). The trick is to veer smoothly. Don’t abruptly change the seam allowance, though it might not matter if one stopped, then restarted. I think veering is better, though. I may have to try the stopping and starting.
I am thinking about adding a pocket. I’ll have to think about how that would work.
Making a Sheffield bag for me has been on my list for a long time. Since it is #6 for the BAMUFO challenge, it is time to work on it. In case you are confused #6 was selected for this month’s project on which to work. I needed to get busy.
The Sheffield is another Sew Sweetness bag. It has an open wide zippered top and is NOT part of the Minikins series. It is a stand-alone pattern. I made one for Gerre (the purple one above) a few years ago.
I put it on my UFO list, because I knew I could finish it within the 30 day window. I was surprised to find I had started to cut pieces for it. They were in my bag fabric bin with the metal frame. That means it truly was a UFO!
After setup at Mary’s house and making a couple of small projects, I got to work on the Sheffield. I was sad not to be using my new machine, but was happy that Mary had a second machine I could use. Not having to haul a machine in our stuffed car was great. She has a Babylock Crescendo, which I have used before. It is a high end machine, which was fine to work on.
Before I could sew the Sheffield, I had to cut the rest of the pieces. As with most bags, there were a lot of pieces, thus a lot of cutting. The handles and the slip pockets were already cut. Apparently, I had already made the choice to make the handles slightly longer than the pattern suggests. Once I finished cutting, I was able to get started with the preparation of the various elements.
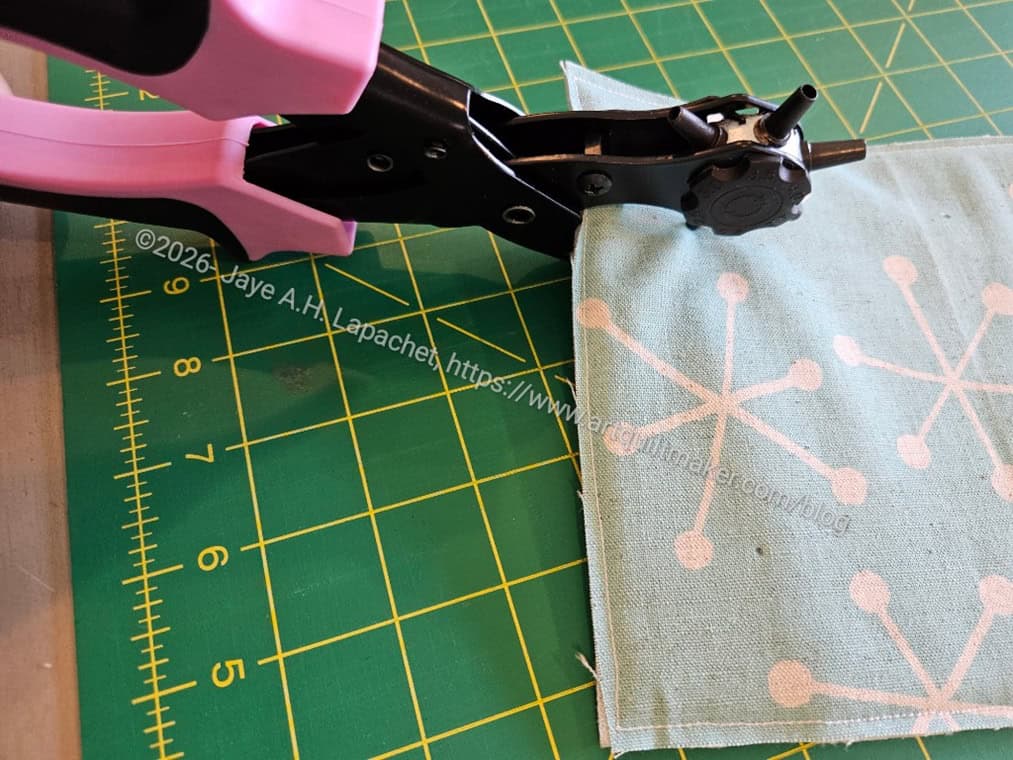
One new thing I did was add purse feet. This was my first time. They are listed as optional in the pattern. Since I had some, I decided it was time to use them. The ones I had were Clover Nancy Zieman Bag Feet in Satin Bronze**
BTW, isn’t ‘purse feet’ a funny phrase? All sorts of hilarious images appear in my brain when I say ‘purse feet’!
Installing purse feet
I brought my ProMaster leather punch** (hole maker) along for the trip. I like this tool. It made punching through two layers of canvas and a layer of foam pretty easy. Since I forgot to bring mine, I borrowed some pliers from Mary’s DH, who is a master wood craftsman. The purse feet are installed by shoving two metal flanges through the hole, putting a metal washer over the two and bending the flanges down as flat as possible.
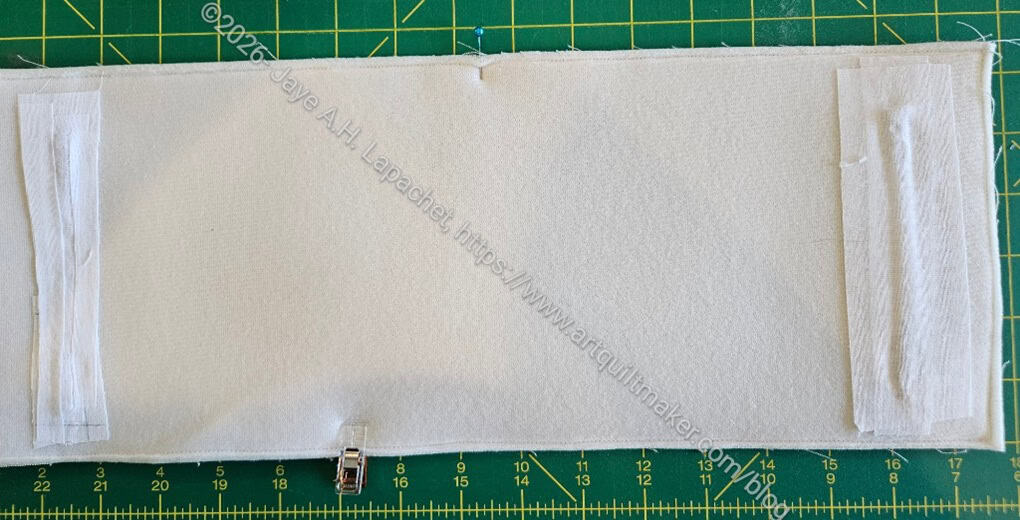
Safety first! SF101 covers purse feet flanges
After I installed them I put a couple of layers of SF101 over the folded flanges to keep them from catching on the lining fabric.
Sheffield bottom with purse feet
There were only four, which surprised me. I always thought purse feet came in sets of five so you could put one in the middle of the bottom to keep the center off of dirty surfaces, but no, the pack I had came with four. I may add some Odicoat** to the bottom. We’ll see.
I had sort of decided not to add the gathered pockets on the outside, then changed my mind and added them at the last minute. I tried out different looks to see how I wanted them to feature.
Sheffield exterior option 1
Sheffield exterior option 2
I finally decided to alternate the fabrics. I didn’t like the look of the all blue gathered pockets. I really wanted to see the Poppy fabric. I had cut the slip pockets out of the Poppy fabric when I thought I wouldn’t use gathered pockets, because I wanted be able to admire that fabric. Using only the blue would cover up too much of it. Using only the Poppy fabric was too jarring and confusing so I eliminated that option right away.
Sheffield – finished exterior mains
The main exterior panels came out well with my choices.
This isn’t a particularly difficult bag, but I felt like I needed to sew slowly and make sure I was doing everything correctly.
After finishing the main exteriors, I was able to put the exterior together.
Poppy Sheffield for me- exterior
I decided after I had made good progress that I wanted to put some pockets on the inside as well as a leash, so I stopped work on it. I didn’t have the hardware with me and we had already been to Green’s, the place to buy hardware near Mary’s house. Since I had hardware at home, I decided to finish it at home.
This is farther along than I have gotten in the 6 years (SIX YEARS – WHAT?!?!?) since I made Gerre’s. I am pleased with how it looks and pleased with my progress.
I am getting quite the collection of tools and might need to make another one of these to store those. Or maybe I will use this one to store tools such as my my ProMaster leather punch**, KAMsnaps, awl, Snap Setter, etc.
**Obviously, you should shop at local quilt shops and small businesses. However, if you are too busy or can’t find what you need there, I use Amazon affiliate links and may be paid for your purchase of an item when you click on an item’s link in my post. There is no additional cost to you for clicking or purchasing items I recommend. I appreciate your clicks and purchases as it helps support this website.
As mentioned, I decided to make this bag instead of the Aneela Hooey bag when visiting Mary.
Zip It Up #1
I got quite a lot done, but I had enough fabric to sew this one and one other. I had gathered enough of the selected fabrics to make three Book and Tool Folios. I had enough of some, but not all to make the second Zip It Up. I want the recipients to enjoy the fabrics. I found that I needed two full half yards to make the case body. Though I had enough fabric to start the third one, I decided I would make one and, assuming all went well, make the second two in assembly line fashion.
I looked at Mary’s version and chose to make this bag with two vinyl pockets instead of a mesh pocket and a vinyl pocket. I thought they were more useful for non-sewing activities than one mesh pocket and one vinyl pocket.
I cut the first vinyl pieces out wrong, so those will become the new windows for future I Spy pouches. I am glad I brought a brand new roll of glitter vinyl. Mary has a lifetime supply of clear vinyl, which was a good backup in case I ran out.
I made good progress despite the need to quilt the fabric. 🙁 As I progressed on the project, I decided I wanted to cover the top of the vinyl pockets below the zipper with ribbon, so I brought the pieces home. Since I was ready to assemble the bag, I needed to stop, add the ribbon and then proceed. Another project to finish at home. Sigh.
Don’t worry. I am not going to tell you about every single one of these I make. I am still in the experimental phase so you get to hear about some of my musings.
Like the Snap Trays, I am experimenting a bit with various parts of how to make this. In this version, I used batting as the interfacing instead of SF101. It works well, but the bag feels a bit floopier, which I think is interesting, though maybe not preferable. It works, but SF101 or, maybe, DecorBond might be better. I haven’t tried DecorBond yet.
I am using fabrics similar to those I used for the Snap Trays. I have a bin of Sorbet fabrics I was using for the Block-a-Long a million years ago. There is a lot of fabric in that bin, so even using some for these bags will leave plenty for me to pick up the Block-a-Long project again. They have a Mary Engelbreit-ish look to them.
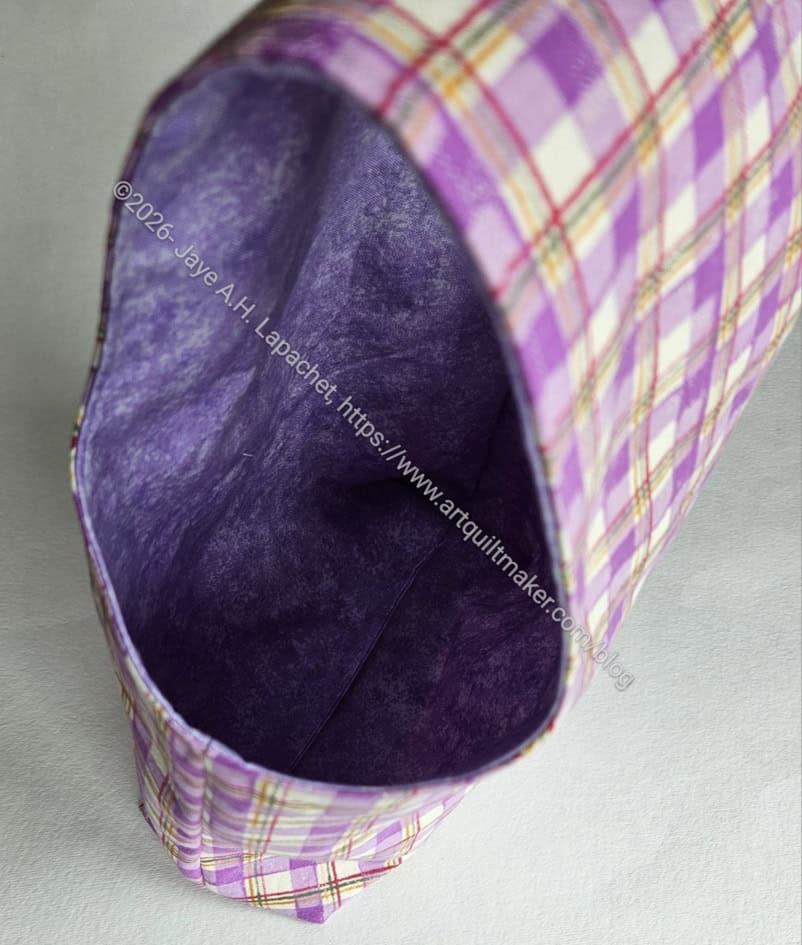
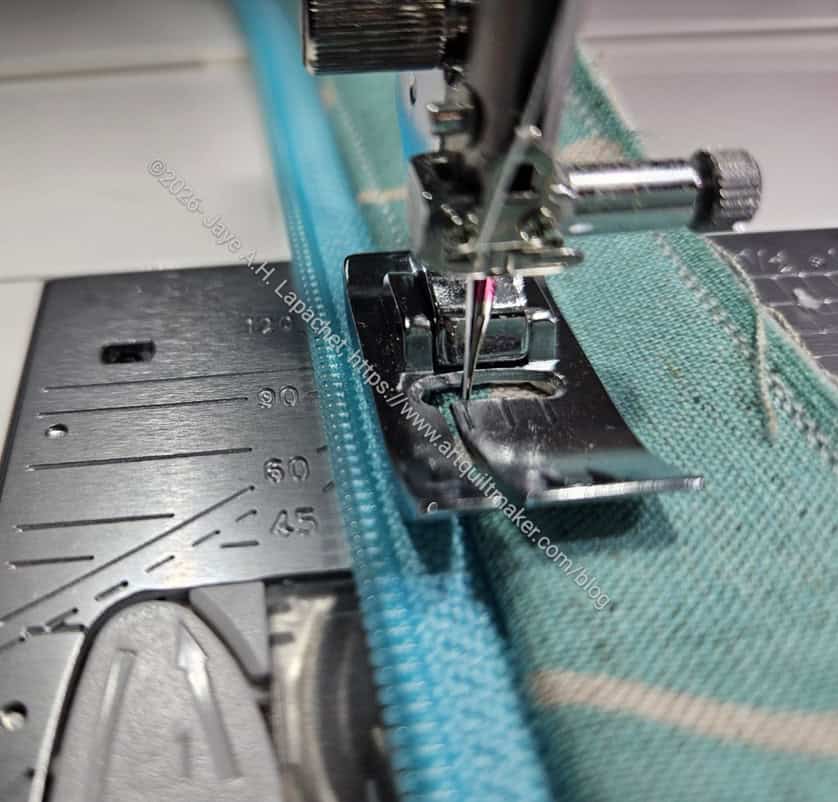
I spent some time on Sunday playing around with making a bag I saw on Instagram. Kotobukisewing showed how to make a Mini One Handle Tote in a reel <insert eye roll here. and something about it appealed to me.
I succeeded! I had to plow through all the bits that IG glosses over, but despite those things, the bag came out very well. This is a relatively simple bag, but my experience with bag making helped a lot.
I had to watch the video about 355 times, because I don’t know how to stop and start IG videos. I was able to make this bag and it looks similar to the one shown on the video. I had to translate the metric measurements into Imperial/American inches and I am pleased to say the bag still looks balanced. One thing I learned is that there is a metric ruler printed on my new machine’s sewing table. Super helpful!
Yes, I did look at their shop, but didn’t see a pattern. They have a lot of other cute patterns.