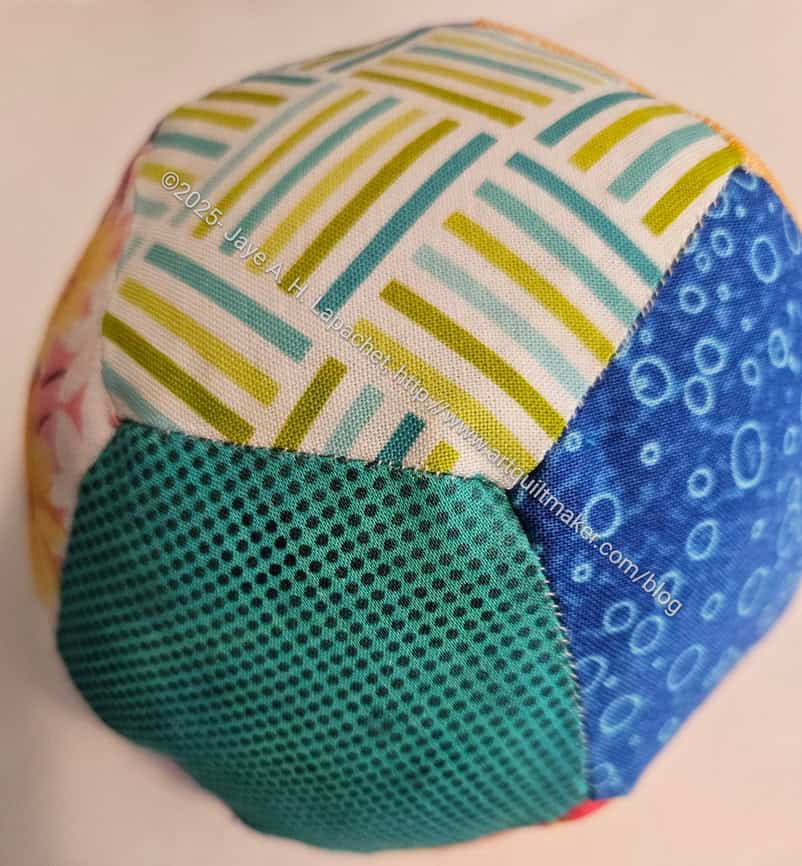
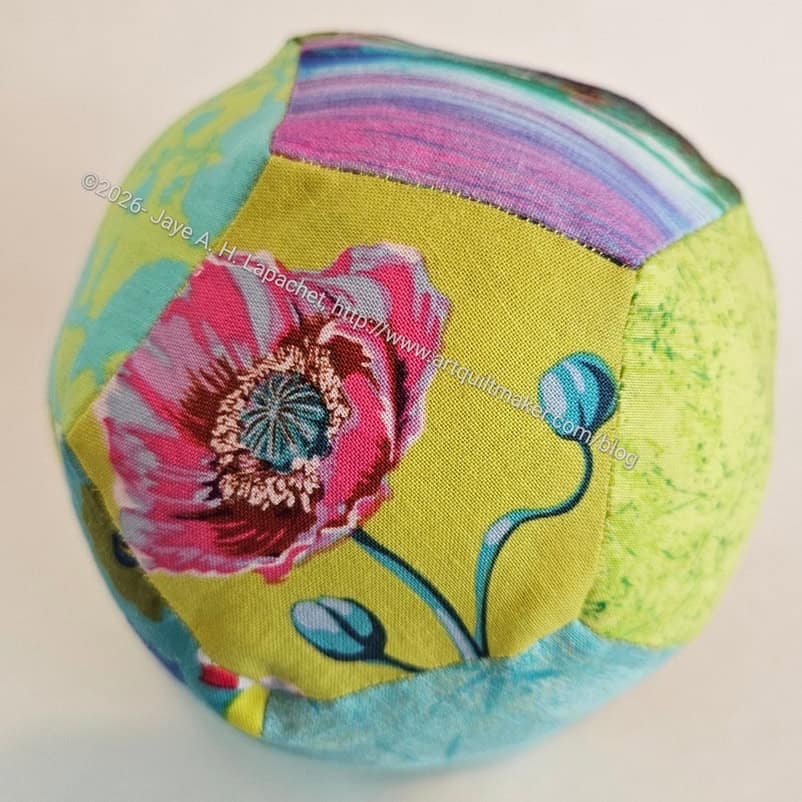
Working on La Pass

Working on La Pass
Working on La Pass

The other day I talked about working on La Pass. I was feeling some kinship with women who worked on large projects in small spaces as I worked on it after laying out the border.

This is what it looks like when I work on it in our living room. The quilt takes up the whole coffee table and my supplies are on the table next to where I sit. In the photo you can see my Sew Together bag in the bottom left. A larger table would be better, but it works as is.

More La Pass

La Pass: fitting the border together

I finally started working on the La Pass Border again. I took the quilt and all the supplies to Sew Day and laid out the pieces for another section of the La Pass border.

As I explained, I lay out the paper pieces I need, label them, then do the basting and, finally, the sewing.

I am about to reach another side of the quilt where I already worked on the border. I don’t know if I am done with that side yet. If nothing else, I am finishing my first pass. I may need to continue and get to a point where I can add a straight piece of border on each side.

La Pass: possible border trimming

I am thinking of trimming. One of the good things about working on this at Sew Day is that I can lay a bunch of the piece out and see more of what I am doing. At home, I need to lay it out on the floor and at the moment, there isn’t space.

In this image, I thought maybe I had enough of a border. However, I think I may need to add more later.

It is so nice to work on this again after dinner.

La Pass Border Continues

La Pass bottom corner

Slowly, but surely, I am making progress. I finished the one side I was working on  last week and am now on to the next side.

You can see my Post-it notes** as described in my Border Methodology post.

In this corner, I decided to add a bit to the red star and put my border fabric around it. I’ll probably end up cutting some of the star off, but I thought it would look weird to have border pieces where star pieces should be.

Yay for some progress!


**N. B. : Obviously, you should shop at local quilt shops and small businesses. However, if you are too busy or can’t find what you need there, I use Amazon affiliate links and may be paid for your purchase of an item when you click on an item’s link in my post. There is no additional cost to you for clicking or purchasing items I recommend. I appreciate your clicks and purchases as it helps support this blog.

La Pass Border Methodology pt.2

La Pass border in process

My new system works very well. I am pleased that I was able to sew the border pieces I prepared without drama or sewing the wrong pieces in the wrong place and having to rip out.

The white you see might look a little weird. AT this point it doesn’t have to be even, but it will be even later when I – or someone (ha!) – cut a straight line.

I am so pleased with how that green rosette came out. The green spikes really are highlighted. They have some space to breathe.

WonderClip facilitating organization

One issue I had was the WonderClips** getting in the way of each other. That was a minor detail since the system worked so well. Another thing I learned is to just baste a small section at a time. I don’t need to try to organize an entire border (one side) all at once. I am making good progress a little at a time.


**N. B. : Obviously, you should shop at local quilt shops and small businesses. However, if you are too busy or can’t find what you need there, I use Amazon affiliate links and may be paid for your purchase of an item when you click on an item’s link in my post. There is no additional cost to you for clicking or purchasing items I recommend. I appreciate your clicks and purchases as it helps support this blog.

La Pass Border Methodology

Labelled La Pass border

I decided I needed a way to keep the border pieces in order. There is no pattern for the border, so I am creating as I go along. I have shown you some photos of what I am doing in recent weeks.

I added some pieces to another part of the border, which is a multi-step process:

    • Figure out how to put the pieces together
    • Baste pieces
    • Sew pieces

From the basting to the sewing, I was finding that the pieces I had basted didn’t fit, thus I needed a system.

You see what I came up with above. I put a Post-it note** with a number on the quilt, then I put a corresponding post it note with the same number on the border pieces I will be adding.

You see WonderClips** in the mix as well.I don’t want those Post-its to fall off and they don’t stick long term to fabric, thus the WonderClips.

So far, so good. I’ll let you know how it turns out.


**N. B. : Obviously, you should shop at local quilt shops and small businesses. However, if you are too busy or can’t find what you need there, I use Amazon affiliate links and may be paid for your purchase of an item when you click on an item’s link in my post. There is no additional cost to you for clicking or purchasing items I recommend. I appreciate your clicks and purchases as it helps support this blog.


La Pass Border Again

La Pass border side
La Pass border side

I finally dragged La Pass out again and started working on the side of the border I talked about before. I haven’t worked on it lately because I was gone, then the cleaners were coming, and [ add in a bunch of other excuses ]. I meant to work on it last weekend, but only had one day to do my own projects at home and just didn’t get to it. I regretted it and determined to, at least, baste a few pieces during the immediate past weekend. I made good progress and followed up with some basting during Craft Night.

La Pass Border again

The section, left, is about halfway down the side. I plan to add in that purple dot star point so it sticks into the border a little. I like that rosette with the orange striped diamonds and think it will look good finished.

I am going back and forth with combining pieces and adding a lot of single pieces. It should have been obvious, but I am finding that a weirdly shaped piece is harder to baste than single pieces and the mess ends up looking weird in the end. I am back to combining some shapes, but not as many as I thought I would.

La Pass Border Again

I am back from my trip to Portland. As usual, I went to get my mom away from home for a rest and to see my sister, the YM and some friends.

Unfortunately, La Pass is too big to bring with me on trips now. But I am working on it every spare moment I can. DH was gone for a week and I just left it laying on the living room floor and worked on it as I passed by.

La Pass Corner & Side

I decided, and I hope I can remember, that I would work on this side. I plan to fill in with pieces up to the tip of that green spike, then sew on a larger piece of background fabric.  I think most of this side will get cut off, but I still need to add some background pieces to straighten up the edges.

So far, I have only put the paper pieces down on the floor. I haven’t taken the time to tape them together and create larger sections from them. I need to do that soon as I can’t leave it on the floor forever, especially with DH home now.

More La Pass Border

I have the feeling that the border might take me as long as the top of the quilt. If it weren’t for that one fabulous rosette, I might just cut off the edges and move on with my life.

Finishing points and adding background

I did do some organization the other day, which gave me almost a week of evenings with hand sewing ready to go.  I know there will be an end, but I haven’t seen it yet, so it seems to be an ever ending process.

I do get small bonuses, which include finishing some points, like the green ones shown in the photo, that I didn’t expect to finish. They will be sticking into the background, so will show up nicely.

At least I hope they will.

Finishing up a star
Finishing up a star

There is a certain amount of hunting and gathering that I have to do at least once a week. I have to figure out which rosettes to finish and which to cut off, then how I will deal with the background.

I just have to get some straight edges, then I can sew larger pieces of fabric to those edges and be done.

La Pass Border Weirdness

La Pass: larger border pieces

I have been dabbling on working on the border. The other day, I tried putting a bunch of pieces together to make a larger piece. I wasn’t sure it was right, so I asked Lindsay, who said it looked pretty normal to her.

I laid this out on the coffee table close to the time I was finishing up for the night. I didn’t want to start anything new right then, but I took a photo so I could remember what I had laid out.

La Pass: larger border piece ready for fabric

After Lindsay confirmed, I laid out the top and looked at it like that rather than bunched up on the coffee table. It looked like it would work, so I started taping the pieces together.

I have also been replacing some pieces where the motifs were never finished with background pieces. I don’t know if it will make the other motifs look better, but I think it will help them stand out.

EPP Ball #3 Finished

EPP Ball #3 Finished

Shortly after finishing EPP Ball #2, I finished Ball #3. As I said in the recent La Pass post, I was in desperate need of handwork. Yes, I have knitting, but I seem to have lost the directions and can’t find the name of the project, so I am stuck for now.

Thus, I quickly sewed up the gap for this EPP Ball.

As I said in the previous post for Ball #2, I will give this one to Dameon or Alita. I haven’t decided yet.

EPP Ball #2 Finished

EPP Ball #2
EPP Ball #2

I was able to sew up the gap in the second EPP ball and it is ready to go to its new home. The birthday isn’t until October, so I have a little time.

I really enjoy making these. If I had some space, I might make one for myself. As it is, I will give this one to Dameon or Alita. I haven’t decided yet.

La Passacaglia Border Pt.1

My project for Sew Day was starting the border of the La Passacaglia top. The reason was twofold. Now that the Half Hexie Star is well in hand, I really need a hand project to work on in the evenings.

I started out thinking I would, finally, cut out the Retreat In A Bag Organizer and the Ultimate Project Bag from the Crafty Gemini Organizer Club. I actually had all the fabric and directions by the door and ready to go. When I got up in the morning, I decided that I needed to work on La Pass. I don’t want that lingering, but I also need some hand work. Also, I really wanted to work on it. I have several bags cut out, so I didn’t need to cut out another one.

Month 18 Rosette
Month 18 Rosette

I had some help folding the top into quarters and then started working on the top. The top, for me, is the side with Month 18. I don’t really know what I am doing, but my goal is to get some straight edges of border fabric that I can trim to a real border. Where possible, I’ll sew in larger pieces normally. I still intend to check a couple of books and see if they provide any advice.

Month 18 with Zen Chic border fabric

At first, I started clipping paper pieces to the edges with a note as to which fabric I needed. As you can see (photo, above), I stopped that and just clipped paper pieces with the border fabric basted to the spot where I wanted to add them.

This meant that I had pieces ready to sew on to the quilt.

Month 18 finishing detail

The month 18 rosette will be the hardest part, I think, because it is the largest rosette sticking out of the quilt. It means there is a lot of space next to the rosette that needs to be filled in. Lindsay had an idea for her quilt to add a star or other small motif in the middle of a large piece. I am going to do one thing at a time and will figure it out as I go along.

Creating weirdly shaped pieces

Part of the deal with the border is that I want to use large pieces. I need to follow the tutorial I wrote with Kelly Pena on creating center medallions. There are no center medallions, but the same principle applies.

In this case, I added a skinny triangle to a pentagon to make some other shape whose name I couldn’t tell you. This will fill in a larger space and alleviate the need to sew a bunch of small pieces together using the same fabric.


More on EPP Balls

EPP Ball #3 Open
EPP Ball #3 Open

This project went way too fast. Not that I want to spend my life on one project, but I do like projects that I can grab and go.

As you can see, I have only the gap to stitch closed. I have the clips on the edges, because I wasn’t sure how else to keep them under control. I really have to look up how to work with the edges of the an EPP quilt or project. This research will be good for the Half Hexie Star project, which is waiting for a back.

I just used regular Fiberfill** to fill it. I was pleased to see that the Fiberfill**, brand name Poly-fil, was made from recycled materials. I didn’t stuff in any Beanie Baby pellets** in case one of the kids decides to chuck the ball at their parents. Beanie Baby pellets** are actually called Poly pellets or ‘weighted stuffing pellets’.


**N. B. : Obviously, you should shop at local quilt shops and small businesses. However, if you are too busy or can’t find what you need there, I use Amazon affiliate links and may be paid for your purchase of an item when you click on an item’s link in my post. There is no additional cost to you for clicking or purchasing items I recommend. I appreciate your clicks and purchases as it helps support this blog.

EPP Pentagon Ball #3

EPP Pentagon Ball #3

In 2020 I made one of these balls and decided that I would make two more for a new-ish grandniece and a new-ish grand-nephew.

#2 is in my Enigma Bag and I take it with me when we drive places. That one is almost done and I’ll try to get a good photo to share with you.

This one uses fabrics that I didn’t use for the Half Hexie Star. I cut a lot of strips for the half hexie pieces and then didn’t use them all. They were available and I couldn’t think of a reason not to use them.

The Half Hexie Star top is done, as mentioned, but I need to figure out how to work with the edges. They still have the papers in, but Colleen can’t quilt it with the papers in, so I need to figure out what to do. I also need to make the back and the binding. Maybe I’ll do that today?

I’ll have to get some more fiberfill** at some point.


**N. B. : Obviously, you should shop at local quilt shops and small businesses. However, if you are too busy or can’t find what you need there, I use Amazon affiliate links and may be paid for your purchase of an item when you click on an item’s link in my post. There is no additional cost to you for clicking or purchasing items I recommend. I appreciate your clicks and purchases as it helps support this blog.

Half Hexie Star Top Finished

Half Hexie Star Top complete

I finished this top last night! I am pretty excited even though I still have a long way to go to finish it.

I rushed to get a photo as I went to bed, so it isn’t the best photo. You can see some of the details in the post I published before.

I have been working on this quilt since August of 2012! I thought I had started it in 2016. Time really flies.

I can’t tell you how pleased I am to have made it this far! Assuming I can get the piece prepped to be quilted and make a date with Colleen, I will enter this in the President’s Challenge for the guild.