What’s on the Design Wall?

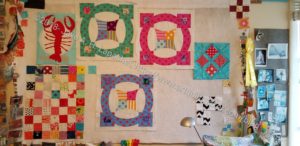
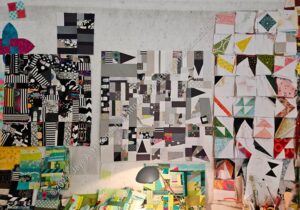
Design Wall - January 2023
Design Wall – January 2023

Not much is happening in my workroom. I was gone and work has tired me out.

Still, the design wall isn’t empty.

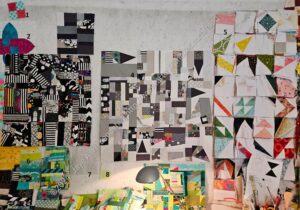
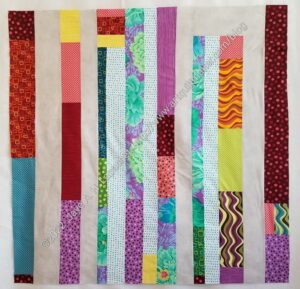
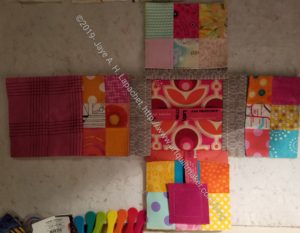
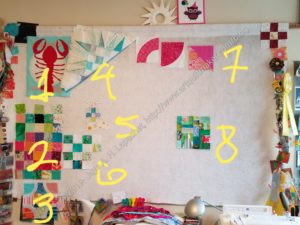
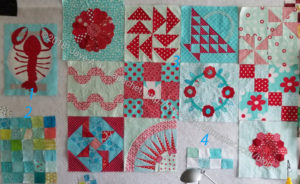
The pink blocks are the start of a future donation top. I talked about it a few weeks ago. I really enjoy looking at them and having them on my design wall. They make me so happy. I plan to get back in the saddle and make more soon.

On the left bottom are random Color Strip donation blocks. Currently yellow and green. Those will turn into something after I finish the pink donation top. Maybe another rainbow top. Some of it relies on how many scraps I have and what Color Strip donation tops I have already made. We’ll see.

Above those random blocks are three blocks. One is a really old foundation pieced circle Mariner’s Compass block from a Barbara Barber class. I don’t see a post about that class. I know I took at PIQF, but heaven knows when. I really should look it up and finish that thing, if for no other reason than to get it off the design wall.

That Rock Star block (white background with curves) is still on the design wall. I talk about the process of that block in the linked post. It uses the Wonder Curve ruler from Sew Kind of Wonderful. Clearly, I am not making the whole sampler nor am I making more of those blocks. Maybe I will, but for the moment, the block is taking up space. I still can’t find a picture of the final Rock the Block Sampler. Oh well.

Finally, the block with the turquoise background is one of the sample blocks I made for my most recent students. It’s too big to go in the file, so there it sits.

On the right side are the Pantone Project blocks. Most of these are from Julie. I really need to get back in the saddle and choose more fabrics.

What’s on the Design Wall – Small

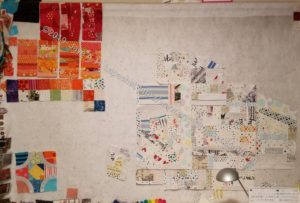
Small design wall
Small design wall

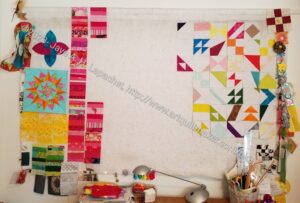
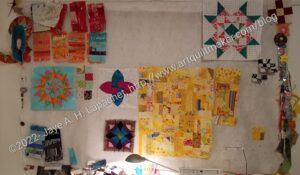
Yes, I am fortunate to have two design walls. I found, while they were folded up and not usable, that I couldn’t really make quilts. I managed one, which seems paltry compared to last year’s general output.

Again, I was surprised at what was on the small design wall. I knew about the yellow improv quilt, because I had been working on it a little since July, but I had completely forgotten all the other projects. They feel overwhelming and I will probably donate the blocks to Maria’s orphan block project or make donation quilts out of them. I am not in the mood to deal with extra blocks at the moment.

I can’t wait to see how the yellow improv bits I made without benefit of design wall fit into this piece.

What’s on the Design Wall?

Large Design Wall February 2022

I was surprised to see projects pinned to my design walls when we put them back up over the weekend.

I knew I had left projects on there, but the mists of time clouded over which ones they actually were.

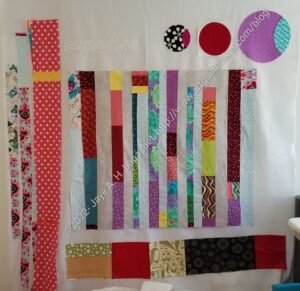
I took all the bits and bobs off the large design wall (pictured) and pressed all the pieces, then put them back up. I really thought I was finished with that Pop Parade Ends quilt. I was shocked to see it still in process. The crazy part is, which I am sure I mentioned before, is how many quilts I made out of the Pop Parade (great name) fabric bundle. Most were FQs, but some were half yards.

Still, I made two donation quilts, one improv-ish and one out of the leftover HSTs from the X quilt. I also made the X Quilt from this Pop Parade line.

Pop Parade Ends donation top in progress

Granted, the last bits of leftover Pop Parade fabric is not much. I paired it with other ‘ends’. The two light pieces on the edges (only in the above photo, not the detail, right) aren’t sewn to the quilt yet. I have to see if I want them there. Part of that decision will be measuring.

It is a great feeling to see that I am almost done with a quilt and didn’t even realize it.

Small Gift Ideas

I originally wrote this to support Bay Area Modern‘s various swaps and activities. Once their new website was live, the blog was discontinued. I think this is a useful post (and not just because I wrote it!), so I decided to rewrite it, update it and post it here.

Please note:

  • I haven’t tried all of these patterns
  • I use affiliate links to support this blog. Please see the full notice at the bottom of the page
  • Some patterns have a cost
  • Generally, I have just made lists of ideas. Where I know about a pattern or specific tutorial or project, I have noted it.
  • Links break. I do check them, but you might need to search. Fortunately, there are usually multiple patterns or tutorials for the same item (or type of item)

Apron

  •  Flapper Apron by Decades of Style. I have made a number of these aprons. With a few adjustments they come out really well.
  • Sew4Home’s Festive Half Apron with Extra Large Pockets tutorial
  • Sewing pattern companies such as McCall’s, Simplicity and Vogue all have apron patterns. The packets often include multiple styles.

Backpack

    • Sew4Home’s Sporty Summer Sling bag tutorial (this company changes the names of their projects, so if the link doesn’t work, do a search)
    • Retro Rucksack pattern from Radiant Home Studio 

Bath bombs tutorial 
Bionic Gear Bag
Board/ruler bag
Boxy bag

  • Snappy boxy pouch tutorial from Clover & Violet

Bunting
Camera case wristlet – pattern
Camera pouch – pattern
Camera strap – tutorial by ikatbags.com
Catch All Caddy by ByAnnie
Car trash bag – pattern 
Car ditty bag – tutorial
Cargo Duffel 2 – Noodlehead revised tutorial on the Robert Kaufman site 
Casserole carrier- Sew Sweetness pattern
Cell phone sling
Changing pad – pattern (make sure your giftee has a baby!) Might be useful to look at my vinyl tips and tricks page.
Checkbook cover tutorial from SewVery
Clipboard (fabric covered) – tutorial from SewVery
Clutch bag – pattern from Clover & Violet
Coasters
Coin purse

Cold pack tutorial from SewVery
Composition book cover tutorial from Hip to Be a Square
Craft organizer tutorial 
Cup holder/ coffee cozy
Cushions / Throw pillows
EPP Travel Kit

    • The Zen of Making pattern and tutorial. Make sure you look at the link for the optional pin cushion and other tutorials on EPP.

eReader /Tablet bags and cozies

    • Book Style Kindle cover tutorial from Clover & Violet
    • eReader sleeve with zipper closure – pattern
    • iPad Cover – (pattern by Michelle Patterns)

Eye pillow / Eye mask
Fabric basket (One Hour Basket)
Fabric boxes
Floor pillow – tutorial from SewVery
Garment bag tutorial from Sew4Home
Gift card holder -Little Wallet pattern from Valori Wells
Glasses case
Grocery bag

    • Jane Market Bag/tote pattern by Alicia Paulson
    • Pattern by Michelle Patterns 
    • Ruby Market Tote tutorial from Clover & Violet

Hanging toiletry Basket (pattern found in In Stitches book)
Happy Birthday banner
Heating pad/ rice pack

Holiday banner

    • Charm square bunting tutorial from Hip to Be a Square

Idea pouch (pattern by Michelle Patterns) – holds notebooks, pens, pencils, etc
Iron Caddy

Ironing Board Thread Catcher + Tool Caddy tutorial
Jewelry

    • Starburst wrapper bracelet pattern

Jewelry roll
Journal cover

Keychain
Lanyard (tutorial)
Light switch plates (covered) – tutorial from Craft Buds
Luggage tag tutorial from Clover & Violet
Manicure roll-up bag tutorial from Hip to Be a Square
Mask
Mini ironing table (pattern/tutorial)
Mini quilt / wall hanging
Mug rug
Name tag
Napkins
Needle safe

    • Kantha Stitched Needlebook pattern  
    • Sew4Home’s Full zippered Sewing (& More) Case tutorial

One Hour Basket (One Hour Basket pattern)

Pattern weights (tutorial/pattern)
Pencil case
Pencil roll (The Pink Chalk version is an excellent pattern)

Pencil pouch – tutorial from Craft Buds

Pillowcase

    • Artquiltmaker Guide to the burrito style pillowcase pattern
    • Clover & Violet French Seam pillowcase pattern
    • Reversible pillowcases pattern  
    • Romantic Floral pillowcase with decorative cuffs tutorial from Sew4Home

Phone sleeve

  • Sew With Me Saturday cell phone pattern & tutorial –  shows how to measure your phone so you can make it the right size

Pincushion

Placemats

Potholders
Project bag

  • Betsy Makes Project bag with zippers tutorial

Purse
Purse organizer

Remote control organizer

    • Remote control organizer pillow – tutorial
    • Tabletop organizer – tutorial from SewVery

Sash with Beaded Fringe (pattern found in In Stitches book)
Scissor Sheath (tutorial)
Sew Together Bag pattern
Sewing machine cover

Sewing Organizer Bag – handwork tutorial 
Sketchbook cover tutorial
Sleeping mask  (pattern found in In Stitches book)
Softies
Stitching folder

    • AllPeopleQuilt.com Sew Perfect project by Linda Lum DeBono (you may have to sign up for an account or newsletter to get this project)

Table runner
Tablet cover/stand

Tea cozy
Tissue box cover tutorial from Craft Buds (you might want to include a box of tissues so the giftee knows the size) 
Tissue holder
Tote bag

Wallet
Water bottle strap
Wrist pin cushion
Zipper bag

    • Zipper pocket tutorial pattern  

Zipper pouch

There are numerous other resources with multiple projects, including:


**I use affiliate links and may be paid for your purchase of an item when you click on an item link in my post. There is no additional cost to you for clicking or purchasing items I recommend. I appreciate your clicks and purchases as it helps support this blog.

Design Wall Monday November 2019

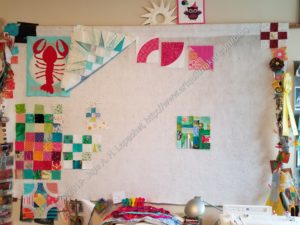
My design wall is not full right now. Neither design wall is full as I work on gifts for Christmas and upcoming birthdays.

Design Wall - 25 November 2019
Design Wall – 25 November 2019

My small design wall is not completely empty either.

There are two projects on the left. I have the leftover Strip blocks from my donation quilts in the very upper left hand corner. I am saving the leftovers for a quilt that will encompass all the colors.

Directly under those blocks are the 2.5 inch squares for Fabric of the Year 2019.

Bottom left: the Ring Toss block is still hanging around.

In the middle, you can see that I have made progress on the White improv donation top since yesterday.

That’s all there is. Stay tuned as I get back to making some quilts.

Mega Pinnie

I saw the Mega Pinnie pattern in an older issue (issue 6, 2016) of Today’s Quilter. It caught my attention, partially, because I have some squares leftover from the Jen Carlton Bailly workshop and they were on my mind. It turns out they are slightly larger than I need for the Pinnie, but worked just fine. I was also looking for something that would be interesting for a swap gift.

I like this magazine as it has practical and interesting articles that teach people something. I have found good projects, like my favorite pincushion, in Today’s Quilter sister publication, Love of Patchwork and Quilting, but this is the first time I have made something from TQ.

This pattern caught my attention as something different, but also useful. I decided to make it as a swap gift. It is essentially a giant pincushion with pockets for other tools. It will work well for someone who wants to keep a few things together at Sew Day.

Mega Pinnie - ready to sew together
Mega Pinnie – ready to sew together

While I am not quite finished, the project doesn’t take very long to make. I am almost done after working on it Sunday in between other projects. One of the sites I found said it took her two hours. I didn’t keep exact track of my hours, but this sounds about right.

Pinnie pockets in progress

In the pattern, the pockets are pieced. They look kind of fun pieced, but I also want to try them not pieced. The project will go faster and will be just as interesting. I also think I can add a placket for WonderClips, as in the pincushion that I have made as gifts.

I found a version of the pattern at the Stitch Gathering website.

I am ridiculously delighted by this concept. I want make a couple more as gifts and I can’t wait to sew this one together!


Resources and Inspiration:

Design Wall Monday -August 2019

I thought it had been awhile since I posted my design wall, but not as long as I thought. I found a post from May, which is relatively recently. My design wall is active, as per usual.

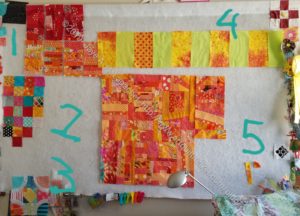
Design Wall Monday August 19, 2019

1. These are a few leftover blocks from my strip donation projects. I didn’t use them in the quilts already made, so I saving them for one that I will make at the end of the project.

2. I am still cutting for FOTY 2019

3. That Ring Toss block is still on my design wall. I still want to try and make a larger block, but haven’t gotten to it yet.

4. I cut some plain green blocks for the background of one of the strip donation quilts and didn’t use them. I decided that I wanted them off my table, so I cut some orange and am making them into a top. Yes, I am interrupting my work on the Orange Improv top to do it. The stack was really bugging me and I want those green blocks out of my hair.

5. While the Orange improv donation top might take a break while I work on #4, it is still in process. I got a lot done last week and it is growing.

Things are happening here. I am linking up with others showing off their design walls via Small Quilts and Doll Quilts, the hosting site of Design Wall Monday.


Design Wall Monday – May 2019

Design Wall - May 2019
Design Wall – May 2019

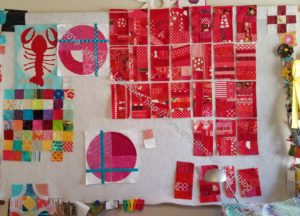
My design wall is full once again. I think it is usually full. The last time I posted about my design was back in February. There are a couple of projects still on it that you might recognize, but progress also.

Design Wall - May 2019
Design Wall – May 2019
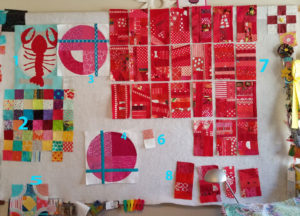
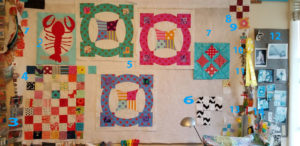
  1. The Lobster is still there. I really  need to do something with that piece as it is taking up valuable real estate.
  2. Current FOTY 2019 pieces.
  3. BettyCrockerAss block from the BAM class I took with her. This will be a table runner for the coffee table as soon as I make the third block.
  4. BettyCrockerAss block from the BAM class I took with her. Same as #3.
  5. Jenny from One Block block I like to call Ring Toss. I still need to make a larger version.
  6. Random start for a 16 patch donation block that ended up behind my sewing cabinet.
  7. Batch 2 of the red strip donation blocks almost ready to set. These are more chunky than strippy.
  8. In process donation blocks. one will finish off the group mentioned in #7. The other bits and pieces will be the start of a red improv donation top.

I am linking up with Small Quilts and Doll Quilts, the hosting site of Design Wall Monday.


Design Wall Monday – February 2019

The last time I did this was back in November. I am not sure why I don’t do it more often. I guess I don’t think about it unless I happen to have a photo of my design wall handy. In this case, Vicki, over at My Creative Corner 3, asked for a picture of what was on our design wall. This is a two birds, one stone kind of post.

Design Wall - February 2019
Design Wall – February 2019

Not much on my design wall this week. Mostly its because I am in between projects -sort of.

Design Wall Feb 2019 - annotated
Design Wall Feb 2019 – annotated
  1. [The Damn] Lobster – Yes, it is still there glaring at me. I really need to do finish this piece. I had an inkling of wanting to do it last week, but it passed.
  2. Fabric of the Year 2018 (and maybe 2019) squares – I am now two quilts behind in the series – 2017 and 2018. FOTY 2017 has been on the design wall recently and will be again. I am re-sorting and counting rectangles so I know the dimensions. I still want to do my Ellsworth Kelly idea for FOTY 2018. I haven’t decided even what shape to use for FOTY 2019. I wondered yesterday if I should combine FOTY 2018 and 2019. It doesn’t fit with the series so far, but if I want to explore the same idea I could just do it once, though doing it twice using the same shape would allow me to use different greys or a black on each one.
  3. Jenny One Block Halo quilt block – This is a test block for the Jen Kingwell/ Jenny from One Block quilt I call Ring Toss.  I thought about making a quilt using this pattern after I bought the templates at PIQF. I really like the templates and the idea of the quilt, but the pieces are too small. This block requires more space. I designed the block in EQ, surviving a rare polygon error, and have yet to print the templates in the larger size. My goal is to try a block in the larger size and see if I want to commit to that quilt. I won’t have the templates, so it won’t be as convenient. I might just give it up. As you know, I have a lot of projects and don’t need anymore.
  4. Spiky 16 patches – These are the blocks for the third Spiky 16 patch donation quilt. I haven’t put it together yet. It is pinned out of the way so I could fit the Green Thing on the design wall and see what I was doing. I haven’t unpinned them, but now that I have finished the other two donation tops on which I was working I can make these blocks into a top.
  5. Mini pre-anything potential donation block – I had one leftover 9 patch from the Octagon 9 Patch. I want to make a donation block out of it, but haven’t quite gotten to it yet. The pieces surrounding it were potential improv additions.
  6. Green donation block in process – as I finished the Green Thing, I needed some leaders and enders, so I  went back to the regular BAM donation blocks and this one is progressing.
  7. Jen Carlton Bailly blocks that I cut wrong – Well, I cut the two circle blocks wrong. The HST is waiting for something to be done to it. I used its sister to try out another technique in the class.
  8. Improv donation block – I did like using up scraps to make the Green Thing. It became unwieldy and heavy and not ideal, so I am not sure I want to do another that large. Yes, I could make it smaller, but I like even baby quilts to be on the larger side. I decided to try making some blocks instead. If I make a bunch of 8.5 inch blocks, they will fit with the 16 patches the guild makes. I can also make enough of them to put together a quilt with just improv blocks. This might be the only one. We’ll see.

I am linking up with Small Quilts and Doll Quilts, the hosting site of Design Wall Monday.

Design Wall Monday – November 2018

I didn’t plan on putting up a Design Wall Monday post, but somehow I just felt like it.

Design Wall Monday - November 5, 2018
Design Wall Monday – November 5, 2018

This is a bigger view of my design wall with some added bonuses that I don’t normally show.

Design Wall Monday - November 5, 2018 annotated
Design Wall Monday – November 5, 2018 annotated
  1. Random fabric squares. I think I was looking for similar fabrics or to make some similar feeling four patches at one point.
  2. Lobster placemat – Still in process, but front and center
  3. ATCs – remember all those ATCs I make?  Here are some for which I trade mine.
  4. Most recent FOTY 2018 squares
  5. Latest MetroScape blocks
  6. Latest donation block in process
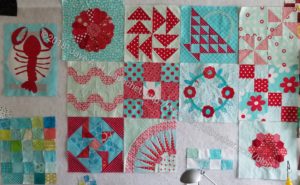
  7. Cathedral Windows block – it didn’t make it into the Aqua-Red Sampler quilt, but it is still a nice block
  8. For Boy Scouts the kids had to sew on a button. I made this block and he sewed a button he chose from my button box into the center
  9. One of the first pieces of fabric – fussy cut – that was given to me as part of a Modern Quilt Guild challenge
  10. Quiltmaking merit badges. I really want to put them on to something, but I haven’t figured out what yet.
  11. Wire and bead dolls.
  12. Inspiration board. My images are kind of faded now, but I still like them.
  13. Possible donation block in process. I am still looking at it.
  14. Quilt show ribbons

I’m linking up with Small Quilts and Doll Quilts, the relatively new hosting site of Design Wall Monday.

Design Wall Monday

Design Wall, July 23 2018

My design wall looks crazily turquoise and red this week. I didn’t realize how much I am in a turquoise and red mood lately. The Stepping Stones n.2 is part of that as well.

Despite the color theme, not much is happening on the design wall. For the moment it is acting as storage.

Design Wall July 2018 annotated
  1. The Lobster. I still have to finish the stitching
  2. New FOTY 2018 squares
  3. Aqua-Red Sampler blocks, most not all
  4. Half of a new donation block

I moved the Aqua-Red Sampler off the larger design wall. My goal is to put the Who Am I? piece up there an finish it. Yes, the Sampler needs to wait awhile longer. Poor baby getting supplanted again.

I’m linking up with Small Quilts and Doll Quilts, the relatively new hosting site of Design Wall Monday.

Knight Scarf Begins

My knitting needles were barely cold before I cast on a scarf for the YM. I want him to have one as well. Almost as soon as I finished the Cosmic Wonder Dust scarf, I started his.

He thought the Madeleine Tosh yarn was a little rough (he is very kinesthetic and also very tuned into the way things feel). At PIQF, I bought some wool and silk yarn from Thread and Ewe. It is Avalon yarn by Round Table Yarns – 50% superwash merino and 50% silk, DK weight. Even though I was annoyed at the “DK weight” – clearly designed for experienced knitters – I was eager to try it out.

Starting the Knight Scarf

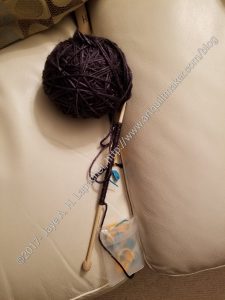
The fibers are not as tightly wound (spun???) together, so I have to be careful not to knit only part of the strand as I progress along the row.

Like the Monarch scarf, this yarn is slippy, so the stitches tend to slide off the needles if I am not careful. While I cast on to straight needles, I am knitting with some circular needles and the line between them is a bit short, so I have to be careful.

I really hope this yarn is soft enough for the YM.

Cosmic Wonder Dust Scarf COMPLETE

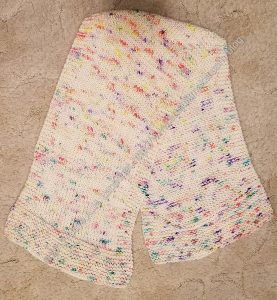
Cosmic Wonder Dust scarf

I finished the Cosmic Wonder Dust scarf last Thursday! Yay! Now I have all of the scarves finished for the kids uh, young adults who helped the YM during his cast phase. They are not wrapped or boxed or mailed, but knitted is a good place to be.

This was made with Madeleine Tosh Chunky yarn. This yarn was a little different than the ones I used for the Lichen and Nighthawk scarves. it is Madeleine Tosh Chunky. It knitted up faster, though I didn’t have as much time to work on it. Good thing it was chunky yarn. The unexpected part is that it is not as long as the others. I should have bought three skeins, but didn’t. C’est la vie.

California Pillow

California Pillow
California Pillow

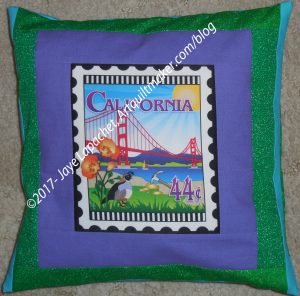
I finally made the pillow I intended to make from the panel Mrs. K sent me.

I feel like such a slacker. This panel has been hanging around since …. I don’t know…. months? I do keep sewing, so I can’t be that much of a slacker, right?

We do not have to raise money this year at Grand Parlor, so I made this pillow for one of our friends who does not get support from his Parlor to attend Grand Parlor. He is running for Grand 3rd VP and needs all the help he can get.

California Pillow back

Yes, I pulled out some Pointillist Palette fabric, after being inspired by my SIL. I can’t hoard it. I have to get the 4th Pointillist Palette quilt done and use this great fabric. Since I had it out to use for Kelly’s Color My Quilt piece, I decided this pillow would work as another effort at using it.

The back is pretty plain, but I do like that blue. I wish I had written down what it was (usually I write the brand and color on the selvedge) as I could look for more. I didn’t so, it will be a mystery.

More Garment Sewing

Layout pattern
Layout pattern

Well, I cannot seem to stay away from the garments. I am still not a confident garment maker and I couldn’t do it easily without my SIL who is a master (mistress??) of garment sewing.

We are using the same Hawaiian style shirt pattern that we did when I visited her in Maryland a few years ago.

I am using some great California fabric that I found at the Granary. It is called California Here we Come by Studio 8 for Quilting Treasures.

California Here We Come Fabric

I bought 3 yards of the tan for the shirt. I knew I would need some extra and I didn’t want to run out in case I made mistakes. I thought the tan colorway would look good with the recipient’s coloring. I also bought a half yard of the black on white, which would be my colorway preference.

This is a really good California print as it has a lot of the sights of our state and goes beyond the most prominent. Whoever drew the print was thoughtful about the motifs.

She is supervising me heavily and I need it, because I can’t get the layout of the pattern pieces straight in my head. I only had to recut 3 pieces this time, which is an improvement.

Now I have cut all the pieces and applied interfacing. I have also hemmed the shirt fronts. Onward.