Pantone Ideas

Pantone ideas - first iteration
Pantone ideas – first iteration

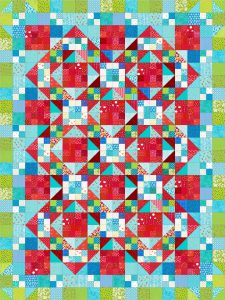
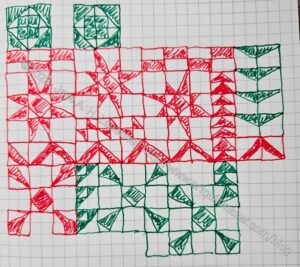
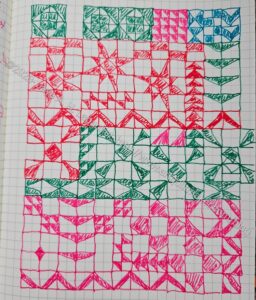
We are fast approaching the end of the Pantone Project block making aspect of the project. That means we are speeding quickly towards the design of the quilt phase. I looked for the ideas that I had generated last year and couldn’t find them so I sat down and doodled what I remembered,or thought I remembered.

I don’t have tons of spare time, so the doodles evolved over several days. The colors represent different days.

Remember, we have units based on Doreen Speckman’s system from her book, Pattern Play**. As an aside, I know most of you missed Doreen’s career in quiltmaking, but anything you can find on her is worth the effort. This book is all about designing quilts using units.

Pantone ideas - evolving
Pantone ideas – evolving

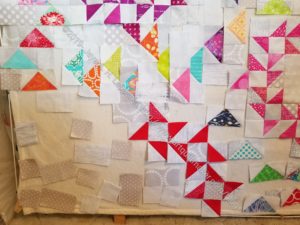
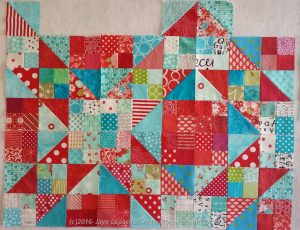
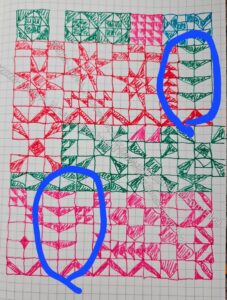
Friend Julie and I are using these units for our project, which means I used those units for my doodling. In putting together these units, I made larger designs. And that was super fun.

I started off thinking of a row quilt. I was a little stiff at the beginning, but as I worked, I started coming up with some interesting shapes using the units.

Umbrella shapes
Umbrella shapes

I am super excited about the umbrella/propeller shape, which makes me want to make more of those blocks. That is an added bonus for the doodling.

One issue I have not addressed is color. You know that each unit is a different color and we are making units from colors in the Pantone Postcard Box** as they inspire us not to any plan. I am not going to worry about that now. After all, I can always make a second quilt with the colors of my choice from the same design, if I want.

You can still play along. You will need:

Decisions to Make with your friend:

  • Size of units (blocks)
  • Type of units to make
  • Time frame for making the project
  • Time frame for sending postcards


**Obviously, you should shop at local fabric, knitting shops or quilt shops. However, if you can’t, please know that I use affiliate links. I may be paid for your purchase of an item when you click on an item’s link in my post. There is no additional cost to you for clicking or purchasing items I recommend. I do not recommend items I don’t like. I appreciate your clicks and purchases as it helps support this blog.

QST 16 Patch Design

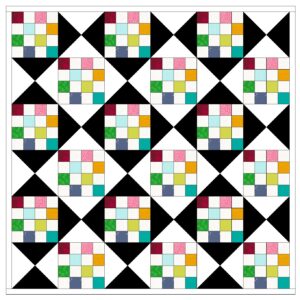
I saw some quarter square triangles (QST) somewhere and started to think about them in conjunction with the guild’s 16 patches. I looked up the dimensions for making QSTs in my trusty Around the Block** book. That simple block was not included. I was trying to avoid firing up EQ8, but had to as I couldn’t get the design out of my head.

QST 16 Patch - cut off
QST 16 Patch – cut off

The first design I made is ok. You can see the design and the secondary design. However, some of the motifs are incomplete. You know how I like my designs to be finished, so I decided to try and finish off the edges.

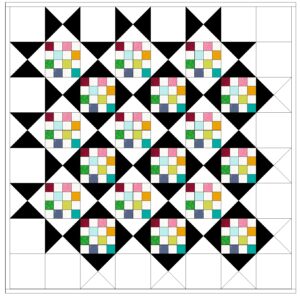
I wanted you to be able, at least, to see the full Ohio Star motif (block) even if I couldn’t finish off all of the secondary designs.

QST 16 patch, design 2

Honestly, I didn’t think through the whole process and wasn’t really prepared for a full-on EQ8 design sessions.

I took a stab. I immediately ran into problems. You can see that doing what I wanted wasn’t straightforward. I think I could have resolved the problem by adding another row of 16 patch blocks, but I didn’t want to make the quilt larger than it was. It will be a baby (ish) quilt for the BAM Community Quilts Project.

For the moment, I decided to leave it and go back to sewing. The second design is fairly asymmetrical, which means true Modern Quilters would probably like it. I don’t dislike it; it just doesn’t achieve my goal. I’ll work on it again another day


**N. B. : Obviously, you should shop at local quilt shops and small businesses. However, if you are too busy or can’t find what you need there, I use Amazon affiliate links and may be paid for your purchase of an item when you click on an item’s link in my post. There is no additional cost to you for clicking or purchasing items I recommend. I appreciate your clicks and purchases as it helps support this blog.
Design Overview Redux

I talked about this topic back in 2011 when I was asked to do a series for a podcast called Quilting for the Rest of Us. The podcast episode might still be available if  you want to hear a younger Jaye talk about this topic. The companion post was more of a ‘here’s what we discussed’ rather than good information. It isn’t as useful in that format, if you can no longer listen to the podcast.

This post is an overview of design, which will go with a presentation I am planning for my guild. I am providing more information here so it is more useful if you can’t/didn’t attend the presentation.

Many quiltmakers, though not formally trained in art (e.g. an MFA in fine art) have intuitive art sensibilities. (Fearless Design for Every Quilter by Lorraine Torrence, pg.5)

Definitions:

What is design?

Design is a problem solving activity within all the arts, placing or creating subject matter so it is of visual significance and interesting to the artist. (The Quilter’s Book of Design, 2d, pg.xi)

If you think of the creation of an art piece as a hierarchy, content and form are above design. “Content implies subject matter, story, or information that the artwork seeks to communicate to the viewer. Form is purely visual aspect, the manipulation of various elements and principles of design. Content is what artists want to say; form is how they say it.” (Design Basics, Pentak & Lauer, pg.5) Design means to plan or organize. It is the opposite of change. The result is visual organization (Pentak & Lauer, pg.4).

Using Design

Hard and fast rules are impossible because of the varied objectives of visual art. Artistic practices and criteria have been developed from successful works. Guidelines (not rules) exist that usually will assist in the creation of a successful designs. (Pentak & Lauer, pg.5)

“Principles of design are the laws of designing anything! In other words, to have a good design, you should consider these principles for the best design possible. Elements of design on the other hand are things that are involved within making a design. The major difference between principles and elements is that principles are rules you have to follow and elements are things that will help you complete those rules for the best project outcome.” (Homework Help: Art: Visual Arts: Principles & Elements of Design)

Thoughts:

“A good design supports or changes how we live” – John E. B. Dubus blog post Sept 23, 2010.

Judy Martin wrote in her May 2012 newsletter ” My basic philosophy boils down to this: I try to do what’s right for the quilt, not what’s right for me. It might be easier to slap a plain border on and be done with it, but if the quilt looks better with a pieced border, that’s what I do. It might be easier to make it out of 5 fabrics, but if it looks better in scraps, that’s what I do. If it looks more refined with 1-inch logs rather than 2-inch, that’s what I do. If it looks more interesting as a queen rather than a 36-inch square wall quilt, that’s what I do.”

Good design requires practice and is the “result of a successful combination of design elements … and principles…”(Fearless Design for Every Quilter by Lorraine Torrence, pg.6)

Elements:

The elements form the ‘vocabulary‘ of the design (Wikipedia, design elements and principles).

The Elements of Design are the language of the visual arts (this quote/information came from a link that is no longer available). 

The elements are components or parts which can be isolated and defined in any visual design or work of art. They are the structure of the work, and can carry a wide variety of messages (Cornell’s Introduction to the Elements of Design). 

Principles:

The principles constitute the broader structural aspects of the design’s composition (Wikipedia, design elements and principles). I think off this as an architect’s conceptual drawing that gives the viewer the look and feel of the project.

The Principles are concepts used to organize or arrange the structural elements of design. Again, the way in which these principles are applied affects the expressive content, or the message of the work (Introduction to the Principles of Design).

Why Know About Design?

Knowing about design principles and elements helps refine your innate skill.

Design is a way of organizing a piece of visual work. According to the Quilter’s Book of Design, 2d by Ann Johnston, “Design is a  problem-solving activity within all the arts, placing or creating subject matter so it is of visual significance and interesting to the artist.” (pg.xi). I like this definition, because it is understandable and doable. It also isn’t scary for people who have no MFA. When I think about solving a problem with my quilt, I relax about design and try to review the skills in my design toolbox. Remember, though, that “we all have personal experiences, subjective leanings, and differences in personality that make us prefer one thing to another…” (Fearless Design for Every Quilter by Lorraine Torrence, pg.57)

Concept: I use patterns why do I need to know about design?

Color is an element of design. To make beautiful quilts, you need to know about color. If you buy a kit, there may be one color you do not like and by knowing about design, you will be able to replace it successfully.

Balance is a principle of design. If your eye sees an element of the quilt as being unbalanced, then knowing about design will help you adjust it.

Concept: I do not make art quilts, why do I need to know about design principles and elements?

Negative space in fabric: “When choosing prints for a patchwork, think about how they’ll look when cut up, e.g. the ratio of background to foreground and the scale of the individual motifs. Does that small print have so much negative (empty) space that the actual print part won’t show up on half of the pieces? Is that large print so big that the pieces cut from it will look like they’re from entirely different pieces of fabric? (Elizabeth Hartman, The Practical Guide to Patchwork, pg.24).

Borders: does slapping on 4 lengths of fabric work with the design you have chosen or would a bit of piecing enhance your excellent piecing?

Books: when looking at books and evaluating whether you want to spend money on it, you can evaluate the various elements and principles of  design included in the patterns of the book.

End Notes:

List of Elements and Principles of Design taken from a handout from a Liz Berg handout (class through CQFA)

Resources

“However I believe strongly that design is important. A good design supports or changes how we live. When I imagine the specifications of a perfect home for a family, one of the most important design criteria is that the home allows family members in all their uniqueness to thrive: physically, emotionally, intellectually and spiritually. Good design is experienced at these levels. Good design allows “a place for everything and everything in its place” including a place for people to nurture themselves, family members, and their greater community.” John Ethan Burke Dubus blog (sadly, the blog is no longer available, but the quote is still excellent)


**I use affiliate links and may be paid for your purchase of an item when you click on an item link in my post. There is no additional cost to you for clicking or purchasing items I recommend. I appreciate your clicks and purchases as it helps support this blog.
 

Successful Scrappy

Valerie made a comment about the White Strip Donation top the other day and it got me thinking about successful scrap quilts.

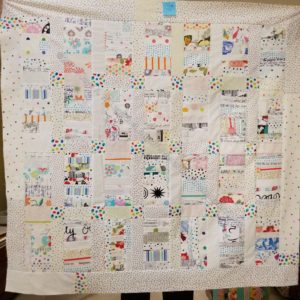
White Strip Donation Top: finished

I think the strip and improv donation tops have been successful because of the consistency of color used. Primarily, these quilts are monochromatic. I say primarily, because fabrics often have different colors on top of a primary color, so other colors are included in monochromatic quilts. Also, for many of them, I have used a different color (complimentary, usually, though neutral as well) for the sashing and border.

I have used a different color as sashing or border to provide contrast in the strip quilts. The White Strip Donation Top I recently finished has a different look. I used fabrics with a  white background for all the pieces. Readers can see some of the other colors as they dominate the image (click on it to see it larger and get a better view), but the overall look is still white.

I often worry about the successful color selection of “paper bag” scrap quilts. Many find it fun to grab a piece out of a paper bag and use it without thought or consideration. I find this method of selecting fabrics to be incredibly stressful. I like to carefully select my fabrics. In that way, I feel like I have a better chance of a successful final project.  I don’t want to spend time on a quilt that ends up ugly.

Scrapitude Carnivale Finished

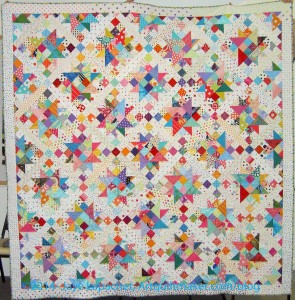
Making the Scrapitude quilt was an exercise in faith. It was a mystery quilt so I had no idea how it would come out. Often, I wait until the end to see the finished product, but this time I stuck to the schedule. I still carefully selected my fabrics and was careful to use the same type of prints for the background-dots on white.

I love the way this quilt came out and I do enjoy looking at it. I wonder, though, when I look at it if I should have included the blacks, dark greens and some chocolate pieces? I like all the fabrics I chose.** I often think of making another version of this quilt and making the changes I wonder about.

I think carefully selecting fabrics even if you are grabbing from your scrap bin is really key to a good looking finished quilt. The quilt will look like your style. You will like it and you will enjoy working on it.


** I think it is absolutely key to only work with fabrics you like. Whether it is the brand, the designer or the colors, life is too short to work with fabrics that make you cringe.

White Donation Quilt Options

I have enough of the white scrap donation blocks now to make a quilt. This set of blocks has seemed to take forever, though I know it probably has not been as forever as I think.

White Donation Blocks - late October 2019
White Donation Blocks – late October 2019

In looking at this set, I am not sure I want to alternate the blocks with plain blocks. I get the sense that those plain blocks can overwhelm delicate piecing. On the other hand,a plain block, might set off the piecing. Hhhhmmm.

I am also not sure I want to add skinny sashing. It would be difficult to piece and keep straight because of the all the seams and layers in the block. I am unwilling to go on an amazing design journey with these blocks so I have decided that I have three options.

First, is alternating my pieced blocks with plain blocks. Second is a skinny sashing with (or possibly without) cornerstones and, third, is a slightly larger width sashing with  cornerstones. I’d like to have a top ready for Sew Day or the November meeting. I am leaning towards the last option.

My next problem is the sashing color. I would default to light, but that would blend in with the blocks. Perhaps some dots?

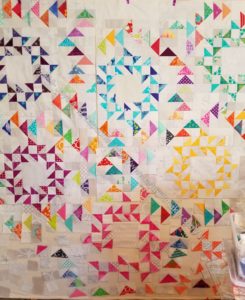
Flying Around Top of Top

Flying Around - early August 2019
Flying Around – early August 2019

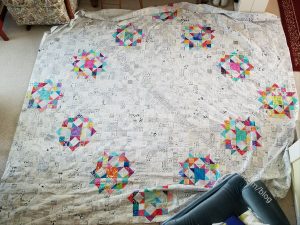
The top finally got to be too much. I need to sew most of the top together in order to move the whole piece up (and hang some over the top of my design wall), so I can work on the bottom. I have been sitting on the floor, which is fine, but not so fine when the quilt doesn’t fit on the design wall. Pieces in order on the floor doesn’t work.

Background detail - Flying Around
Background detail – Flying Around

In order to move the whole piece, I had to be certain of all the piecing on the top and sew the whole top section together, perhaps including the red-violet and yellow Friendship Circles. The top middle was bugging me, however.

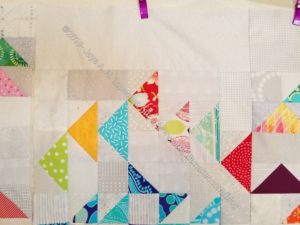
I finally decided that the Flying Geese were too low. They were supposed to add interest that low, but they just looked weird. Unpicking was in order. It was a hassle, but I did it. Anything for the sake of art, right?

FGs moved up, red FG moved to left

The Flying Geese along edge are supposed to be a border. No, they are not a traditional border, but they are still a border because I say they are. Next, I moved the whole section of Flying Geese up higher. This move was intended to get it more in alignment with the Flying Geese border pieces above the purple and Green Friendship Circles. With this move, I had to move one of the red FGs to the other side of the group.

I don’t know why there is a missing FG between the deep purple and the yellow/pink FGs on the right. That space will have to go. It might have looked arty before. Now, it isn’t right.

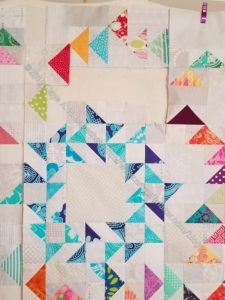
That big white space under the new placement is still weird looking. I sewed a piece in. It didn’t look right. Another big space that was not the center of a Friendship Circle just looked wrong.

The answer? More FGs.

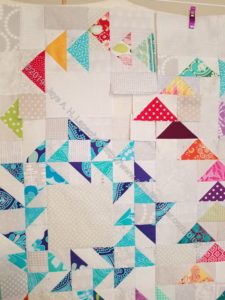
Add red FG
Add red FG
Added, moved Flying Geese

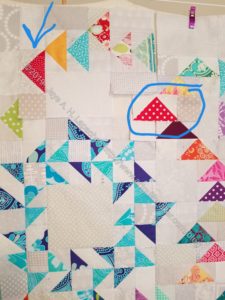
I found another red FG, which I thought would work. I think it is looking better. The red dot FG is not yet sewn in. I wanted to see if I could see how it would look before I committed myself. What I think looks strange is the two greens near each other on the right. I don’t know if I will change one of them, but it is a possibility.

I don’t think I will add more Flying Geese to the ‘white’ space. I think I will break it up with different greys and hope that helps.


Flying Around Arrangement

The other day I showed you most of a photo of Flying Around. After posting that, I started in on the last two Friendship Circles.

Flying Around detail

The placement of these will be tricky for a number of reasons. First, they will be on the floor (see the bottom most red Friendship star? It is right at the bottom of my design wall) as I place them unless I sew together the top and move everything up. I have been wanting to do that, but am waiting because I am not sure I am happy with the top middle of the piece. That big piece of grey at the top is of concern to me. I wonder if it pushes the Flying Geese down too much.

I want the Geese around the edge to act as a border without being a separate entity, but I am not sure that particular section achieves that goal.

Next, I don’t want the ratio of width to length to be too strange. If the piece gets to be too long, it might look too long and skinny. Of course, I am often hampered by the width of my design wall and this is the case with this piece. Sigh. I don’t want to take apart the whole piece and make it wider, so I have to measure and try and estimate how long it will be.

I also need the Flying Geese to wrap around each of the Friendship Circles and there isn’t quite enough space for them to do that with the placement of the red HSTs. You can see that dark Goose near the second Friendship Star; notice how crowded that area appears. Of course, I could move the red Friendship Circle over to the left, but I also don’t want it to be directly below the red-violet circle. I want them to appear randomly placed. The width is really a problem for me.

As you can see, there is still work to do on this piece. I started it sometime in April, I think, so it has been on the wall for a long time. I would like it to be finished, but I also want it to be right.

Evolution of Strip Tops?

If you have read for any length of time, you have seen the various color strip donation tops I have been working on.

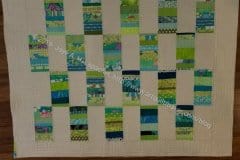
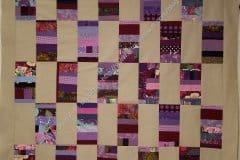
I am really liking the way they are coming out, the slight variations I have explored and the way the shift in colors makes the top look different. Also, Tim’s quilting adds a whole additional dimension.

Julie Sefton's Inspi(Red) quilt
Julie Sefton’s Inspi(Red) quilt

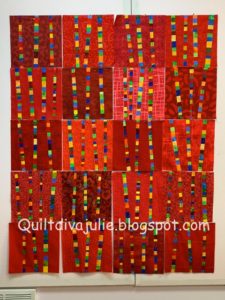
My mind was slightly blown the other day when I looked a a post from Quilt Diva Julie. she covers a lot in her posts and I was just about to click away when I saw her quilt, Inspi(red). I love the little sparks of color that show up against the red. This quilt gives me another idea for these color scrap quilts on which I have been working.

Julie was kind enough to give me permission to post her quilt here. She writes “INSPI(RED) is the red quilt on the blog today with inserts that are the trimmings from the center strips of Luminous.   Inspi(red) is my own interpretation of a pattern named Bright Birch Trees by Amanda Jean Nyberg (Crazy Mom Quilts)”.

N.B. Crazy Mom Quilts is no longer being updated and some of the links no longer work, including the link to the Bright Birch Trees pattern. 🙁 If you are patient you can see the Bright Birch Trees image, which uses a variety of different colored backgrounds.

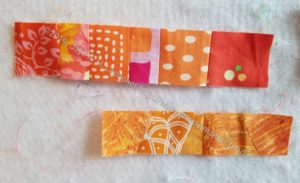
Thin Orange Strips
Thin Orange Strips

I never really know how images out on the web will hit me. I am so grateful that people are still posting on blogs and talking about their work. This quilt made me think of the thin strips of piecing that come out of the strips quilts after I trim. I can add them to larger pieces to make them useful, but they are little gems on their own and get lost, to a certain extent in the improv piecing of the larger donation tops where I mostly use them. Julie’s quilt makes me think of add them to larger blocks as a featured element in the block.

I don’t have enough in scraps to make the blocks as she has done, but I do have yardage that would be well used by people in need.

I don’t think I have enough orange to make a whole quilt in this design after I finish the Improv version. I’ll have to see. I have a lot of blue and pink scraps so those colors might be my test bed.

Apparently, I now have about a million more ideas for donation quilts. It is so great to have that outlet as I can try as many quilts as I want without my house being floor to ceiling with unused quilts!

Stay tuned!

Finally Some Value

Sonja gave a short presentation on Composition at the CQFA meeting on Feb. 2. Sonja is a really good artist and works very hard to get better.  In 15-20 minutes, I learned so much about composition that my head was reeling. I talked about it with a number of people that I know. I was really excited.

First she talked about 8 Common Armatures. I had no idea what this means, but she showed us examples of the different armatures, which are arrangements of art on a page. The 8 are:

  • S curve
  • L
  • Diagonal
  • Triangle
  • Radial
  • Fulcrum
    • O-Frame focal point
    • O-Path around
  • Horizontals and verticals
  • Cruciform

Each of the above armatures can have subcategories. I talked a little bit about this in my Design Series post on Balance.

She also told us to work with intention. I took that to mean don’t just slap anything up on the quilt. She said to identify a center of interest and emphasize it, then she told us how.

Most of the class was taken up with Value. This started out to be a problem for me. For some time I have been irritated when people have said “Value does all the work and color gets all the glory.” Mostly, this saying has irritated me because nobody who said it could tell me why. I have ignored that saying since the first time I heard it.

Actually, I haven’t, but I was doing it intuitively and just using contrast. Contrast has a lot more to it than only value. You can review it in the design series episode on contrast.

First, we have to define value and contrast:

Definition of Value: Graduations of light and dark.  All colors have an inherent value.

Definition of Contrast: Difference in light and dark.  Or light vs dark. (See The Sharpened Artist).

The difference is a mind bender, but there is a difference.

Now we can get on to my epiphany.

In this presentation she talked about value patterns. She showed a diagram of 14 different examples of values in a composition. Each diagram shows 3 rectangles on a larger rectangular surface (presumably the paper or canvas or quilt). Each rectangle is either black, medium gray, light gray or white. In show different arrangements of these rectangles. Sonja showed us a page in Strengthen Your Paintings with Dynamic Composition. You can see what I am talking about a little bit in the arrangement of rectangles in the example on Jacob Bromeo’s site. You can see how the darker rectangles come forward.

There is a lot more I could say about this class. I have some books from the Library. I have some articles to read. I have some blogs posts to update.

Sonja recommended the following books. I got some of them from the library and am powering my way through them.

Resources:

Sonja does watercolors as well as make quilts. The above list is from her watercolor class, so there are things you have to ignore. The material on composition and value cross over from watercolor to quilts and are relevant.

MQG Creative Webinar

Periodically, I am actually able to take advantage of some of the benefits of my MQG membership. Last week, I watched a webinar with Malka Dubrawsky on using prints called Creative Webinar: Printed and Patched: Designing with Patterned Fabric with Malka Dubrawsky.

My overall first impression was that there is an assumption that modern quiltmakers don’t use prints. I see a lot of MQG people buy lots of FQ collections. Wasn’t there some crazy hullabaloo over Heather Ross and some castle/princess collection a few years? Blueberry Park is pretty popular as well.

I tried to take this weird impression and set it off to the side so I could gain some knowledge from the webinar.

Malka said that prints have graphic information. There seemed to be another assumption that we are used to using small scale prints because they read as colors. She talked about using larger scale prints as graphic messaging. Dubrawsky said that using a variety, both large and small scale prints, creates interest.

She divided the presentation up into points:

  • spaces
  • movement
  • color/color contrast
  • common print
  • random

I think that I may have missed one or two points, but I got some good information out of these, so the webinar was worth my time.

When Malka talked about spaces she was talking about dividing up the quilt’s surface into different spaces. She, then, talked about using prints in those spaces. You can also organize blocks as spaces or into spaces to use prints.

Movement went right past me.

She used Color / Color Contrast as a different type of organizing tool, which I thought was interesting. One example was dividing up a quilt into warm/cool.  Again the idea was about organizing fabrics on the surface of the quilt so you can use printed fabrics. I don’t find this to be necessary in my work, but I thought the concept was interesting and it might be worth trying.

She encouraged makers to create rules for ourselves to use prints so they make sense across the surface. I do this with my quilts in general.

I had no idea what Dubawsky meant by Common Print. She was referring to using different colorways of the same prints all together. I have always loved this concept. I often like having all the prints in all the colors. Remember my Half Moon Modern drama? Malka says that it allows for easier color and shape focus.

She said that using prints can produce ‘hidden treasures’ that don’t show up when you use solids. Prints create another point of interest, more to look at.

Random: hard to make work, but can work. This was difficult for the presenter to explain and I can understand why. She threw out:

“Simple shapes, colors go together, big spaces. Active background electrify prints rather than toning them down. Focus is on color rather than design.”

Overall message is that makers need to organize your fabrics and design so that they work on the surface. She said that design is really important and I was thrilled.

She encourages people to make their own FQ packs.

Yay! She uses batiks all the time. She calls them modern batiks – modern, bold, graphic designs. Malka also said that she doesn’t really like the older style, watercolor-y batiks. I got the impression that it was the motifs on the surface of the fabric rather than the batik process she didn’t like.

To start: Pick (buy or create) a fabric collection you really love – she buys entire FQ bundle- and then play around with different ways of organizing fabrics. Small/large prints or warm/cool colors. Use a simple geometric design. Challenge yourself. I also got the impression that she was saying to be brave.

Her new designs will be available on Feb 1 on her website as PDFs. Printed patterns will be available Feb 20. She is also doing kits.

A recording of this webinar is on the MQG site for your viewing pleasure, if you are a member.


Four Low Volume Backgrounds

I have always liked to use a variety of fabrics to add interest. This means that I like scrap quilts, but I also like to use a variety of fabrics in the same colors in my quilts.

I learned this technique from Mary Mashuta. Many of you modern quiltmakers probably think she is old time and her techniques are not a useful addition to your modern arsenal. Mary is a really good teacher. She trained as a teacher and taught at SF High Schools for years before she left to become a quilt teacher. Her ideas are easily translatable to different fabrics and styles. I took a class from her about “pushed neutrals,” which had to do with making a background from a variety of neutrals rather than just using one fabric. I extrapolated that idea out to include non-neutrals as well, which evolved into using a variety of fabrics in the same colors for backgrounds. I have since used this technique for foregrounds as well.

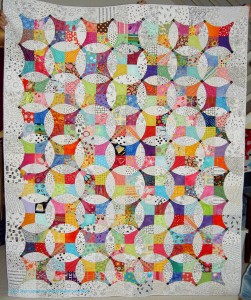
Kay V, a longtime reader, made a comment that made me think about my low volume background for En Provence. As you know, the background is a variety of text fabrics. These are, mostly, the same fabrics I used for the Carpenter’s Wheel.


Jennifers Quilt
Jennifers Quilt

Jennifer’s Quilt is a quilt I made for my acupuncturist who really helped me get back on the road to health. When she died, I got the quilt back. Bittersweet. I would rather have her and never see the quilt again.

It is the first quilt, I think, I made using a variety of black and white fabrics for the background. Some of the pieces are a little heavy and I probably wouldn’t use them again. I also used the same technique for the foreground – the pinks, blues and limes are all a variety of fabrics in the same tones/shades. The blues have more contrast than the pinks and limes.

Flowering Snowball Finished

Flowering Snowball was primarily supposed to be a handwork project – something to take around with me when I needed a to-go project. At that point, I didn’t think as much about the background. In general this is not as successful an exercise in using different fabrics for the background. Some of the prints read grey rather than white. Others have too heavy a hand in the print department.

Carpenter's Wheel top finished
Carpenter’s Wheel top finished

I got better with the Carpenter’s Wheel. I was focusing on using text prints and, thus, tried hard to make the background work. The scale of the different fabrics all vary, but the overall effect works.

En Provence - October 8, 2017
En Provence – October 8, 2017

From close up, the background of En Provence looks somewhat chaotic. The foreground fabrics can handle the chaos, however, because there is no bleeding of color into the background. I like the little bit of chaos as it seems to move my eye around the quilt.

As an added bonus, this technique does not require one to have a zillion yards of one fabric to use as a background. 😉

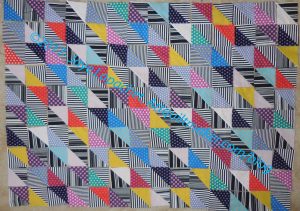
Ta Dots & Stripes HSTs

I seem to have a lot of HSTs around. The other day I talked about the Mostly Manor HST quilt. I found the bag of Ta Dots & Stripes HSTs recently and laid them out to see what I could do with them.

First, they didn’t turn out as expected. The stripes are a lot darker than I anticipated and kind of dominate the quilt.

Second, there aren’t as many as I thought, so this will most probably be a lap quilt.

Third there aren’t enough colors of dots to make this really interesting. I don’t remember if Ta Dots come in more colors. If not, they should, but these are all the colors I have.

Ta Dots & Stripes HST Quilt Layout

I laid them out anyway in order see what I could do with them. I laid them out in lines and straight HSTs.

This layout is similar to the one that my SIL did with the Mostly Manor HSTs. It concentrates the colored triangles together and makes them stand out a bit more. The stripes still fairly dominate the whole piece.

Ta Dots & Stripes HST Quilt Layout n.2

The other layout was inspired by a quilt on the Quilts and More Summer 2017 issue. It is straight HSTs in kind of a color order all pointing in the same direction. I thought it would be a possibility for this quilt.

It is ok, but the contrast is still difficult.

Design Class: Dominance

It has been awhile since we did the last design class. There is no podcast accompaniment, but if one becomes available, I’ll come back to this post and link to it. Gradation was the last installment that I could find. You can find the entire series by clicking on the ‘Design Series’ tag in any of the relevant posts.

I want to finish the series as the unposted final classes niggle at the back of my mind like a to do list item I cannot cross off.

Dominance is related to Emphasis/Focal Point

Dominance is a Principle of Design

Definitions:

  • One element plays the dominant role in a design. (Adventures in Design, pg.106)
    • Medallion quilt
    • Focus fabric
  • “Dominance gives interest to one entity or area of a design over the others.” (Fiber Artist’s Guide to Color & Design, pg. 199)
  • “Dominance gives a painting interest, counteracting confusion and monotony. Dominance can be applied to one or more of the elements to give emphasis (John Lovett)

Notes:

  • The difference between focal point and dominance is subtle. An element that dominates because of size or color, etc can also be a focal point, but it is not a focal point when your attention is drawn to one spot, but then drifts away because something else is going on in the design field that could be considered as dominant or only slightly less dominant than the element that could be the focal point, if not for the other aspect of the design field. Look at page 125 of A Fiber Artist’s Guide to Color & Design by Heather Thomas for an example.
    • Wayne Thiebaud Lunch Table, 1964
      Wayne Thiebaud Lunch Table, 1964

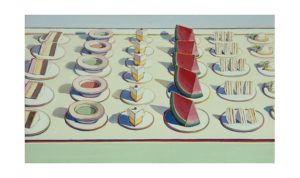
      Wayne Thiebaud’s Lunch Table is also an example. The Watermelon clearly dominates, but not is a focal point because there is so much going on in the design field. The red of the soup helps to draw the eye away.

  • “Both Dominance and Emphasis give interest to one entity or area over others present in a design field, however a focal point is not always formed. Giving dominance to , or emphasizing one design element or area will counteract confusion or the risk of monotony. (Fiber Artist’s Guide to Color & Design, pg. 125)

Using Dominance

  • Dominance “can be achieved through the use of color, value, intensity, size and scale as well as other design elements. Emphasizing one element or letting one area dominate others sends an invitation to the viewer to come in and take a closer, longer look at the work.” (Fiber Artist’s Guide to Color & Design, pg. 125)
  • The elements, line, shape, texture, form, are like the actors in a play. Not all the actors can be the star. You have to chose who will be the lead. When you choose who will be the lead in your quilt design, you are deciding which element will have dominance and you are enhancing visual unity. You can select another element to be your supporting actor and additional elements to play lesser roles to lend “visual support to your design.” (Adventures in Design, pg.106)

Resources

Stepping Stones Progress

I spent some time over the weekend working on the Stepping Stones. I am ready to just piece without thinking. It never seems to work out, though. I always have to do some deciding or planning or math.

This past weekend required all three. As you might remember from my last update, I had some HSTs to make and was putting it off. I finally made them when I needed some easy piecing. I made a bunch so I would have some choice when I made a few more blocks to complete the top. After I made the HSTs and completed the leftover partial block, the question of the border came to mind.

Stepping Stones Revised

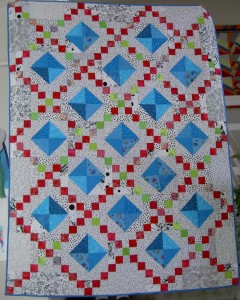
I sat down to look at the EQ plan I had and found that I hadn’t completed it. I wasn’t 100% happy with the border I designed for the original Stepping Stones quilt. It is in no way terrible, but I wanted to finish off the groups of squares (red 4 patches set in groups of four, above).

Stepping Stones, EQ version

I played around with EQ and came up with a new design. I am not sure it is the final for a couple of reasons:

  1. I don’t know that the groups of red 4 patches in the corners add anything
  2. I am not sure about the blue/green HSTs in the very corner. They add a little something, like breaking up a series of squares, but they don’t have any reference anywhere else in the quilt.
Stepping Stones #2 Border Trial

I am absolutely sure that I am happy with the red points that go into the border to finish off the scrappy lines of red that are made of HSTs throughout the quilt.

I want to get the border settled so I can start putting the whole top together via chunking. For chunking, I need to start in one of the corners.

Design Inspiration

Quilt Design Inspiration

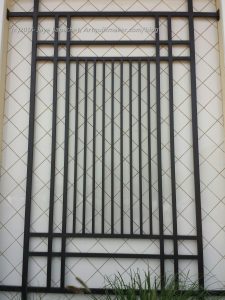
I was out walking the other day and saw the design in the picture. It caught my eye as a possible quilt design I imagine that this design would be done in layers. I was thinking of taking a charm pack and making the bottom layer. Perhaps a couple of charm packs or charm packs with additional layers.

Either I would cut the bottom and sew in the black part or make the two parts separately and applique’ the black part on top. I wouldn’t necessarily make the top layer in black. The final color would depend on the charm pack I chose. I think a solid would probably be good.

This was a good reminder for me that design inspiration can be anywhere.