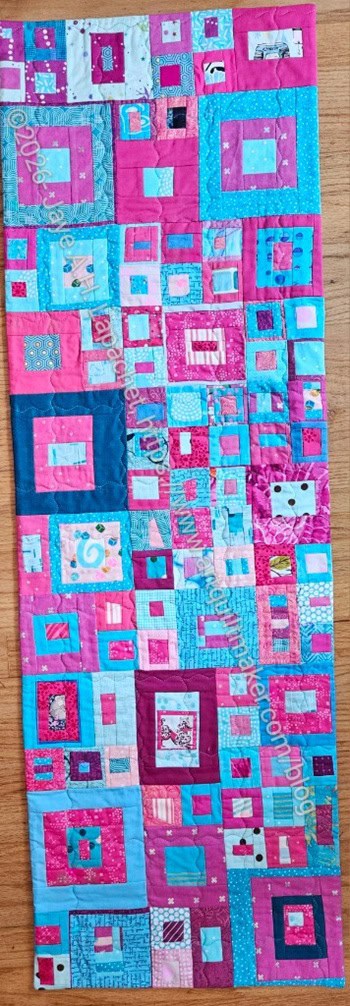
The 1-2-3 Mosaic table runner is finished. This is a project I worked on myself from start to finish. No longarming this time.
Amazing, right?
I quilted the small piece using a wave stitch, as shown, on my new machine. I have wanted that stitch for a long time and really like it. I need to ask some questions of the dealer, but it worked fine the first time out.
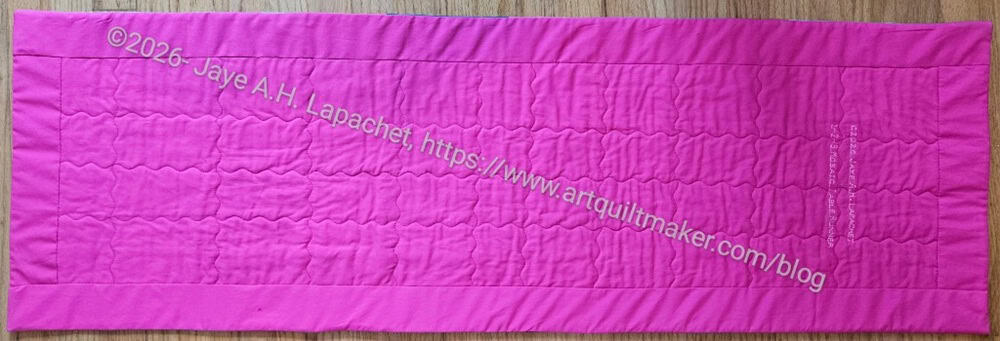
1-2-3 Mosaic back completed
The back shows the quilting really well. It is simple, but I am pleased.
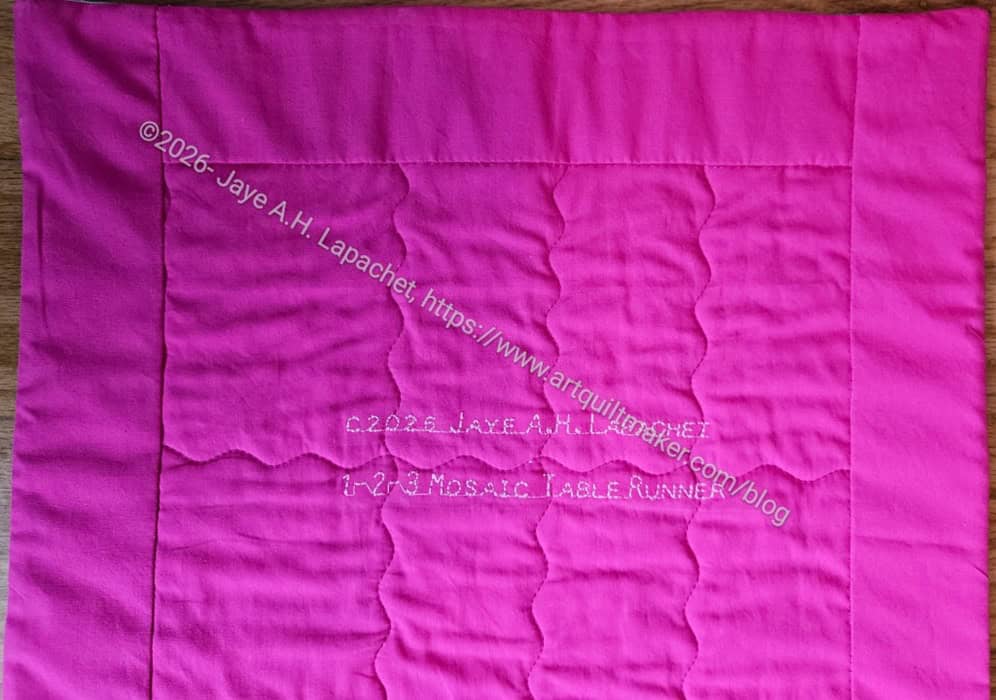
1-2-3 Mosaic back completed – label
I also used the stitch lettering to make a simple label.
All in all, finishing it myself made it a very quick project. It is sitting on my buffet now.
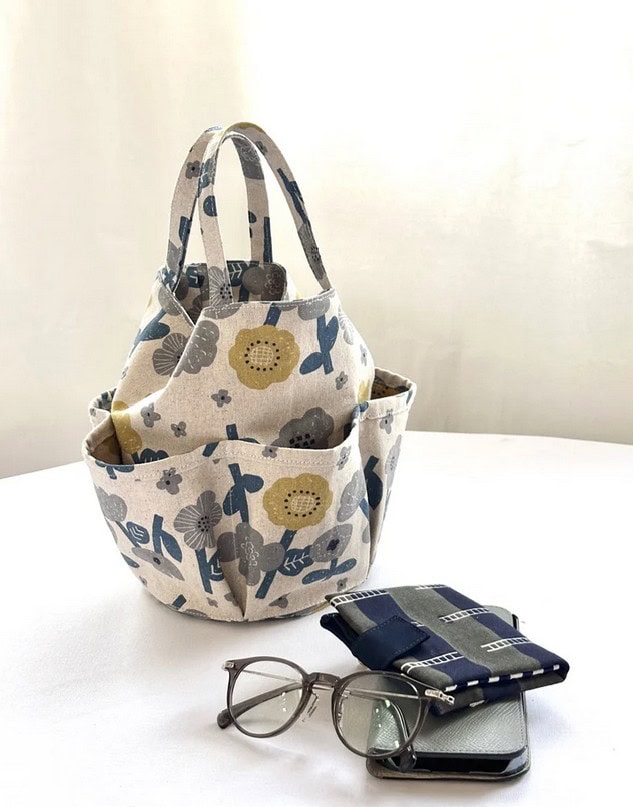
After posting about the free patterns, I started looking at the Kokka website multiple times. The site has really good bag shapes, both free and for sale. For some reason, the Round Bottom Bucket Bag got stuck in my mind. I think it is unique in that I haven’t made such a bag before. I make the Desktop Cube, which is kind of round. I can’t think of any other bags I have made that are round. I am sure the fabric also had something to do with it.
I printed the pattern and took it with me to Mary’s, but didn’t work on it. Then I took it to Sew Day and translated the metric into US customary measurements. Something seemed wrong or off to me, so I put it aside. After that I decided to make it using the metric measurements. That meant that I needed a metric rotary cutting ruler**. Do you know how hard it is to buy a metric ruler? The various sites kept insisting that US customary measurements were more usual in my location. DUH!
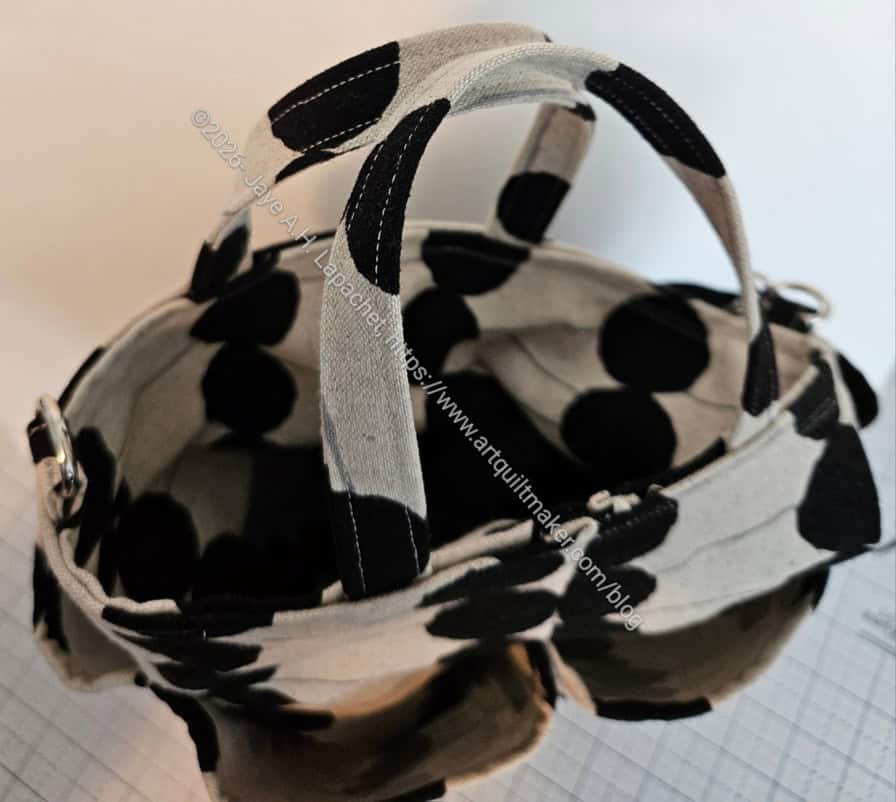
Round Bottom Bucket Bag- top
Finally, at a Sew Day with Tim and Cyndi, I cut it out. The pattern is a Japanese pattern and those patterns are much more basic than American patterns. A lot of knowledge is implied. I consulted with Tim and he said that when making the Japanese pattern he sewed he, basically, made up most of the steps. With that, I went for broke.
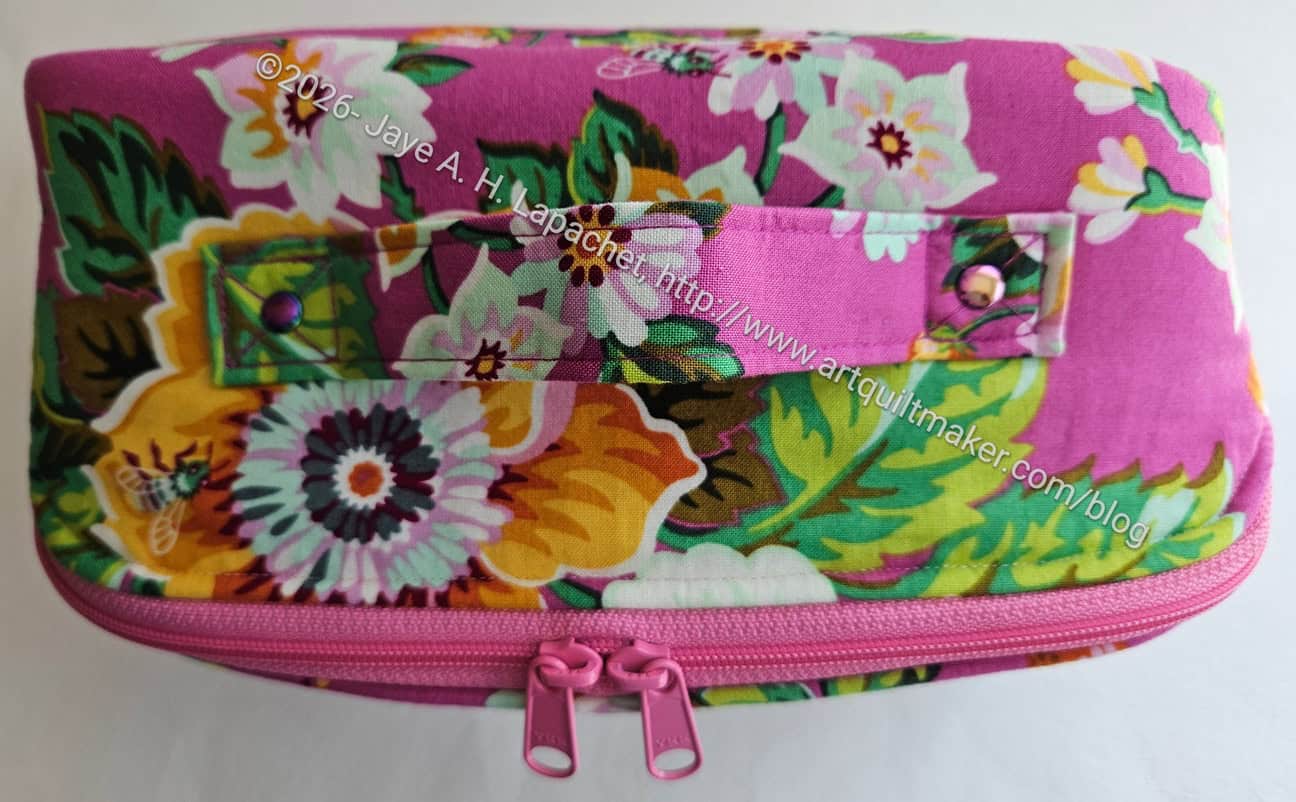
Round Bottom Bucket Bag- top, hardware
Part of going for broke meant diving down a rabbit hole of round bags to understand how they are put together. One problem I had was that most bucket bags have some sort of drawstring top. One of the things I like about the design of the Kokka bag is that it does NOT have a drawstring top.
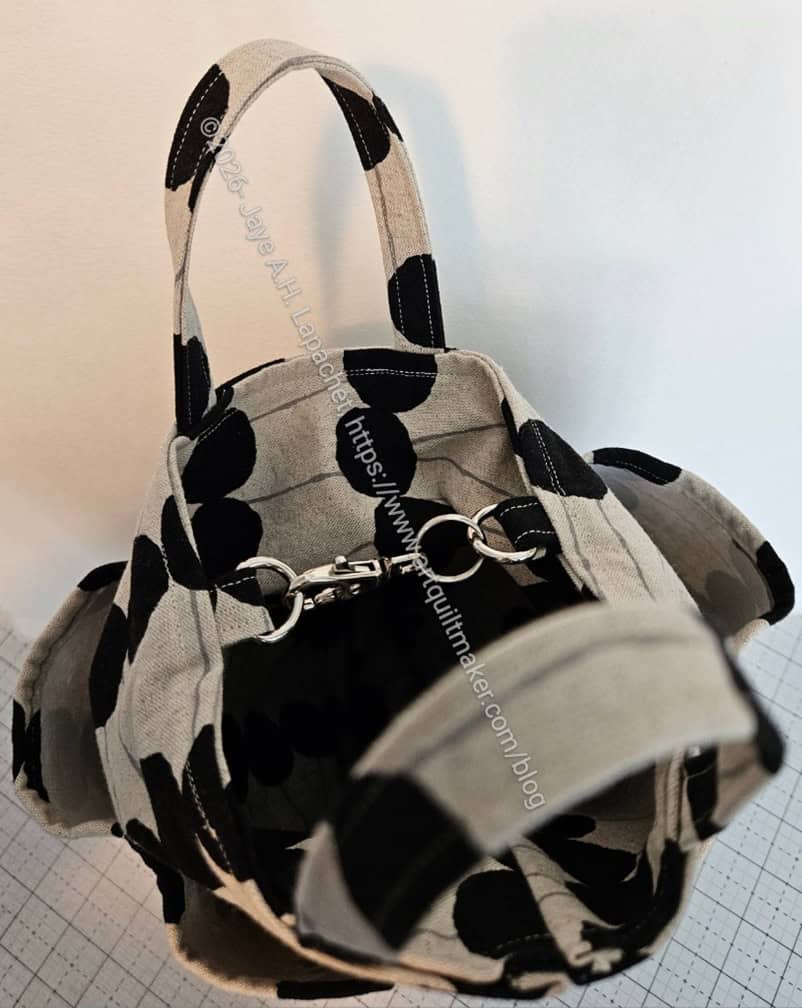
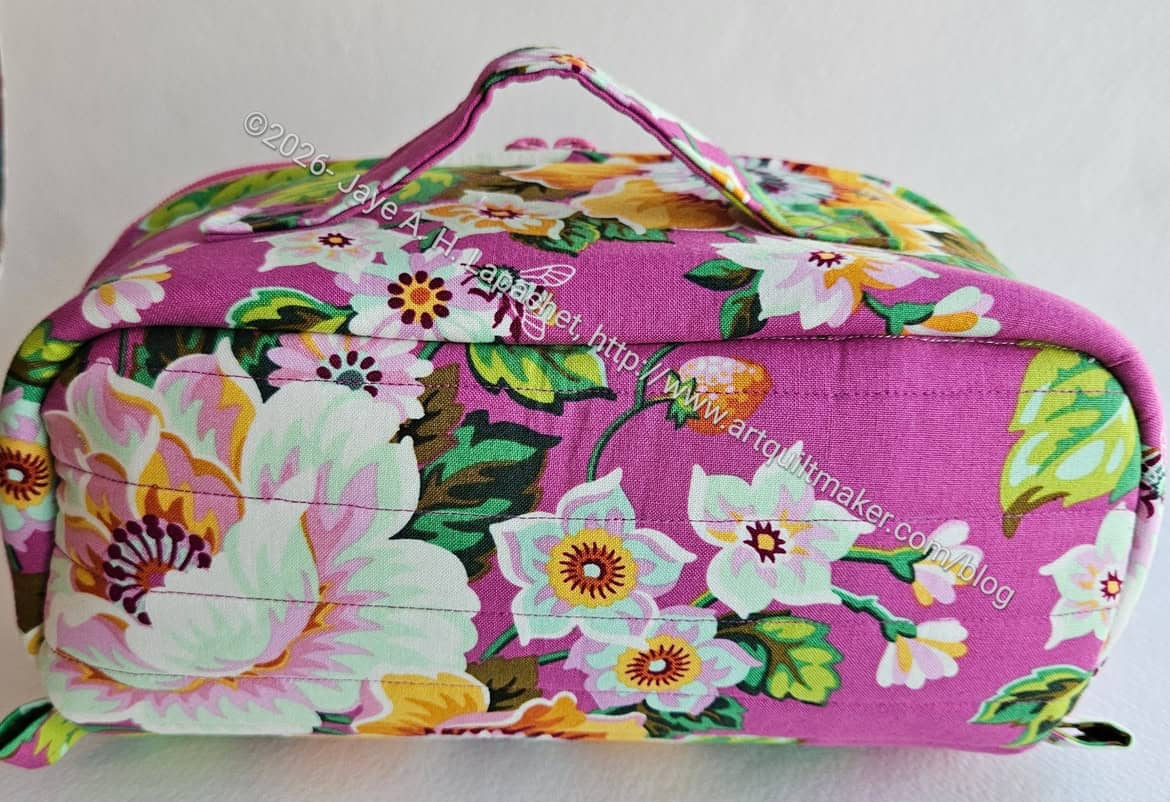
Round Bottom Bucket Bag
The bag did not come out as expected. Mine looks more like a bottle bag than a bucket bag. I guess it could be used for a picnic for a bottle (wine or water or juice) and silverware in the pockets.
The short answer is that it is still usable and I plan to try again. I emailed with the support team at Kokka and they said to convert the measurements to inches. I am a bit confused as to how that would help, but I’ll think about it.
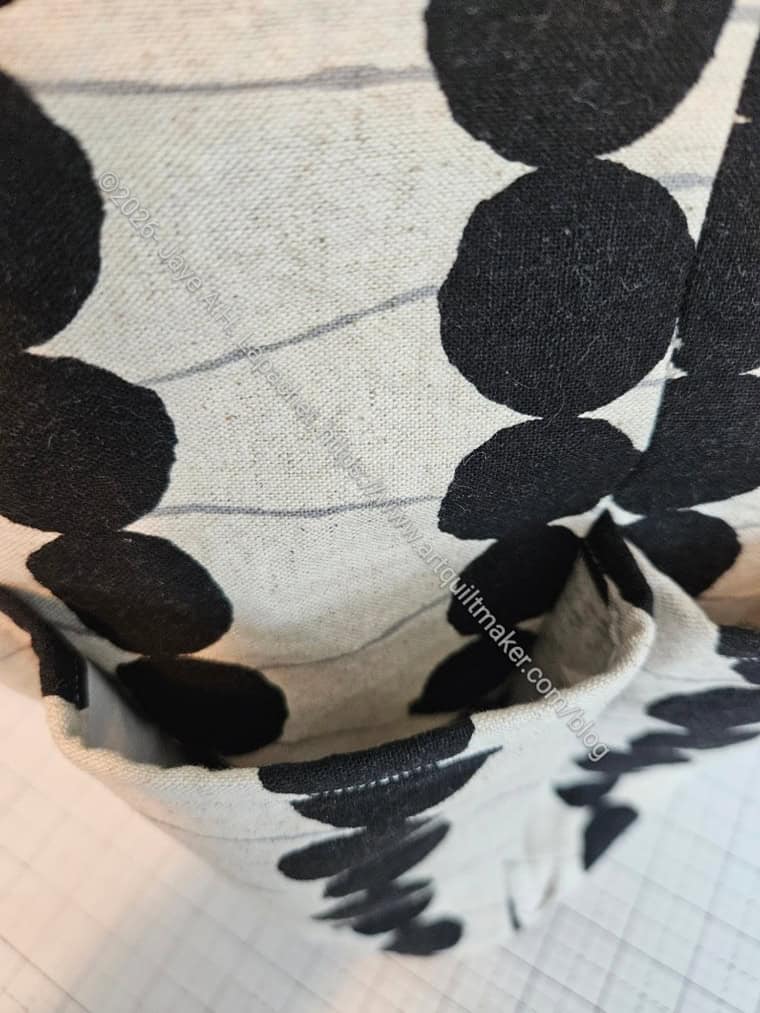
Round Bottom Bucket Bag- pockets
My current plan is 2 Pi r. That means Quilt Math. Finally, I am understanding all of those stupid 8th grade math concepts that I never understood. Let’s teach kids math by teaching them to make bags!
My plan is to create my own dimensions with what I think will make the bag come out like the Kokka was supposed to look, at least in my mind. I know how to do all the steps and can use the directions provided as a guide. I haven’t done it yet, but this the current plan.
I am giving myself permission to play a little. I don’t see the above bag as a complete fail, but it isn’t really a success either. I want to try again and see if I can make it better.
Resources/Some sites I looked at in my deep dive:
Jellyfish Report has a lot of sizes for round bags so you don’t have to do math.
Circle bag tutorial – this breezy looking tutorial shows you how to make a bag (handbag) in the shape of a circle.
Drafting a rounded rectangular base comment/tip – scroll down to find this tip. It’s not just all math; pictures are included to give you a good idea of what you are doing.
Drafting Manual: How to Draft Circular Bags. If you want to skip all the nonsense, this for-purchase manual ($10) tells you everything you need to know about drafting round bags. According to the site “When you purchase this interactive pdf, you will receive all of the tutorials and information needed to draft two styles of bag to your custom size and preferences.”
The Hexi Tote Project has the right exterior height compared to the height of the pockets.
How to sew a rounded bottom post – provides tips and tricks for sewing a circle.
The lined round basket project was the right ‘fatness’ for the bag I am envisioning. I thought I could use the same ratios.
Round Bag Calculator post – the site provides a list of sizes of circles and how big you would need to make the associated rectangle.
2 Pi R
9″ circle base, 10.5″ x desired height rectangle, Project example
**Obviously, you should shop at local quilt shops and small businesses. However, if you are too busy or can’t find what you need there, I use Amazon affiliate links and may be paid for your purchase of an item when you click on an item’s link in my post. There is no additional cost to you for clicking or purchasing items I recommend. I appreciate your clicks and purchases as it helps support this website.
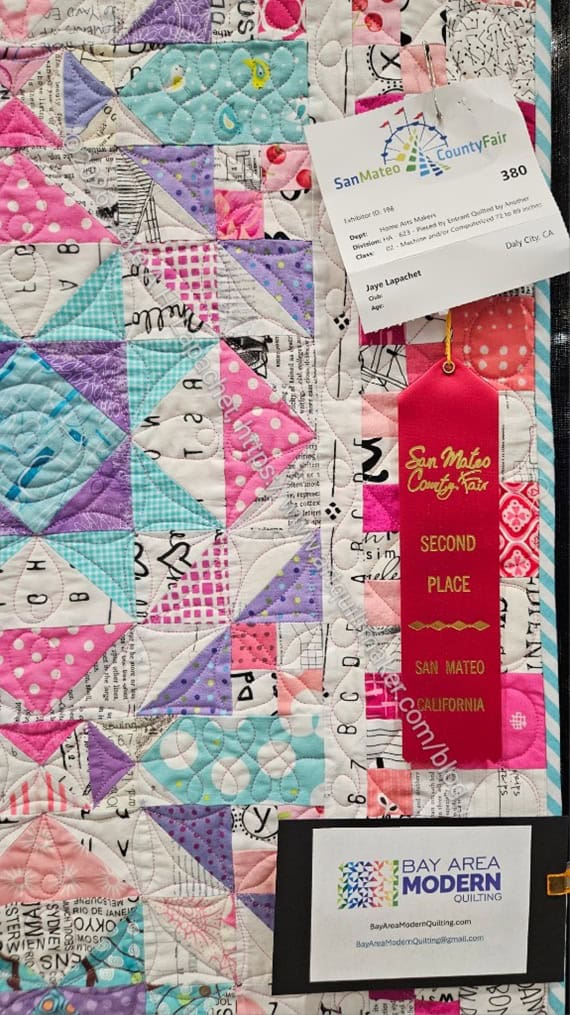
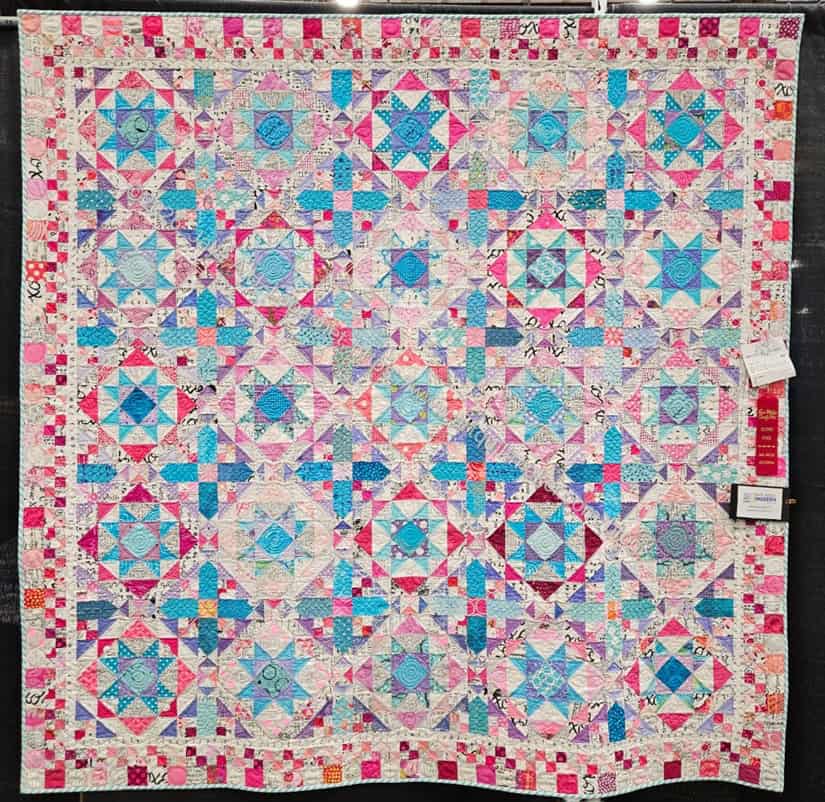
I finished Old Town a few months ago, but never posted about it. I think my quilt holders have been busy or out of town. After winning Second place at the Fair, I realized it and knew I needed to get it done.
Old Town with Ribbon
Old Town is finished! Yay! LOL!
Old Town is the 2024 Bonnie Hunter Mystery Quilt. I played along and sewed many of the blocks together at the BAM Retreat, then finished it up at home.
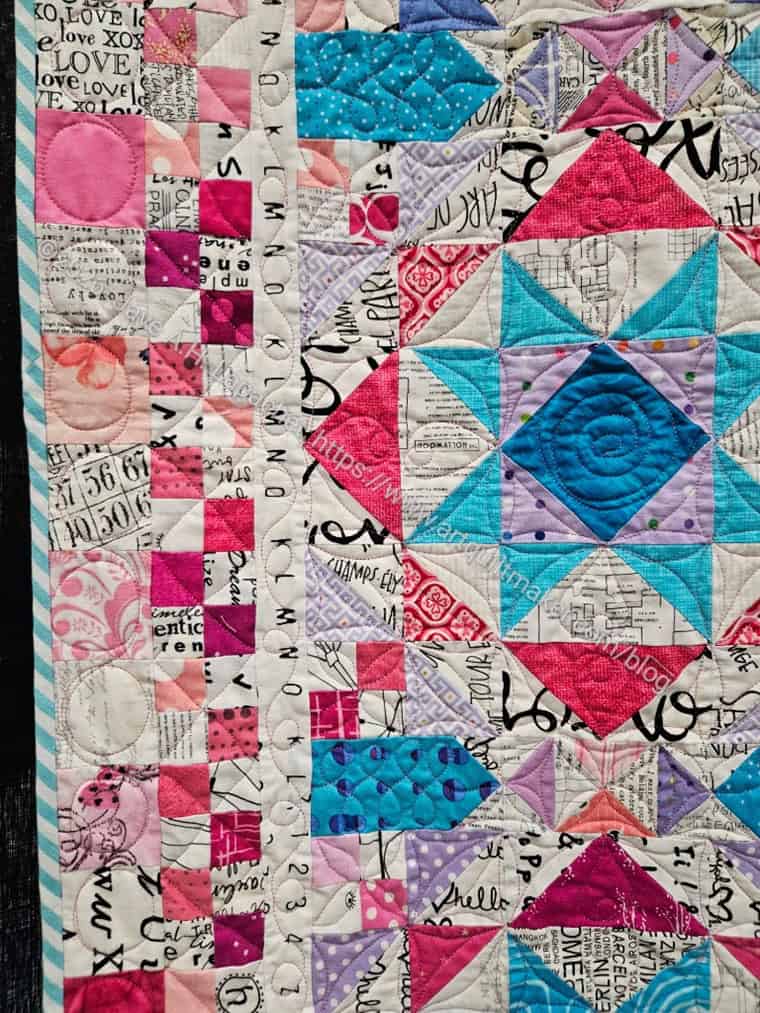
Old Town detail
Colleen quilted it for me and here we are. I was really pleased to get second place since the category in which I entered it (quilted by another) is packed. This was a much easier quilt to quilt than Patchwork Palooza since once I decided how to quilt a block, I just had Colleen quilt all the blocks the same.
It is a little large, so my quilt holder had a tough time. I hope to remember to get some guild members to help me get a better photo.
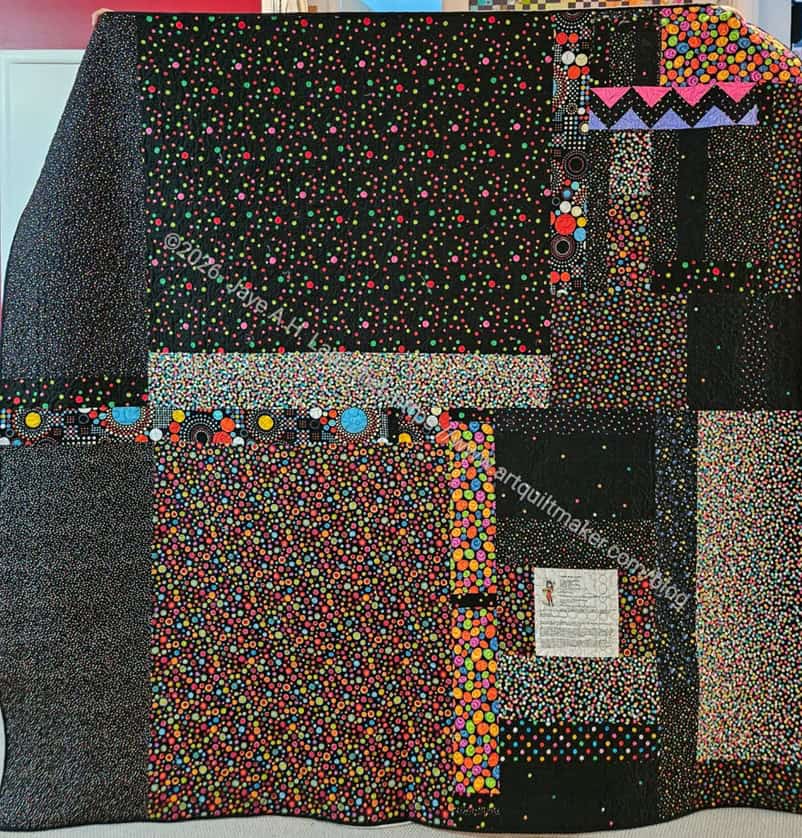
Lupine back – finished
The poor quilt has been languishing between travel and other more urgent projects. In the middle of all the chaos I finally was able to sew the binding down.
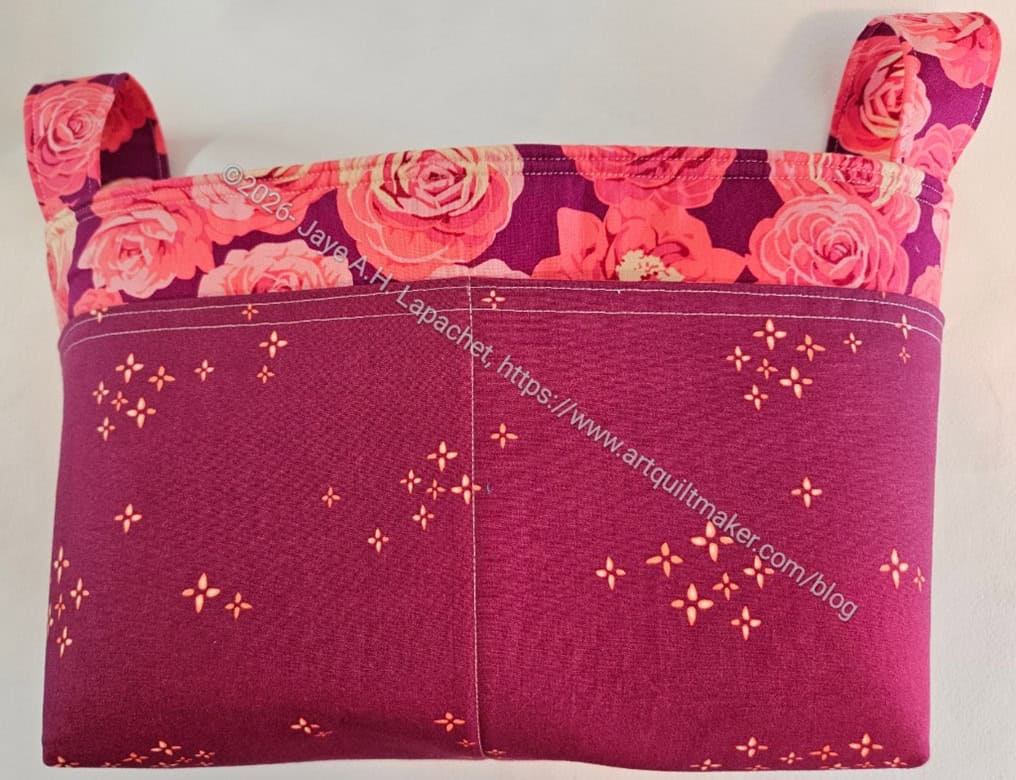
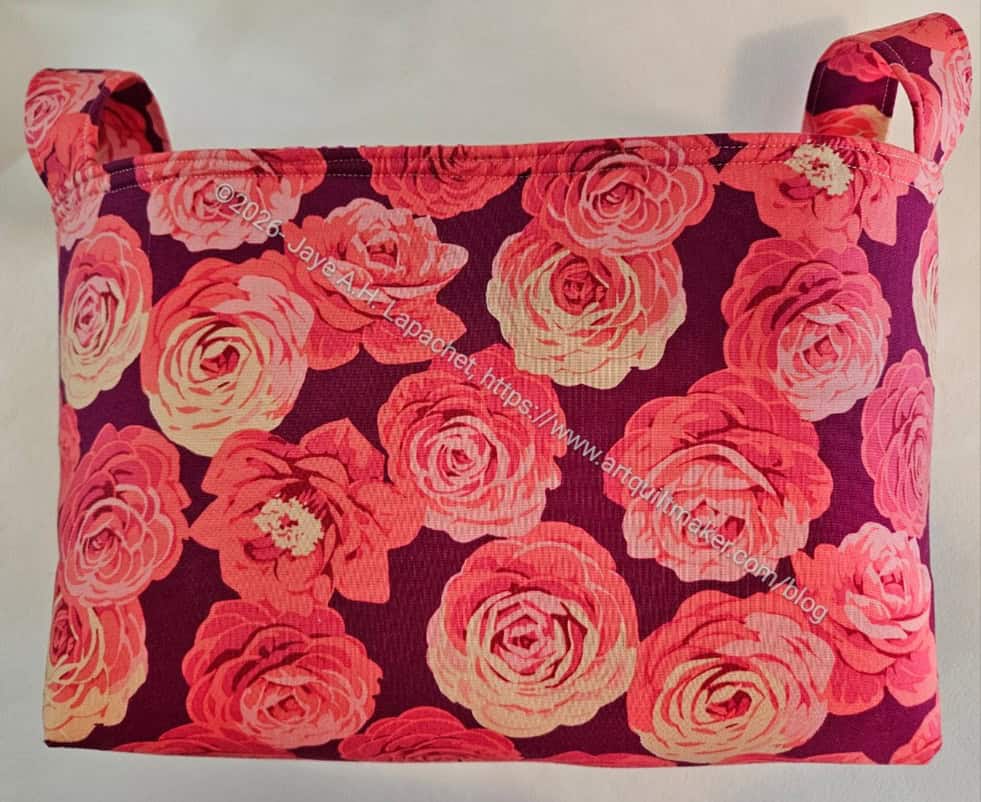
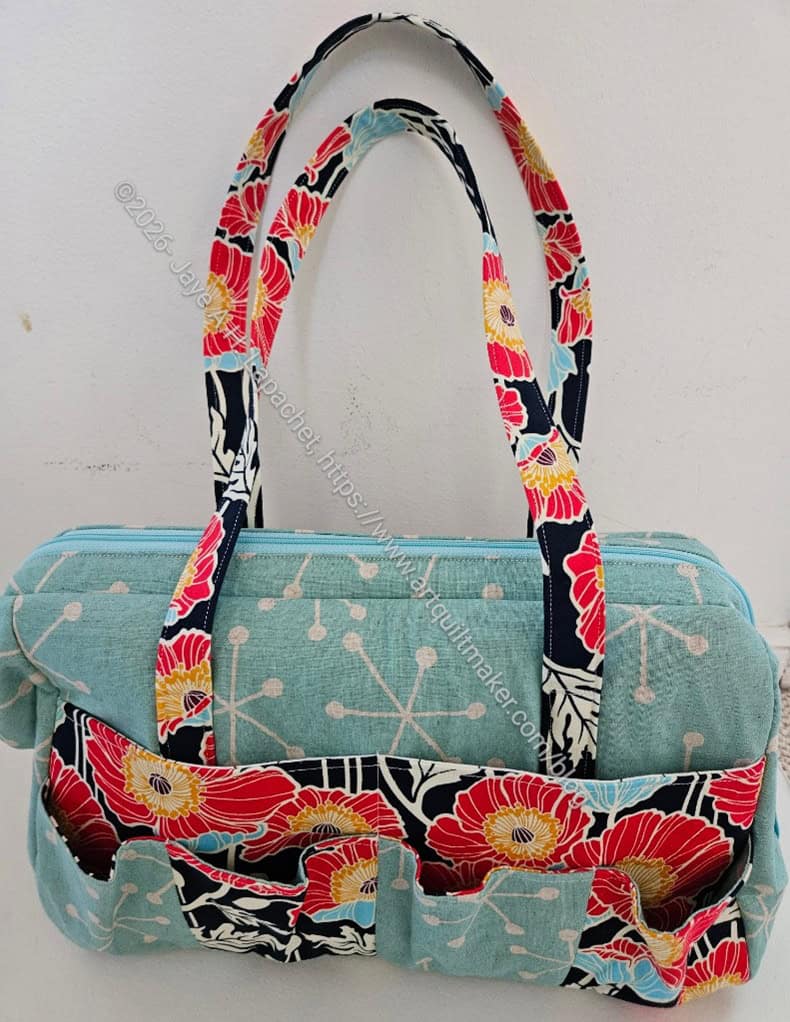
Mary and I talked about this pattern when I visited her. She had the pattern it was on her list to make. I saw it at Picking Daisies, as mentioned, and decided to buy it. Noodlehead patterns are pretty good and I was interested to see how the divided lining was created.
Continuing with the Picking Daisies theme, I used the roses fabric I bought during my visit. The front pocket fabric is an Alison Glass, I think. It was in my fabric closet.
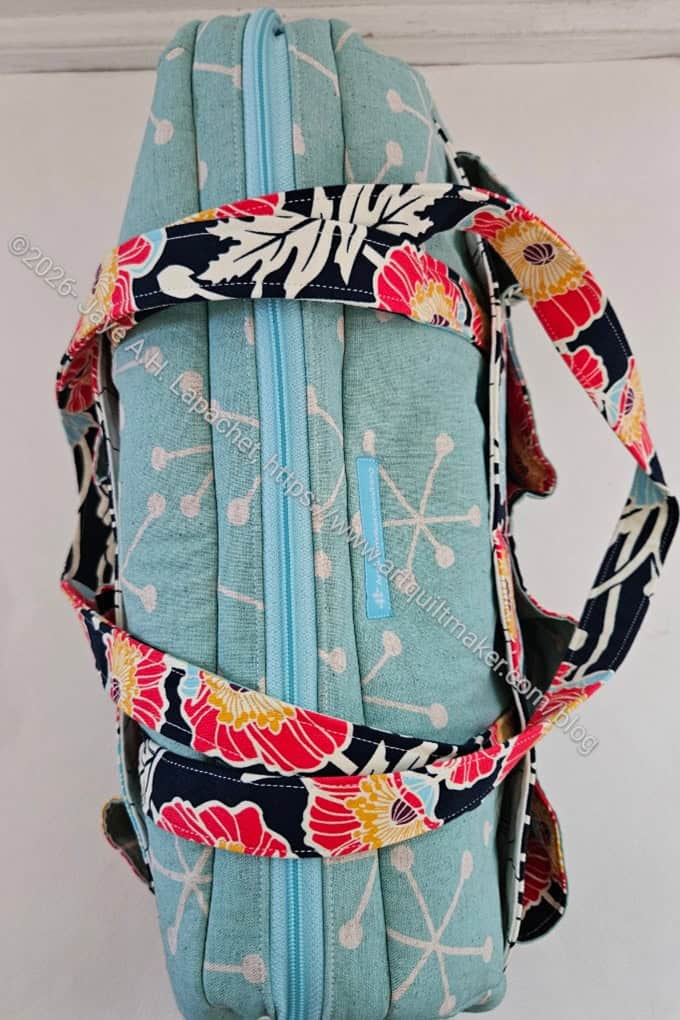
Divided Basket – back
I was surprised at how large this basket is. I did look at the dimensions, but I can never visualize them until I see the actual bag made. It would be good temporary storage for a bag project.
I thought, after I made it that I could place a pocket on the back as well for even more storage.
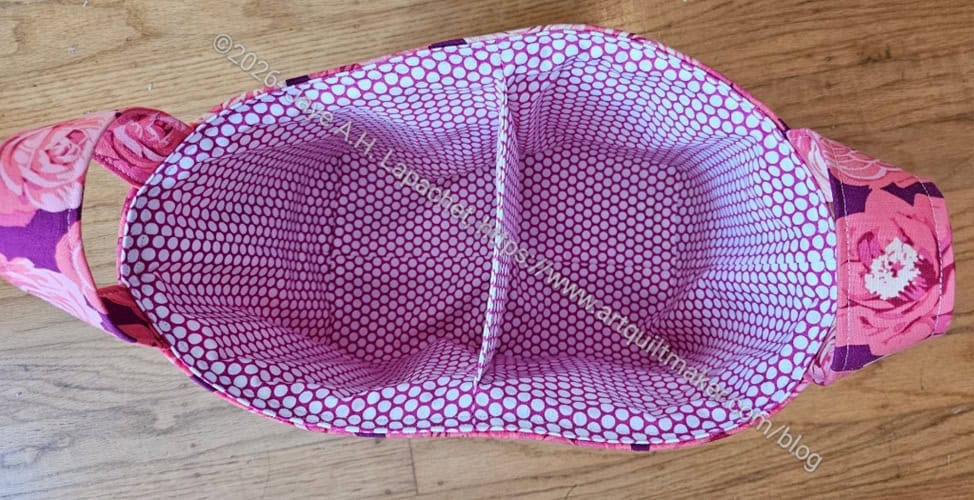
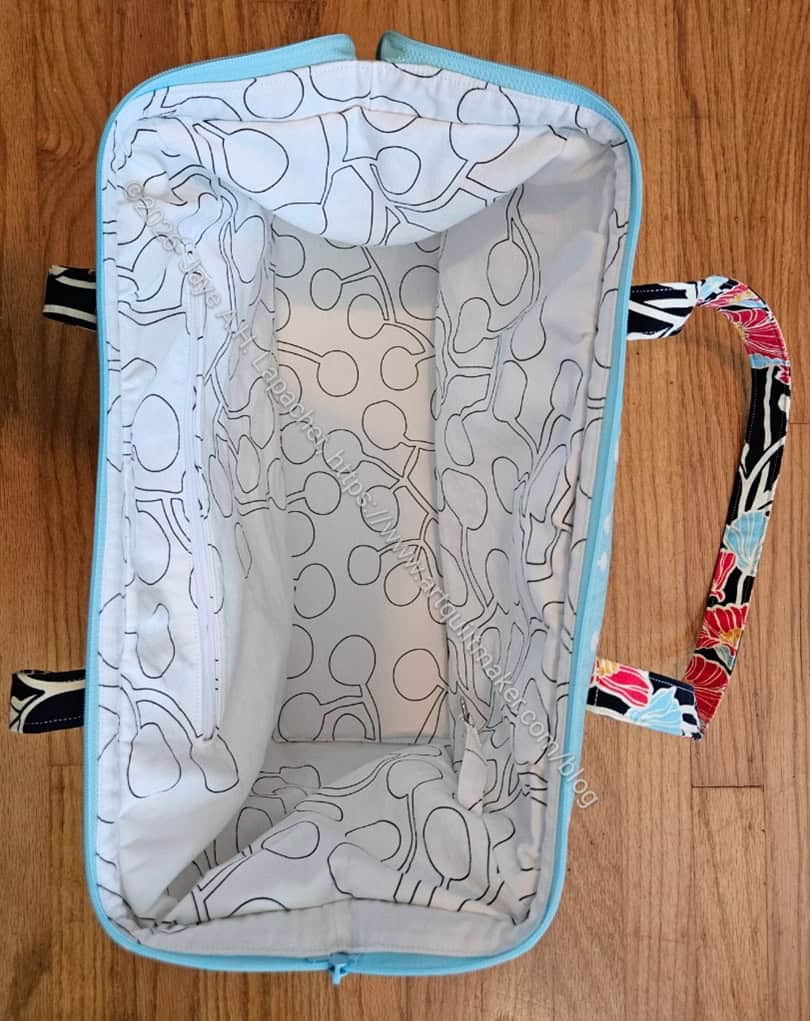
Divided Basket – interior
I was pleased to learn the technique for a divider.
I sewed the whole thing together, then realized I really should have anchored the lining, so I took the basket apart and anchored the lining. I was much happier after I did that.
I sent the basket off to its new home and hope the recipient likes it.
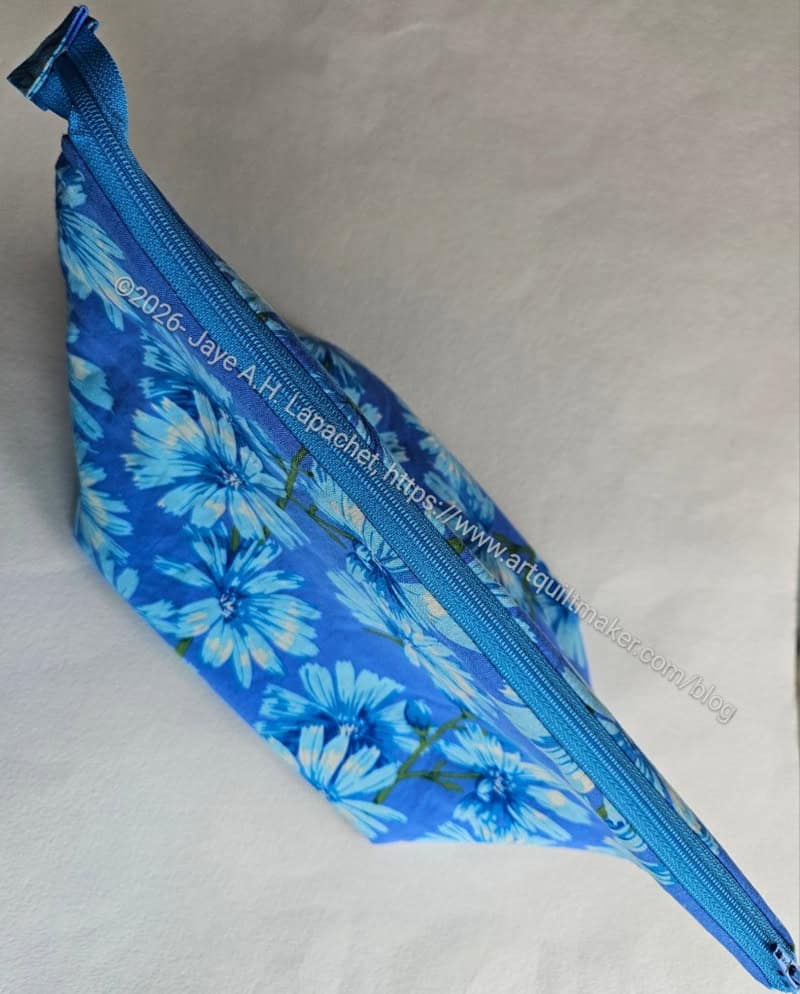
I spent some time making some Open Wide pouches for the wife of a friend of my Mom’s. He drove Mom and stepdad to an appointment on his wife’s birthday. I thought a couple of pouches would show appreciation.
I used the new Martha Negley fabric I bought at Picking Daisies a few weeks ago.
Large Open Wide for Mom’s friend
The one thing I did was delve into math again. The pattern tells you to line up the corners, sew and then cut off the excess. I get better results by cutting out a box and then lining up the edges. DH reminded me of the Pythagorean theorem (!!!!). It is one of those with a lot of letters that made me crazy as an eighth grader. More detail on that later.
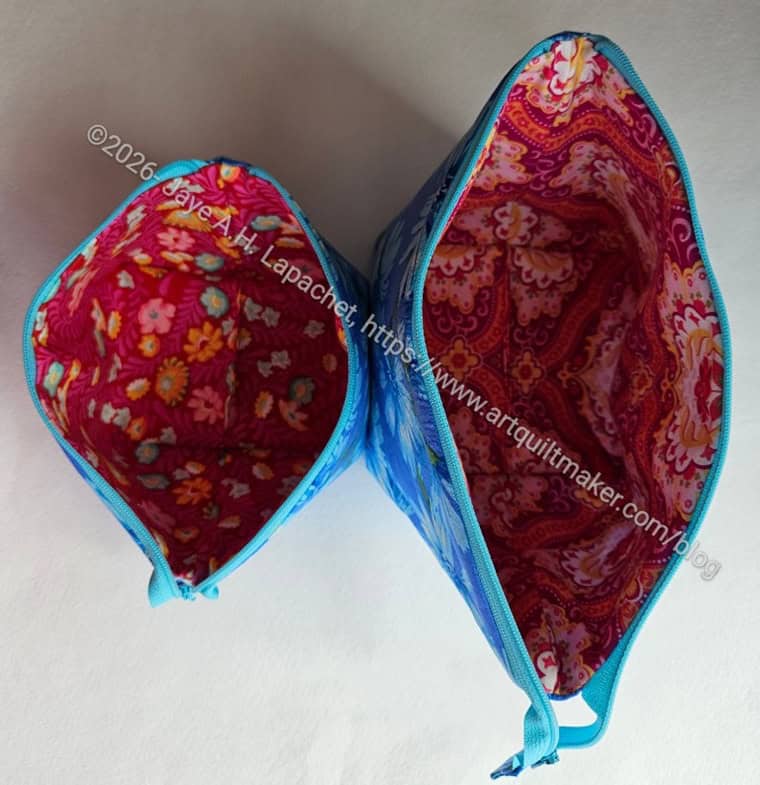
Small, medium Open Wide pouches-open
Needless to say, I used this theorem and my calculator to figure out a box size for these pouches. Closed they look a little weird, but open they look ok. The open wide aspect is so useful.
I’ll have to work on figuring out the best size to make these look ok.
Large Open Wide- open
I have to say that exercise was interesting. I showed DH how a pouch goes together every step during the process and he was really interested. I think he thought the practical use of the Pythagorean theorem was fascinating. I have to say that learning the practical use of one of those stupid math concepts was a revelation.
The other thing I noticed was a lot of similarities in the construction of this pouch and the Retreat Pouch, also free, from Emmaline.
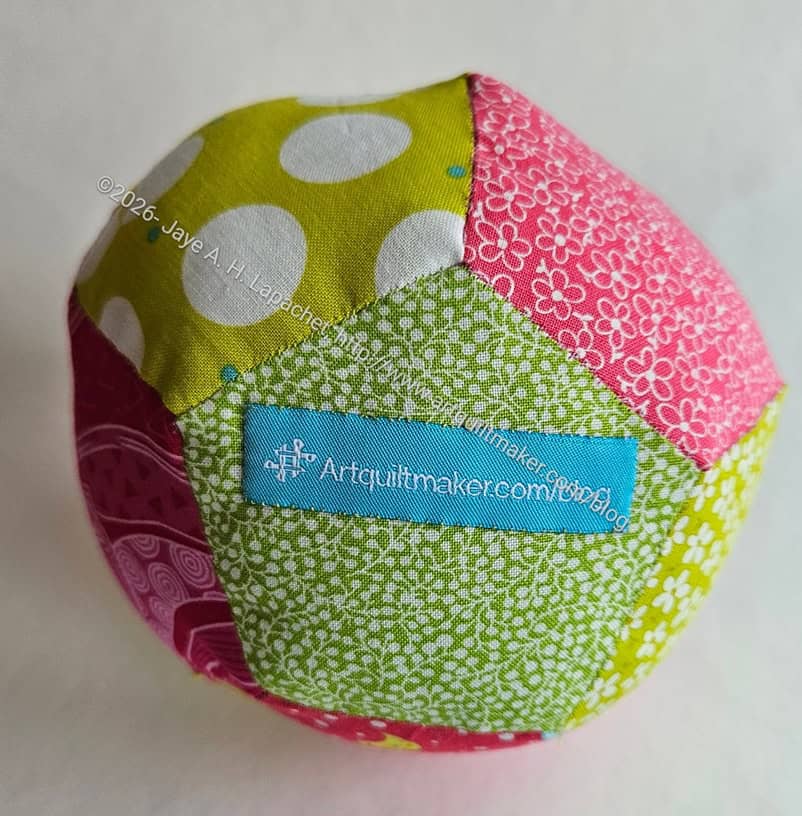
I finished another EPP ball. It wasn’t black and white, but the next one will be. 😉
I had fun using chartreuse and pinks. Some of the pinks are pinky-reds, which I like. I think the chartreuse and pink go together very well. The combination isn’t designed for a boy or a girl and could be used for both.
EPP Ball #13
EPP Ball #13
Do you see a lot of pink in my work lately? I am leaning into pink lately. I am not fighting against the urge; I am just going with it. I don’t know what it means or how long it will last, so buckle up.
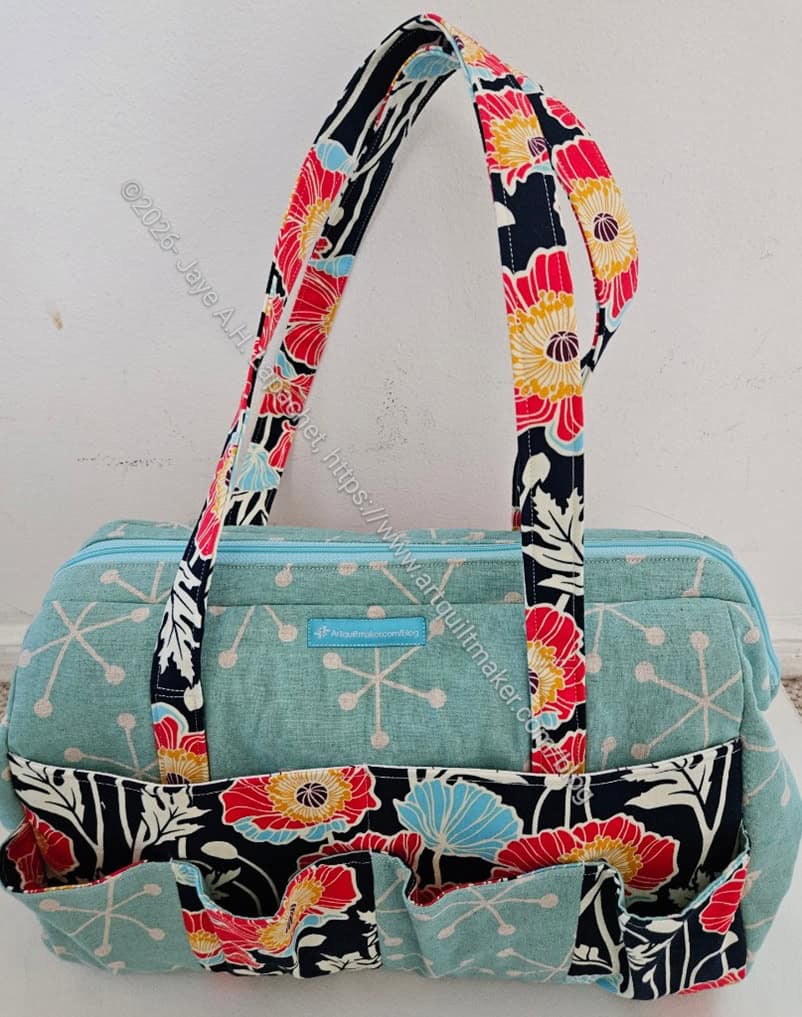
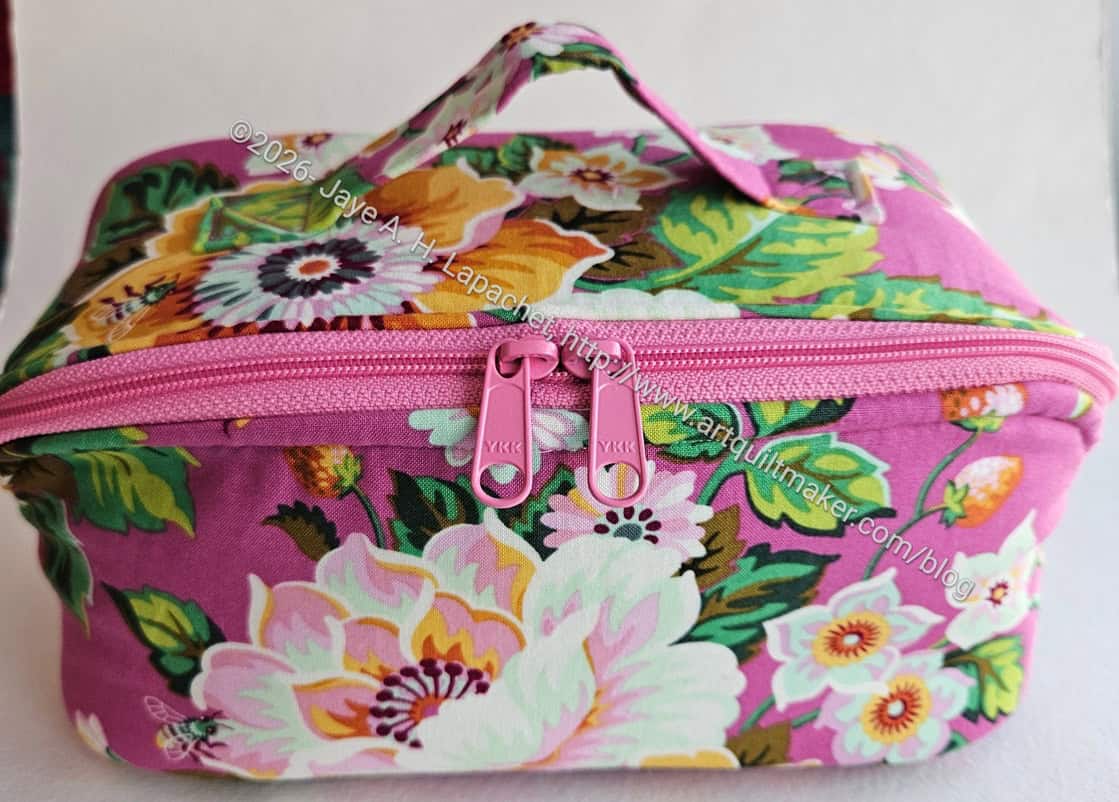
Finishing the Sheffield took longer than I expected. I thought I was done, then I had to make the false bottom, and add a label and…
No problem. I really enjoyed finishing it. REALLY! I realized that I have been anxious to get through the final assembly of recent bags, because that was the time when I fought with my machine. I didn’t even realize I was fighting with my machine until I used the new machine to put this bag together.
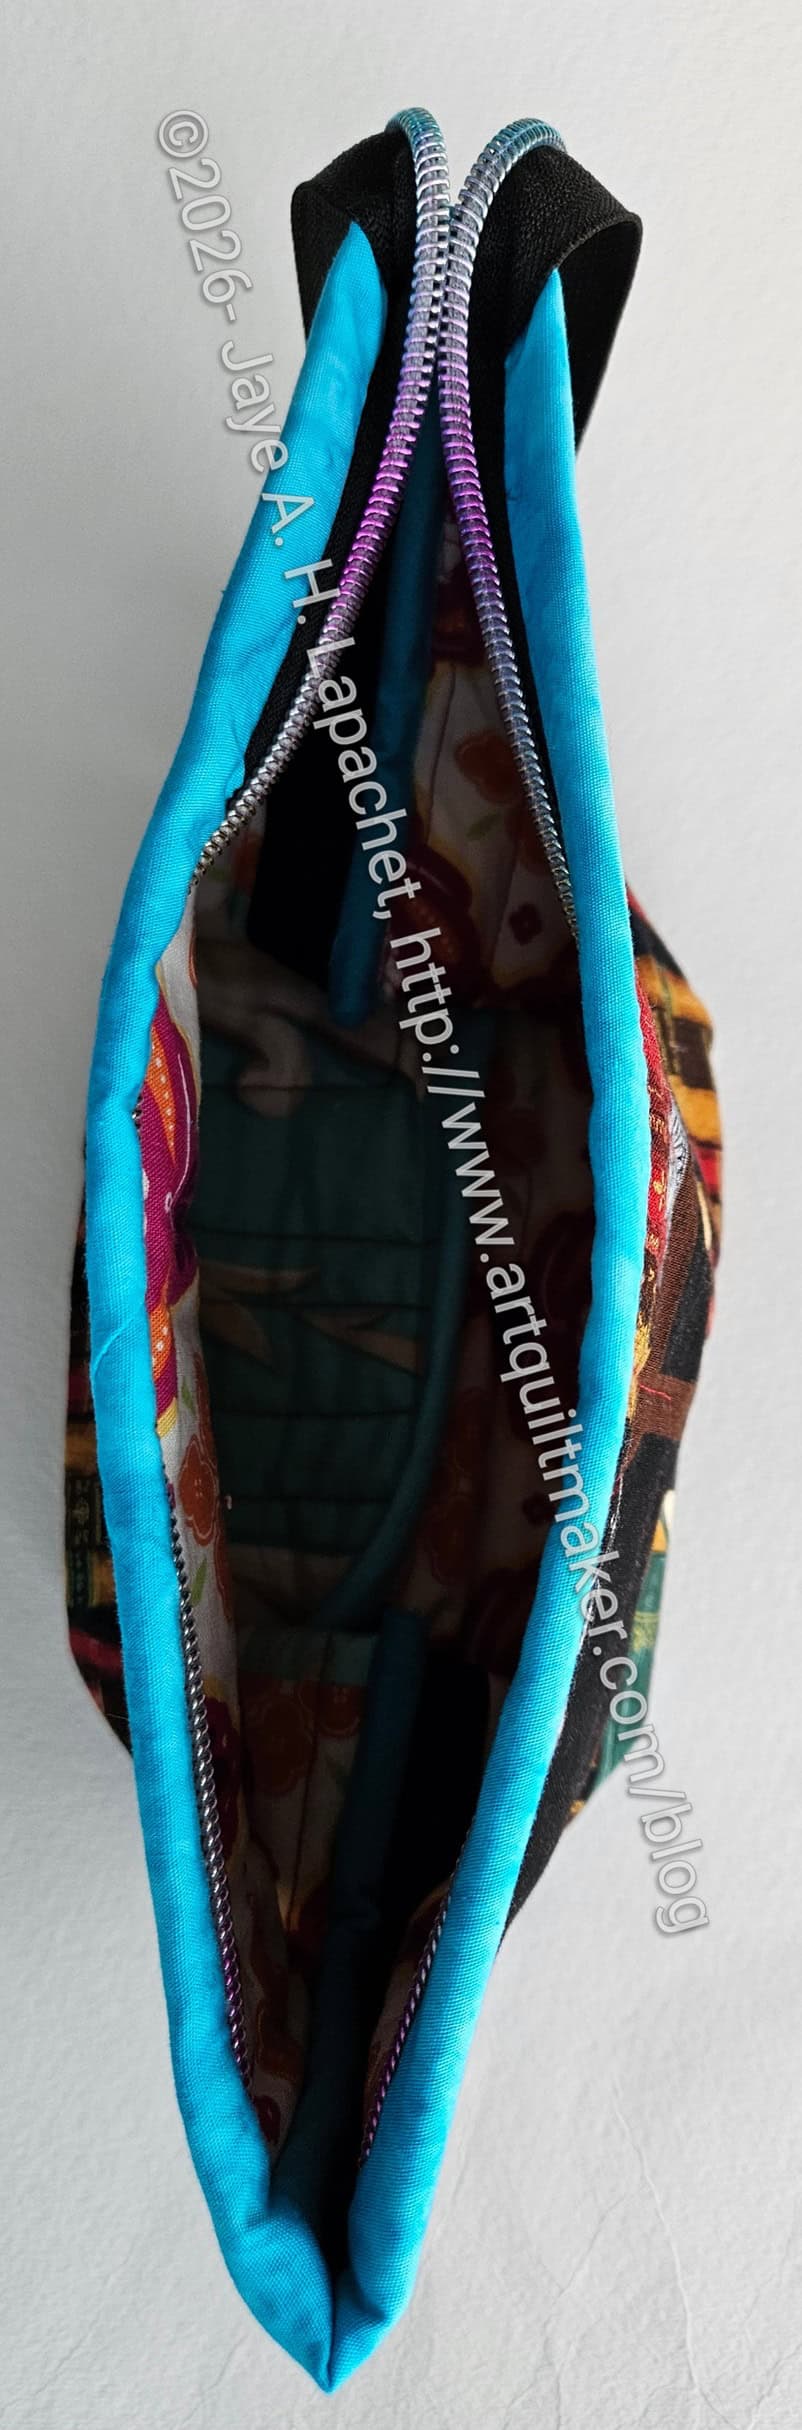
Sheffield: open wide design
The Sheffield has been on my list to make for a long time. Since I made Gerre hers, I wanted to make one for myself. The open wide design of this bag is very appealing.
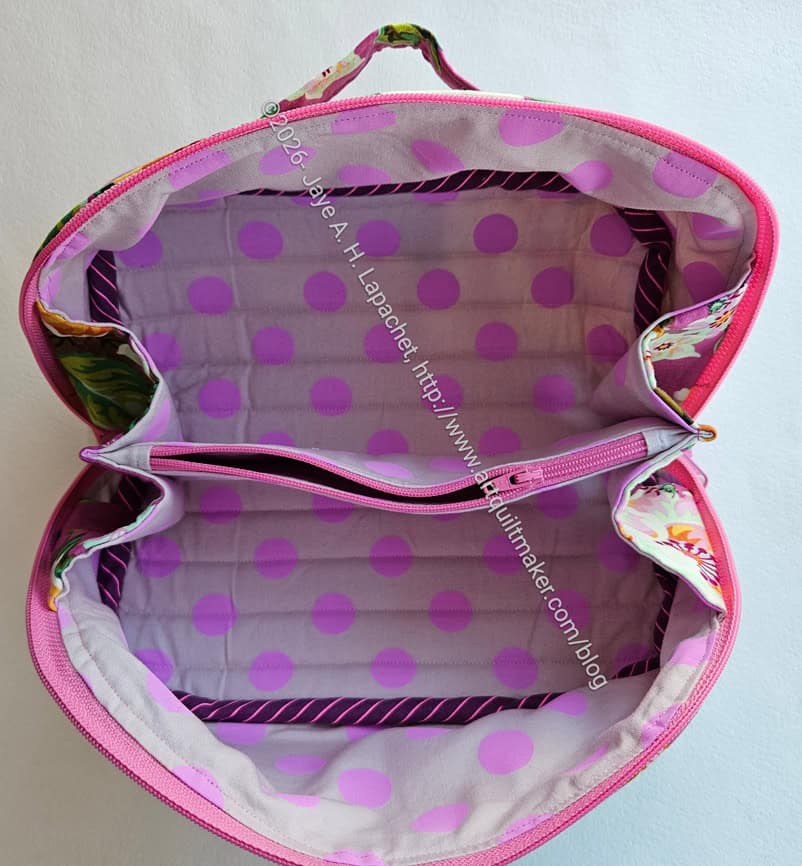
The interior is made from an IKEA lightweight canvas I picked up from the free table. My lining is a little saggy baggy, despite the larger seam allowance. The lining will not fly out since I used my hard won knowledge (thanks, Lynette) of anchoring the lining to the exterior. One issue I had is that the pattern pieces for this bag are not square. They are trapezoids. I think something might have happened, because the pieces are trapezoids, when I was sewing the lining together that made them larger than I would have liked. I don’t know.
Finished: Sheffield back
I finished most of the exterior pieces while visiting MaryM.
I did the final assembly at home after adding a leash and an interior zipper pocket. I wanted to add a slip pocket,but forgot in my excitement.
The handles on this bag are larger than the those indicated in the pattern. Sara has makers position the handles a half inch up from the bottom. This is so the handles clear the seam allowance. Beyond reducing bulk, I am not sure why. I would like to say I will try putting the handles in the bottom seam on my next one, but I am not sure I will make another one.
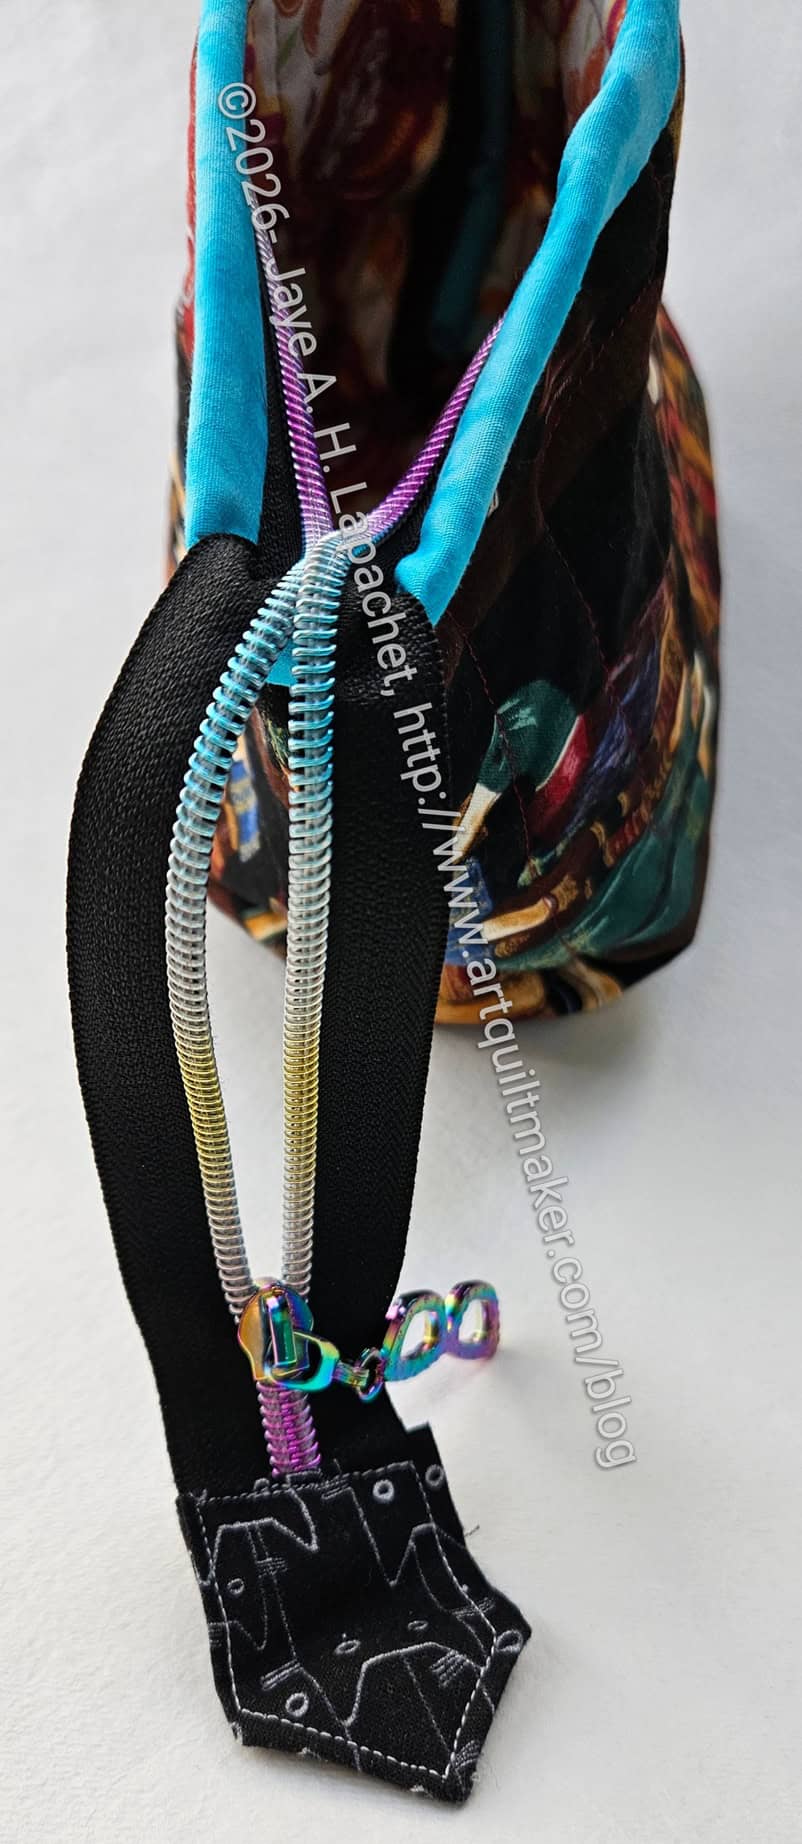
Finished: Sheffield top
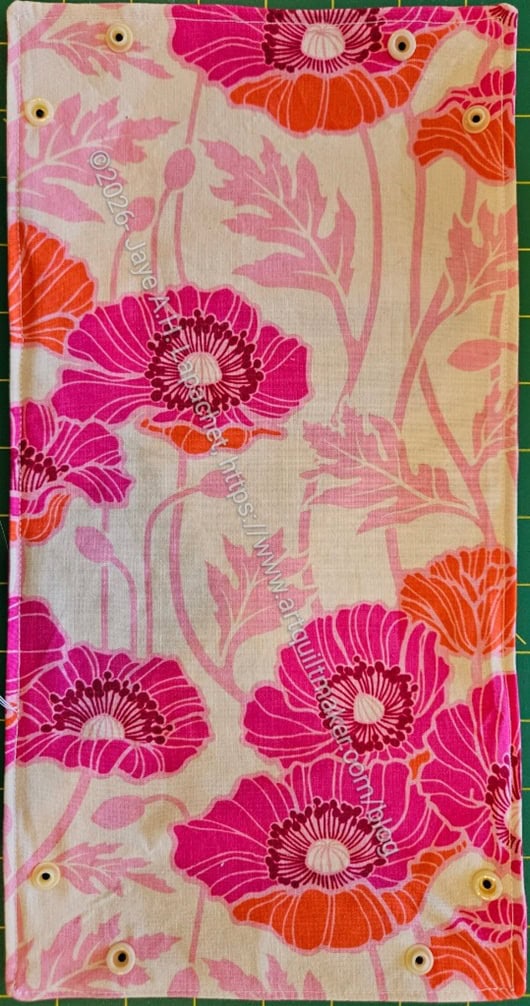
I think I could have put the poppy fabric on the frame casing. I think it would have added a finish or border to the top of the bag.
Cutting for the frame pocket was confusing. I have to look at the directions again to see where the cutting went wrong. I wanted to have the exterior match the exterior and same for the interior. I ended up with extra lining pieces.
For now I am just excited about the bag. I don’t know for sure how I iwll use it. I am thinking about putting all of my metal tools in in: KAMsnaps, Snap Setter, awl, hammer, etc. If there is space, I could add in webbing as well.
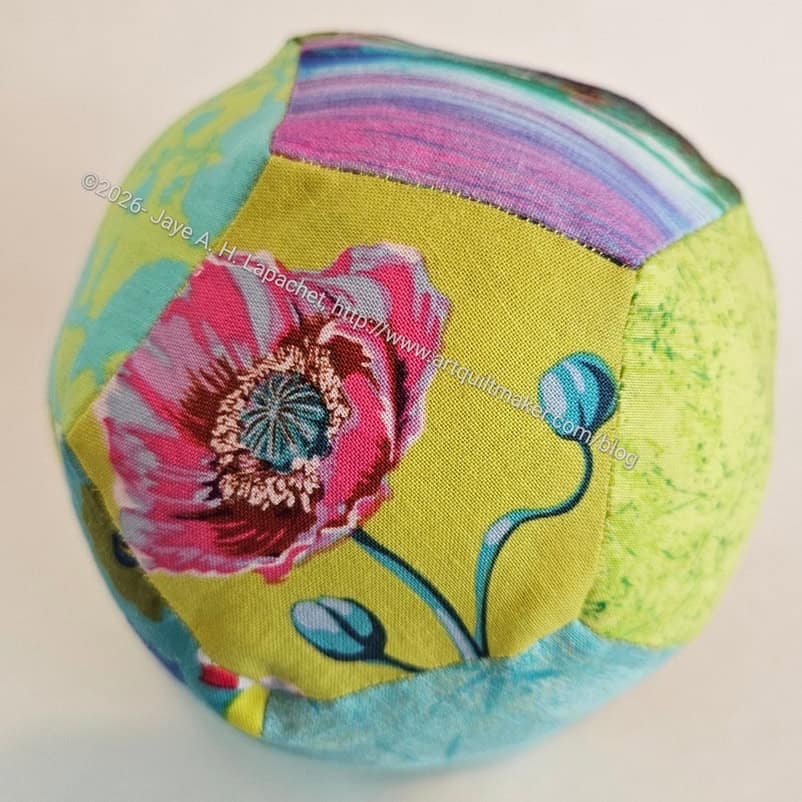
I finally finished this green EPP ball, which had needed stuffing for quite awhile. I love these balls so much!
I wasn’t sure about the green, but made it because I hadn’t made a green one and had bins of green out for the Green Enigma. Seemed like a good plan.
Also, I want there to be some choice in my friend’s store. As mentioned, I have been leaning into pink lately and I know not everyone likes pink.
EPP Ball #12
I also think green is good for boys, though I know I am encouraging stereotyping. I did add a flower to encourage whoever gets this to have a little softness.
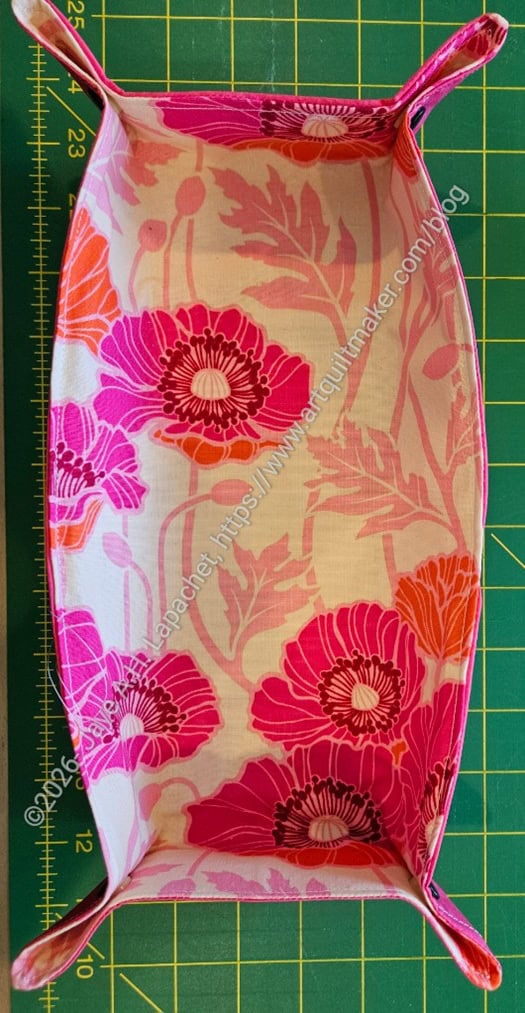
One of the first projects I made on my vacation was another snap tray to use while sewing on the go.
My idea was to put the small Snap tray given to me by Lynette in a larger rectangular Snap Tray and use the leftover portion for schnibbles. I didn’t take a photo of it in use, but it worked really well! As long as I put my tools back in the smaller tray, I was able to find them easily. They also did not roll away or fall off the table while I was sewing.
I found that flat things like packs of hand sewing needles and post-its fit well between the two sides of the trays (bottom of photo).
If you want to make one of these, see the tutorial.
Pink Poppy Snap Tray flat
I chose cream snaps for the interior, mostly because I didn’t have enough of the pink snaps left.
Pink Poppy Snap Tray finished
I like these trays and think they are great for organizing small items.
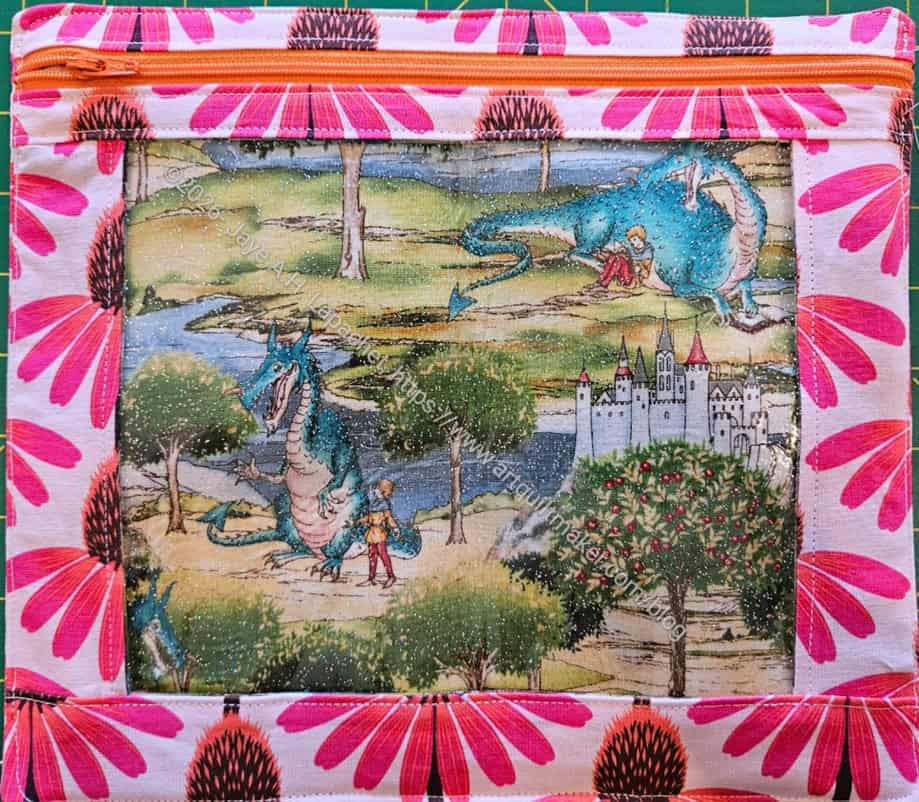
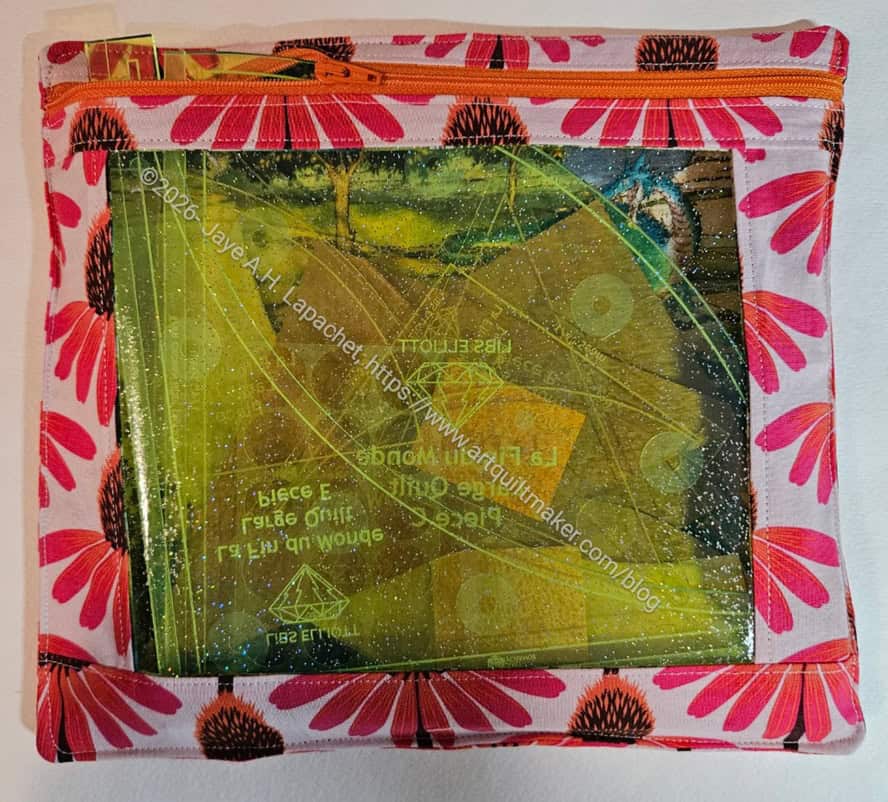
One of the first projects I finished on my vacation was an I Spy pouch. I wanted to make one for the Chaos templates. There are a lot of them and I want them to be corralled.
The largest size of the I Spy pouch wasn’t large enough for the templates, so I decided to make a larger one.
I wanted to make the new pouch 12×12 inches-ish. I got confused using Mary’s ruler and the pouch ended up being about 10×12 inches.
Fairytale I Spy with templates
When I got home I found that the templates all fit, but the I Spy pouches are pretty flat, at least this one is, so the zipper doesn’t quite close. If I had made it with SF101 instead of the Sewfisive foam from Sewfisticated, it probably would have worked perfectly. I love that foam so much, though!
That fairytale fabric was in my pile of backing fabric. I have a few pieces of novelty fabric that have been hanging around for awhile. I thought about donating it, but decided to use it here. It’s fun and provides a good name for yet another I Spy!
As it is, it will do for now. I’ll make another larger one soon and use this one for something else.
I finished the Book Pouch with only a little bit of fiddling. It has already arrived at its new home. I received a lot of nice compliments.
As mentioned, I used the Bristol Pouch pattern by Center Street Quilts as a guide. I am pleased that I was able to use more of the quilted book fabric. There is less of it for me to move around my workroom.
Book Pouch -open
I didn’t focus much on the other fabrics. The lining was the mish mash I used on the table leaf covers. I pulled from scraps and bits I had laying around to finish the pouch.
I didn’t just grab anything; I tried to find a binding that looked cheerful, but also went with the other fabrics. Brown and turquoise go together so I chose a turquoise binding.
Zipper tab
The zipper was also a leftover. The tail is a bit long, but still works. I was pleased that the zipper tab technique I found on Instagram worked pretty well. I had to practice a little trial and error, but it worked in the end.
I find out interesting things on Instagram, but some of the videos are too quick and they are hard to follow. This test worked out.
I found a fun zipper pull in the shape of a pair of glasses that I added.
I finished and sent off this latest Enigma to friend who helped me with a project. It matches the Multi-Pocket Organizer that I gave to her last year.
Nykky’s Rose Enigma-top, open
Like the Green Enigma, I struggled with this Enigma. Many things went wrong and I felt like this project took longer than it should have. Still, I think it turned out well and I am pleased I was able to send it off.
The Tula Pink dots look so great on the inside. This line had some challenging colorways, but the pinky-purple is a favorite of mine.
It also lightens up the inside so it easy to find things.
Nykky’s Rose Enigma-back
I fussy cut various parts a little bit so the roses would be highlighted on the back.
The rose pink of the background looks very cheerful. The shapes and shading of the flowers are nice as well.
Nykky’s Enigma-riveted
This is one of the bags that I riveted. Riveting the handles adds to the strength of the bag.
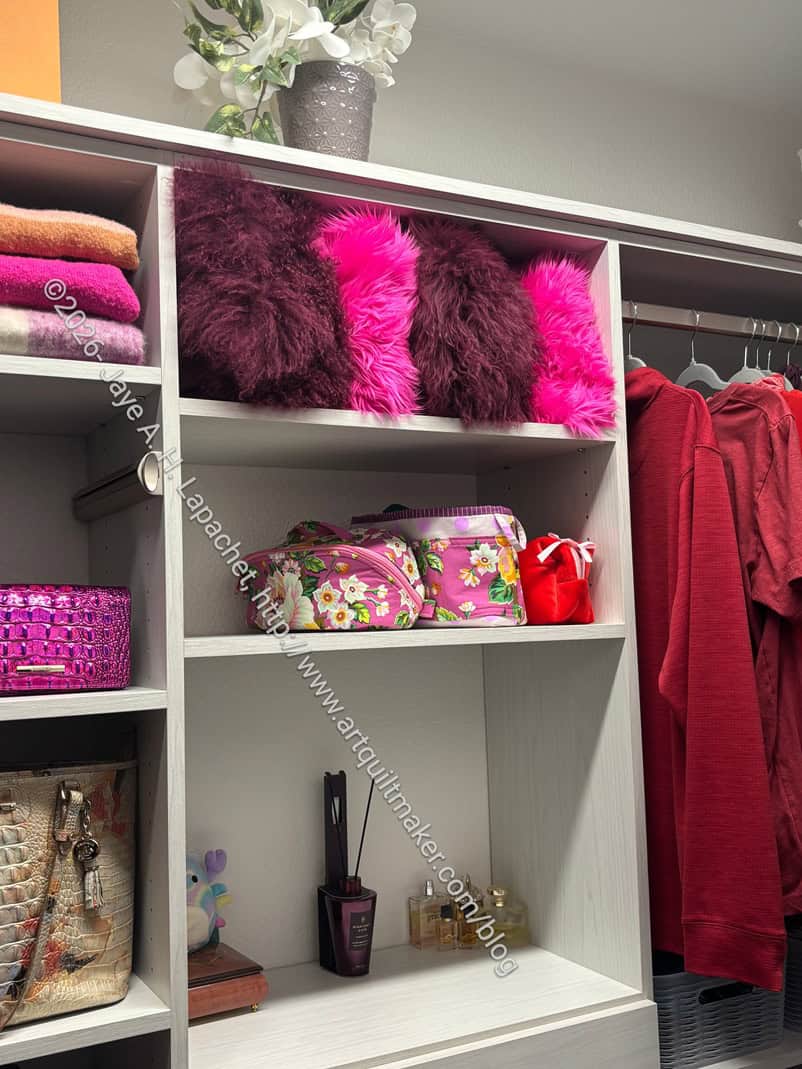
My friend sent me a picture of her closet, which she recently had redone. In it I can see the bags I have made her on the shelf.
Nykky’s closet
The next Enigmas will be finished on the Elna, so hopefully, I won’t have as many problems.
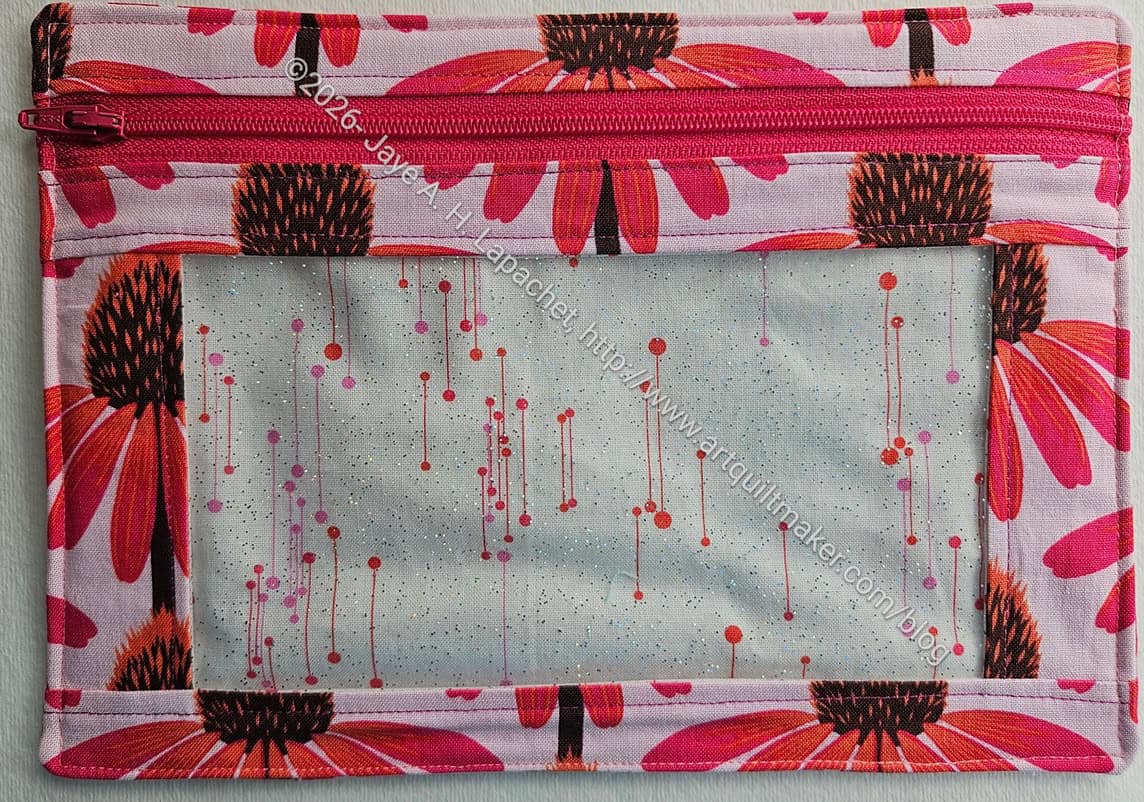
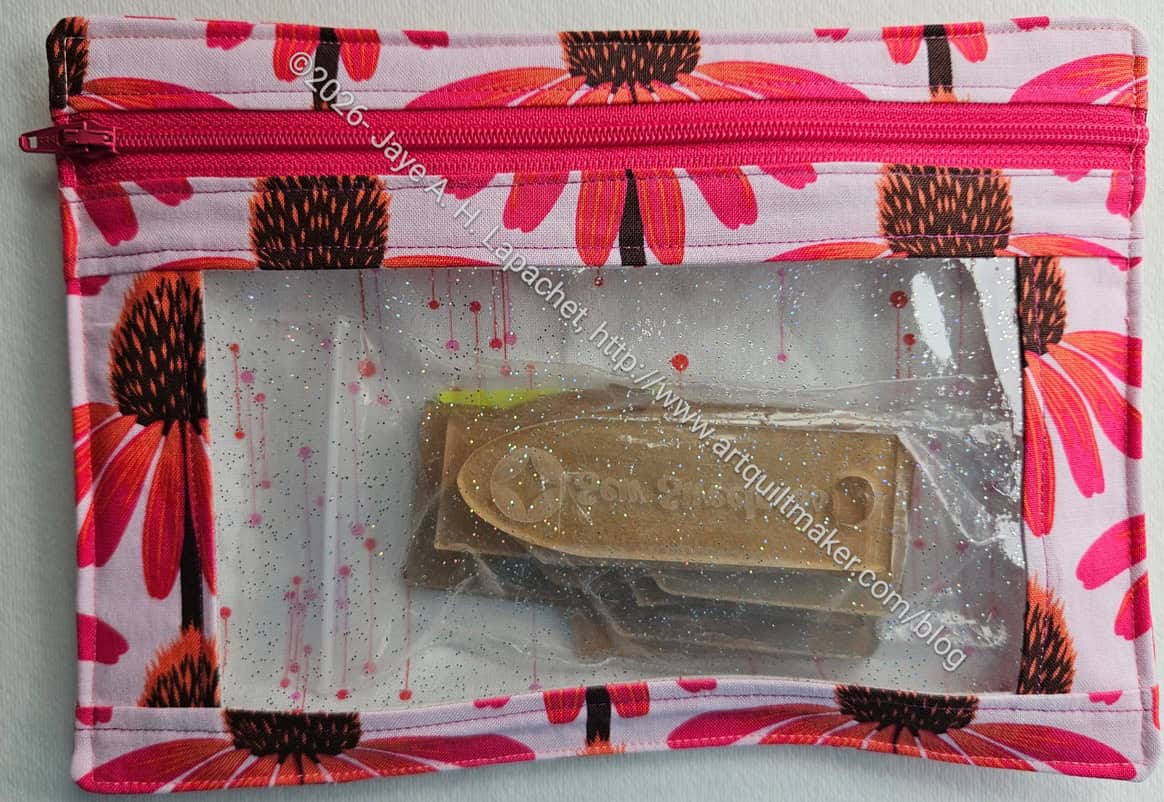
I am pretty excited about how well I matched the horizontal zipper tabs on this one. I also feel like this pouch has a delicate look to it.
Pink Echinacea I Spy – small
This pouch will house Purse Tab templates. Mary and I talked about these when we were riveting the other day. They could be used on the Oxbow Tote to reinforce the side, which was an area we decided would be detrimental to rivet, because it would cut the thread on the side seam.
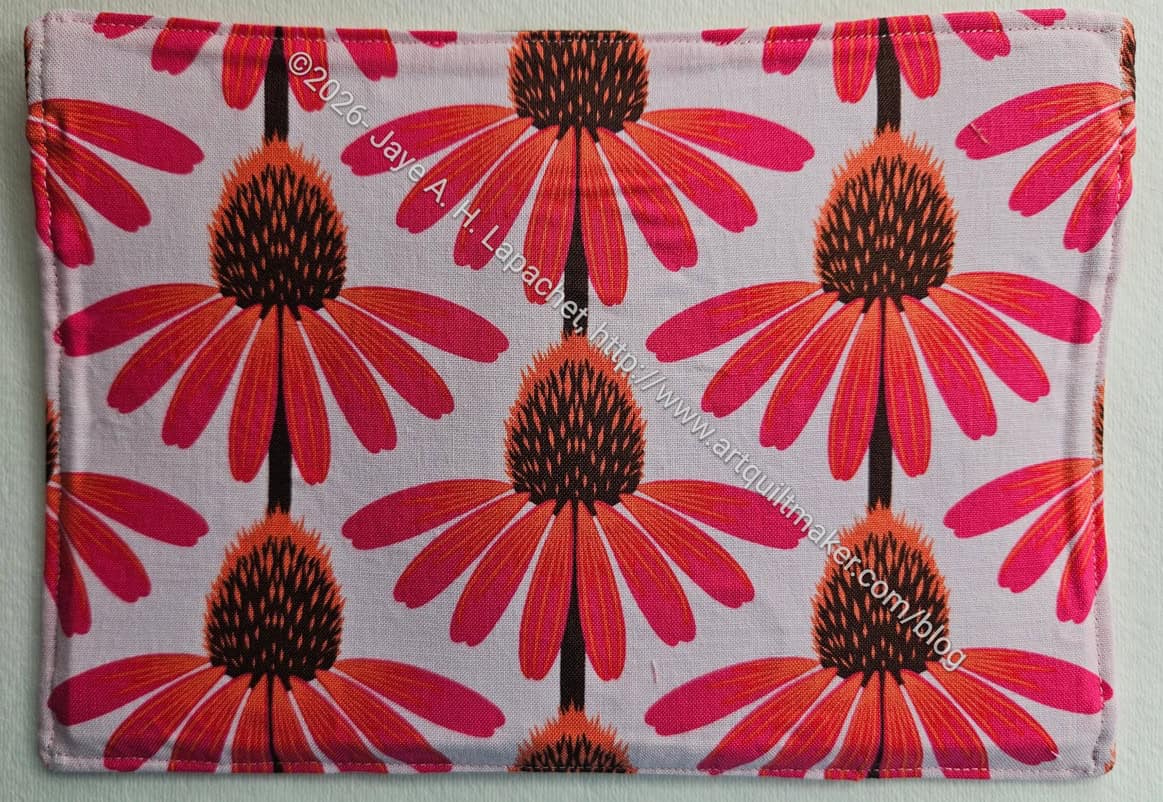
Pink Echinacea I Spy – small – back
I also top stitched this one since I used the stick-on interfacing, like the other two.
I mentioned making multiple I Spy pouches when I talked about the Poppy I Spy the other day.
I made all three in assembly-line fashion, so they all got done at once and I made the same mistakes with all, which was forgetting the interfacing! 😉
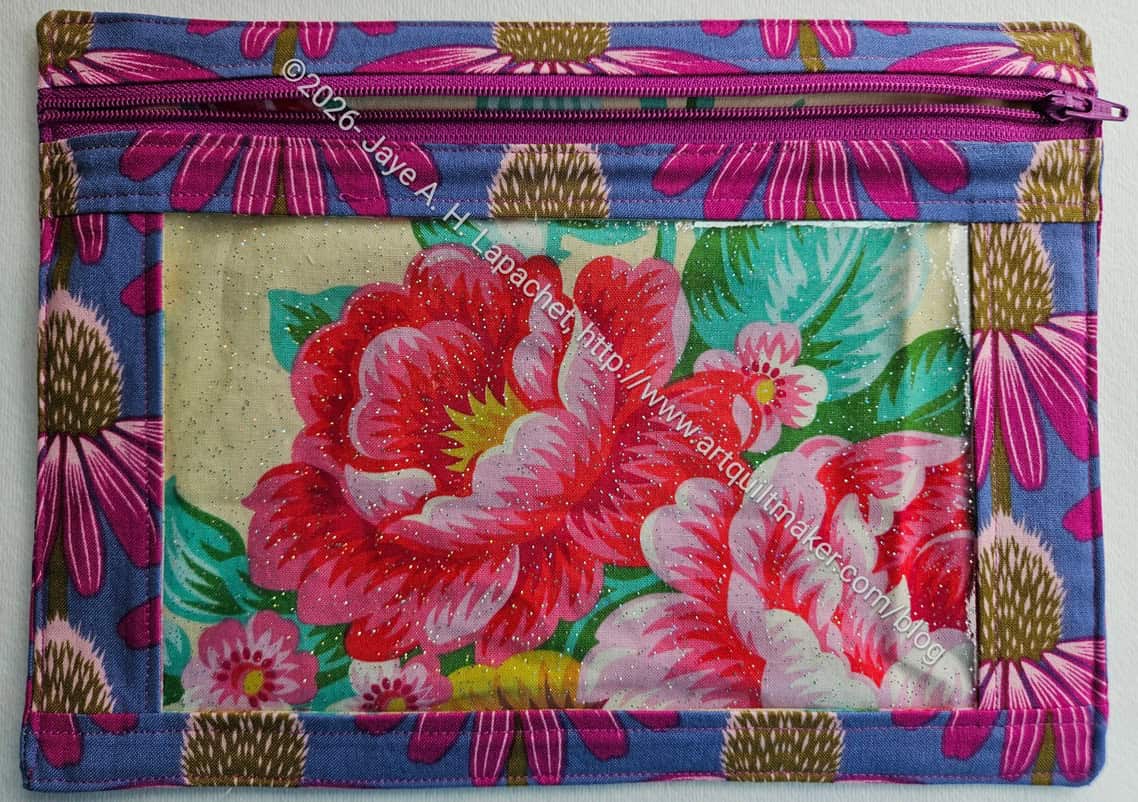
Rose I Spy – medium
The lining fabric on this pouch is a Heather Bailey print. I only had a fat quarter, or only had a fat quarter left, and fussy cut it so the rose would show up when the bag was empty. The motif would also be a nice surprise when I take out the templates out of the bag.
Somehow the Echinacea print doesn’t clash too badly with the roses. At least I don’t think so. I like using different prints for the lining as it helps me associate a certain template with a certain pouch.
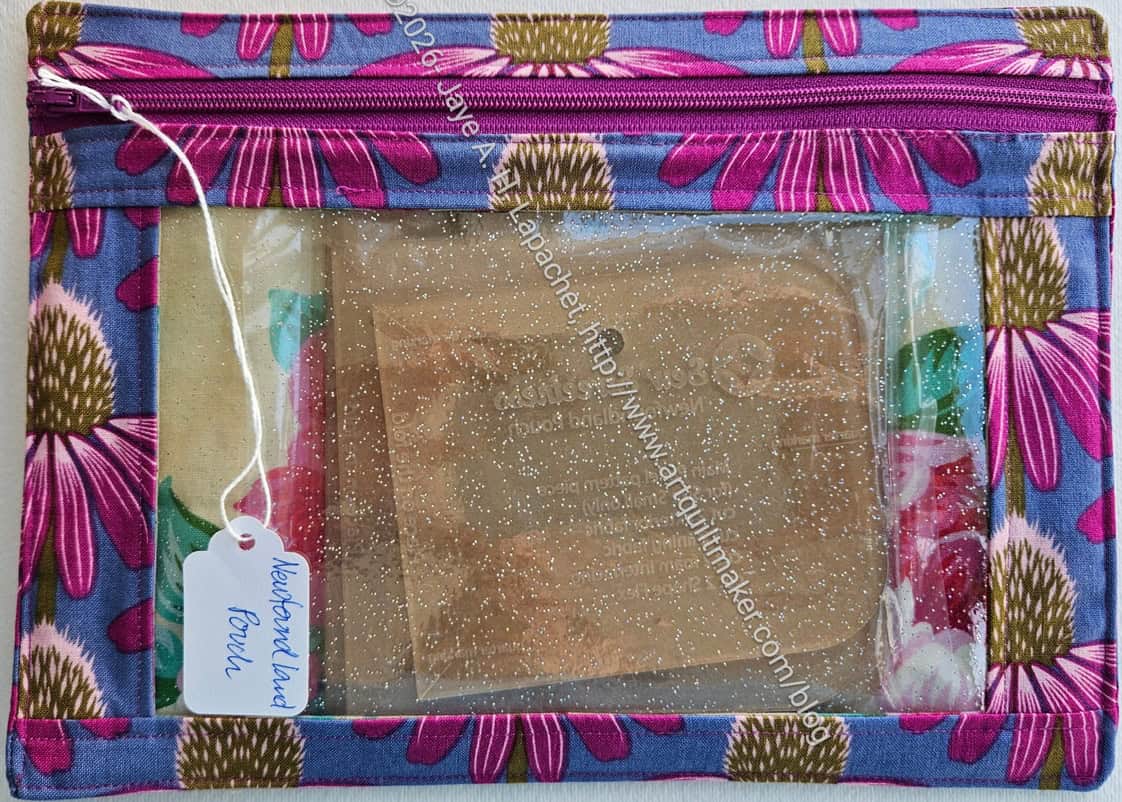
Rose I Spy – medium for the Newfoundland templates
This pouch will be used for the Newfoundland pouch templates. The Newfoundland is a little like the Sew Together Bag as it has an accordion section in the middle creating some organization. It has a similar feel.
I haven’t made the Newfoundland before. Now that I have been reminded that I have the templates, I will put it on my list to try.