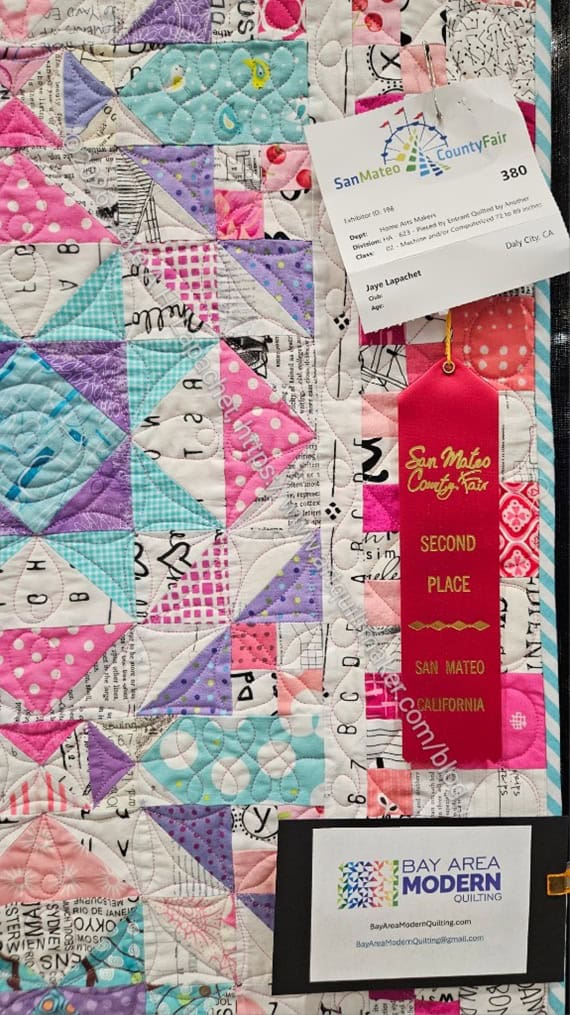
I finished Old Town a few months ago, but never posted about it. I think my quilt holders have been busy or out of town. After winning Second place at the Fair, I realized it and knew I needed to get it done.
Old Town with Ribbon
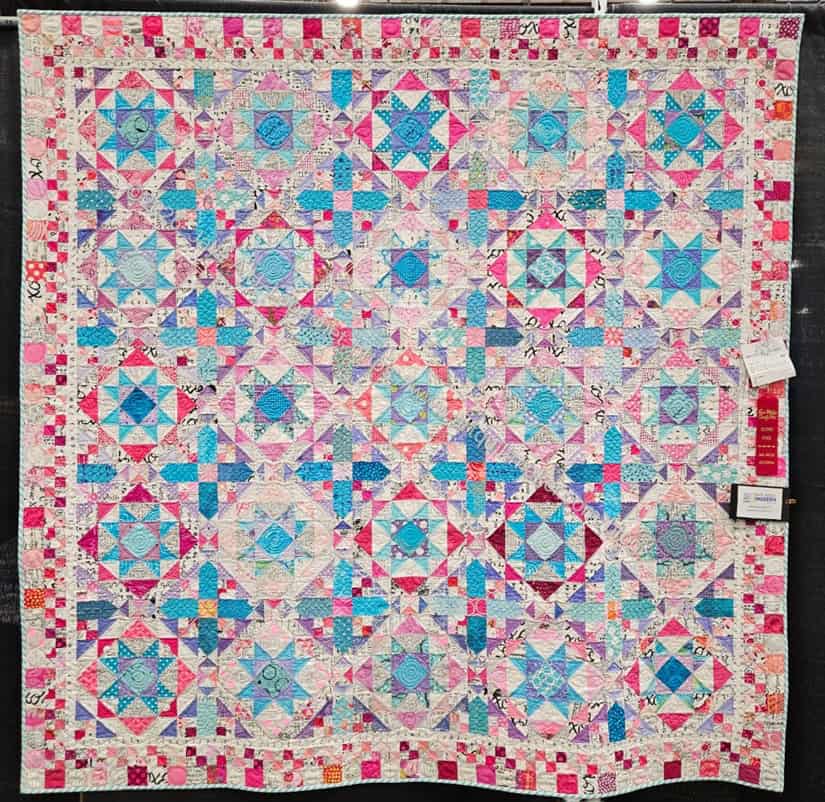
Old Town is finished! Yay! LOL!
Old Town is the 2024 Bonnie Hunter Mystery Quilt. I played along and sewed many of the blocks together at the BAM Retreat, then finished it up at home.
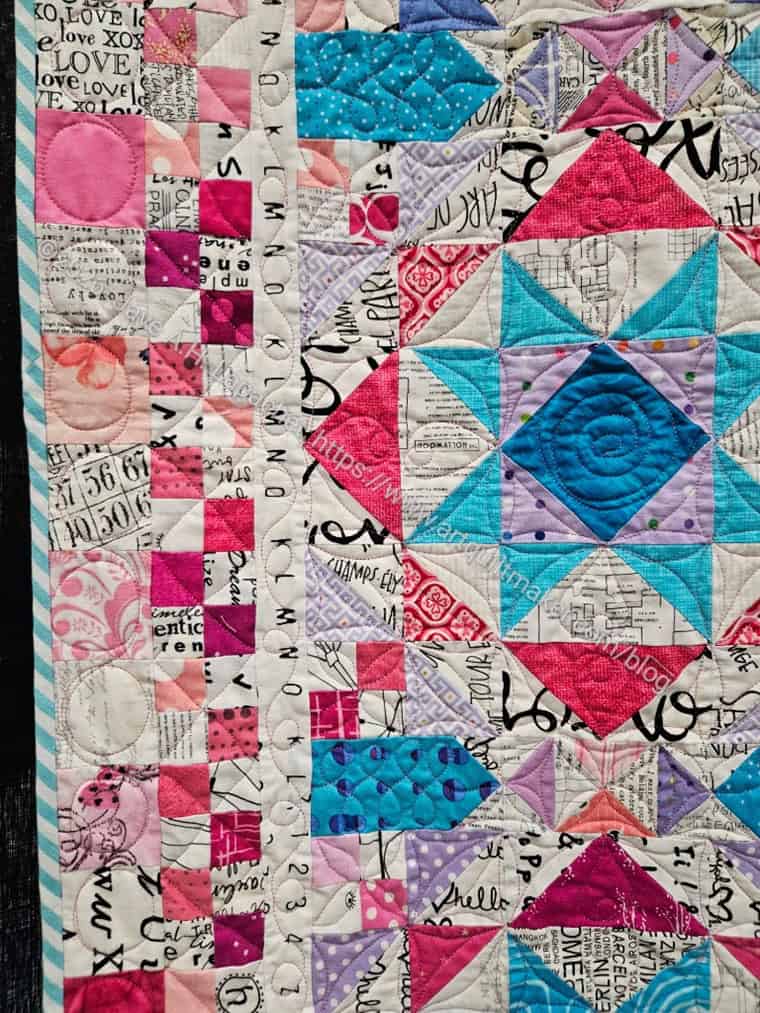
Old Town detail
Colleen quilted it for me and here we are. I was really pleased to get second place since the category in which I entered it (quilted by another) is packed. This was a much easier quilt to quilt than Patchwork Palooza since once I decided how to quilt a block, I just had Colleen quilt all the blocks the same.
Do you know that feeling when you step into a hole and everything tilts. That happened to me, without the sprained ankle, when I asked DH a simple question.
I asked him how to find the number to cut out the box from the “lining up the seams and cutting off a bit” number.
DH said “Pythagorean theorem”.
Holy smokes!
That &*^%$ math! He showed me the theorem. We talked through it and I understood a bit more about how it worked. Am I an expert? No. No, I am not.
I am really annoyed, though. If I had been shown how to make a pouch, then given this problem I would have understood the concept. Instead math teachers throughout my education wrote lines of numbers and letters on a chalkboard that all looked like gobbledy gook to me. Now I get it. Years too late to do more than squeak by in every math class I ever took after 3rd grade. Sigh.
Thanks to www.inchcalculator.com
OK, so here it is. Remember, I am not an expert, so your mileage my vary.
The key number is the number Anna said to cut off after lining up the points. It was 4.5 inches.
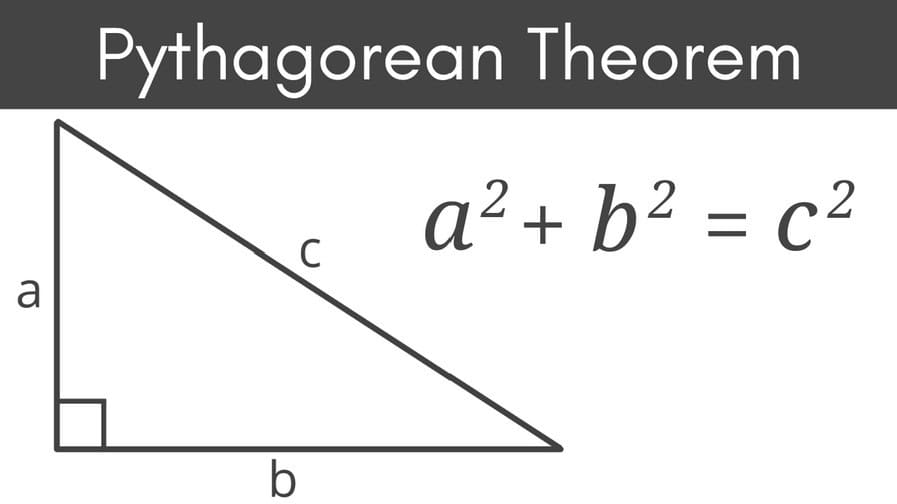
The triangle has to be a right triangle, which means that one corner is 90 degrees. Your formula works like this:
a² + b² = c²
a=b
a² + a² = c²
2a² = c²
c=4.5 inches
In numbers this formula looks like:
4.5² =2a²
some math using the calculator
20.25 =2a²
10 1/8 =2a²
3.28=a
I looked at the number given in the small and medium sized Open Wide pouches and did the match. I came up with 4 (medium) and 3.5 (small). 3.28 isn’t a great number for quiltmaking or bagmaking, so I rounded. I found the Open Wides came out a bit of a weird shape. Still useful, but a little odd. I’ll have to play with the formula bit and I think rounding down might be the way to go.
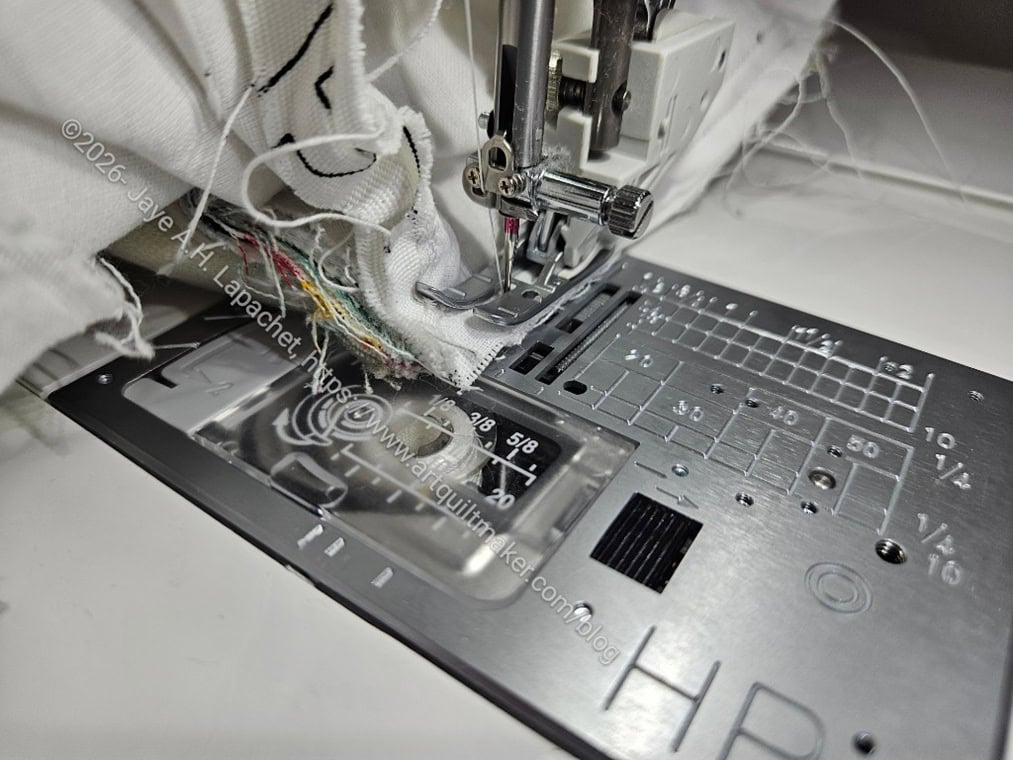
The Sheffield is a joy to work on! I can’t tell you how much easier it is to work on a bag when I don’t have to fight with my machine. I didn’t even realize, really, that I was fighting with my machine.
To make this bag, I changed feet and needle plates pretty frequently, but it really helps use different feet.
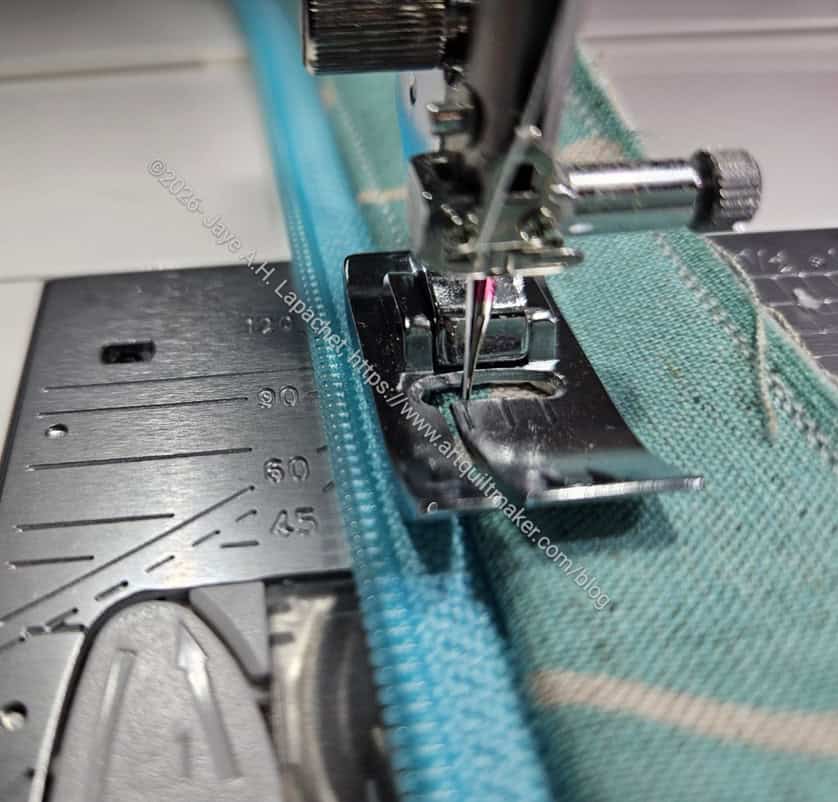
Top stitching thick layers
I used the Bi-level foot to stitch the top stitching on the frame case and that was a breeze. I never used the Bi-level foot before, but now it is one that seems to be coming out of the box often. I am not sure why I didn’t use one before. Maybe I didn’t have one?
Anyway, I was amazed and pleased with how straight the stitching was using this foot. There are a lot of layers the machine is punching through in the photo above and I got good stitch quality, no broken needles or stuttering. Of course, I wasn’t being the demon speed sewist either. I sewed pretty slowly on this section.
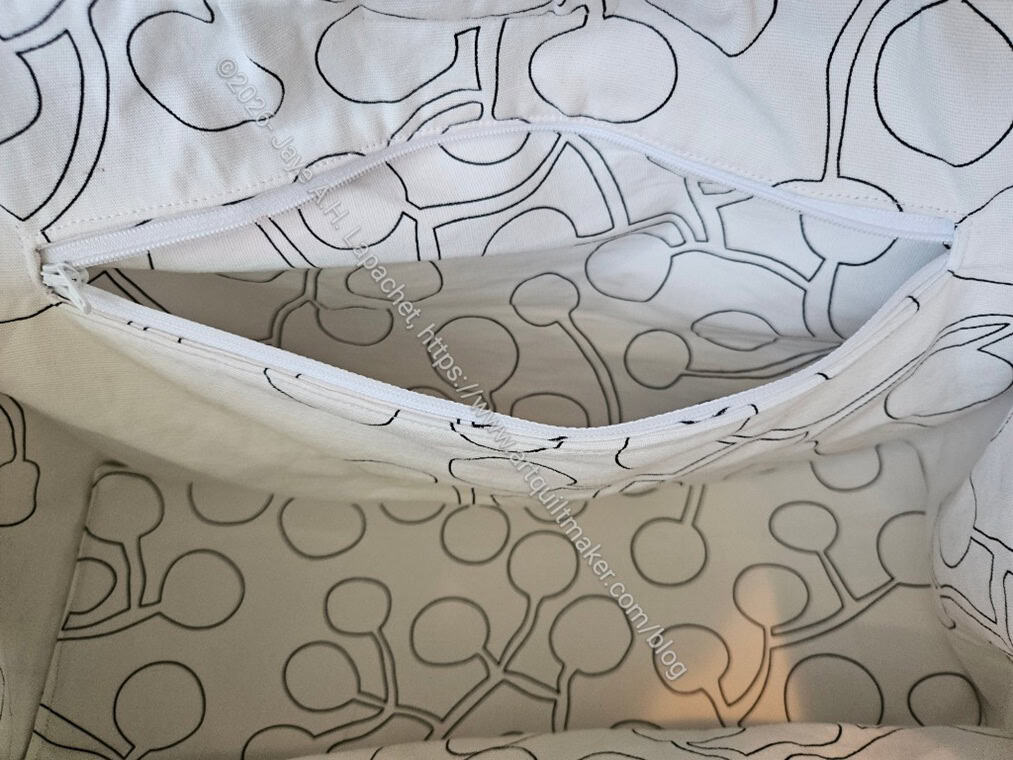
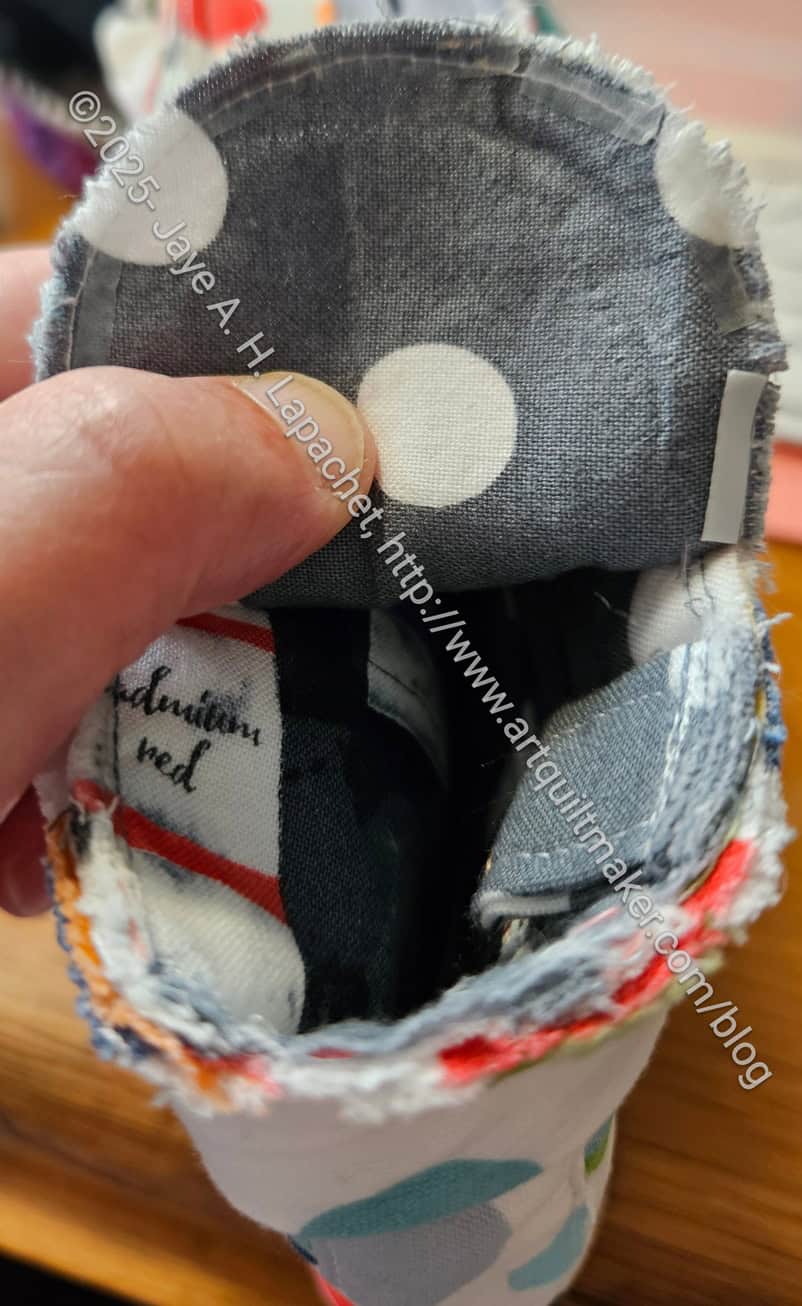
Sheffield internal zipper pocket
I decided to add an internal zipper pocket, which is not part of the pattern.I didn’t have any trouble making it. I learned a bit from the second interior zipper pocket on the Pandora Charisma and that experience helped.
I also wanted to turn the bag through that zipper pocket, which is a technique that Tim taught me. I had to think about it for awhile, because I wasn’t sure if any bag could be turned that way. I didn’t come to any conclusion, so I just went for it. It worked out fine. I like this method, because it means that nobody can see where the bag was turned unless someone digs into the pocket.
I am not sure why I wanted a zipper pocket, but I did. I also added a leash, which I do for all of my bags.
Anchoring the lining
Finally, my next step is anchoring the lining to the exterior. I have started but need to finish.
As mentioned, I decided to make this bag instead of the Aneela Hooey bag when visiting Mary.
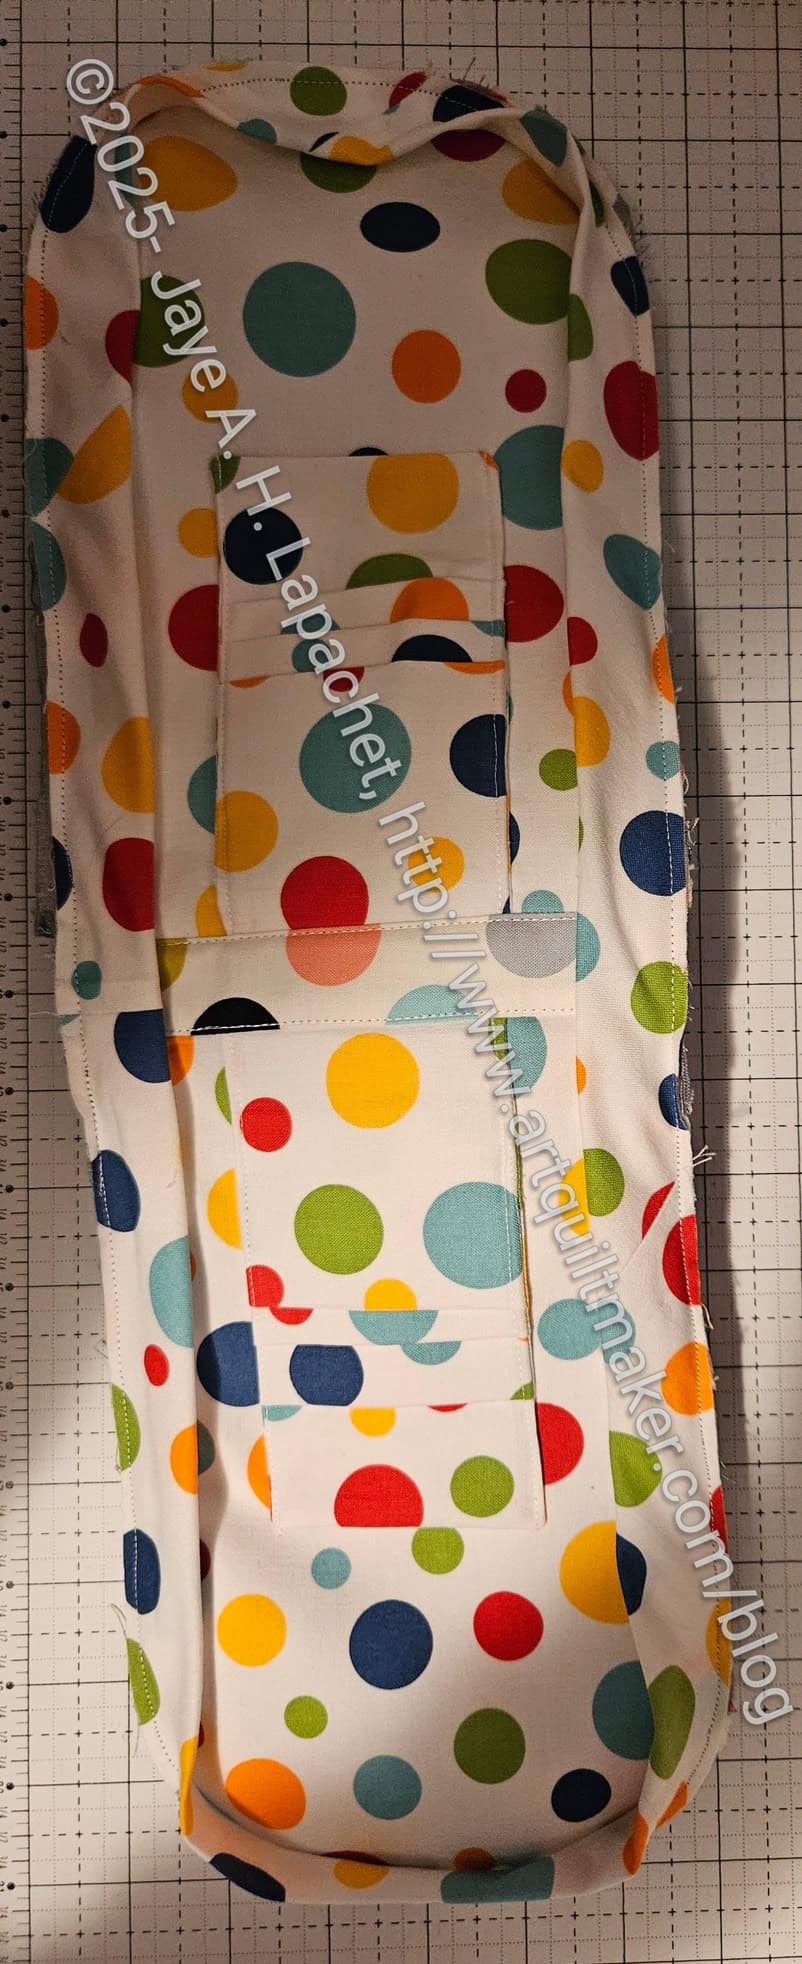
Zip It Up #1
I got quite a lot done, but I had enough fabric to sew this one and one other. I had gathered enough of the selected fabrics to make three Book and Tool Folios. I had enough of some, but not all to make the second Zip It Up. I want the recipients to enjoy the fabrics. I found that I needed two full half yards to make the case body. Though I had enough fabric to start the third one, I decided I would make one and, assuming all went well, make the second two in assembly line fashion.
I looked at Mary’s version and chose to make this bag with two vinyl pockets instead of a mesh pocket and a vinyl pocket. I thought they were more useful for non-sewing activities than one mesh pocket and one vinyl pocket.
I cut the first vinyl pieces out wrong, so those will become the new windows for future I Spy pouches. I am glad I brought a brand new roll of glitter vinyl. Mary has a lifetime supply of clear vinyl, which was a good backup in case I ran out.
I made good progress despite the need to quilt the fabric. 🙁 As I progressed on the project, I decided I wanted to cover the top of the vinyl pockets below the zipper with ribbon, so I brought the pieces home. Since I was ready to assemble the bag, I needed to stop, add the ribbon and then proceed. Another project to finish at home. Sigh.
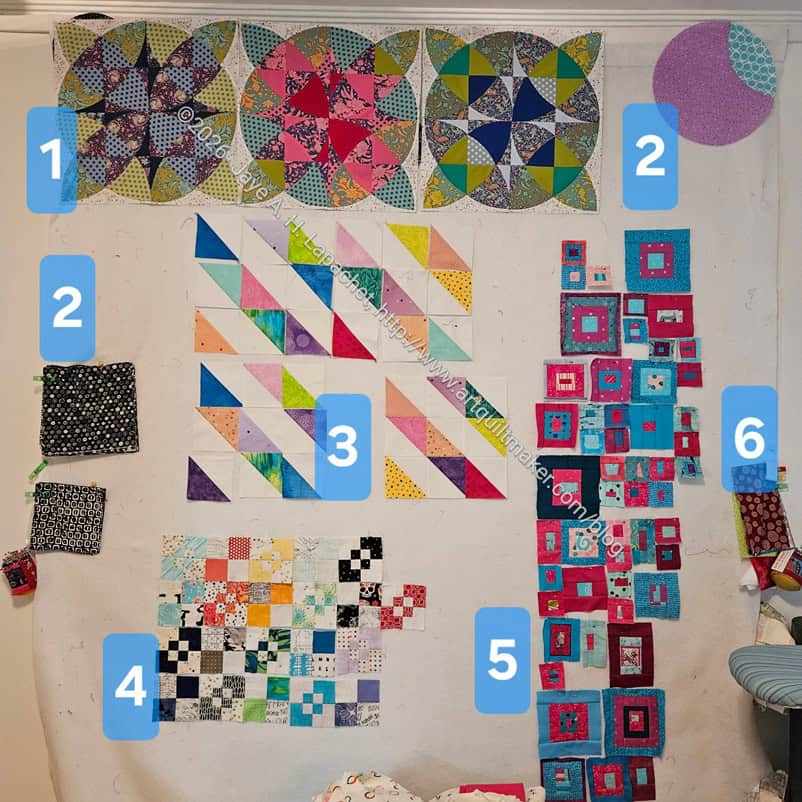
I took a look at my design wall the other day and realized that it reflected the craziness of my mind.
Yes, I have a lot of projects going on right now.
1- The Sad Quilt. I have three blocks made and need to cut out another. It takes time and a lot of brain space to do it, so I haven’t done it yet.
2- Orange Peel Circle sample. This is quite a large block and the wrong colors to use for my Orange Peel Circle quilt. The black squares will become Orange Peel Circles at some point. At the moment, I haven’t decided if I want to cut the large sample down or use it for the back. I really like the fabrics, so I want to do something good with it.
3 – Lucky Blocks. Donation blocks for the Pacifica Quilter’s Club. In process.
4 – Four Patch Fun. I finally have a plan for these blocks. I am pairing them with four patches as in the Judy Martin quilt I wrote about a few weeks ago. I am trying to highlight the contrast by using white and a color for the four patches. I hope that makes the contrast more prevalent. When I showed Cyndi the Judy Martin quilt she thought the design was hard to see and I agree. I am going to make one in cool colors and one in warm colors for the grandchildren of a friend. I think it will be a good use of the blocks.
5 – 1-2-3 Mosaic tablerunner blocks. I need more small blocks, so I will need to clear the decks a little and get back to this project. It requires some prep, which I haven’t done the way I did it in the class.
6 – I am collecting three sets of donation blocks for the Sidewalk quilts I will make at some point. At the very top are plain, one piece of fabric 4.5 x 8.5 inch blocks in scrappy colors. This top will look like Sidewalk #5, which I don’t think I ever wrote about beyond a brief mention in the All the Sidewalk quilts post. It’s very hard to see in the tiny section of the photo, but under those units are a group of pieced half 16-patch blocks in green . I need more, but have run out of green 2.5 inch patches. Way down under the ironing board are more pieced half 16-patch blocks, though in grey. Both sets need at least 20 more before I can put a quilt together. Check the tutorial to find out how to make a sidewalk quilt for yourself.
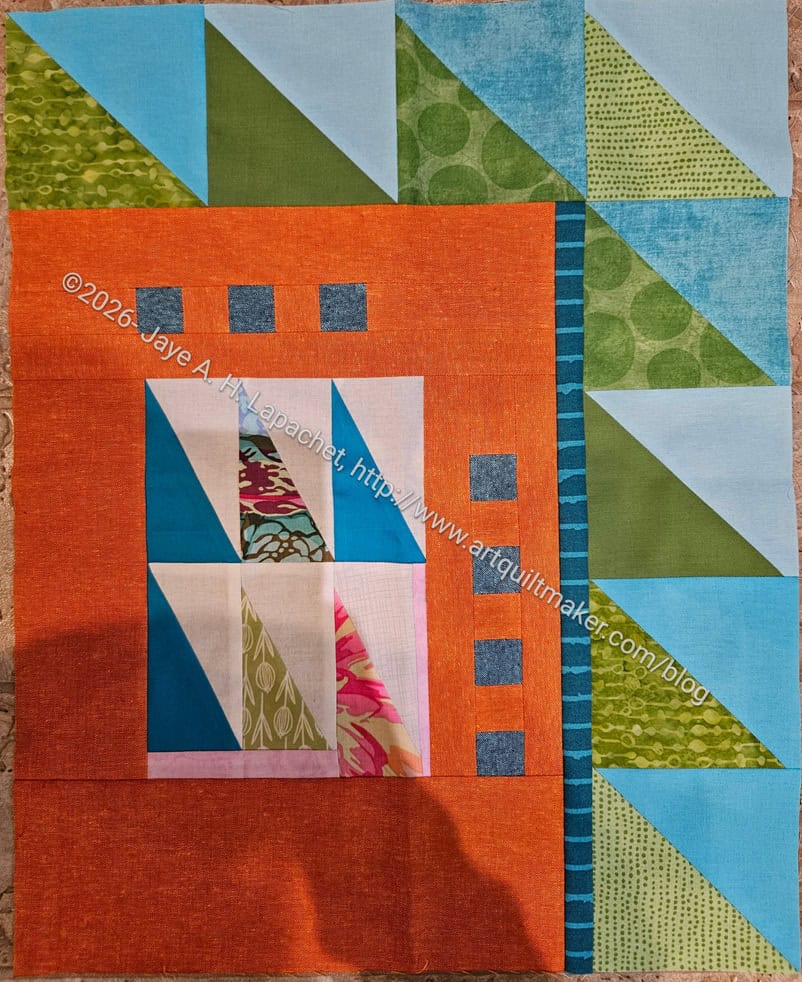
I started a project at the guild called Creative Play. This was loosely based on a concept I had during COVID that kind of petered out. It was also inspired by a quote I read in Libs Elliott’s newsletter. The quote is “I have made a promise to myself that I will make time for creative play in 2026. Because, when work gets overwhelming, I find joy in taking even just a bit of time for myself to experiment and try something different without an end goal in mind.”
I am determined to have it take off this time and so far, so good.
I started out by handing out the rectangles in the center. Cyndi took it and added the orange border. That is an amazing choice. I don’t think I would have thought of it, but I love it. The orange has an interesting texture as well.
I handed the piece to Sue next and she added the half square triangles. I am really pleased with the work so far.
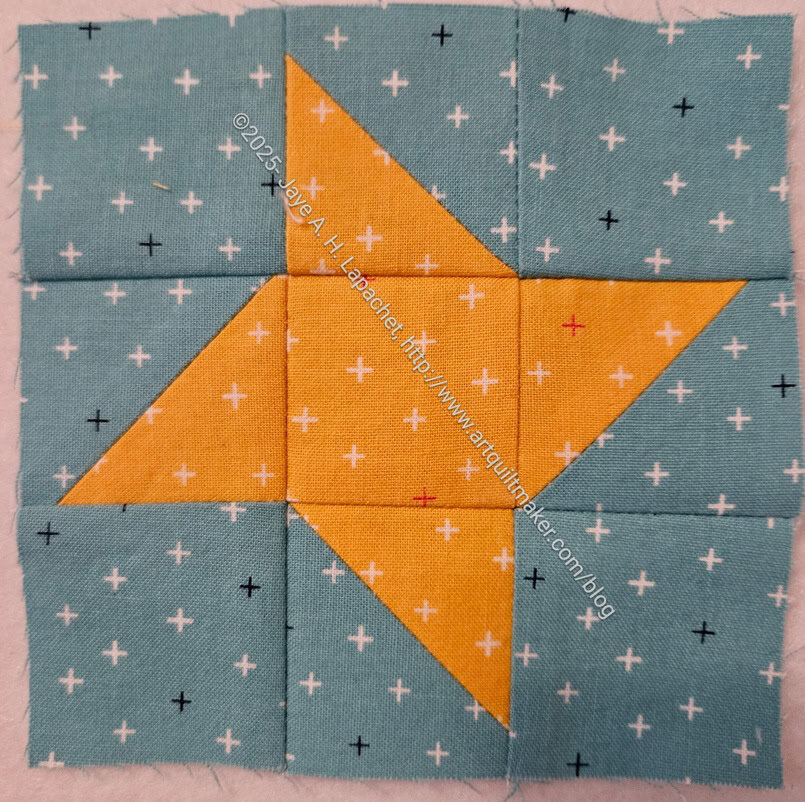
As I said, I am trying to stay ahead of the crowd, so after the BAM Holiday Party, I quickly made a Friendship Star.
In general, I have a tough time with this block. I think it looks much better small. The 12 inch size just looks like it has too much fabric, though a 12 inch block with the star made from a blowsy, large flower fabric might work better.
I do think that using the Friendship Stars as cornerstones, like a donation quilt I made, works well.
The best use of Friendship Stars I have found is making a wreath out of them. I got inspired by Camille Roskelly and then made Flying Around using the Friendship Star wreaths. I’d like to make one for this project. We’ll see if I get to it.
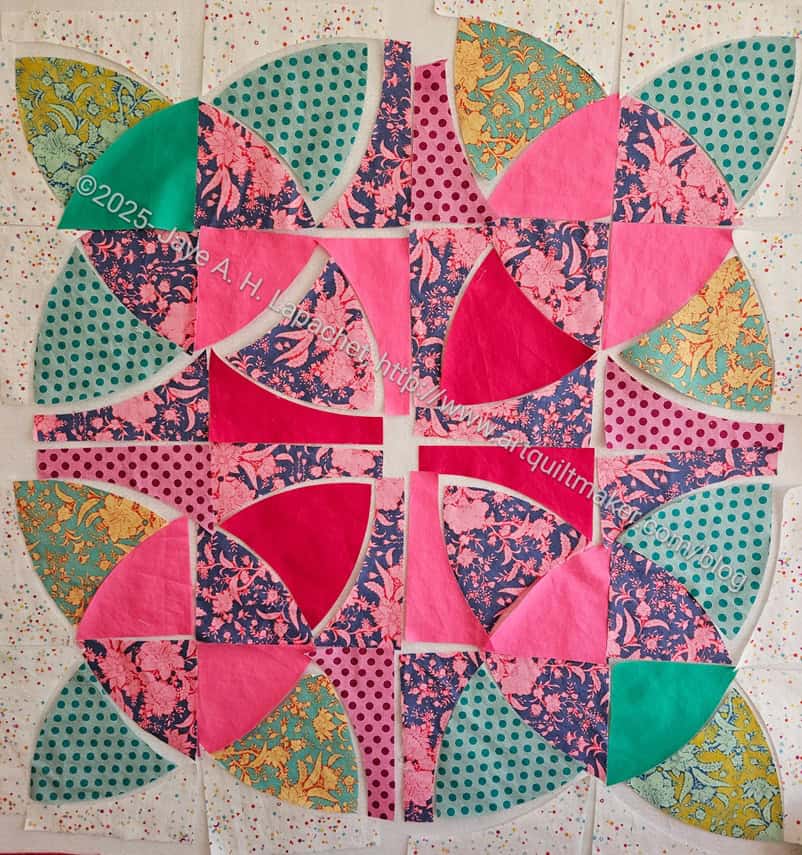
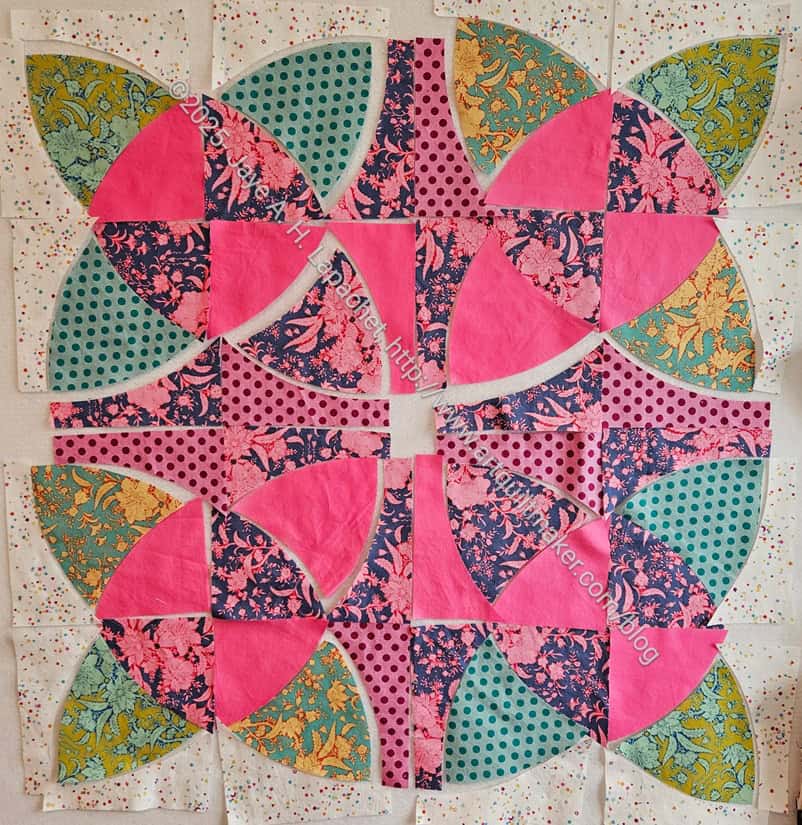
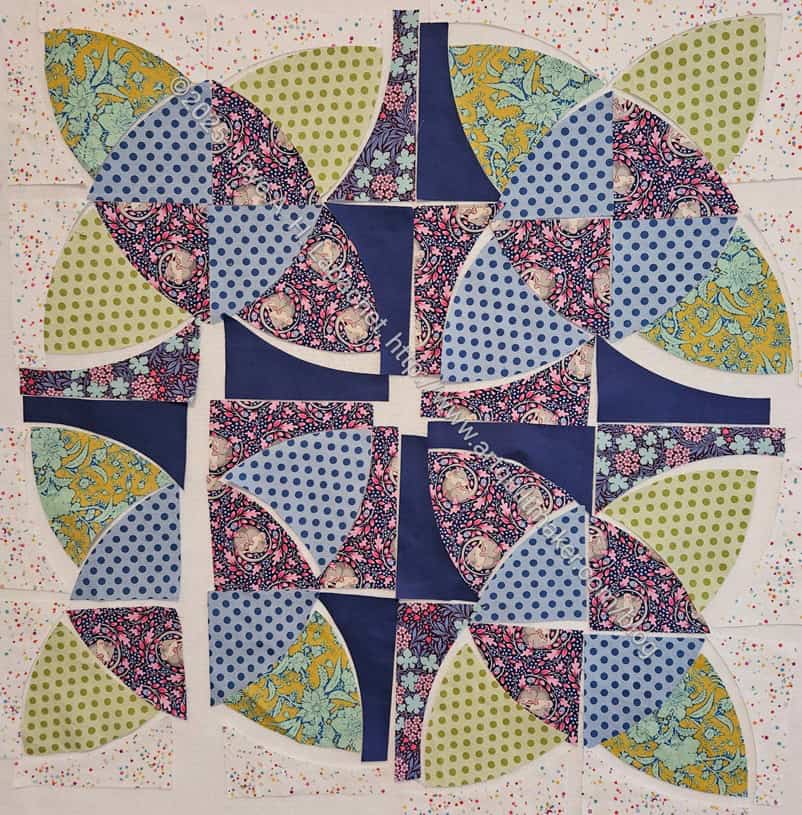
The other day I showed you the rest of the Flower #1 metamorphosis for the Country Revival/Sad Quilt. Here I am going to show you the entire process, though go back to the first post, then the second to read the explanation of whole process.
Country Revival/Sad Quilt flower motif
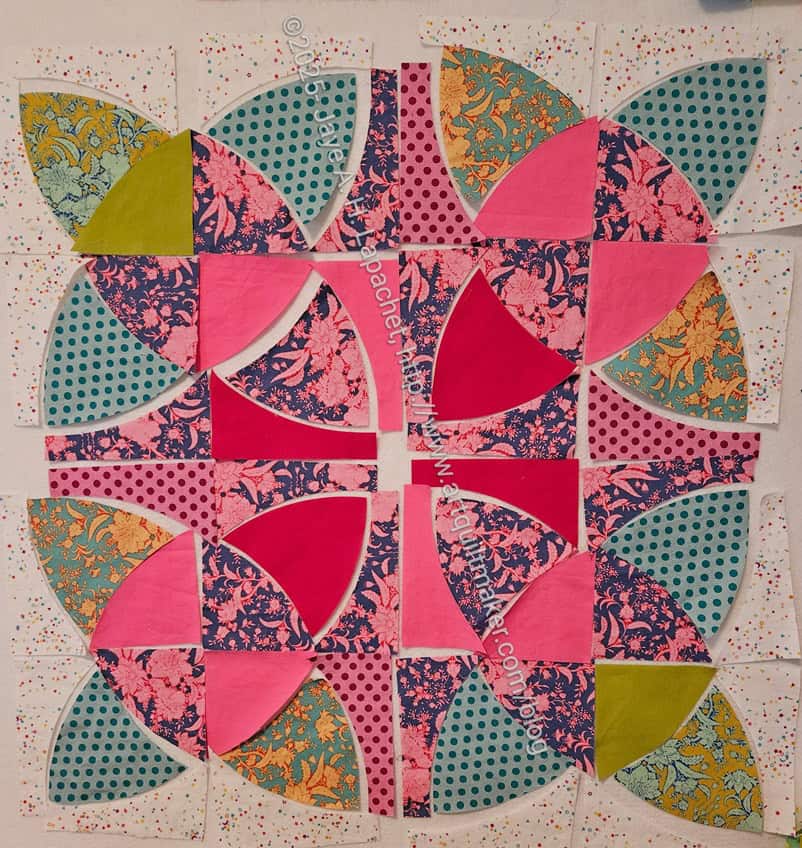
Country Revival/Sad Quilt flower motif with leaves v.2
Country Revival/Sad Quilt flower motif with leaves v.3
Country Revival/Sad Quilt flower motif with leaves v.4
Country Revival/Sad Quilt flower motif with leaves v.4
Country Revival/Sad Quilt flower motif with leaves v.5
Country Revival/Sad Quilt flower motif with leaves v.6
Country Revival/Sad Quilt flower motif with leaves v.7
I am probably more fascinated by my own process than you are. As a result, I may publish another post later today. Stay tuned.
I received the stack of solids I ordered, so it was back to Flower #1 for more changes. you might remember how much I worked on making incremental, small changes the first time around. I have been looking at it as I sewed Flower #2 and still wasn’t 100% happy.
Country Revival/Sad Quilt flower motif with leaves v.3
I decided to pick out some solids and see if I could make Flower #1 look better. I started off with a vast improvement over the original. Adding some more greens made the block much more interesting. I decided that there was too much solid pink, so I replaced some of the solid pink with some Emerald. The Emerald is about halfway down the stack in the photo above.
Country Revival/Sad Quilt flower motif with leaves v.4
I put the Emerald in the corners on the bottom right and top left. I want to make incremental changes to so I can see what it happening. It is amazing how the replacement of two little pieces makes a huge difference.
Country Revival/Sad Quilt flower motif with leaves v.5
The edges were looking better, so I decided to work on the center. I replaced some of the pink with Dragonfruit, a darker pink.
I liked the change, but it wasn’t quite enough. Each change I make highlights another area that needs attention!
Country Revival/Sad Quilt flower motif with leaves v.6
Once I made the change by adding the Dragonfruit, I thought it needed more. I cut another couple of pieces to end up with more dark pink in the middle.
After looking at v.6 for awhile, I decided that this was the final version. Maybe it isn’t perfect. Maybe it could be better, but I like it. I think there isn’t anywhere that is too boring or too repetitive. Even the bottom left and top right corners light pink works.
Country Revival/Sad Quilt flower motif with leaves v.7
Finally, I decided that the Emerald needed to be toned down a little. I like that fabric and the color, but for this block, I needed something a little more subtle. I decided to change the Emerald for Dark Citron.
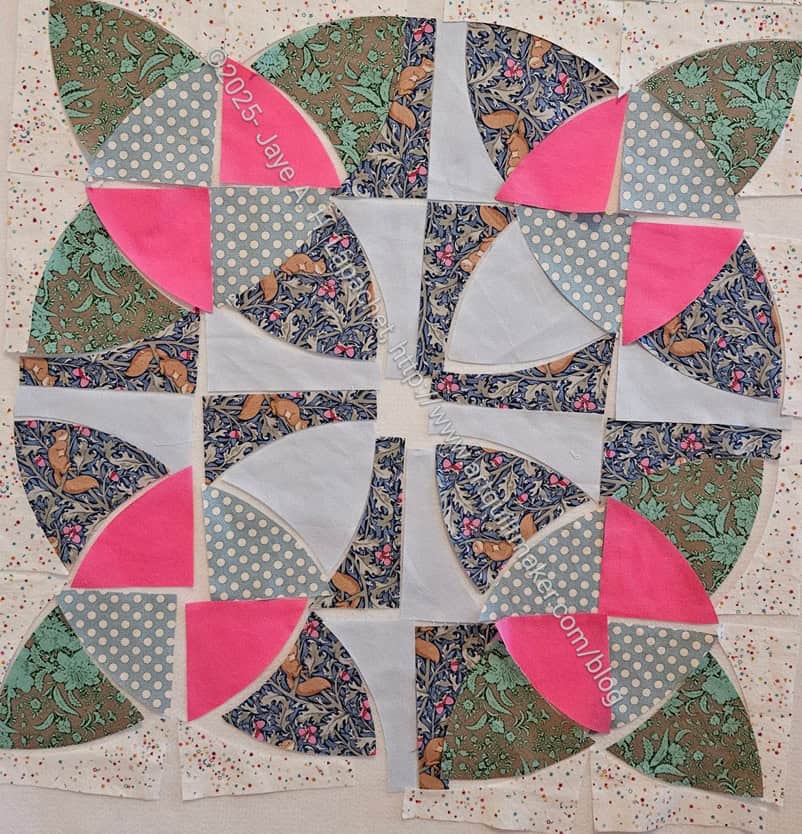
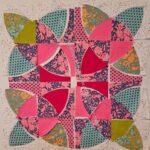
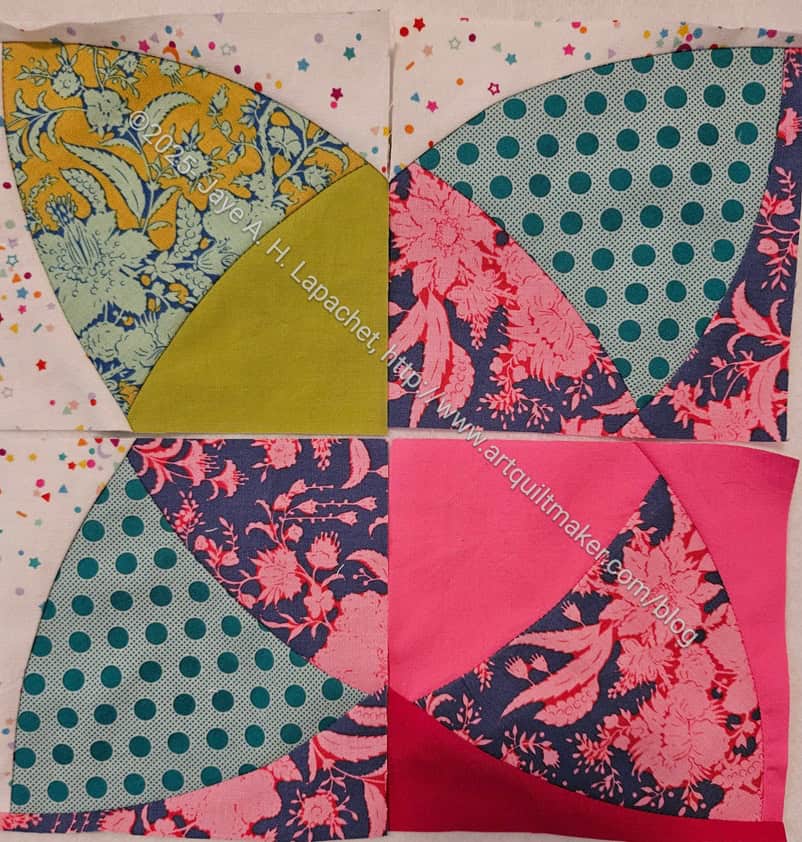
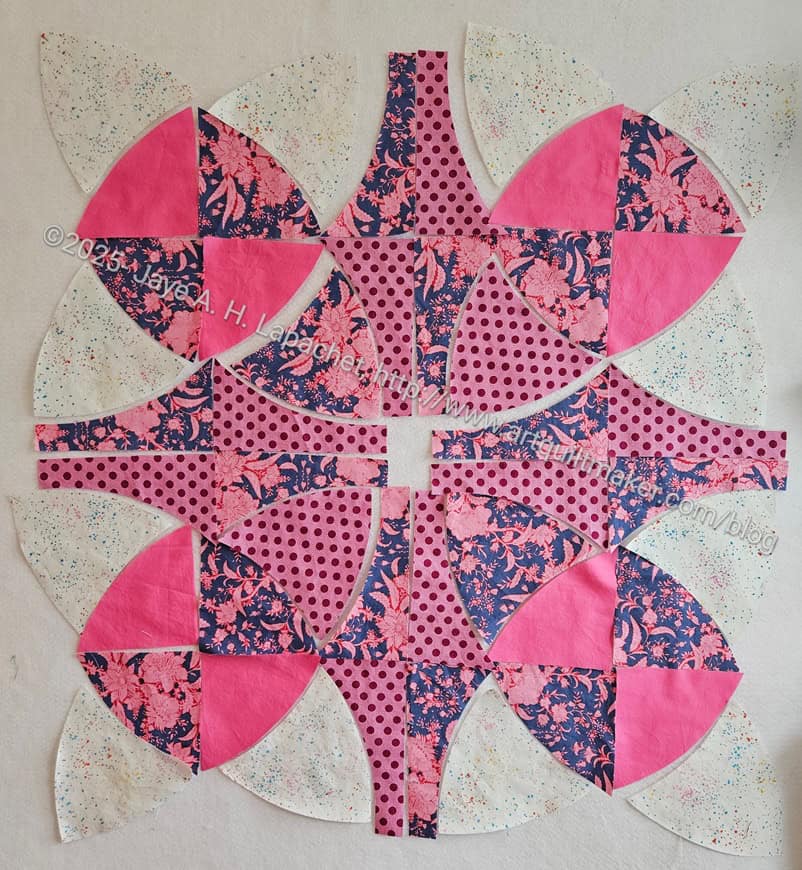
Flower #1: upper left hand corner
I started sewing the block together and it is looking good.
The piecing on this quilt takes a lot of time. I think it is because of the curves. That doesn’t mean it is difficult, just time consuming.
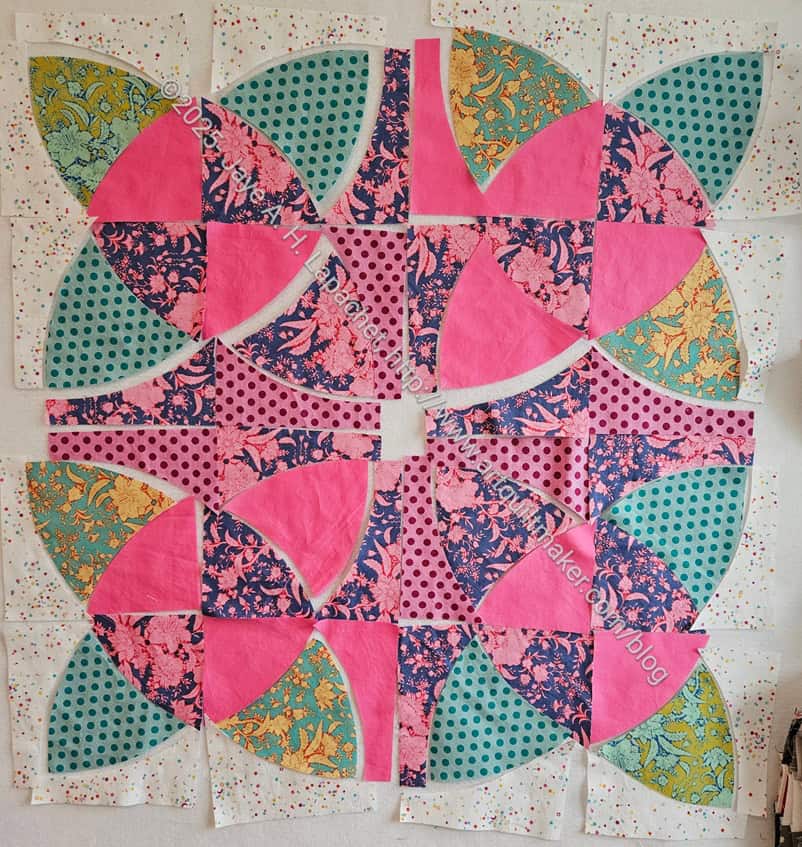
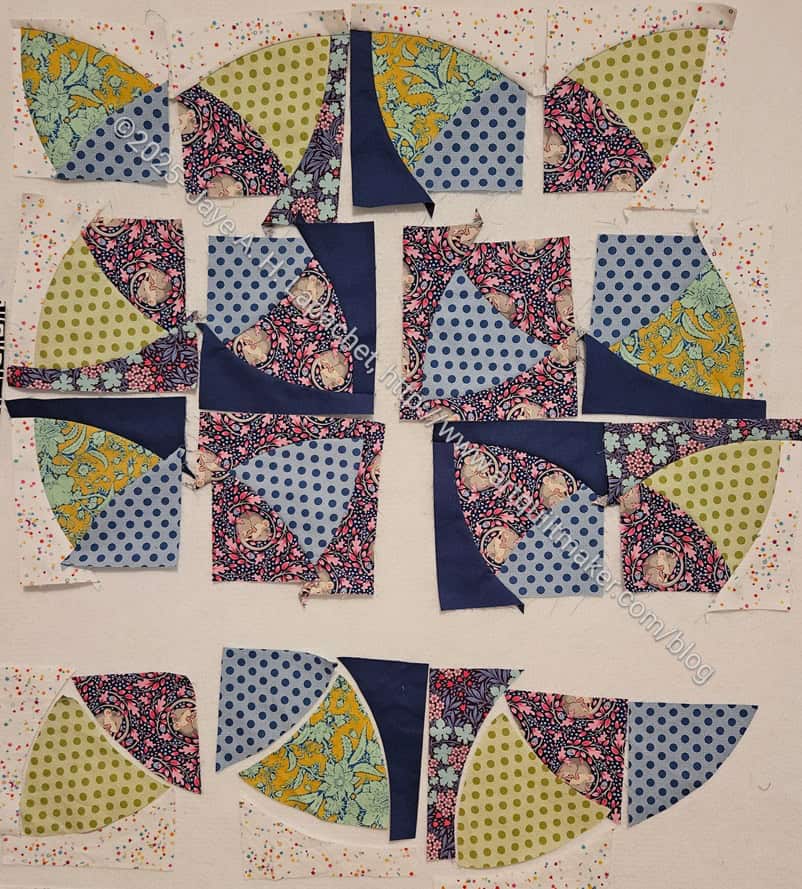
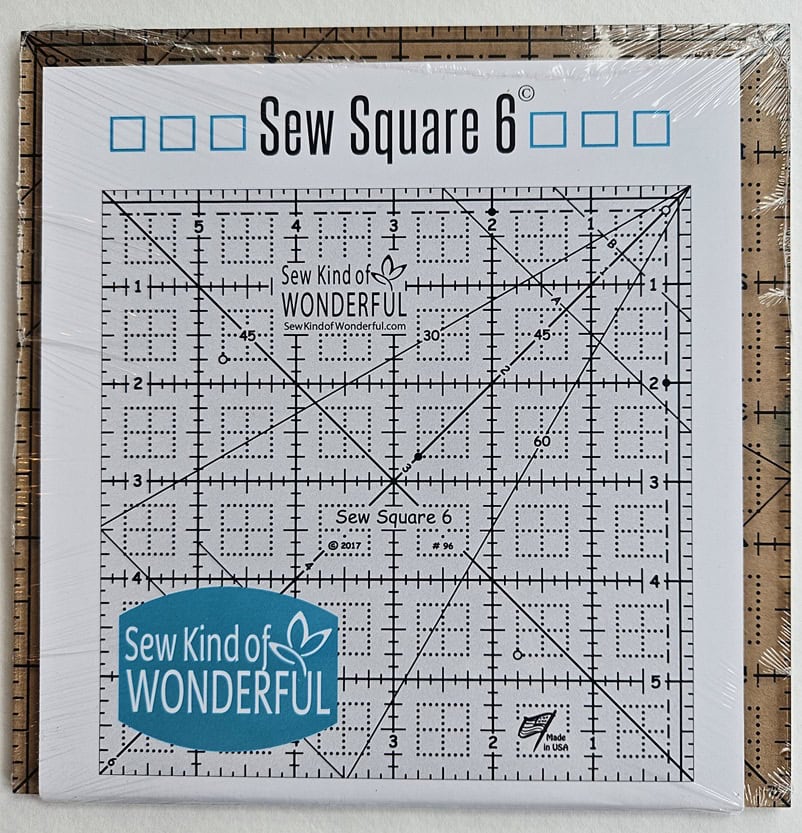
In the photo, the top left unit is pieced and trimmed. I wasn’t happy with the trimming. I ended up buying the SKOW recommended ruler, Sew Square 6**, though, despite my love for specialty rulers, I am fundamentally opposed to specialty square rulers. I would much rather the ruler I already have, the Quick Curve Ruler**, be marked well enough so I could trim with it. It isn’t impossible, but I found it to be very difficult. I haven’t decided if I need to make that upper left unit again. I don’t know if I trimmed too close to the green curved shape.
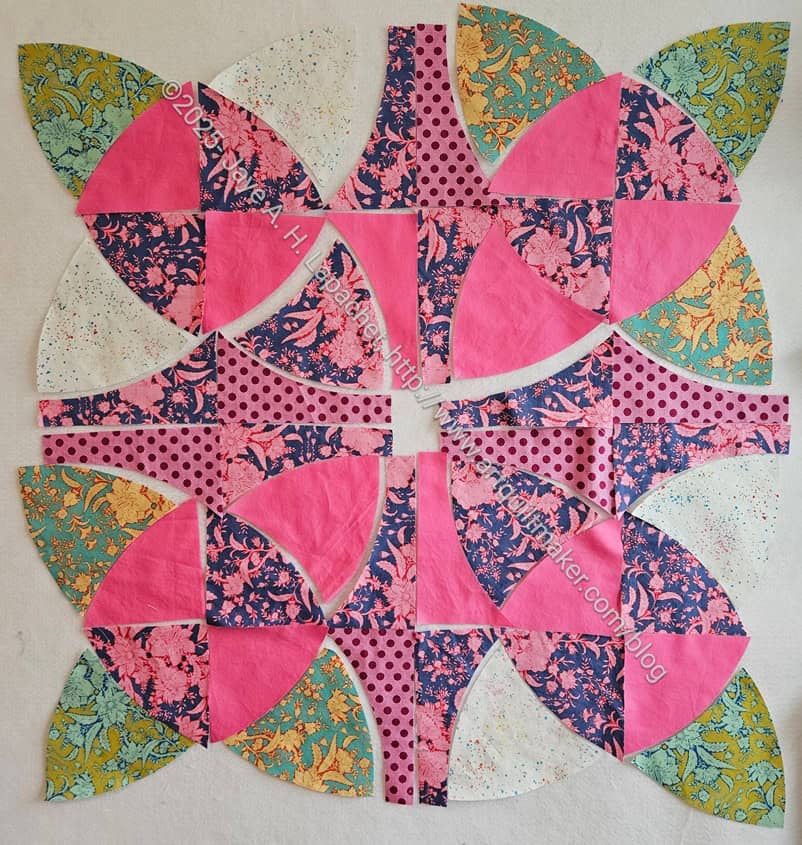
Sew Square 6
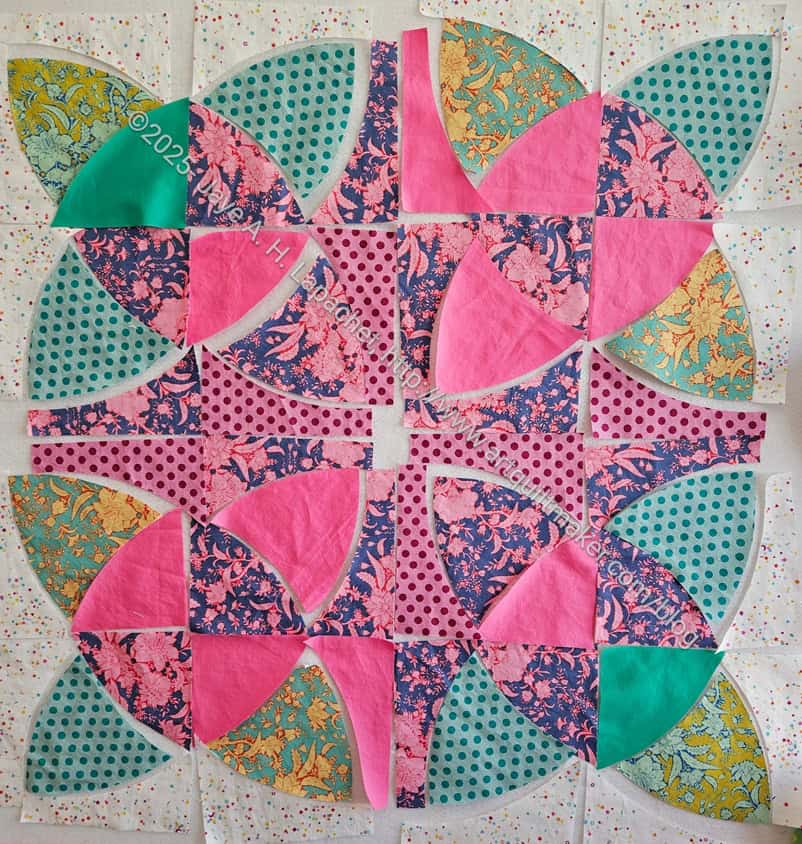
Except for the bottom row, the rest of the units have been sewn, but not trimmed. You can see how weird looking they are before they are trimmed. I bought the Sew Square 6** which I plan to use to trim the other units.
I didn’t buy the whole set; I just bought this one to see if I thought it was better than just using the Quick Curve Ruler.
Country Revival/Sad Quilt flower motif with leaves v.4
Flower 1 is still unsewn. I am not 100% happy with the color selection. I bought a few solids, which I am hoping will help fix whatever the problem is.
**N. B. : Obviously, you should shop at local quilt shops and small businesses. However, if you are too busy or can’t find what you need there, I use Amazon affiliate links and may be paid for your purchase of an item when you click on an item’s link in my post. There is no additional cost to you for clicking or purchasing items I recommend. I appreciate your clicks and purchases as it helps support this website.
I had the Flower motif from the Country Revival pattern** on my design wall for a long time without sewing it together. It wasn’t quite right and looking at it was the only way to figure out how to improve it. I knew I couldn’t use white in the place I had put it originally-leaf area around the outside. I wanted to use white as a background and the white as shown would be lost and change the shape of the flower motif completely. I also didn’t know what to do.
I often find that if I just do something, then I can get started improving a piece.
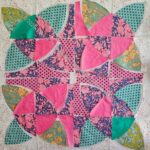
Country Revival/Sad Quilt flower motif with leaves
The first thing I did was decide the white ‘petals’ needed to be replaced with green and become leaves. It was a good start.
I liked the addition of the green, but decided I needed more and different greens. In this photo there are two different Tilda fabrics. One reason is that I used some of the green on the tips of the flowers for a pillowcase for my friend. I didn’t have much left, but I wanted to include some so it would kind of match the pillowcase. I had just enough to make four leaves.
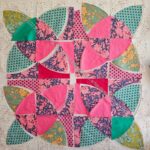
Country Revival/Sad Quilt flower motif with leaves v.3
I wasn’t 100% happy with the look and feel. I really wanted an emerald green solid. I didn’t have that so I tried some dots. They were close to an emerald green and looks like a great addition to the overall look.
I still felt like there was nowhere for the eye to rest, so I moved some of the tall, skinny pieces with the slightly curved tops around. Better, but not perfect.
I added in some of the Dovetail by Ghazal Razavi background I bought at Bay Quilts with Julie a few weeks ago. It is a bright white, which I like and the many colors go well. I know it is hard to see in the photo. You can enlarge the photo to see it better.
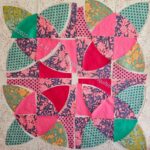
Country Revival/Sad Quilt flower motif with leaves v.4
I can’t get away from symmetry, so I cut more pieces and changed the fabrics around so there was more symmetry, e.g. the piece looked more symmetrical.
I know the changes are slight and hard to see. I changed the corner fabrics and moved some of the other greens around.
My eye was honing in on the pink dots. I wasn’t liking them, but I wasn’t sure what to do. I didn’t want to add more of the pink solid as I thought it would overwhelm the piece in general. For the moment, this is the final version of block 1. I may make some more changes, but I decided to work on a second block and give myself a rest from the pink.
I love that pink and blue Tilda fabric and it is now much less prominent. I’ll have to use it in another block.
**N. B. : Obviously, you should shop at local quilt shops and small businesses. However, if you are too busy or can’t find what you need there, I use Amazon affiliate links and may be paid for your purchase of an item when you click on an item’s link in my post. There is no additional cost to you for clicking or purchasing items I recommend. I appreciate your clicks and purchases as it helps support this website.
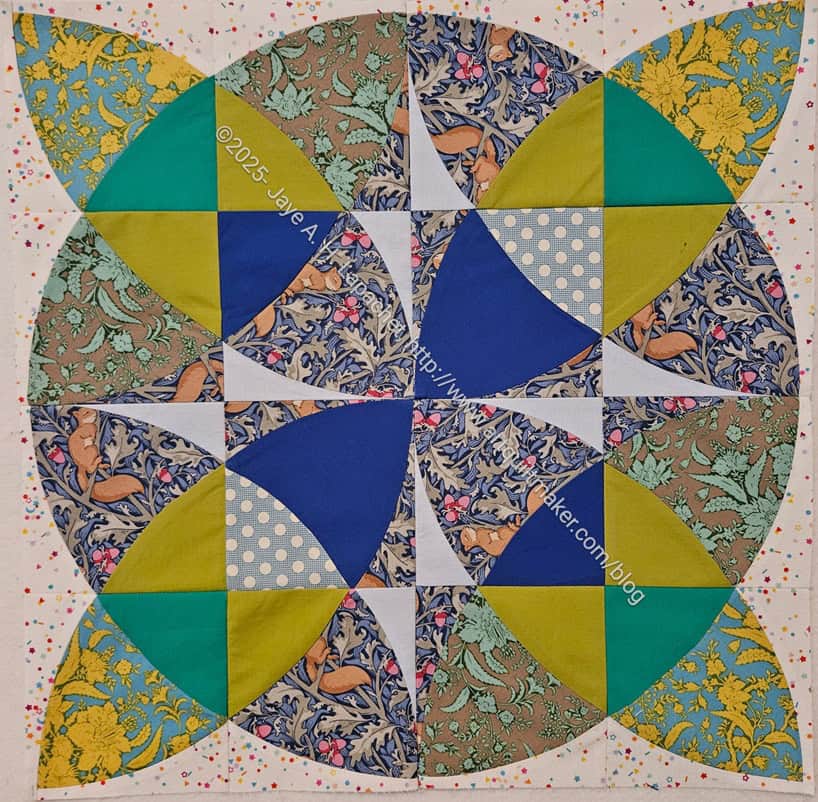
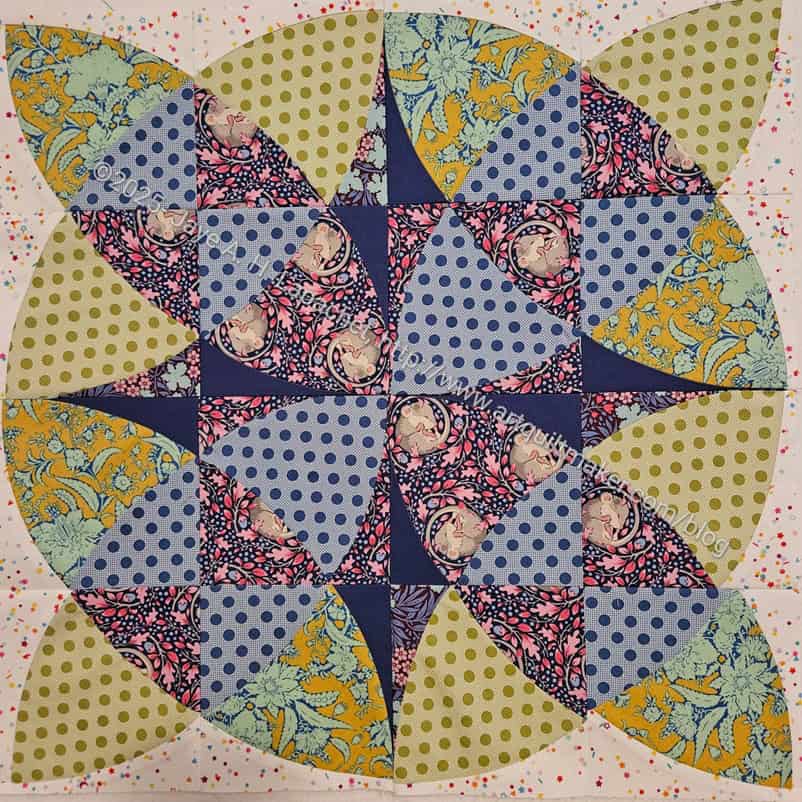
The Pearce is not going well. This curve is nearly impossible to sew on the machine. I have tried at least 4 times and ripped it out that many. Right now it is on timeout while I finish the Multi-Pocket Organizer.
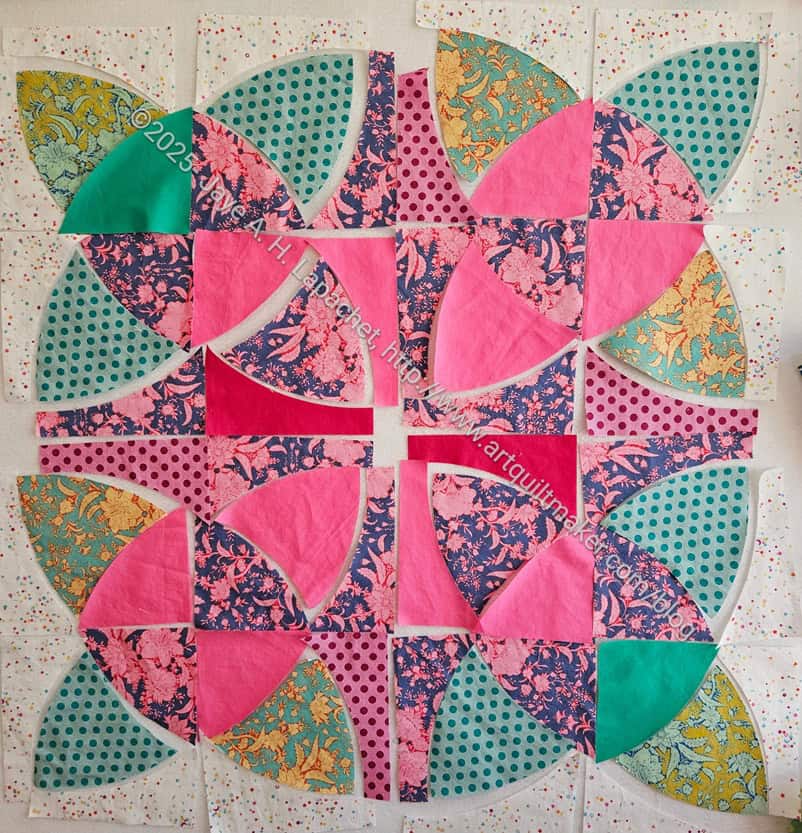
Pearce in Progress
The bad part is that this was going SOOO well. I got to the point where there was one seam left to sew (photo left) really easily. I mean the pattern has been a bit of a challenge, but nothing like I am experiencing with that last curve.
I am afraid I should have sewed the curve first. If I make this again, I will do that. For now, I will think about what to do and get back to it in a few days.