Don’t worry. I am not going to tell you about every single one of these I make. I am still in the experimental phase so you get to hear about some of my musings.
Like the Snap Trays, I am experimenting a bit with various parts of how to make this. In this version, I used batting as the interfacing instead of SF101. It works well, but the bag feels a bit floopier, which I think is interesting, though maybe not preferable. It works, but SF101 or, maybe, DecorBond might be better. I haven’t tried DecorBond yet.
I am using fabrics similar to those I used for the Snap Trays. I have a bin of Sorbet fabrics I was using for the Block-a-Long a million years ago. There is a lot of fabric in that bin, so even using some for these bags will leave plenty for me to pick up the Block-a-Long project again. They have a Mary Engelbreit-ish look to them.
Carrie shared the pattern she is using for a few tote bags. When I saw it, I realized it was the pattern we discussed and she bought at Golden State the last time we visited together. Then she shared the bag she made.
The pattern is very similar to the Essentials Tote I made for Cyndi and Sue S.
Carrie’s bag uses some lovely textured fabric that looks like it would wear well. The handles are also nice and wide.
I am so proud of her. Her bag making skills have really taken off and I am so inspired by her fearlessness at trying new things.
I sent off the Butterfly set to its new home. One of my fabulous readers made a very generous donation to an organization of women helping women. I sent the check straight to them. This happened after I mentioned the organization for whom I originally made the set declined to include it in their auction. Their loss.
I don’t normally make bags to sell. The organization to whom I gave the money is very dear to my heart. They help women with scholarships for academic degrees. I received a scholarship for my undergraduate and graduate degrees from them. The organization made a huge difference in my life. I hope that this small effort on my part makes a difference in another woman’s life.
I finally finished the Butterfly Superbloom, but it is bittersweet. The organization to whom I planned to donate it has decided they have something similar and don’t want it, or the Dogwood Pouches, for their auction. 🙁
I have to figure out to whom to gift it or whether I can do my own raffle and send the money to the scholarship fund. Let me know if you want to buy a bag for a good cause!
I am happy with the way this came out. I like the positioning of the butterfly on the side.
Superbloom: Side pockets exterior
Of course, I love the side pockets. They are so fun!
I think I am done with the Superbloom pattern for awhile. I think the white of the zipper tape stands out a bit, however the rainbow teeth go well with the fabric. The side seams stands out a bit in the photo, but it isn’t as noticeable in real life.
Superbloom: Side pockets interior
I accidentally put a treat inside one of the side pockets. I hope whoever ends up using this bag will appreciate the various places where the butterflies are located.
I finally finished this Superbloom. The Hindsight Superbloom was a high. This one felt like a slog. I don’t know why except that everything that could go wrong did go wrong. This is completely my fault, because I have been somewhat distracted by life. It was still frustrating.
Superbloom #3: interior
The outside looks fine and I am pleased by that.
My aunt loves irises and I found some iris fabric that I knew I had to use for her. The the fabric looks fine , but the lining is too saggy for my tastes, despite my use of a 5/8 inch seam allowance. I know the Muggles won’t know, but you’d think by now I could manage a non-saggy lining. 🙁
Superbloom #3: lining
Normally, I would use a white or very light fabric for the interior, but that iris fabric is so perfect for my aunt. I could have used it for the outside, but I really wanted to use the canvas I bought at Bolt for her for the outside.
Superbloom #3: top closed
I had to buy that ochre fabric after the fact for the zipper panel as I thought the iris fabric would look too chaotic. The ochre fabric is a weird color, but goes with the background of the iris print. Also, it was wonderfully soft.
I think it goes very well with the purple zipper. I don’t think it should, but it does.
Superbloom #3: side interior pocket
Superbloom #3: lining interior pocket
I did use some dots on white for the inside pockets as I thought they would be too dark if I used the iris fabric. I also think I want to make a pouch or a smaller bag with what’s left of the iris fabric.
Superbloom #3: side pocket
Superbloom #3: side pocket lining
I still like the design of this bag. The side pockets are especially cool. I haven’t ever used this bag as I don’t have one of my own, but maybe I need to try it out.
Once I got close to finishing this tote, I stopped working on the SMAP version. I needed to send this one off to my aunt and I wanted to get it done. now that it is finished. I can get back to that bag.
I am making good progress on the Superblooms, but not enough. I really want these to be finished today, so I can take my aunt’s to the post office and mail it. I also want to show at least one of them at the meeting on Saturday. I don’t know if either will happen.
As you can see, I have made good progress. The exteriors are finished and the handles on my aunt’s are sewn on.
For my aunt’s Superbloom, I used cotton webbing for the handles that Cyndi made me take from the free table one time. It is wider than called for, but I think looks good with the exterior fabric.
SMAP Superbloom
The SMAP version is less far along. I had to rip the handles out twice. Hopefully, third time is a charm.
I’ll be working on the lining next and that is always the last step. I have a couple of interior zipper pockets for each bag to make and then lining assembly.
I am preparing to start a new contract and the company is really a pain. It has been taking me many hours I could be sewing to set everything up. Finally on Friday, I had a nice chunk of time, so I got to work on the two Superblooms I have been wanting to make.
I was able to get all the pieces interfaced and the side pockets made. I had some trouble with some fusible foam. It turned out to be fusible on both sides. Since it was a scrap and, I hadn’t marked it, I didn’t realize it was fusible on both sides. I don’t normally buy fusible interfacing. I especially don’t buy double sided fusible. The piece was just big enough for me to cut the foam for the bag sides. Perfect, right? Yes, until I figured out that both sides were fusible. On one hand it was good, because I could just press it on the fabric. On the other hand, I had to use a press cloth and I am not sure if my press cloth is gluey. Iron-off** is a wonderful thing for cleaning the iron.
I have a couple more pieces to cut from the new fabric I bought at Needles, but otherwise I think the rest will go quickly.
As I have mentioned the prep is the hard part.
**N. B. : Obviously, you should shop at local quilt shops and small businesses. However, if you are too busy or can’t find what you need there, I use Amazon affiliate links and may be paid for your purchase of an item when you click on an item’s link in my post. There is no additional cost to you for clicking or purchasing items I recommend. I appreciate your clicks and purchases as it helps support this blog.
After years of whining about the Hindsight Superbloom, it is finally done. Apparently, thinking up someone to whom I could give this bag was the key.
I carefully fussy cut the panels, so those pink flowers were featured. I wasn’t sure how it would look, but it looks good to me.
Hindsight Superbloom – back
I also remembered to machine sew on my label! Yay!
I like the way the handles look. That print is fun. The handles aren’t that comfortable, though. They seem to be made from some kind of polyester. I was trying to avoid sewing strips together to make the handles and that worked. I don’t think the recipient will be able to carry a lot of heavy items in the bag comfortably.
Hindsight Superbloom – interior
Hindsight Superbloom – interior zip pocket
Hindsight Superbloom – top
I used some dot fabric as the lining and it looks really fun. It also achieves my goal of being light colored, so easy to see the items in the bag.
The last photo (above, right) shows the bag closed. It has a recessed zipper. In that photo, the bag has all the small gifts I got for the family who are caring for my stepdad.
I think I might add a slip pocket or two to the next one I make.
Hindsight Superbloom – side pocket
One thing I love about this bag are the sides pockets. They are super cute. I don’t know if they are useful, but I think they would be.
I am really pleased with the way this came out. It went together really well.
I finally started the Hindsight Superbloom. This is a project that has been on my list for a long time. I was excited to make this version at the time I made the first Superbloom. Somehow I lost momentum, but recently I was inspired to pull out the fabric and the pattern and get busy.
Yes, I remembered to put my label on the bag before I started to assemble it! I am happy about that.
Hindsight Superbloom in process with handles
I had a little trouble with the handles as I was using webbing instead of making them from fabric. I eventually got them on the bag. UGH! I know why the process had to go the way it did, but I found it difficult.
I am always surprised at the size of this bag. It is quite roomy, but I always think it is bigger than it actually is.
So far, I am l loving the process. Those side pockets are awesome.
I received an email from DH’s cousin last week saying “i was canvassing for kamala in both reno and racine WI for 5 and 7 days in october, respectfully, just home this wednesday…..i needed a shoulder bag that would hold the door hangers we were distributing….i looked in my closet and found the bag you had made for me one christmas….it worked perfectly through many days of heat and rain!!!…just wanted to let you know you came along with me!!!”
This bag is from 2011! I am so thrilled to see it again. I didn’t remember giving it to DH’s cousin, however I am really glad it was useful.
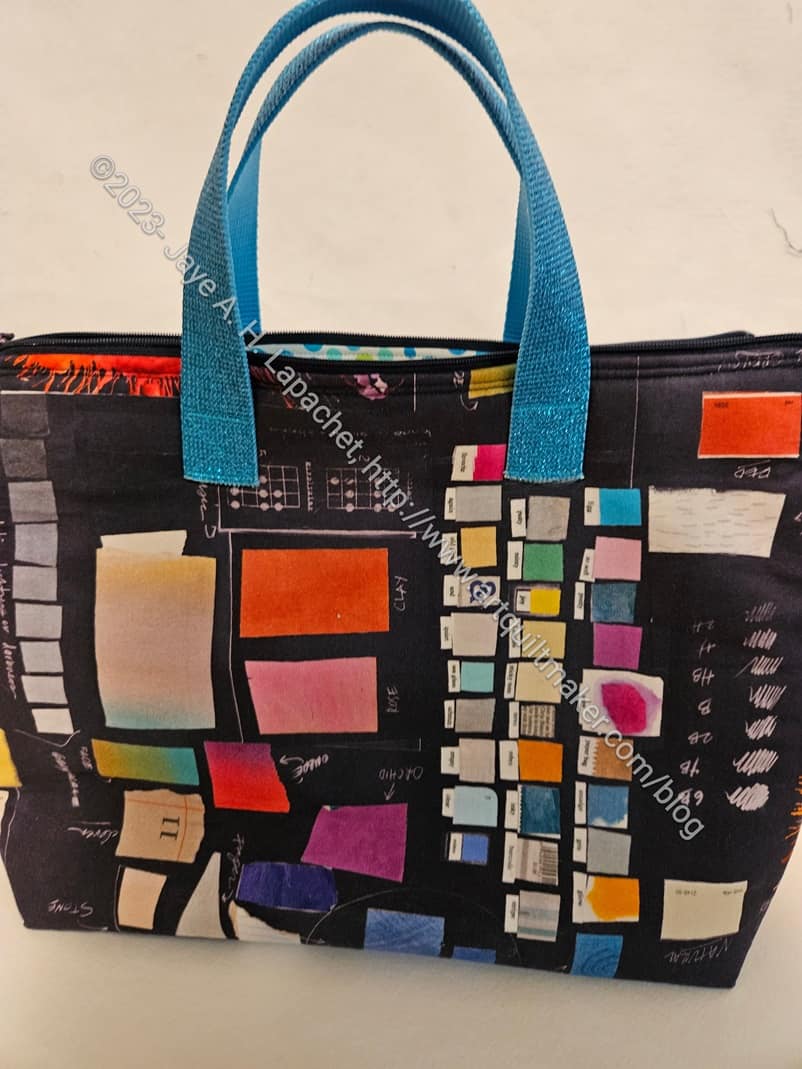
This the Kit Supply Tote I made for Carrie. It looks the same as the one for Sue, mostly because I used the same fabric for both of them. I highlighted the paint chips on this one and the color wheel on Sue’s.
We had a holiday lunch yesterday, which was super fun. I was hopping about the week before, because I could barely contain my excitement in giving these totes to them. I basically thrust the gift bags into their hands as soon as we sat down at the restaurant and made them open them. They seemed excited as well.
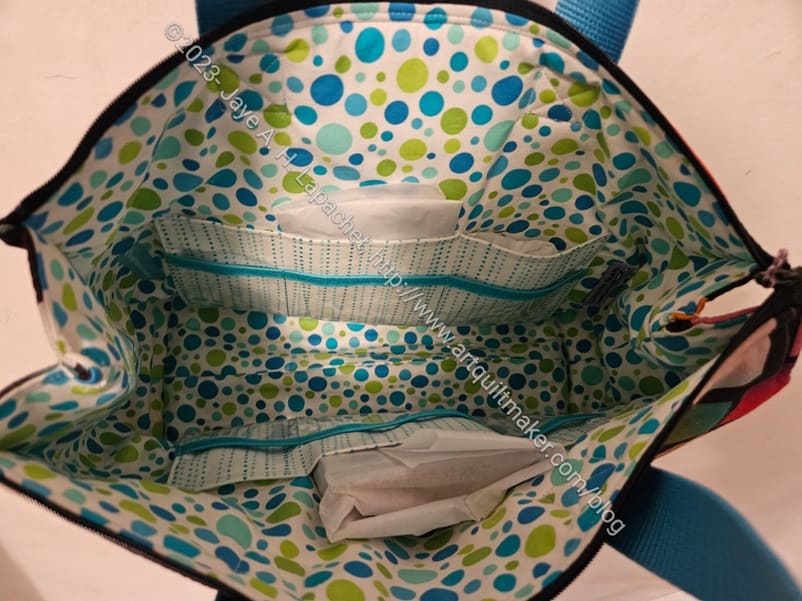
Kit Supply Tote: Carrie’s inside
I put a few small gifts in side just because I don’t like to give empty bags.
The insides are the same on both. I designed the pockets differently from the pattern as I wanted to put two layers of pockets for added storage. On Carrie’s tote, I separated the pockets more. Both have vinyl pockets on top of the fabric pocket. The vinyl pocket is edged with some turquoise doublefold elastic.
Carrie was super excited that this bag matched her Hackney bag. 😉
The other day when I wrote about this project, I was concerned that I wouldn’t have time to finish it before the Retreat. Despite some unsewing, I had no problem finishing it.
I realized while making this bag that one reason I enjoy making bags is that I still have a lot to learn. This bag is pretty good work and I am not ashamed to give it to someone at the Retreat, but the work could be better. It isn’t that my workmanship wasn’t good; it was that I wrestled with the 3D-ness of the bag while top stitching. I just need more practice.
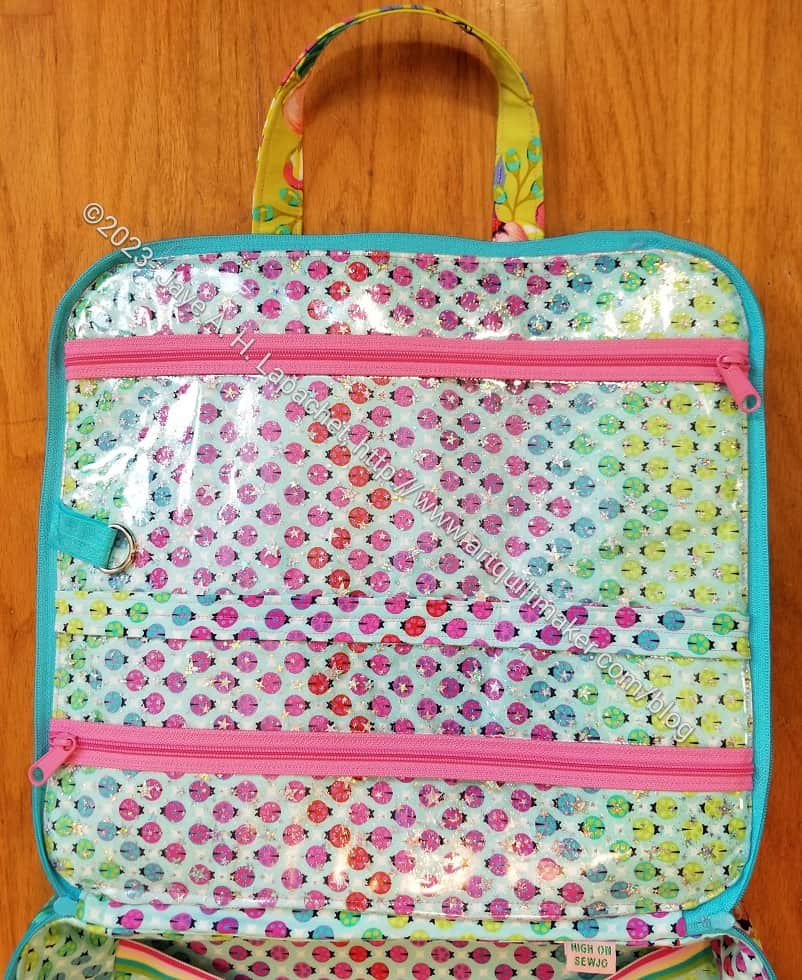
Amethyst Project Bag: inside pockets
I think the bag is more useful with the vinyl inside pockets. I talked about using the directions from the A Place for Everything v.2 bag as guidelines in a recent post.
You can see that I added a D-ring, as usual. I wanted to make an I Spy pouch to clip on to it, but didn’t have time. I also am not sure I have any more of the two fabrics. Maybe later.
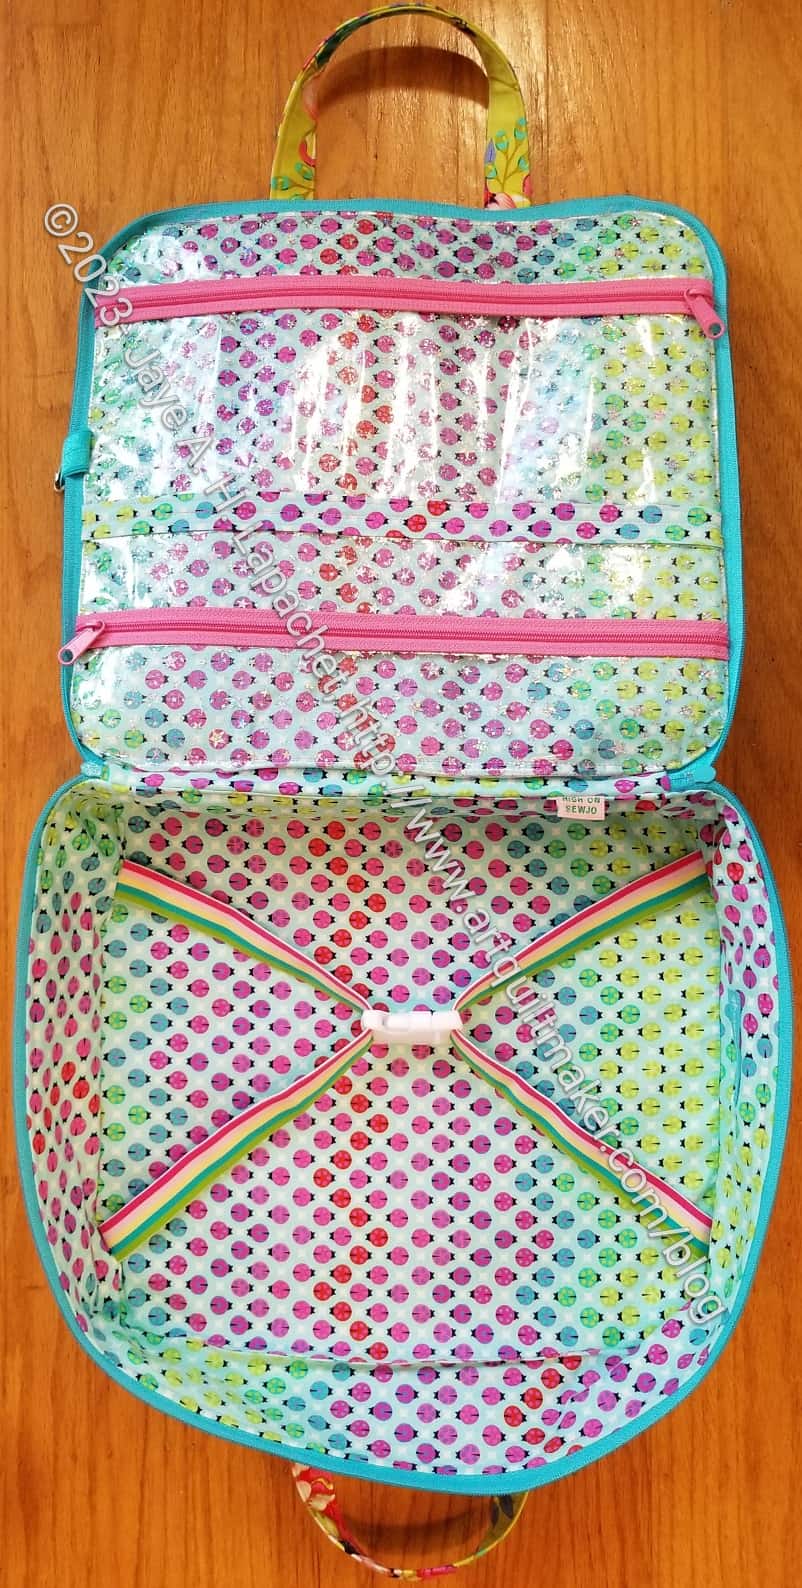
Amethyst Project Bag: bottom inside
The bottom section is where I installed the elastic. The dimensions of this bag are 14.5 x 13.5 inches, which is large enough for most quilt blocks. The elastic and parachute clip keep them inside. I think this could be used for rulers as well.
Amethyst Project Bag: inside
In general, and overall, the inside is very useful, I think. The lady bug fabric (from the Tula Pink Tiny Beasts line) looks really fun. There is a bit of movement in the fabric as well.
All of the Tula Pink fabrics are designed to coordinate, so I think the outside (Ka-Bloom) and the ladybugs go together. I suppose ladybugs crawl on flowers sometimes….
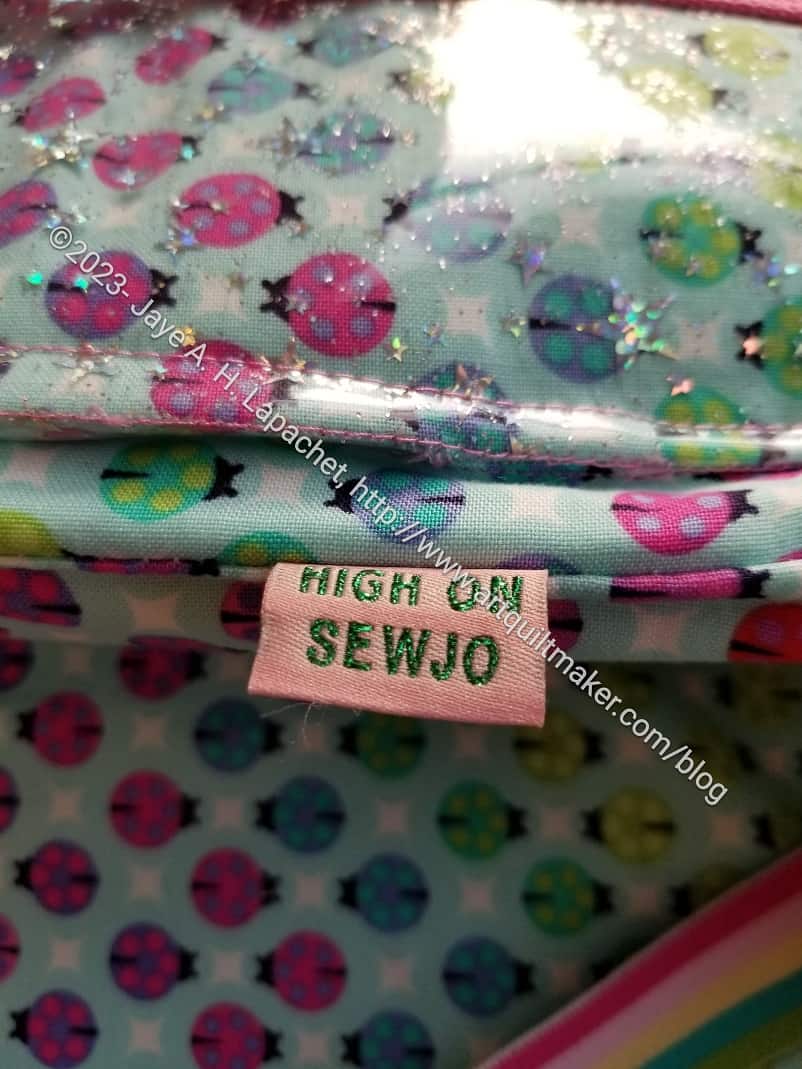
Amethyst Project Bag labelled
Finally, I used another one of the Advent labels. If I make one of these again, I’ll put it on the side. I am still trying to find the best place to attach labels.
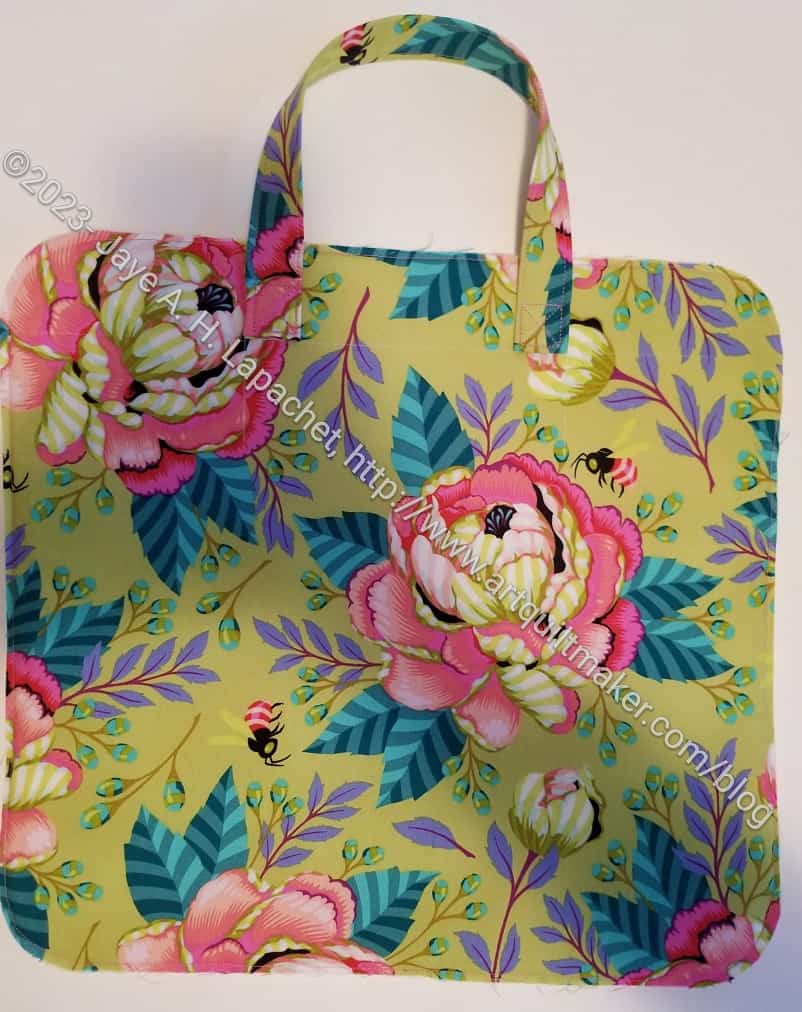
This is not a Sew Sweetness Minikins pattern, but it is one that I have had for awhile. I am glad to finally be trying it out.
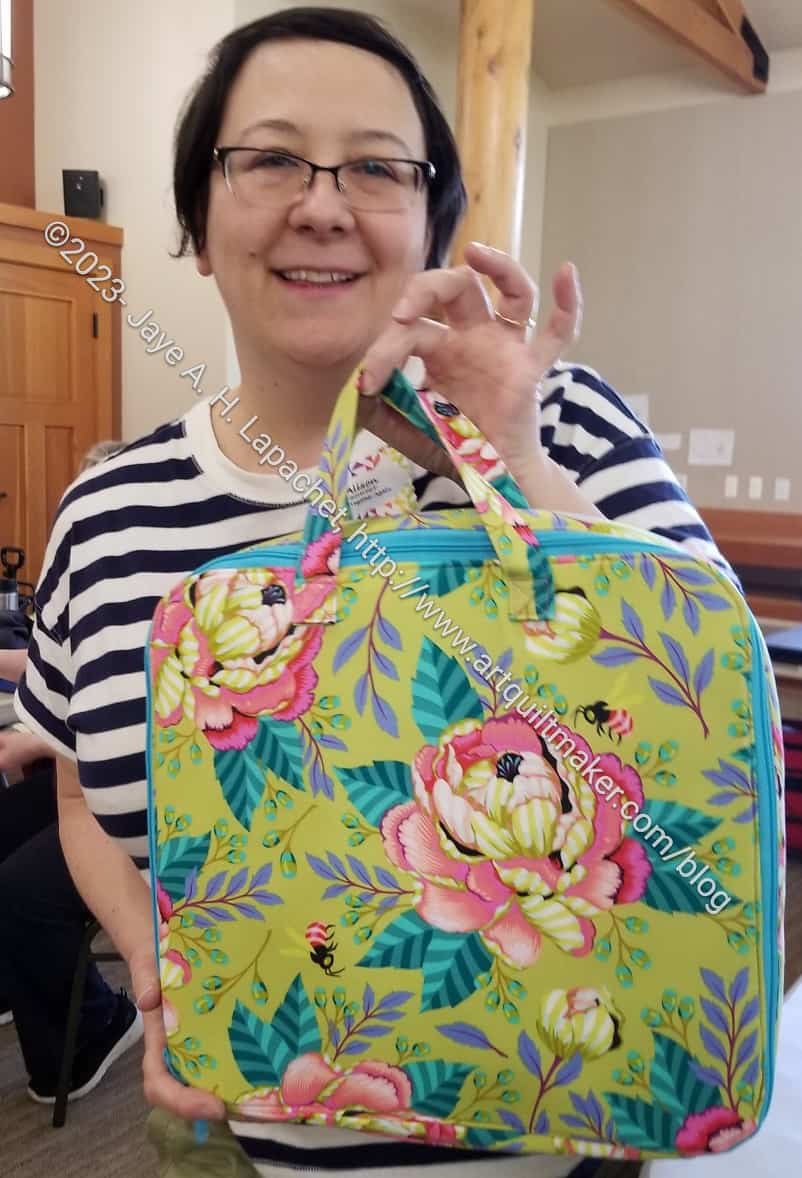
A long time ago, I promised Alison a bag to give away as a prize at the retreat. I thought I would finish the Brocade Peony Ultimate Carry All Bag and give that to her, but I ended up not doing that.
Amethyst Case – process – top
Finally, I decided to make an Amethyst Project Bag. This is a bag you can put pieces of a project into and keep them all together. It isn’t huge, so you can’t put yards and yards of fabric in there, but templates, most rulers and cut pieces would fit very well.
It is not a Minikins project, but it is a Sew Sweetness pattern.
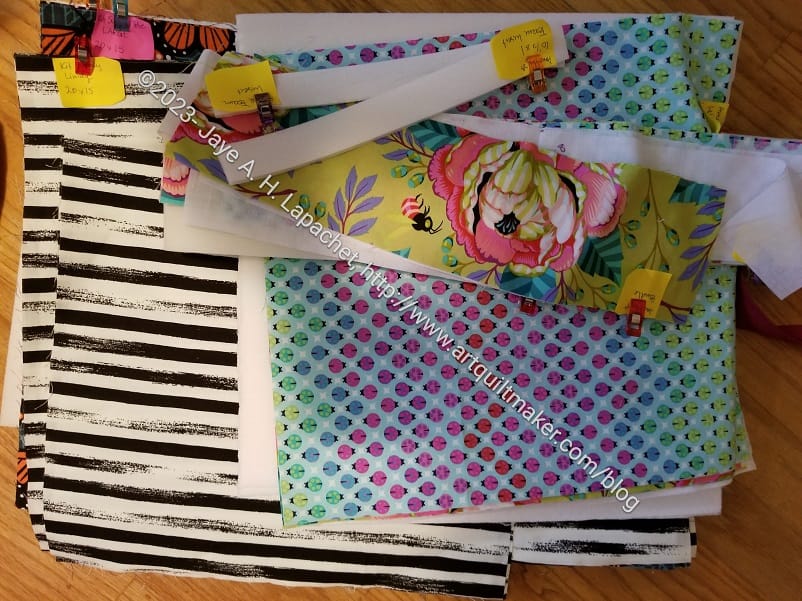
Cutting bags at Sew Day
This is one of the projects I talked about cutting out at Sew Day. It is pretty amazing, to me, at least, that a project can move from a pile of cut pieces to something that is starting to look like a bag in a few hours.
Amethyst Case – in process – bottom
I haven’t finished. In fact, I have only made a start. I hope that I will have enough time to finish it before the retreat. Yes, I waited until the last minute, but I have had deadline after deadline I have been trying to meet. I know they are self imposed deadlines, but they are still deadlines for bags I wanted to give as gifts.
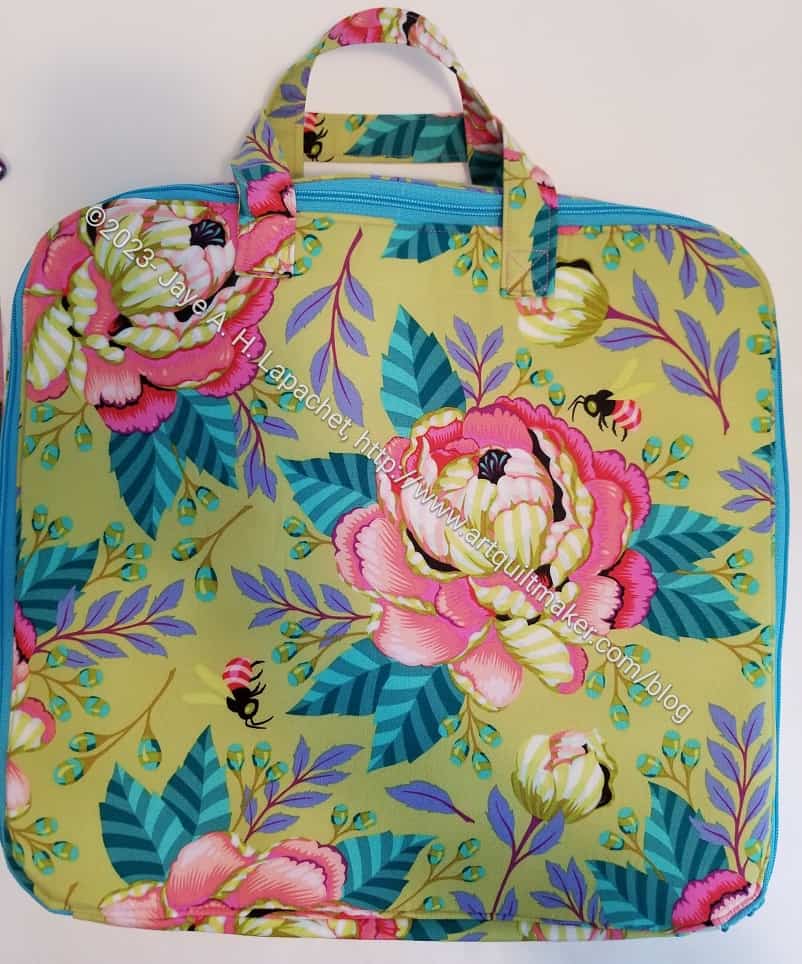
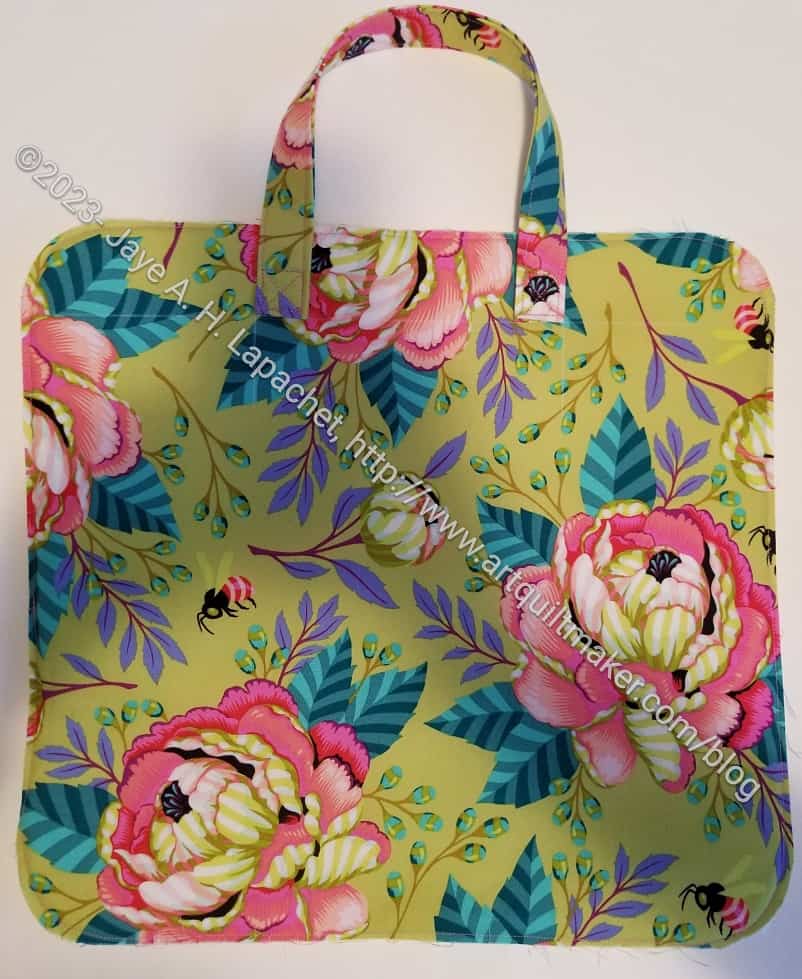
The bag is not exactly square. It is 14.5 x 13.5 x 3.5 (depth). I could only orient those giant peonies in two ways. I chose the other main panel for the top because one of the peonies was close to the center.
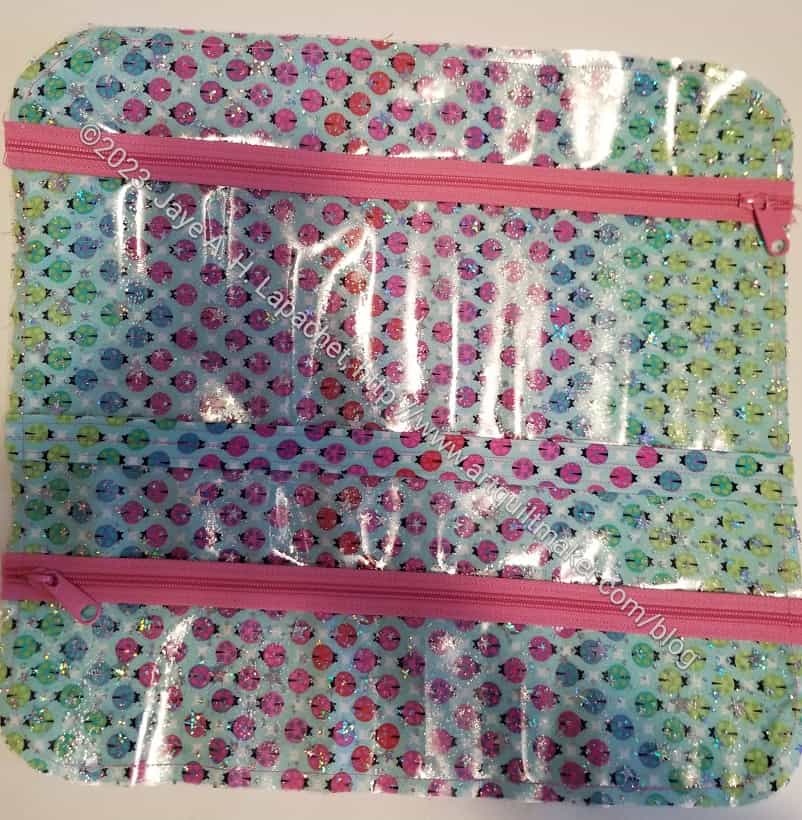
Amethyst Case – in process – inside pocket
I wanted to make a bag that would be appealing to the guild members. I hope this Tula Pink fabric appeals to many of them. I had planned to put some piping around the edge, but decided I needed to make one first before I started really messing around with the design.
Speaking of messing around with the design, I did make this inside front pocket instead of the short mesh pocket and the two pouches called for in the pattern. I like to see what is in my pockets. I am not sure this came out 100% perfectly, but I think it will work. I used the directions for the pages from the A Place for Everything v.2 bag as guidelines for this pocket.
I normally like to make the bag at least once first, but I don’t have the time.