Tools and Supplies for Drawing

Words are very important to me. I like the shape of them – the way they look when written and the way they feel on my tongue, which is why the title is tools and supplies and not just supplies. Supplies would be more accurate, but I don’t like the shape of that word.

I saw this picture – found from a Twitter link – and really liked it. One thing I like about it is the abundance, but I also like the fact that the background is white. There are no distractions from the background in the picture. This style allows me to focus on the elements of the picture. Take a look at the website.

clipped from www.wilfreeborn.co.uk

Tools I use
  blog it

Expansion of Design Wall Space


With some Christmas money, I decided to buy one of the Cheryl Ann’s Portable Design Walls. Terri had one at the CQFA retreat last year. She let me use it and I found it to be very useful. Despite our financial woes, I decided to buy one. It will come in very useful when I work on the FOTY 2008 quilt, which is my project for the retreat.
I looked around the web a bit to see if I could get a better price than Cheryl Ann was offering and ended up buying it at the Quilted Banty.They were fast!

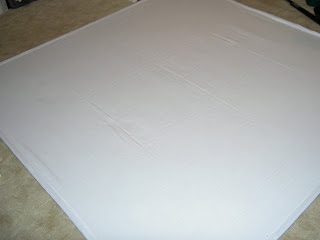
The boys were gone over the weekend, so I set about trying it out. I wanted to make sure all the parts were there and I would be able to set it up. Above is a picture of the behemoth on the floor of my workroom.

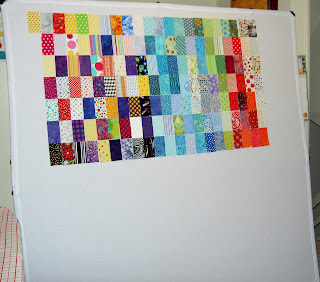
This is the thing set up with some of the FOTY patches placed on it. I have to say that it is a bit wobbly. By that I mean that if you walk by, it waves a bit in the breeze you make. I may buy two extra legs to kind of stabilize it.

Once I put up the most recently cut patches, I had a sinking feeling that the FOTY 2008 quilt will be quite large. A lesson? Perhaps.


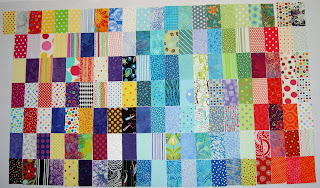
I am determined to get the piece sewn together this weekend. That may be more challenging than I originally thought, mostly due to the Blue. I really like all those blues together. You can see, in the photo above, that I have placed them together. In a kind of test, I also placed the greens and white background fabrics together (above). I like the look. This means that I my have to unsew all the patches I have already sewn together. Before I lose my mind, I am going to post them all up on the design wall to see what they all look like. I also have to remember that I cut second blue patches and have been doing so as I dig into other blues, so I don’t need to keep those blues together to get the same look.

I had planned a Rail Fence type setting, but may sew them together up and down as shown above. We’ll have to see. Your opinions are welcome.

Longarm Class 1/9/2009

I want this to be a year of creativity. I can’t say that this is on my to do list, but it is in the back of my mind. One way to do that is to sew as much as possible.

To that end, I took the longarm certification course at Always Quilting on January 9, 2009. As a result, I am now a certified longarmer at Always Quilting. Don’t be too impressed as this certification only gives me the privilege of renting their longarm to quilt my quilts. Still: YAY!

After seeing the demo in November with the CQFA team, I signed up for the class. I was curious about the whole longarm process and because I wanted to see how I could incorporate the longarm as a tool into my repertoire.

That being said, I learned a few things about longarming:

  1. Using the machine takes practice and people who machine quilt well should be admired greatly
  2. There is much more to learn
  3. I will never be Colleen. I also don’t want to be her and will still use her fabulous services for some of my quilts
  4. I am not going to quilt all of my quilts myself
  5. Using a pantograph is hard
  6. Taking the class will improve the quilts I prepare for someone else to quilt

I really enjoyed the class. It was an expanded version of what we learned at the demo. It was great to hear some of the same information again as it helps to cement it into my mind. Some of the information she gave about preparing quilts, especially, applies to the computerized machine they use to quilt quilts for customers. It is a large computerized machine.

One thing I learned was that the longarm professionals vary, but if you understand some of the background and the way the process works, you can work with your longarm professional of choice much more effectively.

Always Quilting wants you to have square corners. No lopped off edges or strangely shaped corners, because you use the corners to pin the quilt to the machine. Oh! Now I get it. Better fix that I Spy quilt.

Kit also suggested practicing good pressing habits in order to reduce bulk where seams meet. The centers of pinwheels and 8 pointed stars can be a challenge for the machine. I was surprised to learn that the machines have a hard time going through selvedges! I’ll have to look at some of the quilts that Colleen has quilted for me to see what she does in this circumstance.

  • The Always Quilting staff wants the backs 6″ wider than the quilt and had several suggestions for the back. The back needs to be longer than the top, but they don’t care how long.
  • It is ok to piece the back, but they don’t encourage it and the same rules about bulk and bulky seams apply.
  • Kit suggested using large pieces of fabric rather than piecing a second top for the back.
  • She also said to consider pressing seams open on the back and using a larger seam allowance to help reduce bulk.
  • Both top and back should be square and FLAT. Kit reiterated that quilting does not cure all evils. She gave some tips about measuring the top before one cuts and attaches borders that were really interesting, especially to make sure that there isn’t more fabric in your border than in the quilt top.

Always Quilting prefers batting such as Hobbs Natural and Warm & Natural, both of which they carry. A quiltmaker can bring her own batting but they reserve the right to not allow you to use it. Apparently, batting with scrim works best. As you know, Colleen has quilted my quilts using Hobbs Organic for awhile with no problem, so I am not sure what I am going to do about that.

Kit said that they want a quiltmaker to use the shop thread, because of the way it interacts with the machine. Again, you can bring your own, but they reserve the right to not let you use it. They use Signature, King Tut by Superior and Permacore, which is their preference. The Permacore is polyester wrapped in cotton. Bad thread can incapacitate the machine, which is why they encourage quiltmakers to use the shop thread. They have hundreds of colors.

To put the quilt on the machine:

  1. Put the back on first, right side DOWN. You could put a quilt on the machine sideways. This orientation works well for row quilts because it is easier to quilt different things in rows.
  2. Find the center of the back by folding it in half.
  3. Pin the back to the leader about 1/4″ down from the edge of the leader. There are notes in Sharpie on what attaches to what leader. There is a black mark in the center. Pin from the center out.
  4. Ask your helper if the machine has been oiled
  5. Brush the lint out of the bobbin area. There is a very important disk in the bobbin. Hold on to it when changing or cleaning the bobbin.
  6. Line up batting on backing right below the pins on the leader.
  7. Use a single stitch to baste the batting to the backing.
  8. Baste top to batting, lining it up just under the batting.
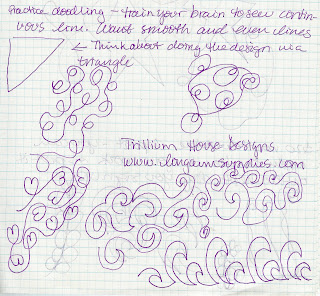

I have found it important to doodle a bit before going to class. It seems to train your brain to sew a continuous line. It helps with practicing for achieving a smooth, continuous line. I assume this would be rule for going to quilt as well. It gears up your muscles for the quilting motion. Above are doodles I made during class. They are my own variations inspired by designs from the various books the shop had. I wasn’t able to try them all out on the machine.

One of the books we were able to look at was one by Trillium House Designs. They have a set of three books called Pocket Guides to Freehanding containing a multitude of quilting designs. Kit said Always Quilting didn’t carry them, because books 2&3 were too advanced and the company did not sell book 1 separately. The price for the set is also $55, which is a bit steep.

I think that there are a lot of continuous quilting designs out there you can use as a guide for your own quilting. It would pay off to start collecting some of those designs and practicing them with pencil and paper before renting the longarm.
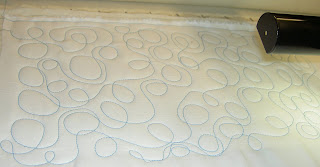

My section of free motion quilting loops. This is the pattern they encourage their students to use for most quilting project. They also encourage people to use this size of pattern when quilting.


My attempts at using the pantograph (above). It was very hard to get the shapes smooth and I thought I would have an easier time posting the design on the wall and following it with my eyes, rather than trying to trace it using the laser.

I am scheduled to quilt one of my own quilts on February 6. I am planning to quilt the Crazy Test. I was planning to quilt the hexagon/I Spy quilt, but decided to do something I didn’t care about much before quilting something I did care about. I do have to make the back before I can quilt it. The longarm doesn’t work very well without a back!

I was really pleased with this class. I thought it was well run and thorough.

PIQF Follow-up


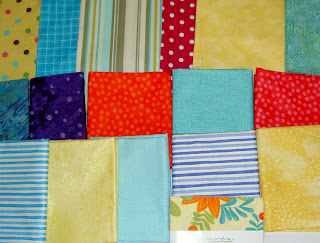
Like everyone else, the economy is affecting our family so I was extremely restrained in fabric purchases at PIQF this year. I tried to only buy fabrics that were really calling my name. As you can see, I still have the turquoise/aqua as well as dot themes going.


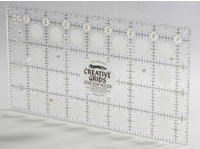
I am excited about the fabrics that I bought and I also got the best ruler in the universe. I know rulers and this one totally rocks. It is a 4.5″x8.5″ Creative Grid Ruler. The ruler is great because it is big enough to cut without fear that I will cut off my hand, but small enough so it doesn’t hang over the edge of my small cutting table. It is also the right size for the variety of pieces that I cut. For example, I can cut the FOTY pieces without having to move the ruler at all. One end is exactly the right size. TFQ and I both wanted to use it at the same time, so I may need to buy a second one for when we are sewing together. If you don’t have this ruler, go out and buy one now.


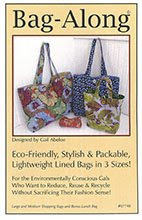
I also bought two new bag patterns. I know I know! I really plan to make them. I have some canvas-type Moda fabrics covered with cupcakes that I bought in Virginia this summer. I think it will be perfect. One is a vertical bag by Liesl + Co called the Backpack Tote. It converts from a tote to a backpack. It requires some hardware that I have never used before, but I can get through it. If not, I will bring the pattern to Seattle in the spring and TFQ can hold my hand while I work on it.

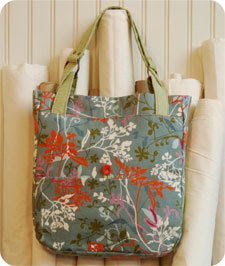
The other is very similar to the Eco Market tote that I have been using. It is by Gail Abeloe, owner of Backporch Quilts in Pacific Grove.
I bought it because of the slightly different shape of the top and the construction of the bottom, which you can’t see in this picture. It has a square bottom and not side panels. We’ll see which one I like better.

I spent a lot of the show really looking at the quilts. We didn’t succumb to trying to take photos at times when there were too many people in the hall. This resolved made me less annoyed and allowed us to really look at the quilts. We took photos on Wednesday evening at the preview and then late in the day when people had left. It worked out well. It was also a joy to see that people are using cheerful fabrics again. There were many, many quilts that were simply wonderful and I know you will see many of them show up in my end of the year roundup of favorite quilts.

Despite the fact that I had to turn around and, virtually, go straight to speak at a conference, it was great to get away, sleep in, not worry about taking care of anyone. I feel like I take a lot of time off, but I seem to need it. I have had several busy weekends in a row, though, so perhaps that is the reason.

Hanging Quilts

I was glad I stopped by melody Johnson’s blog today as she is talking about how she hangs her quilts. Very interesting!

I hang my quilts from a system that uses a shelving standard screwed to the ceiling, and S hooks and fishing line looped over the ends of the rod. Or in this case, actual picture hangers.I have to have a way to hang many sizes of quilts, and I change them out often. This system is hardly noticeable since the eye usually sees the quilt first.
  blog it

Pressing Matters

Houseguests are gone, I have a few more days off, so I am back in the blog saddle. I have lots to show and talk about, but I will try and break it up into manageable bites.
At the beginning of November, I promised a report on my new iron. It is has been weighing on my mind and I have been tripping over the box (not recycled to remind me to write this), so here it is finally!

TFQ is my iron monitor, mostly because she presses a boatload of fabric for me each time she comes to visit. Once again, it was time for a new iron, so we went out and bought one when she was visiting for PIQF. I defer to her knowledge since she is usually in the midst of pressing that boatload when my latest iron gives up the ghost. I am partial to irons I can replace relatively inexpensively at my local Target. I know some of you love your Rowentas and other high end pressing tools, but I haven’t heard enough consistently good things about them to spend the money. Change my mind!

This time I bought at Black & Decker Home Digital Advantage iron. So far, these are the things I like about it:

  • It lets me know when it is ready
  • It lets me know when it is going into auto-shutoff mode
  • Auto-shutoff is not so short a time that I get annoyed
  • When I turn the steam off it is really off
  • When the steam is on, I get a lot of steam
  • Filling the water reservoir does not require bodily contortions best performed by a Cirque du Soleil acrobat
  • The heat is hot; if you touch the soleplate, you burn the offending body part
  • The parts do not feel flimsy – the button for setting the temperature is solid, the dial for adjusting the steam doesn’t wiggle

All in all, I like it. I am still wondering if the iron switch is the culprit for my Pineapple woes. Unfortunately, I didn’t number the Pineapple blocks as I made them so I don’t know if the larger border blocks were made first or after I got the new iron. I really haven’t figured out a way to test the iron on this problem and friends think not, so the iron stays.

As an aside, take a look at Tacky Christmas Yards for a bit of Christmas cheer?!? And if you need any apron patterns (great for embellishing!), take a look at these over at TipNut.com. Marie D pointed them out to me and some are kind of fun.

Thanks for reading.

Oh Joyous Day!!

I had a lot to do today, as is par for the course, I guess. I needed to be out of the house early, because I had an appointment and wanted to stop by my designer as well as take my machine in for a service before the appointment. (Just to cut the drama, I accomplished it all!).

I was feeling quite sad as I packed up my machine, knowing that it would be at least a week before I would be able to work on the Pineapples again AND that now I had to spend valuable time going in search of a thimble. The thought of no fiberwork was too upsetting to even contemplate, but the machine really needed the service. My dealer went out of business and the subsequent dealer who serviced my machine was subpar IMO, so I hadn’t taken it in for service in a long time.

I sucked he drame, uncertainty and all of my worries up and took the poor machine in. Then I went about my business of the day. Eventually I made it home and went up to the workroom. The first thing I saw, sitting smugly in the middle of the floor looking like it had just returned from an illicit rendezvous, was the thimble. I was elated! And puzzled. The floor of the workroom was somewhere that I searched and, unless I am going selectively blind, the thimble wasn’t there.

Regardless, I am thrilled. I can make progress while the machine is gone and I don’t have to go and try to replace the thimble. I will definitely buy a second thimble the next time I am at a quilt shop or show that has them.

Janome 11K

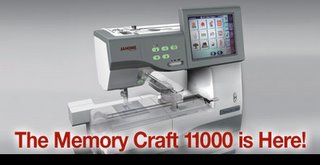
I had been thinking of this machine lately and had a chance to go and look at it on Saturday. I am in love. The thing is wonderful! I want it. You can see all of the bells and whistles at the official Janome 11,000 page.

I have a Janome 9000 and have been very happy with it. Lately I have been lusting after a new machine and the 11000 looks wonderful. It has the same precision sewing that my current machine does, the color screen (that uses a stylus and not fingers) as well as the larger bed that some of my pals have been raving about in the
Janome 6500. I believe that is that the correct model.

The 11000 can read from CDs, straight from a computer or, as I mentioned from a flash drive! There is a USB slot so you can stick a flash drive right into the
sewing machine! Talk about cyborgs! This is a computer-sewing machine
cyborg, if there is such a thing.

The cost, with all the bells and whistles is too much. I don’t have it.

I went to a different dealer than I have been visting and they were very nice, very attentive and not slimey. Classes on using the machine and the software are included for as long as I own the machine. They also have an embroidery club that meets every
month. They offer membership that club free for a year after you buy a machine. I don’t do a lot of embroidery, but I enjoy the simple things that I do with the embroidery module. With the 11000, it sounds like Janome has made the embroidery module much easier to use and manipulate the designs, so I might use it more often.

Sigh. I just wish it weren’t so much, though I am sure it is
worth it. I told DH about it and he didn’t say anything. I will just
have to work harder and save my pennies. Or win the lottery.