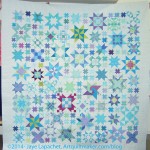
I finally took Sidewalk off the design wall and replaced it with Chain Link. No, Triumphant gets no time on the design wall. LOL! I have a lot of quilt projects happening at the moment. This is the result of starting so much.
This isn’t actually all of the blocks. I have to find a step stool and put the last two rows up at the top. It is enough for me now to see what is happening with this quilt top.
As you can see, I have a lot of the strips sets to make. I think this quilt will go together quickly once those are done.
It is so much easier to get a grip on this design when I can see it.
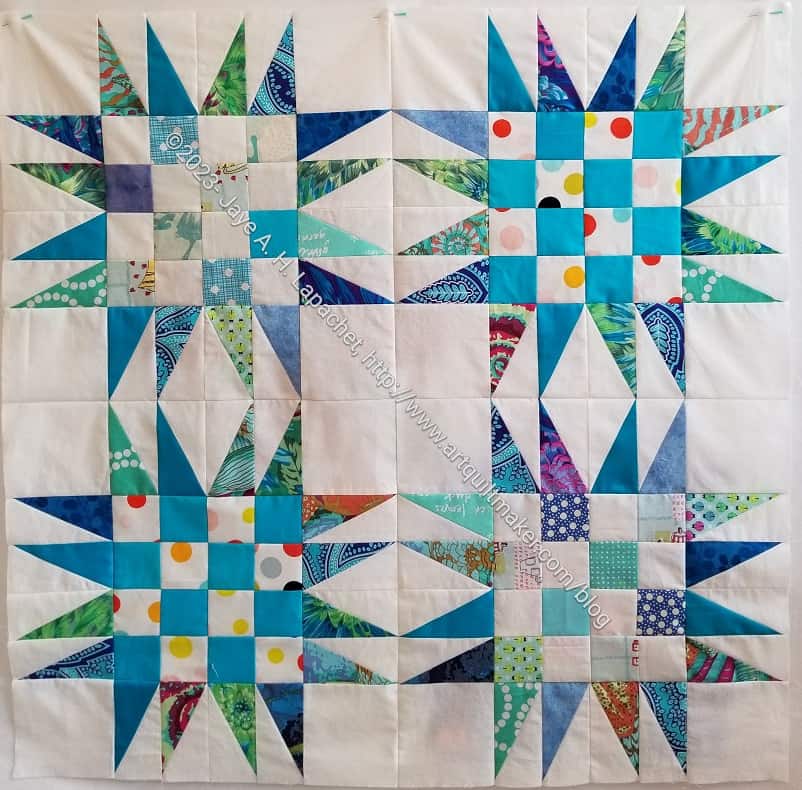
I finished the rest of the block 2 blocks. my design wall is full of Sidewalk, so I used the design floor (LOL!) to lay it out.
What stands out to me is that turquoise border around block 1 (center). It doesn’t stand out to me in a bad way. It definitely highlights the center block.
I kind of wish I had used the purple from the center for the purple tips of block 2, but c’est la vie. I am not ripping out more seams.
Since I had some free sewing time, I spent as much time as I could grab sewing this quilt top together. I concentrated on the half 16 patches first. I had been kind of limping along sewing them in between Triumphant block 2 pieces and was sick of it. I only needed a few more half blocks, so I sat down and sewed them.
I had a few hours while DH was out one evening so I started sewing the blocks together and just continued snatching time wherever I could. Once the half blocks were together this was a relatively easy quilt to sew together.
Sidewalk back
I decided to use red for the back. Shockingly, the back went together very well. Instead of fighting with pieces like normal, this back went together really easily.
I am glad this is finally done! I have some ideas for other versions, but want to get Chain Link and Triumphant pieced.
I am trying to keep up with the Triumphant Mystery quilt. I don’t want that lingering. Since the cutting is the hardest part, I spend as much time as I can on that when I have time.
I cut all the pieces for block 2, but started out just sewing one (of four) together. It has a really different look than ‘regular’ blocks.
I decided to call this quilt pattern ‘ Sidewalk’. There are other quilt patterns called ‘Sidewalk’, but this one looks more like city blocks surrounded by sidewalks than any of the other others. Besides I can’t keep calling it Half 16 Patch Sashing quilt. That name is too much of a mouthful.
I am making good progress. I have sewn the blocks together and am working on sewing them into pairs.
After cutting a lot of pieceswrong and having to re-cut I finally finished block 1. What I figured out is that I am struggling to cut the HRT B pieces.
For the next block, I will label much better. I had a hard time figuring out which ruler to use for trimming.
I have a lot of lists. One of them is in my journal. I get great satisfaction drawing a line through my to do items. I haven’t drawn a line through a project that has been on my list in awhile. You know I have been sewing, but not on those list projects.
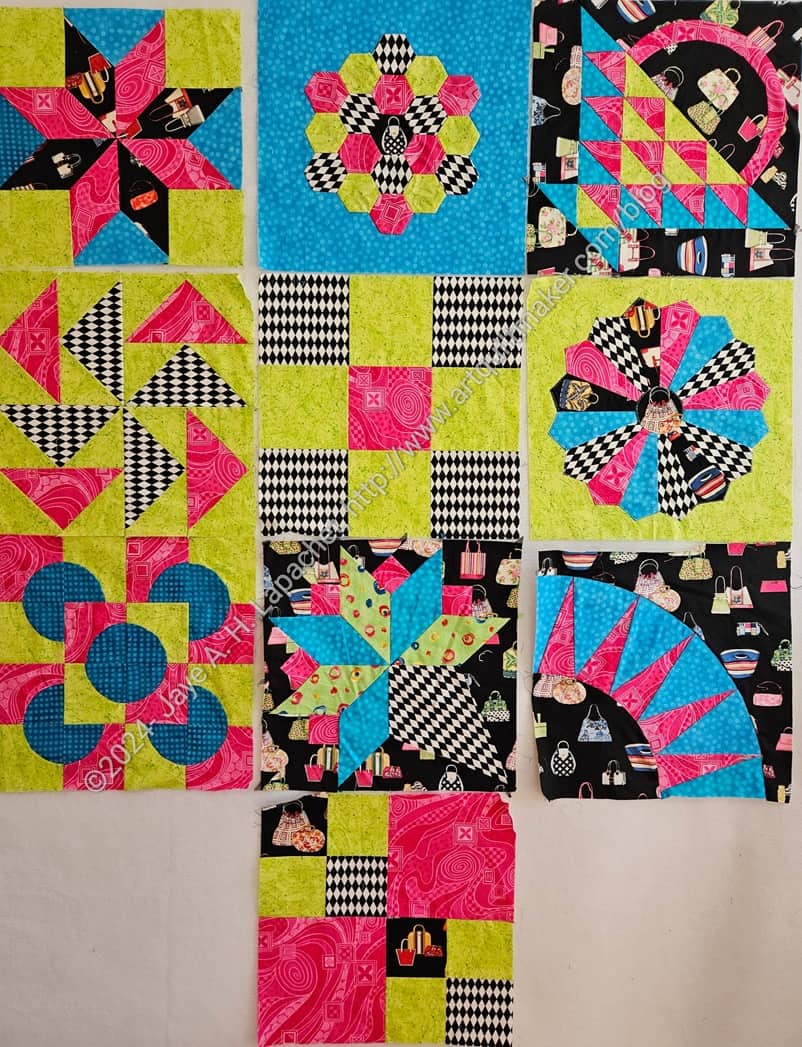
I really want to cross at least one thing off one of my lists. I prefer to cross something off that has been hanging around for awhile. For some reason the Handbag Sampler came to mind. I was really pleased to find the blocks last year. Yet it is still unpieced.
I also found some of the fabrics I used for the piecing. Still nothing happened. I have decided to sew 9 of the blocks together, put one on the back and call it done. The colors are really different from my other samplers, which shows the versatility of block quilts. Still, I am not excited about the project any more and would just like to get it off the list.
Aqua-Red Sampler with prize
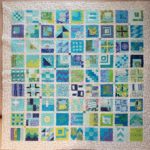
Finished: City Sampler- front
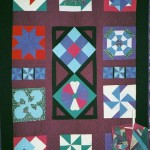
Sampler
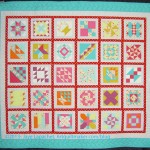
A-B-C Challenge with 1st Place Ribbon
Finished: Star Sampler
While only a couple of these have the same blocks, they are all different types of samplers. I am fond of this style of quilt, because they don’t get boring to piece and I can use a variety of fabrics. I actually like projects like the Star Sampler. It is fun to find all different ways to modify one block.
I know people think samplers are old fashioned and boring. I don’t agree. I think the colors used are the key. I used great colors in the A-B-C Challenge. Actually I like the colors in all of my samplers, except for that burgundy in my first sampler. What did I know?
This is more of a product review than a tutorial. I’ll talk about the ruler and give you some resources and tips.
I started this post when the HuRTy 1** was a new-ish tool. The designer, Latifah Saafir has now released two more HuRTys: 2 and 3. All three HuRTys help quiltmakers cut and sew Half Rectangle Triangles (HRTs). I received HuRTy 1 as a gift from Friend Julie! On a whim, I bought HuRTY 2 and 3 myself.
You may know that Latifah is the creator of the Clammy series of rulers** that help make curved designs. You might remember the class I took from her and the quilt I made using the Clammies, as well as the relatively recent Orange Peel Circle tutorial. Latifah is talented and her rulers work really well!
Remember, I did a series of posts on tools for making HRTs? Take a look at those to get an idea of the various tools available for making this great shape. I use the Split Rects** ruler, mostly. I am always open to new tools and I had high hopes for the HuRTy 1 ruler** when I received it. I have to admit I struggled using it at first. The only way I got more comfortable was to cut a million HRT pieces for the Triumphant quilt. I admit that I cut a lot wrong as I got used to the ruler. Make sure you have plenty of fabric. You can plan to use the mis-cuts for a donation quilt.
Latifah, the designer of the ruler, has a YouTube channel. On it she has some good video tutorials, which SueS talked about when she wrote for this space recently. I tried using the ruler without watching the video and it didn’t work for me. This has nothing to do with the ruler or the instructions. As I have said before, it has everything to do with the way I learn. Also, specialty rulers can be challenging, so videos are great learning tools.
One of the things about HRTs is that you have to be able to make both HRT A & B blocks, if you want to make a piece like my Spiky 16 Patch. This means a lot of flipping and turning of the ruler. Different HRT ruler designers accomplish this in different ways.
Spiky 16 patch #5 top in progress
The first HuRTy video shows viewers how to use The HuRTy™ to cut both A & B HRT pieces. Amazingly, Latifah includes left handed cutting! These HRTs are the normal ones that I was able to cut using the SplitRects rulers.You can see the A and B pieces in this Spiky 16 Patch quilt. They face each other in the top center with the fat part of the triangle pointing in different directions. In this design the middle HRTs are touching.
My first efforts with HuRTy ruler, before using the Triumphant instructions, didn’t seem right. The pieces just seemed too small, then I realized I would have to trim them anyway, so I think most of them would work on my test project. I think trimming is a good thing with HRTs. There is so much bias that, in my opinion, it is the best method for making sure the patches are the right size.
Triumphant block #2
Part of the issue is knowing what size to cut the strips or pieces at the beginning. The Split Rects ruler** by Studio 180 Designs has that information printed on the ruler, which is super helpful. The Triumphant pattern had a whole section about cutting strips, which are later subcut into HRTs. The strip info does not seem to be printed on the HuRTy rulers.
Using both sides
You use both sides of this ruler. For the HRT A, the side called ‘A Start’ is up. For the HRT B pieces, the ‘B Start’ side is up. In the photo you can see that the ‘A Start’ is upside down. In the photo, I am trimming an already made HRT.
This is a little challenging, because you would have to put True Grips**, or similar, on both sides. I often put True Grips on specialty rulers so they stay in place. With the HuRTys, I have to pay careful attention.
I am curious about how to design a quilt using the HuRTy(s). Though I love specialty rulers, one thing I don’t like is if you have follow a pattern in order to use them.
In general, I will try new rulers. Often I buy specialty rulers with the intention of trying them and never do or get derailed. I was glad I signed up for the Triumphant quilt as it really is helping me to learn about using the HuRTy(s). It would be great to have a ‘ruler library’ where people can check out rulers in order to try them out.
Other Resources and Previous Posts
Deb Tucker tutorial on using the Split Rects ruler
Friend Julie has some posts about her Slopes quilt, which uses Half Rectangle Triangles. She used the HuRTy ruler, partially, to make them for a Color Collective project. You might want to take a look at her blog.
**N.B: Obviously, you should shop at local quilt shops and small businesses. However, if you are too busy or can’t find what you need there, I use Amazon affiliate links and may be paid for your purchase of an item when you click on an item’s link in my post. There is no additional cost to you for clicking or purchasing items I recommend. I appreciate your clicks and purchases as it helps support this blog.
I was able to accomplish A LOT at Sew Day. I trimmed all the Triumphant block 2 pieces that I sewed sometime. I also cut out all of the block 3 pieces. I felt like I was on a roll.
In general, Sew Day was not that well attended. We didn’t even fill up two tables this time. We did have a new potential member, which was good.
Amy’s wagon
Amy always finds the best stuff! This time she brought her new wagon, which is awesome and oh so pretty! It is so much more fun than the regular solid (grey and navy blue) Costco versions.
She got it from Natural Life and it is perfect for quiltmakers. They have a lot of great stuff. I was tempted to get a wagon, but I held off. I really liked their Mimi utility tote and almost bought a car trunk organizer. I need to measure my cargo space. They show it carrying groceries, but I would use it for the random stuff (paper towels, umbrella, blanket, first aid kit, etc) that I keep in the back of my car in case of emergencies.
AngelaB’s dino quilt top
AngelaB showed a super fun baby quilt on which she is working. She mapped out the design herself using graph paper! Each square is 5 inches, a pretty standard size. Floral dinosaur anyone?
The dinosaur is really cute. I also like how she used some florals and plant-like fabrics to depict the natural environment.
I am pleased I went and even more pleased that I accomplished my goals.
My entry did not win any prizes, but I enjoyed visiting the Fair anyway. My visit was too short, but fun.
I only entered the pencil roll. Next year, I will enter Old Town. I am pleased with how it came out. I am not sure what it was up against, so cannot determine why it didn’t win. I’ll find out more when I get the judge’s comments back.
Jaye & Julie, San Mateo County Fair 2025
The big event was Friend Julie and I sitting at the BAM table and talking to people. The goal is to add members. I shamelessly talked to almost everyone. I even went up to people and talked to them if they were nearby. We told them about the guild programs, such as community quilts. I showed a few people our challenge quilts. We also handed out cards showing all the info about the guild. For part of the time our DHs joined us. It was a good time and if I weren’t working I would do it again.
2025 San Mateo County Fair mare & foal
Before Friend Julie and her DH arrived, we walked around and looked at the different non-textile exhibits. My favorite was the mare and her foal. It was so relaxing to watch them, though the mare looked completely stressed out. The Chincoteague books** came to mind as I spent time with them.
When we, first, went into the barn, the baby was sleeping. We watched for awhile, then we wandered around the barn to look at the other animals. No chickens this year. Bird flu, I am guessing. When we circled back to the mare and foal, the foal was on his feet having a snack. It was adorable and made me think about the relationship of animals and humans. I haven’t had a pet in awhile and would be hard pressed to find one that would be as great as my childhood cat, Spooky.
BAM challenge quilts 2025
BAM challenge quilts 2025
BAM had an exhibit of challenge quilts. The theme was “Hip Not to be Square”, which was a reaction to last year’s judging. One judge commented each time a quilt was not square. I am curious to see what the judge’s said about this year’s un-square quilts. I didn’t make a challenge quilt this year, but the guild had a GREAT response to the challenge. I loved seeing that not all were hexagons!
Preeva’s Mariner’s Compass
I was particularly interested in Preeva’s solution for hanging her round quilt.
The quilt is truly round. That yellow fabric is a kind of extended sleeve. I thought it was a clever idea.
Improv with Help from Friends
Cyndi put the quilt that she and Tim worked on while we were having a Sew Day at her house. I love the name, Improv with a Help from Friends. She gave me credit, too, which was very kind since I only started giving my opinion when they were well on their way to finishing.
I am so glad this turned into something great. The quilting works well. I am even more pleased that Cyndi got an Honorable Mention!
Lee Ann’s Cozy quilt
Guild members really cleaned up. In addition to Cyndi’s Honorable Mention, Lee Ann won a ribbon for her Cozy quilt. A number of guild members are making or have made one of these quilts. I only know of Lee Ann finishing hers.
Blooming 9 Patch by Julie McAuliffe
One of my favorite (random by non-guild members and friends) quilts in the Fair, though it is sooooo hard to choose, was this Blooming Nine Patch by Julie McAuliffe. I think I really love the colors.
Julie is a friend of my SIL#3 and used to be the organizer of the Home Arts for the Fair. I always say hello to her and remind her of the connection when I see her. I invited her to come and visit the guild as she sat at the Pacifica Quilt club table. Who knew there was a Pacifica Quilt Club? I might go check it out.
Brains, Brawn & Beauty by Elizabeth Savoy
I only had time to quickly look at the Fine Art on my way to sitting at the BAM table. Julie pointed out this dress to me. It is Brains, Brawn & Beauty by Elizabeth Savoy and made from newspaper. The details were really cool looking.
I would have liked to have spent more time with the quilts and looking at the Fine Art, but maybe next year. I really had fun sitting at the BAM table and talking to people, so that was time well spent.
**N. B. : Obviously, you should shop at local quilt shops and small businesses. However, if you are too busy or can’t find what you need there, I use Amazon affiliate links and may be paid for your purchase of an item when you click on an item’s link in my post. There is no additional cost to you for clicking or purchasing items I recommend. I appreciate your clicks and purchases as it helps support this website.
The last meeting was a bonanza of quilts. There was a lot of show and tell plus 3, yes THREE, mini-trunk shows. It was so interesting to see the different styles and designs of the members.
SueS’ HRT quilt
One of the quilts at show and tell was SueS’ HRT quilt. I didn’t even know she was working on an HRT quilt. I am on high alert for HRTs since I am working on the Triumphant quilt with the HuRTy rulers**.
SueS sent me the text I used for this post. I have edited it and tried not to change the meaning.
For this quilt she wanted to see how a single block could be used to create a sense of movement. Sue said that the half rectangle block reminded her of a bird in the distant sky, so she tried to create the idea of a flock of birds.
When I first saw this quilt, I was intrigued by the way it looked like the quilt was sideways. Knowing that she was working to create the sense of a flock of birds make the orientation make more sense.
Sue found that of all the techniques she has used for making HRTs, Latifah Saafir’s HuRTy ruler is her favorite. She used the HuRTy 1**, which is for making 1:2 and 1:6 ratio triangles. The 1:2 triangles range from 1 x 2 to 6 x 12 inches while the 1:6 triangles are 1 x 6, 1.5 x 9, and 2 x 12 inches. All of these sizes, shapes and angles can be made using 1 ruler.
Sue found the instructions to be clear. She also found the ruler to be well marked for right (HRT A) and left facing (HRT B) blocks of each size. She found the markings limited the mistakes that are really easy to make when cutting HRTs.
The HuRTy 1** has a QR code printed on it which links to YouTube tutorials. The tutorials provide help for using the ruler. Sue found the videos to be very helpful for getting started, along with general tips for making HRTs. One tip is to press the seams open. You know me! I prefer to press the way the quilt needs. I have also found that HRTs work well when seams are pressed open. The bulk ads up quickly, and pressing seams open helps reduce the bulk.
Other Resources and Previous Posts
Deb Tucker tutorial on using the Split Rects ruler
**N. B. : Obviously, you should shop at local quilt shops and small businesses. However, if you are too busy or can’t find what you need there, I use Amazon affiliate links and may be paid for your purchase of an item when you click on an item’s link in my post. There is no additional cost to you for clicking or purchasing items I recommend. I appreciate your clicks and purchases as it helps support this website.
This top is taking forever and, again, I need the design wall space, so I’ll need to spend some time this weekend churning out half blocks.
That being said, I haven’t been a slacker. I have made some progress and the quilt top is coming together. I also like the way it looks, though it is a bit dark close up.
There was no way I can finish it to turn in tomorrow at Sew Day, but maybe I’ll be able to finish it for the meeting in a few weeks. Work sure does get in the way of sewing!
I finally got all the pieces I needed for the first block cut out correctly and started to sew the block together.
I am struggling with the HuRTy rulers**. I wanted to give up since my sewing time is really precious. However, cutting the background was so easy that I have it already cut out and couldn’t see wasting those strips. I’ll get there.
So far, I think it is an interesting design, but not one I would have come up with myself. Perhaps this is a stretch for me? I am definitely using my brain with the rulers.
**N. B. : Obviously, you should shop at local quilt shops and small businesses. However, if you are too busy or can’t find what you need there, I use Amazon affiliate links and may be paid for your purchase of an item when you click on an item’s link in my post. There is no additional cost to you for clicking or purchasing items I recommend. I appreciate your clicks and purchases as it helps support this website.
I was reminded of it when I was sewing the Triumphant Block 1. The designs aren’t exactly the same, but this one reminds me of what is going on with the Triumphant quilt.
The back of Old Town is done. I have sewn the binding, so it is ready to be applied after the quilting is done. With all of these chores done, the quilt is ready to go to Colleen for longarming.
I used a really nice wisteria print from Philip Jacobs. I had two pieces, which means I bought it twice, but I can’t remember where. The colors fit perfectly with the Old Town top.
The blue swirly prints were leftovers from the Half Hexie Star quilt. I wanted a little bit of that fabric on a quilt I will probably keep.
So, on to quilting. I have to arrange that, but hope to take another quilt at the same time.