I cut out some more Dogwood pouches the other day. I am using the same sizes (F & J), mostly because I didn’t want to take the time to print more templates. The organization to whom I wanted to donate the set is having their luncheon soon and I wanted to make as many bags as possible. I have only the Superbloom and the Cotton Candy so far.
I finally finished this Superbloom. The Hindsight Superbloom was a high. This one felt like a slog. I don’t know why except that everything that could go wrong did go wrong. This is completely my fault, because I have been somewhat distracted by life. It was still frustrating.
Superbloom #3: interior
The outside looks fine and I am pleased by that.
My aunt loves irises and I found some iris fabric that I knew I had to use for her. The the fabric looks fine , but the lining is too saggy for my tastes, despite my use of a 5/8 inch seam allowance. I know the Muggles won’t know, but you’d think by now I could manage a non-saggy lining. 🙁
Superbloom #3: lining
Normally, I would use a white or very light fabric for the interior, but that iris fabric is so perfect for my aunt. I could have used it for the outside, but I really wanted to use the canvas I bought at Bolt for her for the outside.
Superbloom #3: top closed
I had to buy that ochre fabric after the fact for the zipper panel as I thought the iris fabric would look too chaotic. The ochre fabric is a weird color, but goes with the background of the iris print. Also, it was wonderfully soft.
I think it goes very well with the purple zipper. I don’t think it should, but it does.
Superbloom #3: side interior pocket
Superbloom #3: lining interior pocket
I did use some dots on white for the inside pockets as I thought they would be too dark if I used the iris fabric. I also think I want to make a pouch or a smaller bag with what’s left of the iris fabric.
Superbloom #3: side pocket
Superbloom #3: side pocket lining
I still like the design of this bag. The side pockets are especially cool. I haven’t ever used this bag as I don’t have one of my own, but maybe I need to try it out.
Once I got close to finishing this tote, I stopped working on the SMAP version. I needed to send this one off to my aunt and I wanted to get it done. now that it is finished. I can get back to that bag.
I am making good progress on the Superblooms, but not enough. I really want these to be finished today, so I can take my aunt’s to the post office and mail it. I also want to show at least one of them at the meeting on Saturday. I don’t know if either will happen.
As you can see, I have made good progress. The exteriors are finished and the handles on my aunt’s are sewn on.
For my aunt’s Superbloom, I used cotton webbing for the handles that Cyndi made me take from the free table one time. It is wider than called for, but I think looks good with the exterior fabric.
SMAP Superbloom
The SMAP version is less far along. I had to rip the handles out twice. Hopefully, third time is a charm.
I’ll be working on the lining next and that is always the last step. I have a couple of interior zipper pockets for each bag to make and then lining assembly.
I am preparing to start a new contract and the company is really a pain. It has been taking me many hours I could be sewing to set everything up. Finally on Friday, I had a nice chunk of time, so I got to work on the two Superblooms I have been wanting to make.
I was able to get all the pieces interfaced and the side pockets made. I had some trouble with some fusible foam. It turned out to be fusible on both sides. Since it was a scrap and, I hadn’t marked it, I didn’t realize it was fusible on both sides. I don’t normally buy fusible interfacing. I especially don’t buy double sided fusible. The piece was just big enough for me to cut the foam for the bag sides. Perfect, right? Yes, until I figured out that both sides were fusible. On one hand it was good, because I could just press it on the fabric. On the other hand, I had to use a press cloth and I am not sure if my press cloth is gluey. Iron-off** is a wonderful thing for cleaning the iron.
I have a couple more pieces to cut from the new fabric I bought at Needles, but otherwise I think the rest will go quickly.
As I have mentioned the prep is the hard part.
**N. B. : Obviously, you should shop at local quilt shops and small businesses. However, if you are too busy or can’t find what you need there, I use Amazon affiliate links and may be paid for your purchase of an item when you click on an item’s link in my post. There is no additional cost to you for clicking or purchasing items I recommend. I appreciate your clicks and purchases as it helps support this blog.
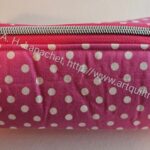
I finished one of the Cotton Candy pouches and was reinvigorated after I did a better job than I did with the Slimline version.
I didn’t have the right length zipper in pink, but I thought the orange went with the fabric. I also thought I should have fussy cut the side panels, but didn’t think of it until later. Still, I am happy with the way it turned out.
I used similar fabrics to the fabrics I used in the Pink Project v.1. I wondered if I should make a whole set using the same fabric. I might have enough of that Denyse Schmidt Flea Market Fancy fabric to make a few more bags and pouches. It might bore me, though, to use the same fabric. I already have a different print chosen for the Chickadee. I don’t want to change that choice at the moment.
Pink Project Cotton Candy interior
Pink Project Cotton Candy interior
The inside is also a Flea Market Fancy print. I filled it with some self-care items and it was used to raise money for Phi Mu Foundation, which provides scholarships and disaster assistance to women. We made $80, which isn’t a lot, but the event was only attended by 9 people. I need to get some more self care items to fill up the next ones.
No, this is not pink, but I am still making it part of the Pink Project, at least for the time being. I don’t want to make a new tag for every project I decide to start.
I was so excited by the triangles that I wanted to use this fabric. I think it is a Carrie Bloomston fabric, but I can’t remember where I bought. I am pretty sure it was a recent purchase.
As mentioned, I am doing a blue version as well as a pink version for two different groups to auction off.
Blue Triangle Cotton Candy – side
I wanted to cement my technique for the Cotton Candy pouch after the mistakes I made with the Slimline Cotton Candy. This is one of the pouches that I made. I decided to make one each for the two projects.
Blue Triangles Cotton Candy pouch inside
While I did better this time on lining up the pieces, I didn’t do as well on the zipper. I am not sure why. It looks really wobbly. Most people won’t notice, but it bugs me.
I wasn’t able to anchor the the sides to seam allowance like I did with the Hildegarde. That might be a challenge for another day.
Blue Triangles Cotton Candy zipper end
I did veer the zipper on one side of this bag, but not on the ‘top’.
I decided to fold over the zipper ends and place them where I wanted them rather than hoping for the best when I was veering the zipper. I think the ends look pretty good.
As mentioned, I started sewing some Cotton Candy pouches at Sew Day. I had cut them out as a reminder after I sewed the Slimline version of the Cotton Candy pouch wrong. I was a little angry at myself, because I want to work on new pouches – patterns I haven’t tried before. Even though I love the Cotton Candy pouch, I have made it many times. I felt, however, that I needed to remind myself how to get this pattern right.
I was pleased with the progress I made at our Special Sew Day. I would have liked to have made more progress, but forgot the zippers. When I got this far, it was time to clean up and go home anyway.
I thought I would try the triangle fabric fabric I bought at Bay Quilts recently and see how I liked it in bags.
Both of these will be for the Pink Project. I know one is blue, but I am doing a second batch for the local Alumnae Panhellenic group and want to use some different fabrics.
I never posted the final group of bags for the Pink Project v.1. I posted the almost final group, but never the bag in which they were all held and the pouches.
Apparently, they were all sold separately and only brought in about $100. It’s a shame people don’t want to pay more for handmade items. The bags are all small, though, so perhaps $100 is fair. Still, I didn’t do it completely for the money. It is a great way to try out some of the patterns I have bought and that has a lot of value to me.
Here are more detailed photos of the bags that were included.
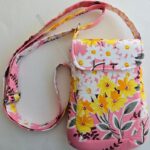
This was an easy pouch which would make a quick gift for a little girl as a small purse. I am not sure what else it could be used for.
This is a pouch for the Pink Project. As I said before, this is a Sotak Handmade pattern. I thought it went together well.
Some of the binding was a bit fiddly, but not annoyingly so.
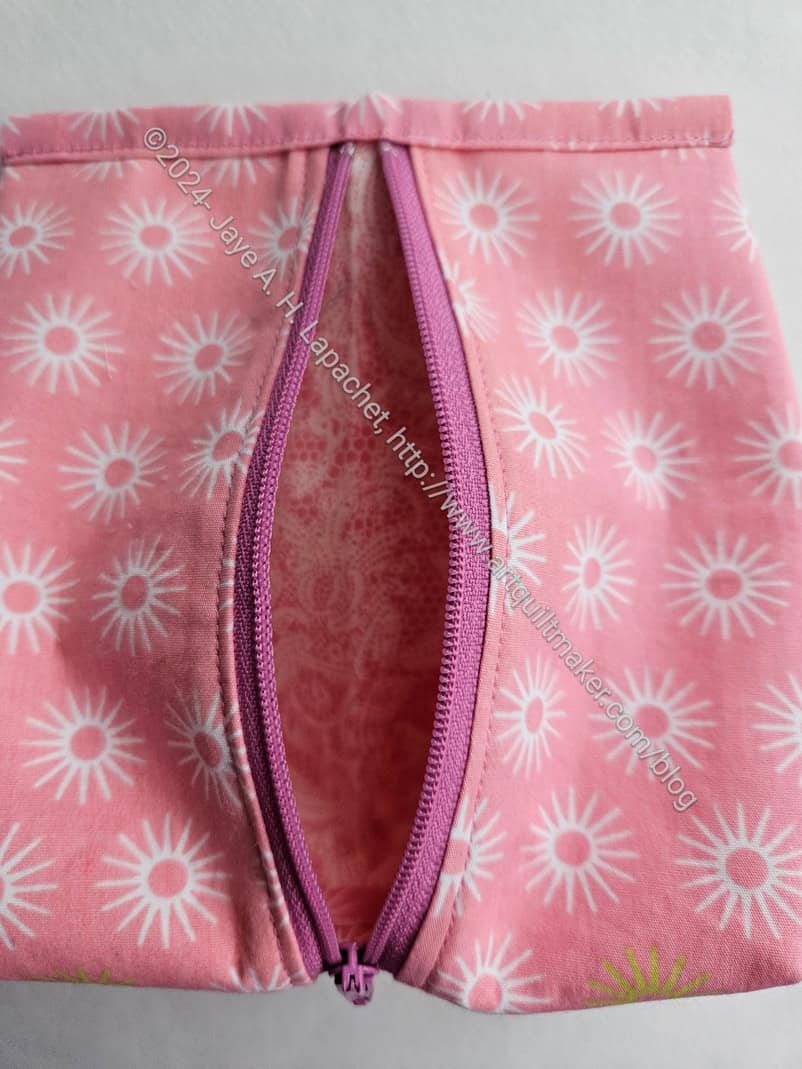
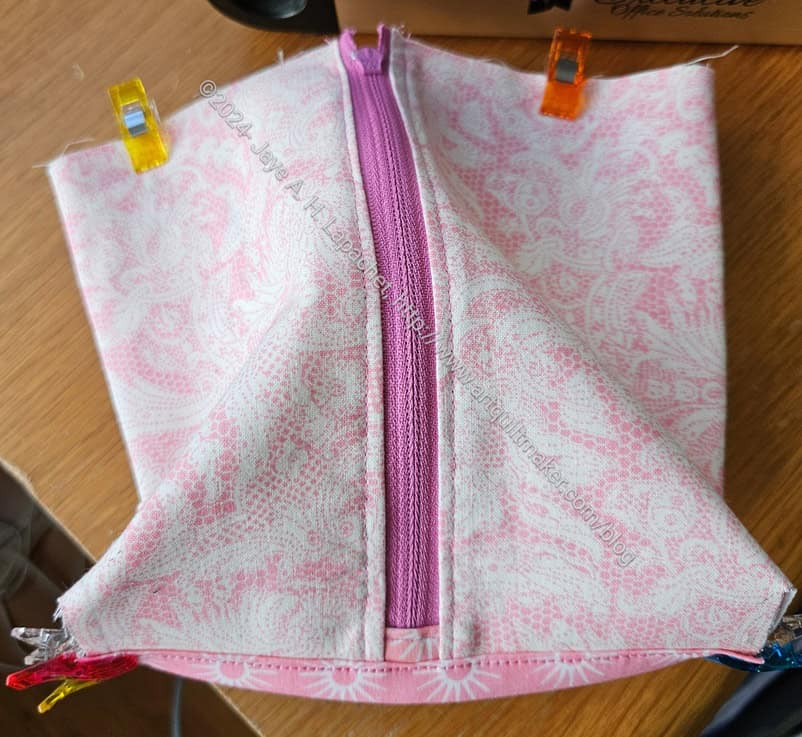
Petunia Pouch – zipper open
One of the good things about this pouch is the size zipper it needs. It needs either a 6 or 8 inch zipper, which I don’t use that often, though I have several waiting for projects. I am sad that the only zipper I had of the right size and closest to the color of the fabric was orchid. I suppose I could have cut down a longer zipper. Maybe I’ll do that next time.
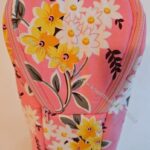
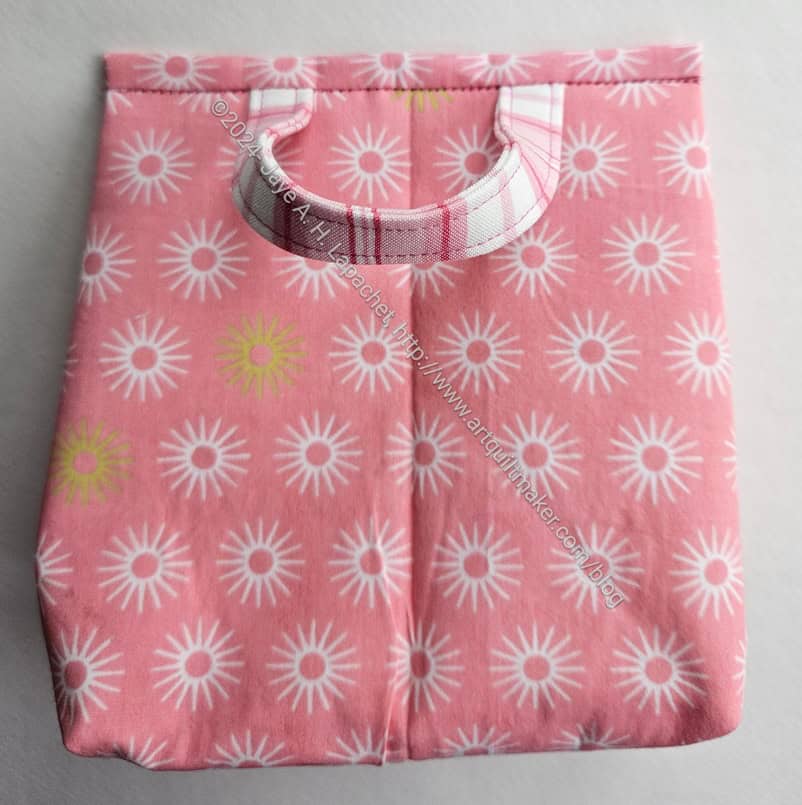
I have to say that looking through all of my pinks and using them is really fun. I had forgotten about this Monaluna print (is that designer still around?). I like the sunbursts a lot and the pink is kind of a petal pink.
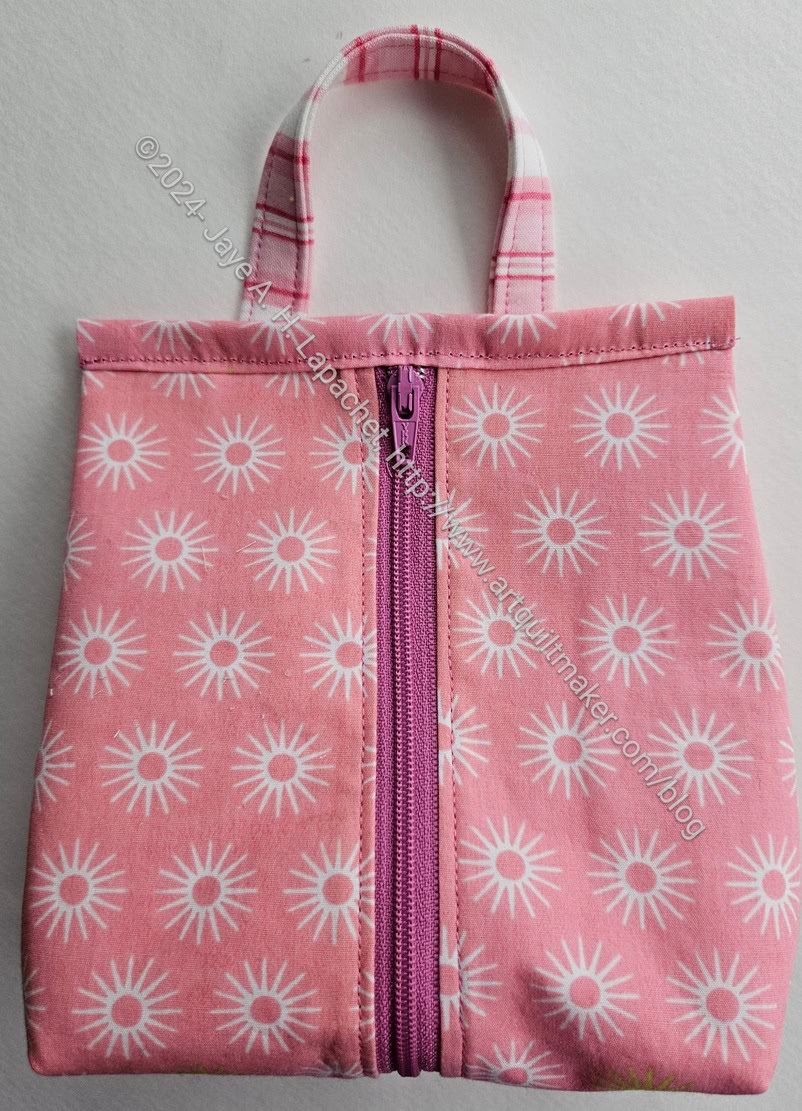
Petunia Pouch – back
I am not sure the handle would stand up to carrying around heavy things. I sewed over the handles a couple of times to try and reinforce them.
This was the last bag for this year’s Pink Project. I’ll see about making some more pouches for next year. I need to make a large tote as I don’t have one of the organization’s bags to put all the pouches in. I have many tote patterns and it will be fun to look through them and choose one.
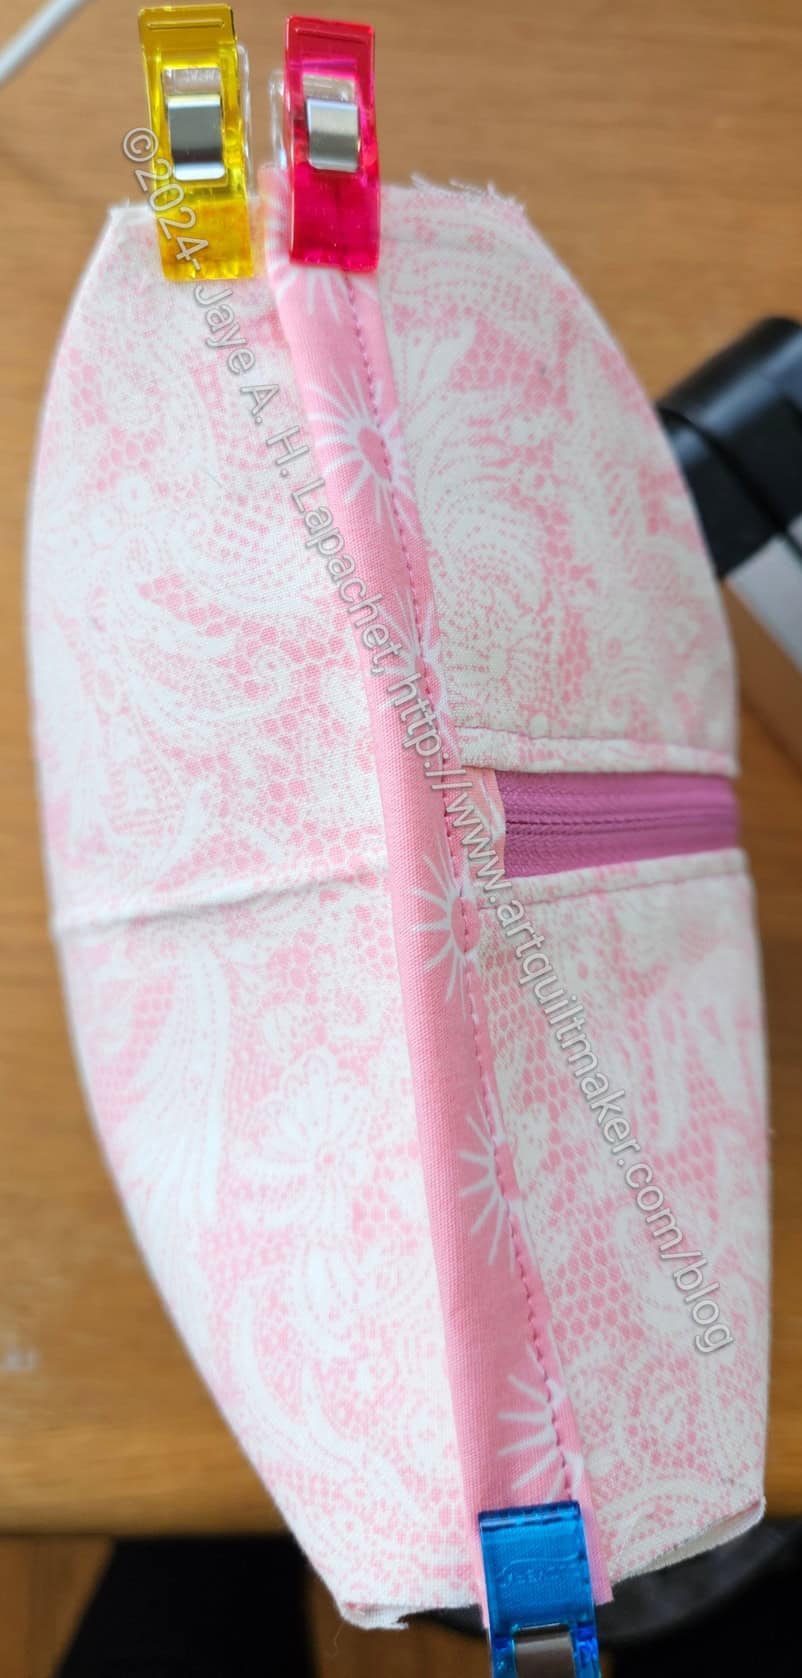
I finally started the Petunia Pouch and it is a fairly easy project so far.
I don’t have a lot of experience with Sotak Handmade patterns. I have made 2-3 projects from her patterns. I watch her reels on IG and am so impressed with how easy the projects look.
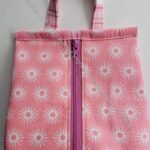
Petunia Pouch in process
I found this one to be easy, so far as well AND the zipper looks good.
One thing is putting binding on everything. It is a pain, but it makes all the edges look good.
The Pink Project is done, but I have decided that I am not done with this idea. I have packaged up the pouches and they are ready to send off to the president of our organization. I like having an opportunity to make pouches for a good cause and try out new patterns.
I had a tote from the organization I used to hold them all. Next time I’ll have to use one of my tote patterns and put all the smaller bags inside. Here are all the pouches for The Pink Project v.1:
Yes, I added the Friesan to the mix even though I originally made it for me. It has been sitting on my shelf unused since it came back from the Fair. I can always make another.
All the others were made for this project. I have a new pattern from the Sotak Handmade sale, the Petunia Pouch, that I plan to make for v.2 of the Pink Project.
I finally took some time on Mother’s Day to finish this pouch. It has been laying around for a few weeks. It was the perfect project for Mother’s Day. I got to sew AND I finished something.
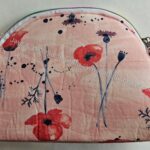
Palomino Pouch – end
This is the second one of this pattern I have made. It is a fairly easy project, though the turns on the curved end are tight. Again, I did some fussy cutting, which I think looks nice.
I know this isn’t exactly pink; it’s more peachy, but it does show the range of pinks. I am definitely in the “give me bright pink” like the Bluestem Pouch camp. Still, this is a nice soft look
I was also pleased that the gluing together part worked for me this time. I had a better idea of how to do it and I am sure that helped.
The other thing I did was to sew down the quarter marking areas. I did a few steps over the quarter marking to tack the various pieces in place, then I went around the whole pieces. That worked pretty well, though those curves are tight for my machine.
Palomino Pouch interior
The inside looks like an inside.
I used a leftover zipper and one of the zipper pulls from Sew Hungry Hippie. I also forgot to put a label inside. Oh well.
I started another Palomino Pouch as part of the Pink Project. I wanted to try and succeed at the gluing step that closes up the sides.
I have everything cut out, but have to find a zipper that matches. The fabric is definitely pink, but more of a peachy pink than the Pink Dot Bluestem or the Pink Piebald and I am not sure I have one that will match. I might have to use white or some other contrasting color. I do like it when the zippers look like they belong on the pouch.
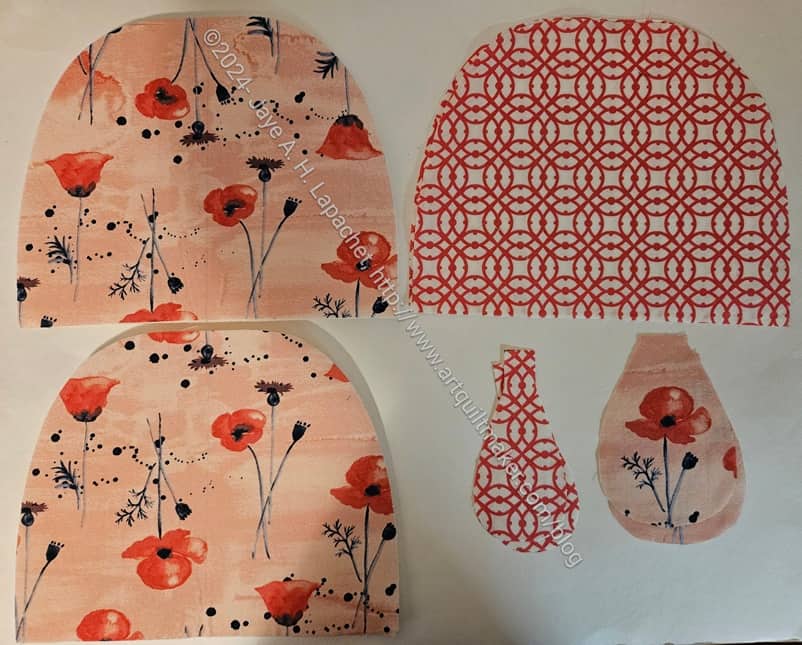
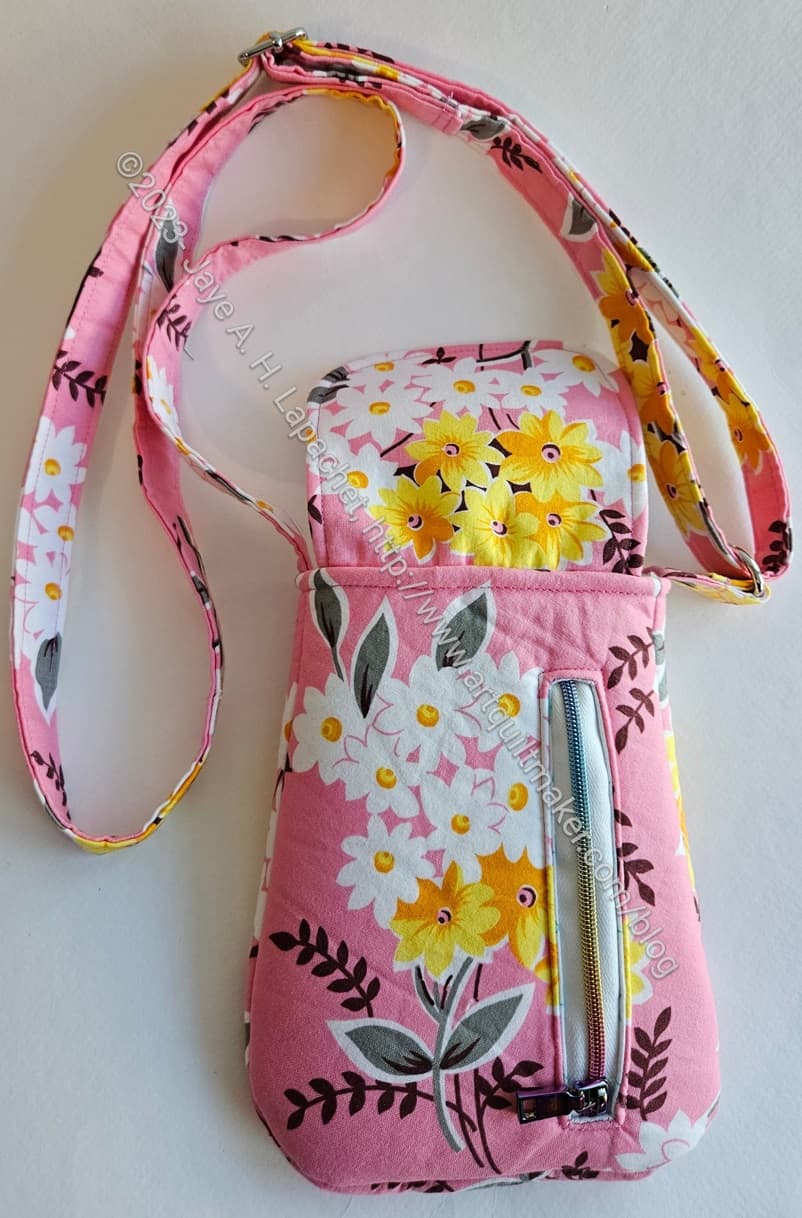
I made good progress since last week and the Sweetbay Crossbody bag is almost done! I just have to press it!
Putting this bag together was a little tricky, mostly because it is so small. The other thing I found interesting was that the gusset isn’t the same on both sides. You can see how it bulges out a little bit. it is very round on the bottom corners. I think that is from the gusset. The directions say to put the front panel on one side of the gusset and the back panel on the other. It was a novel way of putting a bag together.
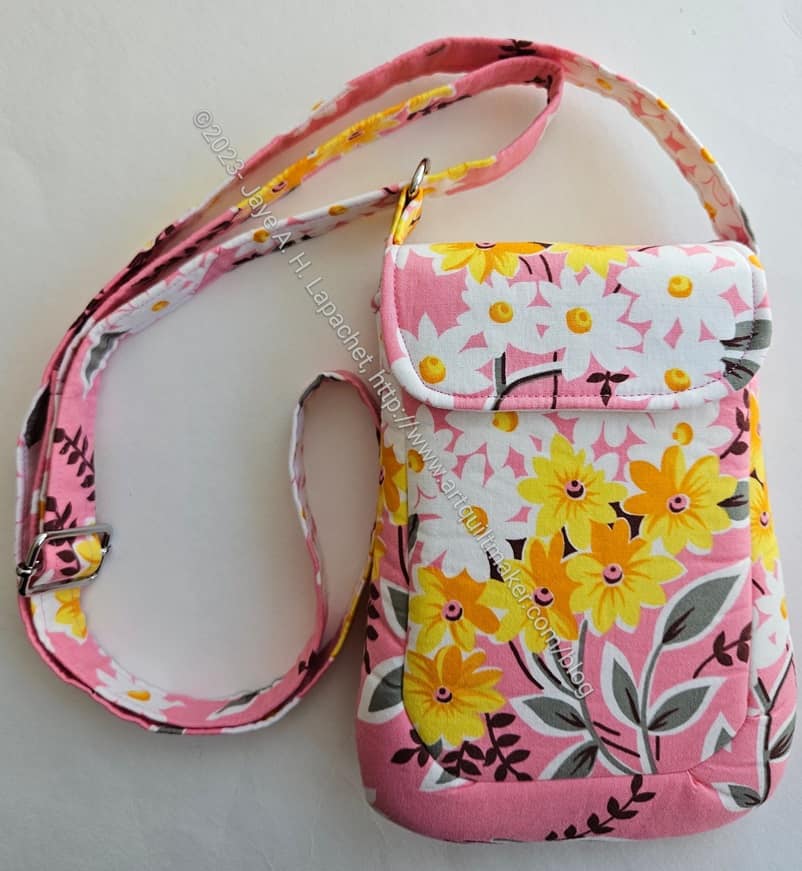
Sweetbay front, open: finished
I remembered to put a label in the bag. It might be a little too prominently placed, but it is what it is.
I have to admit that I thought about the label placement on that flap A LOT. It seems silly, but I wanted it to be right side up when I opened the flap, which required some thought. I did have to move the label once before I put the flap lining together with the flap exterior, because it was too close to the magnetic snaps.
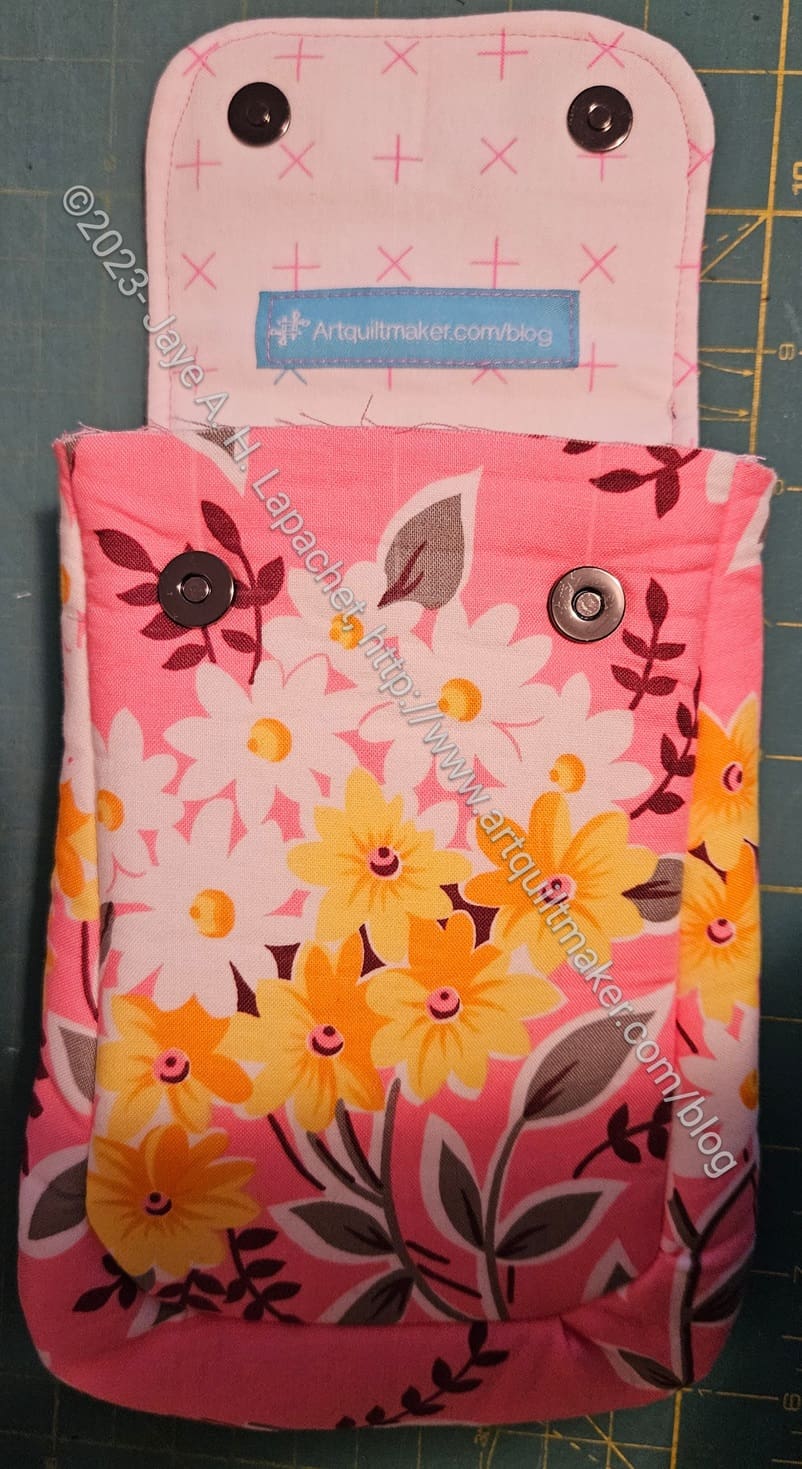
Sweetbay magnetic snaps detail
I am really pleased with those magnetic snaps. Not all of my hardware matches on this bag, but those snaps are awesome. They are small. I didn’t even know I had them until I looked through my hardware bag and found them. The brand is Sally Tomato and I will definitely be buying them again.
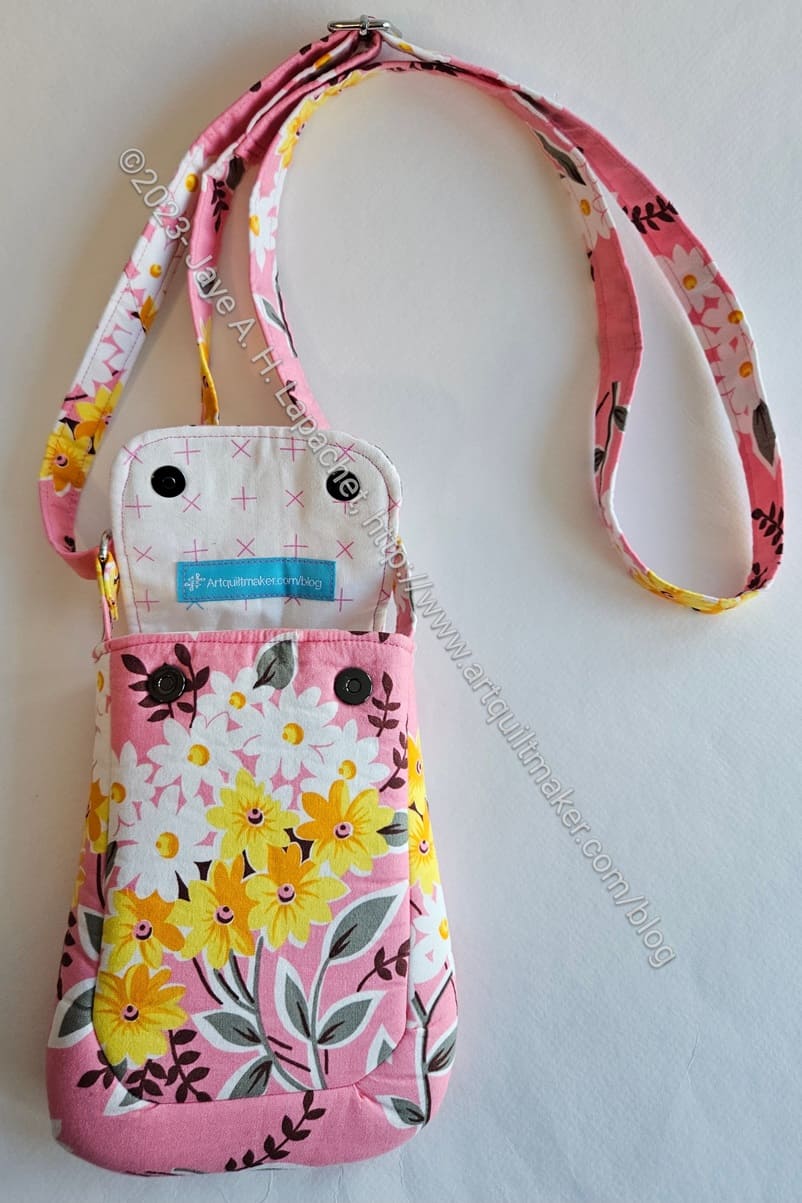
Sweetbay back: finished
I used a leftover piece of zipper by the yard for my exterior pocket. i was glad, because I have few leftover pieces that seem too long to toss. This was the first time I found a use for one of the pieces.
I think I would prefer to install it with the head at the top when it is closed, but I am just happy I was able to install it.
I also sewed the edges of the pocket to the seam allowance so the pocket wouldn’t sag once the user put something in it. I’d like to try perfecting my internal zipper pocket technique. I need to make a few more.
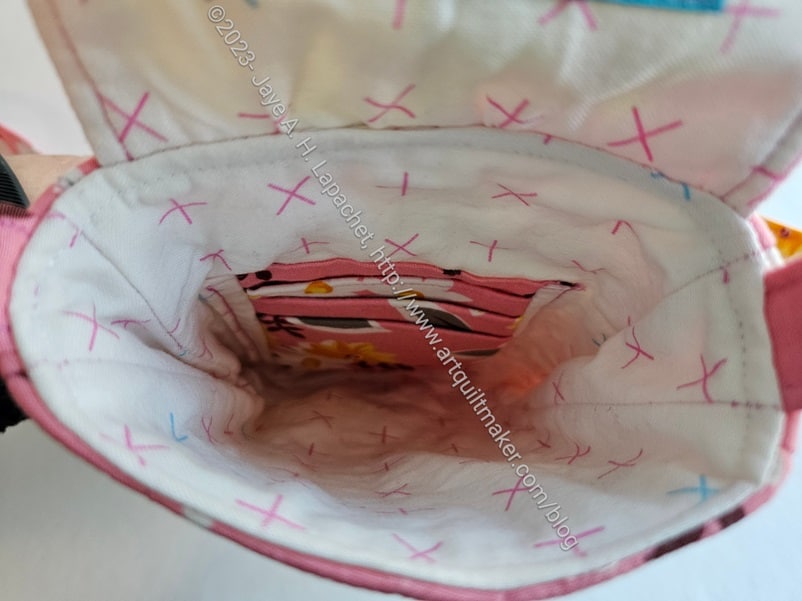
Sweetbay interior: finished
This is really a bag you take along with only a few things. It is really small on the inside.
This will go really well with the other Pink project bags.
Not sure what I will make next. I’d like to make a big tote bag, but I already have one for The Pink Project.
I am keeping up with the Sew Sweetness Sew-a-long for the Sweetbay (that’s a lot of Ss and Ws!!) crossbody bag. This bag has a lot of prep and it started with week 1 and continued to this week.
Some of this week’s work was adding interfacing to all of the pieces that were not interfaced last week.
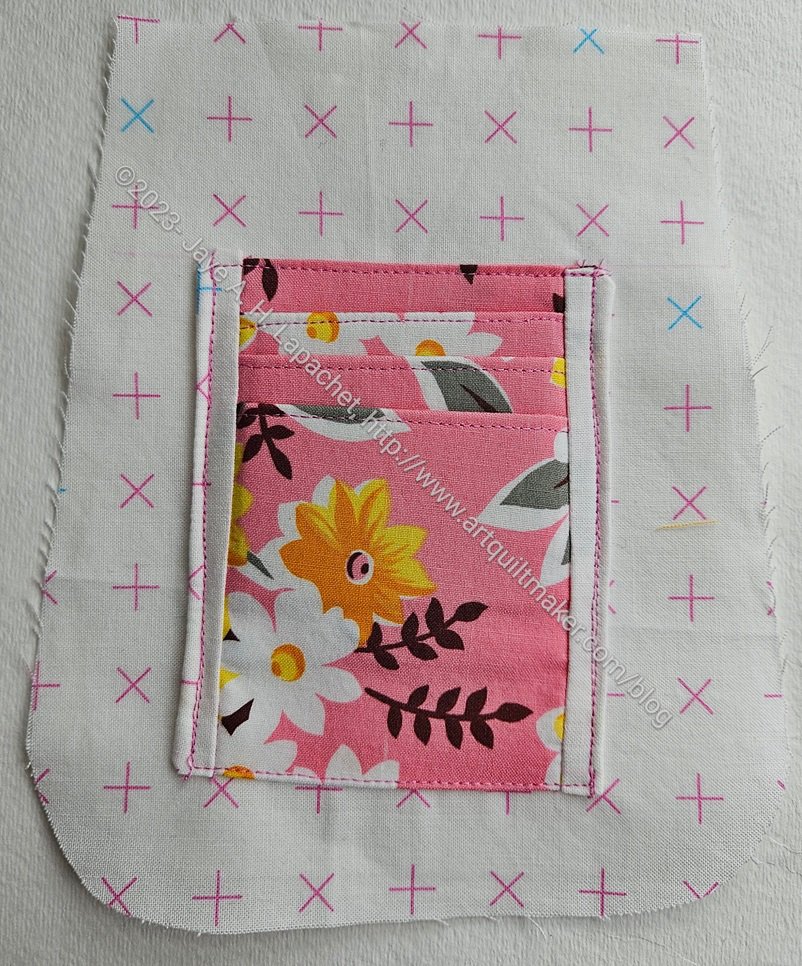
Sweetbay credit card sleeve
I also had to make the credit card sleeve, which didn’t turn out quite as expected. The written directions were a little confusing, but I walked away and came back and was able to figure out what to do.
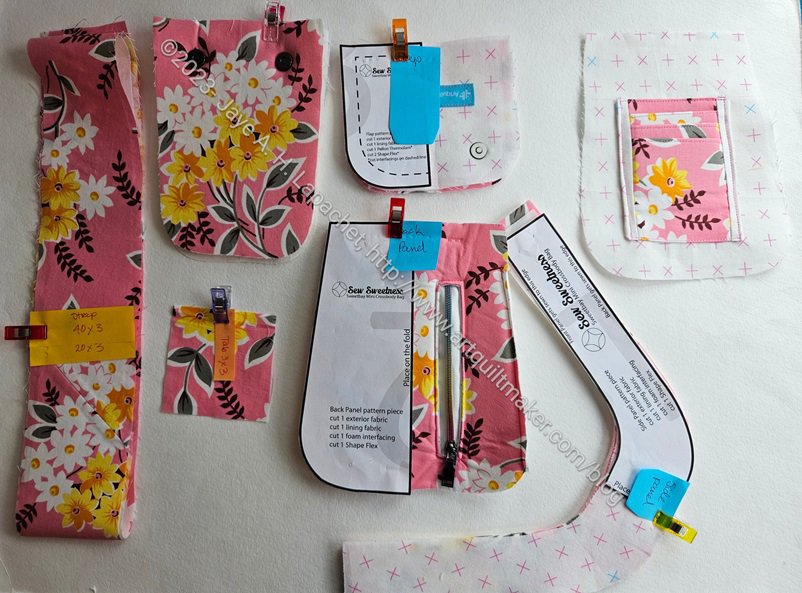
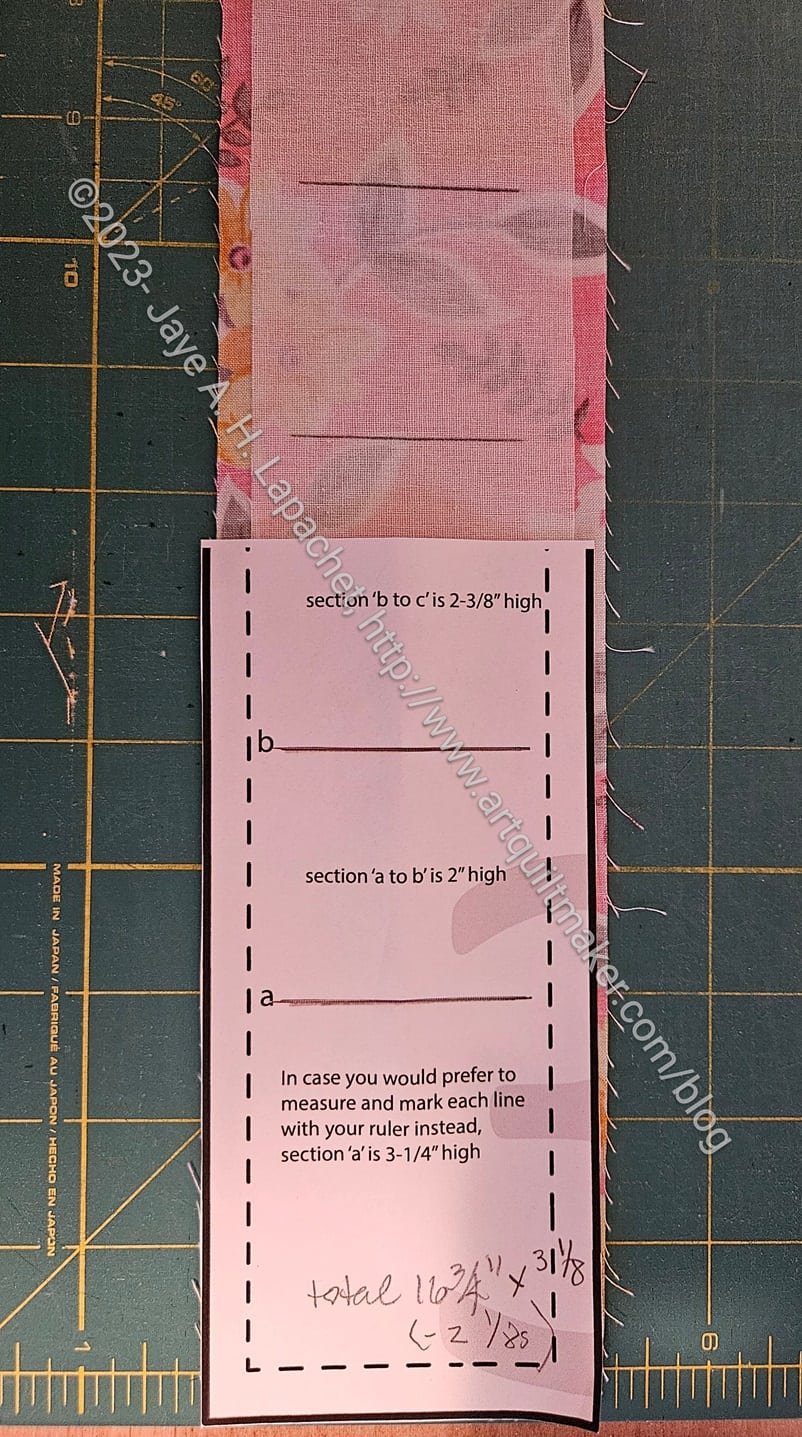
Sweetbay credit card pieces
In order to make the compartments, we were supposed to use a template made from the pattern pieces on the back. I was super pleased that I figured out how to make slots that I could mark through. I know this seems really dumb, but it felt very convenient and like an excellent solution.
This pattern does not have a acrylic templates and I am not sure why. I think the credit card sleeve would have been a good candidate for templates.
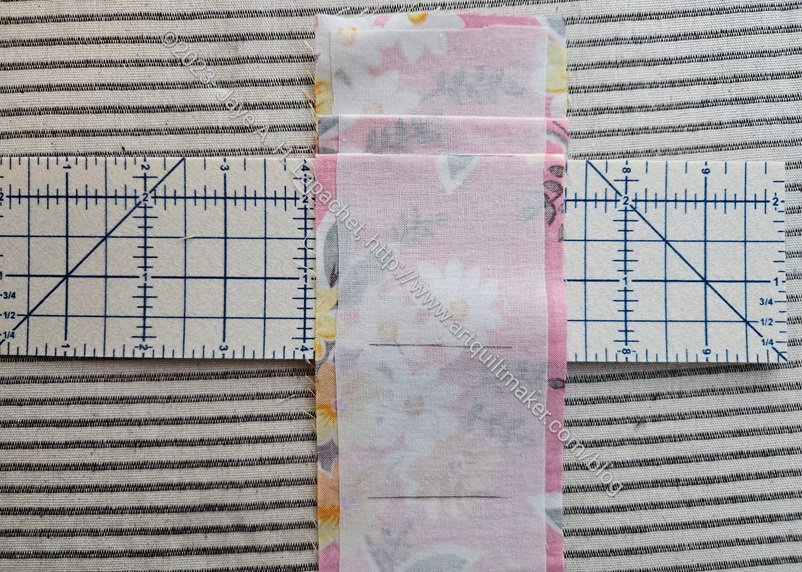
Using the hot ruler
I also made good use of the hot ruler from Cyndi for this project. This was a Christmas gift I received and the more I use it the more useful I find it. It makes the folds a little thick, so if I need precise measurements, I need to be very careful. Other than that, I am finding it to be very useful.
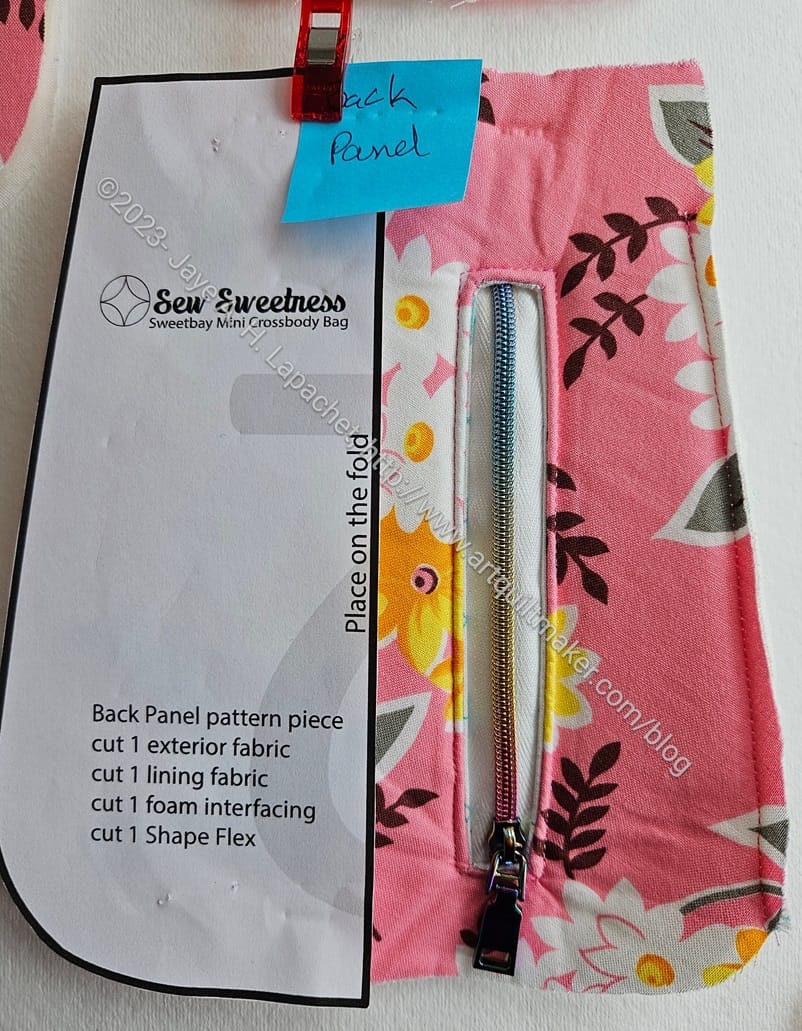
Sweetbay back zipper pocket
I added to the prep work by adding a vertical pocket in the back flap. Vertical pockets look really cool. I also thought that back flap was the perfect location for additional storage, so I created an internal zipper pocket.
I had to remember how to do it, so I looked it up in a couple of books. First was Lisa Lam’s The Bag Making Bible**, which got me started, but left out (or I couldn’t find) some crucial information, so I switched to The Complete Bagmaking Masterclass** and got the info I needed.
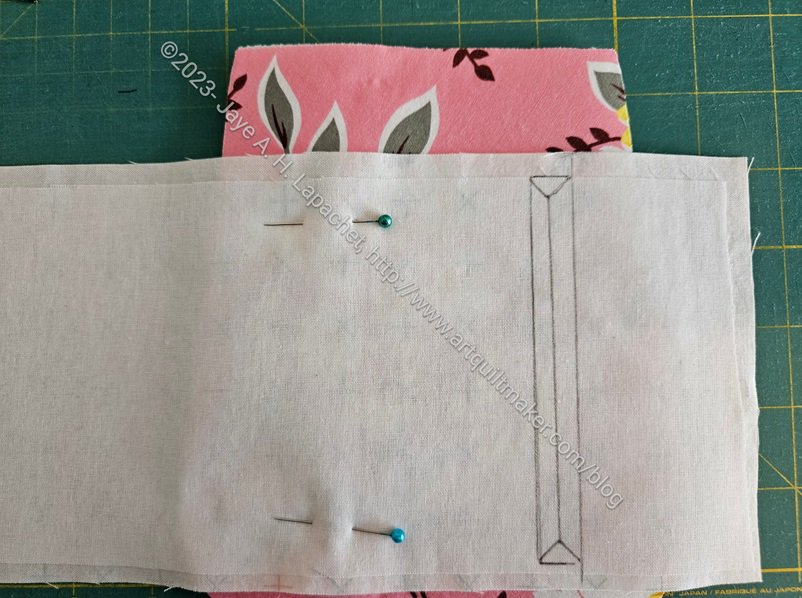
Sweetbay zipper pocket in progress
One problem I had, which wasn’t critical was that I didn’t leave enough fabric on the short ends of the zipper pocket. See how there is barely half an inch on each small end? It worked, but it isn’t really enough and I had to be super careful to make sure the foam and exterior fabric got caught in the seam when I sewed the zipper in. It worked, but I sweated! Hopefully, I’ll remember next time.
Once I had all that done I was kind of exhausted. I am very pleased that I am making progress and keeping up with the Sew-a-long.
**N. B. : Obviously, you should shop at local quilt shops and small businesses. However, if you are too busy or can’t find what you need there, I use Amazon affiliate links and may be paid for your purchase of an item when you click on an item’s link in my post. There is no additional cost to you for clicking or purchasing items I recommend. I appreciate your clicks and purchases as it helps support this blog.