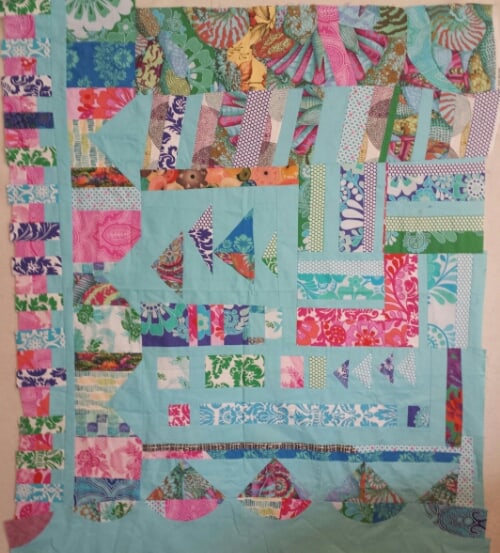
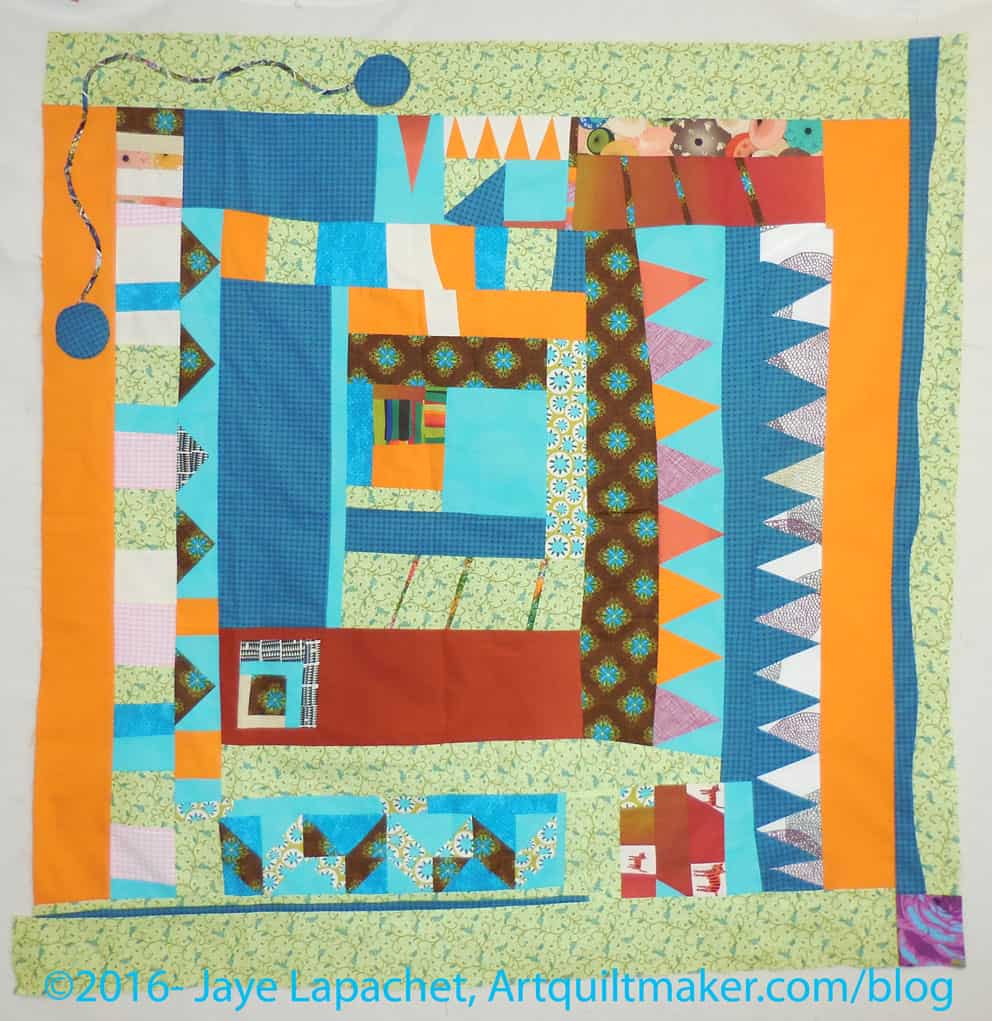
My Improv Round Robin has returned. Ruth had it for a couple of months because I wasn’t at the meeting last month and she wasn’t sure whether to pass it along.
She added the bottom part with the curves. It is an interesting addition.
I am trying to decide whether to try and get more people to work on it or whether I should just do some work of my own and finish it. I have some thoughts:
It needs some space around the edges. The outside top and right side might need some of the turquoise solid to provide some breathing room.
It is definitely not square and I need to figure out what to do about that, if anything.
I want to add more Flying Geese, which I will do myself. Perhaps I will add them on the right.
I am surprised that more people did continue the Flying Geese motif. The time constraints were daunting, however, so I understand.
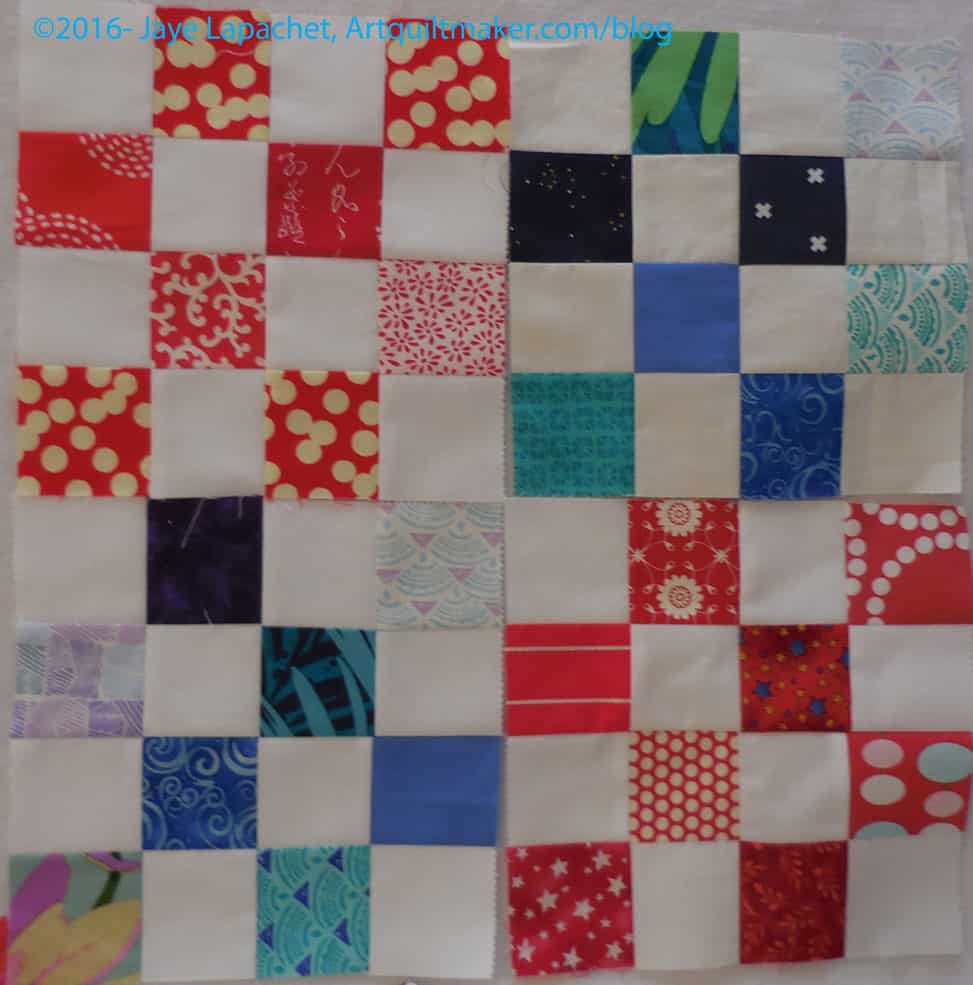
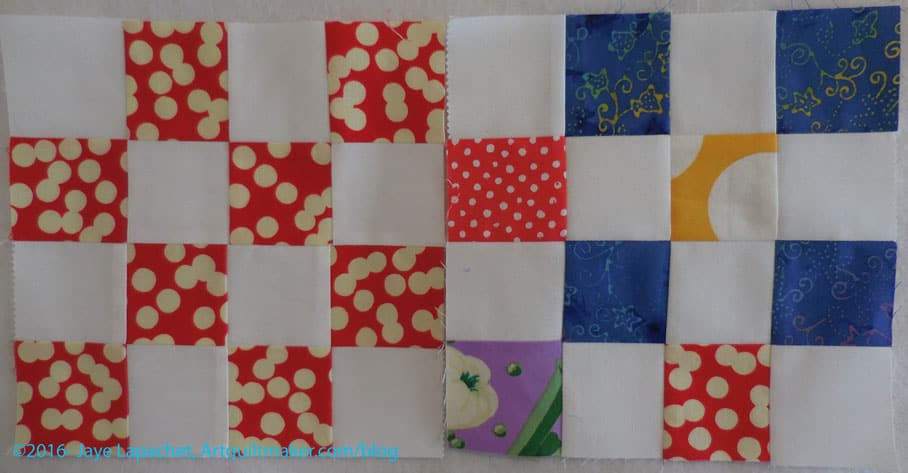
I now have 12 red blocks, which I thought was the end of what I needed to make a top. I actually need at least 16, so I still have some sewing to do before I can make a top. That means I also have to cut more red squares as I am getting bored of the ones I have.
I have a few blue blocks, which I really like. They are cheerful. I have been tossing them into my BAM bag, but I may keep them and make a top from them as well. We’ll see.
I was pretty excited to get back to BAM to see my pals. I only missed the May meeting, but it felt like an eternity. I finally had some things to show. You, of course, have seen them all, but I showed:
My SIL came along. She hasn’t been a member of a guild in awhile, if ever, but I dragged her along. She said she had a good time, which made me happy.
June Charity Sew Day quilt
More details about the meeting can be found on the BAM blog.
I missed the Charity Sew Day due to Political Wifery, but some of the quilts they made were shown. Michelle B. designed the pattern and they sewed the quilts together using the quilt-as-you-go technique. This was a brilliant idea as it made the quilting after the piecing unnecessary.
Claire’s innovative quilt
Show and Tell was fabulous as well. Joy-Lily has finished her 100 quilts project. Not all are quilted, but she has a nice variety of pieces. Zoe brought her tiny baby and the black and white playmat she is making. I loved them both! Claire set a bunch of blocks together in a really unique and innovative fashion.
I know it isn’t true, but I feel like I haven’t sewed at all after seeing all the great stuff people brought.
Jaime will be leading a workshop on making the Noodlehead Cargo Duffle. She has made a few and has made some changes to the pattern including more pockets. I signed up because I admire Jaime’s bag making skills.
We both helped work on the Hearts for Orlando blocks, which I wrote a bit about yesterday. You can see the full details at the BAM blog.
I dropped Cityscape off with my SIL who is the new owner after the meeting. I think she liked it.
In between sewing the top and back of FOTY 2015 together, I made a few more donation blocks. Not a lot, but my pile of reds is growing and the other random colored blocks are going straight into the back to to take to the next BAMQG meeting.
As soon as I make enough of the red, I will make a specific top and back from those. I might use the Cutting Corners ruler again and I might now. We’ll see.
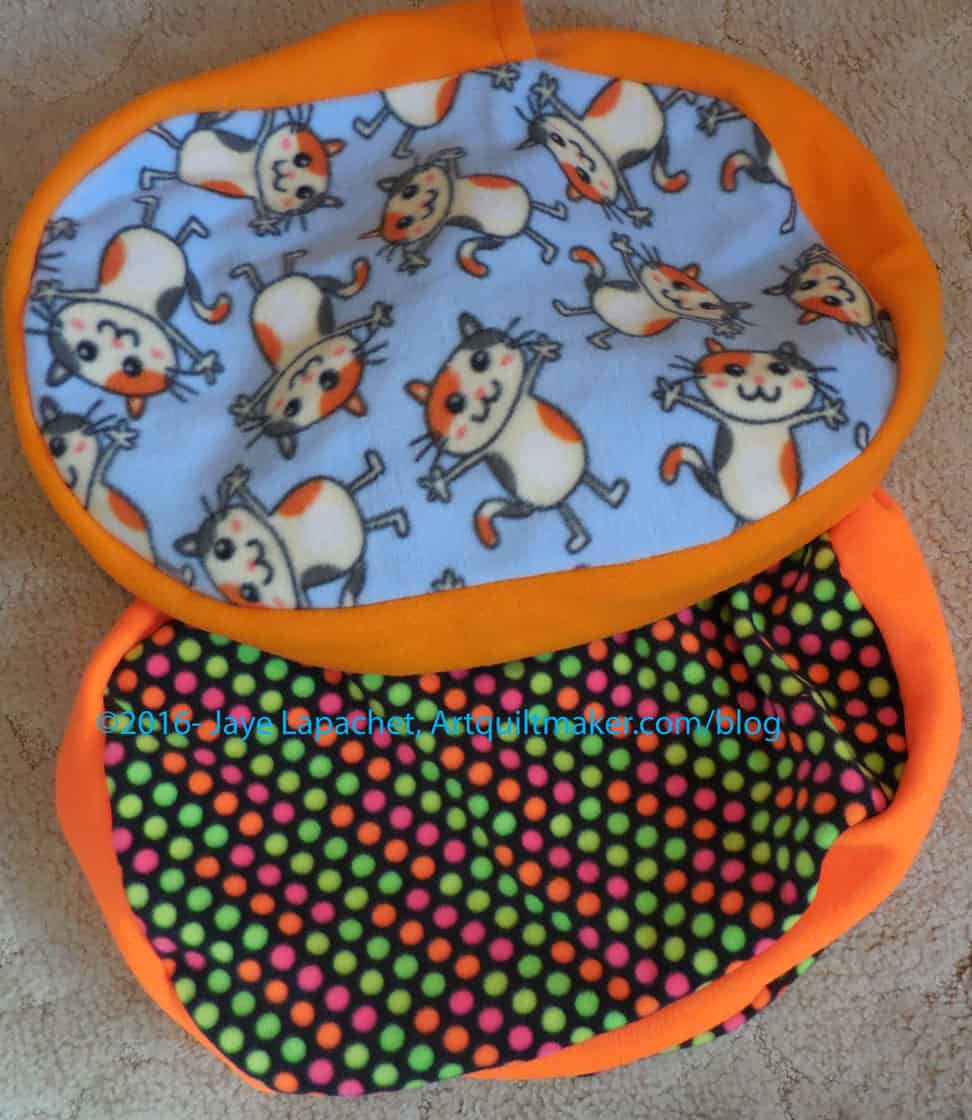
I have had some cat bed fabric waiting to be sewn since the BAMQG April meeting. I finally did it over the weekend, mostly to get the fabric out of my way. My horizontal surfaces are looking kind of full right at the moment.
I didn’t really realize how cute the top fabric was until I laid them down to take a picture. Don’t those cats look happy?
I get to count these as finishes, but I don’t get credit for the fabric since Amanda gave it to me. Oh well.
This is the quilt that Gerre and I worked on at her house a few months ago.
She finished it and brought it to Sew Day. I couldn’t believe that she finished quilting it so quickly! I was thrilled. Not just that it was finished, but also that we had another donation quilt to help give someone some comfort.
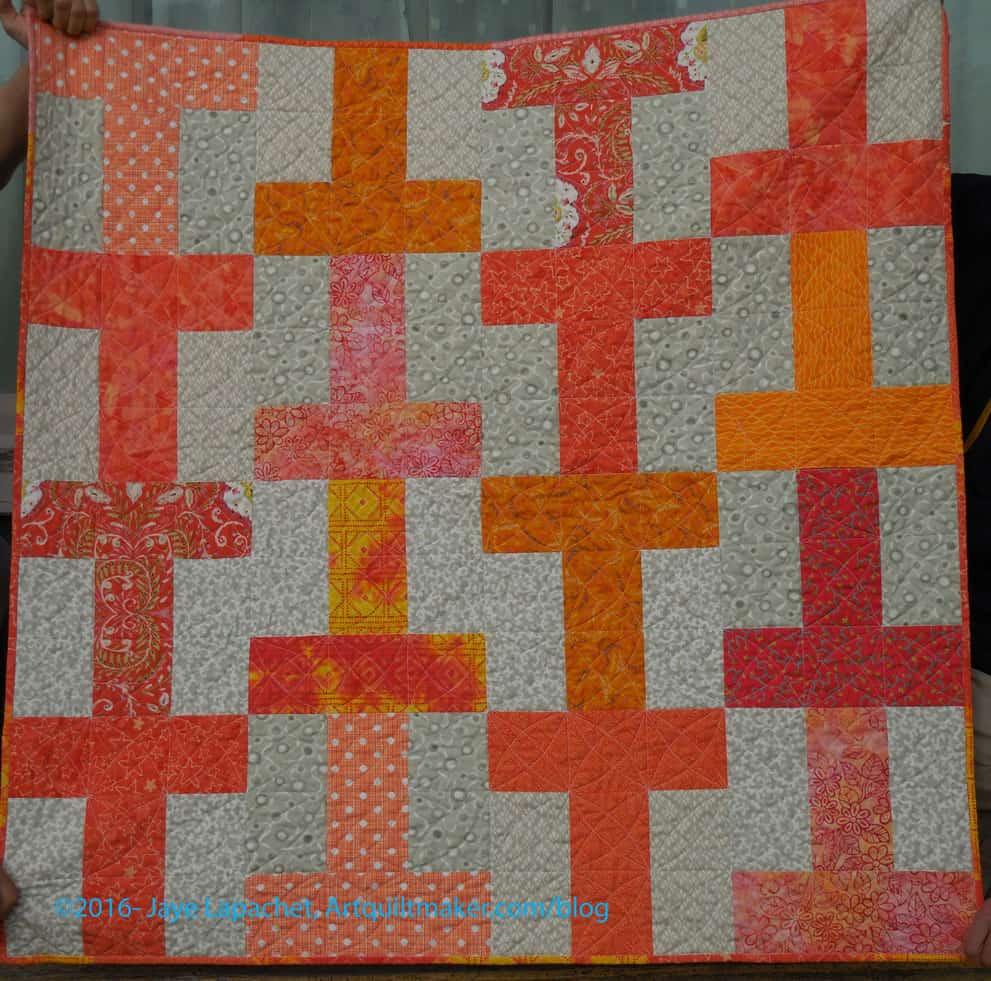
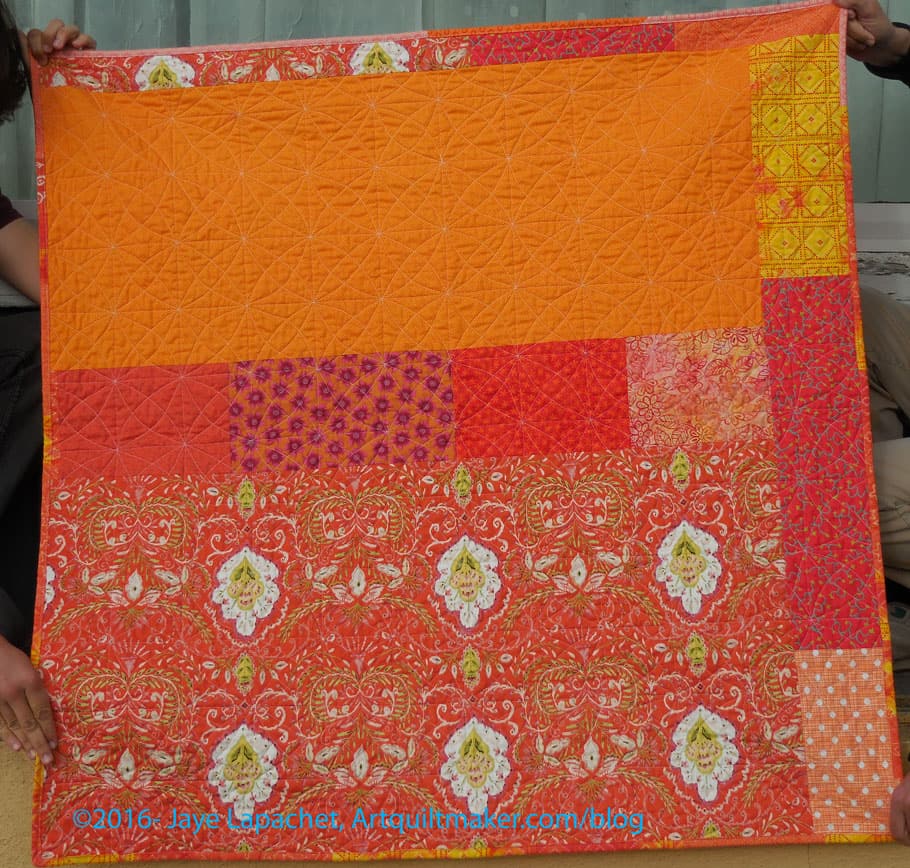
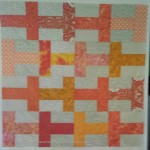
The oranges worked out really well and while we are working on the circle quilt, I am excited to cut for another T quilt. I am thinking of digging into those green bins and thinning out some of those fabrics. I also saw my nephew’s Wonky 9 Patch quilt over the weekend and think that blue would look great with the orange Ts as well.
I finally made it to a Sew Day at the new BAMQG location.
Gerre emailed me while I was in Portland and asked if I was going. I thought ‘why not?’ and Gerre was willing to sew with me again. Even though the YM is home and lounging around, he is old enough to be alone and didn’t want to come with. Why would he? He would be bored.
It was fantastic! I was thrilled to be there and thrilled to be sewing. Gerre brought the Orange T quilt and it is finished. I have to take some photos and then I will post a finished photo.
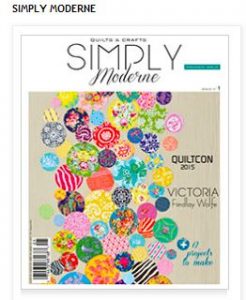
Simply Moderne
We had a great time sewing and chatting and working on our quilt. We had decided to work on a circle quilt as a donation quilt. We got the inspiration from Simply Moderne magazine. I was attracted by the cover and bought an older issue at QuiltCon.
Pushed Neutral Background
We started out by cutting the background pieces in the Pushed Neutral technique I learned from Mary Mashuta 1,000 years ago.
I brought the neutrals and Gerre brought the foreground fabrics, though we didn’t know it would end up that way.
We had talked about using greens, so I brought my green bins along with my beige and brown bin (which thankfully is almost empty). We pulled out the last of my light and tolerable beiges and cut them into 10″ squares and put this together as a background.
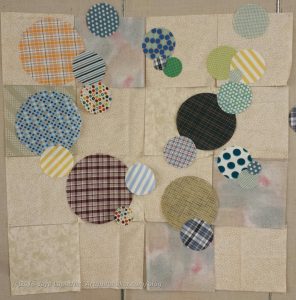
Circle cutting ruler in use!
Gerre then showed me some plaids she had and we decided to use the plaids instead of greens and make a boy quilt. We cut circles using both the Go cutter than Pati brought (with her circle template!) and my newish circle cutting ruler.
I wielded the circle ruler while Gerre took over the Accuquilt Go! I only had my normal 45mm rotary cutter and I think it would have worked better with a smaller cutter. I only have one of those and it was at home, so I did the best I could. I may need a new blade after cutting the circles.
We decided not to have a lot of large circles, because the size of our quilt was smaller than the example we saw in the magazine and we didn’t want the entire surface to be covered.
Circles on background
After putting the background together we laid out the circles on the background. I didn’t take a picture of that stage so you have to be satisfied with the photo on the right.
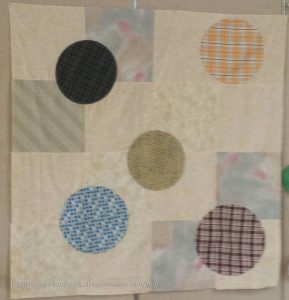
We decided we had to do the quilt in layers so that we could sew around a whole circle and not have to stop and start.
We didn’t bring fusible so we glued the first layer of circles down on the background, pressed it and then Gerre sewed.
Circle donation quilt back
While she sewed, I worked on the pieced background.
The fish and leaf fabric is OLD! The selvedge says “Sykel Enterprises 1993.” I don’t even know if Sykel exists anymore. It is certainly no Moda or Kaufman. I am sure TFQ could tell me where I bought it. 😉
It was in the brown bin and good for a boy quilt. I also had about a yard, which was a great start. It was in two pieces, so I added the strip in the middle. We also cut off a strip so we could see about applique’ing some of the motifs somewhere on the quilt. The center plaids are a couple Gerre brought.
First layer circles sewed
We were able to sew the first layer down. These were the largest circles.
We don’t intend to necessarily go from largest to smallest, but we wanted to start with the largest.
So far, it doesn’t look like much, but the next layer (no photo) looks better.
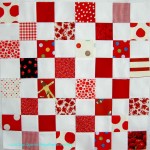
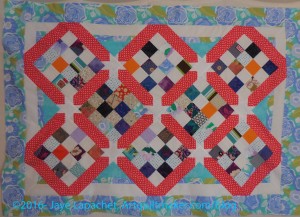
As mentioned in yesterday’s FOTY post, I need leaders and enders. Donation patches inevitably end up doing the job. I made a bunch and have an idea for a red and white donation quilt. I don’t have all the details in my head yet, but I am working on blocks using red fabrics to go with the plain whites.
Donation Blocks – April 2016
I don’t have an unlimited selection of red 2.5″ squares cut, so I am also making donation blocks using other colors. I will donate those blocks to the Charity Girls and they can do something with them unless I have enough blue and green blocks and enough time to make a second donation top. We will see.
It was fun to make the donation blocks. I am playing with the arrangement of colors and different fabrics. The recipients may not know but I have fun and I hope the quilt absorbs my joy.
The layout of FOTY 2015 is satisfying in some ways – it is great to see the piece emerge from a pile of patches. It is not satisfying in that no piecing gets done. I am trying to take Mark Lipinski‘s Slow Stitching to heart and enjoy the layout process.
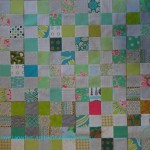
Donation blocks – late April 2016
I am only sort of successful. I want to see blocks emerge from scraps of fabric! In between moving patches around FOTY 2015, I sewed more donation blocks.
As you can see I am sort of making monochromatic blocks. Of course, to say monochromatic is a big stretch of the imagination, especially for the green on in the upper left hand corner, but I am trying out the idea. I really would like to put together an all red version of a donation quilt. At this point, I don’t have enough red squares, but I can always cut more.
Whether this concept will go anywhere, I don’t know. I am going to keep making blocks and we will see.
I know I must be boring you to tears with these donation blocks. Still I have more.
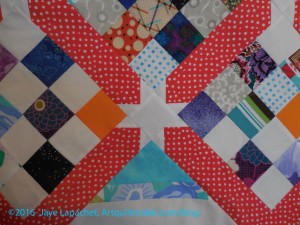
I think it is interesting to put the fabrics together in different ways. I also like the idea of using a bunch of the same fabrics and then combining those blocks with blocks in the same colors. For example, taking that red and white block, making other red and white blocks and combining them all into a top.
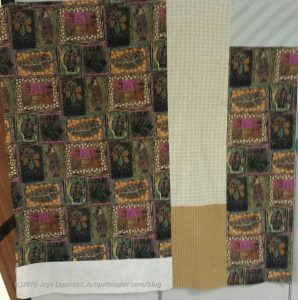
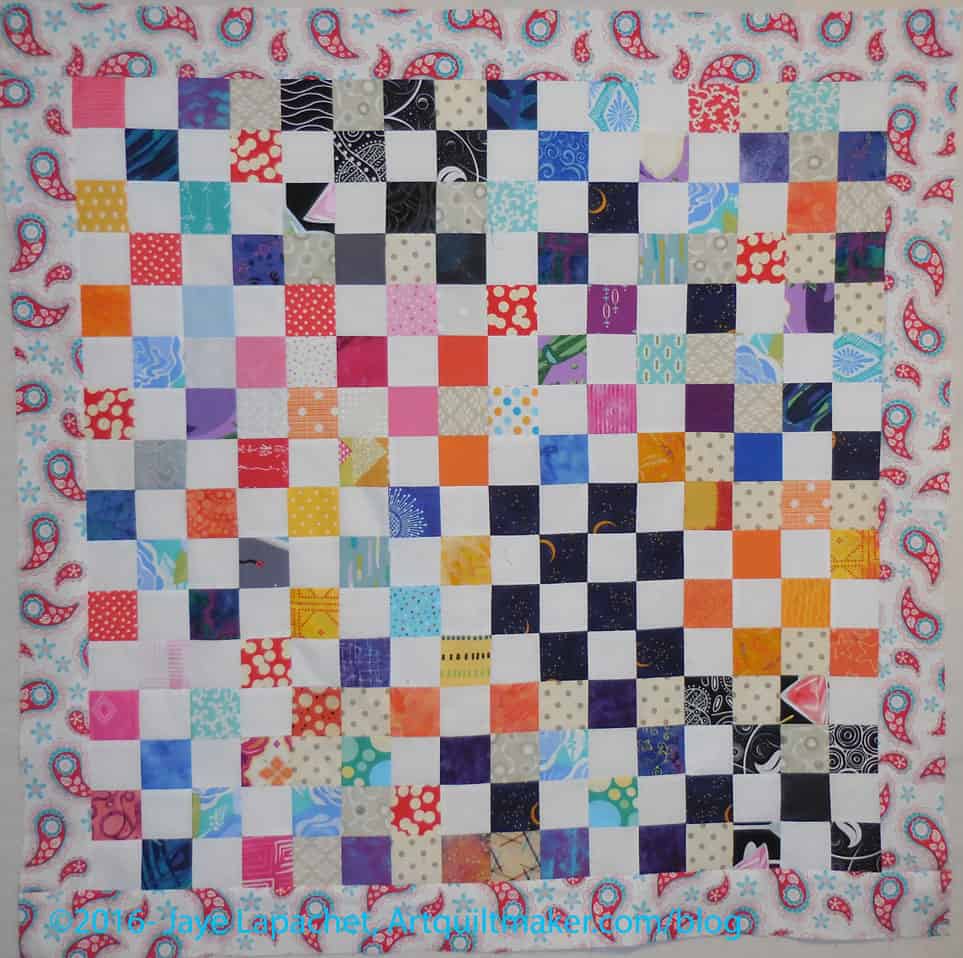
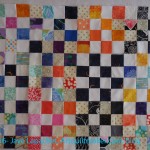
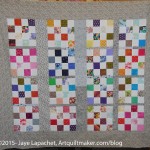
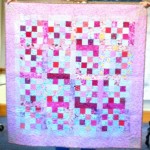
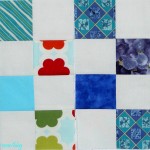
I put the blocks together (as leaders and enders) that I talked about last week into a top. The center is made up from the simple postage stamp/16 patch blocks. As you know I have been working on them for the last few weeks.
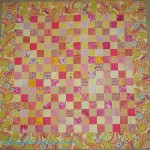
The border is from the Sugar & Spice collection from a few years ago by Amanda Herring of the Quilted Fish. I bought that line and even though it was fine fabric in nice colors, I decided it wasn’t really my style. It made a great addition to this quilt, though.
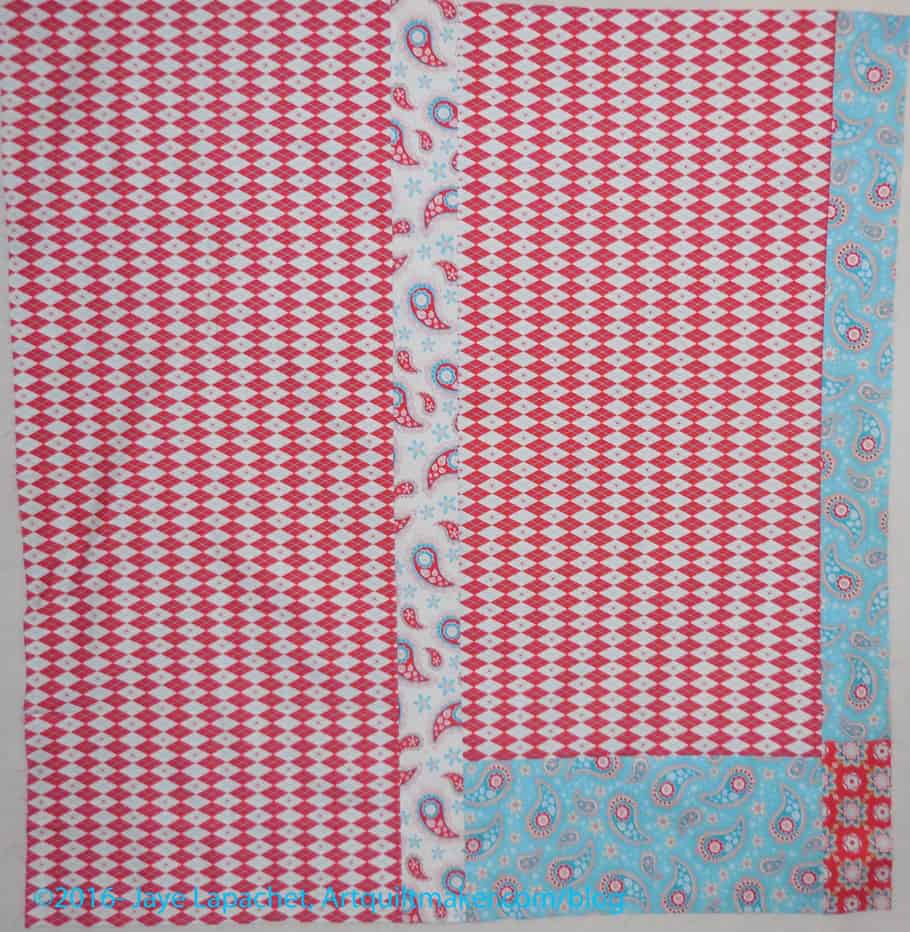
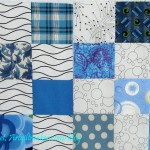
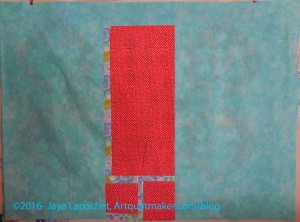
Sugar & Spice back
I saw the group of fabrics in my fabric closet and decided to use the plaid for the back. I needed a bit more to make the back larger, which was when I was inspired to use some of the fabric on the top’s border.
Someone asked in a comment how I select patterns for a donation quilt. This is an interesting question and I am so glad the commentor asked. I never thought of the topic and it is a great one!
The biggest issue to consider for me is what kind of sewing I want to do. I have to judge my mood and my interest level. After that there are a couple of things I think about when selecting a pattern.
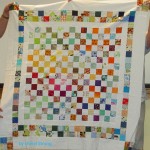
First, I have some go-to patterns. I use these patterns over and over. At least I am still using them. Even though I have made several tops using the patterns, I am still interested. One is a 16 patch, which is a basic, easy block that the guild always encourages.
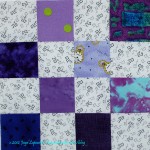
Charity blocks – April 2016
FOTY-made Donation Blocks
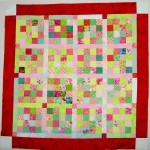
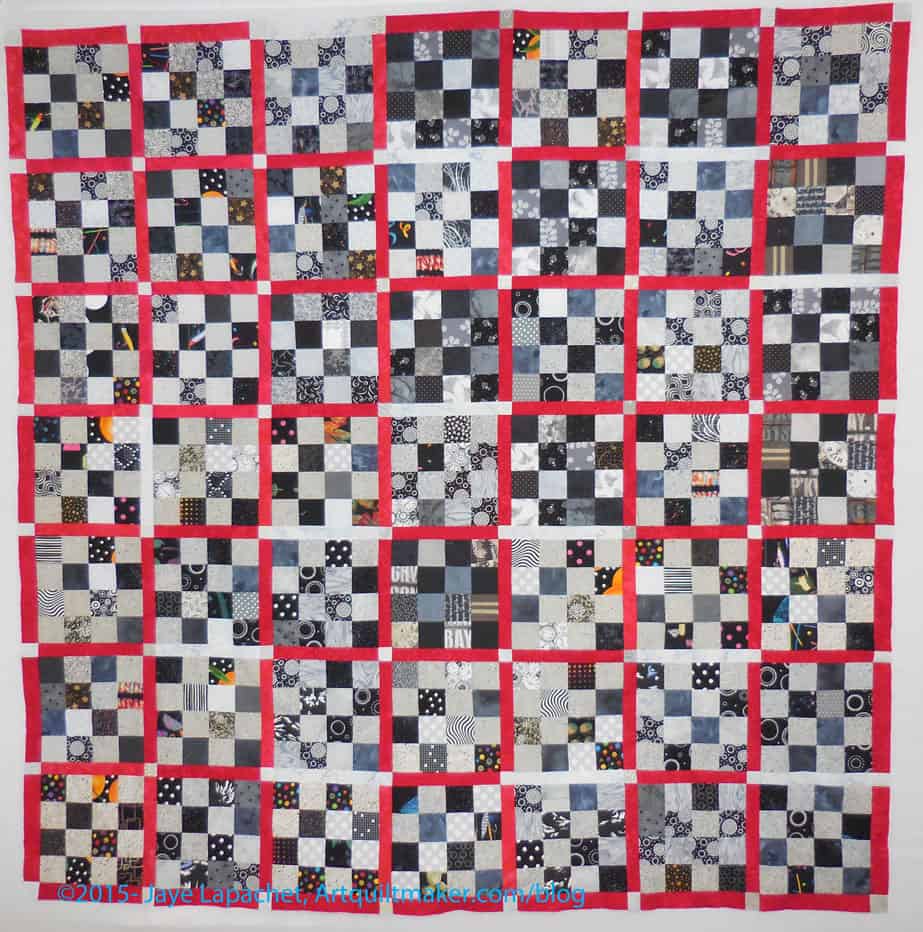
Black & Grey Donation Top Complete
Multi-color Donation Quilt- April
Cheryl’s Donation Quilt
Orange & Grey donation quilt
Donation Blocks – June 2014
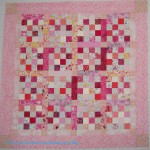
Pink Donation Quilt
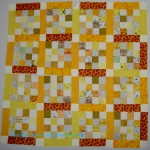
Yellow & Pink Donation Top
Pink & Green Donation top
4 Pink & Green Donation blocks
Pink Donation Top #2
Yellow Donation Top – no borders
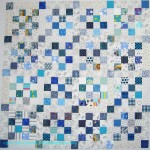
Blue Donation Quilt
February Donation Blocks
Good Fortune Donation block
Donation Blocks – My Scraps
Purple Donation block
Scrappy B&W Donation Block
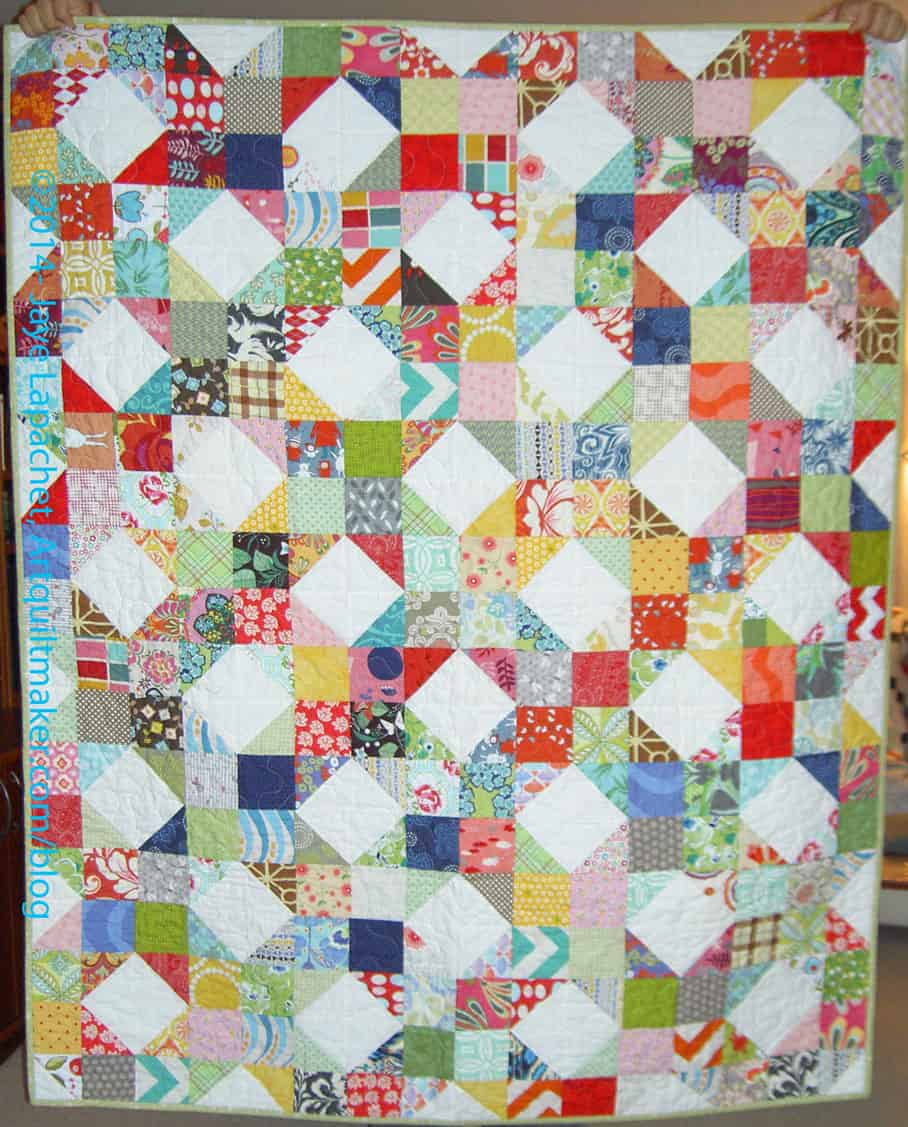
This is a good pattern for all levels of quiltmakers and can be made from pre-cuts. You need 8- 2.5″ foreground squares and 8-2.5″ background squares to make the block. 16 blocks with no sashing make the quilt size we donate to the NICU at Stanford. It works very well with the leaders and enders technique.
There is also a lot of opportunity for creativity and variety. The photos above show quilt tops as well as blocks. There are a couple from the guild that I did not make. Sometimes I have a lot of fabric in the same colors (just finished a quilt), so I’ll cut up the leftovers into a usable size and make a set of blocks in those colors and put it together into a donation top.
I also will just pick random squares in a variety of colors and put them together into a block. I always want to be working on a leaders and enders project as it makes my productivity so much more.
I am also cutting 1-2 2.5″ squares from each fabric I was and press so I have a variety of squares to use as donation block leaders and enders all the time.
These blocks can be set together in a variety of ways as well: sashing, no sashing, on point, straight set, etc. If I make scrappy blocks, I sometimes have a hard time finding a suitable sashing color, so I might use scrappy sashing.
Sometimes I add borders, sometimes I don’t. I don’t think I have begun to explore all the possibilities for setting the 16 patch blocks.
Flower Sugar Donation Top
Orange Donation Top
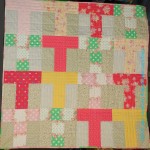
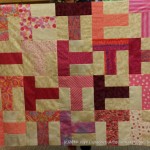
Pink T Donation Quilt
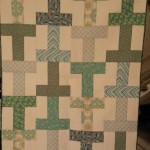
Green T Donation Quilt
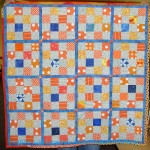
Second, the T Quilt Pattern is another go to pattern that I keep returning to. Peggy, one of the Charity Girls gave us this pattern at a Charity Sew Day. It is easy and it makes a good break from the 16 patches. Again there are quite a few options for variety that can be employed with this pattern. I do think the T design discourages sashing (what would be the point?), but scrappiness works very well.
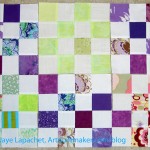
Cutting Corners Donation Top
Third, as with the Cutting Corners Ruler, trying something new is a good opportunity to make a smaller piece until I feel comfortable or know I want to commit to a larger piece. The Cutting Corners donation top is one of those tops. I wanted to try out the ruler and making a donation top was a good option.
Fourth, very occasionally I will have orphan blocks. If they don’t get used for journal covers, they are donated to the Charity Girls to make into donation quilts or I will make them into donation tops. Most often, I just want them out of my hair.
Black & Grey Donation Top Complete
Fifth, rote sewing. Sometimes I need a project that allows my mind to wander into non-quilt territory. The Black & Grey Teenaged Boy Donation quilt was a good example of just sewing something that required few decisions.
BAMQG Mystery Quilt
Sixth, tops or blocks sometimes don’t quite work out. I don’t mean they are ugly or unusable. I meant that they didn’t work out for *ME* for some reason. These pieces can be any fabric, any pattern, any design, any layout. Anything. As I said in the blog post, I like the fabrics in the quilt above. I also like the pattern, but together they didn’t work for me.
Seventh, fabric that didn’t work out. A lot of times I will use fabric to make a donation quilt that I don’t want to use for my own quilts. This doesn’t mean it is crappy or fabric. It might mean that it isn’t my style anymore or the color is just off enough to make it not fit with other fabric choices. It could also mean that I bought a lot of it, because I loved it, used it a lot and suddenly didn’t love it anymore.
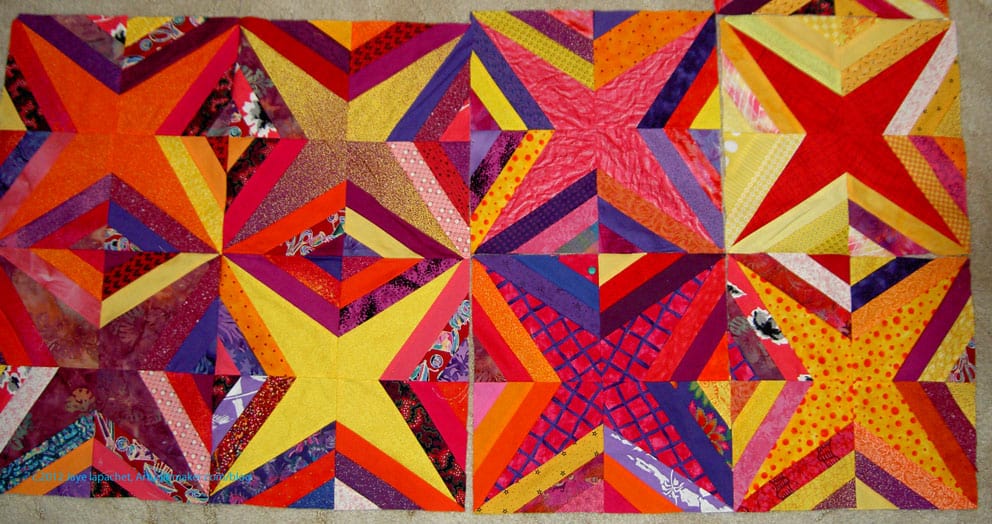
Star Donation Quilt
Eighth, periodically the Charity girls will come up with a block of the quarter (or of the month). For a time they will collect blocks in that design and then the group will make a series of quilts in that design. The Star donation top (above) is a great example. I put the blocks together and made the back. I didn’t make the blocks. Although, it has been awhile, I am still inspired to make more of these blocks and put them together in another quilt.
Ninth, too many scraps is a good reason to make donation blocks. They can be mosaic pieced like the journal covers, trimmed to size and then put together in an appropriate size and layout. They can be made into Sawtooth Star blocks or other blocks with a large center. The microscopic scraps I use for journal covers would take too long to sew together into blocks.This works better for donation tops with larger scraps.
I also cut larger or smaller squares into usable sizes and shapes, depending on what I have, and make a top from those. If I use smaller sized pieces, such as a 2″ square, I try make a whole top or enough blocks for someone else to make into a whole top. I try not to leave the Charity Girls in the lurch by making just one block, though I have known Peggy to run with one block and come up with a great top.
Also, if one of my scrap bins (I sort them by color) is overflowing I will cut a bunch of squares or other shape and make some blocks or a top.
Stars & Stripes blocks
Tenth, sometimes I will start a project with great enthusiasm. This often happens with class projects. At some point (too late to abandon) I will lose interest or realize I don’t like the results. It is a good opportunity to turn it into a donation quilt.
It could be that the fabrics are just fine and the technique makes me cringe. The above Stars & Stripes blocks were made using paper piecing. Not my favorite.
I was kind of surprised at the different ways I choose patterns to make donation quilts.
I do my best to use patterns I like and try very hard not to make ugly donation quilts. The beneficiaries of these quilts don’t care about matching points or perfect layouts. I am sure they are looking at the pretty fabrics and softness of the object they have been given. Everyone deserves some beauty in their life.
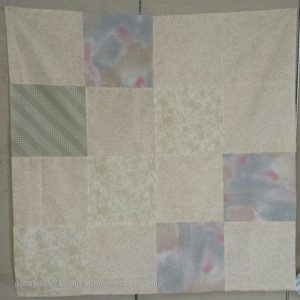
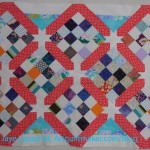
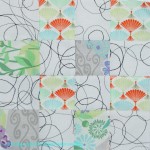
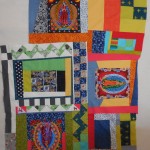
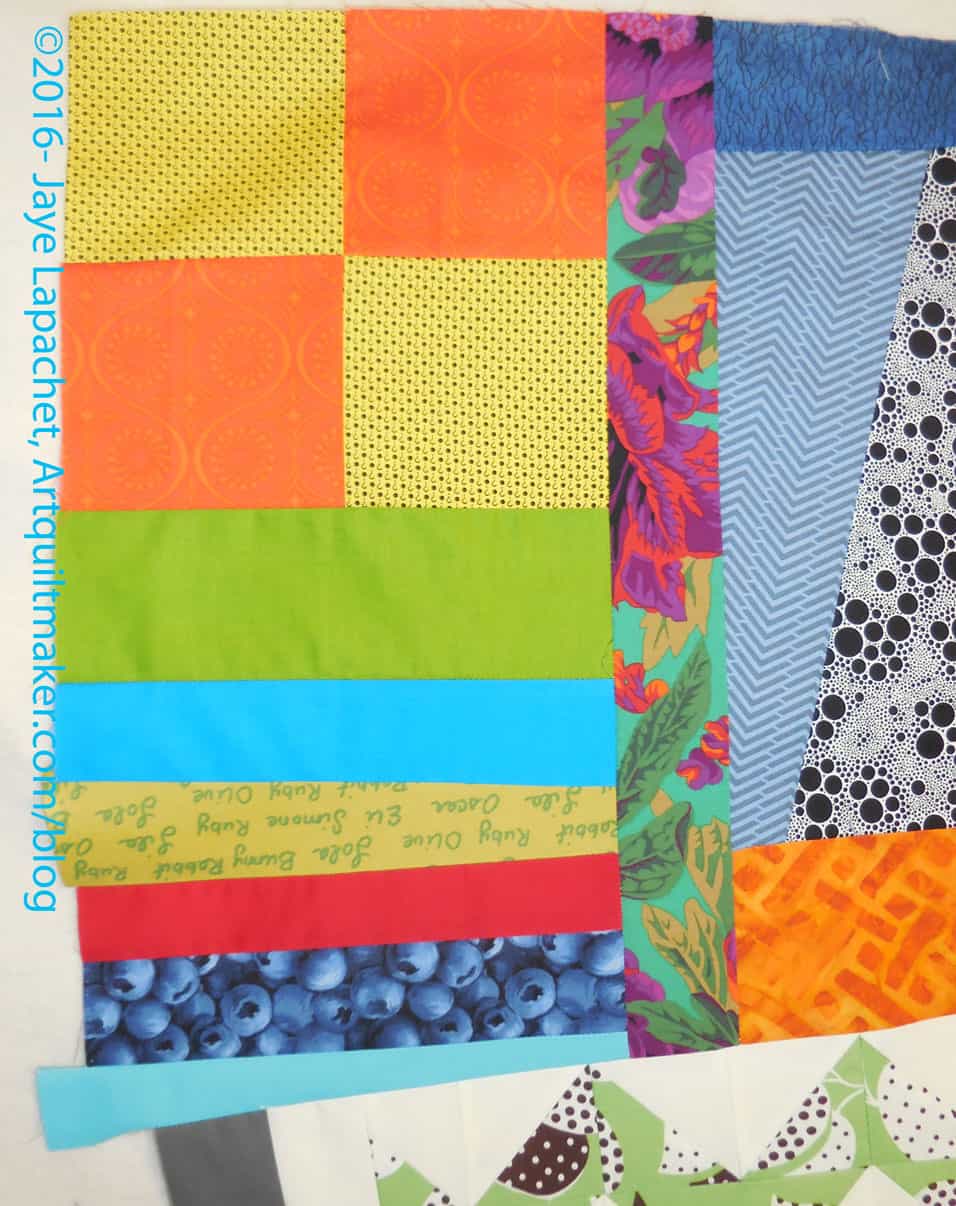
I got two new-to-me round robins last Friday. I didn’t have enough design wall space, so I took them out and looked at them. Different elements caught my attention – the squares in Annemarie’s and the applique’ on Michelle-Nicholle’s.
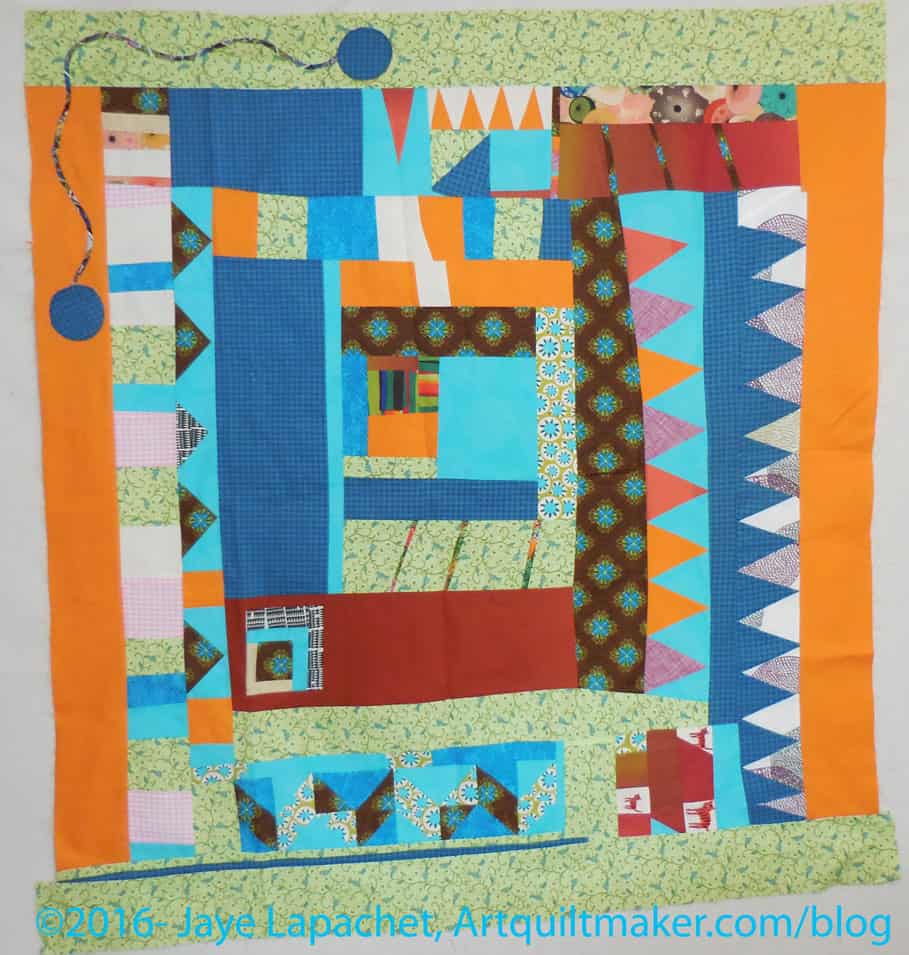
My addition to Annemarie’s piece – detail
I started with Annemarie’s after I finished the Cutting Corners donation top. I decided to add the other corner to the top left. My corner has the same look at the corner on the right side. I wanted the elements to be related, but not to be derivative. I wanted to use more of the Alison Glass fabric, but there wasn’t any left in the packet.
I looked at it after I had finished the squares. They looked too square. I had to make up some space (see the bottom strips where the blueberry fabric is?), so I added some strips and kept adding until my addition was large enough to fill the space. The strips look more improv than the squares. I can’t blame my hand for the cutting as it is much better. Habit, I guess.
Michelle-Nicholle’s Improv piece -before
Michelle-Nicholle’s was harder, mostly because it had the structure of a very traditional round robin. All the pieces in the round robin are getting quite large and Michelle-Nicholle’s is no exception. It is also, I think, the largest piece on which I have worked. There were also only a few motifs I could use as inspiration, none of which were very exciting to me. More applique’ would have been logical, but I just wasn’t in the mood. It was very difficult to think of an addition. I reached back to my early days of quiltmaking when I learned to do improv curved piecing. I added some of that. It is a simple addition, but effective, I think. I may add something else as my addition does seem like much, nor does it help the next person as a jumping off point.
Michelle-Nicholle’s IRR after -detailMichelle-Nicholle’s IRR after
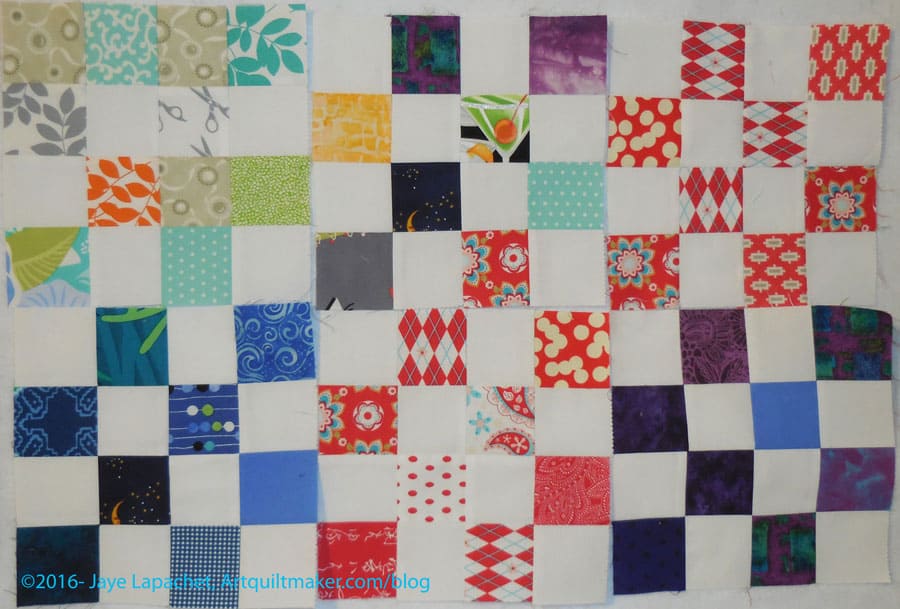
I talked about some donation blocks I made last week. As I worked on the Cutting Corners Donation Top, I made more of the postage stamp/16 patch blocks using leaders and enders. I love how much I get done when I use that technique!
Charity blocks – April 2016
I now have 12 blocks on the wall. I have a few more to make, but I think that I might as well sew them together to make another top for the Charity Girls.
I know I promised I wouldn’t post any more donation quilts “for the time being.” The time being is over and I have another top and back finished. Things are kind of coming together with finishes lately, which is nice.
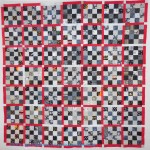
Cutting Corners Donation Top
I worked on the Cutting Corners Donation top on Saturday. I was able to finish the top, the back and the binding. It occurred to me that I should make a Frankenbatting as well. I haven’t done it yet, but I have time before the meeting.
Cutting Corners Donation Top detal
I know I said I was struggling with the corner pieces last time I talked about this top. I decided to move along by sewing together as much of the top as I could. After putting the entire top together, I found that the corners I had made and discarded actually fit in the corner spot. I was pleased and shocked to see how much the quilt shrunk up when I sewed it together. After all of these years, I shouldn’t be surprised, but I was. It is nice that quiltmaking can still surprise me.
Cutting Corners Donation Back
I definitely like the way this top came out, but I am on fence about the ruler. I am not sure that using the ruler was the easiest way to get to the finish. I will probably try it again with different fabrics.