I spent the first part of the quilt retreat (will write about the retreat in general, but want to talk about the projects first!) working on the Food quilt that will go to a friend of the Young Man’s.
We are friends with the parents also, and they are very interested in my quilts. It seems reasonable to make a graduation gift for their son.
I bought plenty of fabric when I purchased for the Young Man’s Food Quilt, so I have plenty of fabric. The fabric is hard to find near where I live, but I bought most of it in Lancaster County when I was there with my SIL. Food themed quilts are good for boys as they are sort of neutral, but not too girly for boys. Quilts can easily be kind of girly, especially for someone like me who loves pink. 😉
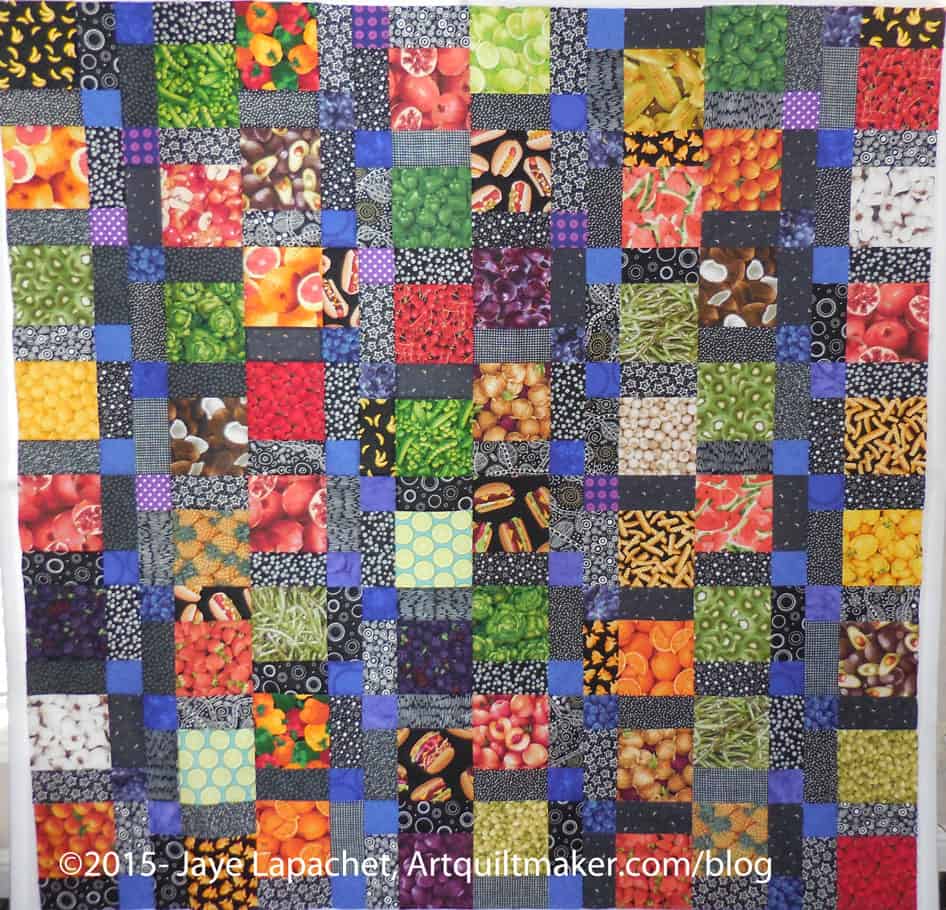
I did the same pattern, a Disappearing Nine Patch, though I arranged the blocks in a different way.
I wasn’t able to finish the top, because I forgot the black I want to use as an inner border. I did make 4 piano key borders to add once I put the black border on the piece.
This project has been hanging over my head so I am glad I have made significant progress on it. Hooray for retreats!
I know I already posted today, but I have posts for the whole week waiting to be posted and I just couldn’t let another week go by without posting this finish!
I finished the binding last week, which means the Food Quilt is FINISHED!!! Hooray!!!!
Aside from just finishing something, this is great for a lot of other reasons:
can move on to other projects without guilt (not that I have much anyway)
The bad part is that I am out of hand work. Really out, not just sort of out. I am diligently quilting on the Garden quilt so the beading and embroidery on that quilt can be my hand work, but I am not there yet.
Still, I am thrilled to be done with another project. The Young Man piled this quilt on top of the other ones and has slept under it for a few nights already. I took it to BAMQG without washing it and hope no boy smell permeated the room! People liked it.
As I mentioned in a previous post, back in July, this quilt is all about the fabric. I got down to it over Labor Day weekend and made the top. I still need to add borders, but the top is basically done.
You can see that the Disappearing 9 patch block means that there is an automatic border on two sides of the quilt. I don’t want a border on two sides of the quilt. I want the border (a border in this case) to be symmetrical, so I added a row of rectangles and squares.
Giant Food 9 PatchGiant Food 9 Patch #2
These blocks actually are quite large. Each square in the block is 6.5″. Once you cut them into quarters they become a manageable size.
I was consistent about placement of red and black, so that the red would end up as cornerstones and the black would be the sashing. I fiddled around with the arrangement quite a bit, as I am wont to do. I wanted to vary the food prints that were next to each other as well as the location of the blacks.
Arranging
This is what you get once you cut a 9 patch block into quarters and rearrange them. In fairness and honesty, the above are quarters from 4 different 9 patches. You would see the same red, if they were from the same 9 patch, but you get the point. Even if this was from the same 9 patch, there would be variety, because of the different blacks and the different focus fabrics.
Chunkin' It
Per TFQ’s instructions, I did chunk this quilt together. That method of putting together quilts works so much better for me than sewing blocks together in rows. I also find it easier to keep my blocks placed where I want them placed.
I started cutting when I found myself starting to wash and iron food fabrics AND when I started to run short of leaders and enders.
As you know I made an effort to get the Farmer’s Market fabrics put out by RJR. I was able to buy a nice selection in Pennsylvania. I also scrounged a bunch from my mom when she was done with her food quilts.
After that, it was time to do a test. I want to do a Disappearing 9 Patch. I saw Robin doing one at the CQFA 2011 Retreat and she got a lot of bang for her buck. I want something that won’t take forever, but won’t be boring. First, though I wanted to try it out.
9 Patch Basic Layout
I am thinking I will make the real squares 6.5″. I didn’t want to commit that much fabric to a test, so I made the test group much smaller. The squares for each part of the test 9 Patch are 2.5″ cut. The above shows you the look I am thinking of using: food fabrics in the corners, white on black print on the middle outsides and red in the center. The Young Man gave his seal of approval, though wanted to know where the pizza fabric was, so I’ll have to rethink not including pizza fabric (it isn’t part of Farmer’s Market).
9 Patch Sewn9 Patch Cut & Rearranged
The blocks look good and I think my idea will work. As I said the real blocks will be on a much larger scale. I think that the rearrangement of the blocks in that kind of infinity pattern will look good as well. Things to which I need to pay attention:
not to many green food fabrics in the same block
cut up lots of reds and blacks, if I really want to get moving
9 Patch Alternate
This is another way I could arrange the block parts. It has kind of a self sashing thing going. I don’t think I would want to do this unless I added more sashing to the center, which would be a lot more work. I don’t see any reason to cut up the 9 Patch in the Disappearing 9 Patch manner if I am just going to add more sashing to the middle. I might as well cut squares and sash them.
I really should have put a quarter or a dime next to these blocks so you can get an idea of how large they are, but I didn’t think of it before I took the photos. As a result, I don’t know if you will be able to to tell how large the final cut patches are?
First 4 Real Sized Patches
As I iron fabric, I cut these large squares out and set them aside. I was finishing up Stars for San Bruno #2 when I first cut these, so I didn’t cut any black/whites or reds. I’ll get to it.
The food fabrics above are for the quilt my mom is making for her step grandson. I talked about it last week. Maureen saw my post and offered me some squares of food fabric. She even cut them. The first 3 rows above are the fabrics she gave me. The last row are fabrics I bought and have cut for mom. I don’t know how many blocks she has, but it must be nearing 100. That should be a good sized quilt.