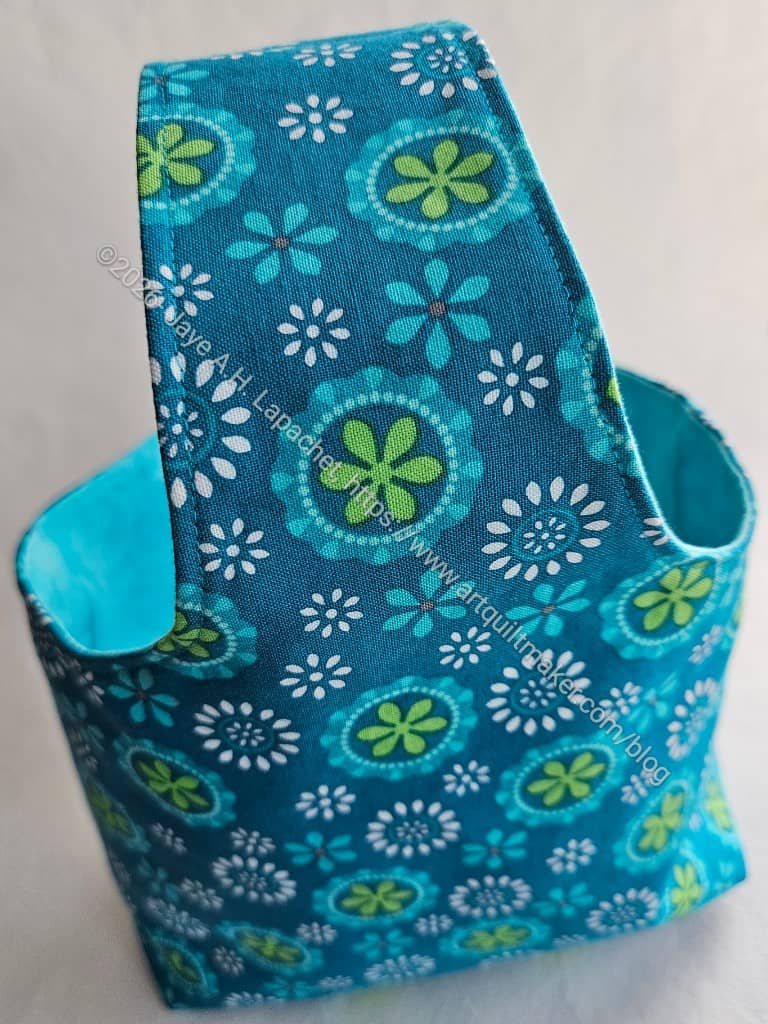
This is a tutorial for a Mini One Handle Tote. I saw a quick IG video and decided to try and make one.
I am definitely not trying to steal anyone’s intellectual property. I was not able to find a pattern shop with this pattern, so am writing this tutorial to help myself remember how to make this bag. I also want you to be able to make the bag. I highly recommend you follow Kotobukisewing on Instagram, take a look at Kotobukisewing’s reel on making this project. Also, visit their YouTube Channel for their various other pattern instructions including garment patterns. I also found a video from Mokochocko_sewing for the same type of bag, but the directions are different. Their bag is more of a bottle bag. Check this video out as well. If I find a pattern to purchase for this bag, I will update this post to include the information.
The instructions below make one bag.
Supplies and Materials
Optional Tools and Supplies:
-
-
- Modern American Vintage Point Turner/Hera Marker
- Hemostat to help with turning.
- Pressing tool to keep your fingers away from the iron when pressing seams open, such as
- Press and Turn tool** OR
- Stiletto**
- Curved Quilt Ruler** OR French Curve**
-
cut
-
- Exterior fabric to 28 inches by 11 inches
- Lining fabric to 28 inches by 11 inches
- SF101** or ProFuse 27.5 inches by 10.5 inches
- Soft & Stable** or Fusible Fleece** 27.5 inches by 10.5 inches
Directions
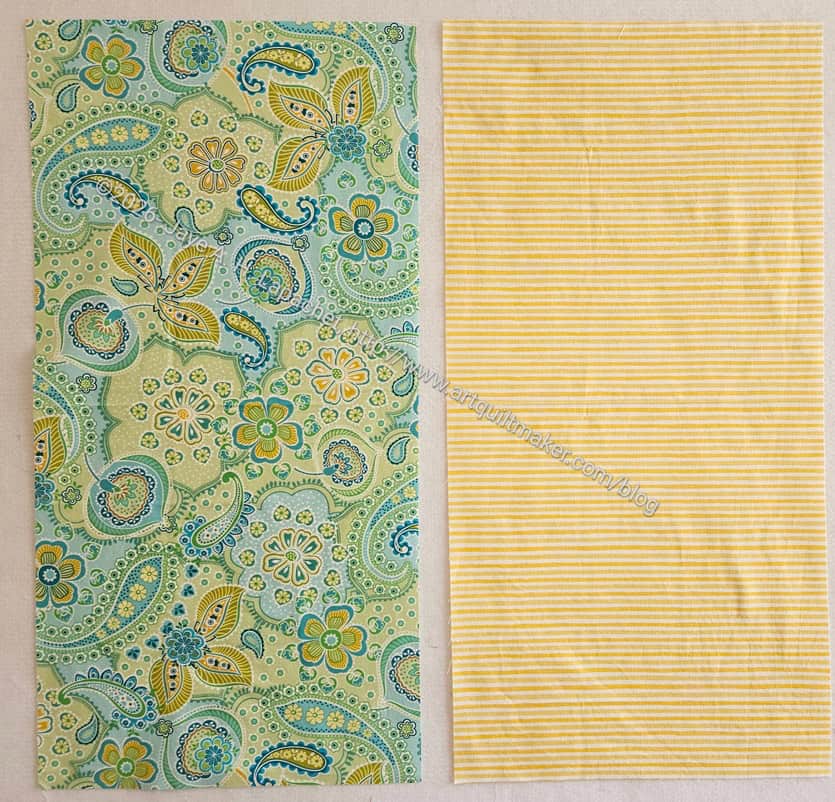
Trim exterior fabric to 28 inches by 11 inches
Trim lining fabric to 28 inches by 11 inches
-
-
- Note: the original video uses metric measurements, which I have converted. The original measurement was 27.5 x 11, but I have been making them using 28 x 11, because the cutting is easier when folded in half. The half inch doesn’t seem to make a difference in the sewing or functioning of the bag.
- Note 2: cutting is easier for me if I fold the fabric in half and then cut pieces 14 x 11 inches, but I have a very small cutting table.
-
Press interfacing according to the manufacturer’s directions on to both the exterior and lining pieces.
-
-
- Note: I leave space around the edge, in the seam allowance with no interfacing to reduce bulk.
-
Make Your Handle Template
Take your piece of card stock/heavy paper and place it vertically on the table in front of you.
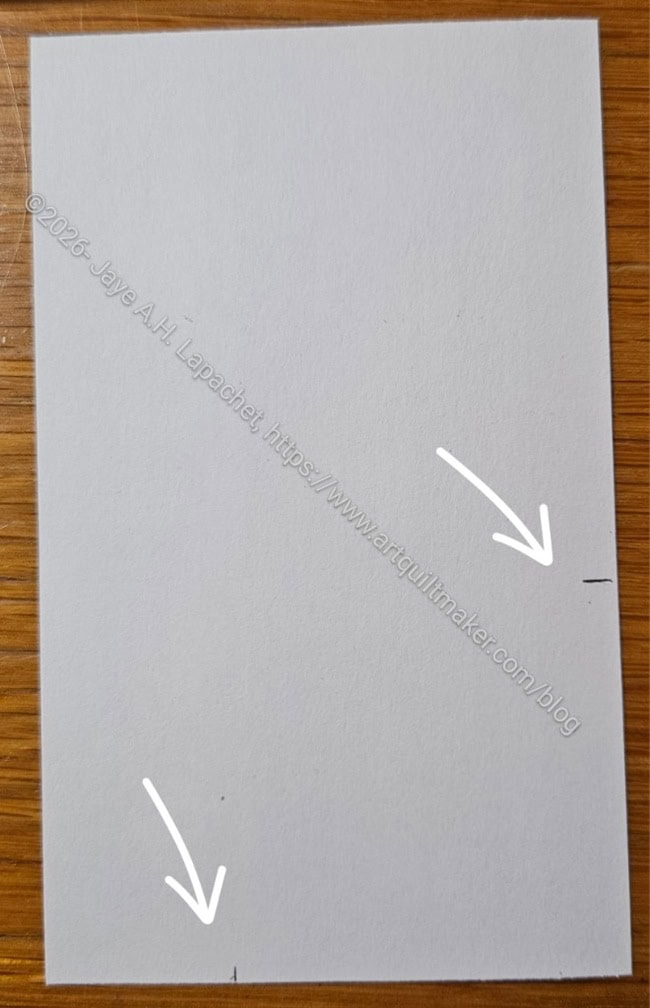
Measure 2 inches from the bottom right hand corner up the right side and make a dot.
Measure 2 inches from the bottom right hand corner along the bottom to the left.
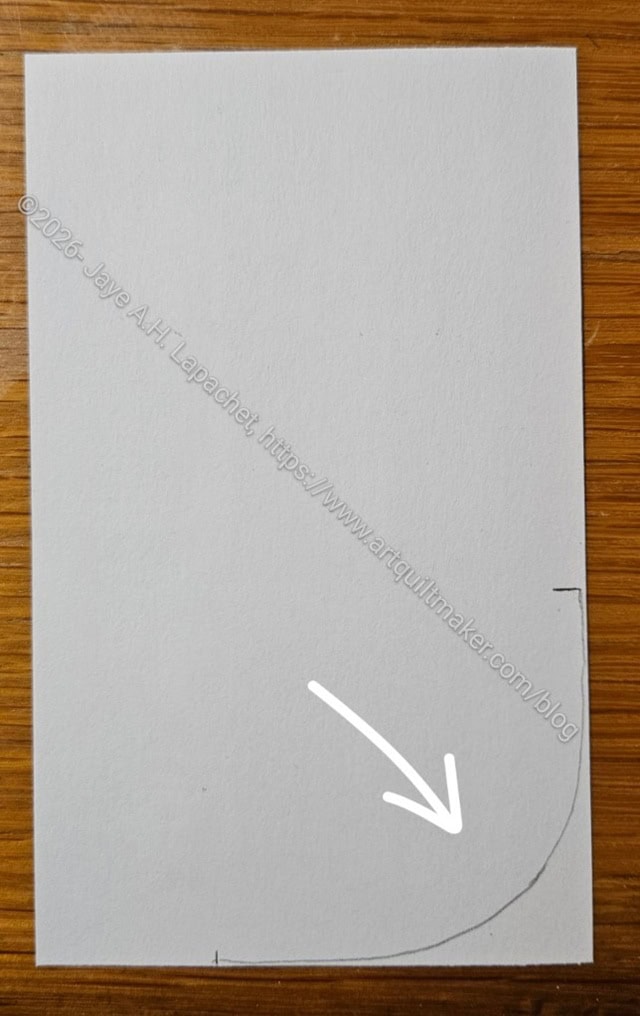
Draw a curved line from the dot on the right hand side to the dot on the bottom.
-
-
- Note: If you don’t want to make your own curve freehand, you can use a French Curve** or Curved Quilt Ruler**. Check the video from Mokochocko_sewing for how they use the ruler.
-
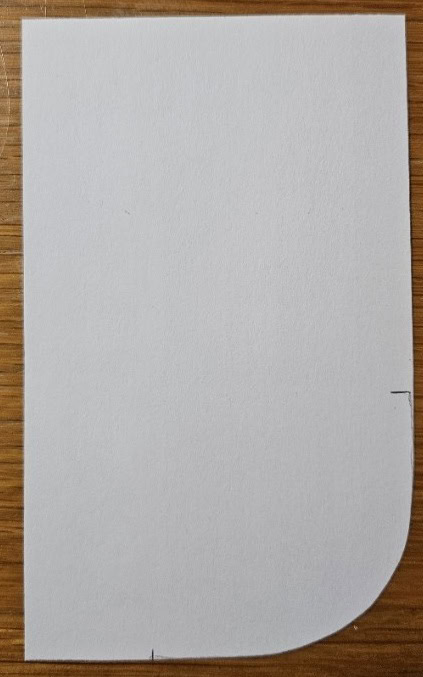
Using your paper scissors, cut along the curve on the card stock smoothly. This will now be called your “handle template”.
Cut Out Your Handle from Fabric
Place your interfaced fabrics right sides together.
Fold the fabrics in half with the fold at the top.
Using Wonder Clips, clip along the straight sides and the bottom. Do not clip the top left and top right sides.
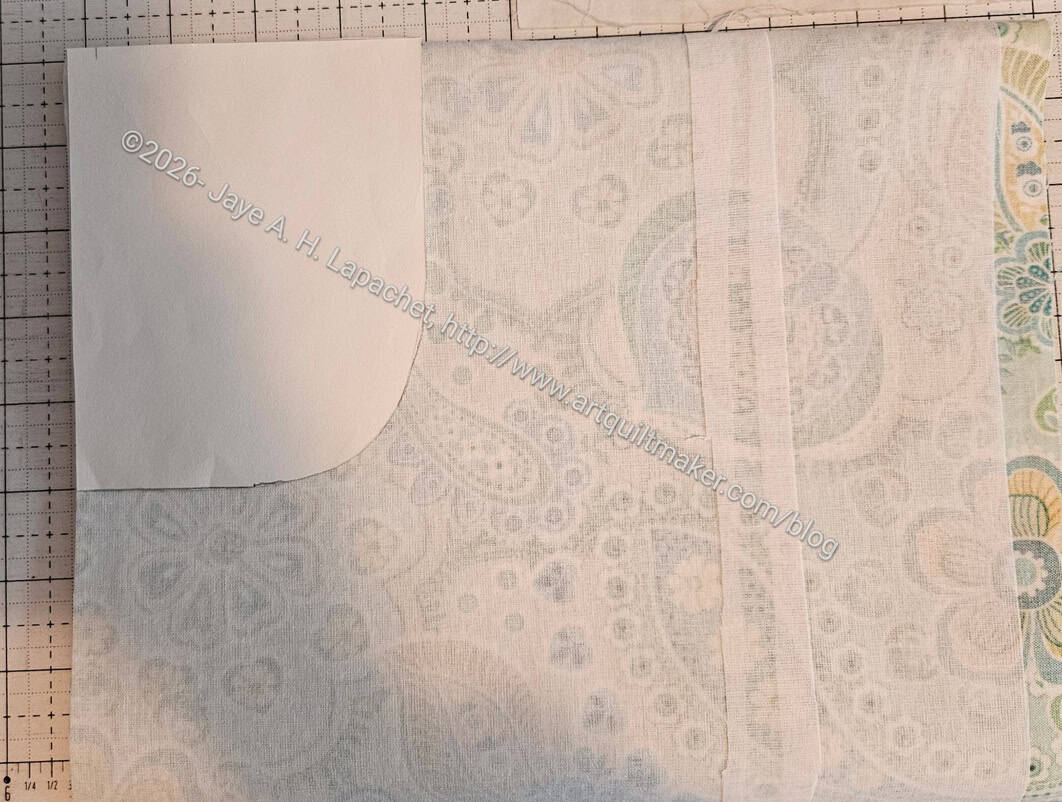
Place your handle template in the upper left hand corner so the top edge of the handle template is even with the fold and the left hand side of the handle template is even with the left hand side of the fabric. The curve will be facing the center.
Draw a line from the top along the curve to the left. You are drawing on the interfacing, which is attached to the wrong side of the fabric.
Flip your template over to the right. You are still positioning the template along the fold.
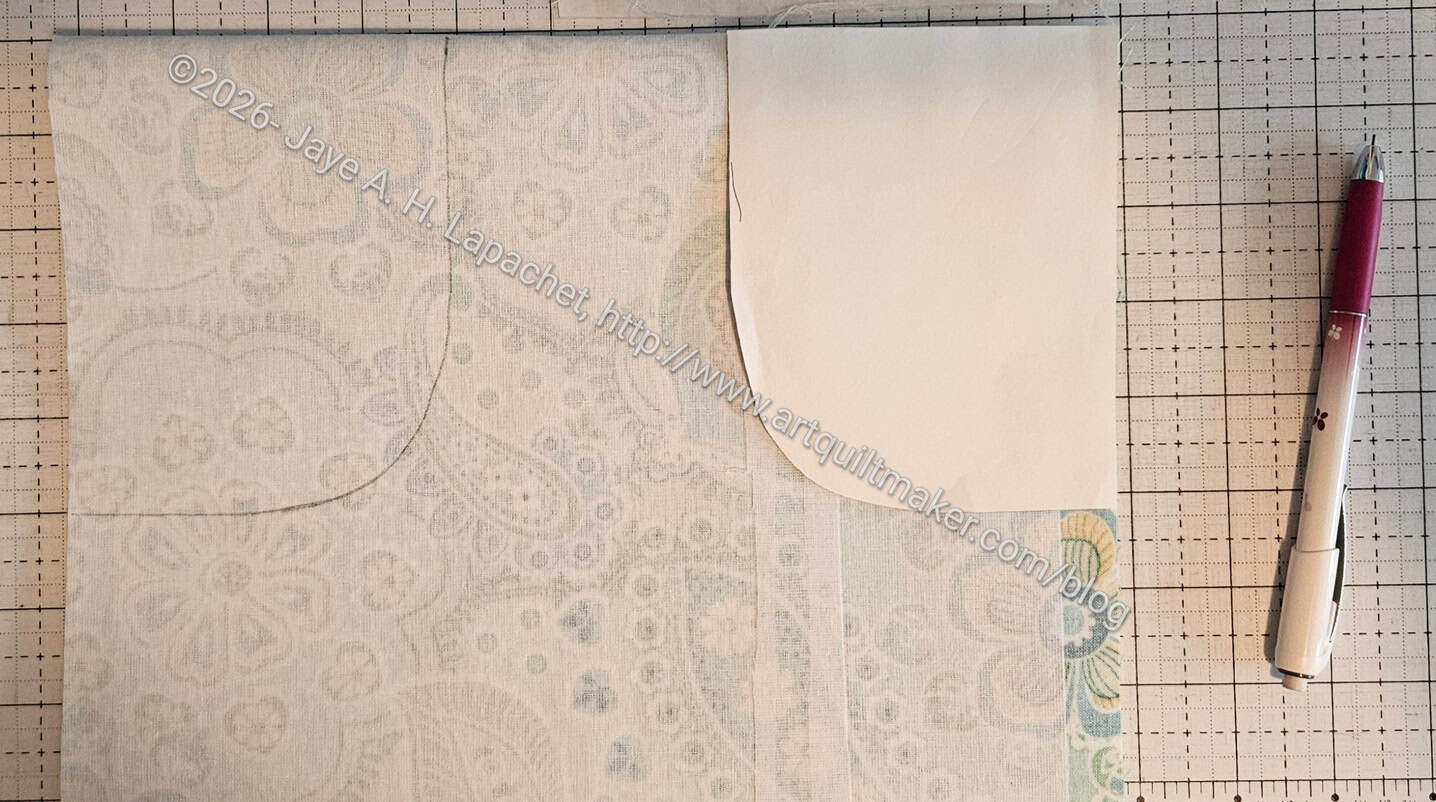
Place your card in the upper right hand corner so the top edge is along the fold and the right hand side of the card is even with the right hand side of the fabric. The curve will be facing the center.
Draw a line from the top along the curve to the right. You are drawing on the interfacing, which is attached to the wrong side of the fabric.
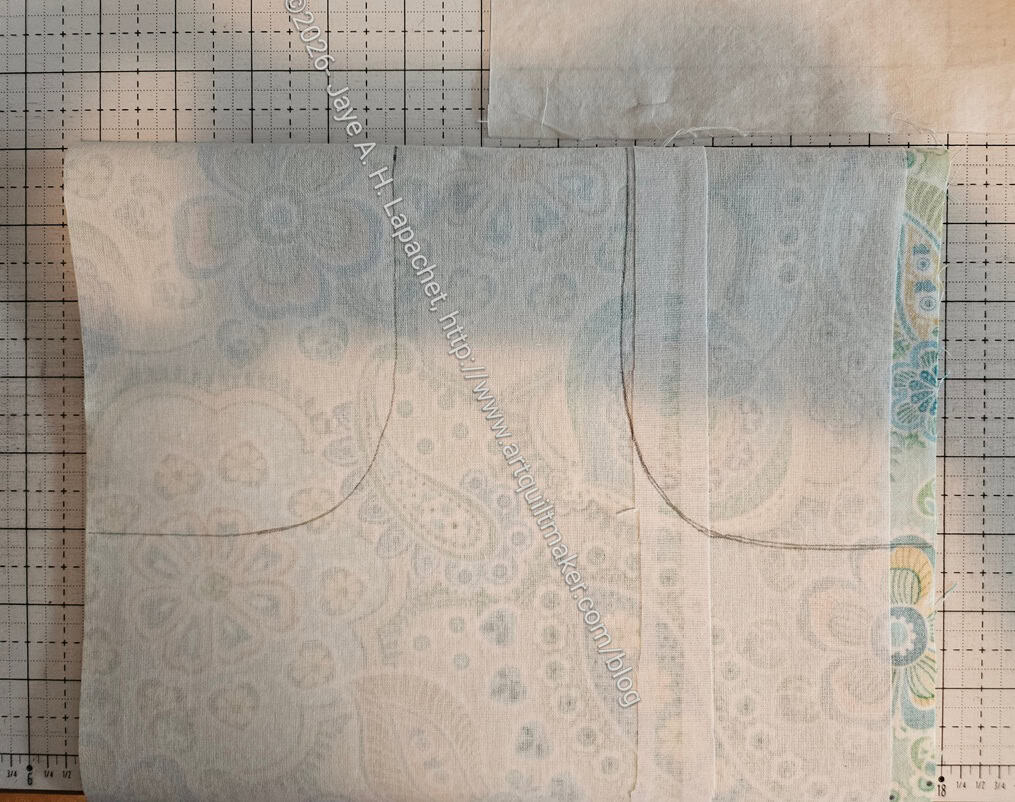
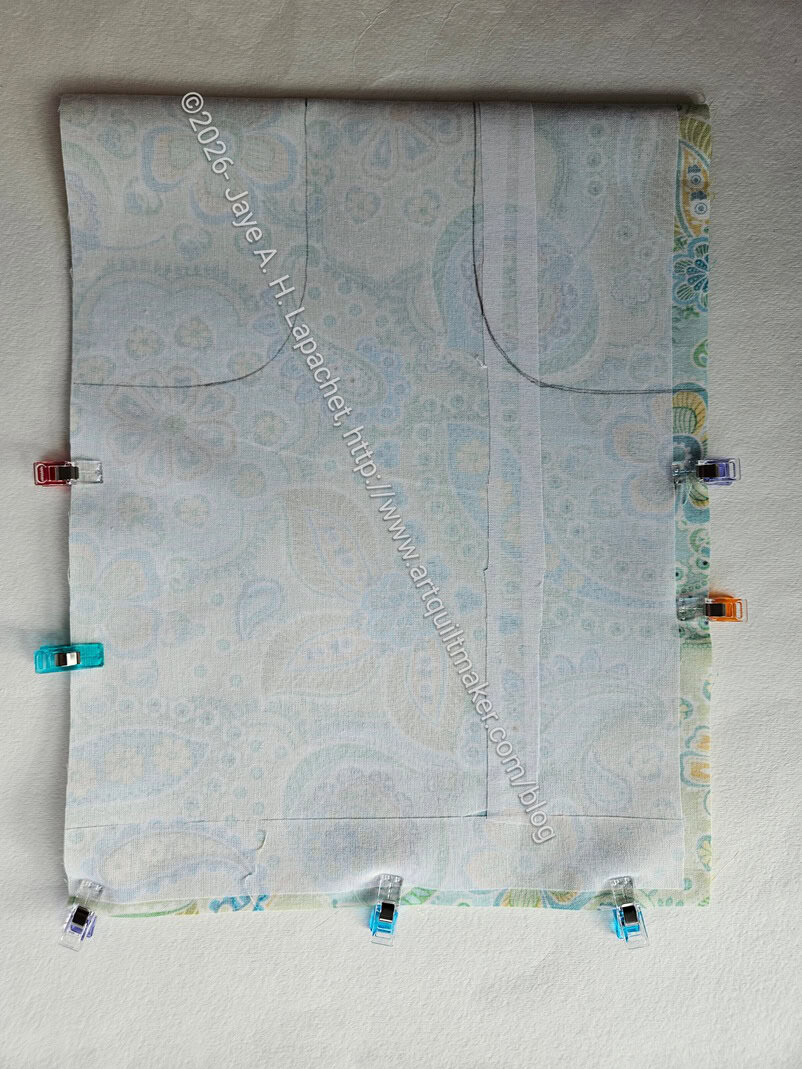
Using Wonder Clips, clip the edges you have not yet clipped, staying away from the lines.
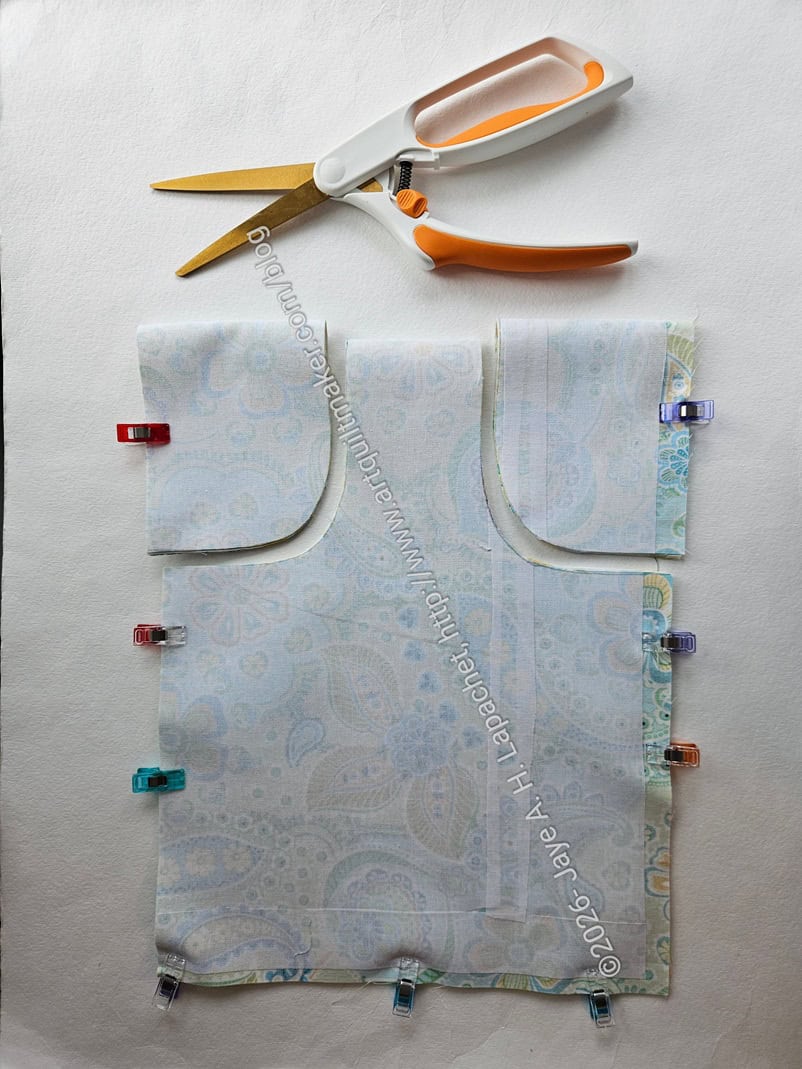
Using your fabric scissors, cut along both curved lines through four layers of fabric and one layer of SF101 (2 exterior, 2 lining and interfacing) .
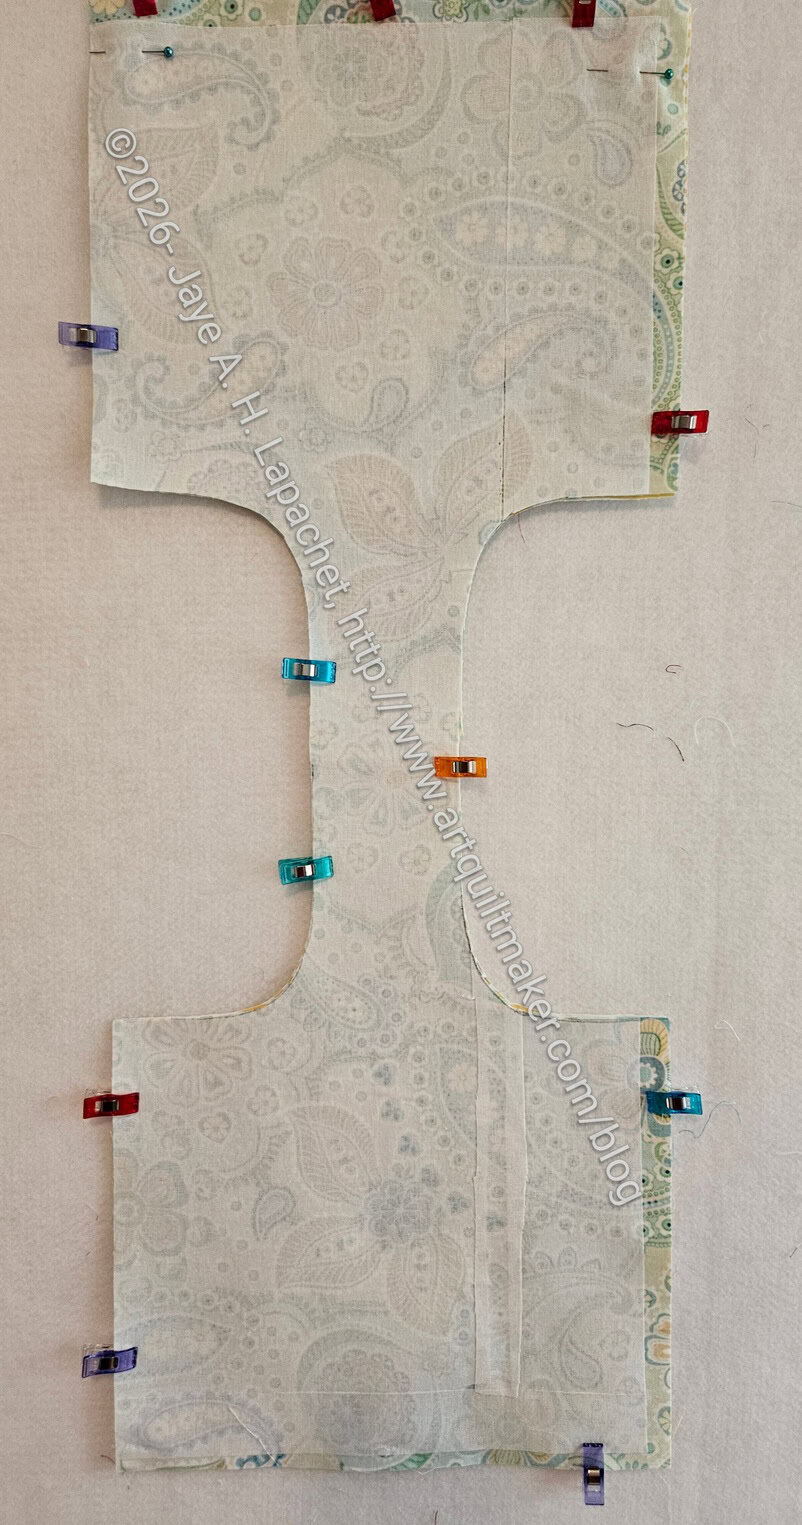
Move the Wonder Clips so two, unfolded, layers are clipped. Fabrics are still right sides together, but they are now shaped like an uppercase I.
Note: The video from Mokochocko_sewing has a different method for making the handle, which you may want to look at if the ‘card’ method isn’t working for you.
Sew the Bag Together
The first step is to sew along the curve ONLY. Start sewing on the top, sew around the curve to the bottom of the curve. You are not sewing any straight edges yet.
Sew along the curve on the other side. Start sewing on the top, sew around the curve to the bottom of the curve. You are not sewing any straight edges yet.
Clip the curve.
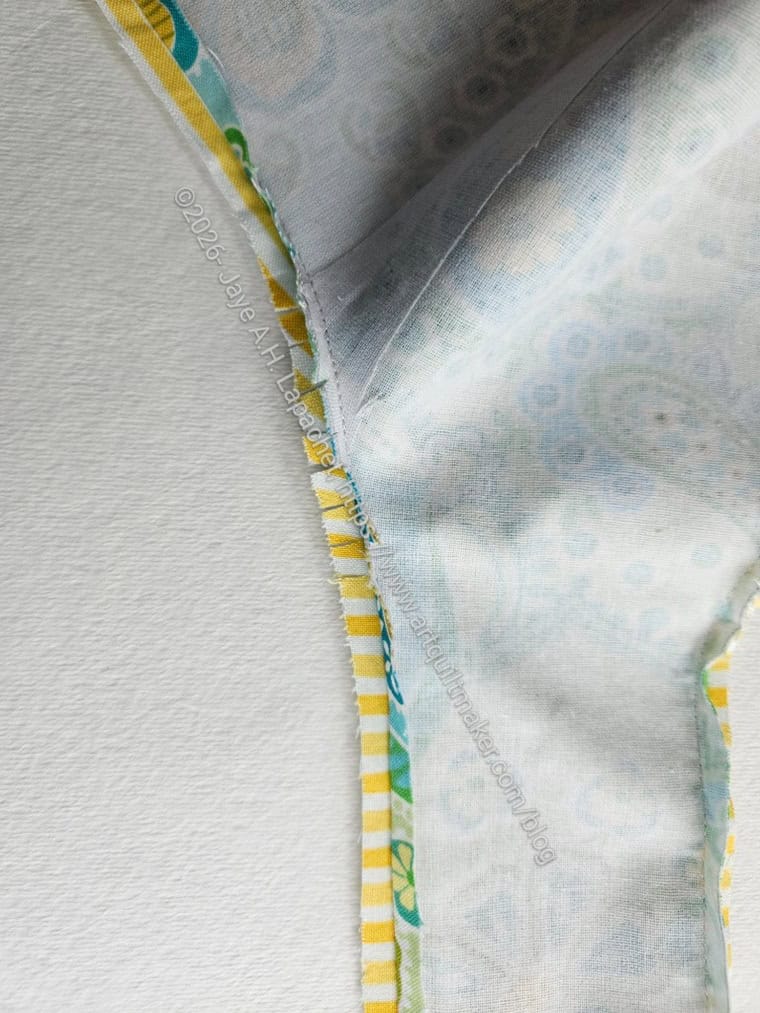
Press the curved seam open.
Remove the Wonder Clips lingering on the straight edges.
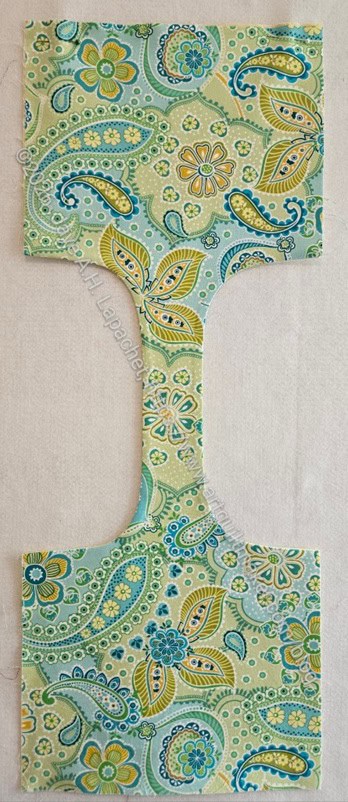
Turn the entire piece right sides out (RSO) through the skinny center piece.
-
-
- Note: this step might be a bit tedious. I have done it with both batting and SF101 with no problems, so have patience.
-
Press the entire piece so the soon-to-be bag is nice and flat.
Lay the piece horizontally on a flat surface (table, desk, ironing board, etc) in front of you with the exterior facing up.
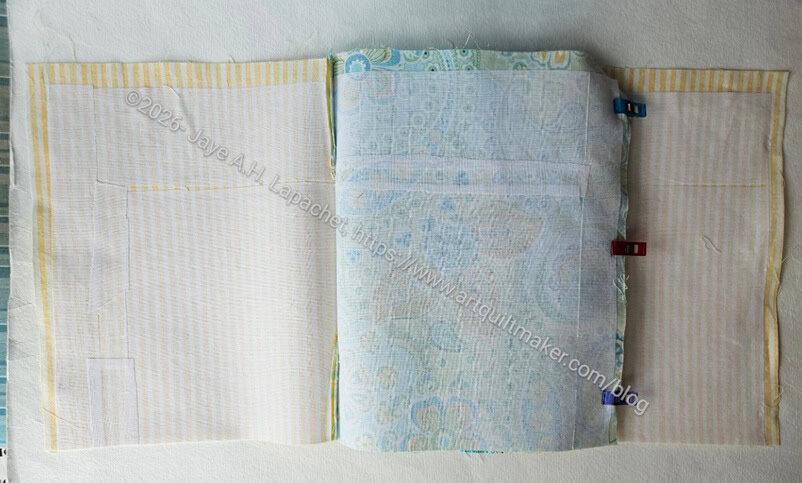
Take the exteriors only – the lining will still be on the flat surface – and line up the bottom edges. Clip the exterior sides and bottom together.
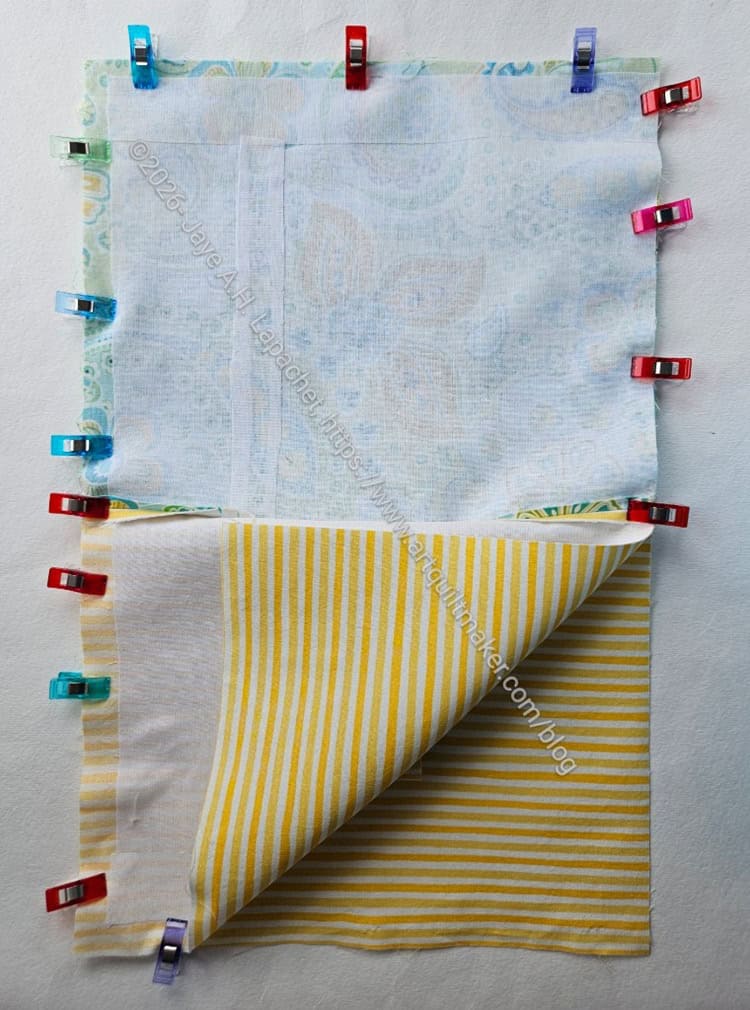
Now take the linings only and clip them together.
Line up the seams in the center.
Open and flatten those center seams, clipping them together.
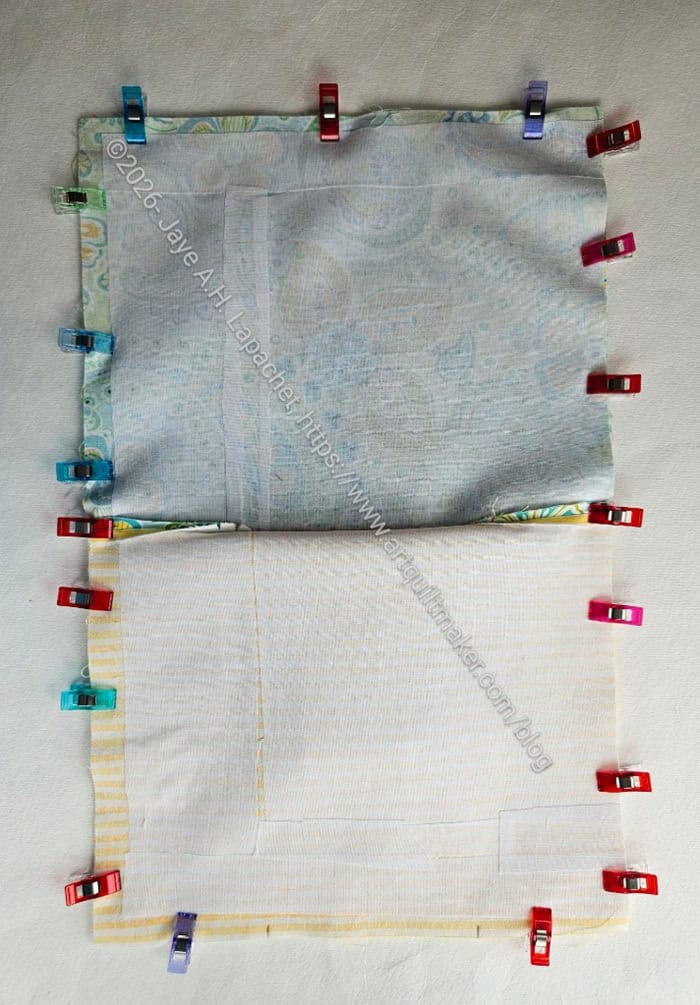
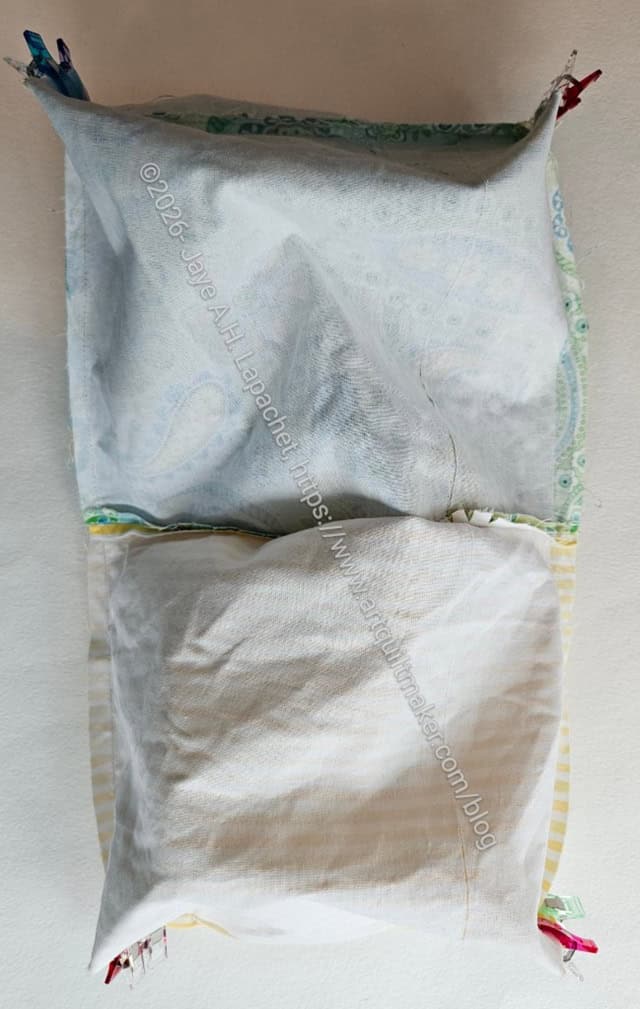
Before sewing, the bag will look like the photo above.
Mark a 3.5 inch to 4.5 inch space on the bottom of the lining that you will NOT sew. This is your opening for turning.
-
- Note: for the next couple of steps you are going to be using two different seam allowances. You want to make the lining a bit smaller so it won’t be saggy baggy. This isn’t a huge problem in this project, but I did notice that it happened in Mini One Handle Tote #2.
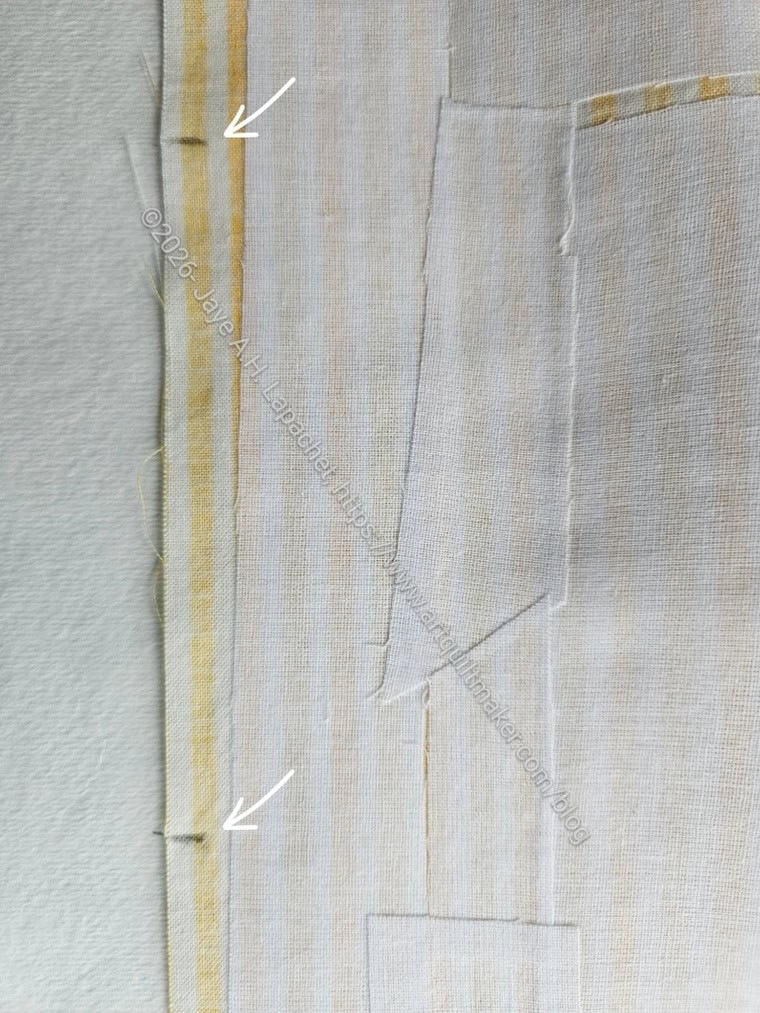
Using a 3/8 inch seam allowance, start sewing on one edge of that lining opening, back stitching after a few stitches, and sew to the corner, then up the side. As you get to the center seam when the lining meets the exterior, veer to a 1/4 inch seam allowance. When you get to the exterior you want to be ready to sew a 1/4 inch seam allowance.
-
-
- Note: Remember how I showed you how to start sewing from the edge in the Snap Trays tutorial? Start at the edge, sew 1/4 inch, turn parallel to the edge and sew as normal? You can do that here as well to make a crisp seam in the turning opening when you turn the whole bag right side out. The photo above shows the marks. Between the marks is the opening for turning.
-
Sew around the exterior using a 1/4 inch seam allowance. I back stitch at corners and anywhere there might be stress on the bag.
When you get to the other side of the lining, veer back to a 3/8 inch seam allowance and finish sewing the bag to the other side of the lining.
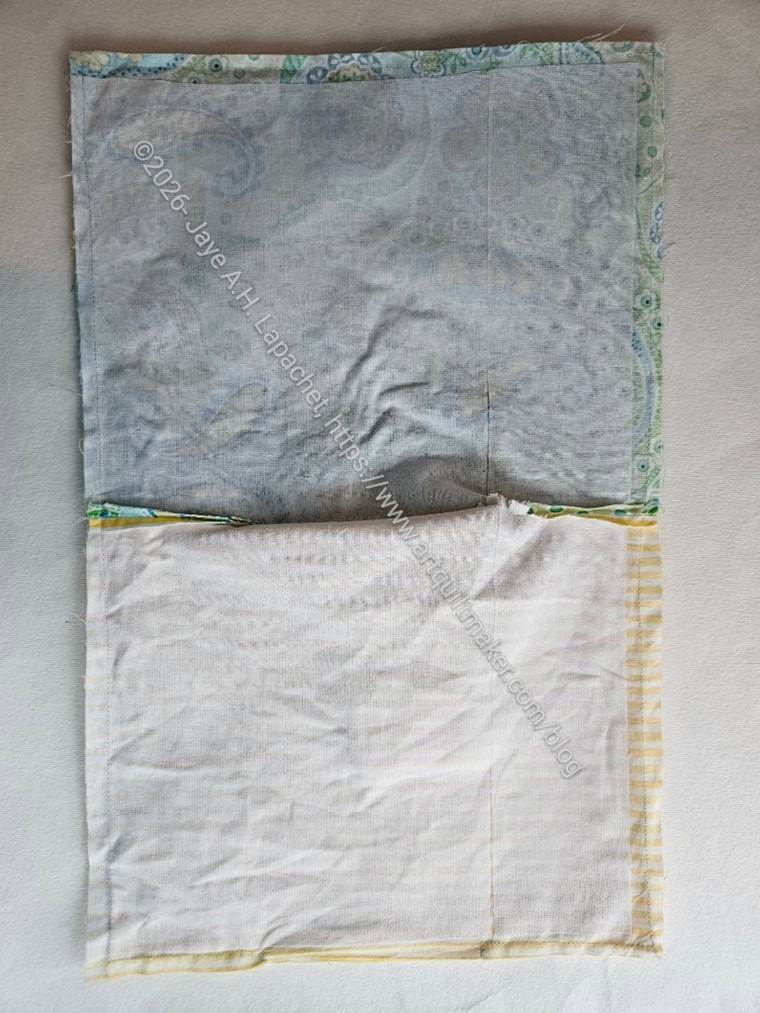
Back stitch at the end.
Press all of the seams you have just sewn open.
Box the Corners
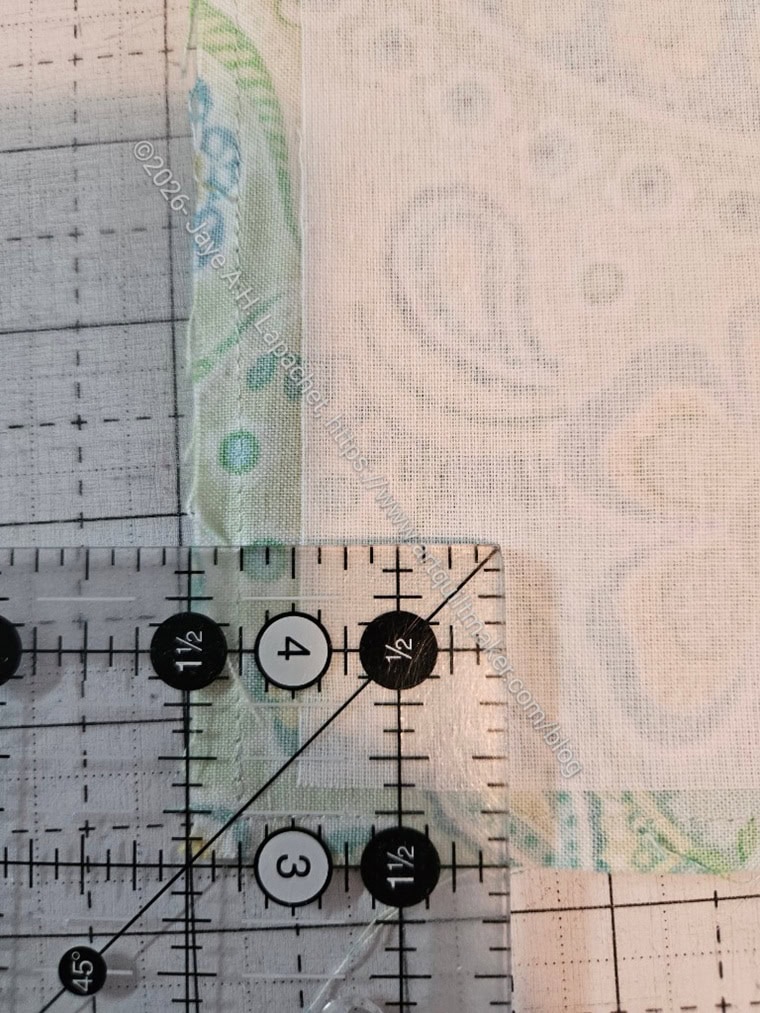
Using your ruler, mark a 1.5 inch box in each corner.
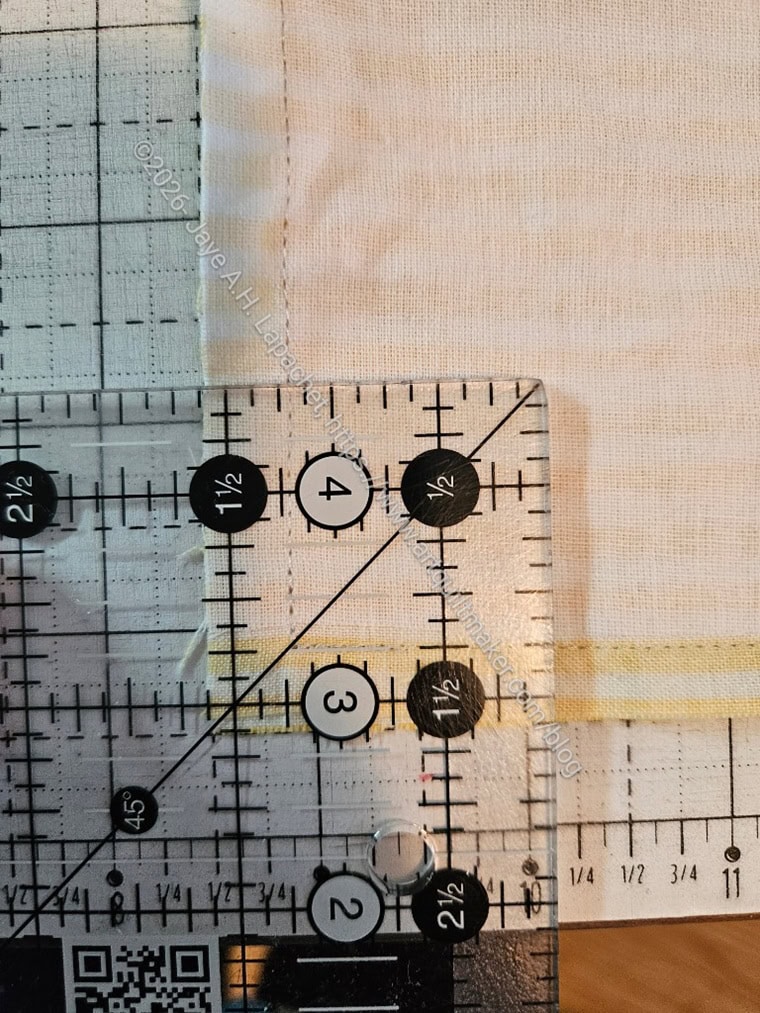
-
- Note: On the lining side, I used a slightly larger box, because of the slightly larger seam allowance. I don’t know if this is necessary, so YMMV.
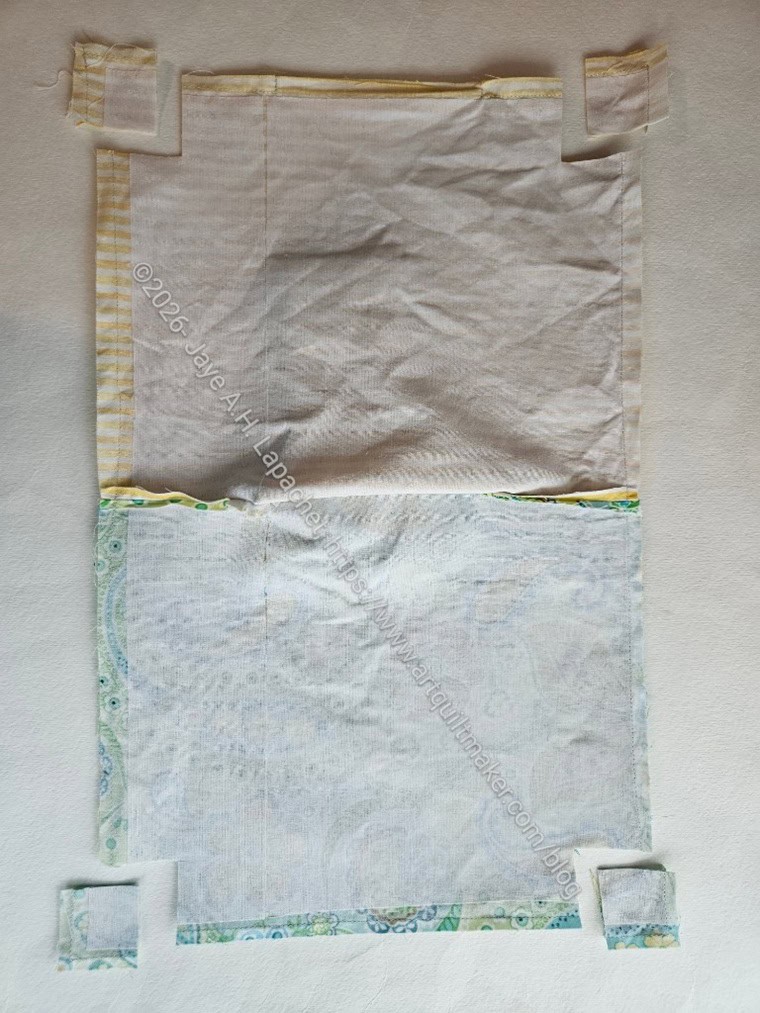
Cut the boxes out using your ruler and rotary cutter or fabric scissors.
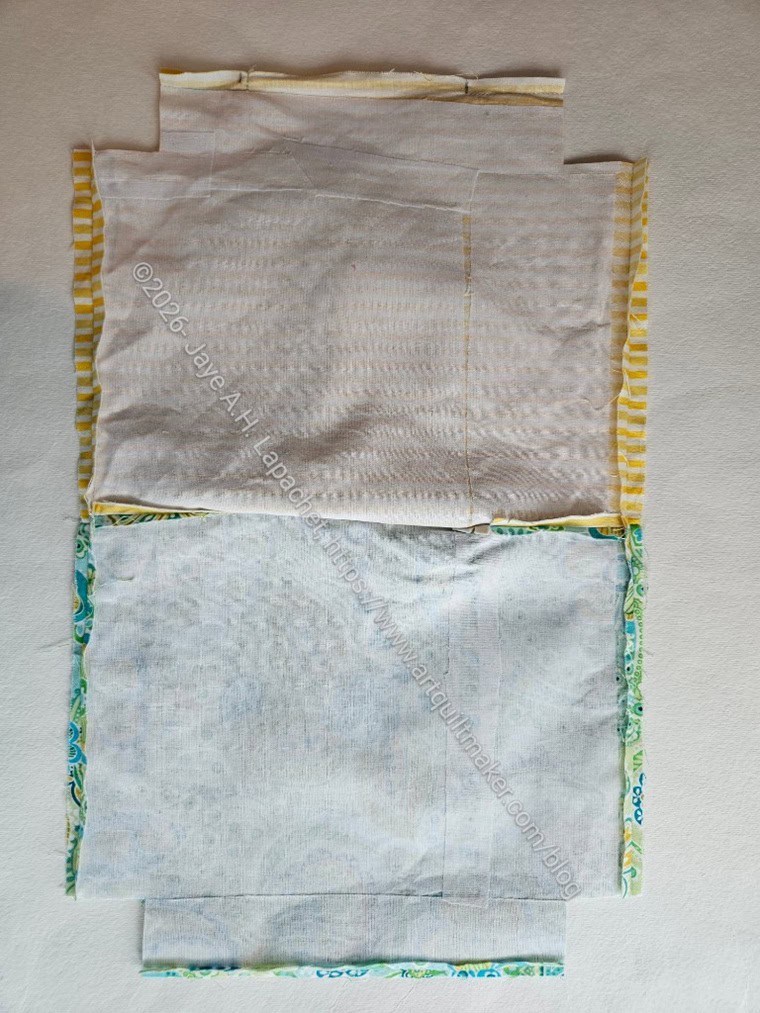
Fabrics need to be right sides together and you will be able to see the interfacing. It will look like you have cut a square off of each corner.
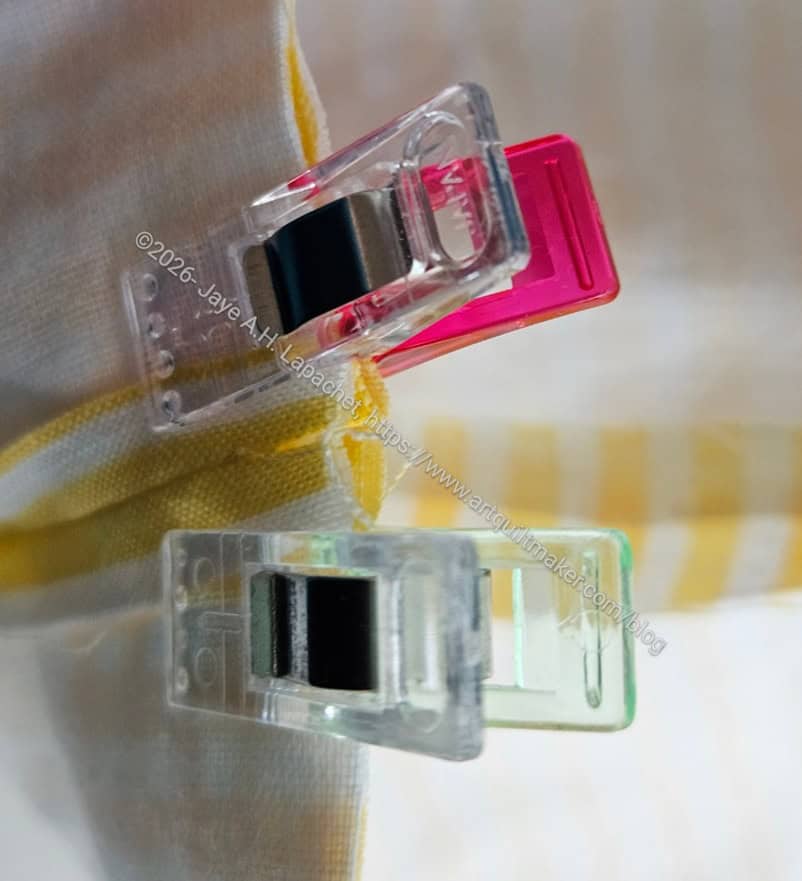
Line up the seam allowances from the boxing the corners exercise and, using Wonder Clips, clip. Align the center seams from both sides of the bag so that they will come together when the bag is turned.
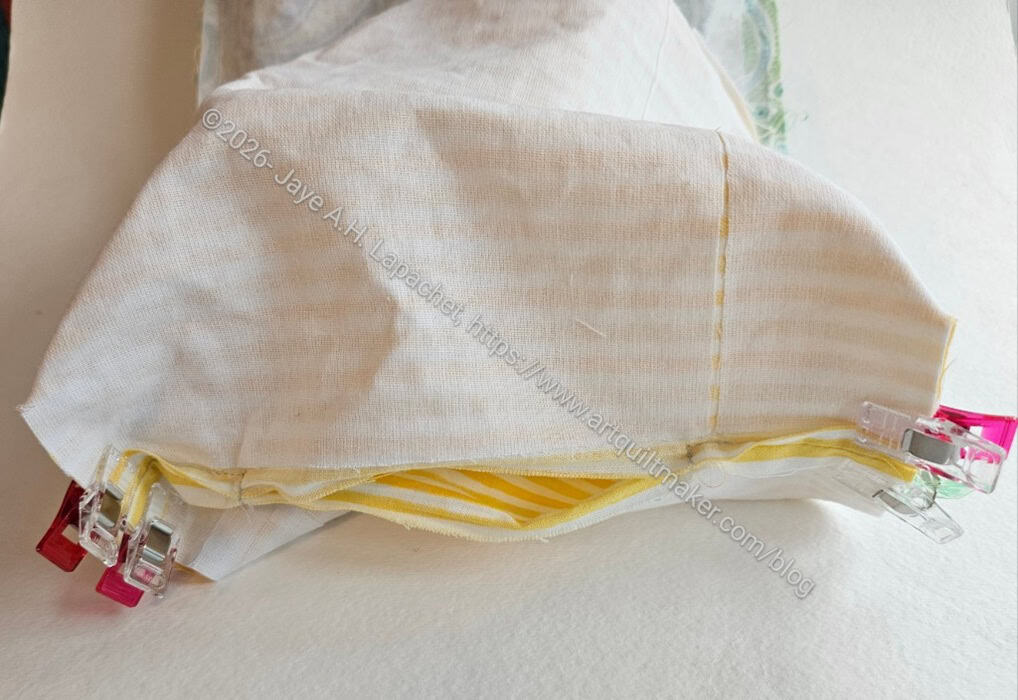
Corners clipped and ready to sew.
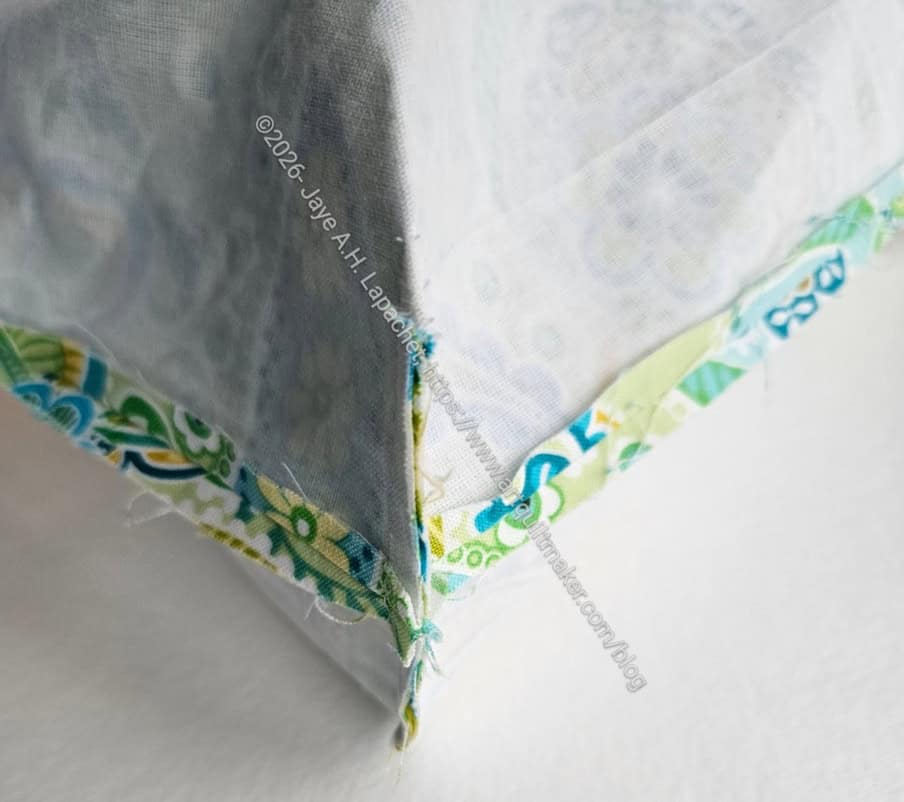
Sew across each box/triangle using a 1/4 inch seam allowance. Repeat the above instruction for the remaining three corners.
Finish the bag
Turn the bag through the lining opening. You may want to use your turning/poking tool to make the corners nice and crisp.
Top stitch around both handles from side seam to side seam.
-
-
- Note: this is a good place to try out decorative stitches
-
Backstitch or bury your thread.
Sew up the opening in the lining by hand or by machine.
Press.
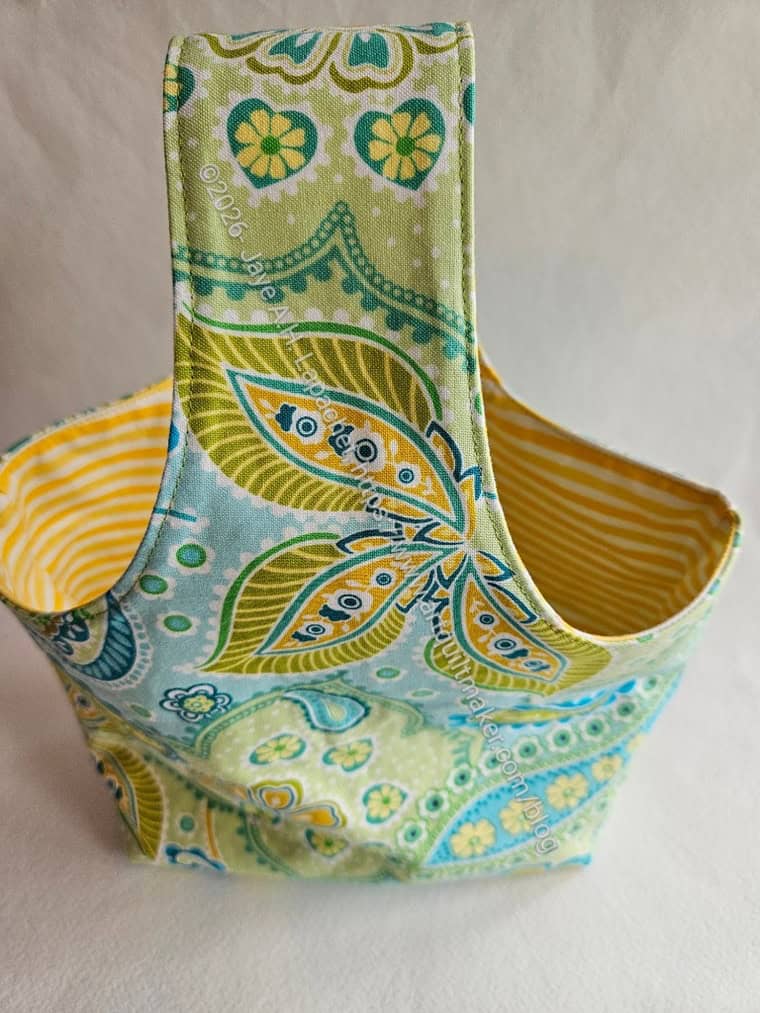
Voila! Finished bag.
Once again, I am not trying to steal anyone’s intellectual property. I was not able to find a pattern shop with this pattern. I highly recommend you take a look at Kotobukisewing’s reel on making this bag and their YouTube Channel for their various other patterns including garments. If I find a pattern to purchase for this bag, I will update this post to include the information.
**Obviously, you should shop at local quilt shops and small businesses. However, if you are too busy or can’t find what you need there, I use Amazon affiliate links and may be paid for your purchase of an item when you click on an item’s link in my post. There is no additional cost to you for clicking or purchasing items I recommend. I appreciate your clicks and purchases as it helps support this website.
Updated:
-
- 12 July 2026
- 15 May 2026