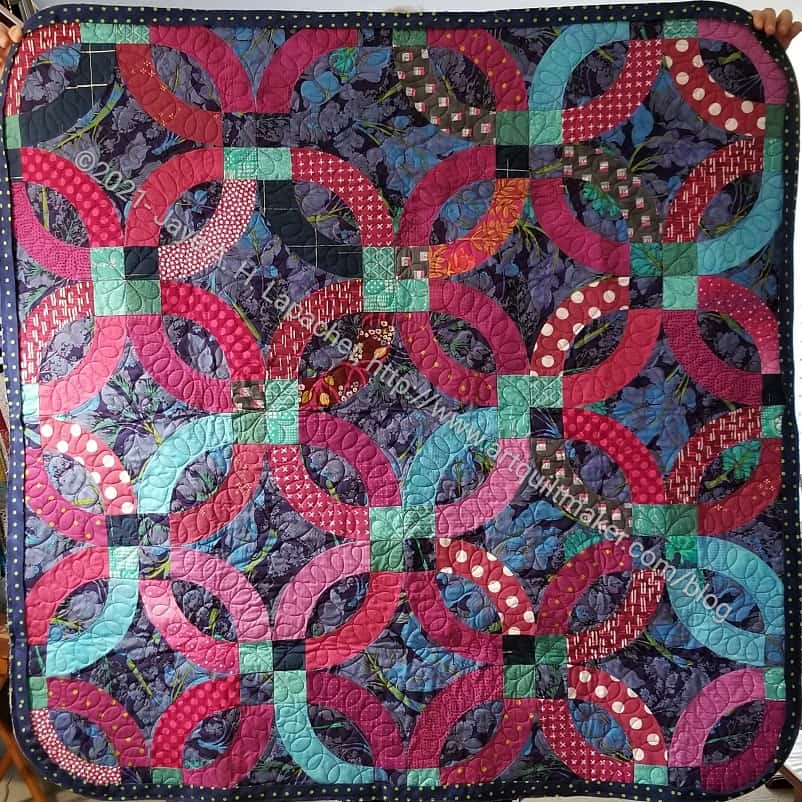
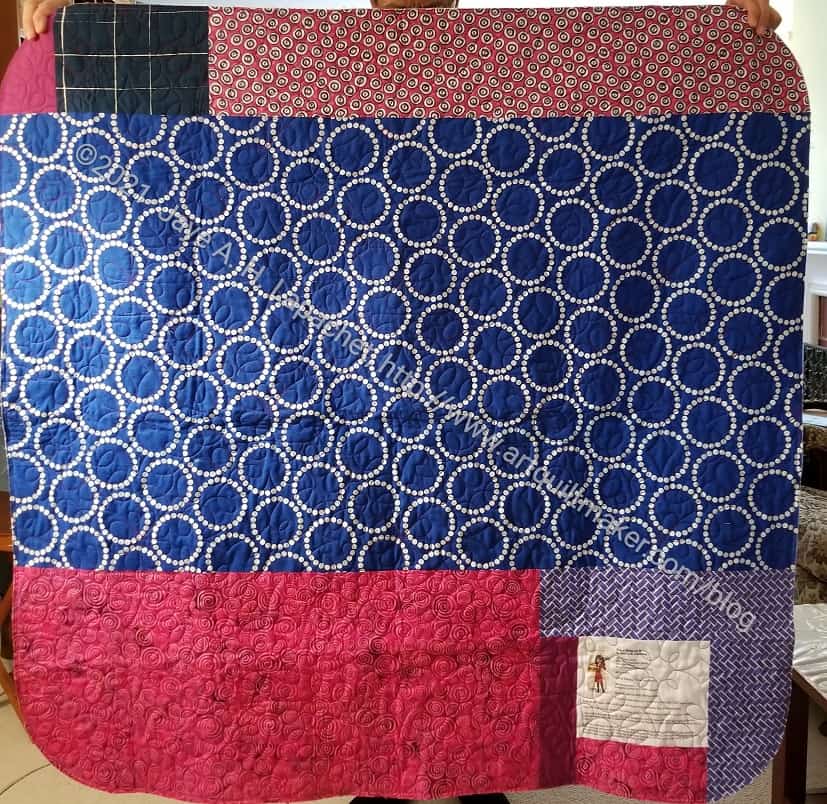
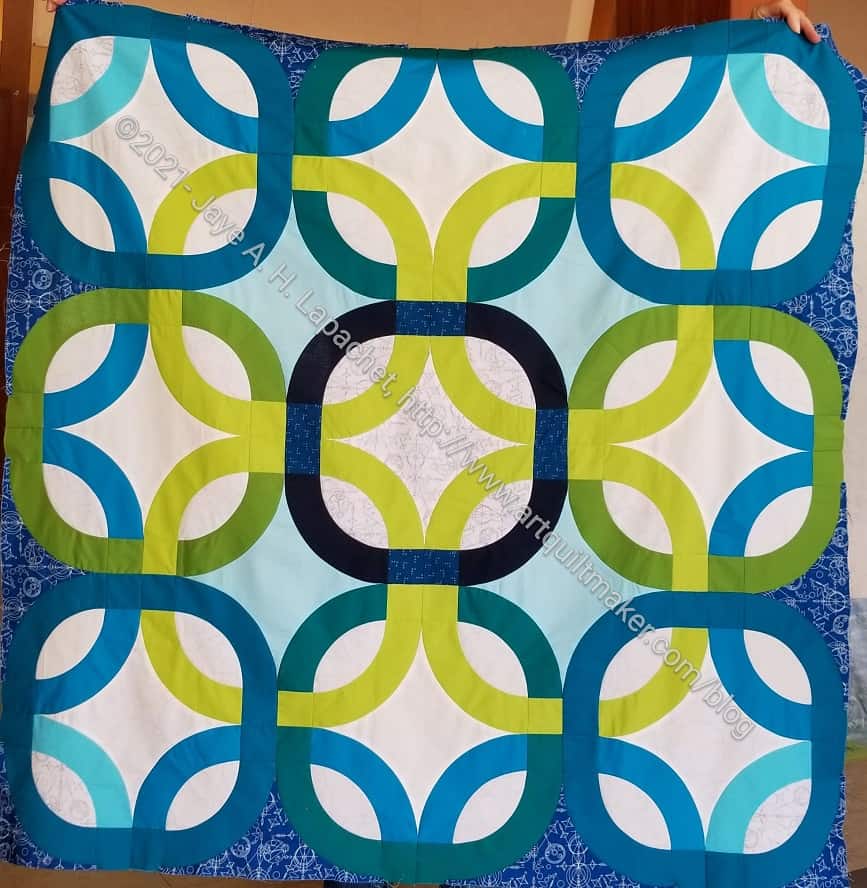
My Put a Ring on It quilt is back from Colleen. It showed up while I was traveling. I haven’t had a chance to put on the binding, but I am closer to being done than I was when we last discussed this quilt.
It is a lot darker than the others in the guild due to the dark blue Martha Negley fabric I used for the background. I like the quilt, but am not sure that I love it. I used similar colors to Frolic!, but the dark blue makes the look totally different. I am really interested in that blue and red-violet combination.
Put a Ring on It back
The back looks good. I may regret using that rings blue, but it goes with the theme and has been sitting around for ages so on it went.
If you have already read this post on the 15th or the 17th or the 20th, you can skip it and get back to your quiltmaking.
Google will be removing FeedBurner from its suite of products. I don’t know when. They sent me an email some time ago and I thought I would deal with it later. Well, it is later, unfortunately.
This means that if you get an email from this blog every morning, you will need to make some changes. I have a list of subscribers and have subscribed all ‘active’ users. Active users are people who have verified their request via some link or two factor authentication. If I have time, I will work on subscribing the rest of you. As a result, if you get an email saying you have subscribed to this blog, then click on the link and continue reading. If you do not get an email, follow the directions below.
There are two ways to make the change.
Subscribe via email box
First, I have added an email subscription box to the right sidebar. It is right under the search box. Put your email in and click subscribe.
Leave a comment
Alternatively, you can re-subscribe while leaving a comment. Please go to the top left of any post and click on ‘Leave a Comment’. You don’t actually have to leave a comment, though I love your comments and welcome any you choose to leave!
Blog-by-email
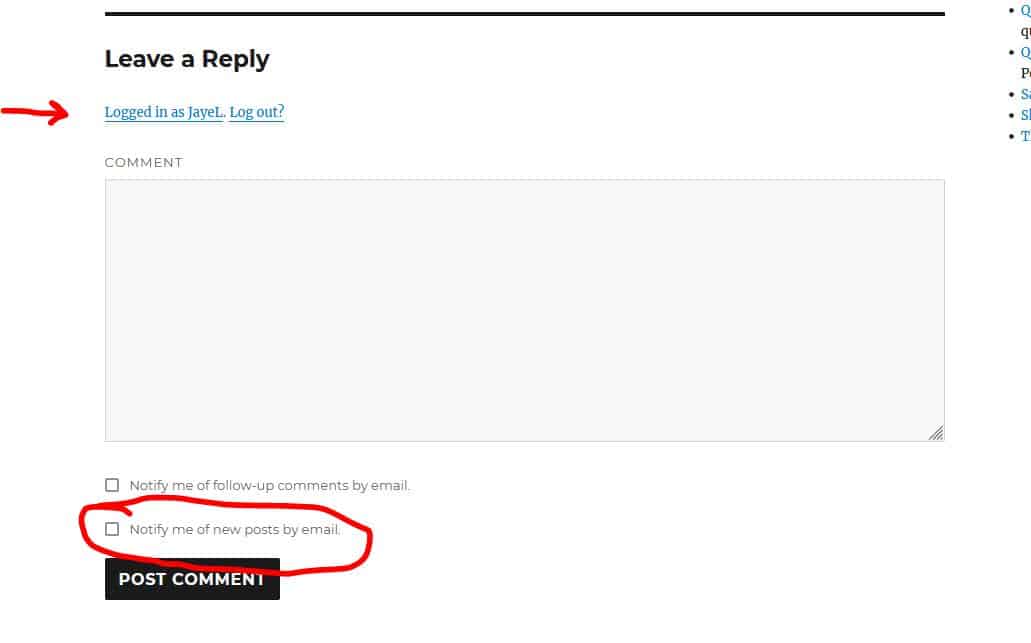
In the comments section of any post, check to make sure you are logged in. In the image, I am logged in (see arrow). If you are not logged in, you will see a form asking for your name, email and URL. If you do not have your own URL, you can leave that blank.
If you are logged in, or once you log in, click the bottom option, “Notify me of new posts by email”. You will receive an email asking you to verify your email, then you should receive a new email every time I publish a blog post.
Email me if you have a problem at poste [at] artquiltmaker [dot] com.
I know this is a hassle. Blame and complain to Google. I appreciate your patience.
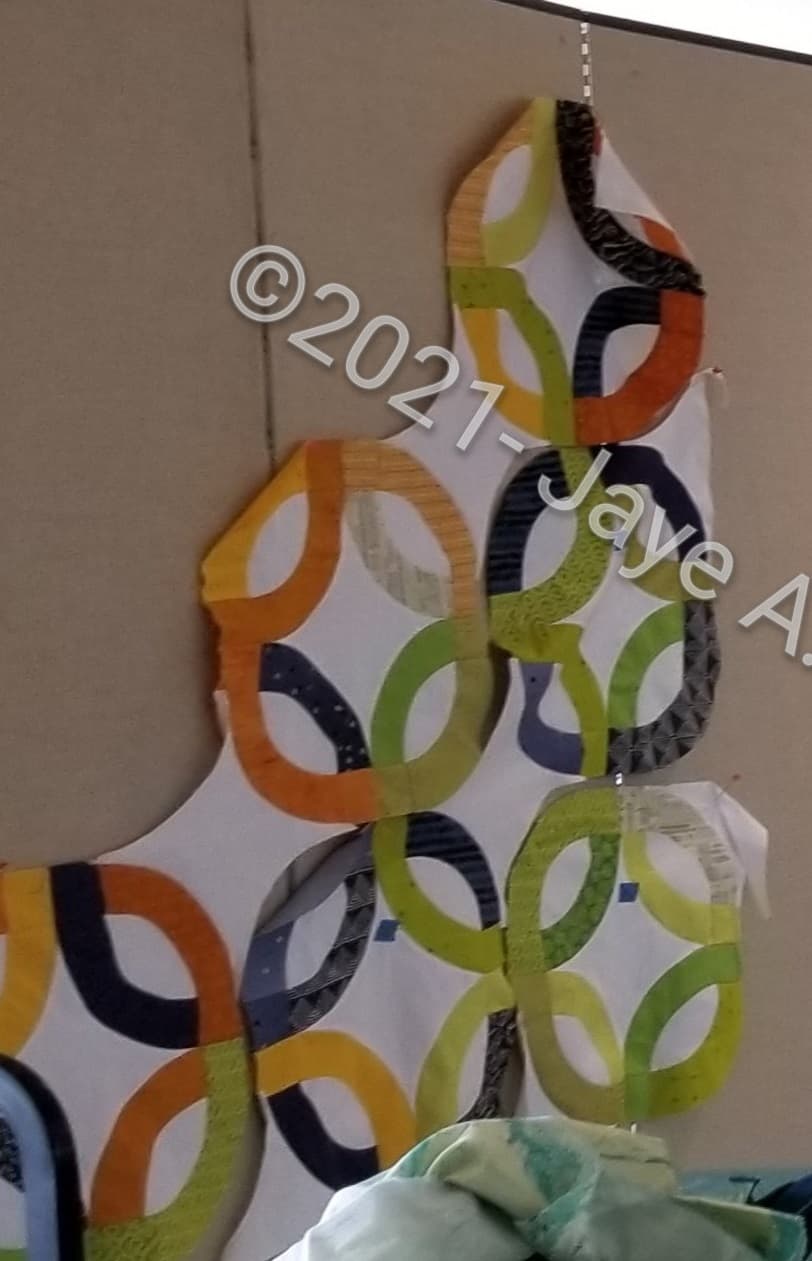
At Sew Day, a number of people were working on their Ring quilts from the Latifah Saafir class. It was great to see how different everyone’s interpretation was from the class.
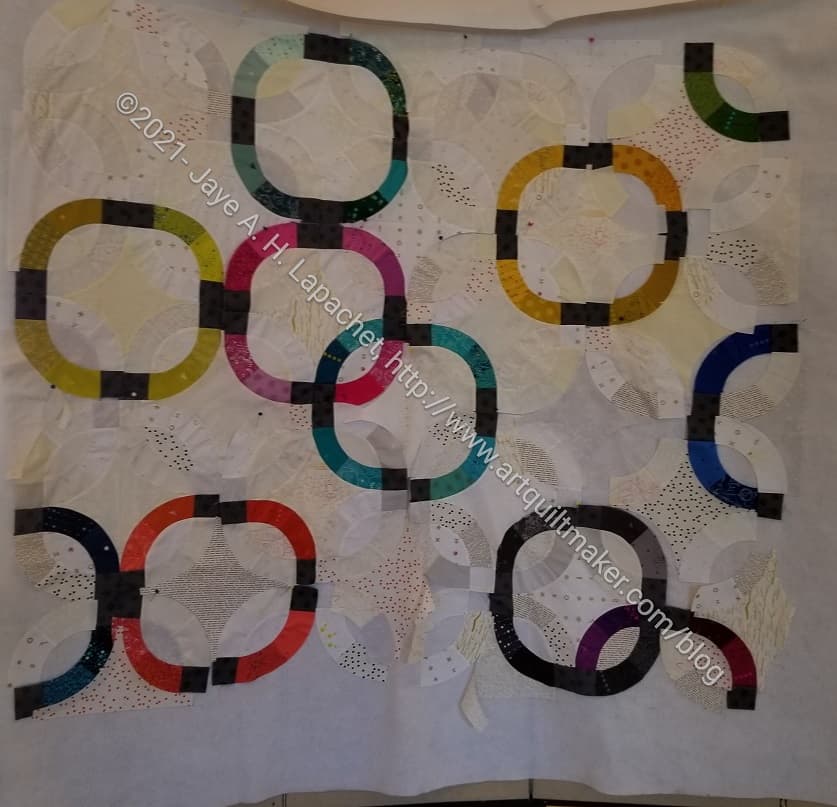
I like the way Maria is using low volume and the rings are kind of floating. I came over and looked at Maria’s top and suggested the green in the upper right hand corner. I think it balances out some of the other green in the quilt.
Gerre’s Put a Ring on It
Gerre was also working on hers and making good progress on her version. She was working on putting the rows together at Sew Day. The green is really great with the orange and the white.
She worked on it again when we had our mini Sew Day and was able to finish it, as I think I said.
I am always excited to see people working on quilts from a class at the same time. It is so fun to see the different interpretations.
Lee Ann’s Ring Quilt
I really LOVE Lee Ann’s version of the Put a Ring on it pattern. She nailed my colors.
I really like the way it looks like the rings are radiating out from the center. The rings are not radiating out in gradation order, so my eye moves around quite a bit .
Did you notice the light blue in some of the centers and the turquoise arcs in the corners? Brilliant! There is so much to look at in this quilt.
Did you notice how most of the quilts are the baby size? I made mine that size also.
I made some good progress on Gelato the other day.
I think it is looking really good. It kind of glows in a way that I didn’t expect. I am working really hard on cutting the background fabric for the outside of the colored strips.
I don’t think this quilt will take me very long. Fingers crossed.
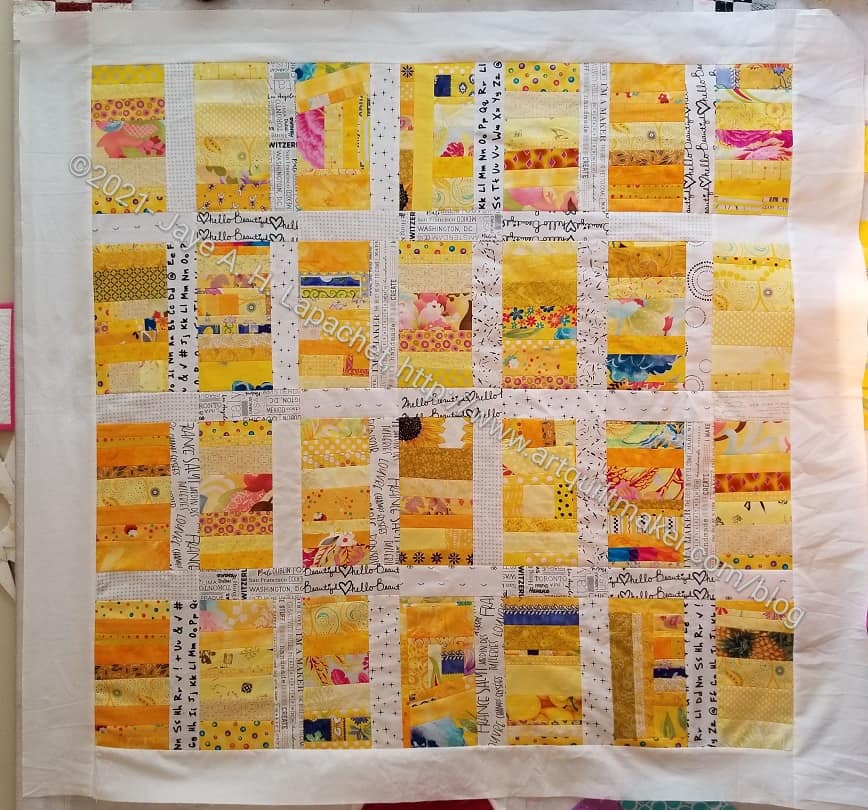
Over the weekend, I finished the Yellow Strip Donation Top (and back and binding). This is another in my Color Strip Donation series.
I did sort of rush this along, but I was piecing like mad on Scrap Dash, so I couldn’t help it, really.
I had to put Scrap Dash on the back burner briefly to add borders, make a back and a binding.
Since I put on very plain borders so the quilting would show up, I decided the quilt needed a dark binding. I made a gold binding.
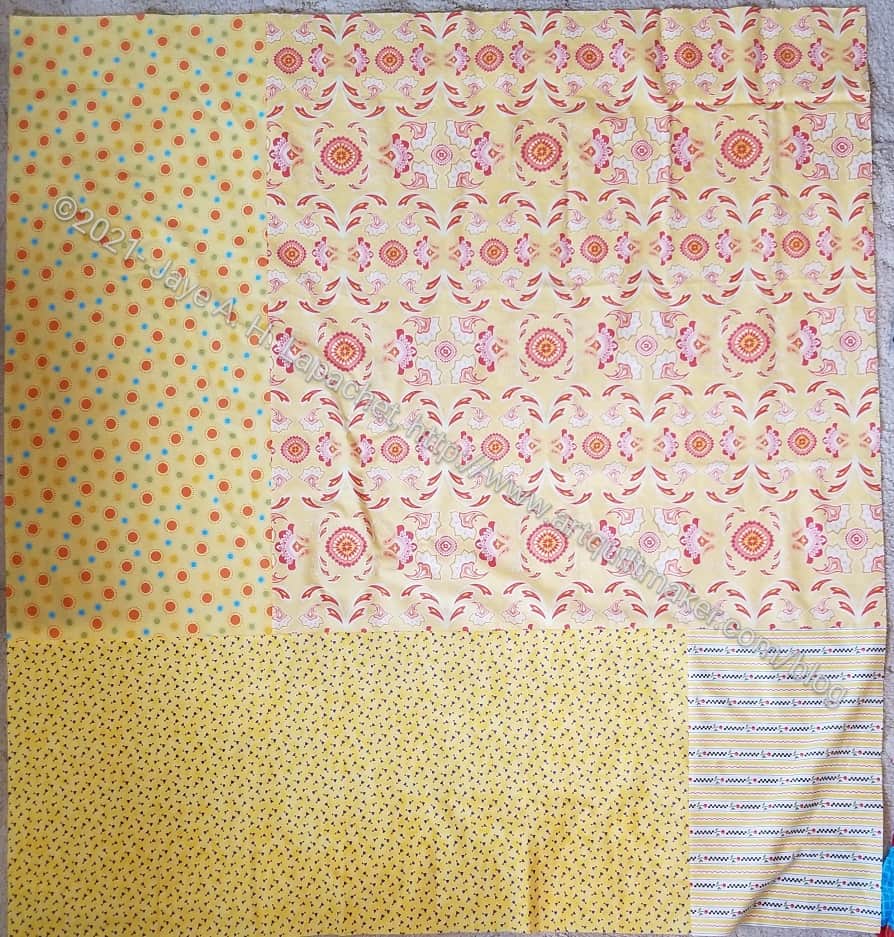
Yellow Strip Donation Quilt Back
I am pleased with the back. I didn’t have to piece too much and I got to use up some prints that have been around for awhile.
I don’t use tons of yellow, so these prints have been around awhile. I think they are good choices: fresh and upbeat. I suppose this quilt could be for a boy, but perhaps not with the flowery back.
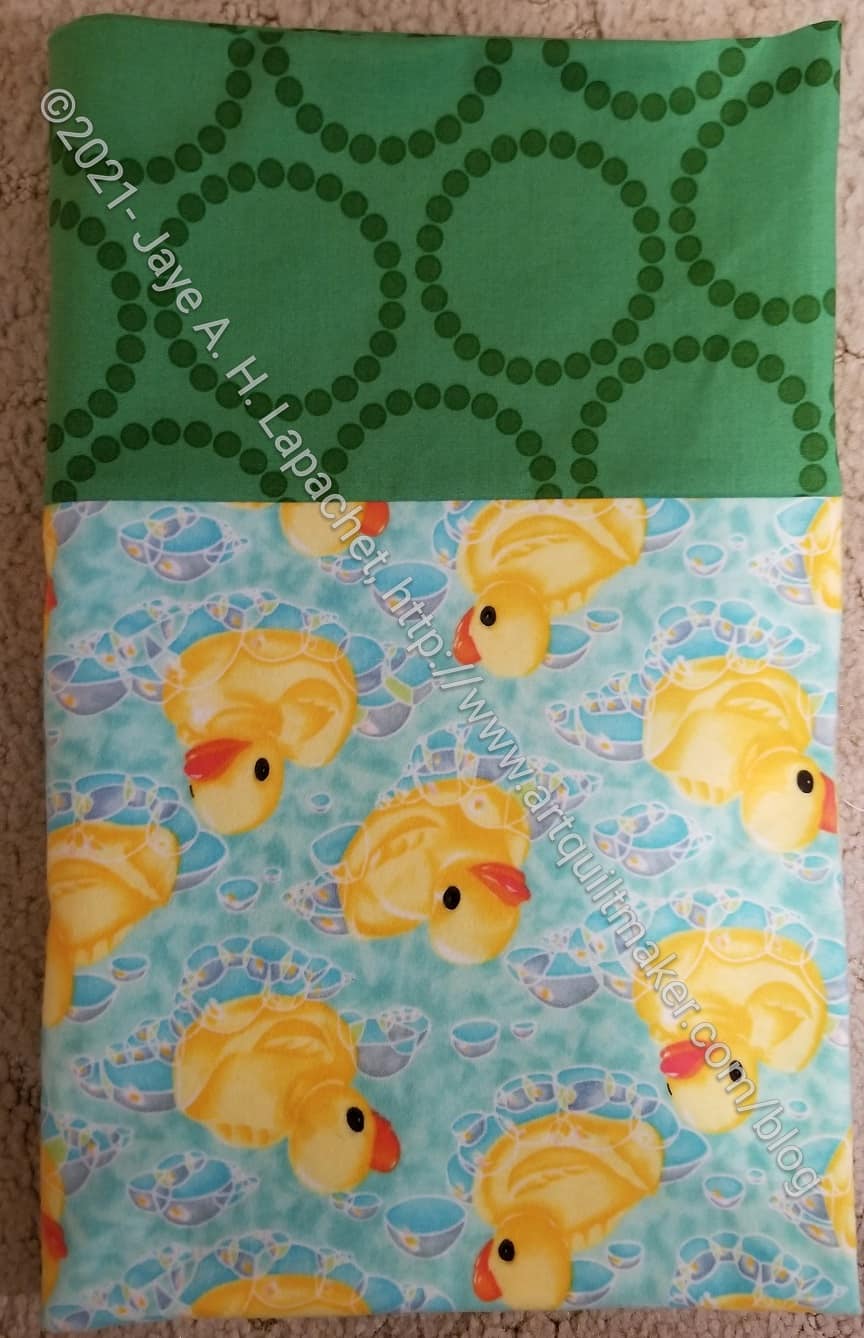
The YMG has a collection of rubber duckies. When I saw the flannel rubber ducky fabric, I decided to make her a pillowcase.
I made it last weekend and will save it for Christmas or her birthday.
Tim commented that she isn’t five, but I decided that she could use a snuggly pillowcase in winter. I also bought a yard of the same print in regular quilting cotton. I’ll put it on the inside of some bags I plan to make for her.
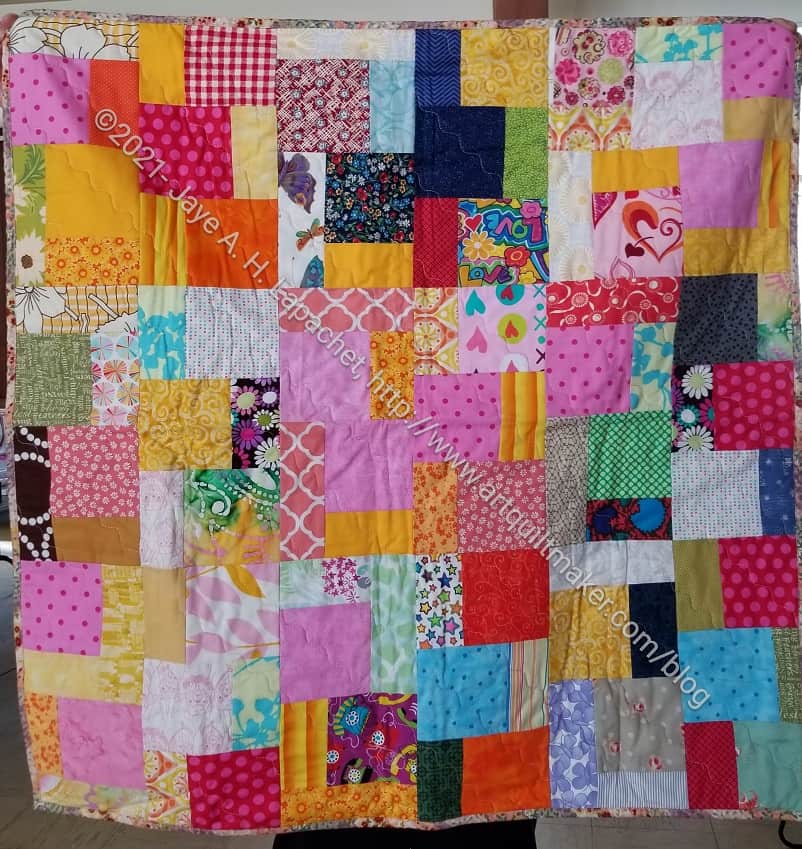
Another quilt that was handed in at Sew Day was made during the February 2020 Community Sew Day. I made a bunch of blocks and may have even sewn them together.
This is a really nice quilt and I hope the person who receives it enjoys it.
I keep thinking of cutting more pieces these sizes so I can make more of these donation quilts, but I haven’t done it yet. It would be better if the pieces were more standard sizes, like 5 inches and 2.5 inches.
If you have already read this post on the 15th or the 17th, you can skip it and get back to your quiltmaking.
Google will be removing FeedBurner from its suite of products. I don’t know when. They sent me an email some time ago and I thought I would deal with it later. Well, it is later, unfortunately.
This means that if you get an email from this blog every morning, you will need to make some changes. I now have a list of subscribers and am working on subscribing all of you. This means that you have to confirm your subscription. If you get an email saying you have subscribed to this blog, then click on the link and continue reading. If you do not get an email, follow the directions below.
There are two ways to make the change.
Subscribe via email box
First, I have added an email subscription box to the right sidebar. It is right under the search box. Put your email in and click subscribe.
Leave a comment
Alternatively, you can re-subscribe while leaving a comment. Please go to the top left of any post and click on ‘Leave a Comment’. You don’t actually have to leave a comment, though I love your comments and welcome any you choose to leave!
Blog-by-email
In the comments section of any post, check to make sure you are logged in. In the image, I am logged in (see arrow). If you are not logged in, you will see a form asking for your name, email and URL. If you do not have your own URL, you can leave that blank.
If you are logged in, or once you log in, click the bottom option, “Notify me of new posts by email”. You will receive an email asking you to verify your email, then you should receive a new email every time I publish a blog post.
Email me if you have a problem at poste [at] artquiltmaker [dot] com.
I know this is a hassle. Blame and complain to Google. I appreciate your patience.
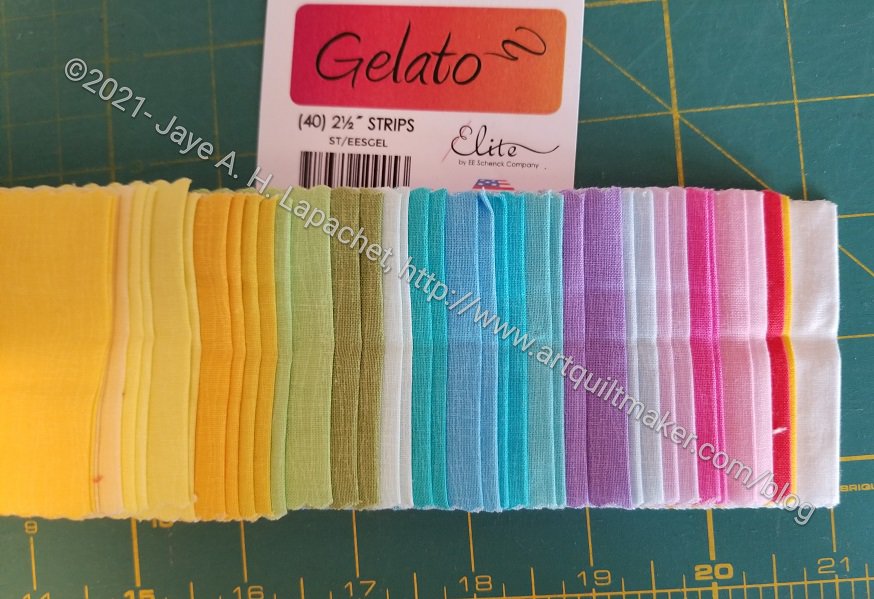
A long time ago, in this galaxy, Friend Julie gave me a jelly roll. I don’t usually like jelly rolls, but I like this one.
One reason I like it is that the serrated edge isn’t deeply serrated, so the width is actually pretty close to 2.5 inches. Also, the strips seem to be pretty much cut on grain.
Molly’s Jelly Roll Top – June 2021
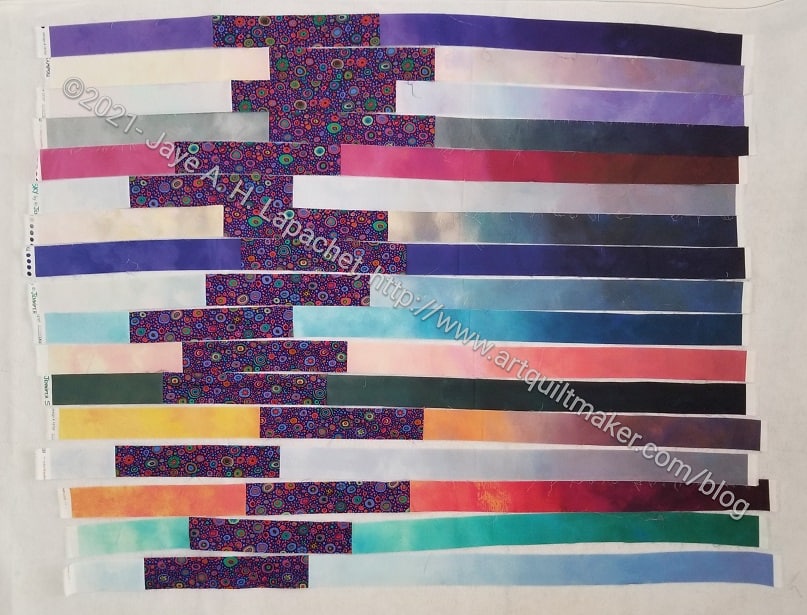
At Sew Day, Molly was working on a jelly roll quilt. She also didn’t want to cut up the jelly roll into squares so she was using the strips almost as is. She made a cut in the middle where the color really started to change and inserted a KFC fabric.
Molly’s quilt got stuck in my mind and I couldn’t get it or the jelly roll in my workroom off my mind. I tried to stay focused on Scrap Dash, but the jelly roll kept creeping in.
One good thing about Sew Day is that I get to be inspired by projects on which other people are working. It is also a good thing about the guild.
Gelato Start – June 2021
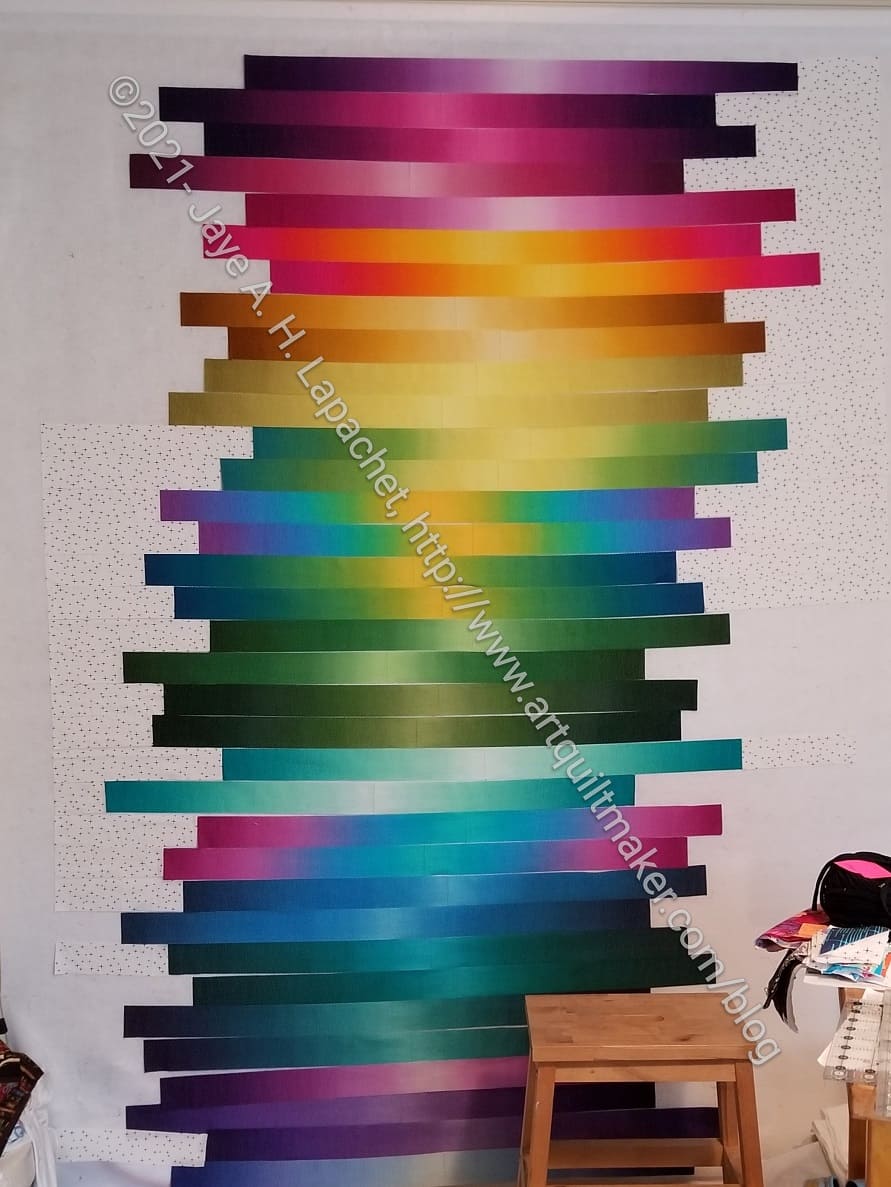
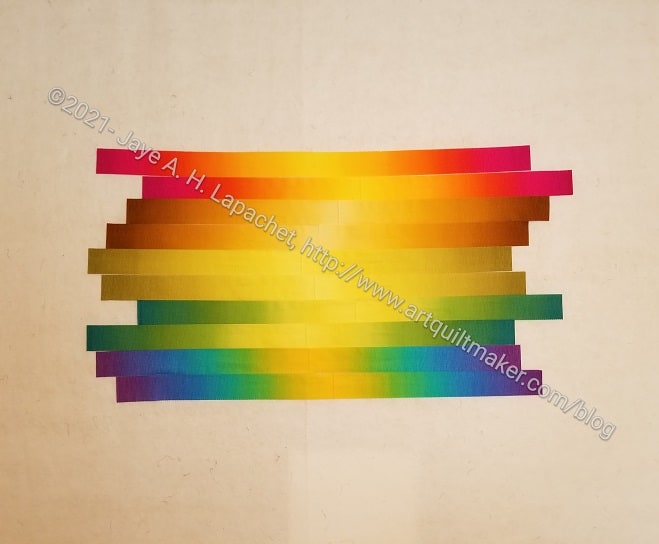
Almost as soon as Scrap Dash was ready to be quilted, I opened the Jelly Roll and started putting strips on the wall. I want to add the background to the outside of the strips.
I didn’t realize the fabrics were ombre! This makes the project much more interesting. Just putting them on the wall is exciting.
Gelato Jelly Roll Open
I am starting out keeping the strips in order. I may move them around later after I see what I have. I am also planning to use the Art Gallery fabric I used as a background for Scrap Dash as a background for this quilt.
As I mentioned, I left the Bay Area and drove north to the Burlington, Washington area. Without driving around Burlington at all, the trip, one way, was just shy of 1000 miles. That is really far. It took us three days, though the first leg, San Francisco to Portland could be done is about 14-15 hours. I am not up for that long of a drive in one day. We stopped in Ashland after the first day, then Portland, then drove the rest of the way. I thought the trip from Portland to Burlington would be easy, but the traffic was very heavy and I forget how far north Burlington sits.
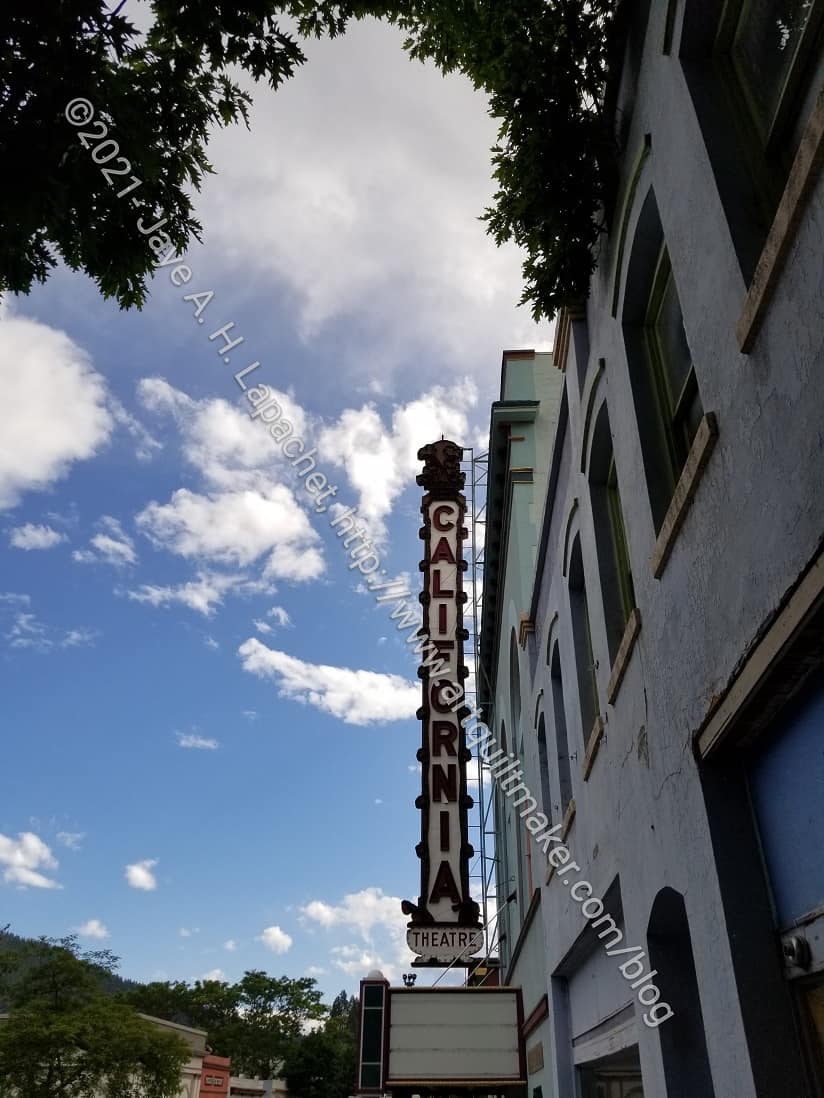
Dunsmuir theatre
On our way to Ashland, we stopped for a break in Dunsmuir. It had started to rain a few miles before we stopped, so the clouds were beautiful. I don’t know why I stopped in Dunsmuir since there isn’t much there. My grandfather was born there, so, perhaps, I feel some kind of connection for no particular reason. I never knew anything about Dunsmuir until long after he had died. I really like the downtown. I have stopped there twice in recent years on trips north.
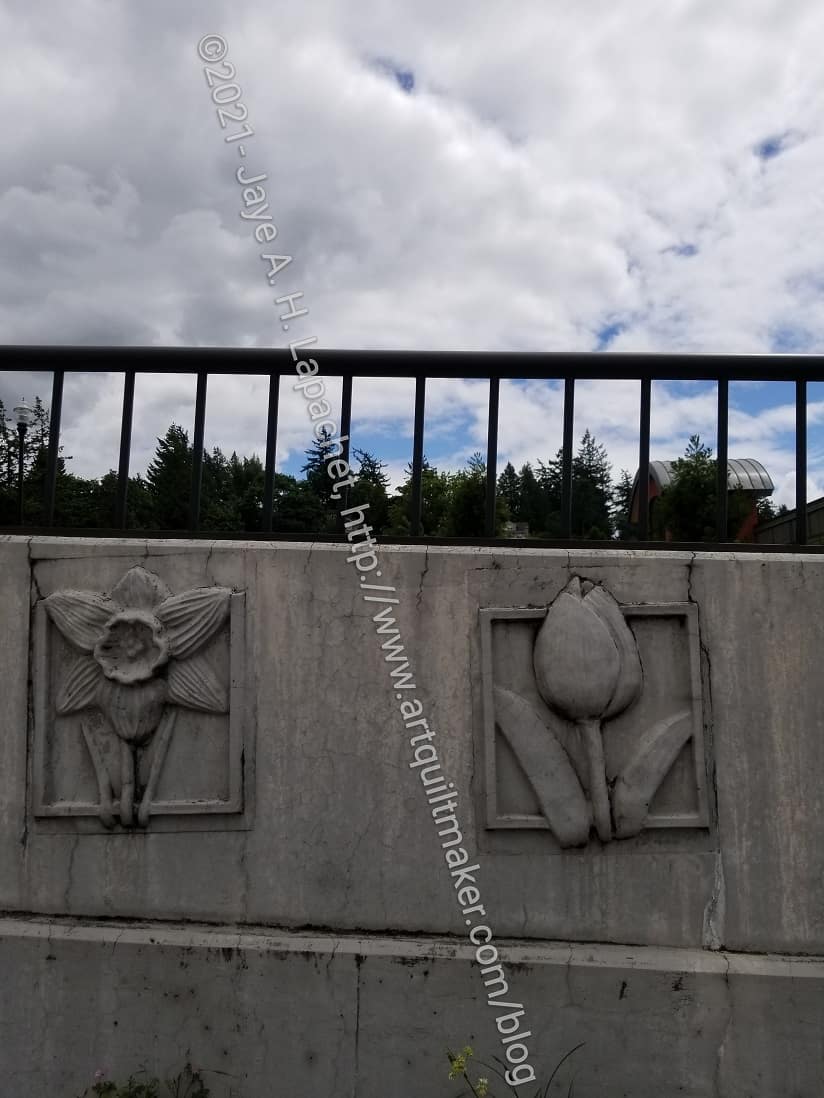
Mt. Vernon bas relief
One thing I enjoyed in Washington was the sky. There were a couple of days of sprinkles on our way up and throughout the drive we enjoyed beautiful views of glimpses of the sky and clouds. The day we went to Calico Creations, we parked in a lot with some beautiful bas relief on the side of an embankment. I liked the art and the clouds very much. I also liked Mt. Vernon, where I saw the bas relief, as well. In addition to the fantastic Calico Creations, there was an amazing used bookstore, Easton’s.
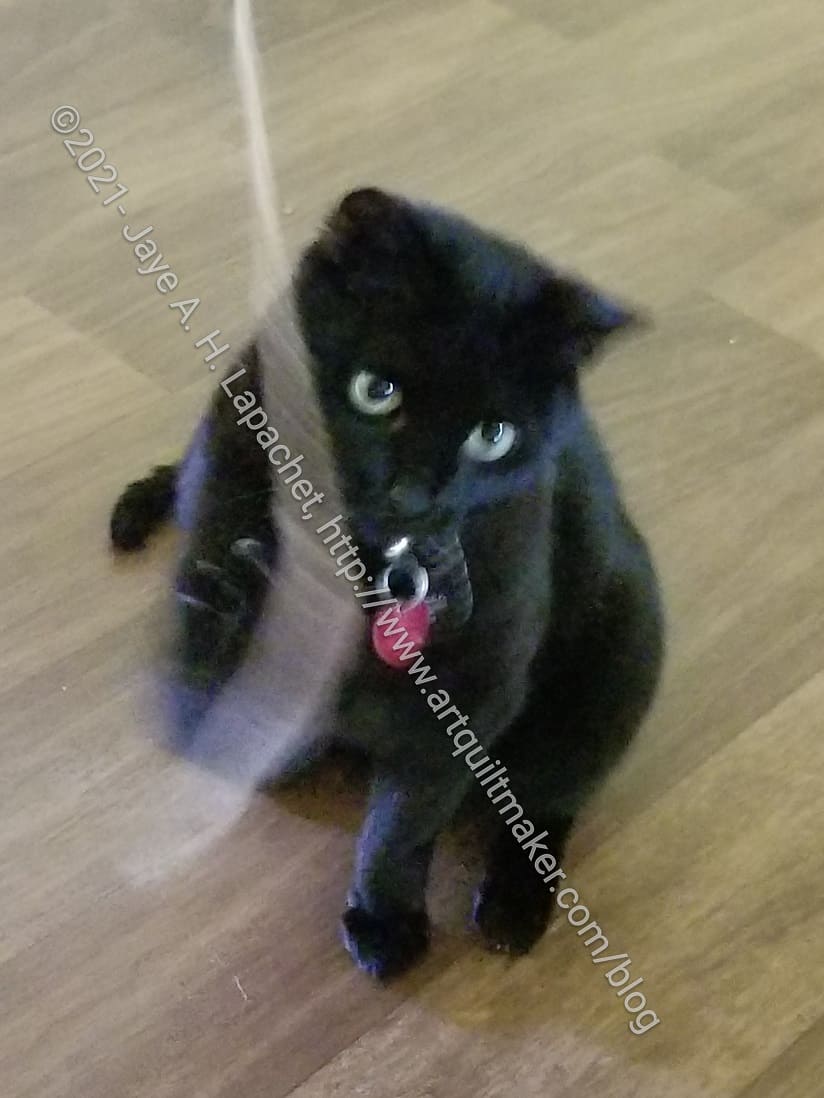
Marie
A wonderful cat has recently joined the YM’s new household. Her name is Marie, which makes me laugh. She is an indoor cat who gets to lounge in front of large windows looking out a birds and the wind blowing the trees all day. She is beautiful and reminds me of the cat I had as a teenager. Marie is a little more stand-offish than my cat, Spooky. She will not sit on your lap until she knows you better and doesn’t let just anyone pet her. She sits with the YM and he gets to pet her, but she needed more time than we had to get used to me. I played with her using a toy, which is a stick with a fish and a piece of twine hanging from the end. She loved chasing the twine, but seemed annoyed by the bells on the fish. I really like this cat.
Mt. Vernon Best Western Carpet Design
The hotel in which we stayed in Mt. Vernon (near Burlington) was a typical Best Western, though this one had very few redeeming qualities. It was surrounded by a concrete parking lot and what flower beds there were were overgrown and sad looking. The room was large, which was great, because we stayed there for 4 nights. Also, the carpet had an interesting design. Hotels are a great place to find quilt designs, specifically in the carpet. I have found several designs that could be quilts, though I haven’t ever, yet, translated one to fabric.
BW carpet design anno
This design I thought would be English Paper Piecing. I only had my phone on which to draw so my annotations are a bit wonky and incomplete, but you can see direction in my thought process. I am not sure how I would finish it or put it together with other blocks, but what I have drawn is a better start than the other carpet designs which still live on my computer.
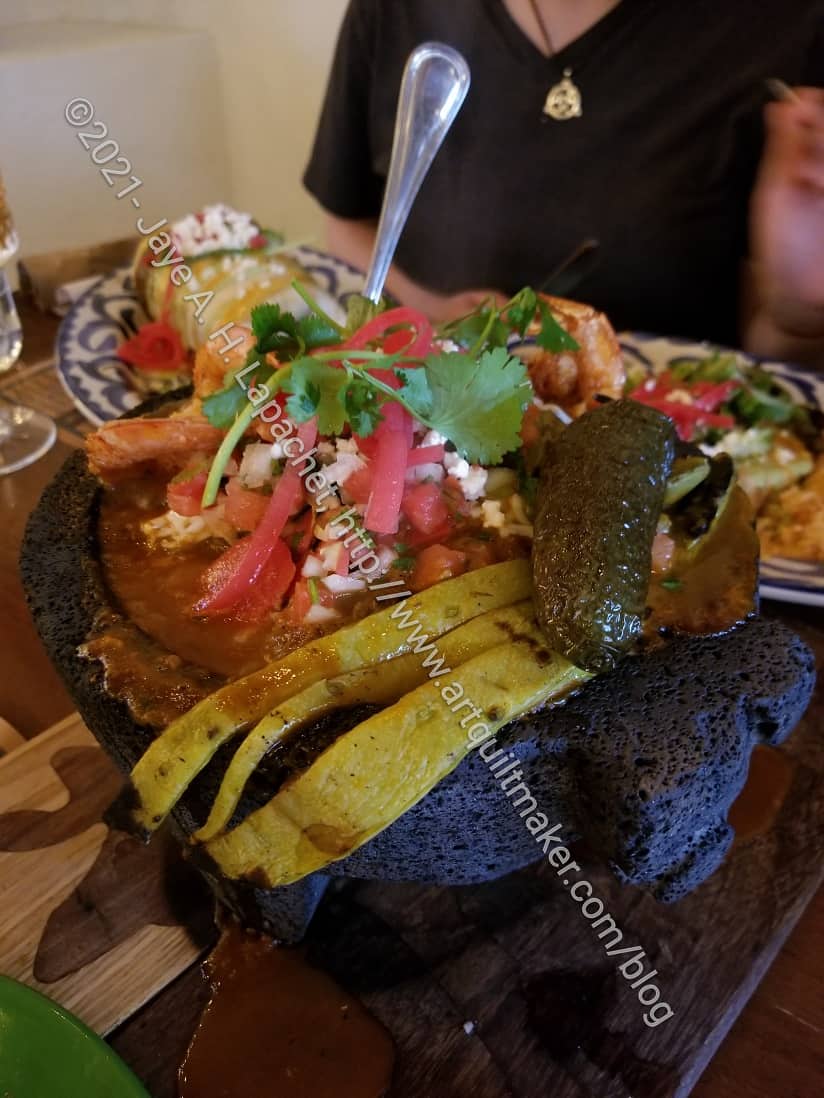
Mocajete
The day we arrived, we took the YM and the YMG out to dinner at a FANTASTIC restaurant called COA Mexican Eatery & Tequileria. The restaurant had the best, hands down, Mexican food I have ever had. The food was super fresh, very clean tasting, e.g. I could taste all the different flavors. The service was fast, too. I didn’t enjoy my drink, but, as I said, the food was amazing. The Mocajete ordered by the YM and my mom to share, had cactus in it. I tried it and the cactus was delicious.
One day, while the YM was at work, we went to LaConner and walked around. We wanted to visit the quilt museum. It was a gorgeous day. While we waited for the quilt museum to open, we walked around downtown LaConner (at least I think it was downtown!), had some gluten free pastries, checked out the boats and enjoyed the sunshine.
We also spent some time at MoNA – the Museum of Northwest Art in LaConner. They were showing the pieces that would be available for purchase at an upcoming auction. Pieces of art were donated by the various artists and some of them were quite good. Others were not to my taste. Check back, I may write a post about that museum visit.
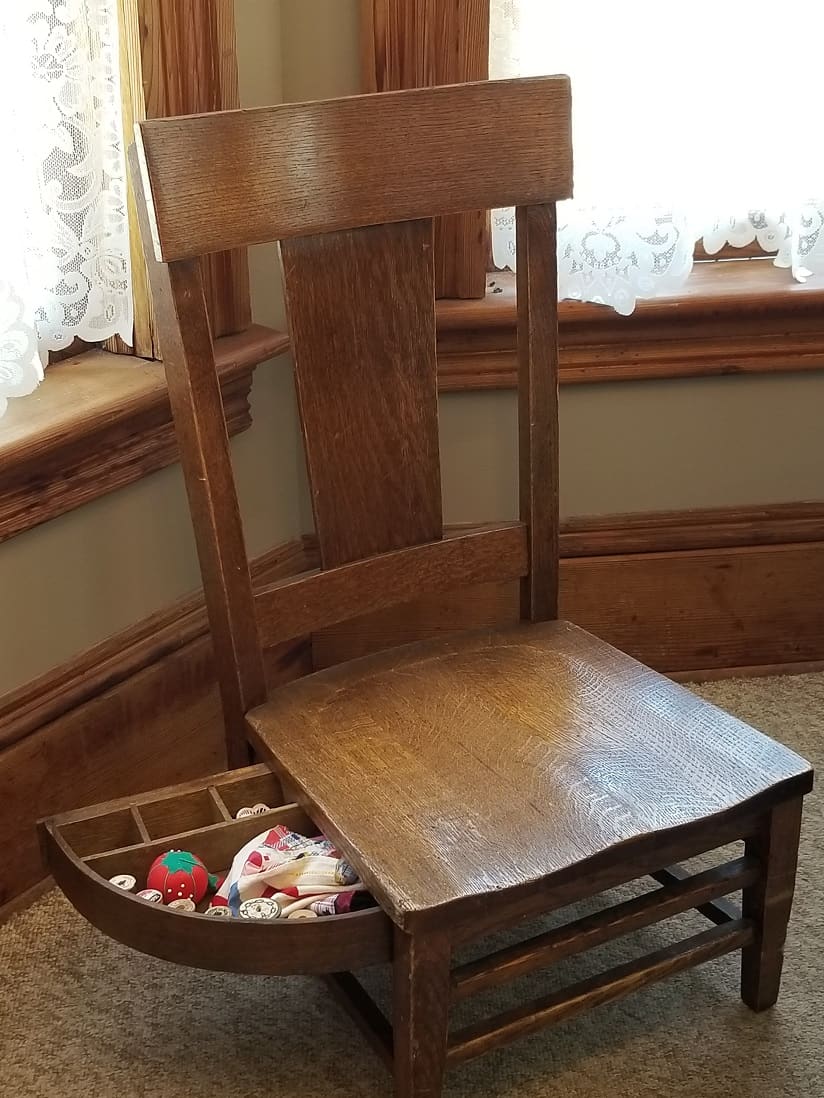
Quilt Museum sewing chair
At the quilt museum, I saw a cool sewing chair unlike any I have seen before. It was in the tower room of the mansion under a mural of the sky. My Mom actually pointed the chair out to me. I think it would be very handy for supplies needed for sewing by hand. I am not sure how comfortable it would be, though the seat was contoured a bit. I have suggested Mom have my stepdad try and make one of these chairs. He probably won’t do it, sadly. I bet it would be very popular among quiltmakers.
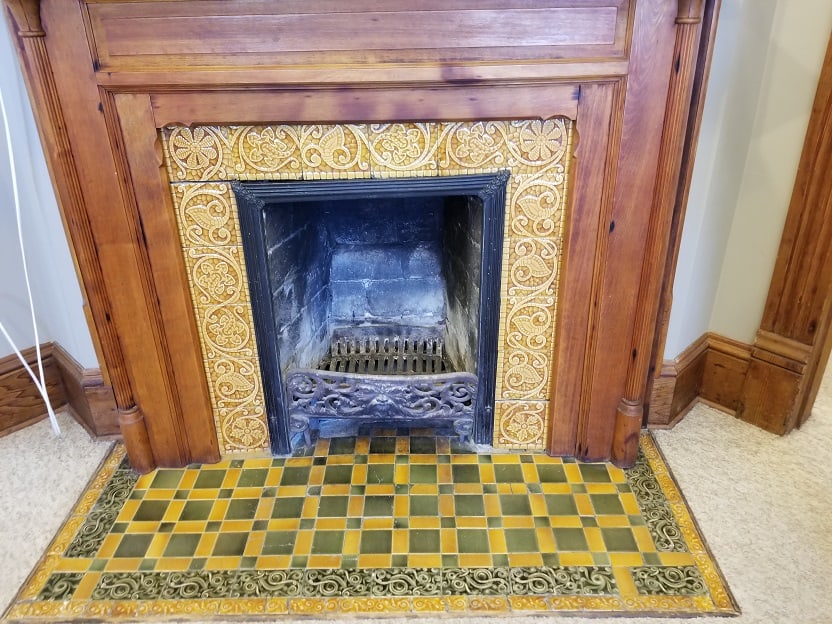
Gaches Mansion fireplace
One of the things I enjoy about architecture, especially in houses like the Gaches Mansion, is the detail. Much of it gets stripped away and has to be rebuilt during restoration projects. While this mansion had some bad luck, some of the details remained, including the tile on some of the fireplaces. I especially like the tile on the surround. The leaves and vines would make a great applique’ pattern.
After visiting the YM for not long enough, we had to head home. On the way south, we stayed for two nights in Portland. We visited with my sister and my friend. Mom and I went on two separate outings one day and had a lot to talk about when we got back together.
Pioneer Quilts: iris
Pioneer Quilts: iris detail
Pioneer Quilts: poppy
Pioneer Quilts – June 2021
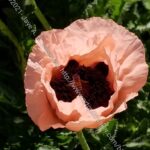
Amanda and I went to a few quilt shops. One was Pioneer Quilts. I have been there before. While the fabric has changed, the cleanliness, good fabric choices and friendliness were the same. Fortunately, despite COVID-19, the shop was open. After a vigorous handwashing we spent a happy hour there looking at their offerings. It is still one of my favorite shops in Portland. It is housed in a historic home and they put the space to good use. Despite the name, they have a lot of modern and contemporary fabrics, beautiful non-brown colors of wool felt, patterns and everything one needs to be a happy quiltmaker. One thing I love is the flowers in the beds around the house/shop. I have seen a few of those giant poppies and I love them.
Sharon’s Quilting Attic – June 2021
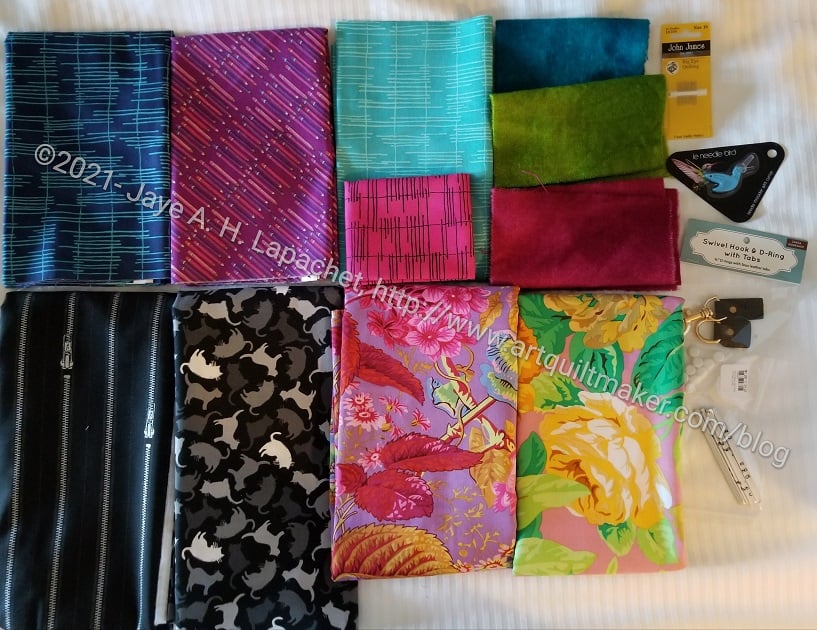
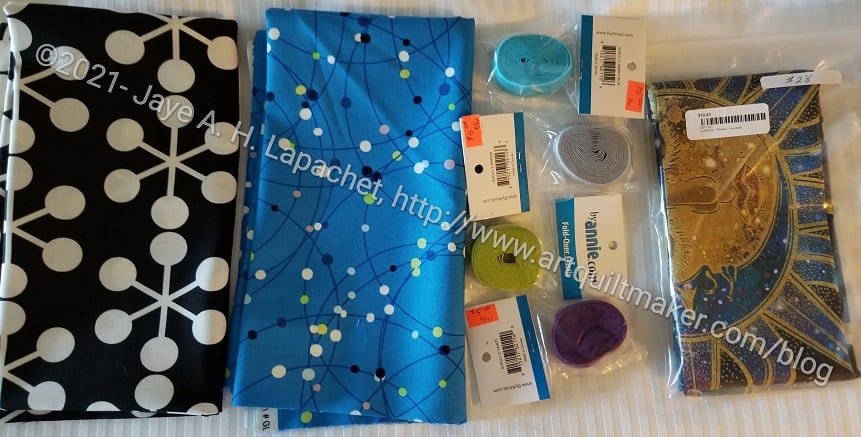
We also stopped at Sharon’s Quilting Attic. I have also been there before. Last time, I bought a roll of Vanessa Christensen’s Ombre dots and wanted to see if they had the same rolls of the new colors. No luck, but they had a few interesting things. I found a good selection of ByAnnie’s double fold elastic. I bought a few rolls as normally I have to buy it online and I like looking at the colors in person. The workers seemed unhappy or overworked. This shop reminds me a little of Always Quilting.
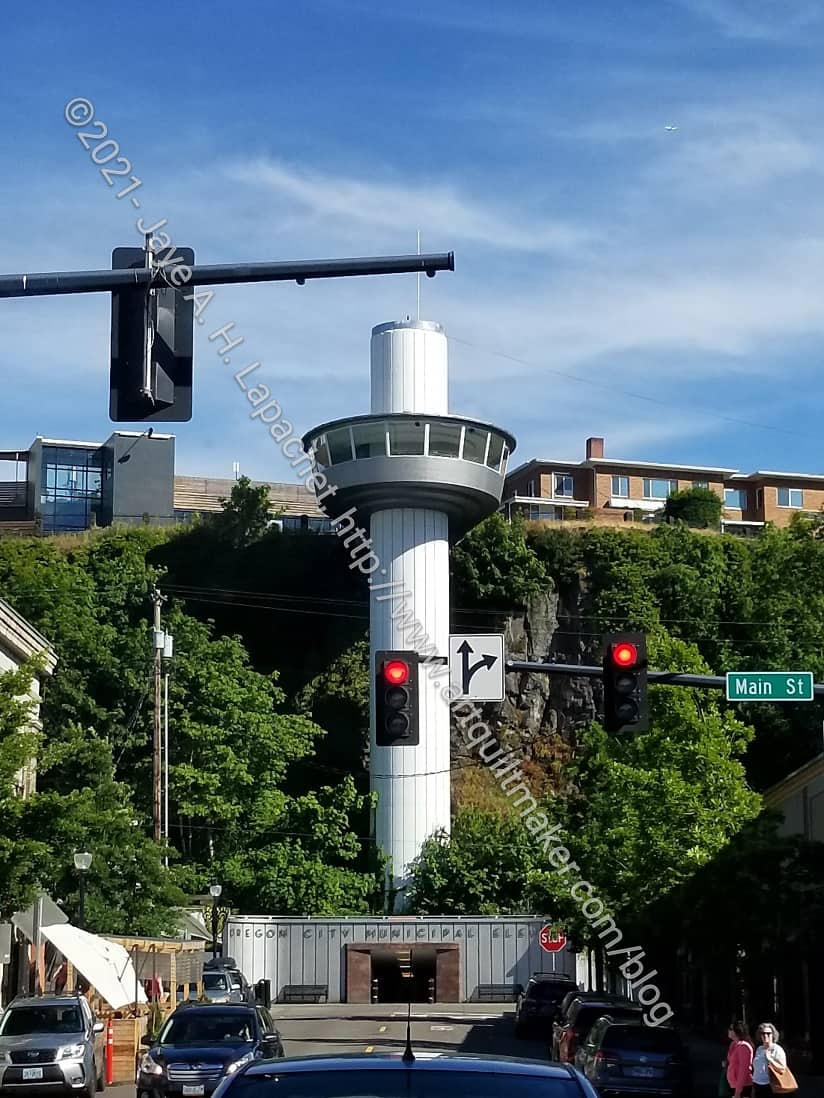
Oregon City Municipal Elevator
While we were driving around, I saw the Oregon City Municipal Elevator. This elevator takes people from one level of Oregon City to another. It was opened in 1915 (though TripAdvisor says 1955) and does not spin around as it goes up and down. The levels are 89 feet apart. It is located at 300 Seventh St, Oregon City, OR 97045. Trip Adviser lists it as the only vertical street in the US. I did not ride it, but now that I know about it may another time.
All in all it was a good trip. I got to see my YM! My mom got a little rest from her caregiving duties. I don’t think I want to drive that far again, but we’ll see.
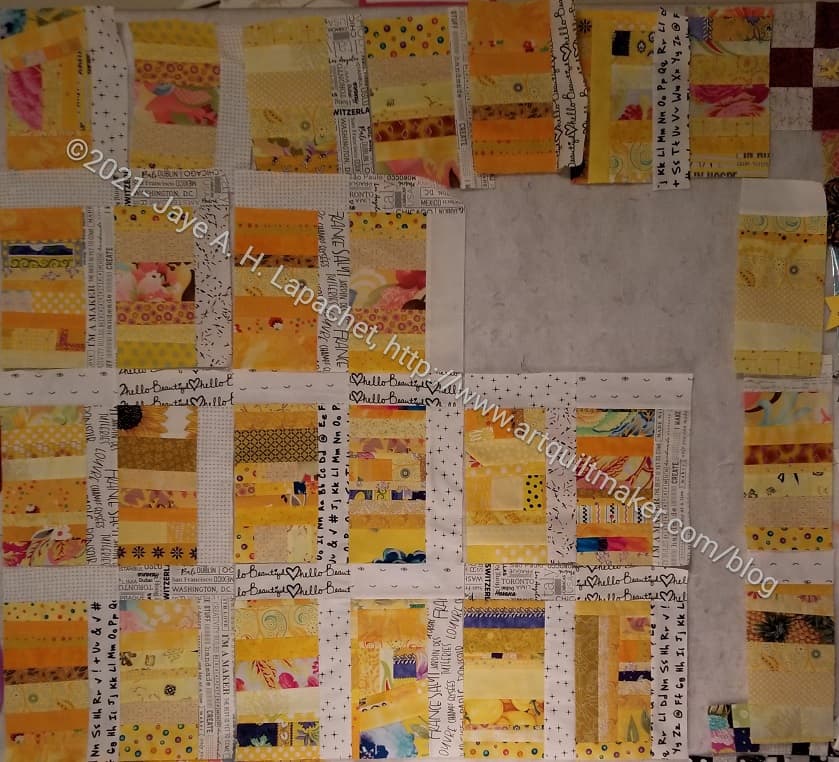
Since I was zipping along with Scrap Dash, I was also zipping along with the Yellow Strip donation top. Leaders and enders really works.
I decided to use some text prints as the sashing. I had some scraps that were about the right size, so I used as many as I could find in the white drawer and then cut some from fabrics I have bought recently. The quilt is really coming together and I am pleased with how sunshiney it looks.
Google will be removing FeedBurner from its suite of products. I don’t know when. They sent me an email some time ago and I thought I would deal with it later. Well, it is later, unfortunately.
Yes, you saw this same post a few days ago.
This means that if you get an email from this blog every morning, you will need to make some changes. I now have a list of subscribers and will work on subscribing all of you, so you don’t have to do anything. If you get an email saying you have subscribed to this blog, then click on the link and continue reading. If you do not get an email, follow the directions below.
There are two ways to make the change.
Subscribe via email box
First, I have added an email subscription box to the right sidebar. It is right under the search box. Put your email in and click subscribe.
Leave a comment
Alternatively, you can re-subscribe while leaving a comment. Please go to the top left of any post and click on ‘Leave a Comment’. You don’t actually have to leave a comment, though I love your comments and welcome any you choose to leave!
Blog-by-email
In the comments section of any post, check to make sure you are logged in. In the image, I am logged in (see arrow). If you are not logged in, you will see a form asking for your name, email and URL. If you do not have your own URL, you can leave that blank.
If you are logged in, or once you log in, click the bottom option, “Notify me of new posts by email”. You will receive an email asking you to verify your email, then you should receive a new email every time I publish a blog post.
Email me if you have a problem at poste [at] artquiltmaker [dot] com.
I know this is a hassle. Blame and complain to Google. I appreciate your patience.
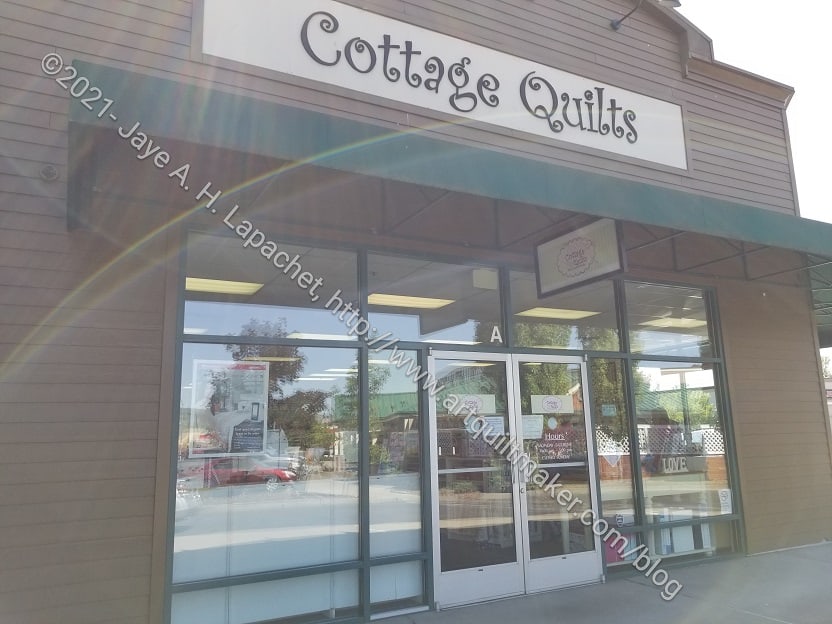
On our way home we stopped in Medford at Cottage Quilting. This shop is not too far from Ashland, so it was the last shop on our way home.
The weather was awful. It was over 100 degrees when we stopped. I tried to find some shade for the car, but just ended up making us walk across the hot parking lot in the blazing sun.
You know what the non-quilting interesting thing was near Cottage Quilting? A grocery store sized Harry & David’s store! I have seen the catalog, but not a shop.
Cottage Quilting – June 2021
Fortunately, most of the world has air conditioning and the shop was nice and cool. What a huge shop! They took up two storefronts in a modern, one story mall. We were also fortunate to arrive when we did as they were closing the shop for a week starting the next day.
The first thing that happened was that the owner scared the living daylights out of me. He just popped up and welcomed us, which was nice, but unexpected. It was completely my fault, because I wasn’t expecting it. I have to say I was hot and tired from driving, so I wasn’t at my best.
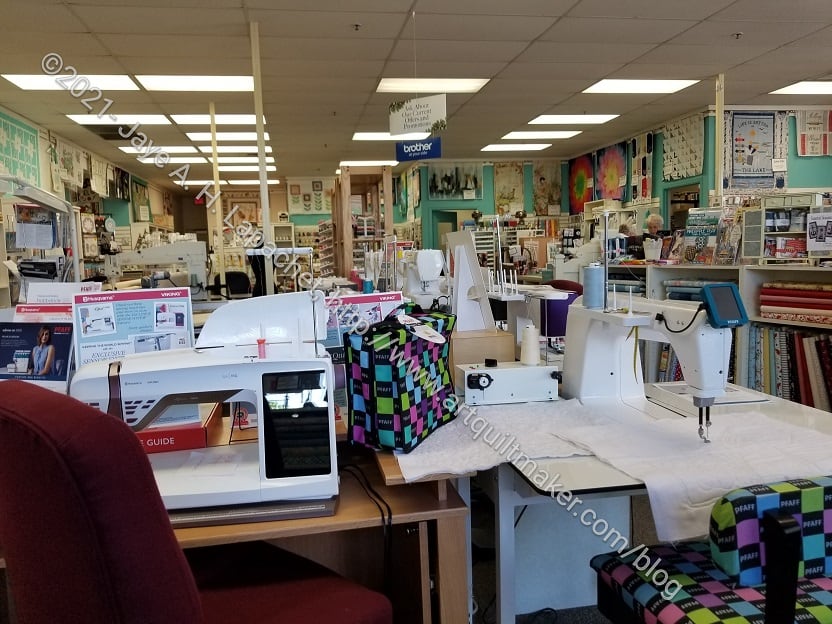
Cottage Quilting – June 2021
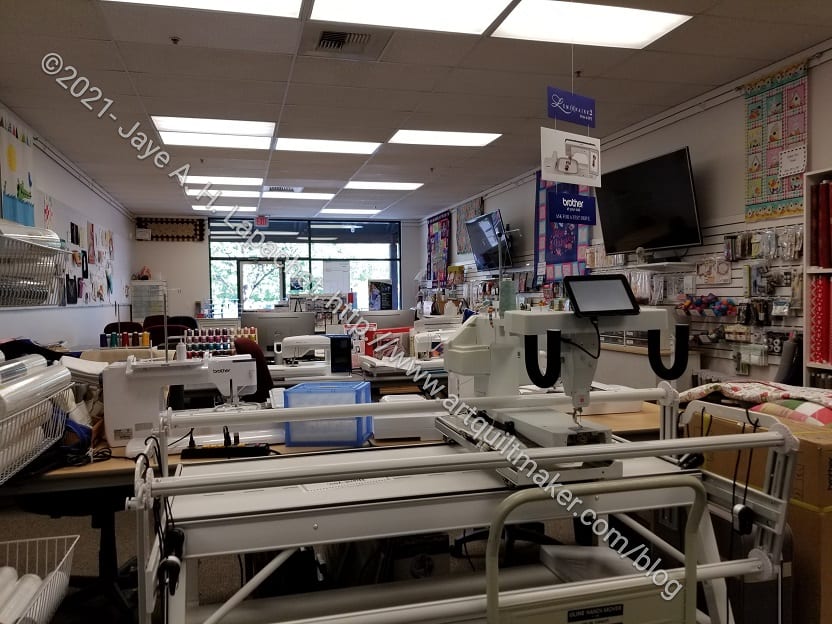
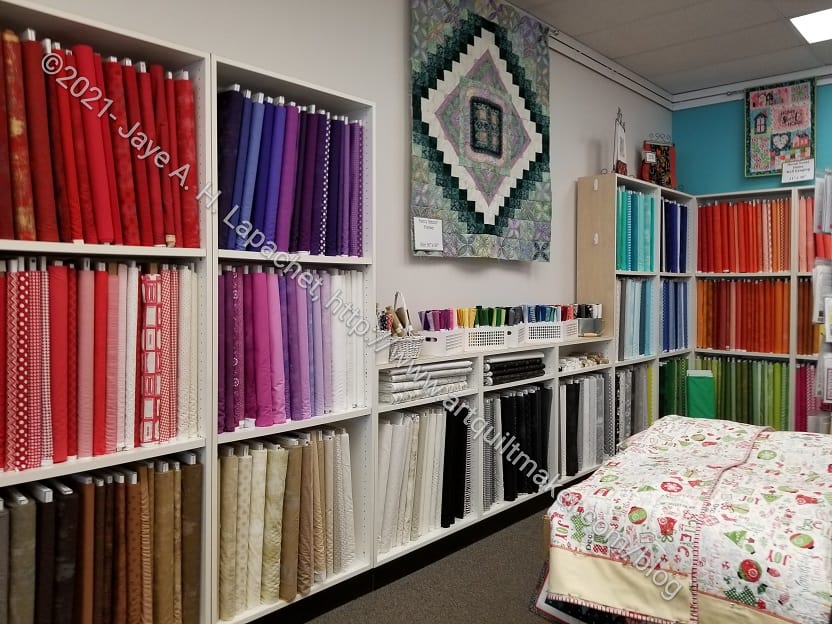
The shop has TONS of various types of machines. After thinking about it, I think most of the shop is machines, though they have a fair amount of fabric, including the best selection of toweling (tea towel fabric) I have seen. They have a number of different colors. I bought some white for my SIL so she can embroider on it. I seem to do that whenever I go somewhere and find tea towel fabric.
Cottage Quilting notions – June 2021
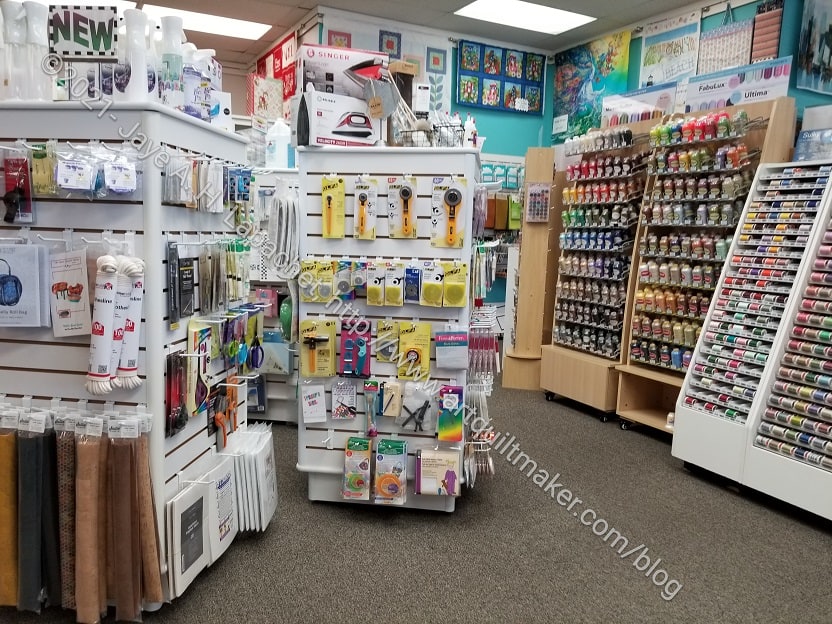
I also liked the selection of notions, thread and rulers. Another excellent selection of both. I truly saw items I had never seen before including a small pair of Duckbill scissors.
The shop had more thread brands and colors than I have seen. I could definitely spend some money there if the shop were closer to my house.
Cottage Quilting – June 2021
The owner came up to us again and wanted to chat a few minutes after we had started to look around. This did annoy me. My mom can always be counted on to chat up new people, so I left her to it and continued to look at fabric and notions.
I would visit this shop again, especially with a list of notions and rulers I needed.
Cottage Quilts * Sew Creative Studio
1310 Center Drive
Unit A
Medford, Oregon 97501
Tel: 541-500-8071
Email: info@cottage-quilts.com
Hours:
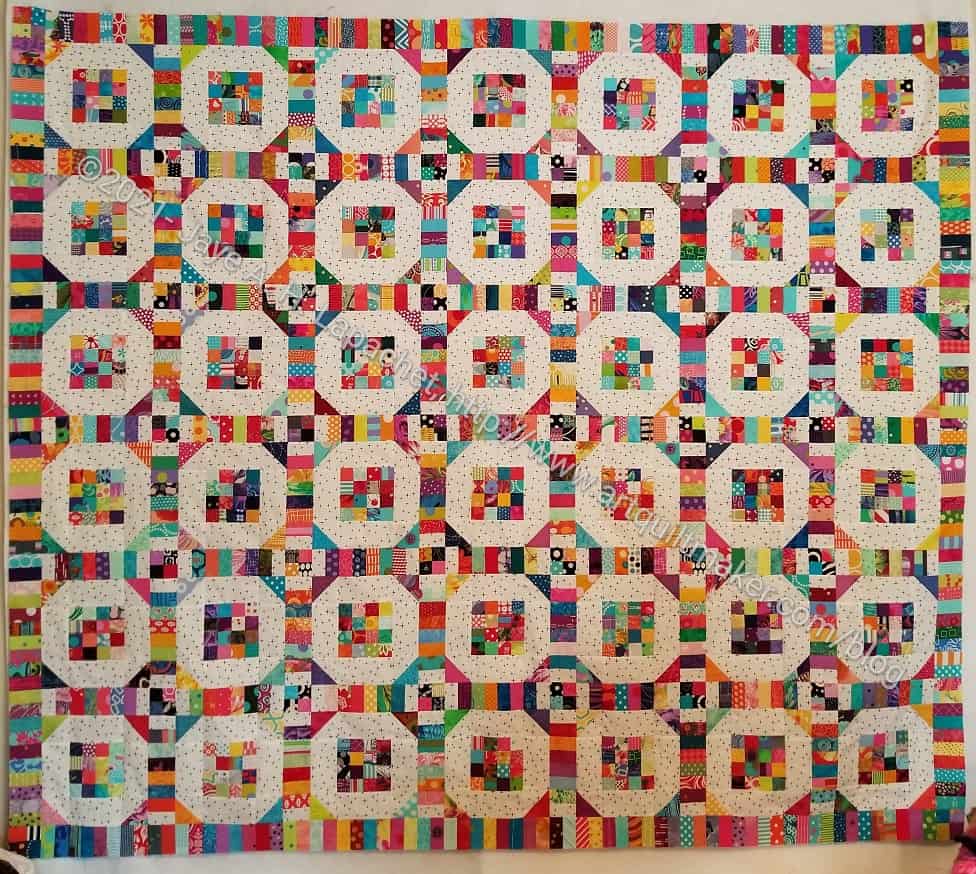
After years of hunting & gathering and months of piecing, Scrap Dash is ready for quilting. I have a date soon with Colleen to hand it over.
I really like the way this quilt came out. If I am diligent, I can see making a baby quilt, or small child quilt, using a smaller version of the pattern. It is really easy to modify the size.
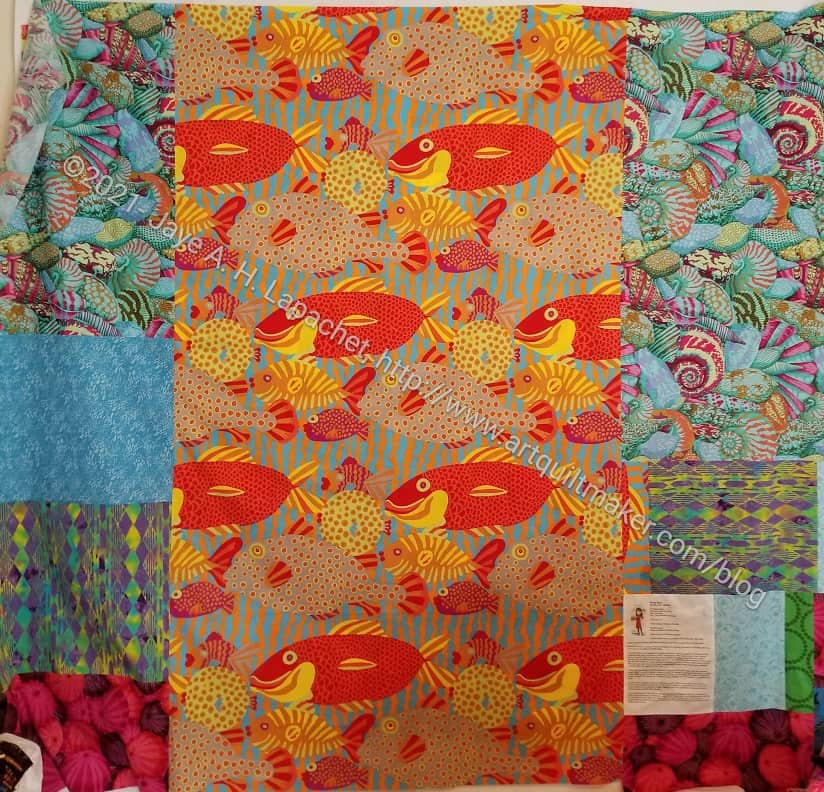
Finished: Scrap Dash Back – June 2021
I tried to go with a sea/water/ocean theme. I bought the fish fabric for some idea I had. Now I don’t remember the idea and I, clearly, never executed it.
I decided that, although I really like this quilt, I will give it away. My house is overflowing with quilts and I have to give more of them away. You’ll have to wait to see who receives it.
Google will be removing FeedBurner from its suite of products. I don’t know when. They sent me an email some time ago and I thought I would deal with it later. Well, it is later, unfortunately.
This means that if you get an email from this blog every morning, you will need to make some changes. Right now I don’t know of a way to transfer your subscription, but I am looking. If you get an email saying you have subscribed to this blog, then you know I found one.
There are two ways to make the change.
Subscribe via email box
First, I have added an email subscription box to the right sidebar. It is right under the search box. Put your email in and click subscribe.
Leave a comment
Alternatively, you can re-subscribe while leaving a comment. Please go to the top left of any post and click on ‘Leave a Comment’. You don’t actually have to leave a comment, though I love your comments and welcome any you choose to leave!
Blog-by-email
In the comments section of any post, check to make sure you are logged in. In the image, I am logged in (see arrow). If you are not logged in, you will see a form asking for your name, email and URL. If you do not have your own URL, you can leave that blank.
If you are logged in, or once you log in, click the bottom option, “Notify me of new posts by email”. You will receive an email asking you to verify your email, then you should receive a new email every time I publish a blog post.
Email me if you have a problem at poste [at] artquiltmaker [dot] com.
I know this is a hassle. Blame and complain to Google. I appreciate your patience.