I know I must be boring you to tears with these donation blocks. Still I have more.
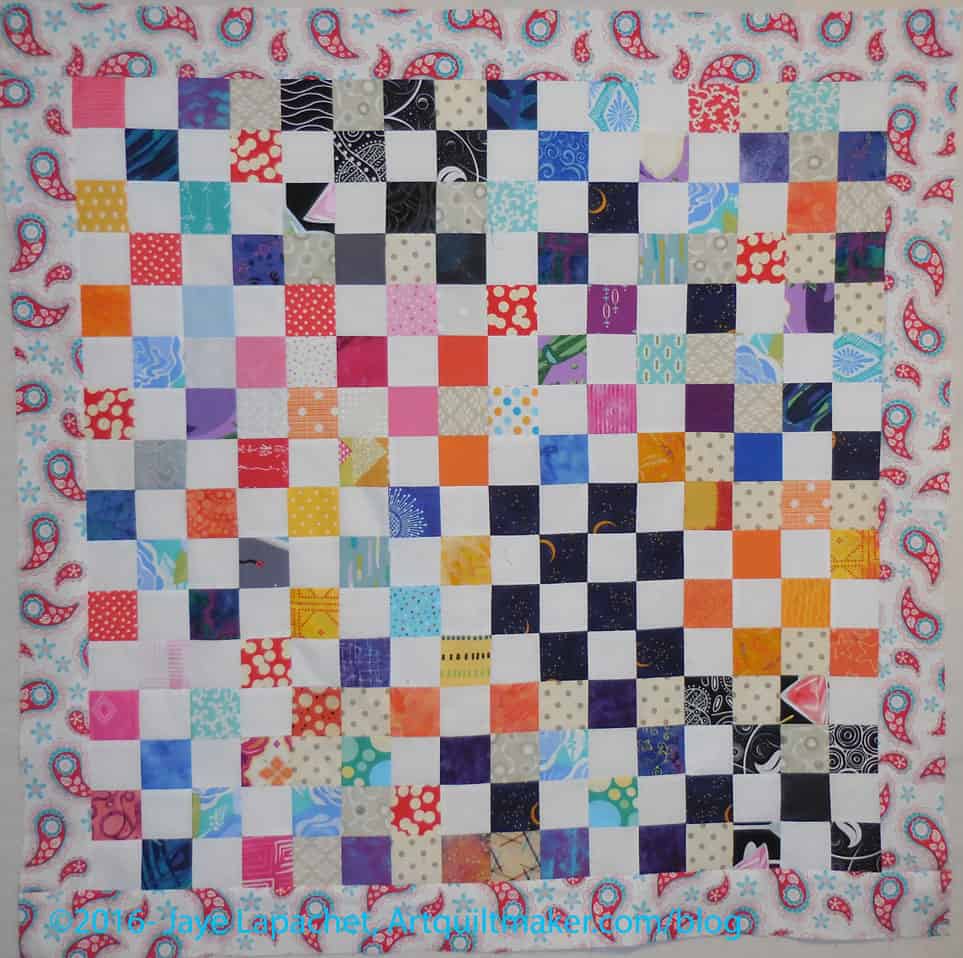
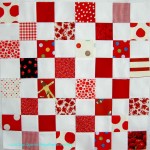
I think it is interesting to put the fabrics together in different ways. I also like the idea of using a bunch of the same fabrics and then combining those blocks with blocks in the same colors. For example, taking that red and white block, making other red and white blocks and combining them all into a top.
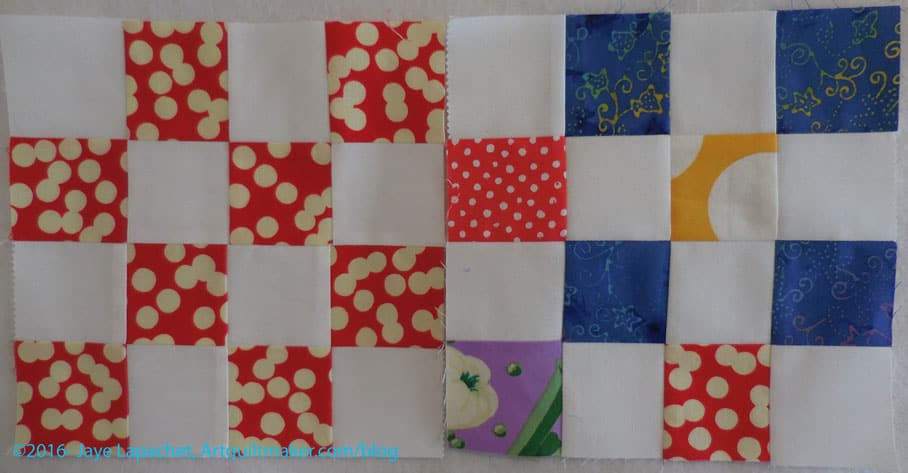
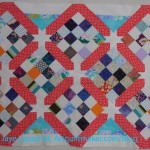
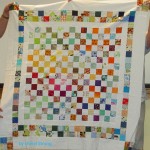
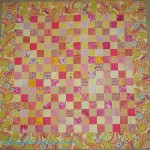
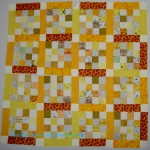
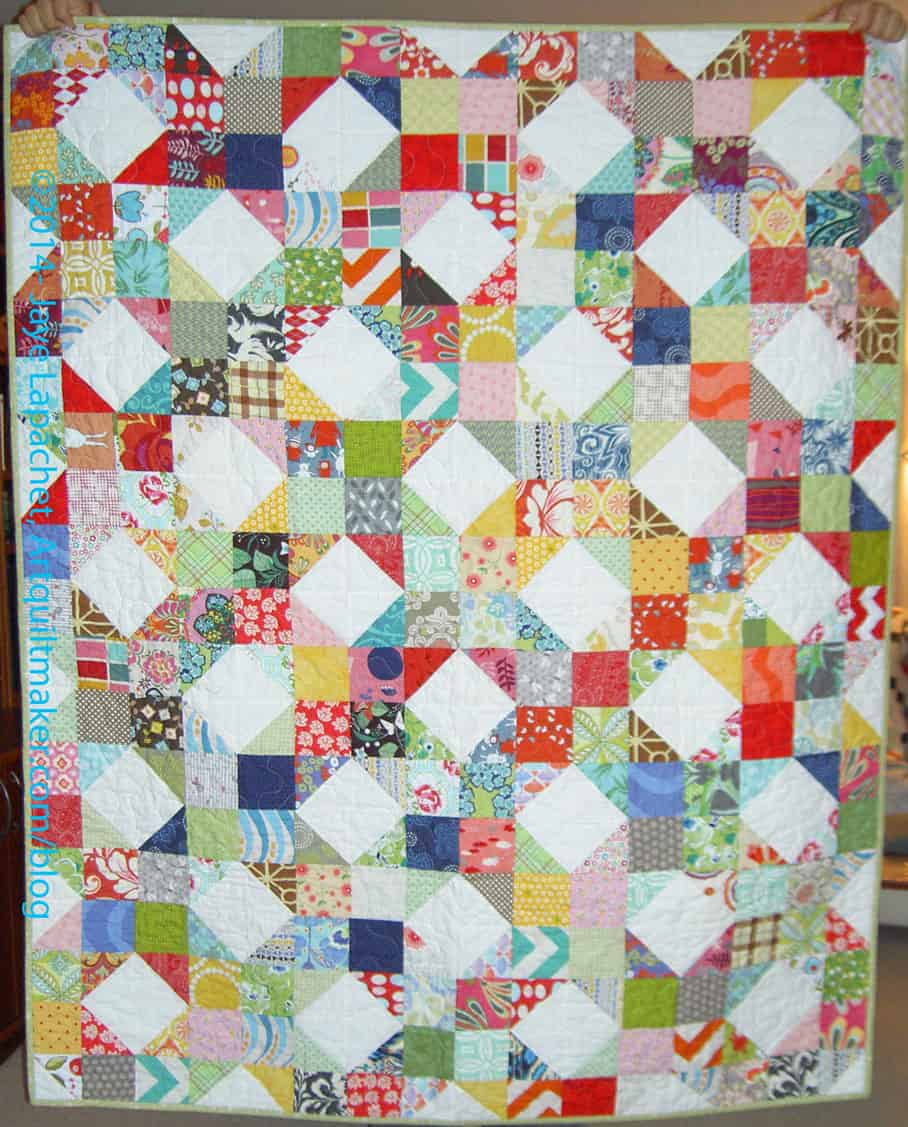
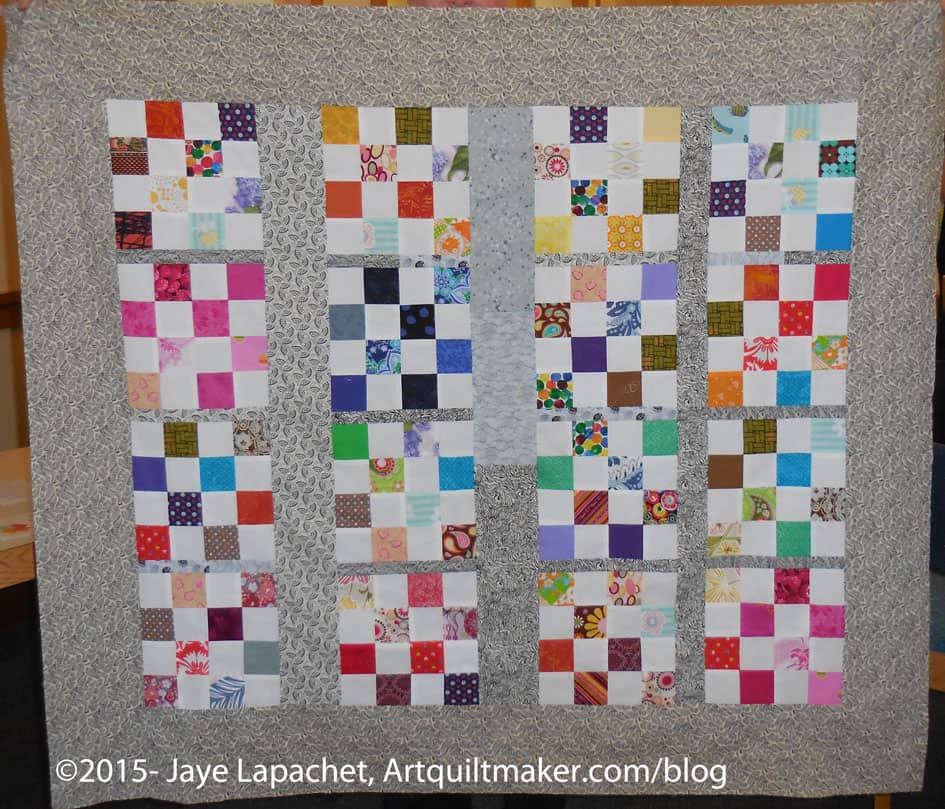
I put the blocks together (as leaders and enders) that I talked about last week into a top. The center is made up from the simple postage stamp/16 patch blocks. As you know I have been working on them for the last few weeks.
The border is from the Sugar & Spice collection from a few years ago by Amanda Herring of the Quilted Fish. I bought that line and even though it was fine fabric in nice colors, I decided it wasn’t really my style. It made a great addition to this quilt, though.
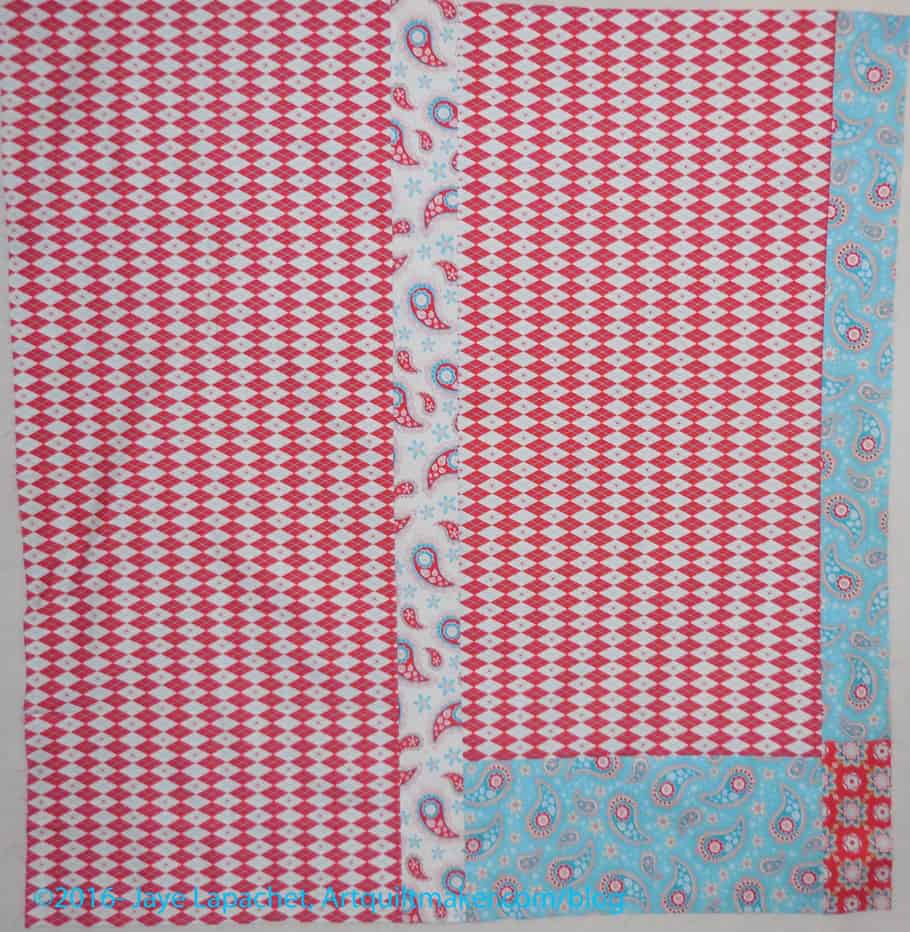
Sugar & Spice back
I saw the group of fabrics in my fabric closet and decided to use the plaid for the back. I needed a bit more to make the back larger, which was when I was inspired to use some of the fabric on the top’s border.
Someone asked in a comment how I select patterns for a donation quilt. This is an interesting question and I am so glad the commentor asked. I never thought of the topic and it is a great one!
The biggest issue to consider for me is what kind of sewing I want to do. I have to judge my mood and my interest level. After that there are a couple of things I think about when selecting a pattern.
First, I have some go-to patterns. I use these patterns over and over. At least I am still using them. Even though I have made several tops using the patterns, I am still interested. One is a 16 patch, which is a basic, easy block that the guild always encourages.
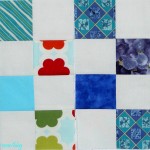
Charity blocks – April 2016
FOTY-made Donation Blocks
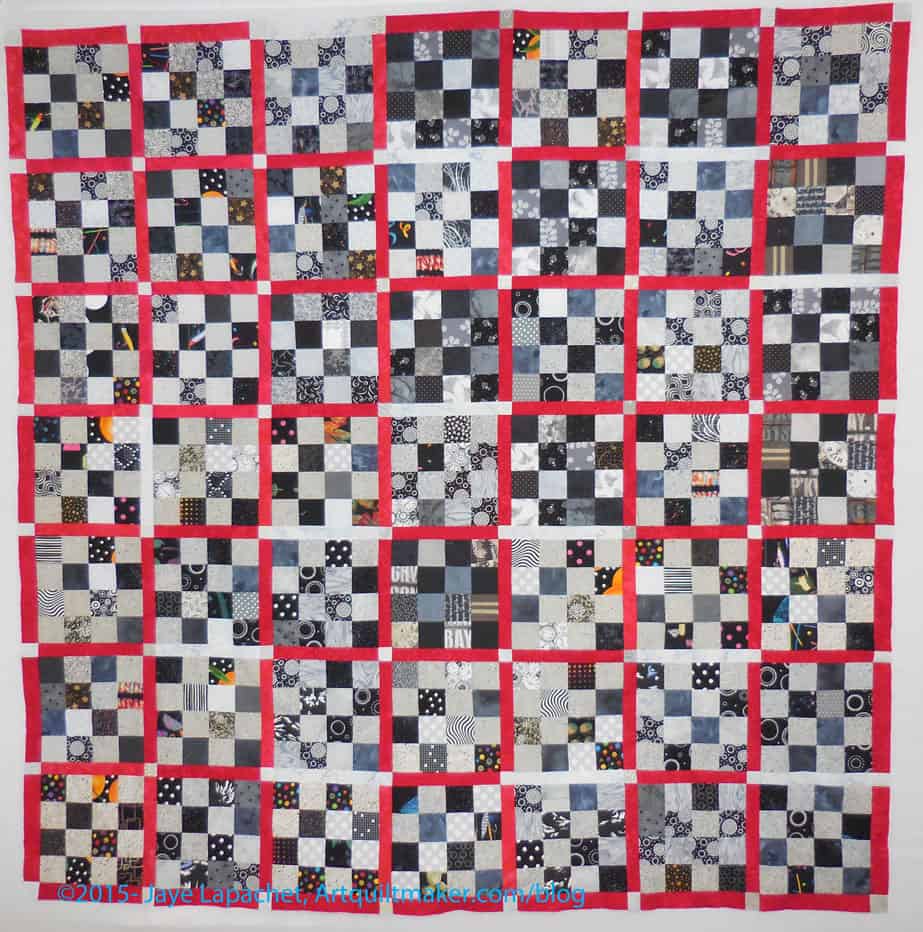
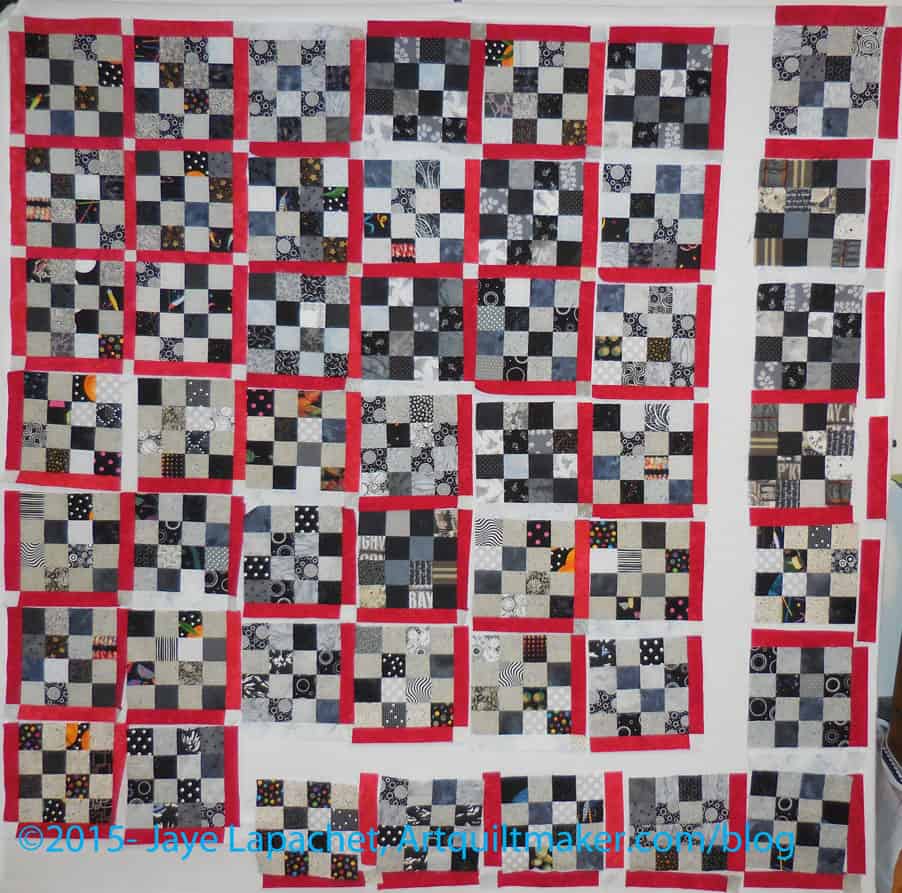
Black & Grey Donation Top Complete
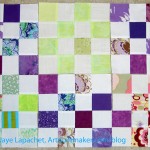
Multi-color Donation Quilt- April
Cheryl’s Donation Quilt
Orange & Grey donation quilt
Donation Blocks – June 2014
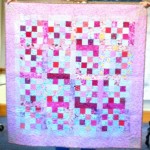
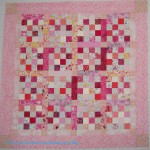
Pink Donation Quilt
Yellow & Pink Donation Top
Pink & Green Donation top
4 Pink & Green Donation blocks
Pink Donation Top #2
Yellow Donation Top – no borders
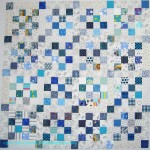
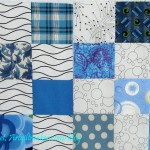
Blue Donation Quilt
February Donation Blocks
Good Fortune Donation block
Donation Blocks – My Scraps
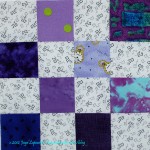
Purple Donation block
Scrappy B&W Donation Block
This is a good pattern for all levels of quiltmakers and can be made from pre-cuts. You need 8- 2.5″ foreground squares and 8-2.5″ background squares to make the block. 16 blocks with no sashing make the quilt size we donate to the NICU at Stanford. It works very well with the leaders and enders technique.
There is also a lot of opportunity for creativity and variety. The photos above show quilt tops as well as blocks. There are a couple from the guild that I did not make. Sometimes I have a lot of fabric in the same colors (just finished a quilt), so I’ll cut up the leftovers into a usable size and make a set of blocks in those colors and put it together into a donation top.
I also will just pick random squares in a variety of colors and put them together into a block. I always want to be working on a leaders and enders project as it makes my productivity so much more.
I am also cutting 1-2 2.5″ squares from each fabric I was and press so I have a variety of squares to use as donation block leaders and enders all the time.
These blocks can be set together in a variety of ways as well: sashing, no sashing, on point, straight set, etc. If I make scrappy blocks, I sometimes have a hard time finding a suitable sashing color, so I might use scrappy sashing.
Sometimes I add borders, sometimes I don’t. I don’t think I have begun to explore all the possibilities for setting the 16 patch blocks.
Flower Sugar Donation Top
Orange Donation Top
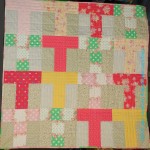
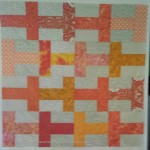
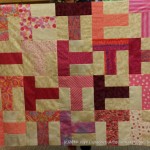
Pink T Donation Quilt
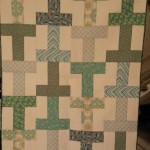
Green T Donation Quilt
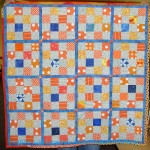
Second, the T Quilt Pattern is another go to pattern that I keep returning to. Peggy, one of the Charity Girls gave us this pattern at a Charity Sew Day. It is easy and it makes a good break from the 16 patches. Again there are quite a few options for variety that can be employed with this pattern. I do think the T design discourages sashing (what would be the point?), but scrappiness works very well.
Cutting Corners Donation Top
Third, as with the Cutting Corners Ruler, trying something new is a good opportunity to make a smaller piece until I feel comfortable or know I want to commit to a larger piece. The Cutting Corners donation top is one of those tops. I wanted to try out the ruler and making a donation top was a good option.
Fourth, very occasionally I will have orphan blocks. If they don’t get used for journal covers, they are donated to the Charity Girls to make into donation quilts or I will make them into donation tops. Most often, I just want them out of my hair.
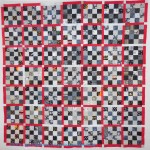
Black & Grey Donation Top Complete
Fifth, rote sewing. Sometimes I need a project that allows my mind to wander into non-quilt territory. The Black & Grey Teenaged Boy Donation quilt was a good example of just sewing something that required few decisions.
BAMQG Mystery Quilt
Sixth, tops or blocks sometimes don’t quite work out. I don’t mean they are ugly or unusable. I meant that they didn’t work out for *ME* for some reason. These pieces can be any fabric, any pattern, any design, any layout. Anything. As I said in the blog post, I like the fabrics in the quilt above. I also like the pattern, but together they didn’t work for me.
Seventh, fabric that didn’t work out. A lot of times I will use fabric to make a donation quilt that I don’t want to use for my own quilts. This doesn’t mean it is crappy or fabric. It might mean that it isn’t my style anymore or the color is just off enough to make it not fit with other fabric choices. It could also mean that I bought a lot of it, because I loved it, used it a lot and suddenly didn’t love it anymore.
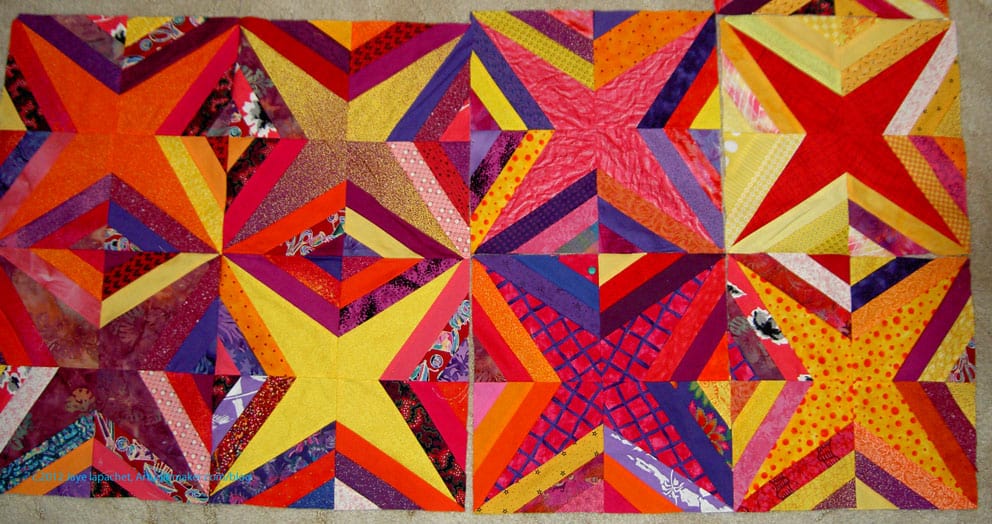
Star Donation Quilt
Eighth, periodically the Charity girls will come up with a block of the quarter (or of the month). For a time they will collect blocks in that design and then the group will make a series of quilts in that design. The Star donation top (above) is a great example. I put the blocks together and made the back. I didn’t make the blocks. Although, it has been awhile, I am still inspired to make more of these blocks and put them together in another quilt.
Ninth, too many scraps is a good reason to make donation blocks. They can be mosaic pieced like the journal covers, trimmed to size and then put together in an appropriate size and layout. They can be made into Sawtooth Star blocks or other blocks with a large center. The microscopic scraps I use for journal covers would take too long to sew together into blocks.This works better for donation tops with larger scraps.
I also cut larger or smaller squares into usable sizes and shapes, depending on what I have, and make a top from those. If I use smaller sized pieces, such as a 2″ square, I try make a whole top or enough blocks for someone else to make into a whole top. I try not to leave the Charity Girls in the lurch by making just one block, though I have known Peggy to run with one block and come up with a great top.
Also, if one of my scrap bins (I sort them by color) is overflowing I will cut a bunch of squares or other shape and make some blocks or a top.
Stars & Stripes blocks
Tenth, sometimes I will start a project with great enthusiasm. This often happens with class projects. At some point (too late to abandon) I will lose interest or realize I don’t like the results. It is a good opportunity to turn it into a donation quilt.
It could be that the fabrics are just fine and the technique makes me cringe. The above Stars & Stripes blocks were made using paper piecing. Not my favorite.
I was kind of surprised at the different ways I choose patterns to make donation quilts.
I do my best to use patterns I like and try very hard not to make ugly donation quilts. The beneficiaries of these quilts don’t care about matching points or perfect layouts. I am sure they are looking at the pretty fabrics and softness of the object they have been given. Everyone deserves some beauty in their life.
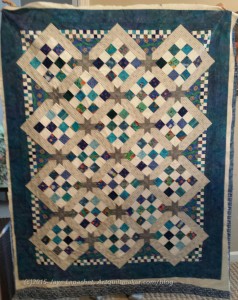
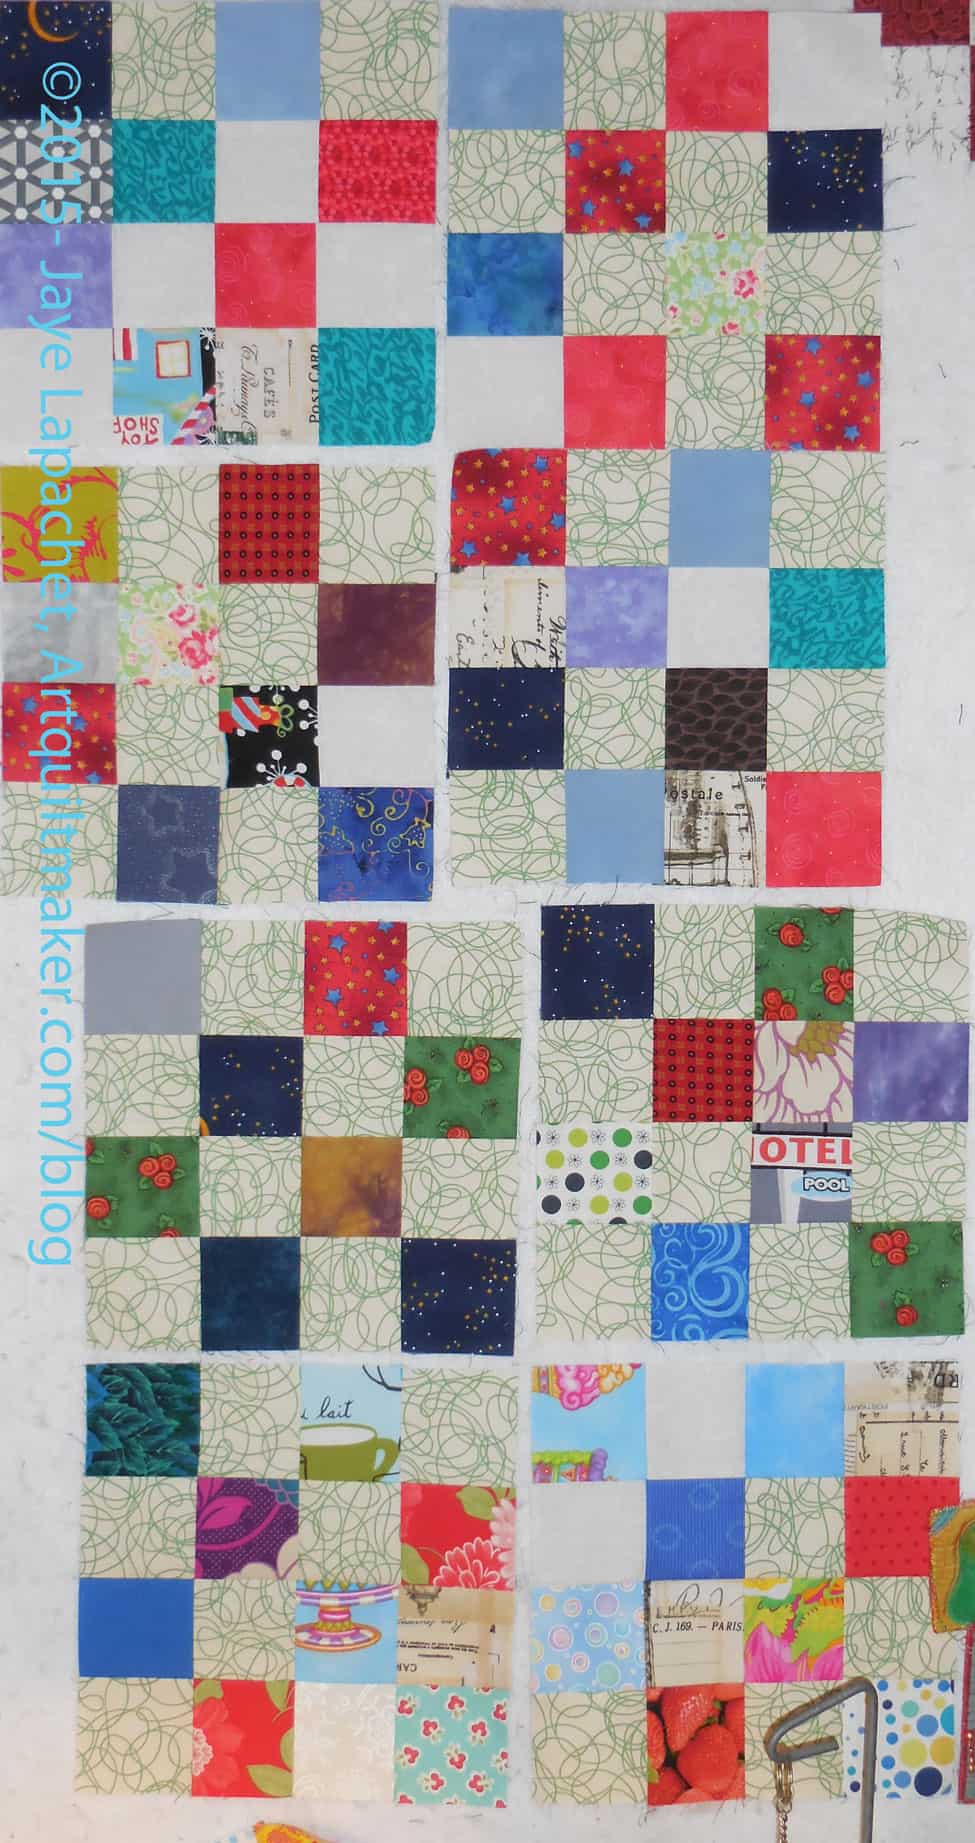
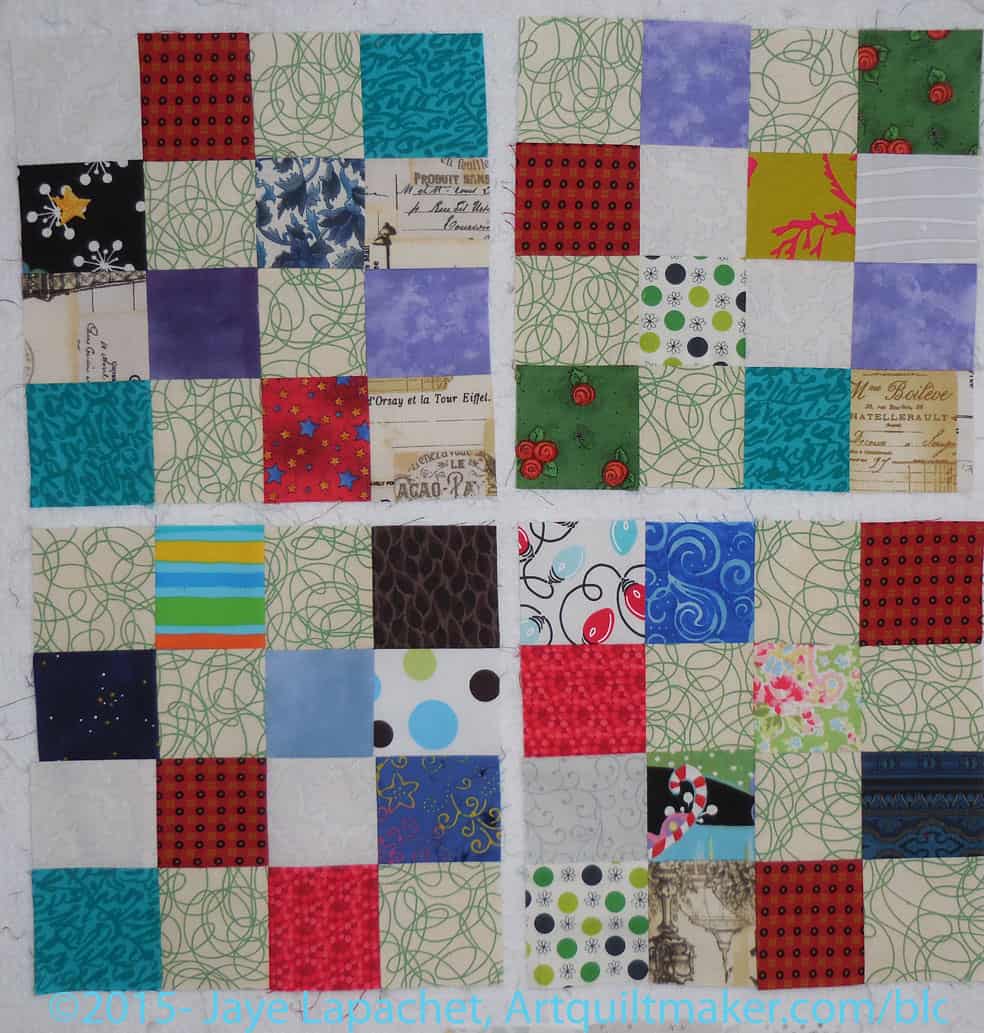
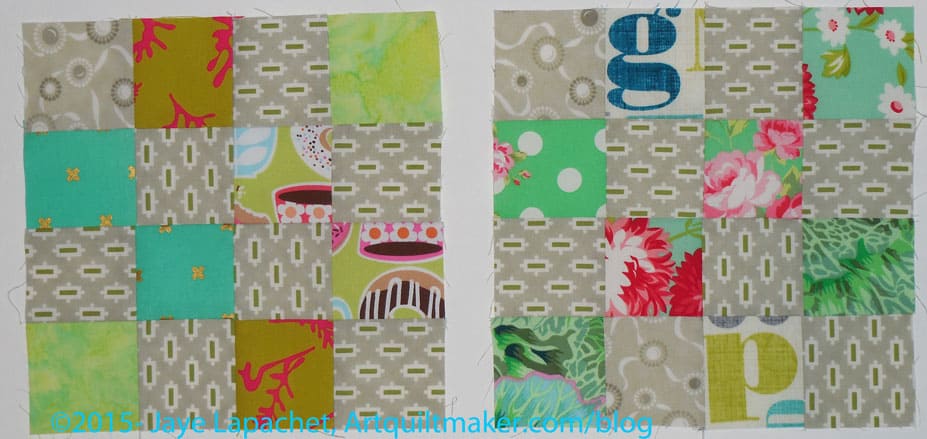
I talked about some donation blocks I made last week. As I worked on the Cutting Corners Donation Top, I made more of the postage stamp/16 patch blocks using leaders and enders. I love how much I get done when I use that technique!
Charity blocks – April 2016
I now have 12 blocks on the wall. I have a few more to make, but I think that I might as well sew them together to make another top for the Charity Girls.
I know I promised I wouldn’t post any more donation quilts “for the time being.” The time being is over and I have another top and back finished. Things are kind of coming together with finishes lately, which is nice.
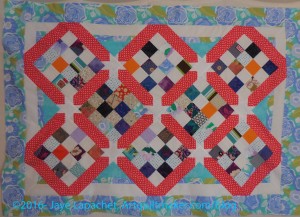
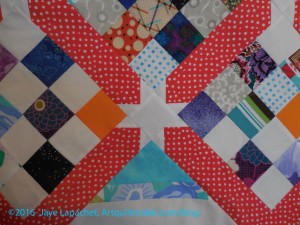
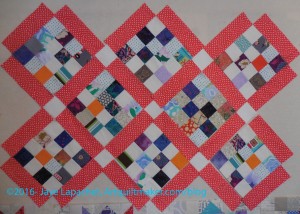
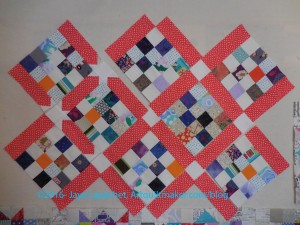
Cutting Corners Donation Top
I worked on the Cutting Corners Donation top on Saturday. I was able to finish the top, the back and the binding. It occurred to me that I should make a Frankenbatting as well. I haven’t done it yet, but I have time before the meeting.
Cutting Corners Donation Top detal
I know I said I was struggling with the corner pieces last time I talked about this top. I decided to move along by sewing together as much of the top as I could. After putting the entire top together, I found that the corners I had made and discarded actually fit in the corner spot. I was pleased and shocked to see how much the quilt shrunk up when I sewed it together. After all of these years, I shouldn’t be surprised, but I was. It is nice that quiltmaking can still surprise me.
Cutting Corners Donation Back
I definitely like the way this top came out, but I am on fence about the ruler. I am not sure that using the ruler was the easiest way to get to the finish. I will probably try it again with different fabrics.
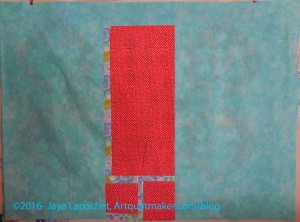
I spent last Sunday finally working on the Cutting Corners donation top. I was fiddling around not knowing what to do. I pulled out a piece of Dear Stella orange dot fabric and was inspired to use it as the sashing. Off I went.
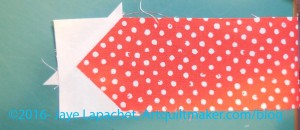
Using Cutting Corners Ruler
The Cutting Corners ruler is not an easy ruler to use, especially for someone like me who is pattern reading challenged. I finally got the critical information and worked on the sashing. The picture above shows the first steps of creating the lozenge shape.
I am not sure this is the easiest method to create this type of sashing.
I am having problems with the corner triangles. The directions for the side triangles are ok. The corner triangle directions are abysmal. There is one line about how to make the corner triangles. I have been emailing back and forth with Mrs. K, but I think I am going to have to call her and get more info.
I probably would have used a different sashing fabric if I had been thinking more. I went with my intuition, though and I kind of like the effect of the orange.
I hope to be able to finish at least the top soon. Perhaps this weekend.
As I said yesterday, I spent Sunday making the Peacock blocks. In between I made donation blocks. I had taken 3 kits from the BAMQG meeting on Saturday so I made those up first. Those blocks are the 2 on the right and the one on the top. After I was done with those, I made up a few more from my own fabric. I sewed them as leaders and enders in between the parts of the Peacock hexagons. I used them to keep track of the various parts of the blocks. They are all the same colors, so it is easy to mix of pieces. And the bonus was all the donations blocks I finished as well.
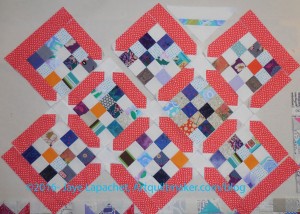
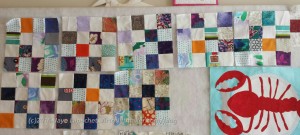
Donation Blocks for Cutting Corners Ruler + a Lobster
It took me forever to get these donation blocks done and I am only marginally closer to having a finished quilt.
Mrs. K’s Cutting Corners Quilt
These are the pieces I am going to use to try out the Cutting Corners Ruler a la Mrs. K’s quilt.
Now that I have the blocks, I have to figure out the ruler. I took a quick look and it seems to make sense. I am going to start with the sashing and decide about the checkerboard border later.
I am making a smaller quilt to start with and may use the ruler to make others later.
Remember the lack of sewing I talked about? Part of the effect was that I didn’t have time to make more donation blocks.
As I mentioned I ran out of the cream and green fabric, so I started cutting some backgrounds from scraps. These blocks are much more diverse in the background department. I think they are also a little brighter.
Every little bit helps so I don’t feel bad about only finishing three more blocks. I just wish I had more time to make more. I may get a few more done before the meeting on Saturday.
Yes. More donation blocks. They were part of my sewing work over the past two weekends. I am now out of cut background squares so I will need to cut more. I have some blue dottish on white fabric scraps leftover from the Star Sampler, which I might use. Since they are scraps, they won’t go far and will be a stopgap.
These are on the dull side. I cut up a bunch of foreground fabrics some time ago. I didn’t feel like I wanted to use those fabrics in a quilt and am working my way through them for donation blocks. Someone will like them, right?
I am not doing that again. I decided that if I have fabric I don’t want to use, I’ll just donate it rather than using it like this. It isn’t enjoyable and I want to infuse these donation blocks good energy so that is my plan.
My last batch will make a cohesive quilt. This group less so. I had one leftover from the previous batch. When I returned home from the meeting on Saturday, I decided to cut up some cream and green squares for a background and make more donation blocks.
I pulled out a small bin of 2.5″ squares that I cut up for donation quilts a thousand years ago and began using those to make more squares. There is a lot of blue.
Last Lone Green & Grey Donation Block
The blocks are interesting. They aren’t as cohesive, as I said, but they make an interesting group of blocks. I don’t know that they will all be put together in the same group.
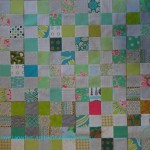
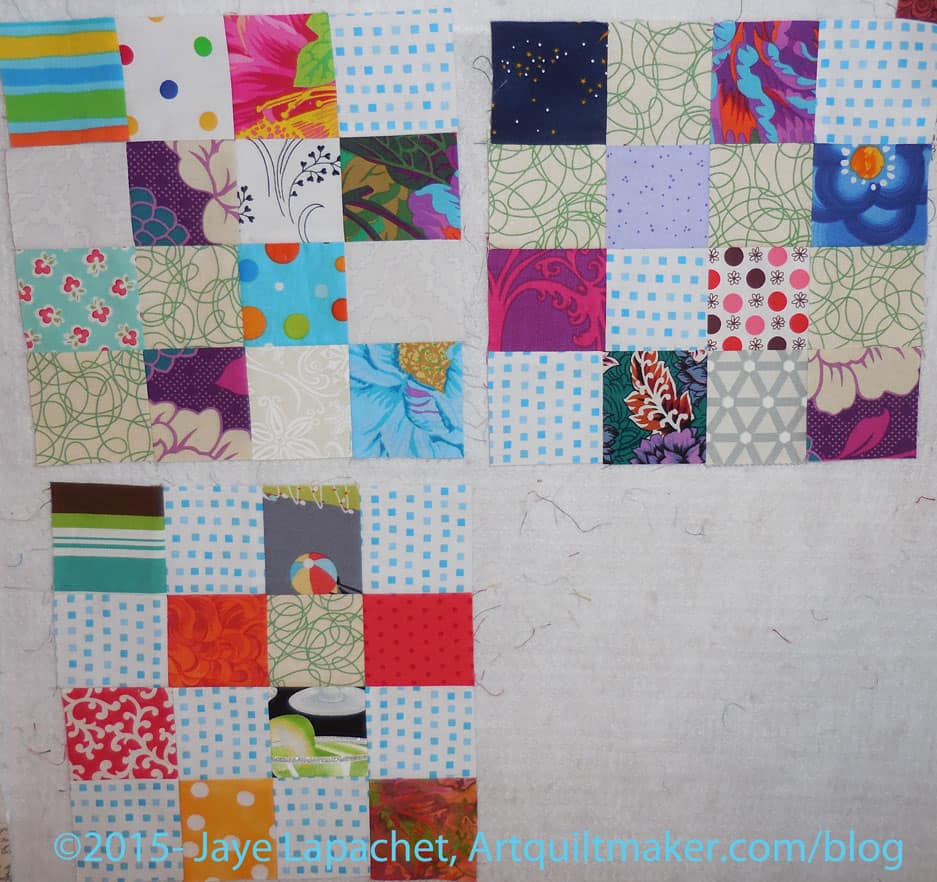
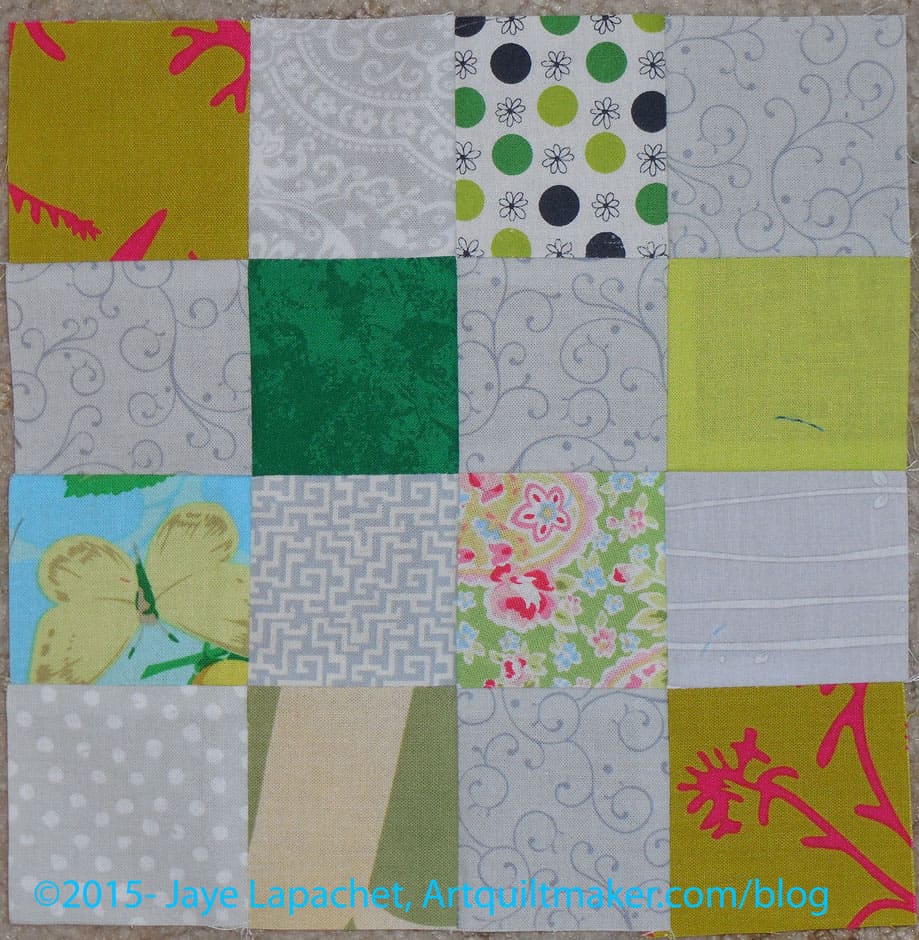
I made more donation blocks last Saturday as I worked on sewing together the FOTY 2014 patches. I thought green would be good and chose a lot of medium greens, though I had to use some darker pieces as my green scrap basket dwindled. I used, mostly, grey for the background. As you will, a little pink and some other colors crept in.
Using the leaders and enders technique, I just kept sewing the 2.5″ squares in between the FOTY 2014 patches and came up with all of these donation blocks. I joked about making enough for a whole quilt, never thinking I would be able to do it. I am close, though, especially with the blocks from the other day.
I saw a quilt on Valerie’s Twitter feed that has these blocks with Flying Geese on the outside to make them into stars. I am sorely tempted, but I have so many projects that I am going to force myself just to turn these blocks in and let someone else make a pretty quilt.
I am very pleased that this will be a quilt (or quilts) that will make someone happy.
Unlike Pam, I do not have piles of 2.5″ squares laying around, though I am starting to think I should. I cut the foreground squares from a FQ I found that I won’t use in a quilt. I decided to make the blocks, because I had some leftovers from a One Hour Basket I made. That fabric became the background. There isn’t a ton of contrast, but they are pleasant blocks. The best part is they will go to a good cause. I haven’t done as much charity work this year and it makes me feel good to add to the BAMQG charity pile.
As I started to sew the FOTY 2014 together on Friday (started last week, but got really serious on Friday), I realized that I needed leaders and enders. After I sew each FOTY pair, I need to sew something in between so that I can keep the FOTY patches in order. I have been using the Octagon 9 Patch as leaders and enders pretty regularly, but I am at a weird place with that project, so for the moment it won’t work. I gave away a bunch of my neutrals, but dug around and found some suitable greys for more donation blocks. I used leftovers of some Bonnie and Camille greys. They are a little too taupe for me, so I have been using them for projects I don’t plan to keep. Since I also have a lot of green scraps, which I don’t use much, I cut some random 2.5″ squares from those and made a couple of blocks.
Green & Grey Donation Blocks
Now I have a random thought to make 12 more and have enough for a quilt. I suppose it is possible since FOTY has a lot of pairs needing sewing, but the cutting of the 2.5″ squares – enough to make a quilt before next week is a little daunting.
I think it will be better if I get over my Octagon Nine Patch hump so I can make progress on that project, not that donation blocks are a bad thing.
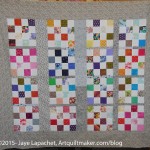
I finally got my act together to put the postage stamp blocks together. I really was feeling like I didn’t have anything to show at the BAMQG meeting, so I decided on Friday night to get these blocks together. I used leftover pieces from another quilt for the sashing. I really didn’t think about the piece too much; I just sewed. Yesterday morning I finished the border and made the back.
Gerre and I made them together back in February. We used them pieces as leaders and enders as needed when we made the Hawaiian quilt. I don’t see any mention of these blocks, so who really knows?
I wanted to try a different setting that the other versions of the postage stamp donation quilt tops I have made. I was going for a row quilt kind of look. I used different widths of sashing for the vertical pieces, because I used what I had. It isn’t my best work, but it was very intuitive and quick. I think that it was kind of amazing that I was able to let the control go and just put the piece together. You can see that there are squares of the same fabrics near each other. Normally, I would have spread them out. Essentially, I just put the blocks on the floor and sewed them together. Kind of bare bones sewing. I hope someone will like its quirkiness.
To be honest, I haven’t really sewn seriously for quite a while. I have sewn a couple of EPP stars and used the opportunity of this piece to make some more O9P nine patches, but nothing else. It felt really good to throw this together. Very freeing.
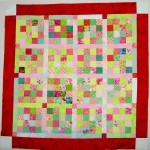
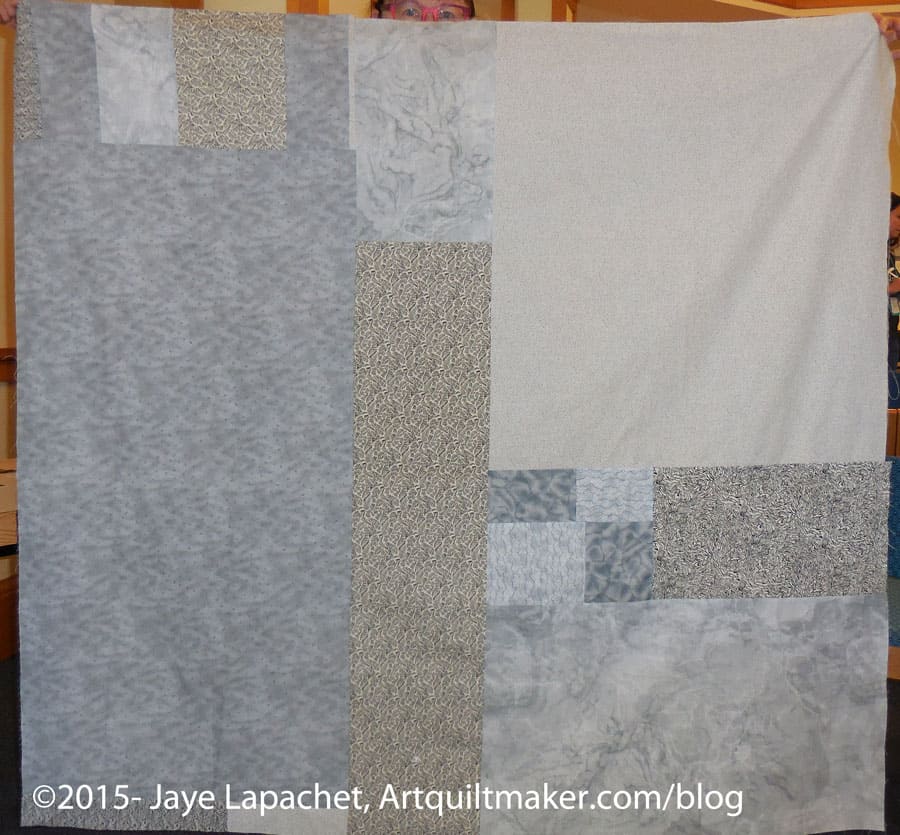
Multi-color Donation Quilt back (April)
The back is made from greys that I pulled out of my grey bin. They are older fabrics in the depressing color range of grey. Summer is coming and I find myself divesting myself of colors deemed too depressing and working with even brighter colors than usual.
I made more progress on the Black & Grey Teenaged Boy Donation Quilt. I have about 13 more blocks to which to sew sashing, then I can start sewing the blocks together.
I know the photo doesn’t look that different from when I posted earlier in the week. I really have made progress. I have made progress by sewing a few bits at a time. It is amazing how much I can get done doing that. It is a little irritating, though to be constantly interrupted. Still, duty calls.
I hope to be able to show you a nearly finished top by the time next weekend rolls around. We’ll see since I won’t have much time to sew next weekend either.