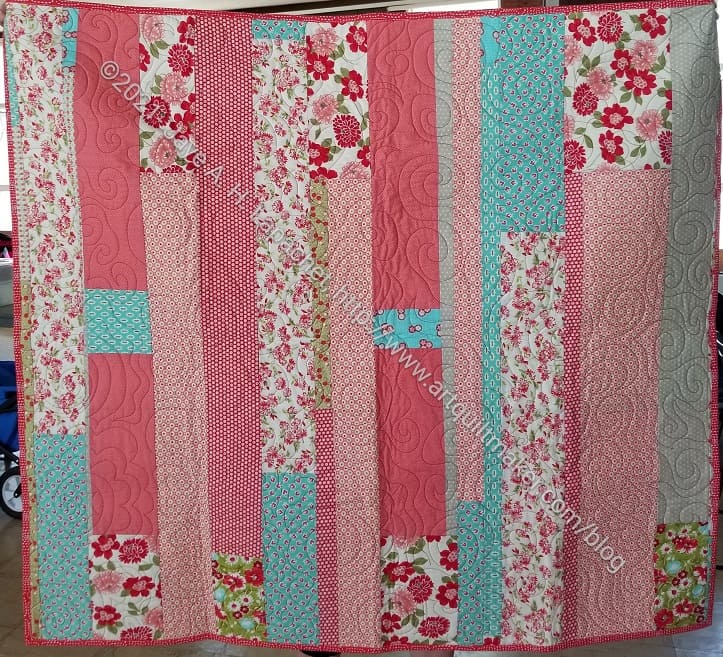
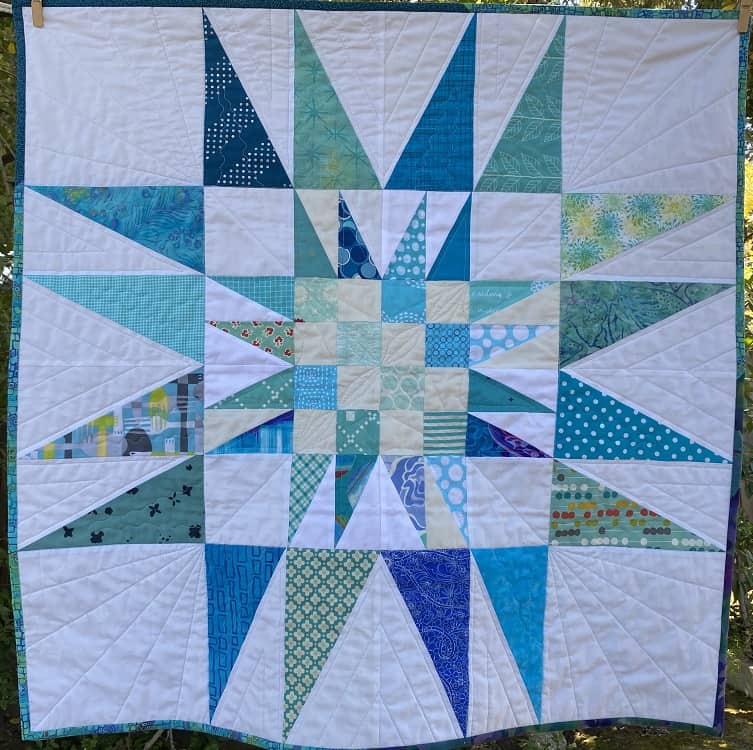
Another one of my creations that was handed in at Sew Day was Ends n.8. I only have a bad photo, so it was hard to figure out that this gorgeous quilt was actually the one I made.
Tim, again, did the quilting and Mary C added the binding. I like using up the edges of quilts and this one turned out great. As mentioned in the previous post, the ends that make up this quilt came from the Stepping Stones n.2 quilt, I think. I also added more Bonnie and Camille fabric.
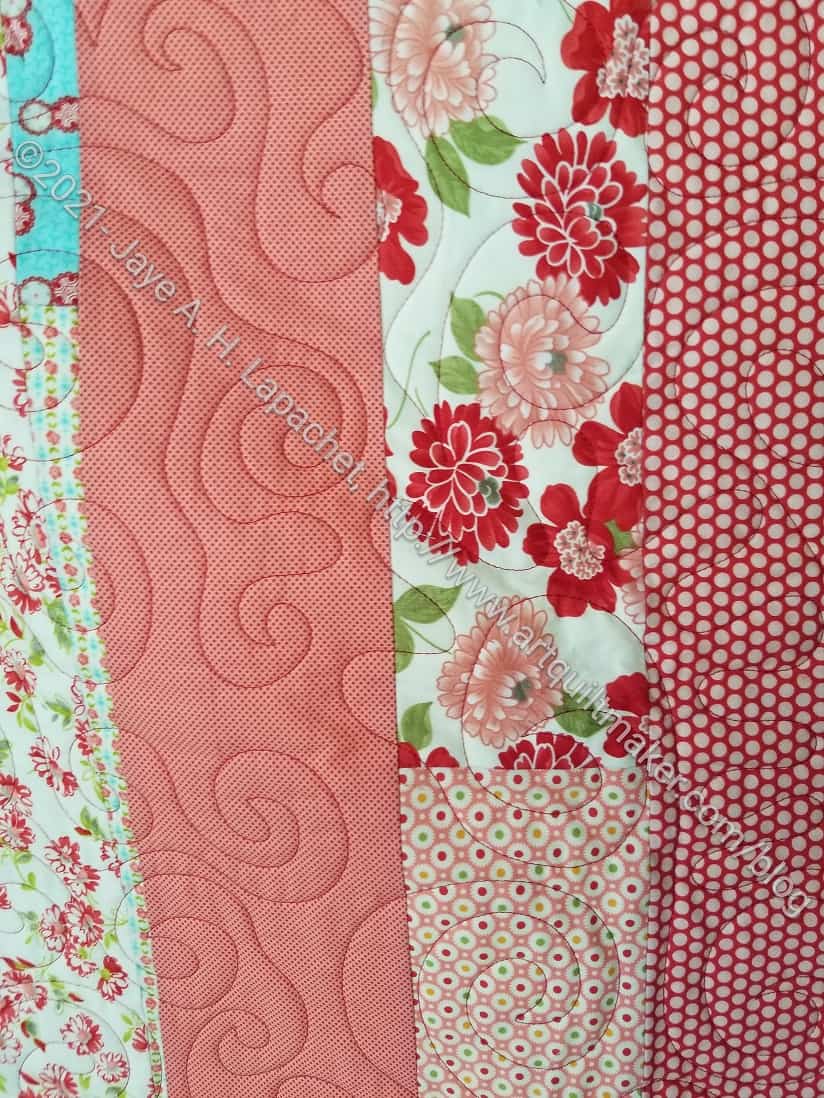
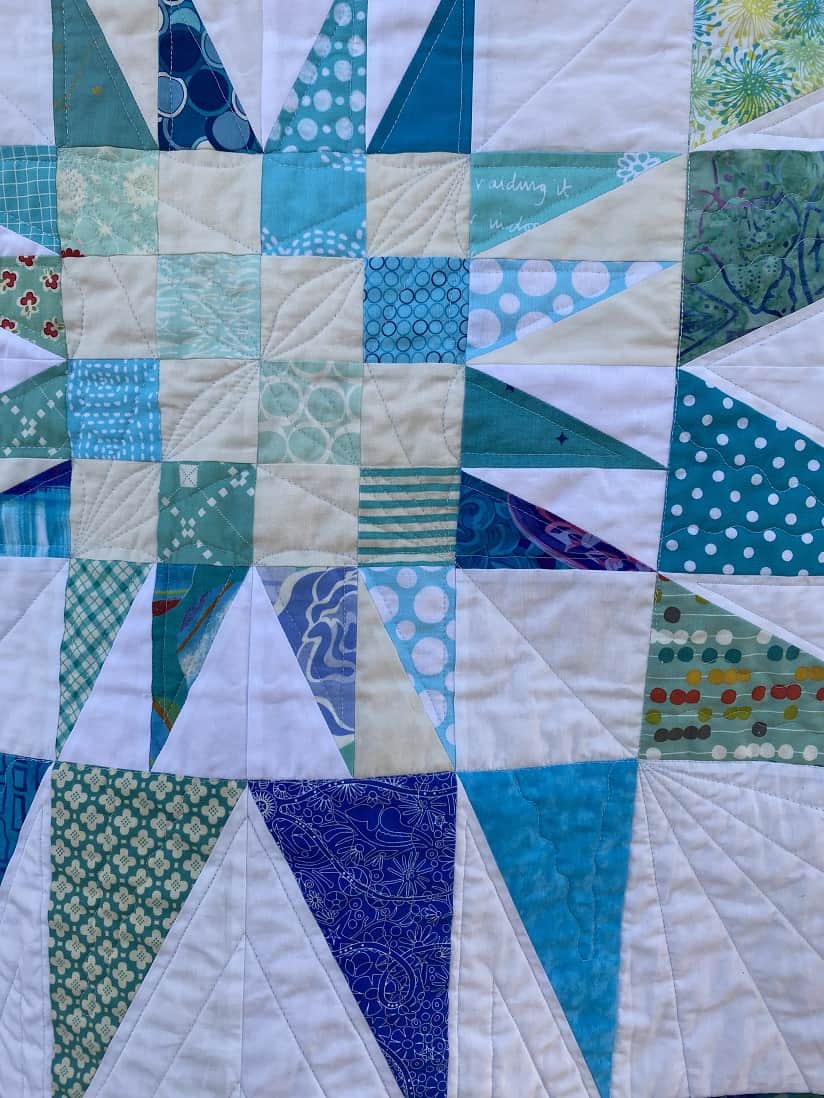
Ends n.8 Finished – detail
As usual, Tim did a great job quilting it. the swirls are a little different, but organic looking and interesting.
We had Sew Day on Saturday, which I will write about soon. One thing that happened is that people brought a bunch of donation quilts that had been in process.
One of them was the Purple Strip Donation Quilt. Tim quilted it and Mary C bound it. I finished it in March of 2019 and gave it to Tim shortly thereafter.
Purple Strip Donation Quilt – detail
Purple Strip Donation Quilt – detail
I really like the angularity of the quilting designs Tim chose. The fact that he added in a couple of circles to the quilting really adds to the overall piece. One thing I always wonder about is what people think when they receive one of these quilts? Sometimes I wish I were a fly on the wall and I could know.
It looks really great and I am so pleased it is done.
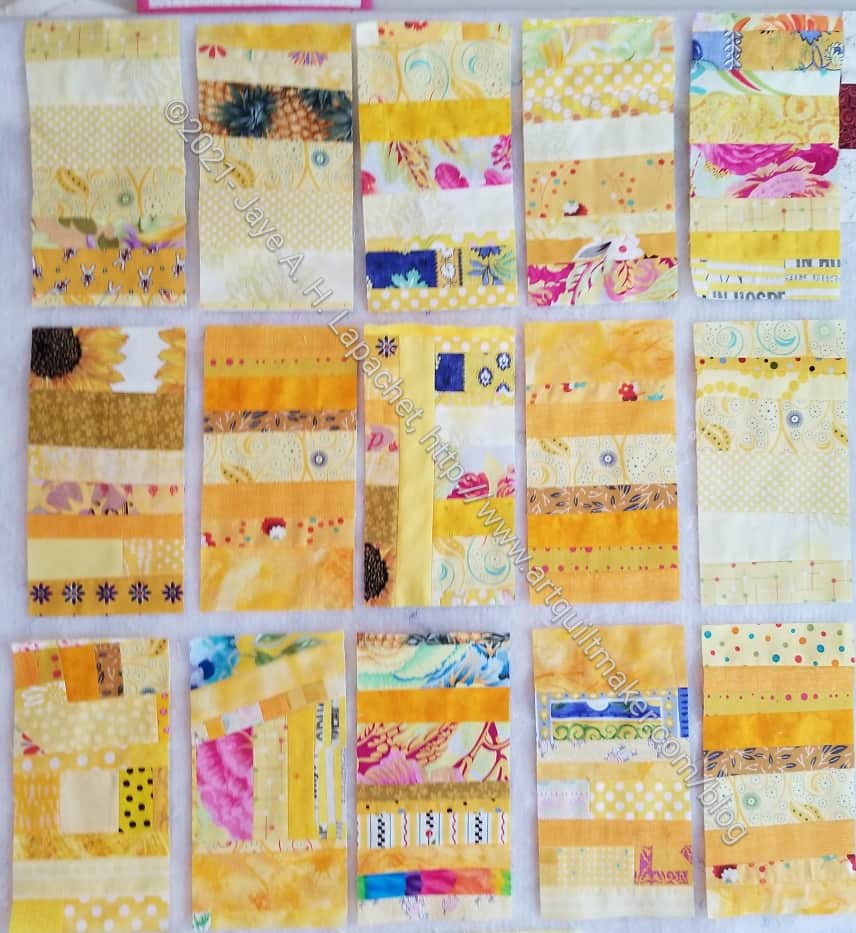
In between working on Scrap Dash, I made more yellow Improv blocks. I don’t have a tons of yellow scraps and I’ll be lucky if I can make this quilt and a straight Improv version like the other colors I have made. I’ll definitely be able to finish this one, but I have had to add chunks to the blocks. I don’t have enough strips to make all the blocks just from strips.
I sewed way more than one seam throughout the day. I felt kind of manic about these blocks. Even though I was working on Scrap Dash, I wanted to make progress on this quilt as well. I am pleased with the progress.
I am on the fence about how this quilt is looking. I don’t have the exact colors that Tim used, so I am using what I have. I don’t know if it is working.
Improv Checkerboard
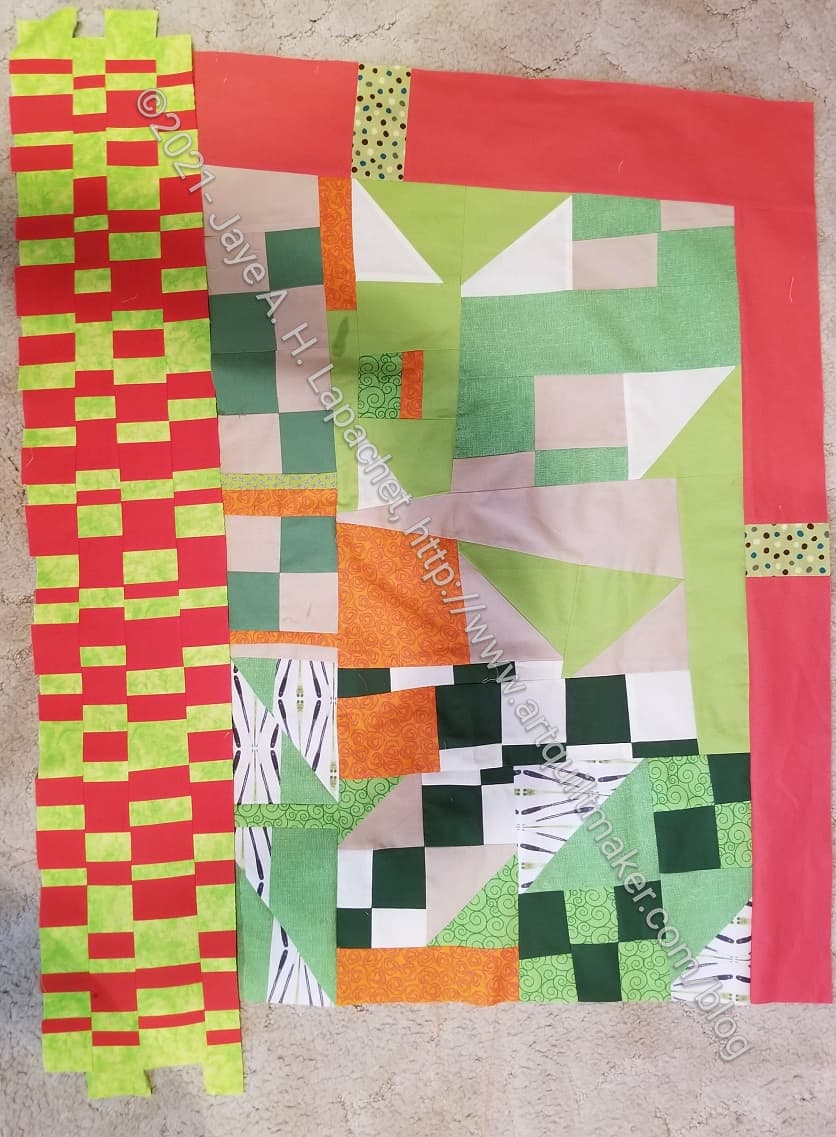
When I talked about this quilt before, I had finished sewing the parts Tim gave me to the piece and had just added a strip of my own.
I made this improv checkerboard to add to the sides as the first piece that was all my own. It was kind of fun to play around with different sized strips. The green, however is a little more chartreuse than Tim used. While I like the shape, I am concerned about the colors and how they fit in with what went before.
I plan to put part of the checkerboard on another side perpendicular to the checkerboard I already sewed to the top.
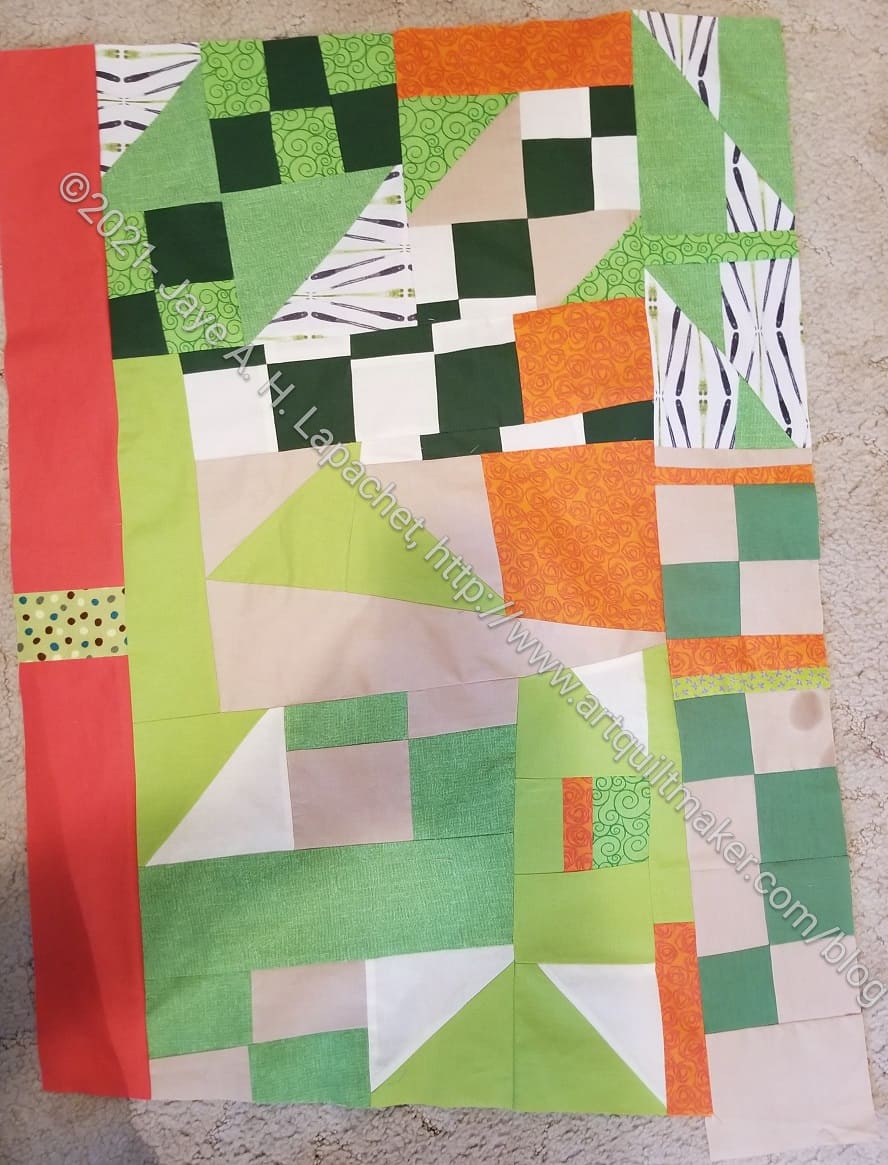
Tim’s Improv Quilt with checkerboard
I don’t think it looks terrible and that might be good enough for a donation quilt. I don’t mean that it is ugly so it is only good enough for a donation quilt, but that it is not too ugly to give as a donation quilt.
I really don’t nee to make it much bigger, but I want it to have a relatively cohesive design without me spending 50 hours on it.
In February, I worked on some more Spiky 16 patch quilts. Then I gave them to Peggy and she found someone to quilt at least one. #2 popped up as finished at the guild meeting last Saturday! Lee Ann did the basting and quilting. She did a lot of straight line quilting, which I think works really well.
There is a wobble on the edge, which surprises me. I am hoping it is the wind blowing the quilt and not my piecing!
Double Spiky 16 Patch Quilted – detail
Lee Ann sent me these photos, which included a detail. You can see the leaf like shapes in the 16 patch center as well as a little more of the straight line quilting on the border.
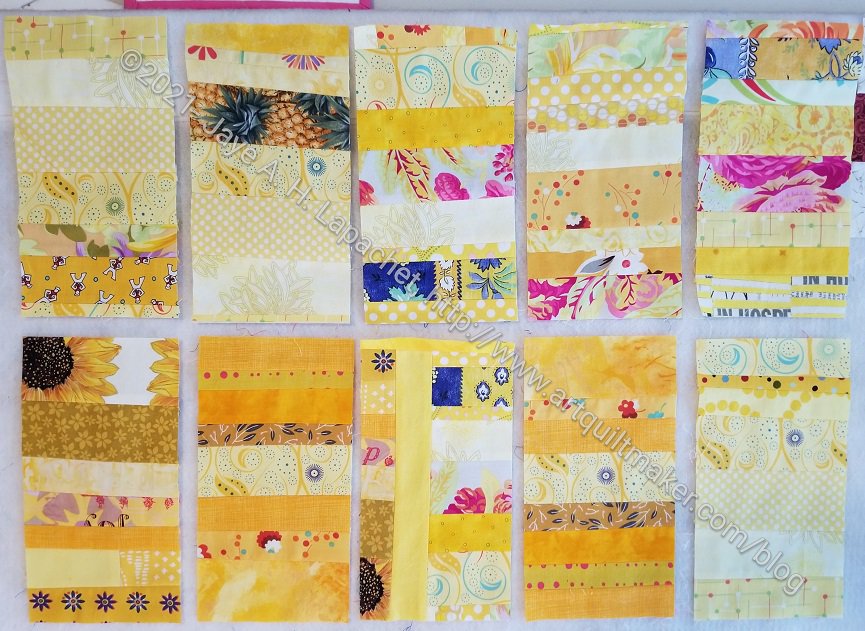
I am continuing to work on the yellow donation blocks. I talked about making another batch a few days ago. I have more progress to show you today.
They look better on my design wall than they do on the photo. Oh well.
I made one with a strip going vertically, because I had two leftover pieces that weren’t wide enough to make a block with horizontal strips. For this version, I am really trying to make all the strips oriented on the horizontal. I have a lot of small pieces of yellow, so I don’t know if it will work. I’ll make as many blocks as I can with horizontal strips, then I will start putting more chucks together into blocks.
Tim made part of a top in a Sherri Lynn Wood class. He didn’t want it hanging around anymore because he didn’t like the class and didn’t think he would finish it. I offered to finish it into a donation top for the guild and get it out of his life.
I sewed a strip Tim gave me to the right of the quilt (the strip with 4 patches). I looked for fabric that would match, but I couldn’t find anything really similar. I chose a more reddish orange and am adding various bits to the piece.
I am slowly making more of these blocks. I know it seems like I am working on very little. I seem to be really busy on things that keep my mind scurrying in a zillion different directions.
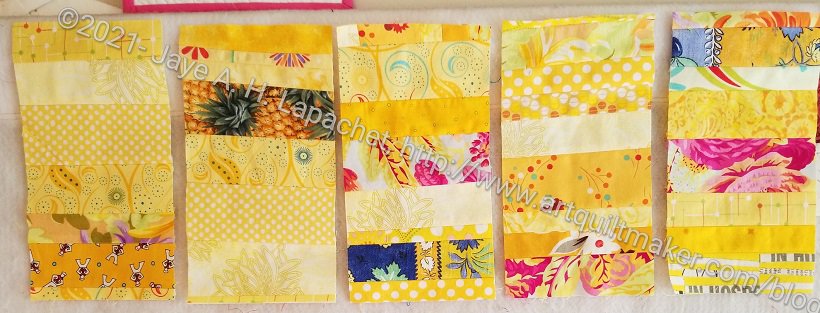
Five Yellow Donation Blocks
I wanted to make enough blocks so I could see what I had. I think I will place the blocks 5 across. I might do 6 across, but we’ll see. My plan is 5 across right now. I also won’t set the blocks this close together. My design wall is a little full right now so I don’t have the blocks placed as they would be. I also am not sure what color I will use for the sashing. Blue is the complement, but I don’t think that blue will be good for the look I want. I think white.
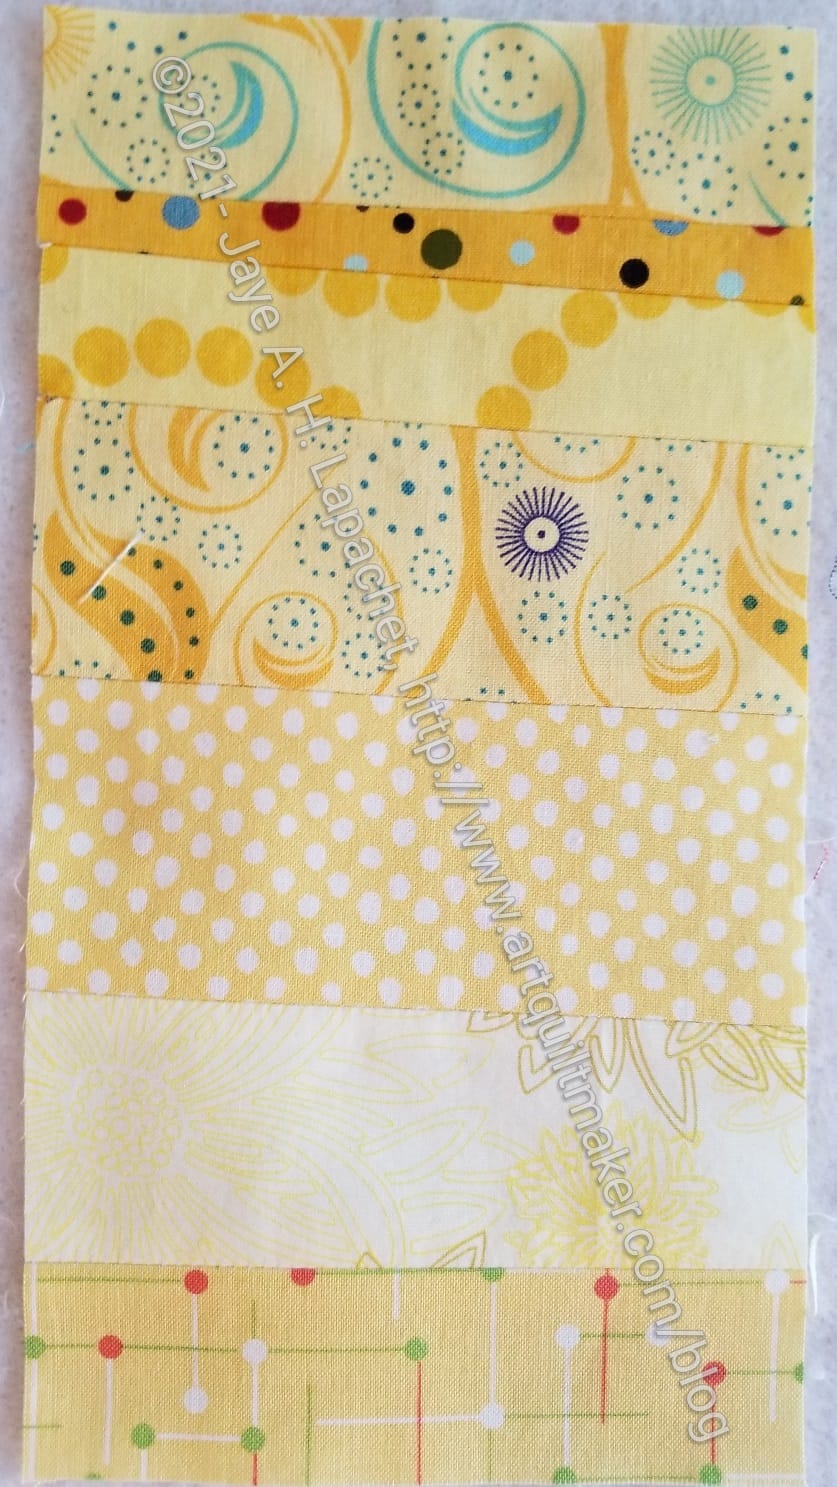
Yellow strip donation block #6
I also made one more block, so I have a total of 6 right now.
Yes, I wrote the title correctly. I have just one block to show you.
I worked to make many, many donation blocks last year. This year I feel like I am sewing a lot and not getting anything done. Am I not finishing things or what? I don’t know.
As I said, I have started some new color improv strip blocks, but I haven’t made any guild donation blocks.
I have been using other projects for leaders and enders. Do I need to get on the ball or can I take a break?
I finally needed some leaders and enders, so I started another Color Strip Donation Quilt, this time in yellow. I am, first, working on making as many blocks as I can with yellow strips. I don’t want to get into chunks if I can avoid it. I don’t know how many yellow strips I have, however. I may need to create some chunks from the non-strip scraps in order to clear away the scraps I don’t want to use right away.
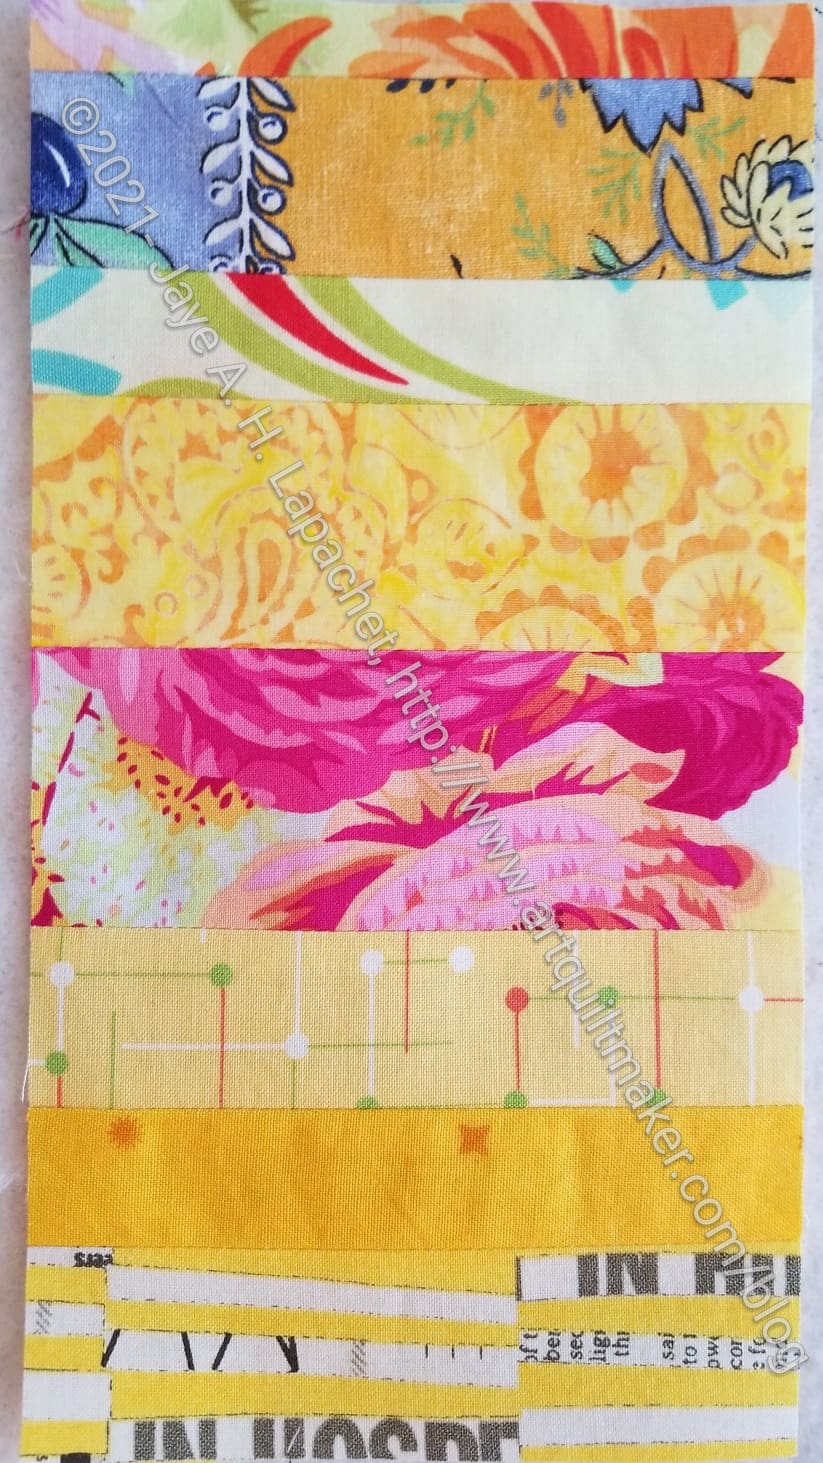
The pink in block #1 is from one of my favorite fabrics. It is, of course, a Philip Jacobs (maybe Martha Negley?) and I only have bits of it left. It was an eye watering yellow with big pink roses on it and I couldn’t help but like it.
Yellow strip donation block #2
These blocks are supposed to be yellow, but they will be mainly yellow. As in the other quilts in this series, other colors will sneak in. I think that adds more interest than dilutes the piece.
I am glad I am doing yellow, though I really should be reducing pink scraps as that drawer is full to bursting. I just have had the yellow version of this quilt on my mind and it was time.
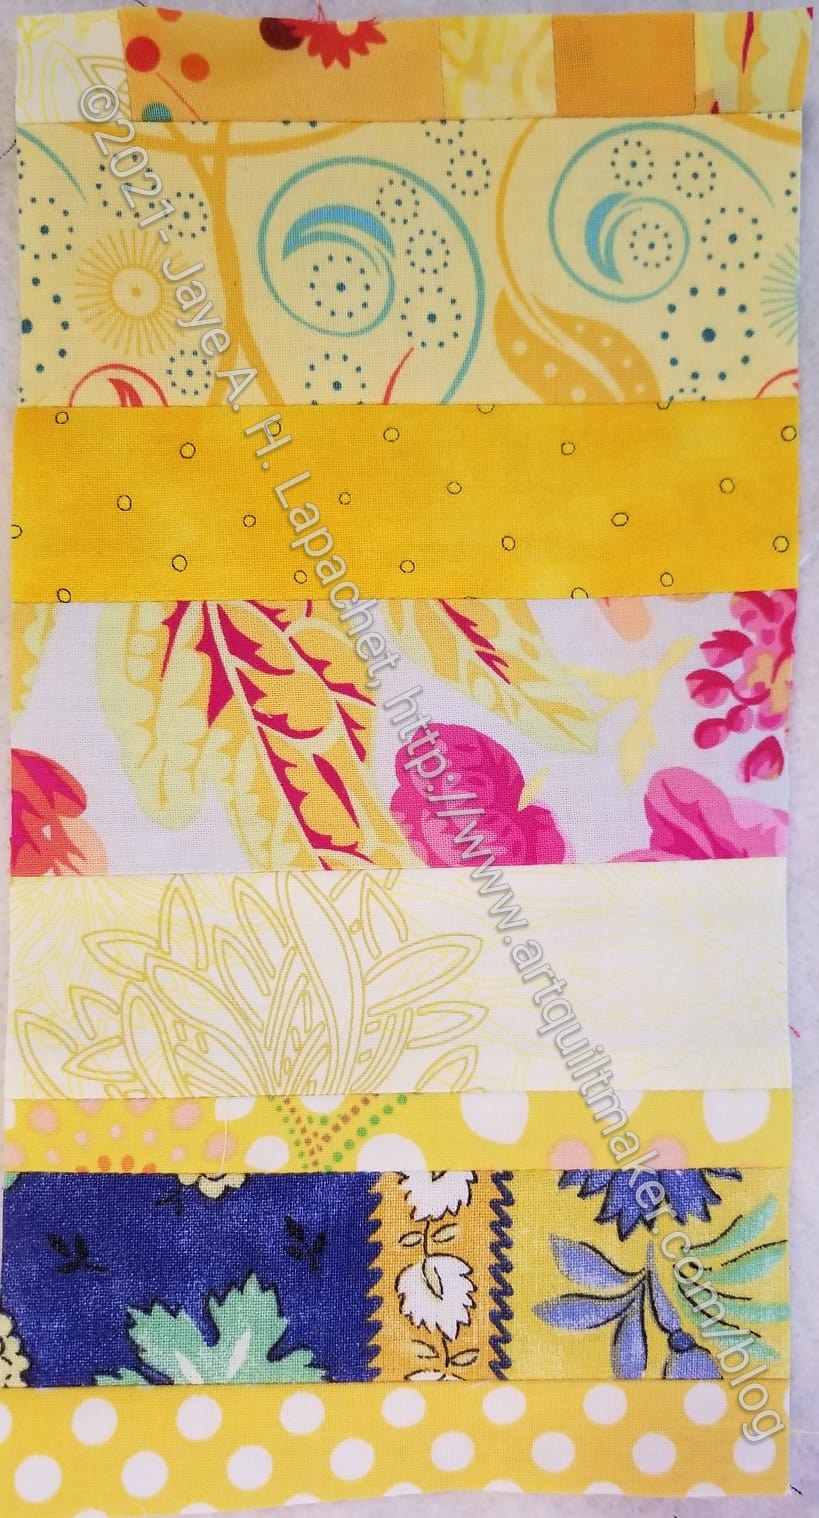
I am also glad I am doing yellow, because I am finding bits of fabrics that I love. The yellow dots at the top of block #2 is a favorite. I can’t say why it is different than other dots, but it is.
Yellow strip donation block #3
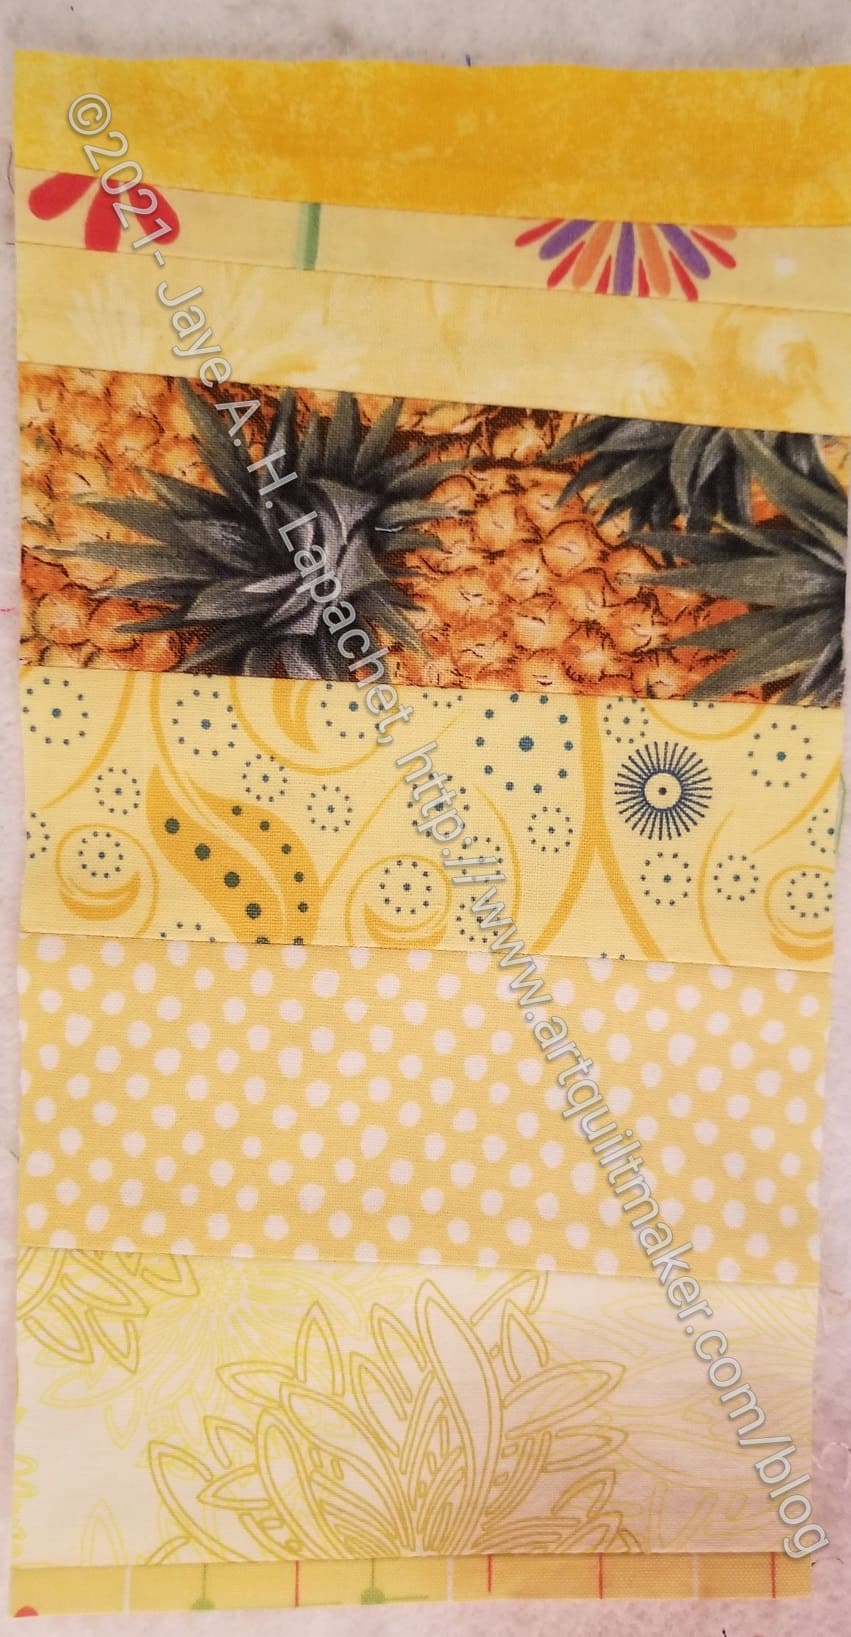
I have four blocks made and 3 others in process. I am concerned that I won’t have enough strips to make enough blocks for a whole quilt. I have two choices if that happens: 1) use the yellow blocks I have for the quilt I have planned with the extra blocks of all colors. I have a few each of red, orange, blue and black; or 2) make some blocks using chunks and combine the strips and chunks as I have in at least one quilt. I don’t know why I am so adverse to that right now. Perhaps I know something intuitively about that design that isn’t readily apparent right now.
Yellow strip donation block #4
I always struggle through the first few blocks. I start making several at a time and it always seems like nothing is happening. Then, all of a sudden, block after block is finished. I have four finished now I am can see a burst of sunshine appearing on my small design wall. I am really excited about how these will work out.
During the tutorial session on Saturday during Sew Day for the Ultimate Carry All Bag, Lynette showed how to complete the front panel. I had tried and messed it up. Don’t worry, though, I will write a tutorial for this step now that I know how to make it to post here later.
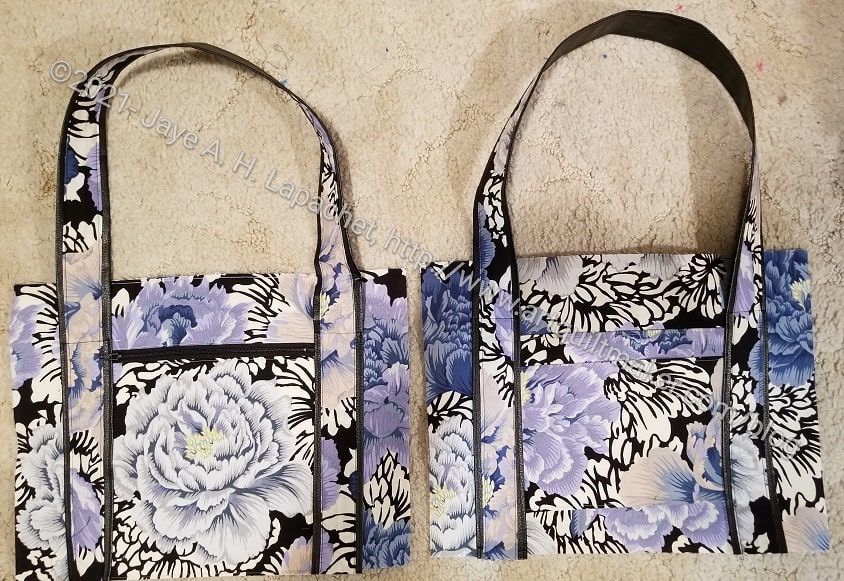
UCAB front and back panels
Lynette went further than I had planned. I had planned on just doing the front zipper pocket, which I talked about the other day. She showed us how to complete that pocket, plus apply the pocket to the front, add handles and make the back panel with handles. I am really glad as it makes the tutorials move along faster and I have to create fewer. I am not afraid; the work just takes time.
One thing that came out is one piece was missing from the list on the pattern of pieces we needed for this step. On part 2, pg.16, you need to add L6, an 8×8 lining piece, to the list of pieces you’ll need. This pattern would improve significantly if the designer went through and numbered all the pieces. I know you know that we did that at the beginning, but you can’t number pieces in the pattern that aren’t listed.
One thing I did was use the handles I made for the All Rolled Up Tote, which I ended up not using for that project. I decided that those handles would work for this bag even though they are a little wider than called for in the pattern. One side, which you can see in the other blog post, is pleather and the side you can see above is the accent piece I sewed from Philip Jacobs Brocade Peony fabric to cover the pleather seam.
I had to unsew and redo the back luggage sleeve because I forgot to put SF101 on the back. I thought it would be ok, but decided it was too flimsy. I am much happier now that I redid it, though unsewing takes awhile.
Finally, this project is starting to look like something. With the back and front panels finished, I can see the end of the road in the distance. In some part of my brain, I feel like I am wasting time when I am working on this project. I feel like I could be working on better projects. In another part of my brain, I tell myself that I am making progress, this bag will use up some fabric in my palette, etc. It is so weird. I just think this project has been hanging around for longer than I like and I want to be done with it.
I have to remind myself that one of the reasons we started this was to encourage people to make bags and show them they could do it. Perhaps we didn’t choose wisely with this weird and difficult bag. Fortunately, it will be a useful bag. I don’t know if people will be encouraged to make other bags or be daunted.
We had another tutorial session on Saturday during Sew Day for the Ultimate Carry All Bag. This time Lynette was the teacher. I was relieved not to have to do the tutorial, because I was confused about how to complete the front zipper pocket. I had tried and messed it up. I hadn’t quite given up, but had put it off for awhile.
The directions seemed to be more complicated than necessary, but once Lynette discussed the steps, I was able to follow. The key is that L7 is sewn to the rest of the zipper panel by top stitching the top part of the zipper. you sew around the outside of the whole panel eventually, but this top stitching is such a weird instruction. I have never seen that type of instruction before.
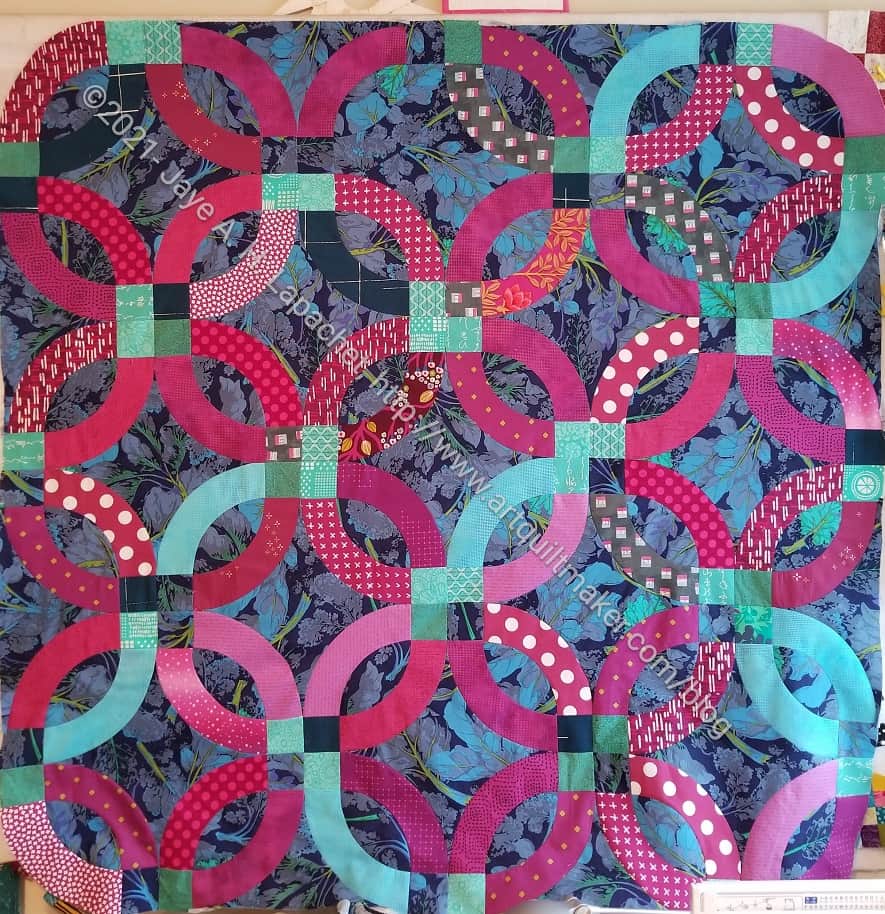
I finished the Rings top over the weekend. Yay! I also started on the back. It is small enough, so it shouldn’t take long and then I can get it ready to be quilted.
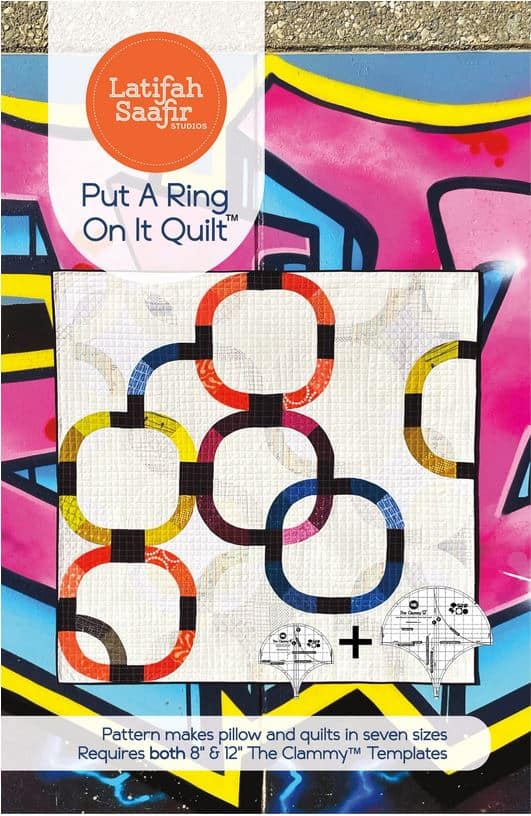
Even though I can teach a vast number of quiltmaking skills, I don’t know everything. The guild hosted Latifah Saafir on Saturday via Zoom to teach us her pattern, Put a Ring on It*.
This pattern uses two of Latifah’s Clammies, the 12 inch** and the 8 inch**. I was super pleased to receive these as gifts between my birthday and Christmas.
The pattern is fairly complete and pretty easy to follow. The class was worthwhile, because Latifah gave us tricks and tips and helped us troubleshoot. The Clammy tool and the pattern really make this, essentially a Double Wedding Ring, pattern accessible to almost anyone. Obviously, I wouldn’t suggest it as a first quilt or if you haven’t tried curves, but otherwise, you can do it.
Martha Negley Vegetables
We had to select fabrics and cut pieces before class. I used an older Martha Negley fabric for the background. The background isn’t very much of the quilt. I wanted something different after looking at all the various versions of this quilt plus other DWR versions online. I didn’t want to make the traditional light background. I also didn’t want to copy the version on the cover. I thought of text prints for the rings, but defaulted back to my Frolic! color scheme with a variety of red-violets and the dark blue.
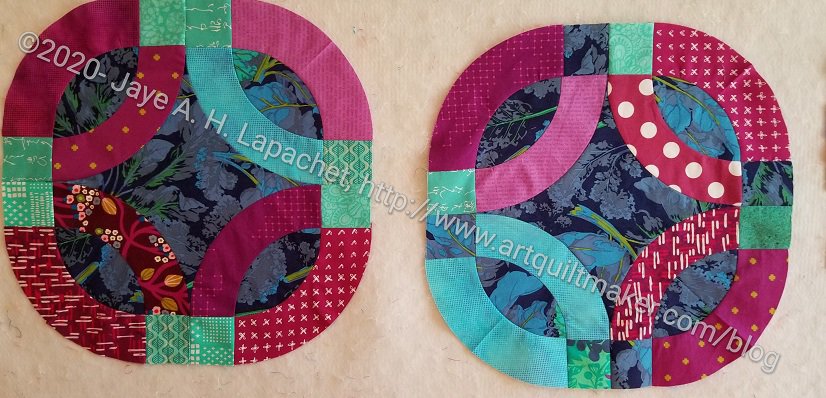
Two Rings Finished
During class I was able to finish two rings. I wasn’t pleased with the green I chose for the squares. That was one good thing about being at home. I was able to grab some other fabrics and switch them out. I’ll mix up the rings so the green doesn’t look like big green blobs in the center of the quilt.
I am making a 9 block (1 ring=1 block) quilt. It will be about 48 inches x 48 inches. I didn’t want to commit to something larger and even this number of blocks is feeling like too much. I am going to power through. If I can get a ring a day done this week, I can finish all the ‘blocks’ by the end of the week and be ready to put the quilt together at the weekend. I don’t want this to become a UFO. I want to get it down and ready for quilting.
What I really wanted out of this class was to learn to use the Clammy rulers. I think I have started on that process, but didn’t get very far. This class was all about the Put a Ring On It pattern and making that. Learning various Clammy techniques was not on the agenda. That was sad. I hope Latifah comes up with a Clammy Sampler class. I get the sense that this tool is an awesome method for making circles in quiltmaking.
*No affiliation. Both a PDF and print pattern are available. I got the printed pattern and really liked the format.
**I use affiliate links and may be paid for your purchase of an item when you click on an item link in my post. There is no additional cost to you for clicking or purchasing items I recommend. I appreciate your clicks and purchases as it helps support this blog.
I finally sat down on Friday afternoon and worked to finish this top. I really wanted to get it ready for quilting and it had been hanging around for too long. I am pleased with how it came out and look forward to seeing how it gets quilted.
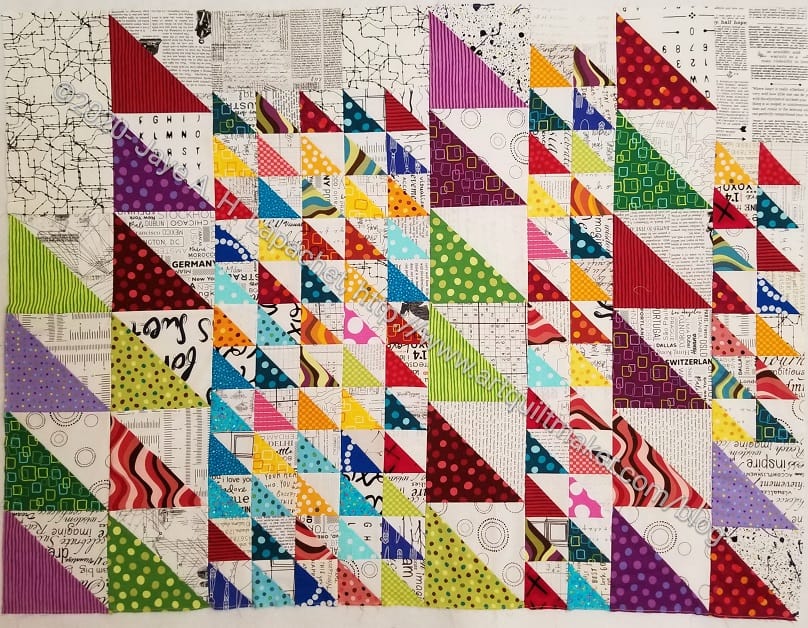
HST Donation Back
I am going to show it to Tim, then send it on to another guild member for quilting.
I tried to use as much of the Pop Parade fabric for the back as I could.