I am trying to relate the blocks together. Hopefully, you will be able to see the relationships as I post them.
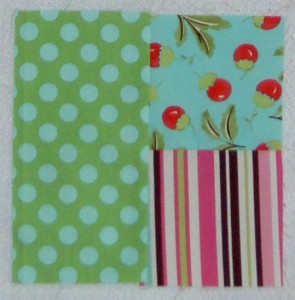
The Rectangle Four Patch #2 is also not difficult. This block is suitable for 3 different fabrics.
Commentary about works in progress, design & creativity
I am trying to relate the blocks together. Hopefully, you will be able to see the relationships as I post them.

The Rectangle Four Patch #2 is also not difficult. This block is suitable for 3 different fabrics.
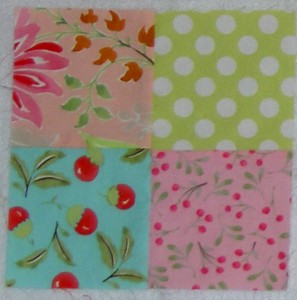
Ta-DA!
Here is the first block for the Block-a-Long. Four Patch #1 is an easy pattern – just 4 pieces. You can use four different fabrics, as I did or you can two. Select and place your fabrics according to any means your heart desires.
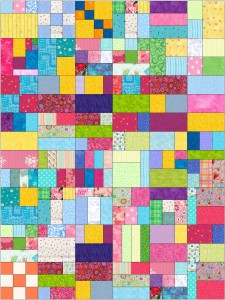
I finally decided that I would commit to posting block designs and instructions so we could do a Block-a-Long. What is a Block-a-Long? It is a project to make blocks. Hopefully, they will turn into a quilt, but that is a project for another day.
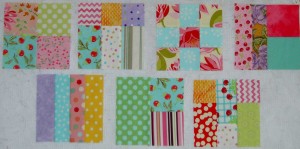
The blocks pictured are some of the blocks that we will be doing. Each block is 6″ finished. I have designed 40 blocks so far. All of them, so far, are straight line sewing – squares and rectangles. There won’t be any curves in the project, but there may be some triangles.
I don’t plan to give you step by step instructions on how to put a block together, though in the blog post, I may give you some tips and tricks to help you along.
The directions will be from EQ7 and will include a picture of the block, what pieces to cut to make the block and that’s it. Of course, if you have questions, you can leave them in the comment field.
First task: go and choose your fabric. Choose some colors that you enjoy. Select a fat quarter pack you have been saving. Choose a theme such as dots or stripes. Go buy yourself some new fabric (FabricWorm has some great fat quarter and half yard packs that they have put together). Use some color combinations that you have always wanted to try.
I’ll wait about a week for you to gather your fabrics.
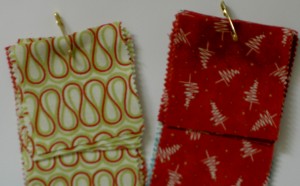
I selected my fabric a couple of months ago when TFQ was visiting. I am hoping to use each fabric 3 times in the quilt.
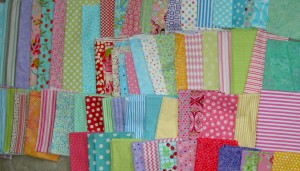
Yes, there are a lot of fabrics in my group. I want my quilt to be really scrappy. You don’t need to have this many. You can always add more later. This is a great project for scraps, so you could just pull fabrics out of your scrap bin. A two color quilt will work well, too, I think, though you may want to use different fabrics of the same colors
I know you have seen the blocks below before. These are some of the first blocks you will be doing. The point is not to make you miserable by posting difficult blocks to struggle through, but to have a little fun and, perhaps, work with color. Have fun!
I felt a bit of freedom in my sewing today. I finished the Blue Janus back yesterday (have to write about that, yes) and didn’t have anything pressing to work on. That left me to see how I felt and work on what I felt like.
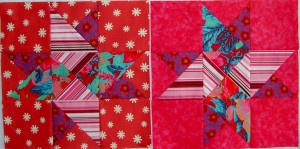
I sewed two more test blocks for the Frosted Star pattern. My pattern is much easier to follow and trimming the segments before sewing the block together works really well. I used a mostly monochromatic color scheme for these latest blocks so I can also donate them to the Rainbow project. I couldn’t resist using a bit of one of my Philip Jacob prints.
I think I need to test the 9″ pattern rather than the 12″, because the 12″ is just too big and the 9″ is what I would use in the quilt. I am thinking that I won’t make this quilt even though I like it a lot.
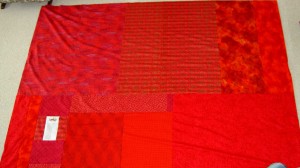
I felt compelled to make a back, so now the back for It’s a Merry & Bright Wrap is finished. This back was less arduous than the one for the Blue Janus quilt. Quite simply, it was much smaller. I also made a big effort to use very large pieces of fabric. Rather than days, it was only a few hours in progress. I am happy that it is done, though I don’t have plans to quilt it yet. I’ll have to see about that.
Making the above back gets me farther along in the various finishing tasks I have to do. I still need to make the sleeves for FOTY 2009 and the Chocolate Box as well as the facing for the Chocolate Box.
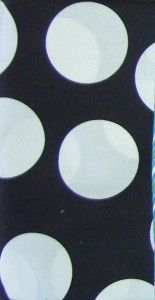
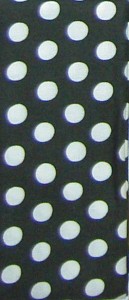
I don’t know what is next on the list, but am thinking a tote bag is in order. I have this new black and white fabric that is demanding my attention. Half Moon by Moda will be the bag body with possibly a pink inside.
The Kaffe Fassett dot attracted my attention for handles (I think I may be in a monochromatic phase right now). GAQF only had a fat quarter, but I found a half yard in my fabric closet, which will be enough for the handles. I like the combination of big and small dots.
I am thinking I will use the AMH Multi-tasker tote pattern again even though it isn’t exactly the bag I want. I’ll peruse my other bag patterns first. I do know how to make the AMH MTT and it is a pretty good bag pattern.
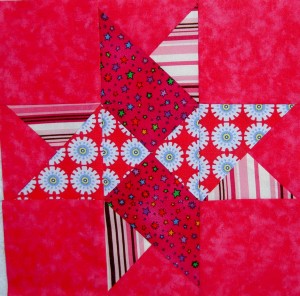
Since I am thinking about going out and actually buying special fabric for a project, I thought it might be a good idea to test the pattern to see if I liked it. Since I finished the top and back of the Blue Janus quilt this morning, I thought it was something that I could manage.
I dug out the directions and went to work. I can’t say I was enamored with the directions from the Moda Bakeshop. It really too me a long time to make one block and I had to follow the directions step by step, because there weren’t cutting directions for one whole block at the beginning of the section where the star starts.
I redrew the block in EQ7 just to see what it would take to make some straightforward cutting directions. I can see why Charlie Scott used some fancy triangle tricks. I created rotary cutting directions in 12″ and 9″ (both finished) sizes. These blocks use quarter square triangles and the triangles need to be cut weird sizes, which I know nobody likes. Still, my directions are a lot more straightforward than those on the Moda Bakeshop page. You can cut the quarter square triangles slightly larger and then cut them down to the normal size. I hope you will be able to click on the numbers above and download the rotary cutting directions.
I am going to make another one using my directions and let you know what happens. I am not knocking Charlie Scott. I love the free patterns out there and have a really difficult time following them. I will probably put some borders on the one above and send it to Anna Maria Horner for the Rainbow project.
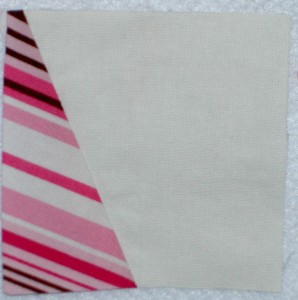
I have written a lot about the Corner Store pattern from Pretty Little Mini Quilts. This block is very appealing especially since I have been thinking about my scrap pile lately. I bought a large piece of Kona Snow and finally cut into it for the Zig Zaggy quilt and for this Corner Store project. I didn’t cut a multitude of pieces in advance (always a recipe for disaster for me), but I did cut some.
You are probably wondering why in the world I am starting this quilt at the same time I started the Zig Zaggy quilt and am still working on the Blue Janus quilt. Insanity? Perhaps.
The true reason is that the box in which I store the triangles for this project is getting full. Also, I thought I would make a few blocks and see how they looked.
My first step was to ask TFQ for the dimensions. She has the Pretty Little Mini Quilts book at the moment. She emailed me back right away with a 3.5″ size. When I cut a few of the squares I thought that looked terribly small. When I put one triangle on, the block did not look at all like the version I saw in Pretty Little Mini Quilts or on Flickr. I must have misunderstood the size. Again, something that should have been a quick chain piecing and trimming start to a project has turned difficult.
Difficult is a strong word. I have to test different squares sizes to see which one will suit the look I am trying to achieve. I wanted to focus on the Blue Janus quilt, so this was put to the side.
Stay tuned!
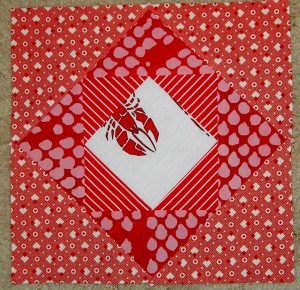
You might remember that there was some devastating flooding in Central Tennessee earlier this year. This is Anna Maria Horner’s neighborhood. She created a project, which I talked about on Thursday, called Rainbow Around the Block. Simply, she is collecting 12.5″ unfinished 2 color blocks (e.g. red and white, blue and orange, etc). These blocks will be made into quilts and given to families who lost their homes, belongings, etc.
Last week, she sat down with her children and designed blocks. I think this is a very nice idea. I can picture the children drawing and coloring and talking with their mom about helping these neighborhood families. We have these kind of times in my family where the lull of filling in a spot with color without the distraction of screen noise helps to free the mind from the mind’s monkey chatter and allows people to bring up interesting conversation topics.
She intends to post a version of each child’s work on the Rainbow Around the Block page as a group called The Horner Family Blocks. The first one, The Joseph Block, is up already. It is a simplified version of a Square in a Square block and simple directions are given for sewing it together. I am concerned about the way she suggests cutting a square into the quarters that the quiltmakers will have a lot of bias blocks to work with. Perhaps that is part of the plan? In any case, you can make any block you wish and a variety are already posted for your viewing pleasure in the Flickr Group.
I made two blocks. I don’t normally make 12×12″ (finished blocks) and the pieces seemed so large. I just made them, though, without questioning or quibbling. The first deadline is July 1. Close to 100 blocks have been posted to the Rainbow Around the Block Flickr Group. People have really taken the idea of letting the fabric do the work, that I talked about from the Jane Sassaman lecture, to heart. I guess they got the message sooner than I did!
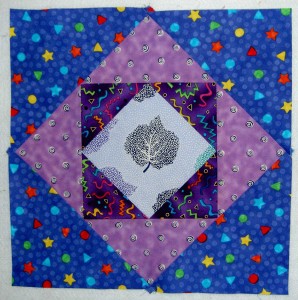
What will YOU make?
|
Rachel Griffith, the power house behind p.s. i quilt has shop with the whole kit available. I have never bought a kit before aqnd am sorely tempted.
Ready for another ride that weaves in and out of the Internet and my mind?
Books, etc
I ran across the notice for Jane Brocket’s quilt book. I stopped reading her blog awhile ago, but was pointed to a link about ribbon, which I have on the mind lately.
A quote from the book via Amazon.co.uk:
“One of the great pleasures of doing anything repetitive by hand, whether it’s knitting, making bread, chopping onions or sowing seeds, is that the rhythm of the action allows your mind to wander.”
I bought this book. The US edition has come out, but I decided to buy the UK edition. I don’t mind those extra ‘u’ added her and there. There is nothing wrong with the US edition. I was pleased to see that the US edition came out relatively quickly after the UK edition debuted.
I bought the UK edition of the Gentle Art of Domesticity and was pleased with the service I received from the Book Depository, so I made my purchase from them again. The cover of the UK edition looks so much better. One fascinating thing about the Book Depository (which LoveAnna turned me on to) is that they have something like a live webcam where you see what books people are buying and where those buyers are from. It is mesmerizing to see people ordering so many books so quickly. I actually saw someone’s purchase of Cello: Grades 1-3 from China!
Embellishments
Anyway, back to ribbon. Somewhere I saw a link to ribbon. I looked at it, which led me to Jane Brocket’s blog, the new book – see above. The ribbon, though was gorgeous. So wonderful for embellishing bags and making markers for journals. LFN Textiles is the purveyor and the website has gorgeous photos. And they have dotted ribbons. What’s not to like?
Pam Rubert of PamDora blog fame recently tweeted a link to Sharon B’s Dictionary of Stitches for Hand Embroidery and Needlework. She has an index on the first page. If you click on one of the links, you see a picture of the finished stitch and where this stitch can be found. She shows step outs of the stitch and gives the reader tips and tricks. If you are browsing, there is a previous/next link at the top of the stitch screen, so that you can just click to another stitch without returning to the index. There are lots of great features of this site and it is great inspiration if you are using handstitching to embellish a quilt.
Journals
If you remember my fit of excitement over the 1000 Journals Project, this information will come as no surprise to you. I found the Artbook Coop via Julie and they are doing a sketchbook project. You can order (and pay for) a sketchbook, which will then be housed in a museum. I am not sure I could finish something like this, but my mind is swirling around it.
Blocks
Brenda Papadakis of Dear Jane fame has a series of block of the month blocks posted on her website for free. It looks like there is an applique’/embroidery block and a pieced block every month.
Media
Last week I had a virus that hit me hard. One day while I was thinking about going back to bed, I stumbled on a blog called Waking Up in Bavaria. It has a really nice clean look and beautiful photography. One of her recent posts is a review of Kaffe Fassett’s Simple Shapes, Spectacular Quilts. It is hard to read a blog from the beginning when you are years behind. Still I read a bit of her posts from last year and my mind spun into imagination land. I spent a formidable time in my life in that area of the world, though in Austria, not Bavaria, so the landscape is familiar. I also like the clean, spare look of her blog. My mind started to wander around the question of what if I woke up in Bavaria tomorrow?
If you need to organize your studio/workroom, the Quilted Cupcake has a podcast and a long blog post with a lot of resources and pictures of her space. QNN TV also has a segment on organization. The January episodes, segments 1&2, 3&4 take on the topic of organizing your studio from different angles. You have to be a member to watch the videos.
I signed up for QNN TV last year and hadn’t really watched the videos. Last week, while I was sick, I was clearing out my email. Some of the messages in there were notices about new QNN TV episodes being posted. Being fit only to lay in bed, I started watching them. I thought they were very entertaining. They have some cooking segments, which I skipped over, but I enjoyed the episode on specialty threads (January episode, Segments 5&6). They have two kinds of links to the shows. Each episode is broken into about 6 segments and two segments are posted each week. This means that you can watch the different segments or watch the whole episode. I have been watching them in segments.
The January episode takes place in Winterset, Iowa, partially at the Fons & Porter store. They also show the Bridges of Madison County, the county in which Winterset is located. I didn’t know that Fons & Porter had a store, so this was interesting to me. I wish they would have done a tour of the store, but they didn’t.
I really enjoyed the November episode. Jodie Davis hosts with Patrick Lose and they report from Houston Quilt Market. They talk about new products and interview people at the show. I was entertained. I think this was shot while Mark was working out the details of his contract with QNN TV. I thought it would be weird, but Jodie Davis handled his not being there with grace. She made it seem like he would be back soon.
I also enjoyed the February Door Knock episode where Mark interviews Liz Porter. It is great to see that she is real and has a real life. I went away from that interview with a lot more respect for her and what she has achieved.
I wasn’t planning to renew my membership, but I may do it. I will definitely watch the episodes as they come out rather than waiting until my inbox is too full before I get to them.
The Alliance for American Quilts had a contest recently called New From Old. They have posted a series of YouTube videos documenting the quilt entries as they arrive. I thought that was very clever! One of them was by Marie Johansen who sometimes reads this blog. I was pleased to see that Yvonne Porcella entered a quilt, which must mean that she is feeling better. There were a number of Dresden Plate entries and two that could be considered Baltimore Album style. Sunbonnet Sue, Grandmother’s Flower Garden and Grandmother’s Fan also made debuts. Some people put a lot of work into their entries and it occurred to me that throwing something together just to enter wouldn’t work for this contest. Then again, it doesn’t usually work for any contest.
If you ever feel like the quilts or ATCs or blocks or paintings you are making are not fit for the fireplace, take a look at the Bad Postcards site. Looking at the works on this site should a) give you a laugh; b) make you feel better about your own work; and c) make you wonder who ever thought it was a good idea to make matching apron, tablecloth and curtains (you’ll have to scroll down the site to get that one). As a bonus for you fabric lovers, there are some interesting fabrics shown in various postcards. It makes me wonder whether people will be laughing about the photos on this blog in 50 years?
Do artists go under Media or Out and About? I don’t know, so here is Michael Cutlip. Mostly I love his website and the way the gallery is laid out. He is the artist who did the picture in the Decor House, which I wrote about in a post a few weeks ago. The picture I took is crappy, but his work is not, so don’t judge him on my photo.
Out and About
You might have heard (or maybe read it here) that the V&A in London has a quilt exhibit up. They have also just announced the release of a second set of patterns, V&A Pattern Series II. “Like the first box set—which included four books arranged by theme and titled William Morris, Indian Florals, Digital Pioneers, and The Fifties—the second series features four books available individually or as a group: Owen Jones, Novelty Patterns, Kimonos, and Garden Florals. In addition to page after page of color images of the textile designs, each hardcover book includes a CD of hi-res images of the featured patterns.”
Being here in the US, it is hard to get to the exhibit, though I am hoping for some kind of miracle (you know free first class tickets, or something), but until then I have been looking at the videos. My favorite so far is the one with Caren Garfen, which I looked at with TFQ. Her quilt is given a bit of short shrift int he book, but this video makes up for it. I wish it were downloadable to iTunes, so I could look at it again without being tethered to my computer.
My sister gets various creative “notions” in her head and her latest is organza flowers. She saw some she loved at Nordstrom. She said that you sew strips of fabric in a circle to a base down the middle of the strip. Have you ever done this? I may try it.
Kaffe Fassett and Liza Prior Lucy are having a blog tour. There are a lot of new and interesting blogs to look at.
My friend, Kathy, from Everyday Bliss, has a new blog called Everyday Mommy. It is new so I can’t tell you exactly how it turns out, but Kathy writes “Do you want to be a marvelous parent or just like watching others try? Join Everyday Mommy for a wacky and fun experiment! Each week we will delve into one of the parenting virtues, have some fun and hopefully become better parents in the process!” It is fun to watch my friend delve into cyberspace. I know that sounds strange since the web is not new. Before blogs I couldn’t tell how many emails people were sending or what websites they were going to. With all of the cross linking and comments, as well as FB, it is much easier.
Deirdre sent me a link to Woody Campbell’s Photo a Day blog. His photos are a bit large. Still, I like the photo of the refrigerator. I like the idea of documenting normal every day things. I don’t always do it, but I think about it. I read about a guy who took a photo of the same building across the street from his shop every day at the same time for something like 30 years. Do you ever do anything like that? I thought about it when I took a picture out the window of my workroom, but then I never followed up. I suppose it isn’t too late!
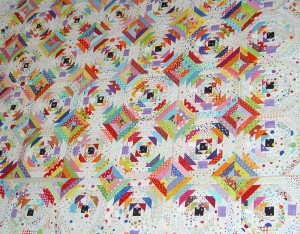
The Pineapple has been on my mind lately. I took TFQ’s visit as an opportunity to get a new perspective. I laid the blocks out in the living room and we looked at them and talked about them.
One of the problems is that some of the blocks are too big. I couldn’t figure out why some were so much bigger than they were supposed to be until I was fiddling with these blocks on Monday. I caught a glimpse of the black block in the middle and realized that I cut some of the center blocks slightly larger than they should have been.
My idea was to trim the blocks and make them a little wonky. No, they won’t match up perfectly, but the way they are now; they won’t match up anyway. After my discussion with TFQ, I think I will trim the blocks straight and see how it goes. Worse case scenario: they don’t fit together.
TFQ made no promises that this would work. Sometimes, as I have mentioned, it is just good to talk over the process. I like these blocks. I like the cheerful look of the piece. If it doesn’t work as a quilt; I will have a lot of really cheerful pillows.
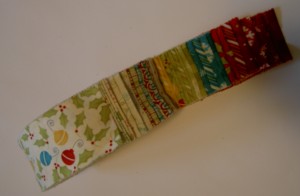
As I mentioned the other day, I enjoyed the Jelly Roll, because I was able to work with a wide variety of coordinating fabrics. I think my favorite in this set, though I do like them all, are the pieces with holly and ornaments. I also liked the diagonal striped fabrics as well.
Aside from the grain problems, the Jelly Rolls provide a quick start for a quilt. I am not saying that this quilt is quick since you haven’t seen the finished piece yet! I don’t really believe in the concept of quick quilts/Quilt in a Day for myself. I think process is important and I think that quilts take longer than a day. Why do you think I make receiving blankets as baby gifts?
I have worked with my child a lot on learning styles, and strategies for successful learning. I have learned a lot from his teachers and the other professionals that work with him about learning styles, which has made me examine my own style of learning. I know that I learn best by someone showing me what to do and then doing it myself. I also learn okay from looking at pictures/diagrams. I don’t learn well by reading instructions. This is probably one reason why I don’t use a lot of patterns. It takes me too long to decipher them.
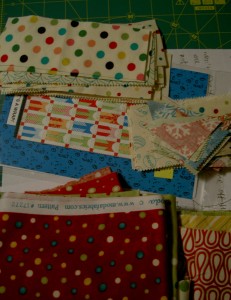
First, I sorted the strips into sets of two. I decided which strips I wanted to be in the same block as package and bow.
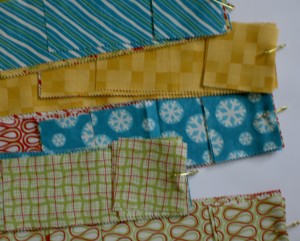
I cut pieces, as designated by the pattern, from the Jelly Roll strips and then I needed a way to keep them together. I don’t have the clips that Fons & Porter use, so I used my machine quilting safety pins. They are pretty sharp so they went through 4 squares, 3 rectangles and two strips pretty well.
I had large pieces of leftover strips and I couldn’t figure out what I was doing wrong. I went back to the directions and, finally, figured out that I needed to cut more bow and package pieces. From each strip needed to be cut enough pieces for a bow and a package.
I did that extra cutting (more TV watching!) and then rearranged the new strips so that they had different mates for the second round of strips.
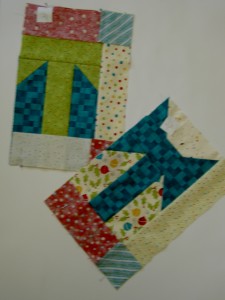
One step in the process is to put the bow together. This step involves triangles, but uses the square-into-triangle method to create the triangles at the top of the package.
The directions show the following:
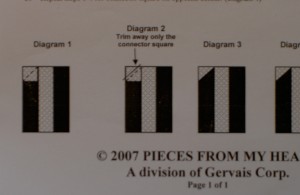
I think it is pretty hard to show this step in directions, especially for someone, like me, who doesn’t use a lot of patterns. I don’t know all the conventions that have been established.
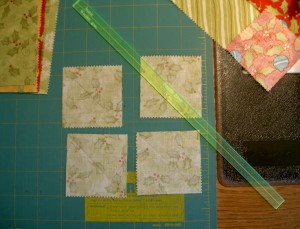
First, I marked all the squares so I would know where to sew. This was part of the meditation of this quilt that I alluded to in the previous Jelly Roll post. This kind of step can really get on my nerves. I didn’t let it; I just sat there with my pencil and ruler and drew lines. I didn’t mark all of the squares at once, but did them in little batches as I needed them.
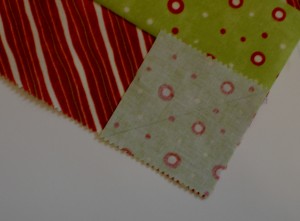
One thing the directions do not show is that the square will overlap the middle rectangle when you lay it out to make the bow. The directions above show that the square fits exactly over the outside package rectangle. I worry about this kind of thing, because I expect directions to be accurate. Now, I don’t know the limitations of creating drawings in a pattern (on my list to find out about!), but words can certainly be included to explain that layout information. This is not a criticism, just an observation based on my style of working with patterns.
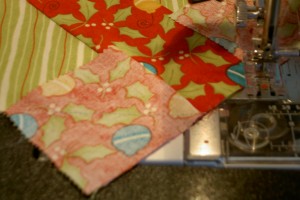
In real life, above is how the directions say to add the triangles to the corners of the package part of the block to make the bottom of the bow. TFQ and I talked about this strategy when I first bought the pattern. I think this technique makes it less intimidating for those afraid of bias. I was a little lazy and just did it this way.
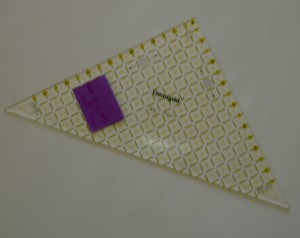
One problem I found with working with THIS pattern using a Jelly Roll is that I only had a certain amount of fabric. When I cut something wrong, I was short. This happened twice. Once with these triangle and I was able to use the Omnigrid triangle ruler to cut some triangles instead of squares, which gave me enough fabric to finish. The other time I just had to add a piece to another piece to make the strip long enough. Working through the process.
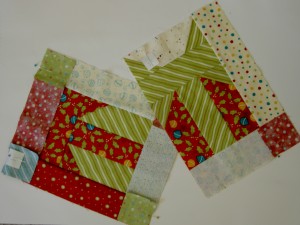
There is a lot going on in the photo above. First, even though I tried to mix up the fabrics for the second round of block making, I did keep some the same. The two above are an example of how the blocks looks when you just switch where you put the fabrics.
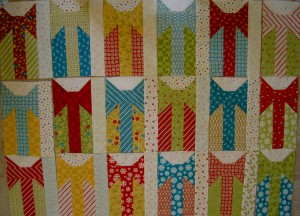
Second, I had to pick the quilt up off the floor earlier in the week where it was laid out while I pieced various bits. Since it is a scrappy quilt, I wanted to make sure that all the pieces stayed in their place. I drew a quick sketch of the block layout and then made numbers to pin to each block.
Third, not all of the sashing parts were sewed together so I sewed all the sashing squares (cornerstones) to the sashing strips and then pinned the larger pieces to the quilt blocks in such a way that I will know how to sew them when I get to that step.
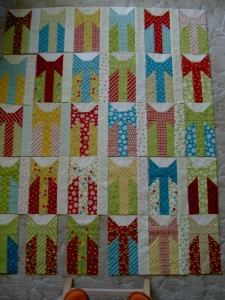
Why, you ask, were these on the floor and NOT on the design wall? Because the Tarts are still on the design wall! Why didn’t I set up the portable design wall? I don’t know; I didn’t think of it. Yes, those are my toes in my orange wool slippers and, yes, I am standing precariously (joke!) on an IKEA stool (highly recommended for their stability) to not succeed in taking a photo of the whole quilt for you.
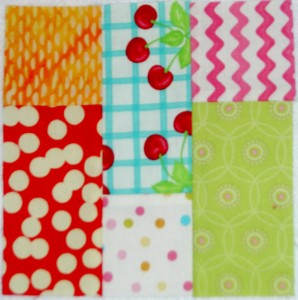
This is similar to the last block I made back in November. When I made the 3 Columns block, I wondered how it would look if I reversed one of the columns. The block to the left is the result.
I think the fabrics are a little busy, but otherwise it was a good idea. It is a simple idea.
I haven’t worked on the Sorbet quilt in a long time. The idea of a quick quilt to cleanse my sewing palette after the Tarts is working out like I thought it would.
First, the Tarts are still on my design wall calling to me. There is something else I need to do to it, but I am not sure what.
Second, as you have probably heard 1,000 times, my laptop died and along with it the notes on the quilt. The notes include all of the designs for blocks. I can easily remake them, but don’t have it in me right now.
Third, bags and pencil rolls have been demanding my attention.
Finally, I can’t find the other blocks I have made. I would really like to find them. This, partially, goes back to organization. I need a better organizational system in my workroom.
|
I talked about the selection and the resizing of this block in a post on February 16, 2009.
I spent Sunday, and a few minutes on Saturday night, finishing up the FOTY blocks so I can take them to the CQFA Retreat. When I return from sewing bliss, I hope to have the quilt top ready to show you.
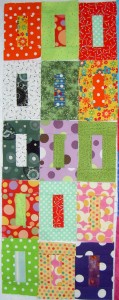
I really like the warm colors in this group. Some of the darker colors, especially the greens were given to me by my sis for my 2009 birthday.
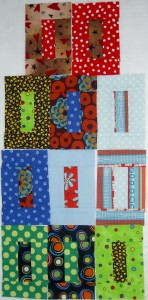
Getting down to the bottom of the pile made matching up fabrics difficult. I tend to pull out the ones I really like and press and use those first. Some (not all!) of these were my lesser favorites.
In a way the FOTY exercise helps me train my eye and mind to choose fabrics I really love and want to use right away. At the same time, it trains my eye to avoid fabrics that are not my colors. Yes, I did find fabrics that I bought that made me wonder why I bought them. Before I buy, I think I will have to not just look at the fabric next to lovely coordinating bolts. I think I need to take the potential bolt off the shelf and unroll it a little to see more of the fabric. That will make me shop slower, which can’t be a bad thing.
I pressed, cut and sewed the last fabrics on Saturday. Sunday I counted all of the blocks and consulted with DH about the layout. Not the layout in terms of color, but the layout in terms of numbers of blocks across and down. He told me I had to have an even square root number (or something). I ended up needing 14.83 blocks across the top and down the side. I don’t know what a .83 block looks like, but I knew it wasn’t going to fit evenly into my quilt.
I immediately grabbed the fabrics I received for Christmas and shoved them in the washer. Then I went to work on a pencil roll, which you can read about later in the week. When the fabrics were done, I had figured out that I needed to make 7 more blocks to come out with an even 225 (15 across by 15 down). I pick out some pairs of fabrics and sewed them together. Now I am ready to arrange the quilt and sew it together.
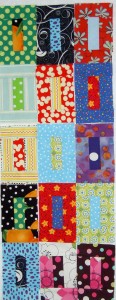
I do have one extra, which I will stick on the back.
Some of the fabrics I bought at the very end of 2009 will end up in the 2010 quilt. As the Quilt Mavs say “my quilt, my rules.”
Unrelated notes:
* I have no Internet at home at this time, so if I am a little slow responding to comments, I apologize! It makes it a challenge to get blog posts up as well!
* Remember to leave a comment in the One World One Heart post for a chance to win!
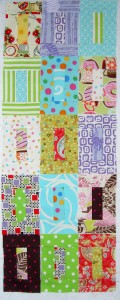
I am slowly getting a bit of the FOTY blocks done in between the Christmas gifts. I am branching out a bit as well and not putting same color with same color all he time. For some of the color combinations it just didn’t look right. Not sure how I will handle that choice when I start putting together the whole quilt, but I am sure that it will work out one way or another.
Cutting FOTY strips and putting blocks together is my main project for next week