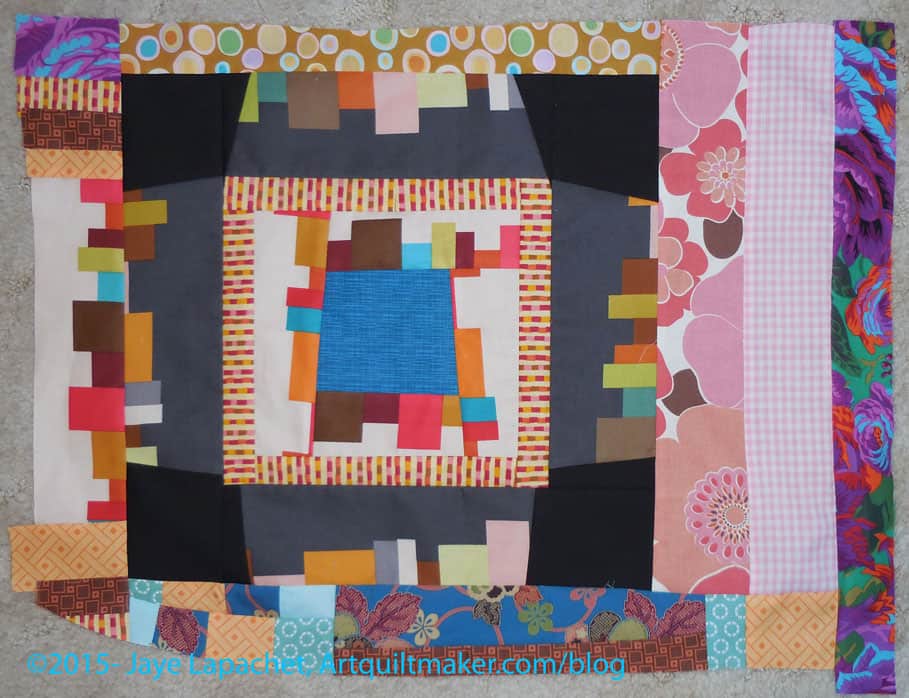
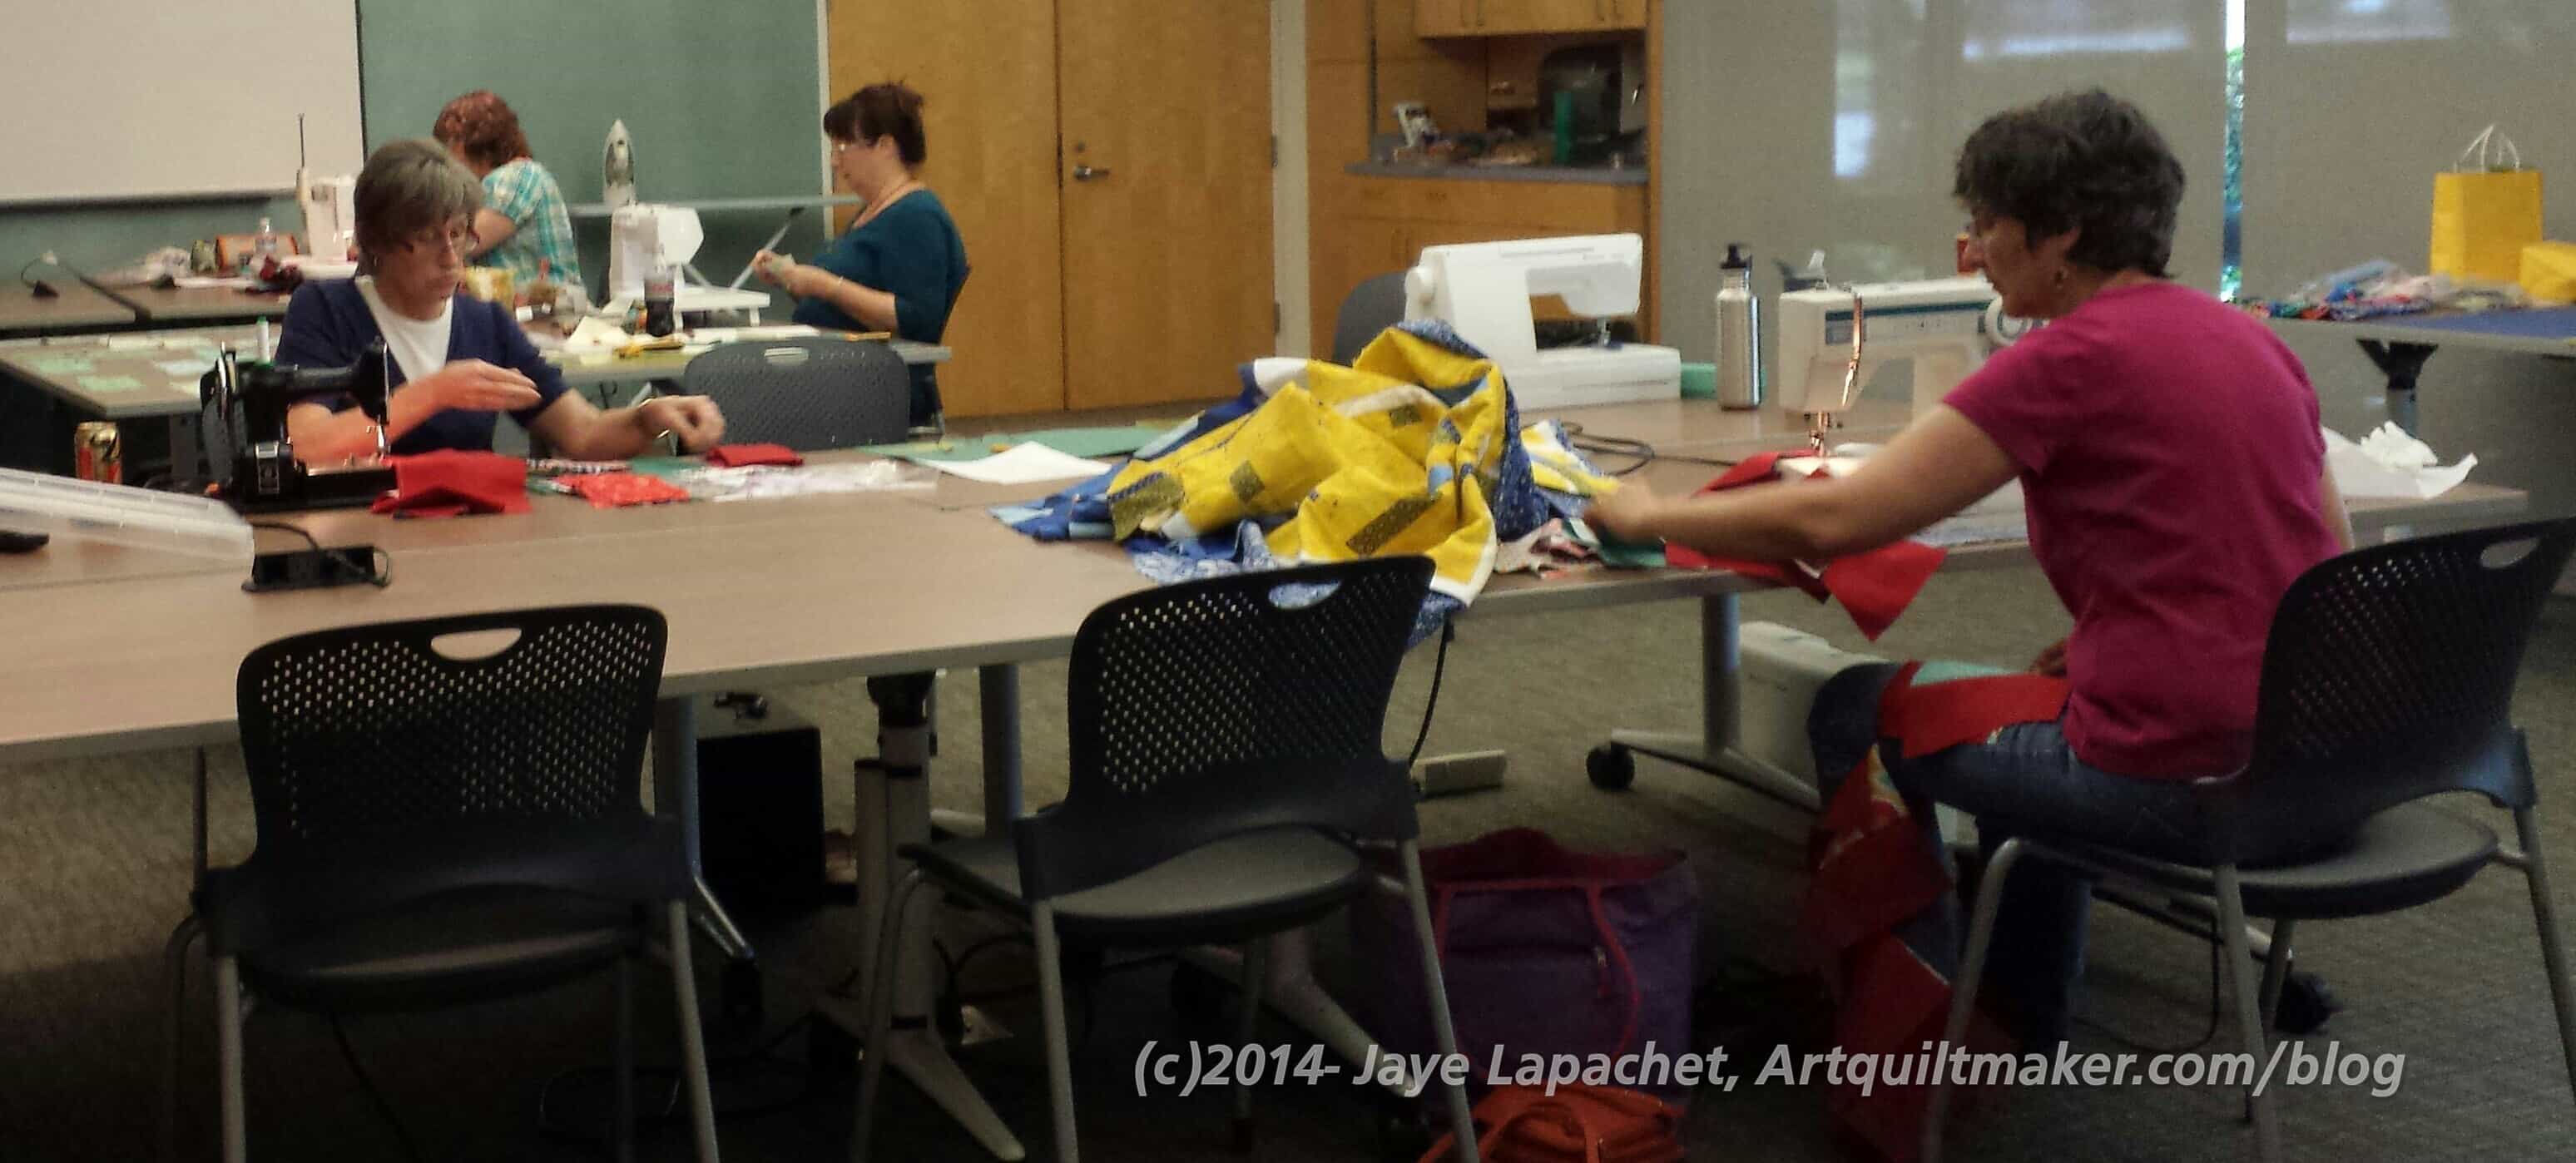
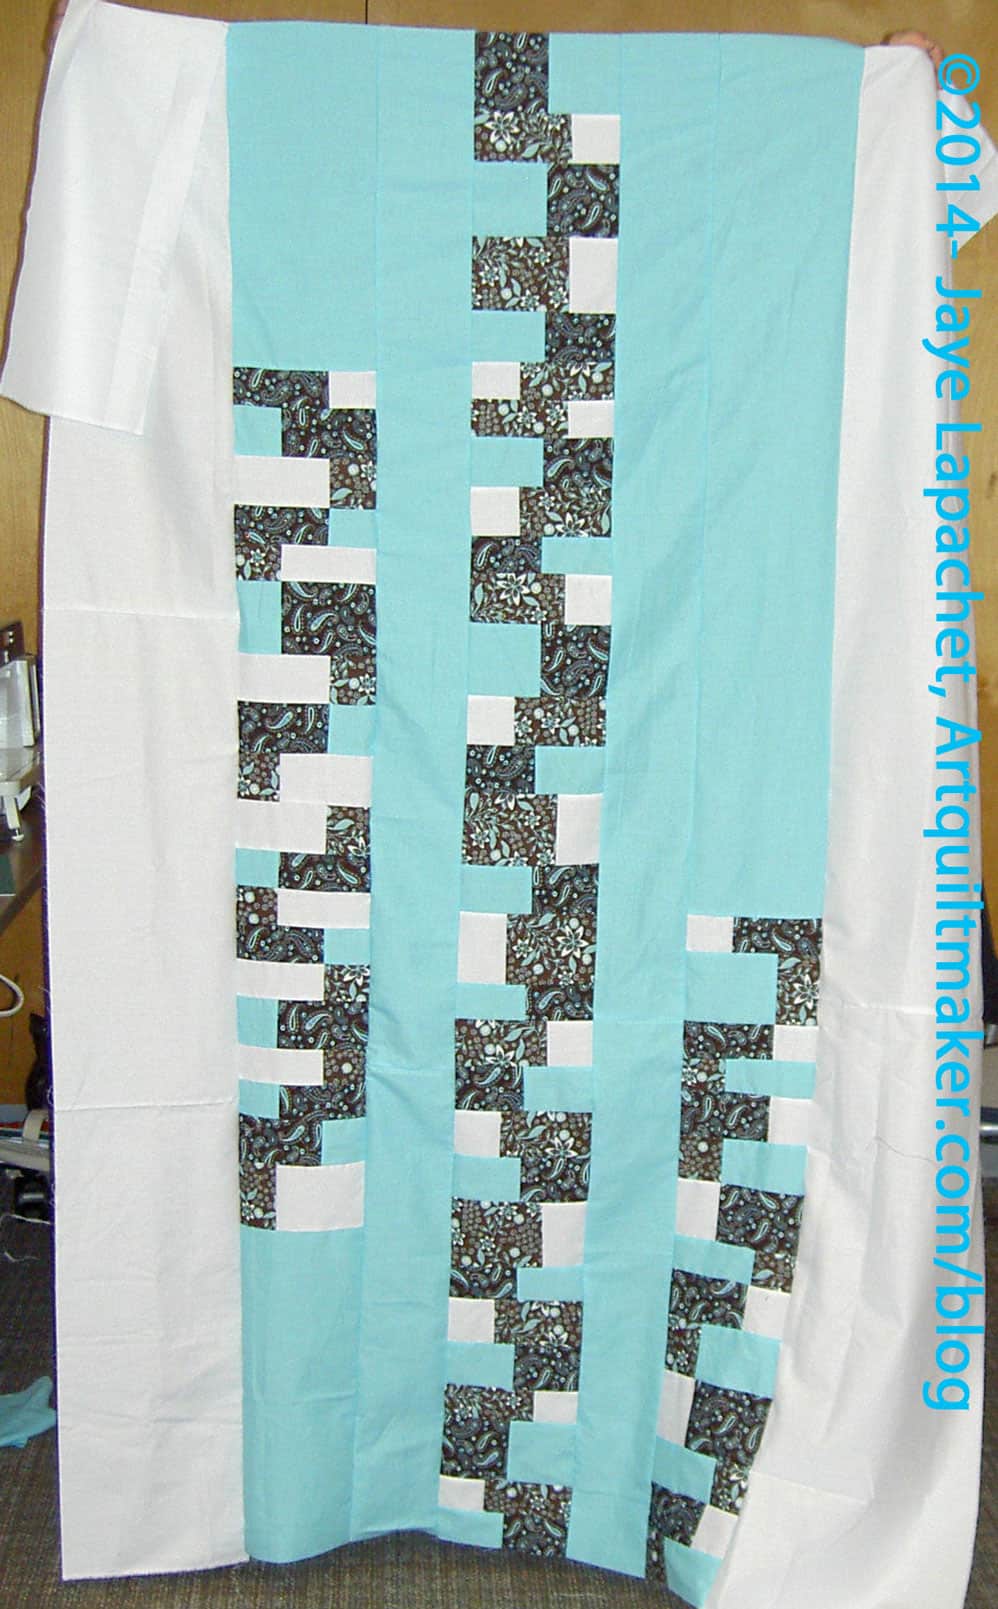
I joined the Improv Round Robin at the last BAMQG meeting. I was really busy last week and didn’t get my stuff together until the morning of the meeting. I forgot the crucial thing: my starter piece. DUH! Fortunately everyone is really nice and I wasn’t the only one. I took Jen’s piece to work on and Michelle and I met near my house and we exchanged starters.
Jen’s IRR Piece
After the meeting last Saturday, I came home and worked on Jen’s piece.
I thought there was no possible way she could have made her piece in 20 minutes (more on that later) until I saw that some of her piece looks like piecing, but is really part of the fabric. So that was her trick. 😉
I added the bottom, which I curved on one end to give someone else the opportunity to do some curved piecing. They may just cut it off or do an angle, which is OK, too.
One of the things about this project is that we each have to have a signature fabric that we add to all of the pieces. I had to use a Philip Jacobs print! It is the green and purple fabric on the right hand side. We are assured that everything will go together just fine.
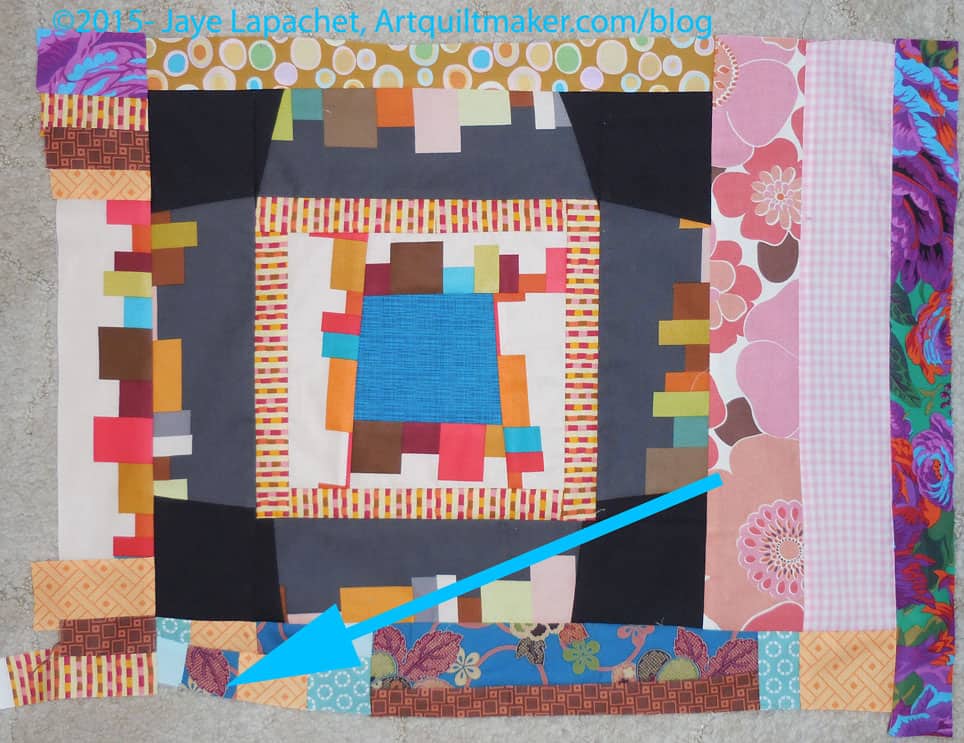
Jen’s IRR piece before trimming
I added some more piecing at the curve, but cut it off. You can see what I did in the bottom photos.
You can see the kind of wonky piecing, which is what inspired me to cut off the end. I added the left side as well.
While I was trying to decide what to do, I pieced some strips of Jen’s fabric together. I ended up just putting them in the bin without using them. I kind of like the thought of adding something that someone can springboard off of.
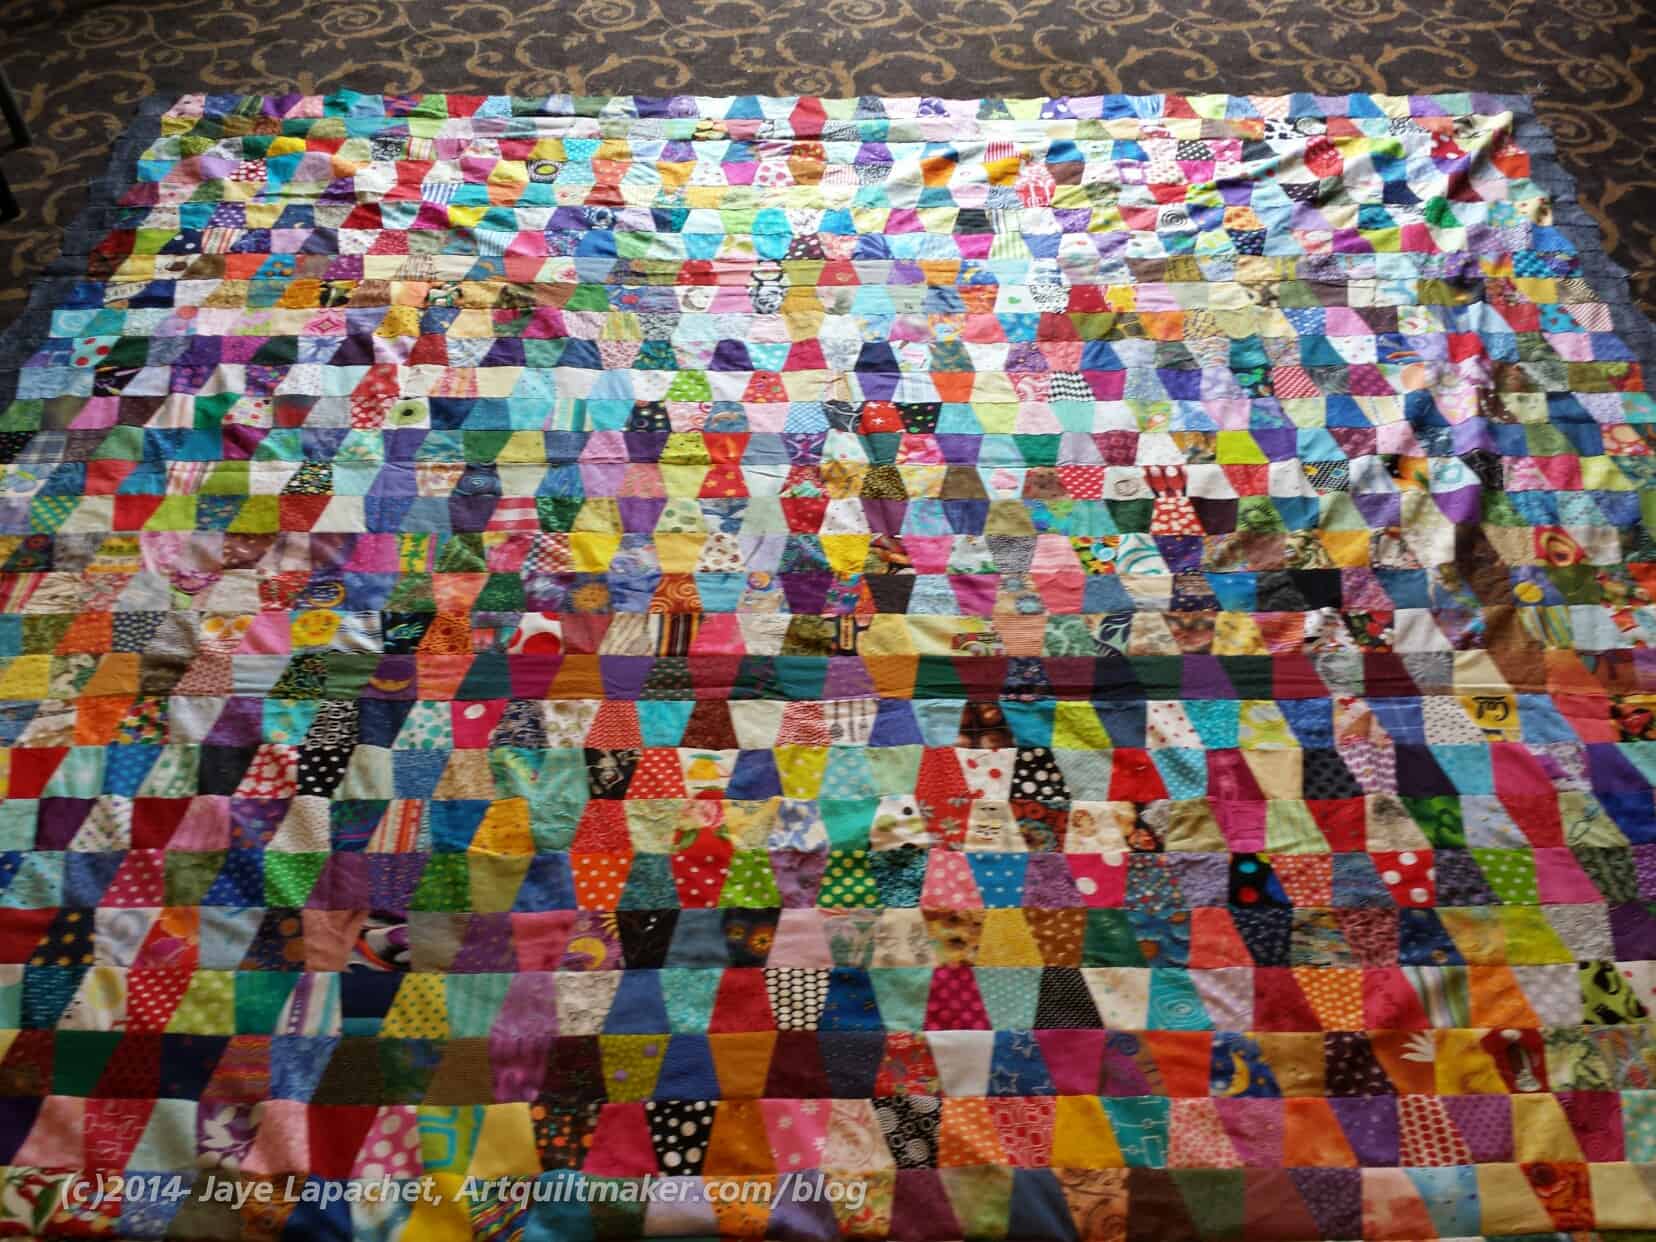
It has been awhile since I was able to attend a CQFA Retreat – 2 years, I think. I was so thrilled to be able to attend the current retreat, which was held over Mother’s Day weekend. Isn’t that a great Mother’s Day gift?? As a bonus, I sewed so much!
I feel like I really made some good progress on projects that were languishing:
First of all, I, pretty much, threw projects and parts into project bags starting about a week before the retreat. This helped me not forget critical fabric and supplies. The only thing I forgot was a lamp and my sewing machine’s light kept me from going blind.
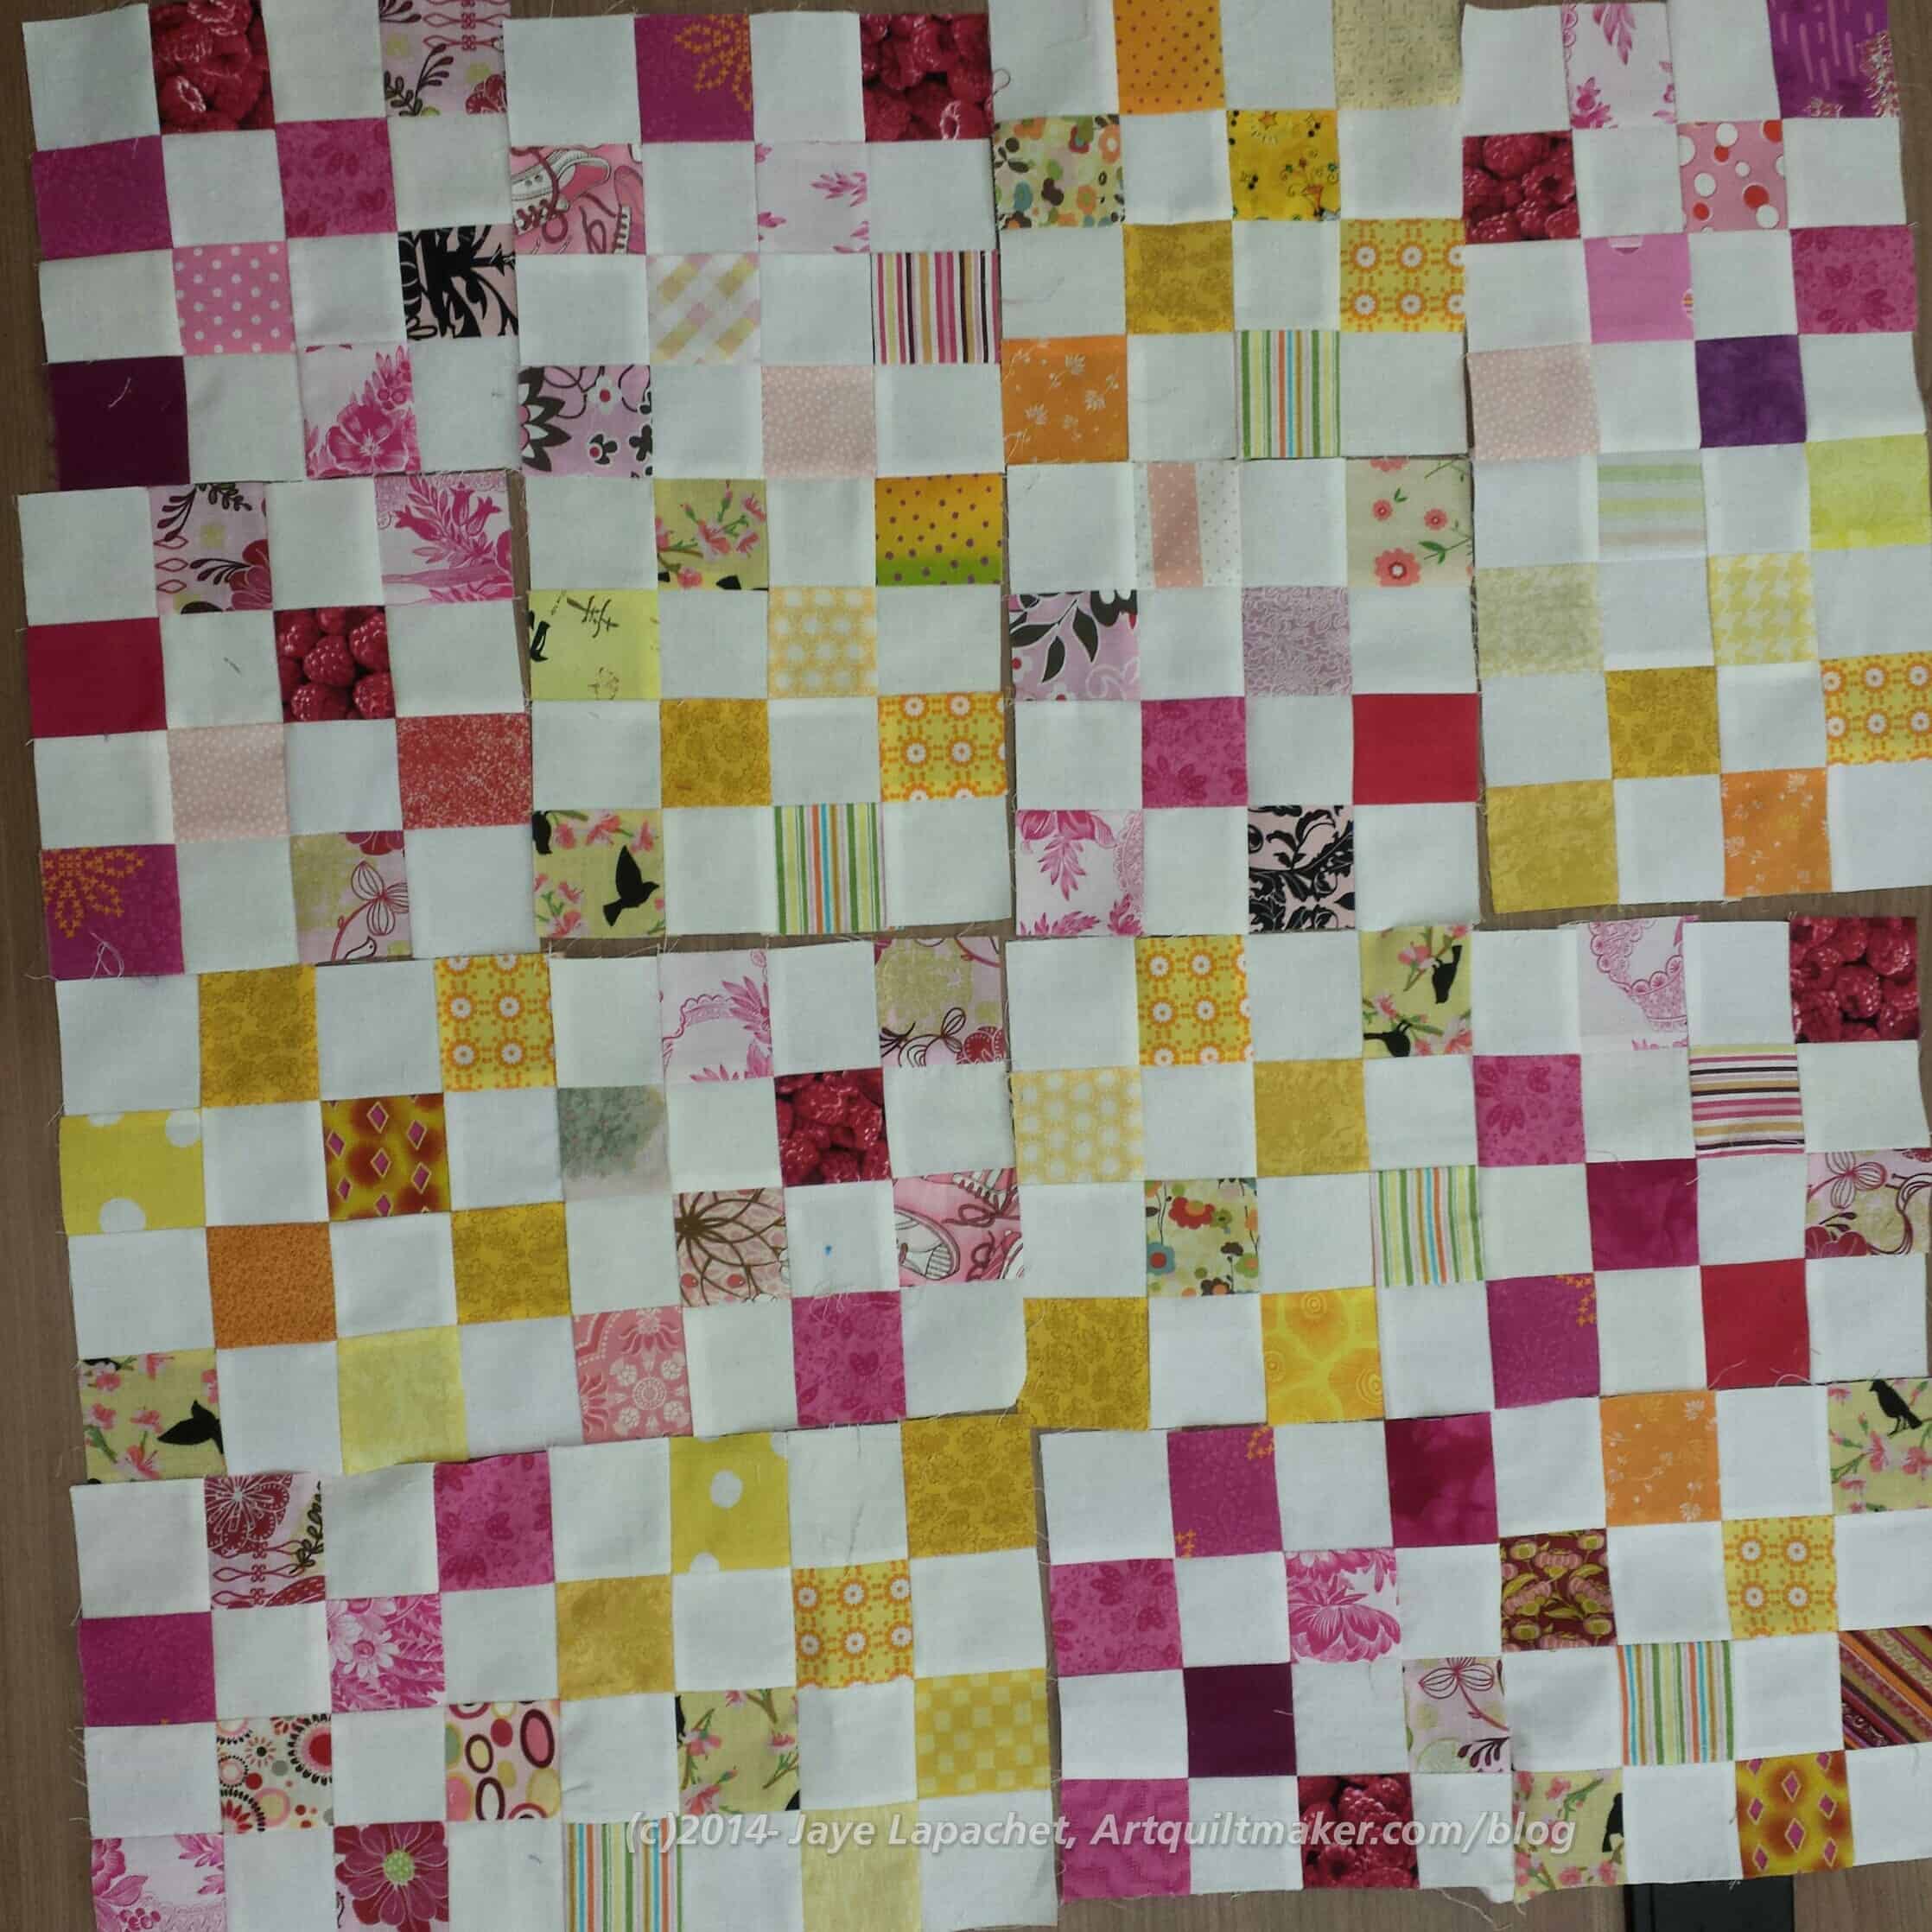
Next, I made sure I had plenty of blocks and parts that would make good leaders and enders. Using the leaders and enders technique, I made 20+ Nine Patches for the octagon 9 Patch on which I have been working and 27 (!!!) Box Full of Letters blocks. In addition to significant progress on two projects, I am pleased with the progress I made on the leaders on the leaders and enders projects.
Oliso ironing surface
The other thing I did was try out the Oliso iron I bought. I finally dragged out the June Tailor ironing surface I bought for the Dale Fleming Circle class as well. It was a little different because you don’t set it up on its end, it just pops up away from the ironing surface. Also, the steam and basic functionality are a little different. Friend Julie tried it also (we shared a table and a mini ironing surface) and gave me her feedback as well.
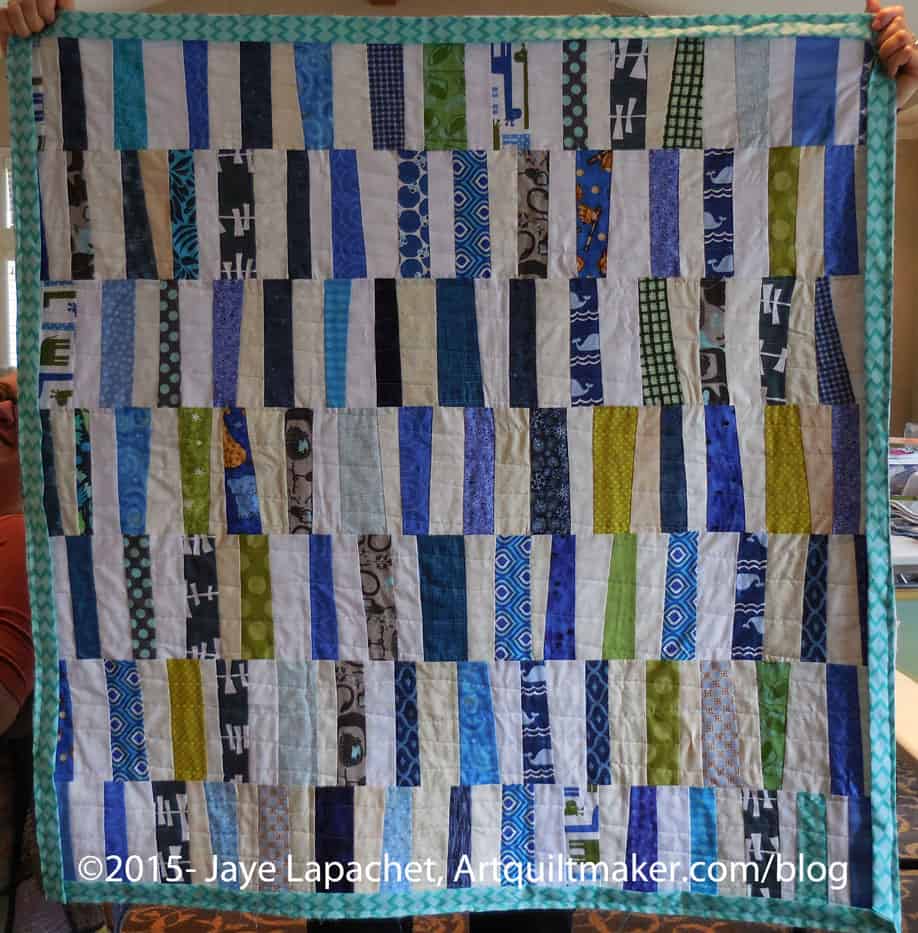
Sue’s Baby Quilt
People made great projects. Bron and Sue were working on baby quilts for friends. I liked the ideas they had and may use the ideas for donation quilts.
Sue’s (left photo) quilt is made from strips and a background. She said she cut strips and then sewed them together in rows. She said she used different widths of strips and I think that gives the piece a lot of movement. Lucky kid, I say.
In thinking of different ways to make this quilt, I could use strips, cutting them as I cut into new yardage. I would save up strips until I had enough and then get Gerre to quilt it. 😉
The other thing I could do it rummage through my scraps and get pieces large enough to do something similar. My mind is reeling.
I didn’t get a photo of Bron’s quilt, sadly, but what she did is wacky sew pieces together, then she cut the pieces into squares and sewed them together with sashing into a baby quilt. She used a white dot on yellow for the binding, which I loved! It would be a good scrap project.
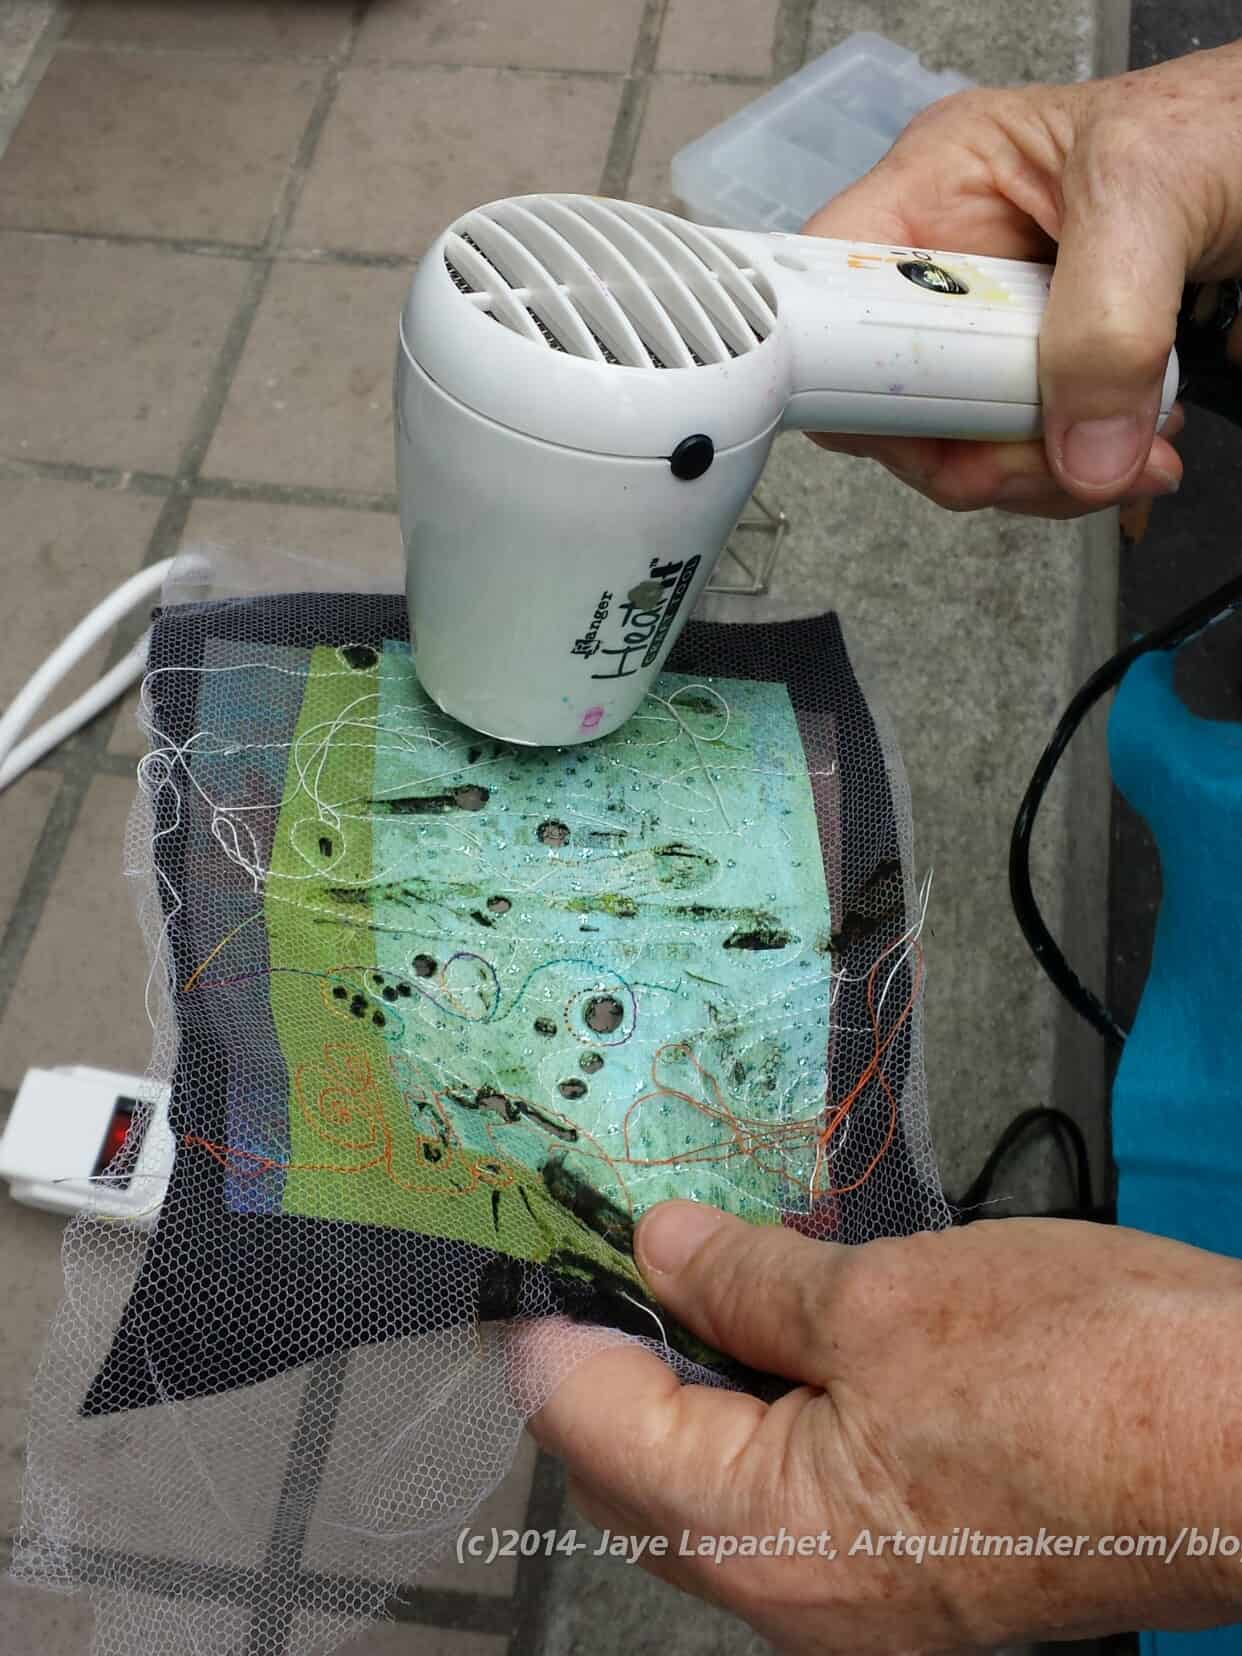
Gerre’s art quiltGerre burning her quilt
Gerre was working on an amazing art quilt. She put layers of fabric together with tulle on top, then quilted it then BURNED it! It was awesome.
Reva worked on a flower quilt.
Angela was doing some improv piecing based on a piece she started in a class.
Julie’s Tumbler
Julie worked on 3 or 4 pieces, including a self portrait and a couple of pieces she started in China. She also sewed rows to her tumbler quilt top, which is nearing completion. It was so great to see her so productive as well.
Rhonda worked on handwork all weekend, including an applique’ project inspired by Kevin Kosbab. She showed me the Valdani Pearl Cotton collection she bought from MassDrop, the temptress! I love Valdani Pearl cotton. I may have to start another quilt like Beach Town. Or just pick a project on which I can embroider. Hhmm.
Maureen’s Mid-Century Modern
Maureen worked on a piece that I thought was made from a pre-cut, but she picked all the fabrics herself. I really think that she should put pre-cuts together for Moda. Her piece looked like a mid-Century modern quilt or painting.
Maureen worked on a plaid piece as well. She found the fabrics at FabMo and turned them into improv blocks which she was playing with when we all had to leave.
Dolores was working on dolls from a class she took with Susan Else as well as the piece from the online class she is taking.
Caroline made pillowcases and worked on a crazy paper piecing project. I think the one section she worked on had 58 pieces!!!
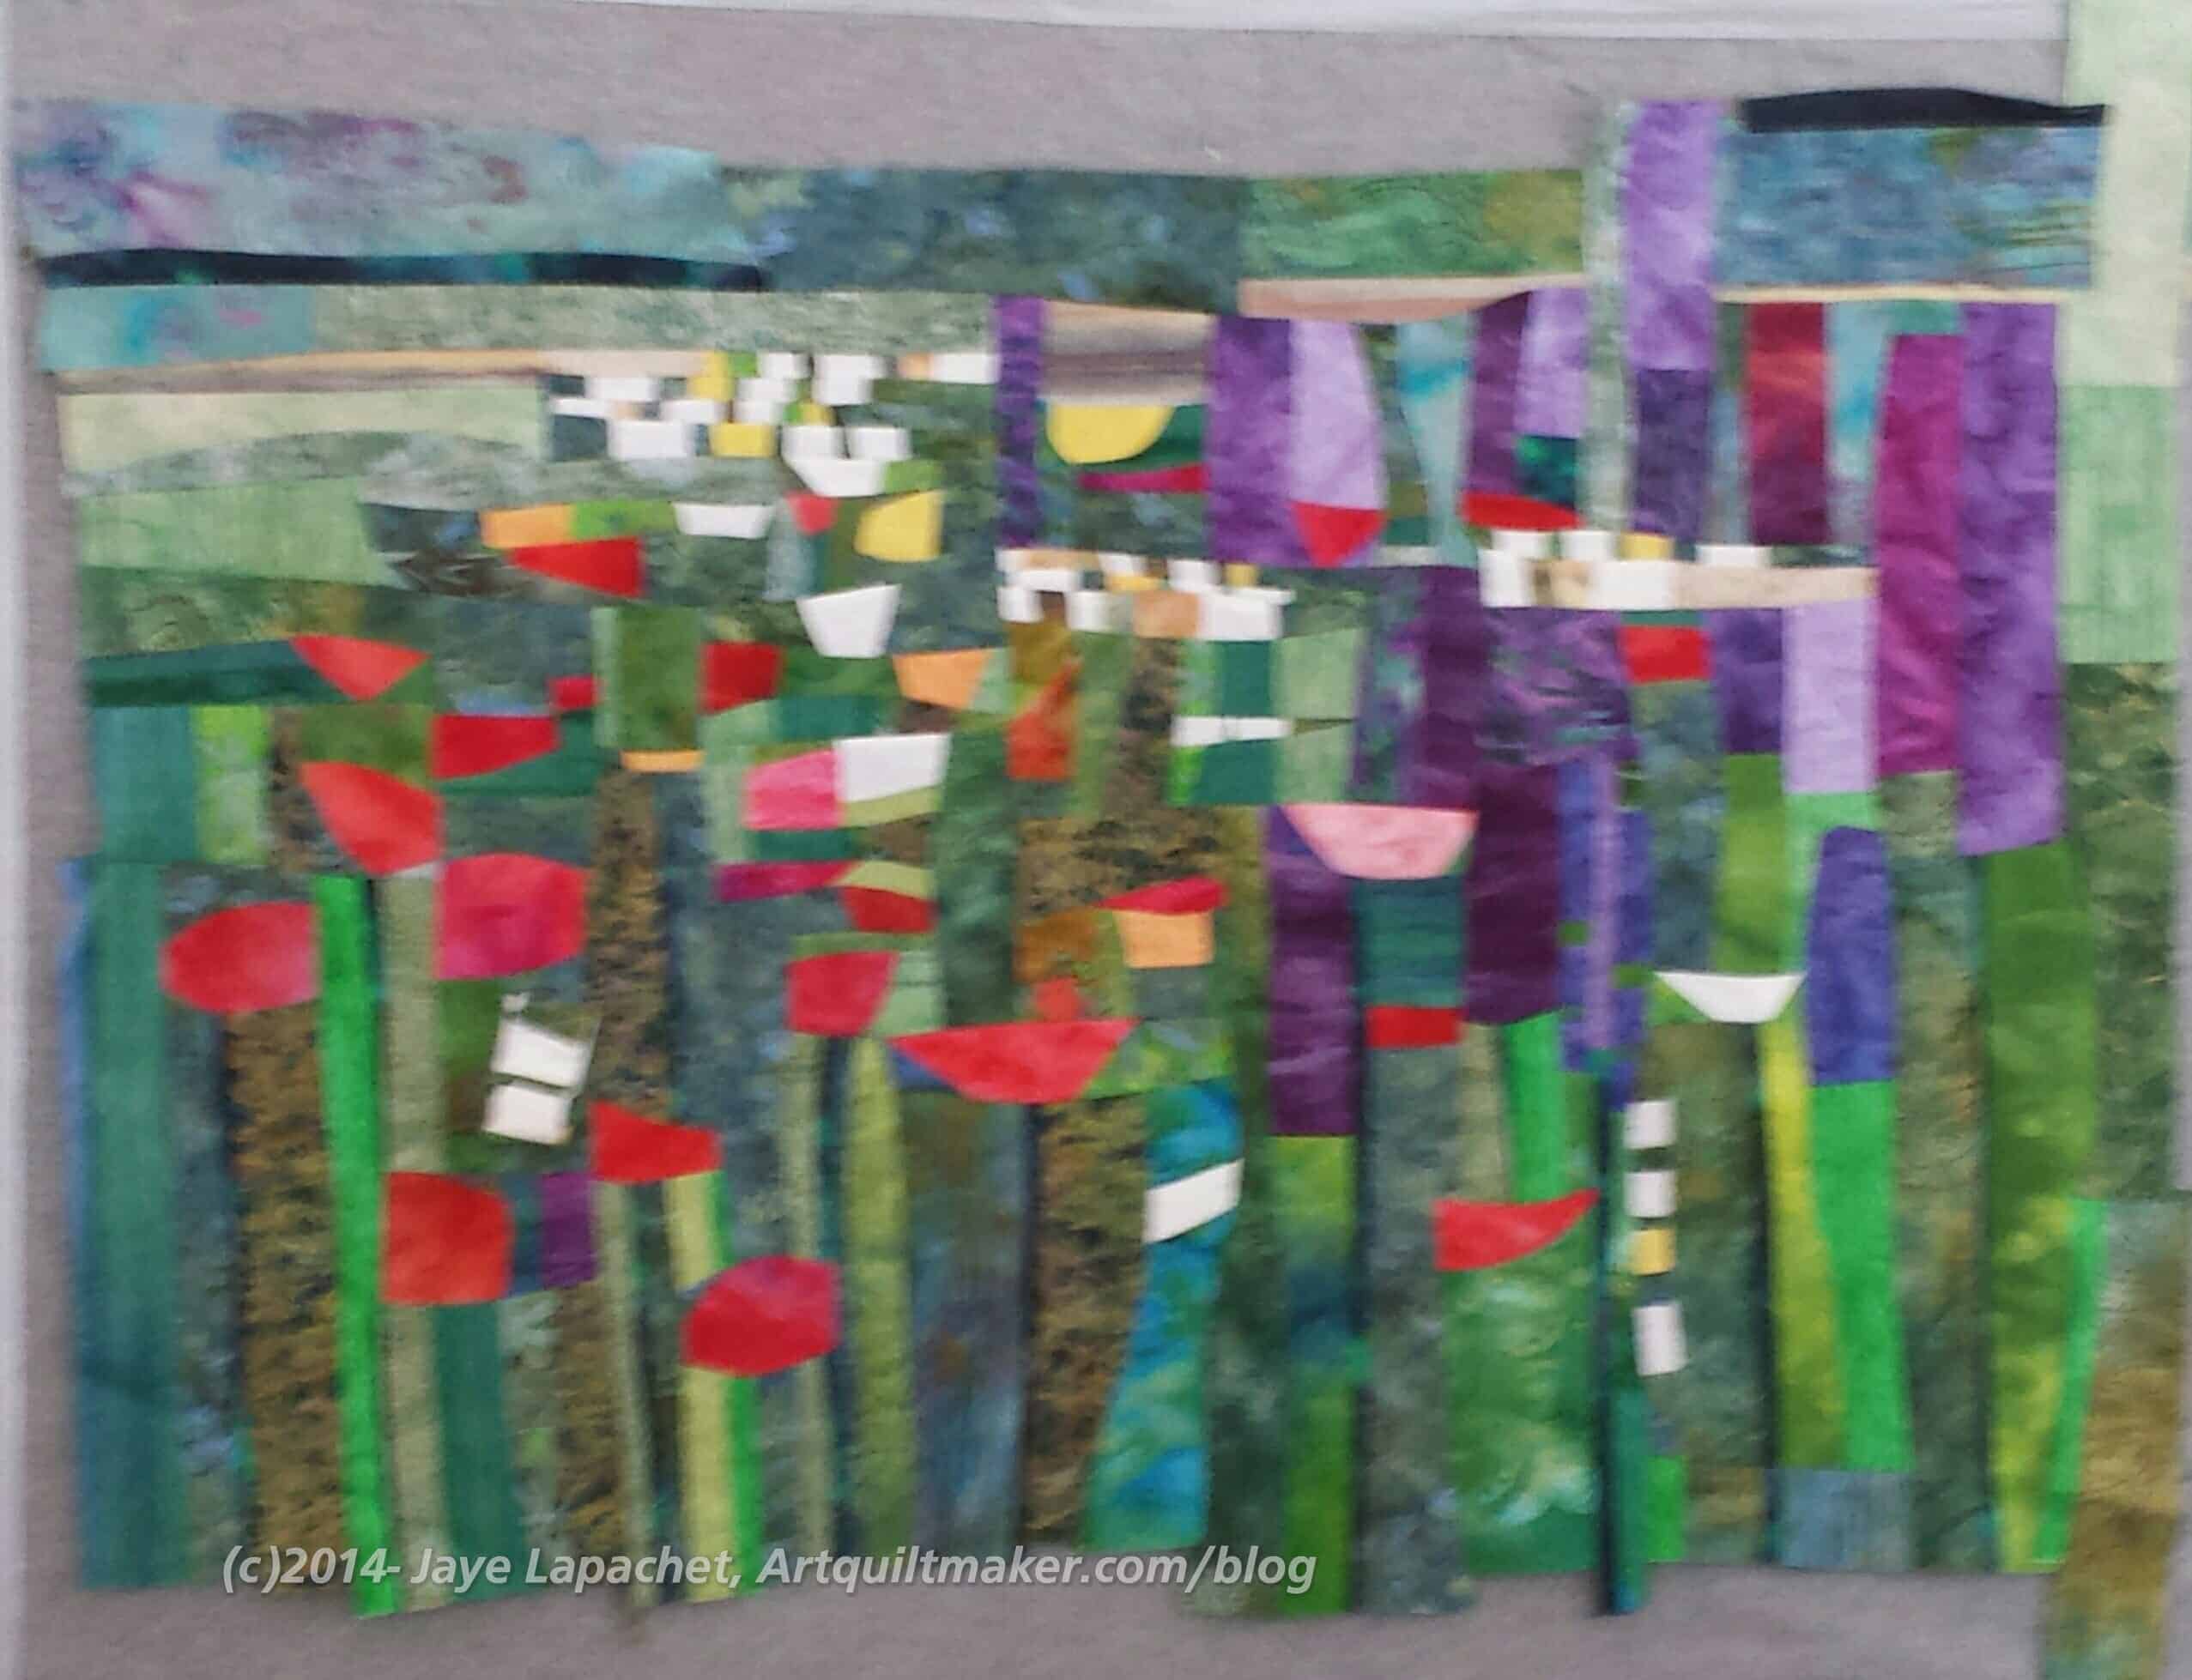
Amy’s Landscape
Amy was working on a kind of landscape with flowers. I loved it!
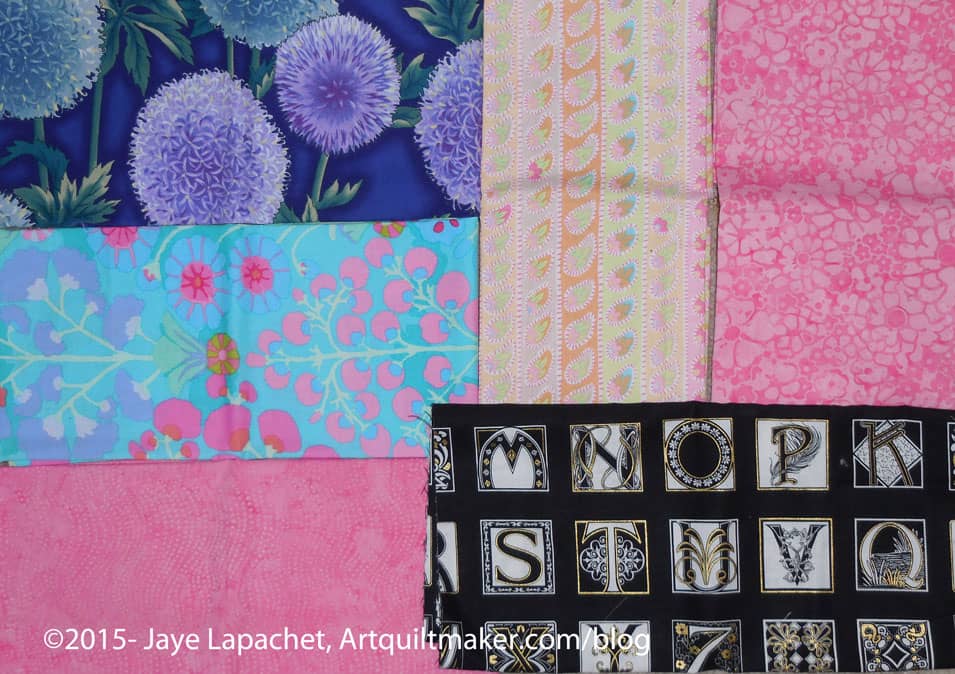
There was also a “free stuff table” and I picked up a couple of pieces of fabric. There was something about the colors and imagery that attracted me. There were a couple of pieces of Kaffe Fassett and some others. I tried to exercise restraint. It was difficult, but I seem to have succeeded. The purple dandelions were kind of a surprise, but they will come in handy somewhere.
CQFA Retreat Free Fabric
In addition to the sewing, it was great to see other people’s projects and chat with my friends. There was never enough time to find out everything I want to know about other people’s process or what is going on in their lives. I didn’t take nearly enough photos and wanted more time to sew.
Still I am glad I got the time I did, especially at this time of year. I felt like I was really productive and that feels good. I need to sew more.
I had a great time at the meeting yesterday and it really didn’t have anything to do with the actual meeting.
Gerre’s Collage
After the business and show and tell, we sat down to work on the picture I posted earlier this week as our workshop picture. We split up and added more tables so people had more space to work and I sat with Gerre and Rhonda. Gerre was doing work in her collage book (a giant board book she bought at a thrift store and then gessoed over. Great idea!!!) in colors vaguely related to the picture I posted. I would have taken the picture, but since it was in a book with beautiful collages, I thought it might be rude.;-)
I really didn’t know that Gerre was so talented with collage. I adore this piece and think it would make a great card.
Rhonda was doing her very precise improv piecing in the colors of the posted photo, tending towards the abstract. I was preparing a piece of white fabric for later painting with Tsukineko inks.
I finished my work pretty quickly. It really didn’t go as I intended and I didn’t want to work on it anymore, so I offered to press Rhonda’s strips. She sat and sewed her improv strips and I walked back and forth pressing them and getting more.
Bird Box for Rhonda
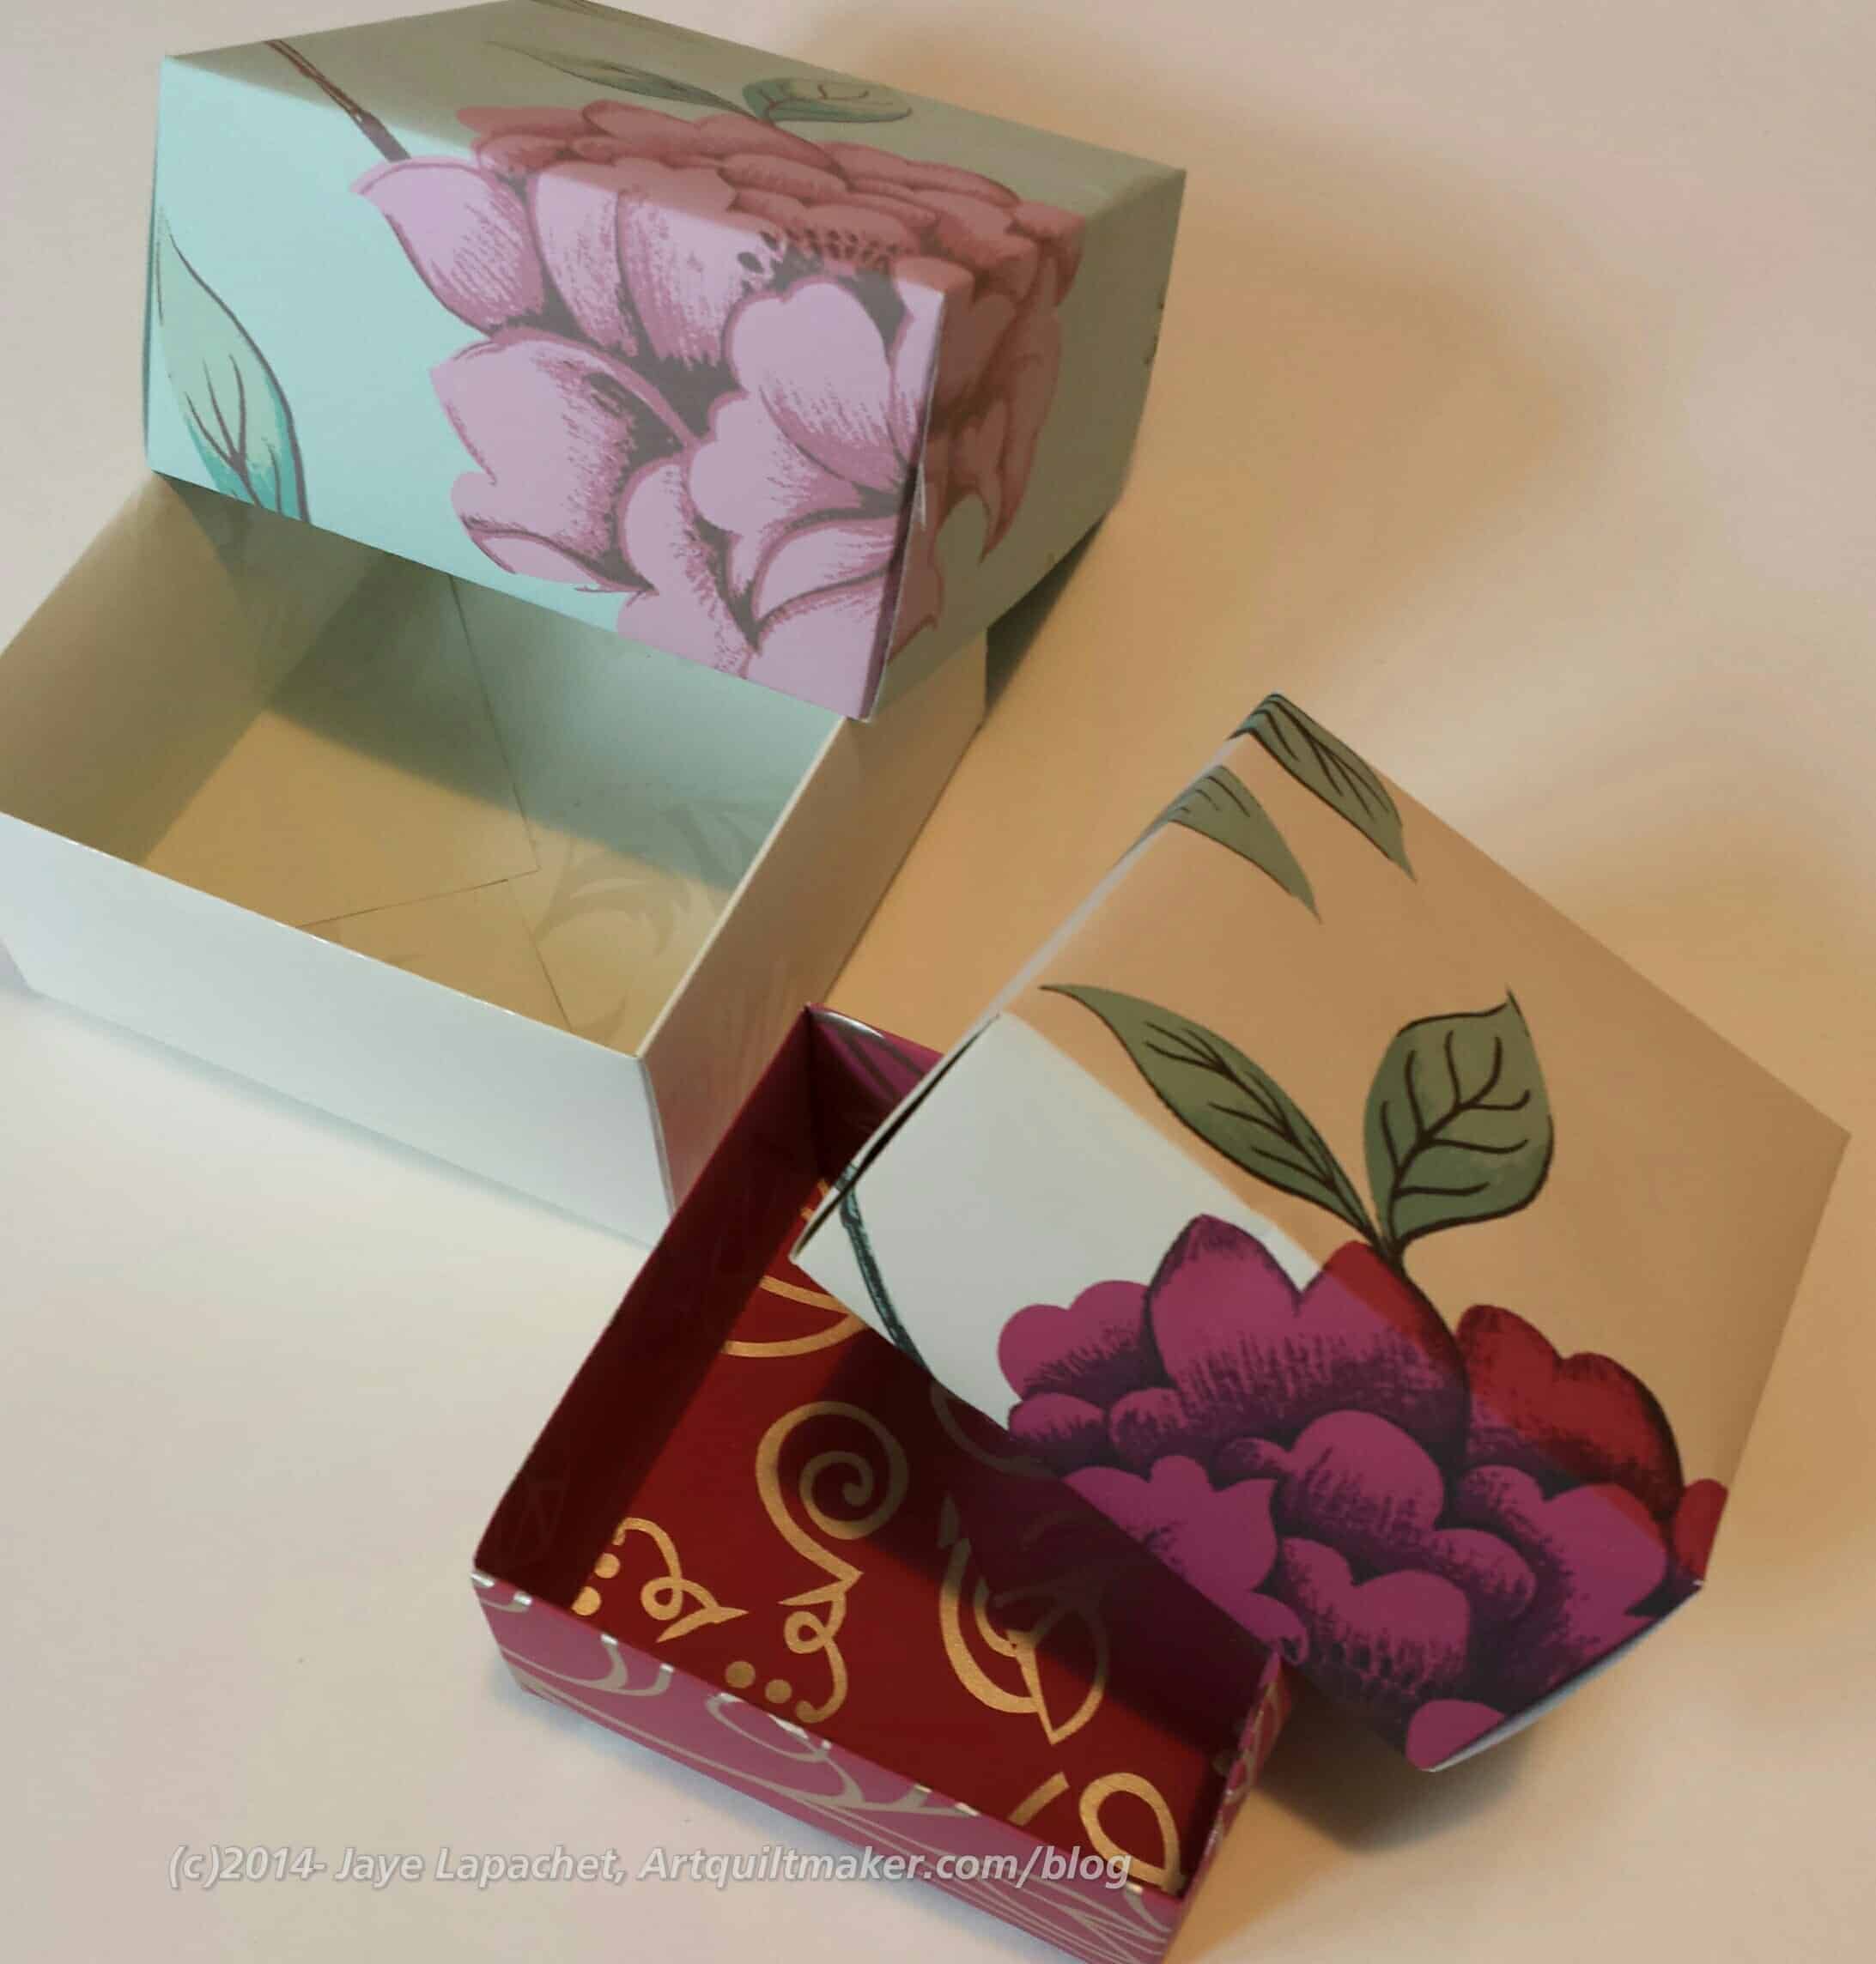
After some time I heard Bron talking about folded boxes. Rhonda said she needed some for her niece and nephew for Easter, so Bron and I sat down to make them, with Bron doing the teaching. It is amazing how they go together and I can see many of my wrapping problems evaporating.
Rhonda picked out the bird paper. We made two of the same and this box is about 3″ square.
Folded Gift Boxes
I decided it would be great to make my MIL a box and put a small gift in it for Easter, so we grabbed some sheets of wallpaper and I made a larger box from a 15″ sheet while Bron made a slightly smaller box, perhaps from an 11″ sheet. I ended up taking both home and will give one to someone else soon. I stopped and got some nice soaps to include in them.
Nota bene: We meet at FabMo and we have, pretty much, the run of the materials they have available. We still put donations in their box; we just don’t have to wait until selection day. In addition to fabric, they had books of wallpaper from which we took the larger sheets for the gift boxes. They are nice, because the sheets coordinate, though they are not always large. Some are half sheets or 3/4s sheets, which is why Bron made her box smaller. I thought some wallpaper with stripes would look great, but we didn’t see any in the quick look.
I enjoyed pressing for Rhonda and making the boxes. It interested me more than my Workshop piece.
The meeting went well. We talked about dues. We will be kicking people off the list soon, so people need to pay up. The Retreat is on and full, which si great. I can’t wait to check in and get sewing. I am going to work on the Field Day Zipper (I know! Blast from the past, right?) and the next Food Quilt. I suspect you can believe I won’t be working on FOTY 2014, but it works better for me to take more time and that requires working at home. I really want to get these two quilts done and 36 hours of sewing may be just what the doctored ordered.
The Field Day Zipper will be a gift. The fabrics and partially sewn pieces are clogging up my cutting table and I would like to get it done. I like the colors, but they are not demanding my time or attention. Too muddy. You knew that right?
The Food Quilt 2 will be a gift as well. It will be for a friend of Y.M.’s. We are friends with his parents and every kid should have a quilt. I keep looking at the Y.M.’s Food Quilt and trying to decide if I have cut enough fabric for the blocks I have slated to be made. The pattern is a Disappearing 9 Patch and I have decided that I will make 16 blocks. That means I need 64 food fabric patches (have already cut them), 64 black and white print fabric patches (almost none cut) and 16 purple patches, almost all of which are cut.
If I finish both of these projects, I also have the Box Full of Letters quilt on which to work. That will take come kind of miracle.
Anyway, the Retreat will be fun and I will have a lot to tell you about when I return.
The SFPL show is almost over. I’ll write more about that later. Be sure and go see it.
Rhonda will lead a workshop in June concerned with embellishment and hand embroidery. I can’t wait for that. I used some Aurifil embroidery thread for my ATCs and loved it! I will definitely buy more of that stuff.
Marie chimed in that there is a Stitchery show up at the San Jose Museum of Quilts & Textiles right at the moment. Fitting, don’t you think?
Show and tell was fabulous. Everyone does such interesting work and they all said kind things to me about the two pieces I brought: FOTY 2013 and the Hawaiian Donation Quilt. I know I haven’t written about them yet. Stay tuned for upcoming posts on those finishes.
Sonja’s Flower
Dolores and Sonja are taking an online class with Elizabeth Barton. They are regularly bringing their pieces to show us and it is interesting to see the process through which they are working.
Sonja’s piece was a follow-up to a flower she finished a few years ago that took forever. This newest piece was finished within the month.
I love the curves and the lines. The color palette emphasizes the design and there is no distraction from color.
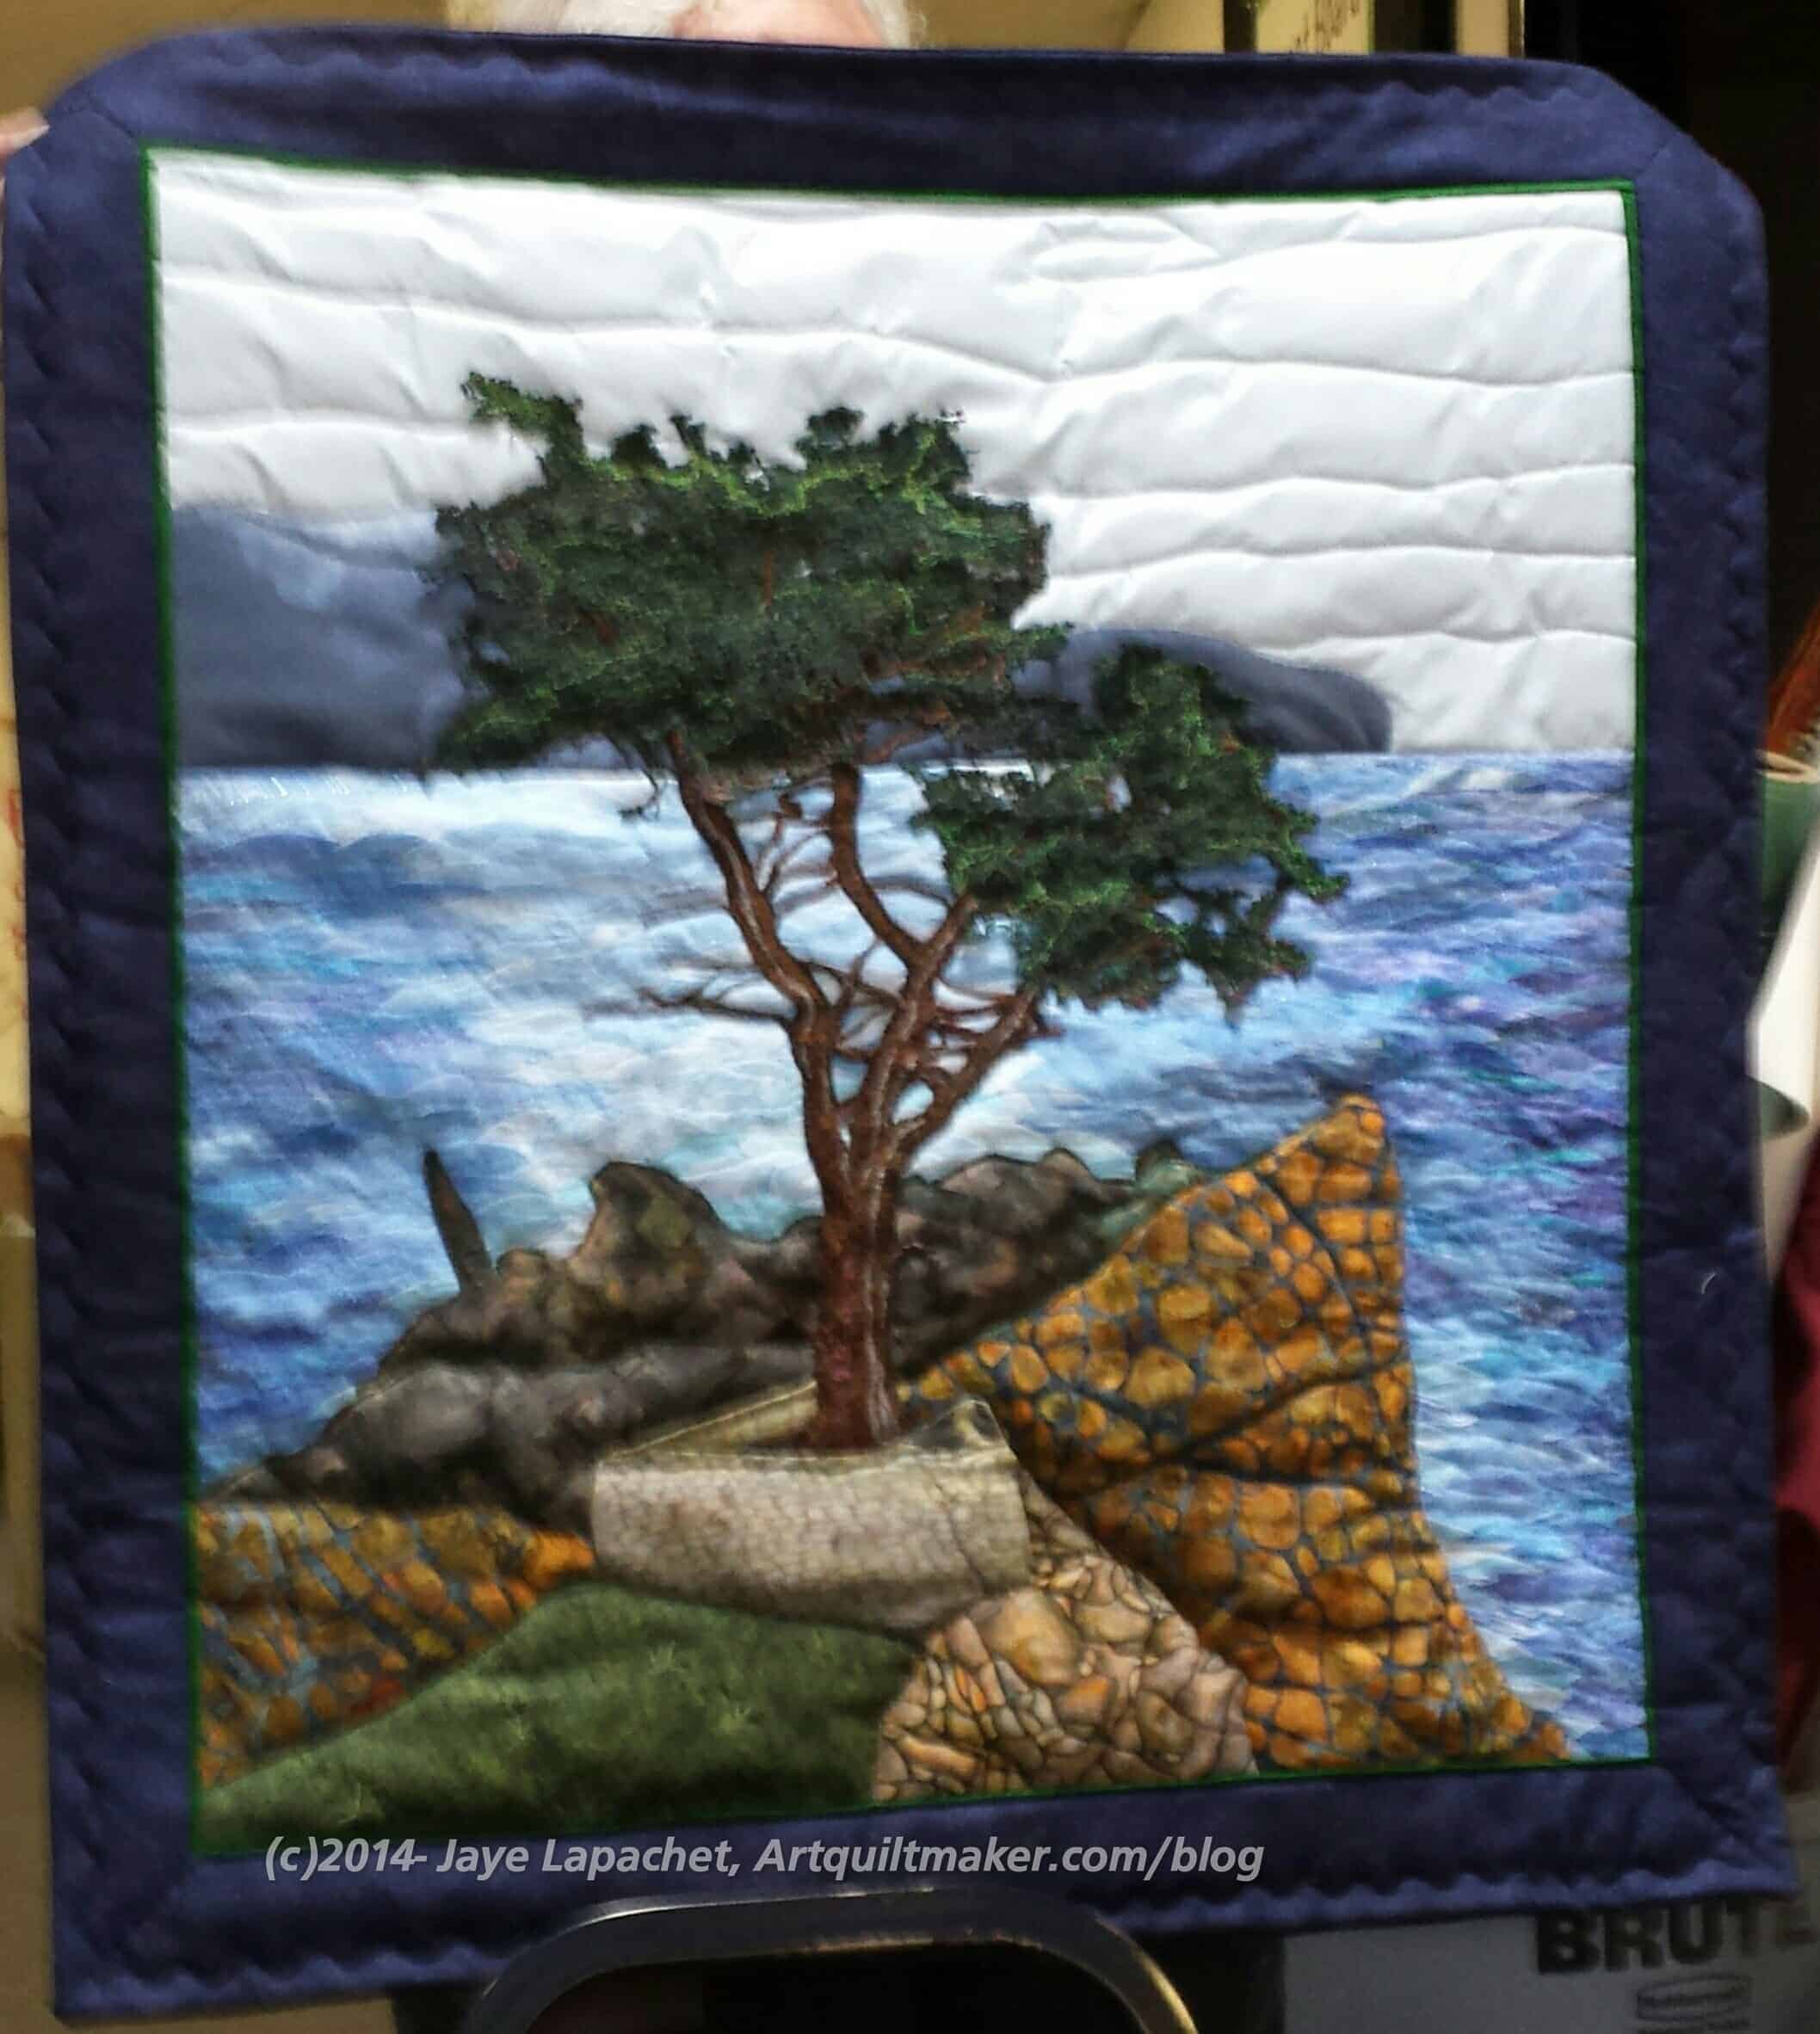
Caroline’s Cypress
Caroline does amazing landscapes and she is nearly finished with another one in her series of Lone Cypresses (Monterey Coast).
She threadpainted the greenery, but a new member showed some cheesecloth she had dyed, which sparked a discussion on the merits of making the greenery with cheesecloth instead of all of that threadpainting. Definitely doable, though different looks would be emphasized, I think. It was an interesting discussion.
Valerie, one of the visitors does amazing work. I didn’t get to talk with her much, but she brought her dyed cheesecloth and embroidery floss as well as a bag she made from hand dyed fabric. I seriously thought about trying to slips some of her embroidery thread into my bag. I restrained myself and decided to make friends with her if she comes back. 😉 She also brought large covered buttons with beading work using seed beads, some fabric postcards and a fantastic name tag.
Valerie’s Postcard
As I said, it was a great meeting. I learned something, got to see my friends and got something to write about for you. The perfect day. 😉
I finally made it back to a CQFA meeting! September was the last meeting I attended and it feels like an eternity.
We changed locations and the months in which we will meet. The crowd was quite large – about 25 people. Dues were collected. Retreat monies were collected (if you are not a member and would like to attend, the cost is $107 and there are a few spaces left. Leave a comment and I will hook you up). Lots of announcements were made.
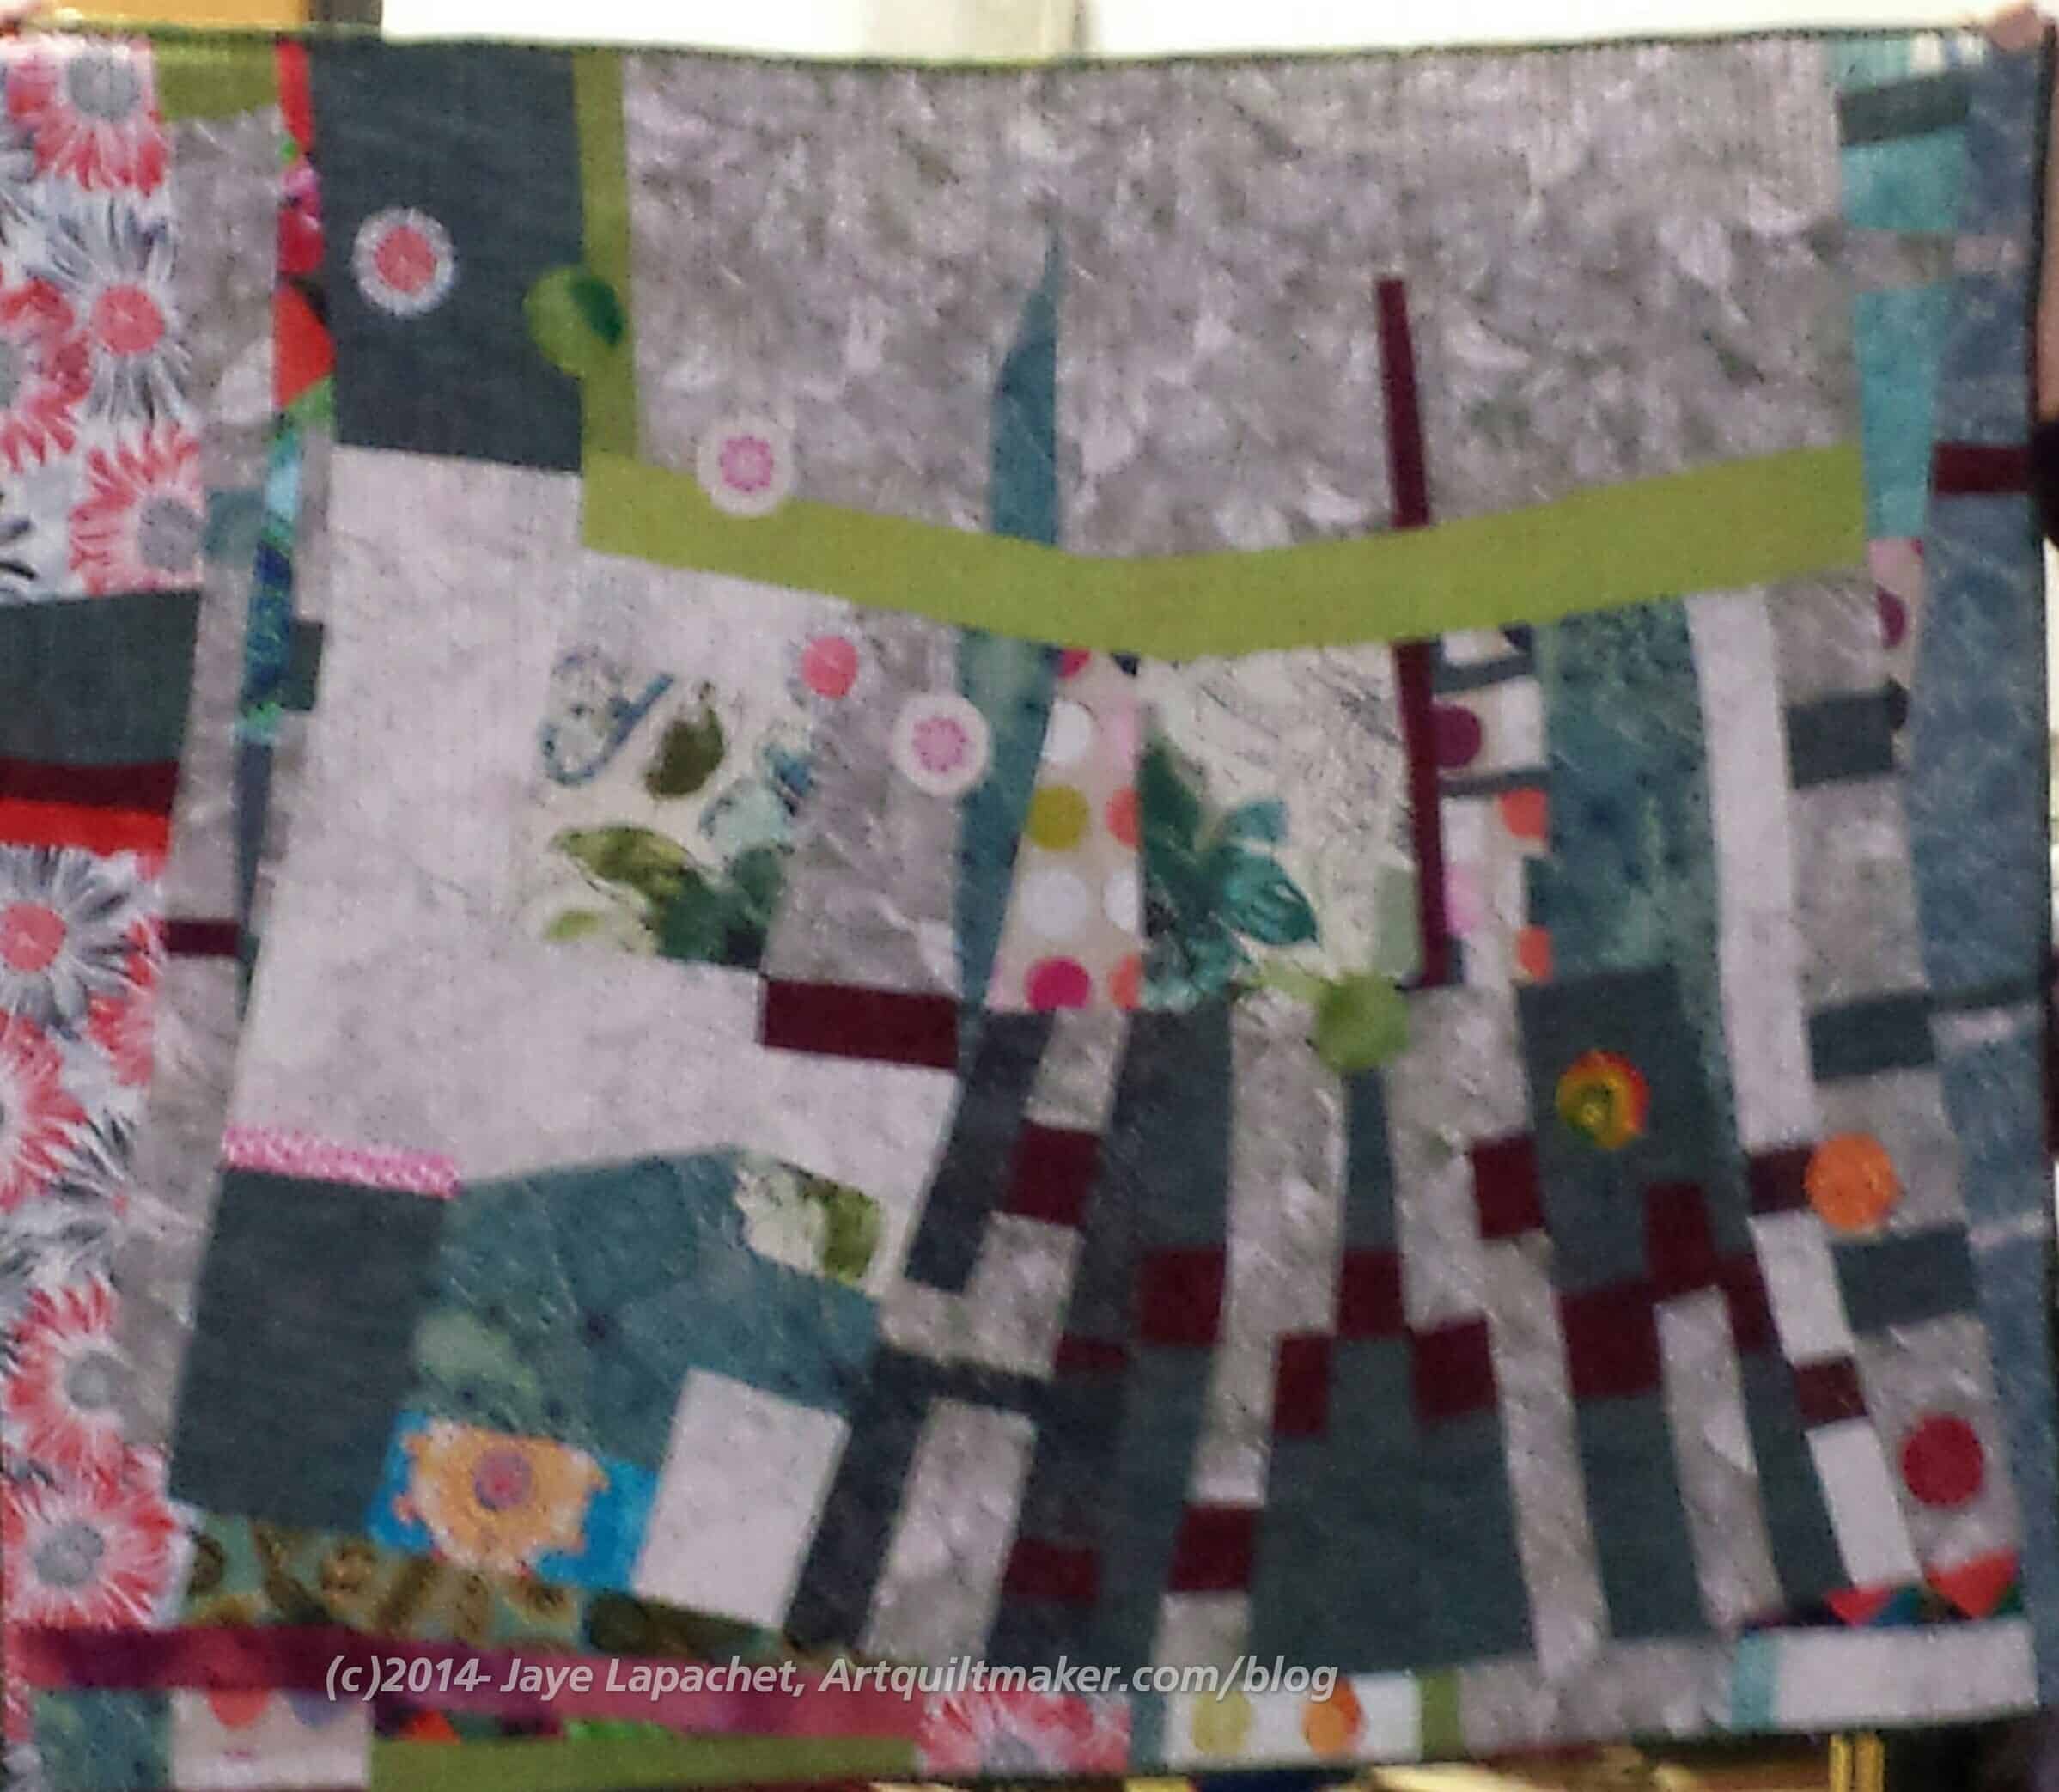
I am in charge of the workshop next time. The title is “Same Design, Make it Mine”. I have to post a photo of the image to our private group before the meeting, then everyone will bring their supplies and ideas and work on their pieces during the meeting. We probably won’t finish, but it will be a good way to work together on our own thing. I had an image all picked out and then I got an different idea during the meeting. We’ll see what I choose.
Workshop
Our Critique Pieces
The first activity we did was to view the SAQA Trunk Show through the lens of a formal critique in order to learn about critiquing art. Maureen secured the SAQA Trunk show and Dolores made up a handout, then presented it, on how to critique a piece of art.
I have never done critiquing and I learned a lot, mostly because there are fact based tasks to perform in a critique before you get to the part where you say whether you like the piece or not.
The moniker we used to remember the steps in critiquing is:
DESCRIBE
E
M
ANALYZE
P
P
L
E
S
INTERPRET
S
JUDGE
U
I
C
Y
The first 3 aspects are essentially fact based: what do you see, what principles and elements of design do you see, what is the work about? The last one starts to get into opinion, but then the last aspect, Judge, is when you get to say whether you like the work and why.
I liked this way of critiquing, because it forces the viewer to stick to facts until nearly the end. By doing that, I found that my emotions about the piece were less important, because I was spending energy is really looking at the piece. There some things that I noticed:
Make an artwork that is appropriate to the size. Some of the pieces had too much going on for the format size (around 8.5″x11″). That is a small piece and you need to focus on using that space well instead of trying to get a complicated message across. We found that the ones that were most successful were the ones that fit the format. There was was one that was interesting, but got lost because of the size. It would have been great in a much larger format.
Knowing the basics of design was really helpful. The most successful pieces adhered to some of those principles and elements. Making a piece – the actual technique – is really fun, but in order for a viewer to get something out of a piece, having some structure is helpful.
Dolores did such a great job on the handout. She really should think about teaching art.
Challenges
Rhonda introduced a new challenge, which was inspired by the book Brave New Quilts by Kathreen Ricketson. We are to make a piece of art inspired by a particular art movement or artist. We will be having a challenge review at our December meeting so we are encouraged to bring past challenges as well as this one to that meeting. I am not really inspired, but I have a book called the Daily Book of Art which I will look at before I completely bail.
Some of the challenges we have had in the past are:
2 shapes
placemats
under the sea
fusible flowers
monochromatic
I have ideas and/or fabric for some of these. I really have a great idea for the placemat challenge and really want to do it. I just need to start designing the shapes, then cutting.
Show and Tell
Show and Tell is, of course, my favorite. I only brought the Pink T Quilt. I’ll post about the finished piece in a day or two. I brought it with the binding half on to the BAMQG Meeting, but Gerre wasn’t there so she got to see it at CQFA, which was great. It isn’t very arty, but people seemed to like it. They asked about the organizations to which BAMQG donates quilts. I didn’t have a great answer, but Rhonda helped out.
I also talked a little bit about the Tsukineko Inks class I took and showed the class samples. I really want to get back to that and do something. I just don’t know what.
Julie’s Christmas Quilt
Julie brought her Christmas quilt, the one we picked up the other day from Colleen (post about that soon as well!). Her Christmas quilt uses a lot of different Christmas fabrics. I have to admire her for having the courage to put them all together. If I look at the fabrics separately, I wouldn’t think they would work, but somehow they do. Of course, the Four Patches are wonderful as well.
Diane’s Silk Piece
I love Diane’s silk pieces and she is always prolific, so she brings, what seems like, dozens. It is amazing how much work she does. I often think she has to have an assistant. My favorites are Diane’s aerial city images. She doesn’t call them that, but that is what I think they look like.
I love this one, because of the swirly quilting. There is also a kind of submarine shape, though I know it is not a submarine 😉 and for the little flecks of gold.
Of course, I also like the blues and greens.
Ann Brook’s workshop piece
Ann Brook brought a finished piece that she started in a Sherri Lynn Wood class.
There were was lots of great work and people were talking about interesting things. So much more that my head is spinning. You should come sometime.
It was a good meeting last Saturday. Friend Julie and I had signed up for a design class with Joe Cunningham, but it was cancelled at the last minute. I didn’t really see any advertising for it and I wish they had let me know sooner so I could have rounded up people. The effect of that cancellation was that I got to attend the BAMQG meeting. I was really sad that I was going to miss it and was really wanting to be in 2 places at once.
Mike gave us a tour of one section of the MQG. The goal is to get us more familiar with the benefits of that site since our BAMQG membership includes an MQG membership.
Karen, the 2015 Challenge Coordinator, gave us a small lecture on “What is Modern?”. Stop with the eye rolling! It was interesting and a little off the beaten track. She took some principles of ‘modern quilting’ and showed us these elements in modern quilts as well as ‘non-modern’ quilts, including quilts from the 1980s and 1990s as well as vintage quilts. It was a cool presentation! Some of the elements she included were:
Improv
Pictorial
Graphic
Negative Space
Bright Colors
Alternative Grid (drop an element to mess up symmetry, space elements oddly, irregular spacing between element, etc)
I added in Text during the discussion.
The result of this fabulous presentation is a challenge quilt due in July (??) using an alternative grid.
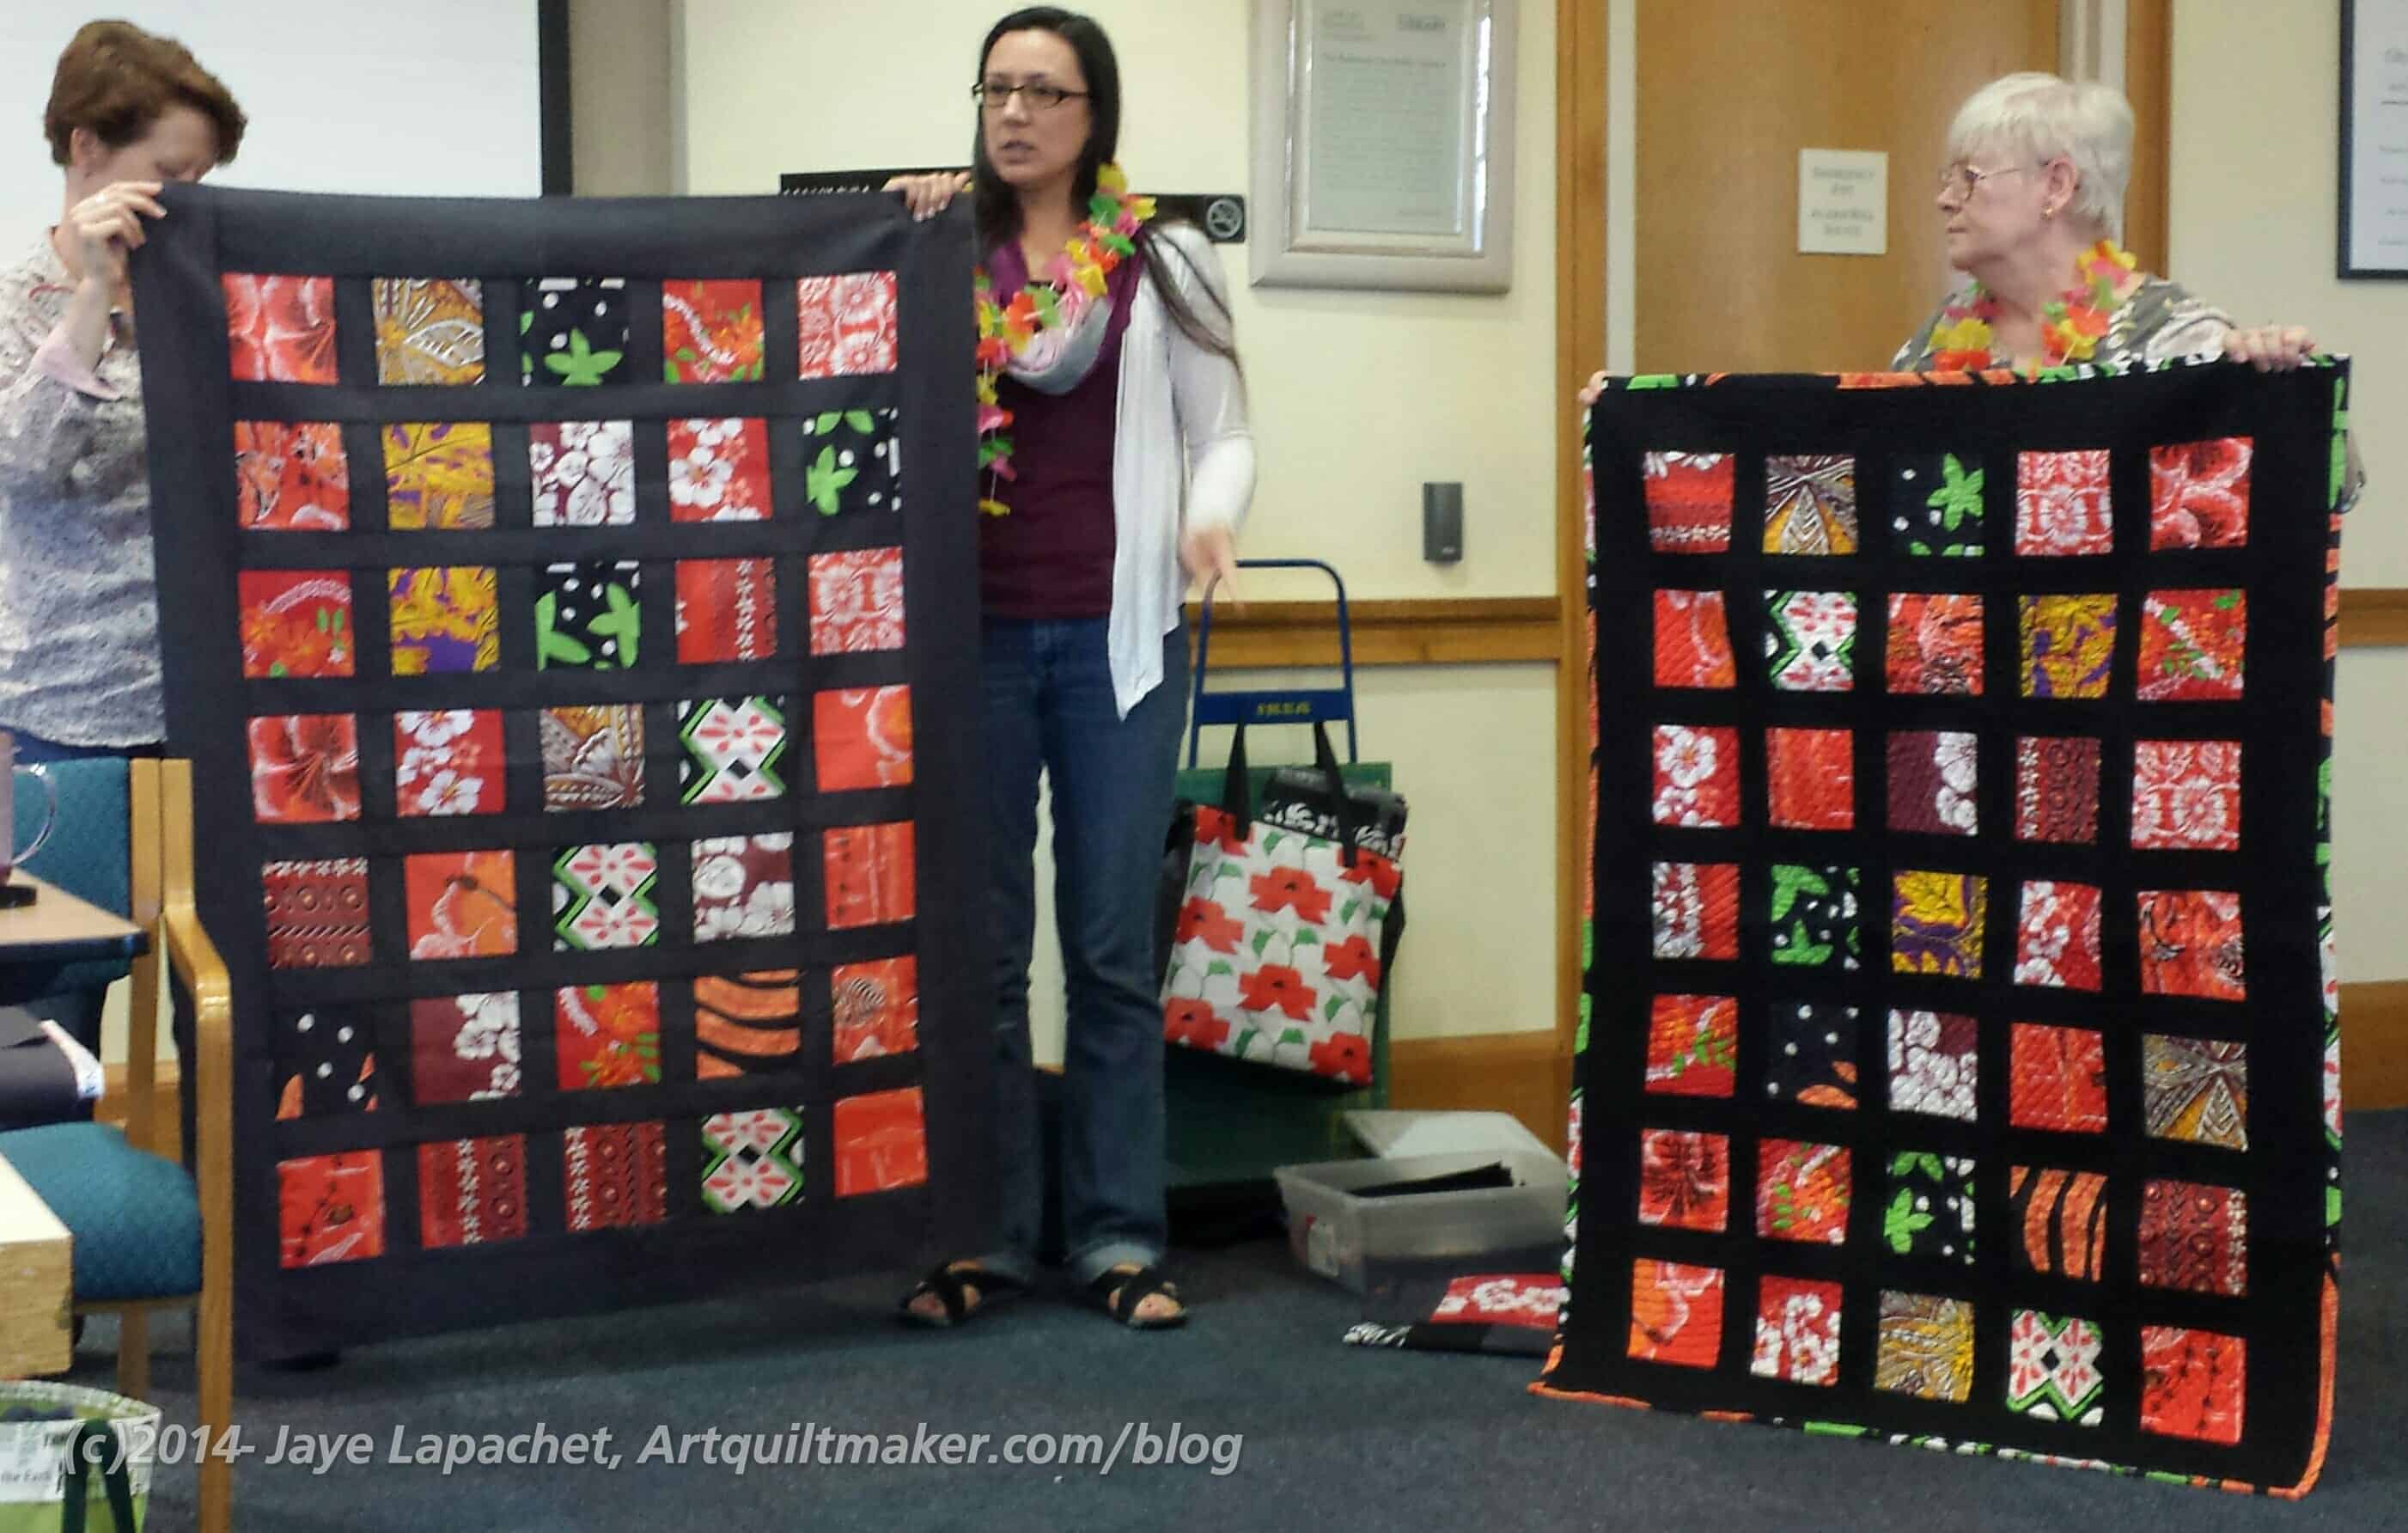
Some of the Hawaiian quilts are finished. Angela handed out binding and talked about the quilts. I think she got some other people who couldn’t attend the Sew Day to take some pieces and parts and finish them.
I got a colorful binding, though Gerre tells me the quilting is still in process. No problem. I am still working on the binding for the Pink T quilt, though I am nearly done.
Joy-Lily is the Swaps Coordinator and the first swap will be in April. We are each to bring a quilt book with which we have finished and trade with someone else for one. In the future, there will be a ‘Sew As You Go” bag swap.
Upcoming events:
Amish Exhibit at the San Jose Museum of Quilts & Textiles ends 2/28/2015
Manteca Quilt Show, March 7-8, 2015
SCVQA Show-March 14-15, 2015
Playcrafts has a challenge going using the Pantone Color of the Year, Marsala
Binding Bee
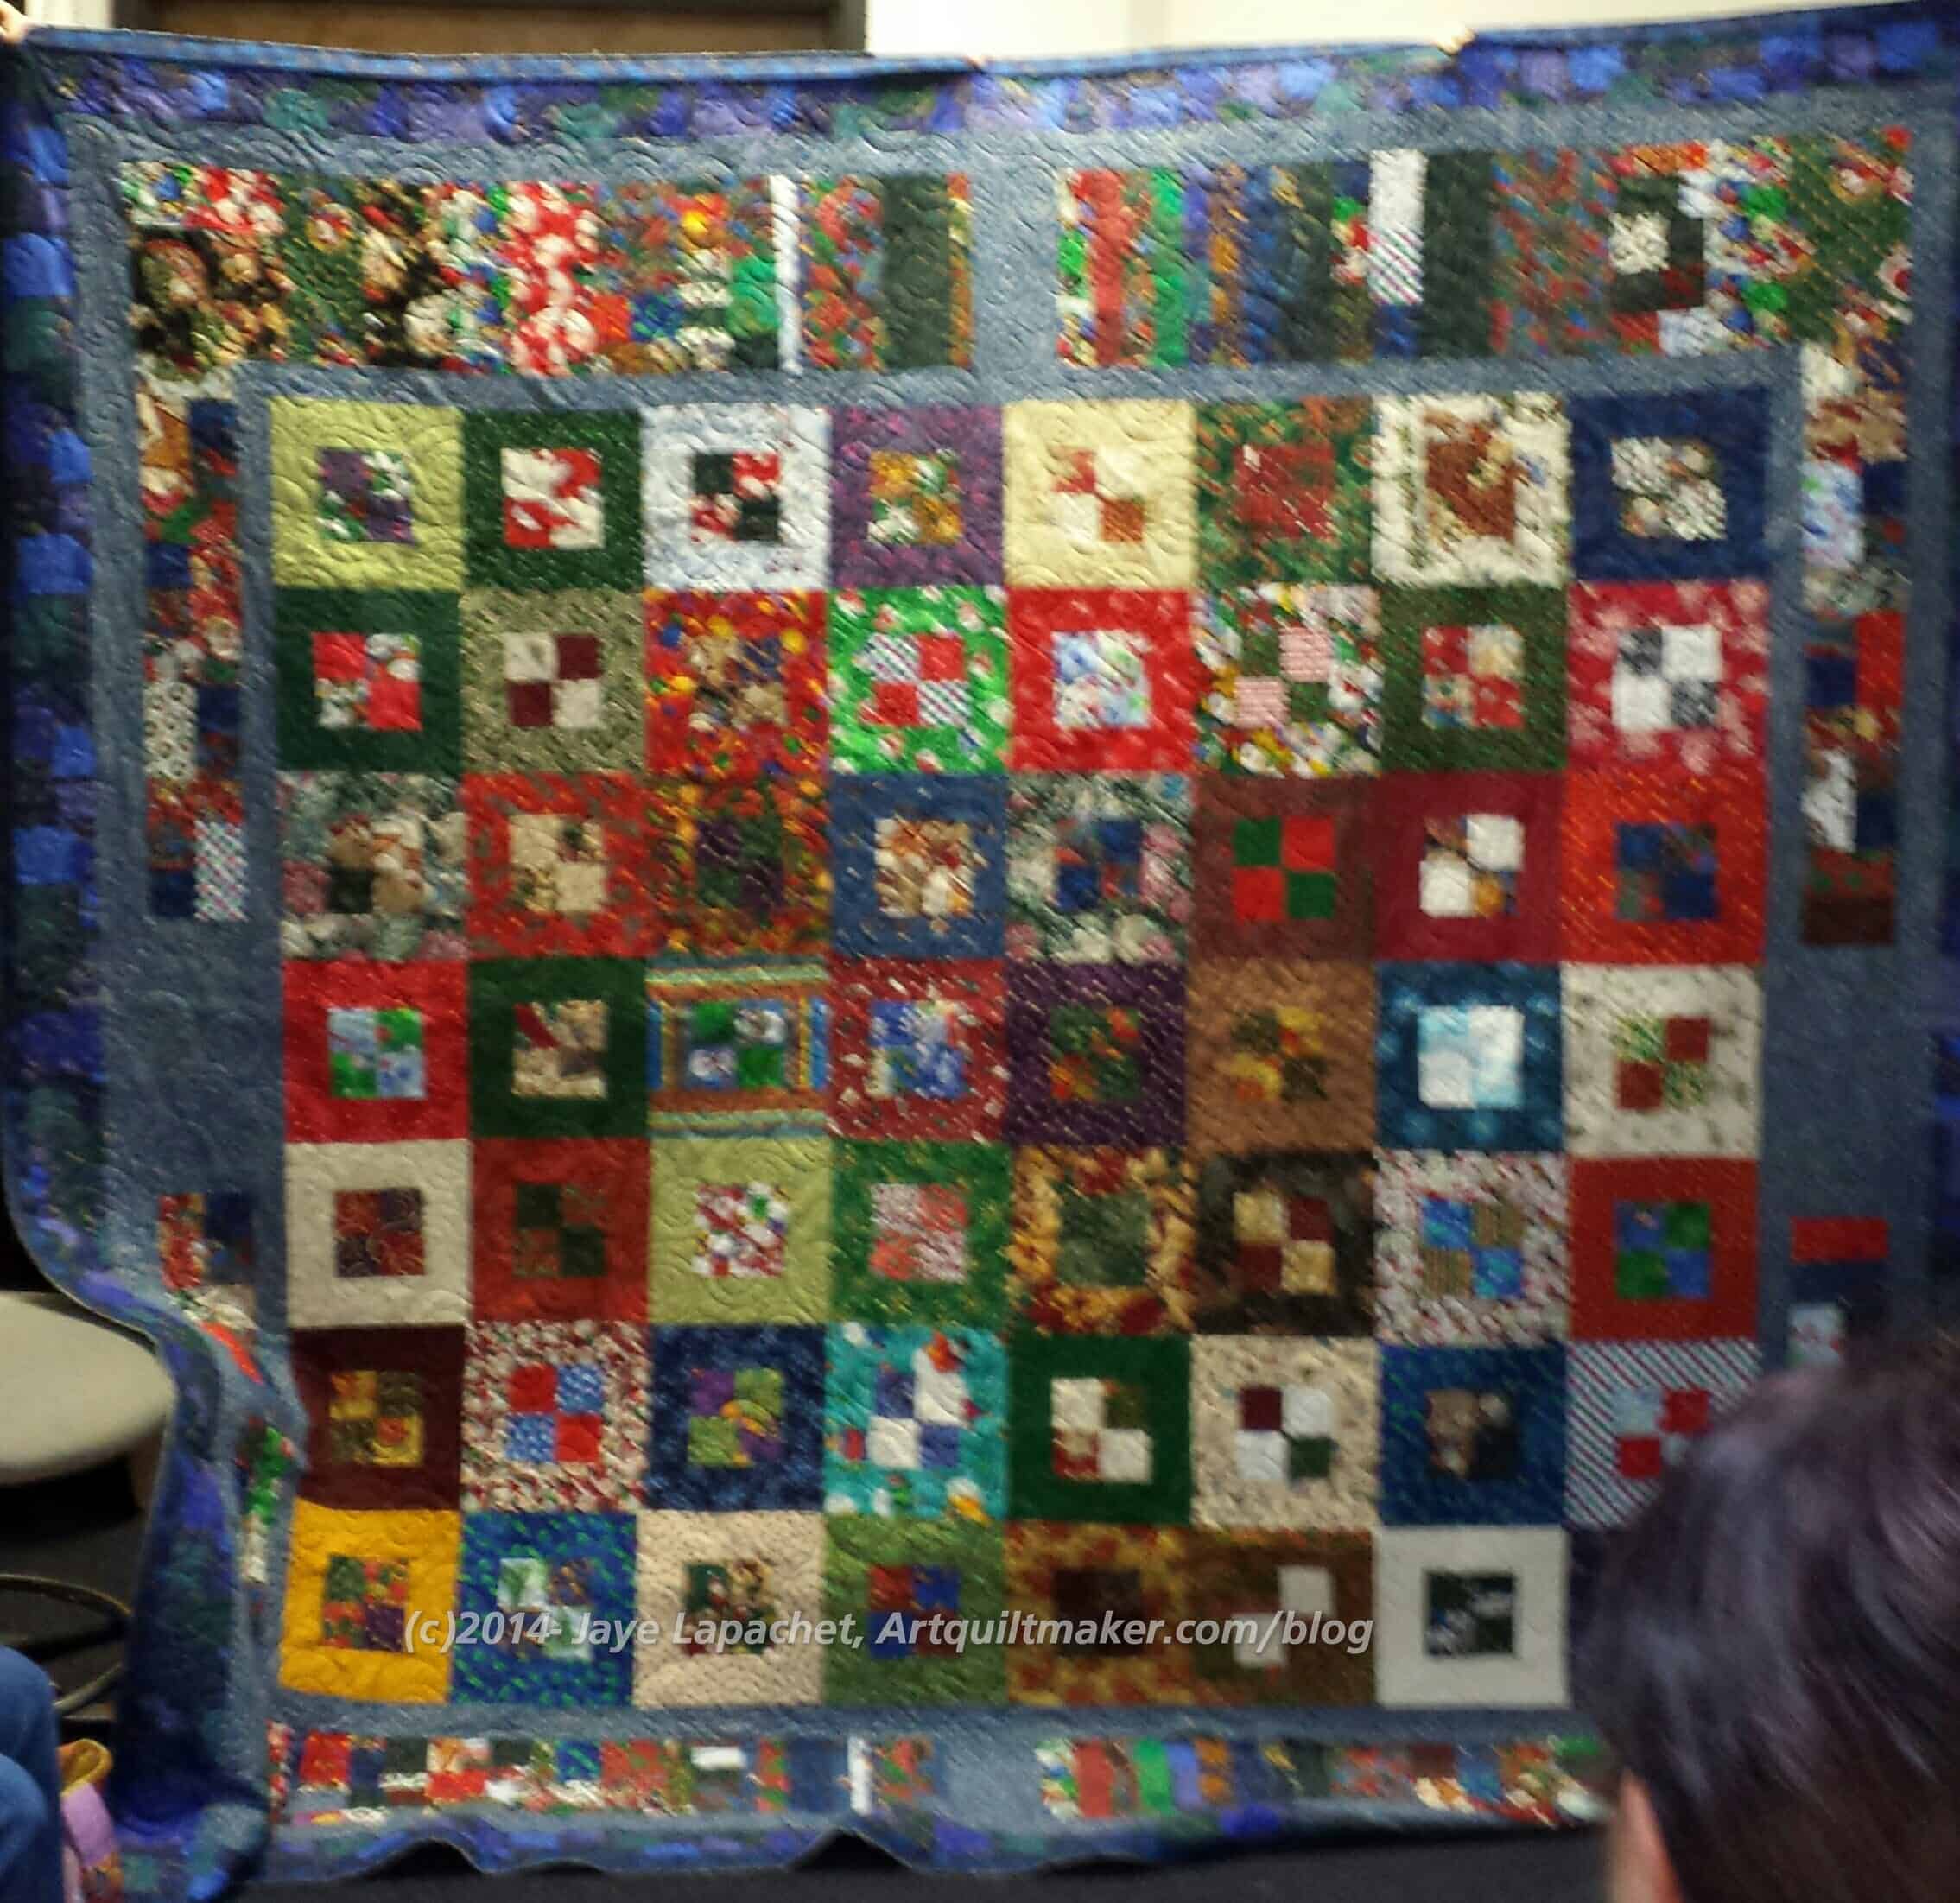
After the meeting ended, a bunch of us sat around finishing up the binding of the guild’s opportunity quilt. The quilt is a monster, but it is also an amazing monster.
Ruth designed it and it is a very unique design that will be appealing to modern quilters, at the very least. Marci Gore designed the quilting and stitched it out on her computerized longarm.
There was some discussion about what the guild would do if we were asked for a pattern. There is a lot of creativity in the guild so I suggested created a pattern and posting it on Craftsy. There are a lot of steps before we can do that, not the least of which is get our nonprofit status finalized, but it is in the idea hopper.
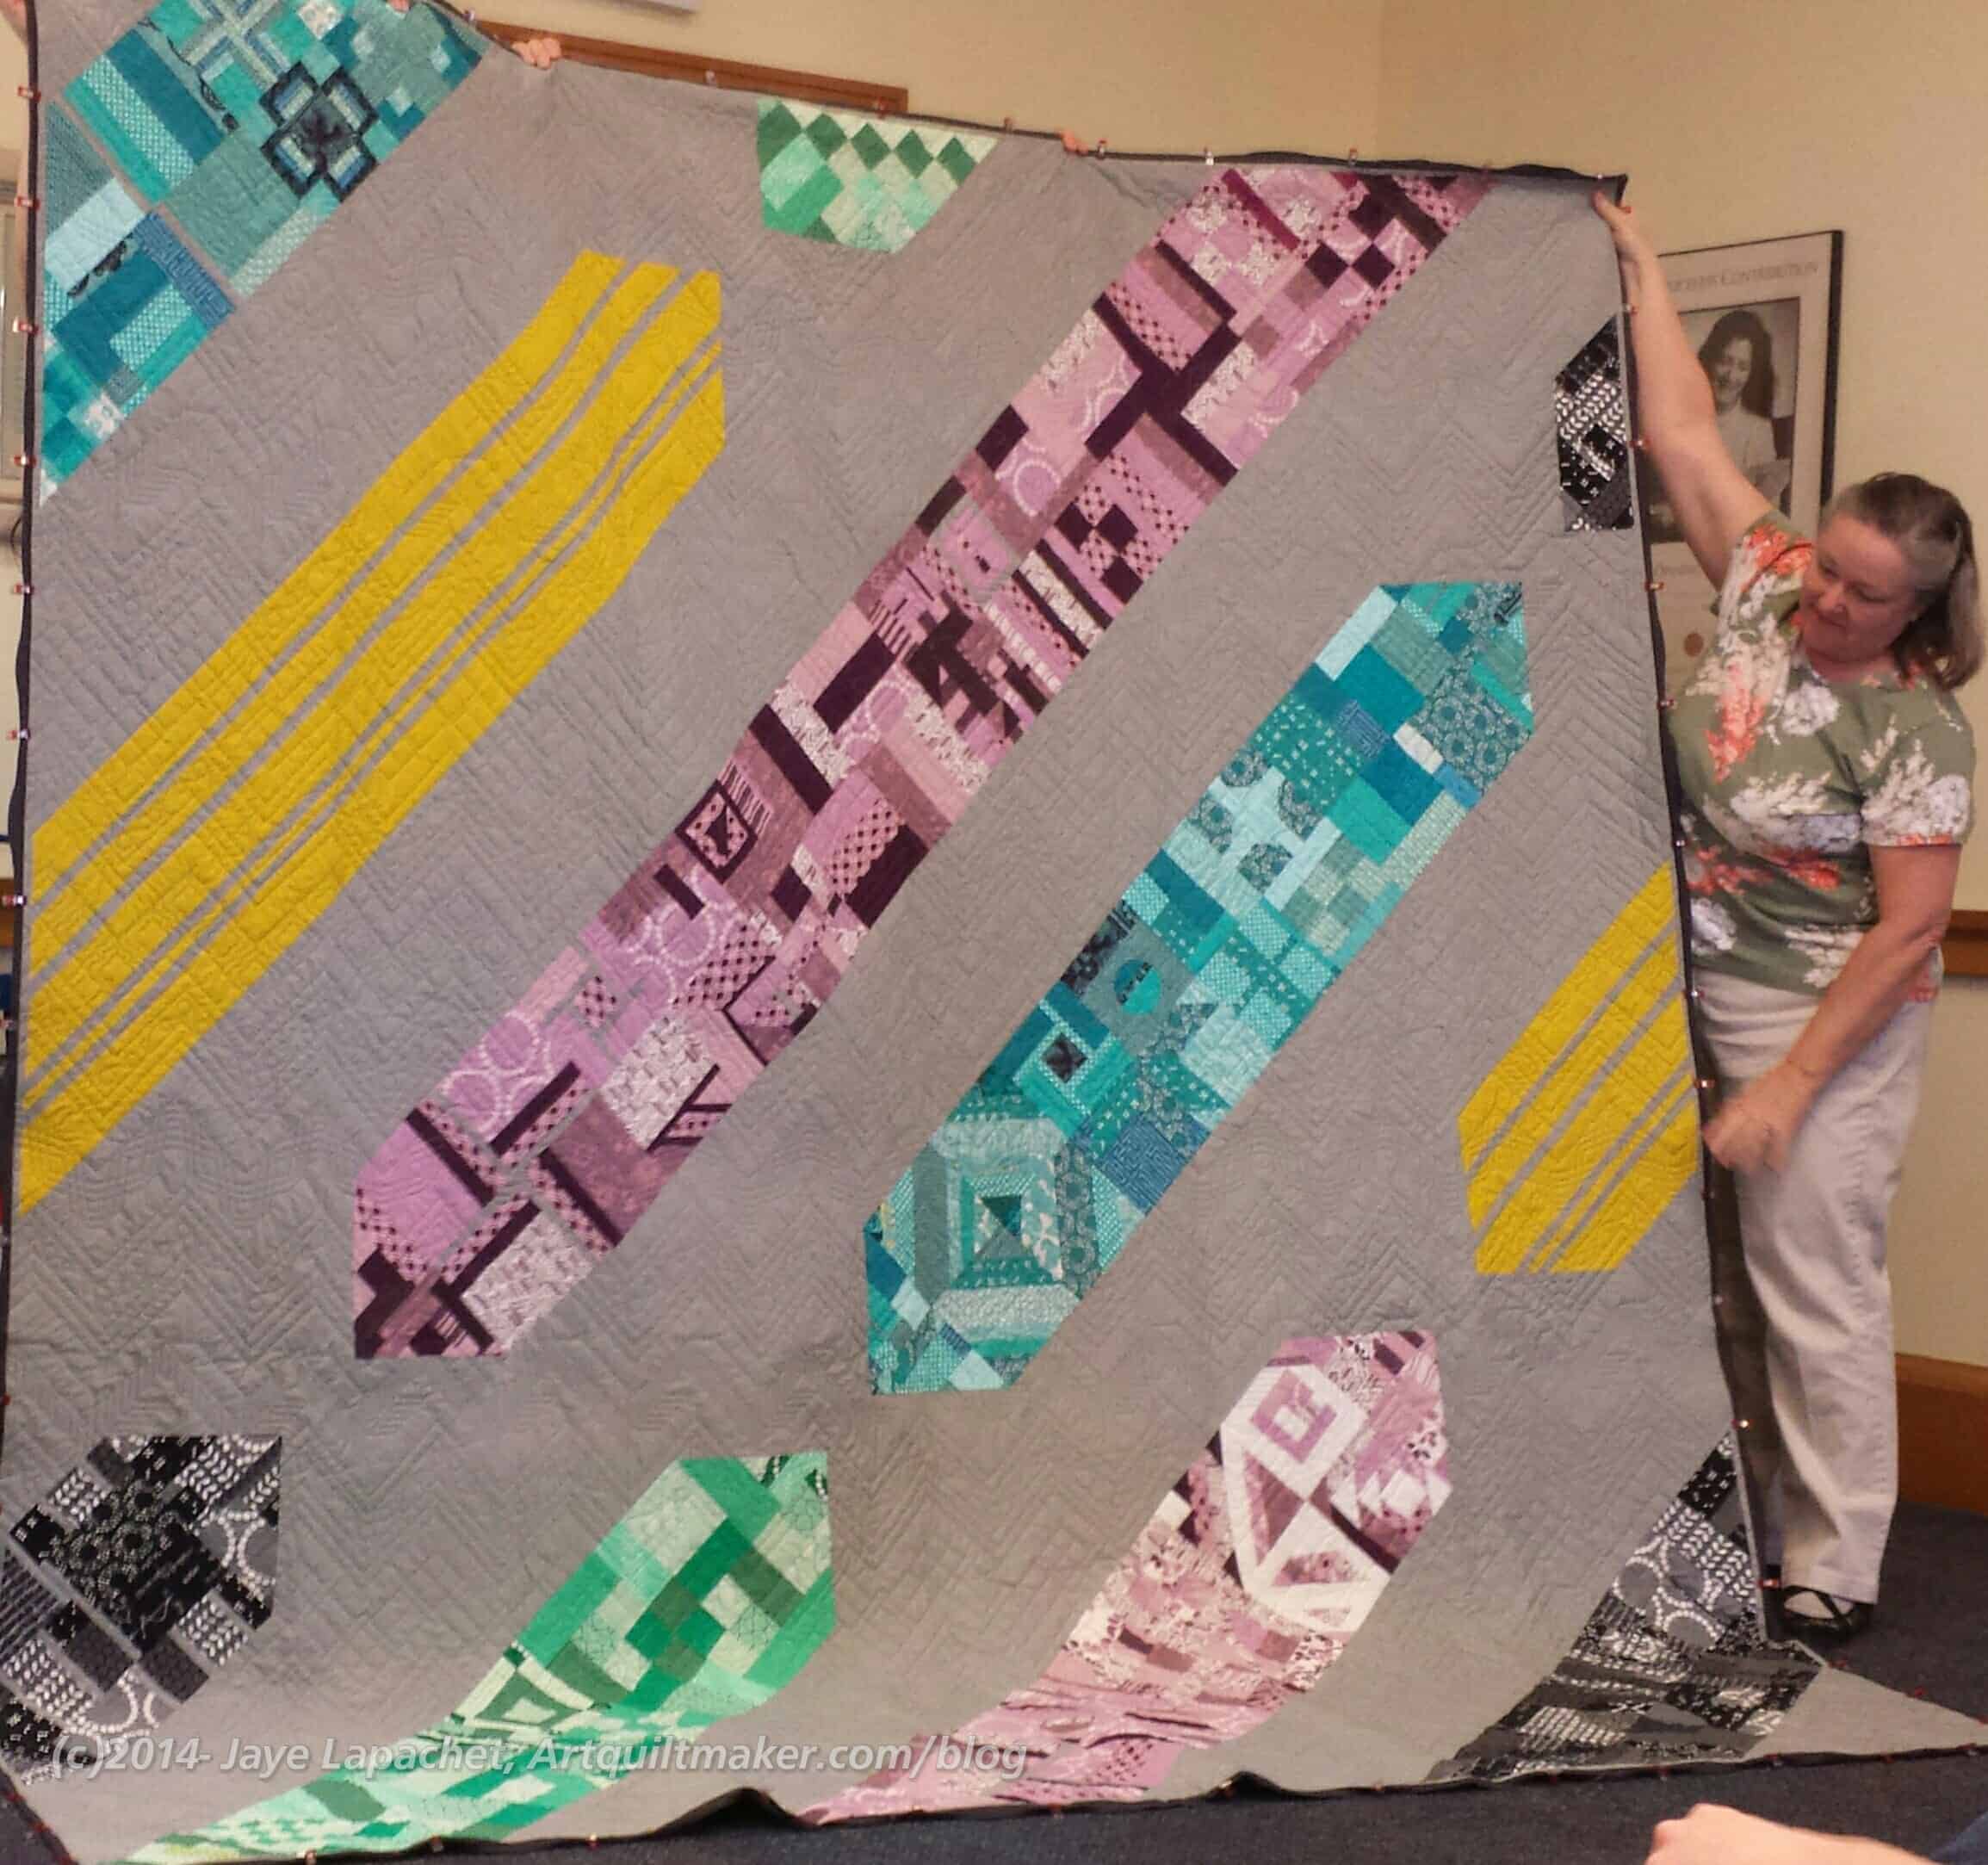
2014 BAMQG Opportunity Quilt
The first opportunity to buy raffle tickets will be at the Santa Clara Valley Quilt Association Show. It was fun. People would walk up and comment that it was just like an old fashioned quilting bee.
The next Sew Day will be at The Intrepid Thread, which will be dangerous. 😉
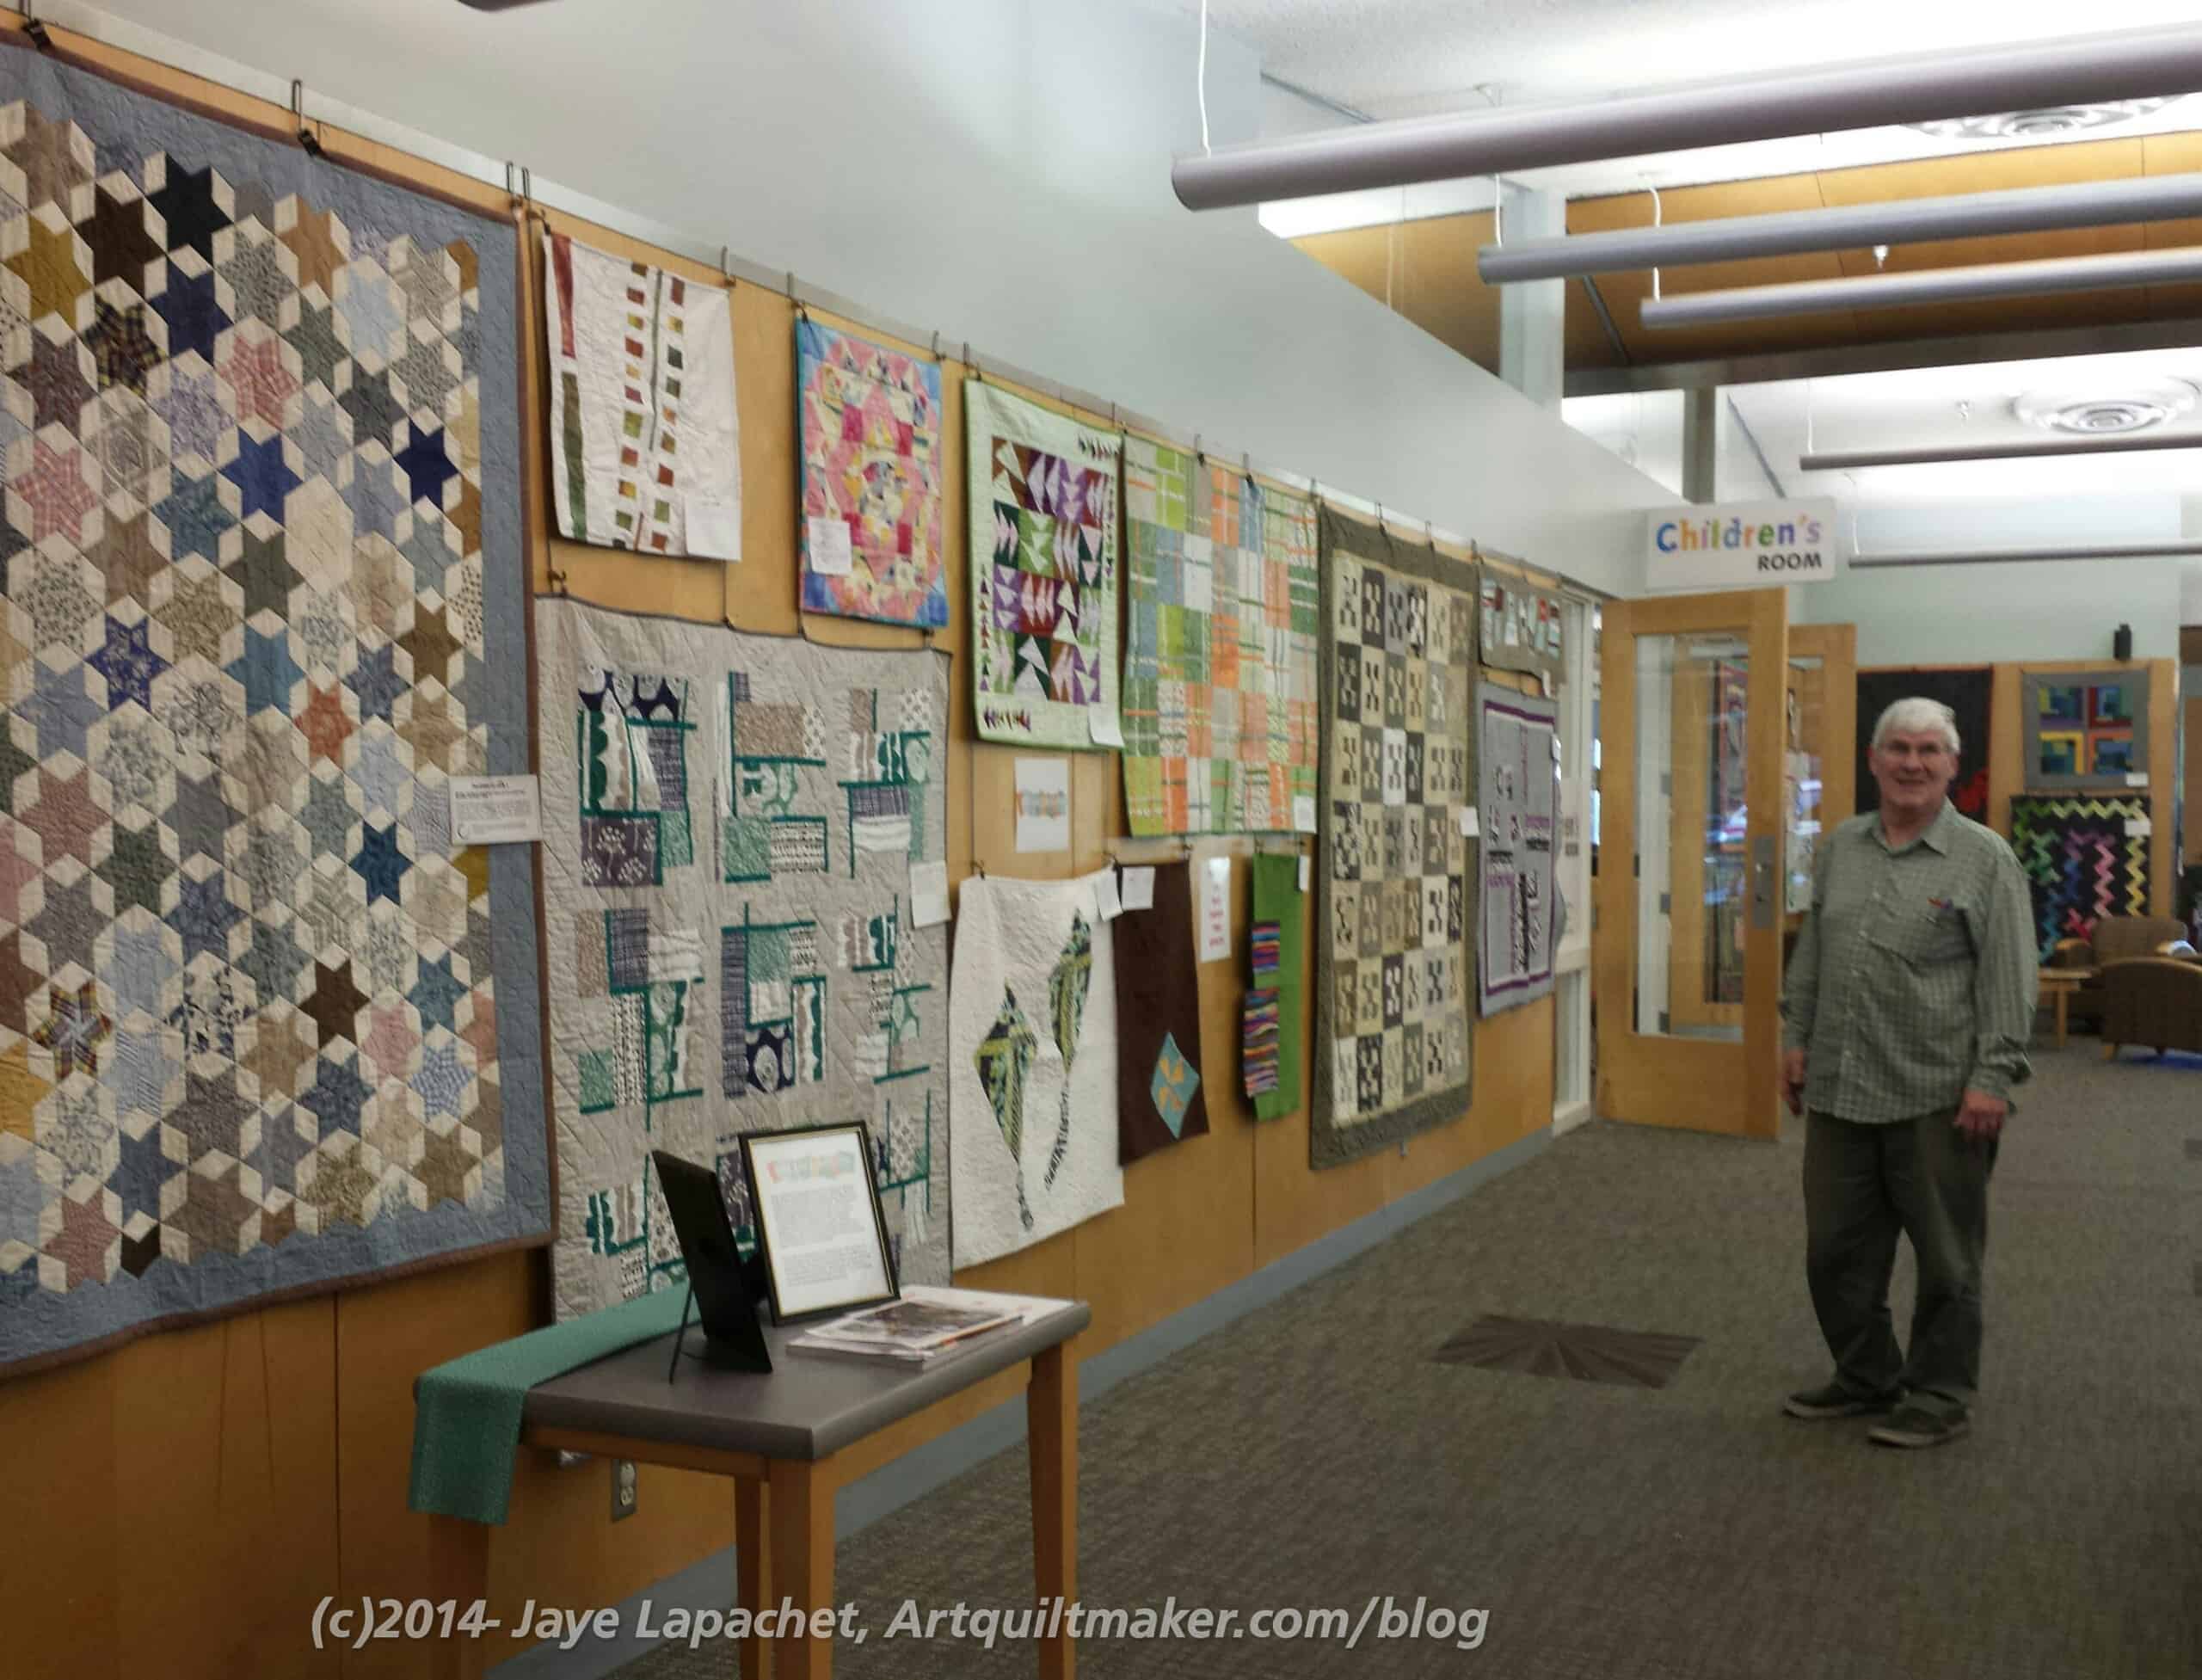
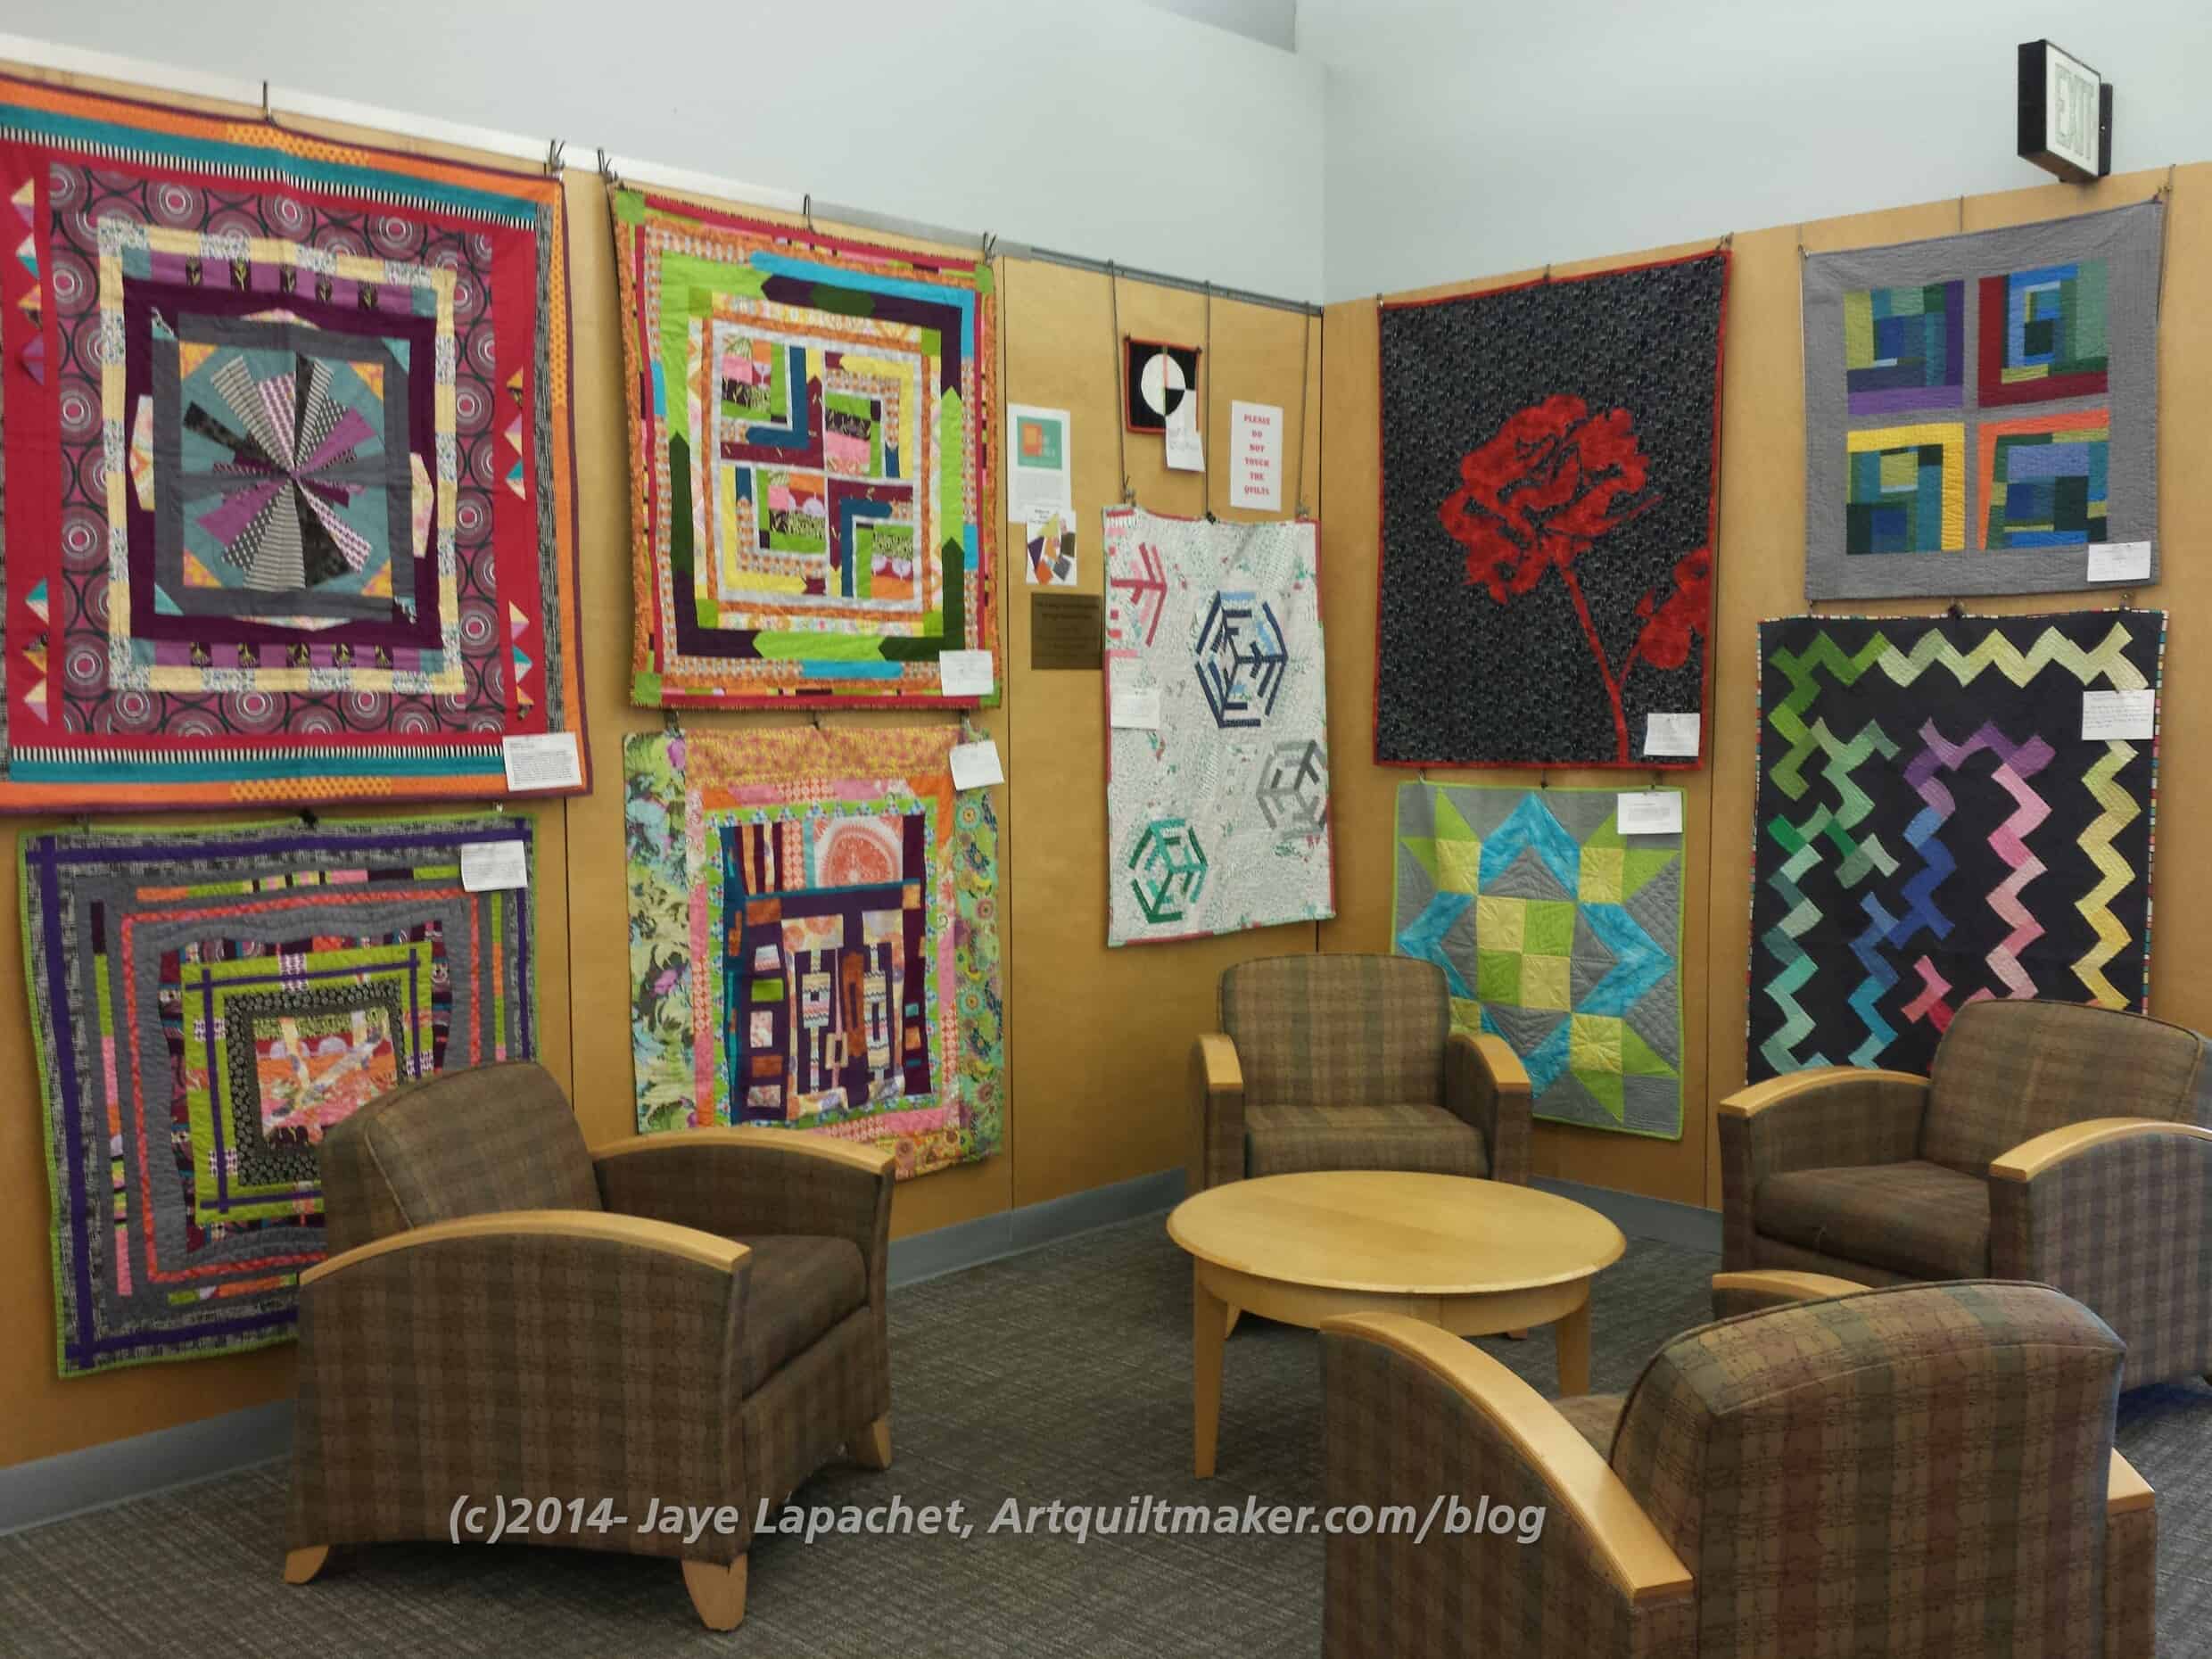
Peggy the Fantastic Energizer (TM) Bunny and pals hung the BAMQG quilt show on Monday and we were all able to view it at the meeting/Holiday Extravaganza on Saturday. Jim, one of our members, was kind enough to stand in as an interested viewer for me. 😉
BAMQG Library Quilt Show 2014
The show is not your regular quilt show, which was nice as it really gets quilts out to the public.
No, I did not enter one. I think the patrons seem good about touching, but I wasn’t sure at the time and didn’t make the time. Maybe next year.
I thought it was a little strange that some of the quilts were hung so low, but then I realized what a great view I would get of them if I sat in the chairs. And I would get a sore neck. Win-win!
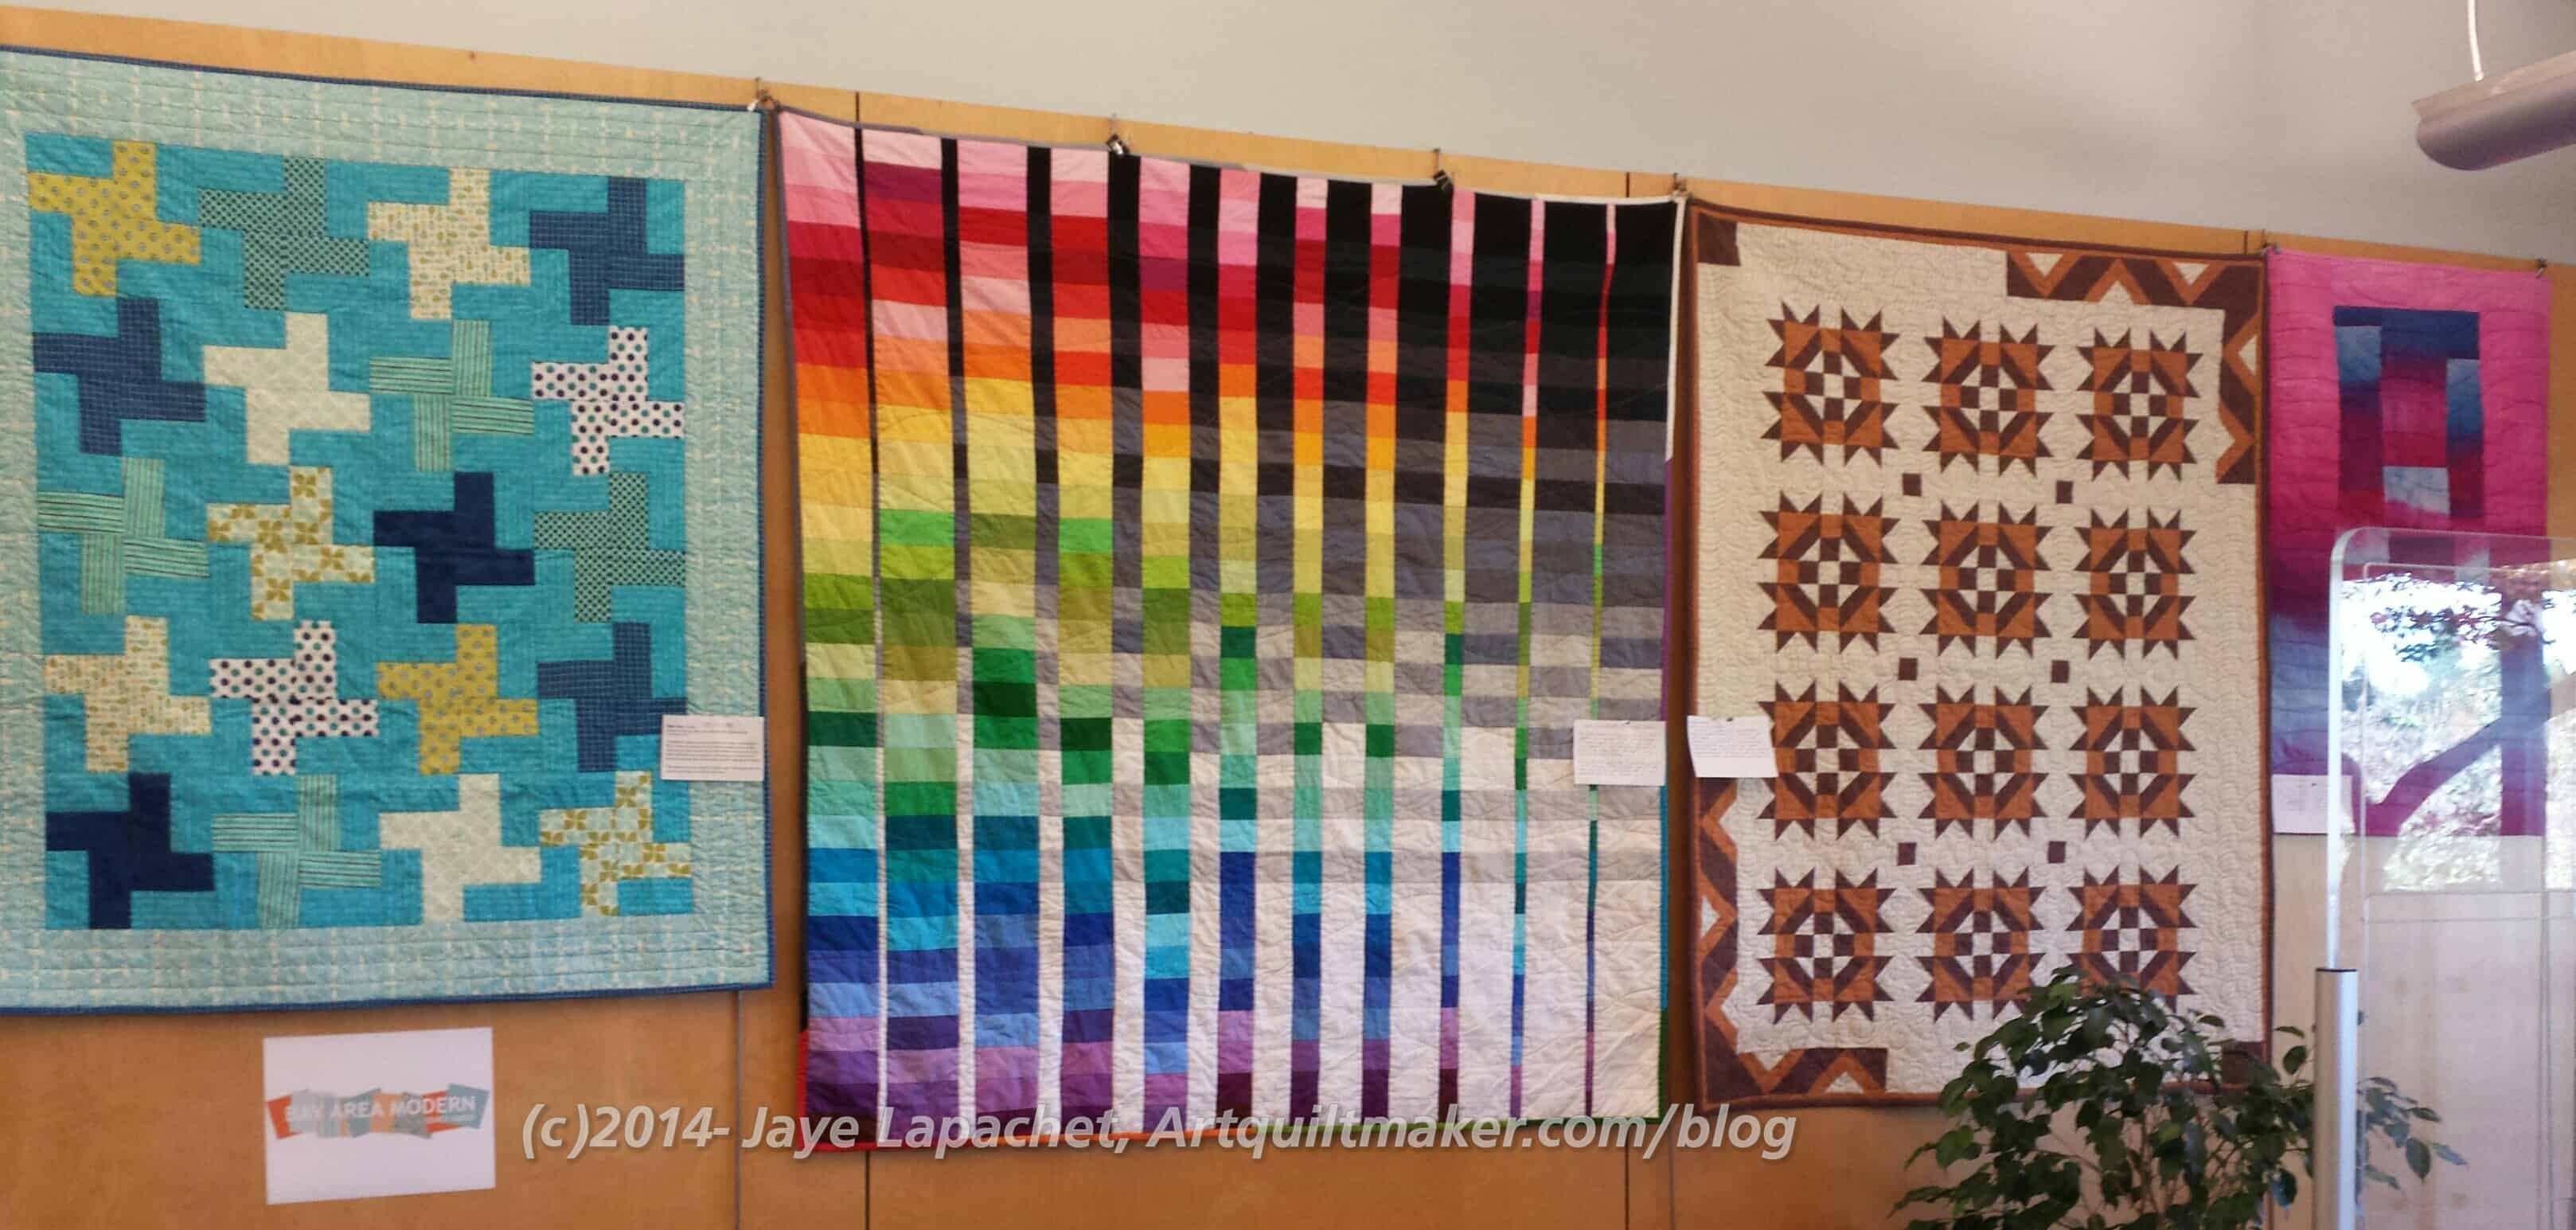
BAMQG Library Quilt Show 2014
There certainly is a wide variety of quilts. I don’t know if they are all modern, but I guess they are now!
I really like Nicki’s quilt, which is the turquoise quilt on the left. Are you surprised? 😉
I am really scraping the bottom of the barrel for posts and I don’t know why. Too many demands on my time, perhaps? I suspect not enough sewing, but this means you get the BAMQG report ASAP! Aren’t you excited?
Claire told us that the 501(c)(3) paperwork has been put in. That is a ton of work and GREAT news.
Quilty Happenings
Amish Exhibit at San Jose Museum Quilts & Textiles. Reception is on 12/7/2014 from 2-4, though SJMQT members and the artists are welcome to a walk through starting at 1pm.
BAMQG members have a show up at the Los Altos Public Library through December 31, 2014. It is open during library hours
CQFA Members have a show at the Main Branch of the San Francisco Public Library in the Wallace Stegner Environmental Center. I have 3 quilts there! Through April.
Santa Clara Valley Quilt Association show will be in March or April and the BAMQG will have a big presence, both in quilts and helping out.
Meetings
The meetings in 2015 are all scheduled to be at the Redwood City Public Library Community Room. The one that might change is the December Holiday Extravaganza because of the Redwood City parade that usually coincides with our meeting. Stay tuned on the BAMQG blog for updates.
Sew Day: January 3, 2015 at Los Altos Public Library
Charity Sew Day: February 2015 at Los Altos Public Library. Probably the first Saturday. Stay tuned on the BAMQG blog for updates.
Events
There will be three speakers next year, Stacy Lynn Wood, the lady from Peppermint Pinwheel and another, as yet to be named, national speaker. Buy or renew your membership to join that fun.
There was a prize drawing for the UFO Challenge and I won a spool of Aurifil thread! Yay! I can totally use that. There is a super prize in January and I can’t wait to see what that is. I hope I don’t have to be present to win as I can’t make that meeting.
BAMQG 2014 Swap Items
The Holiday Swap was awesome. I didn’t participate beyond admiring all the gifties.
I didn’t take a picture of the food, but the committee did an awesome job. There are now five of us who eat a GF diet, so there were plenty of GF goodies of which to partake. I had some yummy chocolate thing that Claire made. Yay for chocolate!
After that I just chatted with people. I found out that Michelle S has a blog. I had never spent time talking with her, but we were sitting next to each other and just got to talking. She does a lot of handquilting and doesn’t have many UFOs, which is quite envious, I have to say. She is also using the Hoffman Challenge fabric to make her City Sampler/Tula Pink blocks. I have to say that Michelle’s blocks made mine look terrible. 🙁
I also had the chance to discuss bindings with Annemarie. She has a large hexie made from Kaffe Fassett (and friends) fabric. She was thinking of cutting off the outer hexies and I encouraged her to either fill in the edges with triangles to make them square a la the Eye Spy or to bind them around the outer hexies, leaving them in tact like I did, sort of, with Flower Sugar. I really wish these designers would stop telling people to cut off their hexies.
Peggy and Michelle did a great job organizing the Charity Day Race Game and 8 of the quilts we made were from the kits Michelle and Peggy put together before the event. They are awesome, dedicated and well organized.
Worker Bees
We all got kits and set to work. Peggy had done a lot of the cutting already, so we all only had to cut backgrounds and sew.
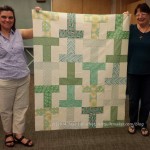
Michelle and Jennifer worked on a red version of the T quilt with a lot of Joel Dewberry Notting Hill fabric.
I was on a team with Gerre and she took the first sewing shift. I wasn’t really paying attention to how other teams organized their sewing and cutting and pressing and pinning, but our organization worked very well.
Rhonda and Ruth worked on a turquoise version with some Pearl Bracelets and a lot of fish fabric.
Diana worked on a pastel version with some Aneela Hoey fabrics and Jennifer finished a second green top that really looked like light in a forest.
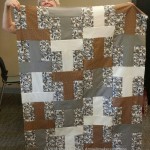
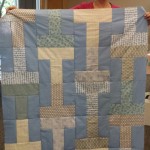
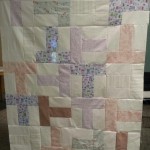
Karen and Joelle finished another red top with a lot of card game fabric that they joked they would give to Kenny Rogers. Peggy made a brown version that looked like candy and Michelle finished a second top with a blue solid background. Gerre and I finished a top with green Ts and a light background. the quilts all used the same pattern, but were so different and fun.
Jennifer & Michelle
Ruth & Rhonda
Joelle & Karen
Jaye and Gerre
Peggy
Michelle 2
Diana
Gerre & Jaye’s Bonus Quilt
After the T quilts were done many people worked on making postage stamp blocks, including Gerre and I. We made as many pink and white postage stamp blocks as we could, then we added in some yellow and white blocks in to bring the quilt up to size. We didn’t finish it. Gerre put me in the sewing driver’s seat and I kept screwing up when sewing the blocks together, so we pinned the blocks together and Gerre will finish the top at home.
Every time I turn around, I am kind of shocked that it is September. Even in my journal, I keep starting to write June when I write the date. I don’t know why. I did that all through last year as well and had no good reason then either.
Anyway. Lots of BAMQG this week.
Play-Crafts Palette Builder
The meeting was awesome, as usual. The best part was the talk by Anne Sullivan of Play-Crafts.com. She gave us all a lecture on Color Theory. I know a couple of things about color theory, but I learned quite a few things. There are things called color models, which I have heard of before. One of the models is called Hue, Saturation & Value (HSV). It is a color model created to be more intuitive and show color relationships.
Anne also talked about the basics of color theory, contrast, and color schemes. Anne has the passion of someone who loves color. She has clearly done the research of a person dedicated to something she loves. I looked at her website and found nothing on color until I went to the patterns and tutorials section and there were some tutorials on color there.
We had some business as well.
Elections are next month.there will be a couple of new positions available: liaison with MQG and the Opportunity quilt coordinator
Charity will host a Sew Day on October 4. We will work in teams to create charity tops.
Amanda still has no reliable source for Cat Bed donations. She had a few that were already made, but not stuffed, so people took those. I gave in the neon orange bed. It got a few laughs. [BTW, I forgot to take a photo of that cat bed, but it was just neon orange, so nothing interesting. Also, I was able to cut a top and bottom, but not a gusset from the remaining Polartec. I hoped that Amanda would have a bit more fabric, not in neon orange from which to make the gusset]
The quilt display at the Los Altos Library will happen Dec 1-31 and Peggy has forms to fill out.
There were a few more packs of fabric for the 2014 Opportunity Quilt. The blocks are due at the October meeting.
PIQF is during the next meeting. 🙁 Poor planning on the Mancuso’s part IMO.
Retreat dates are still in process.
Amish exhibit – quilts are due. I didn’t do one, but people have to arrange for a dropoff with Kelly. People showed their quilts during show and tell, but no photos were taken as people were concerned that others wouldn’t attend the show if they had already seen the quilts.
I don’t know if the small groups met, because I was busy and missed mine.
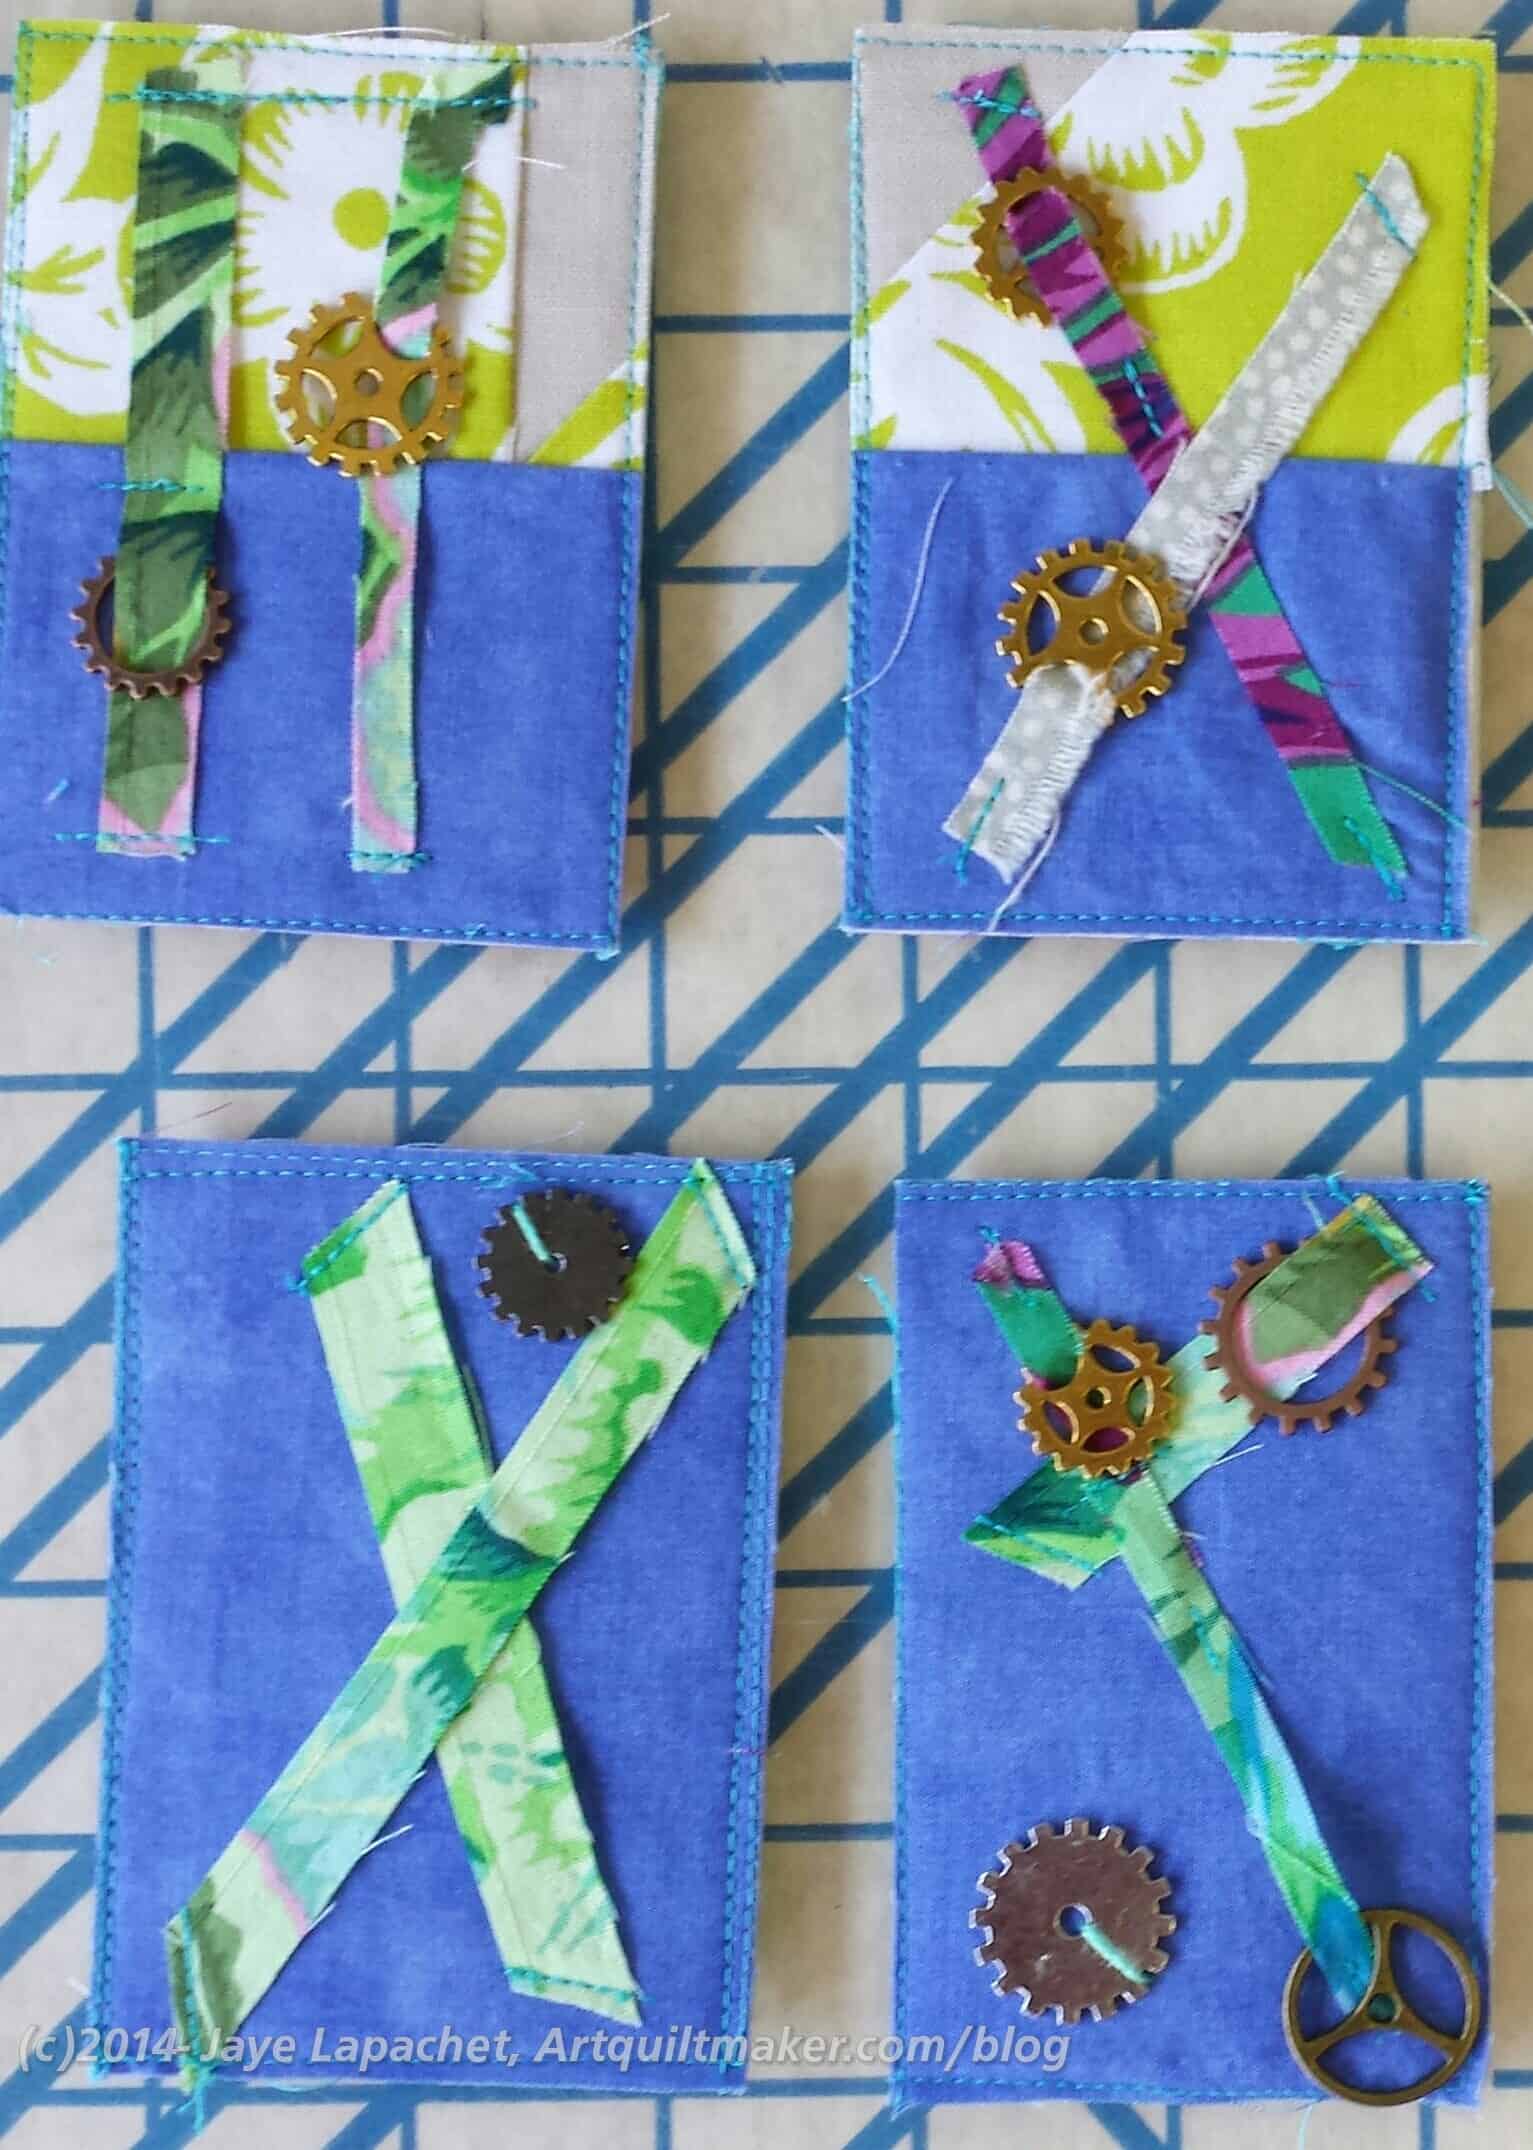
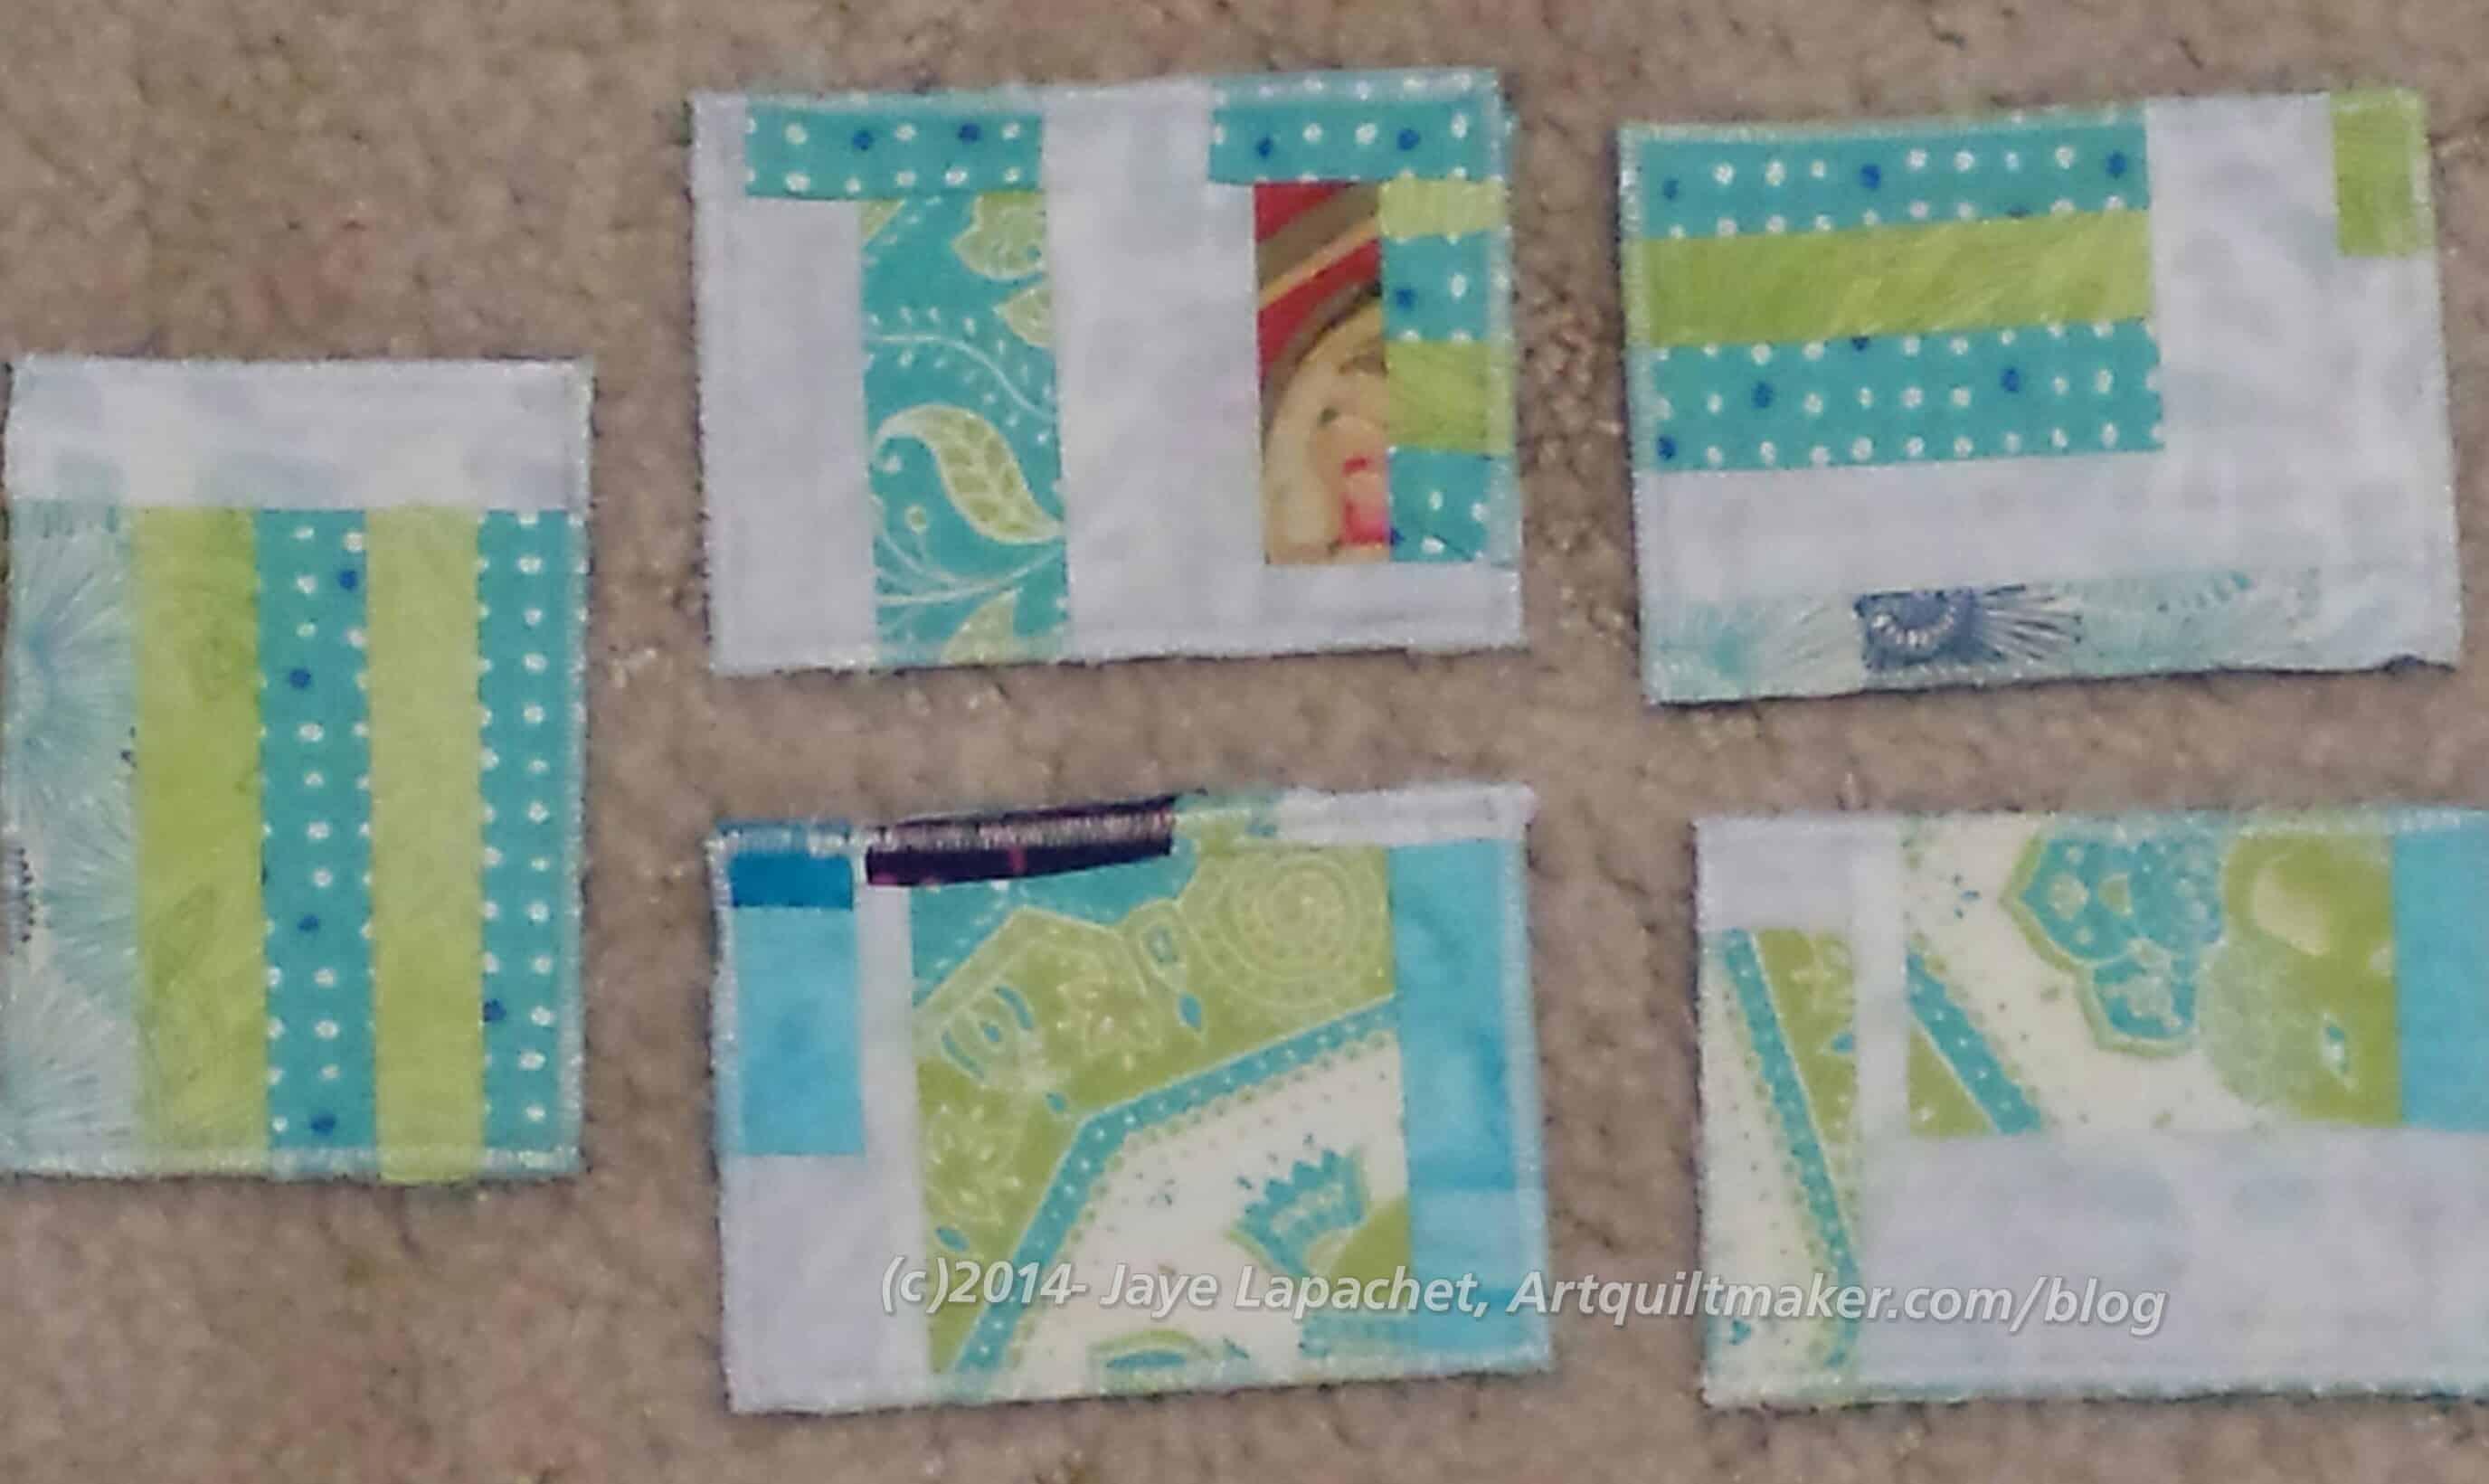
It has taken me awhile to get these posted, but here they are.
I made them the morning before the meeting after procrastinating for weeks, then realizing I no longer had Friday to scrape something together.
I had the gears from a pack I bought at Beverly’s and scraps and that is what I used. I think I need to get some more of those gears and try another iteration, perhaps with Perl Cotton instead of schnibbles? Braided Perl Cotton?
I have two of the gears left, because I didn’t have time to stitch them down by hand.
As I said in the CQFA Meeting report, I want to do them earlier for January (won’t be at the October meeting) and need to start on the backs. Yes, I said that a week ago and haven’t done anything. First step: make the backs. If I have a lot of backs using a neutral fabric, I can concentrate on making the front awesome. Right?
As I mentioned, the CQFA Meeting was last Saturday. It was followed closely by the BAMQG Sew Day, which meant I didn’t get home until after 6 and dinner wasn’t on the table until 7:30. I thought a lot, afterwards, if I should have spent all day out of the house after working all week. I decided that, though I missed the Young Man, it was really good for me to see my quilt pals. Also, I got a lot done.
We have been having workshops first, but on that day the business meeting was held first as we had to wait for the sun to come out. It was pretty cloudy until after 10am or even 10:30.
During the business meeting, there was a lot of talk about the upcoming show. We are getting to crunch time as the opening day draws nearer. People when off to the other room at FabMo and got help recording their audio clips. The quilts for publicity have been selected (mine was not one of them). I recorded my audio files at home last weekend, so I didn’t have to do it during the meeting. I thought some readers might be interested in hearing what I said about the quilts so I will see about posting them to quilt page for each relevant quilt. I still have to make QR Codes for my quilts.
We had show and tell and there was so much great work. I love show and tell. Everyone was very complimentary about the Wonky 9 Patch. Angela, Ann B and Sonja took at SCVQA class on wonky piecing and two of them showed their quilts. Caroline did a landscape all in black and white and talked quite a bit about framing the piece.
Of course, we had the ATC swap. I got up at about 6:30 and made mine! I got an idea and even though I wasn’t going to, I realized that I would be really sad if I didn’t get to swap ATCs, so I made mine quickly. This is the shortest timeframe in which I have ever made ATCs. I hope not to go up against the deadline like this again.
My ATCs
They aren’t the best art ever, but people snapped them up, which made me really happy. I did use the charms I bought at Beverly’s when I was there with Maureen. I think the charms added interest. I definitely will try adding charms again. I also think that I will put together a bunch of backs, so I don’t have to do that when I am in crunch mode. Perhaps I can make 24 backs in advance and just have to worry about the fronts each month. I won’t be at the next meeting, so I have until January to make the backs and new ATCs. I will try and do them earlier!
The ATCs I selected are shown to the right. (From top left to bottom right, they are by Maureen, Sue, Angela and Nancy). Angela’s were on paper and she got the idea from a painting class she took recently. I thought about getting some paper blanks to use as a base, but haven’t done it yet. Sue used a technique that our former member Debbie did a lot of. It was a blast from the past seeing that chenille technique again.
Angela Demonstrating Sunprinting
When the sun finally showed its face, Rhonda and Angela taught us sunprinting. I didn’t participate; I sat and worked on the binding of the Wonky Nine Patch, watched and listened. I enjoyed watching everyone and talking to people while they worked. I also took a lot of photos for the CQFA Flickr group and Facebook page.
After the meeting I drove over the BAMQG Sew Day with Gerre. She is a new CQFA member, but I know her from BAMQG. She let me use her machine off and on at the last Sew Day where I forgot my machine’s foot pedal. We talked about art quilts and one thing I realized about CQFA is that people talk about their process. People are working through a process and they show the different quilts or surface design or bits and pieces of things on which they are working and they talk about it. The group is very process oriented, which I never realized until today and which I really appreciate.
It almost feels sinful to enjoy sewing for charity so much. Odd, I know.
I spent all afternoon on Saturday sewing at the Charity Sew Day. At first, since I don’t like lugging my sewing machine around, I thought I would run around and cut and press for people. Nobody responded to my forum post about that idea so I brought my back up machine. What a waste! I forgot the foot pedal so I ran around and used other people’s machines while I was doing an improv quilt top, then Gerre let me use hers pretty regularly when I started on the second top.
One of the great things was showing Gerre how to do leaders and enders. She was charmed and made 2.5 blocks at least in between her Dr. Seuss wonky log cabin blocks. That means another person knows how to do leaders and enders and more blocks will get made.
Michelle and Peggy were really well organized, as usual, and had a number of different solids to use with our scraps.
Flower Sugar Lap Top
I took the ends of quilt backs, which Colleen cuts off and returns to me. They aren’t much good unless I want to cut them up into squares or something and I never seem to get around to that. It occurred to me that I could make some Improv quilt tops with them so I brought them along. Two birds, one stone: gets the ends out of my house, adds comfort and, hopefully, beauty to someone else’s house.
The first top I made was made from the leftover back pieces from the Flower Sugar hexagon quilt. Edge pieces were quite large and I sewed them together relatively quickly. This is not great work of art, but it isn’t completely boring either. I brought it home to make the back for it. I’ll use some of the leftover Flower Sugar fabrics. I still have a lot of them and I am happy to use them for a good a cause. I may also ad something to the bottom. It looks a bit unfinished.
Star Sampler Charity Quilt
Next, I took the edges from the Star Sampler and worked with those. Michelle had an idea to make a sort of easy log cabin, but I thought the pieces were too small and I made them into rectangles. I got pretty far – to putting on the sashing – but I wasn’t able to finish the top, which would have been my preference.
I still have trimming to do and the sashing to finish. I will have used all the green fabric, from the charity stash, before I get to the two outer borders, so I have to figure something out about that. I don’t know what, but something.
I have two long strips of Philip Jacobs Chrysanthemums that I will put on the outside. I’ll probably put another border on after that, but we will see. I pinned a lot of it together so I could just sew on Sunday.
It was also fun being there with other people. Gerre, Rhonda, Susan, Leanne and Lindalee, with our bosses, Michelle and Peggy, of course, were all there sewing and we were laughing quite a bit. Kelly stopped by, but couldn’t stay.
Rhonda’s Improv Medallion
Rhonda made a large house block quilt and then worked on an Improv medallion piece. The stripes were made by sewing 2 parallel straight lines the width of the black and white fabrics (right sides together) about an inch apart, then she cut 1/4″ away from the sewn line and had strips already sewn together. I want to try the idea.
We played around with the placement of the stripes – both width and direction. It was kind of a group activity and really fun to see how people interpreted the design.
That coffee cup fabric is really nice and in a colorway I haven’t seen. I have some with a teal background. This colorway goes well with Rhonda’s overall design.
Rhonda’s House Block quilt
Rhonda has only been quilting for a few years and I am continually impressed with her design sensibility and what she chooses to tackle. The house block quilt reminded me of my house block quilt, mostly because of the placement of the house block.
In case you can’t tell, she made the door open, which is a really nice touch.
I also really liked the four patches she used as windows in the upper story.
Gerre was using Dr. Seuss fabrics to make wonky log cabin blocks. The red in that line of fabric is very primary, making the blocks really super bright. Working at her table made me feel very cheerful.
Leanne brought some fabrics that were not her style and she was trying to figure out what do with them. They felt as though they had never been washed even though she said they had.
Lindalee was making strip sets and ended up with two strip blocks, where the strips are on the diagonal. She does really nice and precise work.
Michelle was working on two really, really Improv quilts. One was blue and gold and had inset strips throughout the blocks. The other was a beige and purple piece with a lovely New York Beauty-like arc as part of the design.
Peggy’s Brown & Turquoise Charity Project
Peggy was working with brown and turquoise and she did an excellent job. I really love the color combination and know that my sister would love it as well.
there was a lot of discussion about layout and at one point the two shorter sections were down at the bottom, placed symmetrically. I’ll let your imagination consider what the visual symmetry could have symbolized. Someone suggested moving one up and filling in top and bottom and that solved the problem. It is really a nice looking quilt and a good use of color.
Even though I sewed steadily, I didn’t get as much done as I expected. I have high expectations, but am satisfied with what I got done.
Last Saturday was the day of reckoning for Primal Green 2 (remember the first Primal Green show?), the show the group has coming up in the Fall at the San Francisco Public Library.
We all had to show the pieces (in progress ok) we were planning on entering. The work was amazing. Some of it came from the various challenges the guild has had and some is new. It was all very interesting and wonderful.
What a fantastic meeting, if for no other reason than the work alone.
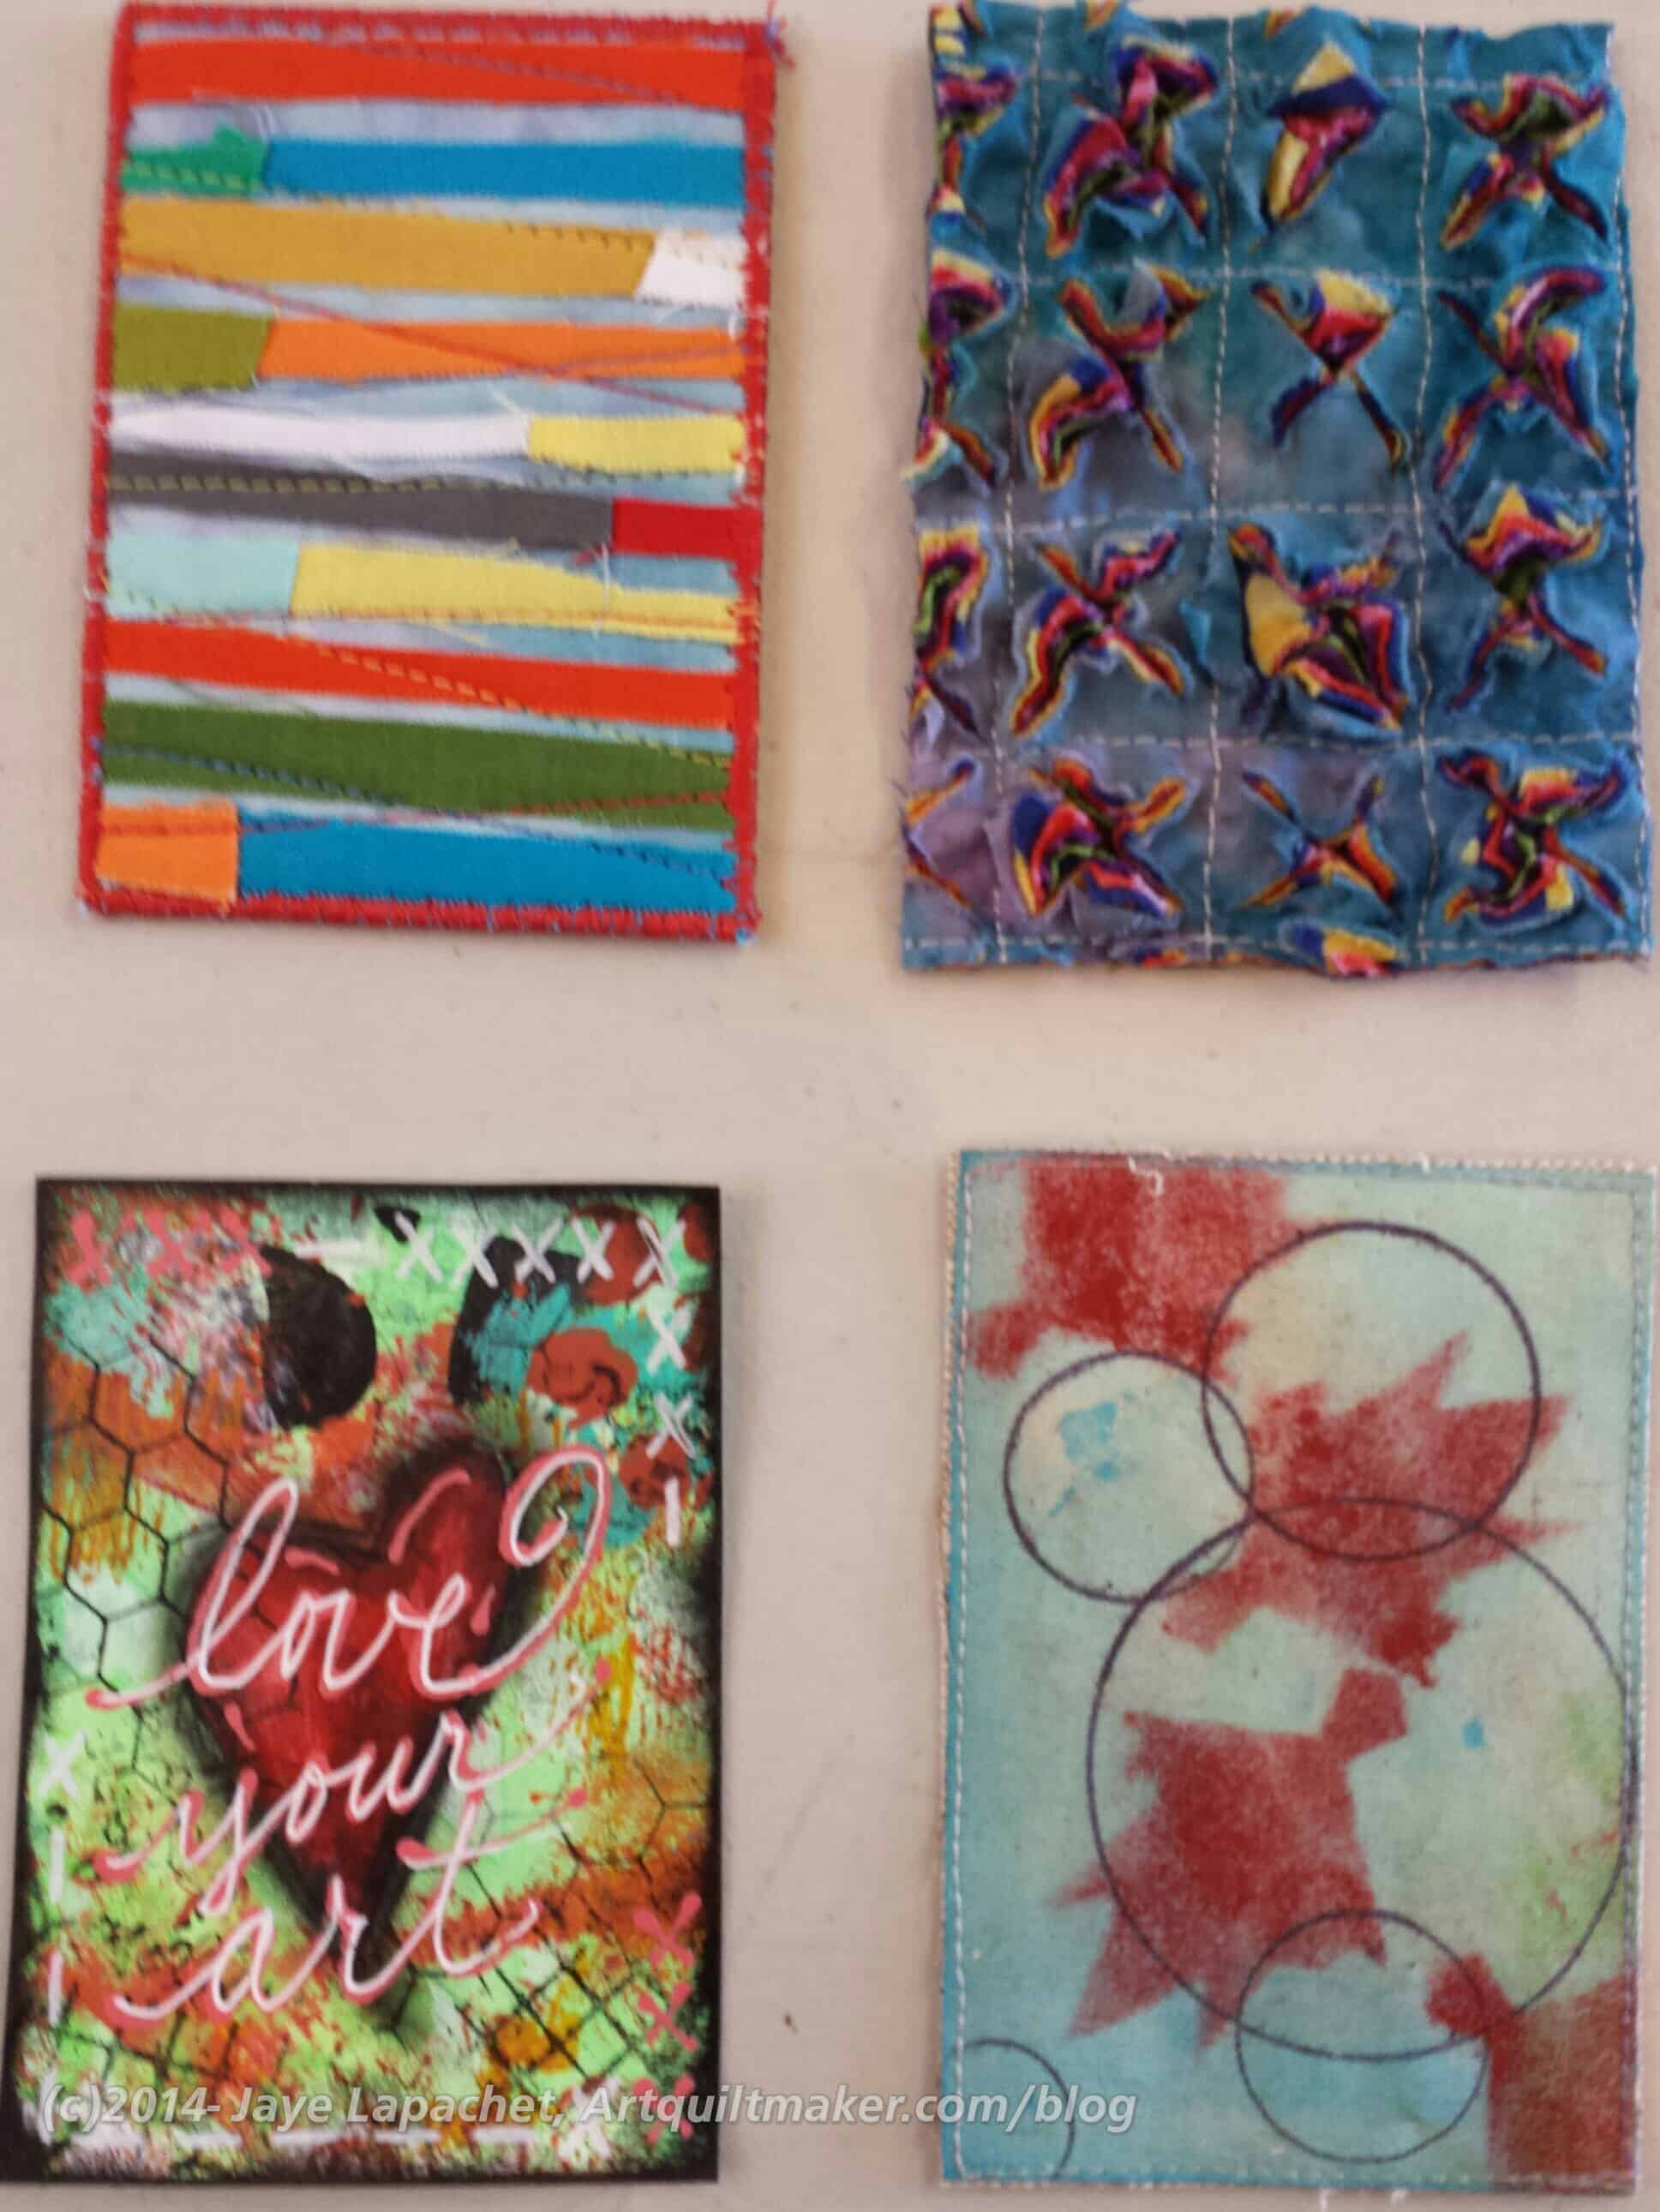
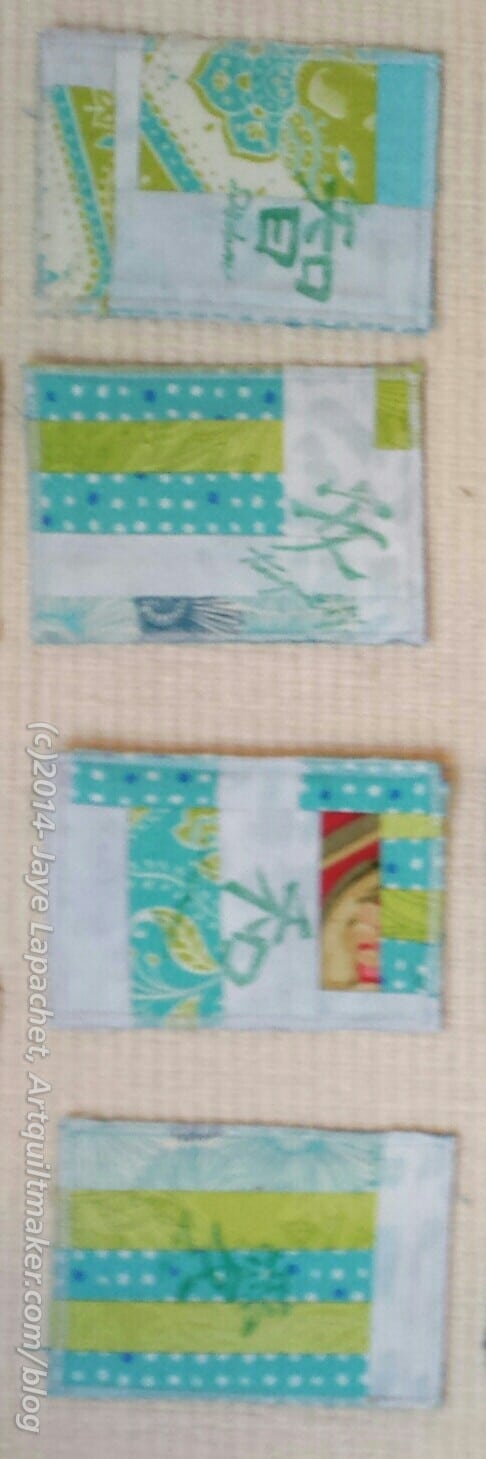
ATCs
July 2014 ATCs
Angela wasn’t at the meeting, so Maureen led us in trading. A few more extras were collected for the show. I thought mine were pretty cool until I saw everyone else’s. I need to up my game. More embellishing, more stamping, more beading. More interesting.
Show and Tell
I showed the most quilts, all of which you have seen:
Scrapitude Carnivale (I might have shown this one at the May meeting, but I didn’t remember and everyone was very kind about not pointing out my error, if I did show it)
Everyone showed such great stuff. Jennifer is really having a lot of success sending materials to magazines. Maureen continues to try new dyeing techniques. Carolyn showed the most hilarious, but fantastic fish pillow. People encouraged her to enter it into the show. It would be a great piece for one of the tabletop cabinets.
After Sewing
I stayed again to work a little bit with friends like I did last week and got part of the second apron cut out as well as the Soft & Stable for another Petrillo Bag. I still didn’t tackle the notepad covers or the Day in the Park bag. I guess I need to rethink those projects and why I am not working on them.
Jan Scardina
Jan and Maureen stayed, too. Maureen took a beading class from Thom Atkins and worked on her sampler project while Jan sewed like a demon to finish her quilt for the show.
I think of this quilt as part of Jan’s “Flying over the Country” series, though I am not sure she agrees. She flies to the Midwest to visit her parents and I think she gets inspired by what she sees during the flights. She started a piece at a retreat a few years go with circles, but similar in construction to the piece above. I love that previous piece and egged her on a bit about finishing it. 😉 I was really glad to see her and see her sewing.
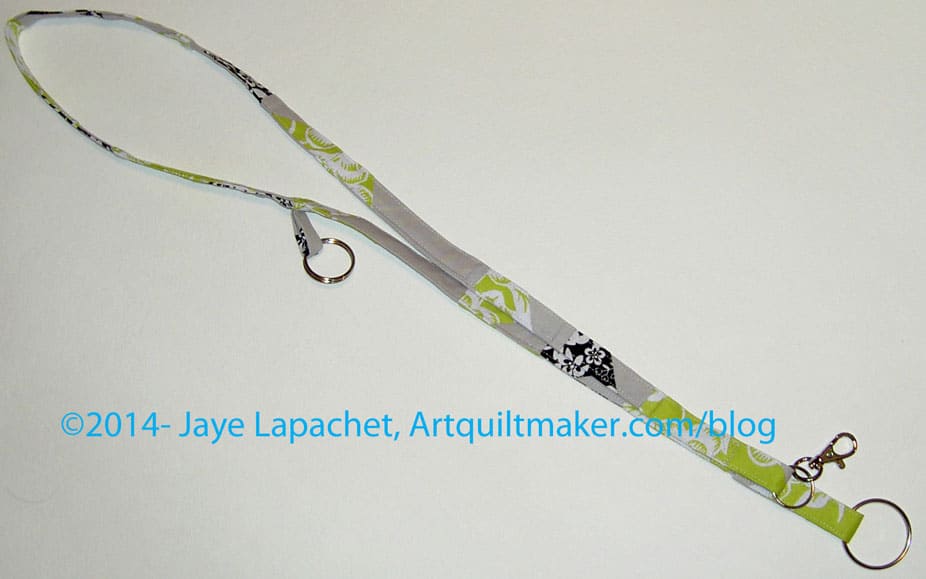
Back in December, I put a post up on the Bay Area Modern blog about making lanyards, which was a personal challenge that the president put out to the guild. I wanted to do it, but I haven’t done it for myself yet. It is on the list.
It took me some time to get around to making any kind of lanyard, but I finally did in response to the Orphan Block Challenge also put out by BAMQG. This one will be given in to a pool of small gifts and then I will get something back. I kind of like this lanyard, but am ok giving it away, too.The best part is that now I have a better idea about how to do it.
First I took a look at the Two Peas in a Pod tutorial. There are several tutorials listed. I picked this one, because it was the first one I looked at and I could follow it easily. Frankly, I already had an idea of how I was going to make the lanyard, but I needed to see how someone else did a few of the parts.
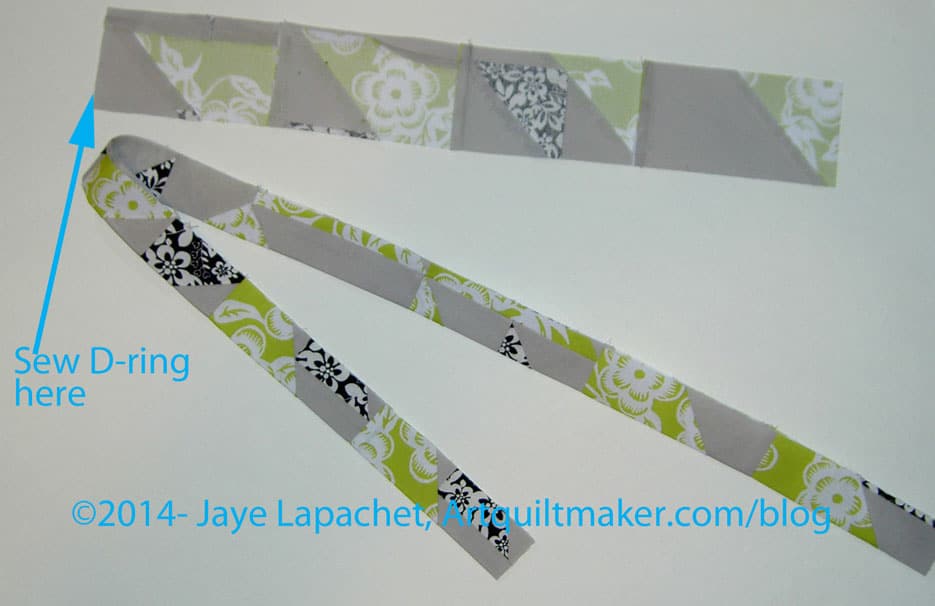
Then, I squared up the blocks a little bit to make sure the blocks to make them easier to cut into strips.
Since this was an orphan block challenge, next, I cut the blocks into 2.5″ strips. The blocks were 9″ or 10″ blocks (I don’t know -I didn’t measure) and I got about 3 strips from each one with skinnier bits leftover. It doesn’t matter what size they are as you can use regular fabric or a Jelly Roll strip and discard the leftovers.
After cutting, I sewed the strips together until I had a piece that was long enough to go from my belly button, around my neck to right below my collarbone (about an inch below or so).
Sew another strip that is long enough to go from your collarbone to your belly button.
Take both strips, fold them in half and press. Open them up and fold the raw edges to the center and press.
Sew D Ring Here
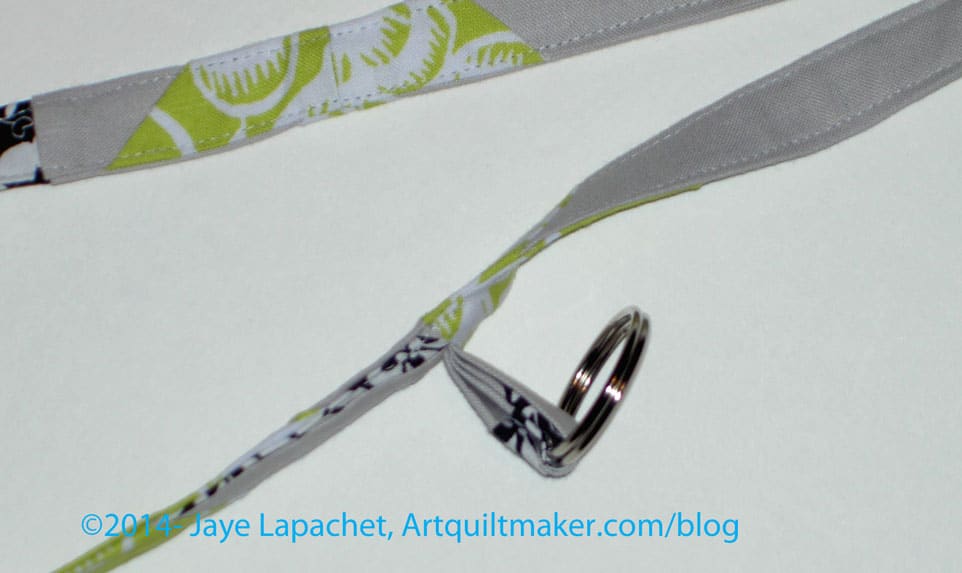
Then I wanted to add a loop at the shoulder so my nametag would be at eye level or I could use it to keep track of my glasses. Cut this piece about 4″.
I took one of the leftover skinny strips (from the block above), folded it in quarters, top stitched both sides, slid the fabric piece through a ring and sewed that piece to the right side of a strip that had not yet been sewed. Once you slide the strip of fabric through the ring, you will have a U if you hold both of the raw edges, one in each hand. The ring will be dangling from the bottom of the U.
Collarbone Loop
Nota bene: In the picture, the strip to which you have to sew is upside down. Make sure you sew the the loop with the ring in the bottom to the right side of the strip. Nota bene due: In a subsequent step, you will fold the whole piece in quarters and top stitch. You may want to measure and sew this loop to avoid the folds that will take place later.
Collarbone Loop
After you have your extra loop added, you should sew the strip to the other strips and keep adding strips until the piece is long enough. You will need a bit of extra length to fold up to accommodate the Swivel hook and other loop, so don’t cut it off too short.
Now you have a long strip about 37″ long. This measurement is from the Two Peas in a Pod tutorial. I cut mine a little shorter to accommodate my height and torso length.
Fold your long strip in half and press. Yes, the glasses loop will be a pain. I haven’t figured out how not to make it a pain. If you know of a way to make it easier, let me know.
Open your piece and fold the raw edges towards the crease in the center. Once you have completed this the raw edges will be encased in the center.
Top stitch very close to the edges on both sides. If you want to be fancy, you can do a double line of stitching or a decorative stitch. Depending on the size of the ring holder, you may have to skip the area where the ring holder is, or go around it.
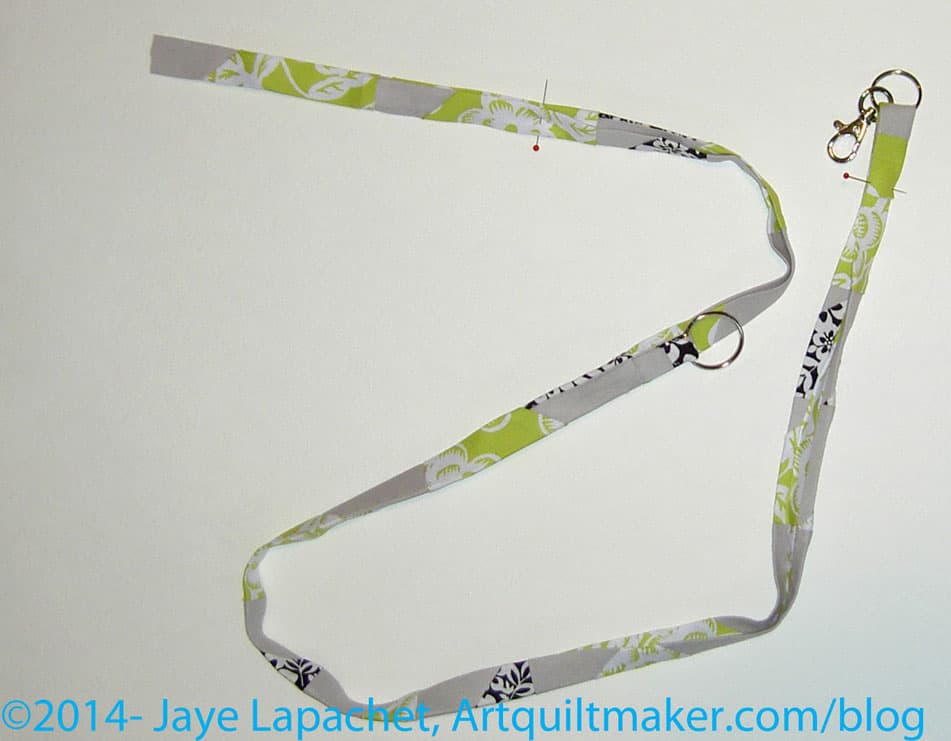
Now hang the strip around your neck. Trim the ends if you think they are too long.
Take the loop and thread one end of your strip through it. Pin in place. WonderClips work well, too.
Thread Strip End Through
Take the other end of the strip and thread the swivel hook through it. Pin in place or use WonderClips.
Now you are ready to finish off the ends. The different tutorials tell you to do it in different ways. I went with the the way the Two Peas in a Pod tutorial suggested. I hadn’t really thought about dual hardware on the bottom, but it works.
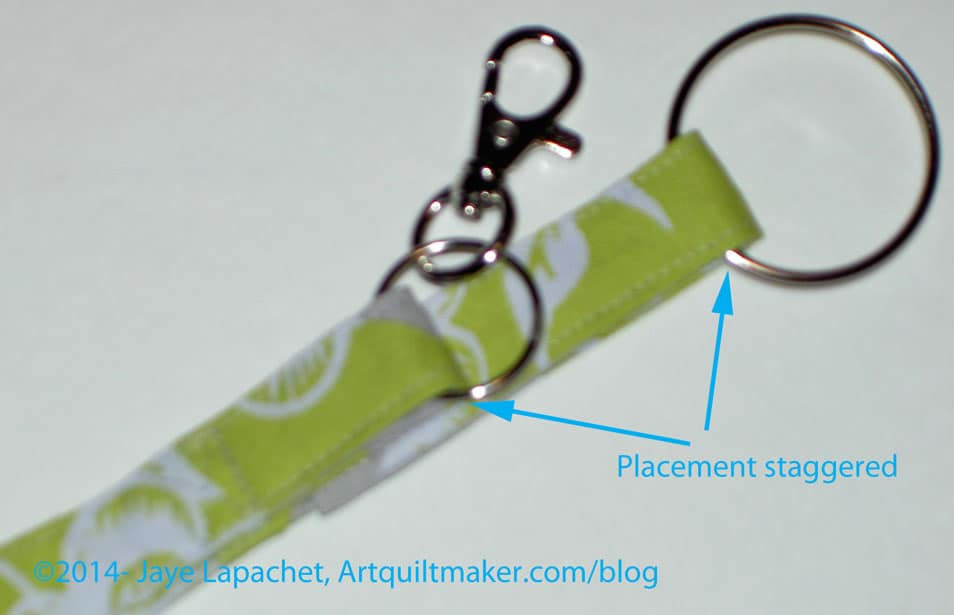
Staggered
I staggered the placement of my loop and swivel hook so they wouldn’t clank together as I (or the user) walked around. This means that I had to adjust the placement of the two pieces. It took a little bit of trial and error, but, ultimately, I am happy with the placement. As an added bonus, I had fewer layers to sew over as I finished the lanyard. That step is optional.
Think about what you might hook on to your loop and swivel hook before you decide on placement.
Place the lanyard carefully around your neck. Make sure to smooth out the twists, if any, so the lanyard lays flat around the back of your neck and on your chest.
Reinforcing Thread Box
Once you are sure everything is smooth, pin (or WonderClip) the two ends together and sew. I made “thread boxes” (the same technique you use to reinforce areas of stress when making a bag) out of my sewing line in order to keep the lanyard together and looking nice.
Change your needle so you are using a new and very sharp needle. Sew two reinforcing boxes, the top one going through all layers. Move the swivel hook out of the way to sew the bottom box to finish the lanyard.
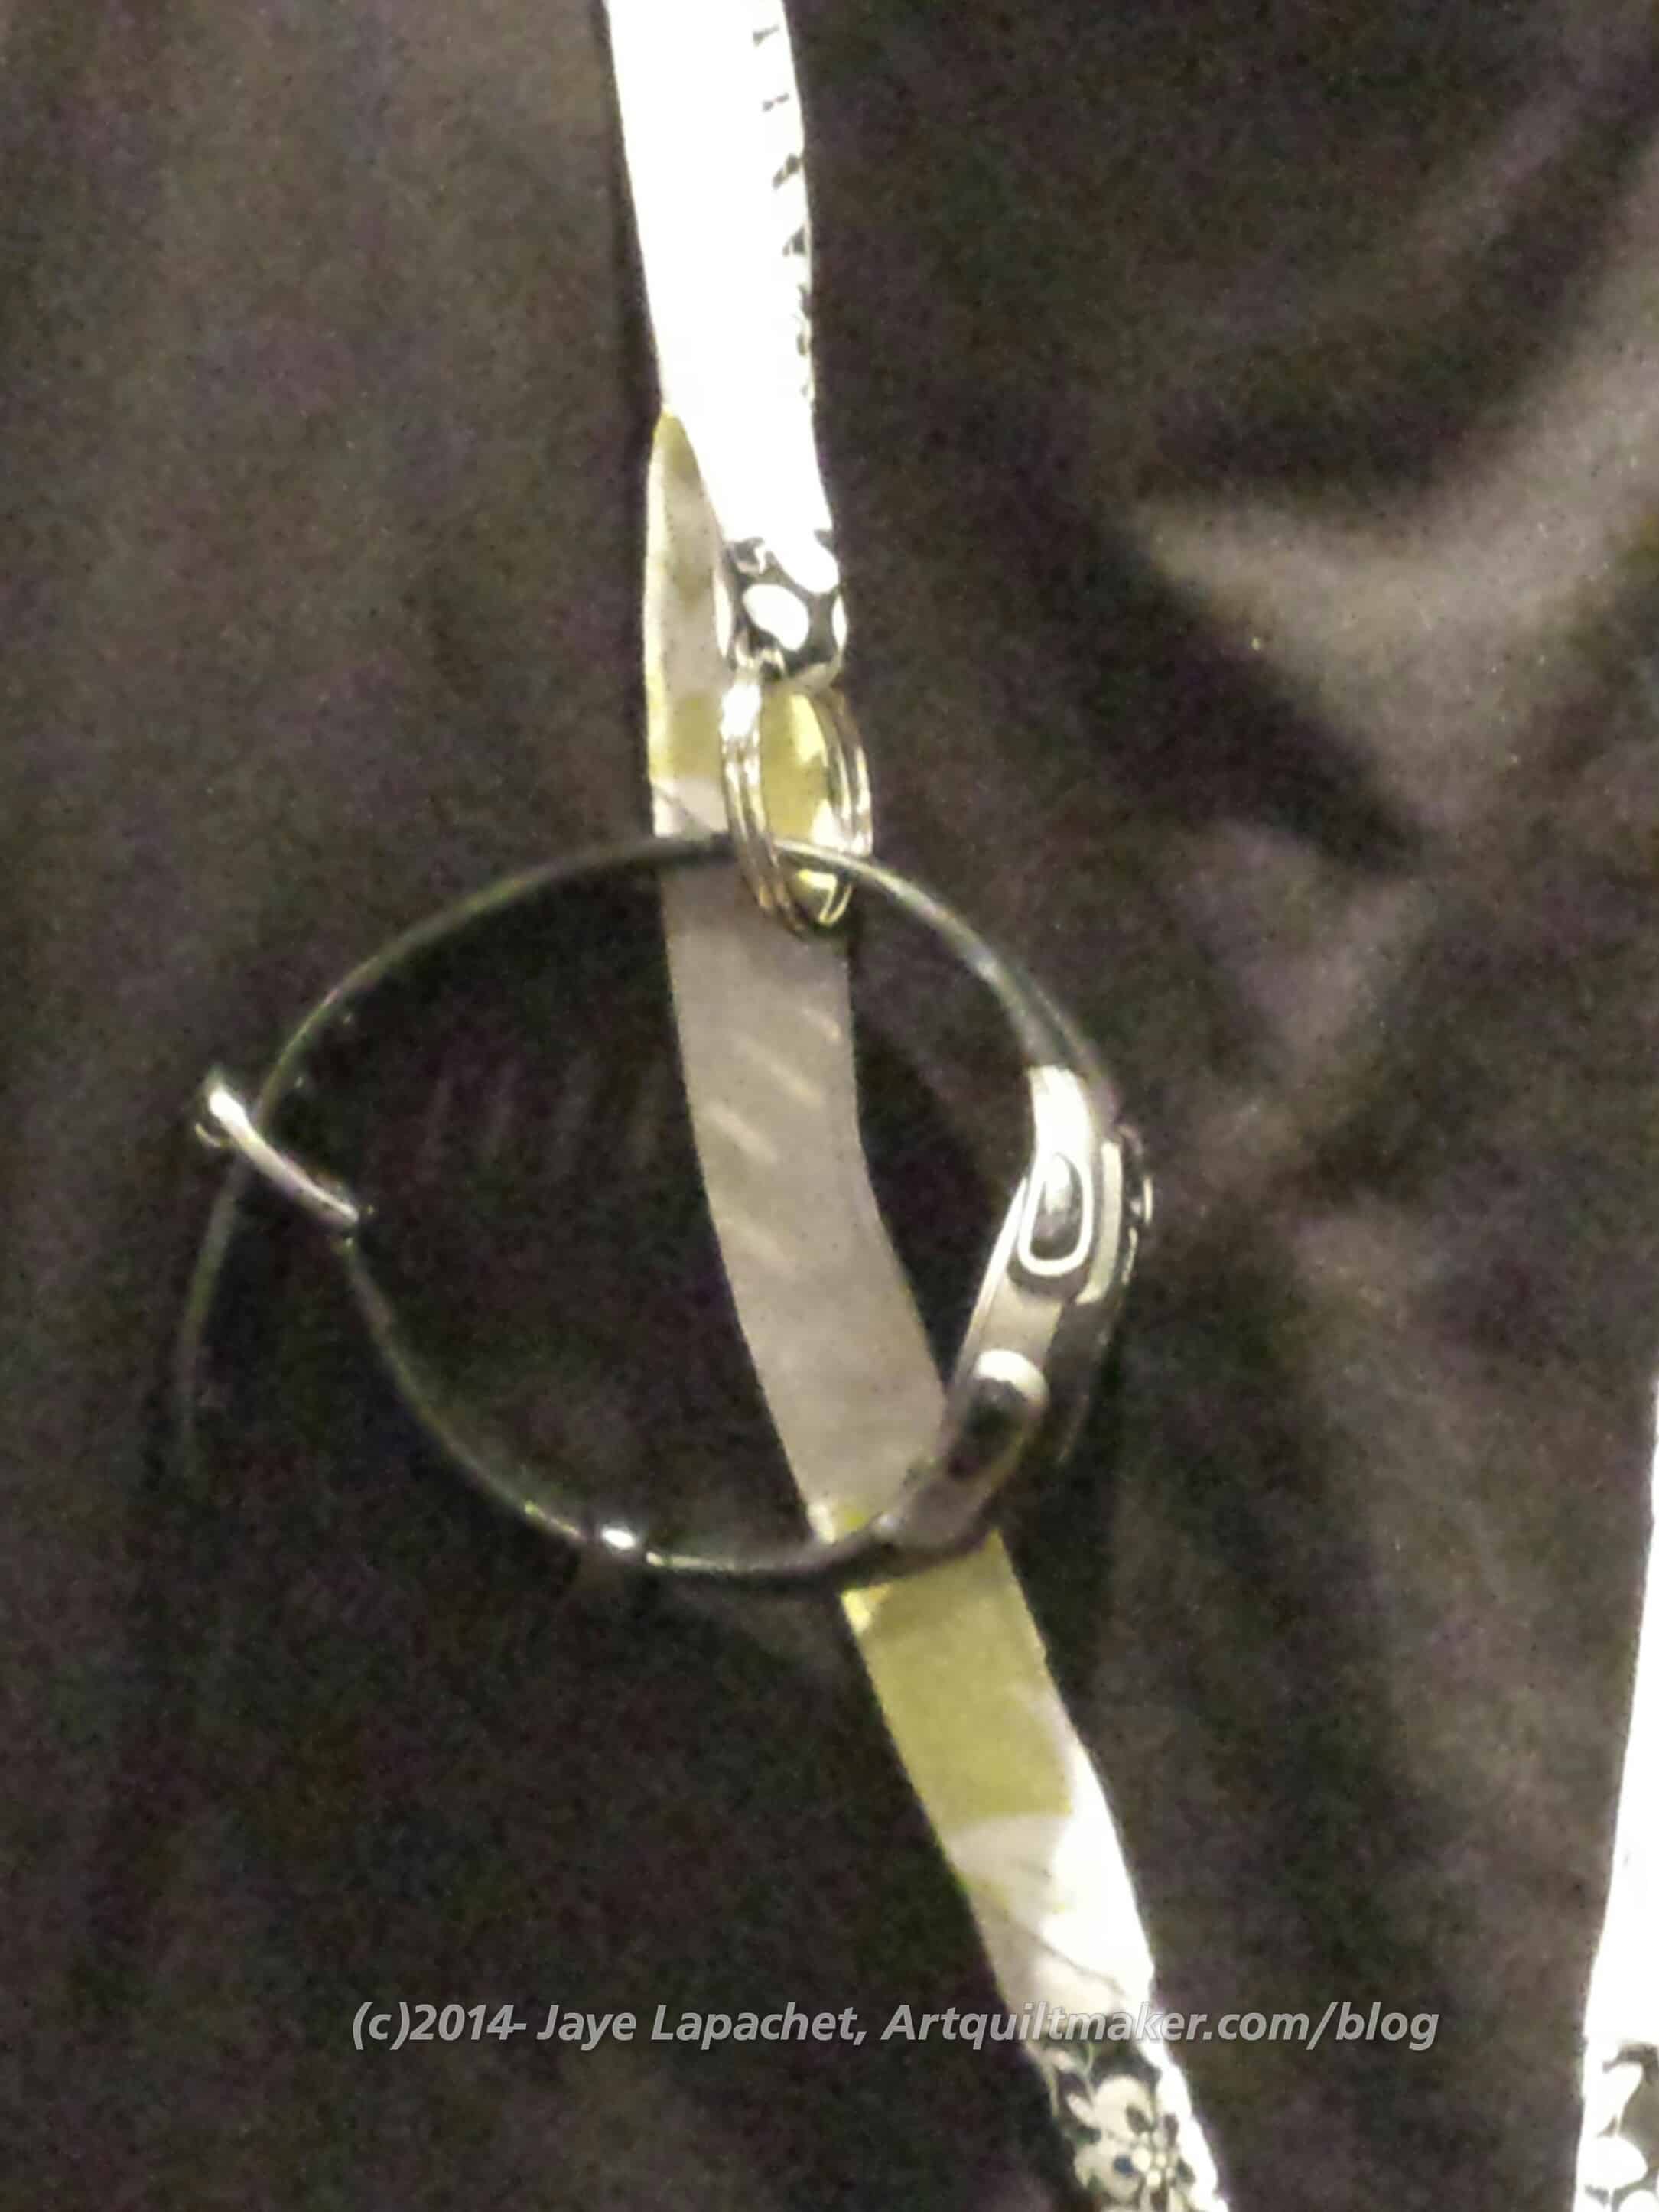
Collarbone ring in use
Pain and Suffering
There are a couple of places that will be difficult. Using orphan blocks or mosaic piecing means that there will be extra seam allowances. With these comes the possibility of really thick seams [See above where I refer to the glasses loop]. To mostly avoid these thick seams, use 3 unpieced lengths of fabric for the neck and loop pieces. 1 Jelly Roll strip (2.5″ wide strip) will work.
I thought ahead for once and made these last weekend, except for the finishing. I didn’t really have an idea, so I grabbed some scraps from the City Sampler blocks and started sewing them together. I sewed until it was long enough to cover a piece I had cut for the backs.
I stopped partway through to actually make the backs. I added stabilizer for stiffener. Once the pieced scrap piece was big enough, I sewed it to the backing and stabilizer, cut the piece in 2.5″x3.5″ rectangles and zigzagged around the outside.
Boring.
I like them. They are mostly soothing colors, but they aren’t very arty or edgy. I planned to embellish them with beads, but really wasn’t excited about it, because I often do beading and just wasn’t in the mood. I also didn’t really have the time. It seemed like too much work in an already full week.
As I was tidying the workroom, I saw my alphabet stamps. PERFECT!!! I decided to stamp words on them. YAY! That I was excited about. I ended up not using the alphabet stamps this time, but using some Chinese character stamps I picked up somewhere.
July ATCs, Finished
Mine didn’t end up being that popular this time around, but the others were fantastic. Mine are calm (which I seem to be seeking lately), but the stamp wasn’t large enough to stand out and show the detail. I need to step up my game. I am not done with the stamps yet, now that I have found them again.
I am not depressed, because I know not everything can be fantastic and these small pieces are for play.