Hand Piecing – Flatback Stitch

La Pass pieces basted

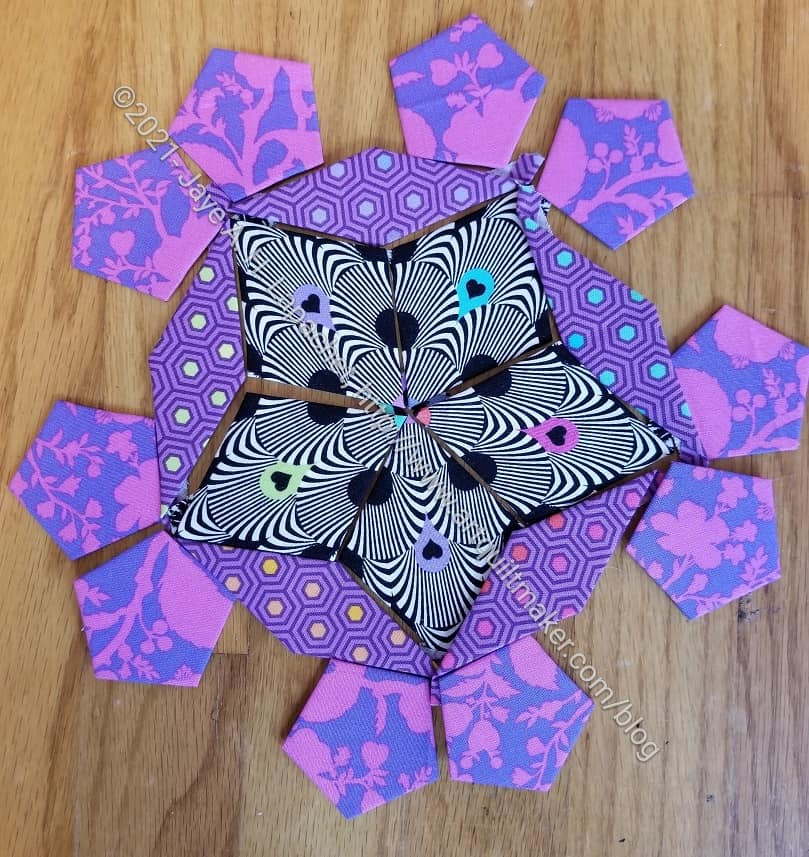
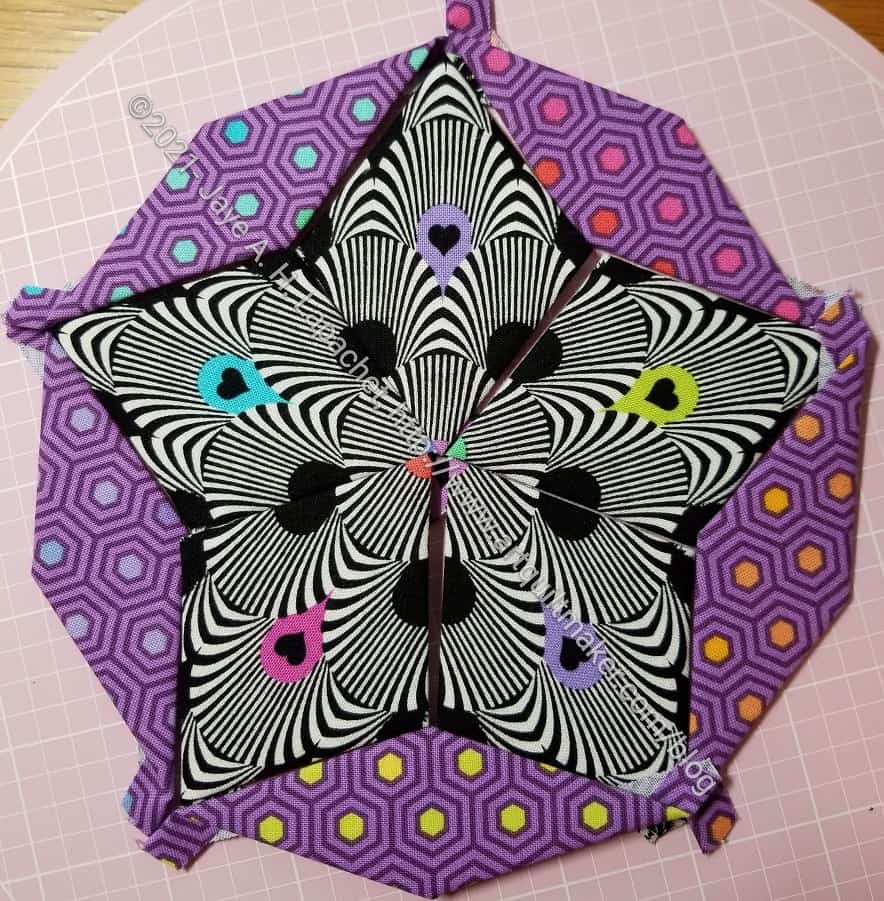
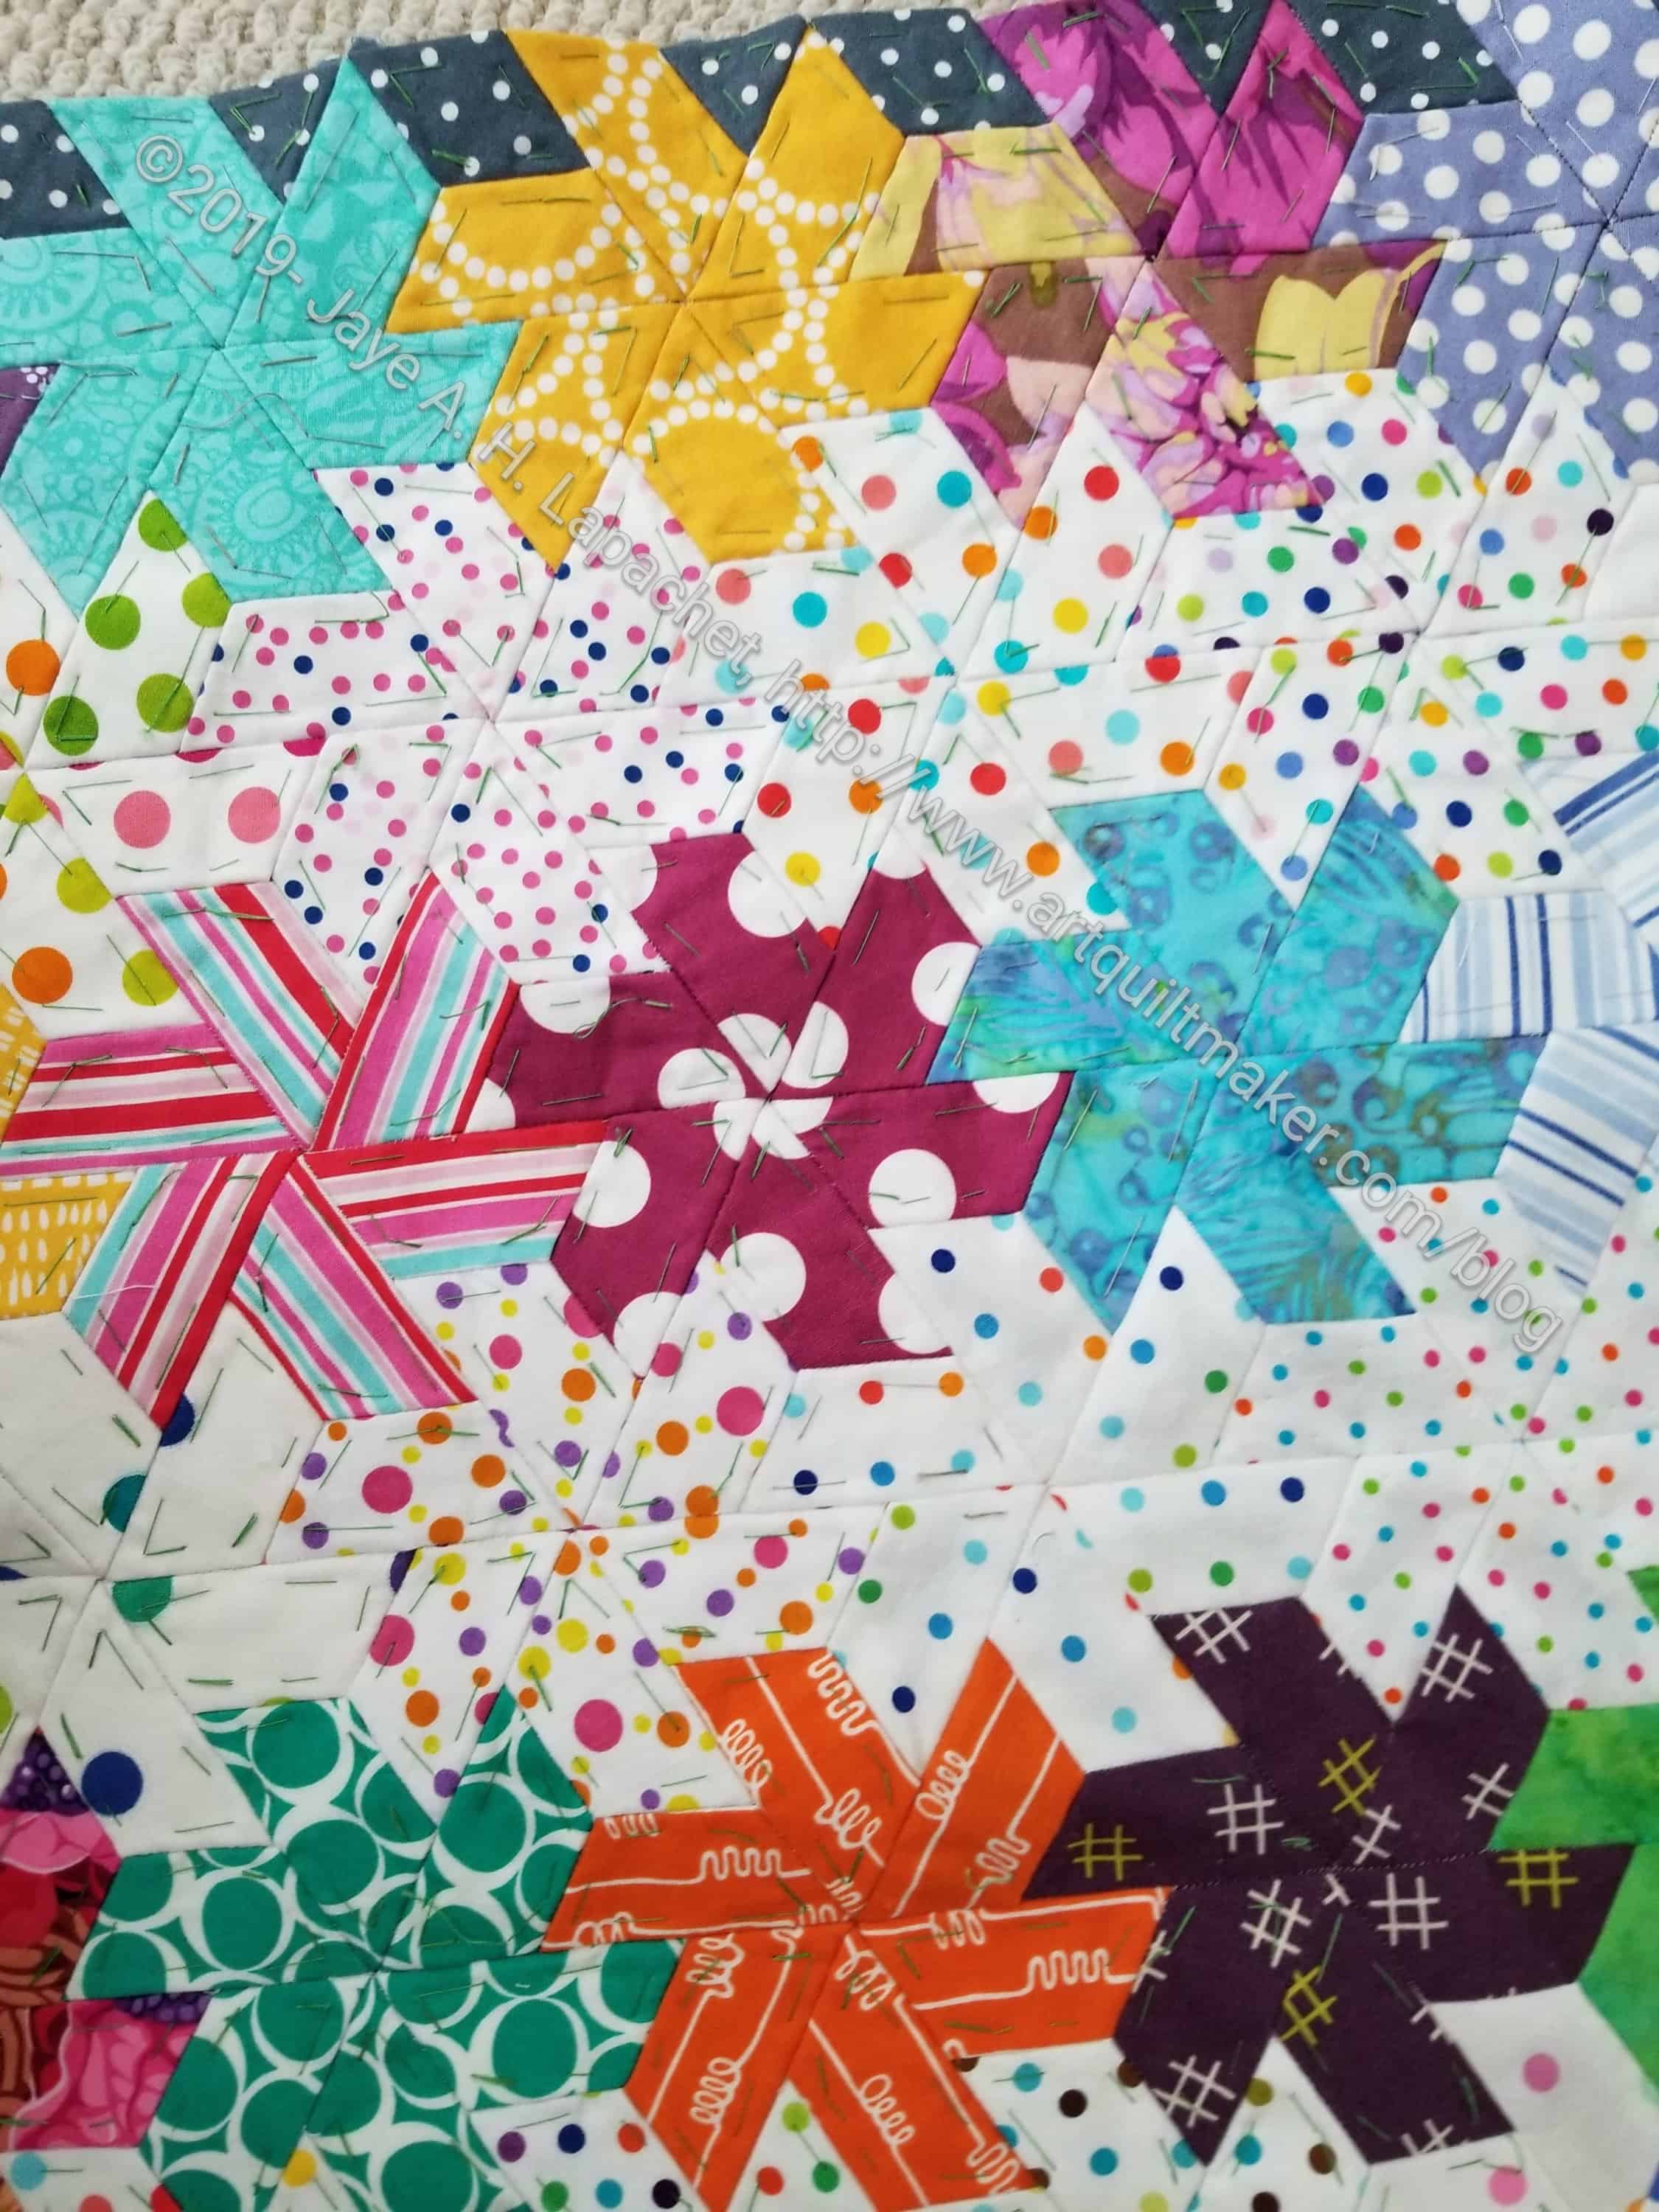
I have changed several techniques as I work on La Passacaglia. I am trying out glue basting, for one. One thing I have not changed is using the flatback stitch. It requires keeping the basted fabric pieces butted up against each other.

This is difficult to achieve, thus I use a combination of WonderClips** and Sew Tites**. I use tons of WonderClips and never seem to have enough, so if you are going to buy them, get more than a few. I put the rainbow pack on my wishlist every year, which means I usually get another 10 every year.

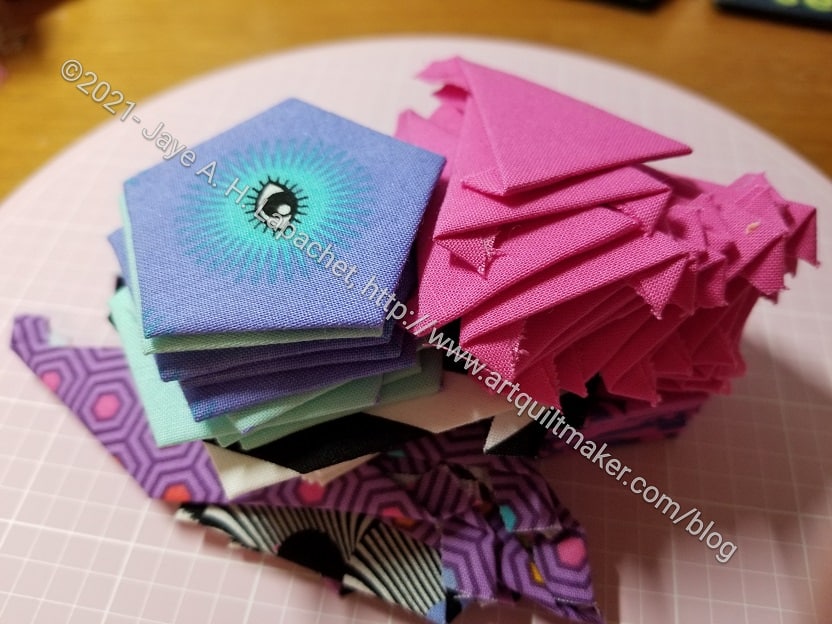
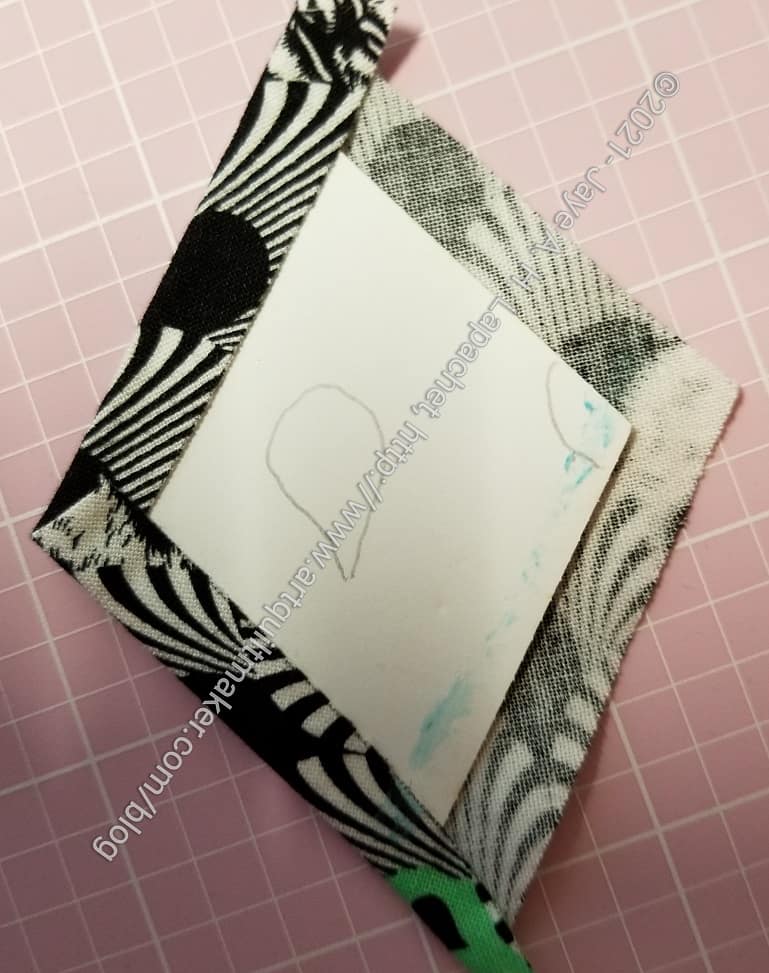
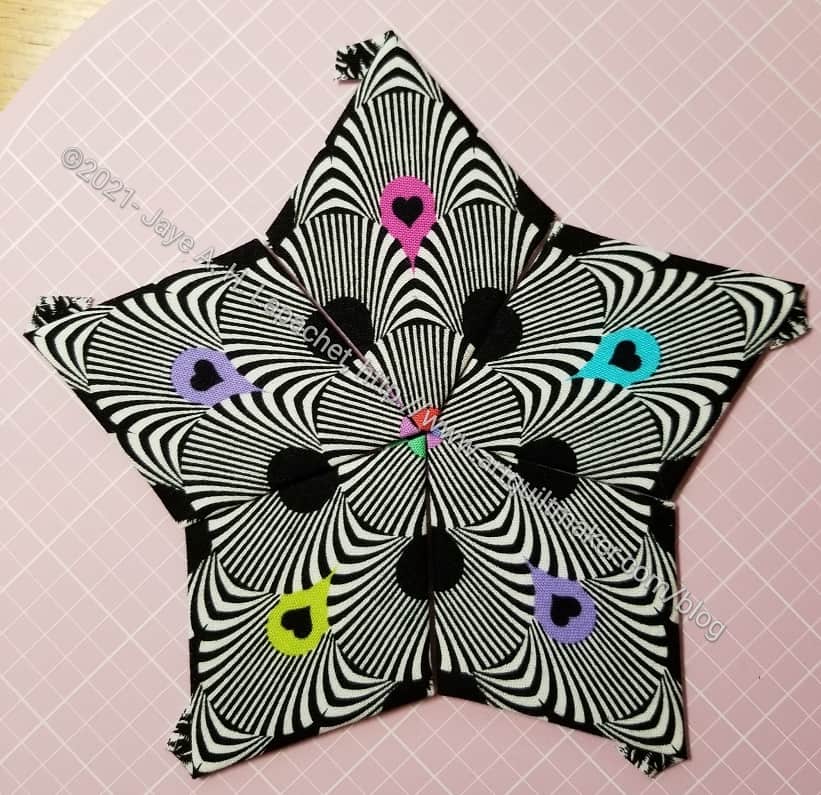
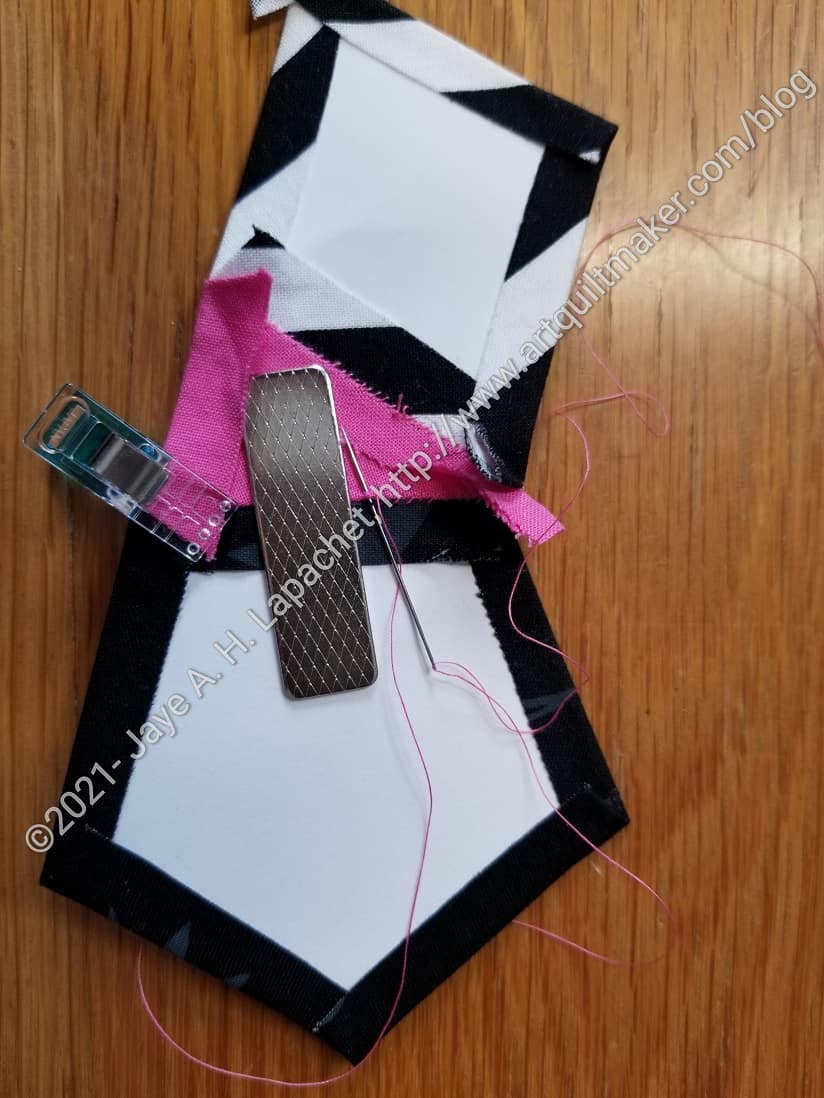
I also have a lot of Sew Tites, but I don’t use them quite as much, so a small pack is good. I am a bit of a sucker for their new shapes. I bought a small pack of Tula Pink Sew Tite hearts**. I saw they have skulls, but I don’t plan on buying those. I can think of someone who might enjoy them as a gift. I find the bars, pictured above to be the most useful for EPP. I use a variety of Sew Tites for bag making.

La Pass pieces basted - detail
La Pass pieces basted – detail

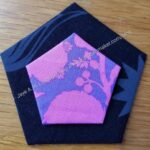
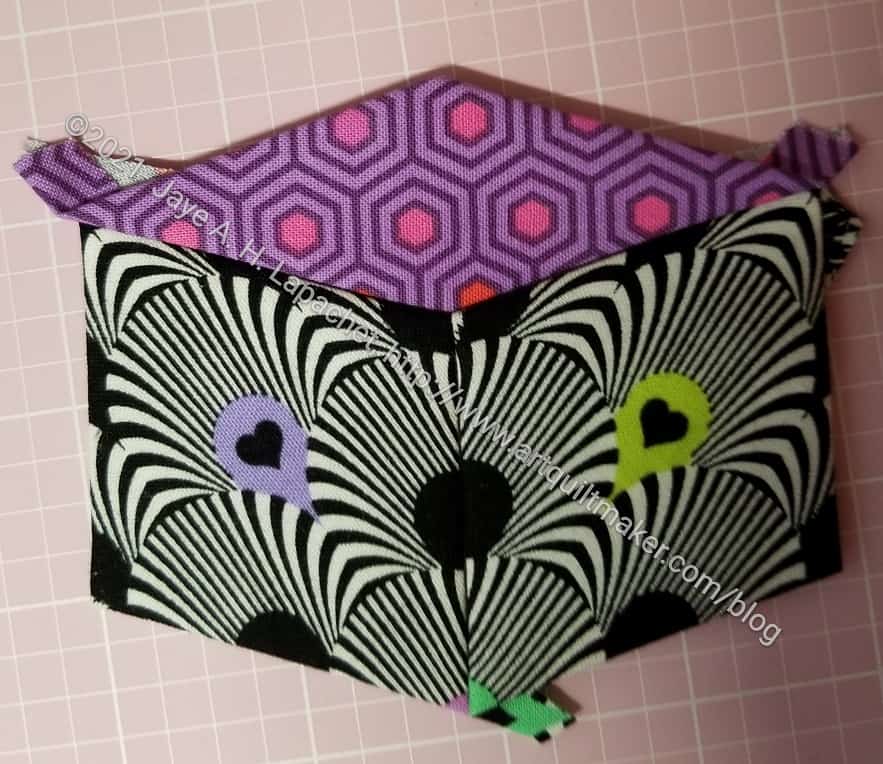
The flatback stitch it is a kind of whip stitch. I put the needle in very close to where the two basted papers meet and come up the same distance on the other side, then pull taut, but not tight.

I have a hard time sewing the stitch when I get too close to the Sew Tite, so I move it over towards the end as I sew. When I am more than halfway through sewing the seam, I remove the Sew Tite and just use the WonderClip to hold everything in place.

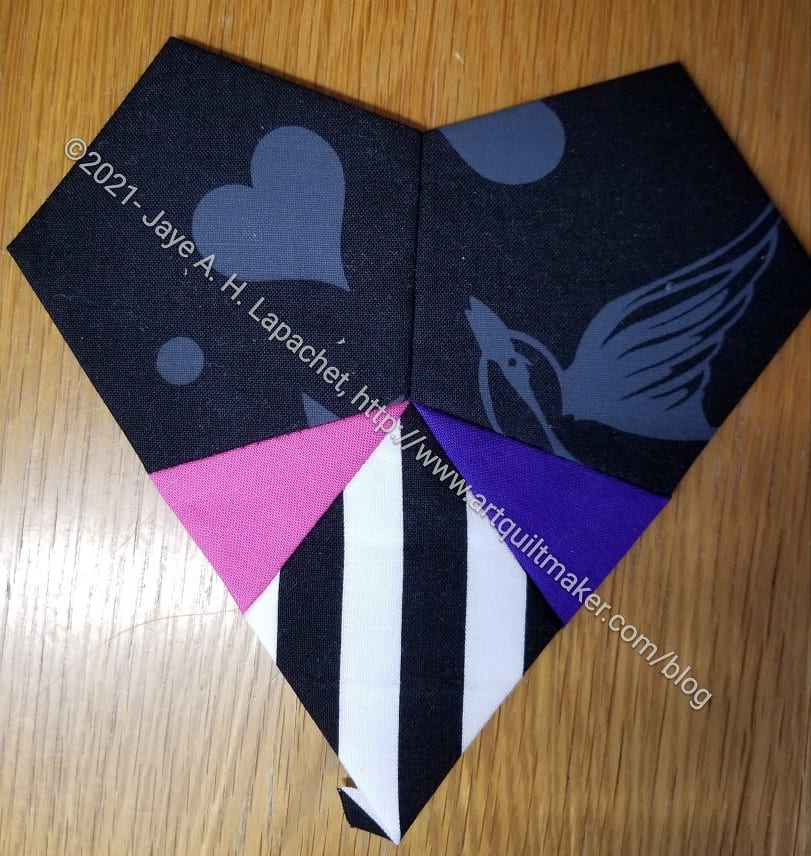
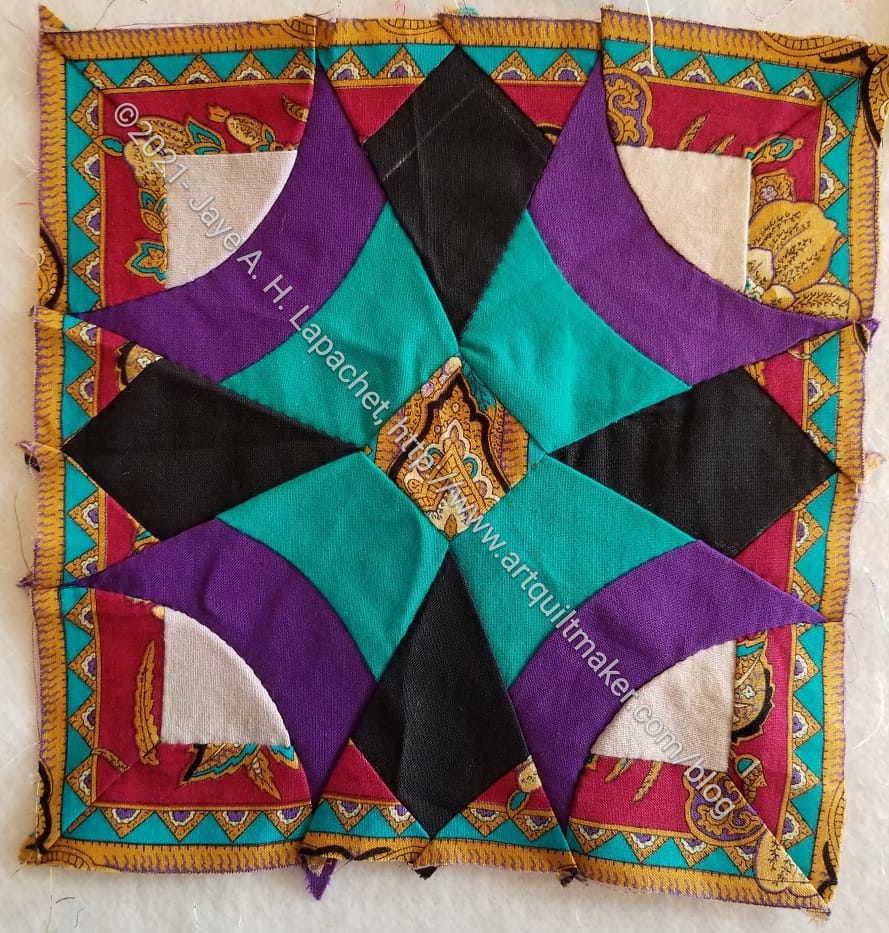
I like the way this stitch does not show on the front. I have also changed the thread colors I use. After watching the Tula Pink EPP video, I decided to try using thread colors that match my fabric. This helps in hiding the stitching.


**I use affiliate links and may be paid for your purchase of an item when you click on an item link in my post. There is no additional cost to you for clicking or purchasing items I recommend. I appreciate your clicks and purchases as it helps support this blog.

La Pass Sewing

Center Star / Rosette #1

Remember the other day when I said the sewing together of the La Pass parts would all work out?

I was wrong.

I cut and basted the wrong size pentagons. I am not sure how that happened, but I did. I need pentagons in that True Colors Dahlia colorway (pink and purple flowers) in a larger size.

I rummaged through the various bits and bobs I have for this project and found enough papers and fabric to redo the correct sized pentagons. The whole project fits together much better with the correctly sized pieces.

La Pass Hearts & Cones

La Pass Assembly Success

First La Pass 'heart'
First La Pass ‘heart’

I was finally able to assemble part of the first La Passacaglia rosette.

These pieces make up the outer circle of the rosette. Some clever person showed how she had assembled the outer circle into ‘hearts’ and ‘cones’. I haven’t done a cone yet, but I think this method will work very well.

It is taking me a long time. Once I get time to sew I can make progress. I just don’t have a lot of time to hand sew right now. I am, however, applauding every little bit of progress. I plan to take this to Sew Day and work on it there. I really want to keep up and I have enough projects cut out at the moment.

Playing with La Pass

I am kind of stunned that I am doing this project. I don’t know why, because it is clear that I am working on it.

Center Star / Rosette #1

I finished basting the other day and also took a few minutes to play around with the pieces.

I am struggling to see how these fit together, but I am sure it will all work out.

I am pretty pleased with the fussy cutting in the center. It is the first time I have used this technique to get a different look from the fabric.

La Pass Basting pt.2

The other day I talked about starting to baste the first rosette for my La Passacaglia quilt.

La Pass star with diamonds

I worked on it at Craft Night for a couple of hours after cleaning up my sewing room.

As I basted pieces, I couldn’t really wait to see what they looked like so I kept laying them out to see if what I cut and basted looked good together.

I did struggle with what the two videos said about which way the bunny ears should go. I thought I understood, but I still have some pieces that I know are going to be a problem.

La Pass star with diamonds

Still, I am happy with what I accomplished. I think this star looks really nice with the skinny diamonds.

I have seen what other people have made in the group so this isn’t really a huge surprise, but I like seeing what **I** have done. I almost started sewing these together, but I continued basting.

Pieces basted at Craft Night

In one of her videos, Tula talks about saving time and being kind to our body parts. I was pleased with how many pieces I was able to baste. I am pretty sure I would not have been able to thread baste this many pieces in the same amount of time.

La Pass Basting

I spent Craft Night the other night basting my first La Pass Rosette. Yes, I finished cutting in case that wasn’t clear.

Half Hexie EPP Section - April 2019
Half Hexie EPP Section – April 2019

On my Half Hexie Star project, I have been thread basting. If you zoom in on the photo (right) you will see the bits of thread holding the papers and the fabric together.

Thread basting is a fine way to prepare English Paper Piecing pieces and their fabric. I had planned to thread baste La Pass. Then I watched the Naudia Tatum video and Tula’s first EPP video, about halfway throug., both of which included sections on glue basting. Sue Daley, the apparent queen of EPP, though I had never heard of her until I started this project, also has a video. Of course, I watched it. I might be tending towards obsession.

Finally, I decided that I would, at least, try it. Time is kind of short around here lately and I really need all the spare minutes I can get if I have any hope of getting anything finished this year.

La Pass -Glue basted diamond

First, I had to find my glue pen**. Fortunately, it was in the place I thought it was. Why I knew it was there, I have no idea. Visual memory, I guess. Then, I watched the glue basting section of Tula’s first EPP video video again and went for broke at Craft Night.

In the photo, left, you can see the swipe of glue on the paper on the right hand side. The process takes some practice. I know there will be pieces where I glued too close to the edge, but I think I got used to the process as the evening went on.

La Pass fussy cutting

The good thing was that I could see the results of my precise fussy cutting right after I basted.

This is some Tula Pink panda fabric. I do not want animal faces looking at me from my quilt, so I fussy cut them in a way that would make black and white optical sort of designs. I am excited to see it once I sew it together.

I found the glue basting fun once I got going. The Sue Daly small turntable cutting mat** arrived and really helped.


**I use affiliate links and may be paid for your purchase of an item when you click on an item link in my post. There is no additional cost to you for clicking or purchasing items I recommend. I appreciate your clicks and purchases as it helps support this blog.

Block Blast from the Past

Pre-Blog block
Pre-Blog block

In the course of cleaning out my workroom, I found this block. It was crumpled up and dusty in the bottom of a bag I haven’t used in a long time.

I made this block in my second quiltmaking class. That class was focused on drafting blocks. None of the blocks were straightforward, so drafting and making templates was the only way to get them made. I drafted the pattern for this block before making the templates and piecing it.

In my early days of the quiltmaking, I primarily used solids. I did have a wild streak that you can see in the border. I fussy cut all of those pieces so that it looked like the block had a special border. I didn’t do a spectacular job on the fussy cutting, but considering it was one of the first dozen blocks I ever made, I am pretty proud of it.

Half Hexies Again

I have been working steadily on the half hexie project while I watch TV after dinner. I am making progress, but it feels slow.

I have started to make the piece wider by adding whole rows to the straight side of the piece. I can’t say whether I like this method, but it is controlled and does make the piece wider.

Half hexie star top on the bed

Yesterday I heaved the top on the bed and checked to see how many more rows I need.

I don’t normally show my messy bed, but this is the best way to show progress. The length is good, thought I do need to straighten up the top and bottom edges. From the photo, I think I need 6-8 more rows to make the quilt wide enough to cover the whole bed.

Scrapitude Carnivale is under the Half Hexie piece so it might cause some visual confusion.

Half Hexie EPP non-fatal Problem

The other day I showed you the latest results in my EPP piece. As I was taking the picture, I noticed a piece that looks a little odd.

EPP non-fatal problem

Dots. Dots are the problem. That violet with white dots fabric n the middle is weird looking. Something about the dots intersecting with the white is unconventional.

The papers are out so I can’t rip it out. I’ll leave it and see if anyone notices.

Half Hexie EPP

Half Hexie EPP - May 2019
Half Hexie EPP – May 2019

The other day I showed a piece of the Half Hexie EPP I was working on. I have spent some time since then attaching it to the larger piece.

I often think I am in a good place with this piece, then I look at the whole thing and realize I haven’t made the progress I wanted. That was the case when I looked at this whole piece as I was photographing it. It is still too skinny. I need to make it wider.

I have been thinking I would square up the top and bottom then make it wider. Somehow it just keeps getting longer and appears to be skinnier.

New Half Hexie EPP section

Fortunately, I still need some length so the work will not go to waste and I won’t have to rip it out.

As an aside, I saw an exact match to this quilt (except for the fabrics) on a Kansas City Star page. They call it Whirligig. Do I like that name? Maybe.

I am kind of thrilled that the Kansas City Star has a pattern for this quilt. I’ll have to look it up and see what my copy says about the pattern.

A Few More Half Hexie Stars

White half hexie stars - January 2019
White half hexie stars – January 2019

In between everything else I have going on, I have been working on the half hexie stars. I need about a million more stars, so I just work on them whenever I don’t have any other handwork pressing.

I especially need white background stars so I have been concentrating on those fabrics lately.

One problem I had with this batch was matching the centers. WonderClips, which has worked perfectly well before, were not working. They didn’t seem to be clipping strongly enough. My pieces kept slipping, making the centers off. Some were just a smidge. Others had to be ripped out.

Half Hexie Star - matching centers
Half Hexie Star – matching centers

Alison saw my double point pins at the last Sew Day. Someone in Rosalie Dace‘s class said I had to have them, so I bought some. Alison mentioned to me that they were for matching up points. I don’t usually have a problem in regular piecing, but since I was having a problem with the half hexies, I thought I would try them. They are not ideal, but they help a lot. You can see from the photo that I use clips and the double point pins. I am now using two pins and a clip. This strategy seems to be working.

More Juggling Balls

Juggling Ball n.1 - in 3D
Juggling Ball n.1 – in 3D

I finally got one whole juggling ball to the point where I can stuff it close it.

I didn’t use the same method of basting I use with the half hexies. I only basted through the fabric, not through the paper. This was recommended by the All Points Patchwork author, Diane Gilleland. It doesn’t feel as secure to me, but so far so good.

The next step is to remove the papers, turn it inside out and stuff it.

As mentioned, I had to take all of the papers out before I left Portland, because the ball, as shown right, would have certainly been squished. I’d like to use those papers again.

Handwork Week

Heading home
Heading home

As you may have noticed, I have spent a lot of time this week talking about handwork. That’s because I have been doing handwork. I had to drive to Portland (1468 miles there and back) at sort of the last minute to be with the YM while he had a second surgery on his ankle. I’ll spare you the close-up of the stitches and previous scar.

I did a few things while I was there, but no major sightseeing or anything. I spent a lot of time sitting around while he slept and making sure he had enough to eat. I did manage to visit a couple of my favorite quilt stores- one in Portland and one in Ferndale.

Wool felt eggs at Pioneer Quilts - patterns available
Wool felt eggs at Pioneer Quilts – patterns available

I have been to Pioneer Quilts and Stitch before. I was able to visit both because I grabbed the opportunities when they presented themselves. I really like both of those stores. Pioneer Quilts has a wide selection of fabrics, but they also have the biggest selection of wool felt and patterns to go with the wool felt that I ever seen. I don’t need any more handwork projects, but I couldn’t resist these eggs. Aren’t they fantastic?

Most of my gifts were finished and you will see them in the next few days after they are opened. Anything I had planned to do this week, the DH had to take care of: gift purchases, wrapping, shopping for dessert ingredients, tidying, etc. It is kind of nice to sit around. I feel a bit guilty, because I feel like I should be doing something. He did a great job and finished up some of the shopping, etc. yesterday.

I have been listening to books and podcasts while I drive and sit around. I got caught up on the QuiltFiction podcast. I am really appreciative of the sensitive way Frances is handling major themes such as race and independent women. I am seriously behind on other podcasts, because all I seem to do is listen to books. Recently I have finished all the books in a series. The author has several series that are related to the main series, which is really interesting. I am all about character development, so these multiple series, with their overlapping characters give me more of an opportunity to’ engage’ with the characters. I recommend:

  • New York Dead by Stuart Woods – this is the first in the Stone Barrington series. I actually read one in the middle of the series. I thought I would go back and just read the first one, but I ended up reading the entire series. Not every book in the series is great, but they are not too obviously formulaic and are very entertaining. This particular book is very good.
  • Smooth Operator by Stuart Woods
  • The Money Shot by Stuart Woods

None of these are great literature, but if you are looking for escapist entertainment, these are your books.

By the time you read this, I should be home and will have to dive into pie making.

The YM at OHSU, December 2018


Pentagon Juggling Balls

Juggling Balls in progress

I am absurdly pleased with how these halves came out. Some parts of sewing them into a 3D shape were not easy, but not too difficult either.

As mentioned, I used a mini-charm pack so the backs don’t look as tidy as my half hexies do. I don’t care. I am using pretty supplies I have. I also had no time to pick out fabric and cut small pieces, so the mini-charm pack worked well.

Pentagon Balls

Pentagon Flowers
Pentagon Flowers

After writing the recent EPP book review, I saw my DH trying to teach my niece to juggle. Since then DH has started to practice juggling again. He used to be able to juggle pins with a friend. He doesn’t have many hobbies, so I am glad he is doing this.

Mini-Charm Pack
Mini-Charm Pack

All Points Patchwork has a pattern/guidelines for EPP balls using pentagon shaped papers. I bought some pentagon papers, grabbed a mini-charm pack and decided to start on some juggling balls for my niece. I plan to put some Beanie Baby pellets inside when I stuff them in order to give them a little weight.

I plan to make a bag for storage. I’d love to have them done by Christmas, but that is a little ambitious. We’ll see.