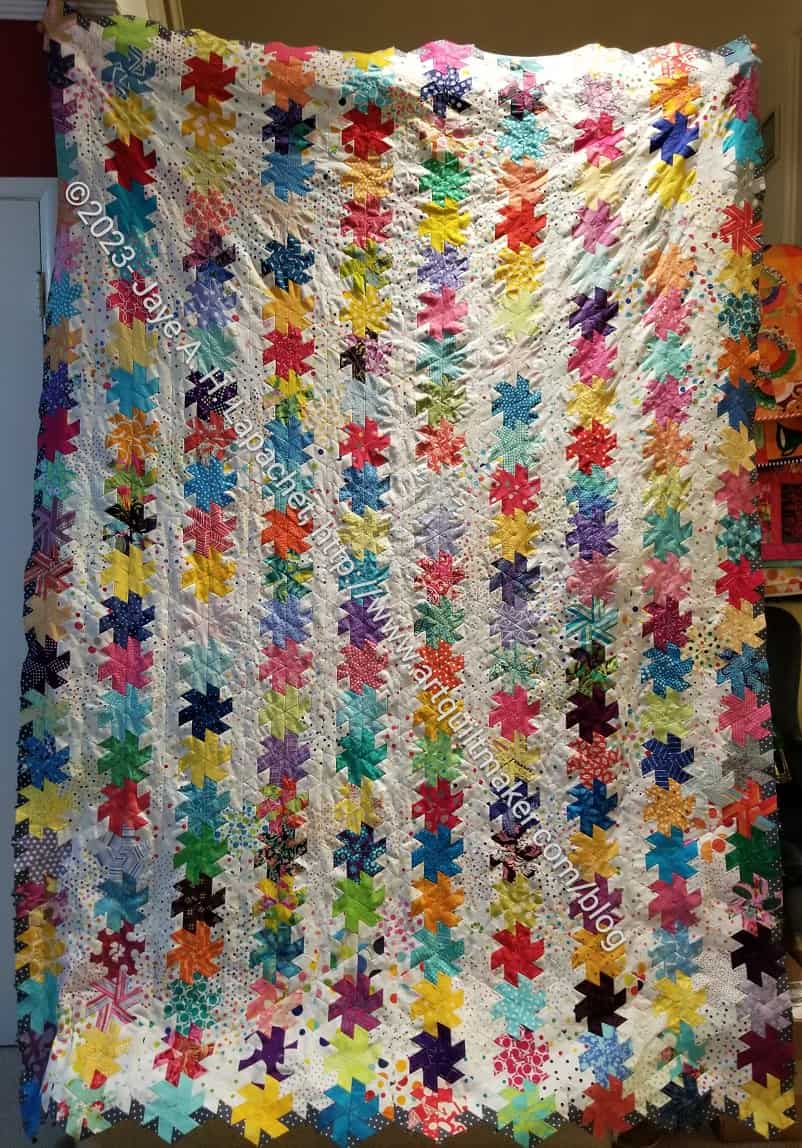
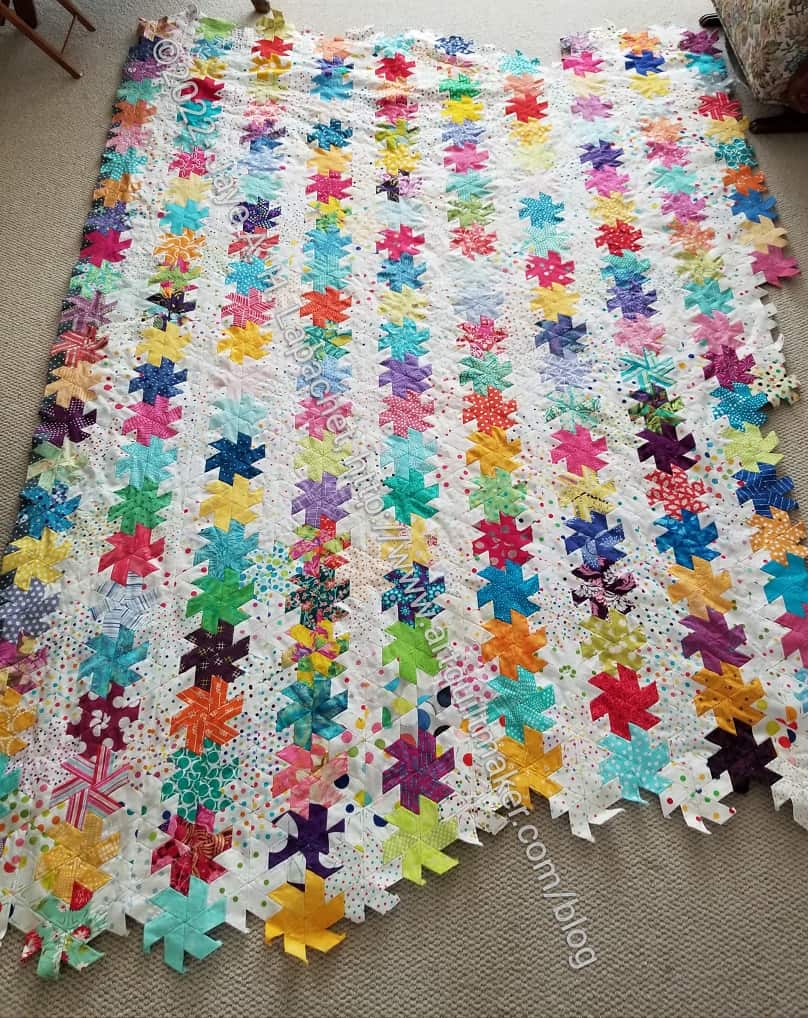
The Half Hexie Star is finally finished and off to its new home.
Someone said that I must really like the people to whom I gave the quilt. I do like them, but as I often say: there is always more fabric. I like the people and the quilt was a lot of work, but there is always more fabric. The point of the quilt was to have something to work on in the evenings when I was watching TV and visiting with my DH.
Half Hexie EPP back
Now I am on to another EPP project and the Half Hexie Star quilt will be loved in a new place. As an added bonus, I have spread the joy of quilting to a new couple.
As mentioned yesterday, I got the Half Hexie Star back from Colleen finally. It is just in time to bind it and have it ready to give as a wedding gift. I am also pleased that I was able to show it at the guild meeting yesterday.
Colleen did a great job, as usual, quilting this. She said the binding of the two ends was the most challenging. I am really glad she put the first side of the binding on the quilt by machine for me. It will make the handwork much easier and get it done faster.
Half Hexie Star – quilting detail
She used flowers and leaves as the quilting design. I am pleased with how it looks.
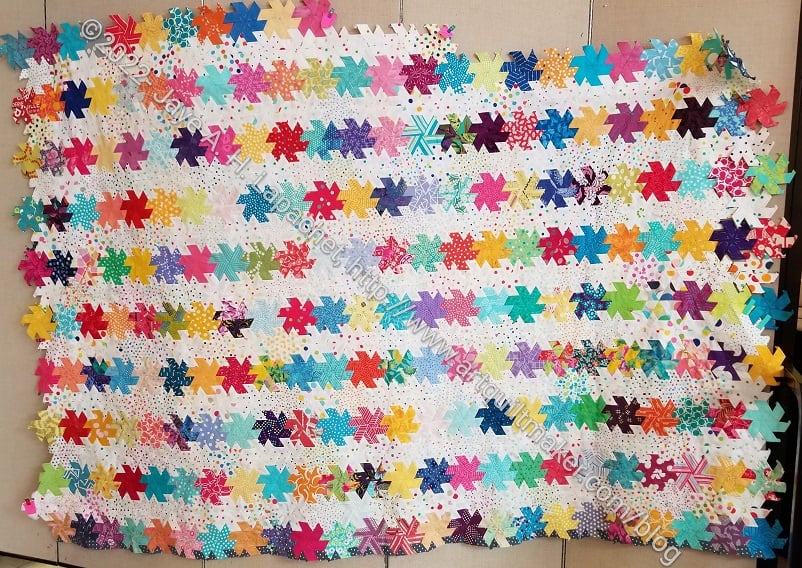
I finished this top last night! I am pretty excited even though I still have a long way to go to finish it.
I rushed to get a photo as I went to bed, so it isn’t the best photo. You can see some of the details in the post I published before.
I have been working on this quilt since August of 2012! I thought I had started it in 2016. Time really flies.
I can’t tell you how pleased I am to have made it this far! Assuming I can get the piece prepped to be quilted and make a date with Colleen, I will enter this in the President’s Challenge for the guild.
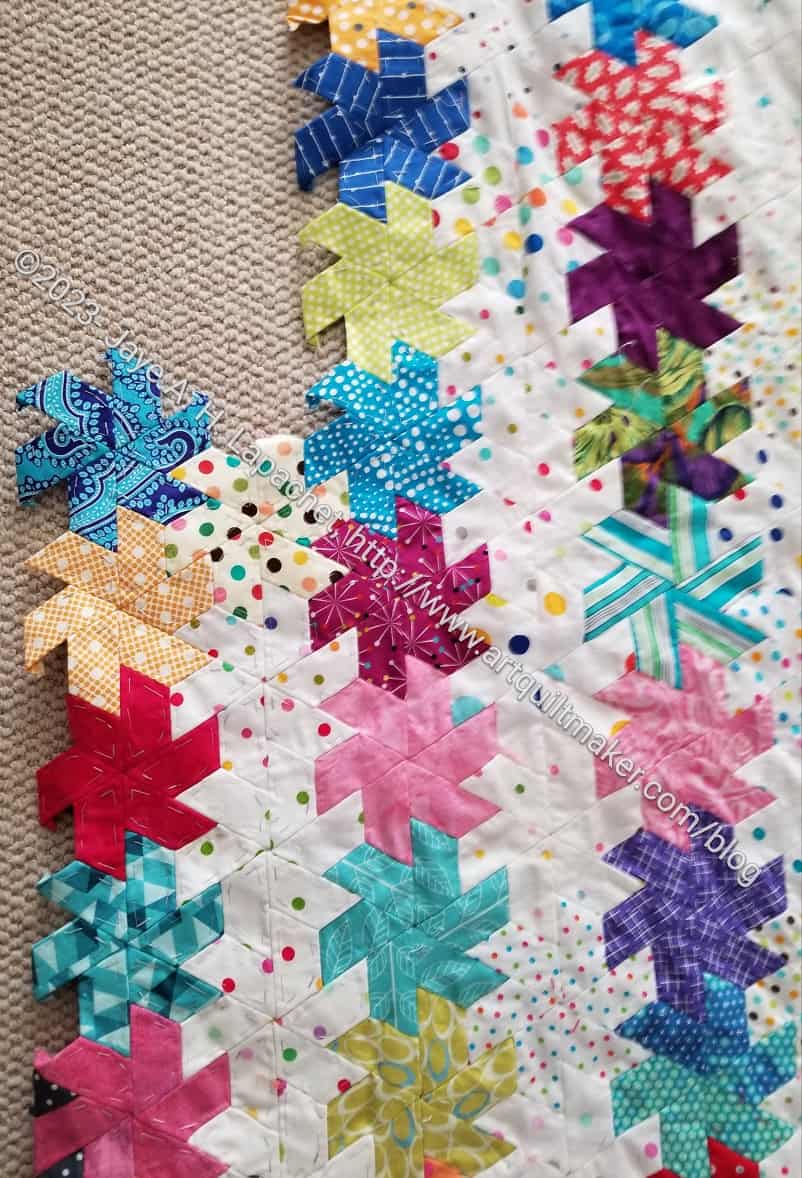
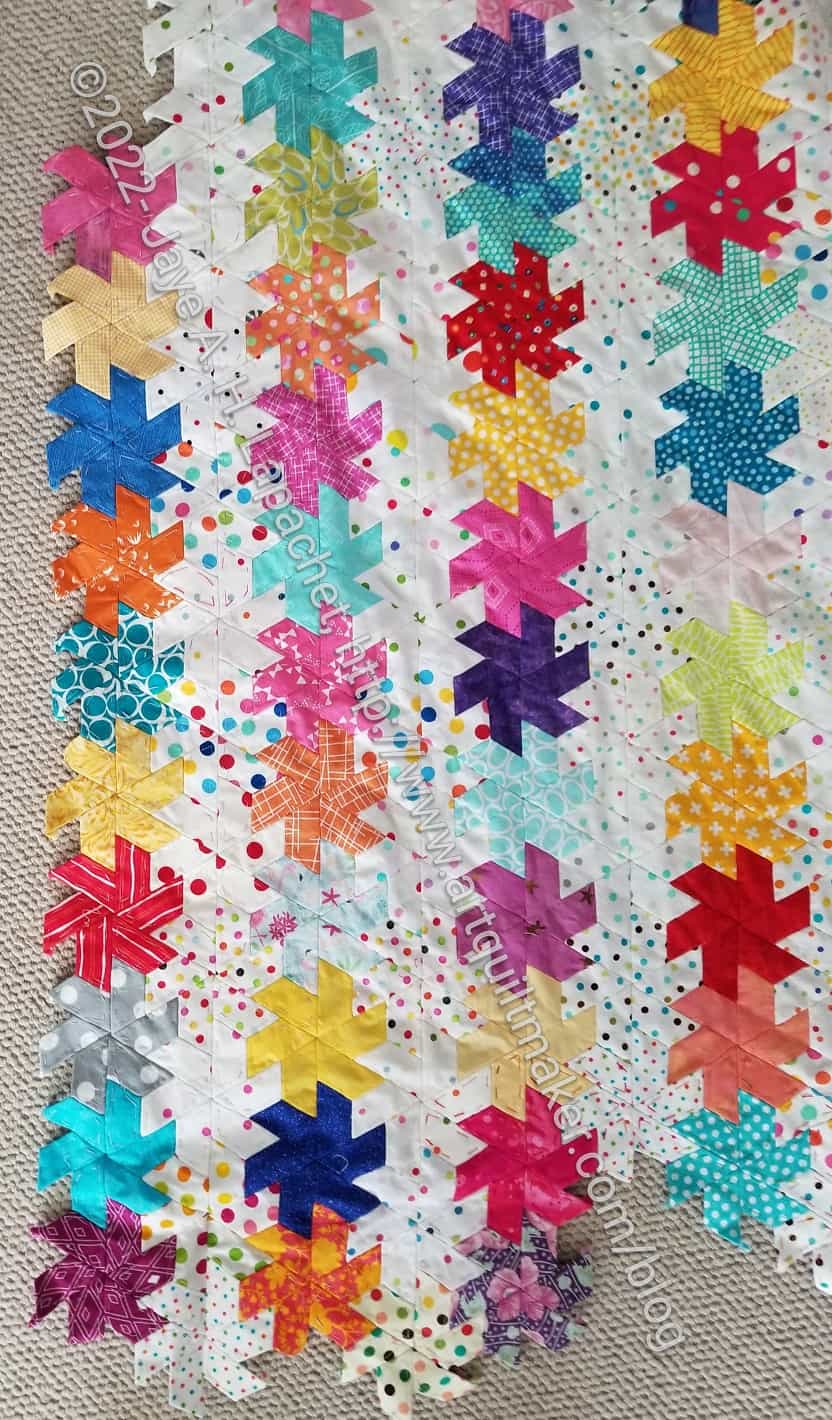
I have made good progress on the edge of the Half Hexie Stars as I take a break from La Passacaglia.
I am not angry at La Pass and have a pretty solid plan for finishing. I just need to pull fabrics and finish off some rosettes. I am working on this at the moment to give me some time to think about it.
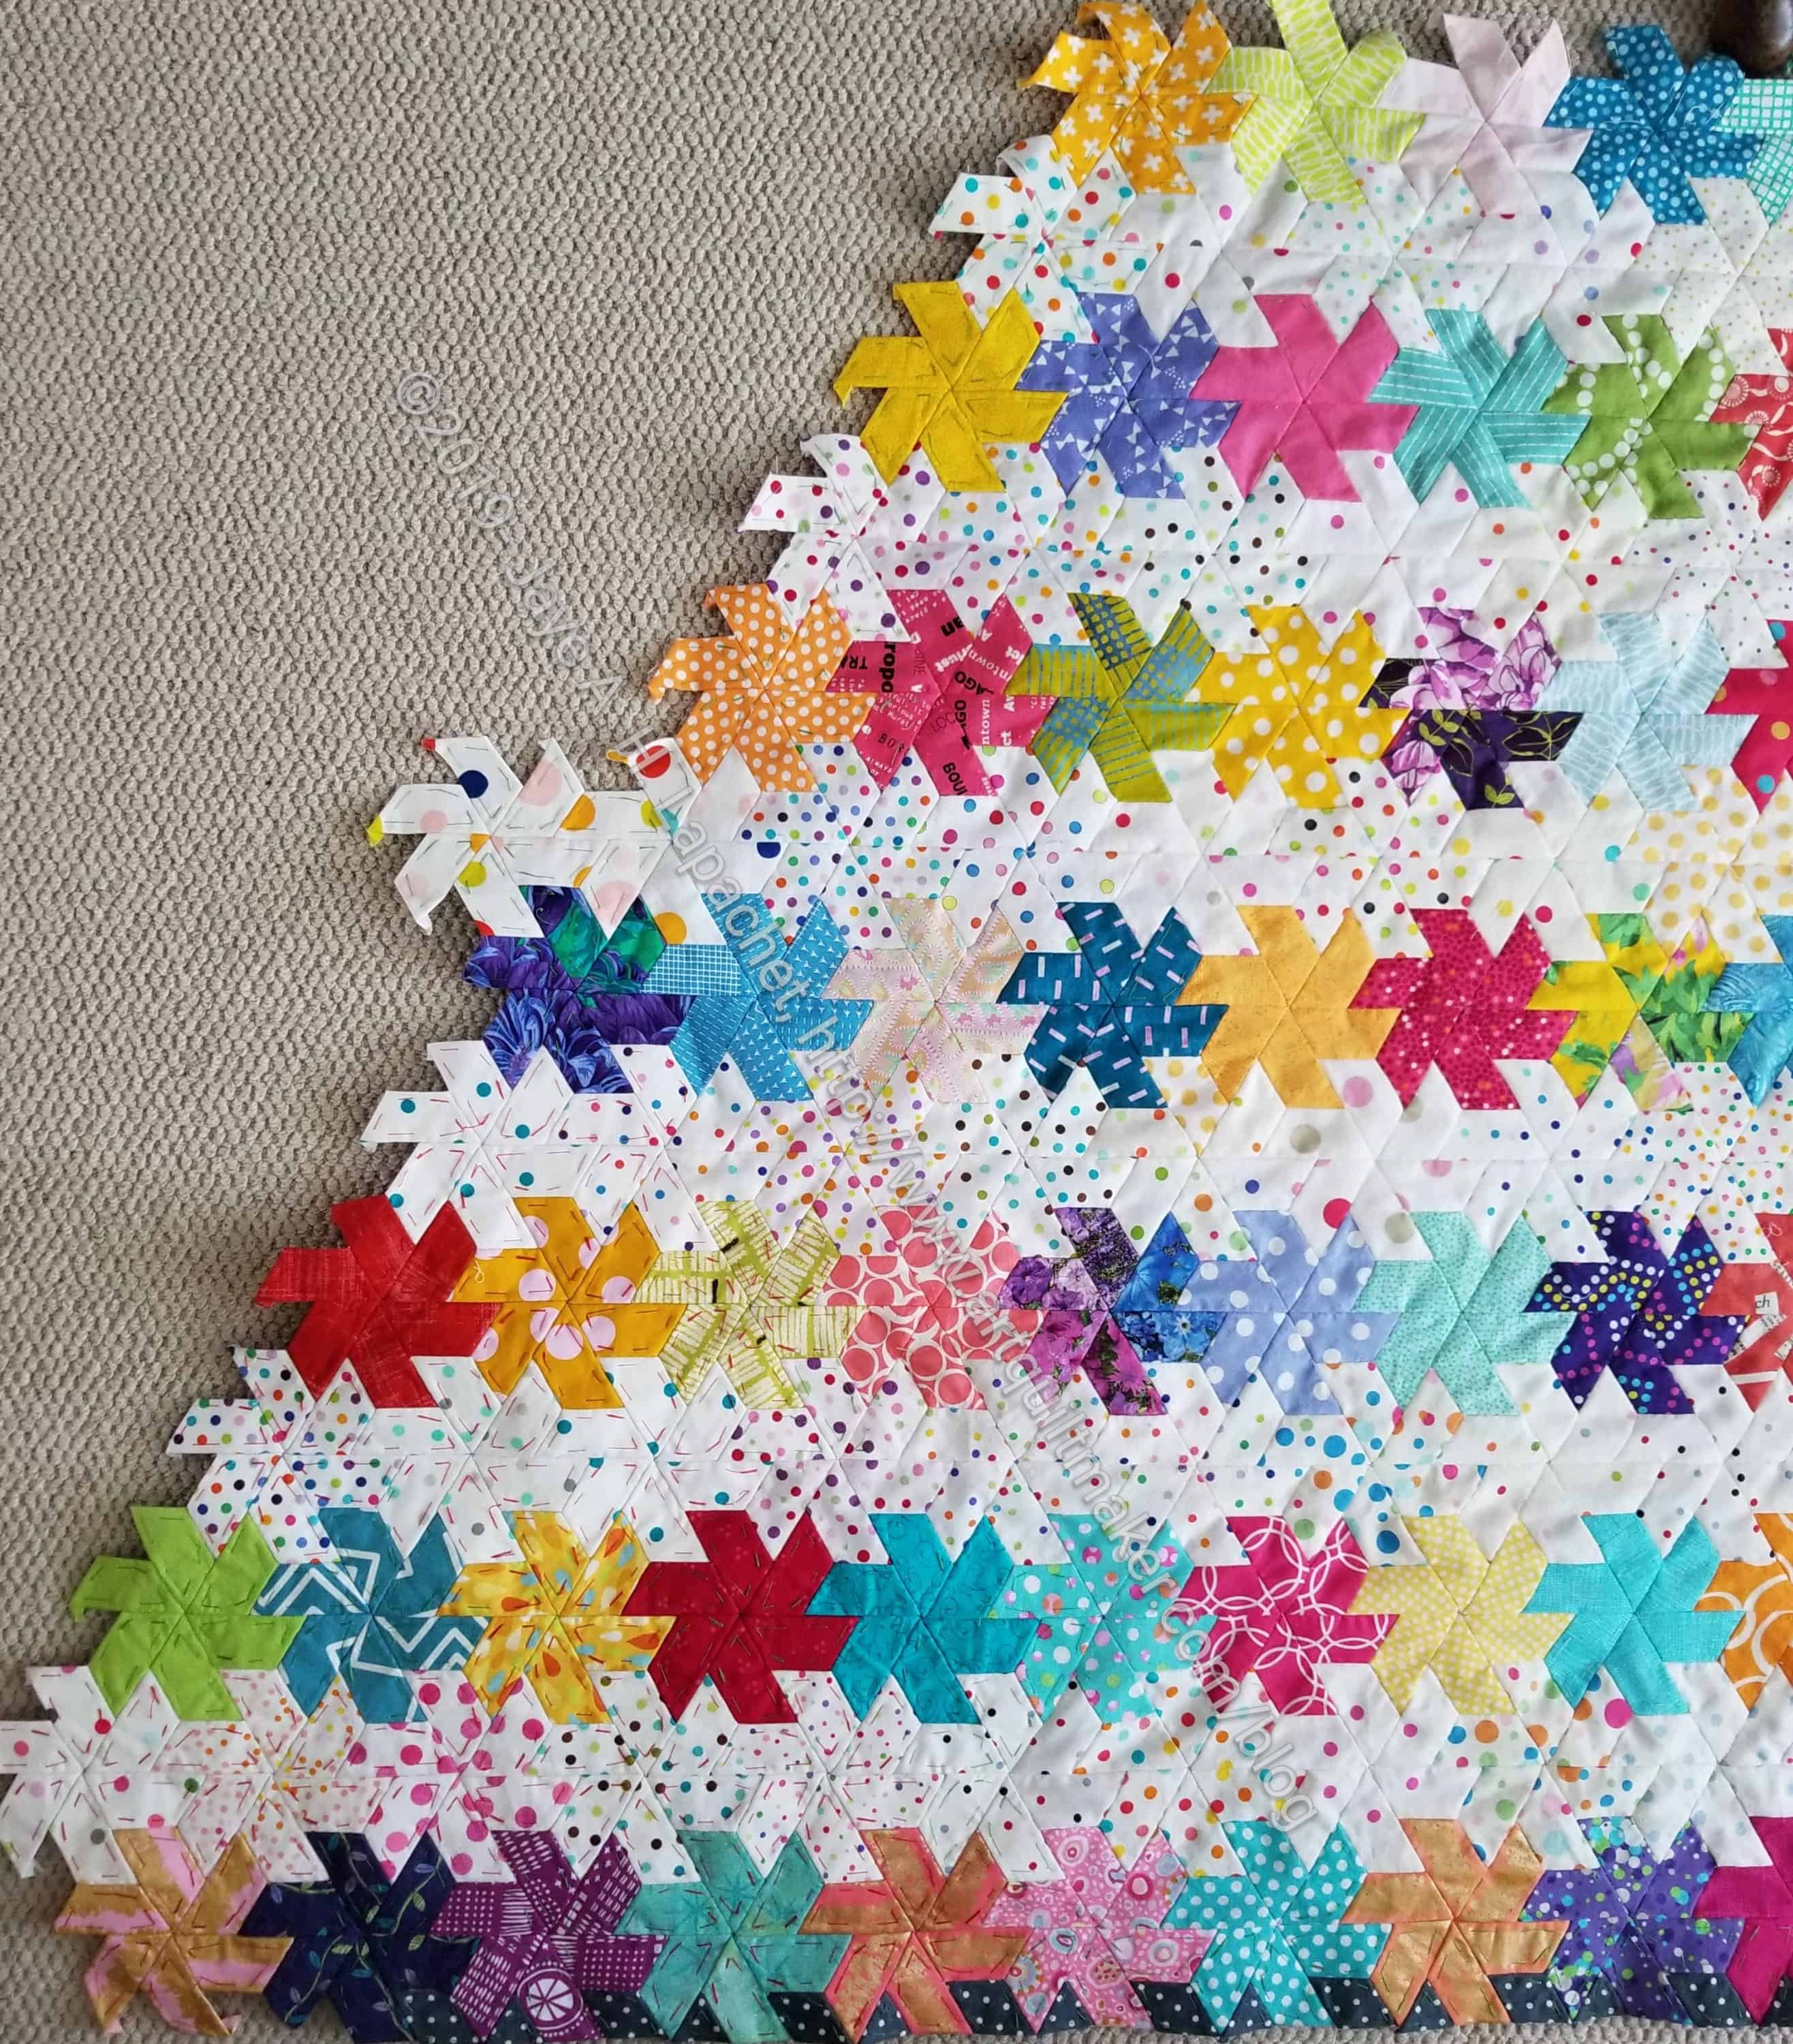
I laid what I have of the top out on the living room floor and am pleased with the look and feel.
Half Hexie Stars corner – July 2023
I have very little to finish. I have the upper left hand corner and the top edge and then I will be done.
I sewed on four foreground stars last night, which leaves nine more foreground and background stars to finish. Of course, the top edge (see photo above) also needs some stars sewn in, but one thing at a time.
Looking at the top laid out now, I can’t help but think I should have put the foreground stars on the diagonal. Too late now, however.
I have enough background stars sewn together to finish the upper left hand corner, but I needed to choose a few more fabrics for the foreground. They are all cut and ready; they just needed to be selected.
Half Hexie Star -Bottom edge ready for quilting
Half Hexie Star -Bottom edge detail
I am pretty pleased with how tidy the edge came out once I added the small triangles and diamonds. I am so grateful for the time I spent working on this piece at Sew Day a few months ago. That time was well spent as it gave me a good strategy for finishing.
I don’t know if I will finish the top before I get back to La Pass. We’ll see.
I was still recovering from my oral surgery last Friday as I prepared for Sew Day after work. With a full week of work and the aftereffects of the surgery under my belt, I was tired. I thought hard about staying home, but decided to go. I wanted to see my friends and participate in the Destash party.
In order not to completely exhaust myself, I decided to bring as little as possible with me. I needed a small project without a lot of pieces and parts. For example, I did not want to bring a sewing machine. The La Pass BOM would have been the perfect project, but it is delayed again.
It occurred to me that I could bring the Half Hexie Star quilt, put it up on the design wall and make a plan to get it finished. Looking at it and making a plan had been on my list for a long time and Sew Day provided the perfect opportunity.
I did it! And it worked!
I now have a plan to finish this quilt. I can see the light at the end of the Half Hexie tunnel, which is a finished quilt. This is very exciting. I thought this would be one of those quilts I would finish in 10 years.
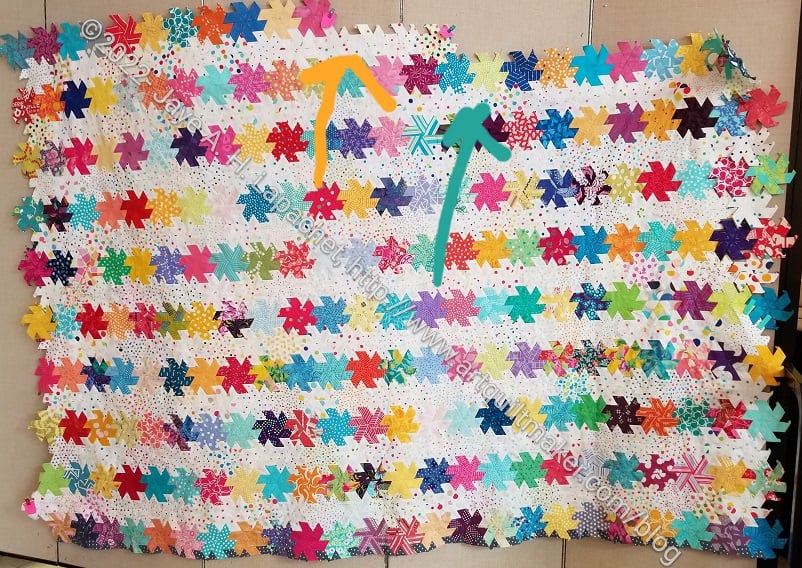
Half Hexie Star: top two rows
First, this may be the first time I have ever put this quilt up on the design wall and looked at it vertically. I have laid it out on the floor, but seeing it on the design wall is better.
Second, I figured out what I needed to do to even up the sides. I plan to finish the two rows I have started on the top (see arrows) and call it done. I am not going to add more rows to make it bigger.
Half Hexie Star: side
A lot of people came and talked to me about the quilt. One of my guild mates asked what the final size would be. I looked at her, confused. She clarified that she wanted to know whether the pattern said it would be a twin or another size. She also wanted to know if I made enough stars to complete the pattern. Clearly she doesn’t know me that well. I laughed and said I wasn’t using a pattern. I said it would be as big as I felt like making it. This was a foreign concept to my guild mate.
At that point, I decided that it would be pretty much as big as we could see on the design wall right then.
Half Hexie Stars: right side detail (to do)
I haven’t measured it, though it would have been a good time to do it.
Next, I tried to think of ways to square up the sides. I pinned stars to the sides to make each side as even as possible, so I could see what I had.
The top and bottom just need some diamonds and triangles fitted into the open spaces in the stars. The top and bottom will be easy.
Half Hexie Stars: Trying to add background
For the sides, I thought about putting a couple of the half hexie pieces using background fabric in to the sides as a way of getting the sides to be more square. I even sewed some as a test. I was going to go with that solution, which would have made a gentle zig zag edge. I didn’t feel it was an ideal solution.
Half Hexie Star: Lindsay’s idea
Then Lindsay arrived and we discussed it further. She thought I could add in the triangles and diamonds without the background pieces. It wouldn’t make the edge square, but there would still be a gentle zigzag. The triangles and diamond pieces would match the look of the bottom better. I like this idea much better and will work on it.
Finally Mary C said that I could use the edge as is – already folded under – and fold the backing under, then whip stitch the top and bottom together rather than applying a standard binding. I think this is a really good idea. If I can work with Colleen to make it happen, I will.
I am pleased with the various solutions. I am also glad that I will be done with this top soon.
Because of the light La Pass month, I have been working quite a bit on the Half Hexie Star. It is not as fun as La Pass, but I do want to get it done. I have put so much work into the piece that abandoning it is not an option.
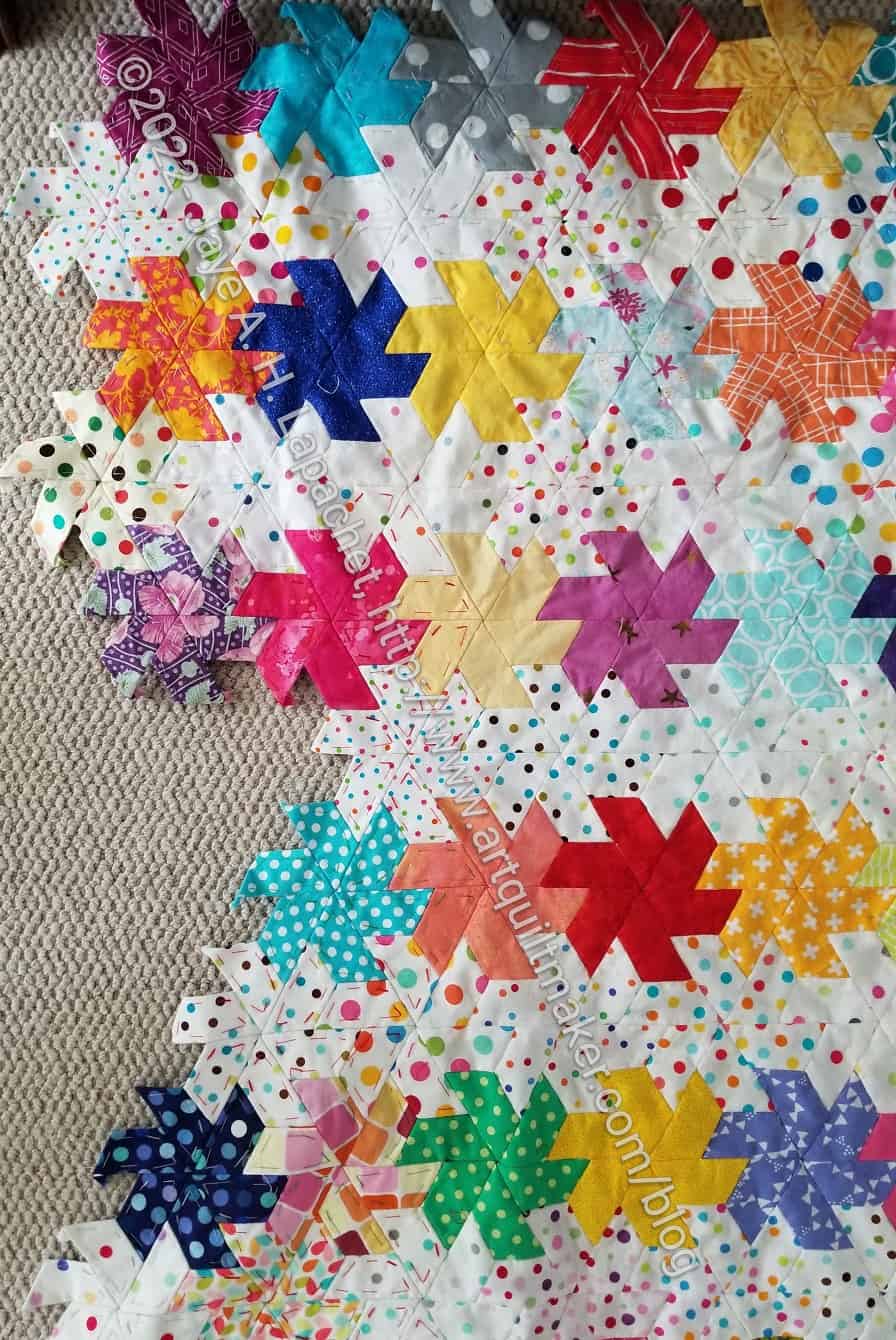
I looked at the piece on the living room floor and it might almost be wide enough as well as long enough. Both ends need some filling in. Two columns on the right (photo top left) need to be finished.
Half Hexie column in process
I am pretty sure it is long enough, but it is definitely not wide enough. First, I assembled as many stars as I could, then I started adding stars to the larger piece. Most of those were foreground stars.
The column on the left (photo right) consists of the stars I have added. The background column to the right of the new stars is pretty complete, so I can add a number of stars and keep my hands busy in the evening.
Half Hexie fill ins required
Soon, I found that I didn’t have any of the white with dots I am using as background stars, so I had to cut more of those. I didn’t have enough paper, which meant I had to remove some of the papers from the larger piece. I like the structure leaving the paper in gives, but needs must. I also ordered some more papers from Paper Pieces.
I started assembling more of the background stars over the weekend. I’ll figure out where to insert them as soon as I get several. I’ll need to cut more fabric and assemble more of the background stars.
La Pass month 10 will be here soon, so I’ll put this back on the back burner except for cutting background fabric.
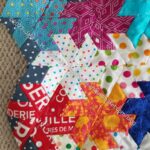
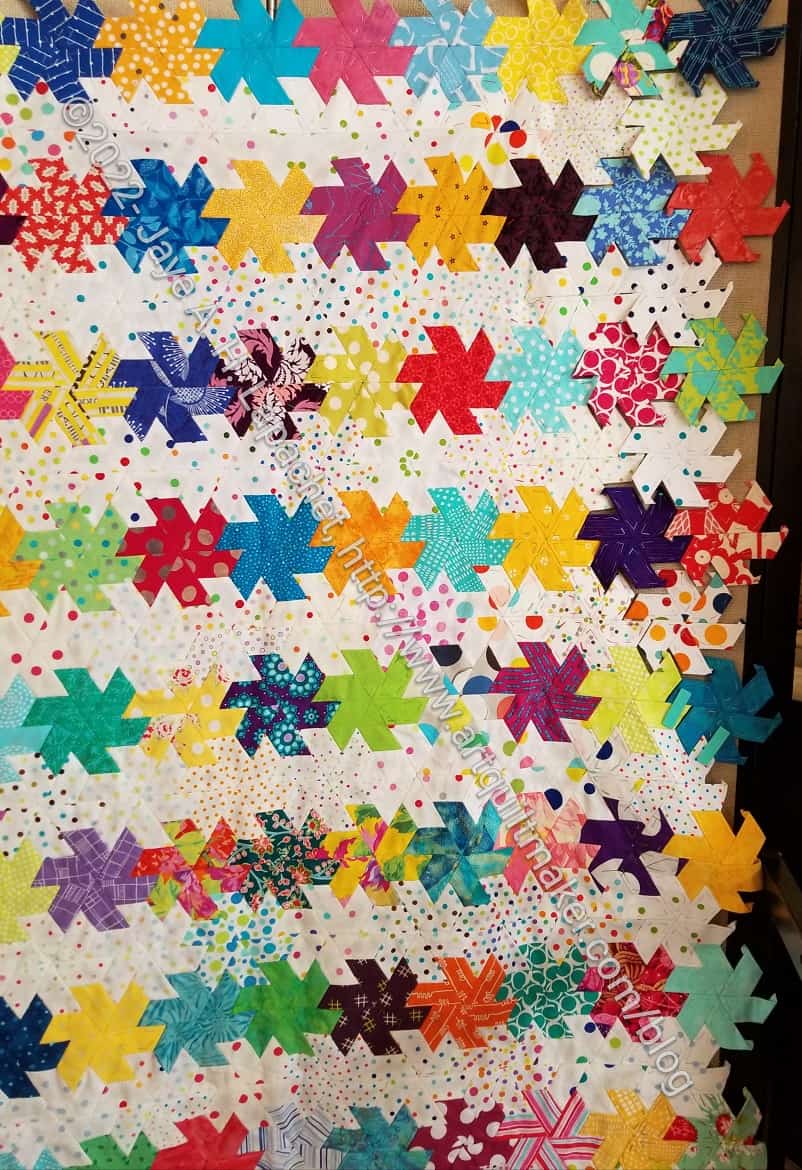
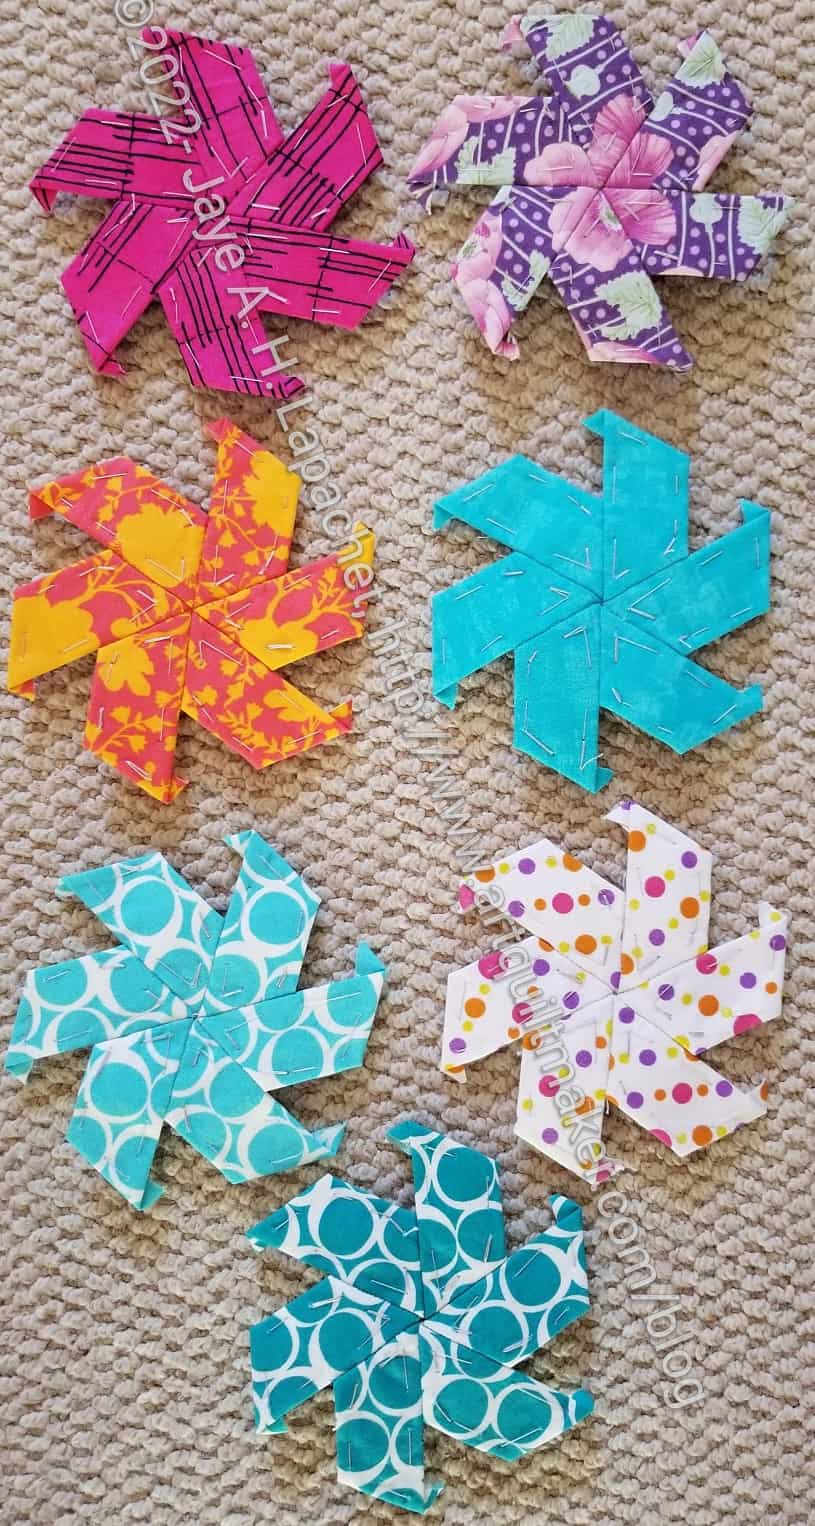
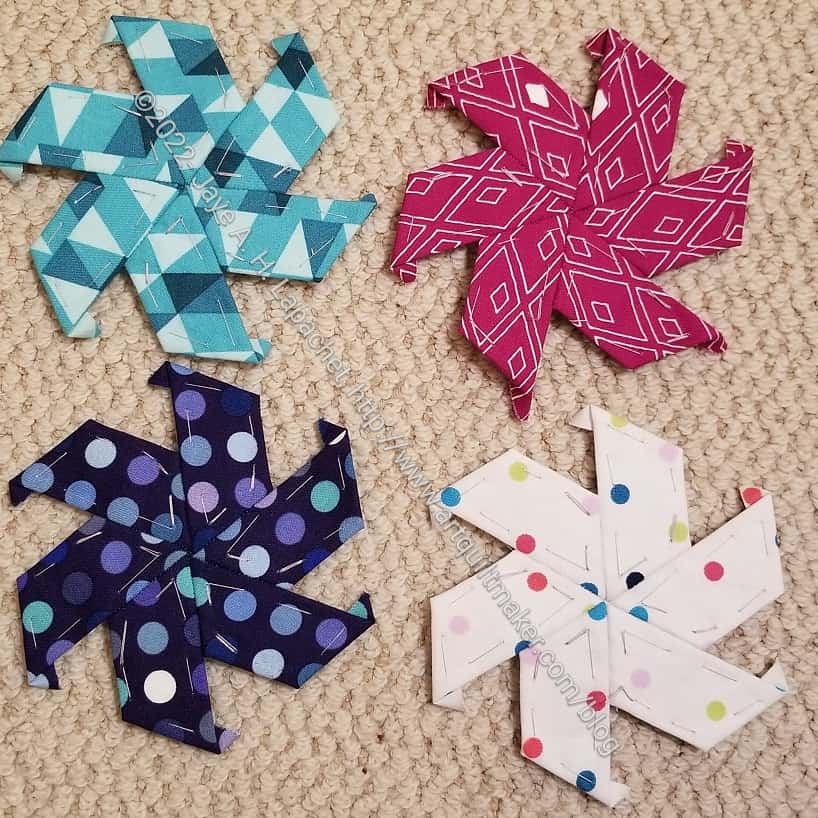
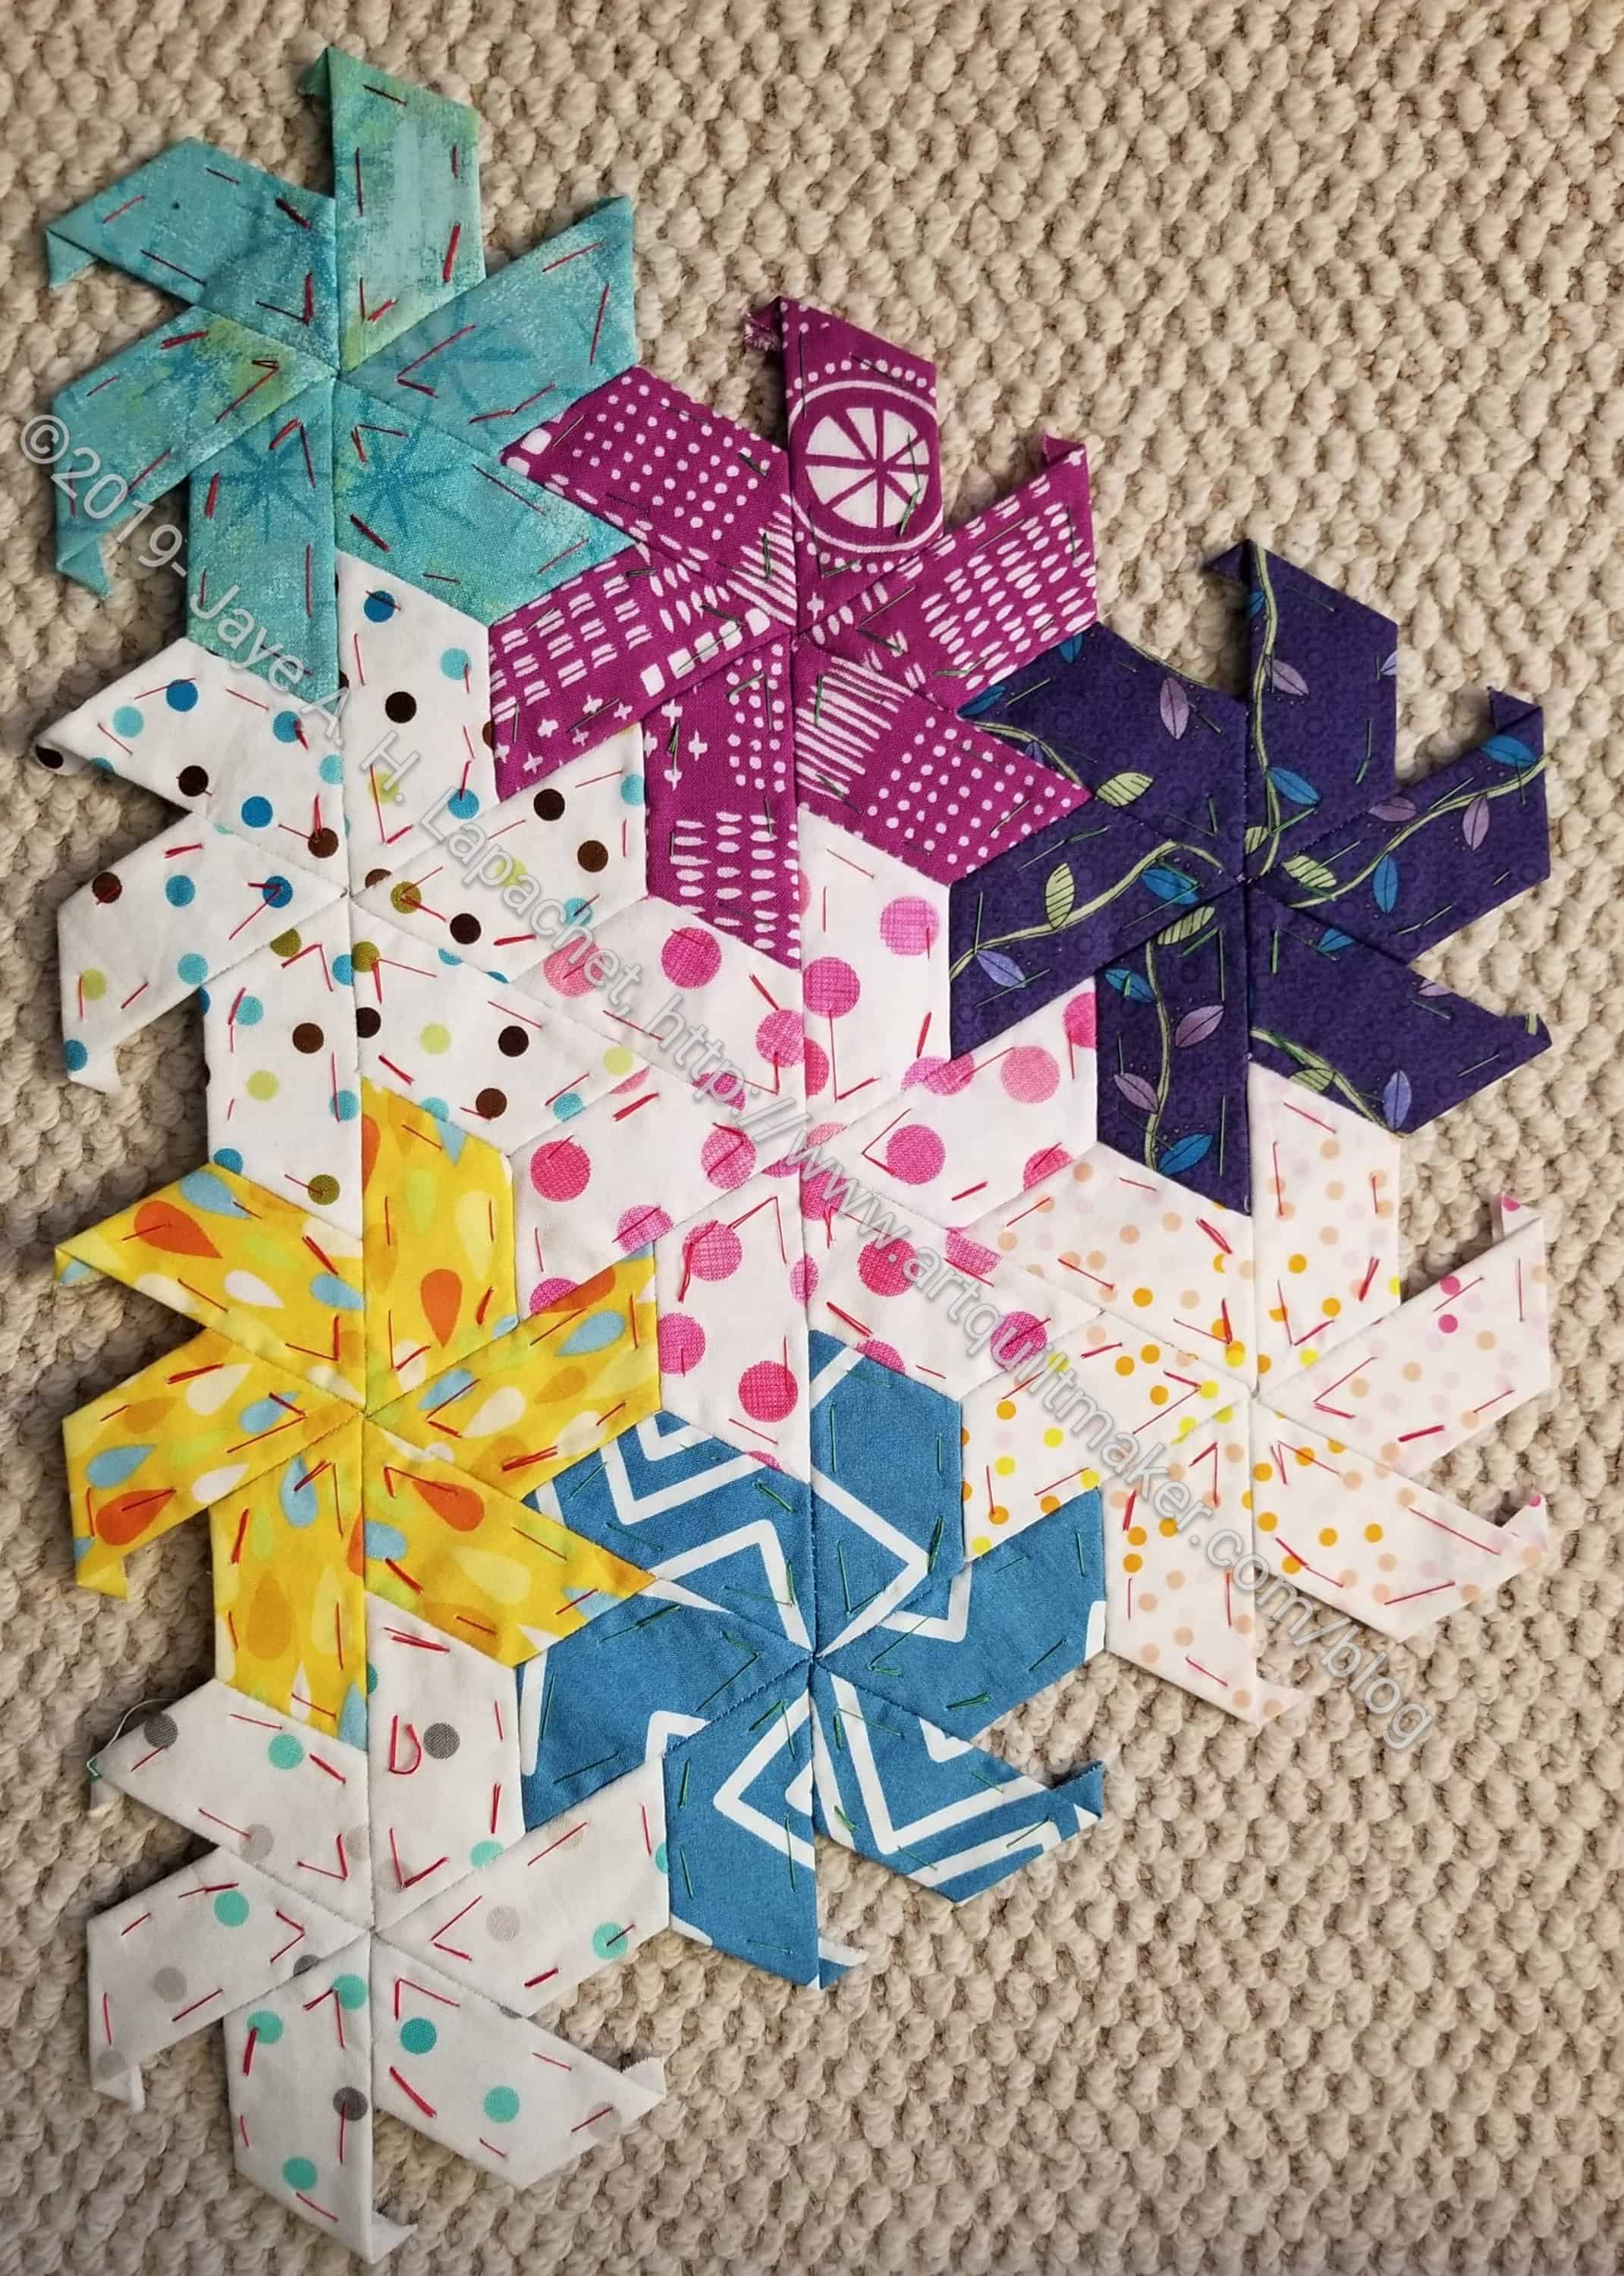
Before I went to Portland last week, I finished a bunch of half hexie stars. I think La Pass is good for the other EPP project.
These are pretty cheerful. The purple one in the upper right hand corner is a Tilda print I bought at Calico Creations in Mt Vernon last year. Don’t you love the way the flowers came together in the center?
I did notice that the papers feel significantly flimsier than the La Pass pieces. Pink Door cuts their own papers. They must use better paper? I wonder if I would notice if I glue basted this project? I might try it.
Regardless, I am happy that I made a little progress.
I have been working steadily on the half hexie project while I watch TV after dinner. I am making progress, but it feels slow.
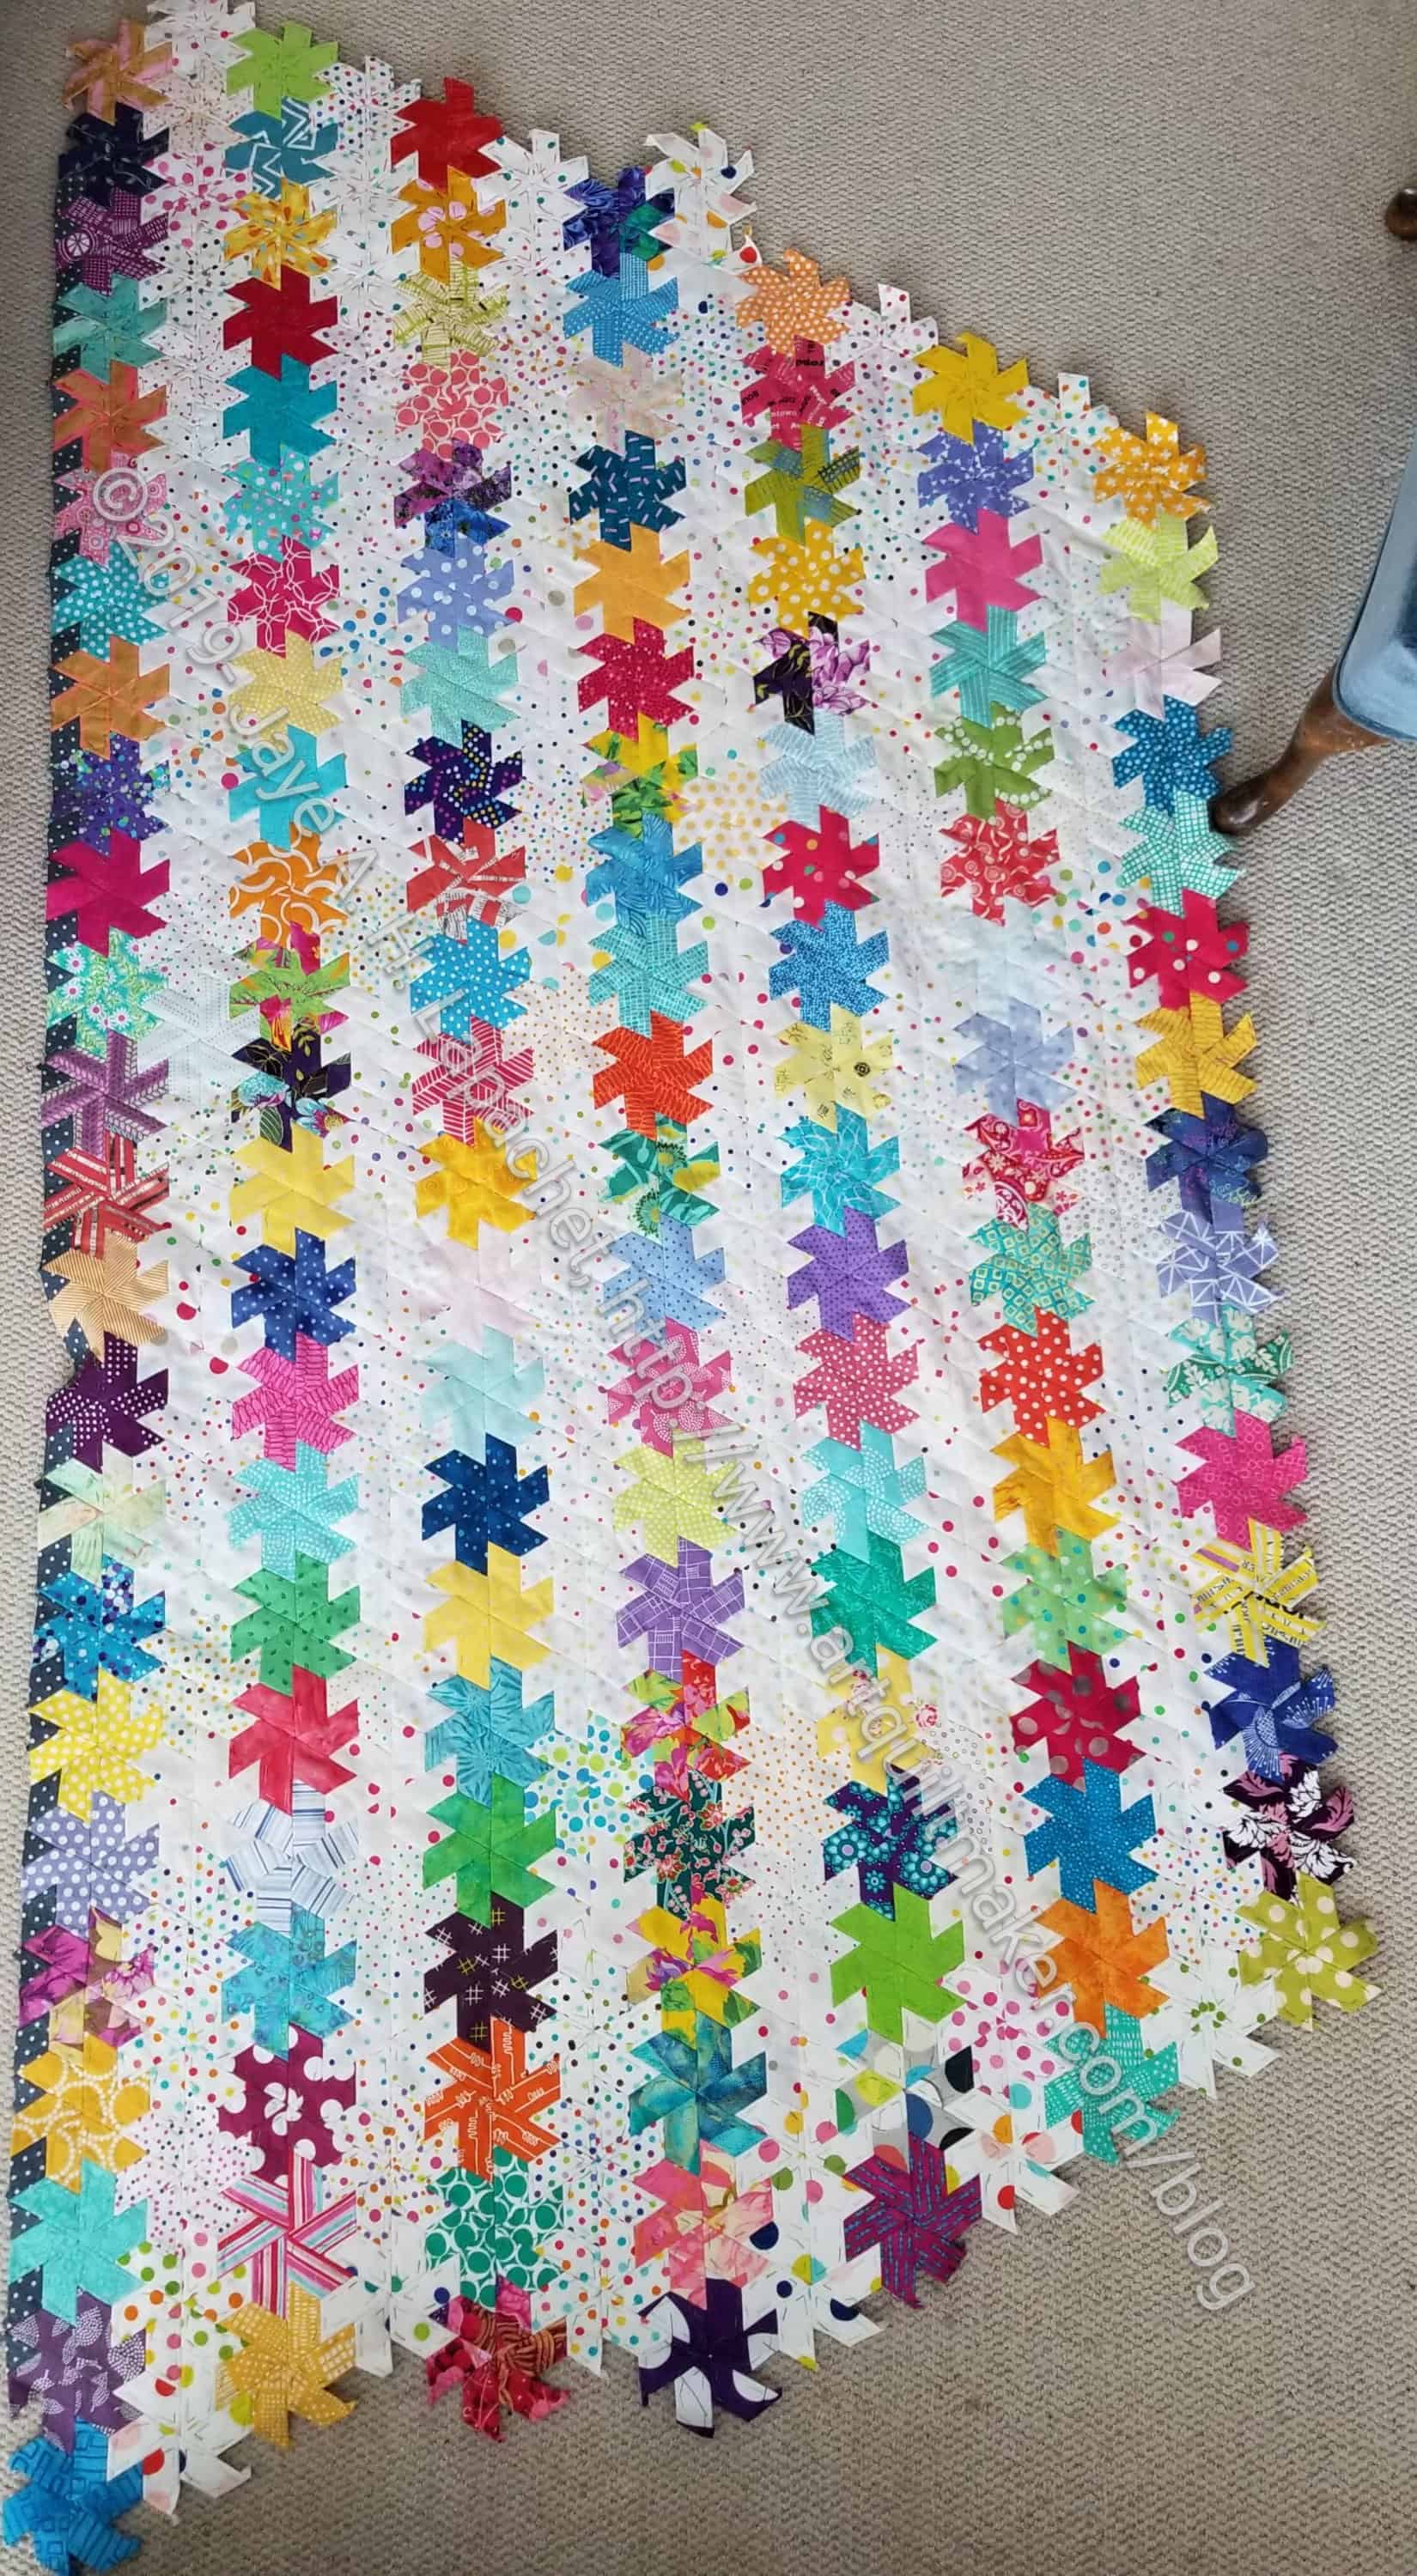
I have started to make the piece wider by adding whole rows to the straight side of the piece. I can’t say whether I like this method, but it is controlled and does make the piece wider.
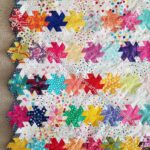
Half hexie star top on the bed
Yesterday I heaved the top on the bed and checked to see how many more rows I need.
I don’t normally show my messy bed, but this is the best way to show progress. The length is good, thought I do need to straighten up the top and bottom edges. From the photo, I think I need 6-8 more rows to make the quilt wide enough to cover the whole bed.
Scrapitude Carnivale is under the Half Hexie piece so it might cause some visual confusion.
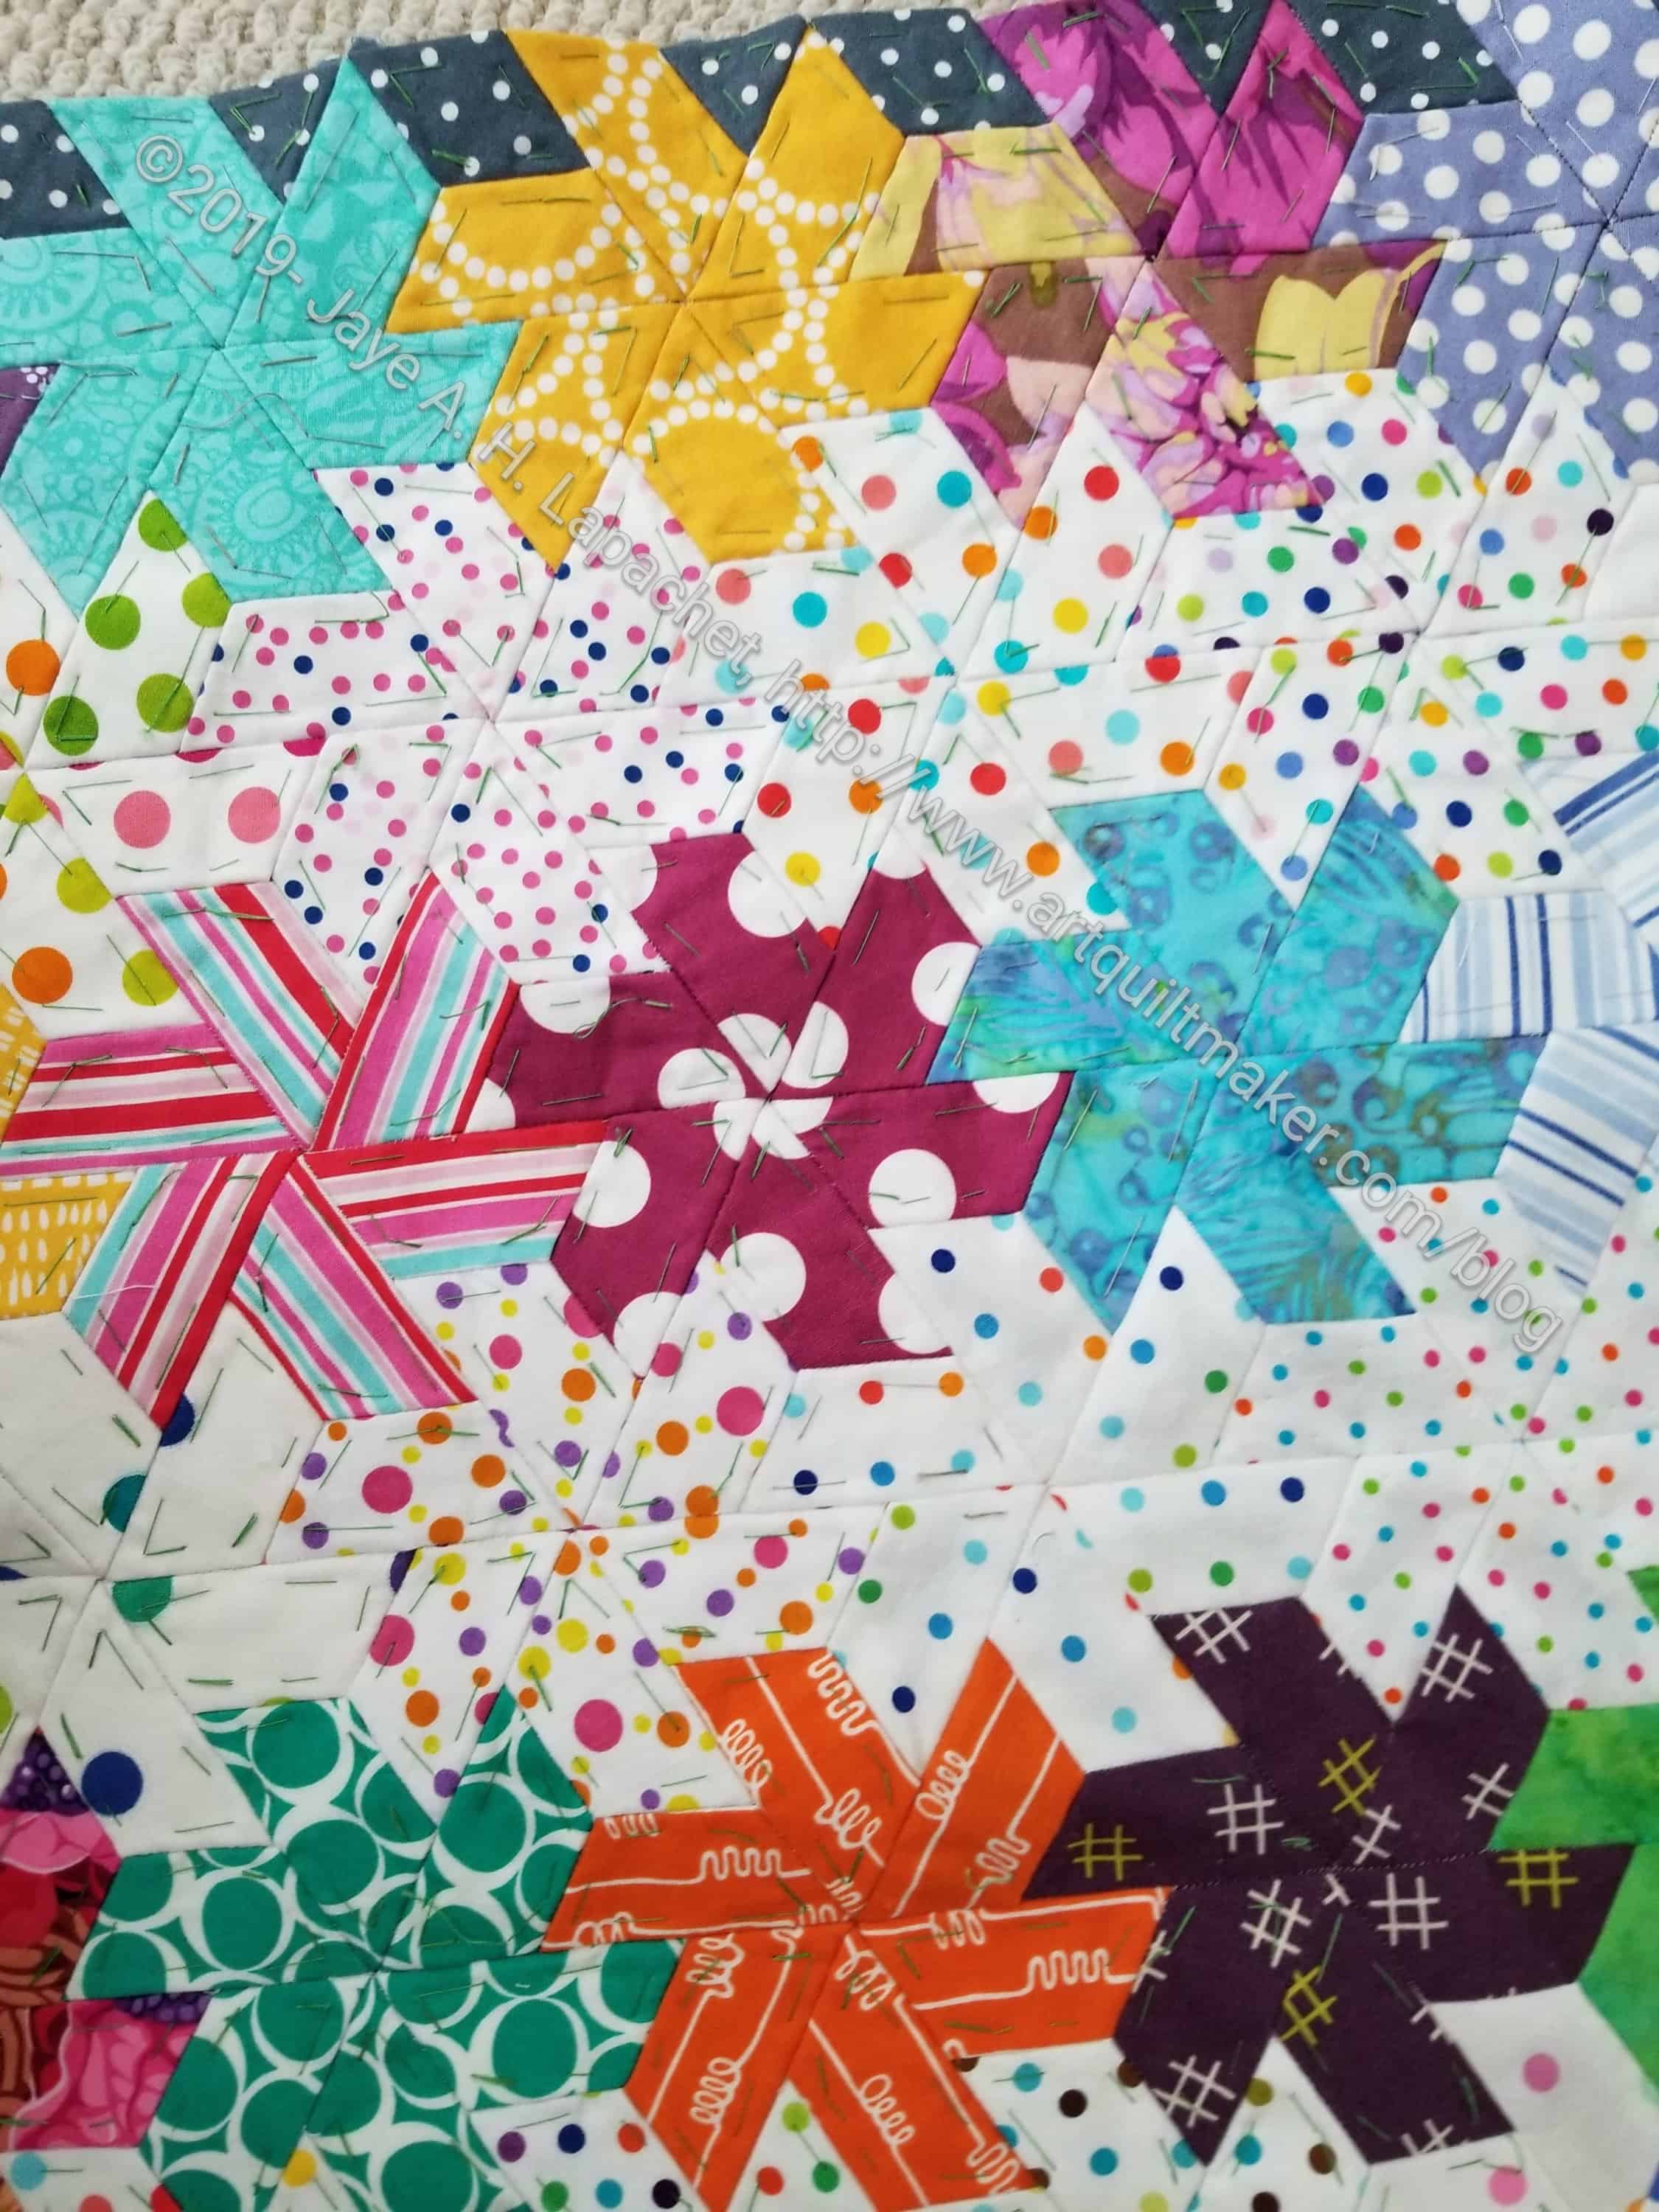
The other day I showed you the latest results in my EPP piece. As I was taking the picture, I noticed a piece that looks a little odd.
EPP non-fatal problem
Dots. Dots are the problem. That violet with white dots fabric n the middle is weird looking. Something about the dots intersecting with the white is unconventional.
The papers are out so I can’t rip it out. I’ll leave it and see if anyone notices.
I often think I am in a good place with this piece, then I look at the whole thing and realize I haven’t made the progress I wanted. That was the case when I looked at this whole piece as I was photographing it. It is still too skinny. I need to make it wider.
I have been thinking I would square up the top and bottom then make it wider. Somehow it just keeps getting longer and appears to be skinnier.
New Half Hexie EPP section
Fortunately, I still need some length so the work will not go to waste and I won’t have to rip it out.
As an aside, I saw an exact match to this quilt (except for the fabrics) on a Kansas City Star page. They call it Whirligig. Do I like that name? Maybe.
I am kind of thrilled that the Kansas City Star has a pattern for this quilt. I’ll have to look it up and see what my copy says about the pattern.
I am never going to get this project finished if I don’t work on it, so I work on it whenever I can. Lately, I have just been making stars. I have a whole Scone container full of the little stars and some pieces in my Sew Together Bag cut to make more. I decided I had better put some stars together to make a section that will increase the size of the main piece before I made more stars. As a result, I have been beavering away at that task.
Half Hexie EPP Section – April 2019
It doesn’t look very impressive, I know. That takes a bit of the wind out of my sails, because all of that piecing is handwork and it took quite a while, though not years, to get that much done.
I am still trying to think of this as my slow quilt project, but it is hard. I am kind of ready to be done with this project and move on to something else. At least I finished one hand project this year.
The other day I got an email from Culcita saying they were raising the prices of Sew Tites.
Like a sucker I bought more.
Sew Tites from QuiltCon 2018
OK, I am not really a sucker. I like this product. I got my first three free at QuiltCon last year and I found them to be incredibly useful for bags and sewing with vinyl. These fill in the gap where WonderClips won’t work. I bought a 15 pack thinking I would disperse them around my various bags so I would have them handy when I needed them.
Sew Tites are magnetic and fall somewhere between a pin and a clip. One half goes on the top of your piece and one half goes on the bottom. There is nothing pointy or sharp which is why they work for vinyl. I think they would also work for something thick like Soft & Stable. I can’t remember if I have tried that or not.
EPP: 1st two half hexie legs
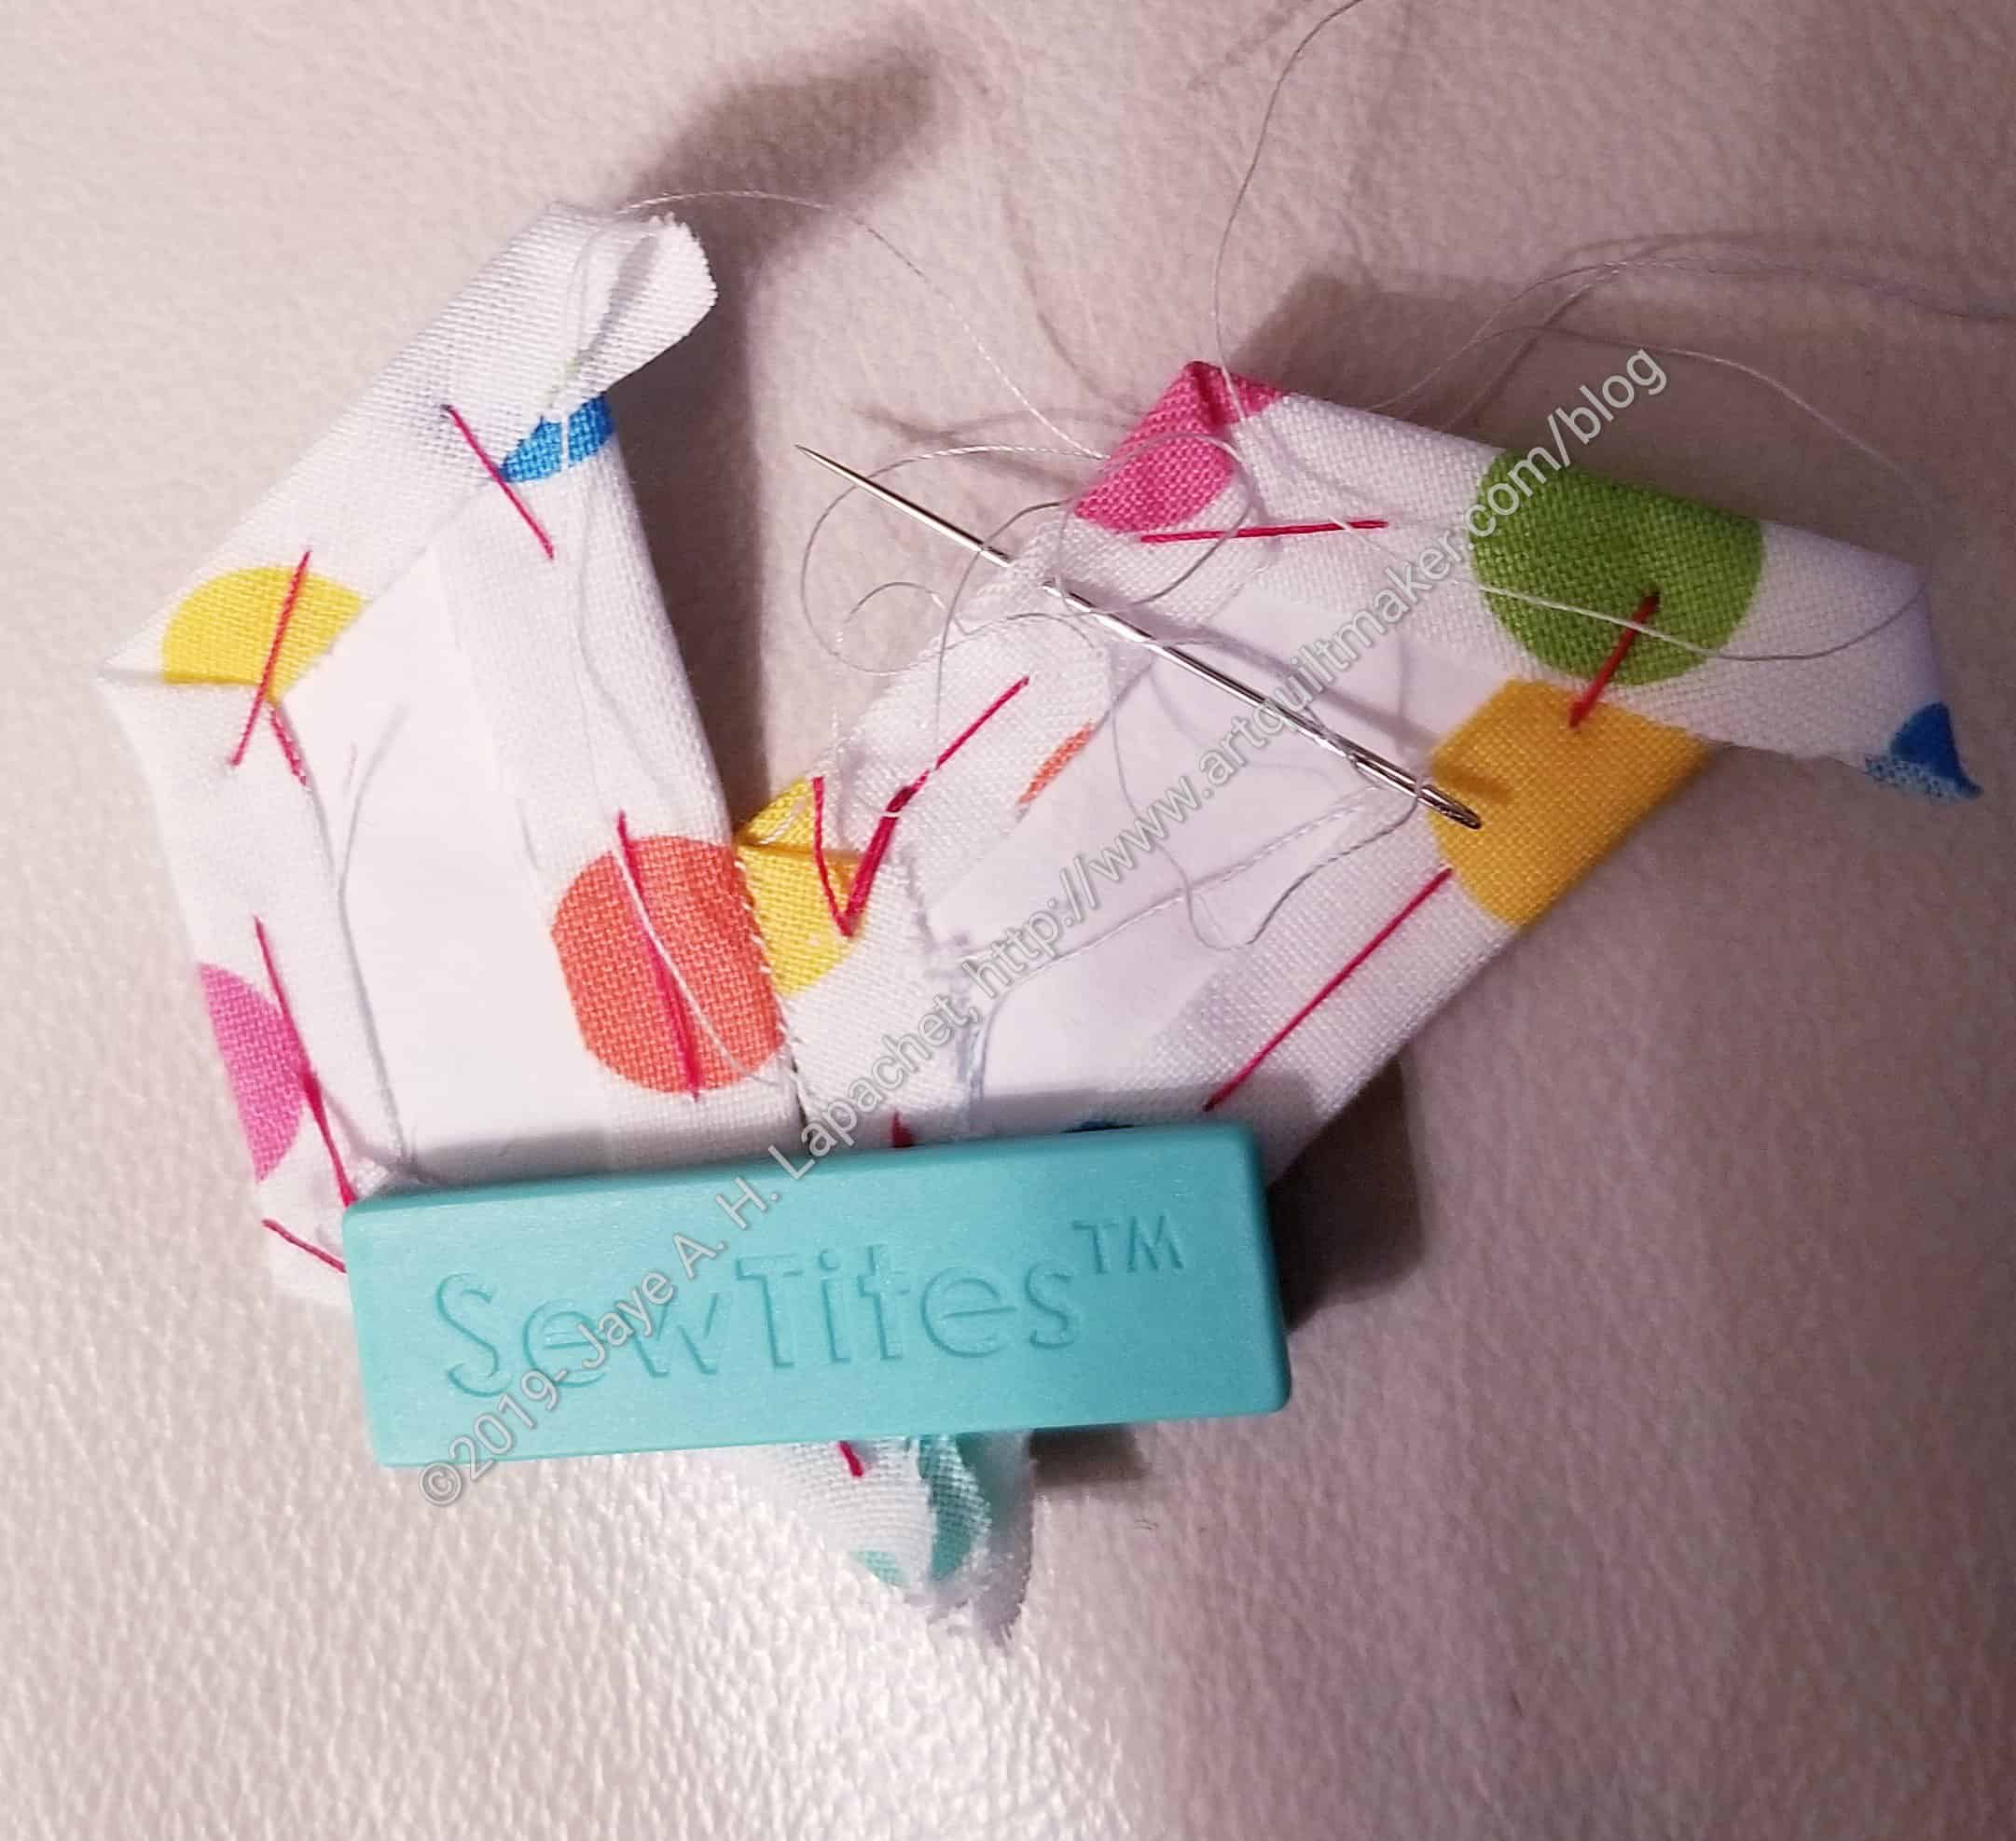
The other night I was, once again, fighting to line up my half hexie EPP project. The tips need to be in just the right place. I remembered I had received the Sew Tites. I went up and got a few and tried them out.
I was putting half hexies together to make stars. I use a ladder stitch (or an approximation thereof). The trick is to keep the two legs next to each other in the correct position long enough to sew them together. This is really tricky since I only have two hands. I have been using WonderClips. They work okay but not great, especially for the inside angle.
The Sew Tites aren’t perfect either. They are a little hard to maneuver to get the pieces to stay where you want them. Still, once you get the Sew Tites in place, they stay put. Thus, your pieces stay put. The Sew Tite are kind of large, so I am only able to hand sew half of my seam before I remove the magnet. Half is enough to ensure that I can keep the two half hexie legs together the rest of the time needed to sew the seam.
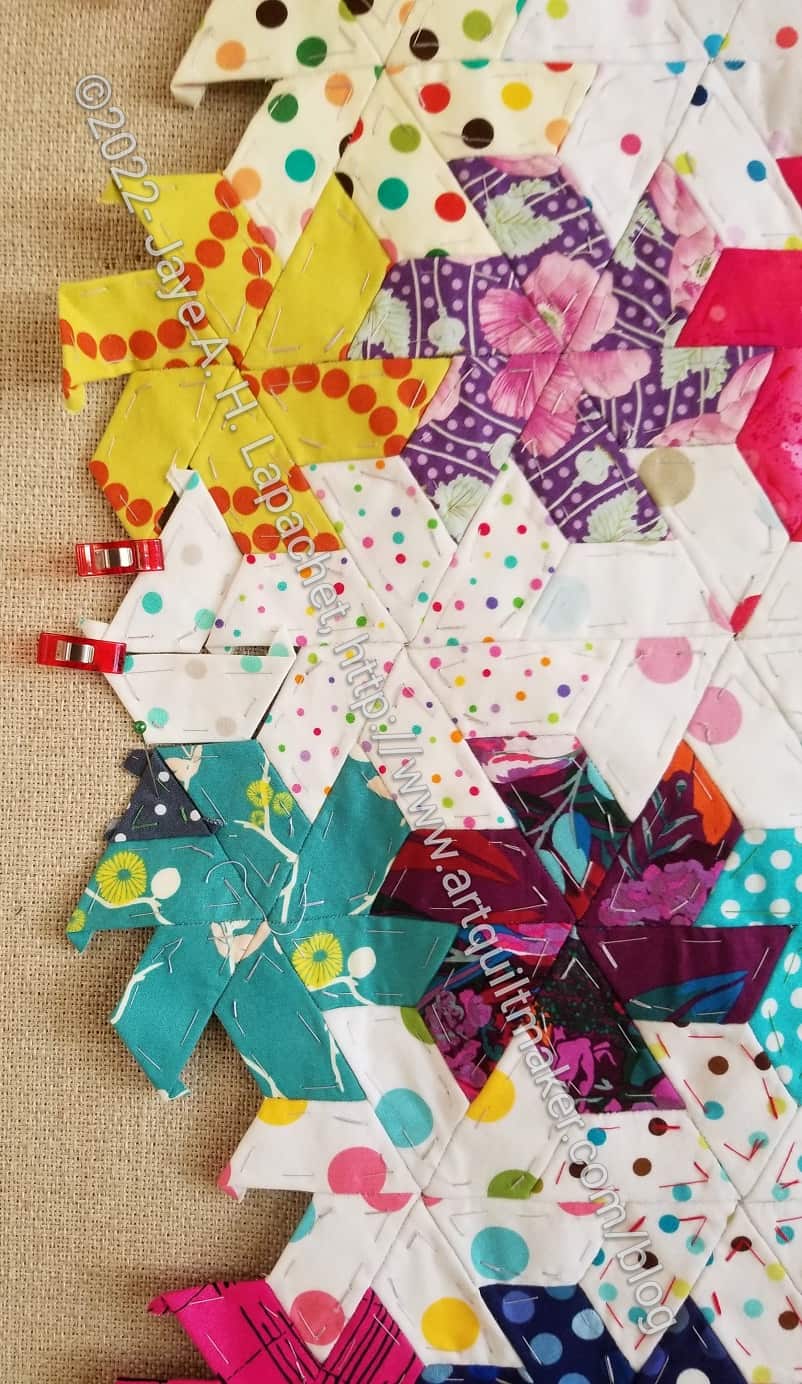
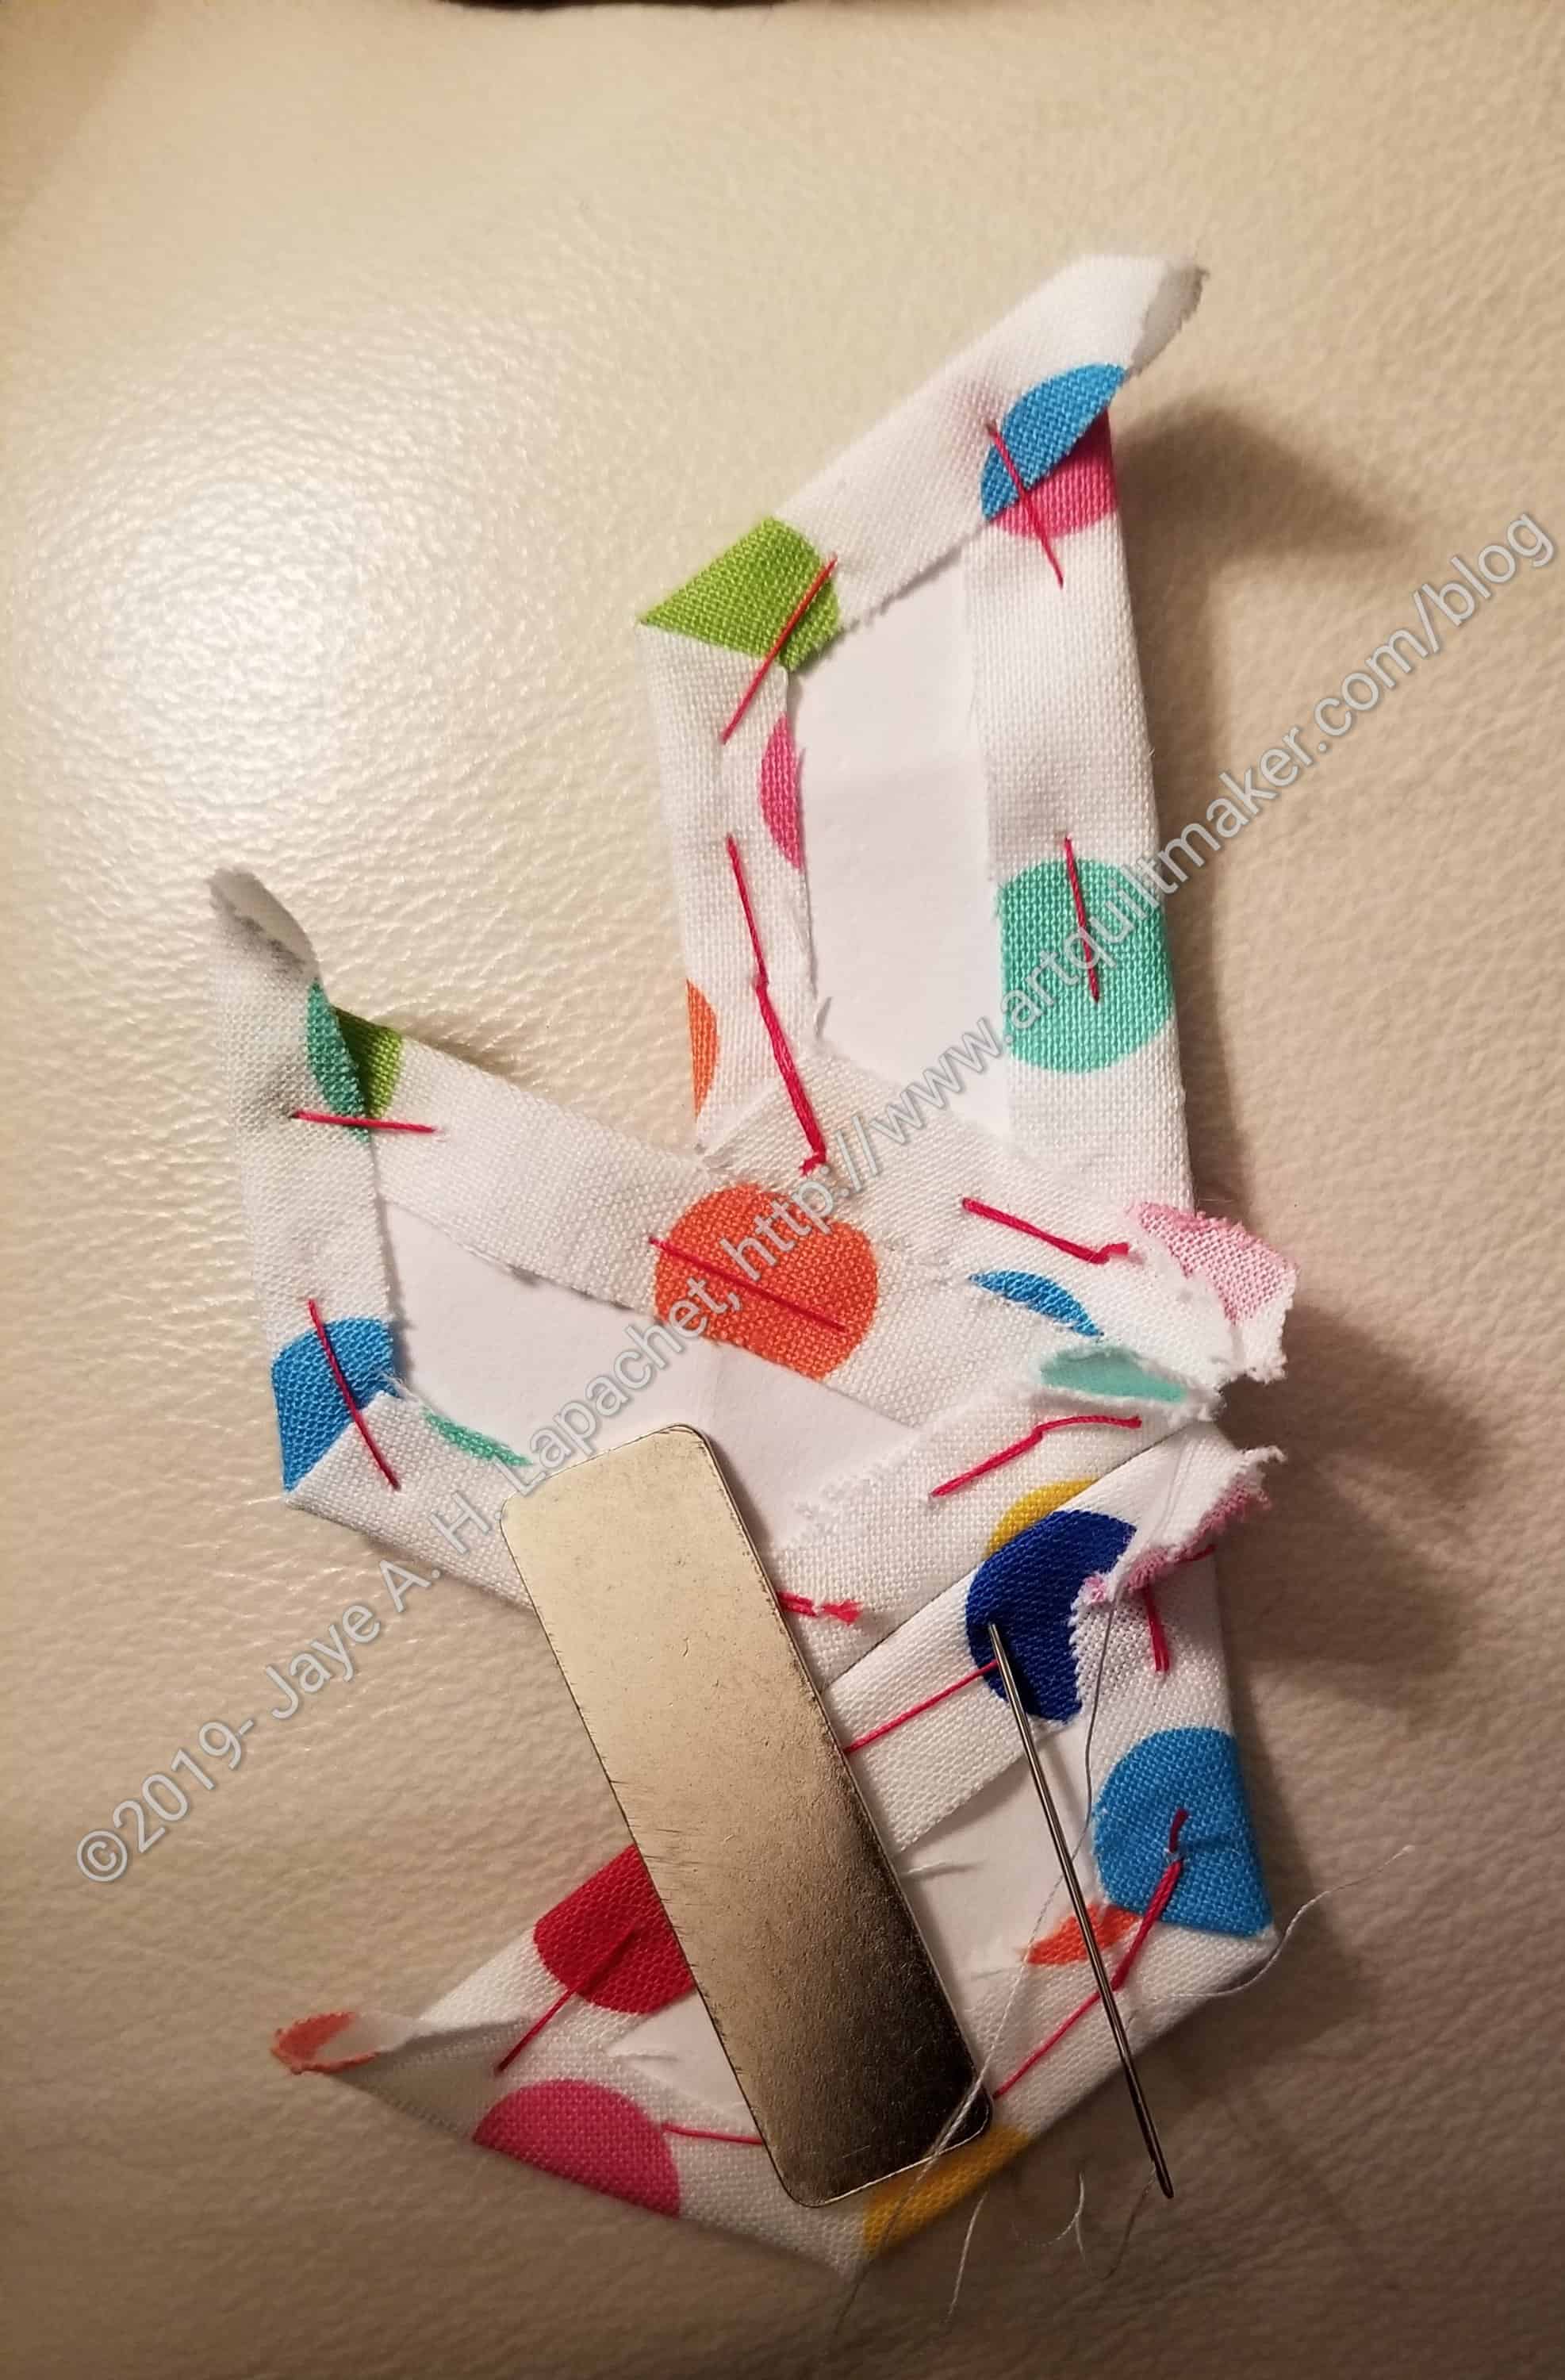
EPP: 3rd half hexie leg
The magnetic Sew Tite can also straddle areas of piecing where there may be no fabric or paper to which to cling. Unlike a WonderClip, which needs something on which to clip, the Sew Tite sticks to itself. In the second EPP picture you can see that there is a space on the inside angle where there is no fabric or paper. The ends of the Sew Tite are on paper and fabric while the middle sticks to itself. There is no problem and they still hold the pieces together.
There is a benefit as well. The farther down I can place the Sew Tite and still have it hold, the more of the seam I am able to sew without moving or removing the Sew Tite.
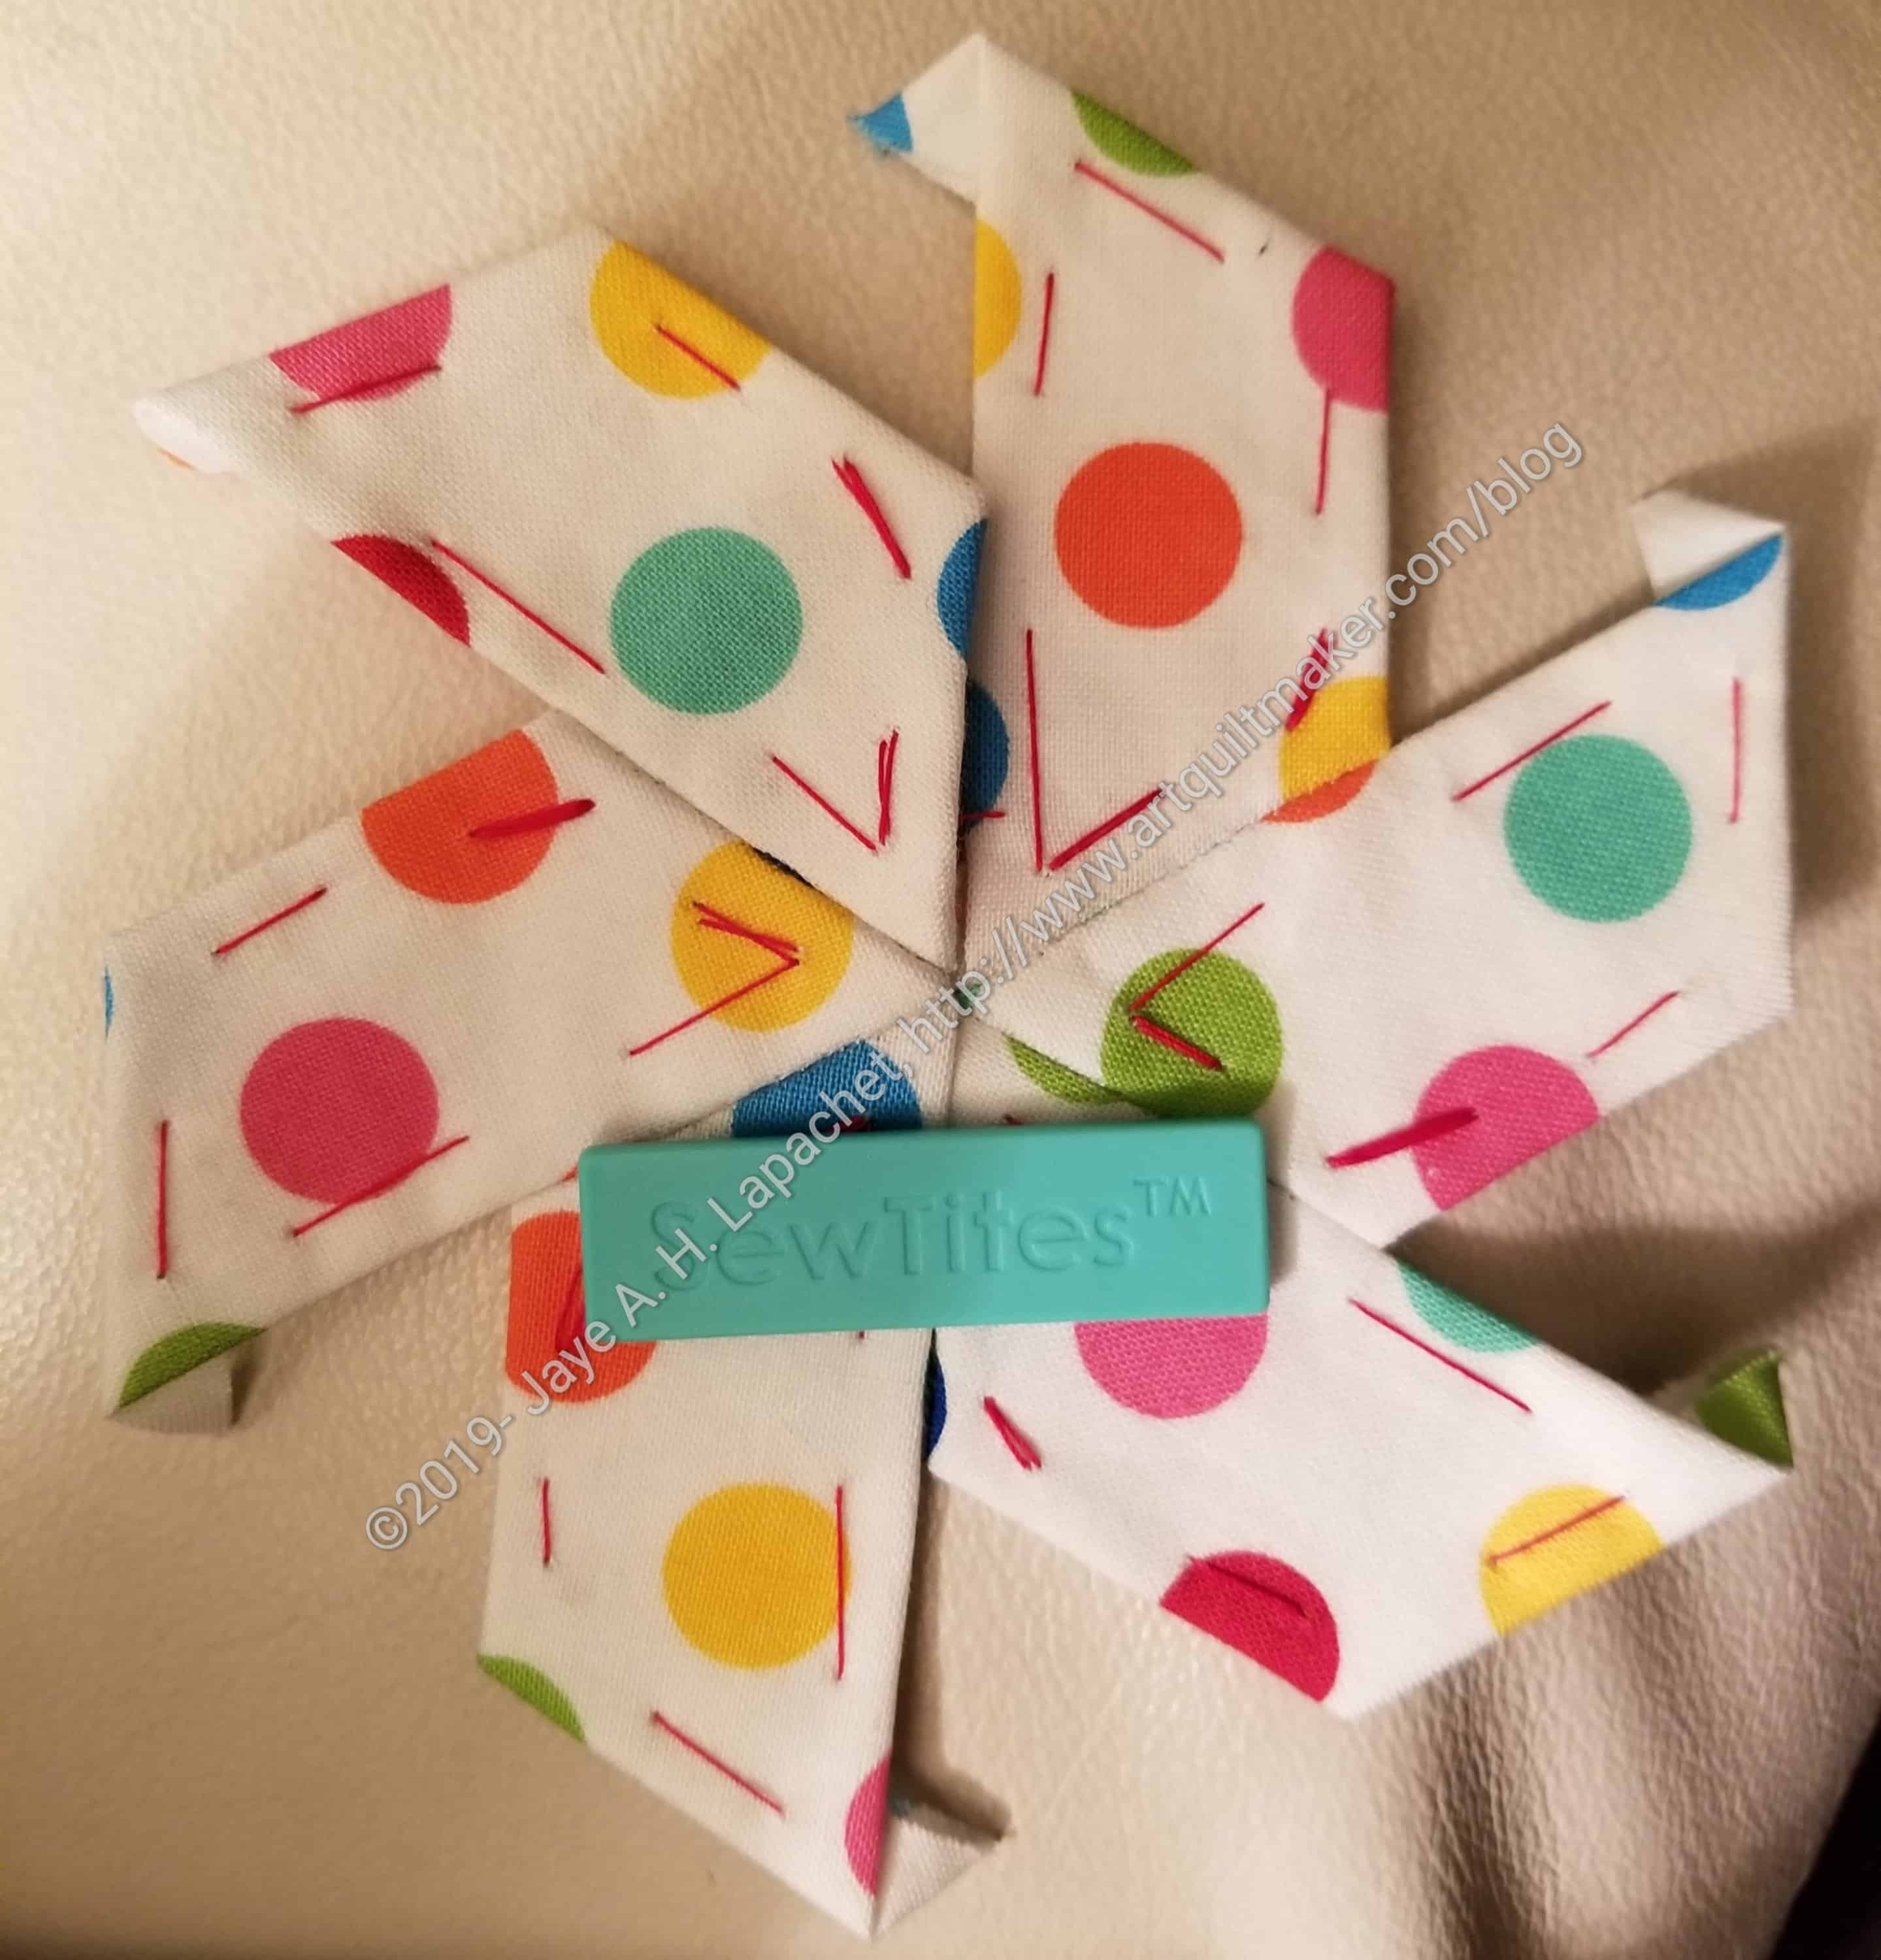
EPP: 2 halves make a star
I have also been struggling with getting the centers of the stars to line up. Sew Tites work for this problem as well. Again, once the pieces are lined up, the Sew Tites hold them in place.
I have been wanting to tell more people about them in the Crafty Gemini Facebook Group, but there is a prohibition against talking about other products. Oh well, I assume people will hear about them eventually.
Check out the Culcita/Sew Tites website for videos and more information.
In between everything else I have going on, I have been working on the half hexie stars. I need about a million more stars, so I just work on them whenever I don’t have any other handwork pressing.
I especially need white background stars so I have been concentrating on those fabrics lately.
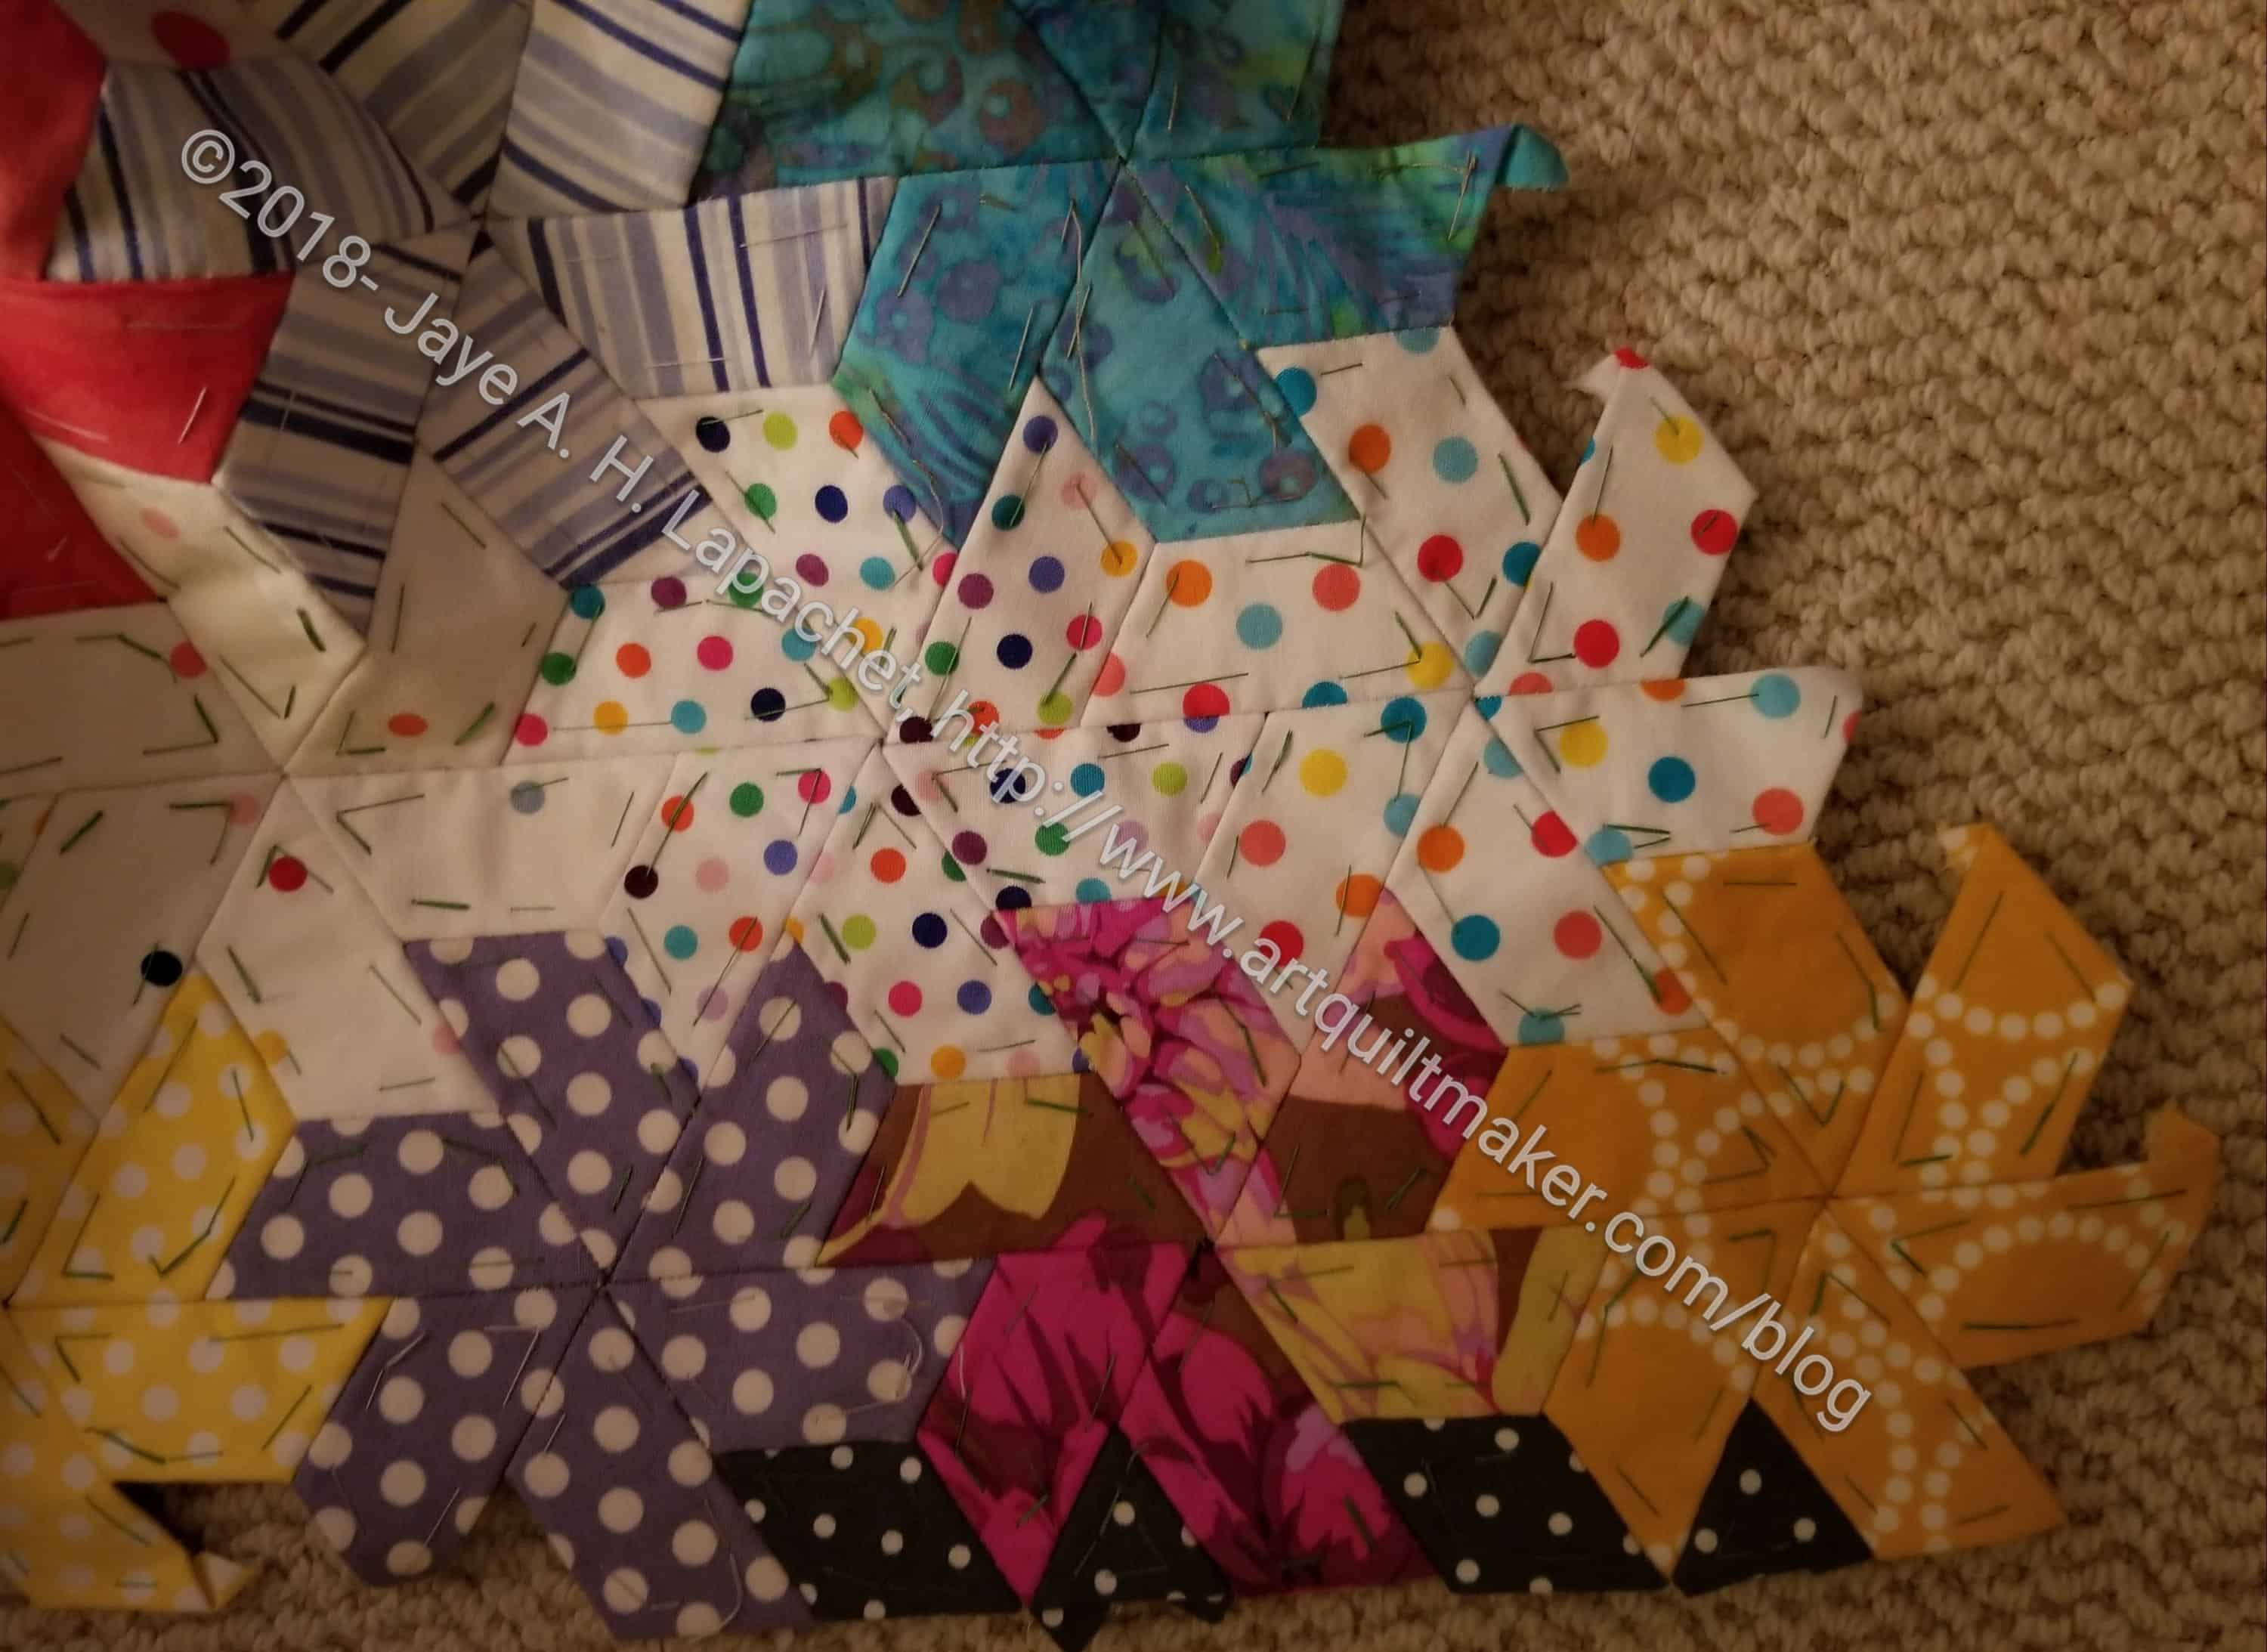
One problem I had with this batch was matching the centers. WonderClips, which has worked perfectly well before, were not working. They didn’t seem to be clipping strongly enough. My pieces kept slipping, making the centers off. Some were just a smidge. Others had to be ripped out.
Half Hexie Star – matching centers
Alison saw my double point pins at the last Sew Day. Someone in Rosalie Dace‘s class said I had to have them, so I bought some. Alison mentioned to me that they were for matching up points. I don’t usually have a problem in regular piecing, but since I was having a problem with the half hexies, I thought I would try them. They are not ideal, but they help a lot. You can see from the photo that I use clips and the double point pins. I am now using two pins and a clip. This strategy seems to be working.
I’d love to say this piece was in the finishing process, but it is so far from the finishing process that lying wouldn’t even cover what I was doing. I am, however, working on this piece. It is slow going, which is fine when I don’t have other handwork that I must do.
Half Hexie First Borders
Recently, I bought papers to fill in the border of the half hexie piece. I needed some triangles and some diamonds. I want to create a full stop at least on one side, so I picked out a dark grey (charcoal) with small white dots and basted some pieces. The fabric is not a pin dot.
It is a little bit of a shift to insert these extra shapes, but I got into it. It is kind of funny to see the edge done. I wonder if the grey is too dark considering the overall cheerful look of the piece.
I plan to put another straight border on the sides, once I get all the diamonds and triangles attached.