I realized that I had never posted the finished quilt. After all these months, it was time.
This poor quilt has had a time. Something about it makes the blocks get lost, the need to post about it get lost. I am not sure why as it is a good looking quilt. It is very different than the other samplers I have made. It makes me want to make another sampler with more crazy colors.
I started the Handbag Sampler when I was teaching Alice and Beth in 2006. 20 years! WOW! This is a real UFO and I am so glad to get it off my list.
The Handbag Sampler is back from Colleen. She was able to drop it off for me when she did an errand in the neighborhood. It was great not to have to drive to her place.
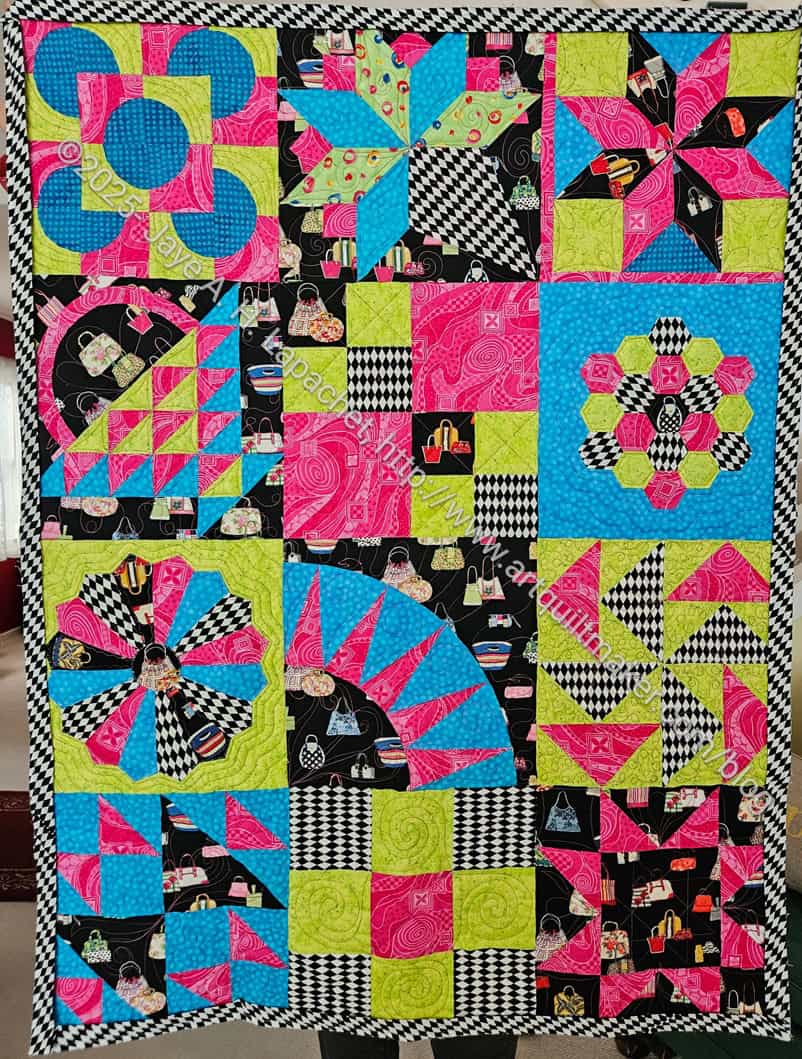
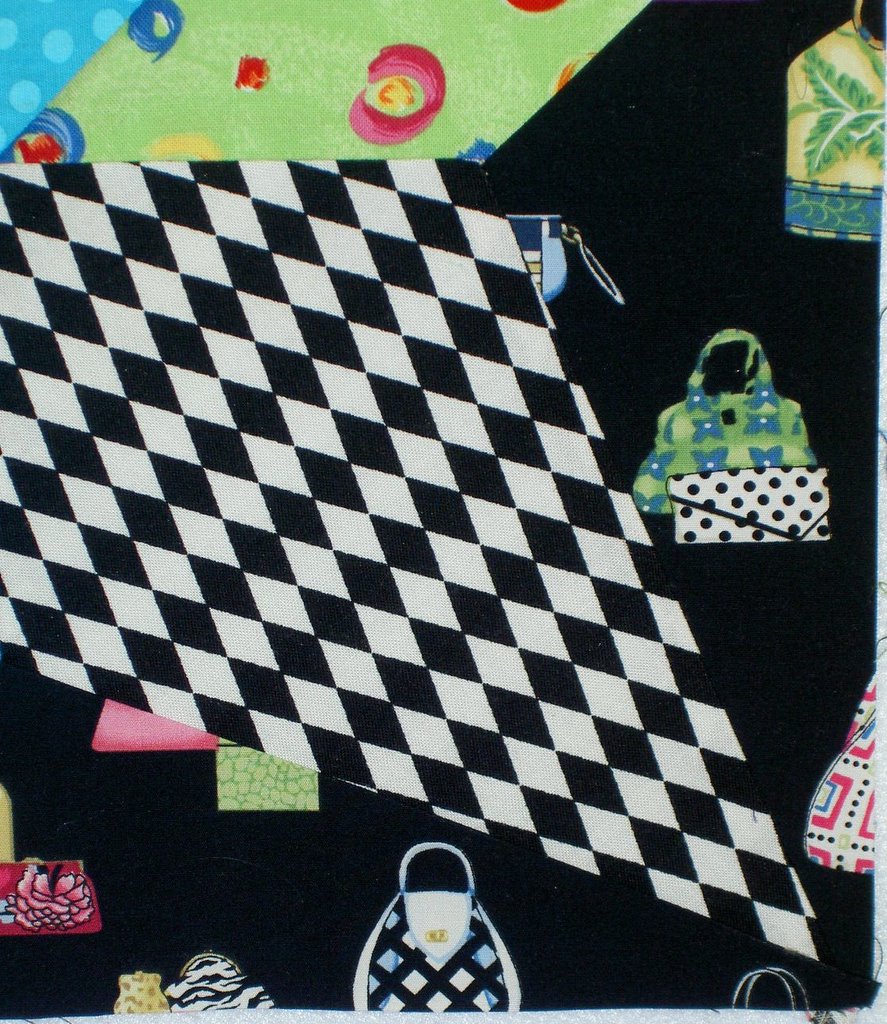
I wanted this ready for the BAM BOM start at the meeting yesterday. I had to stitch the binding on quickly. It was a little challenging, because I used a black and white diamond patterned fabric for the binding. That meant that choosing the thread to be invisible was a challenge. I ended up with white and was very careful about getting the stitches on the underside of the binding so they wouldn’t be visible. They were fairly hidden on the white fabric, but screaming against the black.
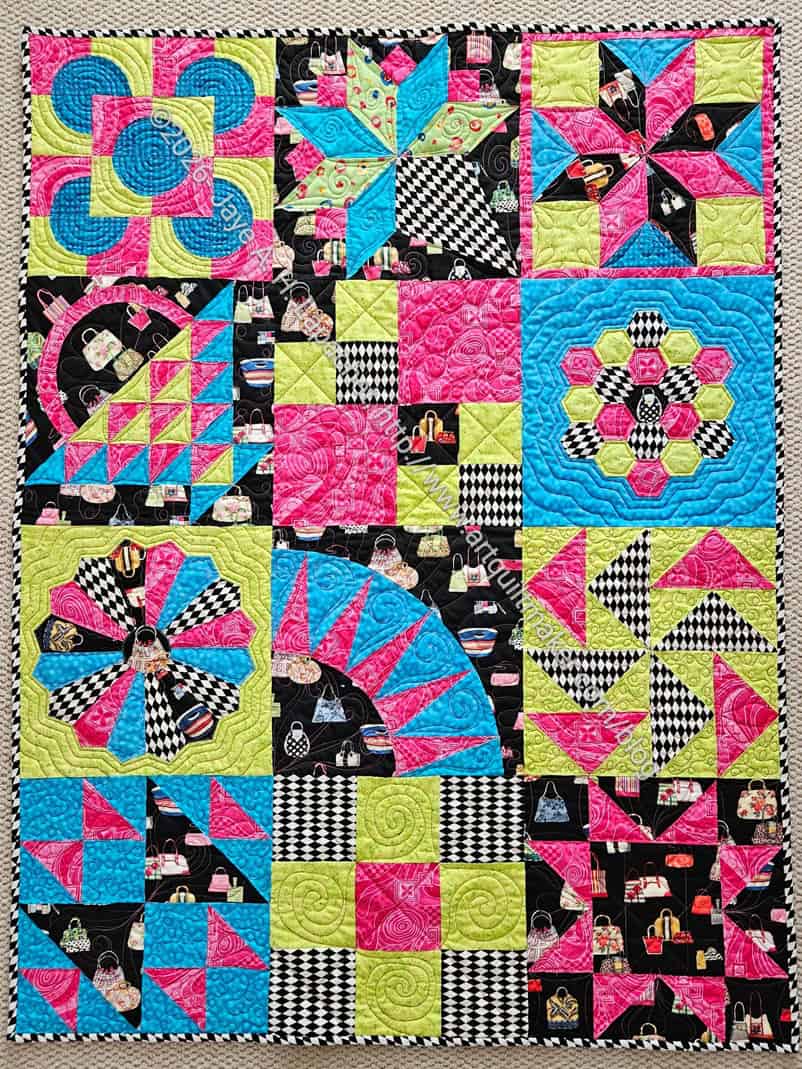
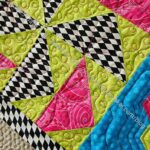
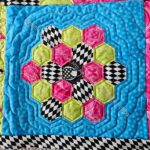
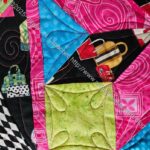
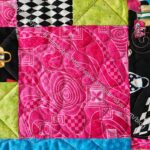
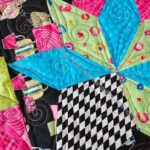
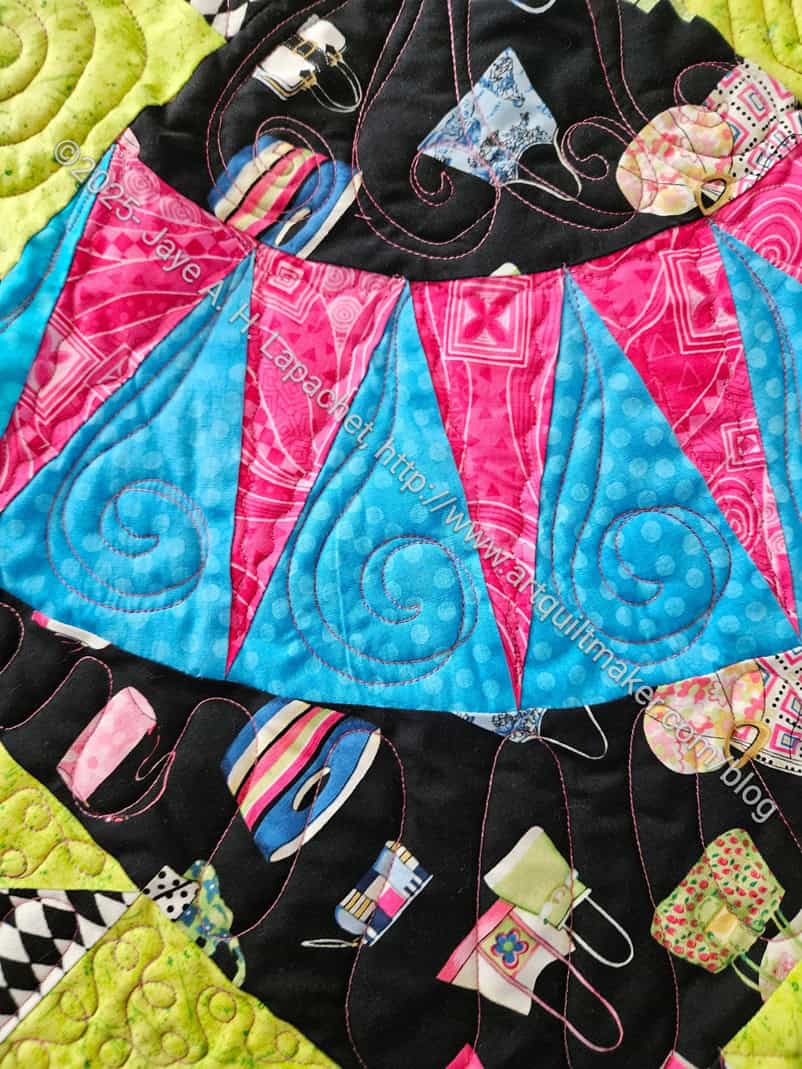
She quilted a lot of different motifs in different places around the quilt. The swirls/spirals in the background of the New York Beauty are a particular favorite.
Working on this quilt and the Patchwork Palooza make me want to start another sampler. How many samplers are too many?
I finished the Handbag Sampler and it is now with Colleen getting quilted. I am pleased with the way it came out. I am even more pleased that it is done.
I am kind of amazed at the colors and fabrics I chose for this quilt. It is super bright and there is a lot to look at.
I rearranged the blocks before I sewed it together. I thought I needed to move some of the diamond fabrics away from each other. They were sort of concentrated at the bottom of the quilt, so I moved the Nosegay block to the top.
I have to admit that I feel slightly bereft finishing this quilt. I have others on my to do list, but this one seems like it might be the oldest.
I couldn’t help myself. I said I wouldn’t, but I really couldn’t help myself. I made two more blocks for the Handbag Sampler.
I decided that the quilt needed a few more blocks and I took the time on Sunday morning to choose a couple of easy blocks. I chose Sawtooth Star, because it is a favorite. I also chose Fox & Geese, because I thought it would look good with the other blocks. I really had to stretch that blue fabric, because I had barely enough to make the background.
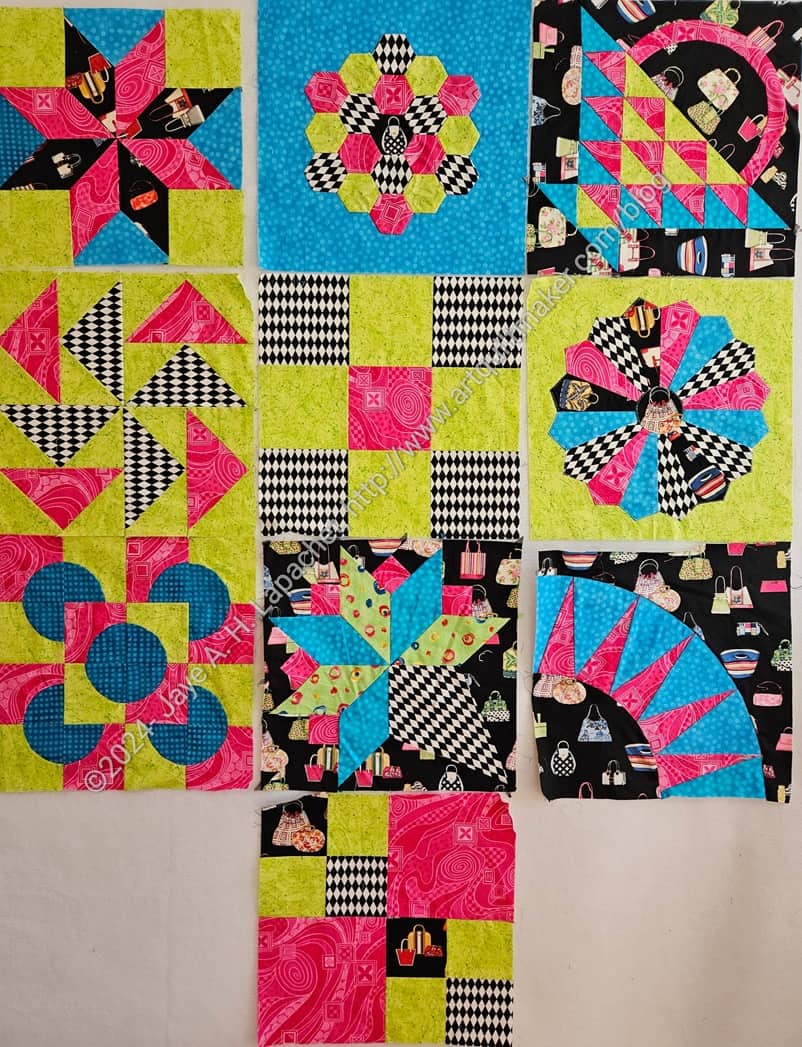
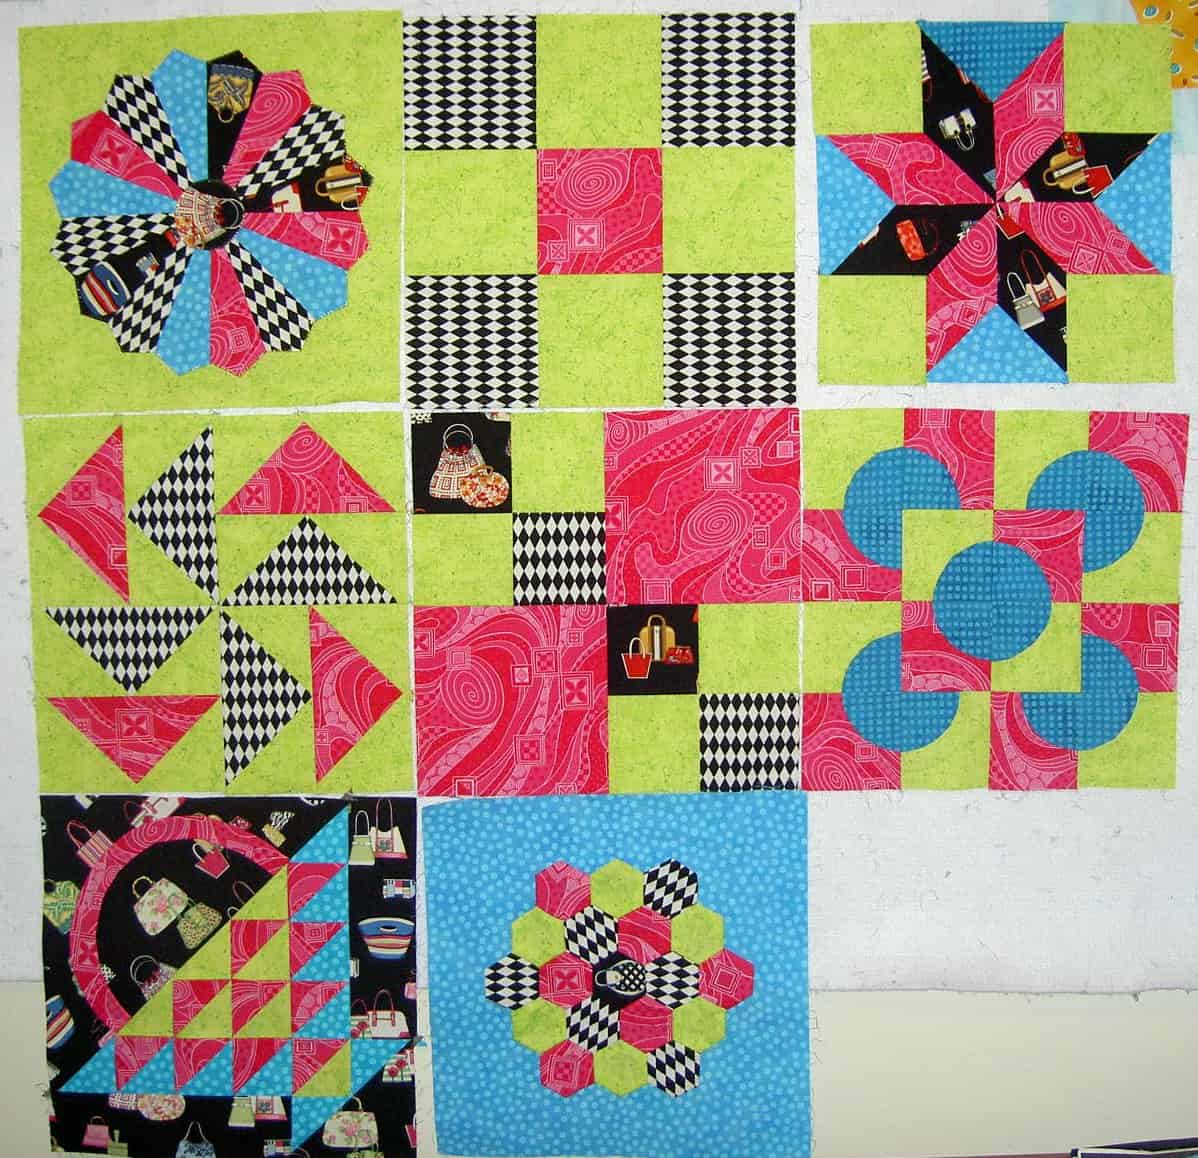
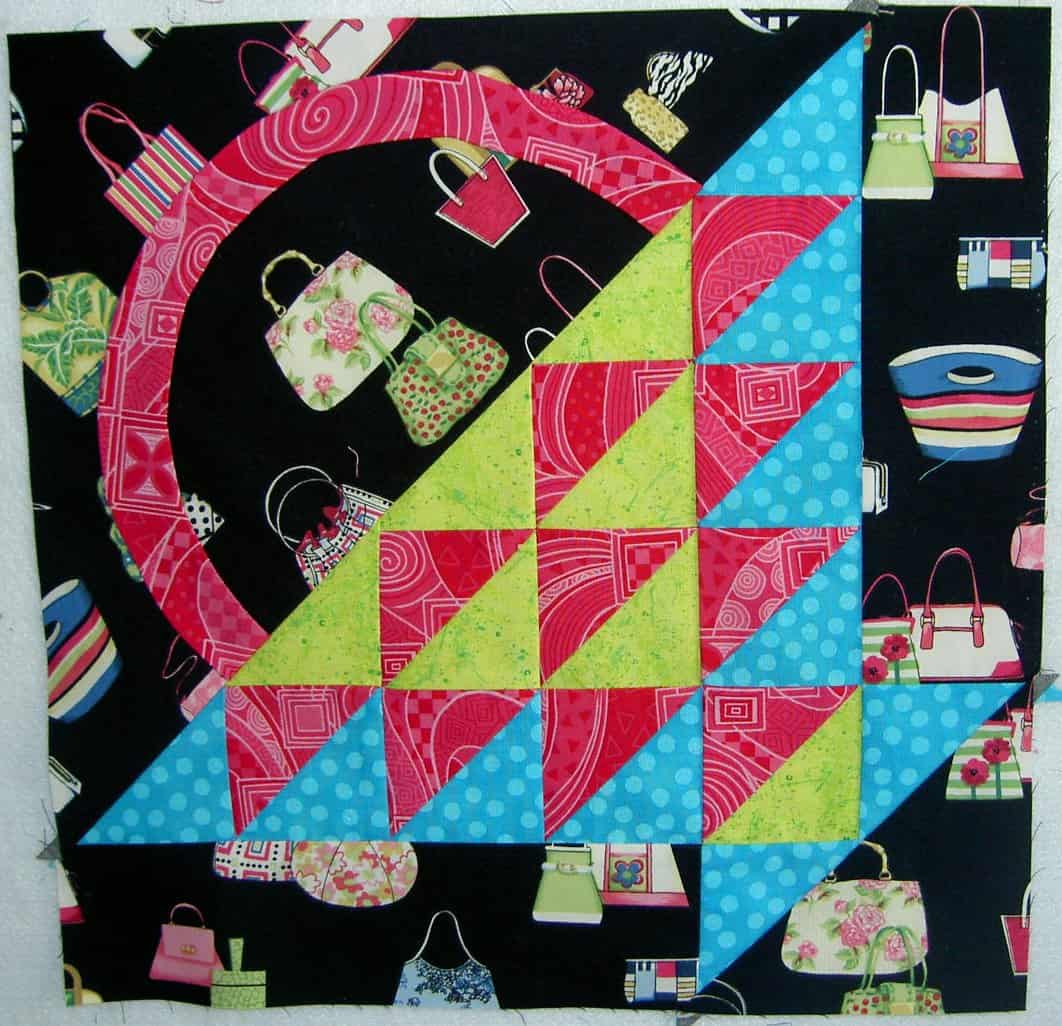
Handbag Sampler – all the blocks
The blocks went relatively quickly and I think they look good with the other blocks. I am well on my way to finishing the quilt.
My appointment with Colleen is coming up quickly and with Triumphant well on its way to being finished I went looking for the Handbag Sampler. That project was found a year ago and nothing has happened, so I decided to sew it together and get it quilted as is.
OMG! I have no idea what the deal is with this project. It has hide and seek in it’s seams. As mentioned, I couldn’t find the blocks. I KNOW I put them somewhere easy to find. I took boxes off the top shelves of the fabric closet and looked through them again. Stay tuned for some posts on the projects <insert eye roll here> I found.
Handbag Sampler July 2025
No dice so I started working on zipper pouches, but I couldn’t get my mind off of these blocks. I had a couple of more ideas for where they could be, which didn’t pan out, so I looked through my project boxes. I found them, eventually, in a box of random blocks. They were easily accessible, but not visible. Now they are on the design wall and will be sewn together soon.
I am not putting them away until the top is done and it is ready to go to Colleen’s.
I finally found the Handbag Sampler blocks!!! They were in a bin at the top of my fabric closet
I need at least a few more blocks, which means I have to find the fabrics I used. I have the focus fabric, the handbag fabric, but the others weren’t with it. I haven’t looked for them, but I am confident that they are together and I didn’t use them for something else.
This sampler start has a really different look than the Aqua-Red Sampler and the Original Sampler, though many of the blocks are the same or similar.
In going through old photos, I found photos of the Handbag Sampler I have been talking about recently.
I haven’t actually found the blocks, but, at least, I have a photo and sort of know what I have.
Handbag Sampler Nosegay
I found a photo of a Nosegay block that I made (or am in the process of making as well. The 9th block is good, because that means, if I find the blocks, I can just put the quilt together. I don’t have to search out fabric, which is all very distinctive. Of course,in terms of learning, it isn’t quite as comprehensive a Sampler as the Aqua-Red Sampler. There is no applique completed.
I have to find the blocks before I decide what other blocks to make.
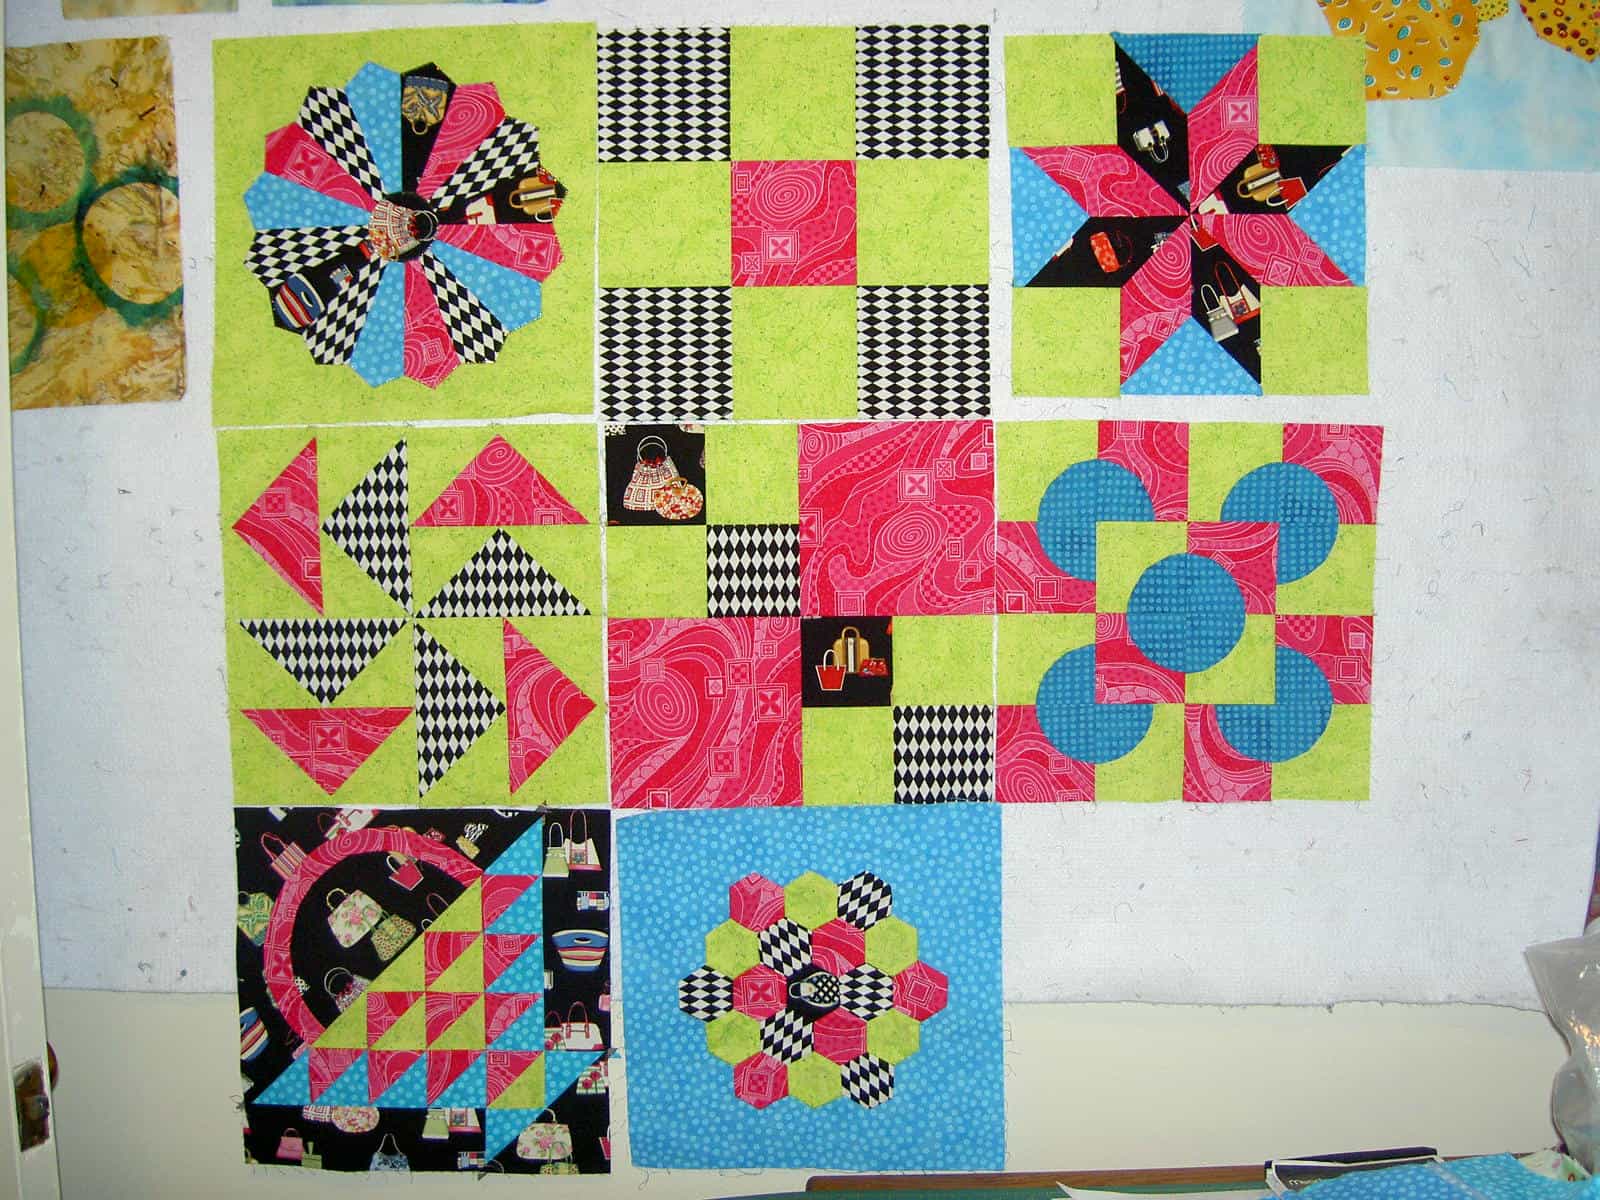
These are the blocks that I have made so far as examples for my beginning quilt class. I usually keep most of them at the office for teaching purposes, so this was the first time I had put them all up together on the design wall.
The first thing I noticed was that there was too much of that acid/icky green. Not that you can really have to much of it, but I need to use more of the purse conversational with the black background in the future blocks (still have a fusible applique’, a foundation pieced block and some others to complete) and well as the tone-on-tone blue dot.
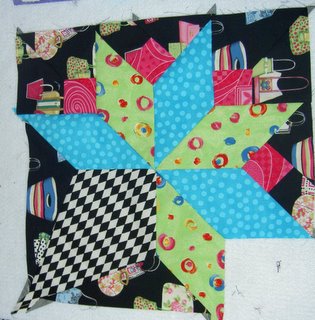
This is definitely a good example of why you should look at your quilt blocks before you finish them and put them together. I am not Paula Nadelstern who works on a tiny table and never looks at the whole quilt while it is in process. She is a genius and I strive to be like her.
I made one of the alternate blocks, the Nosegay, and had a lot of trouble which taught me to not slack on the templates. As some background, I was trying to print templates and HP Mobile printing, which never worked properly anyway, had taken over all the print functions on my computer. This prevented me from printing from EQ5 directly. Always one to revert to pencil and paper, I drew out the block with pencil and paper and made the templates on graph paper. It went together fine until I got to the cone part of the block. The two background pieces were obviously too small.
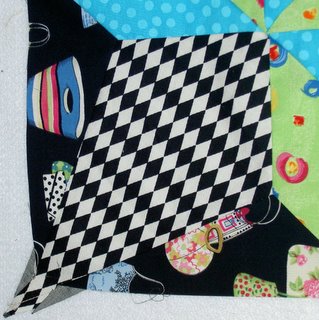
Here is a detail of my transgressions. ;-0
I checked the template with the fabric and they matched. I couldn’t figure out the problem, then work got busy and we went skiing. Finally, this week I was forced to prepare some more templates for class and took drastic action by deleting the pathetic HP Mobile Printing. Now everything works fine. I can’t print directly, but I can save to PDF, which HP Mobile Printing was preventing from EQ5. I redid the templates for the Nosegay and sure enough all of the original templates were fine, except for those two tricky background pieces.
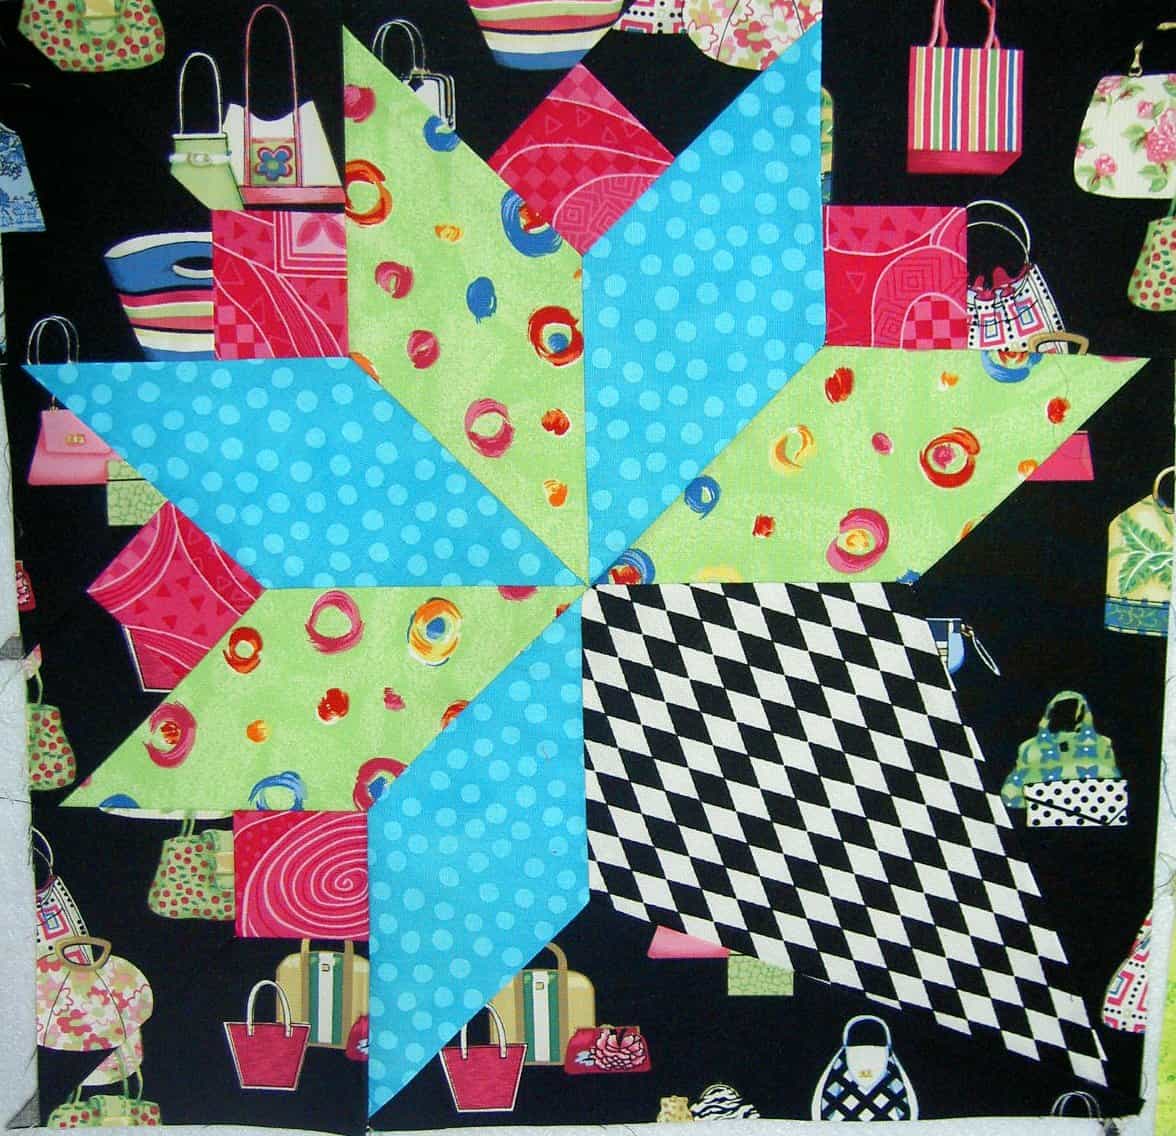
Now the block looks like this:
And here is the detail.
I also finished the basket. I like the way it turned out and was pleasantly surprised when I used the purse conversational with the black background as a background.
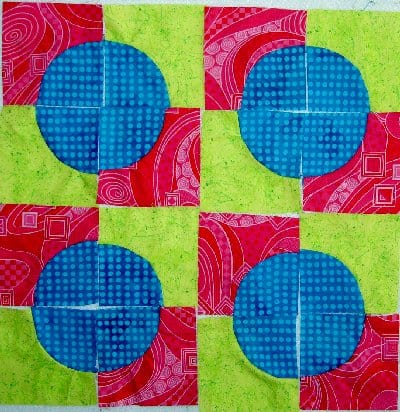
I spent time this week catching up to my students on my blocks. I had the pieces to the Drunkard’s Path blocks cut for weeks, but couldn’t seem to get them together. I pinned and pinned and pinned and pinned and pinned and something didn’t seem right. I couldn’t figure out what it was and I couldn’t sew the things with so many pins. Per chance, I picked up Ruth McDowell’s Piecing book. If you don’t have this book, get it. It is the best.
Anyway, I read the bits about sewing curves and found the problem. Clipping! I had forgotten to clip the concave part of the curve. I think I was so caught up in having problems with the block when I was a beginner and trying to make the Drunkard’s Path that I couldn’t think straight.
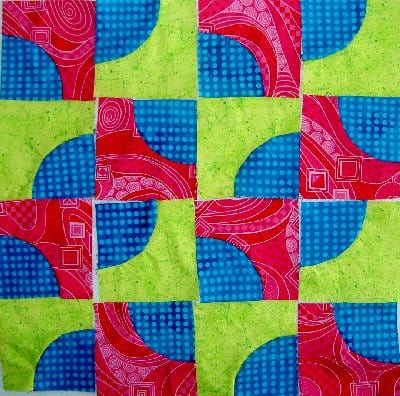
I sewed all the little blocks together then played with the layout for a few days and came up with the following layouts:
Drunkard’s Path
Good graphic look on this one.
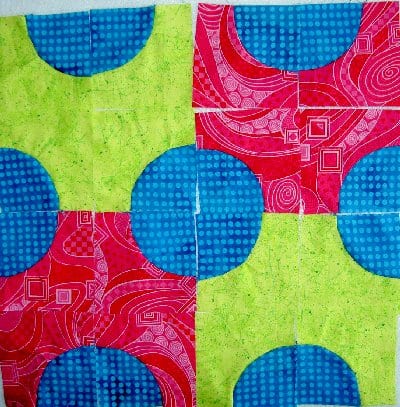
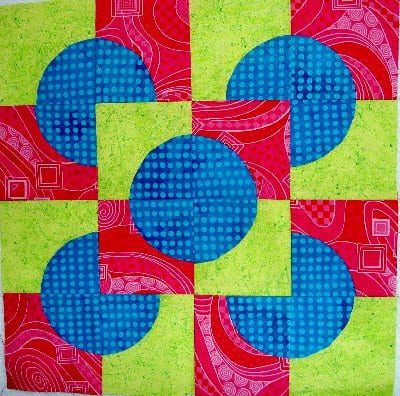
Drunkard’s Path #2
I really like the way the middle circle comes forward in this design.
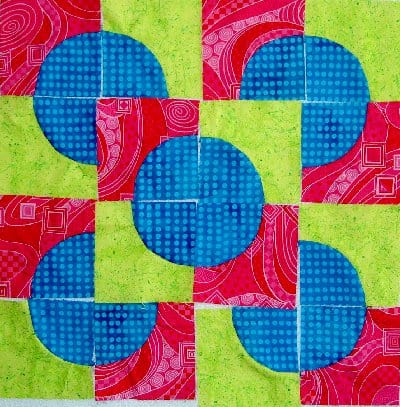
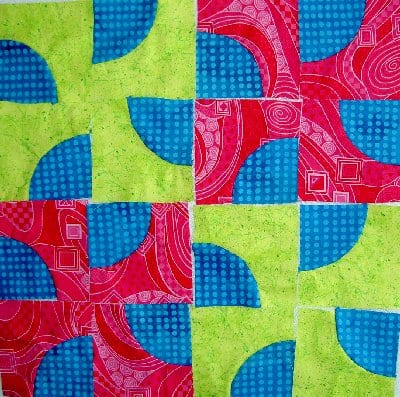
Drunkard’s Path #4
Not sure what the heck this is supposed to be, but it obviously doesn’t work.
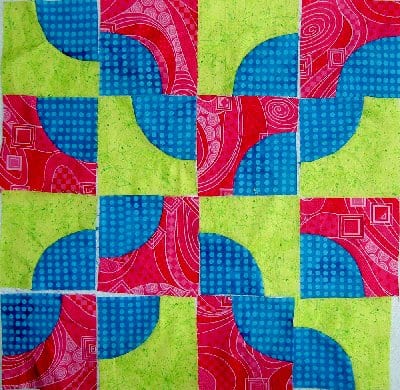
Drunkard’s Path #5
I like the way the pinwheel type design shows up. This is my second favorite.
Drunkard’s Path #6
Again good graphic look, but the way the circles go off the side don’t appeal to me as much as the other layouts.
Drunkard’s Path #7
This is supposed to be an X, but the X doesn’t show up, because I used three colors (2 for the background) instead of just two total.
Until I finally decided on the design below. I did have a hard time deciding between this and the pinwheels:
Drunkard’s Path Final
This exercise, again, shows how great blocks are. I could make a whole quilt with this block and do each one with a different layout. I think that there is so much that can be done with block designs.