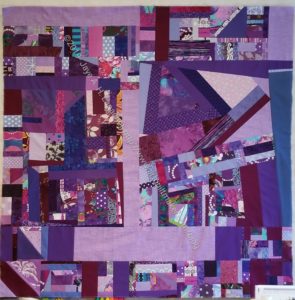
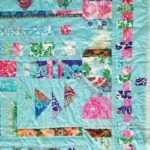
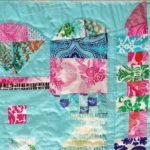
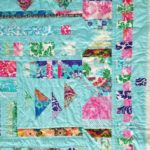
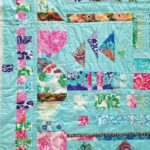
Really Finished: Purple Improv

Purple Improv Donation Back

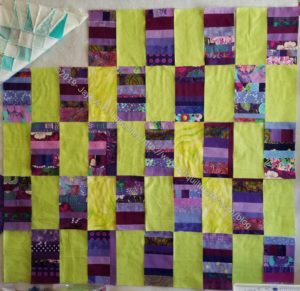
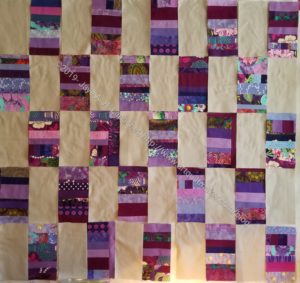
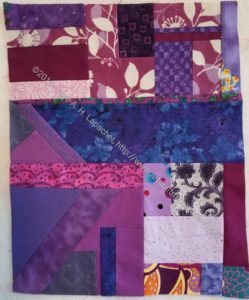
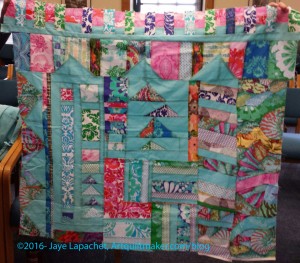
It took me awhile to get the back for the Purple Improv donation quilt finished. It is now done and I, unexpectedly gave it to Tim at Sew Day yesterday.

Making the back was slightly delayed, because I couldn’t get my purple fabric bins. I don’t use purple that often, so they are slightly buried.

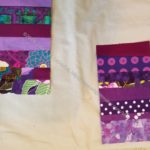
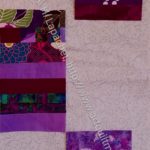
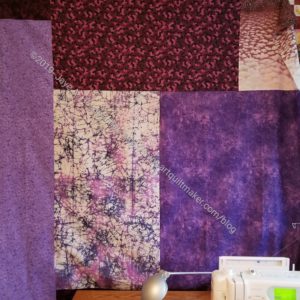
I did it a little differently this time. The top was on the design wall. Instead of pulling it off and using the design floor, I pinned fabrics from my stash to the design wall in the place I wanted to use them. This worked pretty well as I could see where I still needed coverage.

Finished: Improv Donation Top

I didn’t think he would want to quilt the Purple Improv quilt, but he took both the Purple Strip quilt and this one to quilt. He is such a rock star.

Purple Improv Donation Top Finished

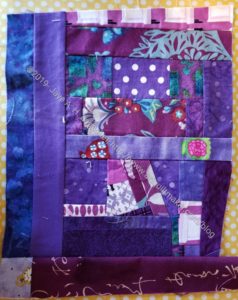
After many hours of sewing and listening to audiobooks on Sunday, I finished the Purple Improv top. I have been enjoying it on my design wall for a few days, because I couldn’t make the back right away.

Finished: Improv Donation Top

There are a lot of small pieces in this quilt. As much as I could, I pressed the seams open to reduce bulk. This caused some issues with sewing. As I trimmed shards, I gained holes and had to be careful to make sure they were fixed before I moved on. I think I like the medallion style of the Green Thing better. I saw improv-ish quilt blocks by @saija_elina and thought, perhaps I would use that idea for another one of these scrap busters. I am not sure I want to make blocks, however.

I am not a huge fan of the T motif that ended up on the quilt, but c’est la vie. That is improv and that is what happens. Perhaps someone with a name that starts with a T will become the owner?

More Purple Improv

Purple Improv mid-March

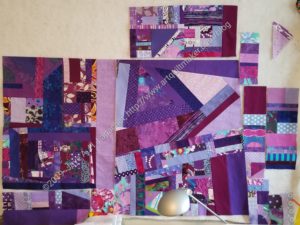
I made quite a bit of progress during the last little while using this piece as leaders and enders for the FOTY 2017. I started out with some largish chunks and grew it.

I am not a huge fan of improv piecing, as you have heard a million times. I have to admit, however, it is fairly mindless and a good way to use up random scraps.

When I come across a larger piece, I am cutting it up into some of the shapes I am Hunting and Gathering for other projects. I especially need to beef up my collection of 2″ cool colors after the En Provence quilt.

Purple Improv - late March
Purple Improv – late March

So I am still beavering away to make something large enough for a baby quilt. The pieces are much more square, but I still have work to do.

Purple Improv

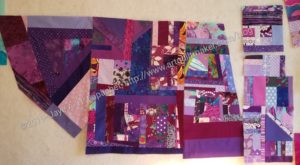
Purple Improv donation top in progress

This is what I am making in order to clear out some more purple scraps after finishing the Purple Strips donation top. I started with some shards that I had made for some forgotten project. I have added to the original pieces quite a bit.

Because of what I started with, this is less like the Green Thing in that it is less of a medallion style. It may end up a little like that, but we will see. I don’t yet know where it is going except that I need to add some larger chunks or strips to the piece to provide some breathing space.

More Process in Purple Strip Donation Top

I finished all the blocks and began to think about the color of the plain blocks. Tim doesn’t like white backgrounds and since he will most likely quilt this top, I decided to look for something else.

Purple strip donation quilt with yellow-green

Across from purple on my Studio Color Wheel is chartreuse. I admit this is a bold choice and I was thinking about it quite a bit before I went hunting for fabric. Finally, I decided that I needed to make visual decisions visually and cut up some fabric.

I like the boldness of the color combination, but something wasn’t quite right.

I was just about to sew it together when Tim saw the photo and suggested grey. Purple is hard for me to work with, because it really darkens my workroom to a depressing state. Adding grey made me think it would just get worse. I knew the yellow-green was the right color for the purple, so I found a couple of greys and tried it.

I chose the greys based on fabrics I didn’t think I would use for something else. These were both in that category because they have a taupe cast too them, which is not my preference for grey. I prefer the cooler white-greys.

Purple strip donation quilt with grey solid

Immediately, I knew that the grey solid (#1) was a much better choice. It will be suitable for a boy and isn’t too depressing.

I have begun sewing the plain blocks to the strip blocks.

I saved the green for another day.

Purple Improv Donation Top in Process

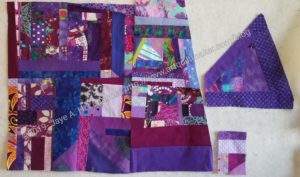
Purple improv shard n.1

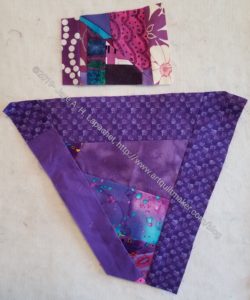
As I said the other day, I still have a lot of purple scraps. I also found some large purple shards in my purple scrap bin. I immediately pulled these out and have decided to use them for another improv donation top like the Green Thing. I can’t say I’ll make a companion quilt to each strip quilt I make, but I have a lot of scraps and this seems like a good way to use them up.

I know these shards probably started out as potential journal covers. I don’t know why I didn’t finish them, but now they can go to a good home.

Purple improv shard n.2

The triangular shard is really strange. I wonder what I was thinking when I made it. Of course, I have to make it into a square or rectangle, so I can use it. I do like it. If I can use lighter purples and lavenders around the triangle, I can preserve the triangle quality of the piece.

I have already added to the smaller piece shown above the triangular shard, using it as a leader as I was getting towards the end of the strip blockmaking.

Purple improv shard n.3

The last shard is good sized as well. The three pieces make a nice start to a donation top. They are all purple and that is good, but I hope the shards go together well enough to make something cohesive.

I do know that I am finding all this purple on my design wall to be oppressive and dark. Perhaps that is my issue with the darker purples? I know I felt like this when I was working on the purple bullseye. I do know that I have a good start to the purple donation improv top and that pleases me.

Book Review: Quilt Improv

Quilt Improv: Incredible Quilts from Everyday InspirationsQuilt Improv: Incredible Quilts from Everyday Inspirations by Lucie Summers

I am not enamoured of improv. I feel like the design potential of improv is overshadowed by sloppy choices and bad workmanship. I think improv is a valid way of expressing creativity. You have seen me make quilts in the improv style. It is not a way to avoid knowing how to make a technically sound quilt. Of course, I can’t say this very often because people take it the wrong way.

Lucie Summers agrees with me. She says in her introduction to this book “One of the my biggest bugbears about improv is when others assume ‘just because it’s improv’ workmanship doesn’t matter. Of course, it matters! Badly made quilts, whether traditional or not, are just badly made quilts. By badly made, I’m not talking about whether your seams or patchwork points match, I’m talking about fabrics sloppily stitched together so there are holes” (pg.4). I was really pleased to read this, because I think, and have always thought, workmanship matters. You will often see in my posts about project some lines about identifying a mistake and deciding whether I could live with it. Workmanship matters. I like Lucie Summers.

I am just as surprised as you that I picked up this book. I am wary of books on improv, because it is improv. Why do you need a book? You certainly don’t need patterns. Cheryl had it at Sew Day and something about it drew me in. I leafed through the images and was interested in the colors and shapes. I checked it out of the library so I could peruse it a little more.

I like the way Lucie has written the prose. The style is friendly and approachable and, even for me, she has a reasonable way of explaining improv in a true fashion. Also, she isn’t condescending.

The book starts out with an introduction. In this introduction is my favorite quote (above) and a little bit about how she works, what working with scissors means, piles of scraps and the use of measuring in improv (pg.4). The introduction is followed by a section called “How I Work” (pg.6) which details piecing maps, inspiration and another fabulous quote “…as you embark on making a quilt from the gallery to make it yours. Give it your personality. Don’t search high and low for the exact blue dotty fabric I’ve used in the top right-hand corner of quilt number 6 – use a grey floral, or an orange solid, whatever… Make it yours, relax and have a huge amount of fun. At the end of the day we’re not saving lives here, we’re cutting into fabric and stitching it back together” (pg.6). This is so critical to me. I have made a few exact replicas of quilts in magazines and books. There are definitely benefits. I get to sew. I feel the meditative qualities of putting fabric through the machine, but these quilts do not have souls. They don’t come from my heart. Branch out when you work from this book. Use the fabrics you have with confidence. There is always more fabric!

The next few sections have to do with fabrics (pg.6), thread (pg.8) and equipment (pg.9). Lucie brings her calm style to these sections. They don’t feel rote or the same as other books I have reviewed.

“How to Use this Book” (pg.10-11) is really important. It is a guide to how this book is written, how she uses measurements in more detail than in the introduction. A great idea is the section on “Building Blocks” (pg.12-39). It starts with a visual list of the block designs Ms. Summers considers basics. This is your basic guide and it is followed by instructions on how to make each block. The section includes 13 different blocks. The reader could spend years making quilts from these blocks alone. The possibilities are endless.

Because publishers seem to require patterns these days, the blocks section is followed by “The Quilts” (pg.40-113). Lucie’s quilts are really stunning, vibrant and have a lot of movement. They are designed and do not look messy. You can see this on the double page spread introducing the section (pg.40-41).

One of the things I like about this book is that Lucie Summers discusses her inspiration for each quilt. I can always use more of that. She doesn’t take pages to do it, but it is important to the process and valuable to the book. Each quilt ‘pattern’ in this section includes a brief rundown of the inspiration, a summary of techniques, design idea, design plan, “Make Me Key”, finished plan, and the piecing map. The design idea breaks down the design while the design plan is more involved. Lucie uses this section to dig into the design, talk about resting spots for your eyes, how she balances different areas and the differences in her design and the finished piece. The ‘Make Me Key’ is a sidebar that combines some text with visual cues to the elements of the quilt. The piecing map shows how the various sections are put together generally. YMMV. The sections for each quilt are robust.

It’s hard for me to decide which quilts I like best. I definitely like the the Shoe Boxes Quilt (pg.42-47). There is a section of the Seed Tray Quilt (pg.54-59) that is very appealing. The fabric cohesiveness and simple design of the Feathers Quilt (pg.60-65) is exciting, too. Many of the quilts have circles and I like those, such as the Bricks and Fences Quilt (pg.66-71), too. I think the Plates Quilt (pg.90-95) is appealing because it reminds me of the Eye of God quilt I made some years ago, has dots and a fabulous inspiration photo. There are no bad quilts in this book, but my favorite might be the Building Blocks Quilt (pg.108-113). Many of her quilts remind me of views of cities with domes and this one is no exception. I also like the quilting. With the large variety of quilts, readers will find something that appeals.

These quilts are designed not thrown together. The fabrics are chosen carefully and quilts are designed to make the overall piece look cohesive.

The last section is called General Techniques (pg. 115-124). The first subsection is called ‘Piecing’ (pg.115) and has a good discussion of why use a quarter inch seam in improv piecing as well as how chain piecing works. She discusses pressing (pg.116) including which way to press and why to press to the dark. Lucie also has a little bit of ergonomics thrown in. ‘Assembling Quilts’ (pg.116) includes what to do to get your quilt to hang straight. The section on Finishing Off Quilts includes the envelope method or ‘bagging out’ (pg.119) as Lucie calls it. There is a short section on quilting (pg.120) with some interesting quilt designs and a bit about marking quilt designs. The Binding section (pg.122-123) includes both facing* (called invisible binding here) and a mitered binding. The book wraps up with how to make a hanging sleeve and labeling your quilts (pg.124).

I might buy Quilt Improv. I like the fact that the author isn’t lazy and discusses the attributes of design within the improv context. The photographs are wonderful. The fabric choices are VERY appealing. Well worth taking a look at.


*Remember my tutorial on facings.
BAMQG IRR in Process Again

BAMQG IRR, January 2019

I am a little sick of the Half Hexie Star project, so I switched to Big Stitching the BAMQG IRR. It never ceases to amaze me how much progress I make when I actually work on a project. It has been awhile since I worked on it and it is a nice break from EPP.

I had to get back in the Big Stitch groove, which was difficult. I finally figured out that I couldn’t do it when I was stitching in a seam allowance, because of all the layers. That means I am doing some stab stitching in addition to the Big Stitch.

One of the challenges I have is what quilting designs to use. Right now I am just echo quilting. I don’t know if I want to do more, if curves will work with Big Stitch or if there are other designs I should use. I haven’t handquilted a lot. When I have done it I have mostly used echo quilting to highlight the block designs. Occasionally, I have used stencils. I’ll have to look at some books and see if I can get inspired.

Big Stitch Update

BAMaQG IRR May 2018
BAMaQG IRR May 2018

I made some progress on the BAMaQG IRR at Craft Night the other night. The image shows the whole piece. Obviously, you can’t see the hand stitching, but you can get an overall view of the piece.

I am not using a pattern or marking much when I Big Stitch. I am following the stitching lines and eyeballing where my stitches go. They are mostly straight lines, a quarter inch from seams.

I plan to use different threads, especially the Sue Spargo threads I have been buying, but at the moment I am using an Aurifil embroidery thread.

BAMaQG IRR May 2018 detail

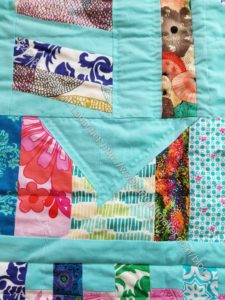
The Flying Geese made some arrow type designs.

You can see, especially if you click on the image to make it larger, that I am doing multiple rows of outline stitching. I don’t want the piece to be stiff, so I probably won’t fill in the whole arrow, but I might do a few more lines. I’ll have to see.

BAMaQG IRR May 2018 back detail

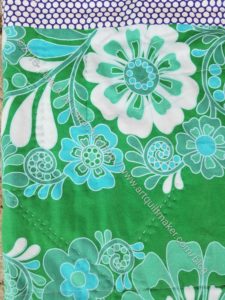
I am pretty pleased with the way the back looks as well. Unlike 10 stitches to the inch hand quilting, the stitches on the back of a Big Stitched quilt are supposed to be smaller, according to Sarah Fielke. Mine are smaller and even, which is what I have been working to improve.

BAMaQG IRR May 2018 detail

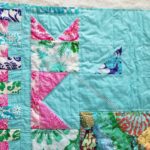
If I were to put stitches in all the solid areas so there was no open space, the look would be somewhat like one section I already did. The section between the green dots and blue flowers has about 4 lines of stitching that covers the whole area.

BAMaQG IRR Top Ready for Next Steps

BAMaQG Improv Round Robin

The top is finished and I am on to putting together the back. I don’t think I will make my deadline of having this ready for Big Stitching, but I have made great progress and see the light at the end of the tunnel.

There is much more space and lightness in the piece and the solid areas will provide some good spaces for stitching.

Food Donation Quilt

Food Donation Quilt
Food Donation Quilt

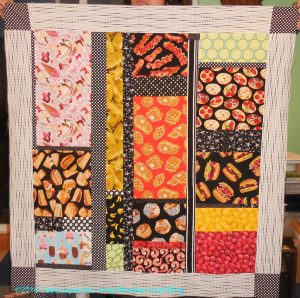
I worked on a donation food quilt over the weekend. I decided, though it wasn’t a conscious decision, that I would try and use up the rest of my food fabrics and put that chapter behind me. Three food quilts is enough.

I think I also did it because I have been longing to provide another donation top and back to BAMQG.


Thus, I worked on the donation food quilt over the weekend. By Sunday night, I had a top, a back and a Frankenbatting.

I sewed it in kind of an Improv manner, but it is structured improv. I tried to use the pieces that I had and not do too much fiddly piecing.

Food Donation Quilt back

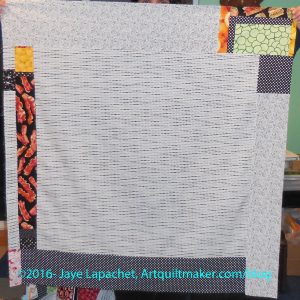
I may have enough pieces for another version when I get the Food Quilt #3 back. I think the back is large enough to provide at least a base for another donation quilt.

BAMQG IRR

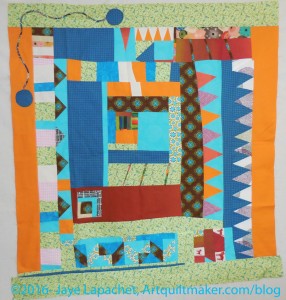
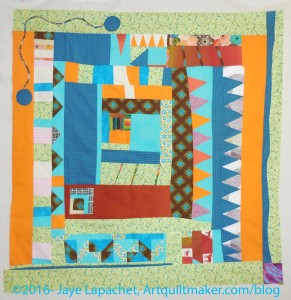
IRR - June 2016
IRR – June 2016

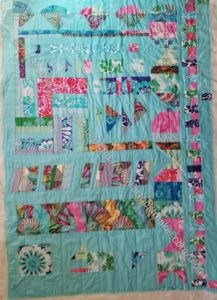
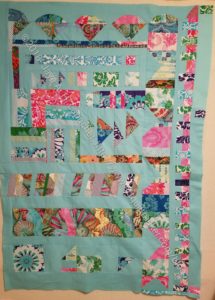
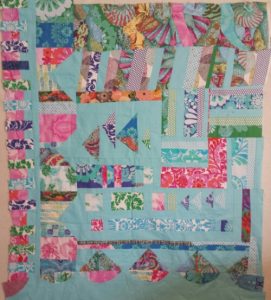
My Improv Round Robin has returned. Ruth had it for a couple of months because I wasn’t at the meeting last month and she wasn’t sure whether to pass it along.
She added the bottom part with the curves. It is an interesting addition.
I am trying to decide whether to try and get more people to work on it or whether I should just do some work of my own and finish it. I have some thoughts:

  • It needs some space around the edges. The outside top and right side might need some of the turquoise solid to provide some breathing room.
  • It is definitely not square and I need to figure out what to do about that, if anything.
  • I want to add more Flying Geese, which I will do myself. Perhaps I will add them on the right.
  • I am surprised that more people did continue the Flying Geese motif. The time constraints were daunting, however, so I understand.

I do need to look at it for awhile.

Cityscape Returns

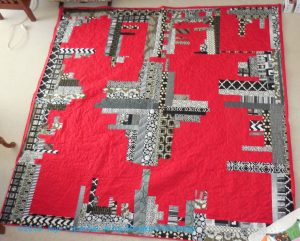
Along with Flowerburst, I also got back this quilt, which I wish I had called Cityscape. It really does look like a cityscape.

Cityscape- back from the quilter

I have sewn on the binding. I worked at sewing one whole side per evening so the binding process only took me about 8 hours. The quilt is 82″ x 84″ so quite a bit of work. I used a Kona solid for the back and the binding and it was a pain. The needle doesn’t slide through that fabric like I think it should. I MUST remember that.

Cityscape - detail
Cityscape – detail

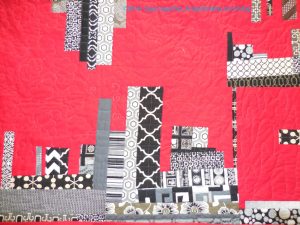
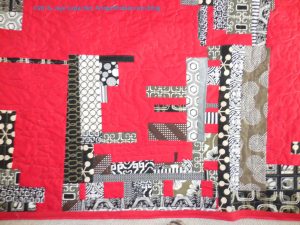
The red is the background and I had Colleen think of it as a sky and put clouds in it. She did four different types of clouds in the four quadrants. I think of it as the four seasons.

Cityscape - detail
Cityscape – detail

The black and grey are more like buildings, so she did more geometric quilting in those areas.

Now I need to put a sleeve on it.

Improv Again

I got two new-to-me round robins last Friday. I didn’t have enough design wall space, so I took them out and looked at them. Different elements caught my attention – the squares in Annemarie’s and the applique’ on Michelle-Nicholle’s.

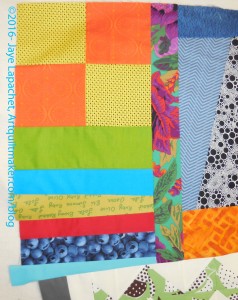
My addition to Annemarie's piece - detail
My addition to Annemarie’s piece – detail

I started with Annemarie’s after I finished the Cutting Corners donation top. I decided to add  the other corner to the top left. My corner has the same look at the corner on the right side. I wanted the elements to be related, but not to be derivative. I wanted to use more of the Alison Glass fabric, but there wasn’t any left in the packet.

I looked at it after I had finished the squares. They looked too square. I had to make up some space (see the bottom strips where the blueberry fabric is?), so I added some strips and kept adding until my addition was large enough to fill the space. The strips look more improv than the squares. I can’t blame my hand for the cutting as it is much better. Habit, I guess.

Michelle-Nicholle's Improv piece -before
Michelle-Nicholle’s Improv piece -before

Michelle-Nicholle’s was harder, mostly because it had the structure of a very traditional round robin. All the pieces in the round robin are getting quite large and Michelle-Nicholle’s is no exception. It is also, I think, the largest piece on which I have worked. There were also only a few motifs I could use as inspiration, none of which were very exciting to me. More applique’ would have been logical, but I just wasn’t in the mood. It was very difficult to think of an addition. I reached back to my early days of quiltmaking when I learned to do improv curved piecing. I added some of that. It is a simple addition, but effective, I think. I may add something else as my addition does seem like much, nor does it help the next person as a jumping off point.

Michelle-Nicholle's IRR after -detail
Michelle-Nicholle’s IRR after -detail
Michelle-Nicholle's IRR after
Michelle-Nicholle’s IRR after


Visiting with Improv

Improv Round Robin - March 2016
Improv Round Robin – March 2016

I got a brief glance at my Improv Round Robin piece before Ruth whisked it away to work on.

More of the Philip Jacobs print is showing up and that is creating some interesting results. I do think the piece needs more space, so I will add more solid or, perhaps, someone working on it will add more solid.