Rebel Quilter’s Bullseyes

JulieZS, one of my partners in Bullseyes (in case you haven’t been reading) sent me the link (http://rebelquilter.com/latest_news.htm) to these bullseyes by Susan Leslie Lumsden. I can’t really see them up close and personal, but I love the colors and the look of them. I am always interested in seeing other people’s iterations of bullseyes.

clipped from rebelquilter.com
Slipstream Adventure
Slipstream Detail A
Slipstream Detail B
Live Water Magic Time
Strength Through Diversity
  blog it

Projects Calling

I couldn’t stay away from my workroom on yesterday. I found a playmate for the child and left them to their own devices (except for an occasional admonishment to go outside away from the screens) while I sat and sewed. I sent Aja’s Bullseyes off to her, as I may have mentioned, last week. She received them Thurs or Fri, so I only had my blocks to work on.

This calling business was a bit disconcerting, because it seemed like my mind had a mind of its own. Normally, I will sew a bit, do the laundry a bit, sew a bit more, make my weekly phone calls, sew a bit, change the laundry and do the dishes and sew a bit more. Yesterday my body and mind were united and they were having none of it. I went to the workroom and basically stayed there. No dishes, no laundry and the dinner didn’t get started until almost 7pm. IT WAS FABULOUS!!!
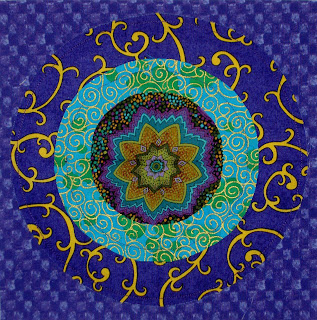
This is one of the blocks and I really liked it. I fussy cut the last circle and was sad to slice it up, because the flower is so perfectly displayed.
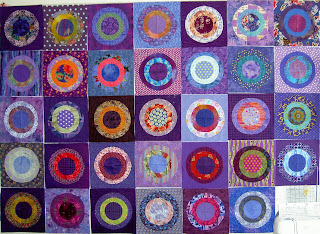
These are my blocks after I have added the last circle. The blocks in the upper right hand corner are blocks that weren’t in the photo I posted the other day. My design wall isn’t big enough to accommodate all of the blocks.
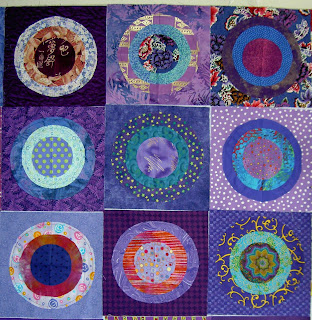
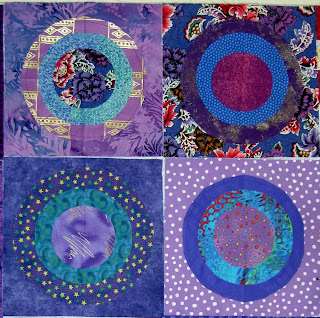
These are details of the blocks from the upper right hand corner.

Now my Bullseye blocks are nearly complete. I have sewed the last circles on and trimmed all the blocks down to 9.5″.
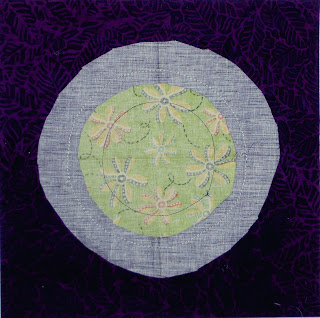
This is how the back of a block looks after I have sewn the last circle and before I have cut the back of the second circle out. You can see that Julie and Aja have cut out the backs of the background and the first circle.
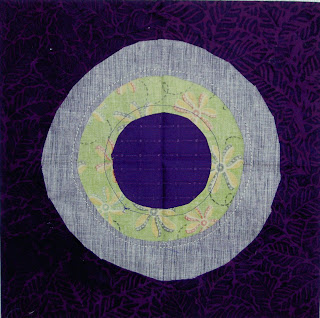
Here is how the above block looks after I have cut out the back of the second circle. This reduces bulk and provides lots of lovely circles for another project.

I finished the process of cutting out the backs of the second circles, and I have sliced the blocks into quarters. I am preparing them to be sent off to Julie and Aja.

Here is how I set up the blocks to slice them. I love the Creative Grid rulers, because they have a lot of different markings that allow you to line up the ruler so the block is sliced very precisely.

I keep two quarters of the block and send one quarter each to Julie and Aja.
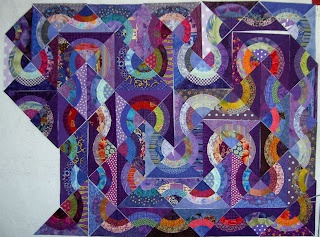
Here are my slices. I just slapped them up on the wall, but I like the internal maze surrounded by a larger maze and may go with that type of design for the final design. I think I will have to put some of the stronger colors, perhaps red, in that internal maze so that it stands out. I will also want the self bordering technique to give the piece a finished look You can see it in Seeing Red.

Bullseyes – Another Round

Friend Julie sent me a second package of Bullseyes sometime last week and I decided I needed to get my act together and sew them up.

Adrienne’s blocks detail.
The rest of Adrienne’s blocks after I put the circles on.
Adrienne’s blocks after Julie put the first circle and I sewed the second circle.
The rest of Adrienne’s blocks after Julie put the first circle and I sewed the second circle.


The rest of my blocks. I was surprised at how much non-purple the other girls used, but then I remembered that that is the fun. DUH! I have cut all the squares for the last round and hope to sew them on this weekend. I recut a lot of them so that most, if not all are purple. I want to cut them up and send them off before I start off on my travels.

Will You LOOK at those Dots???

The Quilting Stash podcast host, Annie Smith, interviewed Mary Lou Weideman in April. The show is really great, interesting as well as entertaining. I just listened to it this week and finally went to look at Mary Lou’s quilts. I have one one of her books, but the photos of these quilts are so cheerful. I think she is one of my new heroes!. Will you look at all of the dots she uses?

I was interested to hear, in the interview, that MLW creates her borders first. Look carefully at the witch quilt’s border. It amazes me that she can make the border first when it is so intricate. Definitely a technique I want to try.

clipped from simplearts.com
blog it

Trivial Pursuit gets Personal

I was leafing through a recent (ish) issue of Quilting Arts and was able to read Patricia Bolton’s editorial before I dropped off into a dead sleep. In it she describes a game board she made for in-laws for their 50th (WOW!!) wedding anniversary. Sadly, there were no pictures and my dream of websites launching in midair (remember that delusion I described sometime ago? I tried to find it in my blog, but couldn’t. If I do find it, I’ll edit this post to include it) didn’t happen.

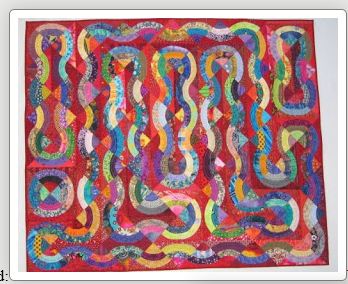
Today, I emailed Ms. Bolton on Facebook and asked her about the photos. She pointed me to her blog and there are the photos. This gets counted in the cheerful quilt department. I am also impressed with the different techniques that she described. The idea of using those little felted things as laggers is great, too. All around a wonderful idea.
  blog it

Denyse Schmidt Returns with more Fabric

TFQ sent me a notice about this post on TrueUp saying that Denyse Schmidt is coming out with another line of fabric. This time it is home dec fabric and it looks like she is repurposing some of of her other designs. You know what? I am fine with that as I don’t think Flea Market Fancy stayed around long enough and wish it would come back.

clipped from www.trueup.net
denyseschmidt-countyfairstack

Denyse Schmidt’s County Fair line is being introduced at Quilt Market next week and will be in stores in June. In addition to favorite designs from her Flea Market Fancy and Katie Jump Rope lines, there are a couple new small-scale geometric patterns and a cheater print called “Patchwork Promenade.” All are on 54?-wide, home dec weight cotton canvas. Patchwork Promenade will make a quick and easy quilt, but that’s not its only application, as you can see below.

  blog it

Some Not Like the Others


TFQ put this together a week or so ago. It is small. I think it is has a lot of movement and a lot of possibilities. The movement is created (or at least facilitated) by the variety of colors that are close to each other…or complements.

TFQ’s project has a a lot of possibilities as a jumping off point for a series.

  • How would this look with different colored circles on the same background?
  • How would this look with these same circles on a different background?
  • What if you created circles all one color and put them on a very active background?

The possibilities are endless.

Thanks to TFQ for sharing! Ready? Set! Go! 😉

Leaves

The Gabrielle Swain Workshop I am taking in May is about leaves. I, amazingly, looked at the supply list tonight (rather than the night before the workshop) and found that out. Now I have leaves on the mind! I think this is a great piece and I think the hanging rod and the dangling bits work for this piece. I don’t like cutesy hanging rods, or dangling things if they aren’t part of the design. I think they work with the overall design of this piece.

  blog it

Making Bullseyes, Part 2

In the previous post about making bullseyes, I left you ready to sew the circles on. Tips on appliqueing the circles to the background:

  • use a quarter inch foot.
  • start sewing less that a quarter inch from one of the folds. This ensures that your stops and starts will be covered when you sew the pieces of the bullseye together later.

Then you sew. Once you sew the circle on, you get the finished product pictured above.

To cut out the back, carefully separate the top and the back of the block. Pinch a little bit of the back, inside the sewn line about a quarter inch from the sewn line. Make a small cut, being careful not to cut through to the front. Cut around the inside of the sewn line. I use a pair of applique scissors, which help to protect the front from cutting through.

Here is a block once I have cut out the back.

Here is a close up of the sewn line and the cutting line.