In addition to Women’s Work 1, Orange You Glad was also in an art exhibit.
Yes, an art exhibit not a quilt exhibit.
My work had a “[name of company]’s Got Talent”. It was mostly performances, but there was also an art show on the side and I entered Orange You Glad.
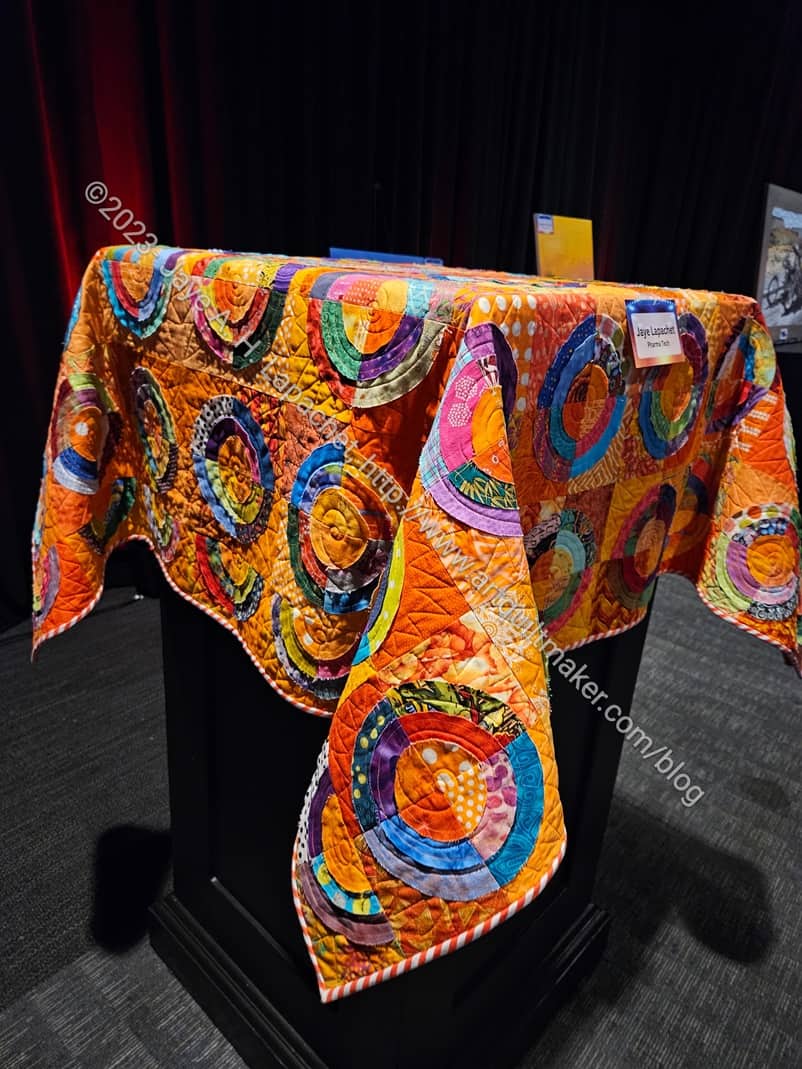
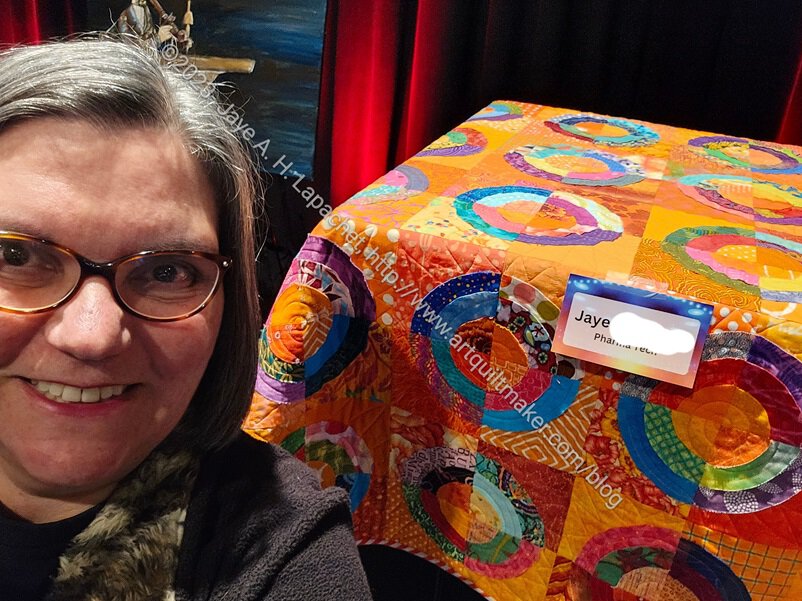
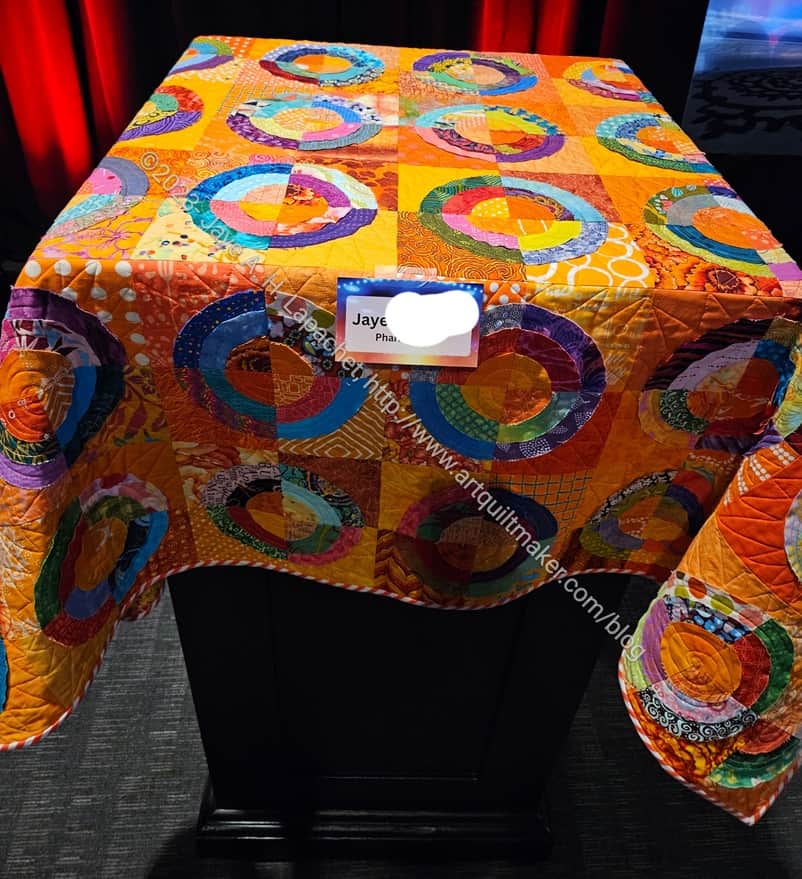
Orange You Glad & me
They didn’t know how to display quilts, so I had to give them a lesson and bring a curtain rod, but the art handlers flung the quilts over plinths and that’s how they were displayed. It worked out ok.
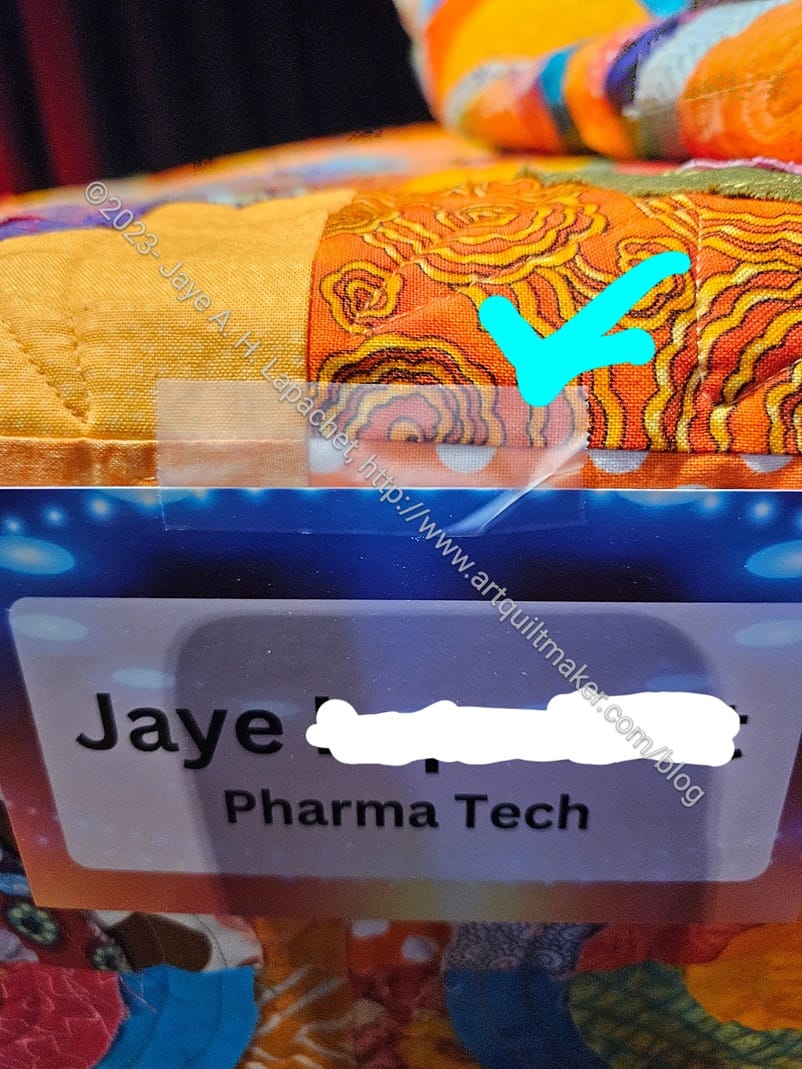
Orange You Glad with tape 🙁
I was kind of shocked when I saw that they had taped – yes Scotch taped! – the label to my quilt!!!
Clearly they were professional curators and it was only a few hours, so I didn’t worry about it too much, but it was still kind of shocking.
I had never seen a quilt on a plinth (pillar?) before, so that was an interesting experience. I thought it looked ok, though the border I sewed was completely lost.
Orange You Glad at work
I was glad to have the opportunity to have another quilt on display with paintings, wood carvings and other works.
I finally finished Orange You Glad’s sleeve. It took forever considering I got the quilt back from Colleen in February. The real problem was that I put off making the sleeve for awhile. I know I should have made when I finished the quilt, but I didn’t.
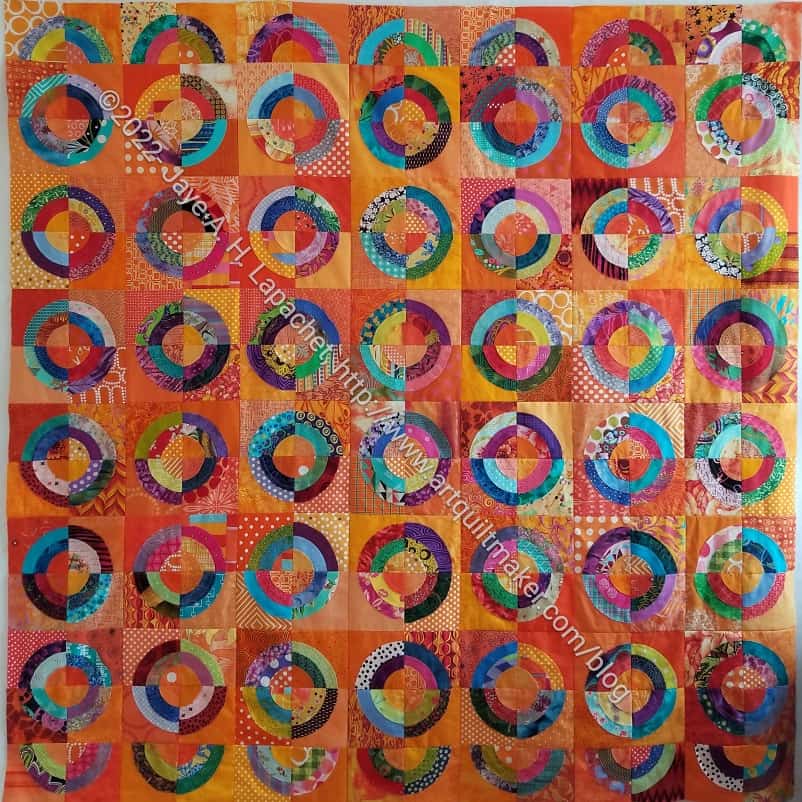
This quilt doesn’t look square, but apparently it is. It is 63×63 inches.
Like the Lobster, the Orange You Glad has returned. The quilting is done and I have to sew down the binding.
I was glad to have a few months break, especially over the holidays where I had little time to stitch anyway. Now I am close to finishing the La Pass rosettes and will have more time to sew down bindings and sew on sleeves.
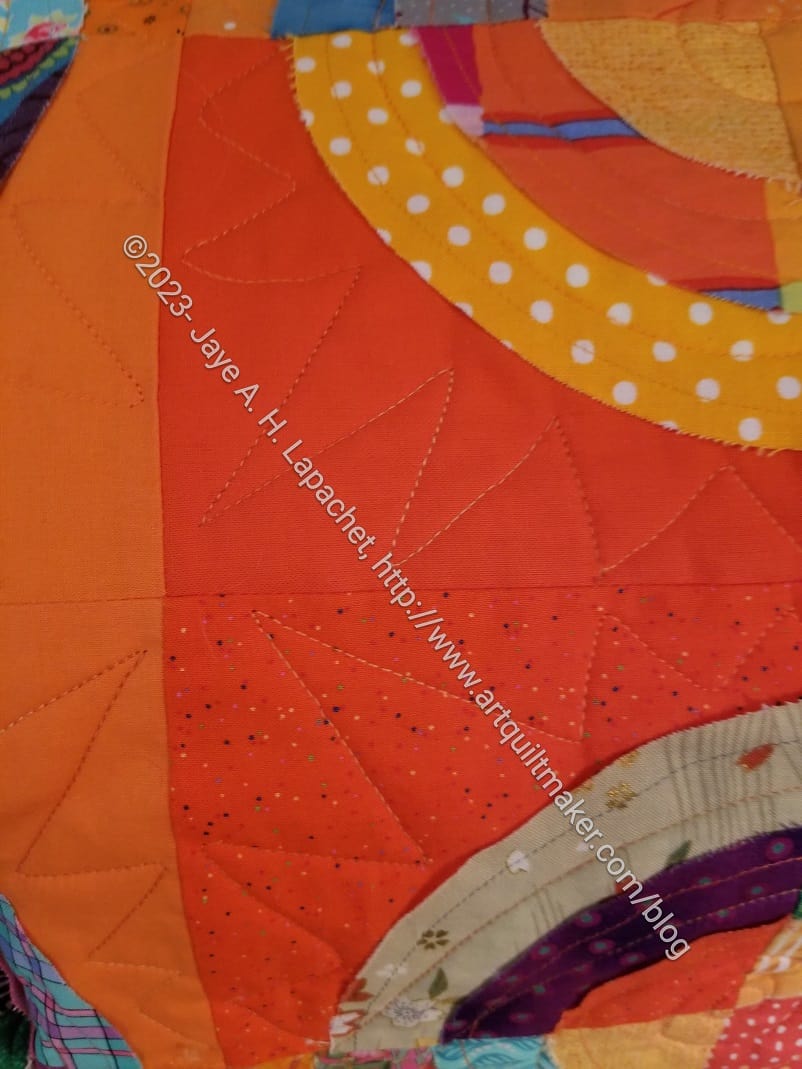
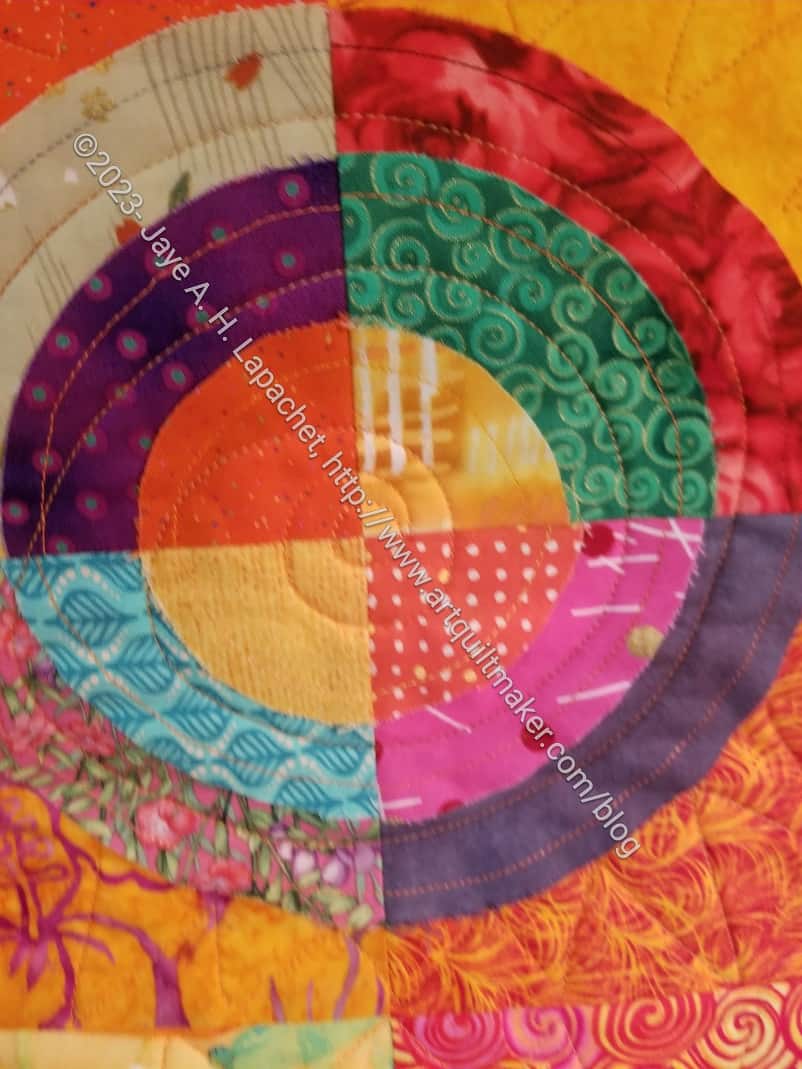
Orange You Glad quilted- detail
One of the things I like about this quilting is motif depicting rays that Colleen did around each of the circles. Simple, but effective.
She did a great job avoiding the raw edges. I always warn her, but you never know. So far, on all of these Bullseyes, I haven’t had any folded edges. That makes me very happy.
Orange You Glad quilted- detail
In the center of the circles is a simple spiral. She would have done something better, but I couldn’t think of anything.
There is enough quilting to keep the thing flat as a pancake, which is my preference.
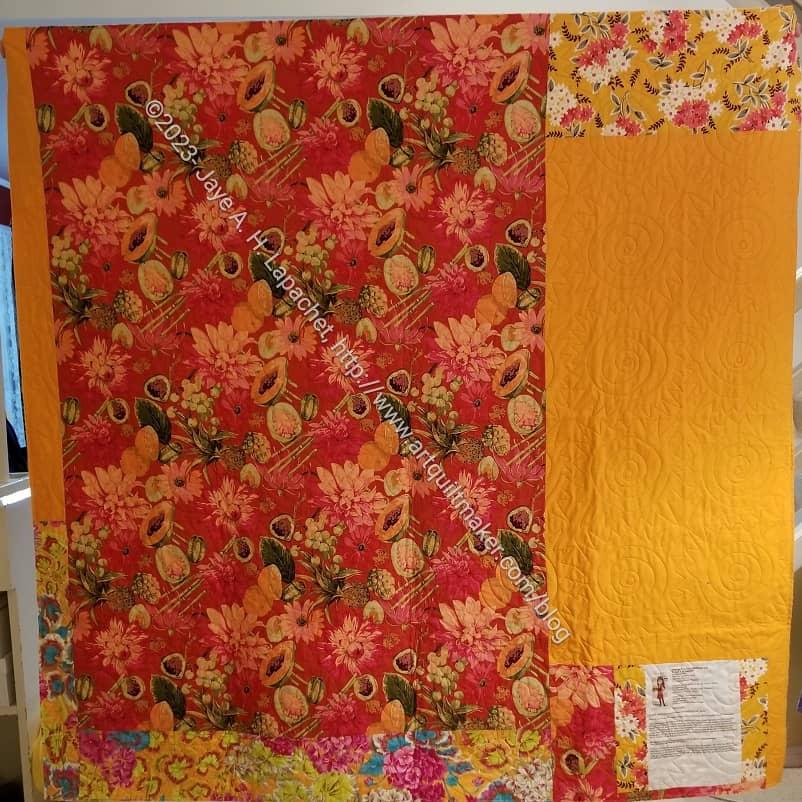
Orange You Glad back quilted
Finally, the back looks good. I know I was sick of the quilt when I made the back, but the large pieces are really effective. I like seeing those big flower prints in all their glory.
All in all, I was very pleased with the price. Four quilts, a tablerunner and two pieces of foam were very economical.
Yes, I finished the top and back of Orange You Glad. I actually came back from my knitting class and made the back and binding.
I needed this off my design wall, so I just worked like a crazy woman on it.
There is nothing wrong with the quilt. My feelings all have to do with how many projects I have in progress. With this project on the machine, I couldn’t work on the Tarts. I found that project and its urgency fading from my mind the longer I didn’t work on it.
Orange You Glad back finished
The back uses a large and favorite print from Martha Negley. Since this is a quilt I will keep, I was happy to use it. I know it isn’t the same orange as the front, but I like it.
I know it is all Orange You Glad all the time right now. I am almost done piecing the top.
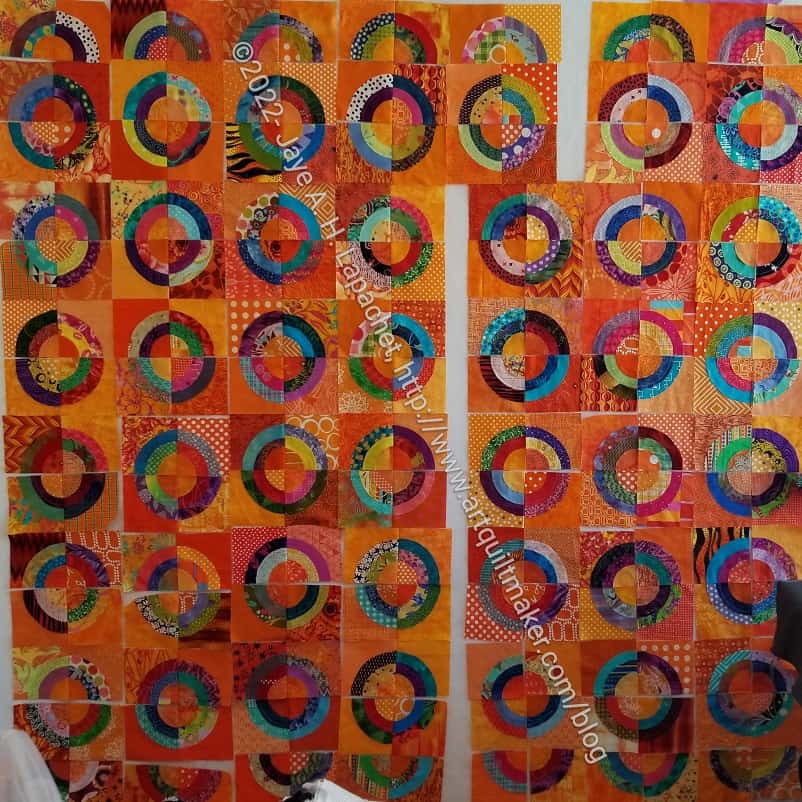
I spent the last few days chunking the top. I have many chunks and the piecing is going much faster. I’ll probably be able to finish piecing the top tomorrow or the next day. Life gets in the way of sewing.
I have finally sewed all the pairs of quarter blocks together. It took a long time.
I started on Saturday and finished on Sunday. Of course, I couldn’t sew all day both days, but I did spend a good portion of my time on the project.
One thing I can never get over is how much space is taken up by the seam allowances. The spaces in the photo (right) show how much space I gained by sewing the blocks on the left.
Orange You Glad Pairs sewn
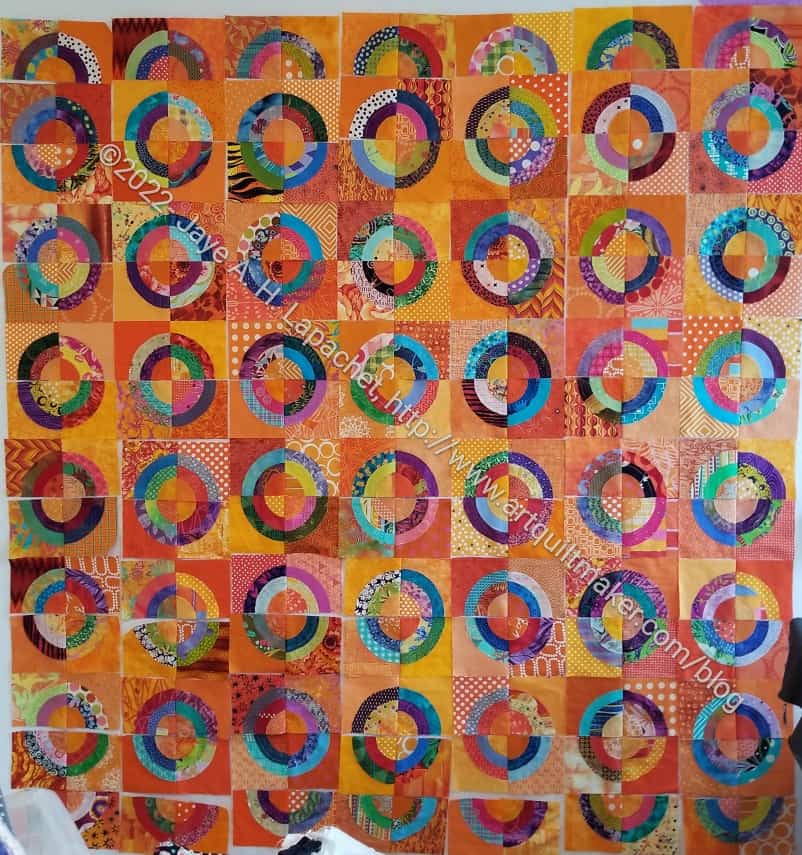
Once all of the pairs of quarter blocks were sewn together, the piece looks ‘normal’ again. Of course, I have to sew the pairs into blocks. Then we’ll see the spaces develop again.
I made good progress during the week. All of the blocks are sewn together.
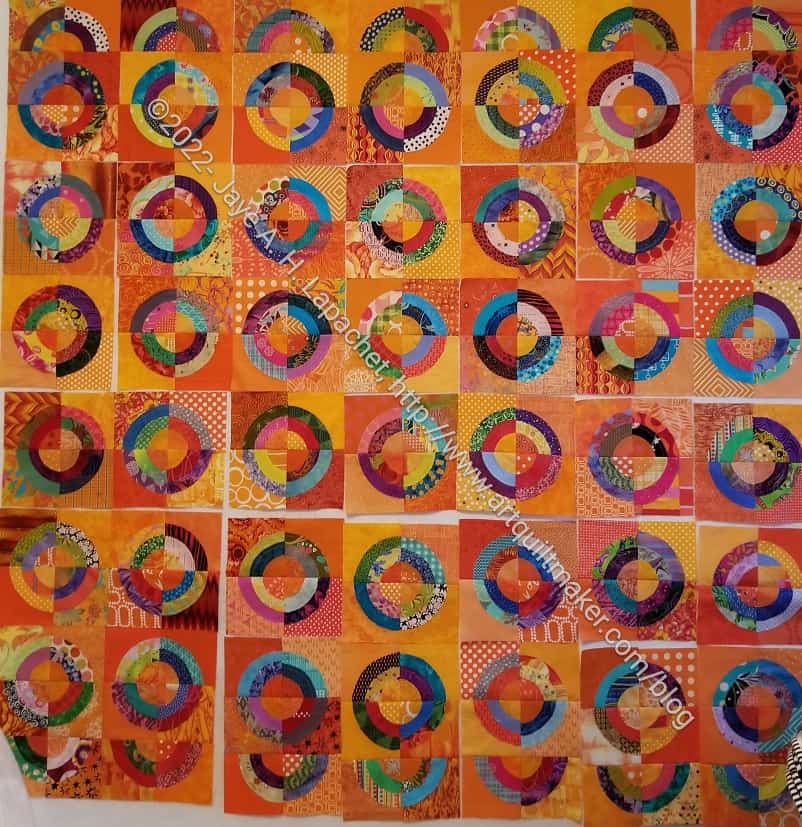
I spent quite a bit of time during the week sewing as well. I am trying to enjoy this process, but it is hard. It really has nothing to do with this quilt; it has to do with the fact that I have too may projects at the same stage at the moment.
Regardless, I am paying close attention to the blocks and where they go. I am making minor adjustments even at this late stage. The quilt is looking good, I think
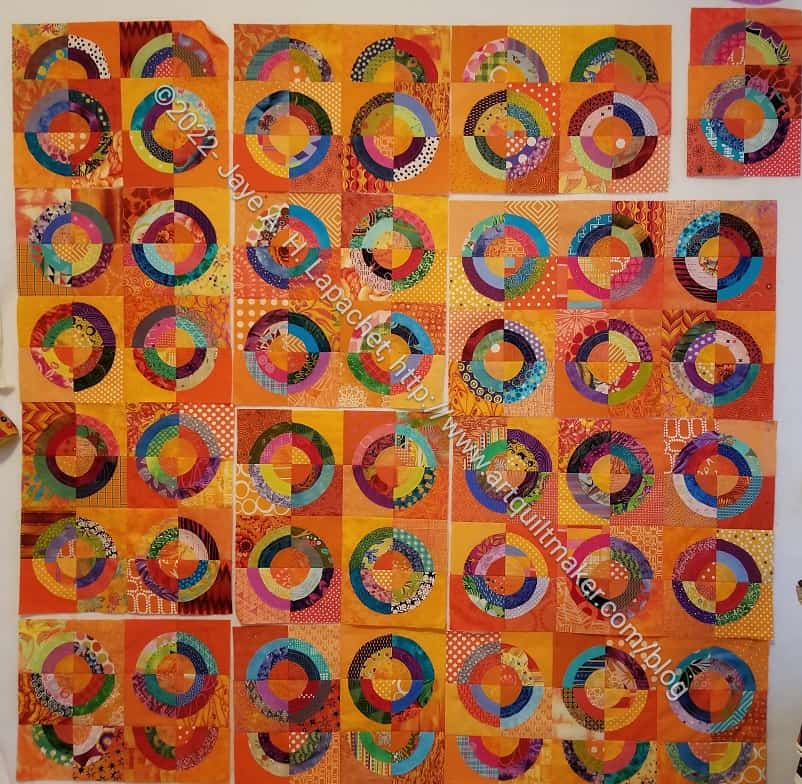
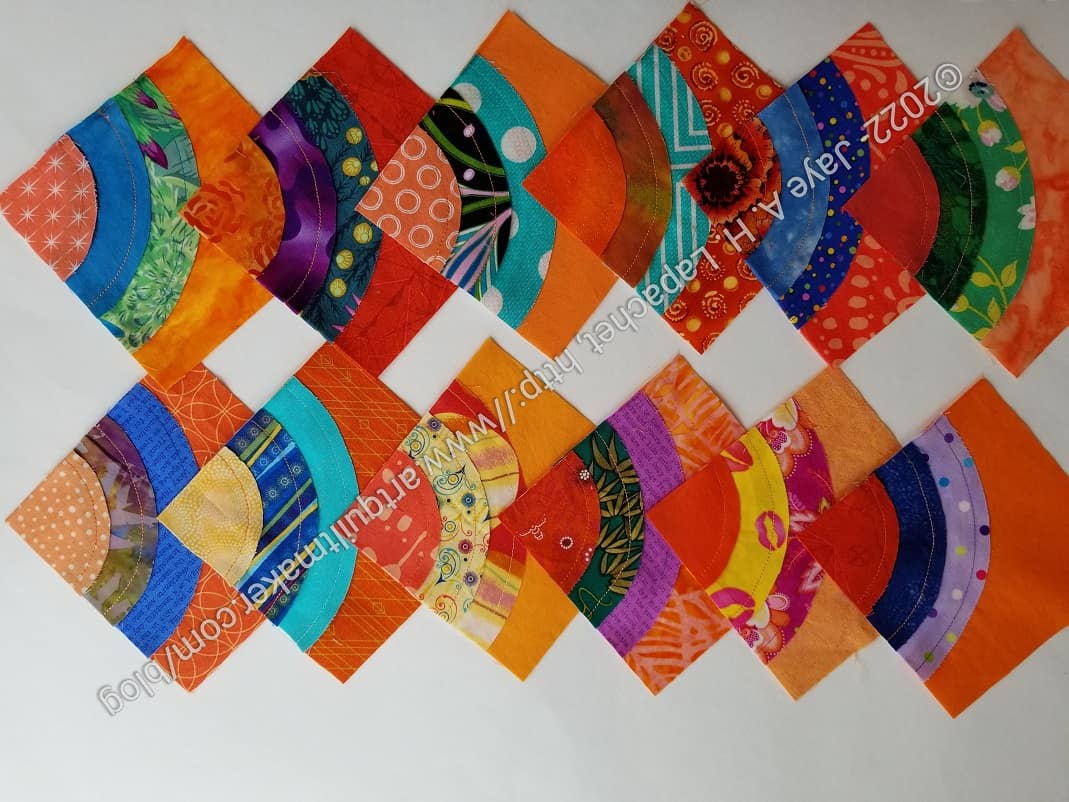
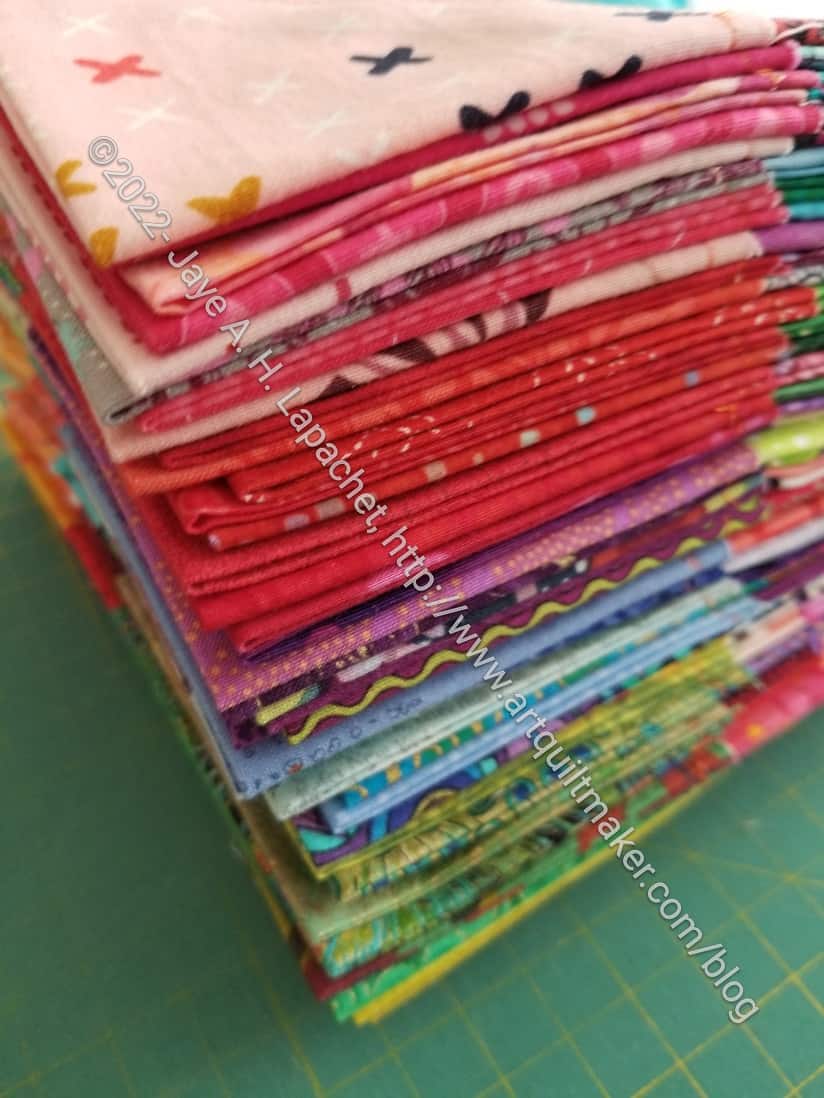
The other day I talked about using 3/4s of the squares to make a design. Since then I have received the rest of the quarter squares and put them up on my design wall. It is so great to have more options.
I have been rearranging and changing the locations of the quarters every time I walk into the room or look at the design wall. I noticed that we have, mostly, all used cool colors for the first circle. That makes highlighting different fabrics a challenge. It is not impossible, but I have to look carefully to make sure each fabric is showcased.
I want to get to sewing, so at some point I need to stop rearranging and start sewing the blocks together.
I was super excited to receive quarter squares from Julie the other day! I am eagerly anticipating the receipt of Adrienne’s quarters as well. Once I get those I can seriously start scheduling time to finalize the arrangement and sew the top together.
Orange You Glad – my and Julie’s quarter squares
In the meantime, I interspersed Julie’s quarter squares with the mine on the design wall. Because I was so excited, I forgot to take a picture of the quarters received. I took a photo of the ones I hadn’t yet put on the design wall (photo above). Aren’t they fun?
The photo, right, shows my layout in the process of being rearranged on the design wall.
Orange You Glad – my and Julie’s quarter squares – complete
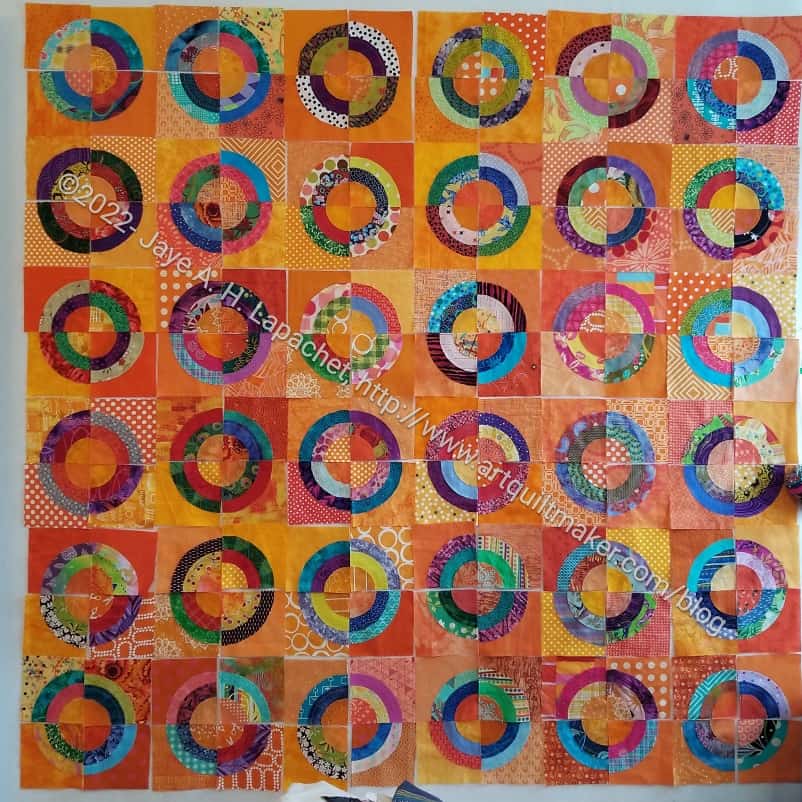
What I have with three quarters of the blocks looks pretty good. I am thinking that I will keep them as circles, but there is one other layout I want to try out first.
The blocks above were my favorites and I was anxious that they would be ‘ruined’ when I added the other circles.
Orange You Glad faves with 3 circles
The blocks definitely look different after the last orange circles were added. I am excited that they look even better. I still lament the covering up of some of the motifs (like the flowers in the pink and blue plaid circle), but overall, I think the blocks are enhanced by the additional, small circle.
After playing with the blocks a little, I am now ready to continue working on the bullseyes.
Then I looked through the bullseye blocks. Some caught my attention and I was sad to cover up the second fabrics with more circles. Still it had to be done.
Pink & plaid circle
Blue excitement circle
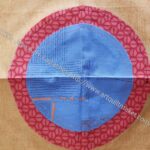
Blue on red map circle
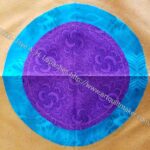
Turquoise & purple circle
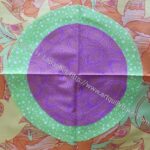
Green and violet circle
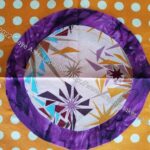
Purple fireworks circle
Pink and blue plaid circle
The blocks above are my favorites after looking through all of them. I know that will change when I sew the last circles on.
I dragged out the bag of bullseyes yesterday that had been languishing because of my travel and life. I wanted to look at them and match up the last circles, but instead I started appliqueing them to the blocks.
I did look at them all. Then, I did match up the small orange circles with the rest of the block, but I didn’t do as much looking and rearranging as I thought I would. I really just wanted to sew. I wasn’t lax, I was just faster than I thought I would be. I have never been much of an agonizer where it wasn’t necessary, especially with quiltmaking.
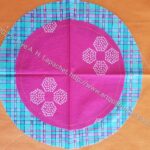
Orange You Glad example
I thought I would try and finish the top and back of this quilt and take it to Colleen as well, but then (head to desk and a big DUH) I realized that I need to wait for the parts of Julie and Adrienne’s blocks before I can go farther. Not a problem! I will use this quilt to make up the second batch of quilts I plan to take to Colleen in a few weeks. I am on another finishing mission.
Julie has a Picking favorites blog post on her blocks.
I am waiting for my backgrounds to be returned. Julie has them finished and I will get them when we meet for lunch.
I cut these squares as I was cutting the backgrounds. I have no idea if they will work after the other two have added their stamp to my backgrounds. However, they are a start.
The other day I showed you how to finish the bullseye blocks in preparation for the next circle. I didn’t have all of the photos, but I do now. Until I can write a real, complete tutorial you’ll have to look at both posts and integrate them. I know you can!
This tutorial assumes that you have cut your backgrounds and appliqued your circles to those backgrounds.
Supplies (same as previous post)
Bullseye blocks
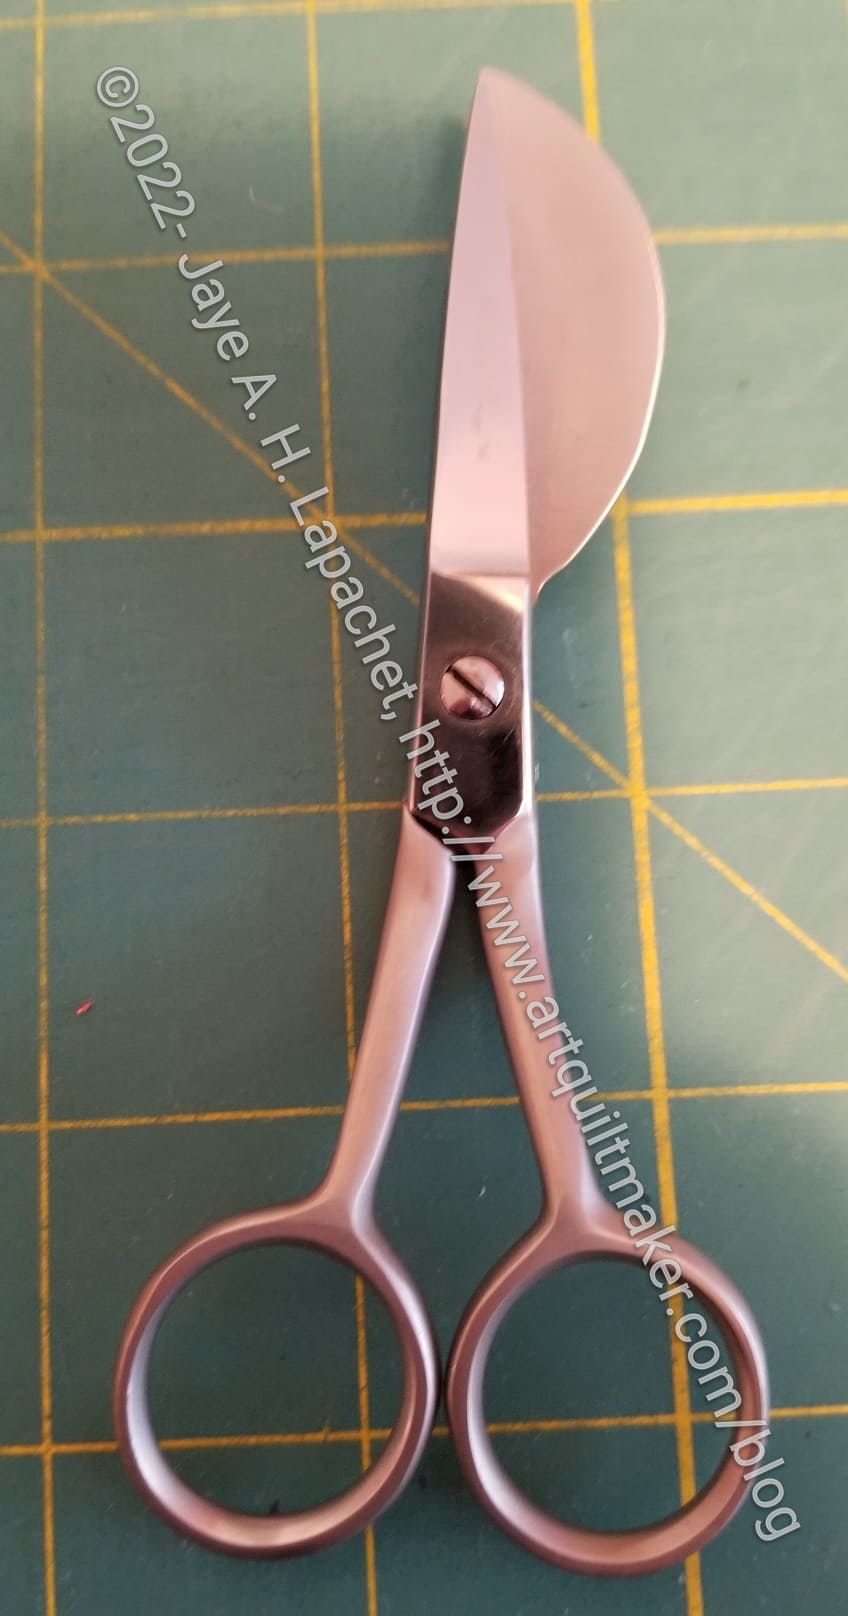
Inspira duckbill applique’ scissors
Applique’ scissors** – I have two pair. One is by Gingher, which I have had since the dawn of time. These are maybe 10 inches, but probably 8 inches. The other is a much smaller pair (6?) I bought last year at Cottage Quilting in Medford. The brand is Inspira and they are shown on the Husqvarna/Viking website. I thought they were super cute and I had never seen a pair this size before. N.B. after using them for this project, I really like the Inspira duckbills. The holes are really small, so if you have large hands, they may be uncomfortable.
As mentioned above, previous steps can be found in the previous post.
…Your goal is to be able to cut a circle out of the background fabric without harming the front circle.
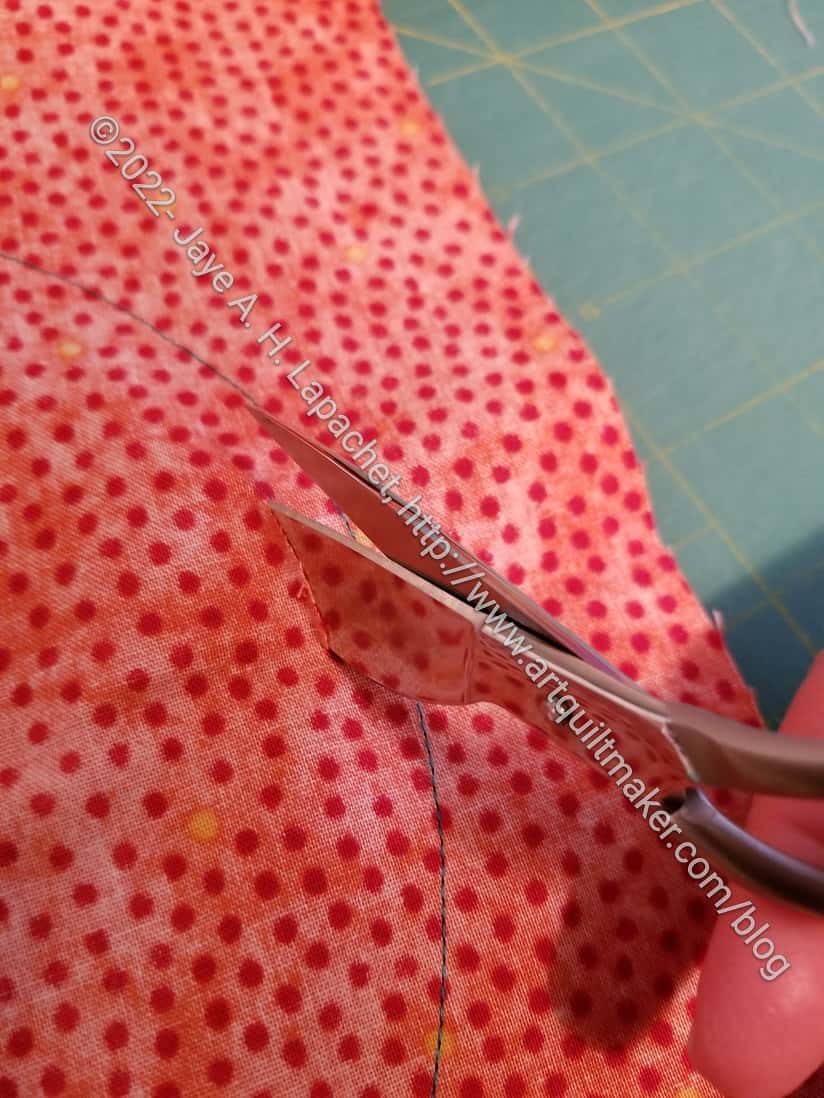
Bullseye: Cut parallel to the line of stitching
Second, cut a slit. You will need to continue pinching the background layer of fabric away from the front circle. The slit should be cut straight down, parallel to the line of stitching. If it is angled, you will see it right away in the V shaped cut that results. It’s no big deal, but try to keep it straight so it is parallel to the sewing line and makes a neater cut.
Now, continue on to step three in the previous post.
**Obviously, you should shop at local quilt shops. However, I use affiliate links and may be paid for your purchase of an item when you click on an item’s link in my post. There is no additional cost to you for clicking or purchasing items I recommend. I appreciate your clicks and purchases as it helps support this blog.
Since I am working on a Bullseye project, I thought it would be a good opportunity to write some tutorials about the process. At the moment, this will not be a full set of step by step tutorials. You’ll have to use the skills you have gained from my Quilt Class tutorials to extrapolate the rest of the process.
This tutorial assumes that you have cut your backgrounds and appliqued your circles to those backgrounds.
Supplies
Bullseye blocks
Inspira duckbill applique’ scissors
Applique’ scissors** – I have two pair. One is by Gingher, which I have had since the dawn of time. These are maybe 10 inches, but probably 8 inches. The other is a much smaller pair (6″) I bought last year at Cottage Quilting in Medford. The brand is Inspira and they are shown on the Husqvarna/Viking website. I thought they were super cute and I had never seen a pair this size before.
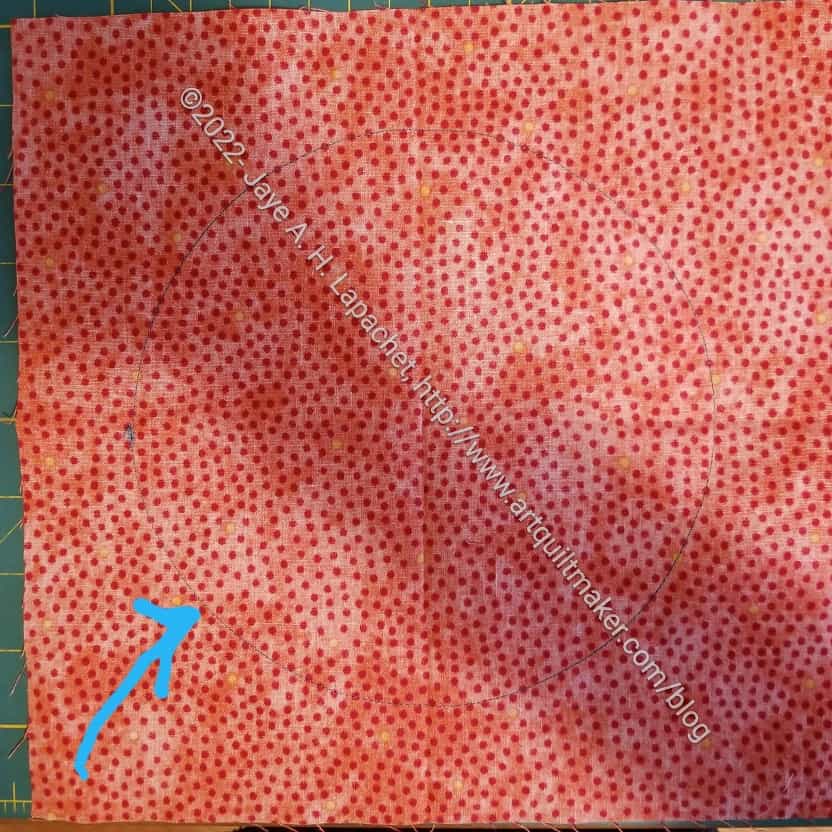
First, take one block and lay it face down on your cutting mat.
The picture shows the sewing line (arrow is pointing to it; you may need to enlarge the photo). Use the sewing line as a cutting guide. If you want, you can draw in an erasable line to follow for cutting. You don’t need to do that, though. Just eyeball one quarter to a half inch.
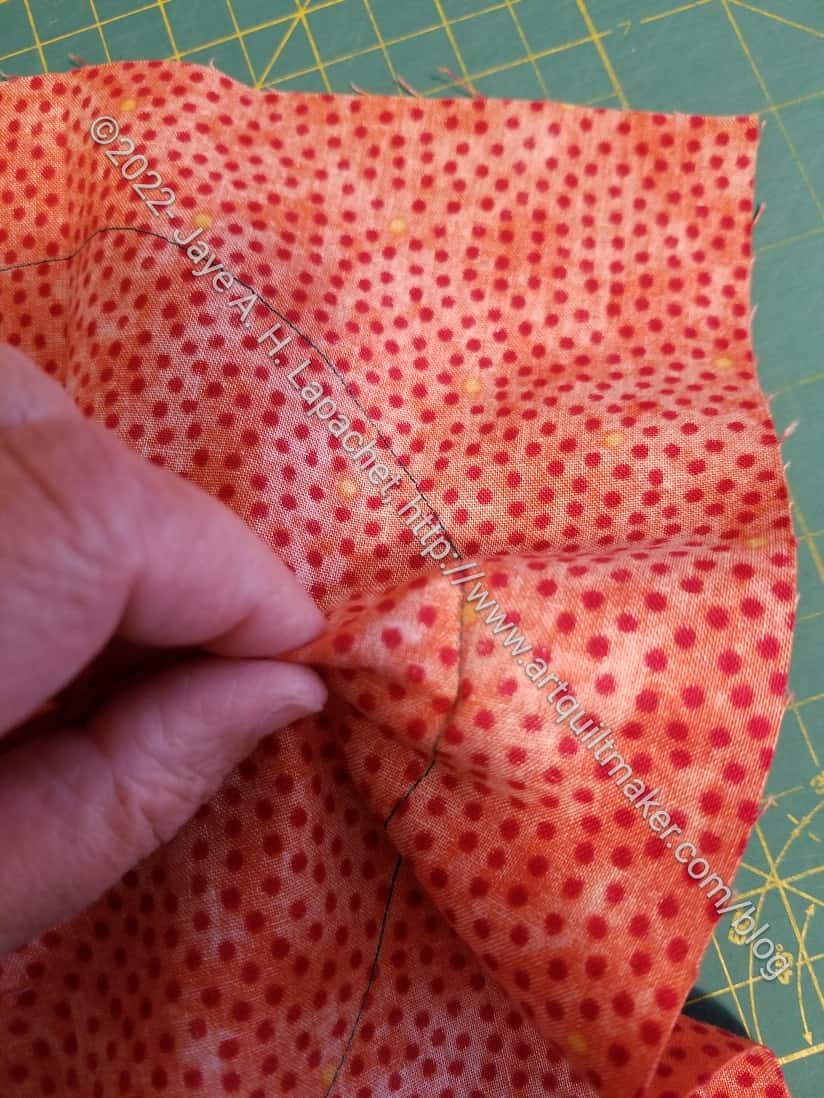
Bullseye: Pinch fabric layers away from each other
Pinch the background fabric layers away from the front/circle fabric layer. Your fingers should be about half an inch away from the seam line, as the photo shows.
This is usually a two handed process and you will need to feel around to make sure both layers are well away from each other.
Your goal is to be able to cut a circle out of the background fabric without harming the front circle.
Second, cut a slit. (no photo) You will need to continue pinching the background layer of fabric away from the front circle. The slit should be cut straight down. If it is angled, you will see it right away. It’s no big deal, but try to keep it straight so it is parallel to the sewing line.
Third, let the fabric layers go back together, e.g. they are not pinched anymore, but, again, laying flat on the cutting mat.
Bullseye blocks: Enlarge the slit
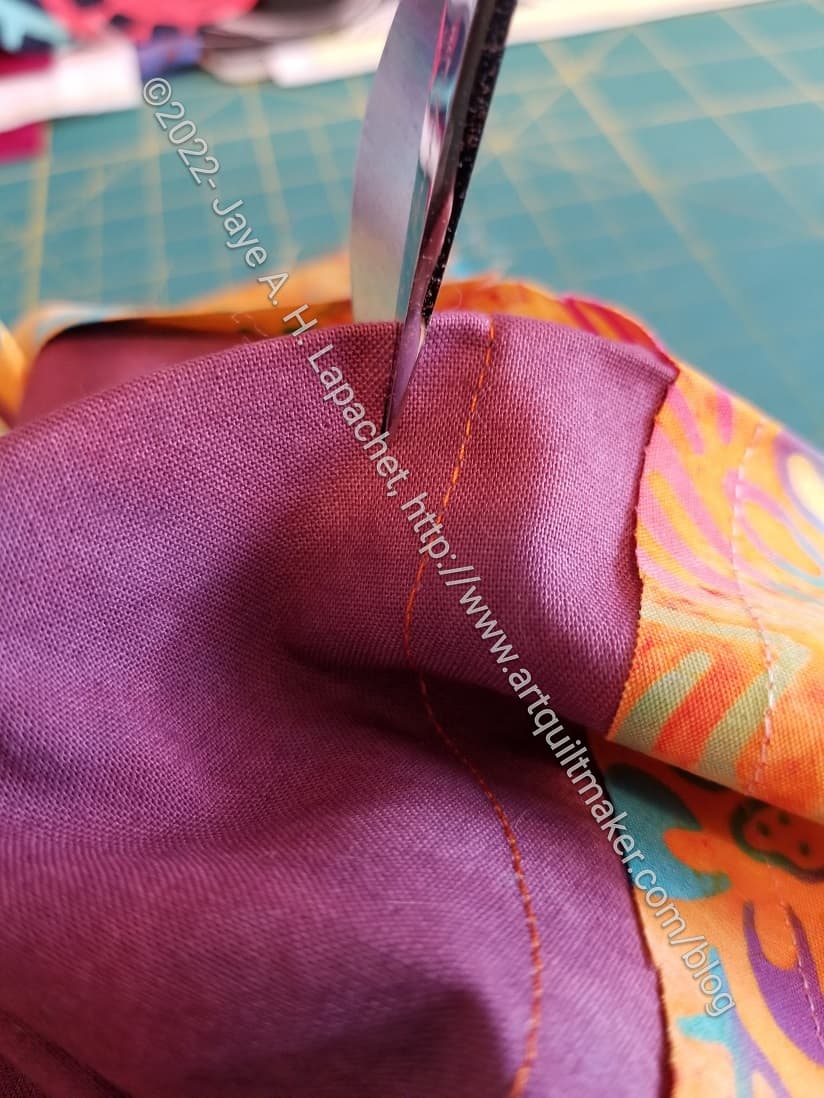
Fourth, carefully stick the duckbill tip of your applique’ scissors into the slit and start cutting away the background layer. Cut one quarter to a half inch away from the seam line.
Be careful to only cut the background layer. The duckbill part of the scissors should help keep you from cutting the foreground. This doesn’t mean you don’t have to be vigilant. You do!
If I sound like a militant dictator, it is because I have cut through the fronts of appliques and had to do them over.
Be vigilant.
Bullseye: cutting out the background
Fifth, continue cutting carefully around the whole circle. I keep the circle out of the way of the scissors to try and preserve as much fabric as possible. I can cut some of the shapes I need for other projects from the leftovers.
This part of the process becomes easier once you have cut a large enough slit so the front circle fabric shows.
In the photo, left, you can see how the duckbill rests on the front/circle fabric.
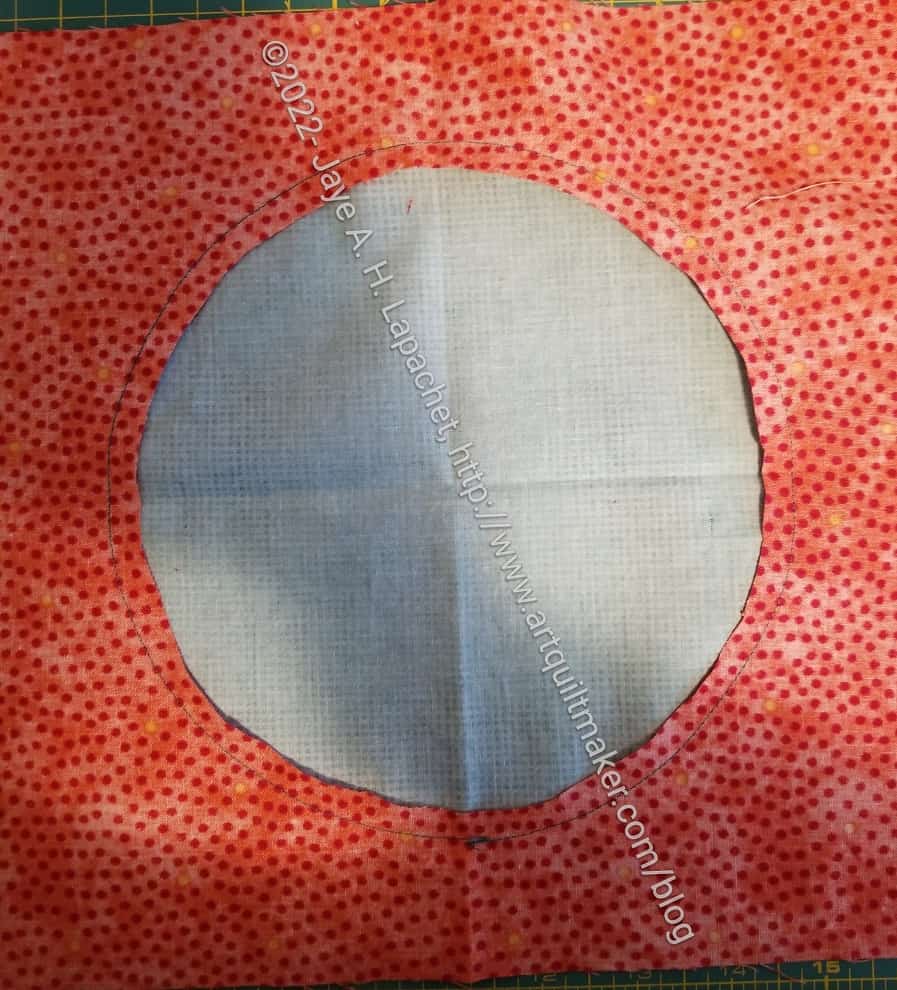
Bullseye: background cut out
When you have cut the whole circle out, you will have a back view to the front fabric.
Repeat for all blocks.
**Obviously, you should shop at local quilt shops. However, I use affiliate links and may be paid for your purchase of an item when you click on an item’s link in my post. There is no additional cost to you for clicking or purchasing items I recommend. I appreciate your clicks and purchases as it helps support this blog.