Yes, they are coming fast and furious! I got two at the last BAMQG meeting, as I mentioned. I was able to work on Claire’s piece during my last free sewing weekend, but I didn’t get to Ruth’s. While having little time to sew on the weekend, I have had to cram the work into bits of time during the week. Of course, I forgot to take a before picture. 🙁 C’est la vie. If you imagine removing my part, that is the before. 😉
There is something that makes me think of a castle. The ‘mountains’ could be points of a tower and the curved sections could be arches.
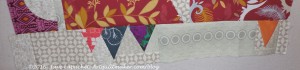
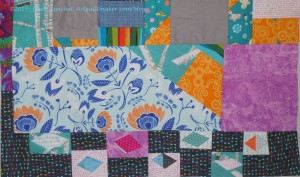
My addition to Ruth’s IRR
Ruth’s piece has a clear color story and large curved center with triangles seem to be a design focus. The piece spoke to me immediately after I put it up on my design wall. I saw the triangles on the top that looked like mountains and decided to add something similar on the bottom.
I had to do some fancy sewing with background around the mountains since I didn’t want to cut off the tips. I think the background looks like Mary Mashuta’s Pushed Neutral concept and I like it.
Next on the IRR list was Claire’s piece. Claire was in my original group so I wanted to make sure I worked on all of those quilts. I received her piece at the January BAMQG meeting.
Claire’s IRR was a challenge. The colors are perfect for Claire, but they are not my colors. Also, many of the fabrics had been used up or smaller pieces were left. This is why the project is called a challenge! I did not let these things discourage me.
I put the piece up on my design wall and tried to see the focal point or the place where Claire started. I couldn’t really tell, so I looked at who had worked on the piece and still couldn’t tell what might have been Claire’s start.
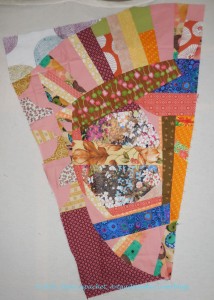
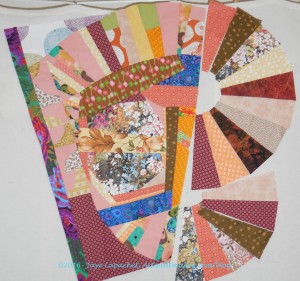
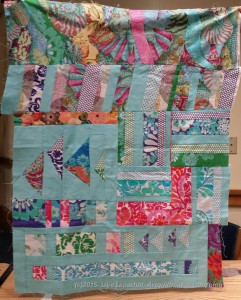
Trying out the Grandmother’s Fan idea
I put the focal point aside and looked at the piece. I saw some good curved lines and thought something like the Grandmother’s Fan block might work. I cut some blades and put them up on the design wall.
I really did try to keep, mostly, to the 20 minute rule. I find that rule to be hard as the pieces get larger. Of course, cutting is still a challenge. Also, the curves on Claire’s were not an easy design element. And, right on cue, life got in the way and the piece sat on my design wall for a week or more.
Claire’s IRR – continuing the curves
As I walked in and out of my workroom I decided I did like the curves. At one point, I adjusted the fans so the existing curves would be continued — or give the illusion of being continued.
In the photo, I tried to point out to you, in a very obnoxious color, what I thought of as ‘continuing the curve’. No, the blades aren’t all the same size, but the curve seems to be the most important in terms of design. I hope the curves I added work with the existing curves to create a focal point.
The bad part is that I didn’t square off the fans. I know I should have, but I just didn’t feel like it. I know I can offer to do it later, if push comes to shove. I am hoping that someone else will square them off down the road.
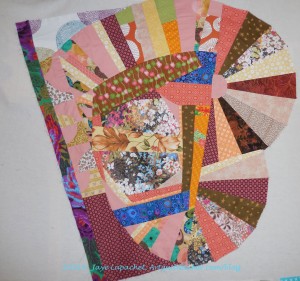
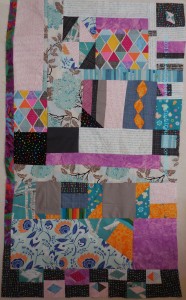
Claire’s IRR with my addition
I am happy with what I did. I gave the piece to Michelle on Thursday and will look forward to seeing what she does.
A week or so ago, I wrote my first Various & Sundry post for 2016. In a comment, BAMQG pal, Annemarie, asked about quilt labels. It occurred to me that I had been meaning to write about quilt labels for a long time and I hadn’t yet done it.
First, I think quilt labels are VERY important. They document the work of women who are not being paid to make things. While you may think that women and their work are valued, I think that we have a long way to go to have handwork (even by machine) valued as much as something such as, for example, a technology infrastructure or a new and successful app.
Second, I think quilt labels are important because they can tell the story of your quilt, if you want. Even if the story includes only:
maker
date
recipient
It is a small story, but a story nonetheless. It can be the starting link of a chain.
Label for Small Items
Third, for bags and small projects, I have a small label I print out in batches of about 20 on a page. It is not personalized to any particular project, but it lets people know who made the item. I even put these on ATCs. While simple and not unique, they can link a small item to my larger quilts. These would be perfect to make on Spoonflower and I might just do that.
Fourth, ALL quilts are important even the baby quilt you whipped up overnight for a baby who came early. The child will look at the label, wonder at and ask about it when s/he is old enough.
I did a little meditation on quilt backs a few years ago. Since I put my labels on the back, is relevant for this post. You may want to take a look.
What to Include
When I make a quilt label, I start with a Word document and save it to the folder on my computer (Google Drive or similar would work as well) that has all of the notes and images for the project. I include the following:
a picture of myself or my avatar
the name of the quilt
the size of the quilt (this is helpful when entering shows as I don’t have to measure the quilt every time)
details about materials and construction, such as if I have embellished the quilt or used special materials. I always put the content of the fabric and thread. Most of my quilts say 100% fabric and thread, but this is the place to put other content information, if relevant
my name, address and phone number
the name and address of my blog
Name and company of the quilter who quilted the quilt for me, starting with “Quilted by” or “Longarm quilted by”. Sometimes my name is in that spot. I feel it is important to differentiate the piecing from the quilting.
If this is a gift, I also include “Collection of Jane Doe”
If many people worked on the quilt, I include their names. This may help historians build connections between me and my guild mates in the future.
Sometimes I will include the pattern name.
If I got the pattern from a publication, I will include that and note changes that I made.
If the quilt was made for a show or exhibition or in response to a challenge, I put it on the label. Again, it helps make connections.
The story, process and inspiration for the the quilt. This is often the same, or similar, information I use on the quilt’s webpage. This information may include why I gave the quilt to this particular person. If I used special fabric or a particular line of fabric, I may include the information in this section. I also include why I made the quilt. It may have been specifically for a person. I may have started it in a class or wanted to try a technique or process
washing instructions, especially if the quilt will be a gift
Yes, the above is a LOT of information. My labels are frequently very large – taking up most of an 8.5″ x 11″ sheet. This is the information I would want to know if I came across a quilt in an antique store.
I often write up the label as I go along, so I only have to do some editing when I am ready for it.
How to Make a Quilt Label
There are as many ways to make a quilt label as there are to make a quilt. You can:
use my process and print on fabric
write with a permanent pen on a plain piece of fabric and sew on to your quilt
write directly on the quilt (watch for bleeding!!!!)
hand or machine embroider
applique’
use stitch lettering on your machine to write out label information directly on to the quilt.
Get sheets of labels already printed on fabric and fill them in with a permanent marker
Use Transfer Artist Paper
Write up your label in Word (or another word processing program), then trace on to fabric with a permanent pen
Create on Spoonflower
Buy personal, pre-cut woven labels (like the ones in your clothes) with your name, blog name, a short message, etc
Insert a triangle of fabric into the binding with your information written on it
embroider (watch for floss that bleeds)
I love the front of a quilt. Sadly, I am happy for the the fairies and magical animals to finish the rest for me. By the time I get to making the back, I want the quilt to be done. My method for making labels is relatively quick, in the grand scheme. Some tips:
print a test page on a piece of paper to check for color and clarity.
Make sure you ink cartridges are at your desired level
Sewing and More Information
My mom’s car was broken into and my niece’s quilt, which was coming to me to be bound was stolen. It had been made at a shower for her mom and many people had drawn, colored and written messages for my yet-to-be-born niece. The quilt was a wonderful scrapbook of heartfelt love and was never recovered. It is one of the saddest events in my quilty world.
I sew my quilt labels into the back of the quilt before the quilt is quilted. I do not applique’ labels onto the back after the piece is quilted. Yes, that means piecing the back. Yes, the quilting can make the words look weird, but I want people to know the maker and owner of the quilt. If the quilt is stolen, then the thief will have to destroy the quilt to remove the label. I think this is unlikely, but in a sick kind of way, I would rather have that then someone passing my work off as their own. If they don’t care, then perhaps every time they see the label, they will feel a little bit ashamed.
Confession Time
I have one quilt that is unlabeled and there are no photos of it. It isn’t a horrible quilt or anything and I do keep meaning to do it. I just don’t seem to get around to it. If I die before I do it, nobody will know anything about it, which is sad.
I really dislike making labels and quilt backs. I do it, because I truly, deep in my heart, believe it is important to document my work. If you don’t feel that labels are important, then you don’t have to make them. The above is not a call to arms, but information on how and why *I* label *my* quilts.
Resources:
This is a small sample of the myriad of information available. For more resources type “quilt labels” into Google and look at the massive amount of resources and images that are retrieved. Everyone has a different process. Find what works for you.
Here is 2016, bold as brass staring at me and daring me to adjust this list. I am tempted to make a list of bag patterns I own and haven’t yet made. Other than that, I am pretty sure I have everything that I want/need to do on this list. Perhaps I’ll get it done and have no more To Do Lists?
Wash fabric AKA The Great Unwashed-I washed a load recently and am working on ironing it
Finish sewing Anna Maria Horner Multi-tasker tote -this was a gift I intended to give during Holiday 2013- sigh. Missed 2014 Holiday deadline as well. The bucket part of the bag is done and I just have to add the straps.
Cut out 3 notepad covers for gifts
Finish cutting out Day in the Park backpack variation
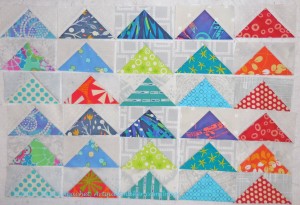
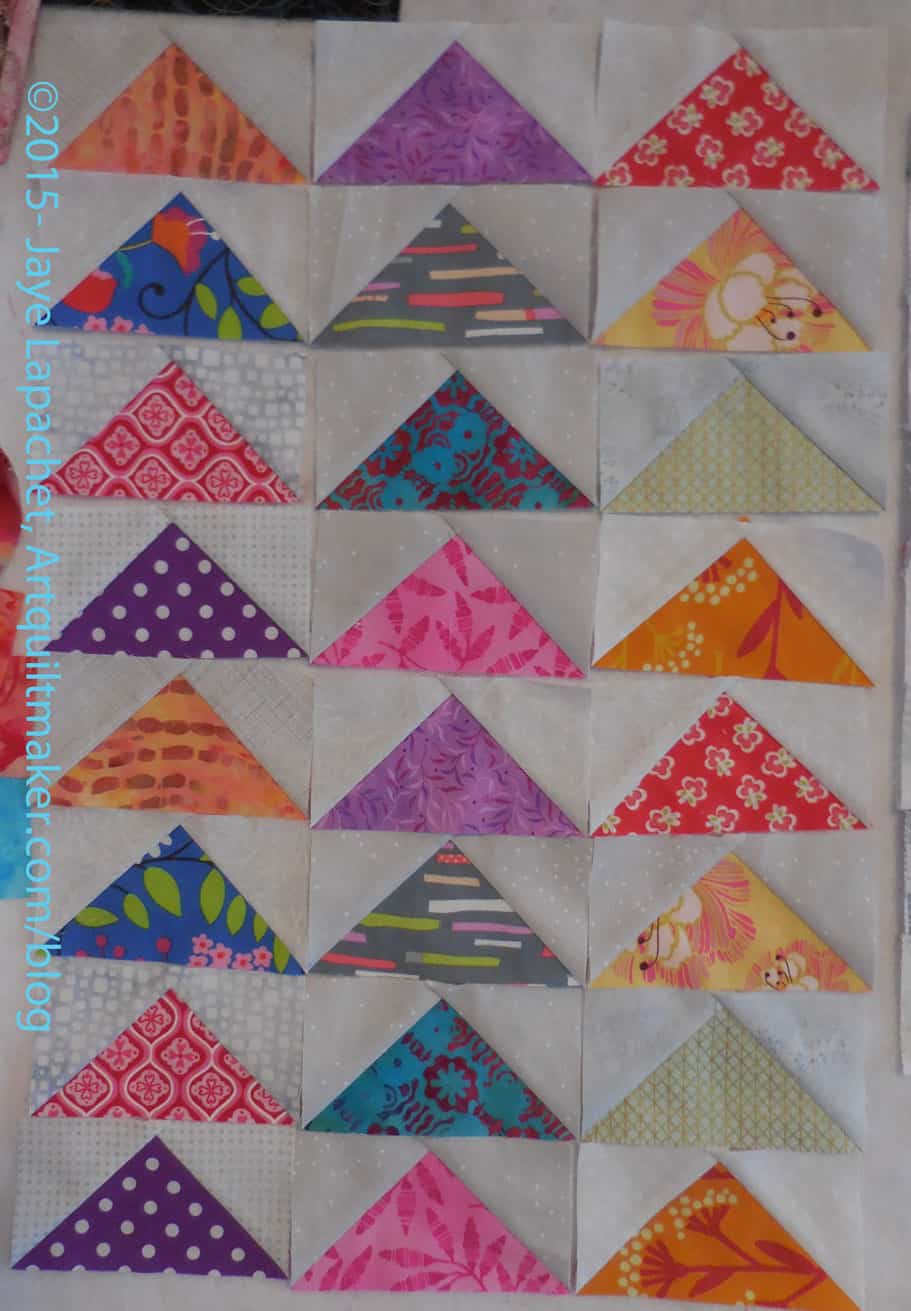
I have been making and receiving Flying Geese all along. I finally decided to do an update as the group was getting kind of large and was taking up space on my design wall. Also, the last update I did was on November 14 and that seems like a long time ago.
If I did the math correctly (50 weeks x 4 geese each week), I have at least 200 right now. It doesn’t seem like enough, though. I think I must have more. I am kind of amazed at how easy it is to make these blocks and to have them add up in number. I really want to sew up all the patches I have cut. I am trying to restrain myself.
Some of these TFQ won’t recognize, because I haven’t send them off yet. They were part of the Wacky Weekend Work I did. Flying Geese make good leaders and enders.
I had two recent opportunities, the IRR post and the BAMQG Meeting post, to talk about my round robin piece, which is still circulating, and missed both of them.
Jaye’s IRR – December 2015
I was able to glimpse the work done on my piece at the meeting last week. I think my piece is looking spectacular. There is a lot of interest because of the improvisational piecing. There is also cohesion because of the limited palette of fabrics.
I am so thrilled that some of that Philip Jacobs (or perhaps Martha Negley??) fabric was added (shells at the top). I love the boldness of it. I would like to take a better look at it as I see some other fabrics tucked into that top section.
As I said before, the pieces are getting quite large and mine is no exception. I think it is probably NICU size right now, or slightly larger. I want it to be larger, but may have to add bits of my own at the end. People from other groups are still working on it, which is great.
At the meeting the other day, everyone doing the IRR challenge got together and we swapped pieces. We changed things up and I now have Angela’s IRR piece. We were not originally in the same group. Her group was small and everyone had worked on all of the pieces at least once. I didn’t have one to work on so I volunteered to work on Angela’s.
The pieces are getting quite large. I quickly put a signature strip on the side and then started thinking about what I could add that would look great. I liked the castle fabric, but wasn’t sure about just putting in a big strip of towers.
The diamond motifs caught my attention and I started working on adding free form diamonds.
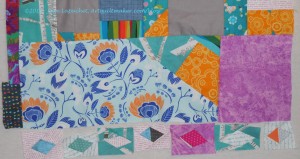
Free Form Diamonds in Process
I have a hard time being completely free form/improv-y, but I did my best. I tried to make the diamonds not in alignment. I didn’t like the way they looked. I sewed the diamonds to backgrounds and played around with them a bit.
I looked at the piece and saw that dark grey kite fabric. I played around with that fabric and came up with a kind of checkerboard effect.
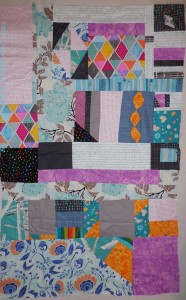
Finished Angela’s Piece
I like the way it turned out. I think the dark fabric adds a bit of a frame to the piece and sets off the diamonds as well. I also like the visuality of the dark fabric going around the corner.
Wash fabric AKA The Great Unwashed-I didn’t wash anything recently, but I have been pressing.
Cut out Anna Maria Horner Multi-tasker tote
Finish sewing Anna Maria Horner Multi-tasker tote -this was a gift I intended to give during Holiday 2013- sigh. Missed 2014 Holiday deadline as well. The bucket part of the bag is done and I just have to add the straps.
Cut out 3 notepad covers for gifts
Finish cutting out Day in the Park backpack variation
Finish cutting out 3rd Petrillo bag
Sew Bon Appetit apron
Cut out Art supplies Sew Together Bag
Sew Art supplies Sew Together Bag
Cut out Art supplies pincushion
Sew Art supplies pincushion
Cut out Purple Sew Together Bag
Sew Purple Sew Together Bag
Cut out Purple pincushion
Sew purple pincushion
Cut out Thanksgiving tablerunner #1
Cut out Thanksgiving tablerunner #2
Cut out Thanksgiving tablerunner #3
Cut out Thanksgiving table mat
**ATCs for CQFA December meeting
**New this time
I did break up some of the steps into cut and sew, which seems to have made the list longer not shorter. Still, it will be better in terms of crossing things off.
To see the 26 Projects Lists, which list quilt WIPS, visit the October 26 Projects update. October’s To Do List has a couple of changes, which is heartening.
Make tracing paper patterns for Pink Chalk Notetaker pattern
Frances added “5. Listen to your favorite podcasts!”
Nearing the end of my day, here is what I got done:
Finished the back of the Improv quilt (unless I need to add another strip to the width – am waiting for a call back on that)
Rhonda’s IRR piece is done and I will be sending it on to Cheryl tomorrow or sometime this week
Not only did I cut pieces for the Flying Geese swap, I actually made Flying Geese. I used them as leaders and enders as I sewed the backs together. Voila! Done.
I did start to work on catching up on podcasts. I have a few more to go and I made a point of putting an iPod on my Christmas list.
Still have the pattern pieces to trace, but I am pleased with my progress.
I want to have clear goals for tomorrow, November 22, so I get stuff done. Not only do I need to sew, but I need to get some projects moved to the next step. I know with Thanksgiving coming the next several days will be taken up by cooking and prep.
Make back for Improv quilt
Rhonda’s IRR piece
Cut pieces for Flying Geese swap
Make tracing paper patterns for Pink Chalk Notetaker pattern
I have another batch of Flying Geese blocks to show. In light of my post on inspiration for this project, I also spent some time on Pinterest looking at Flying Geese quilts. I finally feel ready to start thinking about a layout. I am not sure I want to sew a quilt, but looking at designs is finally fun.
This group of blocks looks much more Autumn-ish than previous groups.
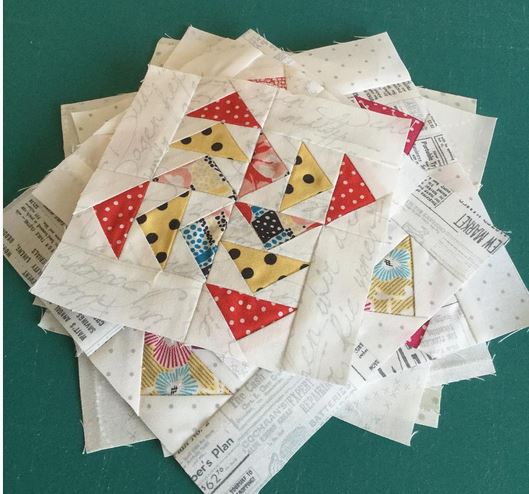
TFQ recently sent me a link to block that I really like made from Flying Geese. It was on the Moda Instagram feed and I can’t tell if it is a historic block or if the maker added another FG to a Dutchman’s Puzzle block.
We have been doing the Flying Geese Exchange, which I highly recommend, BTW, and I have started to look around for interesting design in which to use the Flying Geese. I have begun to start thinking about something interesting to do with the blocks. TFQ is clearly on the same page.
The blocks above are from the Moda Instagram feed. I have always liked the Dutchman’s Puzzle block and actually made one for my first Sampler quilt. This block puts a little twist on the idea, but it might be just enough to keep me interested.
Mary Fons posted a link to a block she made, which I originally thought would be great for our Flying Geese. After looking at it again, I don’t think it will work. I still like it, but there is an extra color that exaggerates the motion in the block. Our Flying Geese do not have that extra color. Of course, we could still put the block together, but we would miss out on the motion.
Love of Patchwork and Quilting had a block made from Flying Geese (Issue 24, Darling Dorothy) that is mildly appealing. I don’t think it will work for me for a whole quilt.
So you can see where my head is with these Flying Geese. Any ideas? Any interesting ideas?
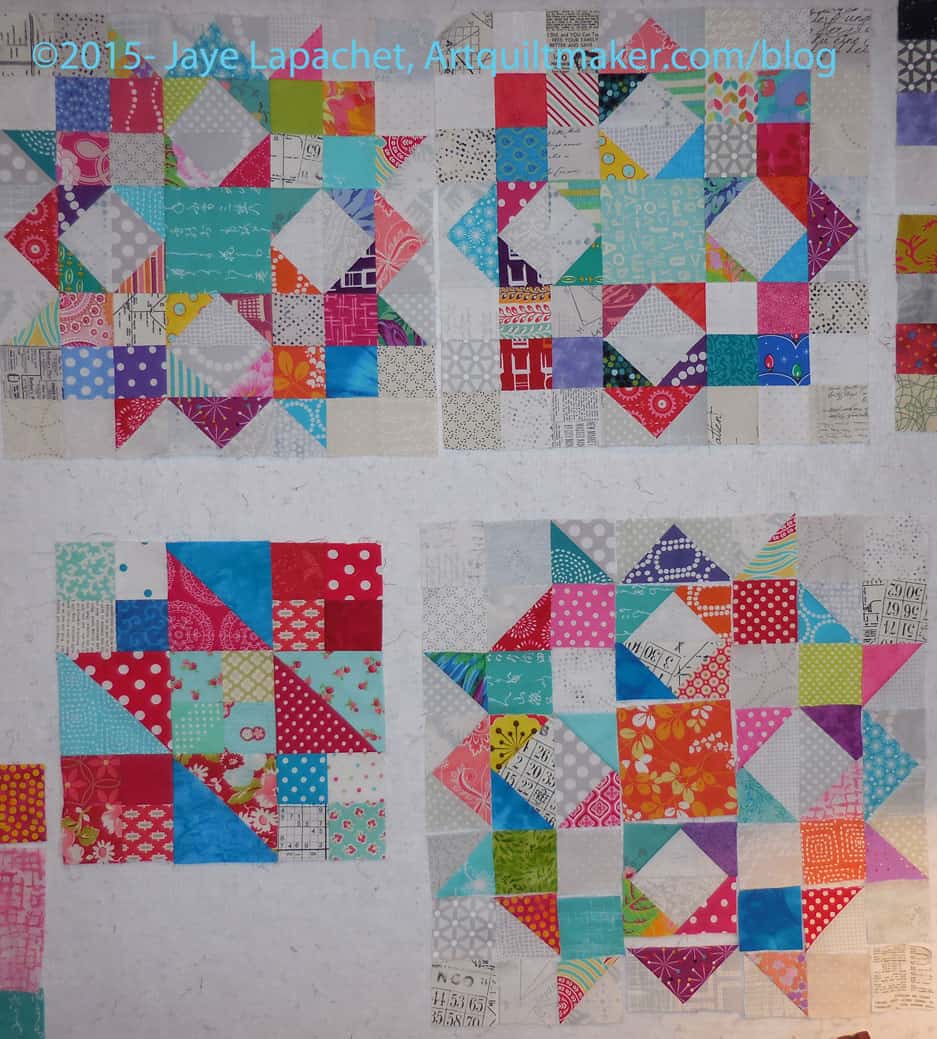
I spent almost the whole day last Saturday working on the Carpenter’s Wheel blocks and the Red and Black Improv quilt.
I was really struggling with the Improv quilt and it was taking up space on my design wall so I wanted to get it done and off. Done and off the wall meant making more blocks. Somehow making more blocks has lost their appeal.
3 Carpenter’s Wheels + a Stepping Stone
I decided as I worked on the Carpenter’s Wheel blocks that I would intersperse pieces and parts for the Improv quilt and make some progress at least. I am so pleased with the progress I made! And I had fun.
The Carpenter’s Wheels are very cheerful and that makes them fun to make. I sewed the second block together (top left) on Saturday and am enjoying looking at the two blocks together while the third block is in process.
Improv Quilt – Late October
I had started out on these blocks, but the Improv quilt was nagging at the back of my mind, so, as I said, I pulled out some black and red strips and started to work on an Improv block in between working on the second Carpenter’s Wheel block. When I finally pulled my nose away from the needle and assessed my day’s work, I found that I had completed a whole side of the quilt! I only have three blocks more to make to finish the top!
This quilt is a monster, which should surprise nobody, which makes it hard to photograph, but you should be able to see some of the work and the progress. There will be no border and sewing the blocks together should be a challenge, but not so much of a challenge that I can’t do it. The seams will be long, but over quickly, I think.
I was doing such good work that I was angry that I had to leave on Sunday for a work trip. I was looking forward to the work trip, but it just came at an inconvenient time and I was hoping I wouldn’t lose my momentum, especially with the Improv quilt.
I haven’t posted a Design Wall Monday for awhile, because there is no point in posting a boring design wall. I don’t think you should look at a boring design wall.
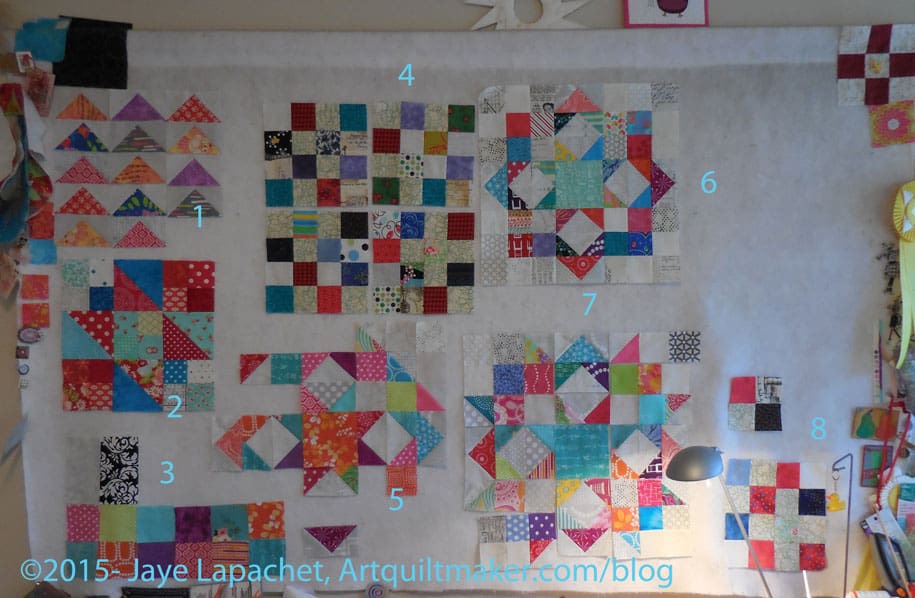
Design Wall Monday -10/19/2015
Flying Geese – these are the most recent Flying Geese from my exchange with TFQ.
2. Stepping Stone block. I just put it up there for inspiration and because I like these blocks.
3. Most recent FOTY patches
4. Newest donation blocks
5. 3rd Carpenter’s Wheel block
6. 1st Carpenter’s Wheel block, which looks more like a quatrefoil
7. 2d Carpenter’s Wheel block
8. Donation blocks in process
I think my design wall looks quite cheerful at the moment and that pleases me. What project is on your design wall? Leave a comment with a link to a picture of your design wall.
Wash fabric AKA The Great Unwashed-I washed more loads in September. I washed all the fabric I bought during the Great College Travel Adventure and have used a number of piece. Now I have a huge pile of the Great Unironed
Make stiff bucket or box for TP in main bath
Anna Maria Horner Multi-tasker tote (gift-due Holiday 2013- sigh. Missed 2014 deadline as well)
Cut out 3 notepad covers for gifts
Finish cutting out Day in the Park backpack variation
Finish cutting out 3rd Petrillo bag
Sew Bon Appetit apron
Fix button on DH’s California shirt – he decided it was fine
Art supplies Sew Together Bag
Art supplies pincushion
Purple Sew Together Bag
Purple pincushion
**More Christmas Pillowcases
**Thanksgiving tablerunner #1
**Thanksgiving tablerunner #2
**Thanksgiving tablerunner #3
**Thanksgiving table mat
**ATCs for CQFA October meeting
To see the 26 Projects Lists, which list quilt WIPS, visit the October 26 Projects update. August’s To Do List has a couple of changes, which is heartening.