Remember the Carpenter’s Wheel?

Carpenter's Wheel Finished
Carpenter’s Wheel Finished

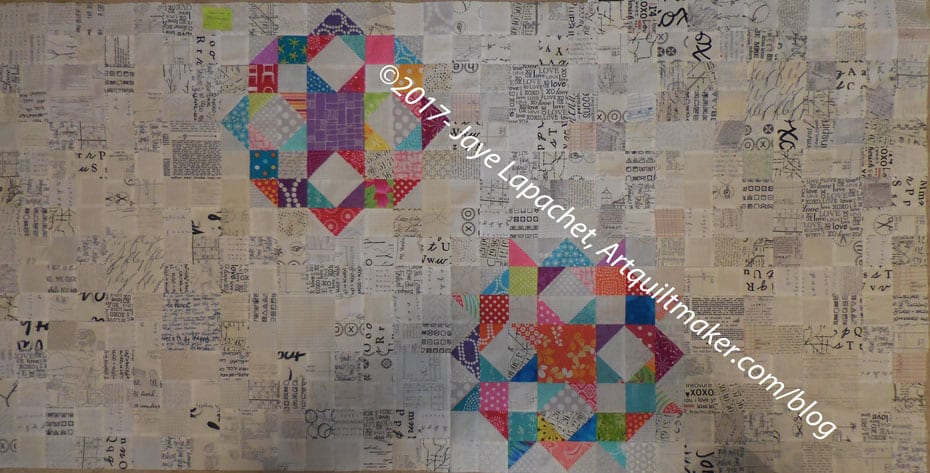
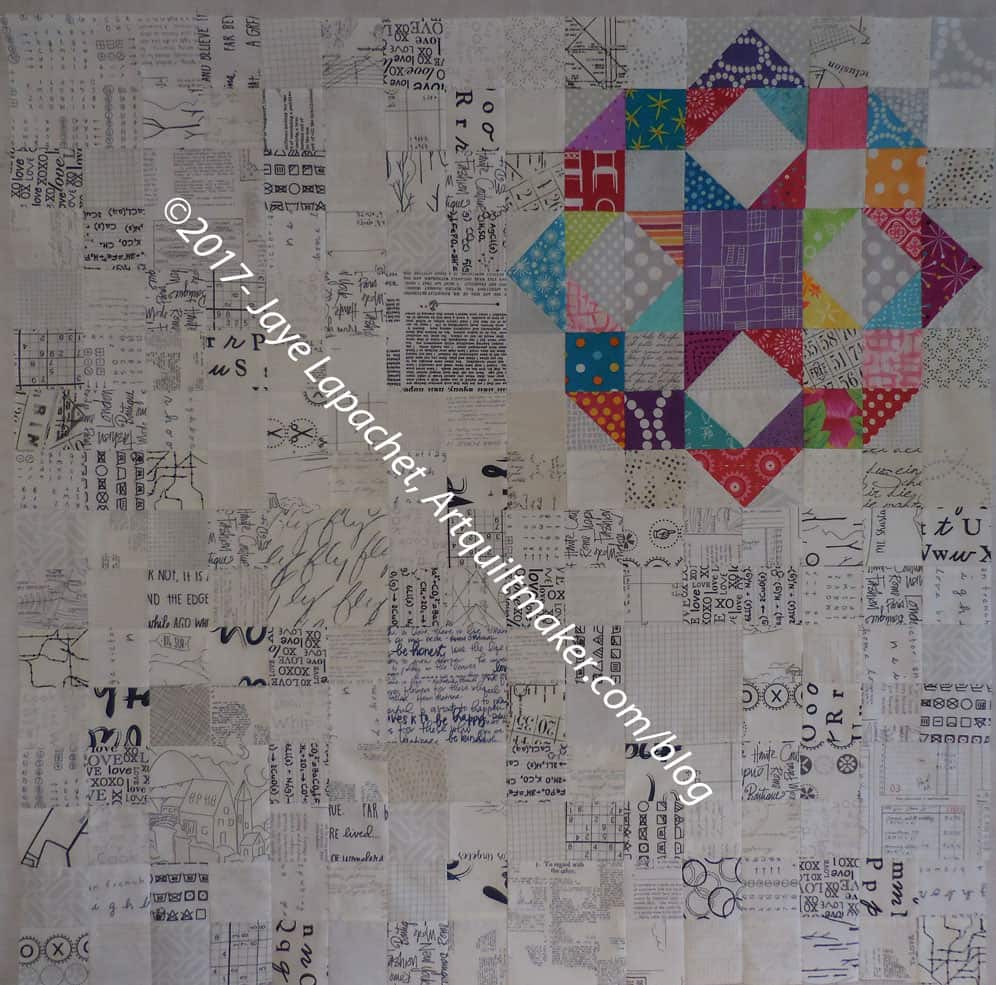
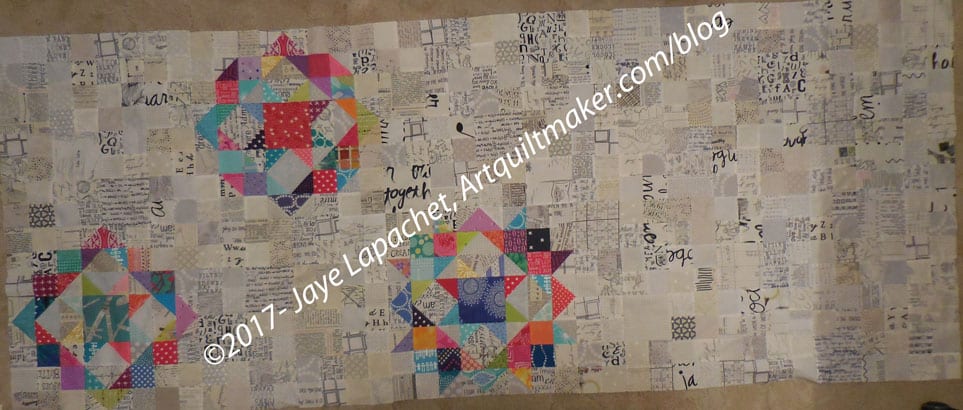
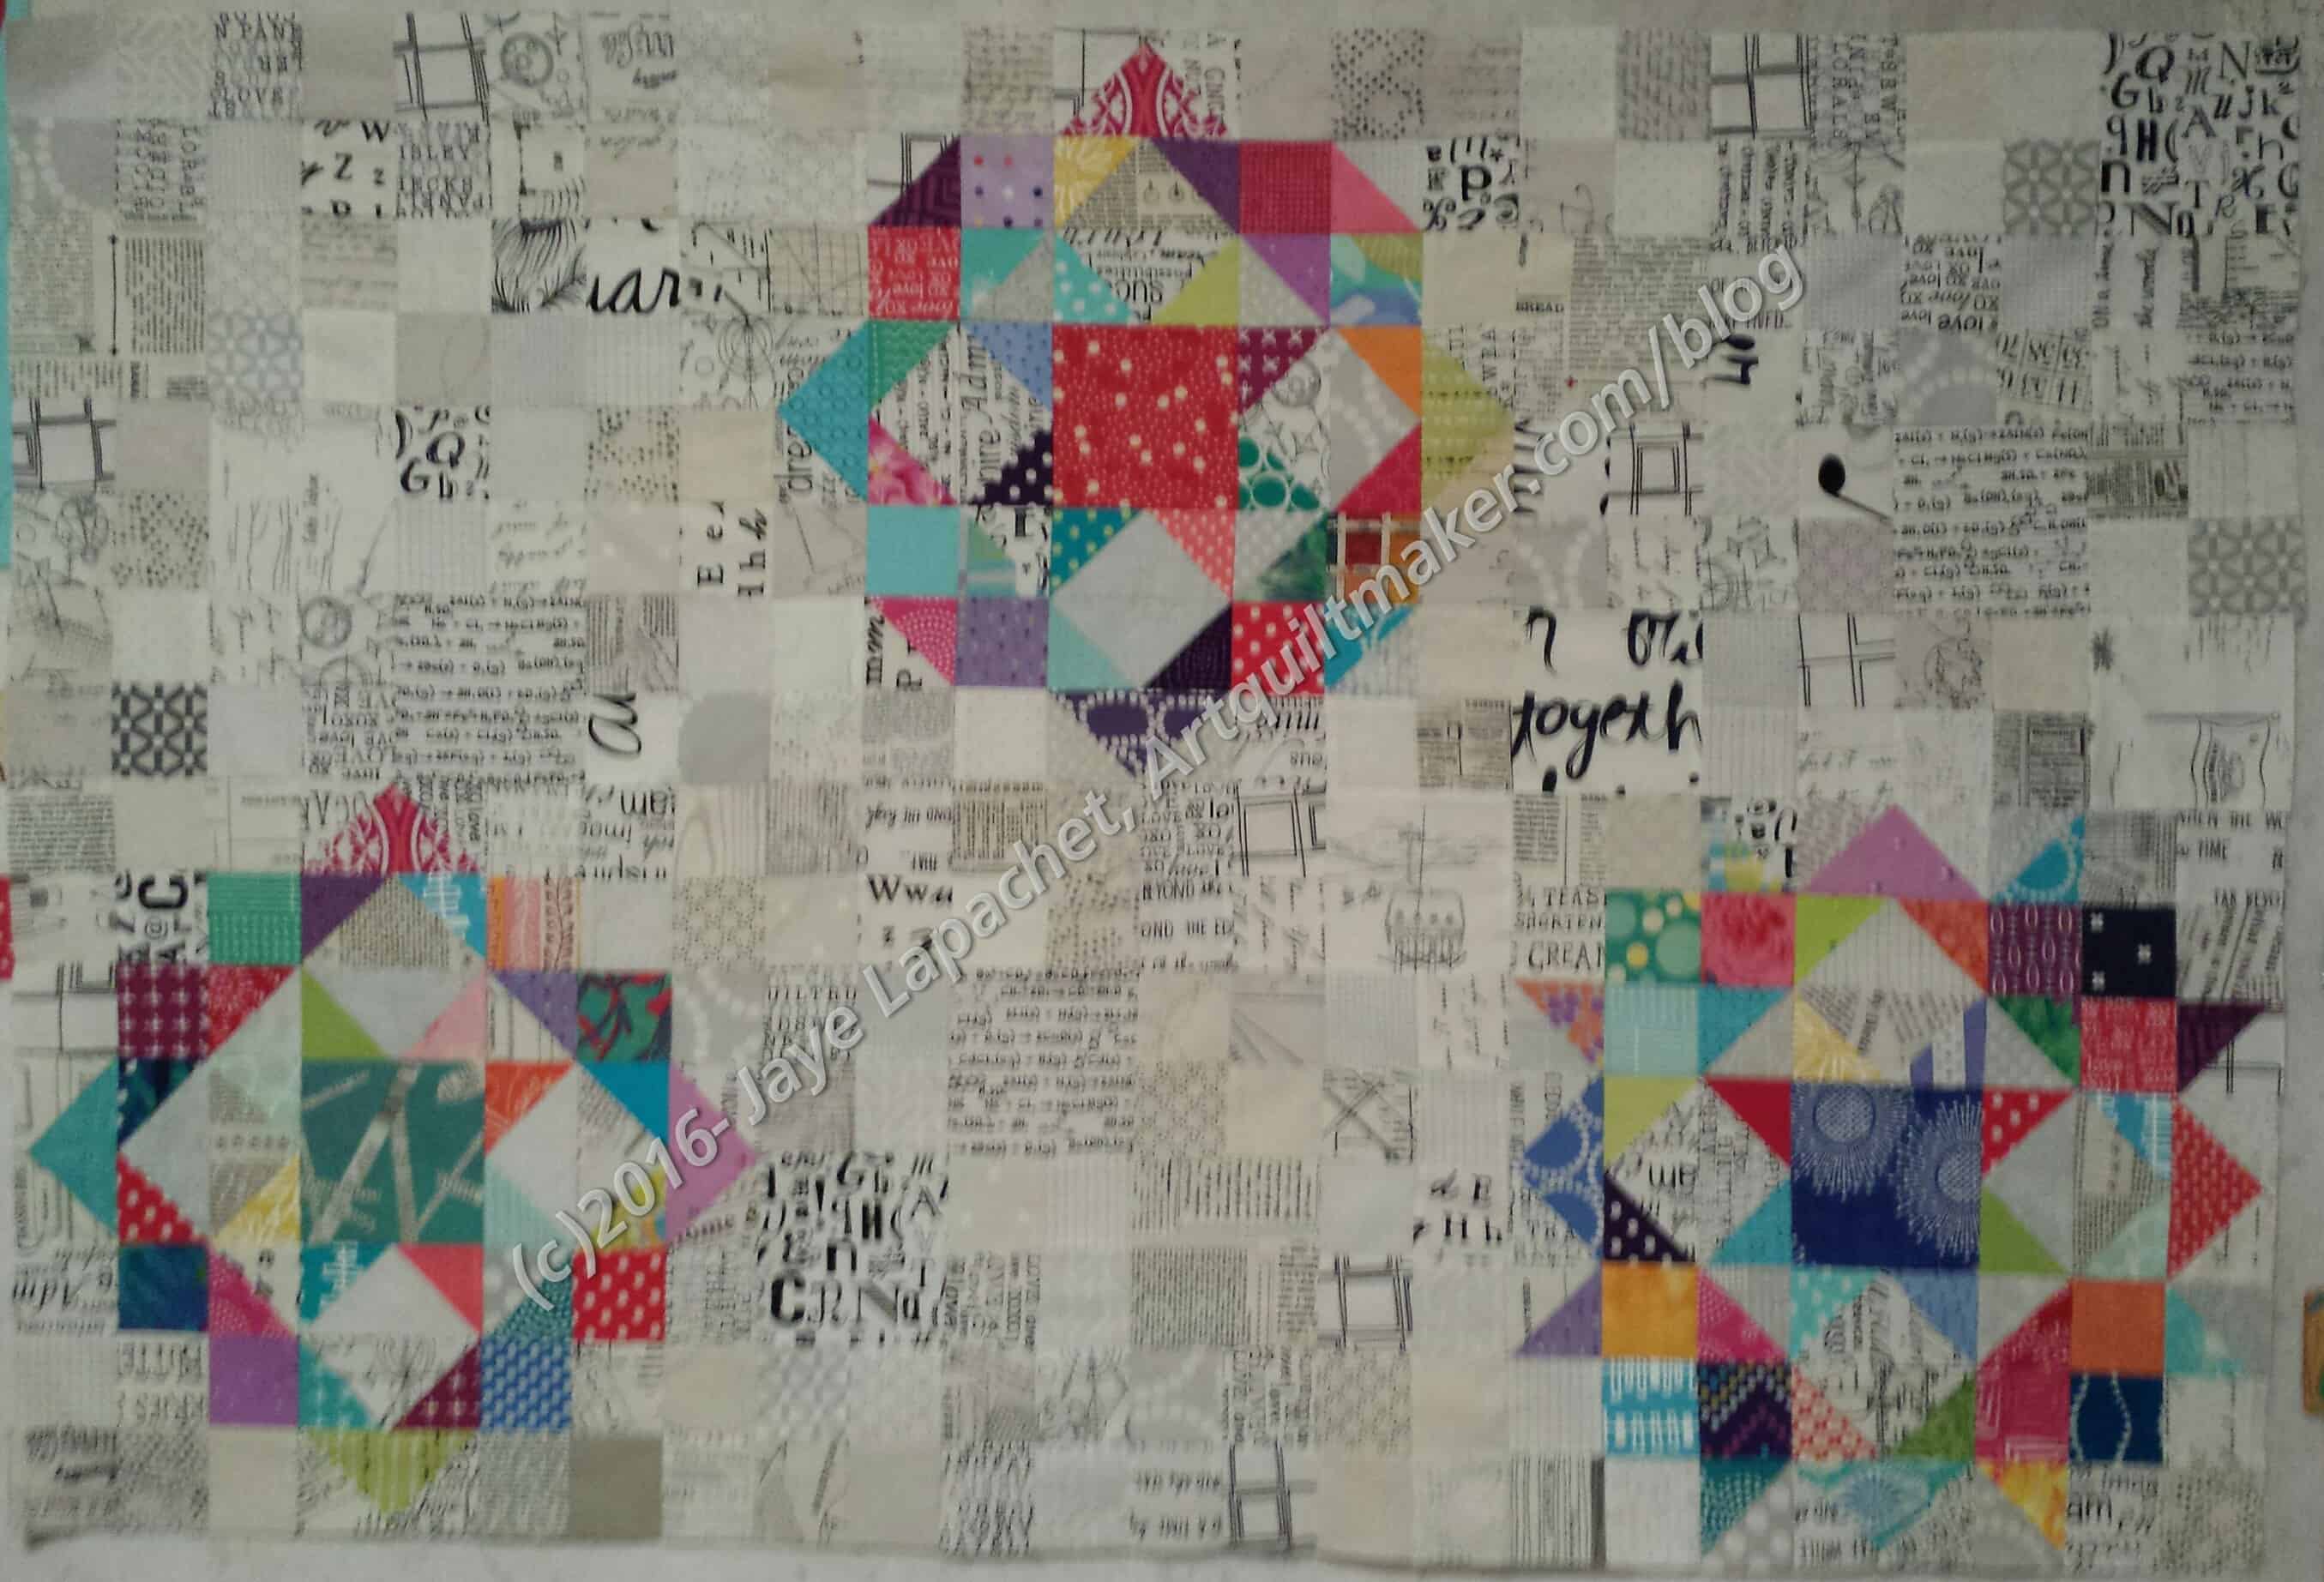
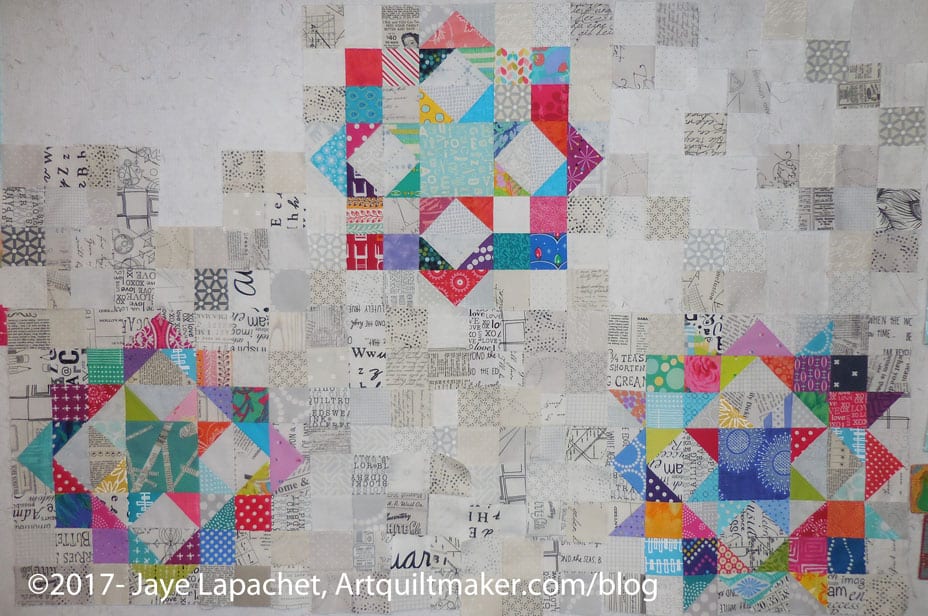
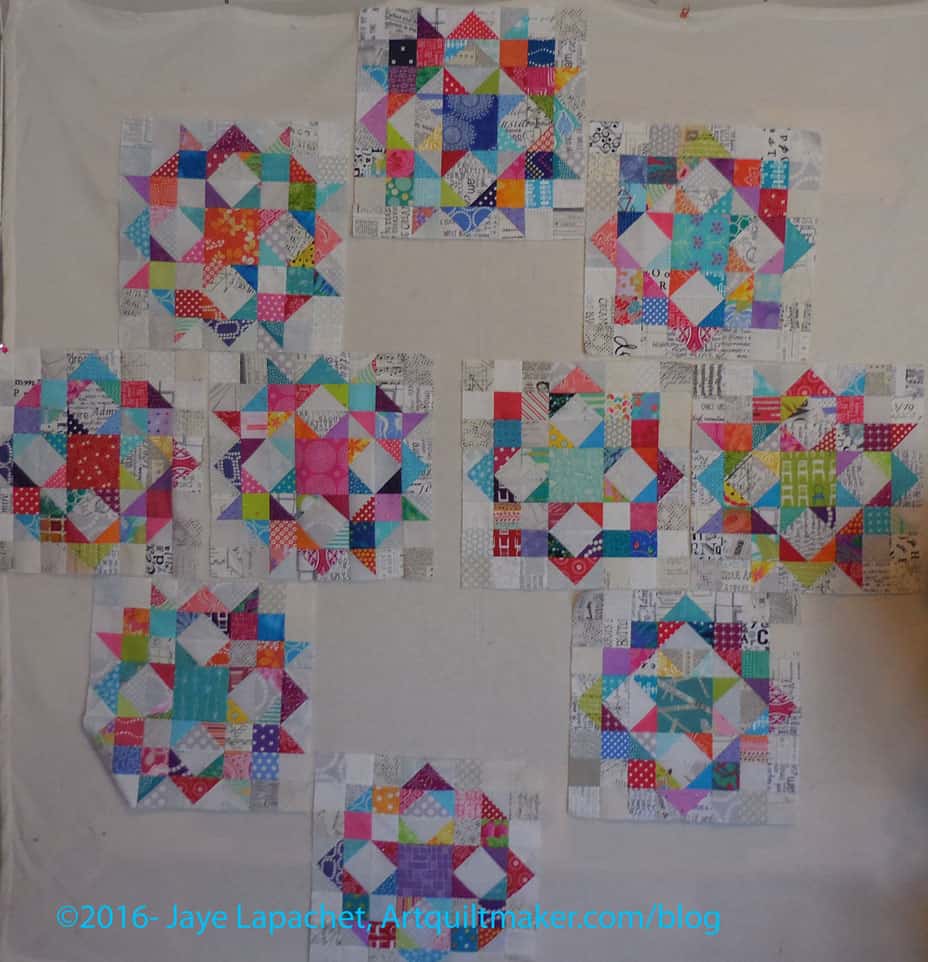
Remember when I went on and on about this quilt? I still love it and am still proud of the design.

Recently, I saw that Barbara Brackman wrote a post about the Carpenter’s Wheel block.

She was asked to write it by the Accuquilt Go** people to celebrate their new Carpenter’s Wheel die. She references a video about the pattern in her post.

Barbara shows a lot of different quilts, tells you how and where to find the patterns in Electric Quilt and Blockbase and discusses the pattern in general. It is a really interesting post.

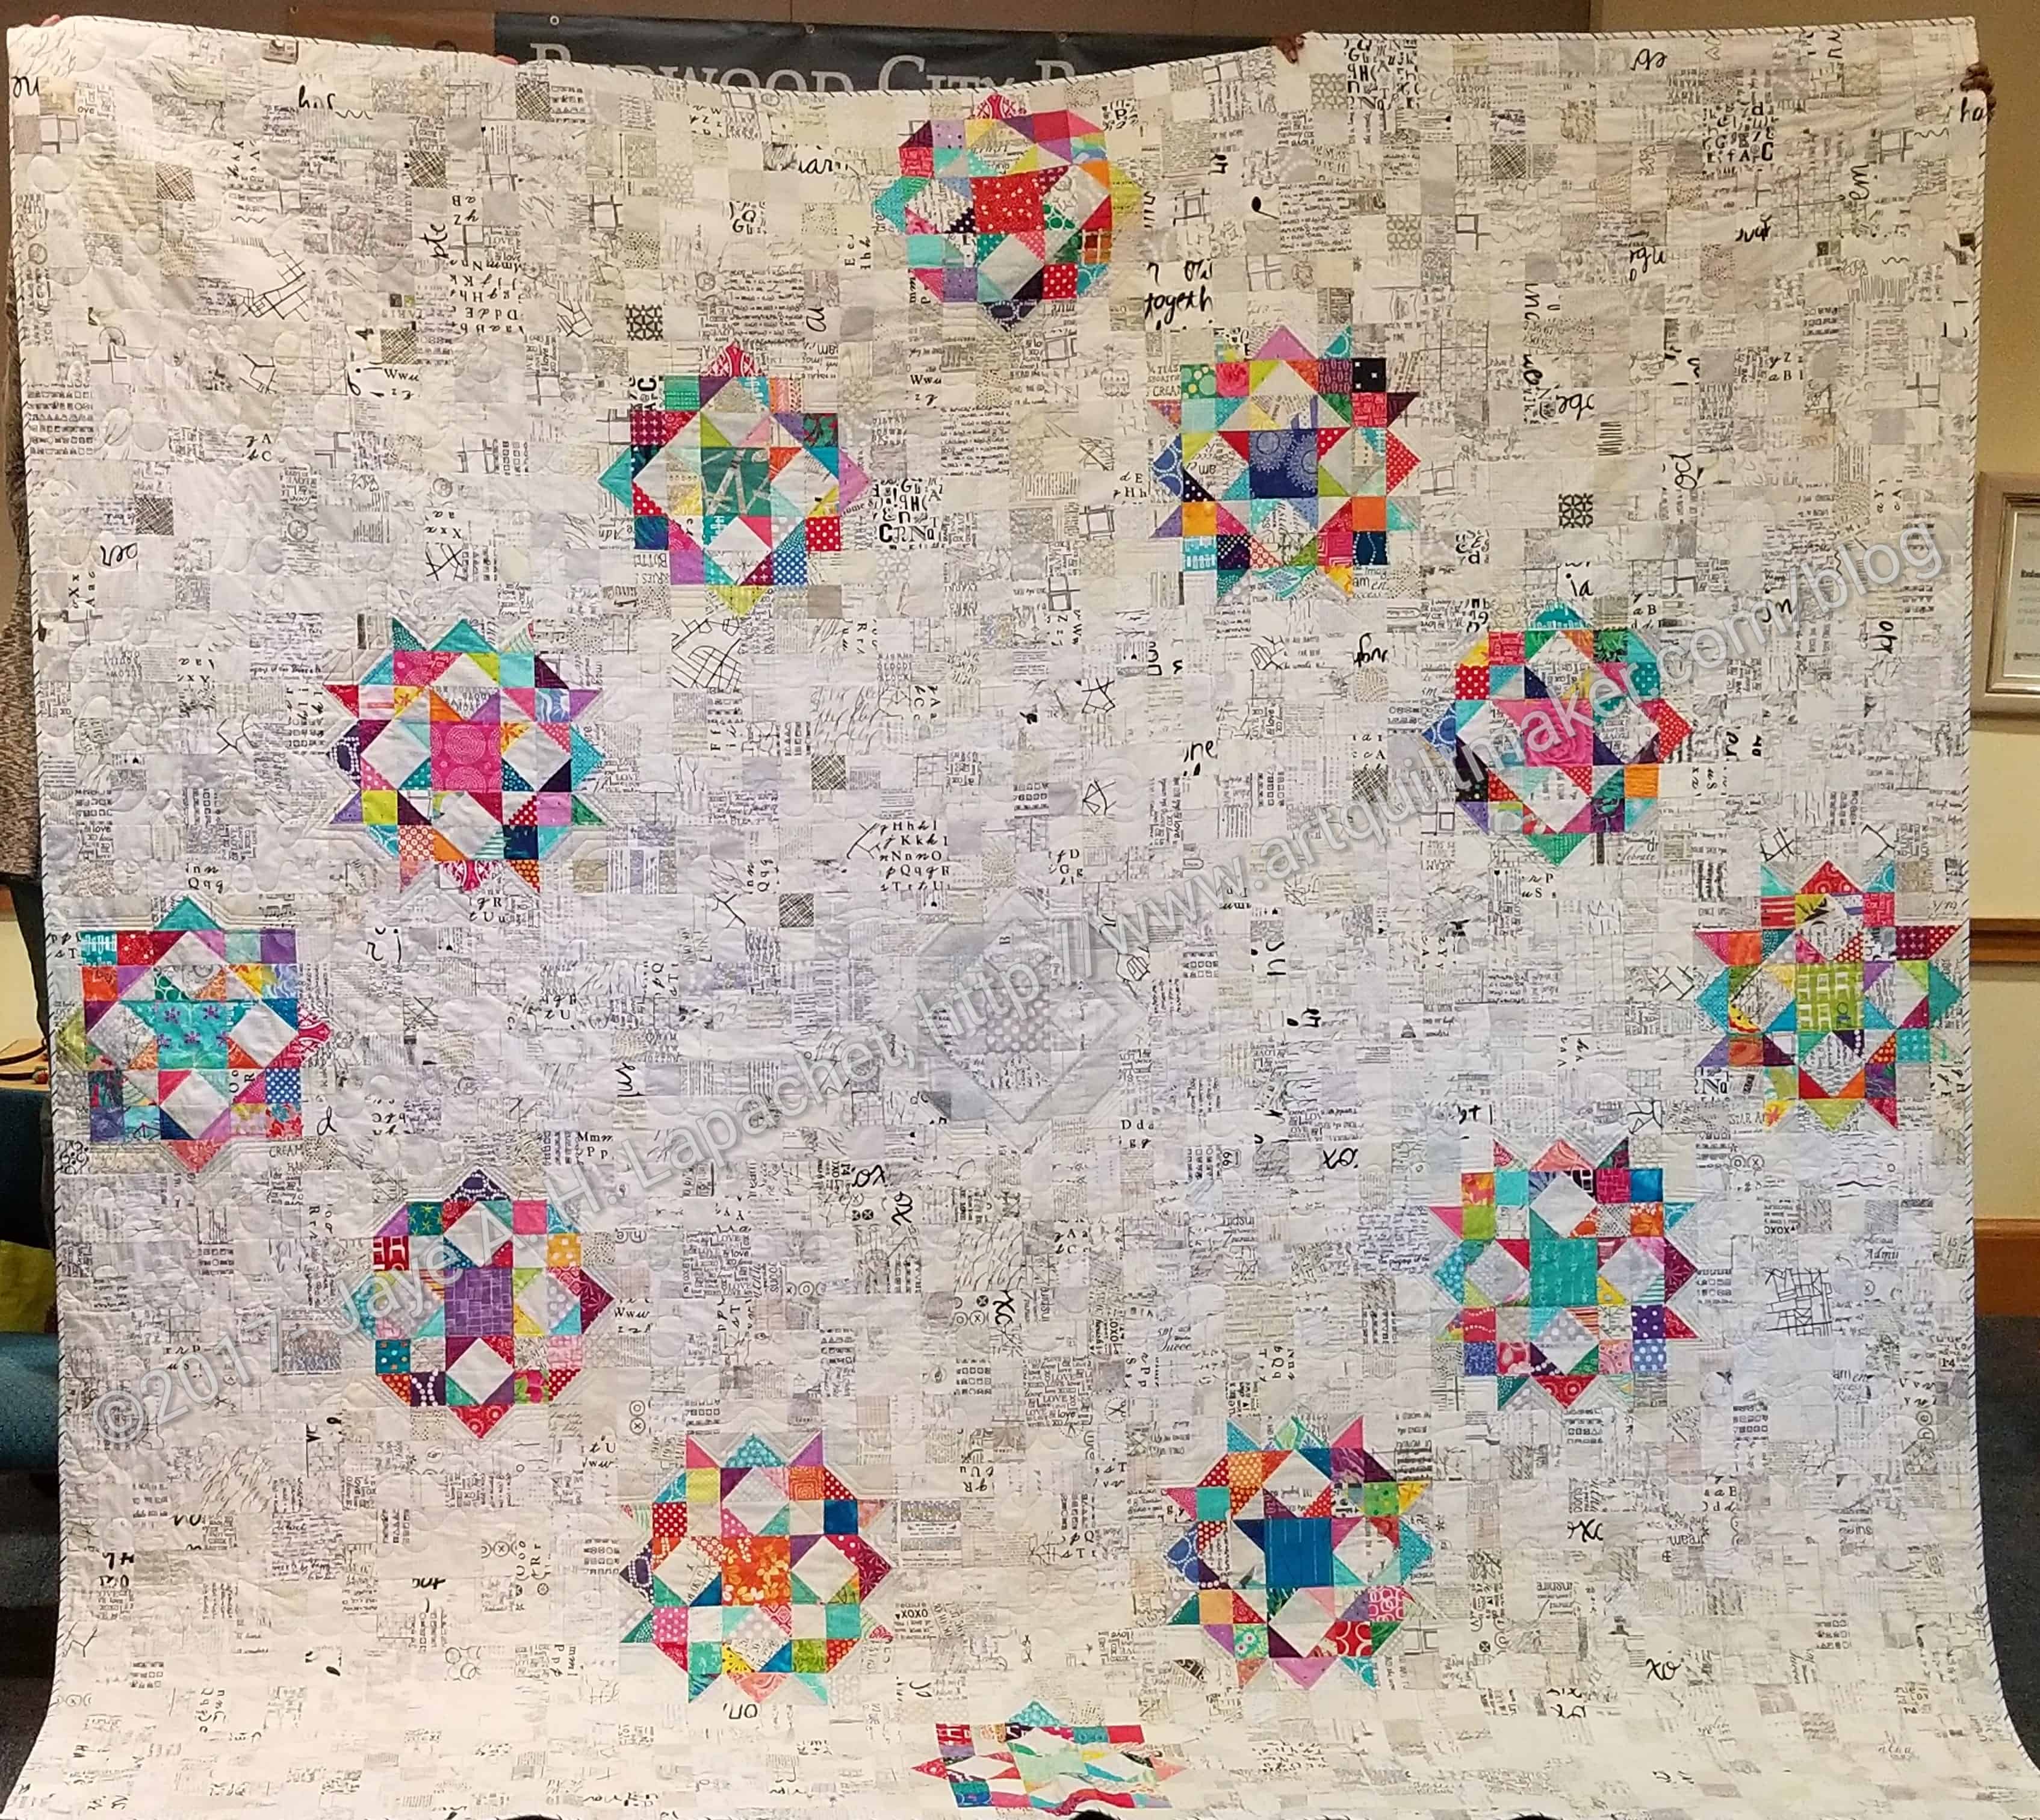
I am not sure I would have used  this die for my quilt. I didn’t know what I was doing in terms of fabric or layout when I started. Still, I do think the die is a good idea if you want to make even one of these quilts. The pattern takes a lot of cutting.


My Carpenter’s Wheel quilt is for sale, so let me know if you want to buy it.


**I use affiliate links and may be paid for your purchase of an item when you click on an item link in my post. There is no additional cost to you for clicking or purchasing items I recommend. I appreciate your clicks and purchases as it helps support this blog.

Finished: Carpenter’s Wheel

Carpenter's Wheel Finished
Carpenter’s Wheel Finished

Yep. The monster is done.

I spent most of the past two weeknight evenings sewing on the binding and the sleeve. I showed it at BAMaQG on Saturday and now I am waiting to enter it into a show.

I had help holding it up. Two members stood up on a table so someone could take a photo with my phone. I thought this might be my only chance.

Did I mention that the thing is a monster? I know what possessed me, but I am still wondering what possesses me to make such huge quilts.

Carpenter’s Wheel Top Finished

Carpenter's Wheel top finished
Carpenter’s Wheel top finished

A few weeks have gone by since I finished this top. I am not sure why I didn’t post it, but I am now.

The piece, as I have said a million times is HUGE. This means that it is hard to photograph. It further means that you get a glimpse of some of the furniture that needs to be recovered in the photo. 😉

I am pleased with the way it came out. The back is done (no photo, sorry), the binding is done and I am working on a sleeve.

I made The Peacock sleeve this week and thought it would be great to just make the Carpenter’s Wheel sleeve as well. It would be ready for hand sewing and I wouldn’t have to stop what I was doing to make a sleeve. I haven’t completed it yet, though it is in process.

Finito…Mostly

I am REALLY, really, Really excited that I finished the Carpenter’s Wheel top on Friday night. DH was preparing for a Native Sons event and I sewed after dinner until 10. As I have said before, after dinner is not my best time, but I have been getting good sleep lately (no coughing), so I was up for the challenge.

Carpenter's Wheel top finished
Carpenter’s Wheel top finished

I had about half a block to finish sewing.  Then I had to sew it together and sew that block to the last row. Once I completed that section, I had to sew that section to the right hand corner section to make one giant bottom row. After that it was just one long seam to join the two halves of the quilt together.

I did it and stay stitched around the whole quilt. As I knew it would be, the quilt is a giantess.

On Saturday, I sent DH off to a Native Sons event and laid out the top in the living room and measured it. Laid out is kind of misnomer, because the thing is too large for my floor.

I also made the label, but had to go and get ink for the printer, so I did that, then came home and started sewing the back. I promised myself I would stick to LARGE pieces and stay away from fiddly sewing. I mostly did that. The back is mostly 3 large pieces of fabrics with a few fill in smaller pieces. Nothing crazy and I didn’t finish it feeling horrible. I felt find and switched to another project right after I finished.

Still on the to do list:

  • Prepare binding

Right Hand Corner

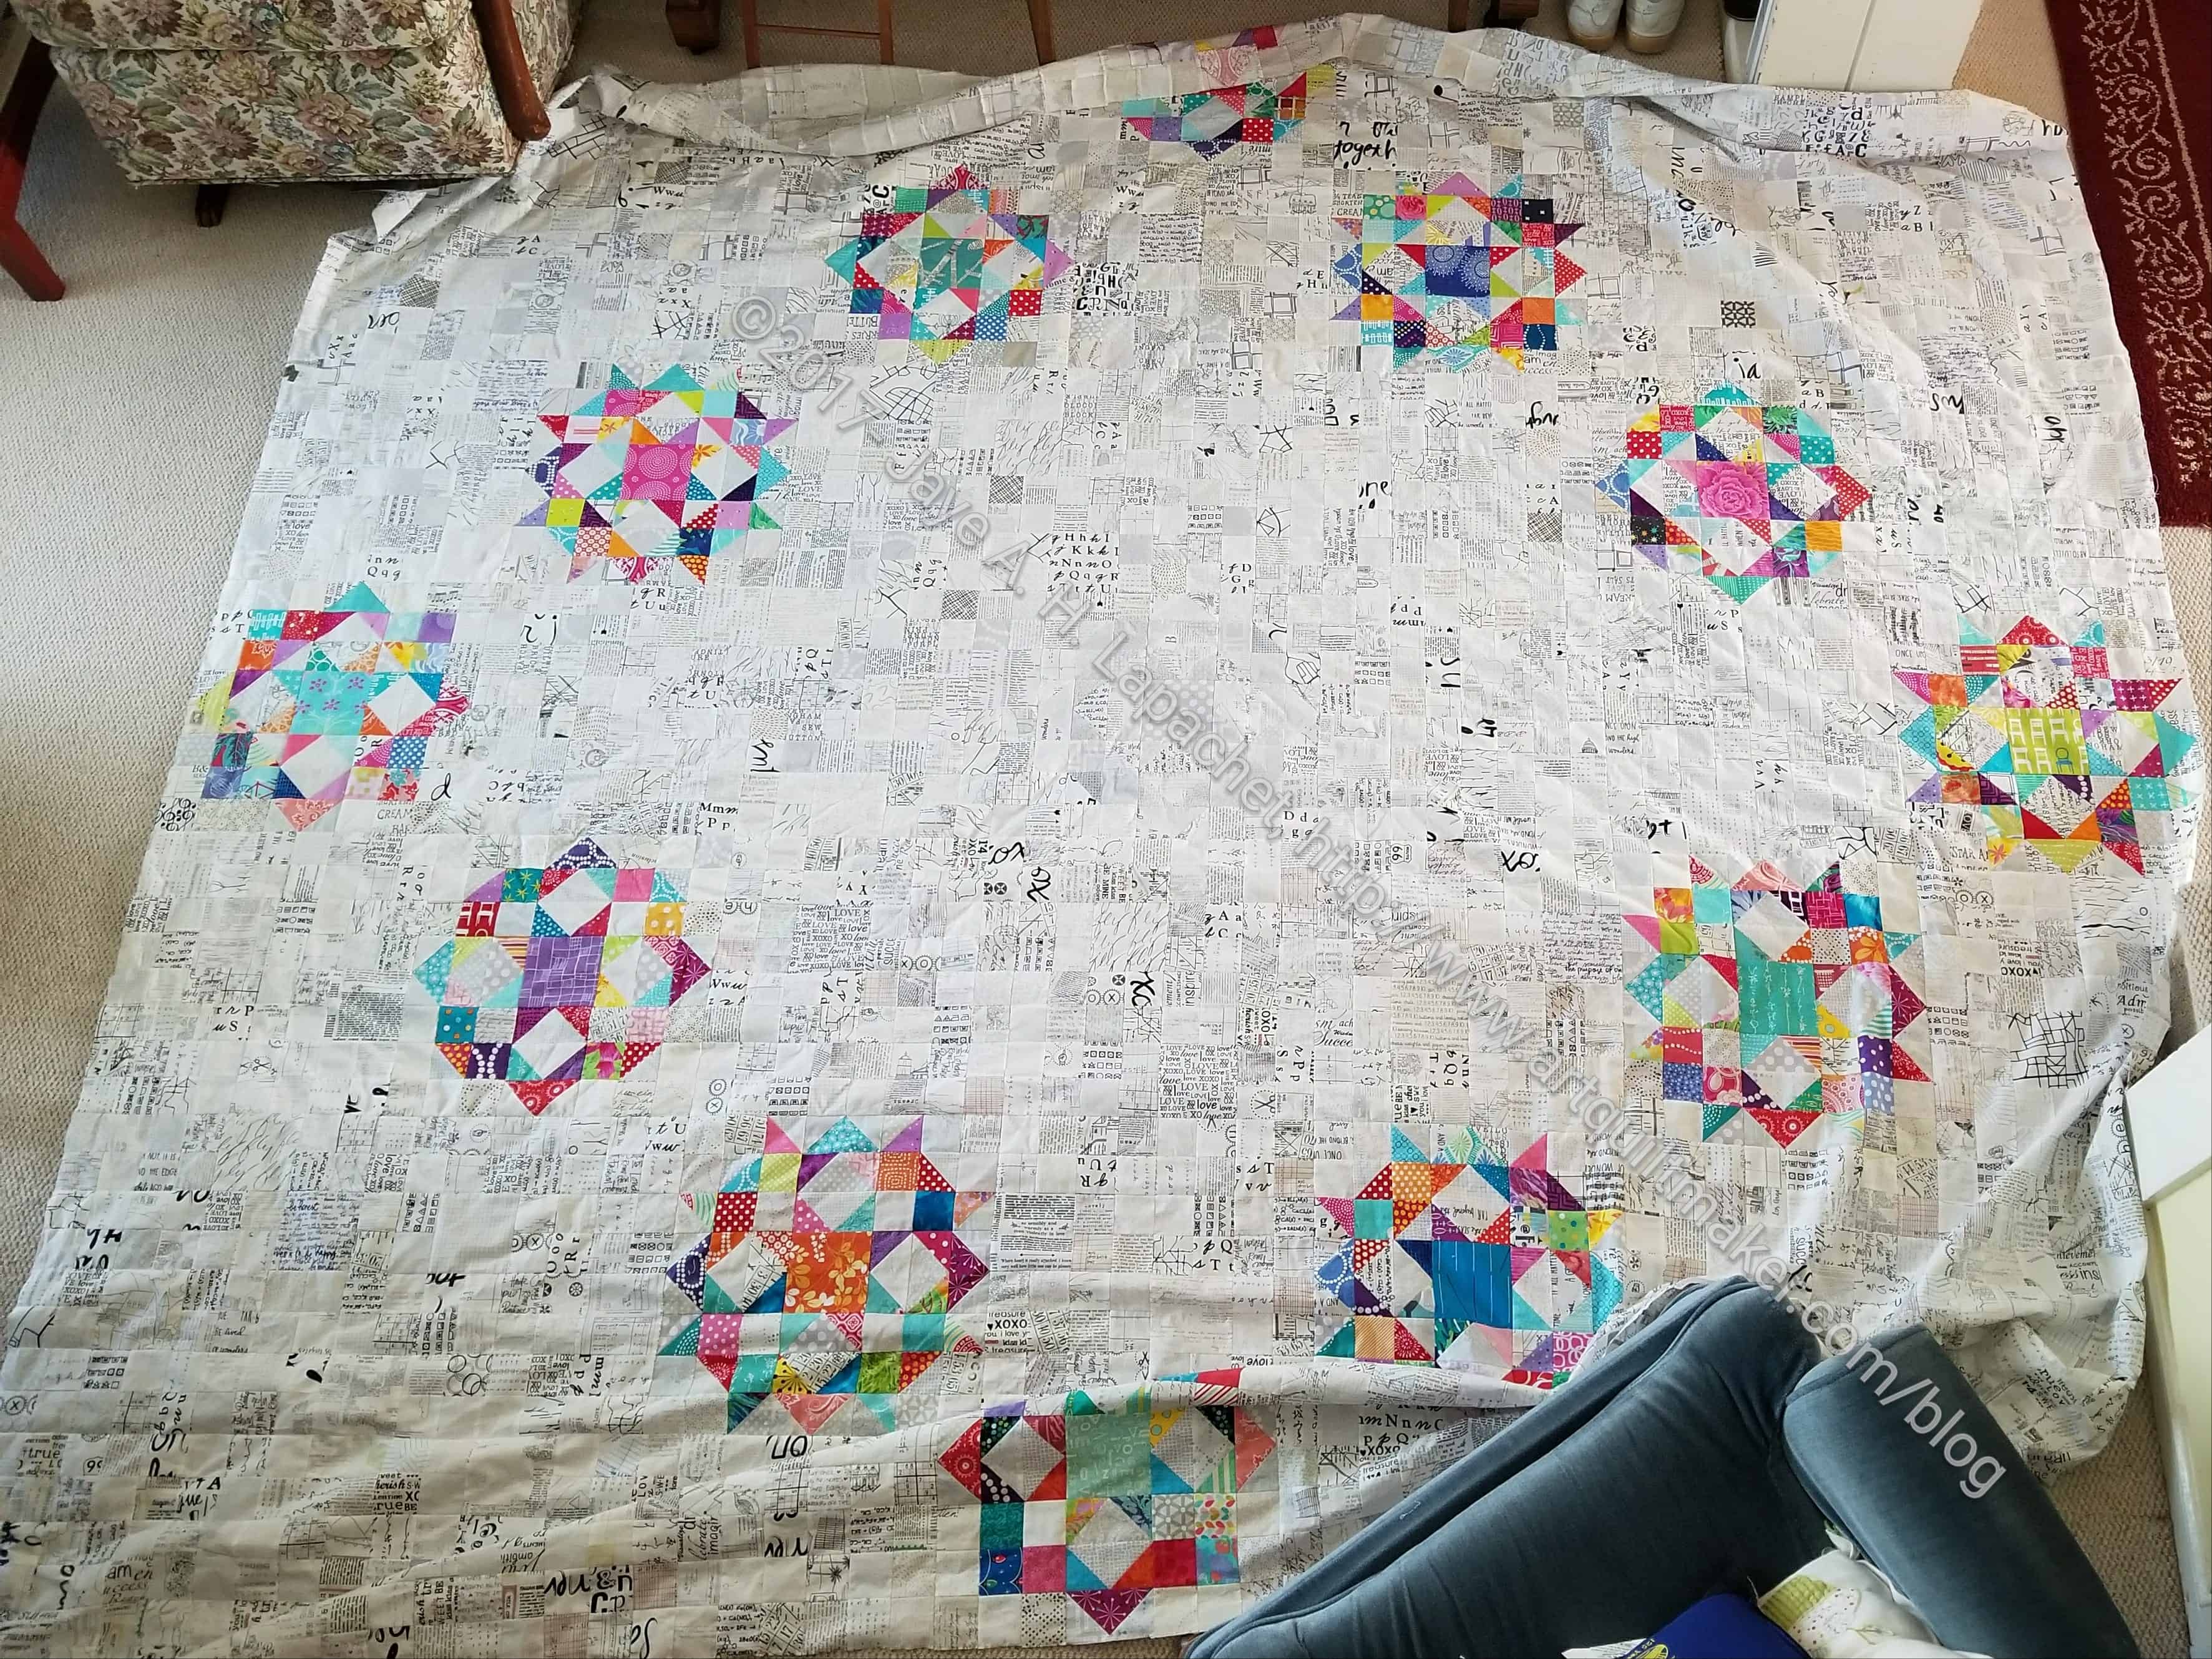
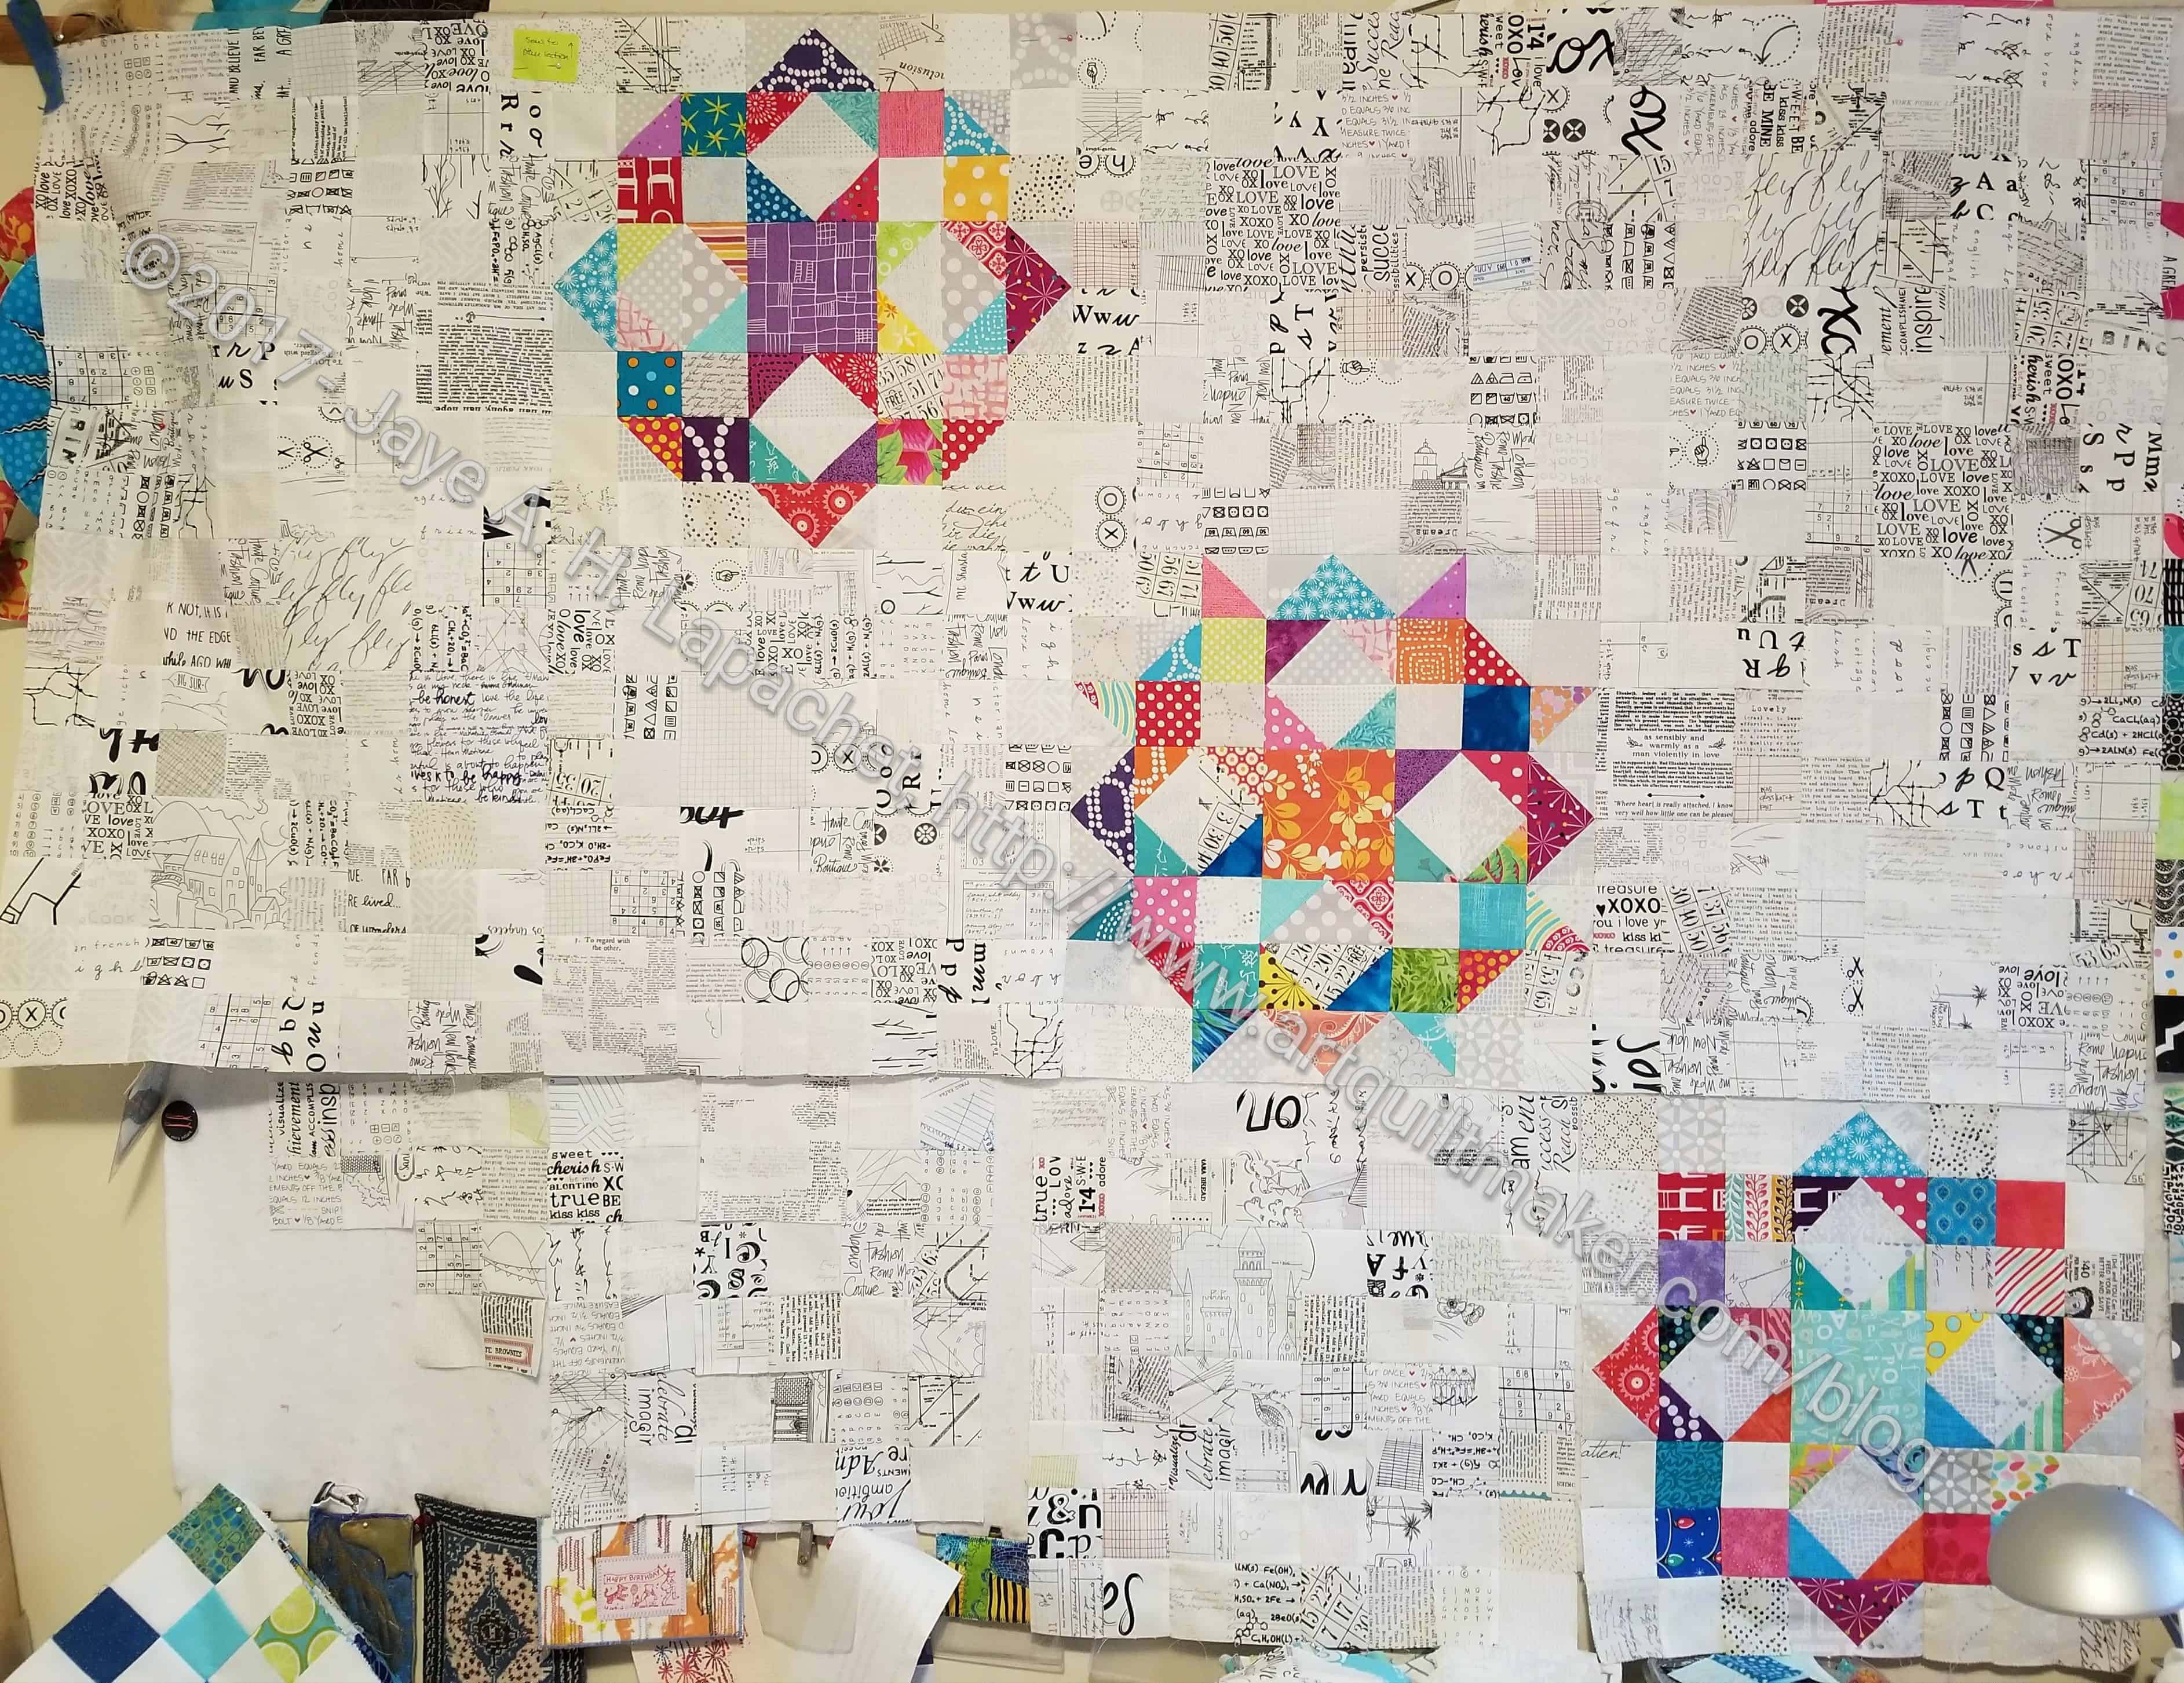
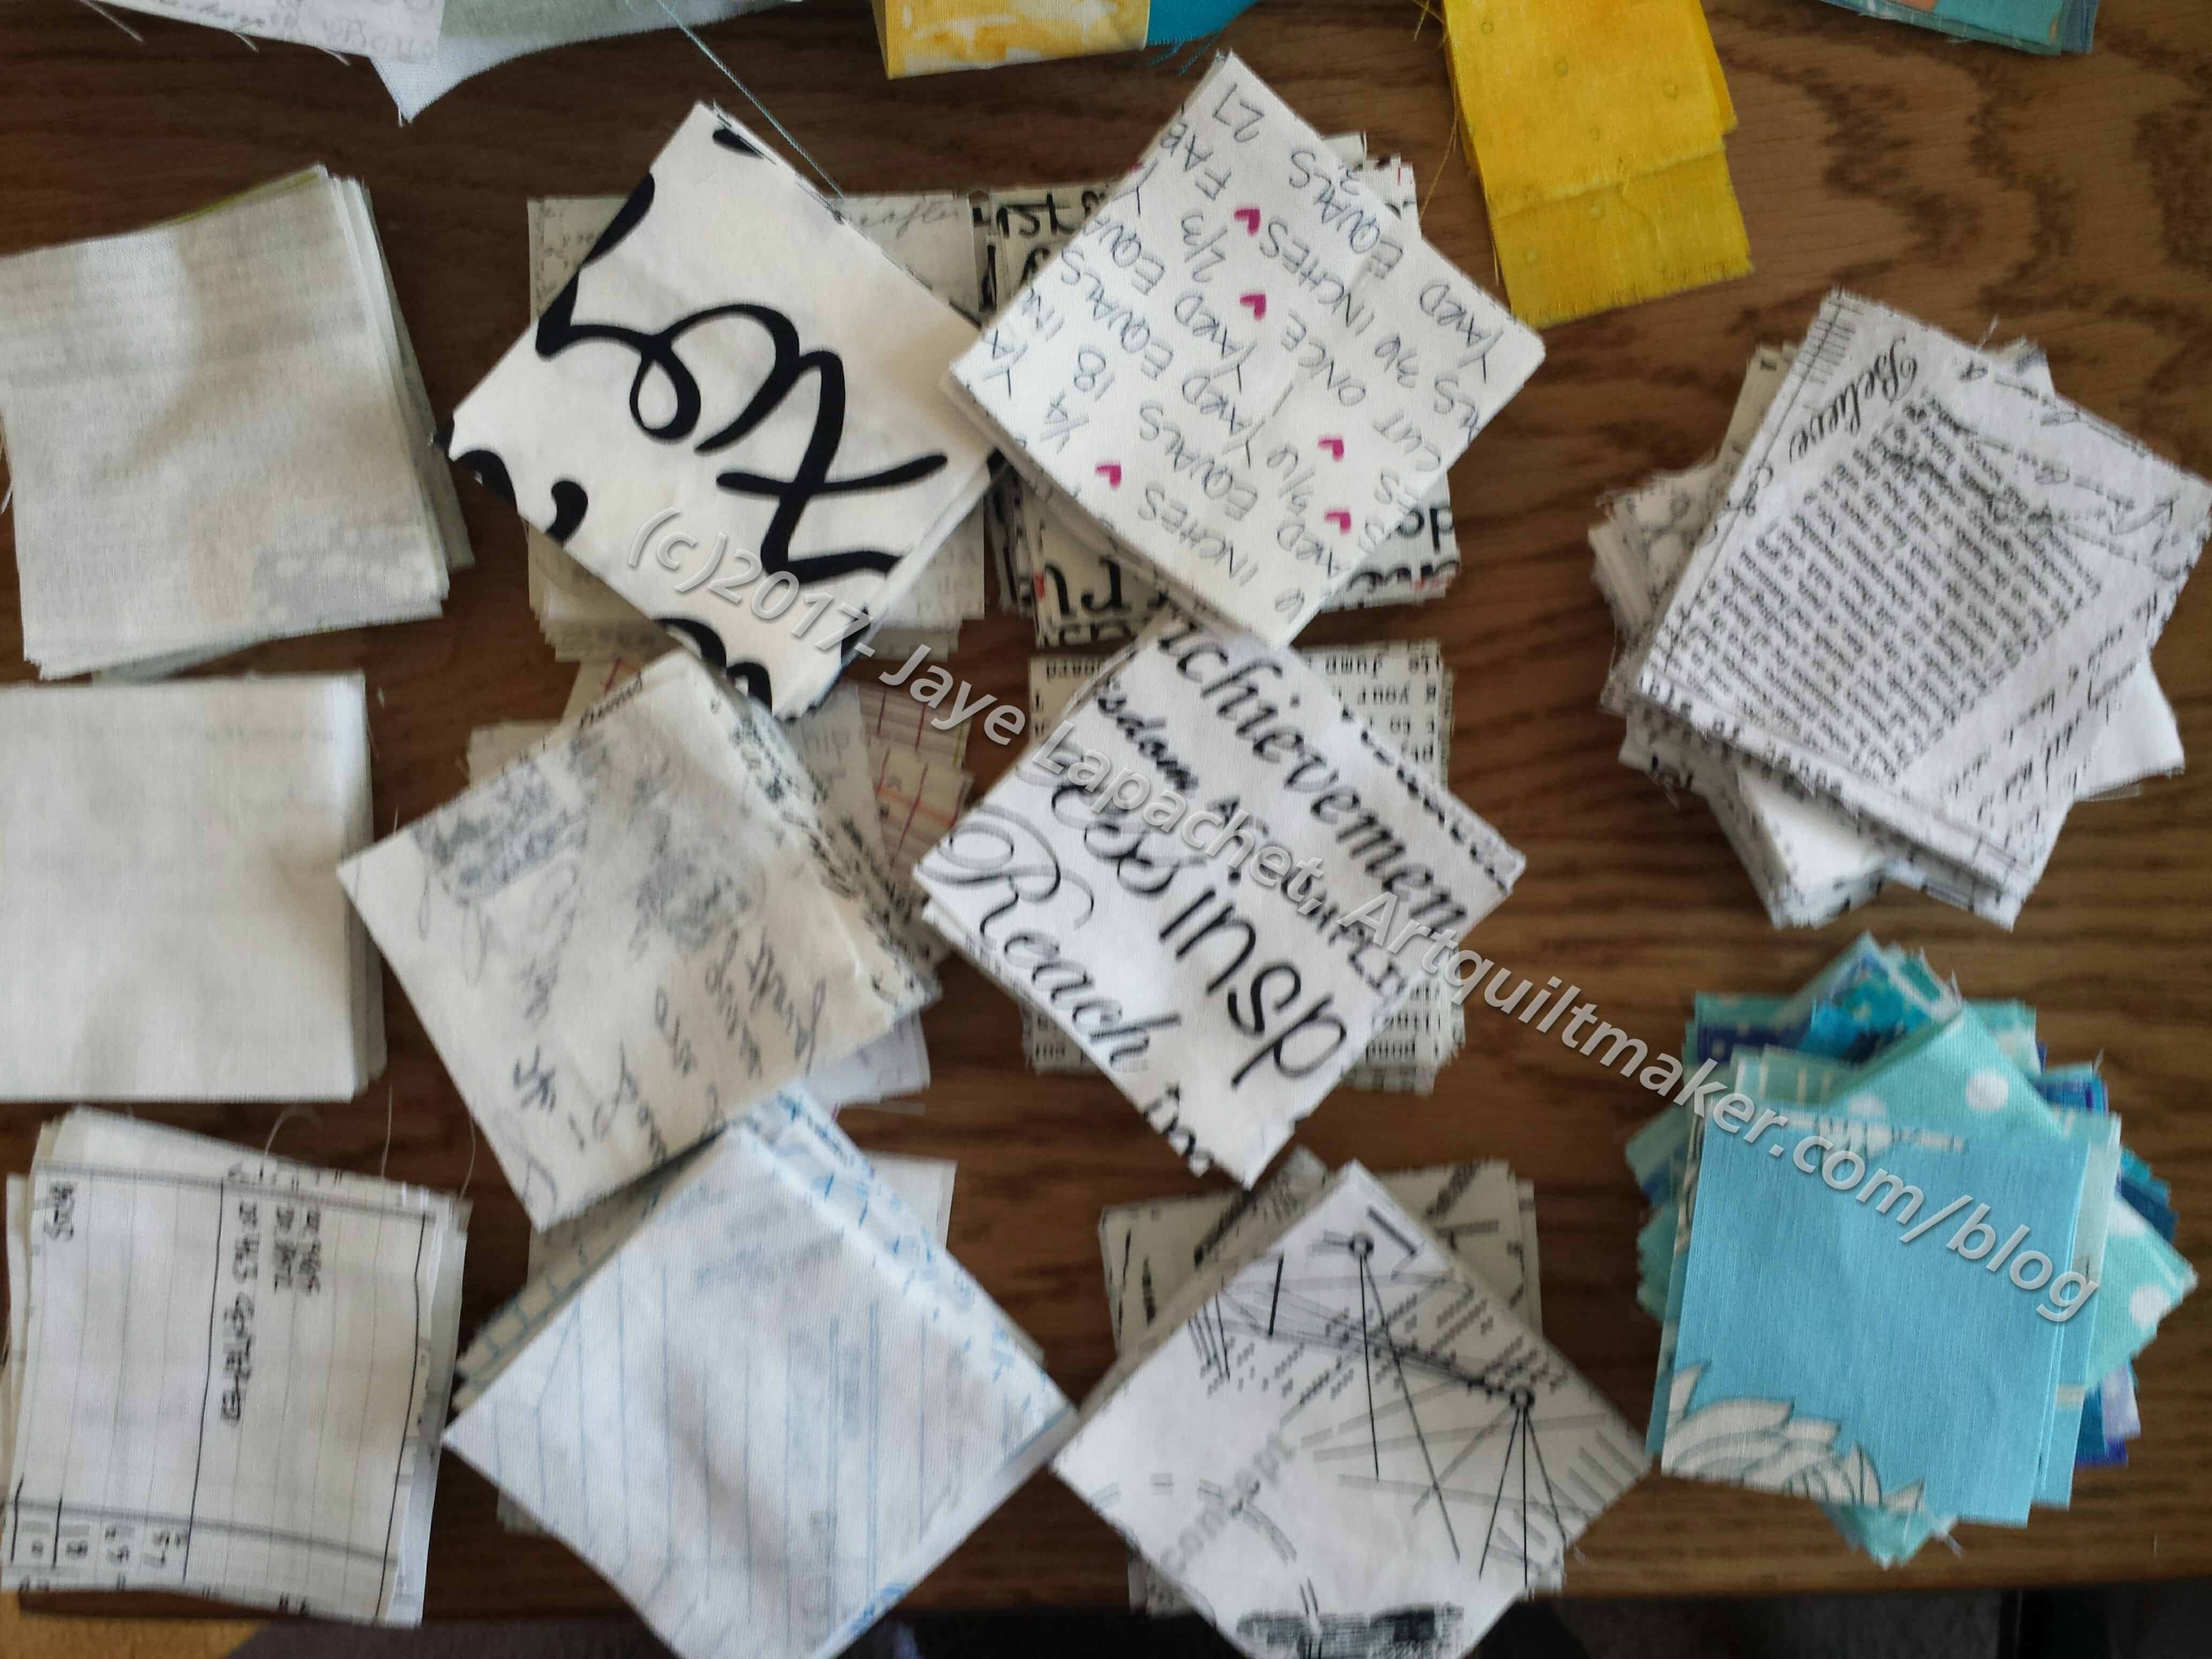
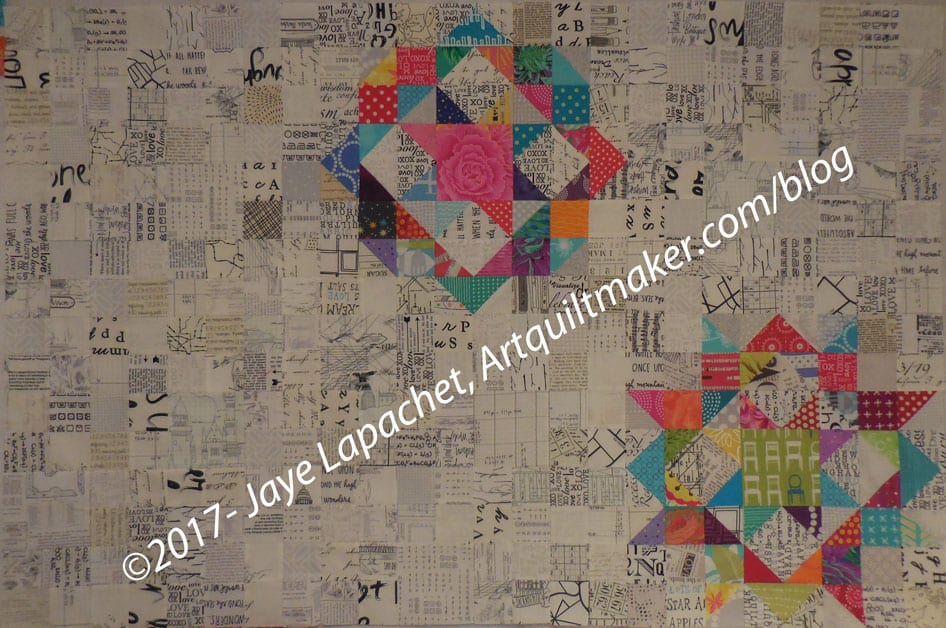
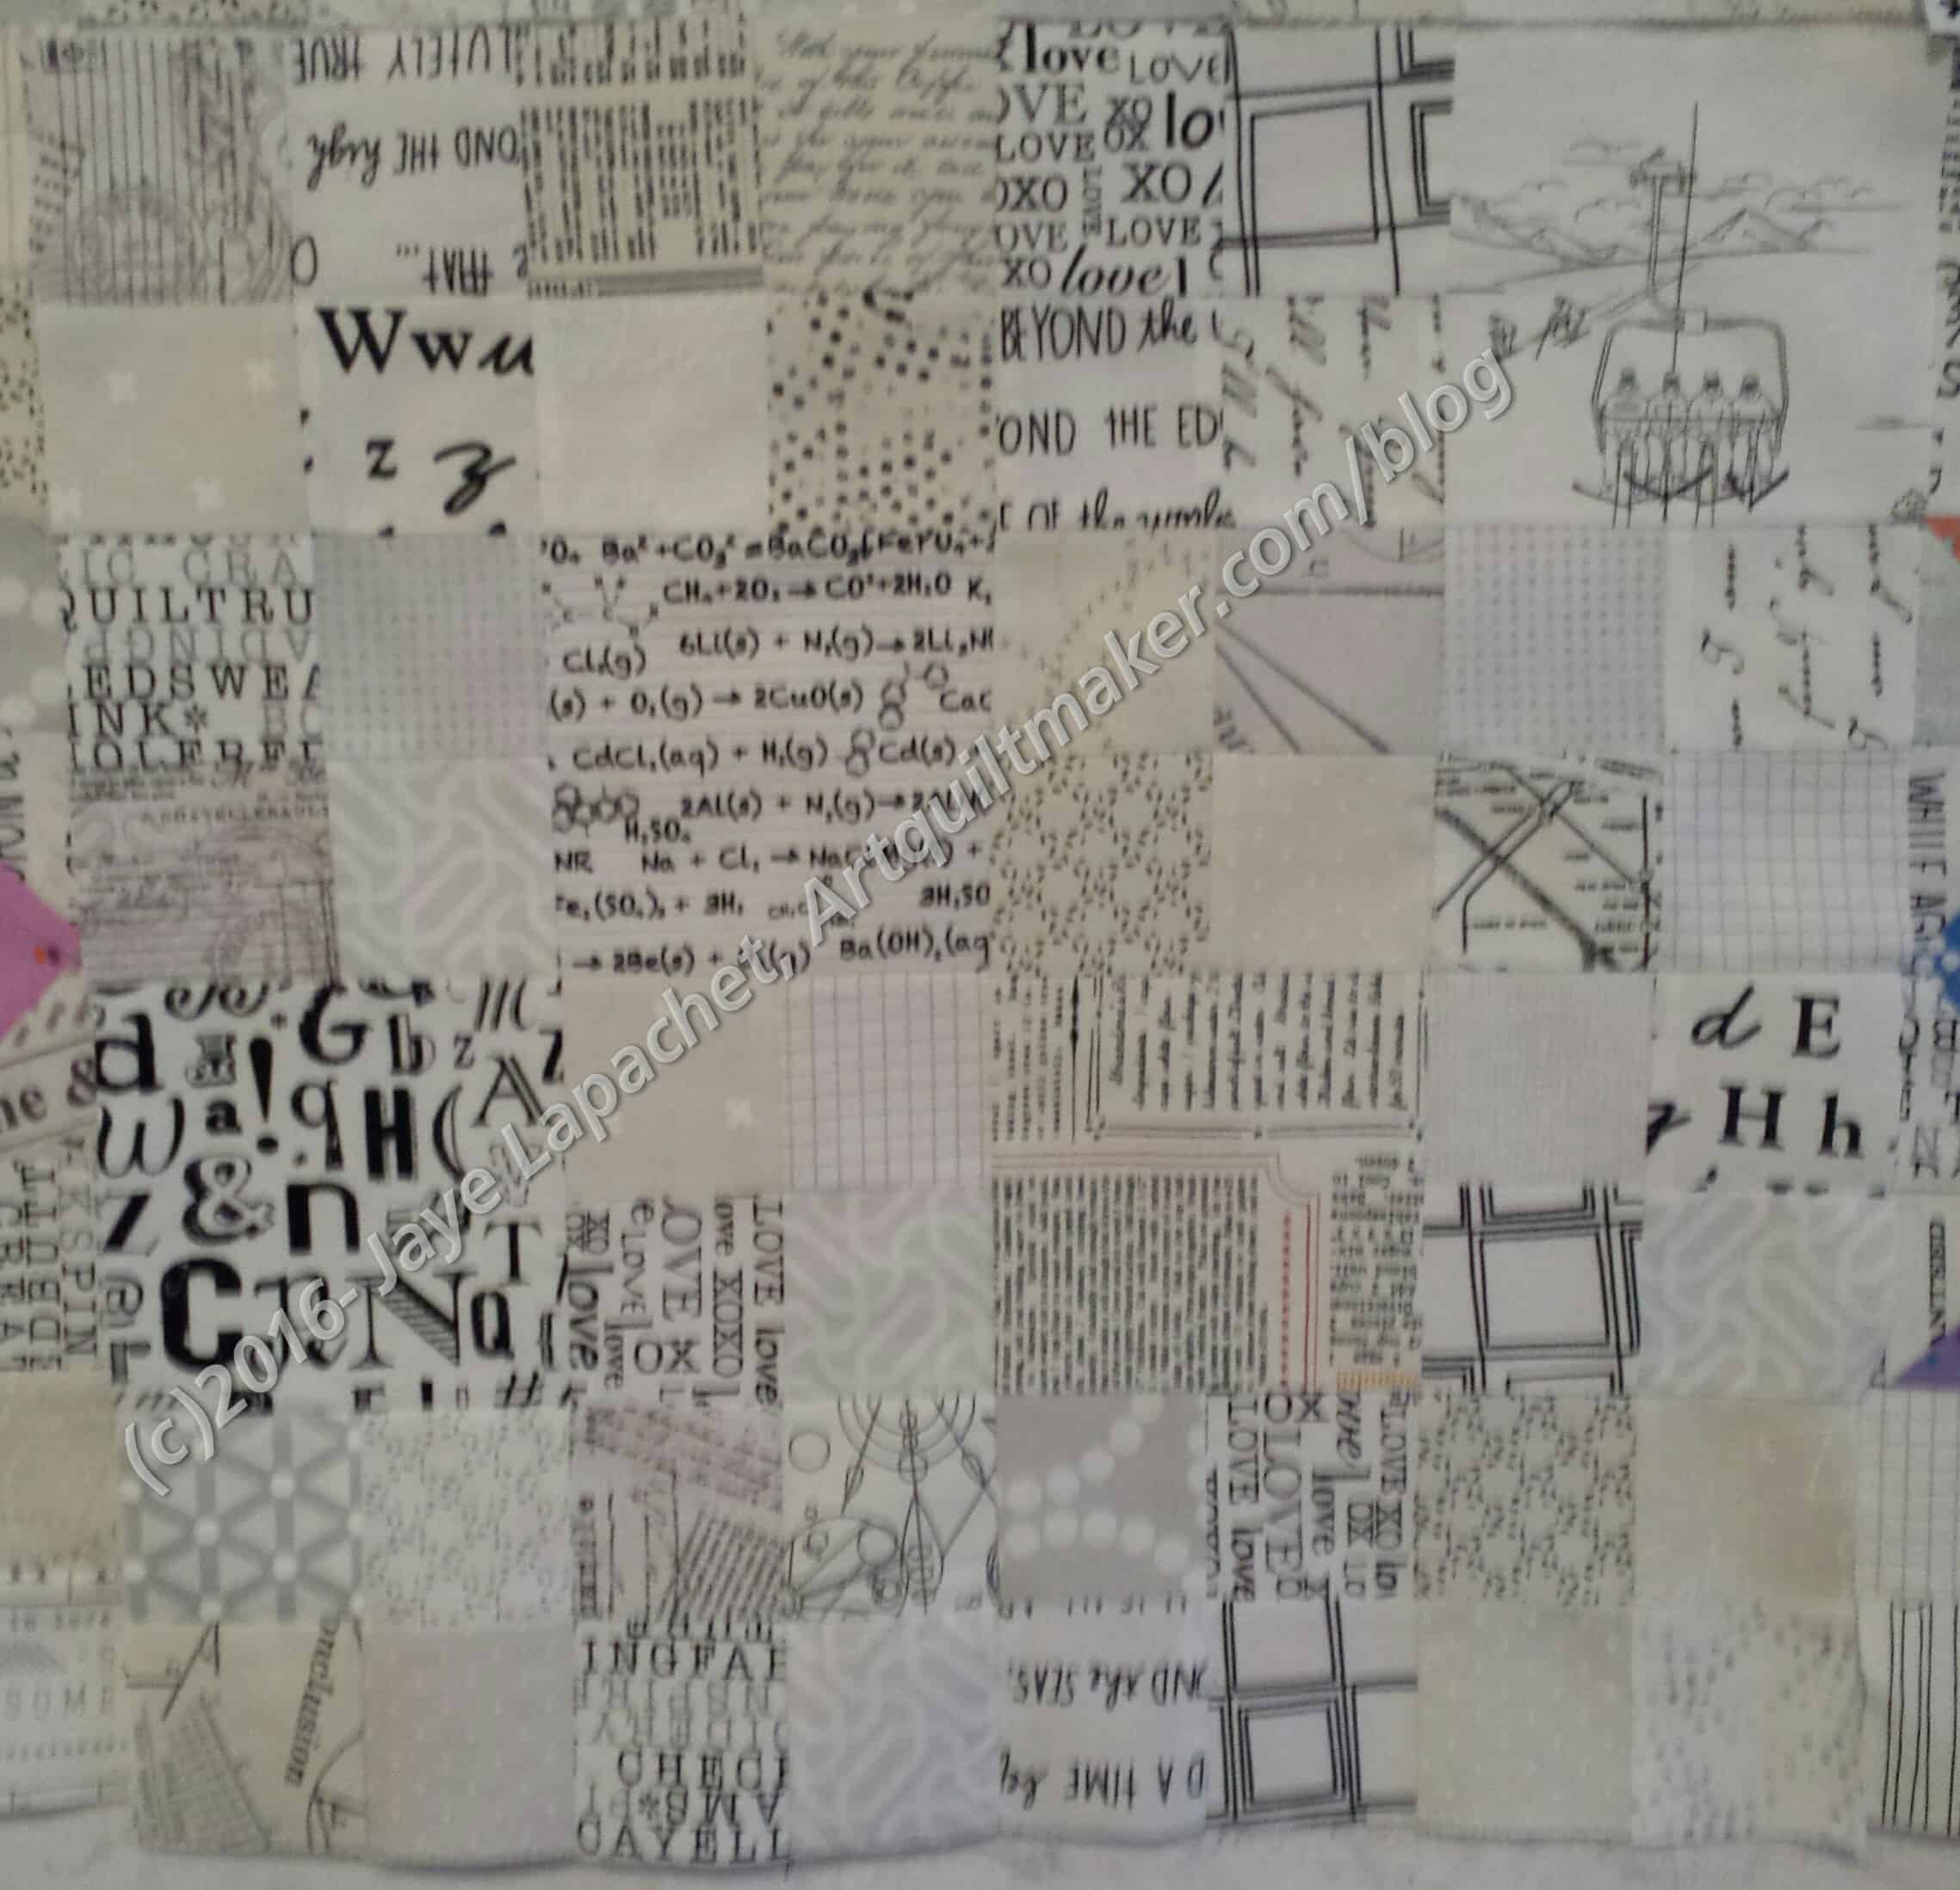
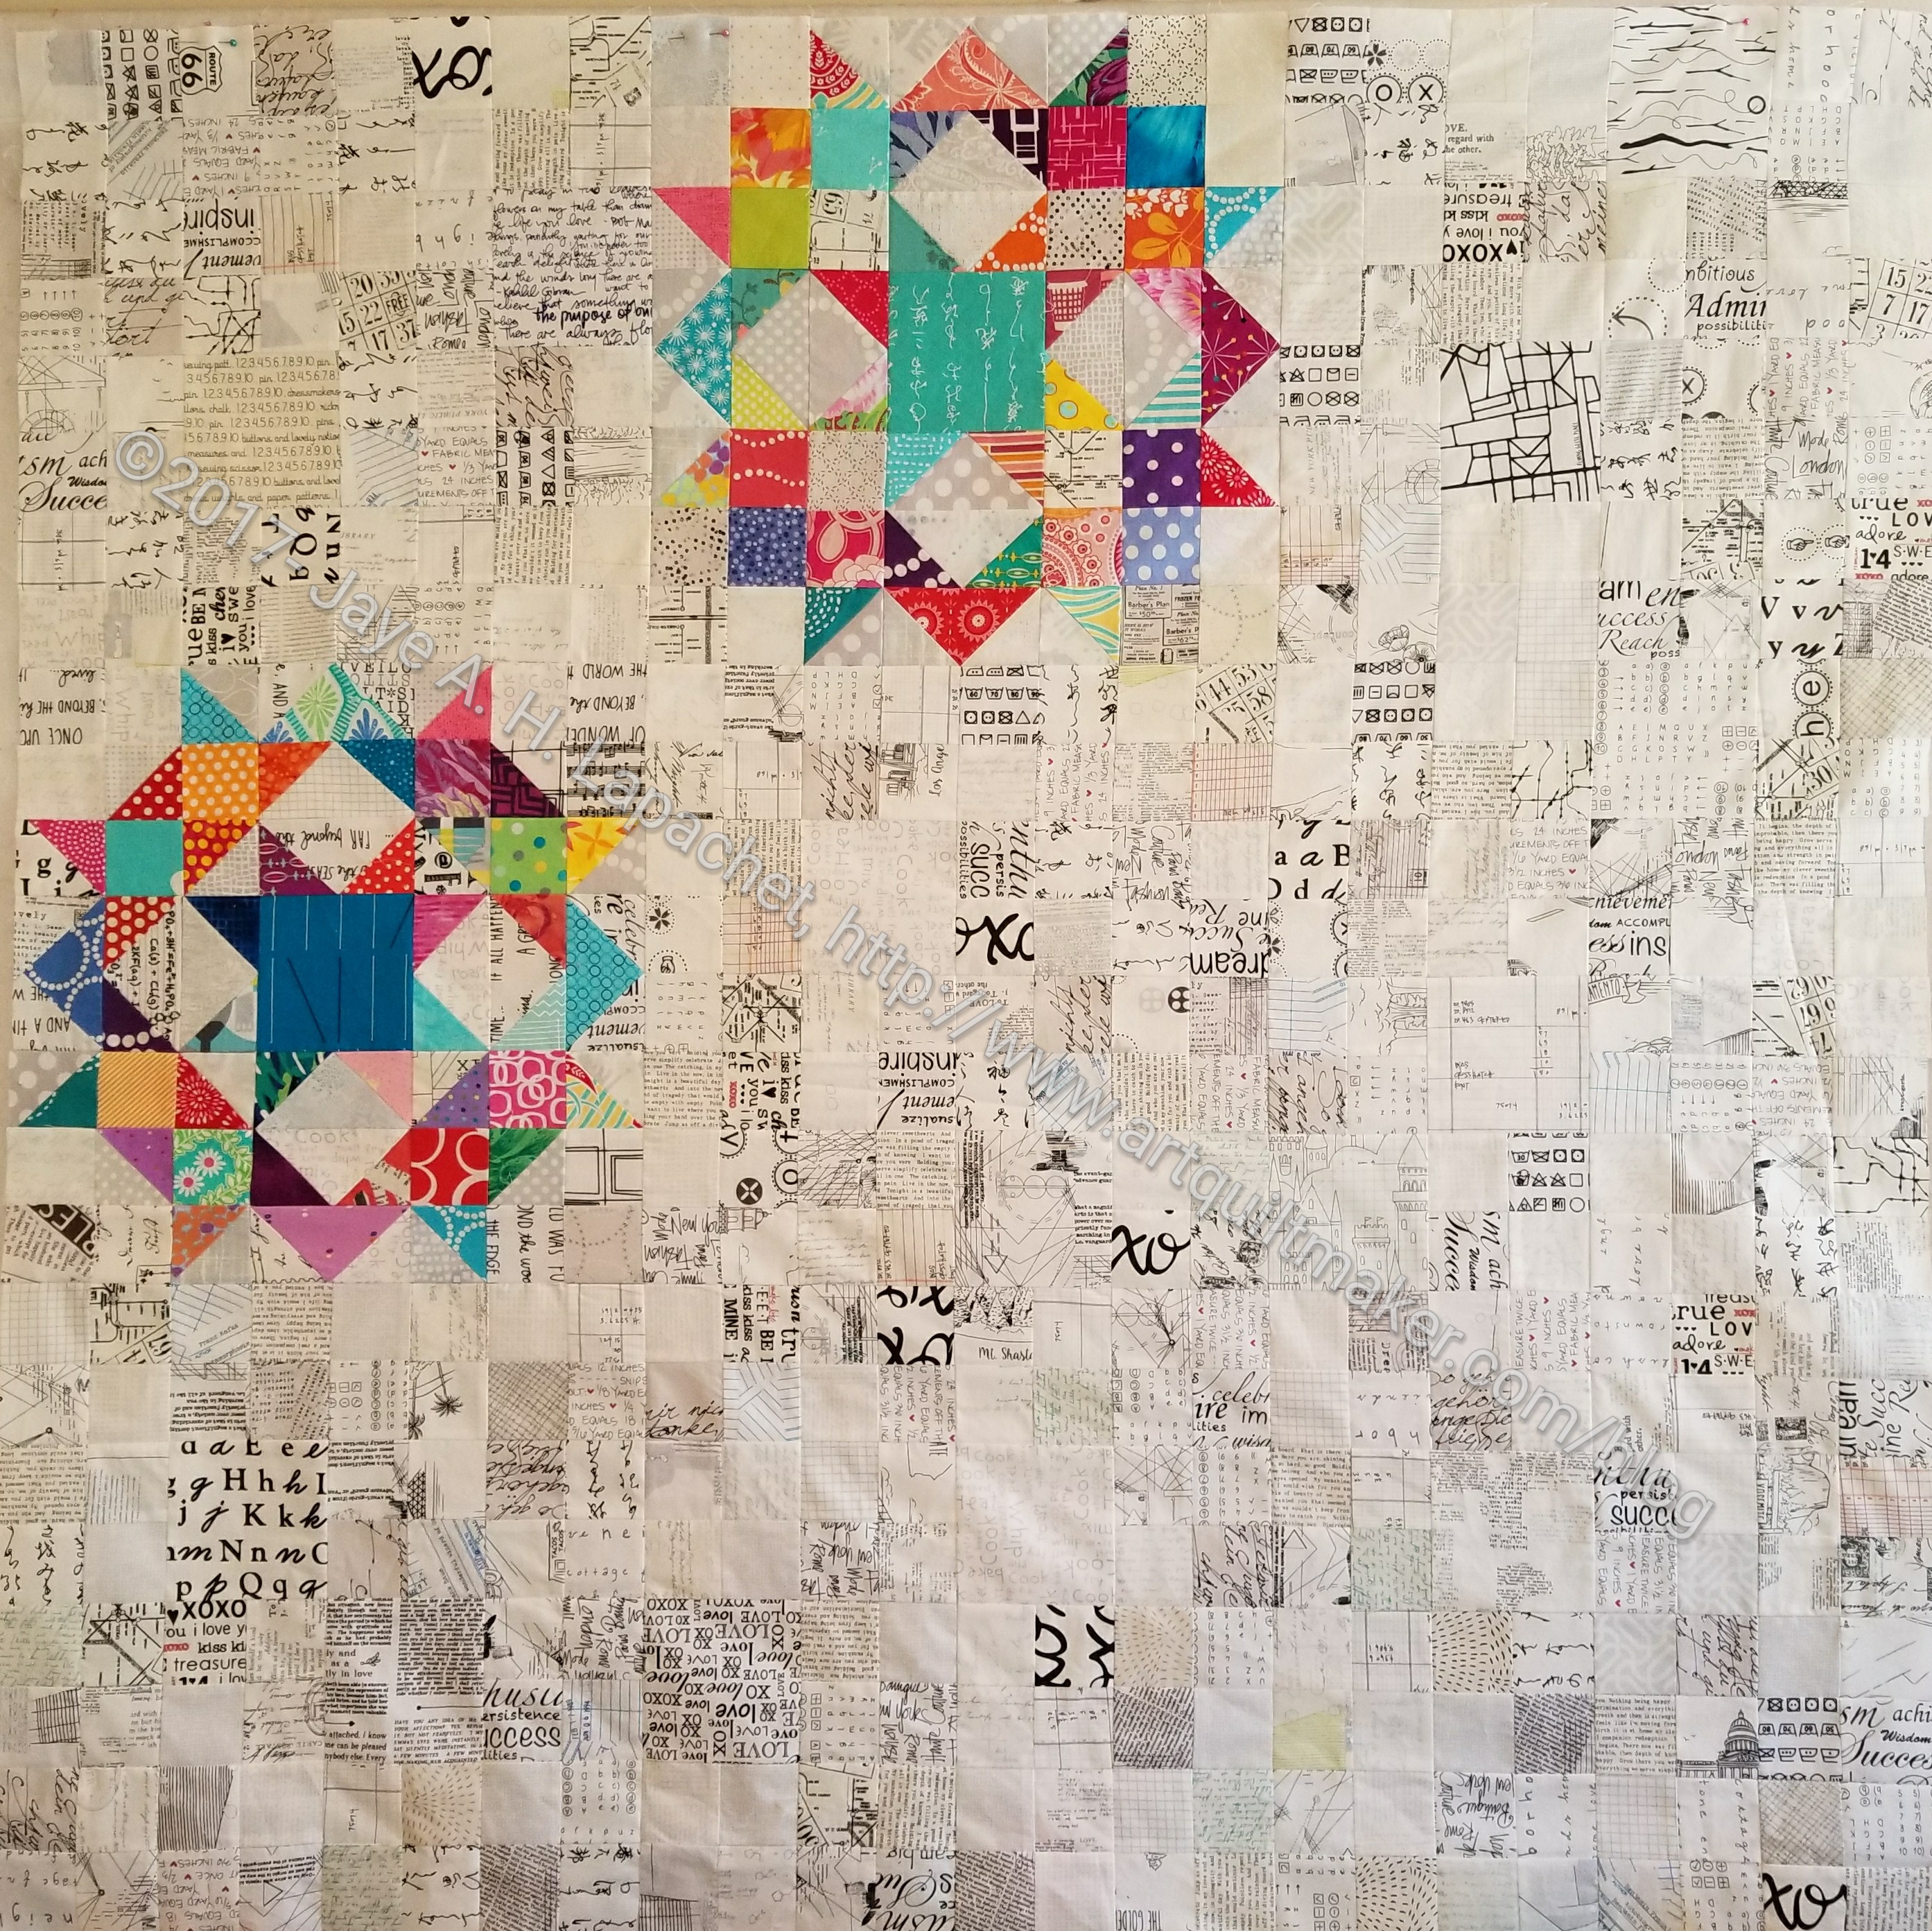
I decided to work on the Carpenter’s Wheel and move towards getting the top done. I have spent the past week making background blocks during every spare moment.

The bad part is that I had no time over the weekend to sew. I spent the weekend with DH on #politicalwifery. We didn’t get home until 7pm Sunday after leaving at 11:30am on Saturday. Very limited sewing time. Also, as an added ‘insult,’ we were so busy I didn’t even get to visit any quilt shops.

Still, after working part of Friday, I spent a few hours Friday afternoon adding to the section I finished last weekend (section 3).

I decided I would make the two blocks (far right) to finish section three. Once I did that I decided it would be easier just to add the three background blocks to the bottom of the section, making a giant 9 patch. What you see above is a giant 9 patch and the entire right hand corner of the Carpenter’s Wheel quilt.

Carpenter's Wheel - left hand bottom
Carpenter’s Wheel – left hand bottom

I am using the same technique to finish the left hand side of the quilt. One background block, which is next to the bottom Carpenter’s Wheel, is finished and I have two more to make. The two sections will end up together like:


I know it isn’t ideal but you can sort of get an idea of what it will look like.

Sewing a Gazillion Squares

Carpenter's Wheel - Section 1 & 2 sewn together
Carpenter’s Wheel – Section 1 & 2 sewn together

I had such a nice weekend. I was able to, essentially, spend two days sewing after really missing it during all of my #politicalwifery over the past few weeks. As I mentioned, I had to cut a lot. I just didn’t have enough variety of text squares to make much progress on the Carpenter’s Wheel. I see to sew this piece in fits and starts.

After sewing the cut squares together into 4 patches, I began to assemble the blocks. It takes 64-2.5′ squares to make a block. As you have seen in other posts, I do put a larger square in to the blocks to add interest, so I don’t always have to sew 64 squares together. Still 60 squares or 56 squares, because I usually don’t sew more than 2 large squares into one block, is a lot.

Carpenter's Wheel -almost last row, section 2
Carpenter’s Wheel -almost last row, section 2
Carpenter's Wheel -almost last row, section 3 - in process
Carpenter’s Wheel -almost last row, section 3 – in process

The section above will fit on to the bottom of the two sections I already sewed together, shown above.

I was able to finish one whole section and make a good start on the last section, shown right. I really enjoy making progress on this quilt. I only have about 10 seams to have these four blocks sewn together. I do need to make two more text blocks (like the lower right) in order to finish the section.

Definitely progress.

Working Towards a Gazillion Squares

Squares
Squares

I had to bite the bullet over the weekend and just cut like crazy. I can’t finish any more of the Carpenter’s Wheel sections until I cut some more background patches. As I have said 3,000 times, I desperately want to finish a quilt top and so certain tasks must be accomplished.

I can’t finish the 4 patches for Step 3 of the En Provence Mystery Quilt until I cut more blues.

I have had some bits of times to cut and have made some progress, but I really went at it on Saturday and spent nearly the whole day cutting both blues and the text fabrics. It was kind of crazy, actually, because I really cut a lot of squares.

I should have used my Accuquilt for the 2.5″ squares, but the blades on my die have never worked quite right. The pieces I cut last time were more trouble than they were worth. I have to get a new die. In the meantime, I am going through rotary cutter blades.

Carpenter’s Wheel Row 3 Section 1

Carpenter's Wheel Row 3 Section 1
Carpenter’s Wheel Row 3 Section 1

Except for one long seam across the center, I actually finished this piece before I went to Portland.

It is the first section of the last row and it is a bit of a trial. I have more cutting to do for the text squares and it is a bit of a trial. There seems to be a lot of cutting in my life right now.

I have now started on the next section. I have to cut, as mentioned, and make a bunch of four patches before I can make any significant progress, but I am making some progress.

Carpenter’s Wheel – 2 Rows Together

The other day I talked about making the two sections of section 2. After I did that it took me a few days to sew section 2 together and then sew that large piece to section 1.

Carpenter's Wheel - Section 1 & 2 sewn together
Carpenter’s Wheel – Section 1 & 2 sewn together

I still need to make and add Section 3. I have barely any 4 patches left for the background, so I have to sew those blocks together first.

I am stupidly pleased with this section. Even more so because the feeling of having crossed a huge hurdle is even stronger now that I can see this section laid out. Of course, I may never be able to see the entire top as it is so large. I might have to move the dining room table and get a ladder to take future photos.

Carpenter’s Wheel -Section 2

With two more seams, section 2 will be finished and attached to section 1 making one large section.

To get there, I have to sew two seams. Before that I finished all of the section two background blocks. As a bonus, I feel like I surpassed a major hurdle. The feeling of slogging through and never making progress was strong, but finishing this section made the light at the end of the tunnel visible.

Section 2: right blocks

It is so odd how I can feel like a project will never end, then suddenly, with no warning, I see the end coming.

Ghosts and Carpenters

The other day I talked about needing leaders and enders. I was working on another section of background for the Carpenter’s Wheel project. Each of those background blocks has about 64 pieces, though sometimes less when I replace a 4 patch with a 4″ square.

Middle blocks of middle section

I focused and was able to complete 4 blocks. That is the middle part of the center section.

I have four more background blocks to complete the middle section. After the middle section I have approximately the equivalent of what I have already sewn to make again. It is a lot of little 2.5 inch squares.

The interesting part of this section is the ghost block. I got the idea in  my mind that I should put a ghost Carpenter’s Wheel block in the exact center of the quilt. I hemmed and hawed and almost didn’t do it. However, I know myself well enough to know that if I didn’t see that idea to fruition or failure that it would haunt me. Every time I would look at the quilt, I would wish I made it.

Carpenter's Wheel Ghost block
Carpenter’s Wheel Ghost block

So I sewed another Carpenter’s Wheel block.

This isn’t as easy as it sounds. Because the background is very scrappy – that is my goal – I have to make about twice as many pieces as I need. With the colored Carpenter’s Wheel blocks, this was ok, because I could use various bits and pieces in the other blocks. I only needed one of the Ghost Blocks, so I have a lot of parts leftover. I guess I am building up my Parts Department.

Also, I wanted to make sure that the Ghost block blended in, but could still be seen. I made one bad choice, but it isn’t fatal. Otherwise, I think the design doesn’t scream at you, but also blends in. I am pleased with it and pleased now that it is done.

New Section of the Carpenter’s Wheel

Top Section of Carpenter's Wheel
Top Section of Carpenter’s Wheel

This is big. Fortunately, I know and can accept the width. It doesn’t mean that it is small. It isn’t. Even this partial section is big. It is 80″ wide* as you see it. I will be 112″ wide when I sew the last four blocks to the top section.

This is a perfect example of me not making small quilts.


*Thus the wonky photo. I am not tall enough to take the photo, don’t have a large enough floor or design wall.

Carpenter’s Wheel – First Piece

Carpenter's Wheel - first piece
Carpenter’s Wheel – first piece

Hard on the heels of the Peacock was a deadline for the Carpenter’s Wheel. Since I had started thinking of the background for each block in terms of low volume prints, there was a lot of text fabric included.When the text Challenge was announced at my modern guild, I immediately thought of this piece. It wasn’t exactly made specifically for this challenge, but it fit the theme and the blocks were just hanging around, so Text challenge quilt it was.

That meant that I had to get some of it done before the big reveal, which was Saturday. I couldn’t be there due to #politicalwifery. Still, I had options for showing it.

I used some mini charms, which I bought in Oregon, to get the ball rolling, but picked up other text fabrics along the way as well. A few weeks ago, I spent some quality time with the Accuquilt and the 2.5 inch die cutting, what I hoped were, enough squares to make 3 background blocks.

Carpenter's Wheel - Feb 2017
Carpenter’s Wheel – Feb 2017

I refused to compromise my vision, which started with the layouts I worked on in the spring of last year. I wanted some good texture int he background, so multiple squares, rather than big squares of fabric it was to be. I began using the 2.5 inch squares as leaders and enders as I finished the back for The Peacock. I made a stack of 4 patches, which later turned into 3 background squares.

Carpenter's Wheel background block
Carpenter’s Wheel background block

I wanted to see how 4 inch squares would look mixed in. I chose the fabrics carefully and fussy cut in some cases. I thought they fit in and didn’t scream, so I used a couple in each block. This make the piecing go a little faster and add a little relief to the background.

I had to sew into the evening on Thursday in order to give it to my SIL on Friday to take to the meeting. I succeeded and still got to spend time with DH. I have gotten some very nice comments on Instagram and hope, even if unfinished, it is well received at guild.

Carpenter’s Wheel Moving Forward

Carpenter's Wheel - Feb 2017
Carpenter’s Wheel – Feb 2017

I am trying out a new concept for the Carpenter’s Wheel blocks. It is not a completely new concept because the idea comes from the layouts I tried back in April when I was playing with layouts.

I still like the circle layout and am moving in that direction. As mentioned, I wouldn’t put the two blocks in the middle.

I was relieved and pleased to see, when I put the blocks up on the wall, that the foreground pieces were not overwhelmed by the background. The Carpenter’s Wheels stand out well. I do think I need to cut some larger pieces to mix in. It will take me a thousand years to sew so many 2.5″ squares together and I think larger squares would add interest. I’ll have to try it out and see, of course.

I hope to get these 6 sections sewn together so SIL can take the piece to the meeting. I have a lot of work to do to get there, so we will see.

Carpenter’s Wheel Play

Carpenter's Wheel
Carpenter’s Wheel

I have been thinking about the Carpenter’s Wheel blocks lately. As you know, I made two more blocks recently in order to lay the blocks out in a circle effect.

I laid out the blocks on the floor (design wall is full) and the photo left shows the top of a layout. I am not sure about it-imagine adding 7 more blocks. It will make a very large quilt. I also don’t really want to fill the blank spaces with 2.5″ squares. It would make an interesting background, but would also make me crazy sewing. I could use larger squares or even different sized squares to add interest. The small size, however, makes the wording less prominent, however. I don’t want some giant word to end up in the middle of the quilt.

Carpenter's Wheel Layout #8
Carpenter’s Wheel Layout #8

After taking this photo, I went back and looked at my other layouts. I like this one the best. The only thing I have to decide is whether to put the two blocks in those blank spaces or to make the circle bigger.

Getting closer.