Stars in Alignment

For once, the stars were in alignment which made my technology work and me able to solve my template problem. As I mentioned, I was unable to locate my original EQ file. It has disappeared from my computer or was saved to such a weird location that I will only be able to find it by stumbling across it when I am looking for something else.

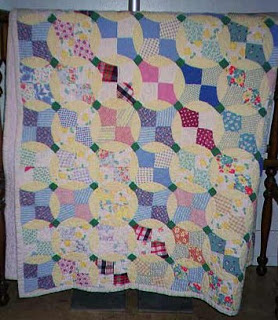
Since I had been researching the Cross Block’s real name, Flowering Snowball, I had found EQ’s version of the block in their database and had saved it to EQ6. I decided to try and print templates from their block to see if it would work with the piecing I have already done.

There were a lot of ifs in this little escapade. Since my printer was moved down to the laundry room, I haven’t been able to print from my computer. I thought I would need to get some boosters for my wireless network before printing would work again. In the meantime I have been saving to a flash drive, running downstairs and printing that way.

I forgot to change the printer to PDF and printed out templates in the correct size. I didn’t get an error message and that surprised me, so I went to the printer and, lo and behold, there was a template printout waiting there! What luck.

Daring not to hope that this could work, I went back to my work table, hauled out the other templates I have been using and measured the corner template against the printout. Yippee! The size was perfect! I was in business.

I made the template and cut out a couple of the middle squares and sewed them to a couple of the corner pieces as a test. All worked perfectly!

A Variety of Quiltmaking


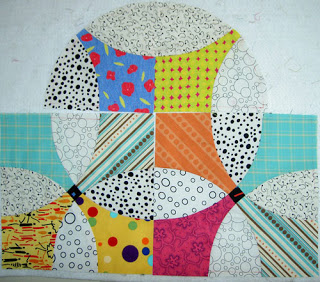
Here are some Flowering Snowball blocks (Cross Block) in progress. Some of them you have seen before (many times?), but I put the new fragments with them to see how the piece can get away from the murky look. I felt it was a bit murky with the chocolate in the striped fabric and that particular orange.

I have lost the middle template for this block, which is holding up progress a bit. I looked at my EQ6 files and can’t find the project file, which means I have to recreate it somehow. I can cut most of the pieces and sew the corners to the middles, but at some point I have to deal with the loss of that template.


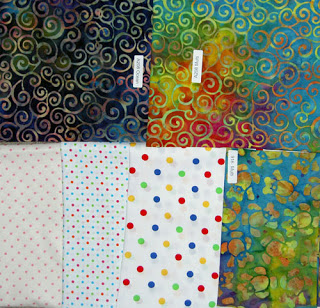
These are the fabrics from BatkisPlus and Quiltfabrics.com. I think that the batik on the right is the same one I used on Sharon’s quilt.


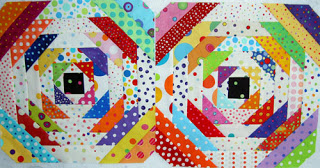
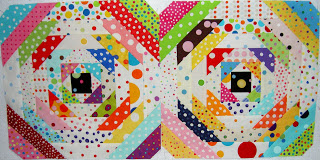
Here are Pineapple blocks 9 & 10. They are the first one using my new system of organzing the strips. I can’t really see much difference, except, perhaps, that these blocks are a bit darker. I think it was the way the strips fell. In the last rows I skipped over the dark blues and stuck with turquoise.

Pineapples are Pretty

The title was inspired, for no particular reason, except that it struck my fancy, by a poster at the Castro Theatre advertising Pretty in Pink, the 1980s movie. Molly Ringwold’s hair was precious.


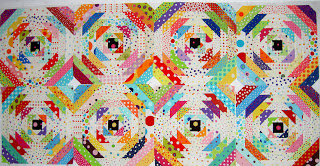
I finished two more Pineapple blocks for a total of 8 now. I feel like I should have more, but I don’t. As I keep reminding myself this is an ongoing project with no deadline. I am enjoying seeing the evolution of the piece.

The blocks, all together, look pretty good.

I notice an interesting secondary pattern developing. I knew i would, but am just surprised at how much I like it.

A Monkey Finally Off My Back


When I got to my workroom this morning the back of the Nosegay was glaring at me and I could only sigh. I didn’t want to work on it. I had, somewhere in the back of my mind, wished that it would just be done. I thought about taking out Sharon’s quilt blocks and just ignoring the back of the Nosegay. It seemed too big, too much, too old, too depressing. I felt like I just couldn’t do it. Still, I knew that if I didn’t just do it, it would glare at me forever. Since the thing has been hanging around since 1998 and I wanted it done in my lifetime, I decided to just do a couple of rows. After all, if I did a couple of rows every week, it would eventually get done.


I arranged some 1930s scraps that were laying on my cutting table into a largish block and sewed them together. That kind of warmed me up and I sewed on a row of the blue and a row of the 1930s fabric and laid it out. I found that I had sewed more than half! Halfway done! I couldn’t believe it. How did that happen? That spurred me on.
I sewed entire FQ pieces into long rows and sewed them to the back. Each strip took about 2.75 yards of fabric. It took me about 3-4 hours, but I finished the entire back. The back is done. Whew!

I had been wondering if I shouldn’t just take Thoughts on Dots and Serendipity Puzzle to the quilter and bring the Nosegay later. Now I don’t have to. I will call the quilter and see if I can bring the quilts over, then I will be free of them for a time.

I am so thrilled!


I didn’t get through as much of the 1930s fabric as I had hoped, but I only have about 1/2 a bin left. I think I may put the fabrics with each color family rather than segregating them.

I have to say that the colors depress me a little bit with their muted tones and sweet little designs and I am tempted to just send them off to someone.

Cross Block Redux

By the time this quilt is finished, I will probably have named 137 posts Cross Block Redux n.1…..n.137. We’ll see how interesting this quilt stays.

In response to the post Quiltmaking is a Journey Not a Destination, fellow quiltmaker and blogger, Laume wrote:

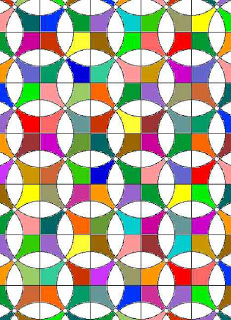
“There is a third option – make each block scrappy, but not planned so that the colors in each secondary “stretched out square” is matched. You would get rid of the matched “X’s” in the second option you think look unfinished. Whether the background circles would still come to the fore like the second option, or whether they secondary pattern of dark stretched out squares would come to the fore like the first option, I don’t know. You’d have to try it on paper and see.”

I had no idea what Laume was talking about. I knew it couldn’t be terribly complicated, but I am visual person and the words just didn’t translate. I sent Laume a line drawing of the quilt and she was kind enough to color it in.

Basically, she was saying to make the Xes totally scrappy and just match the curved background pieces. I was leaning in the direction as I had just realized that I used a piece of fabric for the back of Serendipity Puzzle that I really wanted to use in this quilt.

Laume’s idea is an excellent one, because the parts of the Xes really do take up quite a bit of fabric, which means I can’t use as many scraps as I would like. However, I will still have to cut into yardage, regardless, so perhaps it doesn’t matter?

Stay tuned!

Nearly Done! HOORAY!!!!

In between many other tasks related to house, children and work, I am thrilled to say that I have finished the back of Thoughts on Dots. I really buckled down and took every spare moment to work on it. HOORAY!!!!!!

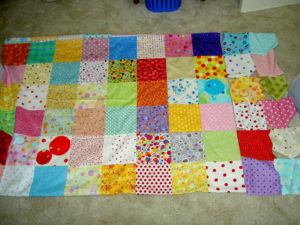
The back is even larger than the top, which made it harder to photograph, but here is an image anyway.

The squares are the reject dot squares which I did not use in the top. The lavendar and beige square in your upper right hand corner is the label. I decided to use the beige for three reasons:
1) I did not want to piece together 100 FQs of dots;
2) I had large-ish pieces of beige (bought them at a time when I thought I might use them as backgrounds); and
3) I decided I did not want to take away from the front. I wanted it to be clear that the front was the main showcase.

I did piece the back, because I have a enough fabric to do so and because I wanted it to be unique. I do see the attraction of buying 107″ wide fabric and just sewing one seam to make the back, however.


Above is a detail of the top of the back.

Above are a couple of details of the other side of the top including the label. Take the term “detail” with a grain of salt!

I made the label by creating a Word document and then print the ‘document’ on fabric.


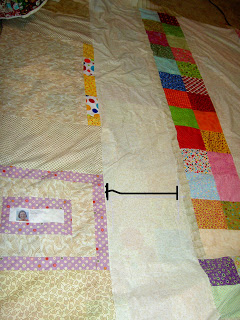
Above shows the only problem. I think that I may have to take off the beige piece on which I have drawn a line, because it is too wide. I think it would work better if I put it on the outside. That way, I can trim the back after it gets quilted. I don’t want to hack of part of the block that has the label in it or any of the squares. I know it is just the back, but I still want it to look good. I don’t remember right at the moment whether I pieced that beige as all one piece or if I will have to unsew multiple pieces.

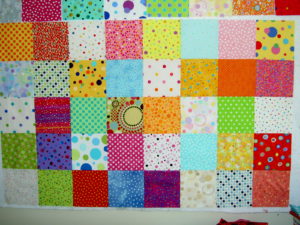
And finally, below, here is a better (not great, but better) image of Thoughts on Dots:
Part of the day’s chores involved moving furniture form one room to another. While my workroom does not look fantastic and I lost some shelf space, I do have floor space, once again. YAY! I was able spread the quilt top out on the floor. It nearly fits. Unfortunately, I didn’t actually fit in the room so the image is still a bit wonky. Hopefully, however, faithful readers, you get a beter idea of how cheerful it is.

Quiltmaking is a Journey Not a Destination


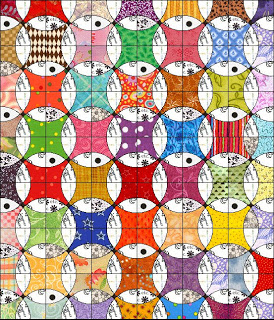
I found this quilt somewhere, drafted the block and am now trying to decide if there is a color layout scheme that I prefer. I don’t remember where I saw the quilt, which is a shame because I would like to document it better than “I don’t remember.”

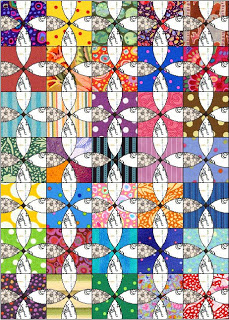
There are two color layouts for the Cross Block quilt that appeal to me:

I like this one because the circles really stand out and you can really see the fabric. I don’t like the way I would have to plan out a bunch of the fabrics in advance (like Spiky Stars, which worked out well in the end). The other thing that bothers me is the half blocks on the edge. On one hand, they look unfinished. On the other hand they could comprise a self bordering technique border, again like Spiky Stars, that is so effective.


In the option above, the blocks would be a lot easier to piece. The crosses really stand out, which is nice, in a way. It looks a lot less interesting than the one above…a lot more regular.

So, does this count as another project or a way to get some more sewing done when I am not at the machine? Quiltmaking is a journey and not a destination, so does it matter?

Am I Really Cut Out for Strip Projects??


The Pineapple project requires lots of strips. I am not sure I am cut out for managing such supplies for this project. They are everywhere and I can’t seem to find good combinations of strips. I have seen curtain rods that people have set up on which to hang their strips, but I don’t have anything like that at the moment. Bleah!

Still, I soldier on and I seem to be making progress. I finished the strip part of the second two blocks. I still have to put the triangles in the corners, but will do that later.

Top Complete; Borders and Back to Go

I don’t usually sew during the week. It is a habit I got out of some years ago due to general evening chores, preparation for the next day, etc. Tonight I just decided to sew 3 more seams and now the top of Serendipity Puzzle is complete.


Here is the entire piece. It is very busy and the reds and brown do stick out. It is cheerful. I could just make the back and have it quilted, but will try out some borders before I do that.


Detail of one of the blocks.

First two Pineapple Blocks Finished

Learning to do something new makes the first two blocks or parts of a project practice. For this project, and, yes, it is now on the project list, I am pretty pleased with these two blocks. The blocks are fairly flat, there is no paper to rip or muslin to quilt through.

I spent some time yesterday putting the last two rows on as well as the corners. I may have to remove the corners and put others on, as they need to be a bit bigger, but we will see.

I am very pleased with how the fabrics look together.

I am still cutting strips, which is a drag, but I will be happy when I have piece of all of my dots cut.

Update on Serendipity Puzzle


Here is my last try at figuring out which fabrics to use for the sashing. I decided against the larger print background fabric. The background of that particular fabrics is not as bright as the background on the others. Also, the motifs are so big that they mostly got cut off.


Once again, I am trying to sew it together in chunks (rather than rows) to keep the piece straighter and more manageable.


Essentially, I have two more seams to sew to get this baby done. I can’t avoid them being long seams. Of course, there is the border. I, also, already started the back.

Not Enough Dots?

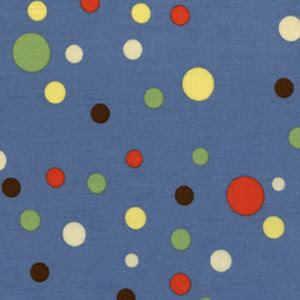
The Pineapple class, about which I have been talking on and off for the past week, is today. I began packing my supplies and materials and got into a panic that I don’t have enough dots in enough different scales and colors. I want to have a wide variety to provide interest. I rummaged through everything to find more and came up with two that I had washed last week, but needed to be ironed. I ironed them, but the stack still looks pathetic. One of them is a Michael Miller fabric similar to the one below, but with more of a sky blue background than the soldier blue depicted below.

I hope I am just having the last minute jitters and really do have enough fabric.

Pineapple Homework cont’d

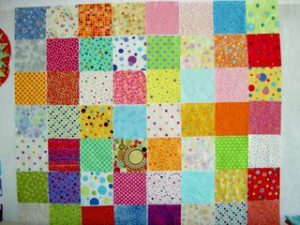
I worked, yesterday, on selecting fabrics for the Pineapple class, which takes place next Friday. These are the fabrics that I have selected so far. As I looked through my dot fabrics, I felt like some were missing, but couldn’t find any others, so I guess I just have the impression in my mind that there are never enough dots! I am pretty happy with the selection, but am still contemplating whether or not the dot sizes are too similar and whether the colors are too similar in value.

In this selection, I didn’t include any of the Fusions fabrics by Robert Kaufman, but am considering adding some to add a little motif size interest. Some of the colorways are very light, however, so if I do add them I need to take care. I don’t want the background to bleed into the foreground creating visual confusion. I can certainly bring them with me, so if I need them I will have them, but if not, no harm done. Opinions are welcome.


Ignore the checkerboard, as that is my ironing board cover!


The two pictures above are the same group, so you will see some overlap (e.g. the red).


Value too similar? I might have get rid of the red one in from the right as it seems to read as a solid.

Additional Progress on Thoughts on Dots

Here it is right before I sewed the bottom right hand side together:

Here is the bottom right hand side sewed together:

Here is the top of the left hand side (the side I have completed) with the joining rows laid out next to it:

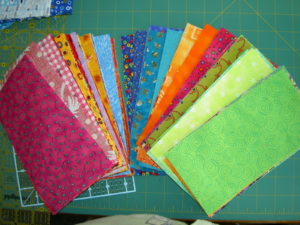
Below are the rectangles that I cut for my aunt’s quilt:

After taking this photo, I sewed them together by putting two rectangles together relatively randomly and sewing them. I did try to put a warm color with a cool color most of the time to try and get some contrast going. I didn’t, however, put them up on the design and arrange them. I thought it would be a different kind of challenge to sew two together and then put them up on the design wall and try to arrange them. I also did this in the interests of speed. She is very ill and I want to get the quilt done.

Also, Thoughts on Dots is still hogging up the design wall space. The portable design wall we saw at PIQF is looking pretty good right now!

Real Progress on Thoughts on Dots

After the CQFA meeting today, I came home, eschewed the work nagging in the back of my mind and worked on Thoughts on Dots. Earlier this week, I started to sew the squares into pairs. Today I kept on sewing – four patches, groups of two four patches until I was finished with the main part.
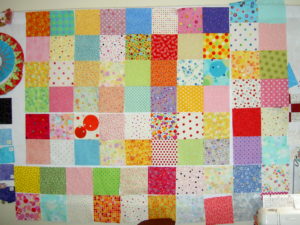
Above: The main part nearly sewn. The big problem I had was that the squares were not the same size. Part of it could be the ruler that I used at St. JCN’s. However, St. JCN said that the fabric was stretching as it went through the feed dogs. It was getting really bad as sewed the four patches together. Finally, I decided to take a page out of St. JCN’s book and trim the squares. Nobody will sue me for changing the size of the blocks. I changed my rotary blade and very carefully measured and trimmed the 4 patches. The larger pieces went together better after that, but I noticed as the same pieces went through the sewing machine a third or fourth time that they started to stretch again. While it is possible that my feeding of the pieces through the machine or my pressing had something to do with the stretching, I doubt it as I was trying hard to be very careful.

This is the second time that I am doubting my machine. I guess I need to take it in for a service. I can use the Gem while the 9K is on vacation, but I think it is time for me to really consider a new machine. 10 years is long enough for one machine and it has seen some hard use.
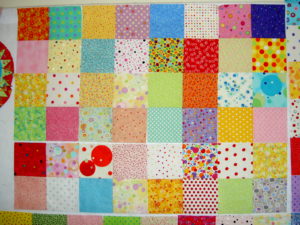
Above: Detail of the main part nearly sewn together.
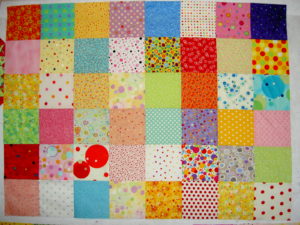

Above: Finally, I got the entire main section done. I call it the main section, because I need to piece the entire top in sections. Since I plan for this piece to be a cuddle quilt, I think it will be relatively large. My design wall isn’t big enough to do the whole piece at once. Pay attention to the bottom two rows, which are still unsewn in this picture.
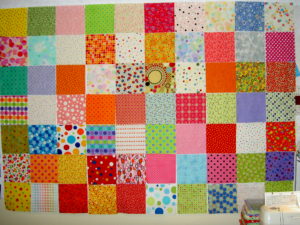
The above photo shows the former bottom two rows at the top of the quilt. They will still be on the bottom of the top section (far above photos), but on top of this new section, which is shown directly above. These are new squares that I threw up on the design so I could arrange the bottom part. The rule is that I am not allowed to move the top two rows as they have to coordinate with both the section above and the section below. I know they coordinate with the section above as they are, but since I can no longer see that section, I have to leave them as is to ensure I don’t make any egregious color errors.

I didn’t think I would make changes right away, but even before I got all the squares up on the wall, I began moving squares away from their fellows of the same color and removing squares that were too dull or didn’t look right. The immediate problem is that the colors in this section seem darker to me. I think I will have to remove some of the darker colors and put in more pink, add some more of the fabrics with the white backgrounds in order to make it more sherbet-y.

There are colors/fabrics that I like, but may not make it into the final piece. One example is the blue 60s dot (left hand side 3rd from the bottom, two from the left.)

I like the weird spiral dot smack in the middle, but it may be too different to include on the front of this piece.

On the back, I may make columns of the leftover squares and alternate them with plain rows – like a row quilt. It would be good not to let those already cut squares go to waste.

I was thinking about binding today and may add a thin rectangular border of various fabrics and pull it to the back rather than making a regular binding. We will see.