Pineapple Redux

Pineapple quilt
Pineapple quilt

This is what the awesome BAMQG Charity girls made from my disappointing Pineapple blocks. I was so thrilled to see this quilt made from the blocks that I thought were a hopeless loss.

In addition to being happy that the blocks were usable, I also learned that a few mismatches wouldn’t detract from the overall look of the quilt.

This makes me feel like I could make new blocks and make a quilt out of those blocks. I still want to work out the measurements of the blocks, row by row so I can try and figure where I went wrong on the first series of blocks.

I just feel so much better about my original idea and about my technique.

Pineapple Progress

Pineapple Laid Out
Pineapple Laid Out

The Pineapple has been on my mind lately. I took TFQ’s visit as an opportunity to get a new perspective. I laid the blocks out in the living room and we looked at them and talked about them.

One of the problems is that some of the blocks are too big. I couldn’t figure out why some were so much bigger than they were supposed to be until I was fiddling with these blocks on Monday. I caught a glimpse of the black block in the middle and realized that I cut some of the center blocks slightly larger than they should have been.

My idea was to trim the blocks and make them a little wonky. No, they won’t match up perfectly, but the way they are now; they won’t match up anyway. After my discussion with TFQ, I think I will trim the blocks straight and see how it goes. Worse case scenario: they don’t fit together.

TFQ made no promises that this would work. Sometimes, as I have mentioned, it is just good to talk over the process. I like these blocks. I like the cheerful look of the piece. If it doesn’t work as a quilt; I will have a lot of really cheerful pillows.

Mom’s Pineapple

Last December Mom and I decided to take a Pineapple class on the spur of the moment. I paid for everything as part of her Christmas gift and we took the class together in January. You all know the progress I am making, but my mom has finished hers and it is above. She did a wonderful job and I am so impressed with the finished product. She normally does pieces like Mary Lou Weideman.

Here is a detail.

Pineapple Sew Test

As promised, here are the two blocks that I sewed together. This is all I have done in terms of sewing and they don’t match up very well, but they also look GOOD! I think this means that they don’t look horrible! Hooray.

Can’t stay away from dots. I saw this outfit and bought it for a friend who is having a baby after many years of trying.
This is a birthday card to me from Pamelala! She sends me a digital art piece like this every year. Perhaps I should make them into a deck. 😉

Pineapple Work Continues


I am studiously ignoring the Pineapple problem and trying to soldier on. These are the nine blocks that now have corners on them and fit fairly well together. I am tempted to sew them together, because I think it would give me a boost. One thing I did, without thinking, when I started cutting corner triangles was make too many of one color. Now I am just making two of each. I am hesitating sewing these together because I don’t want too many of the same corners to be near each other. These look fine, but…. I guess I am not feeling confident in general about this project.

Pineapple Problem

I didn’t get to spend the entire day on Friday on the Pineapples as I would have liked, but I got to spend some time on them and make some progress.

First, I needed to figure out the corner problem.

For Pineapple corners, you need to cut a square in half. The book assumes you have pieced perfectly and tells you to cut squares which are 1.75″ wide and use them to make the block and the squares that go on the corner. Because I was actually using fabric, which stretches and has fabric qualities, 1.75″ didn’t work for me. Below are the sizes I tried.

2″ works on some, but not all. I don’t want to rip the ones out that are too small and I can’t tell until I have sewed them, so 2″ squares (cut in half to form a triangle) are out.

3″: a little too big. I don’t need that much extra overlap.

2.5″ : still too big. I still don’t need that much extra for trimming.

2.25″ : looks too big, but once you sew it on it isn’t.

Here is the triangle cut from the 2″ square laid on top of the triangle cut from the 2.25″ square. It gave me a visual clue of the difference in size.

With the 2.25″ squares (cut into triangles), they work. They have enough play so I can trim them and make the blocks look beautiful. I was pretty excited about REALLY finishing the blocks and putting the quilt together until…

I put four blocks together. Sigh.

As you can see above, the border blocks fit pretty well together, but the center blocks (well, at least the one I finished with corners) are much too small, which means that they don’t work with the border blocks.

What does this mean?
How did this happen?
I used the same strips, the same sewing machine.

The only difference was the iron.

I am exceptionally down about this and truly ready to put this quilt away and start something new. That is exactly what I didn’t want to do. For once, I wanted to work on a quilt from start to finish.

I will add a few more corners to other center blocks and see if they are all too small, then I will decide what to do.

Pineapples and Housecleaning

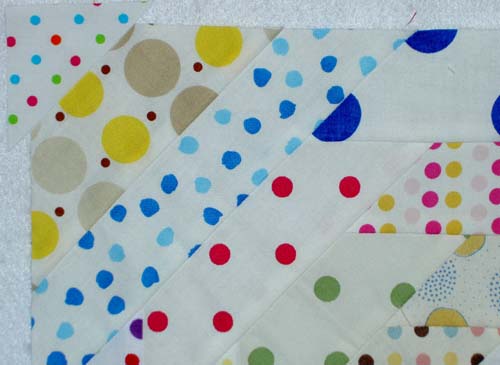
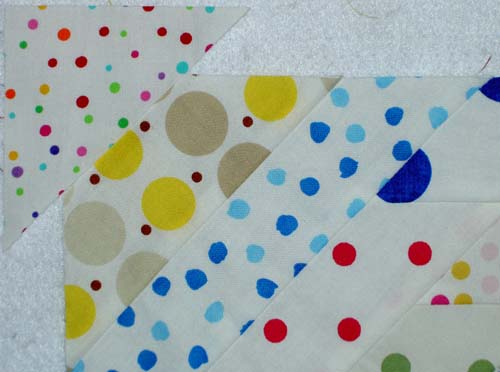
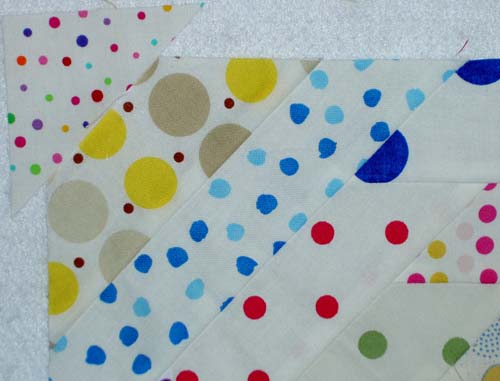
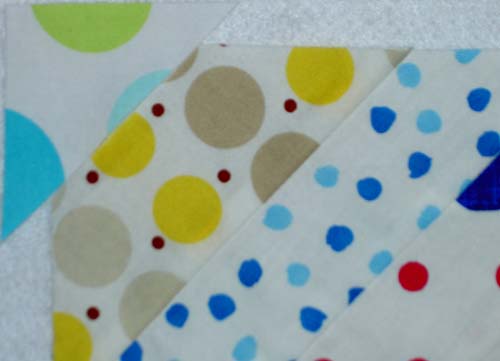
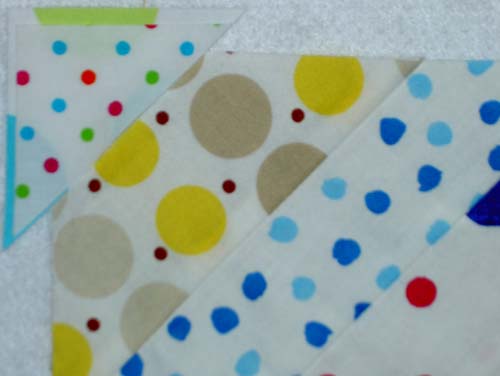
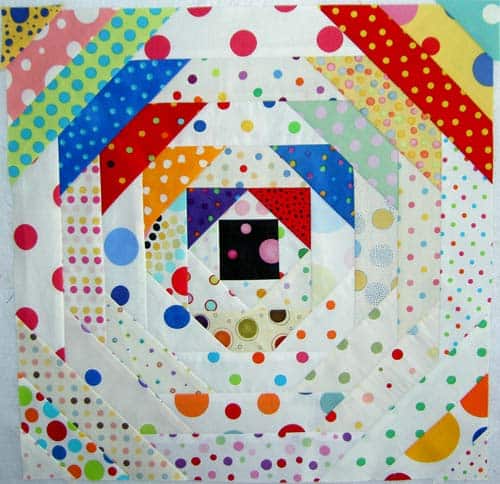
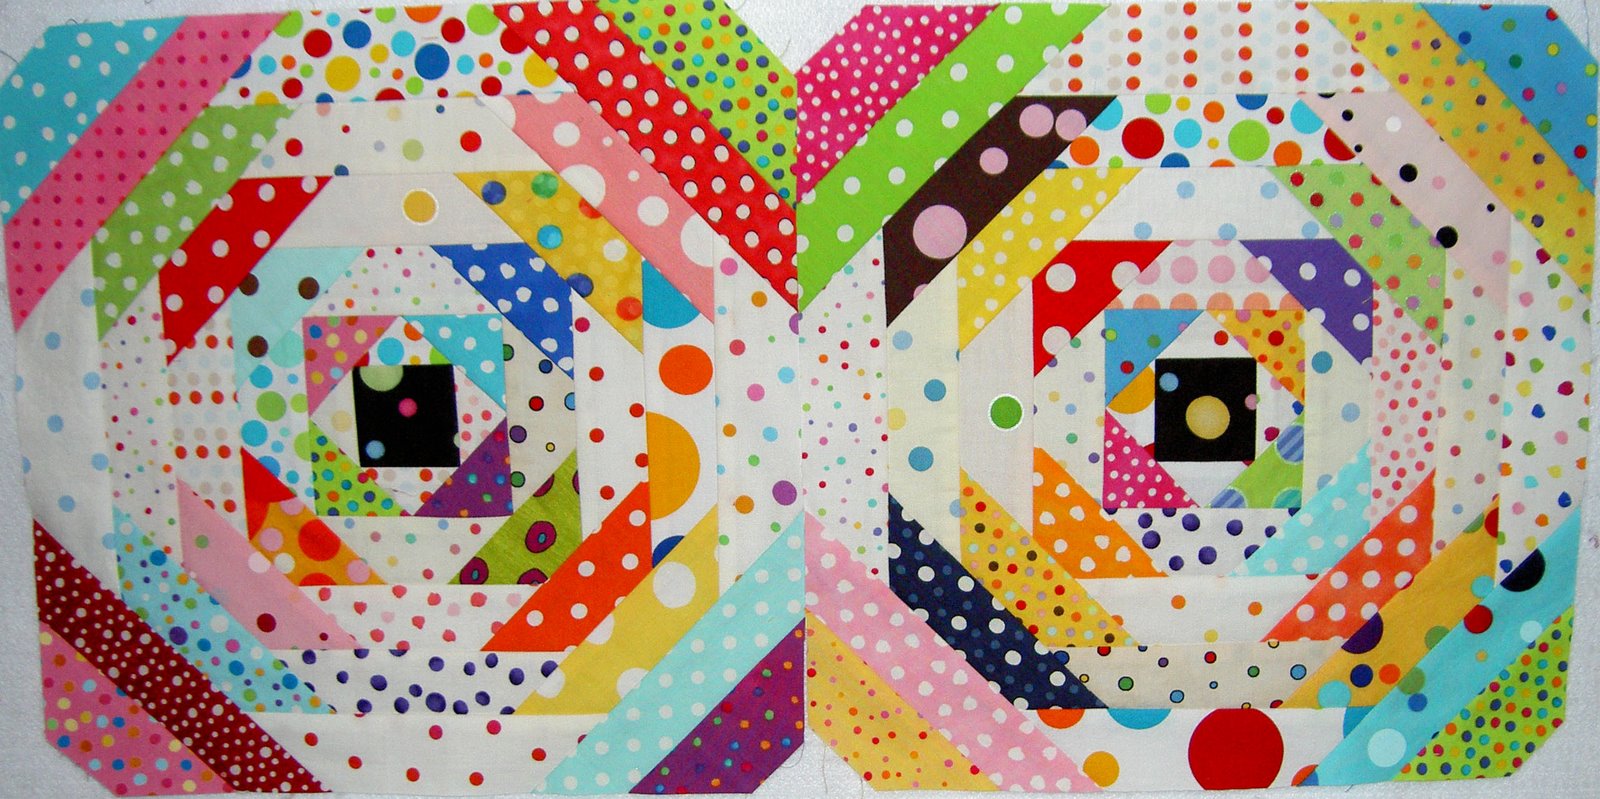
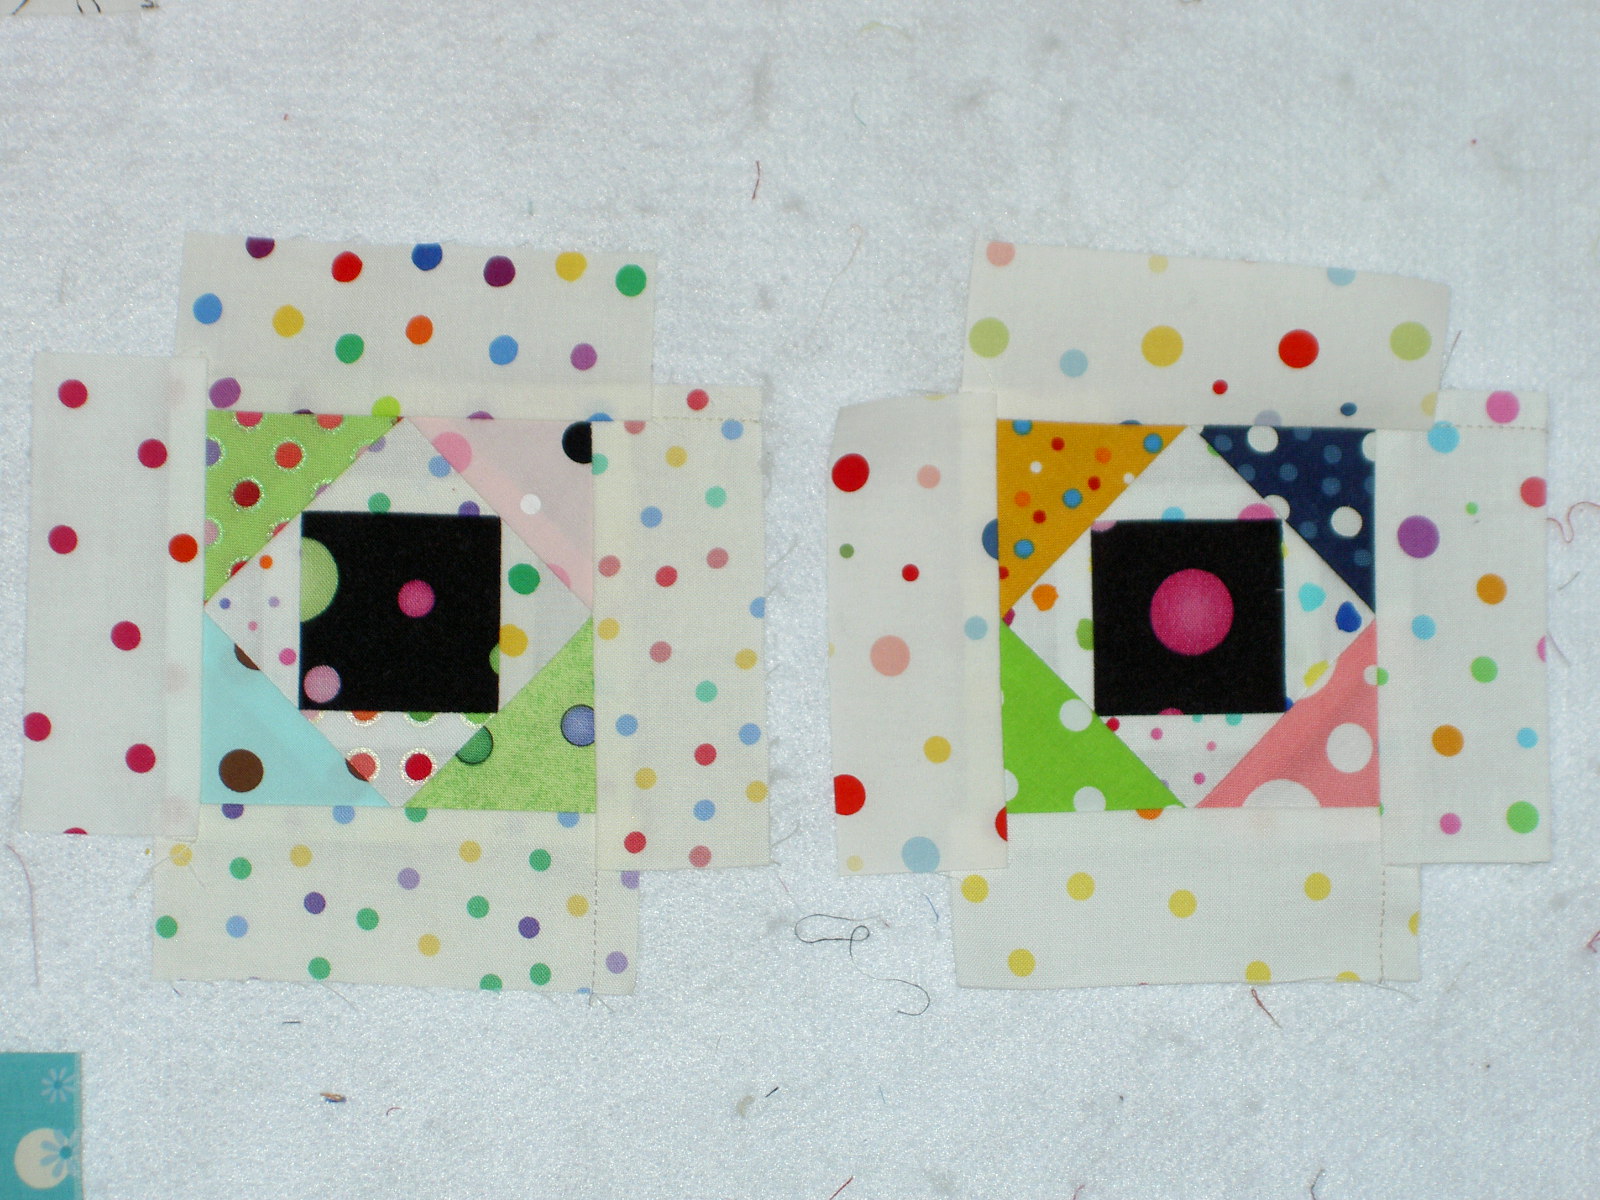
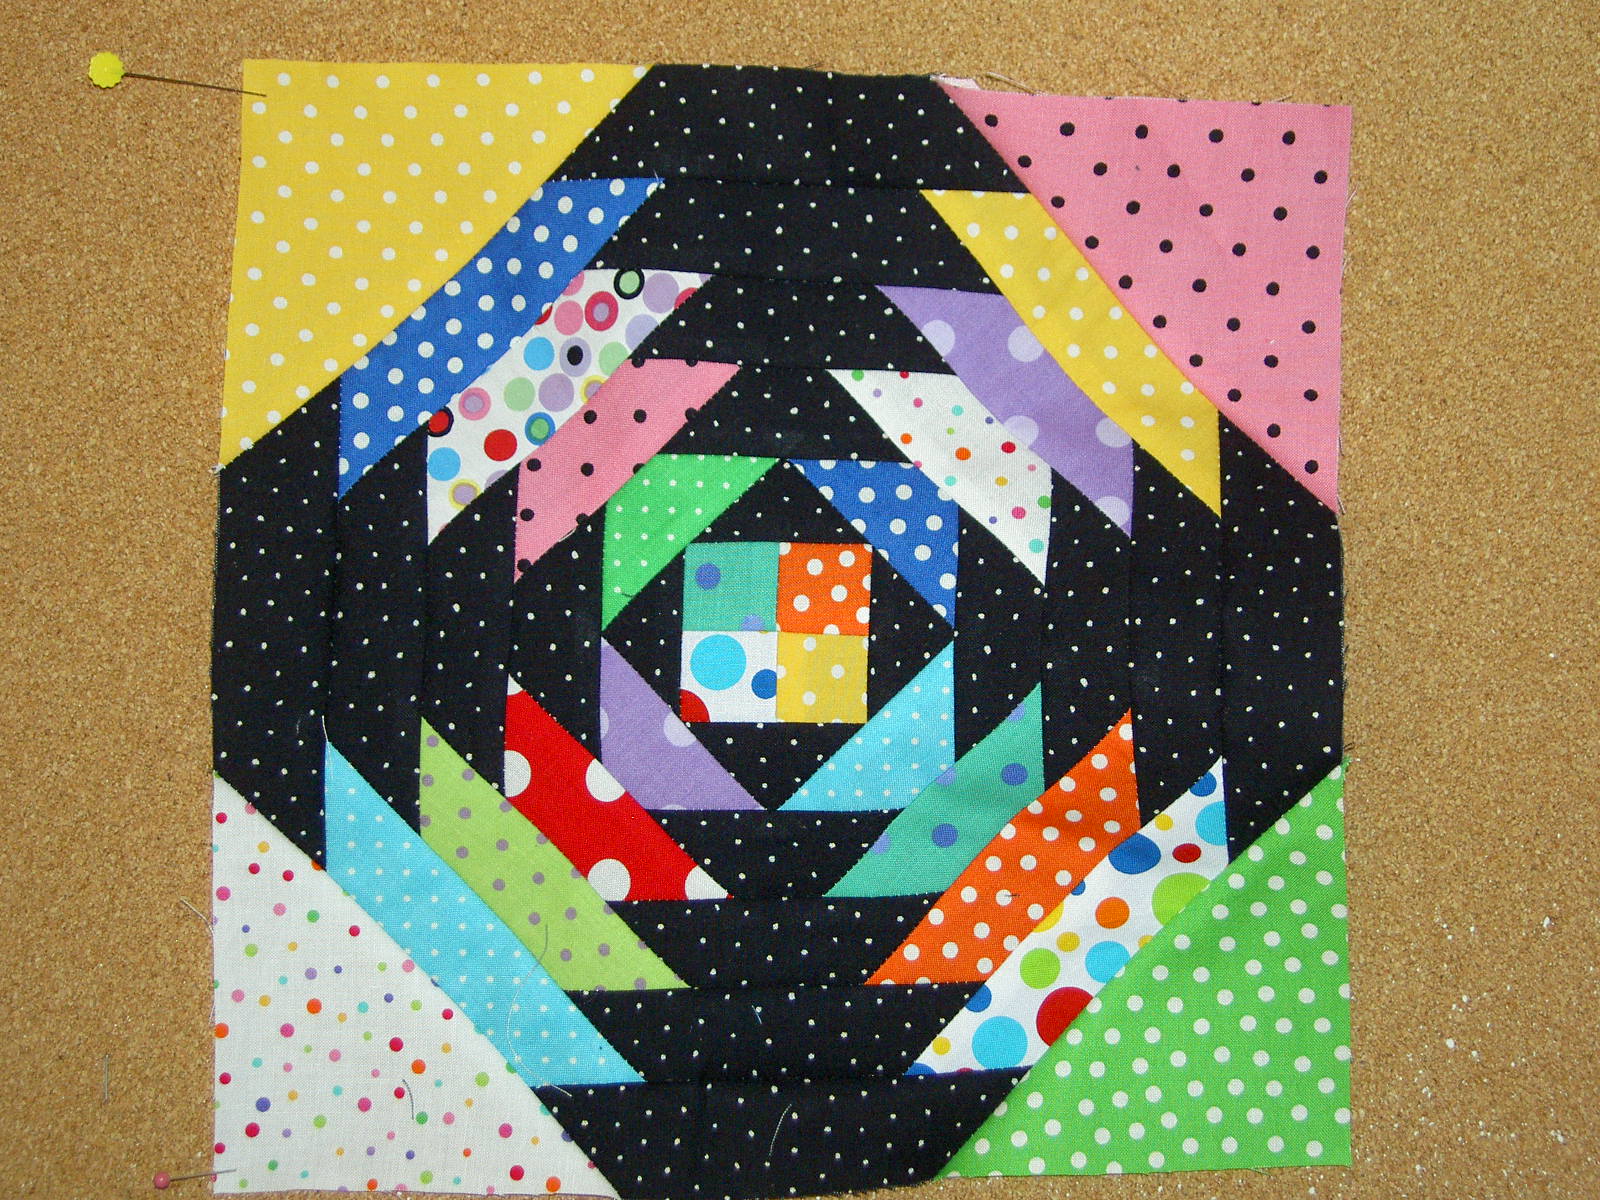
I finished two side border blocks today. I had started them last week or the week before and finally took the time to finish them. I found, as I was working on them, that I really needed more background fabric. I was coming across too many duplicates in these blocks. I had used up a lot of the previously cut strips and needed to replenish my supply. Interspersed with sewing, I cut about 10 new fabrics for the background and began to use them for these blocks. I found that some of the dots I had not used at all. In looking at the pictures above, I wonder if the corners really look like background fabrics?

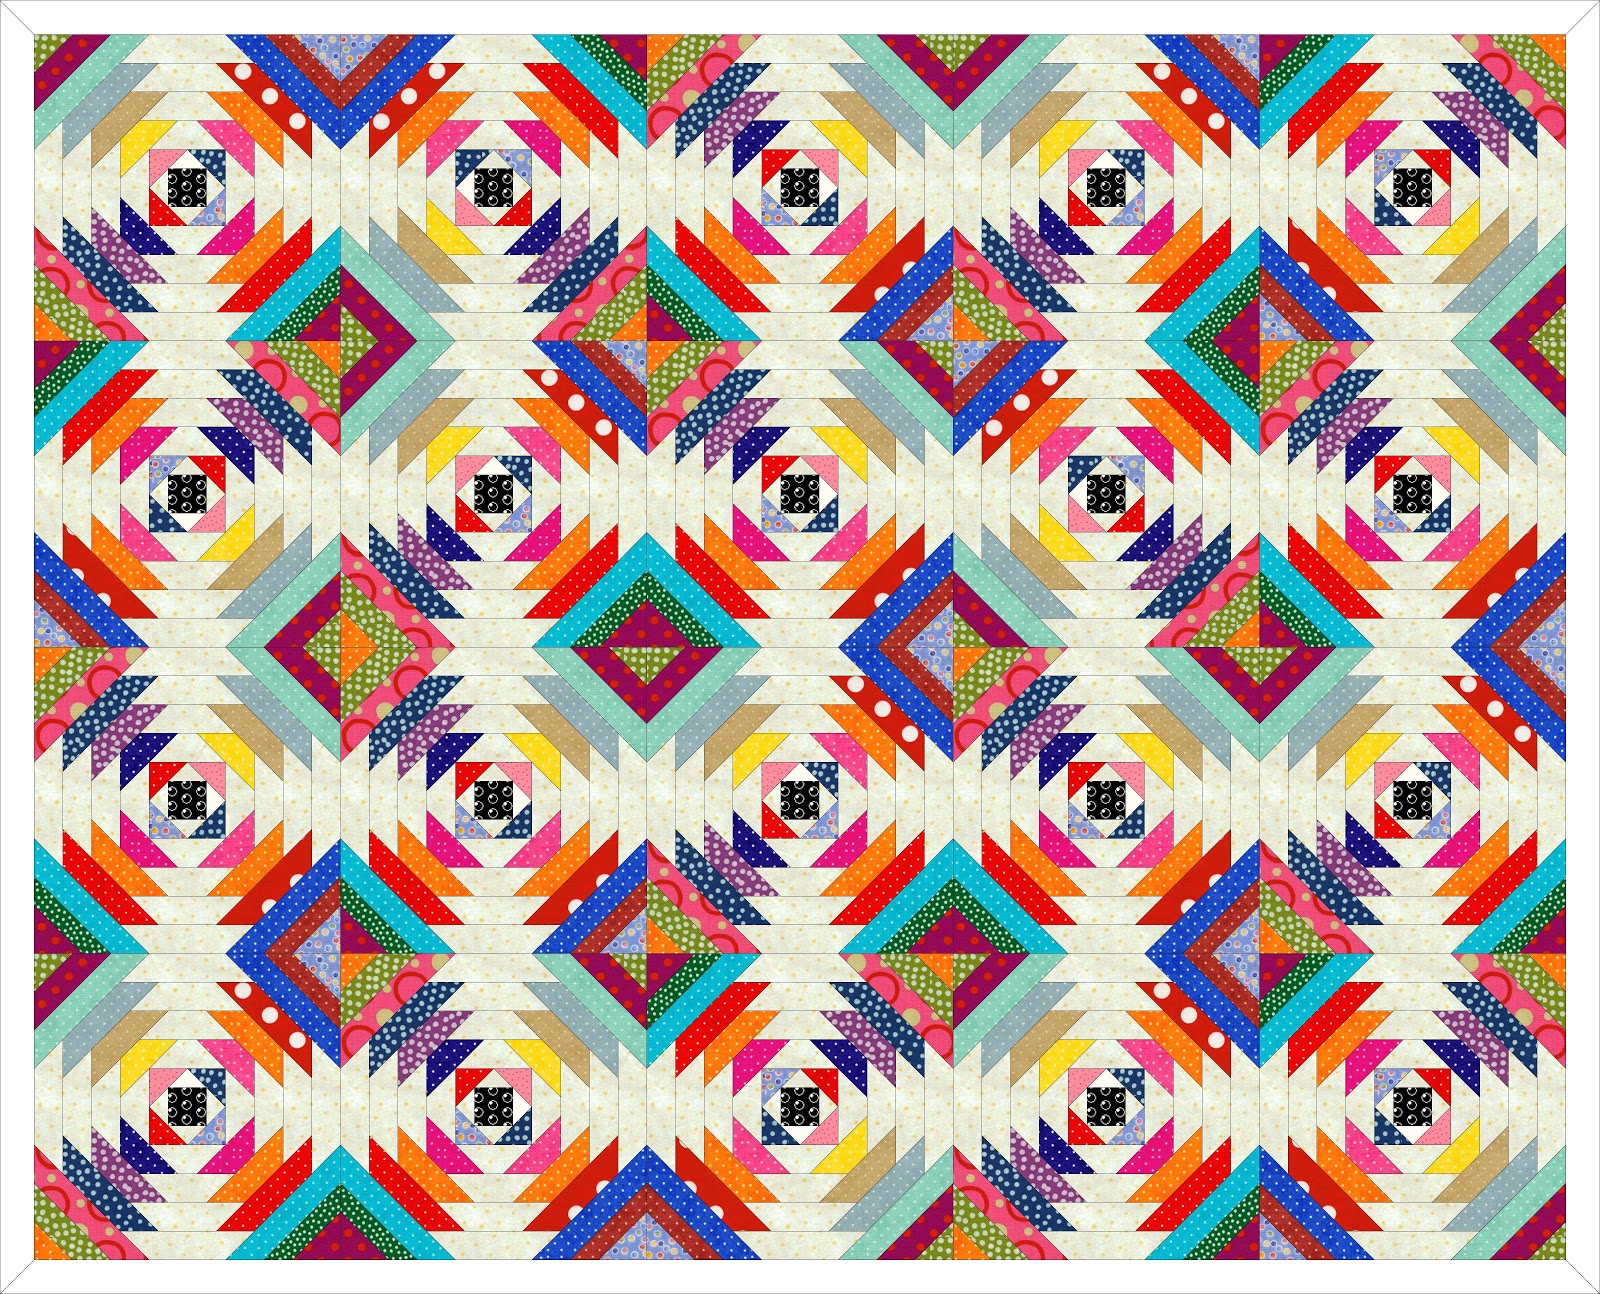
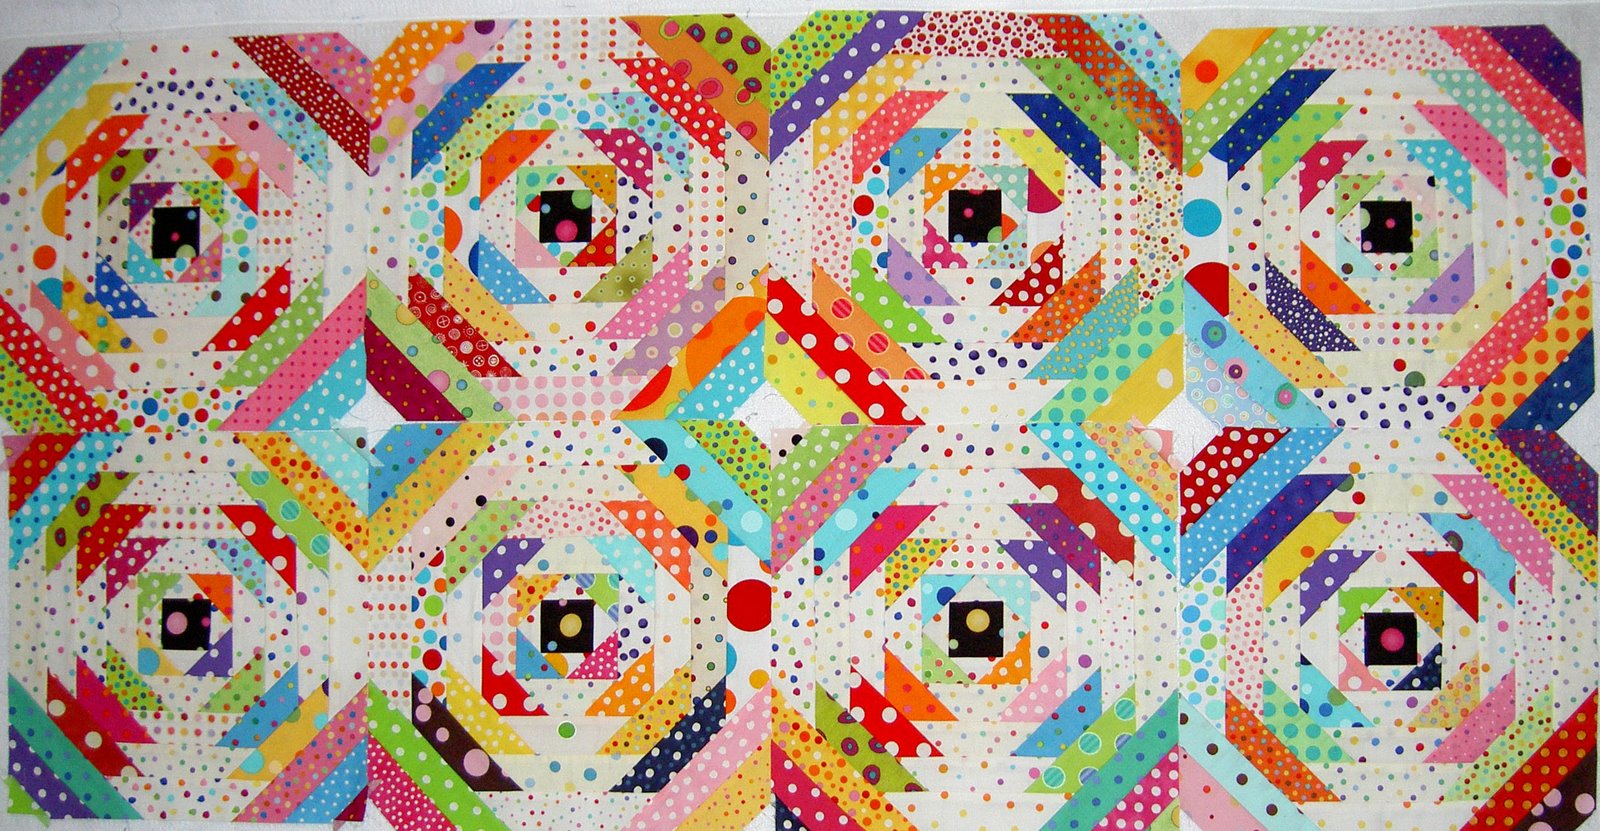
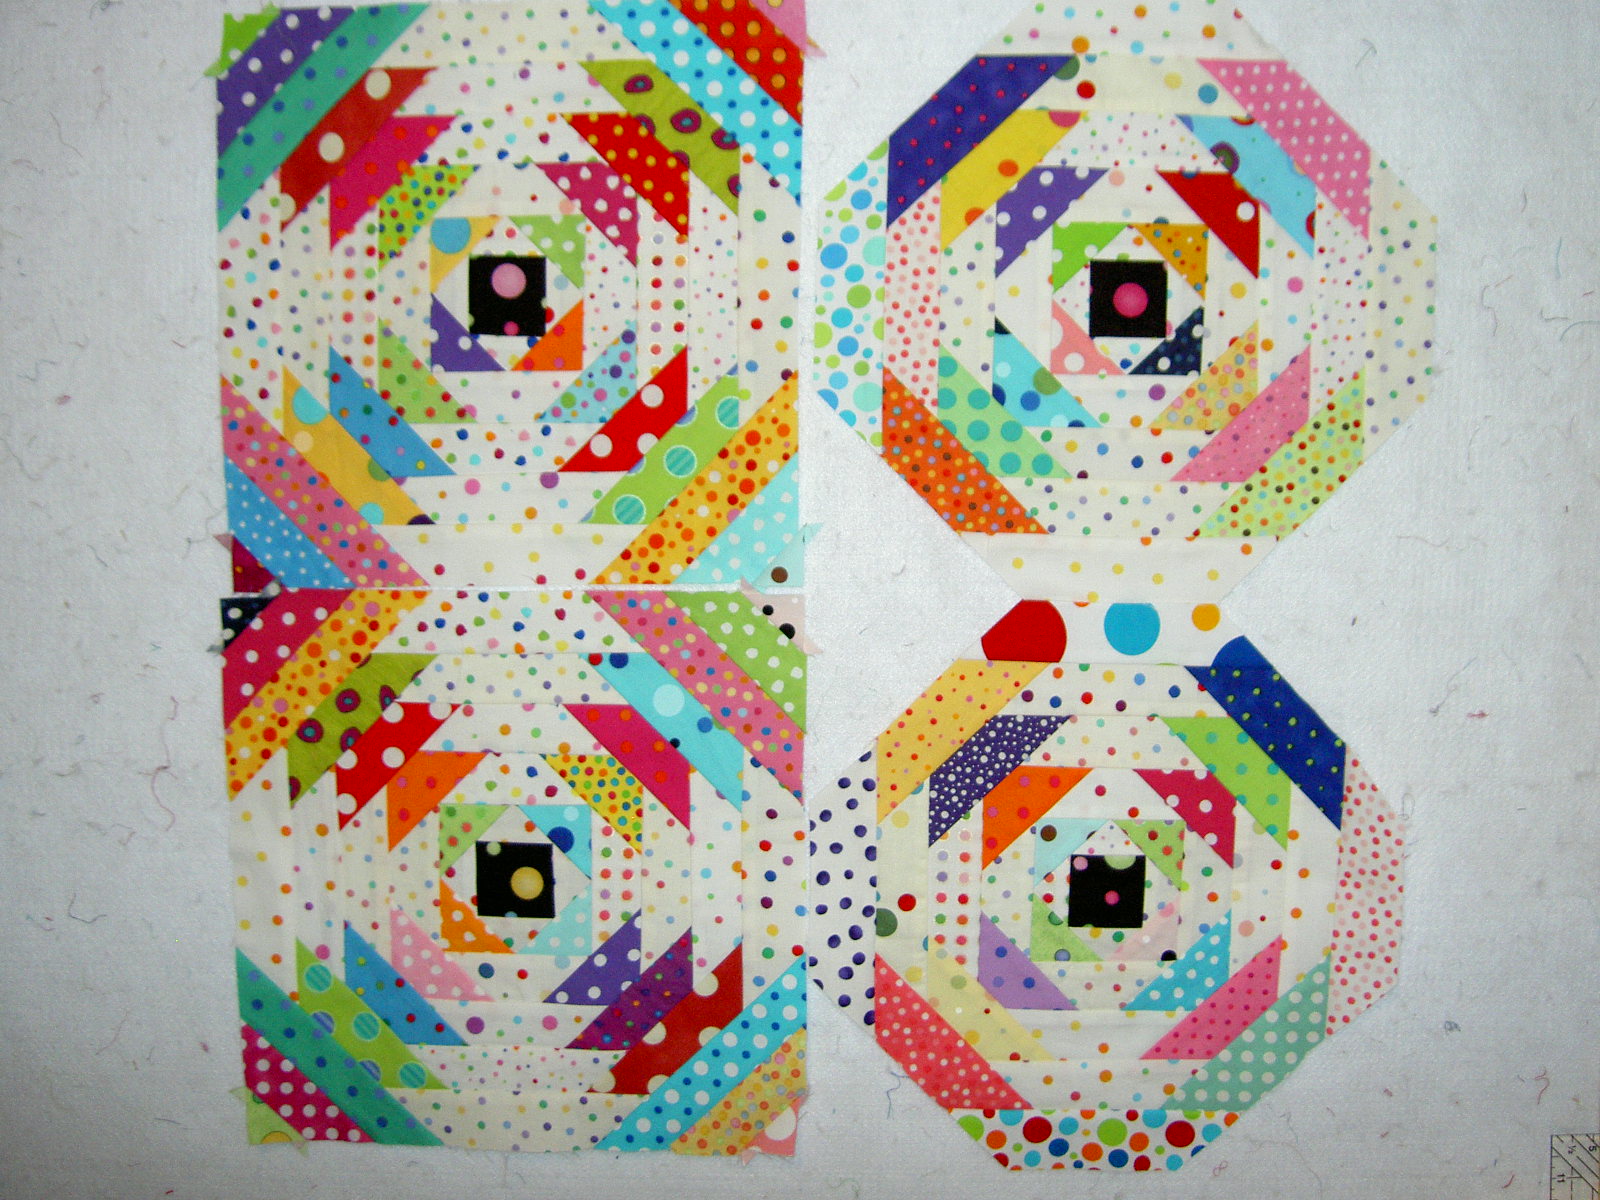
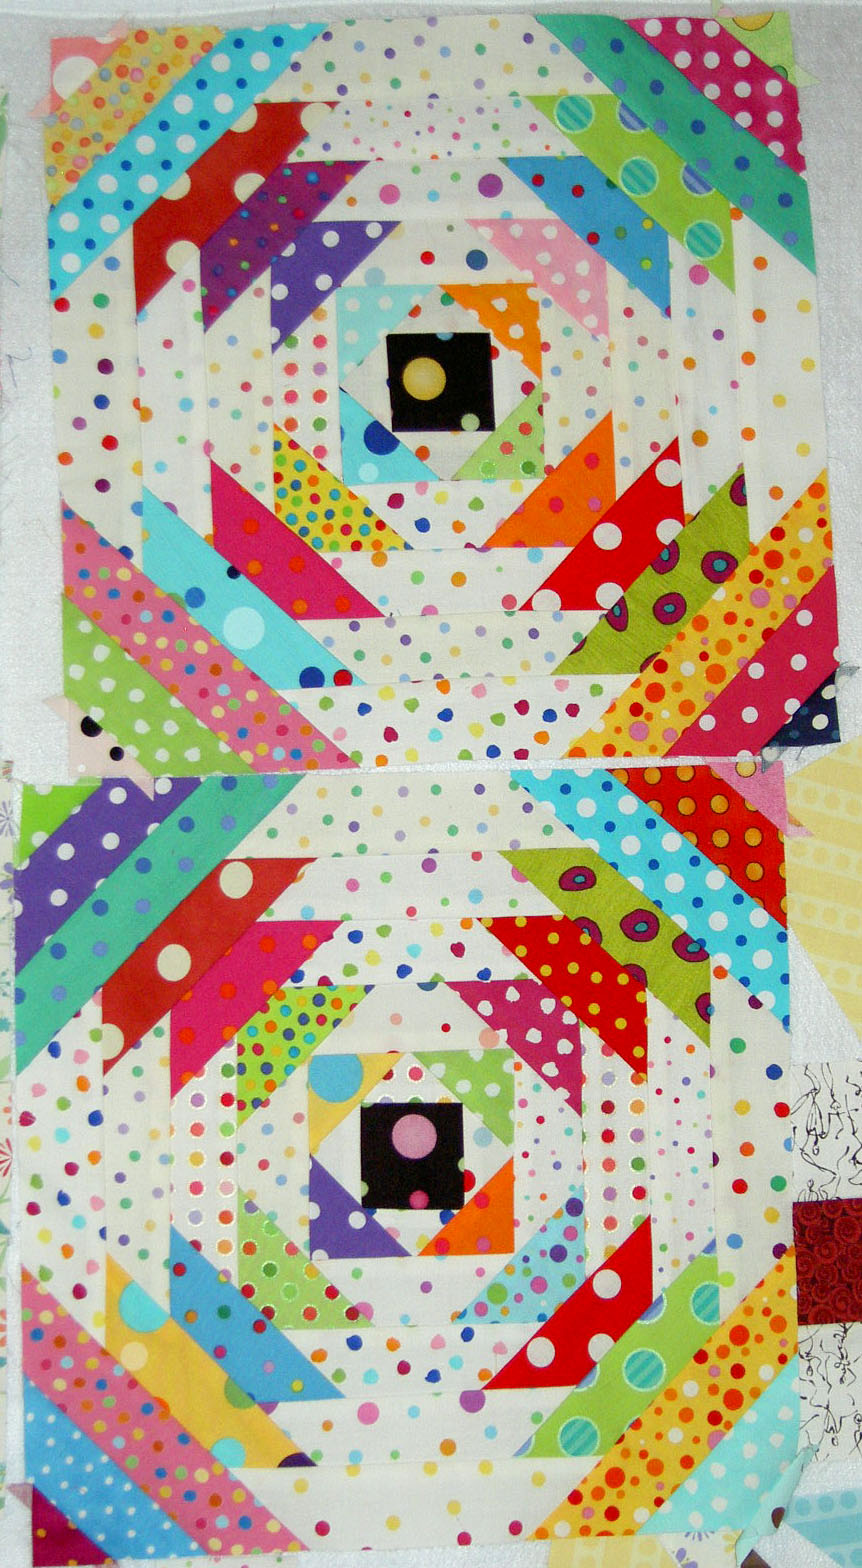
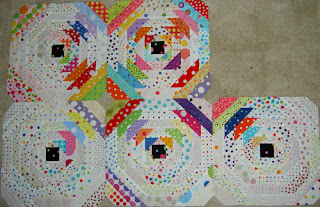
The above gives you an idea of how a corner of the quilt will look when the quilt is finally put together. You can see the corner block on the left bottom and right bottom. You can see the side blocks on the left top and the middle bottom. The top middle block is one of the center blocks.

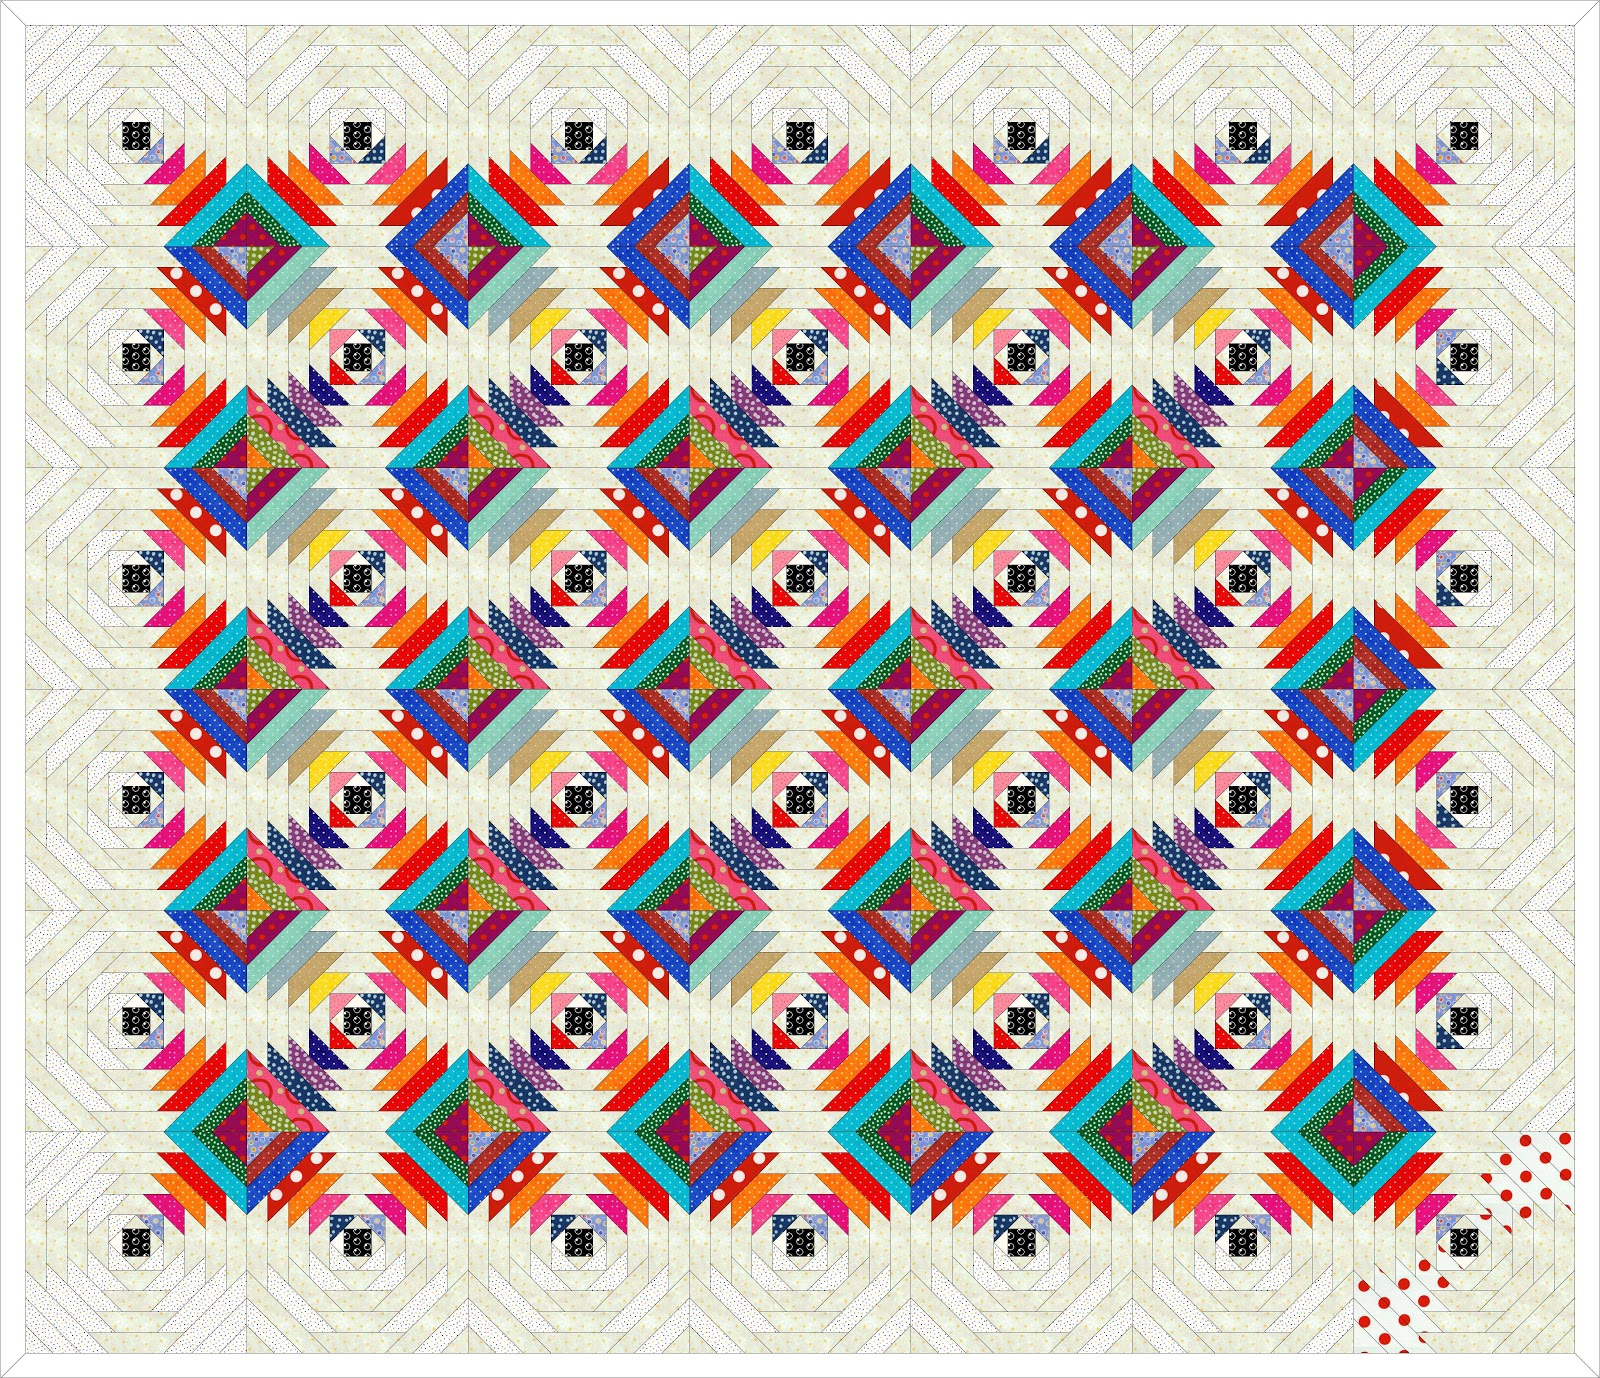
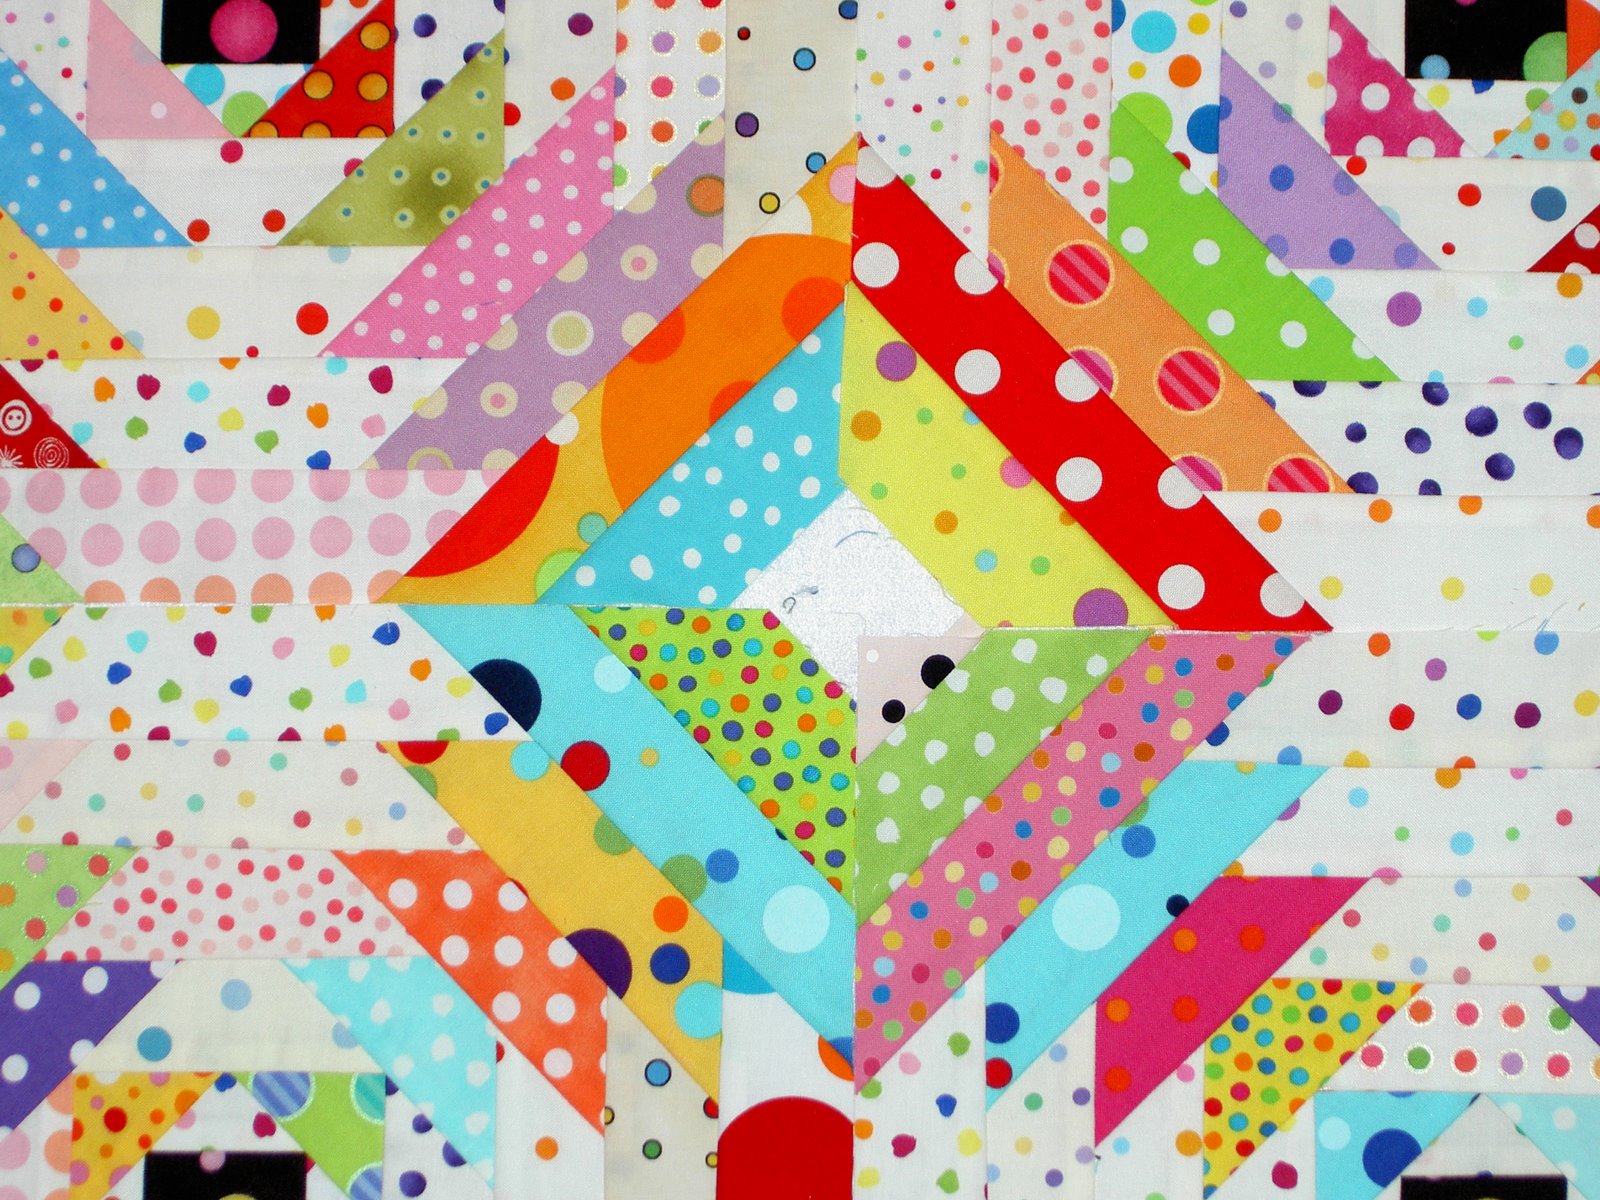
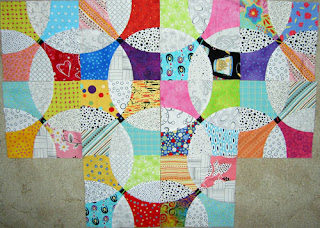
I made one or two more Cross Blocks (Flowering Snowball) and laid out all the blocks I have made thus far. I like the way the blocks are coming together. I am surprised and pleased each time I lay them out with the interplay between the fabrics. Laume was right in her comment to the More Quick Bytes post in advising me not to sew the Flowering Snowball blocks together as I went along when she said “Unsolicited advice – I’d hold off on sewing the snowball blocks together until you have them all made. You may find that as you make them you go through stages where you like and use one color more than another, or you run out of one or more background scrap fabrics and add in some new ones. You’ll want those changes to be dispersed evenly within the body of the quilt instead of showing up in little clumps. I assume. And one more thing – they look LOVELY!”. The more often I look at these blocks the more I like them.

A visitor has made me feel like I need to get busy and get rid of some of the junk laying around the house, or at least get it organized. Unfortunately, I don’t have a lot of time, so it will have to be a little at a time. I did starting thinking about some of the organizational containers that are currently available. We’ll see what I get.

This isn’t necessarily a bad thing. I always get a great sense of accomplishment out of tidying and organizing (librarian gene, I guess). I just don’t want to spend all of my limited and precious spare time on it.

To that end, in a previous post, I showed some fabrics that Deirdre sent. I really had no time during the past week to even think about fabric and quiltmaking. In order to get back into the fabric groove, I spent some time pressing and cutting them up for background pieces for the Cross Blocks. It was a good, meditative way to get back into the groove of sewing. I still have some more pieces to cut up. This task was also a way of cleaning up my workspace.

I have been using the red mosaic quilting piece as a thread catcher. I needed to get one of the pieces under control, because it was getting unwieldy. If you review the previous post (see link above), you can see how long and skinny the piece was. In its current state, it is still small (~10″x10″??), but really looks usable now. I want to make it bigger, so I am still working on it. Working on it like this is a little more difficult, because the small pieces don’t get added to the square very easily. I am currently working with some small pieces and making them big enough to add on to the piece shown above.

I am planning on adding the second piece, which is an even odder shape to the square above.


Confidential to TFQ: here is the purple I thought would work for your sashing. Unfortunately, taking a photo of it doesn’t do it justice. The above pictures shows too much blue, so I will send you the sample.

I know many of you have commented on recent posts and I have not had a chance to respond, but rest assured that you are on my mind and I will get to it. Thanks for reading!

Contemplating the Completion of the Pineapple

I am not done with the Pineapple blocks yet, but I am within sight of the end. At this point, I find myself contemplating the finishing of the quilt:

  • How will I put it together?
  • How will I quilt it?
  • What color binding?
  • Will I enter it somewhere?

And inevitably, my mind strays to the borders:

  • Should I have a border? Plain or pieced?

My original idea was to put the 20 blocks together and a striped binding and move on to the other ideas flittering around in my mind. If I did that the quilt would look something like:

I can’t help asking myself what the quilt would look like if I used my self bordering technique. The Pineapple blocks would all be complete, for one. There would be no stray, hanging centers. I used EQ6 to test out what it would look like:

I like it. It looks really good. It looks finished. It looks framed.

It means much more cutting and piecing. It means 20 more blocks (double what I will have when I complete blocks 17-20). But it looks finished. I will have to think about it… hard. Now that it is has entered my mind, I don’t know how I will not be able to run with this idea.

I am sure you realize, also, that this quilt, if I had 20 more blocks, will be another monster close to 70″x 90″. The piecing so far has taken me about 5 months, so I can look forward to another 5 months of piecing – not an altogether unpleasant thought, but somewhat daunting however you look at it.

So, dear readers, your opinions are most welcome.

Pineapples are Pretty

The title was inspired, for no particular reason, except that it struck my fancy, by a poster at the Castro Theatre advertising Pretty in Pink, the 1980s movie. Molly Ringwold’s hair was precious.


I finished two more Pineapple blocks for a total of 8 now. I feel like I should have more, but I don’t. As I keep reminding myself this is an ongoing project with no deadline. I am enjoying seeing the evolution of the piece.

The blocks, all together, look pretty good.

I notice an interesting secondary pattern developing. I knew i would, but am just surprised at how much I like it.

The Pineapples Progress

I have made some progress on the Pineapples. I am working on them in between everything else so I don’t feel guilty about starting a new project. Yeah, yeah, I know guilt is not productive. Above is the first bits of the second two blocks.

I have made more progress on the second two blocks. I am about 3 rows away from finishing. One thing I did differently in the last few rows is add new backgrounds. the size and spacing are different from the background fabrics I have been using. We will see how they turn out and if you think they scream “INAPPROPRIATE.”

I also added some fabrics with smaller dots. In these photos they look like tone-on-tones. We will see if I use them again.

First two Pineapple Blocks Finished

Learning to do something new makes the first two blocks or parts of a project practice. For this project, and, yes, it is now on the project list, I am pretty pleased with these two blocks. The blocks are fairly flat, there is no paper to rip or muslin to quilt through.

I spent some time yesterday putting the last two rows on as well as the corners. I may have to remove the corners and put others on, as they need to be a bit bigger, but we will see.

I am very pleased with how the fabrics look together.

I am still cutting strips, which is a drag, but I will be happy when I have piece of all of my dots cut.

Pineapple Class Review

The class was great.

I had enough dots, but could have used more.

The Pineapple Ruler is totally worth the money.

The above photo shows how to place the ruler to cut the pieces. No foundation.

Here are the blocks that I made:


This is how my one block looked after a couple of rows.

This is how my two blocks look now. I have two more rounds to go: I have to put some strips on the corners and one triangle on each corner then each block is done. I should have cut the strips in advance, so I would have had more sewing time, but I didn’t have the time, so the point is moot.


This is the teacher’s, Katrina Lampken, quilt. She did a nice job teaching. She a little background on the Pineapple block. She talked about different ways of making it and why she liked this method. Then we got started. She was able to answer all of the questions. She was really mild mannered, but go her point across. It was a great day.

These are some of the other student’s work:


Sue

Barbara from San Ramon (we were dot sisters)

Laura worked with gradations