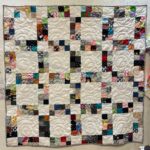
I started another Sidewalk quilt with 4.5″ x 8.5″ panels I cut when I processing scraps a month or so ago. I haven’t made a ton of progress, but I like what I have done so far.
While the ‘panels’ are the same size as the pieced units, this top feels like it is going together much more quickly.
I finally found that someone else had created a pattern for, what I call, the Sidewalk Quilt. Jennifer Jones of Penelope Handmade has a pattern for the Dorothy Quilt, which is, essentially, the same as the Sidewalk quilt. She has a long blog post from 2023, which includes links to her YouTube Channel. She uses all solids in her examples – at least the ones I saw – and they look quite good against a white background.
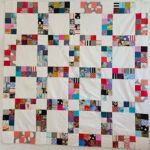
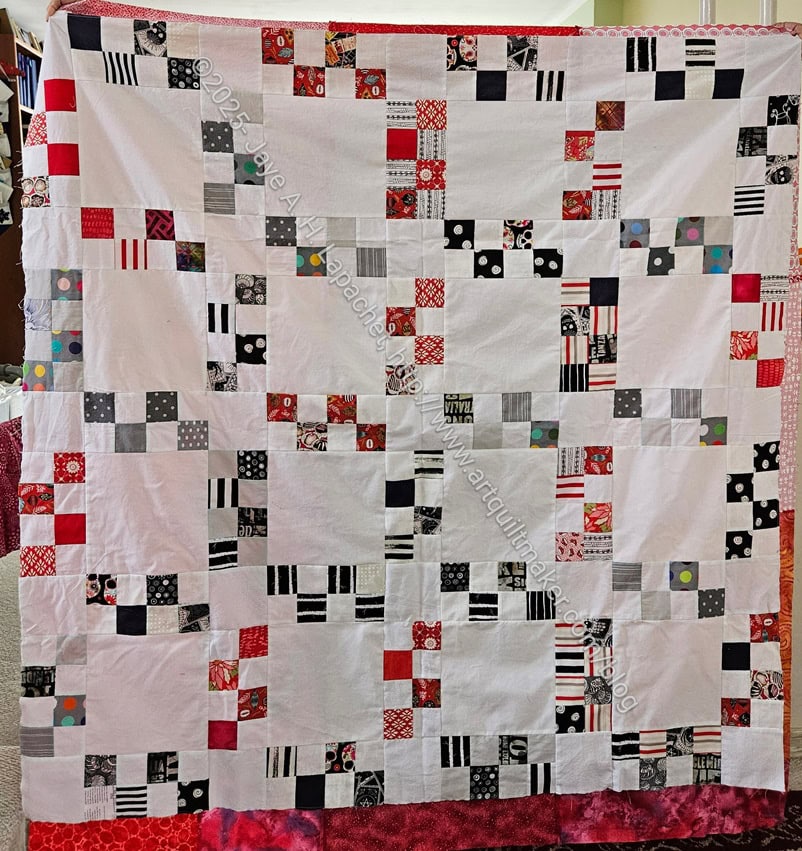
I definitely need to think about less white in the Half 16 Patch blocks. This quilt is VERY white and you don’t really get the sidewalk effect with so much white.
I have been working on some green and blue Sidewalk blocks with white and I may use a different color for the background.
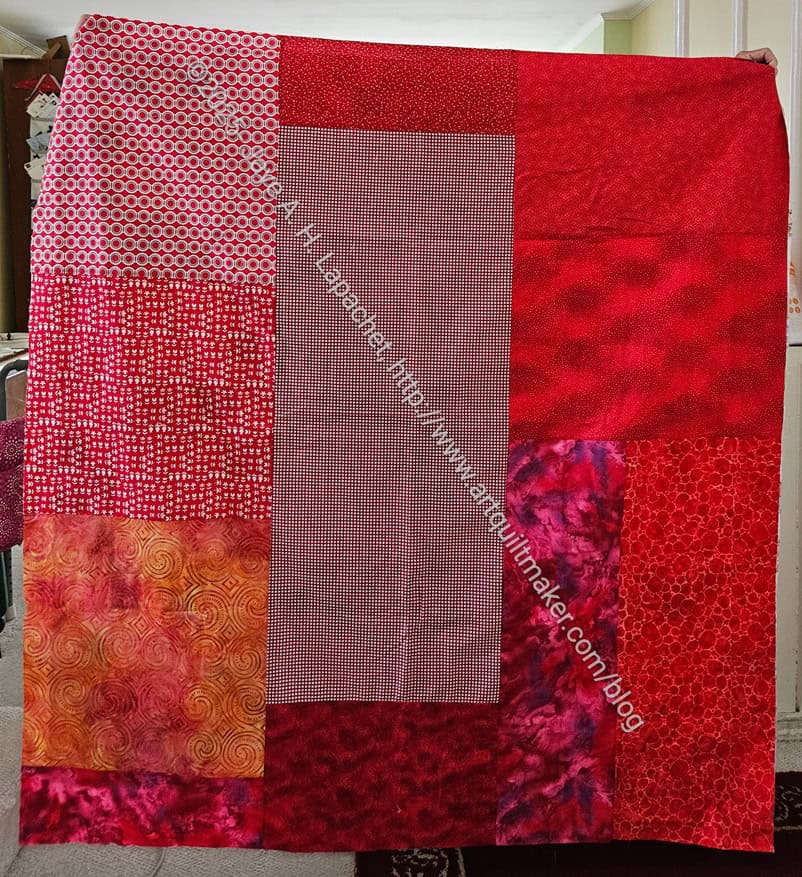
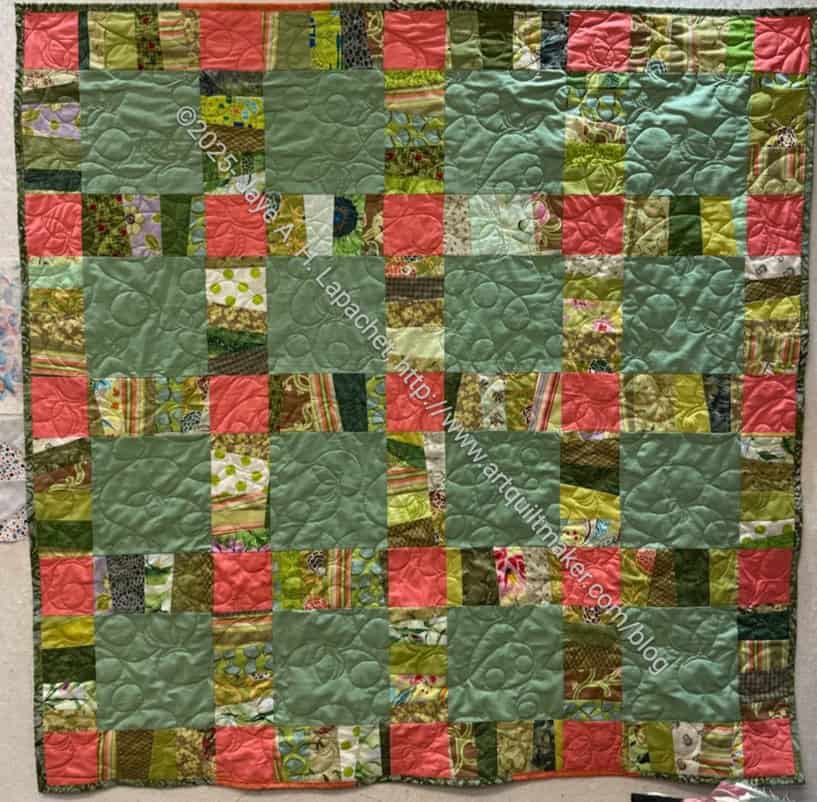
Sidewalk #4 back
I was very surprised at how well this back went together. I didn’t worry about eeking every little inch out of the fabric. I got enough pieces out and cut there where I needed to. It means I have more scraps to cut up as well as a finished back.
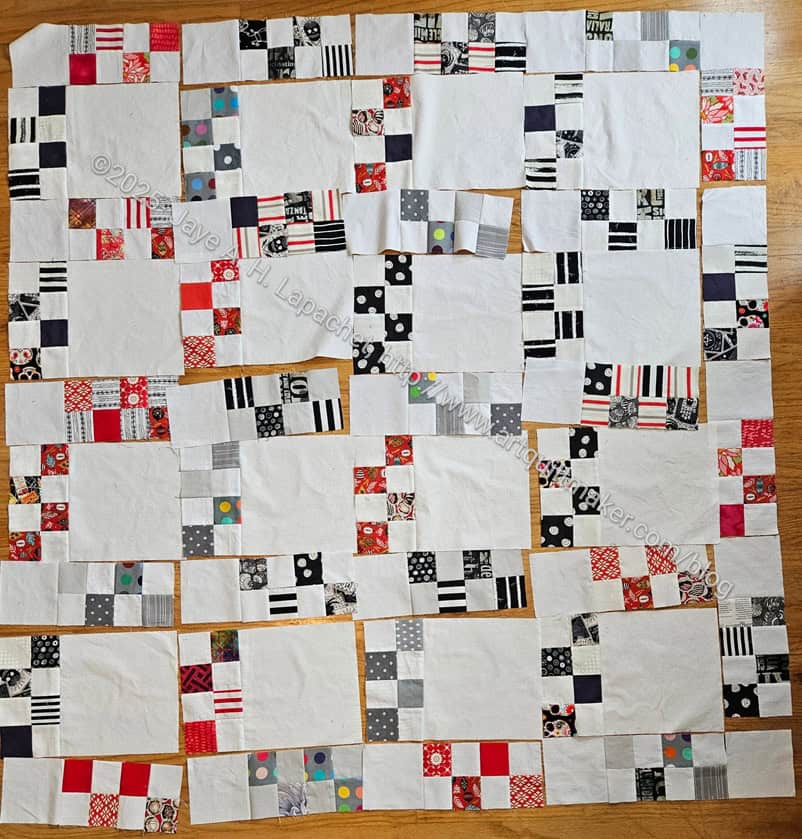
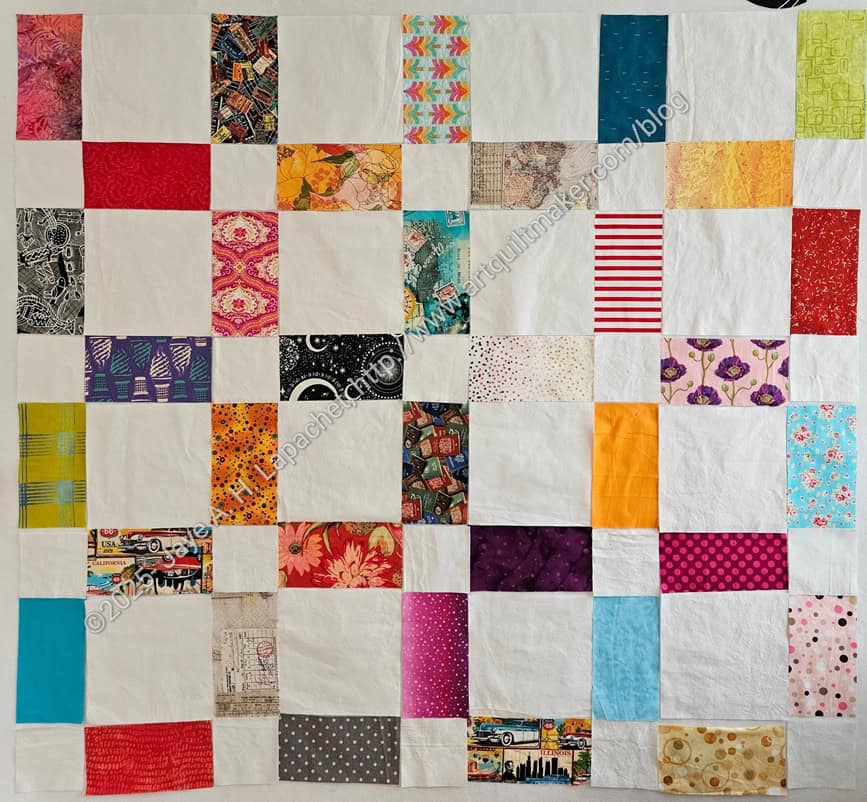
I started Sidewalk #4. As you can see from the photo, I am using my design floor. The design walls are full. I can’t take Country Revival/The Sad Quilt off the large design wall until I get more sewn.
Sidewalk is too big for the small design wall so design floor it is. Not my preference, but needs must. Too many projects on the go, so I needed to get one of them off my list.
I have been randomly sewing Half 16 Patch blocks to the white background pieces as leaders and enders, so I have a small start. I have a lot to do, however. The Community quilt team for the guild really needs backs, so that is an extra step. I know I normally do it, but was considering being lazy this time. More fabric used, however.
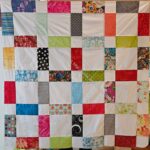
I was so excited to see that Laura was inspired to make a Sidewalk quilt when she saw one of mine in the batch of BAM quilts given to her for quilting.
Green Sidewalk by LauraM
At Sew Day, we talked about it and she was excited that I had made the original one (aside from the one I saw at the Fair). She showed me a picture of one with a green background. I have been thinking about making one with a color for a background. I am not done with the white background yet. I can see where white strip blocks would work well with some kind of colored background.
We talked about making it bigger and it occurred to me to make a 12″ version. I can easily adjust the pattern, but I would have to find a new ruler if I actually pieced a larger quilt!
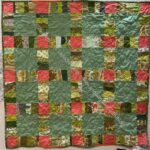
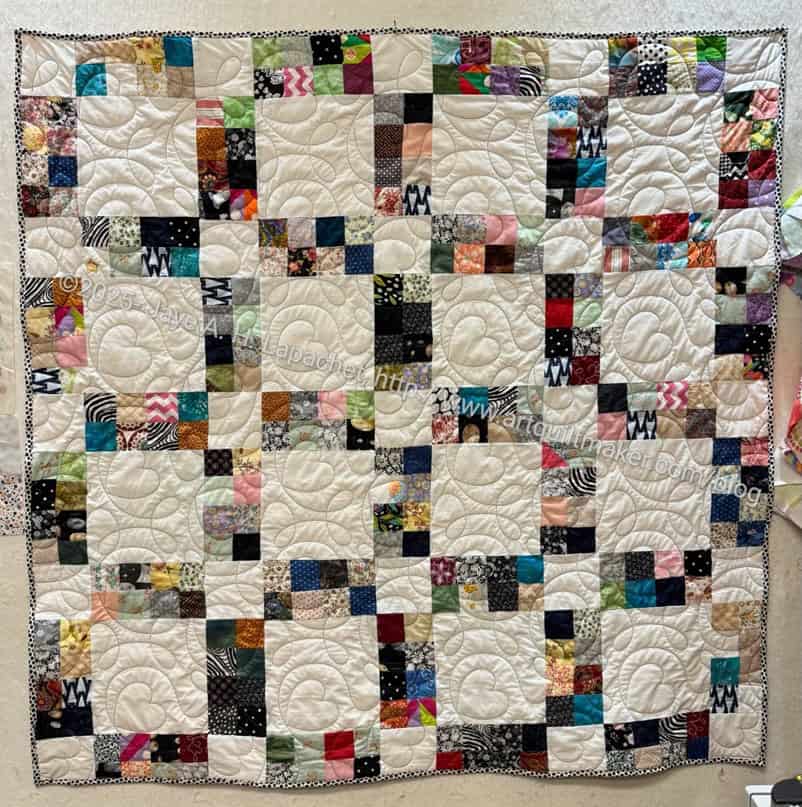
I made good progress on Sidewalk #3 and was able to get this finished quickly. Using one patch, instead of improv piecing or Half 16 patch blocks, for the 8.5 inch x 4.5 inch units helped make the piecing go very quickly.
This is already with Laura waiting to be quilted.
I noticed after it was gone that I forgot to put a top border on. WTH? Oh well. I’ll do better next time.
I know I made a back for this quilt, but I didn’t take a picture of it. Again, WTH? Not like me at all.
This is a different kind of Sidewalk design. I thought of this design after cutting some 4.5 x 8.5 rectangles for another another Rectangle donation quilt. Remember the first one I made last year?
I had cut enough rectangles to make another of those rectangle quilts. However, I saw that the size would work with this design as well. While I was on the sidewalk roll, I decided to try it. It will be super easy to sew together.
I worked on Sunday to get Sidewalk #2 off my large design wall.
I am really pleased with how it came out. I like the differences between this one and the first one. I am excited about how it looks, excited about the possibilities of other versions and excited that it is finished.
I think the scrappy strip blocks look good. I will be curious to see how they look in different colors. Maybe I’ll use a colored background for one of these quilts?
Sidewalk #2 back
I delved into my box of blues to find backing fabrics. I came up with oldies, but goodies.
I’ll give this one to the Community Quilts team at the next meeting.
I am well into my second Sidewalk quilt. I got such good feedback on it at the guild meeting last month that I decided to write a tutorial for it. I want to encourage people to make donation quilts using the 16 patch blocks the guild makes tons of. This tutorial will enable you to make one of your own.
I saw the original quilt at the Sonoma County Fair. There was no attribution. If I find that someone has written a pattern for the quilt, I will add a link here.
Supplies
Sewing machine
Background fabric
Random scraps
Basic sewing kit
Thread
Iron
Pressing surface
Graph paper
Pencil
Optional: Colored pencils
Draw
1. Draw out the design on graph paper
2 Mark the pieces that will be background. You could do this with colored pencils
3. Mark, or color in, the pieces that will be your foreground
4. Count up the pieces on your design and confirm my math is correct.
This gives you a map to work from.
Cut
Nota bene: Cutting directions are duplicated below. I have included cutting here in case you want to cut the background in advance.
Cut 25 4.5 in. x 4.5 in. background patches (B blocks)
Cut 16 8.5 in. x 8.5 in. background patches (C blocks)
I used one full yard to cut these 8.5 inch blocks out.
Sew
1. Create 40 8.5 in. x 4.5 in. patchwork blocks, unfinished. (A blocks) There are several ways to do this:
improv piecing similar to my improv donation quilts / made fabric
one solid piece of fabric cut at 4.5 in. by 8.5 in.
2. Cut 25 4.5 in. x 4.5 in. background patches (B blocks)
3. Sew 24 4.5 in. x 4.5 in. background squares (B blocks) to 24 patchwork pieces (A blocks). This creates an A+B block.
3A. Keep back 8 A+B blocks for the ‘border’ or outside edge
4. Press to the background squares (B blocks), because there is less bulk. If you are using white, there might be a shadow.
5. Cut 16 8.5 in. x 8.5 in. background squares (C blocks)
6. Sew 16 8.5 in. x 8.5 in. background squares (C blocks) to 16 patchwork pieces (A blocks). This creates an A+C block
7. Press to the background squares (C blocks)
Sidewalk #2, block 1
8. Sew 1 4.5 in. background + patchwork combination block (A+B block) to 1 A+C block )8.5 in. background + patchwork combination block).
You will end up with a block like the one shown on the left.
You need a total of 16 of these blocks, so go ahead and sew them.
Blue Strip Sidewalk blocks
9. Put all of your blocks on the design wall.
10. Rearrange them until you like the design.
As I was looking at these blocks on the design wall, I realized that I had focused on putting like blues together rather than mixing them up, so in this arrangement there are big blobs of dark blues that I will need to mix up before I sew the blocks together.
11. Find the 8 A+B blocks for the ‘border’ or outside edge that you set aside in step 3A. Position them along the right side and the top.
I have more than plenty of the blue color strip blocks to make another Sidewalk quilt similar in size to the first.
This is the first block I have put together with the white background and I think the block looks nice.
Sidewalk #2, block 2
I made a second one using some darker blue strip blocks. It looks nice, too and the sewing is going pretty quickly in between the Chain Link and Triumphant piecing.
I need to finish something as finding the time to finish four projects is making my head swim a little! LOL.
Since I had some free sewing time, I spent as much time as I could grab sewing this quilt top together. I concentrated on the half 16 patches first. I had been kind of limping along sewing them in between Triumphant block 2 pieces and was sick of it. I only needed a few more half blocks, so I sat down and sewed them.
I had a few hours while DH was out one evening so I started sewing the blocks together and just continued snatching time wherever I could. Once the half blocks were together this was a relatively easy quilt to sew together.
Sidewalk back
I decided to use red for the back. Shockingly, the back went together very well. Instead of fighting with pieces like normal, this back went together really easily.
I am glad this is finally done! I have some ideas for other versions, but want to get Chain Link and Triumphant pieced.
I decided to call this quilt pattern ‘ Sidewalk’. There are other quilt patterns called ‘Sidewalk’, but this one looks more like city blocks surrounded by sidewalks than any of the other others. Besides I can’t keep calling it Half 16 Patch Sashing quilt. That name is too much of a mouthful.
I am making good progress. I have sewn the blocks together and am working on sewing them into pairs.
This top is taking forever and, again, I need the design wall space, so I’ll need to spend some time this weekend churning out half blocks.
That being said, I haven’t been a slacker. I have made some progress and the quilt top is coming together. I also like the way it looks, though it is a bit dark close up.
There was no way I can finish it to turn in tomorrow at Sew Day, but maybe I’ll be able to finish it for the meeting in a few weeks. Work sure does get in the way of sewing!
Well, I thought I had done more than I have actually done. Or that’s the way it feels.
Half 16 Patch Sashing top #1 – more progress
I put this quilt up on my large design wall and it turns out I have a whole bunch of sashing/blocks left to do.
I put the sashing/blocks along the outside so I could see the full extent of what I had. With so much white, the outside of the quilt melted away into the design wall.
It turns out that I have one full sashing/block on the machine, but I still need about 13. I have more than a week until I want to hand it in at the guild meeting.
It has an interesting look. I think when I make the next one I need to be more selective about the colors I choose. I need to have one color used as alternate patches in all the blocks.
I have made good progress on the Half 16 Patch Sashing Donation top. I used the 2.5 inch squares as leaders and enders as I worked on Old Town. It was getting too big for the small design wall and that helped to spur me on to get Old Town finished. I wanted to see this top on the large design wall. I feel like I am almost finished!