This word wasn’t planned at all and I was contemplating how I would fit a whisk into one of my drawings when I saw this display!
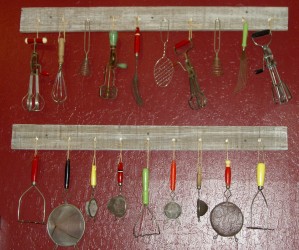
Lucky me!
Author: Jaye
Creative Prompt #55: See
See’s candy
Did you see it?
Seeing eye dog
What do you see?
See Saw
Seen and not heard
Monkey See Monkey Do
“I can see clearly now the rain has gone…”
Holy See
See through
The world as I see it
see also (see reference)
See the Creative Prompt page if you have questions about this project.
Post the direct URL (link) where your drawing, doodle, artwork is posted (e.g. your blog, Flickr) in the comments area of this post. I would really like to keep all the artwork together and provide a way for others to see your work and/or your blog.
The Creative Prompt Project, also, has a Flickr group, which you can join to post your responses. I created this spot so those of you without blogs and websites would have a place to post your responses.
North Coast Quilt Shops
We spent the weekend on the North Coast. I wasn’t excited about going, but, for various reasons, agreed and was glad I did. The North Coast is beautiful and I found as the car left the City behind and my eyes took in more green than concrete and metal, I felt calmer and more relaxed than I had in awhile.
To prepare for the trip, I looked up quilt shops in the area and came up with four. On the way up, we also saw a shop in Laytonville called Fat Quail Quilts that got good reviews from the other shop owners, but I wasn’t able to stop.
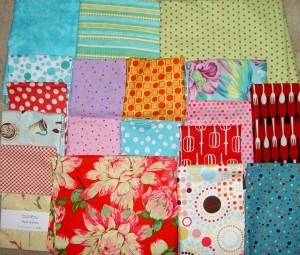
We did stop at Kim’s Fortuna Fabric and Crafts, Itsy Bitsy Quilt Shop in Ferndale, Scottie Dog Quilts and Ocean Wave Quilts, both in Eureka. The first shop I visited was Kim’s Fortuna Fabric and Crafts. It is in a strip mall (a nice one) off of Rohnerville Road and Main Street right as Main Street turns into Fortuna Blvd. I am telling you this because I had to call since I couldn’t find it by driving up and down Main Street.
It is a nice store with a good selection of fabrics at about $8.99 a yard. the woman behind the counter was helpful and friendly. They also have yarn and other craft supplies. there was a Tumbling Block class going on while I was there and the teacher has quite a selection of classes going on during the next few months. I bought 3 flannels I like to use to make some receiving blankets (top 3 fabrics, above).
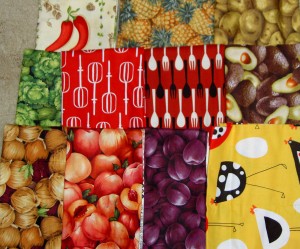
I bought some food fabrics for my mom for one of her quilts and a couple of dots for myself. I saw a pink and white flower print that went with a black and white and a stripe. The three of them would have made a fabulous Anna Maria Multi-tasker tote, but I resisted. I have a full box of tote bag fabrics and need to make a few tote bags before I buy more fabric.
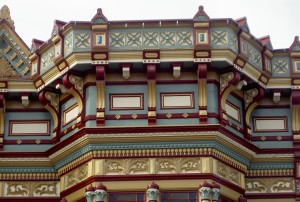
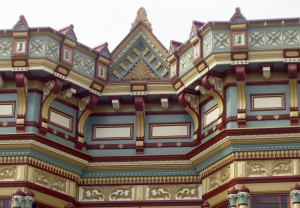
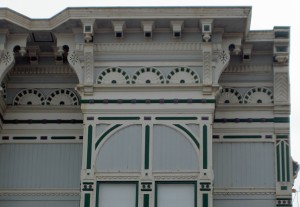
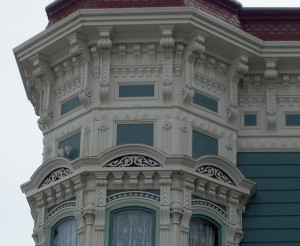
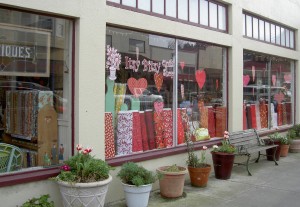
Famous last words, however, after I stopped in at Itsy Bitsy Quilt Shop in Ferndale. Ferndale is a cute little town off the beaten path with gorgeous buildings on its Victorian Main Street. Itsy Bitsy Quilt Shop had a very chatty man sitting behind the counter when I walked in. He turned out to be the owner’s husband. They had fabulous fabrics and I succumbed, including two tote bag fabrics.
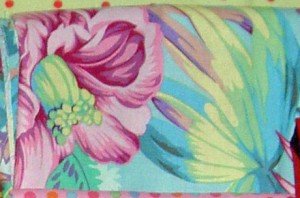
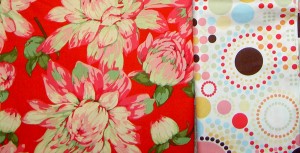
The store was really bright and cheerful and I think that was part of the attraction. I think it was my favorite quilt of the four I visited. The 2 tote bag fabrics are Kaffe Fassett prints. I also bought some dots, of course. The one above will go on the inside or the pocket panels. Not sure what I will use for the inside, perhaps a black & white print? I have plenty already.
After Ferndale we went up to Eureka to see Scottie Dog and Ocean Waves. Scottie Dog Quilts was a nice shop as well. I am amazed at what quilt shop owners can cram into a small space. Don’t get me wrong, I didn’t feel crowded in Scottie Dog, but it wasn’t Best Buy either. I bought more dots and a conversational on turquoise with coffee cups that I want to use on the back of the Tarts (see above on the left, 4th from the top).
Scottie Dog Quilts had 2 diamond quilts hanging on their wall. I asked if they had the ruler or template they used to make it and the shopkeeper said that they used the Accucut. I never considered that machine as an option for me, but that offhand comment opened up a whole new world for me. Cutting diamonds for the FOTY 2010 would be absolutely no problem, however. Hhmm. I wouldn’t buy that machine just to make one quilt, but I will look around and see if a shop has it and I could try it. I have a lot of questions:
- do they have the sized diamonds I have started to cut?
- can you put one layer of fabric and have it cut?
- how large of a piece of fabric can you put in, e.g. can I cut a 2×6″ piece of fabric and cut the diamond from that or does the piece have to be larger?
Finally, we went to the Ocean Waves Quilt Shop. It is housed in an old Victorian house, which made it adorable, but also a bit dark. I bought a pack of charm squares and another food FQ for mom. I think I was tired of fabric shopping by then.
I find it quite hilarious to listen to what the quilt ladies talk about while I am shopping. In my travels this weekend, I heard about the tribulations of the world including prescription drug addiction, surgery, a sister determined to have 4-6 children though she doesn’t have the money to raise them and a multitude of Valentine’s Day anecdotes.
If you spend any time up on the North Coast, you won’t have to worry about a shortage of fabric.
History of the Janome Company
I also know, now, why I was so confused when I bought my machine about whether I had a New Home or a Janome – that was they year they officially changed the name! Yes, I have had my machine for 15 years.
Finally, the article gives a little teaser about what is to come in Janome machines.
|
Modern Quilt Guild
Check out the site and see if there is a group in your area.
|
Minor Detail
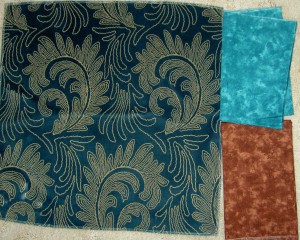
I am thinking of using this combination of fabrics for my next pencil roll. I will center the main part of the back around those two feathers and the teal and chocolate will be the inside and the pocket piece. I thought I would start this the first weekend in Feb, but kind of tanked and didn’t do it.
The upholstery fabric is another FabMo fabric. I already pried off the tags and removed the staples.
Sketching #53
Sketching #52
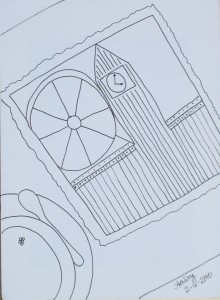
I often sit down at my sketchbook and wonder whose dumb idea the current word is? Then I remind myself it was mine and resolve to find a better word for the next week.
This one actually formed in my head pretty quickly. I wanted to look up an actually picture of Big Ben and Parliament, but was, ultimately, too lazy.
I really need to get back to my street scenes.
One World One Heart Winner
OK, girls and boys, I am here to announce the winner of the one World One Heart blog go round/ blog project/ whatever it is called.
First, my goal was to get new blog readers, so I hope some of you will stick around and join our little community here.
Second, I appreciate everyone who actually took a look at my blog and followed the requests that I had about entering . I really wanted to know where everyone was coming from.
Finally, I also really liked it when people said something about my posts or a post. I was tempted to toss those who didn’t follow the directions out of the drawing. However, I was persuaded otherwise and everyone stayed in.
TA DA!!! The Winner is:
Bonnie
from
Southern Style blog
http://nanbon44.blogspot.com/
You can also make your own Over the top bag. The pattern is from All People Quilt. You can read about my bag in my August 26th post. Lisa put up a list of all the OWOH participants in alphabetical order. Great list if you are looking for some blogs to read!
Sketching #51
In addition to this post being about a creative prompt response, since it has hearts, it will also be a Valentine’s wish for you!
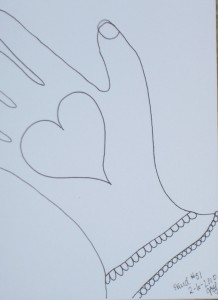
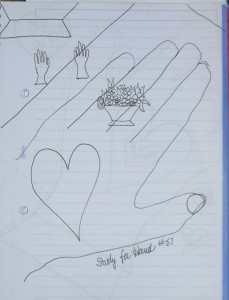
Here are some of the designs I was working on. What I wanted to draw was a Baltimore Album Quilt in the window of the shop I have been drawing. I started to test the basket design and just didn’t feel the love. I have been feeling a little impatient lately and I think my inability to settle on these last few drawings is a symptom.
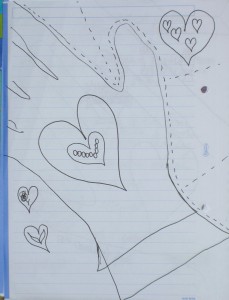
I did this study after the main part of the hand drawing. I was trying to see if I could add more detail and make the piece look better.
Teaching a Young Sewist
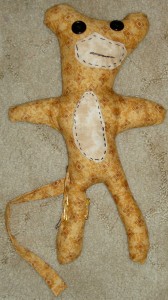
My nephew made this monkey with my guidance.
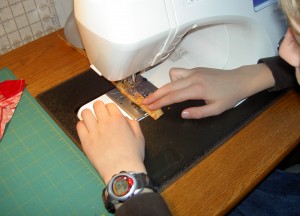
I first showed him how to use the machine to make the tail.
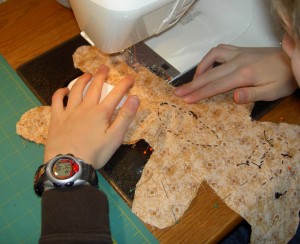
Next, I made him pin the body pieces together and then I let him sew them on the machine.
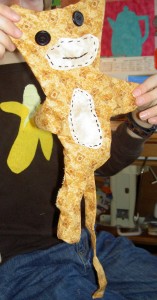
Here is the piece after he finished sewing and turning it, but before stuffing.
Creative Prompt #54: Whisk
Definition: A whisk is a cooking utensil used in food preparation to blend ingredients smooth, or to incorporate air into a mixture, in a process known as whisking or whipping. Most whisks consist of a long, narrow handle with a series of wire loops joined at the end. The wires are usually metal, but some are plastic for use with nonstick cookware. Whisks are also made from bamboo.
Whisks are commonly used to whip egg whites into a firm foam to make meringue, or to whip cream into whipped cream. (from Wikipedia)
Definition:
2 a : a usually wire kitchen utensil used for beating food by hand b : a flexible bunch (as of twigs, feathers, or straw) attached to a handle for use as a brush (from Merriam-Webster)
1 : a quick light brushing or whipping motion
_____________________________________
whisk broom
Whisk & Ladle
Wine Whisk
wire whisk
whisk-ey 😉
See the Creative Prompt page if you have questions about this project.
Post the direct URL (link) where your drawing, doodle, artwork is posted (e.g. your blog, Flickr) in the comments area of this post. I would really like to keep all the artwork together and provide a way for others to see your work and/or your blog.
The Creative Prompt Project, also, has a Flickr group, which you can join to post your responses. I created this spot so those of you without blogs and websites would have a place to post your responses.
Amish Abstractions at the DeYoung+
Mom and I had museum day last Friday. We first went to the DeYoung and saw the Amish Abstractions exhibit. This is an exhibit of Amish quilts from the Stephen and Faith Brown collection.
I could look at Amish quilts for years and never get bored. I went to the Esprit exhibit at the DeYoung back in the Dark Ages and I even demonstrated handquilting during one of their free evenings through a quilt class I was taking at the time. That was in the old museum building and before they charged extra for the special exhibits. Times definitely change!
I really tried to look at each quilt for more than 30 seconds (which my mother tells me is the average time that someone looks at a piece of art in an exhibit.
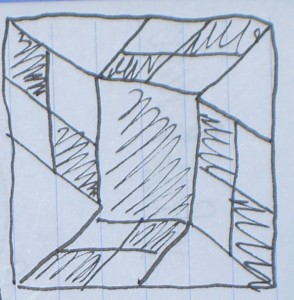
I liked all of the quilts. The ones that particularly stuck in my mind were a small crib quilt with two vertical rows of 3 Jack’s Chains* and a small 6 block crib quilt using a block I had never seen before. I am calling it the “Shutter quilt.” Do you know the name of the block?
The hidden complexity (quilting) in the simplicity (piecing) fascinates me. The piecing designs are often (not always) relatively simple. As the viewer gets closer, s/he can see the complexity of the quilting designs. Many of the quilts had feathers quilted into the border. A quilt using the Bars design had a feather wreath in the middle surrounded by an octagon of straight line quilting design with little quilted clamshell stitching accenting the octagon line. This detail was invisible unless I got up very close to it.
One thing I particularly noticed this time was the deft use of their limited color palette. They use certain colors, which I knew. The glow that I have noticed in some of the quilts comes from the colors and how they were put together. This must seem obvious to you, but somehow it struck me as I was comparing some of the quilts that had this glow to the more subtly shaded pieces. I noticed that the more subtle quilts did not use the salmon, turquoise and lavender colors. I think, based on this quick trip, that this is the case.
I was drawing the shutter piece block from the crib quilt when my mom sat down on a bench nearby and began talking to the lady next to her. My mom talks to everyone. They were talking about a 9 patch quilt made partially from 4patches when I heard the lady said “oh this is the man that owns the quilts.” A nice looking, white haired man in his mid fifties to early sixties wearing a blue Oxford shirt was standing there. Of course, my mom started talking to him!
She started in asking him how long he had been collecting (since the mid-1970s) and how he stored the quilts at home (acid free boxes) and did he display them at home (no). I decided to mention the Jack’s Chain, which was listed as “pattern unknown”. I have had that pattern on my to do list for years and originally saw it at a shop in the East Bay as a class. Even then it was called Jack’s Chain. He said that he would look it up and made a note. This made me think that he provided all the information about the quilts and the museum didn’t do research. I don’t know for sure, however. Then my mom asked me to give him my quilt business card. No, I do not have a quilt business!, but I do have a card that lists my blog address. He actually looked at it and commented on me having a blog!
Marie over at Z Quilts had a long review of the quilts and the exhibit catalog in which she posted some photos. My favorite, though I liked all of the quilts, is the one mentioned above I call the Shutter quilt. The pattern had no name according to the card next to the quilt. I want to look it up in Barbara Brackman’s book, or int he new Jinny Beyer block book, but haven’t yet. Stay tuned for that info.
I overheard some guys commenting that it looked like the shutter of a camera closing or opening. It is the 5th image on Marie’s page.
The museum had a boatload of stuff in their regular gift shops and they had a full shop right outside of the exhibit. One of the items that really drew me were wooden boxes with quilt designs inlaid on the top. They were form Quiltboxes.com (about $125) and were absolutely gorgeous. I liked the one with the Dutchman’s Puzzle design.
After the DeYoung, we went over to the Legion of Honor and saw the Cartier and America exhibit. This was a jewelry exhibit. I enjoy seeing different types of art and craft exhibits because I enjoy seeing the commonalities with quiltmaking. I also enjoy getting inspiration from other media. Of course, the jewels were fantastic. There was one stone that over 143 carats. Can you imagine? This type of jewelry is so out of my realm of possibility that I just looked at the designs and admired the artistry. There was one tiara of which I wish I could have taken a photo. The swirls would have made excellent applique’ designs. That tiara was in the exhibit catalog, which I didn’t buy. I may buy it later and if so, I will show it then.
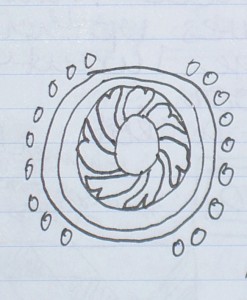
I was also very interested in the historical aspect of the exhibit. The exhibit cards said who bought the piece, who owned it and, in some cases, whether it was purchased for a gift. Some information mentioned changes to designs with the times. The meager information made me think that such an exhibit would be a good way of getting people into the history of the era. There were obvious changes in the jewelry designs as times changed. Flappers, for example, didn’t need stomacher broaches.
It may be that pieces for the exhibit were selected for their relevance to SF, because there were a lot of pieces owned or purchased by prominent people in local history.
I did, finally, learn what a pave’ diamond setting was. Apparently Ms. Wallis Simpson loved pave’ settings for her panther broaches.
Some of Princess Grace’s jewels were there as were Elizabeth Taylor’s. Sadly, I was very tired after all this visual stimulation, so I didn’t look and read as carefully at these as I would have liked.
I was very annoyed and disappointed with the selection of postcards. None of my favorites were available as postcards. It was probably a good thing as the postcards were poor reproductions anyway. Not the high quality to which I am accustomed. The exhibit catalog was wonderful, but times are tough so I didn’t buy that either. It is on my list. I think you would enjoy it as well!
*No affiliation with this site; I just think the picture of her Jack’s Chain is a good example of the pattern.
Beach Town Finishing
Last Saturday and Sunday, I had a lot of time for the first time in several weekends to work on quilt projects and I completely tanked in that department. Most of the time I sat around and couldn’t figure out what to do. I thought about making another giveaway for OWOH, but was talked out of it. I also just wasn’t motivated to do anything. I have a lot of quilt work to do and I really couldn’t focus.
Finally, on Sunday, I pulled out Beach Town and decided to get the facing on and the sleeve ready so that I could take advantage of some hand sewing time I will have next weekend.
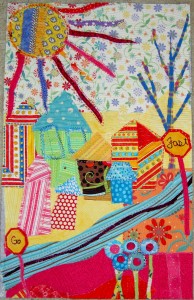
Yeah! Progress on Beach Town! Trimming is easy.
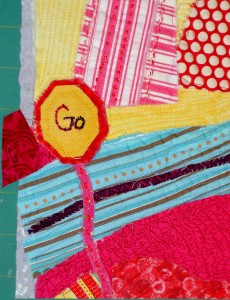
However, after trimming, I found a little section that needed a repair. One of the hazards of working using this free form method is getting too close to the edge. In an effort to avoid that problem, I didn’t get close enough. Yes, I could have trimmed it more, but I didn’t want to cut off any part of the sign.
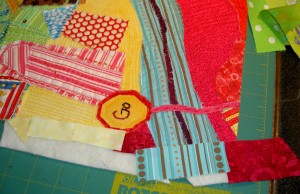
I had to go rummaging for fabric to find a match. I found some in the scrap bin. Then, I had to carefully lay the fabric and a small piece of batting out so that it didn’t look like a repair (don’t tell, please!). Finally, after it was all laid out and pinned together, I machine quilted the three little sections in matching thread and trimmed it again.
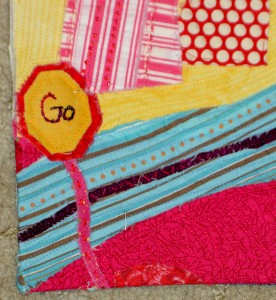
One of the good things about this project was that I had to focus my mind on a specific task. One thing I learned was to give the edges a little extra space from important design elements.
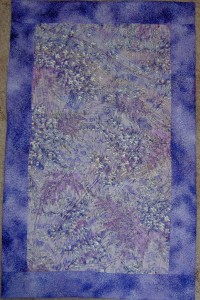
I dug out the facing instructions I had made awhile ago and applied a facing to the Beach Town. I still need to practice making more facings. I’ll make another one for FOTY 2010.
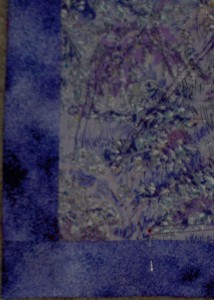
Here is the corner of the facing. As I mentioned, I have not sewn it down yet.
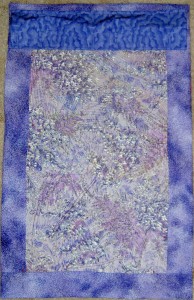
I use the Robbi Joy Eklow method of sleeve making. This most excellent sleeve making method method is in her book, Free Expressions. This time I made the sleeve smaller than her directions specify. I hope it works in terms of a hanging rod to fit.
More Inspiration Tuesday
Enjoy and let these photos inspire you to make something fabulous!
|
.jpg) oss the Atlantic in less than 14 days. An instantaneous form of communication called the telegraph was about to cross the U.S. continent. And an amazing device called the home sewing machine was allowing Americans to sew clothes for their families at a huge savings in time–a shirt that took 14 hours to sew by hand could be sewn by machine in 1.5 hours.
oss the Atlantic in less than 14 days. An instantaneous form of communication called the telegraph was about to cross the U.S. continent. And an amazing device called the home sewing machine was allowing Americans to sew clothes for their families at a huge savings in time–a shirt that took 14 hours to sew by hand could be sewn by machine in 1.5 hours.