In addition to this post being about a creative prompt response, since it has hearts, it will also be a Valentine’s wish for you!
Heart in Hand CPR#51Sketching #51 Study #1
Here are some of the designs I was working on. What I wanted to draw was a Baltimore Album Quilt in the window of the shop I have been drawing. I started to test the basket design and just didn’t feel the love. I have been feeling a little impatient lately and I think my inability to settle on these last few drawings is a symptom.
Sketching #51 Study #2
I did this study after the main part of the hand drawing. I was trying to see if I could add more detail and make the piece look better.
Below is the 2009 inventory of my UFOs. Let’s see if I made any progress since the previous roundup post of December 31, 2008 and where I am in the process as well as what I need to do. First, I want to tout my accomplishments. 😉
2009 started off very well.
I read 50 books this year. Of the 50 9 of them were quilt, bag or creativity related.
Completed Pieces in 2009
One of the great things about completing quilts and projects is that they go off the ‘not done’ list and on to the completed list. Two birds with one stone and all of that. 😉
Completed means to me that they are now usable and can in no way be considered to have anything left to stitch.
464 blog posts related to quiltmaking, design or creativity. This year I also published my 1,000th blog post. That is a lot of writing! Thanks for reading!
Mostly Done, Need Finishing
I added this new category to break up the UFO list and to make myself feel like I had accomplished something, which was quite overwhelming. Also, these are all mostly done, IMO.
Cheerful Baskets: Top finished; sent to TFQ for back, quilting, binding and sleeve. We meant to talk with Angie of the Quilting Loft about quilting it and what design we wanted, but we didn’t get to it on my week away.
Chocolate Box: Top and Back finished; needs quilting and binding. See the post from August 14, 2006 to see the fabrics I used. I will take it to Colleen to be quilted and damn the cost. I meant to do it before Thanksgiving, but didn’t get to it.
Purple Bullseye: Top finished; needs back, quilting and binding. See above under Chocolate Box.
Kissy Fish: top finished, though I may want to add some more machine quilting to it, needs binding and sleeve or binding and framing.
Beach Town: from April 2009 Pamela Allen class with CQFA; finished; needs facing and sleeve.
True UFOs
Here is my list of UFOs. You can see many of them over at Artquiltmaker.com or look at the links I have provided.As mentioned last year, this list in no way implies that I will discontinue starting new projects or finish any of these.
Original Bullseye: Still have those directions for doing the border the way I want it (the directions I found late last year). Asked TFQ to help me puzzle out the border, but we had better things to do. No progress in 2008, but am hopeful for 2009.
Flowering Snowballs/Cross Block quilt: I have been working on it steadily all year and have finished the center blocks. The side and corner blocks are drawn out on EQ6. I worried on and off about how to keep the blocks from fraying after I square them up. Got some good ideas from fabulous readers after my December 20, 2008 post! Progress throughout 2008.
Garden from Pamela Allen class: needs hand embroidery and embellishment. Worked on it in the 2009 Pamela Allen class and it is much improved. Needs quilting, embellishment and binding.
Laura Wasilowski Flower Garden: started in the Laura Wasilowski class CQFA held in July 2007: needs machine quilting, hand embroidery and embellishment. No progress in 2008.
He Tried to Make it Up to Her: needs back and to be quilted. This is probably a quilt I will want to quilt myself. TFQ has dug out a number of quilts, but I don’t know if this was one of them. No progress in 2008.
Her Eyes were Bigger than Her Stomach: needs a back and to be quilted. Very active quilt; probably not the best design, but a mile marker in the quiltmaking journey and an excellent learning experience. No progress in 2008
Pineapple: All blocks are done. Need to put them together. Still facing the reality that some blocks are much too large and trying to figure out how to move forward. I measured all the blocks and found they were all different sizes. I think that I will cut them down to all the same size and let them be wonky.
Pointillist Palette 4: Night: This is the fourth (of six) in a series of Pointillist Palette fabric by Debra Lunn and Michael Mrowka that was popular a number of years ago. No progress in 2008
QA Challenge Quilt: need to fuse the parts and rubber stamp the words. No progress in 2008
Quilt Sorbet: started after finishing the Tarts top.
See: started in a David Walker class. Needs fusing, satin stitching around fused pieces and quilting. No progress in 2009, but I did think about it alot.
Self Portrait from Pamela Allen class: needs more piecing, hand embroidery and embellishment. No progress in 2009
Solid Star Friendship Quilt: need more friends so they can make stars for me in solids with black. Do you want to exchange a star block with me? No progress in 2009
Spiderweb: foundation pieced project, still piecing. Need to create the templates for the border blocks. Aside from collecting more strips, no progress in 2008
The Tarts Come to Tea: Top finished in 2009. Adding a few bits of machine applique’ before I baste and quilt.
Under the Sea: brown piece from April 2009 Pamela Allen class with CQFA. Needs machine quilting, hand embellishment and finishing.
Women’s Work 2: last year I said that this quilt “needs focus.” Was inspired and have the design. No progress in 2009, except for finding my drawing and making a file. Scroll down to see the blocks for this piece.
On My Mind
Here are the quilts and projects I am thinking about. Some are on the list from last year. In some cases I have purchased fabric, but no sewing has been done, so they are not yet considered UFOs.
Paper pieced Nativity scene: I downloaded this pattern when it was free a few years ago and have never gotten up the energy to be as organized as I need to be to make this, but I still want to make it. You can find the pattern, for purchase, at Paper Panache.com
Interlocking triangles #4: love the technique and have at least one, if not two, idea[s] for more quilts using this technique.
Dot quilt with inset circles a la Ruth McDowell: more uses for dots and a good exercise in piecing. the Twinkle quilt recently shown in the January 2009 issue of Quilting Arts magazine is similar and renewed my interest in this design.
Feathered Star dot quilt from Summer 2007 issue of Quilts & More: more use for dots. Thought I would get to this after making the Pineapple, but the Pineapple is still not complete, so this this dot quilt has not been started.
Some kind of pink quilt with all the pink fabric I have still been buying.
Colorblocks 3 with silks: I want to use silk fabric with a luscious sheen instead of the regular cottons. Background will be cotton sateen. What’s been holding me up? Backing all the silk. I have the backing and just can’t bring myself to do it. Barsha told me to skip the backing and just make the quilt without it. Can’t decide if the project has new life or not. Definitely not on the top of the list.
Garden Quilt: I have been collecting photos and patterns of interesting flowers for years and have always wanted to make some kind of garden or flower quilt. It will probably be something like The Tarts Come to Tea. Need to finish the Tarts first before starting the same kind of project.
Jack’s Chain: I saw a quilt of this pattern years and years ago and have always wanted to make one. Probably at least a partial hand piecing project after the Flowering Snowball (Cross Blocks quilt).
P&B Pop Parade quilt a la Serendipity Puzzle
Bathroom ‘quilt’ out of heavy clear plastic. I want to make pockets that I can put interesting things in that won’t get waterlogged. I also think the stitching would be an interesting addition to the piece. I also saw a tallish tote bag with many pockets that is similar to what I have been thinking for this quilt, so perhaps I will do another tote instead.
Presents quilt: have the pattern (It’s a Wrap by Sandy Gervais) and jelly roll to do it. Got excited about it right after I started piecing the hexagons, but kept on with the hexagons. The link is to someone’s Flickr stream done in Figgy Pudding. I have the Jelly Roll called Merry & Bright from a few years ago, but like Figgy Pudding, so perhaps I will buy a Figgy Pudding Jelly roll and do two of these quilts!
Abandoned Projects
This is also a new category. I decided to be upfront about the projects I got rid of.
Nothing abandoned in 2009!
Other
I am still trying to enjoy the process of quiltmaking more than the finished product. I think there is more work to do, but I also feel like I succeeded so far.
I have added projects to the On My Mind section because tote bags have been a big part of my life since 2008 and I expect that to continue in 2010.
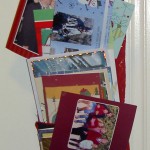
We give small and/or handmade family gifts to DH’s siblings (5 of them) and his cousins (5 on one side, 1 on the other side) plus small gifts to a few hangers-on who attend our Christmas Eve celebration. This year DH and I made cardholders. Just so you don’t have to do the math, I made about 14 cardholders.
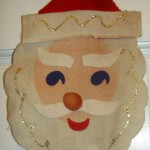
Original Card Holder
DH’s mom has a cardholder in the shape of a Santa (oddly shaped, but Santa nonetheless) that I have long admired. She bought it from a door to door salesman in the 1950s or 1960s. She may have told me the name of the company, but I don’t remember. I have wanted to replicate it for a long time and decided that this year would be the year of the cardholders. I also quickly decided that I was not going to make the cardholders in the shape of a Santa.
Original Card Holder - detail
I searched the web to get some ideas and found very few ideas online. Apparently, this is not a popular gift. I did find a few, but no free patterns that I liked.
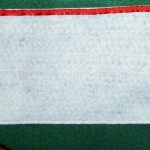
What I find were ideas for shapes. I decided that a long rectangle with a pointy bottom would be easiest to sew and look the best.
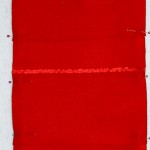
DH and I sat down with the measurements of felt (72″ wide) and an idea of what I could sew in a reasonable amount of time. He did most of the heavy math lifting while I stuck to the practicalities of sewing.
Once we had the dimensions down I set about cutting and figuring out the sewing process as I wanted to do as much assembly line sewing as I could.
Testing Ribbon Trims
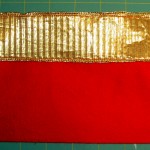
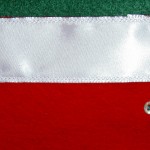
I have a can full of various odds and ends of ribbon. I use that ribbon when I make gift bags. Some of the saved ribbon is too short for gift bags so I got it out to test trimming the pockets. Above is some really interesting French gold ribbon that I sewed on to a pocket. I liked it, but thought it was a bit wide.
I have several rolls of 1/4″ ribbon in red and green that I got when I cleaned out my Aunt’s craft room after she died. Since I have a lot of it, I used quite a bit to trim various pockets, even though I thought it was a bit thin. The best size turned out to be 7/8″ ribbon, which DH got when I sent him to the store to get some silver ribbon.
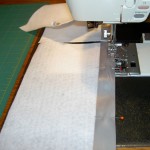
Assembly Line Pocket Trimming
I got the assembly line figured out eventually. Above it looks like I am just putting a bunch of pockets on a line of ribbon and sewing. Actually, I cut the pieces of ribbon, wrapped them around the pockets. This enabled me to sew through two layers of ribbon and one layer of felt to anchor the ribbon and keep it from fraying a bit. As soon as I was done sewing one, I would put the next pocket very close to the one exiting the presser foot and keep sewing.
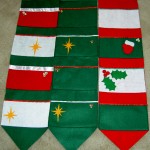
Figuring out color schemes
You know my rule is to “make visual decisions visually”, so we laid out all the cut pieces and rearranged them until we were happy with the color combinations. After this step, I got down to being serious about trimming the pockets.
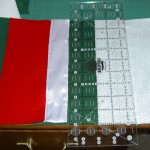
Measuring pockets
Once all of the pockets were trimmed, I sewed the sleeve and then pinned them to the back, measuring down from the sleeve’s seam line (above).
Cardholder: pinned & ready to sew
The pockets required more thinking to sew on. I ended up pinning as many as I had cut and trimmed and then sewing like colors on. First I sewed all the red pockets. That left some cardholders with white and green pockets only trimmed and pinned. Once I completed all the red pockets, I changed thread and worked on green, then white. This method prevented me from having to change thread (to match a pocket color) every 5 minutes.
One evening I was home alone, so I took all the cardholders down to the TV and embellished them with buttons, sequins and beads. It was nice to do a little handwork and get away from the machine for a couple of hours. I also think it gave them a bit of a one-of-a-kind look.
Little did I know that DH was surfing the web and had embellishment ideas of his own! He found patterns/templates for some stars, ornaments, mittens and holly. Again, I hauled all of the cardholders downstairs and we figured out what would go where.
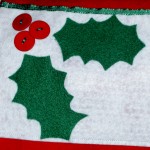
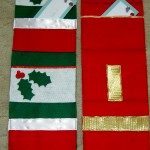
Holly Embellishment
It was very clear that the red buttons I sewed on a whim would make excellent holly berries. I would have liked to put some kind of spine or shading on the holly leaves, but ran out of time to figure that element out. These are some of the cardholders we made.
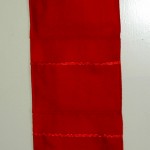
First Completed Cardholder
This is the first completed cardholder. We gave it to our friends, Eric and Yar, when we went to their Christmas party at the beginning of the month. They also invite us over for dinner every year and we have yet to reciprocate. Now that the dining room is painted, I think the time has come.
This was is more plain than the later versions. I should call it subdued!
Hanger detail
We are using some Lucite rods, that didn’t work as quilt hangers, to hang the cardholders. They look nice, were easy to cut, did not need finishing other than a bit of sanding and work very well.
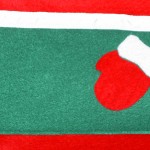
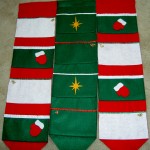
2 Mittens & a Star2 Stars, Mittens & Holly
I had to pay attention to what color embellishments went on which color of pocket or background. If I didn’t, the embellishments wouldn’t show up. This war particularly tricky for the mittens, because of the white cuff. I tried some other colors, but they didn’t look right. This is why the embellishments ended up on the two middle pockets on the card holder on the right, above.
Holly & Gold Ribbon
The gold ribbon in the card holder on the right, above, had a papery feeling. I didn’t like the feel of it after I put it on. I had to chalk it up to experience, though, as those were some of the first pockets I embellished and was still in the learning process.
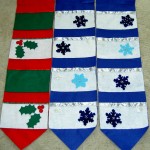
I also made one with a winter theme, rather than red and green, for a family that celebrates both Christmas and Hannukah.
Winter theme with Holly
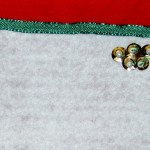
Here are the two winter themed card holders I made with one of the holly versions. I had fun embellishing the blue and white with silver beads, sequins and pearls.
Winter beading - large detail
The beading does help keep the embellishments on as well.
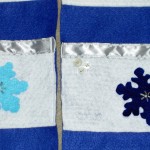
Winter theme - detail, small
I thought the turquoise snowflake added a bit of shading or interest to the Winter card holders.
One of the good things about making many of a project is that you know how to make it well. I would say that I am a master card holder maker now, if there is such a thing!
Here is the journal cover I made for Julie. It is a companion to the pencil roll I made for her birthday. This is actually the third journal cover I have made and this one went together the fastest and looks the best. My only problem was putting it together backwards, so the tree I wanted on the front ended up on the back.
Julie's Journal Cover - front
No matter. I tried to think of it as a design challenge after my initial disappointment. I fussy cut a tree out of the small piece of fabric I had and raw edge appliqued it to the front. I thought that Julie could handle the raw edge stitching.
Julie's Journal Cover - in process
The main green fabric is an old Marrimeko print, as I may have mentioned. The directions I used are a combination of the pattern from Allpeoplequilt.com, the directions on the Exuberent color site (they don’t print well) and my own trial and error and notes from previous journal covers. I use the Miquelrius journals, so those are the journals I bought and for which I made covers. Hope all of the recipients like them!
Yesterday I drove to Monterey to attend a Kaffe Fassett lecture. It was put on by Back Porch Fabrics, a local Pacific Grove/Monterey quilt shop. I have written about that shop a couple of times, most recently on November 4, 2009 after my late October visit.
During my last visit, I saw that they were selling tickets to a lecture by KF. I decided to buy 2 tickets and just go. I knew it would be after a 2 or 3 day holiday extravaganza, but I decided the opportunity was too good to pass up and that I would worry about who to take later.
Signed Books
I left in time to arrive before 2pm, which is when the book signing started. I got about 6 of his books signed and he didn’t mind. He said that I was supporting him and he was glad to sign. 😉 I don’t know why getting books signed thrills me so much, but it does.
Quilt Road Signed
My SIL went with me and she was pleased to see and shop at Back Porch Fabrics. She bought a few fabrics for another Infinity block project she is working on. I bought a few of the Lonni Rossi fabrics so I could make another bag. I bought some FQs there in October and used them all up on Marilyn’s Multi-tasker.
The lecture wasn’t until 7pm, so we had time to hang around Pacific Grove a little bit. We spent a fair amount of time in the shop, partially because it was REALLY crowded and the lines were long. One thing I love about my SIL is that she makes me slow down in quilt shops. She really looks at things, which is a good reminder for me to do the same. Not much else in PG was open, so we went out to eat and then to Home Depot to find some paint colors for MIL, and to Borders to look at books.
After some technical difficulties with the projector and the Powerpoint, the lecture got started at about 7:30. Things I didn’t know about Kaffe Fassett:
He found the name Kaffe in a children’s book about an Egyptian boy he thought looked like him. He took it to replace his boring given name, which he is trying to forget. He refused to tell us the boring given name. I imagine it is Joe or Rod.
He was born in San Francisco, grew up in Big Sur and is now living near the Camden and West Hampton (Hampshire??) sections of London in Kilburn.
He went to a museum studies program in Boston
He learned to knit and purl in 20 minutes on a train, which was followed, later, by another 20 minute lesson from his cleaning lady on weaving in the ends and casting off.
He feels that color is in instinctive, that people have to work hard at conquering their fear of color and to learn to listen to their instincts. He enjoys going to places where there is intense color such as South Africa, India and Guatemala. He feels that color is life enhancing; it can make something elegant. He finds color to be a gift that people can give to themselves every day for a very low cost.
He thinks that there is a lot of visual pollution in the US, such as concrete parking garages, and hideous buildings. He thinks that the buildings in the US are very drab. Every morning I go to a horrifyingly ugly concrete parking garage and wish that someone would add some color to it or embellish it with tiles or mosaics or something, so I have to agree with him. He finds developing countries o be filled with intense color, which he calls visual poetry. He showed a number of slides of buildings in various countries, which were painted and embellished in a different ways.
As you may know, Kaffe started as a knitter. He said that knitters are never bored, are happy in their own company and make things that are very personal. He also said that anyone who says they can’t do what he does hasn’t tried. This is the point where he said he learned to knit in 20 minutes on a train. His point was that people certainly cannot make what he makes if they sit and whine. People have to go to their knitting needles or sewing machine and try, then try again. He said that he makes simple things and spices them up with glorious color. I am not sure his needlepoints are simple, but I get his point, which echoes one that TFQ says:
Go to Your Studio and Make Stuff!
InKaffe’s career trajectory, he moved on to needlepoint after knitting. Some of the chair covers and cushions are just wonderful. I love his vegetable cushion and chair covers. He also create rugs and does quite a bit of needlepoint commission work.
He finds knitting and needlepoint to be slow, so was amazed when he discovered patchwork and saw how fast quiltmakers can cut up fabric and put a piece together. He loves teaching quiltmakers and commented several times on how he loves seeing how people put his fabrics together in new ways.
His adjectives of choice were ”thrilling and ‘exciting’. He uses those two terms a lot when he talked about fabric. He said that making books and fabric allowed him to give part of his creative mind to others and he commented again on how thrilling it is for him to see how people put his fabrics together.
For him, the different media are all about manipulating color and the knitting, needlepoint, fabric design and patchwork all are ways that he can work with color. He said that he painted white on white still lives for a long time, because he was also afraid of color. He continues to be fascinated by neutrals. He talked about how he enjoys putting colors and textures together so they almost merge (you can see what he is talking about in some of his vegetable needlepoint works, in the shading, especially the Lichen Auriculas at Ehrman Tapestry, which is part of the needlepoint slide show). He showed the Vegetable Rug Border Pack in the rug form and also made into cushions. He makes me want to take up needlepoint!
He got around to talking about stripes as well. He said that he is thrilled by stripes and finds that lots of ordinary stripes put together become extraordinary.
He talked about hanging an exhibit of his quilts in France, where he was thrilled to find that the quilt stands had shocking pink background drapes/curtains. He was thrilled and said that he would never find such an occurrence in the US. He finds mostly black and, the most ghastly color against which to hang quilts, white in the US. “Ghastly” was his description and I immediately thought of TFQ.
Philip Jacobs and Kaffe Fassett are now working together. Apparently, Philip Jacobs does large realistic paintings, which Kaffe then recolors in different colorways. One of the recent collections includes some very large sea shells.
Someone asked about creative waxing and waning. He said that life serves up the rhythm and since he travels quite a bit he gets quite hungry to get back to his studio and work, especially when he has been surrounded by inspiring views. He often will see something and go to his studio and make something from the inspiration. This is a piece of advice that I also like.
He hangs up projects which have gotten stale and works on something else. Leaving the stale project around so he can see it affords him the opportunity to be reinspired.
He doesn’t usually plan his projects from beginning to end, but makes the color combination up as he goes along. He also keeps looking at it from different views and angles to see what the piece needs.
Kaffe’s theory about fabric design is that he is working with a palette of color and continually works with those ranges so that newer fabrics work with some of his older fabrics. He is also working on keeping fabrics in print for longer by recoloring them and adding older designs to new collections. He doesn’t want to create a line that is in today and “so yesterday” tomorrow. I completely appreciate this and whish more fabric companies would take this advice. He seems to be going for more of a classic look/feel. I am not sure if that is the right description, because I am not sure I would characterize his fabrics as having a classic look. Perhaps they are the ‘new’ classic?
He said that he is basically a shallow person who likes pretty things. He claims not to have much depth. I think he was saying that we should make things that we like, things with which we want to surround ourselves and I think that is wonderful advice. He encouraged people to just start playing and put something into repeat to see how it looks. He also reminded us to work with simple shapes.
Kaffe finds inspiration everywhere and said that in England the gardens are where the passion is hidden. Aside from this, I think the best advice he gave was that ‘manifesting’ was vitally important and that having the confidence to make the statment [with your work] and enough energy to make the thing in the first place are the most important parts of the battle. Finally, he said it is important to surround myself with other positive people. This advice is stuck in my head and I think the confidence part is particularly pertinent.
His next book will be out in the spring of 2010 and will be called Simple Shapes, Spectacular Quilts.
It was 2 hours each way and I didn’t get home until 11:30 pm, but it was totally worth it and I am glad I went. I am now very interested in taking a class from him.
In the middle of the craziness last week, I just had to make myself a new napkin. We use cloth napkins in my house. Why not? There is a boatload of great conversatonal fabric and plenty of it is in my fabric closet. I don’t use many conversationals in my own work, but I seem to buy them anyway.
During the great Iron-Off that is ongoing I came across two conversationals that would go really well together, so I made a new napkin. Not four, not a set, just one.
Raspberry Cake Napkin
On the back is a luscious raspberry print. The motif is so good that the raspberries look good enough to eat.
The front has that funky cake print. There is a lot of pink, aqua and turquoise.
I use a full FQ for my napkins. I do not try to make them perfectly square and I like having my entire lap covered when I eat.
The bad part about this little project is that neither of these prints will end up in FOTY 2009. Oh well.
I love my sister dearly, but she is hard to shop for. She buys what she wants, so I always have to think early and creatively. I found this Basic Grey fabric and just knew I had to use it for a gift for sissy. She is an invertate scrapbooker and LOVES Basic Grey paper. It started the whole thought process, actually.
Sweet Harmony - Full
On my week away, TFQ tempted me with doing a joint Sweet Harmony Bag by Amy Butler. My idea was that we would each make one at the same time. However, it turned out that we worked together on one bag.
This is probably the last time I will make an Amy Butler pattern. I purposefully did not write the review right away, because I wanted to give the shock time to wear off and give the piece a fair hearing.
While the finished product turned out really well, the directions were overly complicated and the pattern promoted extreme wastefulness.
Here are some tips and things to be aware of when making this pattern:
Trace the pattern pieces on tracing paper and keep the originals all together on the pattern sheets.
Trace the pattern pieces again, but smaller (approximately 3/4″ will work) for the fusible fleece and interfacing pieces. If you don’t do this, the pattern will tell you to cut them full size and then trim them down. Thus, this direction promoted a lot of waste in the interfacing, Peltex and fusible fleece.
Make a separate pattern piece for the inside pocket as well. This is a combined piece and it is just too confusing not to have a separate pattern piece.
Make a chart (Excel or the Google Docs Spreadsheet feature would work) of the pattern pattern pieces you will need and which fibers you need to cut them out of. I didn’t know to do this and ended up laying all the cut pieces out and reading the list over and over while counting pieces.
The designers seem to have a problem with naming pattern pieces consistently. In Step 4G, they ask you to do something to a Lining Panel. This was the first time I had ever heard of this piece.
This pattern and the directions don’t always make it clear which layer (fleece & interfacing or interfacing only) the designer wants you to work with.
Sweet Harmony Org System
Directions should have included a rotary kit (cutter, mat, ruler). The instructions do not include these tools, but they make the process much easier. I understand that the pattern isn’t necessarily targeted at quiltmakers, however I think many sewists now have rotary cutting kits as part of their tool arsenal. If you only sew garments and accessories (e.g. no quilts) and do not have a rotary cutting kit, I think you should go and buy one. What do you think?
Use tailor tacks to mark dots.
Handbag pattern includes a 20″ zipper in the list of supplies needed. Then the designer wants you to modify this zipper to make it about 8″ shorter. I don’t know about you, but I don’t know how to modify a zipper. I also did not want to modify a zipper. I barely know how to put in a zipper. TFQ who has LOTS of garment sewing experience and she didn’t know how to modify a zipper with confidence either. This is another bit of waste. I ended up omitting the zipper (it’s for a an inside pocket), but I would recommend buying a 12″ zipper and not modifying anything. The pattern also gives the pattern pieces for a tote bag, which I did not make, and I believe that the 20″ zipper would work with the tote bag. I think they were trying to save space on the pattern by not listing two supplies.
The marks for the magnetic snaps are below and to the left of where they actually should go.
Sewing piping to outside pocket
The pattern asks you to make much more piping than you actually need. You will really only need about 25″.
Finally, there are not enough pictures, despite the price of the pattern, so I would recommend giving yourself plenty of time and using nice fabric. You may never make it again, so you want to like it!
I think that making all the tote bags I have made really helped in understanding the pattern and how to follow the directions. The final product is really nice and looks very professional. I als learned how to make a pocket that has a little tuck so larger things will fit and you can actually pull it out.
Remember this tote? I wrote about in a post way back in March. I ended up giving it to my mom so I get to visit with it periodically as she brings it over when she comes to visit with the Child.
The financial situation has not improved much, but my mom said in no uncertain terms that we were going to exchange gifts. We didn’t last year and she said it was really hard, so I decided to work on making some her, and a few others, some gifts.
I am not always a fan of giving homemade gifts, because I don’t want to give people things that have that homemade dorky look. I also like giving people things they will actually use and I don’t know yet know how to make iPhones or a Wii.
I have been working REALLY hard at making my fiber stuff look professional. It will never look like it was made in a factory, which I don’t want either. I press really well, poke the corners carefully and am careful about stitching, so I think they look good. In any case, I am not embarrassed to give things I make away.
Mom's Pencil Roll
I decided to make my mom a pencil roll since I thought she would use it and I had a lot of fun making Julie’s during my week away. Kathy‘s patterns (well, at least this one) are fabulous. As I mentioned in a previous post, they are very well written and easy to understand.
Mom's Pencil Roll Open
The most time consuming bit of this project was cutting the strips. I was kind of at a loss on fabric choices until I found the flowered fabric and the turquoise, both of which I used on the tote I made for her. Perfect! She’ll have a little set!
Stitching all the parts together after layering and turning them is also fairly time consuming. I do that topstitching very slowly after marking the lines on the pocket with a white pencil.
For the inside, Kathy says to use flannel, which I didn’t have, so I used batting and it was a little bit thick o sew through. I can’t say I would absolutely not use batting again, but it wouldn’t be my first choice. If I make another one, I’ll try a couple of layers of interfacng, though I suspect that would make the piece too stiff. We’ll see what I have in the fabric closet that might work.
Strips sewn for Pencil Roll #2
Above is a picture of how the strips look sewn together before the whole thing is layered together. One thing I needed to remind myself about was to turn the strips with a strong motif around so it would show after the pocket was applied. I didn’t choose fabrics that would lend themselves to arranging the strips in a colorwash design, as Julie did with mine. I am happy with the arrangement and the idea of making his pencil roll into part of a set.
And Peace and Joy to all of you who do not celebrate Christmas!
Tree 2009
For the past few years we have only put lights on our tree. Our Christmas decorations are still in storage after our kitchen remodel. They are closer to coming out, though. Just one more step and then we can unload the storage facility. Next year we will have all of our own decorations.
This year my mom went to her storage room and got her ornaments. She and The Child decorated our tree with her ornaments. It looks beautiful!
Decorated tree 2009
Below is a detail. The teapot ornament is really a chime. I decided to put it on the tree this year so I could admire it.
No rest for the wicked! Even on Christmas you get a prompt. ;-)I am doing it early so I can do a Christmas post for tomorrow and so you have time to get it done in a timely fashion. 😉
Please note that every single holiday in the universe is NOT listed. This is a small sampling.
Holiday preparations
New Year’s Day
Holiday packages
Three Kings Day
Holiday trip
Martin Luther King Day
I am going on holiday
Valentine’s Day
Golf Holiday
President’s Day
Definition: A holiday is, in the English-speaking world, a day designated as having special significance for which individuals, a government, or a religious group have deemed that observation is warranted.
The Holiday (2006) (movie), Directed by Nancy Meyers
Kwanzaa
Boxing Day
See the Creative Prompt page if you have questions about this project.
Post the direct URL where your drawing, doodle, artwork is posted (e.g. your blog, Flickr) in the comments area of this post. It will keep all the artwork together.
The Creative Prompt Project, also, now, has a Flickr group, which you can join and where you can post your responses.
I am slowly getting a bit of the FOTY blocks done in between the Christmas gifts. I am branching out a bit as well and not putting same color with same color all he time. For some of the color combinations it just didn’t look right. Not sure how I will handle that choice when I start putting together the whole quilt, but I am sure that it will work out one way or another.
Cutting FOTY strips and putting blocks together is my main project for next week
I mentioned that I am trying to make as many gifts as possible for the holidays. I am having fun doing it, but I wish that I had started earlier. I wasn’t sure what to make Grama since all she really likes to do is shop and play bingo. I decided to make her a ‘Grab Bag’ from the All People Quilt pattern.
She has started bringing bags back to the grocery, so I decided to make her this bag. I knew how to make it since I made it for a gift previously and could use a couple of FQs, if necessary.
Grama's Grab Bag in process
I found the older Jinny Beyer border print and a floral for the inside and think that it turned out well. I know she doesn’t read blogs, so I am not worried about ruining the surprise by posting this before Christmas.
My birthday isn’t until January, but during my week away, TFQ took me to Laura Bee Designs, a handbag maker in Seattle, and I was allowed to pick out the makings of a business card holder. It came last week.
I asked about whether she made saddlebag type handbags and she asked me what I liked about my handbag. I found out later that Laura asks many people that question.
Biz Card - inside
I love the bright cheeriness and I am waiting anxiously for someone to ask me for my card so I can whip it out and show it off.
We first heard about Laura Bee from a CraftSanity podcast. You can hear a lot of more about how Laura got started and her whole business.
McDowell’s information is always good. I have to say that, initially, I was disappointed in this book. It seemed to be, mostly, a rehash of the Piecing book, which is one of my bibles, so I know it very well.
After sticking with the book (rather than abandoning it) I found a few good sections. Around page 50, McDowell discusses thinking through a different way of piecing her Muir Woods quilt, which she had done a couple of times before. I really like it when quiltmakers discuss their process and I am also pleased to see that McDowell is working in a series.
One section is about using fabric. Ruth McDowell has a lot of little gems about, which could be considered good ideas and rules to live by, including using and choosing fabric. This section has some commonalities with Lorraine Torrence‘s advice to “make visual decisions visually.” I think this is an interesting section because McDowell gives insight, again, into her process.
McDowell makes a comment [on page 61] that making a quilt is not taking a photo. YAY!! Finally, an author has the guts to come out and just say it. She follows that up with more advice on using fabric in landscapes.
I particularly like the “Flamingo Demonstration”. She really makes a good point about how foreground pieces can blend in to the background if you don’t take care to separate the foreground (in this case flamingos) pieces from the background pieces. McDowell says “regardless of your intentions you must be honest with yourself about what you really see.” It is a reminder to me that if I think “oh, this choice will be ok”, it means that I have been lazy and it will probably NOT be ok.
Ruth McDowell has an excellent discussion of background fabrics and creating backgrounds, especially creating light backgrounds. She talks about including what different scales and motifs adds to and takes away from a background.
Another thought about backgrounds that Ms. McDowell discusses is about balancing colors in the overall quilt. The backgrounds can be unrealistic if the fabrics are the right colors. She says that it is more important to balance the colors in a quilt than make a realistic quilt.
Ruth McDowell is a thoughtful quiltmaker. She really thinks about all aspects of the quilt and their design. After thoroughly discussing the foreground and background, the main portion of the quilt, McDowell launches into an excellent discussion of borders. You might think that borders are easy – just slap on a long piece of fabric and you are done, but McDowell shows how borders can add to the entire piece. She shows what a border is and how the border are part of the piece.
I really like the buffalo quilt on page 82. I am not a big fan of buffalo, necessarily, but I like and respect the way Ruth McDowell completes the composition by using a non-border border. The border in this quilt is so subtle that you don’t even know it is a border. She skillfully integrates the border into the overall composition. I love the fact that the quilt has a border, but it doesn’t scream border at me.
The book has the obligatory section on quilting, batting and binding. Fortunately, Ruth McDowell doesn’t try to teach people how to quilt, choose batting and bind in 3 pages or less. She makes this section her own by telling the reader what she does rather than trying to teach everything there was to know about quilting, binding, and batting.
I was also pleased to see a disclaimer saying that the fabrics may not be available.
Finally, this book has an index. Indexes are fabulous in any book with sections to which you might want to refer later.
Have you seen the hot drink quilt, She had to have her Latte? I really need to take a better picture. This one was taken in the olden days before digital… No excuse, I know
Post the direct URL where your drawing, doodle, artwork is posted (e.g. your blog, Flickr) in the comments area of this post. It will keep all the artwork together.
See the Creative Prompt page if you have further questions about this project.


