BAM had a Charity Sew Day on May 6th. Peggy and Michelle created kits and a pattern for walker bags for a local nursing home. I made three, though not without mishap and only with the help of SIL.
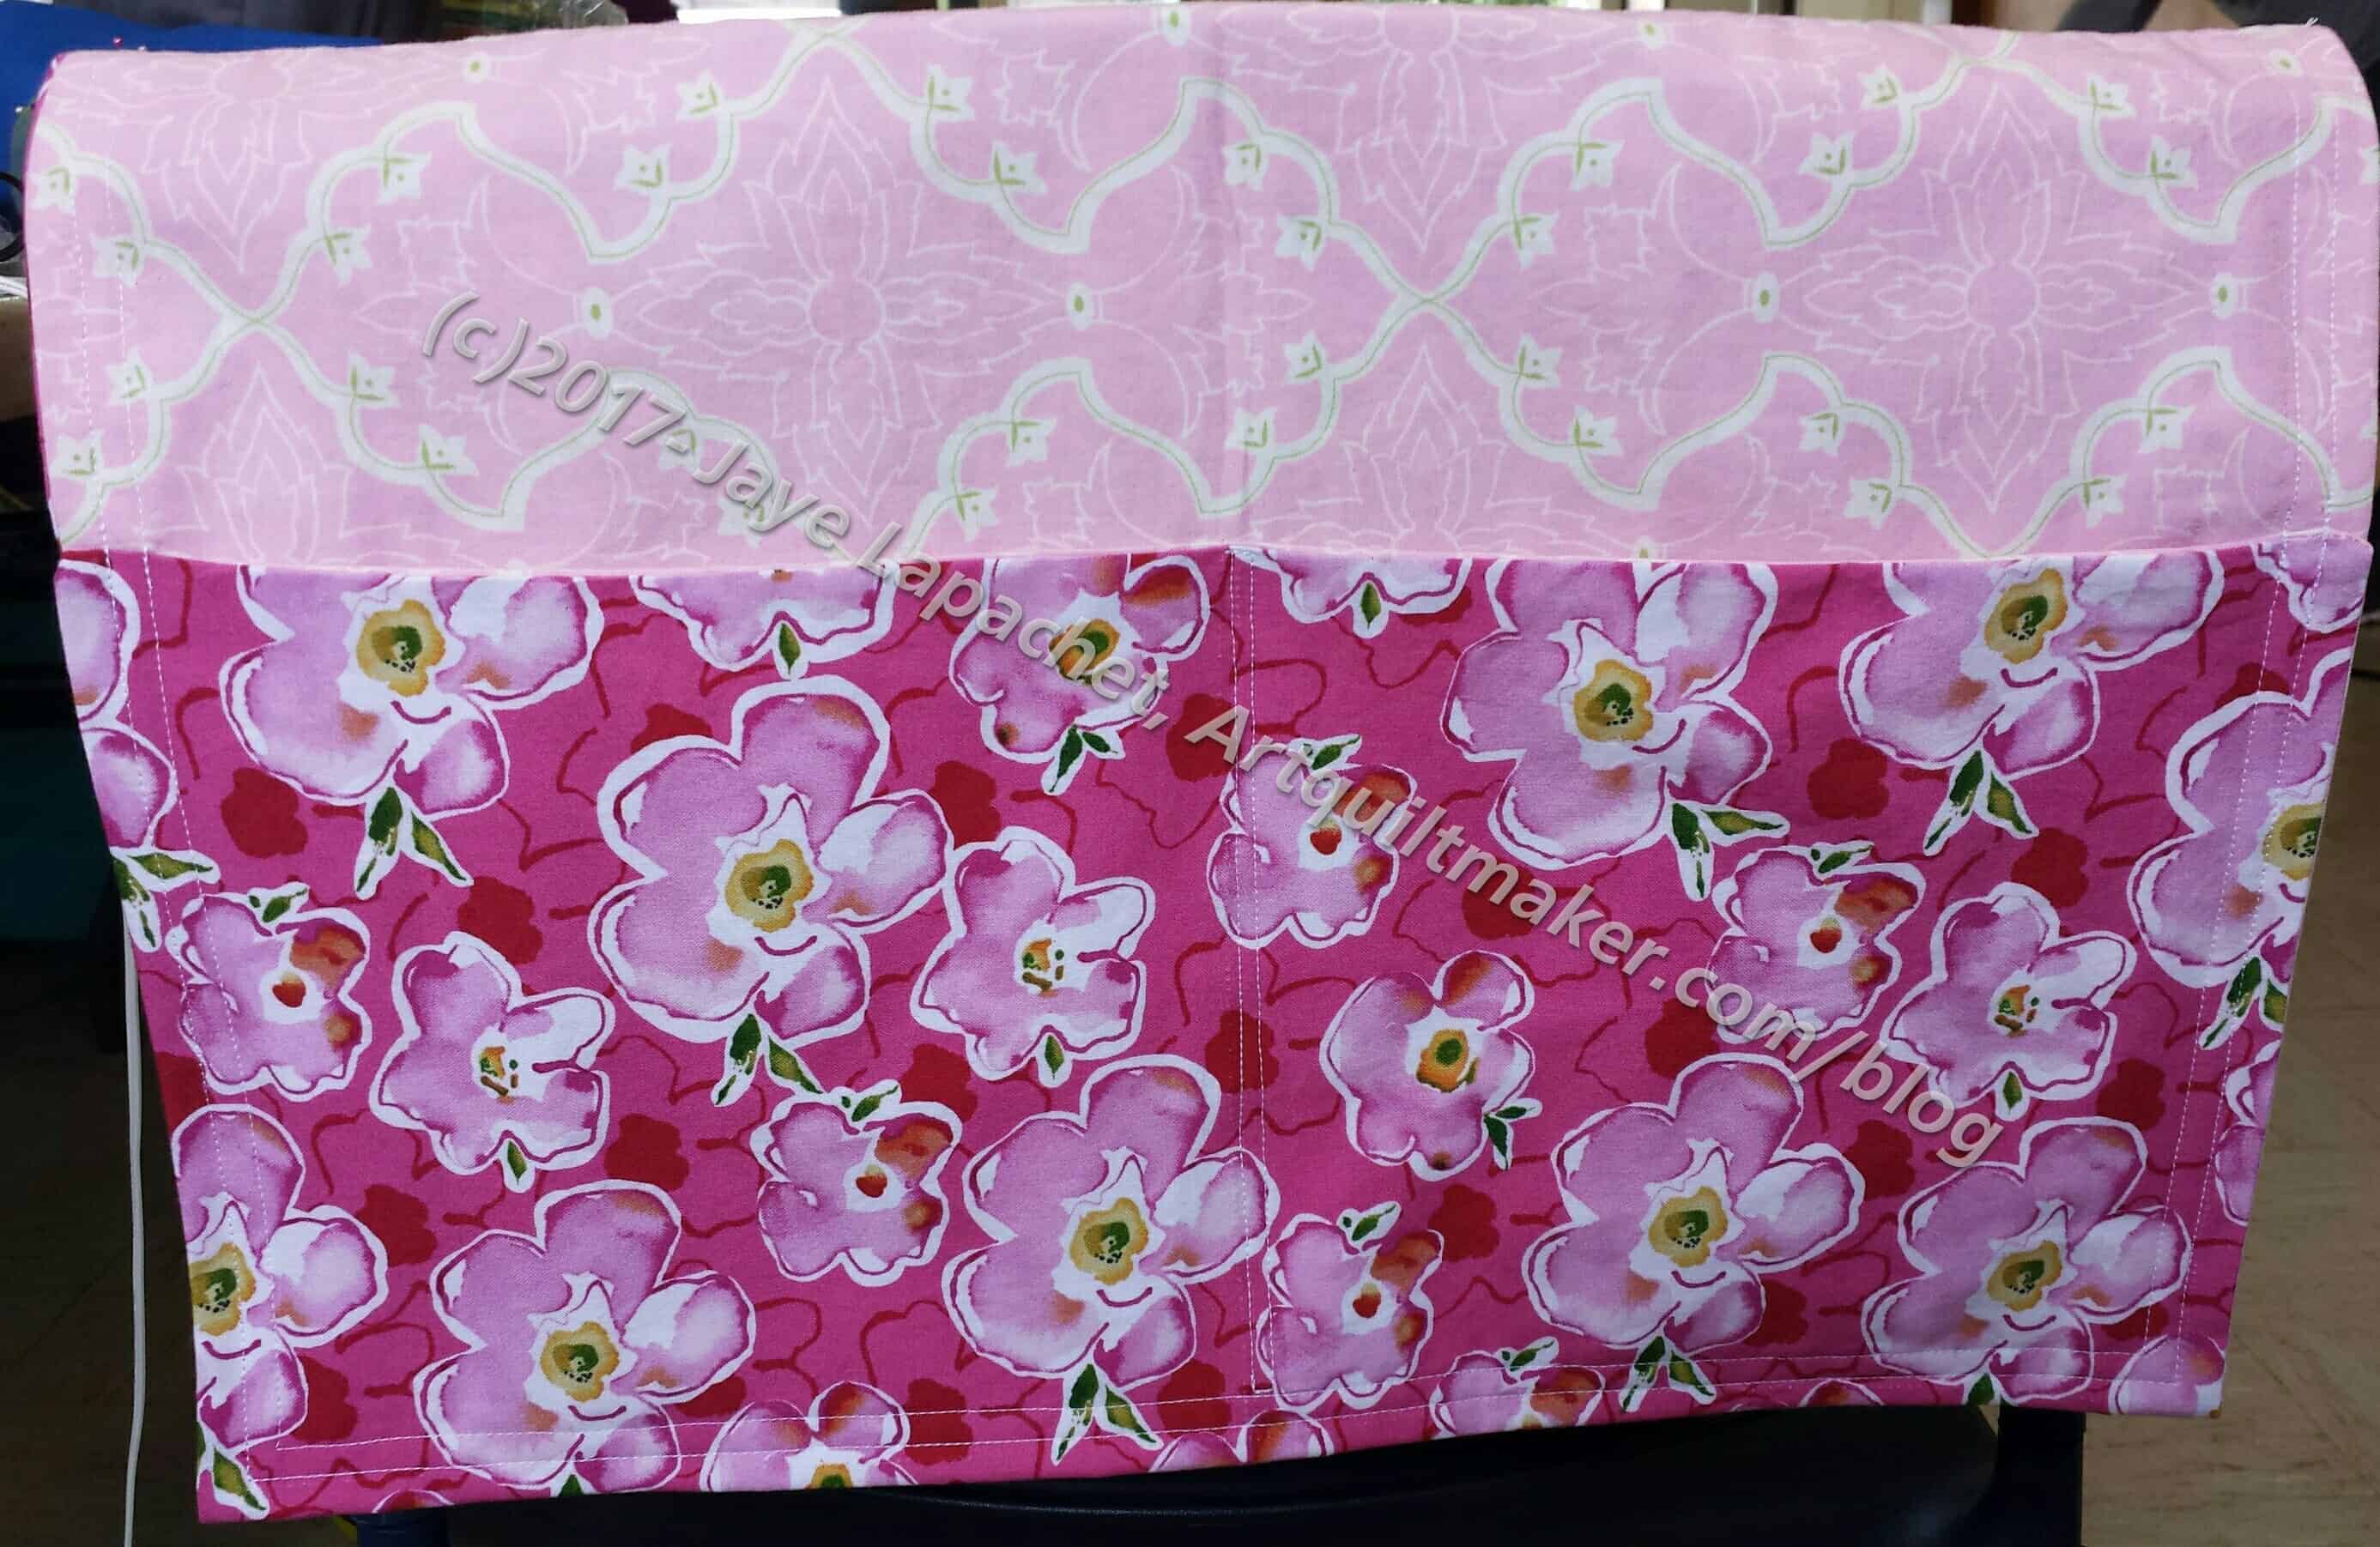
The first one I made was the pink and purple version. I liked the fabric combination.
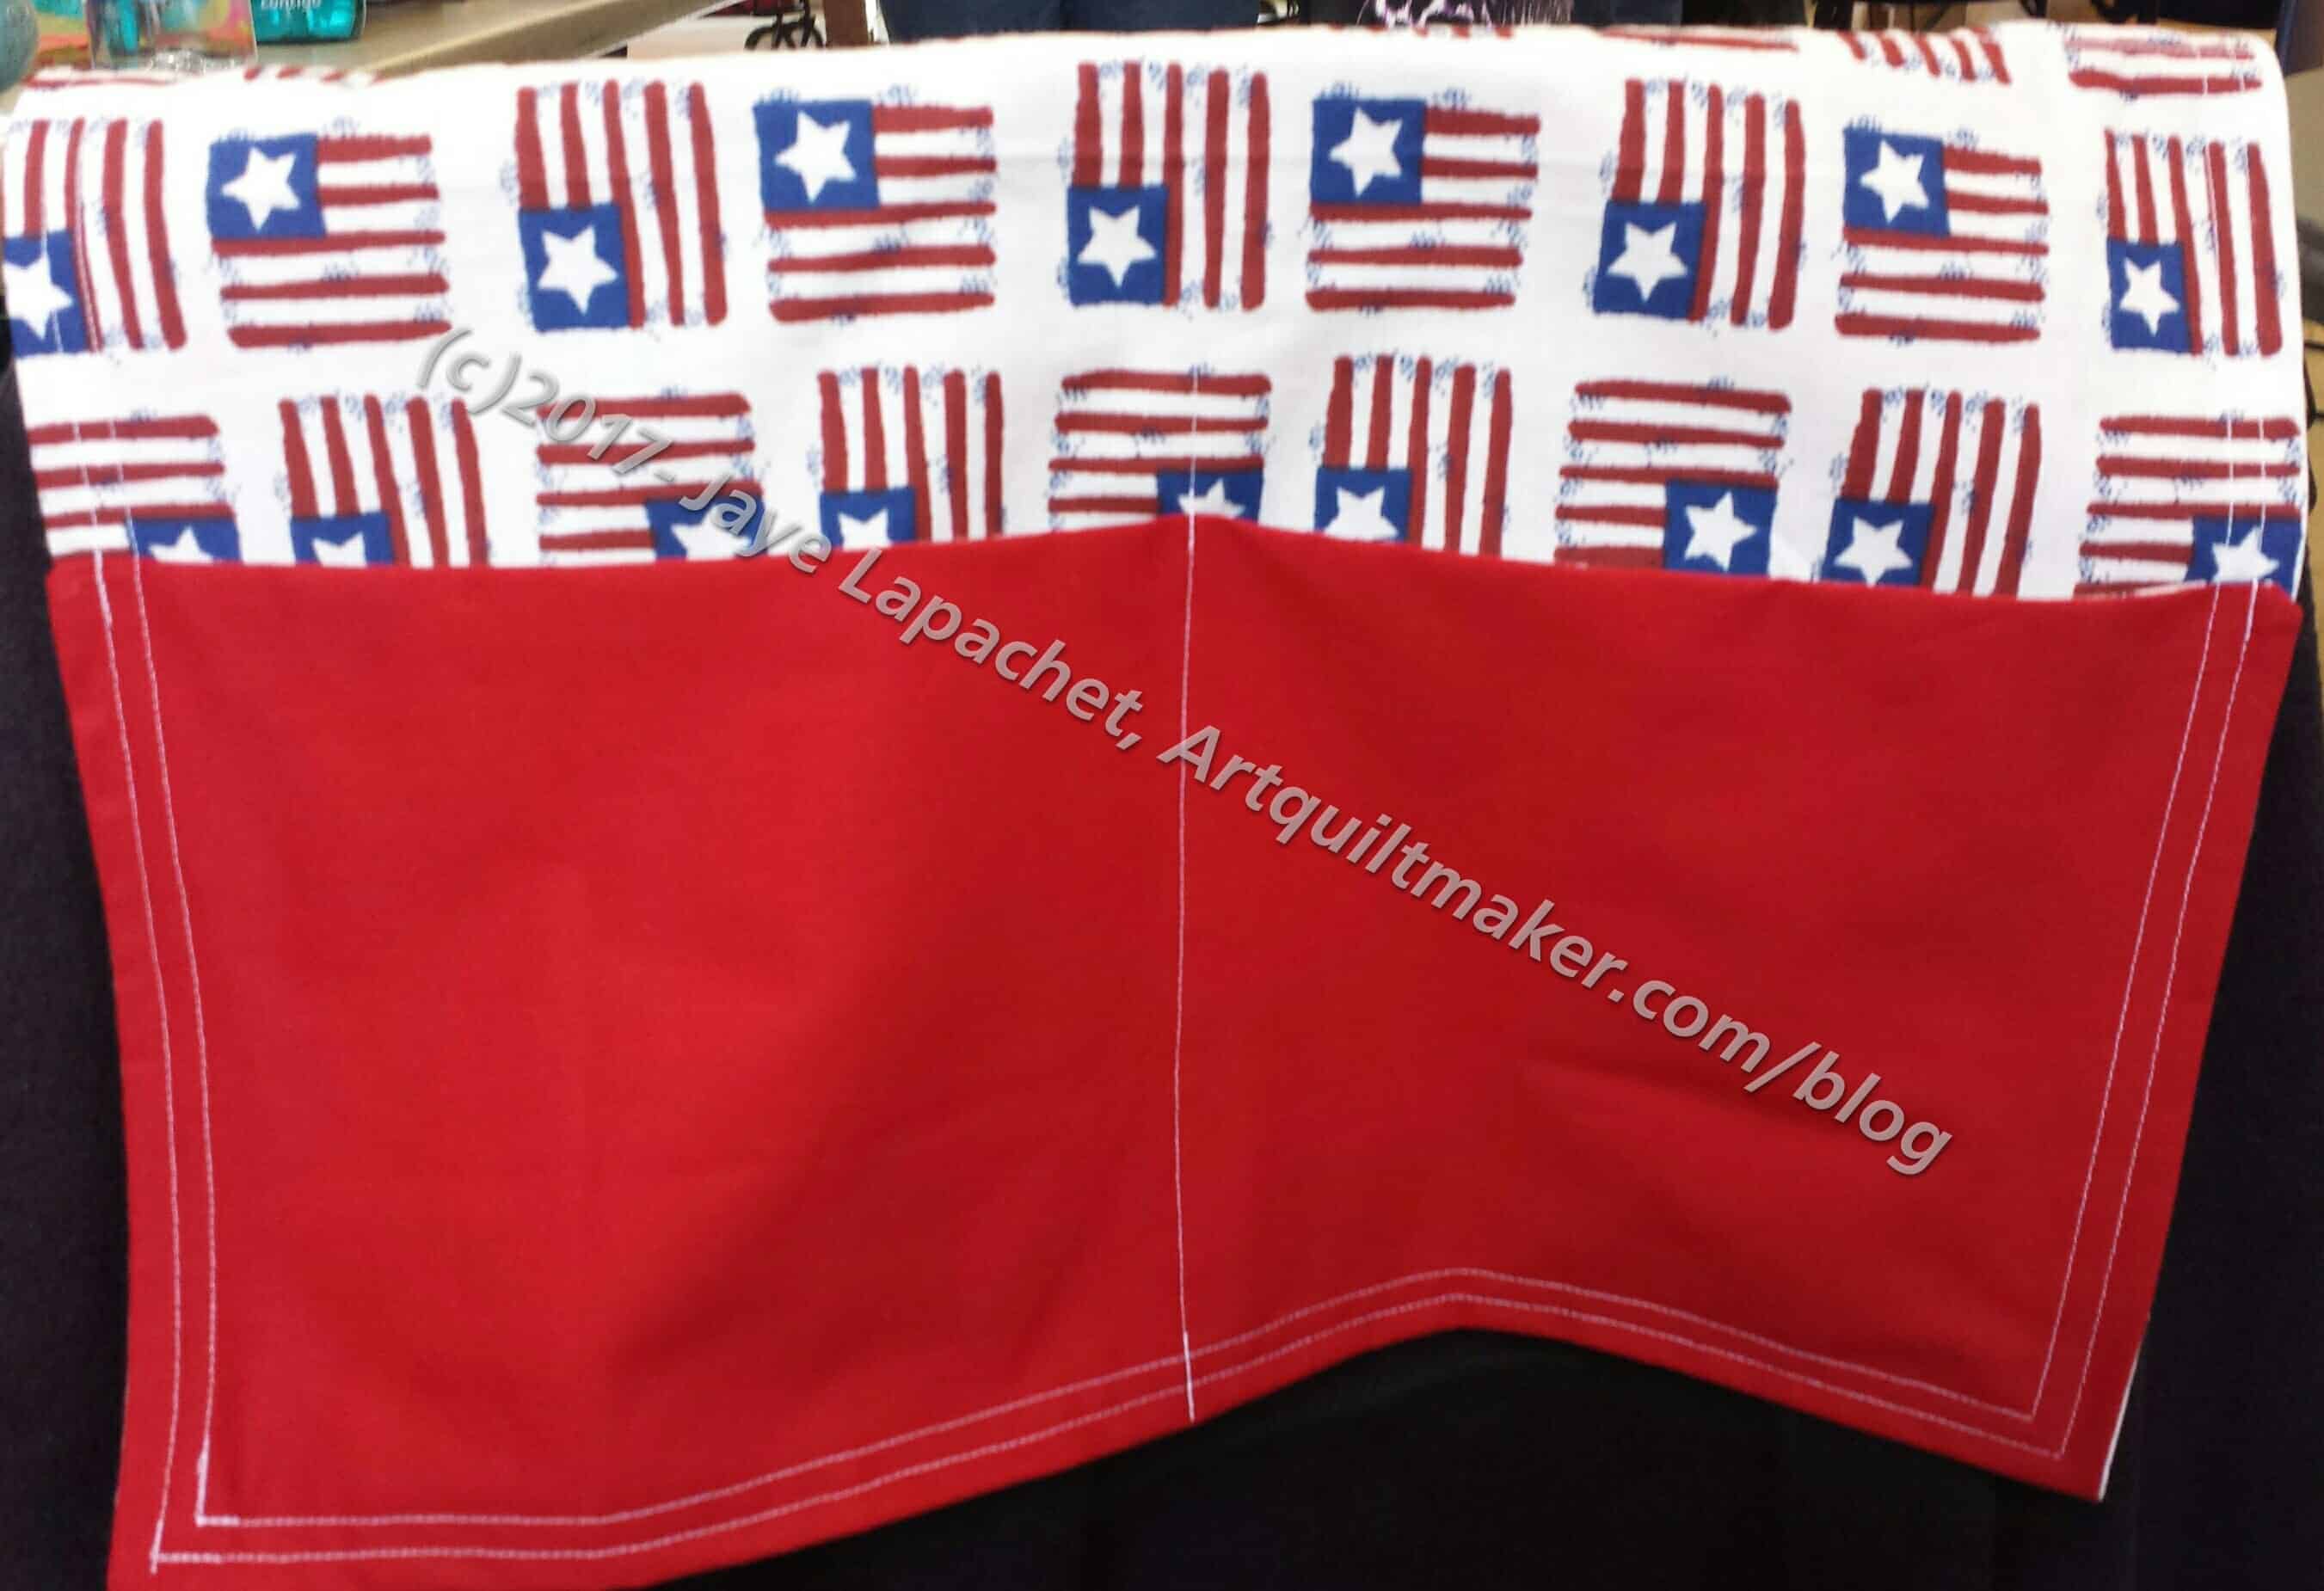
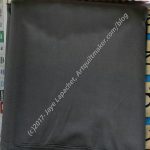
Patriotic Walker Bag
While SIL turned the first one (the first seam is right sides together), I started in on a second. I wanted to kind of do an assembly line and get as many as possible completed. I don’t use much patriotic fabric, but I did like the flags. They are cheerful and a little jaunty.
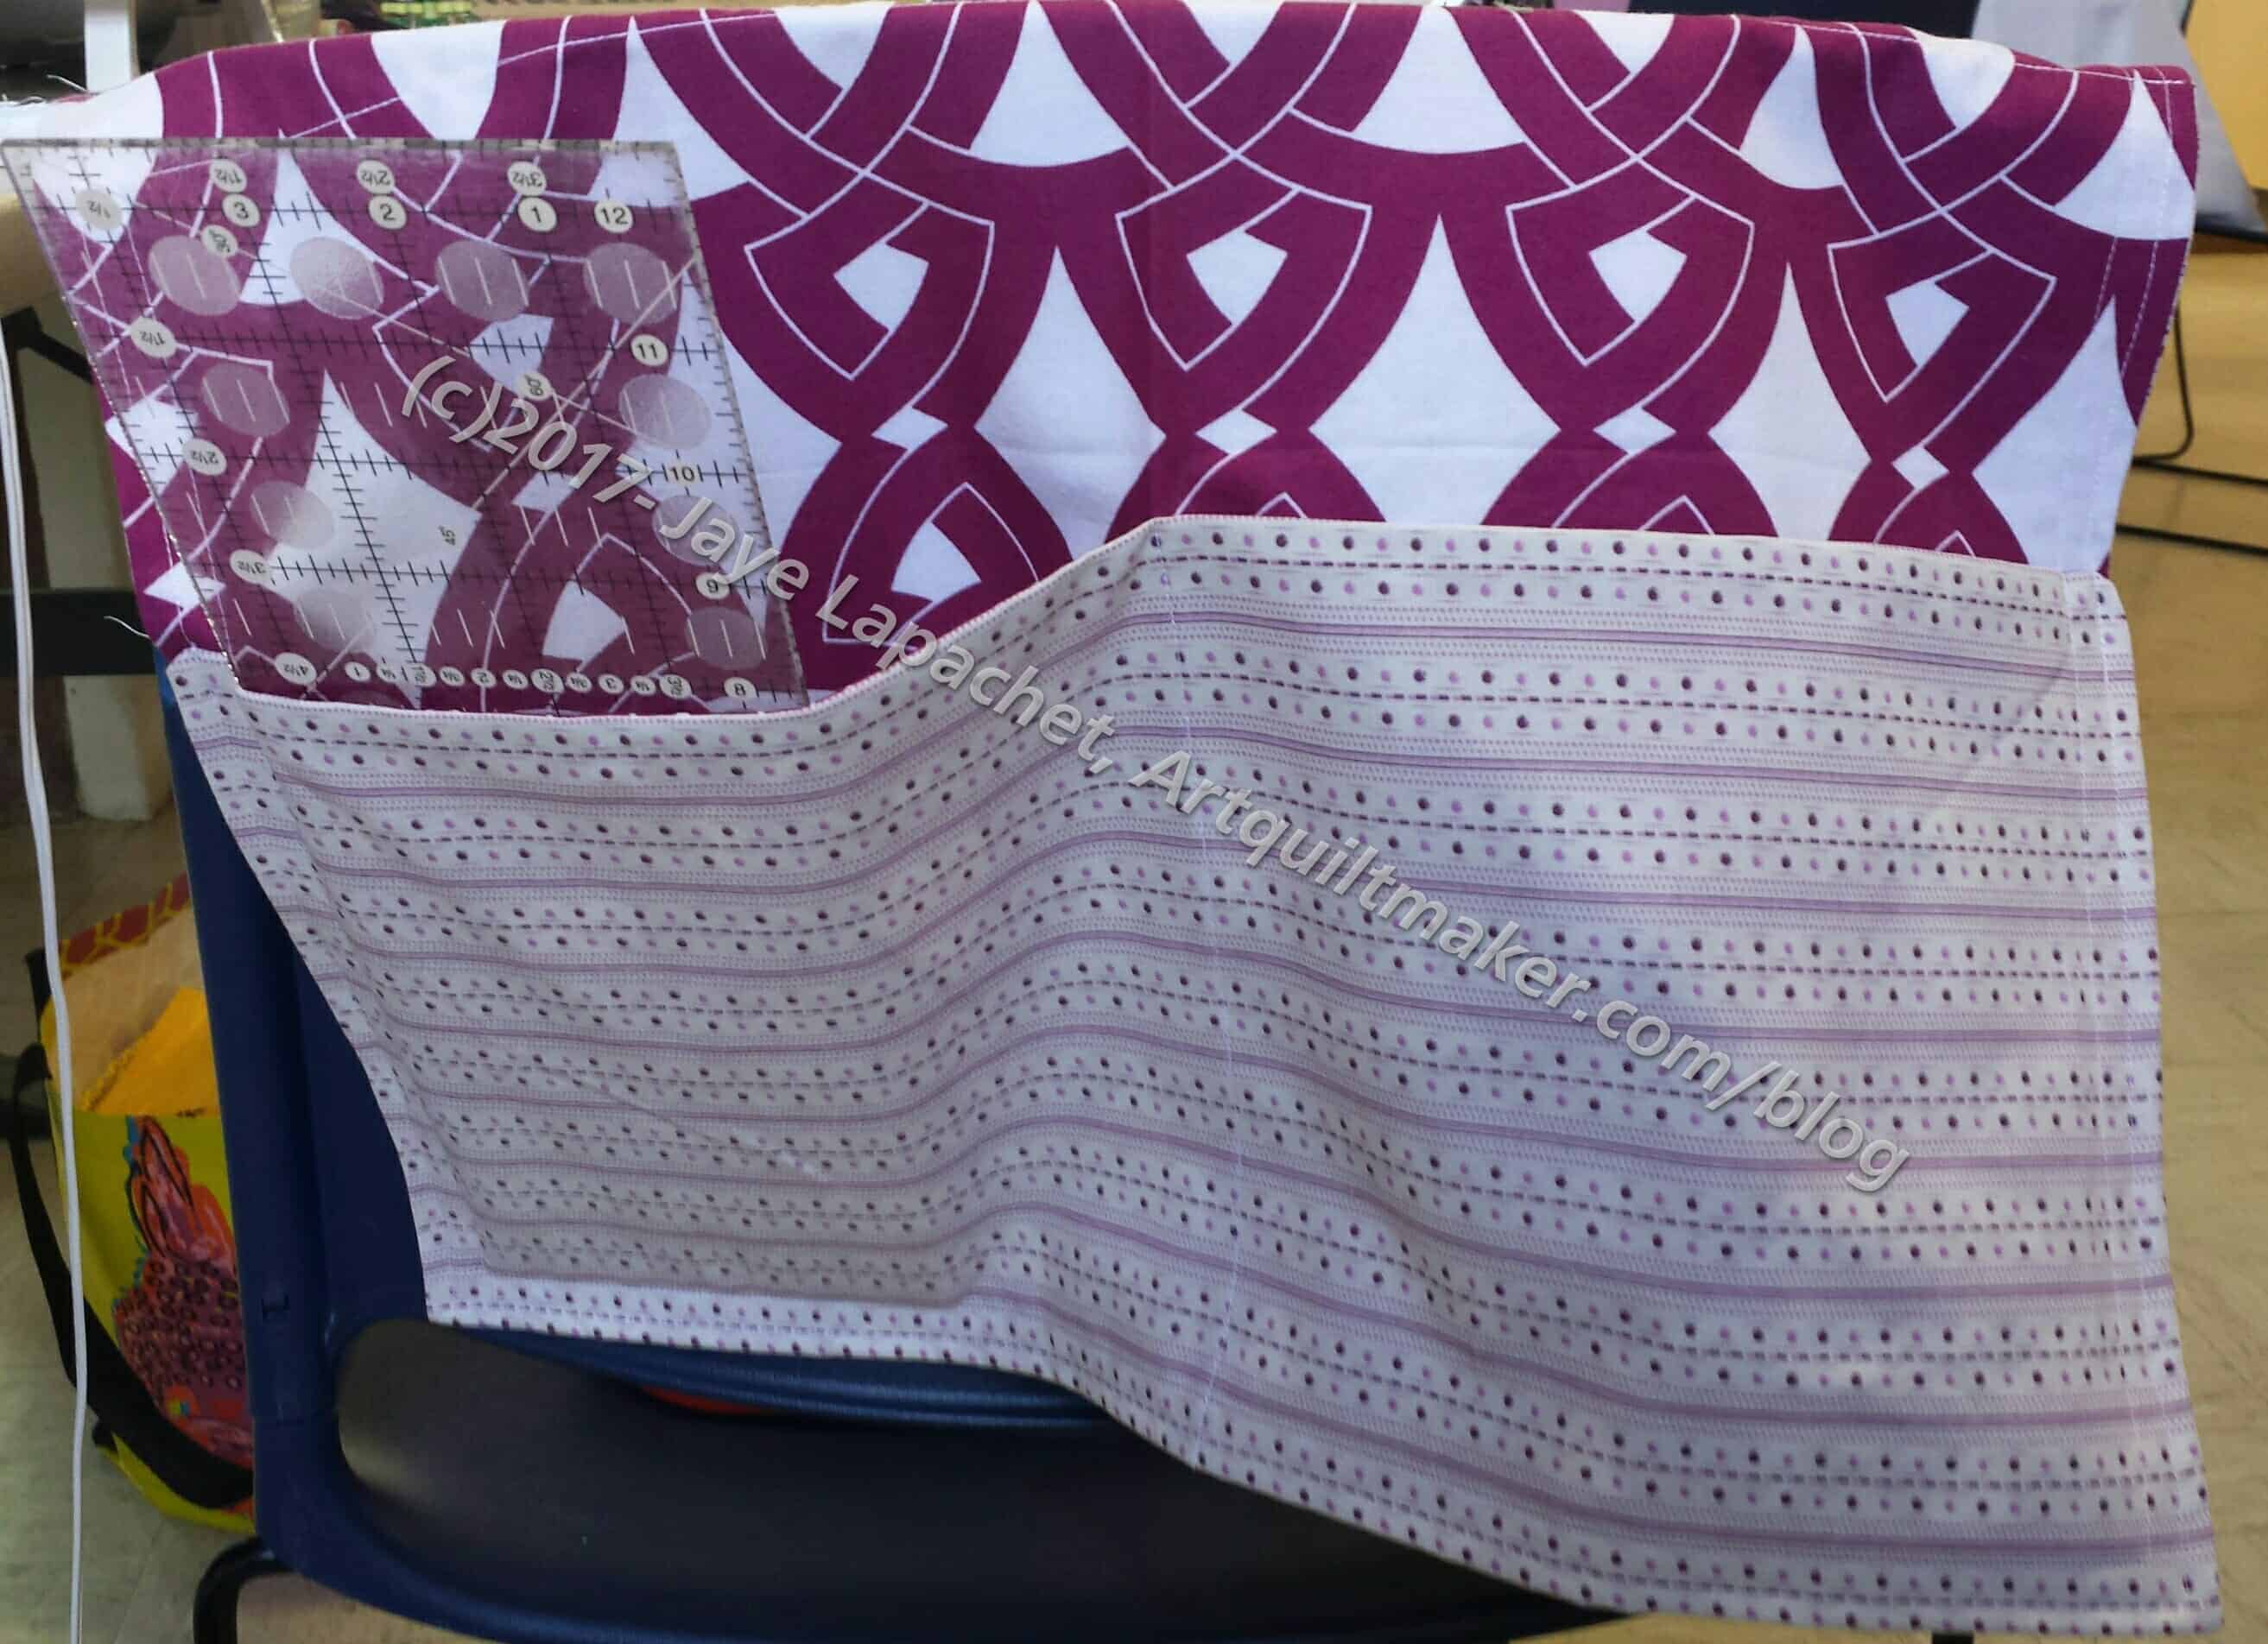
Walker Bags n.3
I was kind of confused about the various seam allowances so I did have to rip a bit. SIL also ripped for me some.
I stuck a ruler in one of the pockets to show the depth. It was a little too tall for the pocket, but I am sure they will work for smaller items.
All around it was a good day. We finished about 25 bags and there was a lot of laughter, which is important as well.
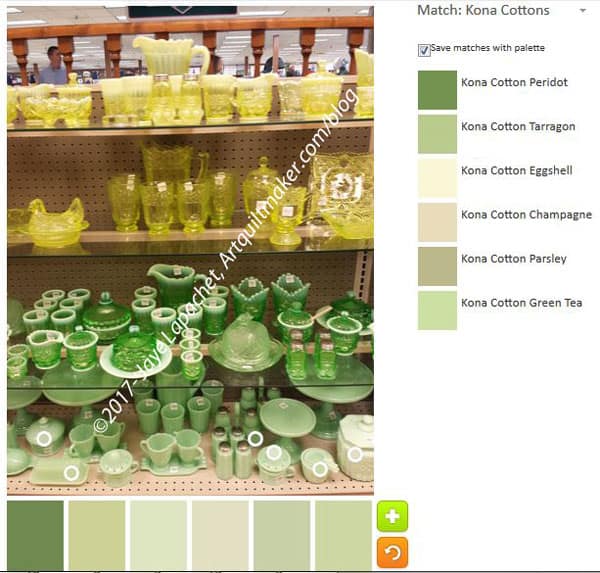
I decided that I would do a few more palettes with the photo from last week. I realized that I wasn’t quite done with it yet.
ColorPlay May 19 n.1
We are skipping the default image since it will be the same as last week’s. Go look at it if you want to see how neutral it was.
I wanted, first to explore the lighter section of the bottom shelf and see what light greens Kona came up with. There is an interesting selection. Champagne is included and it looks very green to me in the bottom palette. I think the lighter colors, in general, look like succulent colors.
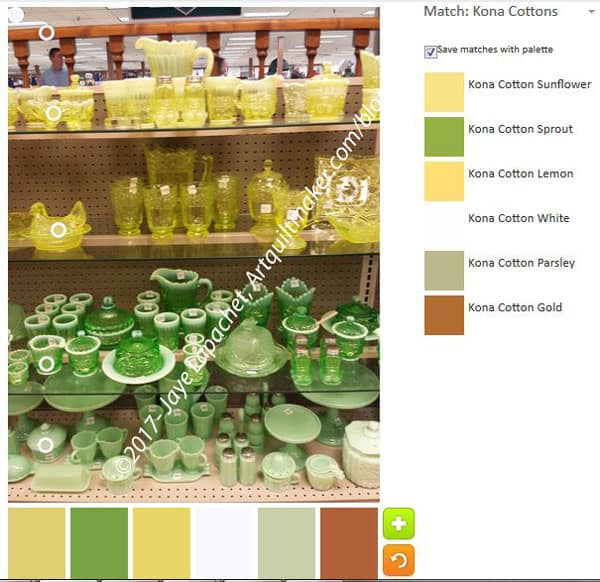
ColorPlay May 19 n.2
I really wanted to combine all the colors and see what I could come up with. I had no plan for selecting sections fairly and equally, so I just lined up the bubbles in a row and came up with a very different palette.
There is a certain look that all the colors have except for the Kona Parsley. This ‘look’ seems to make them go together in kind of a 1970s avocado and gold sort of way. Still there is a warmth about the palette. I wouldn’t make a quilt with it, but I can see it as being a successful palette for someone.
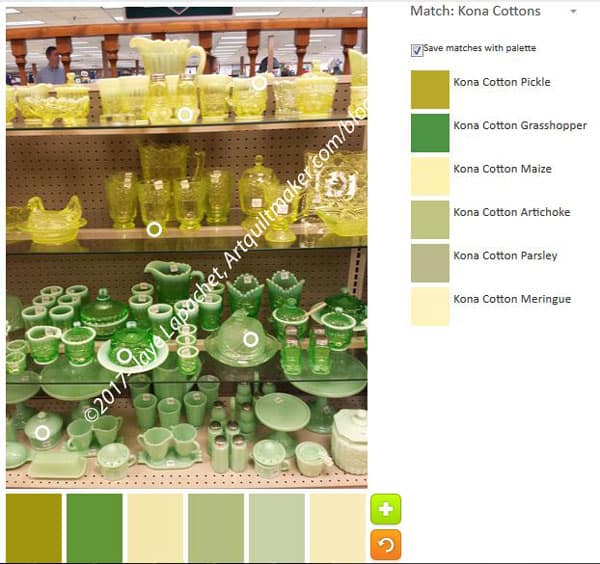
ColorPlay May 19 n.3
I was a little more careful with my final selections (yes, I think I might be done with this photo and the palette possibilities) and came up with one last palette.
The palette doesn’t have any real yellows although I did put three circles on the yellow shelves. I wonder if the green is reflecting or somehow influencing how the camera sees the yellow?
If green and yellow were neutrals, I would say this would be another neutral palette. It isn’t neutral as the greens are clearly defined, if still in the succulent area.
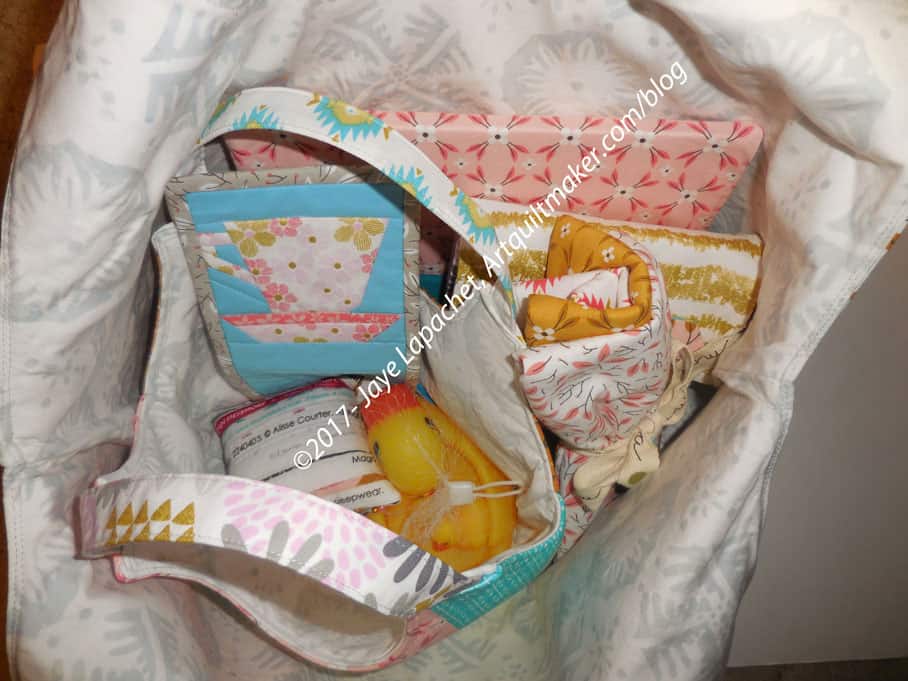
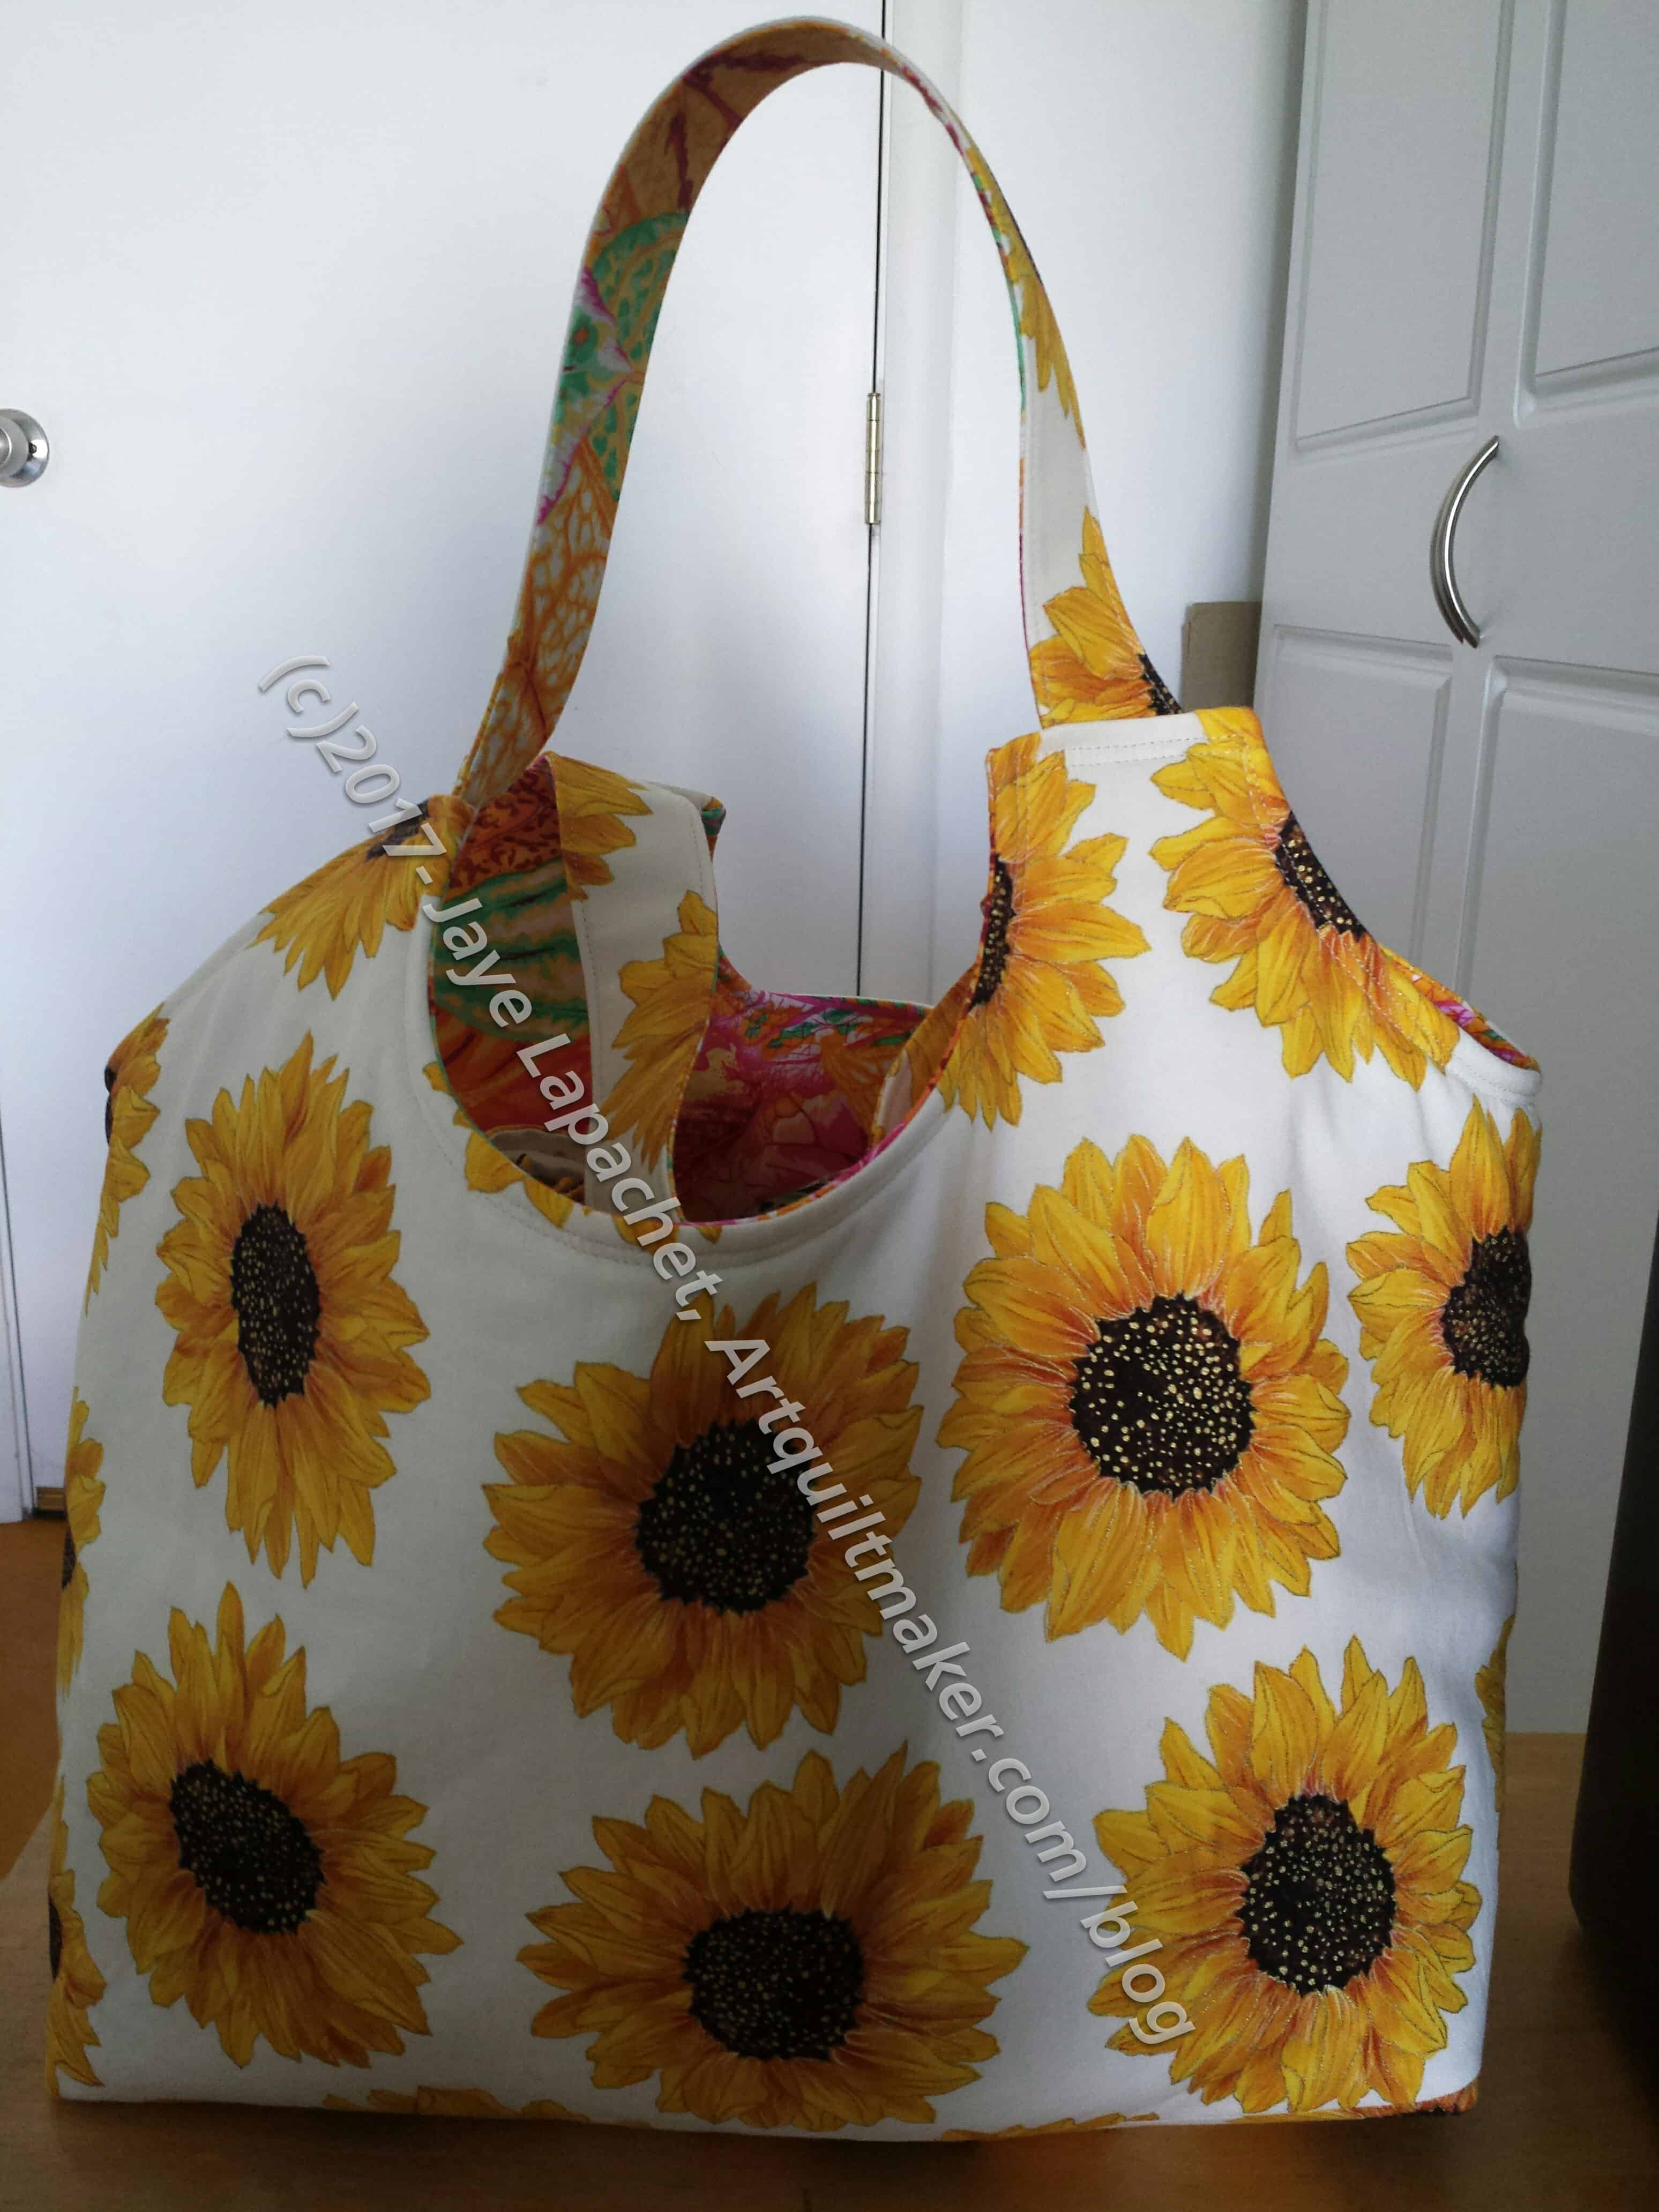
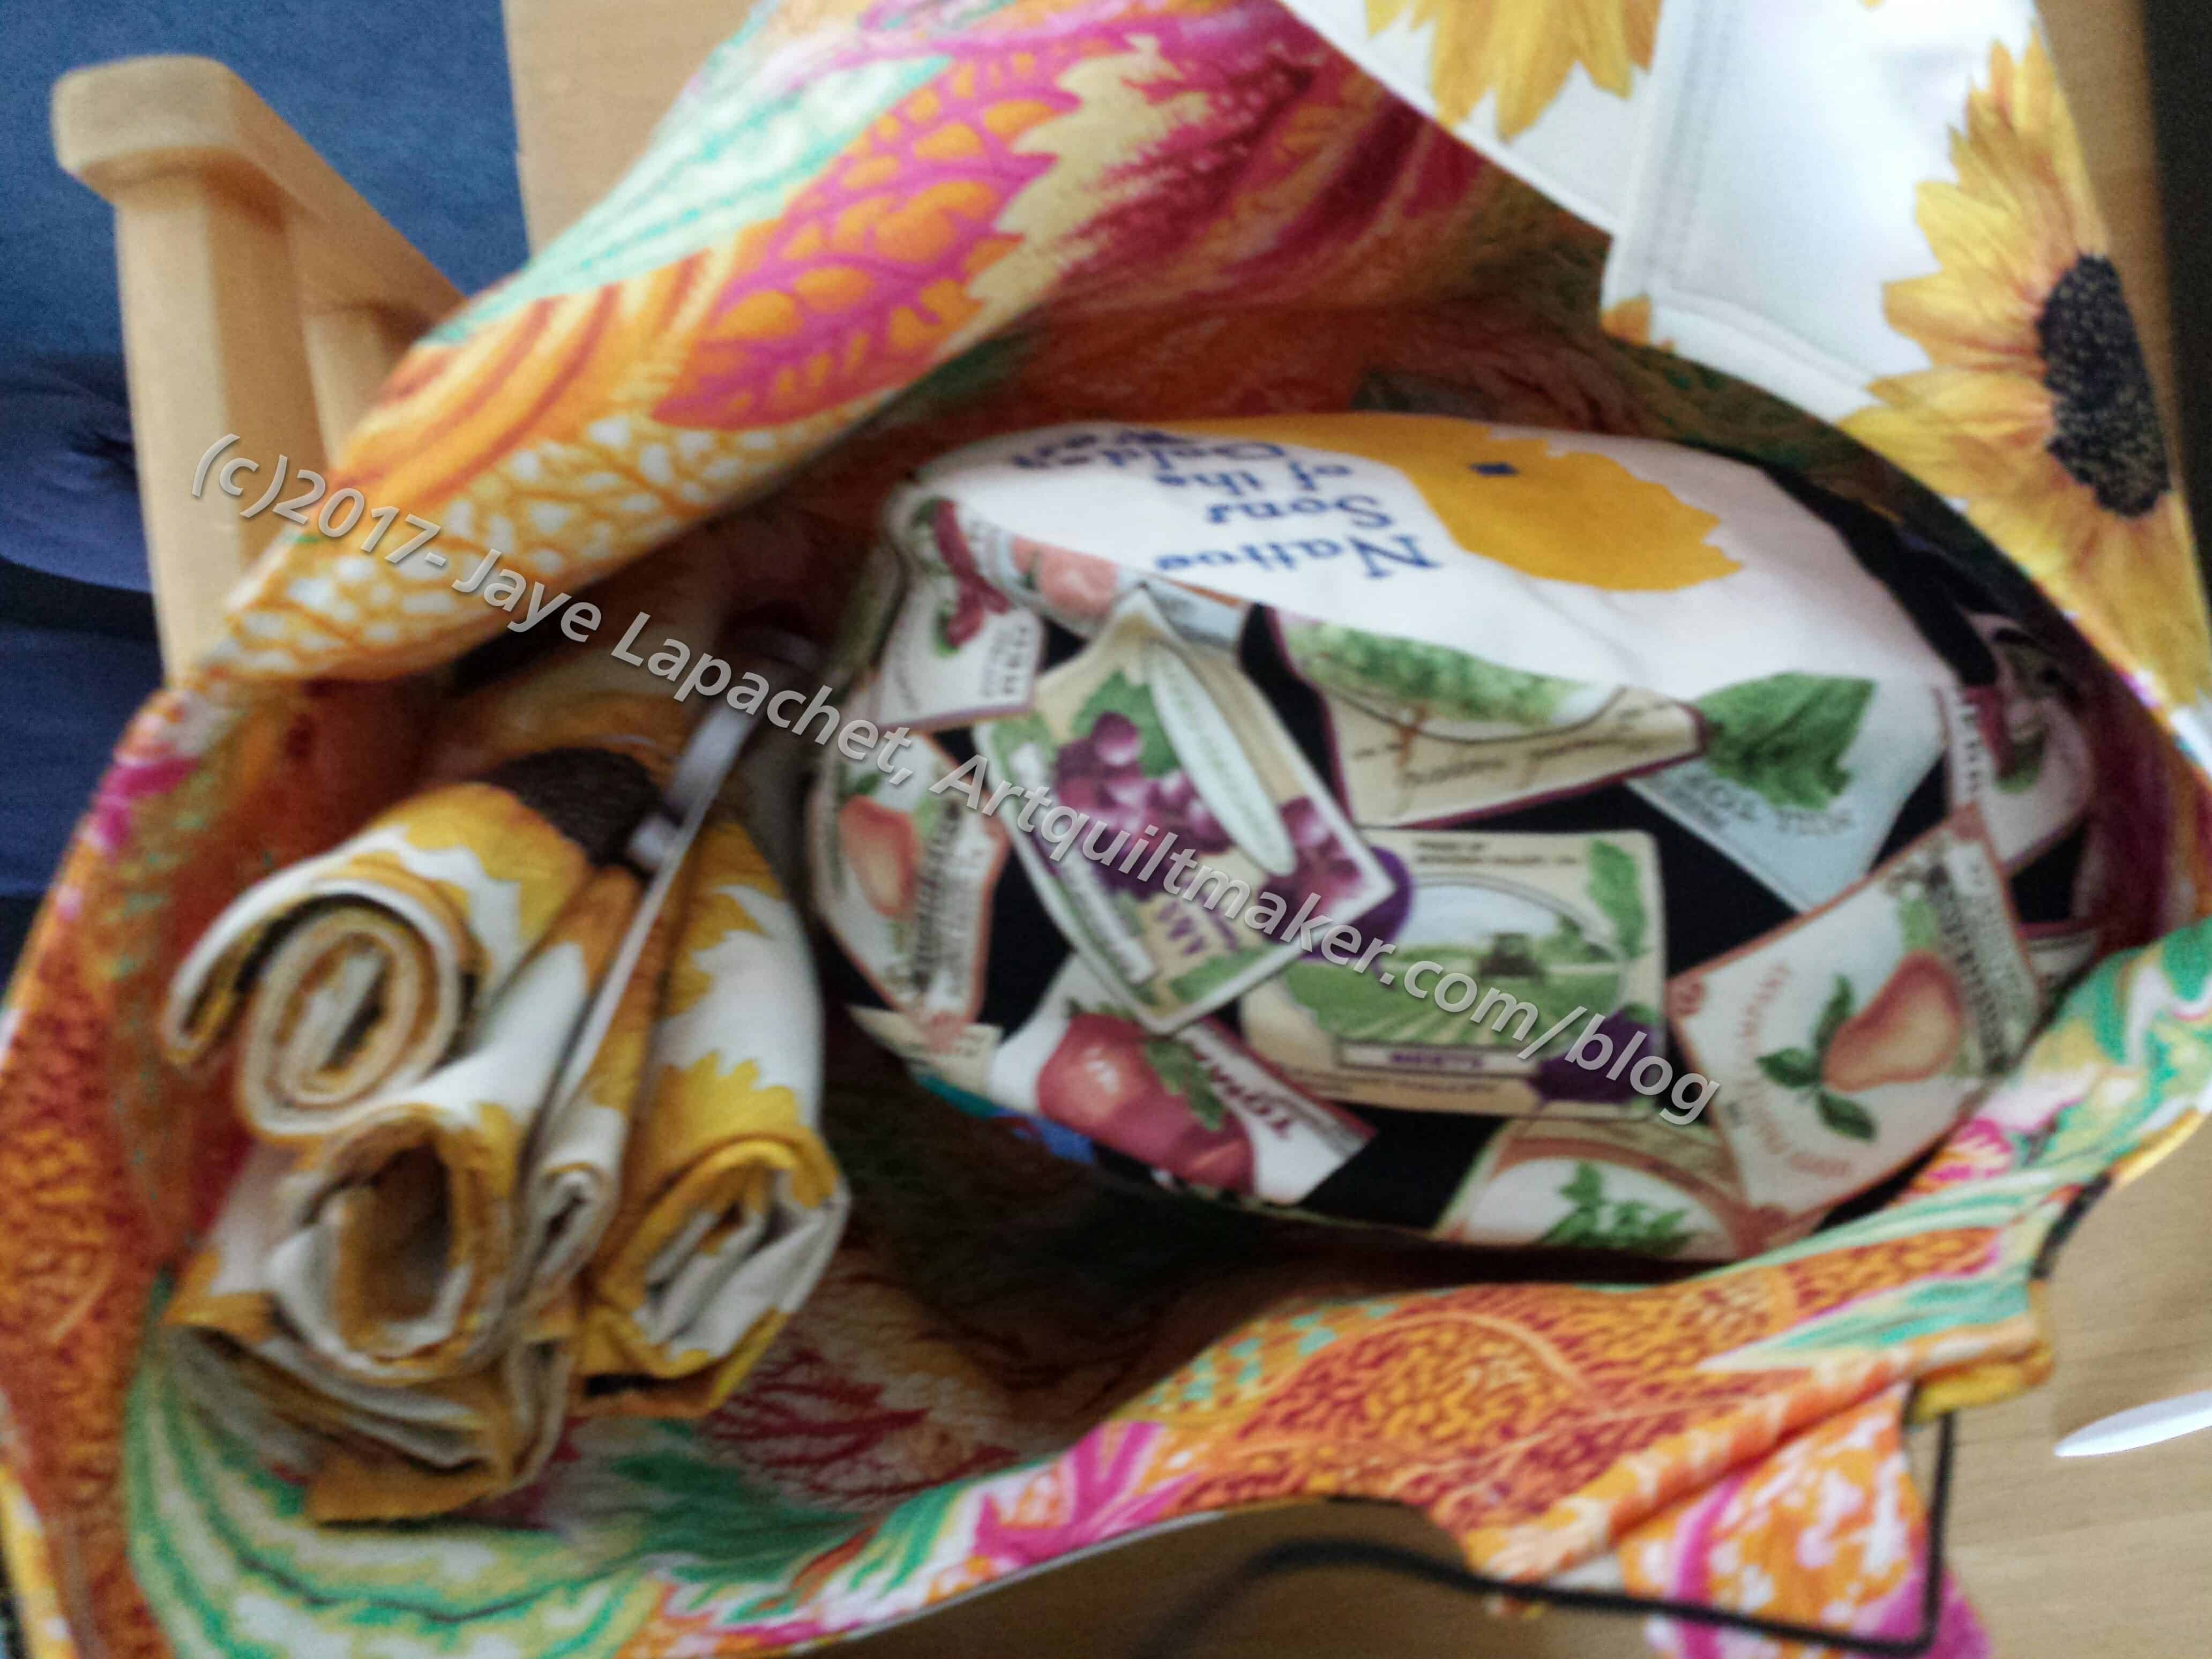
You have seen pieces and parts of the newest Gift Grouping. This is Gift Grouping 2.0, not because it is better, but because I had to think harder of new things to put together. I still like my first group of gifts, which made me quite pleased with myself. I am also pretty happy with this newest group. I used the same basic fabric with both groups.
Gifts laid out
All of the above are in the Big Patchwork Tote from the Make It Take It book. This is the pattern I used for the Sunflower tote. It doesn’t feel like a lot, but as I write this, I am out of time and need to give the gifts to the recipient tomorrow.
Gifts laid out and labeled
You have seen reports of most of these gifts, but I have labelled them so you could relate them to a previous post.
This is the fourth paper wreath I have made during the last few months. I really like making these, though I find making one rather than three at once is a lot easier on my hands.
This was another door prize for the Ladies Luncheon at Grand Parlor (that was one of Monday’s events). I have a tutorial so you can make your own.
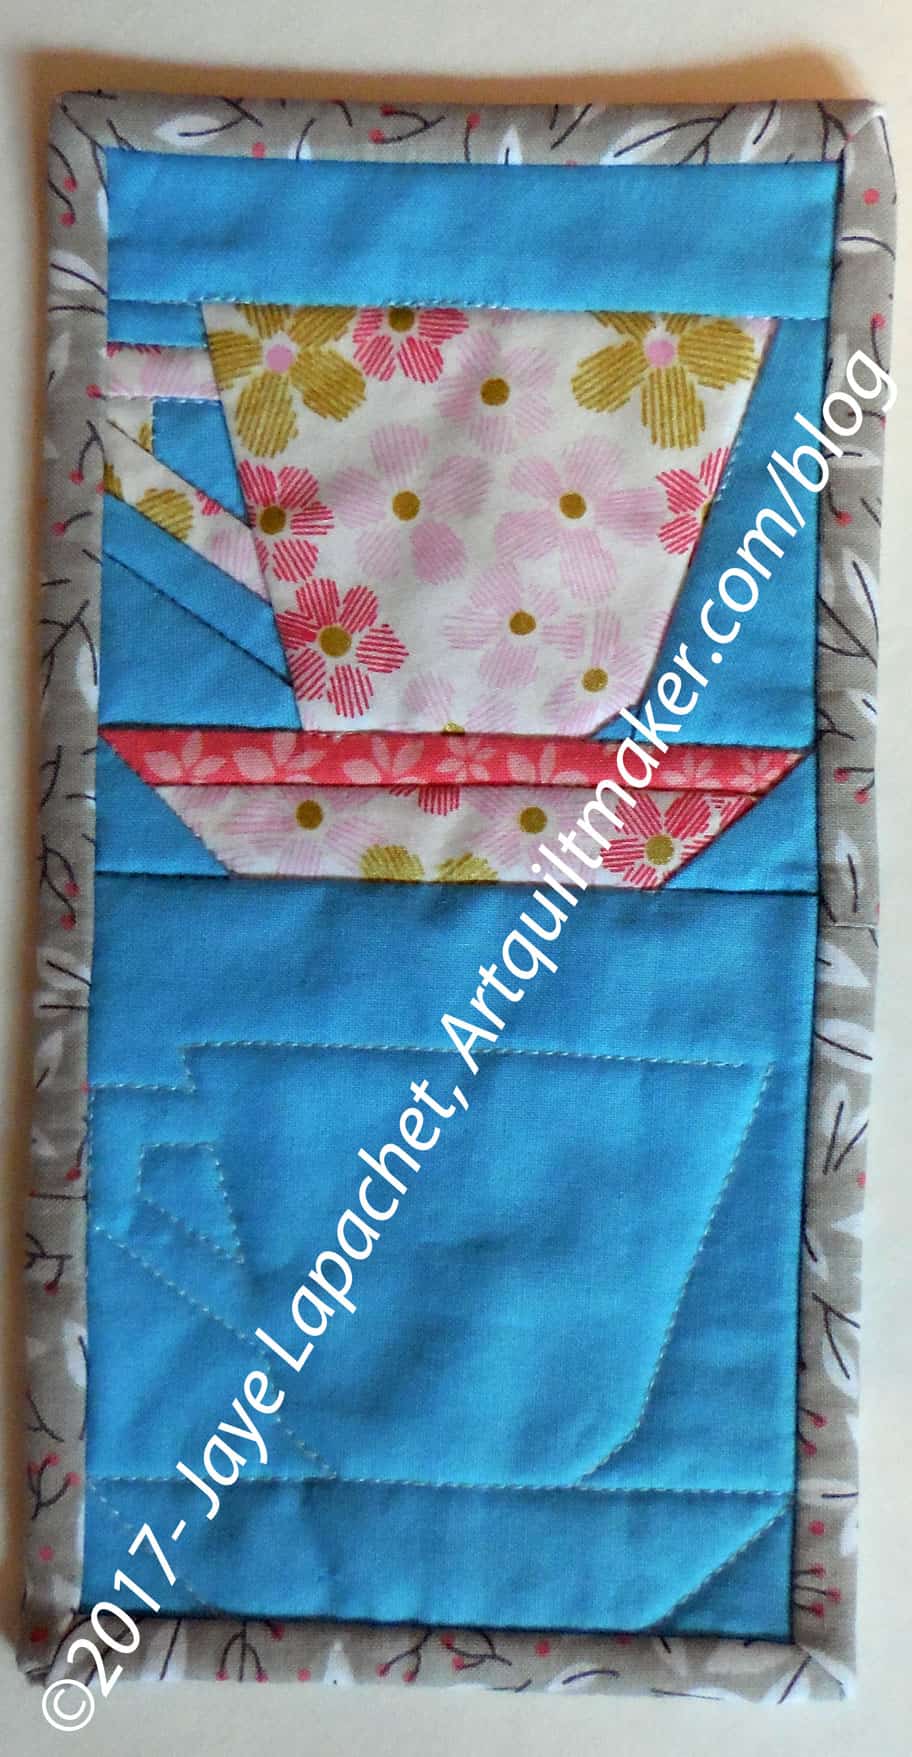
I have finally made a mug rug. I always thought they were dumb, but now find them to be useful. I wasn’t sure what I wanted in terms of a pattern, but thought that a cup or mug would be a fun play on words/imagery.
The piecing on the front as well as the quilting took me a couple of hours. I could have finished the whole thing in, basically, one sitting except I had to hand stitch the binding and didn’t get to it for a few days.
I did a simple web search and eventually found the set of cup patterns on the Piece By Number site. I have about 5 or 6 more from the set I could use to make more blocks, if I wanted. I wasn’t particularly looking for paper piecing, but the blocks appealed to me, so I went for it (good reason to have skill versatility).
This goes with the latest gift grouping on which I am working.
Please check out my For Sale page. I know you want a new design wall.
Patterns &Projects
Fabric Mutt has a project called the Gingham Girls Stationery Kit. I am not sure why it is called ‘stationery’ unless that is part of the name of the fabric line? This is a small sewing kit project, similar to the needle case that I make sometimes.
Tools & Techniques
Applegreen Cottage posted a tutorial about starting off sewing without a knot. This is useful in theory, but genius. It is easy and I was amazed by the effectiveness. Apparently, the blog owner has a lot of tutorials on the site, which I have not yet reviewed.
Media
Pam has a pattern in an Australian Modern Quilting magazine. Take a look at her blog and listen to her podcast for a discount code. It is downloadable so you won’t have to wait for it to arrive AND you won’t have to devote shelf space to the issue.
Gretchen has pointed me to Margaret Soloman Gunn’s work and her blog. The description of herself and her blog made me smile and I love the style of her writing.
Sad news that a majority share of Craftsy is being purchased by NBCUniversal. I am sure we will get more spam, more PITA and less content. I am sure the owners are happy. I got an email with this news and don’t see it on the Craftsy blog.
Other
Jackie has upgraded her workroom. She wrote a blog post about what she did and what she used.
I really like this pattern even though it gave me a few fits before I finished it.
I found this pattern somehow. It is free (for personal use only) from Zen of Making*. I wish I had thought of the name, because there is something zenlike about making and the name is cool.
Anyway.
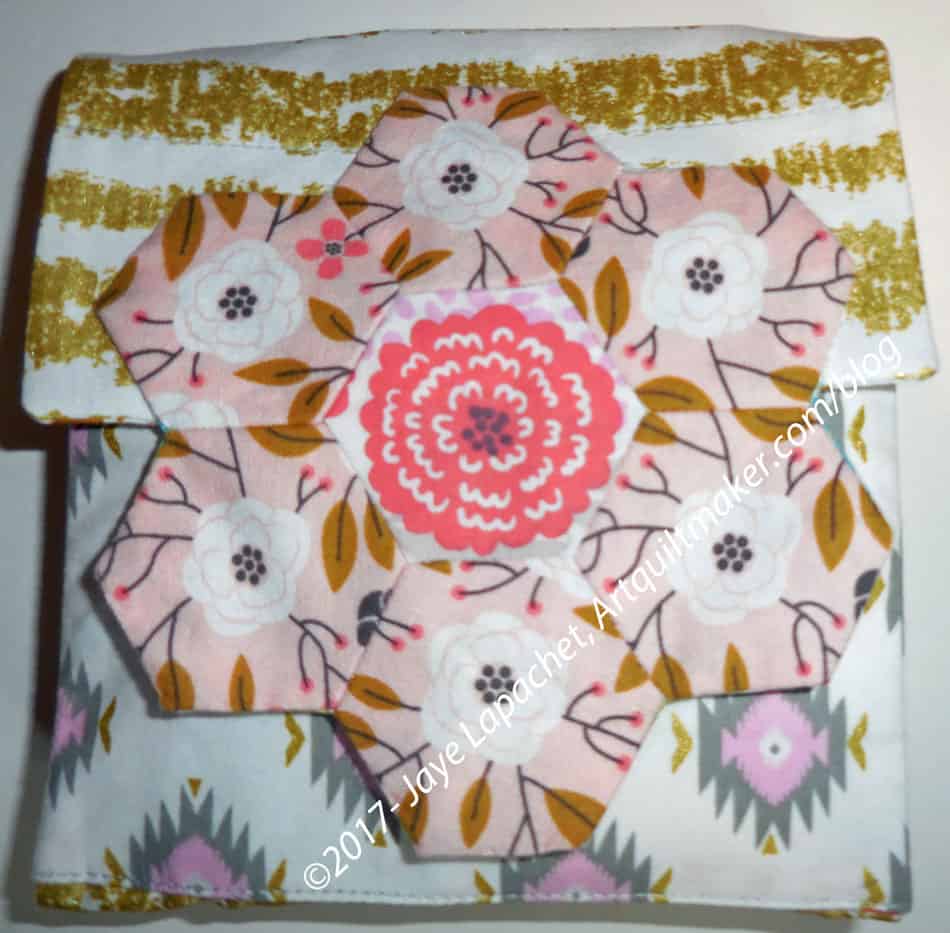
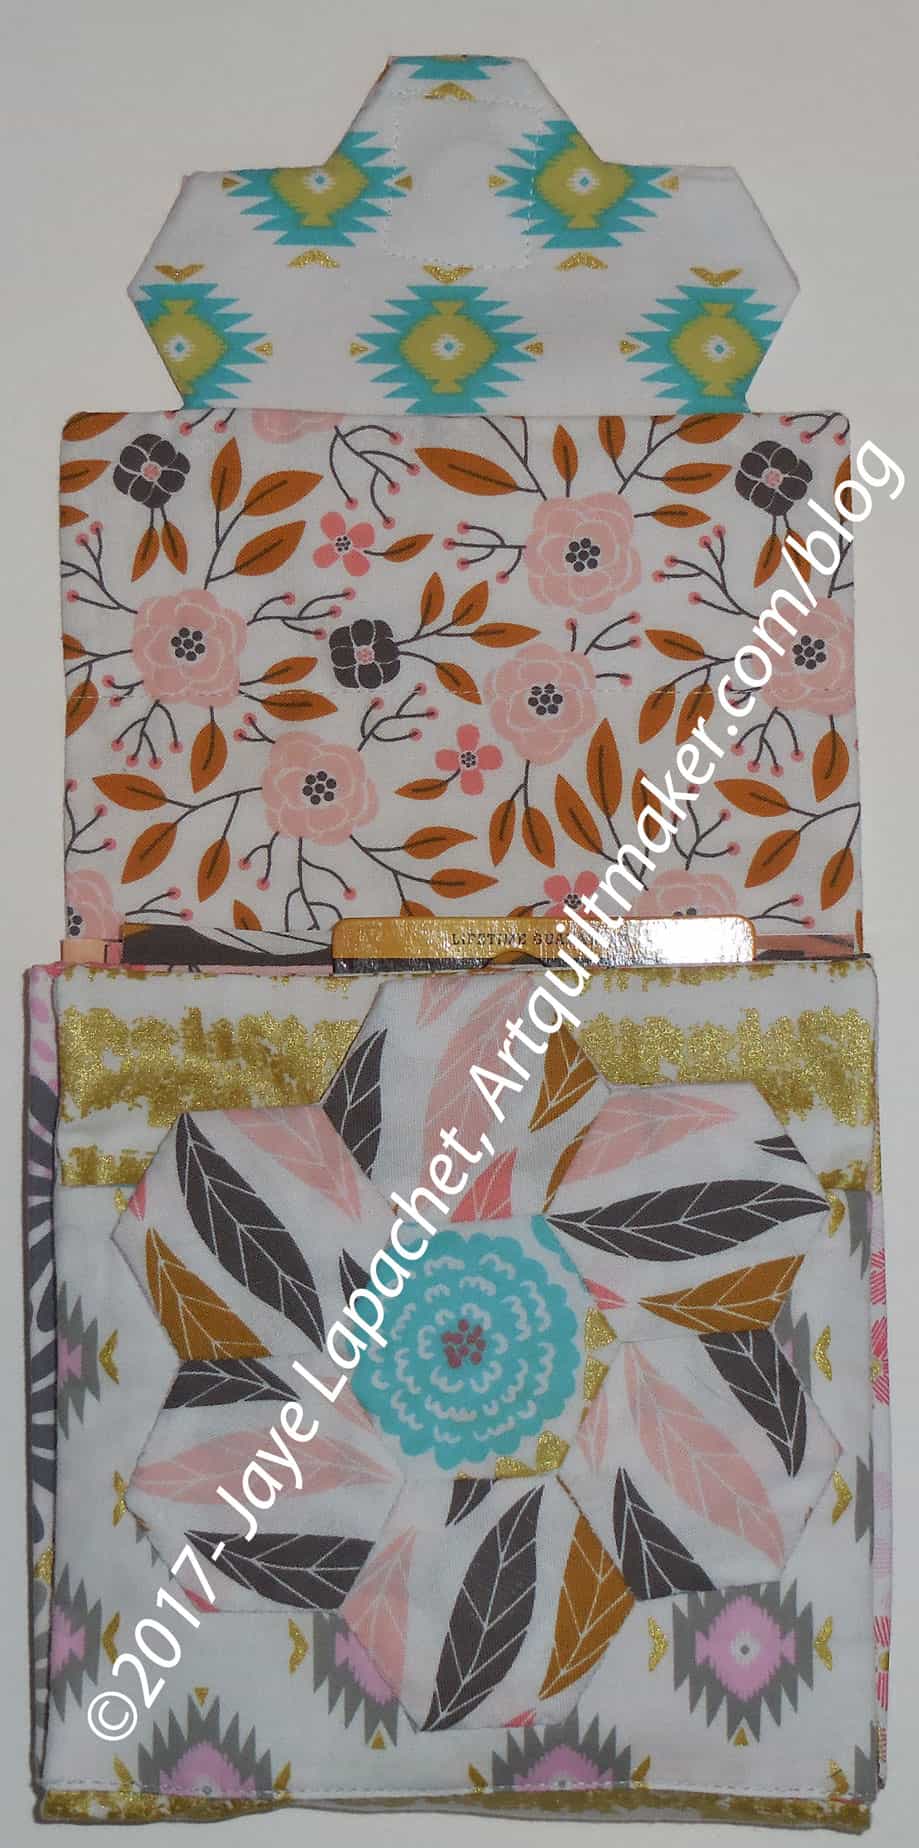
The travel kit is part of a three part series, which includes a lesson on making the hexie flowers. The final piece is making a pincushion out of smaller hexies to use with the EPP Kit. I had plans to make that as well, but ran out of time.
EPP Travel Kit – open (front)
This travel kit is awesome and the problem I had really had nothing to do with the pattern, but with the supplies I had on hand. I hand on hand, and wanted to use, some sew-in invisible magnet closures. Sara of Sew Sweetness uses these in a lot of her patterns and I find I have better success with them than the models with the ‘legs’ used in this pattern.
The closure is pretty awesome. I love the way the hexie flowers stick together. Very clever.
Once I figured out how to get the sew-in magnetic closures oriented in the right direction, the assembly went pretty smoothly. There is a lot of handwork in this pattern, which I wasn’t expecting.
The open look (right, slightly above) is a little odd. I think it might be because of the scrappiness of the whole piece. I think I should have used a backing for the flap hexie flower that matched the hexie flower (the one with leaves and a turquoise center). I do kind of like the scrappy look. I think I will make one that looks like a Dia de los Muertos celebration for a different friend. I definitely want to try different colors.
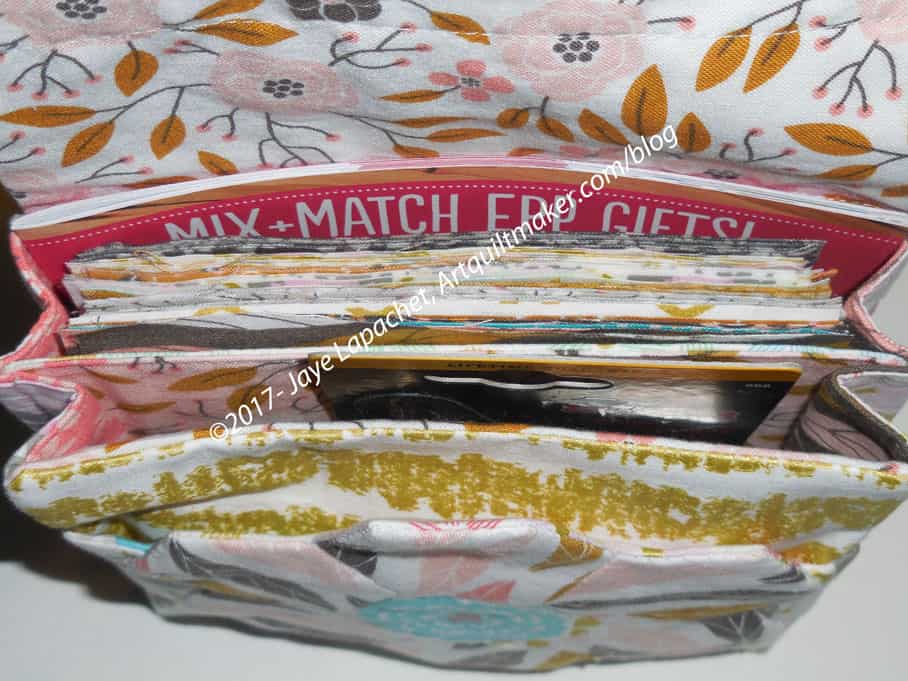
EPP Travel Kit – inside view
Altoids tins fit nicely inside and Haley (blog owner/designer) calls for two of them for this project. I had to scrounge them up. I put a piece of felt in the bottom of each tin to make them less rattly and a little nicer.
I cut and added some 5″ squares, and an EPP book to make the kit look full and fun.
*It appears that the name of the blog has changed to Red Handled Scissors. Not sure why, but the pattern is still there.
The week is nearly upon us. My house looks like a bomb of tissue paper, decorative paper and ribbon went off in it. There are gifts and baskets everywhere. I haven’t even begun to inventory my clothes for the week yet. That will only add to the chaos.
In addition to the physical chaos, we also had some other chaos: our washer broke and is unfixable and one of the Grand Officers died so some of our precious prep time was, understandably, devoted to a rosary and a funeral.
Favor Soaps
Soaps and Ribbon: prep for boxing
Boxing Soaps in Process
My SILs, a friend and I spent Craft Night on Monday boxing and wrapping favors for the Ladies Luncheon. These soaps were made my my sister, owner of Wooden Heart Soaps (go buy some-they are awesome), the wallpaper from which we made the boxes was from FabMo and one of my SILs dug into her stash of gift bag ribbon for our use.
The soaps are Grapefruit Bellini scent. I wanted something that most people would like and was not too strong. Cross your fingers.
Gifts for Ladies Committee
I also had to procure a number of thank you gifts for the people who helped with all of the events.
I decided to use handbags as the holders since they were nice and could be used later. I hope the committee likes them. If they don’t, I know they won’t say anything. 😉
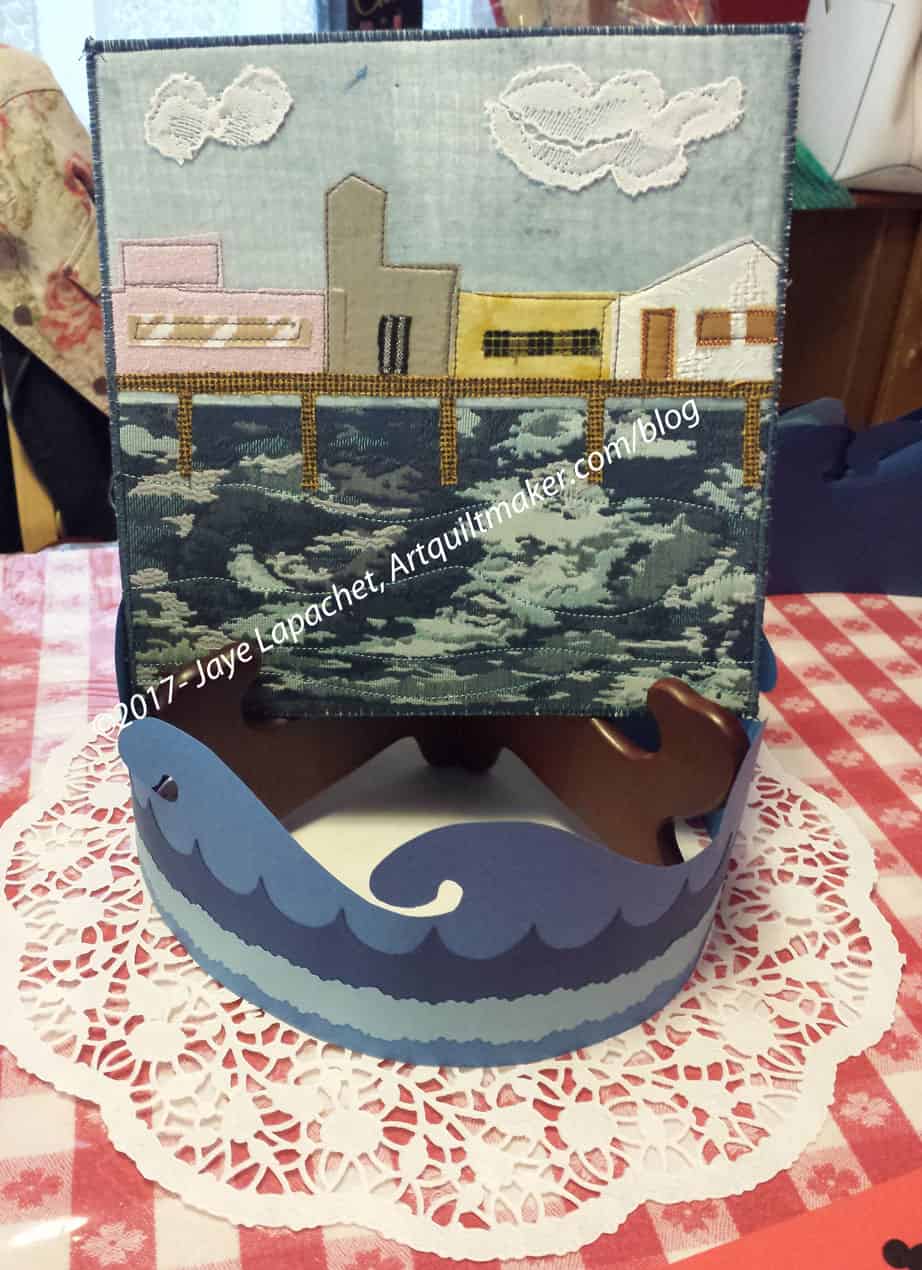
One Centerpiece
Maureen designed the centerpieces and Carol took them and designed a tableau around Maureen’s work. The plate holder will be clear or white (I can’t remember); the one in the picture is just a sample. Carol designed the waves and put together enough for all the tables. She did a wonderful job, especially using the lace doily to add a bit of finish to work.
After organizing my clothes, I think I will be done. We’ll see whatever other crises fate throws in our way.
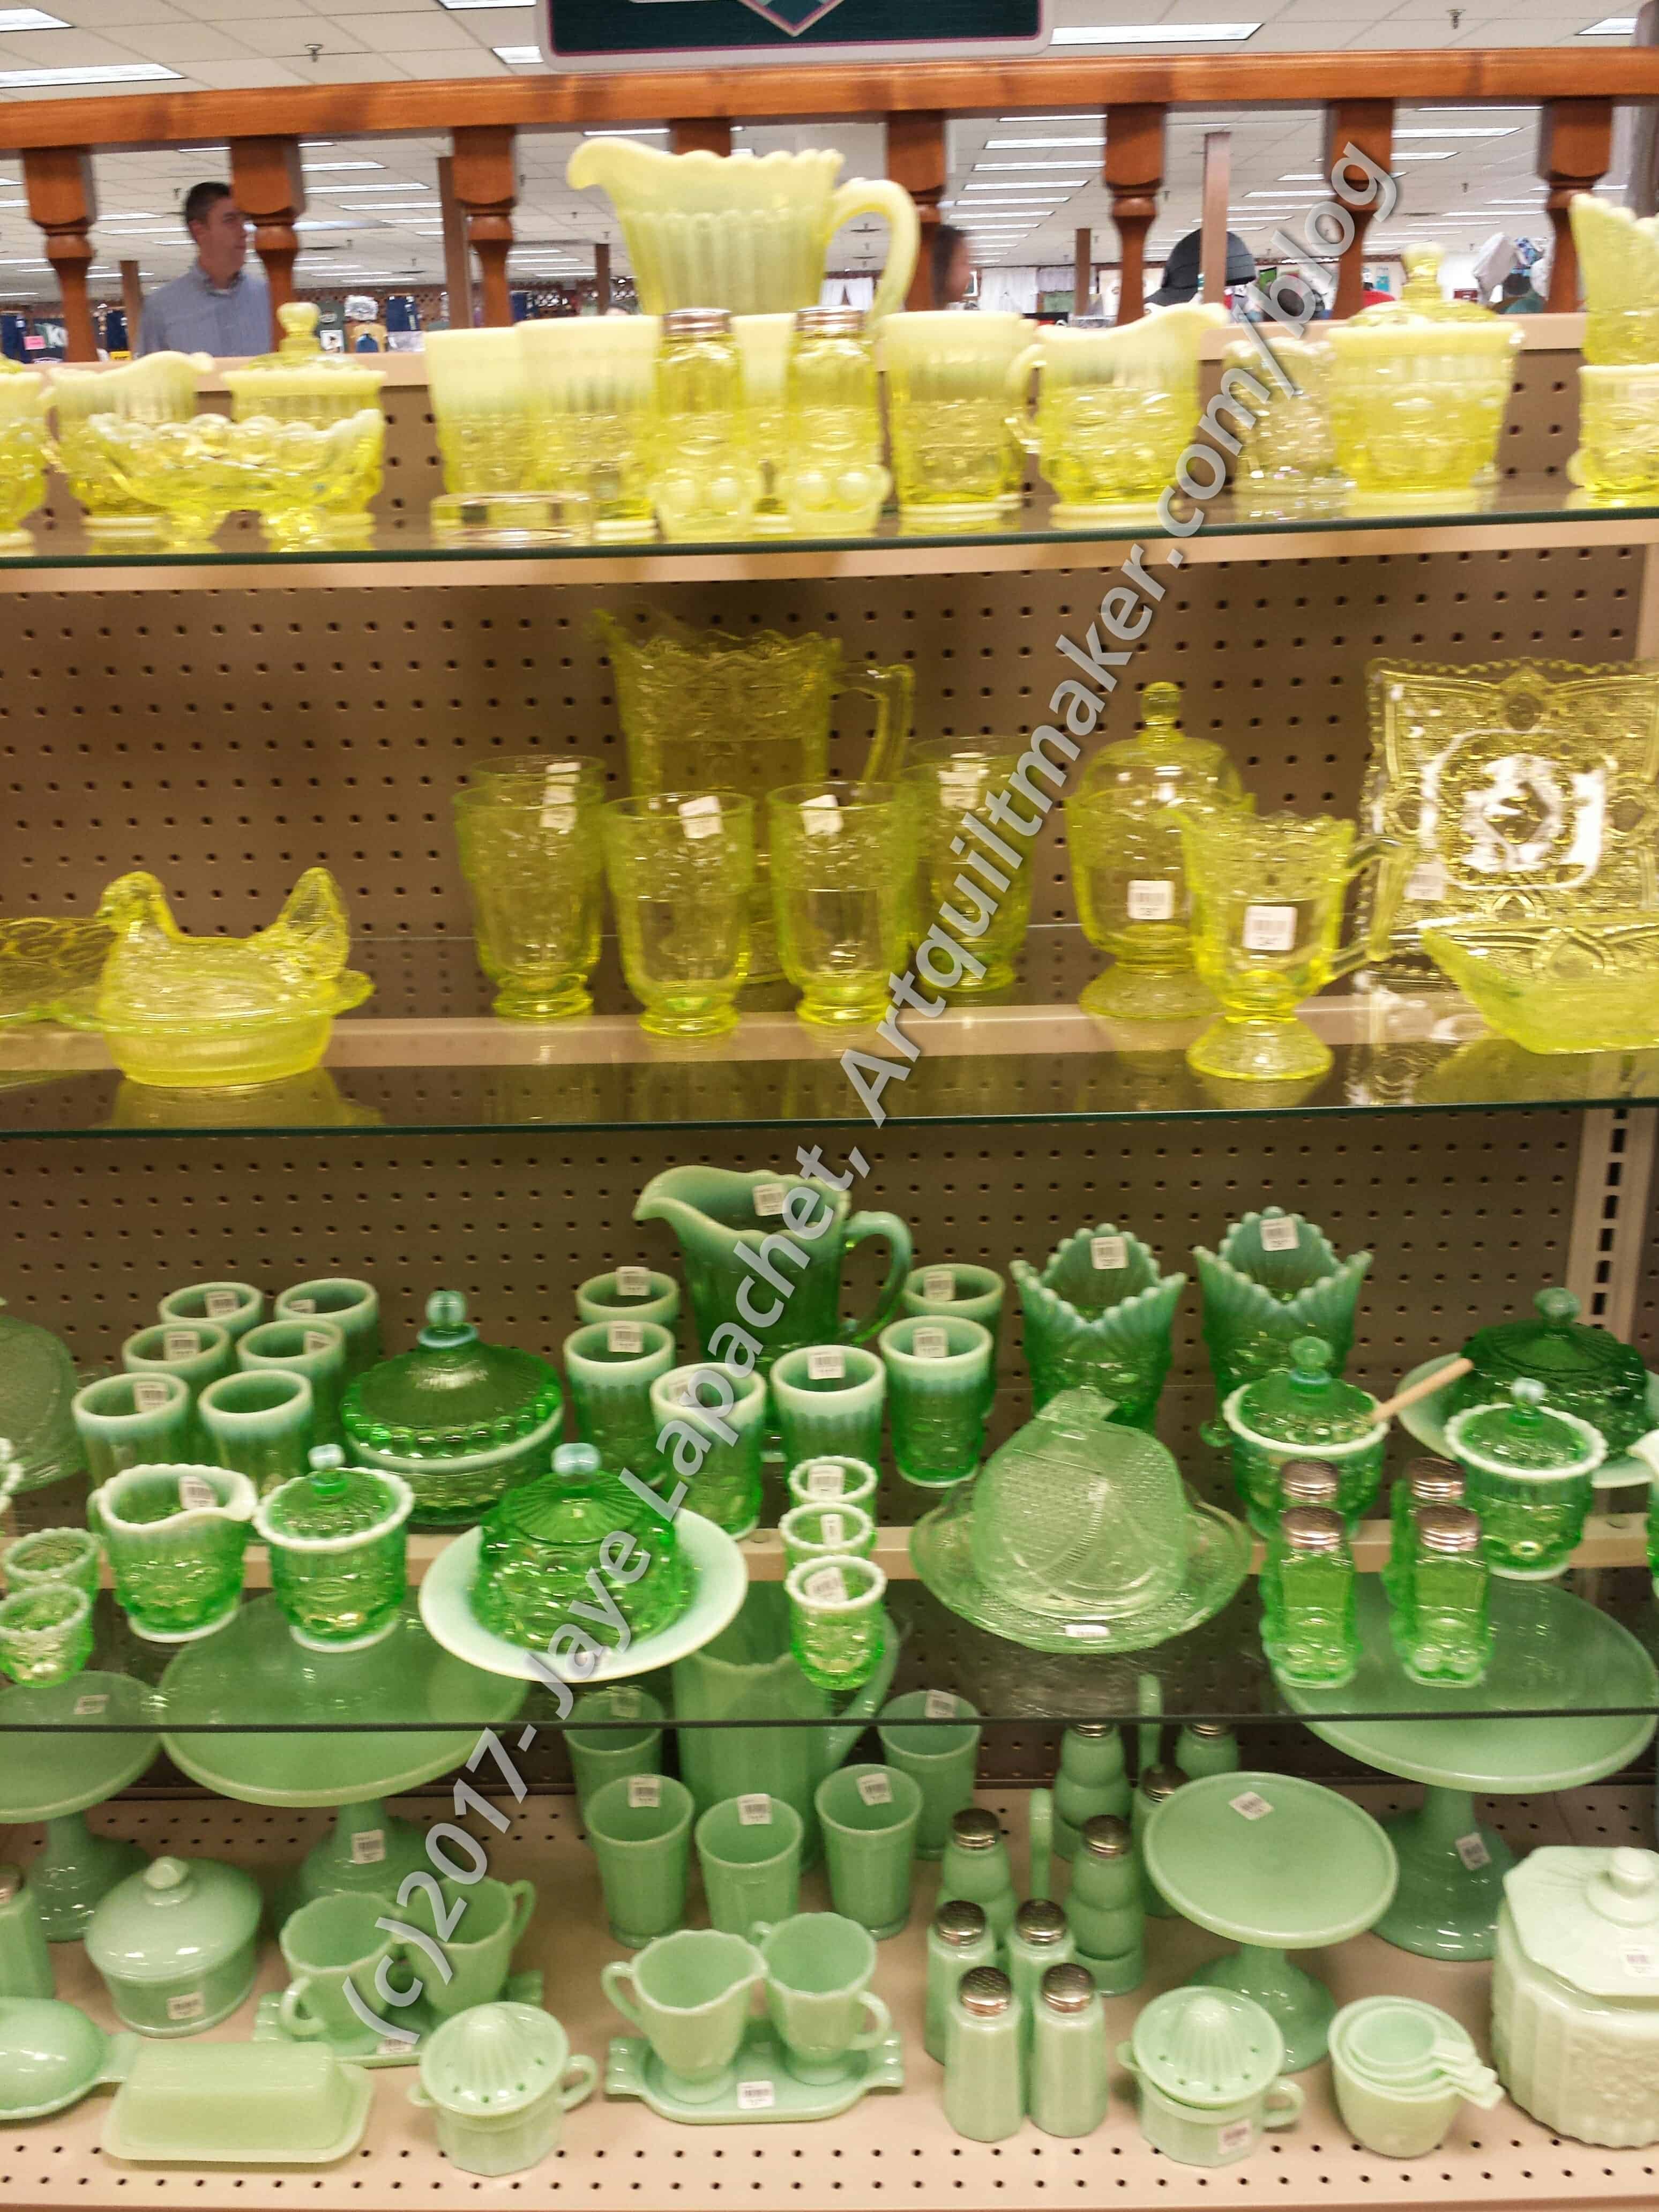
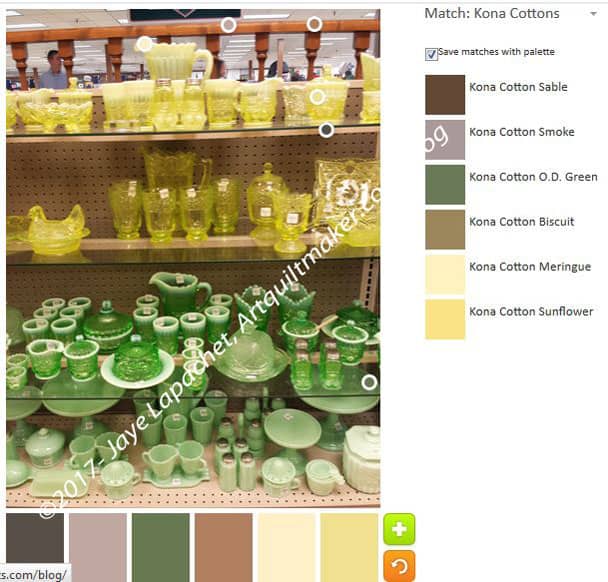
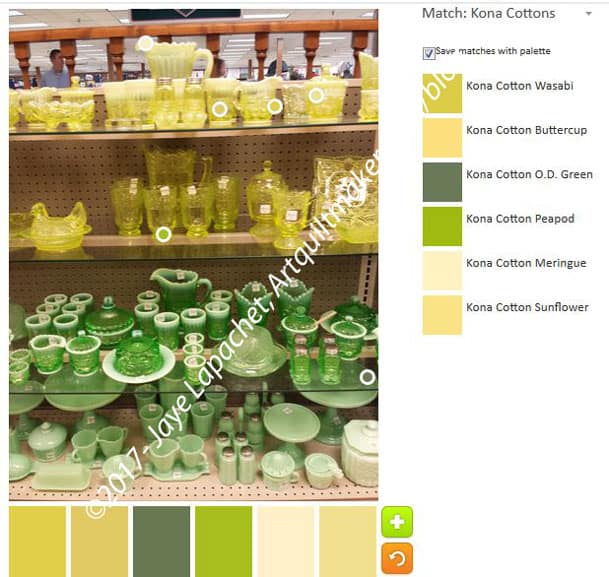
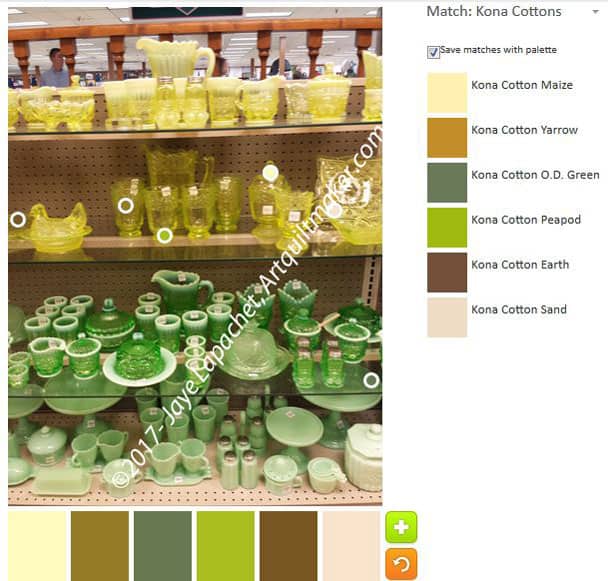
Last week I talked about the pressed glass glassware I saw at Yoder’s. There was a lot of it and I decided to do a series of posts about the different colors.
Green & Yellow Pressed Glass
The green and yellow weren’t my favorite, but I could appreciate the colors. The green also reminded me of my Jadite batter bowl.
The yellow is really interesting. There is a combination of milky and clear that I can see in the photo. (I don’t remember from the store)
The Palette Builder is a great and fun tool. Try it out! Let me know if you make anything with any of these palettes.
ColorPlay May12 – defaultColorPlay May 12 n.2
The default palette is predictably neutral based. There is one yellow and I guess Meringue can be either a neutral or not, depending on whether it is next t a neutral or next to a bright. It is kind of shocking how many neutrals can be found in an image where my eye sees mostly green and yellow.
A very smart reader pointed out that the camera has limitations on what it can see. I know that is true, but it still amazes me.
It was interesting do move the dots around for the first time on this image. I always get a little tingle when I do that. All of the circles were towards the top in the default image, so the green was not even touched in the default palette. I kept my range in the yellows and tried to get as many yellows as I could. I will work my way down.
ColorPlay May 12 n.3
The third option is a combination of neutrals and greens. It is fine.
ColorPlay May 12 n.4
ColorPlay May 12 n.5
I got two marginally different green palettes out of this image. While there are some similarities in the exact shades, which makes sense, there are no duplicates in the palette. This is a good thing about camera images. The camera can pick up the differences in shades and tones found in shadows and in bright light.
ColorPlay May 12 n.6
Finally, I wanted to play around the Jadeite looking pieces on the bottom. I was concerned there would be too many lights for Kona, but I don’t know how many lights they have so I decided to see what I got. I was surprised to see the tool register so many darks. I did stay towards the back of the case, I’ll admit that, but still. The pieces seem lighter than the pieces one shelf higher.
I could have gone on and done more palettes, but I had to get on. Enjoy!
I have decided that I like that Big Tote pattern from the Make It Take It book.
This will be the carrier for the other gifts, such as the cloth napkins I talked about earlier this week, DH will present to the NDGW Grand President. This is the first one I made with just two fabrics. No mosaic piecing. The bold print works very well, but I think smaller prints would look better using the mosaic piecing method I used for the second one I made.
There are some things I would like to try, e.g. pockets. In my mind pockets are essential. This isn’t a huge tote, so I envision it being used as a handy bag to put a few things in when you weren’t planning on buying anything.
Kaffe print inside
I couldn’t resist adding a little of my own personality to the inside.
You can see some of the other gifts inside the bag.
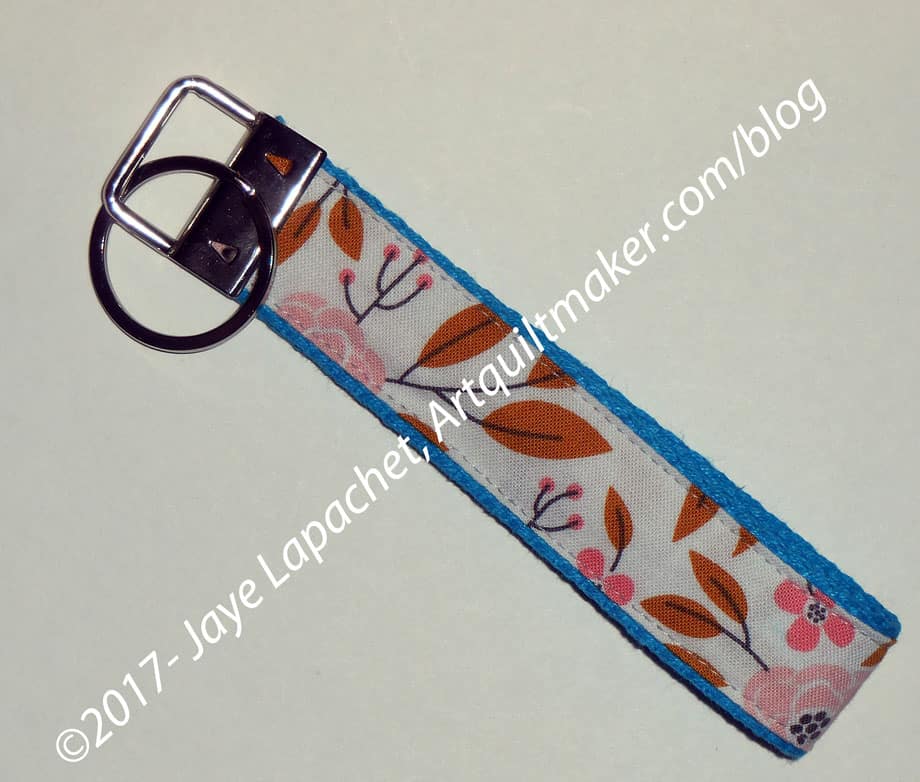
This is so small and I used a scrap that I didn’t even put the used fabric on my spreadsheet. I am sure I will get 10 inches by 2 inches at some point.
I never thought I would make a key chain. Buying the hardware is the stumbling block for me, but since I was at Fabric Depot and saw them I bought two sets of the hardware.
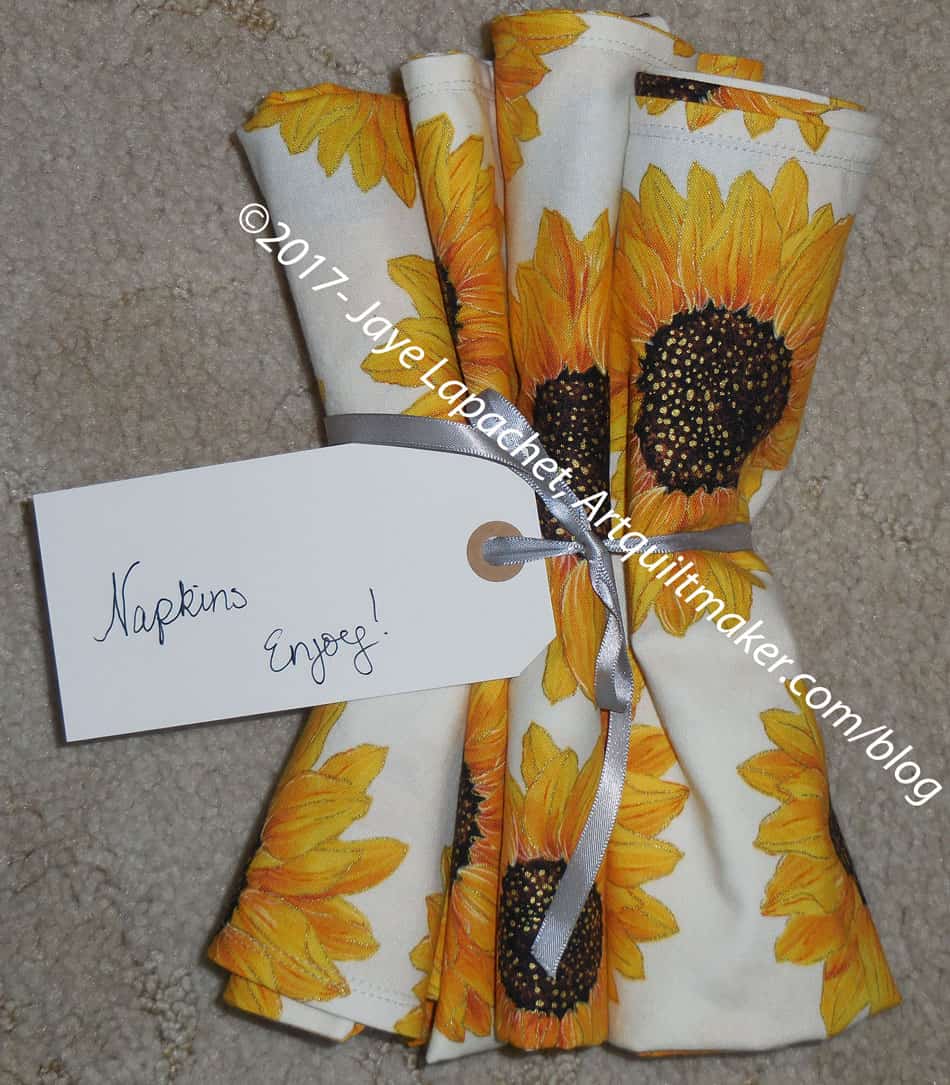
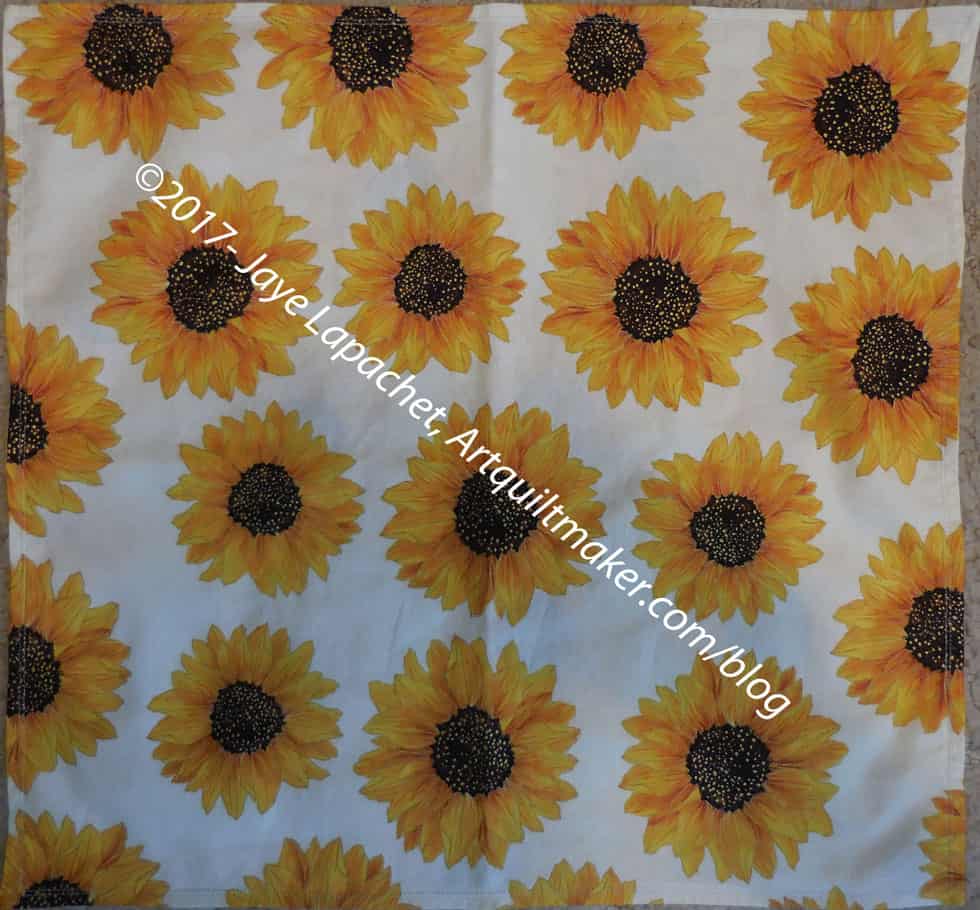
These are also for the Grand President of the Native Daughters. The napkins will be placed in the bag I will show you later this week. Same fabric.
They go with her theme, which is sunflowers and with the dessert plates we got for her as a gift last year.
I put the label on as many people do not use cloth napkins at home and I wasn’t sure she would know what they are. I would hate to see someone wearing one on his/her head. 😉
Sunflower Napkins – full
I generally use 2 quarter yards – fat quarters – to make my napkins. I like generous napkins that cover my whole lap. I think I made these square.
Normally, I do a decorative stitch on the edge, but I wasn’t up for that with this project. I just sewed two lines of straight stitching and I think it looks fine.
They are done and I am pleased. Napkins are a great way to use up fabric, by the way.
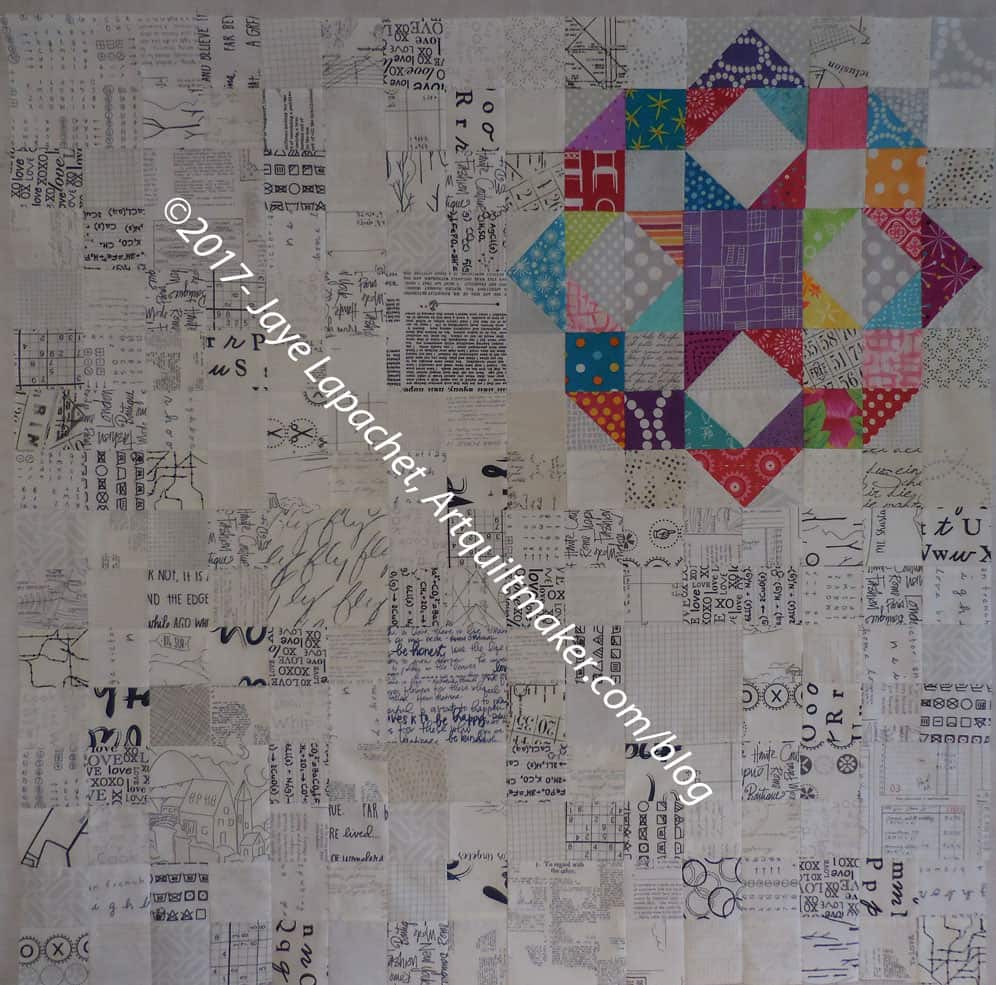
Except for one long seam across the center, I actually finished this piece before I went to Portland.
It is the first section of the last row and it is a bit of a trial. I have more cutting to do for the text squares and it is a bit of a trial. There seems to be a lot of cutting in my life right now.
I have now started on the next section. I have to cut, as mentioned, and make a bunch of four patches before I can make any significant progress, but I am making some progress.
I decided to use blue instead of purple on step 3 of En Provence. I have been hanging around not doing anything about step three for several weeks. Finally, needing something mindless to do for a few minutes, I cannibalized the blue squares from my stash of Blue Lemonade 2 inch squares. I planned to use them for En Provence and replace the Blue Lemonade blue squares before I started to sew that piece together.
Everything didn’t go as planned.
Blue Lemonade also has green and purple squares, so the entire box wasn’t blue. Also, there were duplicates, so I didn’t take all of the blue squares as I want both to be relatively scrappy. Not even the majority of the box was blue. I think the squares were evenly distributed between the three colors.
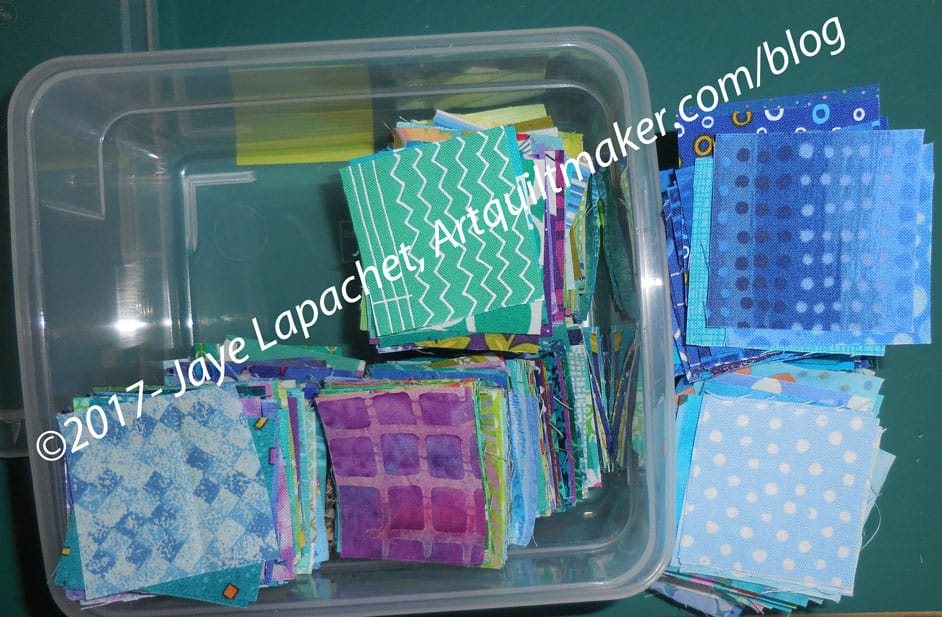
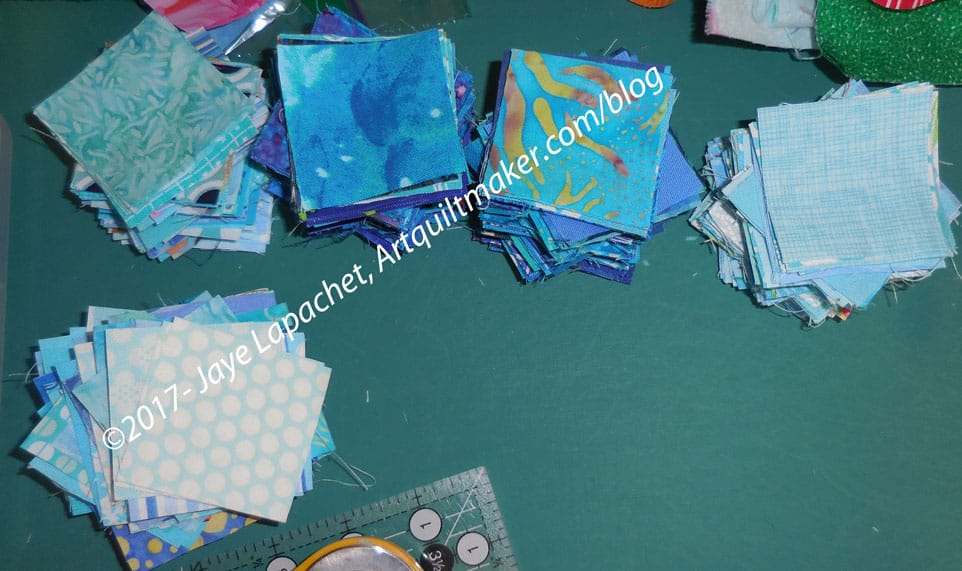
Cutting from Scraps
I ended up with about 380 squares. If my math is right (never a guarantee), I need 672 squares to make 168 four patches. Bonnie doesn’t exactly say, but I think I need 672 squares to make 168 four patches. My math isn’t so terrible that I can’t multiply. Still, it seems like a lot. I can use strips and make them less scrappy. We’ll see.
Blue Scrap Bin
Then I started to cut from my scrap bin. I have a lot of blue scraps, so I was able to cut several out of the scraps. My scraps are either too small or too big. Still, I found some I could use. This put me up to 464 squares. Not shabby, but still 200+ short. I don’t relish the thought of cutting 200+ squares, but it has to be done or I have to use strips.
Then I have to replenish the Blue Lemonade squares as well. Sigh.
Yes, I am starting another project. Mostly I am starting it because Daisy said I should and then the omens were good. I found a layer cake I liked at $15 off and found some American Made Brands background at a $1 off per yard. Perhaps this will be boyish enough for one of the nephews?
Alison Glass Sunprints from Fabric Depot
American Made Brands Charcoal from Yoder’s
I couldn’t have done it without my recent travel. I got the layer cake (left) at Fabric Depot in Portland. That place is huge-HUGE and they were having a pretty good sale. Yes, both new items add to my fabric usage totals, but I am hopeful that I’ll be able to finish something larger than a handbag soon.
The charcoal is from Yoder’s in Shipshewana, Indiana. They had the whole line, which was awesome! I got a bit more than I needed, but you know, mistakes. The fabric is now washed so I can start cutting.
The quilt is called the Layer Cake Explosion. You can find the free pattern on Craftsy. Also, check out Daisy’s blog for more information. I did look at the templates for the alternate block and I am thinking I might do something else. I am not a fan of the way that little triangle looks. We will see.
The pattern calls for the Creative Grids Stripology Ruler. There is a YouTube video which shows you how to use this ruler. As much as I love rulers, I don’t think I will be using it. I think I will use my Accuquilt, though it is possible I don’t have the right die for the strip size. Stay tuned.