Book Review: Bojagi & Beyond II

Bojagi & BeyondBojagi & Beyond by Chunghie Lee

This book was sent to me by Karen Searle at the publisher, Beyond & Above, after I offered to review it. This edition is, apparently, the revised edition of Bojagi and Beyond published in 2010 and has new material added.

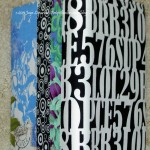
Being the tactile person that I am, the first thing I noticed was the paper. The cover isn’t as thick as other paperback/trade paperback covers of books I have reviewed, but the paper used for the pages has a thick and pleasant feel.

The first pages of the book talk about BoJaGi outside of Korea as well as some inspirations. Since I didn’t know what BoJaGi was before I read this book, I wished that the first part would have included an explanation. The author got around to it after a bit, never fear!

The introduction describes classes at the Rhode Island School of Design and how those students took the art form further and made it their own. “While these classes and workshops outside Korea have produced work to convey ideas and personal expression, the same is largely true of the work made over the centuries by women in traditional Korean households. While those makers practiced the craft as a means to fill a practical need for special ceremonial textiles, they also saw it as an outlet for their artistic and spiritual expression.” (pg.iv) This reminds me of what people say about quilts. In both instances the need for something practical provided an opportunity for women to express themselves when they had few other ways to do so. This is also another example of people from different backgrounds and cultures being more alike than different.

The introduction and foreword applaud the author for her work with students and how that work influenced work in other countries and in other textile disciplines.

The true introduction (called Introduction), was written by Chunghie Lee herself, does describe what BoJaGi are and mentions that a related form called ChoGakBo which involves patchwork. Truly, however, the introduction is a mini-bio of the author’s achievements.

The table of contents comes next and tells the reader that there are many different kinds of Korean wrappings. We glean that some are especially used for events like weddings or for covering a table for a meal, but most of the table of contents leads the reader to making and designing these wraps.

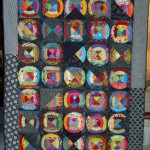
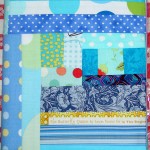
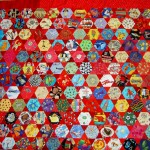
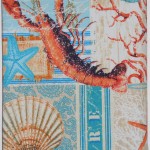
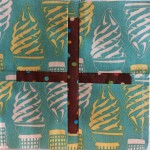
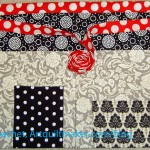
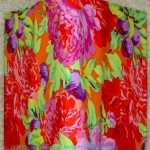
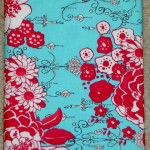
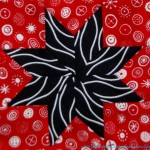
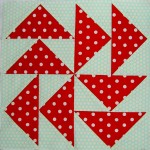
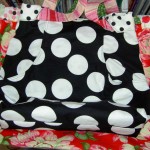
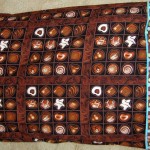
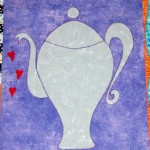
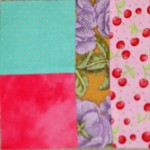
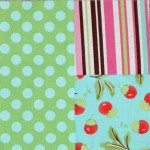
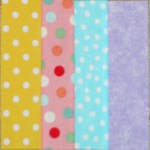
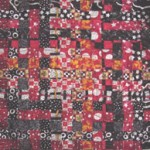
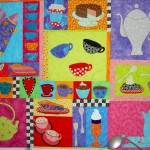
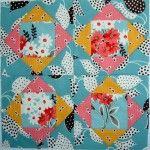
The history of BoJaGi includes their usefulness, a reflection on the lives of Korean women and when and why the tradition of making and using BoJaGi was established (pg.1). The book discusses the oldest BoJaGi in Korea (pg.3) and how they were used in the royal court. In this section ChoGakBo and other varieties of BoJaGi are also described (pg.5). This section says that the wrappings “are named according to function: OpBo are large BoJaGi used to wrap large items such as bedding. SangGo are lined with oiled paper and used as food covers” (pg.5), etc. There is a long description of the usefulness of BoJaGi, which make me look at my Tupperware cabinet with a speculative eye. Colors and symbols are also covered (pg.7) in this section, which is well illustrated with examples of the cloths and symbols.

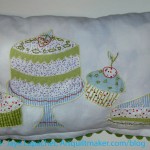
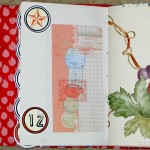
Examples are shown of the various types of wrappings in the next part. This section is illustrated with watercolor illustrations and I got an image in my mind’s eye of a pile of fabric wrapped gifts at a wedding or other major (graduation?) event (pg.14-15).

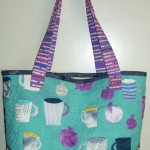
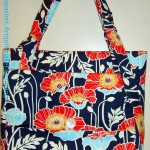
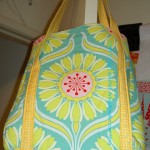
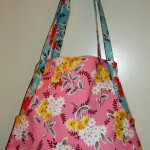
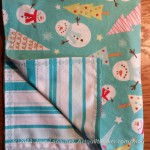
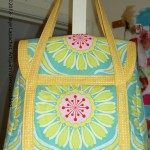
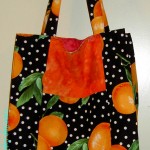
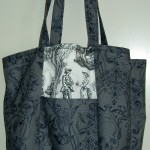
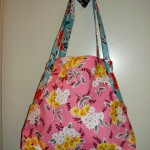
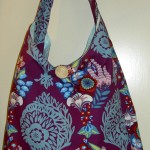
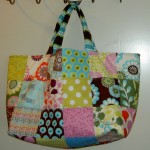
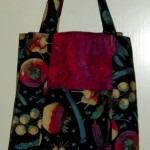
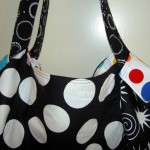
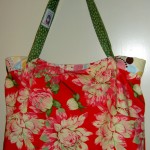
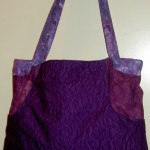
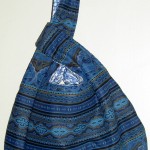
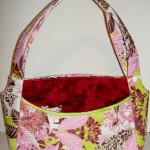
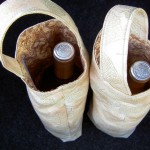
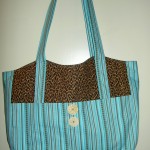
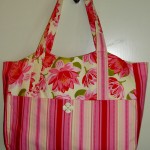
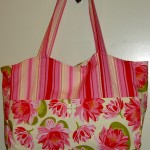
In the food covering section, different types of handles are shown, also as watercolor illustrations. These handles could be adapted and used for tote bags, I think.

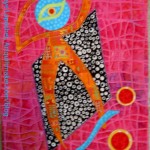
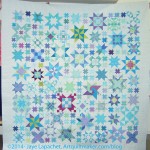
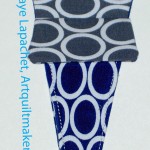
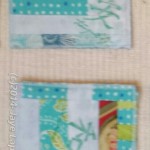
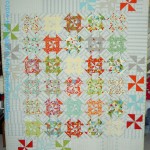
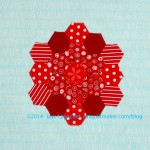
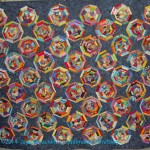
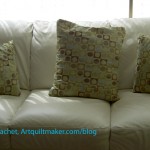
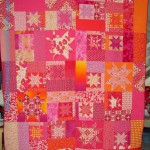
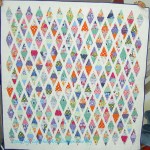
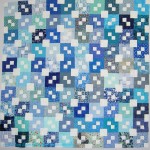
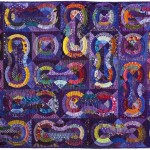
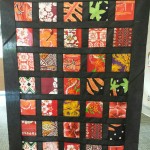
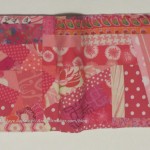
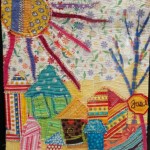
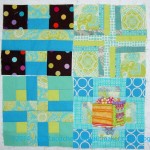
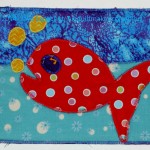
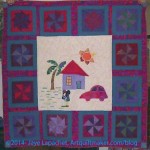
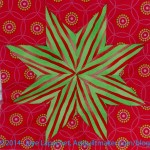
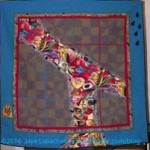
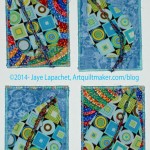
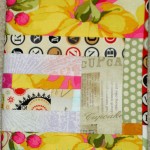
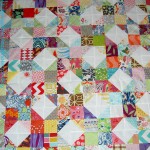
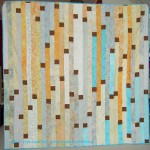
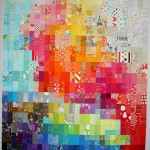
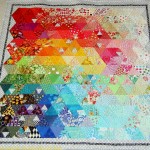
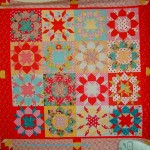
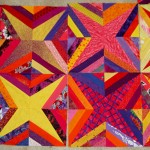
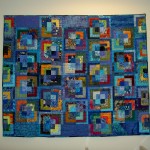
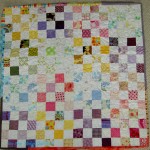
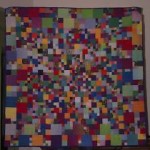
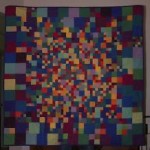
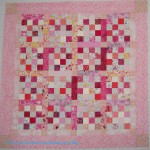
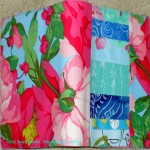
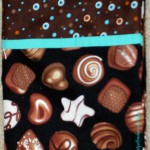
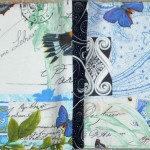
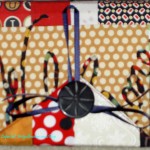
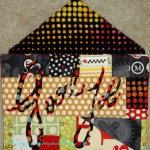
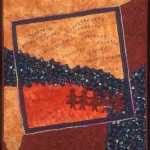
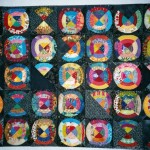
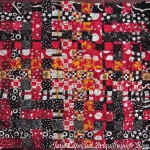
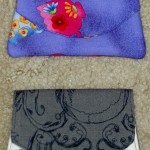
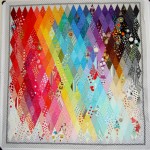
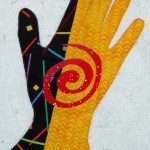
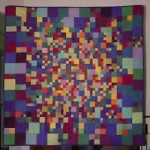
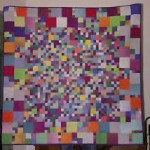
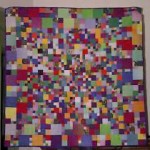
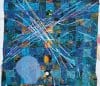
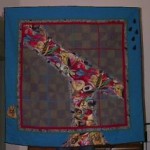
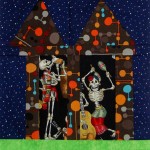
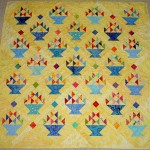
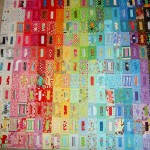
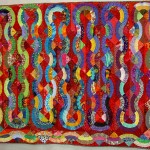
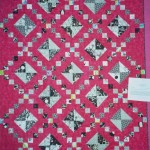
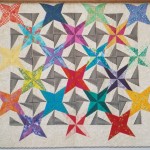
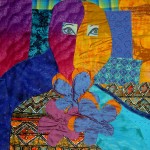
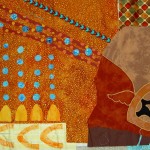
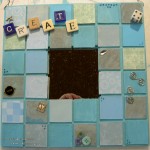
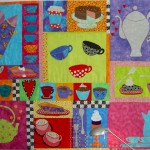
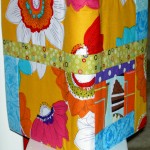
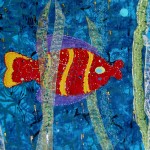
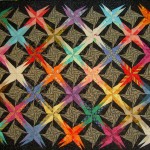
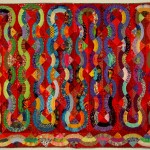
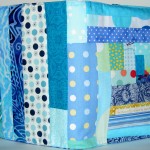
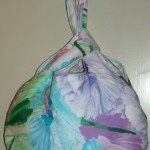
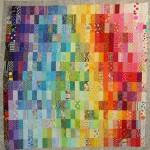
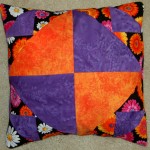
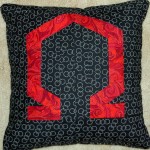
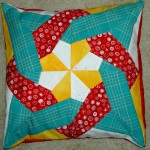
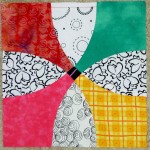
A gallery of works by Chunghie Lee is included in the book. Many of the pieces are installation pieces and shown in situ (pg.24-25, etc). One outdoor installation piece reminds me of Christo and Jeanne-Claude (pg.60-61). I particularly like the journal shown on page 28. it reminds me of fabric journals I have made in the past. These works, in general, are different in influence, but do not look very different from some art quilts. A number of the works have embroidery stitches and screen printing (or similar). Chunghie Lee uses images of women’s faces on many of her pieces and this practice makes me think of honoring the anonymous women who have made other textiles such as quilts, table linens, pillowcases, etc. She also expanded into kimono shaped robes and other types of wearables, though I hesitate to call the pieces wearables. They may be normal, if large, BoJaGi draped over people (pg.44-59).

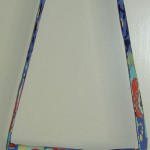
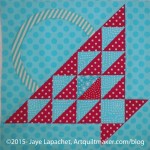
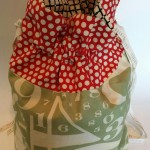
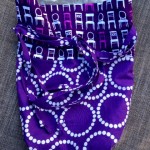
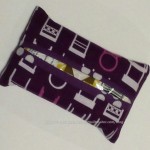
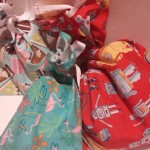
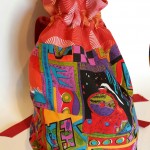
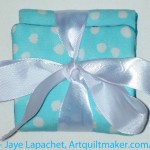
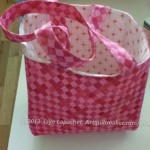
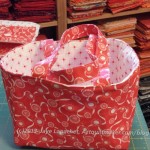
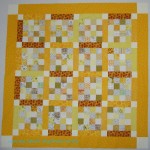
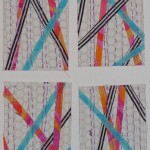
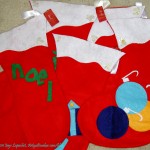
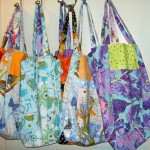
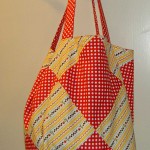
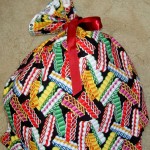
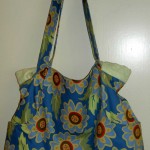
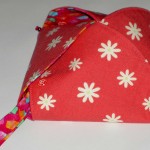
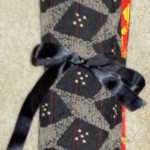
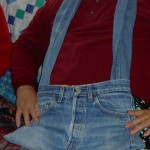
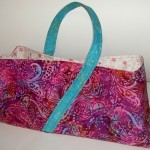
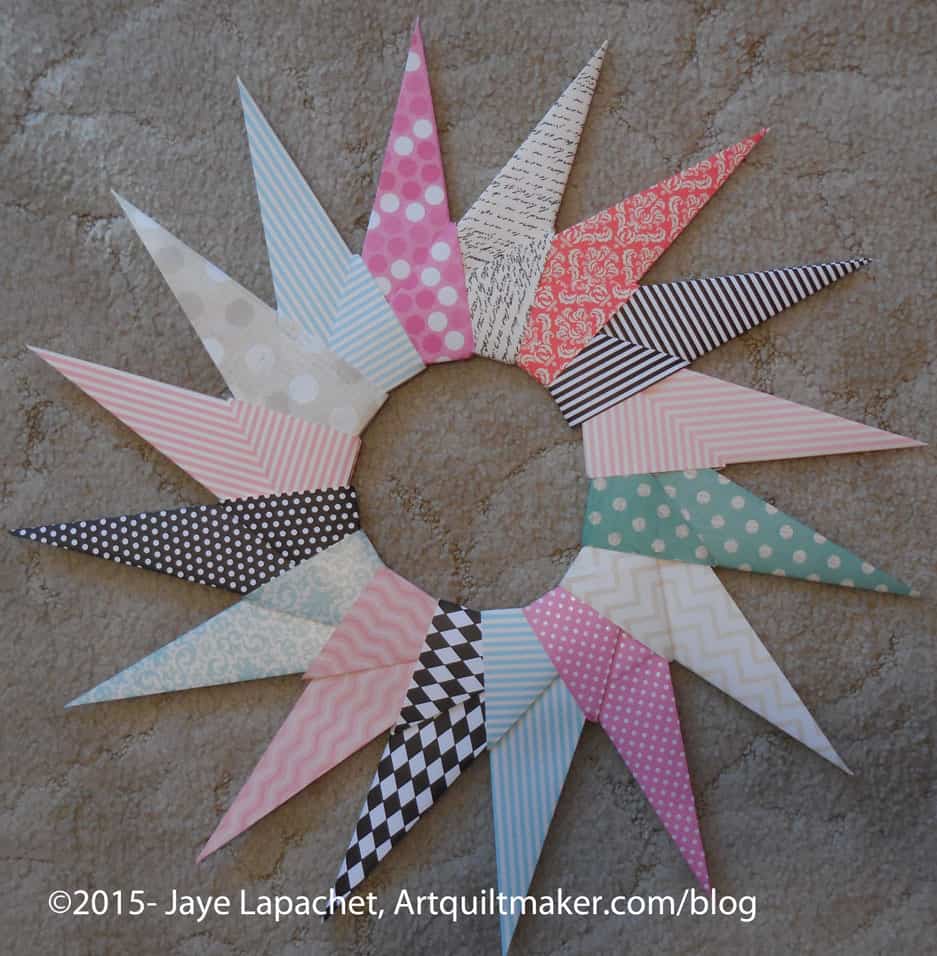
The first part of the ‘how-to’ section centers on using a BoJaGi. The illustrations are drawn and show how to wrap and object, including a decorative knot (pg.78-79). Making a basic BoJaGi is a logical next section (starting on pg.80) and includes photos of the product, drawings of the supplies and sizes in both English and metric systems. The process is simple and similar to finishing a quilt without batting in the envelope style. Directions for making the tie are also provided (pg.82), which is immediately followed by some ideas for making the tie more decorative (pg.83). Again, my mind raced to making tote bags more decorative with something like these ties. The directions for other types of specialty BoJaGi are also shown and include pictures. I can see a transformation of the display of gifts for the holidays when you use your plentiful fabric to make these BoJaGi and wrap all of your gifts in them!

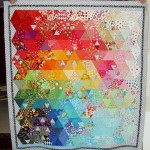
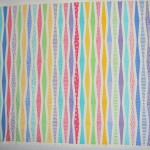
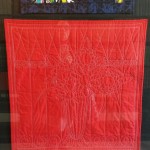
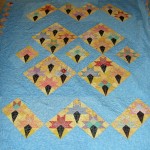
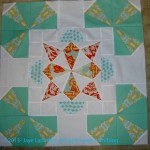
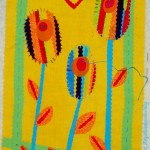
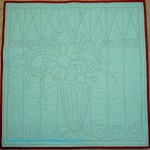
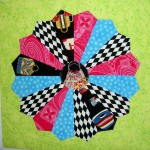
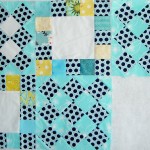
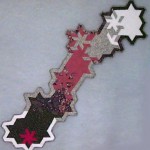
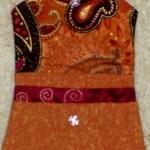
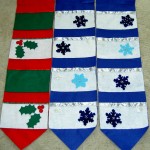
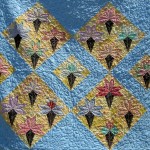
A section on embellishing starts on page 105. One of the embellished Bojagi shown looks like a Cathedral Window quilt (pg.109). Another embellishment looks like prairie points (pg.111). The wedding embroidery KiLeoKi (pg.112) are very beautiful and provide a lot of inspiration.

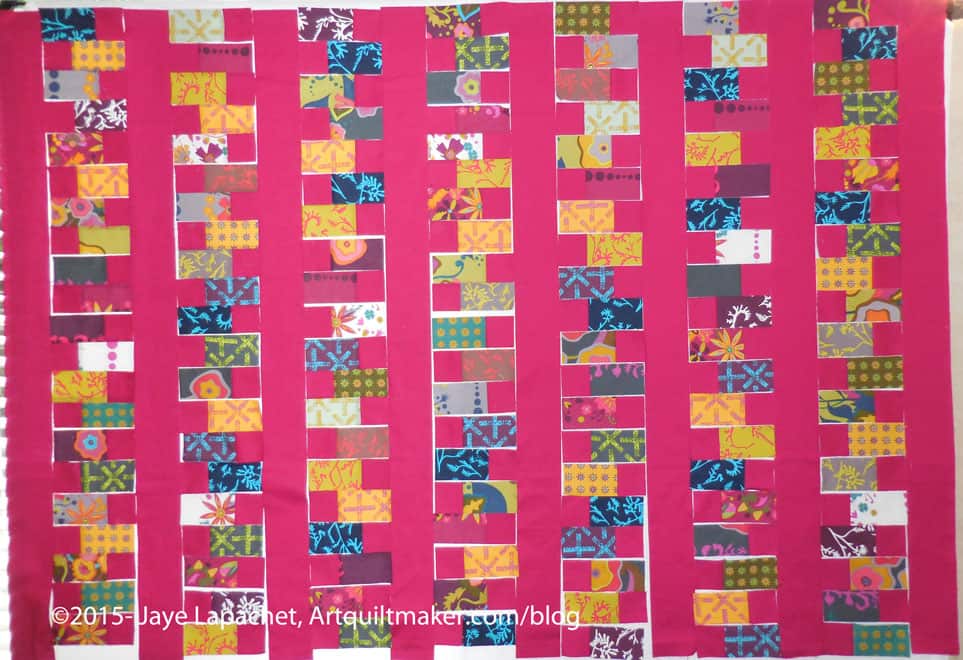
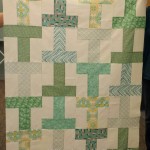
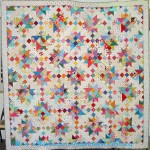
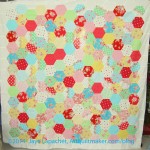
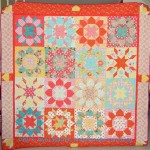
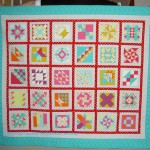
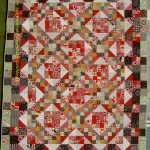
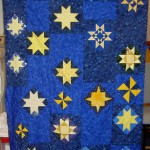
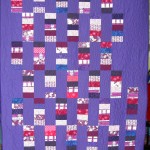
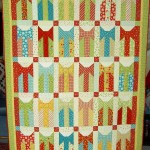
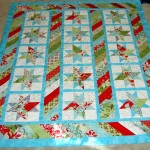
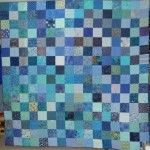
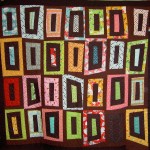
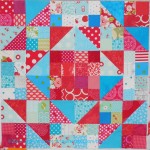
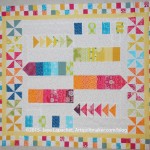
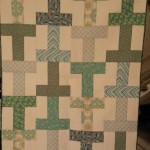
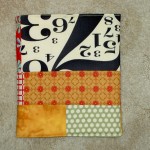
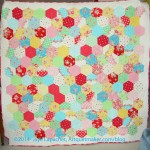
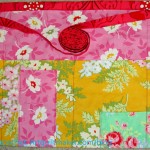
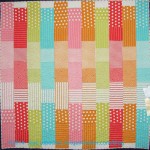
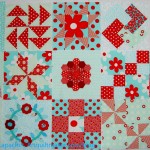
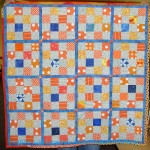
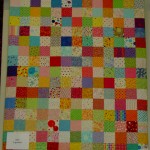
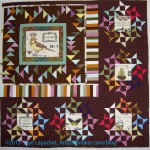
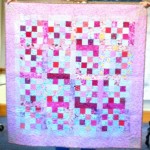
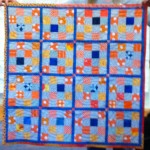
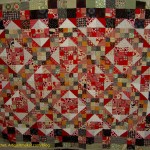
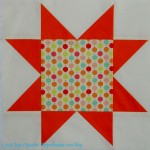
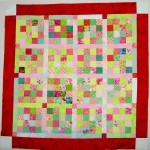
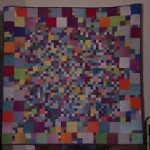
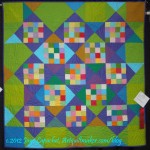
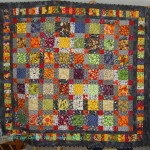
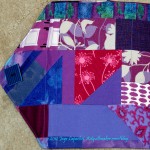
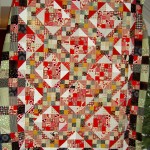
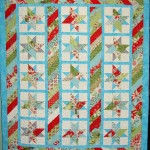
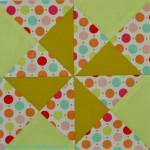
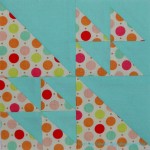
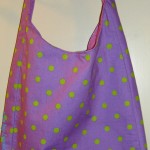
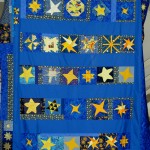
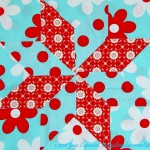
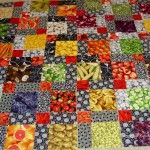
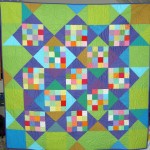
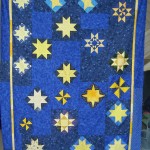
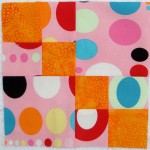
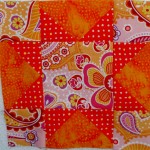
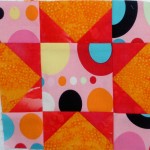
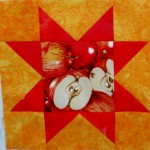
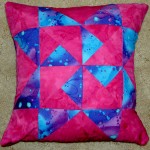
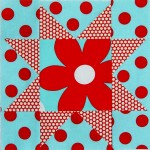
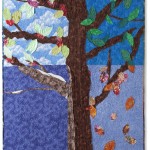
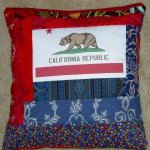
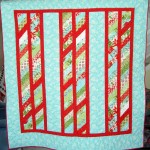
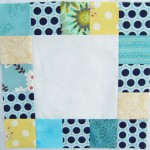
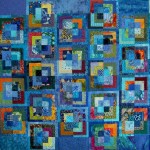
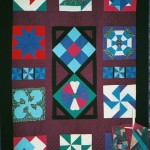
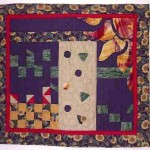
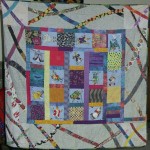
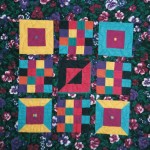
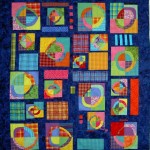
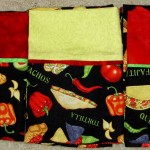
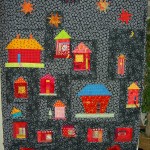
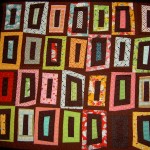
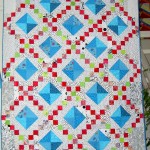
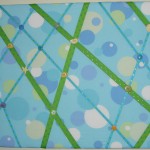
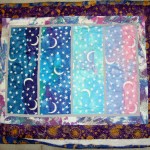
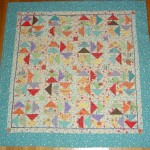
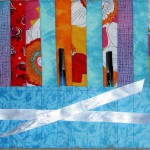
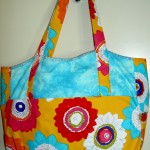
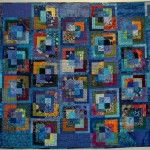
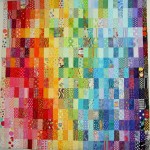
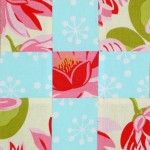
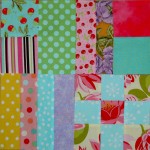
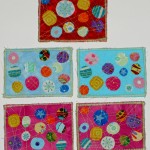
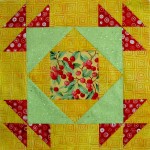
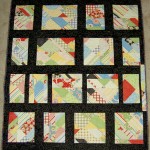
As with many books sold today, there are projects included. The directions for the 5 projects start on page 121. The wall hangings don’t look very different from some modern or art quilts, but the other items have a distinctive Korean flair. In general, they have a different aesthetic than other projects in other books.

The final section is about designing for BoJaGi and the thing I liked about it was that the author asks you to consider your materials in a different way. One thing she says is “consider scale in the repetition of elements (pg.138)”, which makes me think of the design series.

There is a lot to look at in this book as well as a lot of inspiration to be had. I would recommend you take a look at it.

View all my reviews

Retreat Review

Happy Sewing Bees
Happy Sewing Bees

It has been awhile since I was able to attend a CQFA Retreat – 2 years, I think. I was so thrilled to be able to attend the current retreat, which was held over Mother’s Day weekend. Isn’t that a great Mother’s Day gift?? As a bonus, I sewed so much!

I feel like I really made some good progress on projects that were languishing:

It was fantastic!

First of all, I, pretty much, threw projects and parts into project bags starting about a week before the retreat. This helped me not forget critical fabric and supplies. The only thing I forgot was a lamp and my sewing machine’s light kept me from going blind.

Next, I made sure I had plenty of blocks and parts that would make good leaders and enders. Using the leaders and enders technique, I made 20+ Nine Patches for the octagon 9 Patch on which I have been working and 27 (!!!) Box Full of Letters blocks. In addition to significant progress on two projects, I am pleased with the progress I made on the leaders on the leaders and enders projects.

Oliso ironing surface

The other thing I did was try out the Oliso iron I bought. I finally dragged out the June Tailor ironing surface I bought for the Dale Fleming Circle class as well. It was a little different because you don’t set it up on its end, it just pops up away from the ironing surface. Also, the steam and basic functionality are a little different. Friend Julie tried it also (we shared a table and a mini ironing surface) and gave me her feedback as well.

Sue's Baby Quilt
Sue’s Baby Quilt

People made great projects. Bron and Sue were working on baby quilts for friends. I liked the ideas they had and may use the ideas for donation quilts.

Sue’s (left photo) quilt is made from strips and a background. She said she cut strips and then sewed them together in rows. She said she used different widths of strips and I think that gives the piece a lot of movement. Lucky kid, I say.

In thinking of different ways to make this quilt, I could use strips, cutting them as I cut into new yardage. I would save up strips until I had enough and then get Gerre to quilt it. 😉

The other thing I could do it rummage through my scraps and get pieces large enough to do something similar. My mind is reeling.

I didn’t get a photo of Bron’s quilt, sadly, but what she did is wacky sew pieces together, then she cut the pieces into squares and sewed them together with sashing into a baby quilt. She used a white dot on yellow for the binding, which I loved! It would be a good scrap project.

Gerre's art quilt
Gerre’s art quilt
Gerre burning her quilt

Gerre was working on an amazing art quilt. She put layers of fabric together with tulle on top, then quilted it then BURNED it! It was awesome.

Reva worked on a flower quilt.

Angela was doing some improv piecing based on a piece she started in a class.

Julie's Tumbler
Julie’s Tumbler

Julie worked on 3 or 4 pieces, including a self portrait and a couple of pieces she started in China. She also sewed rows to her tumbler quilt top, which is nearing completion. It was so great to see her so productive as well.

Rhonda worked on handwork all weekend, including an applique’ project inspired by Kevin Kosbab. She showed me the Valdani Pearl Cotton collection she bought from MassDrop, the temptress! I love Valdani Pearl cotton. I may have to start another quilt like Beach Town. Or just pick a project on which I can embroider. Hhmm.

Maureen's Mid-Century Modern
Maureen’s Mid-Century Modern

Maureen worked on a piece that I thought was made from a pre-cut, but she picked all the fabrics herself. I really think that she should put pre-cuts together for Moda. Her piece looked like a mid-Century modern quilt or painting.

Maureen worked on a plaid piece as well. She found the fabrics at FabMo and turned them into improv blocks which she was playing with when we all had to leave.

Dolores was working on dolls from a class she took with Susan Else as well as the piece from the online class she is taking.

Caroline made pillowcases and worked on a crazy paper piecing project. I think the one section she worked on had 58 pieces!!!

Amy's Landscape
Amy’s Landscape

Amy was working on a kind of landscape with flowers. I loved it!

There was also a “free stuff table” and I picked up a couple of pieces of fabric. There was something about the colors and imagery that attracted me. There were a couple of pieces of Kaffe Fassett and some others. I tried to exercise restraint. It was difficult, but I seem to have succeeded. The purple dandelions were kind of a surprise, but they will come in handy somewhere.

CQFA Retreat Free Fabric

In addition to the sewing, it was great to see other people’s projects and chat with my friends. There was never enough time to find out everything I want to know about other people’s process or what is going on in their lives. I didn’t take nearly enough photos and wanted more time to sew.

Still I am glad I got the time I did, especially at this time of year. I felt like I was really productive and that feels good. I need to sew more.

Design Wall Monday

The last post was in April. Not quite a month, but close.

Design Wall 5-18-2015

How’s this for a change? I completely revamped my design wall.

Normally, I am fortunate enough to work with two design walls. I usually have a large design wall leaning against one wall, but I gave it to Friend Julie at the last retreat. yes, I used it, then made her take it home. HA! I have been waiting for a new one since the Santa Clara show and it was finally delivered on Friday of last week. In the meantime I was a design wall short, so I cleared off the small one in anticipation of actually sewing. HA again!

I made two Flying Geese all week. This nonsense has got to stop or I will not have anything to write about and you will all go away.

Here are the things on my design wall this week:

  1. Hot 4 Patches. I will want to make more of these and do something with them, but they have not floated high enough in the idea file for me to actually do anything about it.
  2. I rearranged the red and turquoise 4 patches. They look kind of cook in a big row like that, don’t they?
  3. FOTY 2015. This is the start of the second batch of patches. Amazing how fast they accumulate.
  4. Field Day Zipper (or whatever I am going to call it). I wasn’t able to put the whole thing up on the wall, because I didn’t want to take down some of the things on the left, but the last three rows are stacked up on top of each other on the right. When I am able to sew the left hand rows together, there will be space for all the rows.
  5. These are hand written numbers that tell what order the rows should be sewn.

I am linking up with the Patchwork Times by Judy Laquidara.

Box Full of Letters Progress

Sample Box Full of Letters blocks

I worked on the Box Full of Letters blocks at the Retreat. I made 21 blocks as leaders and enders. The photo (left) shows a selection of the blocks I made.

I love the leaders and enders technique. I couldn’t believe how much I accomplished using leaders and enders.

I still don’t know what I am going to do with these blocks, but I am thrilled that I have an actual group of blocks with which to work.

May 2015: 26 Projects

I haven’t posted this post for awhile, because I haven’t been in the mood. I am sick of being a good girl and want to just sew whatever I feel like sewing. I did finish a lot of UFOs and a few still are on the list, but it means that I don’t have 26 Projects anymore and I have been starting projects with wild abandon. Fortunately, I seem to have learned some self restraint and am finishing projects, too.

Finished 2015 Quilt Projects

Finished 2014 non-Quilt Projects

7 Christmas pillowcases as gifts – finished May 4, 2015

This year is, so far, not as stellar as last year, but I am making some progress on projects.

Short, but sweet. Stay tuned!

Creative Prompt #310: Helmet

Helment Heroes

Helmet City

motorcycle helmet

Helmet (band)

Helmet hair

helmet laws

Definition: “A helmet is a form of protective gear worn to protect the head from injuries.

Ceremonial or symbolic helmets (e.g. UK policeman’s helmet) without protective function are sometimes used. The oldest known use of helmets was by Assyrian soldiers in 900BC, who wore thick leather or bronze helmets to protect the head from blunt object and sword blows and arrow strikes in combat. Soldiers still wear helmets, now often made from lightweight plastic materials.

In civilian life, helmets are used for recreational activities and sports (e.g. jockeys in horse racing, American football, ice hockey, cricket, baseball, and rock climbing); dangerous work activities (e.g. construction, mining, riot police); and transportation (e.g. Motorcycle helmets and bicycle helmets). Since the 1990s, most helmets are made from resin or plastic, which may be reinforced with fibers such as aramids.

The word helmet is diminutive from helm, a Medieval word for protective combat headgear. The Medieval great helm covers the whole head and often is accompanied with camail protecting throat and neck as well. Originally a helmet was a helm which covered the head only partly.” (Wikipedia)

flying helmet

football helmet

Helmet Salon

The Daqri smart helmet replaces the traditional hard hat and looks like a Tron motorcyclist’s costume

‘Thor’s Helmet‘ is a strikingly beautiful, messy nebula.

batter’s helmet

Post the direct URL (link) where your drawing, doodle, artwork is posted (e.g. your blog, Flickr) in the comments area of this post. I would really like to keep all the artwork together and provide a way for others to see your work and get familiar with your blog or website.

The Creative Prompt Project, also, has a Flickr group, which you can join to  post your responses. I created this spot so those of you without blogs and websites would have a place to post your responses.

We are also talking about this on Twitter. Use the hashtag #CPP

Dream Projects #5

New and exciting projects continue to spring into my head.

Art Institute of Chicago Fusible Quilt

  • Pattern: Original
  • Fabric: Turquoise and red, mainly, but other colors for the leaves and flowers
  • Steps: need to fuse a bunch of turquoise to some piece of fabric in the ‘ticker tape’ style. I am thinking of making it similar to the Whole Cloth Quilt and using red, again, for the background.

Basketweave Baby

  • Fabric: Scrappy
  • Pattern: Fons & Porter, series 1000, episode 1005
  • Thoughts: I like the challenge of piecing this quilt and the unique piecing

Blue Rectangles Gradation Quilt (Hunting and Gathering)

  • Fabric: blue 2.5×4.5 rectangles
  • Pattern: similar to FOTY 2008
  • Thoughts: Original idea stemmed from the FOTY quilts. I just decided to do one with blues instead of all colors.

Blue Lemonade (Hunting and Gathering)

Easy Street

  • Fabric: pinks
  • Pattern: Easy Street by Bonnie Hunter
  • Thoughts: I really liked Daisy‘s version of Easy Street, which she calls Cherry Bomb (she thinks of the best names for quilts) in terms of color and feel. I don’t want to copy her, but if I do this quilt, I’d like to have the same pinky-red feel to it. One challenge about a mostly monochromatic quilt is getting enough contrast. I look forward to that challenge.

Feathered Star Block (Dream State)

  • Pattern: I haven’t decided on a particular feathered star
  • Thoughts: use the Triangle Technique for the HSTs

Food quilt #3 (Hunting and Gathering)

  • Pattern: Disappearing something, probably 4 patch or 9 patch
  • Fabric: RJR Food prints. Will use a different color for the non-food print section than I did for the Young Man’s version.
  • Thoughts: Gift for nephew for graduation

Good Night Irene Quilt

  • Pattern: Good Night Irene from the Missouri Star Quilt Company’s Block magazine, Spring issue v.2, issue 2, pg. 54
  • Fabric: Possibly a layer cake I already have, though I am tempted to use the scrap 2.5″ squares I have been cutting.
  • Thoughts: I thought about using dots on a white background, as I did with the Scrapitude Carnivale quilt as the background. It makes the Scrapitude quilt look so cheerful. I probably wouldn’t call it Good Night Irene.

Half Moon Modern Quilt

  • Pattern: I have some ideas, but nothing definite. It occurred to me that I could use the Stepping Stones pattern with a strong background to make the pattern show up. I’ll think about that.
  • Fabric: Half Moon Modern Fabrics. I have half yard cuts, I think, plus some odds and ends and I’d like to use them together with some additional fabrics, or, at least a background.
  • Thoughts: I do think it is difficult to start with fabrics rather than a pattern.

Interlocking Triangles Quilt(s)

  • Pattern: This is an idea that I designed myself. I made two quilts and have variations on the pattern to make more.
  • Fabric: I have a few different collections of fabric I want to use. Most are rainbow colored
  • Thoughts: This is a quilt from which I get a lot of bang for my buck. The visual impact is tremendous. The easiest way to do the spiky triangles is with paper piecing. I am not that big of a fan of paper piecing (read my laments about the Spiderweb‘s paper piecing). I made Spiky Stars using templates and that was meditative and won a prize, so it is doable.

Jack’s Chain Quilt

  • Pattern: Jack’s Chain, a continuous pattern
  • Fabric: bright scrappy, consistent centers
  • Thoughts: This is one of the first quilts I saw hanging in a quilt store and thought of making, after I had learned to quilt. Making the nine patches would be a good leaders and enders endeavor.

Medium Mondo Bag

  • Pattern: From QuiltSmart. Saw Katie’s and really liked it. I also thought it would be a good use of those mini-charms, or give me an excuse to buy them.
  • Fabric: I have a number of groups of mini-charm packs I have been collecting to use for this project. I will probably go with a combination of Bonnie & Camille fabrics to start.
  • Thoughts: There is something about the stabilizer that I cannot wrap my head around, which is one of the reasons I have not started this pattern.

Music Quilt

  • Pattern: Top will have a piece of music the Young Man can actually play. That will probably be applique’
  • Fabric/Colors: music prints and tone-on-tones with a little red
  • Thoughts: The Young Man has requested this quilt as his graduation quilt. Probably won’t make it for graduation, but I will make it. He has sent me a piece of music, which I need to print out and make into an applique’

Neutrals and Red/Scarlet Quilt

  • Pattern: Sew two ~3?x3? squares together, slice each separate fabric and insert a red strip, resew and sew the two squares to another set of squares.
  • Fabric: neutrals+white, black and whites. I have some of these. I bought them not know what to do with them.
  • Thoughts: gift

Pineapple (Hunting and Gathering)

  • Fabric: dots. Have most of the strips cut. Will be much more selective about which strips I use.
  • Pattern: Pineapple log cabin
  • Thoughts: I haven’t given up on a Pineapple quilt despite my frustration with the previous attempt. I bought a different ruler: a Creative Grids Pineapple ruler in hopes that it will work better for me.

Pink Rectangles Gradation Quilt (Hunting and Gathering)

  • Fabric: pink 2.5×4.5 rectangles
  • Pattern: similar to FOTY 2008
  • Thoughts:

Scrapitude #2

  • Fabric: scrappy again, but with NO browns or blacks or super darks that look like holes; also more blues and perhaps a different background, though I do like the dots on bright white. I would make sure to skip the dots with a cream background.
  • Pattern: Scrapitude by Charlotte Hawkes
  • Thoughts: I want to try and figure out how to make the edges NOT on the bias.

Silk Colorblock quilt

  • Fabrics: silk dupioni and cotton in brights (of course)
  • Pattern: Similar to Colorblocks 2
  • Thoughts: I have made a couple of, what I call, Colorblock quilts over the years. One was the Kona Challenge in 2011, another was my 1990 Colorblocks 2 and the first one, Colorblocks, also made in about 1990. I bought the fabrics at the Marin Needlearts show about a zillion years ago and they have languished waiting for me to learn to back them so I can use them.

Spin Wheel  (Hunting and Gathering)

Stepping Stones #3

  • Fabric: Macaron pre-cuts from Hoffman. It isn’t started, but I have lots of pre-cuts and think they would make a really fun version of this quilt.
  • Pattern: Stepping Stones by the Lintott girls

Windmill  (Hunting and Gathering)

  • Fabric: Scrappy. I will use a grey for the background, because if I use more of the cut fabric patches, the pattern will be lost. The pieces are too oddly shaped and I don’t want to lose the pattern in a mass of scraps.
  • Pattern: Come Quilt with Me Rotary templates

Out of the Dream State:

Box Full of Letters

  • Fabric: Kiss Kiss Charm Pack with a solid blue background
  • Pattern: Missouri Star Love Notes
  • Thoughts: since I write so many letters it appealed to me. I have already started sewing, though only a little.

Food quilt #2  (Hunting and Gathering)

  • Pattern: Disappearing 9 patch
  • Fabric: RJR Food prints. Will use a different color for the non-food print section than I did for the Young Man’s version.
  • Thoughts: Gift for son of good friends for graduation. I have started cutting for this in a serious way. The alternate color will be purple. I will use black again for the non-food squares.

Stepping Stones #2  – I started to make blocks for this, so it is out of the dream projects stage.

  • Fabric: Bonnie & Camille fabrics Bliss, Ruby, Vintage Modern. I wanted the contrast to be good, so I added additional fabrics to beef up the Bonnie & Camille fabrics.
  • Pattern: Stepping Stones by the Lintott girls

Various & Sundry #6- Mid May

Books, Patterns, Magazines & Projects
I am blowing through Marie Bostwick’s Second Sister. This is her most recent release and not part of the Cobbled Court series. I thought I would be resentful, because I really want to know what happens in new Bern. I was pleased to find that I really like the characters, the premise and the story in Second Sister. I was kind of annoyed at myself for not giving this new book a chance right off the bat, but I am over it. As soon as I started reading, I was all in. This is a well written, modern book that I think many women who work at demanding jobs and have family life intervene can relate to.

I found a leaders and enders Linky party over at A Quilting Chick. I don’t really think of my leaders and enders in the same way she does, but I added my most recent O9P post to the Linky party to 1) get more traffic and 2) acknowledge that the progress I am making is all because of leaders and enders. I wonder what my life would be like if I only worked on one project at a time?

I have always been interested in casserole carriers and other things like that. I thought they would be good gifts, especially for a shower. “The Casserole Carrier measures 9-1/2″W x 14-1/2″L x 4″H and transports a standard 9″ x 13″ casserole dish. Zippered pockets on top and bottom will hold utensils, napkins, a cutting board, and more. There’s even an inner mesh slip pocket for a hot/cold pack. Measuring 11-1/2″D x 3″H, the Pie Carrier is perfect for pies (even deep dish!) or cupcakes.” My only concern is whether the casserole would get on the inside top of the carrier. I saw an interesting pattern in the May 1 ByAnnie newsletter. You might also need a shower gift or a room parent gift.

In the same newsletter, I also saw a baby travel accessories pattern that would make great baby shower gifts. I especially like the pacifier carrier.

The Lindy Petal Skirt is a free pattern from Itch to Stitch. I love the petal look and the designers says you should be able to sew it in an hour. (Not me, but you)

Other Artists

During Ricky Tims’ concert at the Paducah show, he got on FaceTime with Libby Lehman and the brief conversation was projected on the screen for the whole audience to see. Libby was also able to interact with the audience. She has come such a long way from the aneurysm and stroke she suffered a few years ago.

Nancy Zieman is a giant in the world of sewing. In recent years, she has also jumped into the quilt world and produced some great projects and products. Now she has been diagnosed with cancer and it is time for us to give back. All of us have  cancer somewhere in our families. Some of us, sadly, know better than others the day to day worries and emotions that engulf a patient and a family. I saw an article recently about Emily McDowell, an artist and cancer survivor, who has produced a line of cards to send to someone with cancer. I am not saying to go buy one of these cards, but go read the blog post about why she produced this line before you write to Nancy or anyone else you know who has cancer. It will change the way you phrase your words. At least it did for me.

Weeks Ringle posted on her blog about this and Nancy also has a video posted explaining what is going on. You may not be a fan of Nancy Zieman, but she has, no doubt, worked hard in this profession and contributed.

Websites, Articles and Information

Mandy Applebee of Yellow House Quilts wrote a great blog post about encouraging others and not breaking them down. One quote was “I am instead asking that we take a moment to BUILD OTHERS UP, speak up, stand up and ENCOURAGE others to create their best work right now, encourage them to TRY, practice and create whatever makes their hearts happy.  Support others, it doesn’t take anymore time to build another person up instead of breaking them down.  ENCOURAGE, ENCOURAGE, ENCOURAGE and help build others up!!  This industry is big enough for everyone no matter their level of skills and training, so help and support others whenever you are able.  Be a builder and take a stand against the bullies!!  PLEASE!!”

I am not diminished in my own process or projects if you sew up a storm. I find joy and inspiration in what you do. I want everyone to share the excitement and challenge I feel in quiltmaking. Why are there quilt bullies? What is the point? Is it the same reasoning as for other bullies? Thanks to Ms. Lottie for sharing.

Gretchen was kind enough to point out an article on pre-washing in a recent blog post. What was interesting was the shrinkage. I would have thought bleeding would be the issue, but shrinkage was much more noticeable. I was surprised to see that one fabric shrank 1/2″ on the weft side. The article is well organized by fabric manufacturer. (As an FYI: I wash all of my fabrics in hot water with Retayne and dry them on low).

12 revealing facts about rulers (not the Queen Elizabeth kind) is an informative and entertaining look at rulers. It mostly has history, but a few bits about quiltmaking rulers as well and the history gives an interesting foundation to the tasks we perform with our rulers.

I have wanted to make a Feathered Star blocks since I first saw what Marsha McCloskey was doing. She has a number of books out and I own a few. Now with the Triangle Technique, it is a lot less daunting. Still, I have not done it, but it is on the list. Marsha McCloskey finally has her blog up and running. Take a look at: https://featheredstar.wordpress.com/

Fabric, Tools, Supplies, Shops & Embellishments

Rock Baby Scissors has an interesting Etsy shop full of bags. If you need some quick gifts for Comicon fans, this is your shop.

Exhibits, Tutorials and Events

“Kevin Kosbab, who wrote the popular book, Quilter’s Appliqué  Workshop, is dedicated to helping other quilt artists use appliqué easily and creatively, using his tips, tricks, and techniques.

Here are some of his suggestions for success:

1. In general, for both hand and machine appliqué, start sewing an appliqué along a straight or gently curved edge rather than a corner or point. The corners look neater this way.

2. To reduce stiffness from fusible web, cut the center away from your fusible shape, leaving a border of about 1/4″ inside the traced outline.

3. Try different types, sizes, and brands of hand needles to find the best one for you. I use a size 11 sharps for hand appliqué, but you might find it easier to manipulate fabric edges with a longer milliners needle. Ask for recommendations from friends or quilt shops, but ultimately it’s a personal decision.

4. Cross-wound spools of thread generally feed better on your machine’s horizontal spool pin, while stacked (parallel-wound) spools work best on a vertical pin. If your machine doesn’t have a vertical spool pin, try a thread stand-also a good idea if you find monofilament thread tangling when sewing invisible appliqué.

5. When combining piecing with appliqué, press the pieced seams in the direction that makes sense pictorially-that is, press seams away from whichever fabric is supposed to be the “background.” When pre-piecing fabrics to sew down as a single appliqué shape, press the seam allowances open to reduce bulk in the turned edges.

Kevin has many more tips, techniques, and patterns for creative, stress-free quilt appliqué, and he shares them all with you in Quilter’s Appliqué Workshop.”

Field Day Progress

I am not liking the name Field Day Zipper. It is too long and unwieldy. Anyway, I made progress on this piece at the fabulous retreat.

Field Day- May 2015
Field Day- May 2015

All of the pieces are cut and all of the sections are sewn to the background. As well, sections are sewn to each other, so there is no more than two sections are alone. I worked hard at getting the piece put together, but couldn’t quite do it. Still, I am pleased with how much progress I have made and see the end in sight.

The fabrics, as you may recall, are all from one line. As you also may recall, I usually advise people to to remove about 20% of the line and replace it with other fabrics not from that line. One issue that I had is that I did not add or remove any fabrics from the piece. It really shows. I had to be careful about where I placed fabrics so as not to create big blobs of color or pattern. It isn’t easy to remove certain fabrics and add others, but this is a lesson to me to take my own advice.


Food Quilt #2 – Major Progress

Food Quilt #2 top without borders

I spent the first part of the quilt retreat (will write about the retreat in general, but want to talk about the projects first!) working on the Food quilt that will go to a friend of the Young Man’s.

We are friends with the parents also, and they are very interested in my quilts. It seems reasonable to make a graduation gift for their son.

I bought plenty of fabric when I purchased for the Young Man’s Food Quilt, so I have plenty of fabric. The fabric is hard to find near where I live, but I bought most of it in Lancaster County when I was there with my SIL. Food themed quilts are good for boys as they are sort of neutral, but not too girly for boys. Quilts can easily be kind of girly, especially for someone like me who loves pink. 😉

I did the same pattern, a Disappearing Nine Patch, though I arranged the blocks in a different way.

I wasn’t able to finish the top, because I forgot the black I want to use as an inner border. I did make 4 piano key borders to add once I put the black border on the piece.

This project has been hanging over my head so I am glad I have made significant progress on it. Hooray for retreats!

10 Years of Artquiltmaker Blog

Yes, today is my 10 year Blogiversary. Appropriately I am at a Quilt Retreat. I’ll pick up any gifts when I return. 😉

Have you been with me the whole time?

I started Artquiltmaker Blog because I had hit a big milestone and I wanted to start something new and send my life in a new direction and practice writing. My first post was not stellar. I remember being distinctly uncomfortable and not knowing what to write. I got better though and even later in May 2005, I was posting real content. Short, not every day, but real content.

At the end of 2008 I moved the blog over to WordPress.

In 2008 and 2009, I started trying to post every day. I worked my way up to posting on that schedule, which I do now except in extraordinary circumstances. Life happens sometimes.

Somewhere in there, I did the Block-a-Long, which was fun, but not very popular. I am also doing the Creative Prompt Project, which will be ending when I get to #365. I still have to think of something special for that one! Having a once a week post that I don’t have to think up helps a lot in getting something posted every day.

This forum has helped me to move forward in my work. I have enjoyed seeing comments from people, getting to different quiltmakers via Instagram and Twitter and even meeting a few in person.

I really enjoyed looking through the photos below to pick the ones I wanted to add to the gallery of the last 10 years worth of my work. I was pleased to add a few pre-blog photos, so you get more of an idea of my work during my quiltmaking career.

I don’t know what the future holds. I don’t know if I will continue to post every day or if I will start posting twice a day. As long as I enjoy the process and contribute to the quiltmaking community I will continue. Thank you for enjoying the ride along with me.

Regards,

Jaye

Update 5/13/2015: Thanks for playing! Comments are closed. The winners are:

  • Pam C – fabric scraps
  • Sherri D. – pattern
  • Jackie B – book

Creative Prompt #309: Treasure

Treasure Island, San Francisco

treasure chest

Bruno Mars, Treasure

buried treasure

lost treasure

treasure map

Definition: “Treasure (from Greek ???????? – th?sauros, meaning “treasure store”,[2] romanized as thesaurus) is a concentration of riches, often one which is considered lost or forgotten until being rediscovered. Some jurisdictions legally define what constitutes treasure, such as in the British Treasure Act 1996.

The phrase “blood and treasure” or “lives and treasure” has been used to refer to the human and monetary costs associated with massive endeavours such as war that expend both.” (Wikipedia)

treasure hunting

Staffordshire Gold HoardStepping off the road near the rise of a small ridge, they dug a pit and buried a stash of treasure in the ground. For 1,300 years the treasure lay undisturbed

Treasure Island by Robert Louis Stevenson

Sacred Treasure, a free online Adventure game brought to you by Armor Games.

Treasure Island Flea Market

National Treasure (2004 Movie)

Treefrog Treasure – free online math game, students explore different worlds as a frog and learn fractions and numberline concepts.

Treasure Arena is an online battle-arena for up to 4 players.

treasure planet

Princess Treasure Hunt (Lego and Disney)

Post the direct URL (link) where your drawing, doodle, artwork is posted (e.g. your blog, Flickr) in the comments area of this post. I would really like to keep all the artwork together and provide a way for others to see your work and get familiar with your blog or website.

The Creative Prompt Project, also, has a Flickr group, which you can join to  post your responses. I created this spot so those of you without blogs and websites would have a place to post your responses.

We are also talking about this on Twitter. Use the hashtag #CPP

Origami Starburst

A long time ago, I met up with a friend and she taught me to make folded paper stars. Later, I found out that they are actually called starbursts.

Back in the day, I only had copy paper and I made a practice star from that. You need 16 squares of paper to make one starburst, so it is not an insignificant amount of paper and I didn’t have that much pretty paper on hand. I was pretty proud of that simple white star. At some point, I glued it together.

It was a good technique and the results are impressive, so one Christmas, not long after, DH and I folded up bunches of legs to make ornaments for gifts. We also made some larger ones as gifts and Christmas passed. Then the process kind of fell off my radar and I forgot how to make these starbursts. Sadly, I couldn’t figure out how to make them by reengineering, because I glued the one I had left together.

So, time passed, but I kept looking at that star at the top of my design wall. I started to become obsessed by making one again. I searched the web and couldn’t find instructions. I was infuriated. I am a librarian, for goodness sake, I should have been able to find one measley set of instrustions.

I firmly put the problem into the back of my mind to torture me there – uh, rumble around – and let my subconscious work on it.

One day I was on a boring call and clicked over to Pinterest to peruse while I listened. Suddenly, I saw a folded paper star!!! It finally dawned on me to search Pinterest and after trying ‘starburst’, within moments, I found instructions on a blog!!! I know I reported on this in the last V& S post.

For awhile I basked in the knowledge that I had the instructions and could make a starburst anytime I wanted.

Last week, I decided to make one to see if works. Now I can’t really stop. I haven’t been doing much scrapbooking lately, so I took some paper and made a first star. I cut the paper to 8.5″ squares and made a pretty big starburst.

Origami Starburst
Origami Starburst

Next I went, coupon in hand, and bought some special pieces of 12″x12″ scrapbook paper and make them into another even more giant starburst. The paper I picked wasn’t matchy-matchy, but it reminded me of a line of fabric that kind of had a Paris theme with lots of pink and black. I just felt like these were the right patterns and motifs.

Paper is fun and everything, but I have a lot of fabric and I began wondering if I could make a starburst from fabric. I let the idea rattle around in my head and decided that one big problem was cutting 32 pieces of square fabric – well 16 pieces of fabric and 16 pieces of interfacing. Regardless of how much I cut in other projects, it seemed daunting for this starburst. I think it was a problem in my mind, because of the uncertainty of whether it would work.

Finally, I came up with charm squares. I got a Fresh Cuts charm pack out of my drawer and picked out 16 squares that I thought would work together. I worked on it at Sew Day and then finished it at home. You need Flatter or Best Press to make the pieces really flat.

Fresh Cuts Origami Starburst

The idea worked. I think the starburst came out really well. It is a little bright and cheerful. The only thing I need to think about is how to keep it together. Normally, the tension keeps them together, but the starburst wreath is kind of fragile if it gets handled too much. Sewing or gluing are my options.

May to Do List

I completely forgot to post this in April. Probably for the best, because not much has changed even after TWO months. The last post is from March.

To Do List:

  1. Quilt Christmas table runner
  2. Wash fabric AKA The Great Unwashed-I washed more loads in April. I have a some receiving blankets to make and some dresses for Political Wifery to make, so it was inevitable.
  3. Make stiff bucket or box for TP in main bath
  4. Make stiff bucket or box for TP in second bath – I am thinking of making this triangular in shape
  5. Anna Maria Horner Multi-tasker tote (gift-due Holiday 2013- sigh. Missed 2015 deadline as well)
  6. Cut out 3 notepad covers for gifts
  7. Finish cutting out Day in the Park backpack variation
  8. Finish cutting out 3rd Petrillo bag
  9. Sew Bon Appetit apron
  10. ATCs for CQFA April Meeting – made a large piece
  11. Fix button on DH’s California shirt
  12. 3 Christmas pillowcases
  13. ATCs for June meeting
  14. Art supplies Sew Together Bag
  15. Art supplies pincushion
  16. Purple Sew Together Bag
  17. Purple pincushion

To see the 26 Projects Lists, which list quilt WIPS, visit the December Current Projects update. Last month’s to Do List has a couple of changes, which is heartening.

All small items, prior to those completed in December 2014,  have been completed since November 4, 2013. This is a new list for 2015. You can find the list for 2014 and previous on the last post.

Finished in 2015: