Time does funny things to my head when I am sewing. I know I sewed A LOT over the weekend. Still, I felt like it wasn’t enough. Will there ever be enough time to sew? I don’t know.
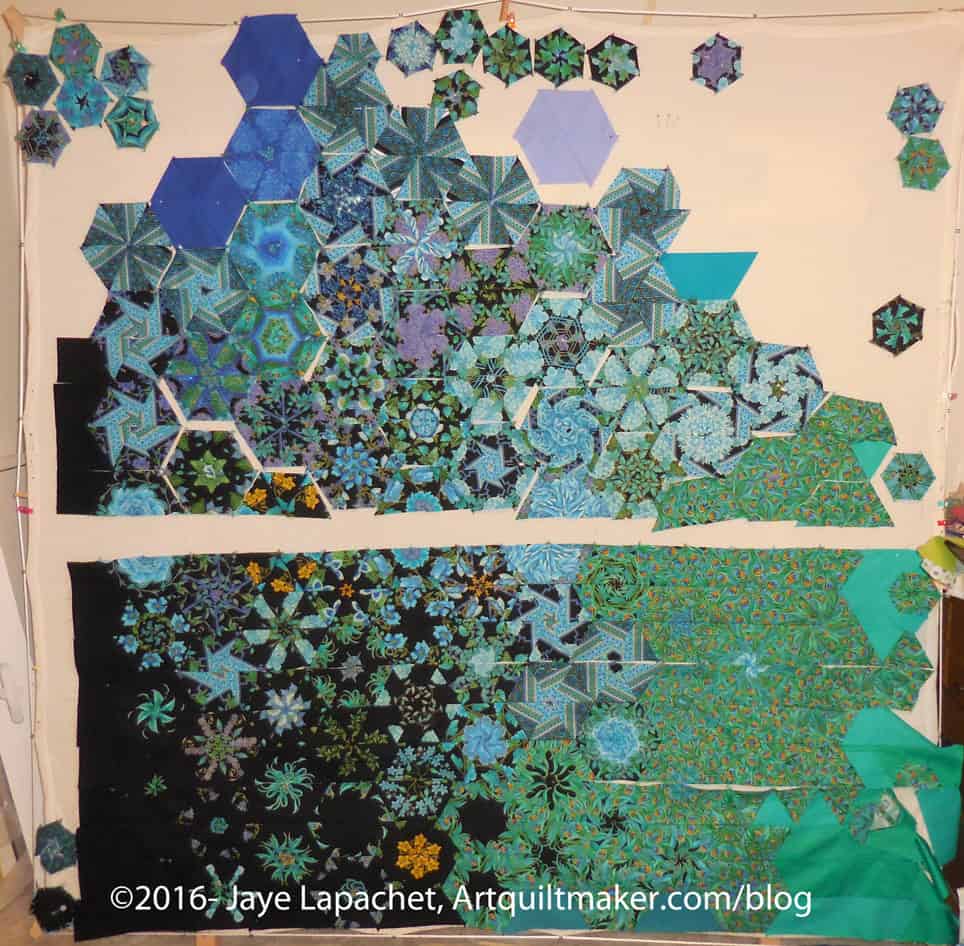
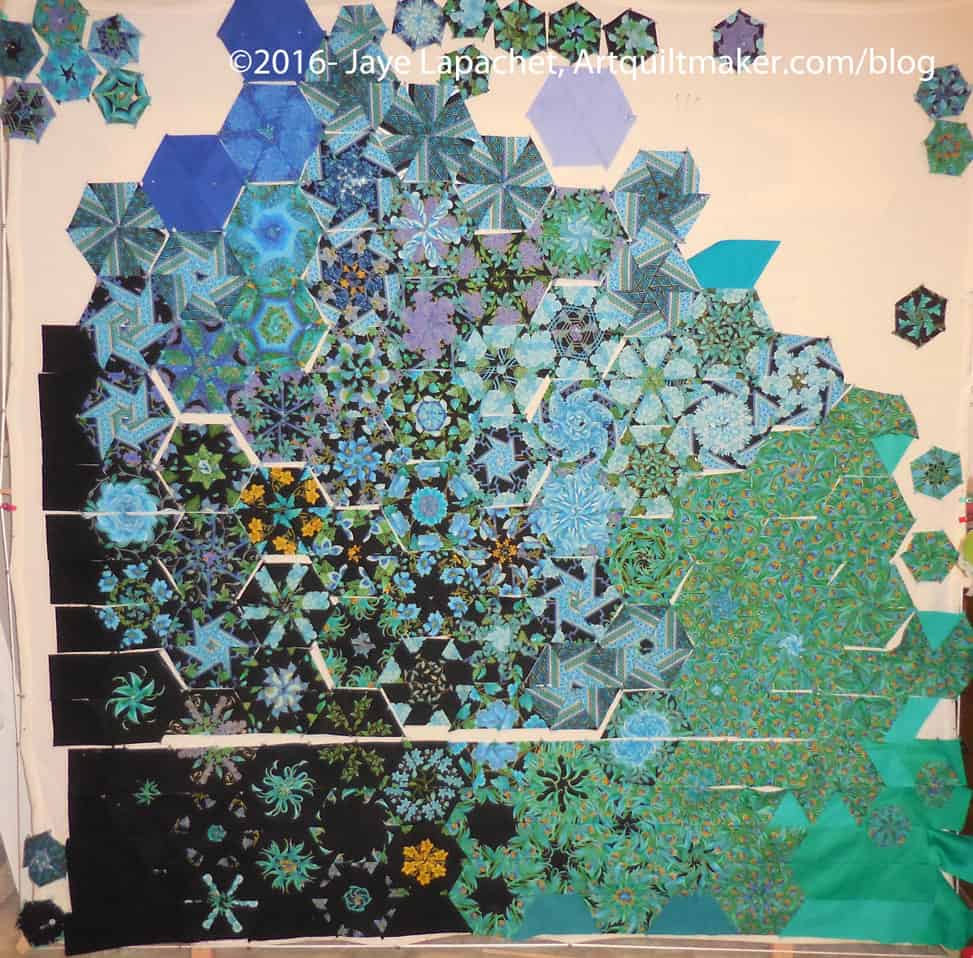
The Peacock, end of October 2016
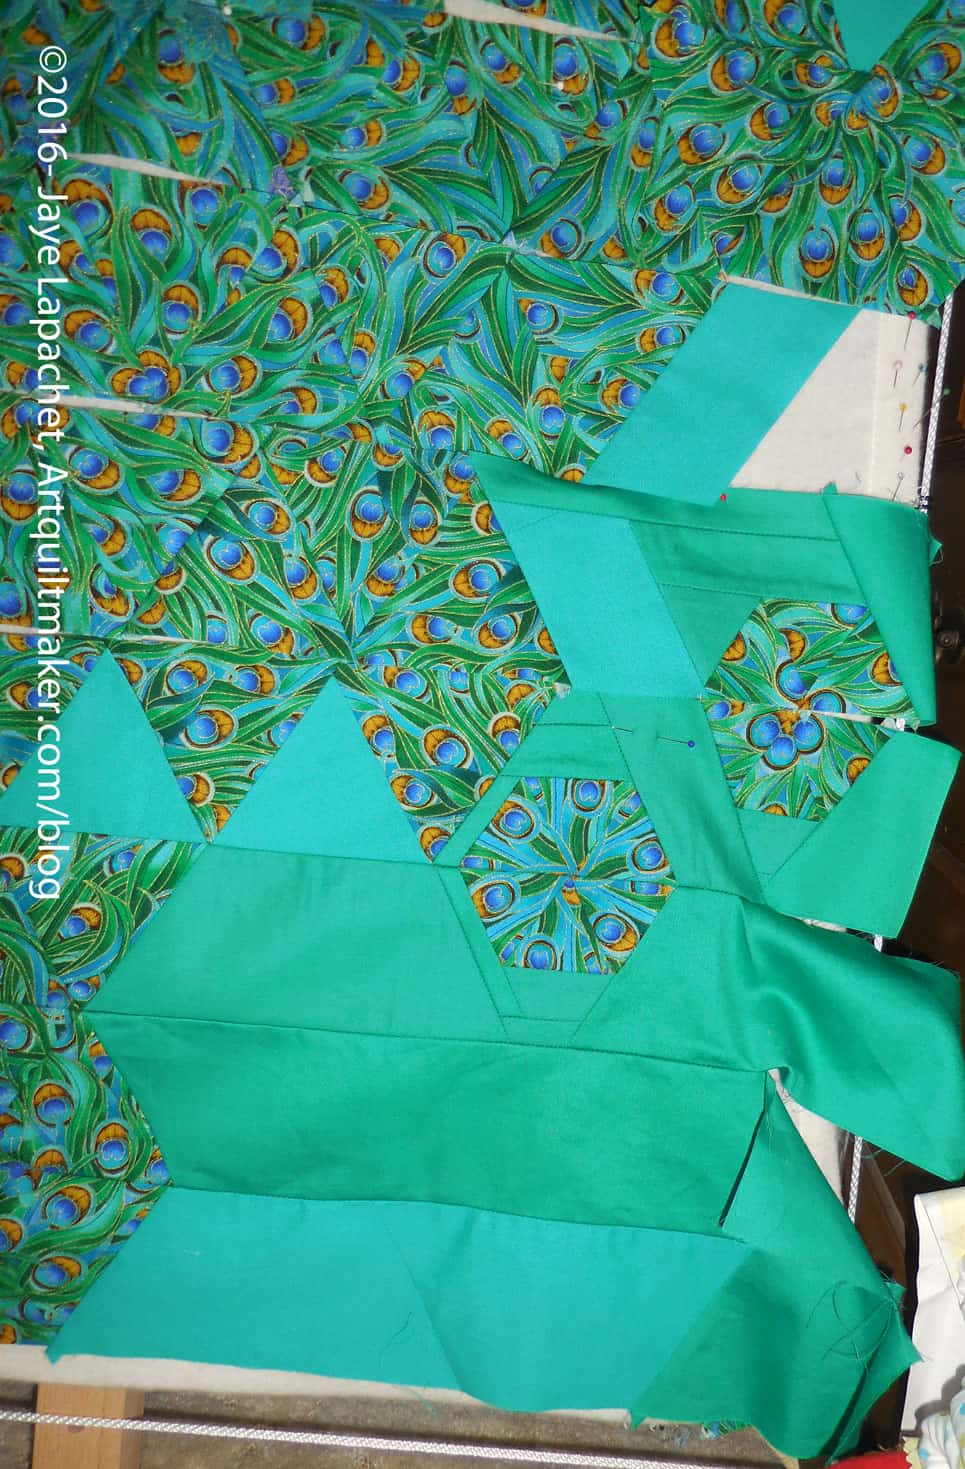
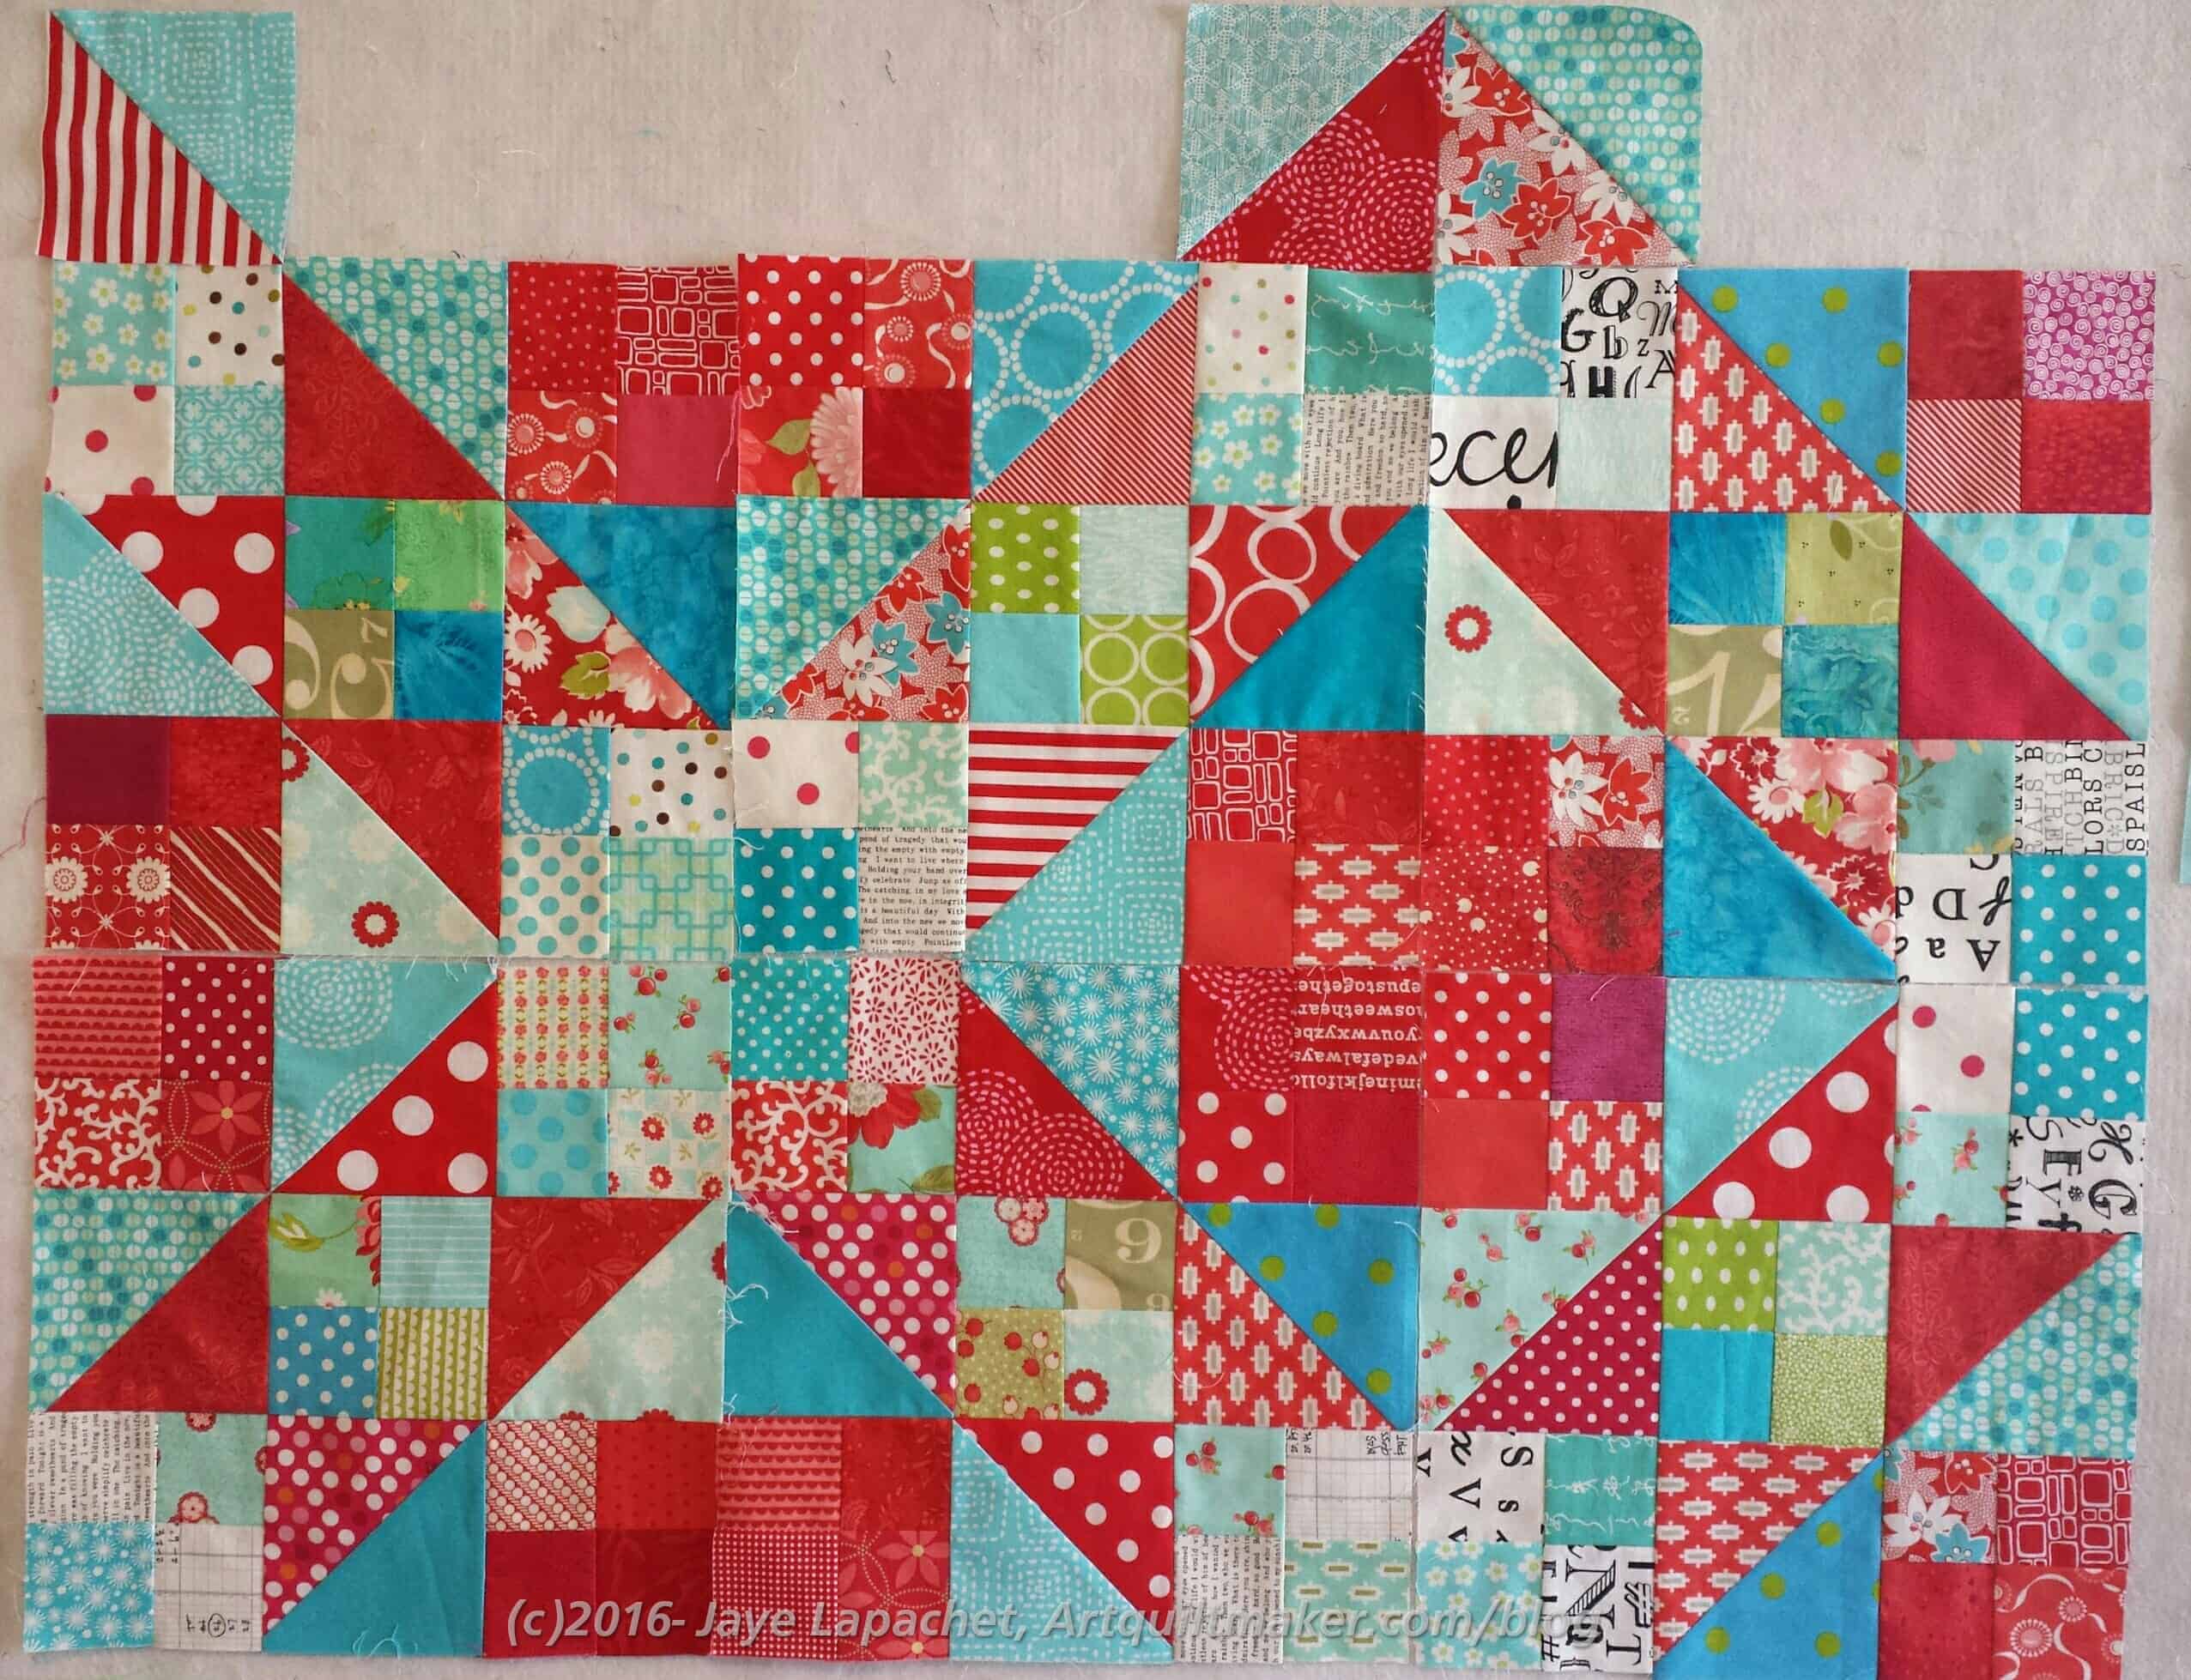
During all that time, I worked, mostly, on the Peacock. I now have 10 rows sewn together in some fashion or another. I have them mostly sewn together in groups of four rows. They will all be sewn together eventually, but I am just doing this much for now.
I also started to sew some bits of the upper rows together, but nothing major is done up there. I have to get serious about the solids and see what I can make for the background in the upper right hand corner.
I have an idea to spice up the latest batch of 16 patch blocks I made for the BAMQG charity project using HRTs.
HRTs are half rectangle triangles, which are similar to half square triangles. This shape/block is also called a Bias Rectangle. I wanted to make them using a method similar to the Triangle Technique. Wouldn’t that be great? DH and SIL worked on the math, but they could only get one rectangle and a kite shape out of a similar method.
It might be easier to cut these shapes if you had a cutting mat turntable. Martelli has one that includes an ironing surface.
The Modern Quilt Guild posted a tutorial on bias rectangles. The tutorial shows how to make 4.5 x 6.5 inch final block size, but notes that the tutorial works for any size as long as you use the same sized rectangles. The tutorial includes directions for “squaring” up the blocks (a rectangle made up of two triangles).
Wayne Kollinger also posted 3 (yes, THREE) different tutorials for making HRTs. First, he talks about just cutting fabric. No tools or special rulers. Wayne’s second method also uses the Tri Recs ruler. The third tutorial uses freezer paper. One thing Wayne says is “the rectangles are twice as long as they are wide. This means that for a 6″x6″ block the rectangles would have a finished size of 2″x 4″. For a 9″x9″ block the rectangles would have a finished size of 3″x6″.”, which is very helpful information moving forward.
Heidi at Buttons and Butterflies posted a tutorial includes what not to do, which is a great illustration of what I found out from DH’s mathematical adventures. From the tutorial you can see what happens without having to do it yourself. 😉 There are a few different techniques included in this post including an Accuquilt technique. The Accuquilt die has the tips cut off for easier matching of patches. She finishes up with a tutorial similar to the Modern Quilt Guild tutorial. Heidi also talks about the differences in HRTs, which I was glad about since I didn’t realize some of the things she discusses.
Kristi of the Schnitzel and Boo Blog uses a similar technique to Heidi, but sews on each side of the center line to make her HRTs in her post. The post includes a quilt tutorial/pattern as well.
Marjorie Rhine from Quilt Woman has a PDF discussthe topic, including three options for making the blocks. One is to use a template, similar to my tutorial on using templates. I supposed the Tri Recs ruler discussed above would also work. Also mentioned are the Marti Michell’s Template Set D or Margaret Miller’s AnglePlay Template. The latter is a companion to a couple of books. She includes paper piecing and using templates as techniques. The PDF includes a lot of useful information.
These can also be made using foundation piecing. Printing a template from EQ7 or drawing the paper template is also possible.
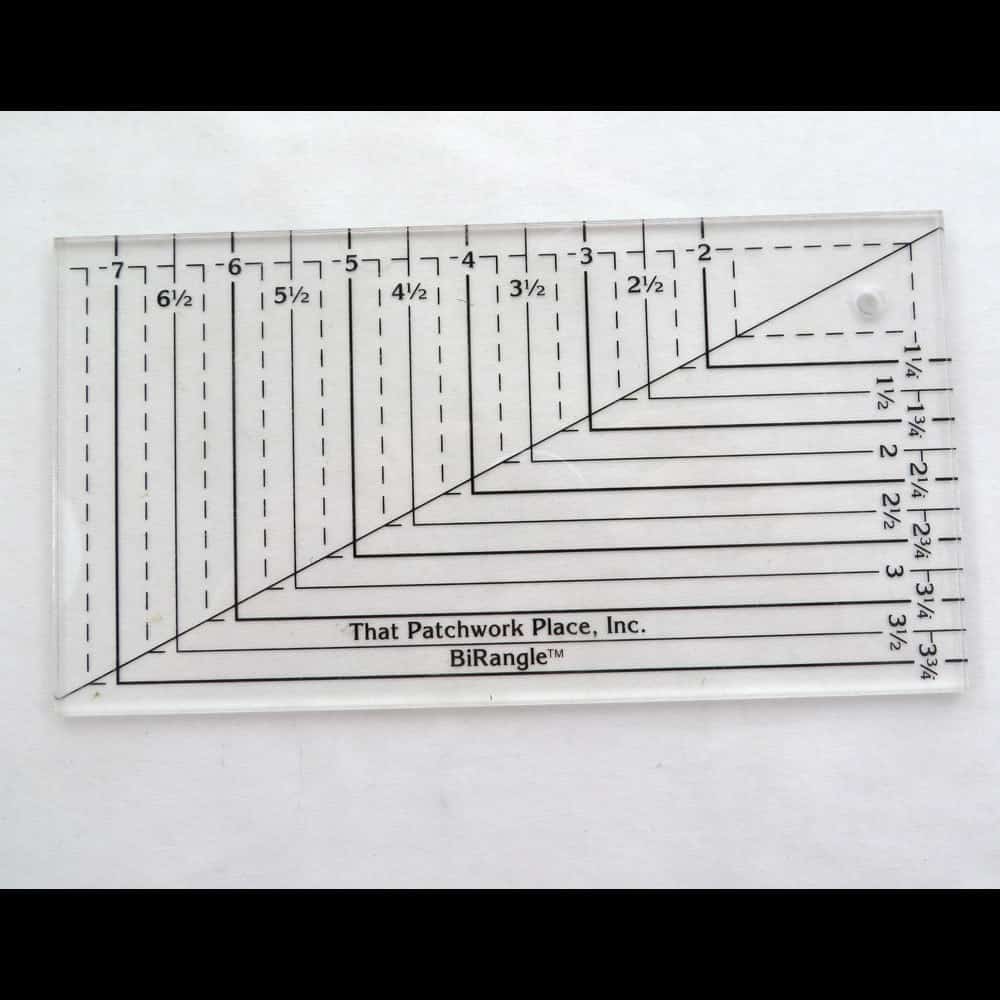
BiRangle ruler
Finally, I have a ruler called a BiRangle ruler. It is by Martingale (I bought it when the company was called That Patchwork Place).
Sew Mama Sew has a tablerunner pattern. She talks about why the Triangle Technique does not work for HRTs.
I am pleased to report I have used about 145 yards of fabric this year. Isn’t that crazy? I can hardly believe it. I still have to work on using more and I am sure I can use at least another few by the end of the year. November To Do
Wash fabric AKA The Great Unwashed-some progress
Cut out 3 notepad covers for gifts
Finish cutting out Day in the Park backpack variation
Finish sewing Anna Maria Horner Multi-tasker tote -this was a gift I intended to give during Holiday 2013- sigh. Missed 2014 Holiday deadline as well. I made it for birthday 2016 and it was a successful gift.
I am out of cut white squares for charity blocks, so I used pieces for the City Sampler blocks as leaders and enders while I was sewing the Peacock together this past weekend.
City Sampler blocks n.38-41
I was able to finish a total of 6 blocks, which still makes me under 50 done, but progress is progress. I am still on the triangle blocks and my machine really likes eating the corners when I use the method Tula Pink suggests. I was grumpy making these blocks and ordered more Northcott charm packs to use for the donation blocks.
City Sampler block n.41
I added a few new fabrics from the group I recently washed to spice things up. They are all in the blue-green range, so they will go. I know I said before that I had too many, but clearly now I don’t care.
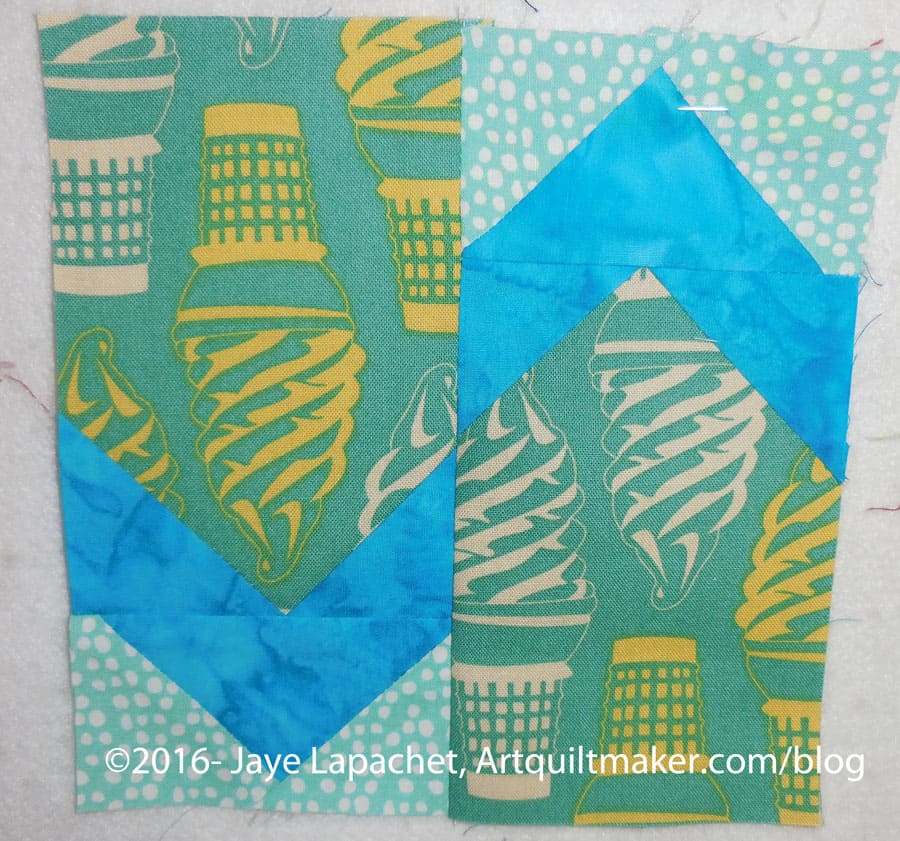
I don’t have a lot of fabrics in my group that are good for fussy cutting, so I did the best I could. I am pleased with the way the ice cream block came out.
Of the above blocks, I really only like the one in the upper right hand corner. I like of the fabrics in all of the blocks, but don’t much like the block designs and not just because my machine ate the corners. I particularly dislike the one in the upper left hand corner. It looks like baby blocks and I don’t think it came out well. The piecing is really wobbly due to the above referenced machine hunger and because of the many small pieces. I may redo as suggested by some on Instagram, but it will probably just blend in by the time I get all of the other blocks made.
City Sampler blocks n.42-43
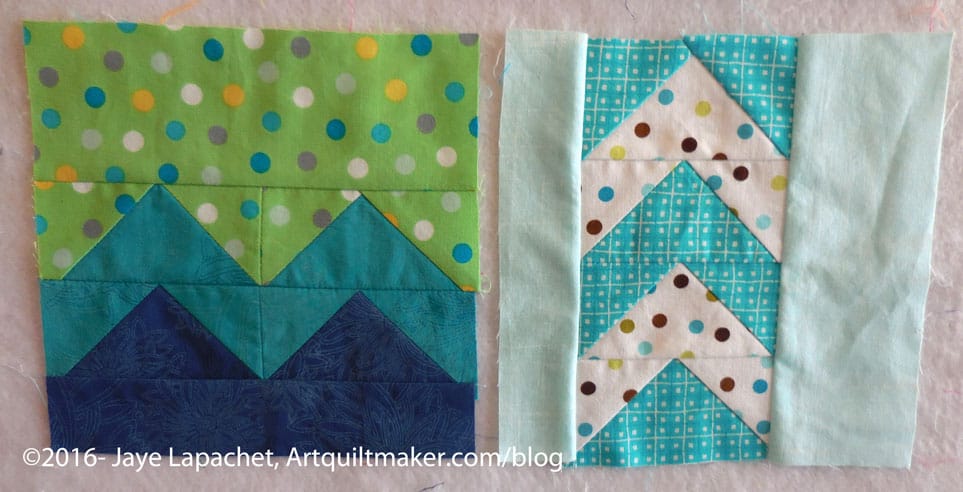
I do like the two I made yesterday and think that simple is better for the small size of these blocks. I am really looking at the one on the left and thinking about making it super big – bed sized, in fact for one of the nephews. I have to figure out how big that would actually be. I can see the block as a quilt in, from the top down, Kona Ash, scarlett and black. I would probably do a test block first to check the color choices, then see if American Made Brands or Art Gallery has a similar solid color to Kona Ash.
Someone asked me why I finished FOTY 2014 in 2015 instead of in 2014. This was before my trip, so the comment annoyed me. Now that I am much calmer and have had time to think about it, I realized that some people may not understand the concept. Don’t worry I am not going to rehash it here, but you can see a detailed explanation of the concept on the Works in a Series page about the Fabric of the Year quilts.
Fabric of the Year 2015: Finished!
I finished FOTY 2015 last week (or perhaps the week before). I was still sewing on the sleeve when I took it to BAMQG last weekend for show and tell.I needed DH to help me photograph it and that didn’t happen until last night.
I am pleased with how it came out. I really like the layout using rectangles and squares. The two different shapes add interest, I think.
Fabric of the Year 2015 Back: Finished!
I used large pieces for the back, which should come as no surprise. I have been trying to minimize the fiddly little piecing I can get into for backs. I like large print fabrics and the ultimate goal is to get backs done. I need more of that yellow fabric as I used the last bit for the EPP Stars and was short one leg of the EPP stars.
The Orlando Modern Quilt Guild updated their meeting minutes and included a detailed description of their Pulse Project. The scale of the project is mind boggling. I am amazed at what they have accomplished. They also posted some photos of the first distribution on the OrMQG Instagram feed.
If you want an ongoing way to use up scraps by doing some good, take a look at Kat’s Block Drive. She requests blocks every month to make quilts for families who have lost loved ones.
I was pleased to get Marsha McCloskey‘s newsletter. I was not so happy to hear that she has been 24/7 caregiver for her very ill husband. Send her good wishes via her website if you have a chance. She mentioned the Stargazing: American Star Quilts exhibit at the Iowa Quilt Museum in Winterset. It runs now until January 24. Her Star of Chamblie Sampler quilt is in the exhibit. I want to make a version of that quilt!
Products
Johanna Bashford, coloring queen, has a line of tech cases for Apple products. Samsung owners, including me, are SOL.
Patterns, Tutorials and Projects
I recently saw a link to the Queen Bee handbag pattern from U-Handbag, a British company owned and operated by Lisa Lam. I love the look and the design, but didn’t really want to deal with British pounds (sorry, UK friends, I am not trying to be an ugly American). I looked around and found the pattern on Craftsy, but without the purse frame and other bits and pieces. Sigh.
My sister, not as well versed in the ways of fabric as some of you, dear readers, but she has a good eye and sent me a link to a fabric rugmaking tutorial. The fabrics used in the tutorial are very appealing. The technique is similar to one in which bowls are made. It is nice and would be a good way to use FabMo scraps.
I love the look of this pieced Pineapple quilt pattern. Tutorials are linked on the page.
I have been talking about making a Lozenge quilt for awhile. While I have a number of projects in process, I think the stars have almost aligned for me to do this. I found a pattern that works with charm packs (5 inch squares) and a layer cake (10 inch squares), which is kind of what I want to use. I got a layer cake of Manor by Victoria Findlay Wolfe and have been looking for a reason to use it. This might be it. Looking back at the page of ideas I gathered, though, makes me wonder if that is the right fabric. I’ll have to dig around in my fabric closet and see if there is a more suitable layer cake. God forbid, I should actually CUT fabric for this project. 😉
Bonnie Hunter has announced her 2016 mystery quilt, En Provence. It is inspired by that region and the photos are worth viewing even if you don’t want to participate.
Other Artists
Christa Watson has a post on a series of black and white quilts she did after choosing black & white for her ‘color of the month’. I really hope she didn’t make all of those quilts in one month. I’ll feel quite lazy if she did! Regardless, Christa has a great design sense. Her Illusions piece moves when you look at it. As she says, black & white quilts have a high impact graphic quality that is hard to beat. Information about the Color Blog Series can be found on Michelle Wilkie’s site.
Marie Webster was active in the early part of the 20th century and owned a pattern and kit company before such things really existed. A lot of her patterns were applique’ and very different from the feedsack and pieced patterns of the 1920s and 1930s. Kathy Matthews wrote an article about an art quilt exhibit responding to Webster’s patterns in a new way. You can read about her in a book.
Media
You might have heard of Frances Dowell’s new book, Birds in the Air. She also has a different site from The Off Kilter Quilt that is all about Quilt Fiction. You know that my librarian heart loves this type of compilation. Frances notes in her recent episode (#199) that the Quilt Fiction site is a still a work in progress. You get a free story if you sign up for her newsletter.
If you have wanted to start a La Passacaglia quilt, but don’t know where to start, take a look at Dana’s post. First, she has great photos of her “La Pass.” I like the way she approached the project and it has given me ideas for getting started, which I have been avoiding. (N.B. I do have an idea that will help me take the leap). She also has an idea about combining shapes to make a larger space. This is an interesting idea that I might use when I get farther along. Not only is this post helpful, it is also written in a great tone.
Tips and Tricks
Kathy Matthews posted a link to some still relevant vintage tips and then she wrote an article talking more in depth about the tips booklets.
Quilt World News
Sadly, art quilts were stolen off the walls of a church in Vancouver. The article states that the quilts were worth $6 million. The article has a link to photos of the stolen quilts. There are two sites that list lost and stolen quilts, Lostquilt.com and a page for Missing Quilts on Quilter’s Cache. While there is no good in stolen quilts, I am pleased that the quilts are considered art in this instance.
Bonnie Hunter announced her 2016 mystery quilt*, En Provence, today. I haven’t ever done one of her mystery quilts, but I always collect the instructions, thinking that I will do one some day, after the fact. I am pleased to watch Pam and Daisy and Valerie and others do the steps. They have made some gorgeous quilts.
I have a great deal of respect for Bonnie for creating a new mystery quilt every year. I just haven’t made the plunge. I did Scrapitude, which I love. That was a mystery quilt and I am not sure I could top it.
Normally, I am quite confident choosing colors for a quilt. One problem I have with mystery quilts is choosing the colors. Scrapitude was great because it was a scrap quilt and the background was clearly defined. In this one, I don’t know if the neutrals will be the background. I don’t know where the green and yellow will end up, though Bonnie says the two colors should have good contrast with each other. I appreciate her mentioning such tips and tricks. However, I don’t want to spend time on a quilt only to have it end up as a mushy mess at the end.
My color preferences are much brighter than hers. I always wonder if they would work. I did some Palette Builder work on her inspiration photos and was glad to see that she had made good choices.
So, I don’t know if I will make the mystery quilt. I will collect the directions and I did order the new and fancy ruler (I love rulers!), so I am ready to go. Stay tuned.
*As you may know, the link above will not work after ~June 2017. You will need to work along with her to get all the pieces.
My recent trip to Austria was a complete feast for the eyes. Everywhere I looked I wanted to capture the images – the layering, the lines and especially the color.
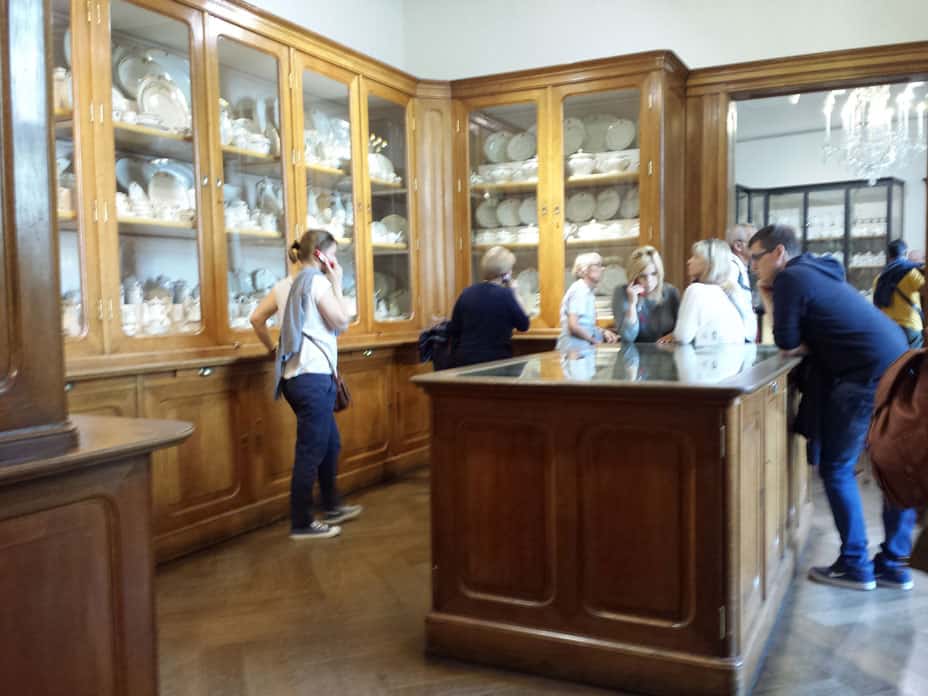
Silberkammer: pantry
It is hard to choose a favorite museum, but right now I am in love with the Silberkammer in Vienna. It is the museum of the Kitchens and Dining of the Hapsburgs. There are dishes, serveware and set tables everywhere. Above shows one of the rooms of the pantries that remain. There were several, but some are now used for other purposes. Ever since I saw the butler’s pantry at my friend Kathy’s childhood home in Upstate New York, I have wanted a pantry. Of course, the one shown above would take up half of the main floor of my house (kitchen, dining room and part of the living). To have somewhere to keep china, crystal and silver would be fantastic.
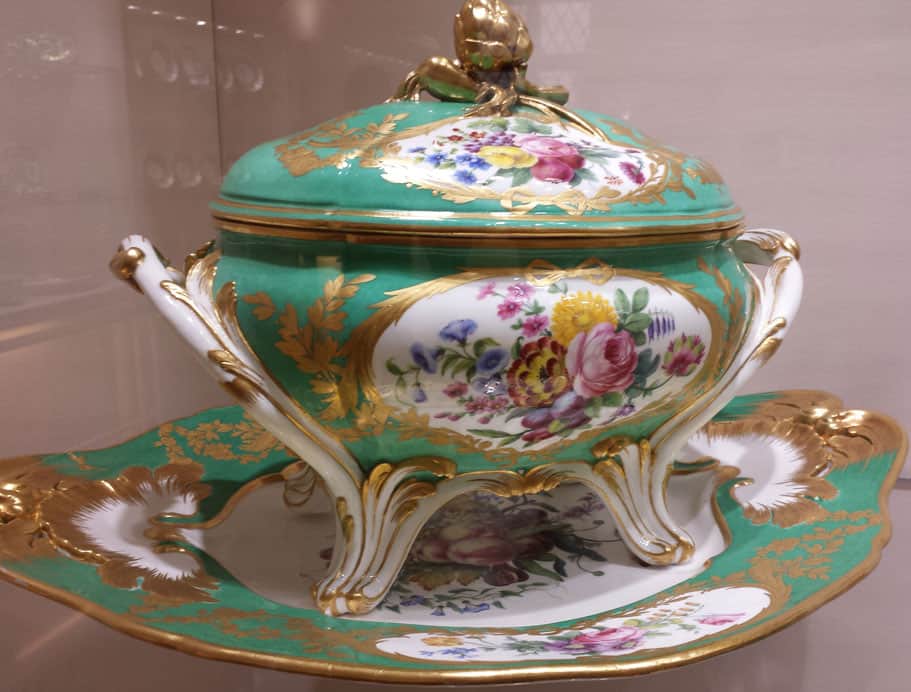
Silberkammer: Soup tureen
One of the sets of china includes a soup tureen decorated with a lovely jade color. I am using it as our color play today.
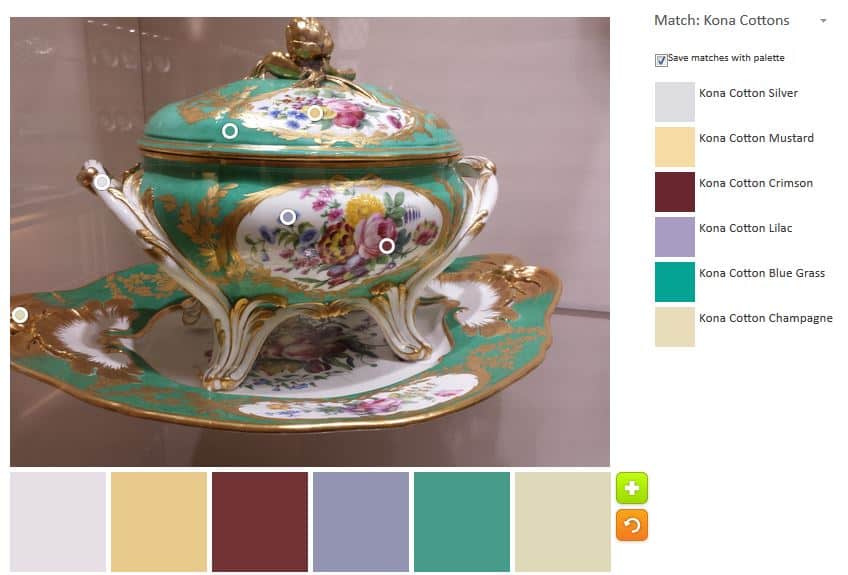
The color scheme the Palette Builder tool originated was all neutrals. That lovely green color was not included. I didn’t even save that palette. I moved all the circles around to come up with something better
Soup Tureen Palette
It is interesting that the green is considered Kona Bluegrass. I’ll have to go and look up what color Kona Jade is, if there is such a color.
Again the tool had problems with the pinks/fuschias. I moved the little bubble around quite a bit and the Kona Crimson was the only red I could get. I think the angle of the photo had something to do with the results as well.
I would definitely change out some of the colors if I made a quilt with this color palette.
Let me know your thoughts or if you make something from this color palette.
As I mentioned the other day, I was able to piece in some of the small blocks.
It isn’t a very linear or straightforward process and there is a lot of fiddling that goes on.
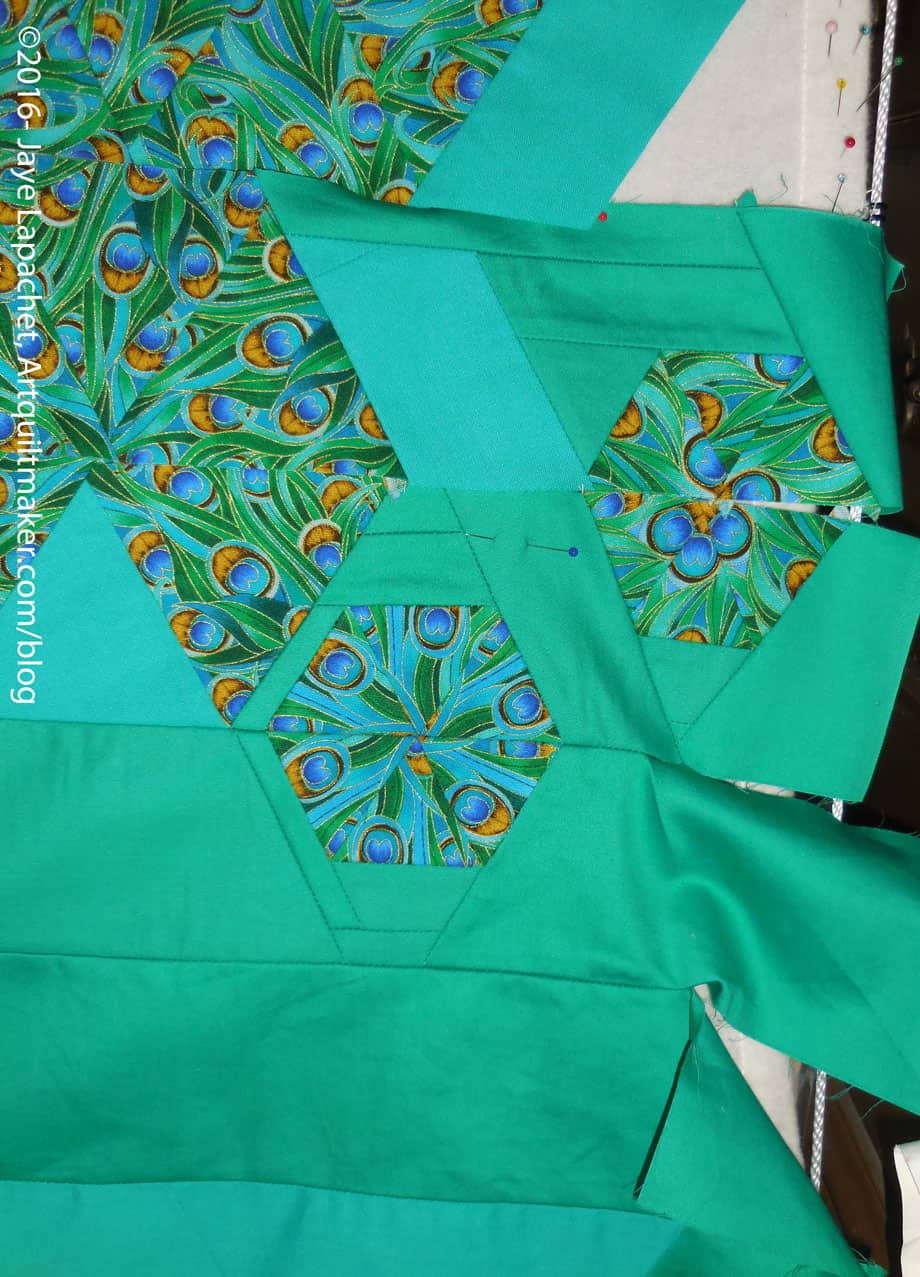
One issue I am having is with measurements. I know each row is 3.5″ wide, so I have cut solids + seam allowance to make up that size with the small blocks. I still run short and have to add other pieces of fabric. I do like the texture the added seams give the piece. However, it is still annoying. I can’t figure out what I am doing wrong.
The Peacock “border” detail
I didn’t put a small block on the end of the bottom (first) row and am kind of regretting that. I have a lot of small blocks I want to use and may need to go back and add one. However, the top right hand corner background area is pretty blank and may need some mall blocks there to lighten it up.
You can see the not all of the row ends are sewn on the right side. I am leaving the design open to add more small blocks. I didn’t do that on the left and may need to add some additional yardage to the ends. We’ll see. It may be that I concentrate the small blocks on the top and right.
I am adding different colored solids that kind of match the colors of the print fabrics on the edges and to fill in the background. I bought some solids from the line of fabric, but I have others that go with the fabrics as well. the shiny green solid you see above is one of the first fabrics I bought when I made my first quilt. I have been keeping it all this time and I think it is the right color for this piece.
I bought a lot of black with the intention of using black for the entire background. While I need to drape a piece of black up on the right-top, I decided that it will probably make the quilt too depressing. I am also thinking of using a variety of solids.
The dark blues at the top are ok, but the lavender might be too light.
Last Sunday, I took some time to visit PIQF, the Pacific International Quilt Show put on by the Mancuso family. It was, again held at the Santa Clara Convention Center. I was pleased that there was no 49ers game (the stadium is across the street) as I had no interest in fighting THAT traffic.
It was the last day of the quilt show and I could tell all of the vendors were tired. I wasn’t able to find any Aurifil #2600 50wt and found that many of the vendors were out of the most popular items.
In general, I thought that the show showed a slight improvement this year. In terms of quilts shown, I found them brighter and more cheerful.
detail of Ophelia by Marilyn Farquhar, Heidelberg, Ontario, Canada
The machine work was still excellent and quiltmakers seem to continue to push the boundaries. The Best of Show was someone new this year, which also pleased me. There were new vendors and some vendors had been moved around.
The modern exhibit was really excellent and number of BAMers had quilts in that exhibit.
I saw many more Southern California and out of state quiltmakers showing than Northern California quiltmakers. I wonder about that: first, is my impression correct; second: why are more So-Cal and out of state people entering and are we Northern Californians not entering as much? I know I did not enter a quilt this year.
I drove with my SIL down to the show. She spent most of the show talking to longarm vendors. I got her take on the machines during lunch and the drives. I was really glad the show provided her the opportunity to talk to multiple vendors in one place. While she was doing that, I walked up and down nearby aisles and was able to look at most of the vendors and quilts while she got the information she needed from various longarm vendors.
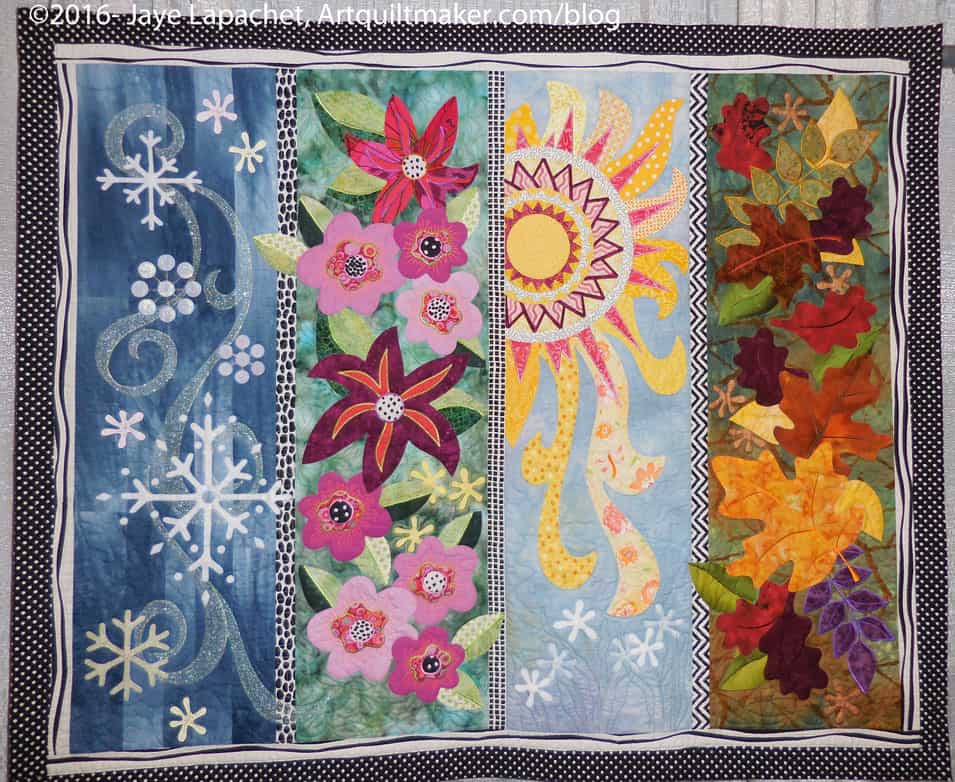
Untitled by Linda Evans of Murrieta, Calif.
I have always wanted to make a season quilt. I don’t know why, but I like the imagery of the seasons indicating the passage of time.
I am not sure I need to make a seasons quilt now as this one is really great. I love the curviness of the shapes and imagery. Of course, there were things I would do differently, so, perhaps, I do need to make one. 😉
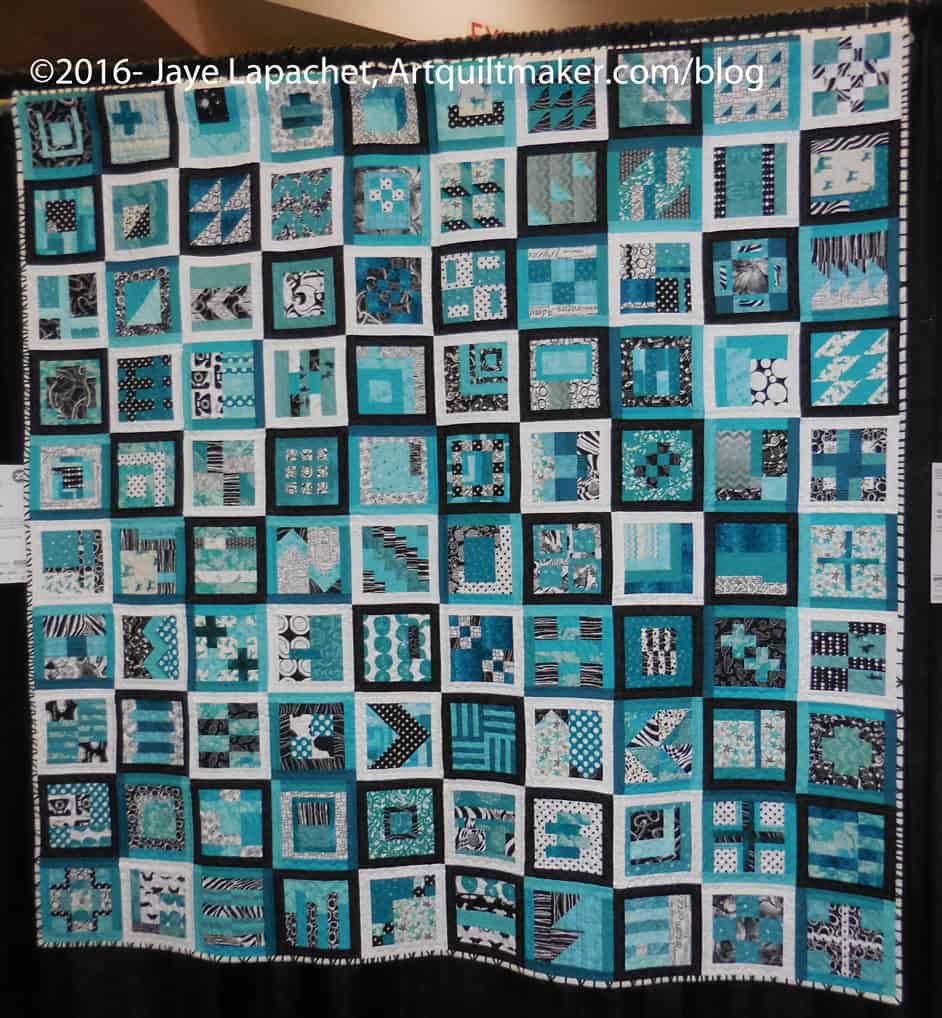
Teal in the City by Elaine Lindsay, Cupertino Calif.
I was pleased to see one Tula Pink City Sampler quilt, Teal in the City by Elaine Lindsay, Cupertino Calif. Seeing this quilt inspired me to continue working on mine. I like the way Ms. Lindsay used a cohesive color palette. The blocks really fit together. I also like the different sashing colors for her blocks. That is a good idea. Seeing a done City Sampler in person also gives me an idea of the size. It is large but not crazy large. It would probably fit on our bed, if we needed another bed quilt. 😉
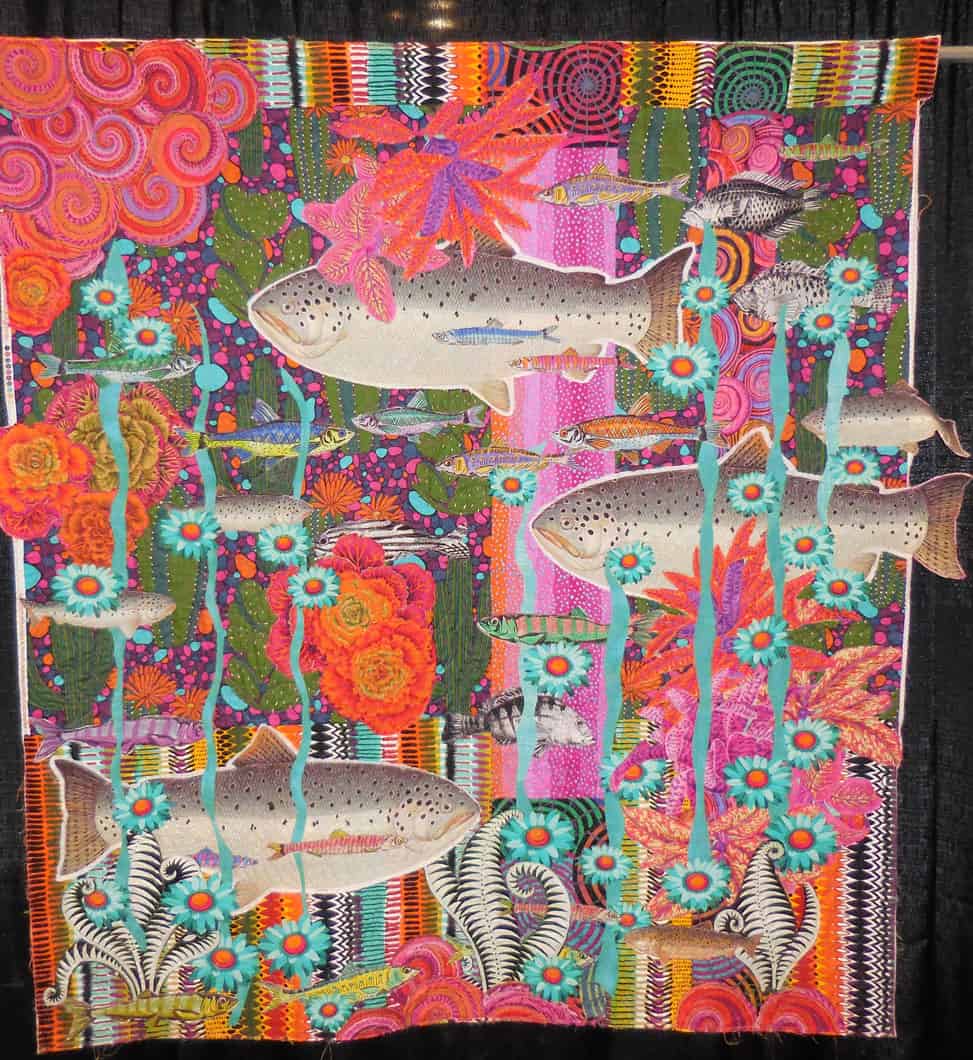
Cactus Fish, a collaboration between Freddy Moran and Alethea Ballard, Walnut Creek, Calif.
You might remember that I talked about Freddy Moran’s new ‘appliquilt’ style of work. I was pleased to see one of her quilts, Cactus Fish, a collaboration with Alethea Ballard, in this style at the show. It was one of the quilts she showed in July. I just can’t remember if it was finished at the time or if it was still in progress.
One day isn’t really enough. I walked down a couple of rows twice, once by myself and once with SIL. I found myself not remembering the quilts I had already seen. I consider myself someone with a good visual memory. I may need to rethink that. There is a lot of visual stimulation at a quilt show and even I couldn’t take it all in in one day.
Some themes I noticed:
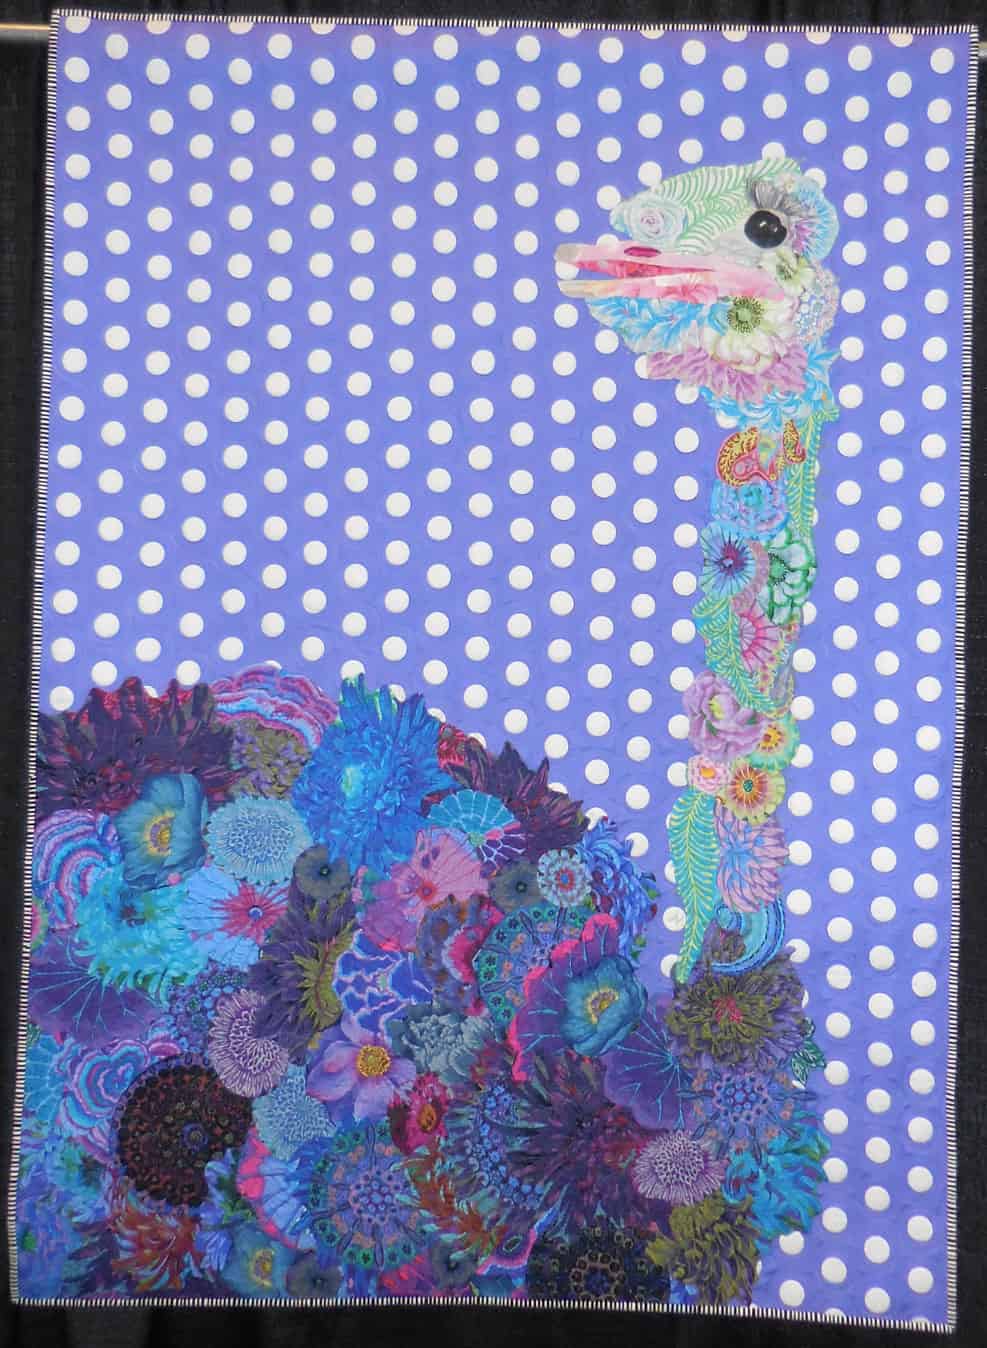
several Peacock quilts
Ophelia by Marilyn Farquhar, Heidelberg, Ontario, Canada
secondarily, a number of interesting animal quilts – not in a photorealism style, which I appreciated
fewer dark landscape quilts
less photorealism
fewer art quilts, though the ones I did see were interesting.
I noticed a number of brighter, more whimsical quilts
There was a lot more negative space, even in quilts not in the Modern exhibit
Some improvements the Mancusos could still make:
white drapes instead of black would lighten up the whole show.
continue to vett vendors and replace out of date/boring vendors
more modern vendors
require vendors to have new fabrics, not just old stuff they keep in their traveling kit
limit non-quilt supplies vendors
Of course, I am not a quilt show organizer (though I am happy to consult!) and I am glad to have such a large show so close to me. It is easy for me to say what I think should be changed, but it is not always easy to make the changes. Incremental changes are easier to make and less of a risk. I wish they would publish year over year attendance records, so I could see how the changes they made this year affected attendance, though they might not see an increase until next year.
PIQF 2016 Purchases
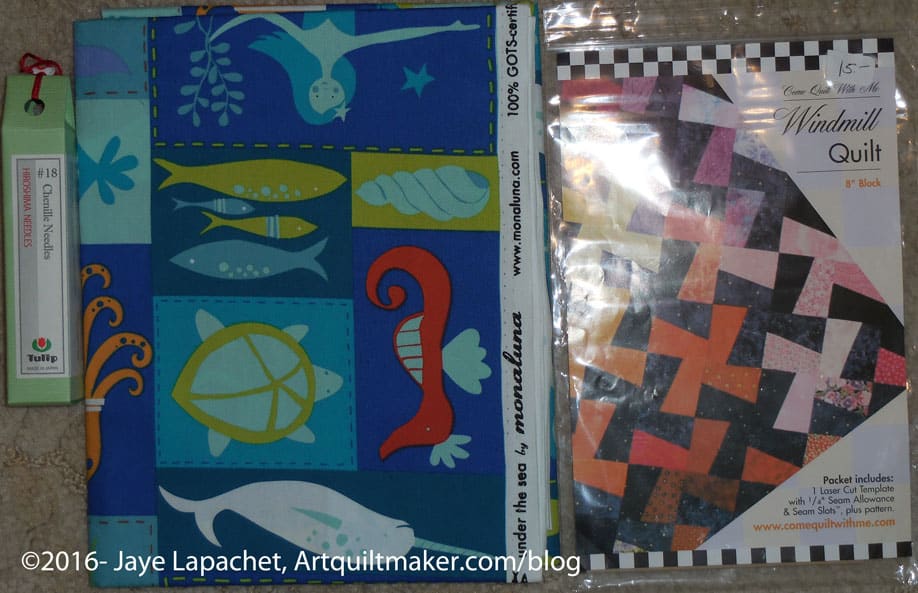
I bought a few things, but not the items that were on my list. The fabric will be a quick quilt for the grandson of one of my Austrian friends. I want to finish (work on??) the Windmill quilt. Since I still have not been able to find the template I bought another. Silly, but necessary. I also am always on the hunt for sharp needles with big eyes. I bought another Tulip brand pack to try them on Under the Sea.
As I mentioned yesterday, I needed a lot of leaders and enders to help me keep the layout of The Peacock in order. In addition to other projects, I made a number of donation blocks.
I picked up a few blue kits at the guild meeting Saturday. My intention was to sew them “sometime” during the next month. Quickly, I realized that I would need leaders and enders while I pieced The Peacock. Very quickly I had the kits out and blocks partially made.
Donation blocks – October 2016
Soon after that, I had 4 blocks made from a combination of my own fabric and the kits. These join the two I made before my trip.
I made several blue blocks with the intention of putting them together into a quilt. I don’t have enough yet, but will will soon. I think I mentioned that the Peacock requires a leader/ender between each seam. One half of the block is in one row and the other half is in the row above. It requires another piece between each Peacock seam so I can keep the different blocks in order. It is a quilt where I will get two quilts out of the piecing.
Red and turquoise donation blocks – October 2016
Previously, I made red and white blocks for a different charity quilt. I like having color themes even if the reds (or whatever colors) aren’t exactly matchy-matchy. I have enough red blocks to make a charity quilt, however, I want to try something new and am waiting to figure out some match and layout before I piece the blocks together. I am still making red blocks as I can pair them with black for boys.
I spent some time on Saturday night and most of the day Sunday trying to make progress on The Peacock. I now have four rows sewn together in a chunk. A fifth is the start of a new chunk.
The piecing is very labor intensive, though not as labor intensive as Y seams. The good part is that I have to put a leader/ender piece between each Peacock seam under the machine. This will equal a lot of additional blocks or, perhaps, a quilt top.
I started to put the small blocks into the ends of some of the rows. That piecing is fiddly and I haven’t gotten all the measurements figured out. Still, I am pleased that I have been able to incorporate those small blocks into the border as I piece. I have more to piece in and have to figure out how to do that.
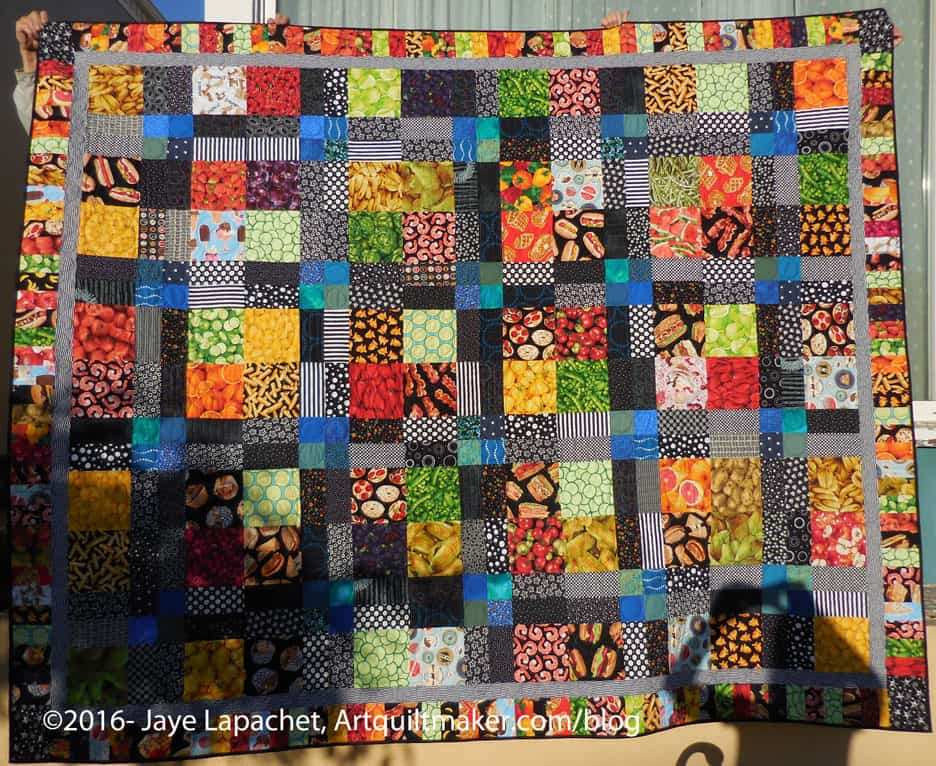
I finished this quilt at the Labor Day Craft Night. This shows the power regular sewing with people who are expecting you to be there.
This quilt is for my nephew who is now a freshman at the University of Michigan. He will need it when winter sets in, California boy that he is.
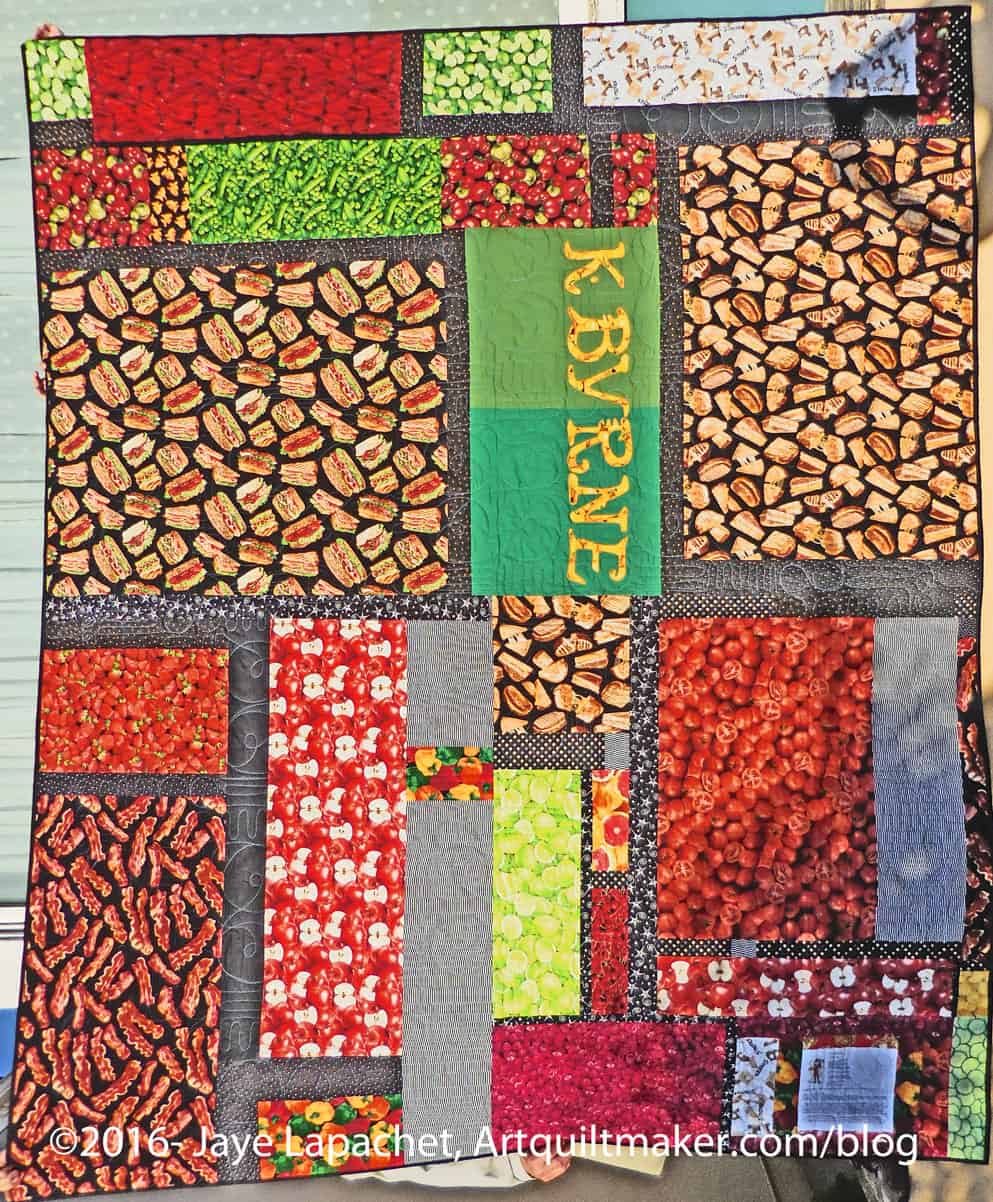
Food Quilt #3 Back
I am pretty sure I am done with food themed quilts. I made an effort to use most of the larger pieces on the back and think I just have a few smallish (up to fat eighth size) left. Someone at the guild asked for the scraps and I may give them to her. I have a few years before the next batch of nephews go off to college and all of them already have quilts, so I don’t feel obliged to make another. However, an excuse to make a quilt is always tempting. For now, I need to focus on the nephews who don’t yet have quilts. One in particular is ripe and I have no idea what to make for him.
The photo isn’t great as I had to take the photo outside late in the day, so the shadows disrupt the look.
Once again, I used the palette builder to…well… build some palettes for you.
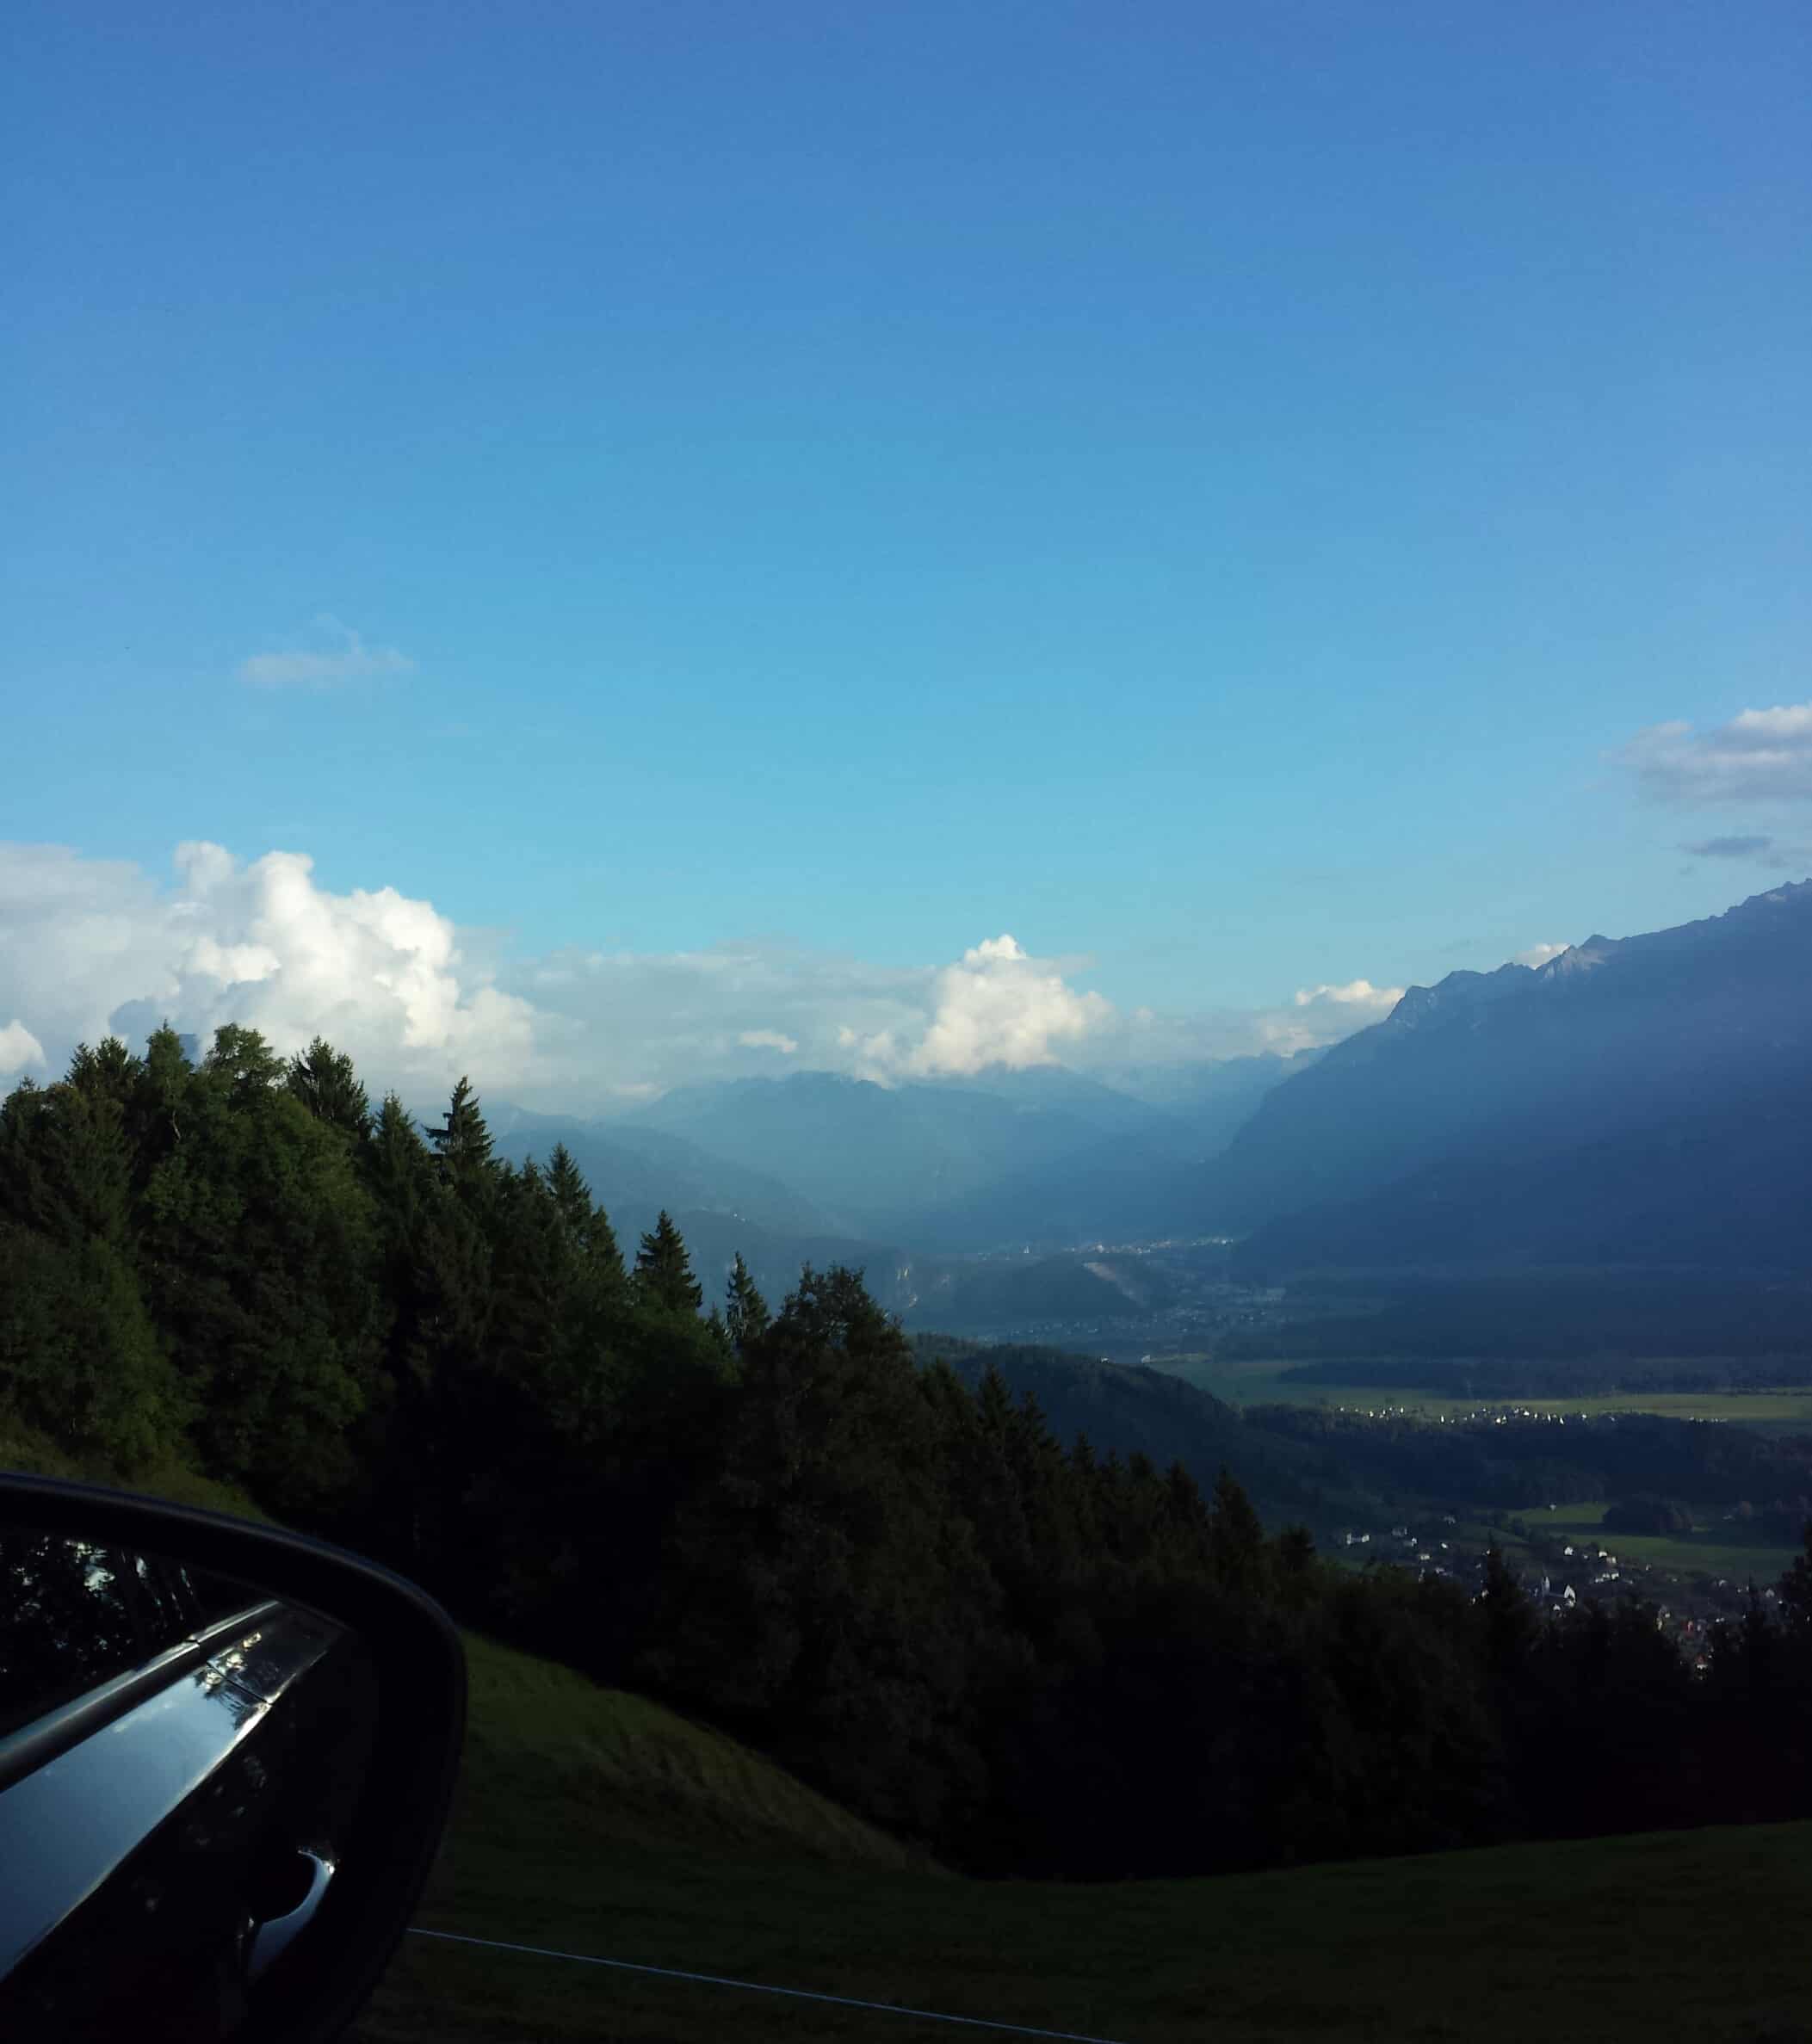
Mountain photo
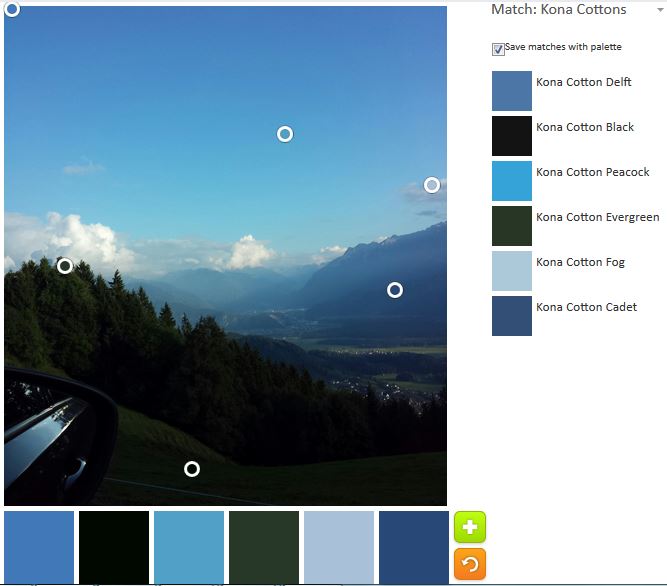
The photo is a photo I took from the car window as my friends drove me around GroBes Walser Tal in Vorarlberg, Austria. I chose this picture deliberately because there were a lot of blues and I wanted to see if the Palette Builder could deal with them.
Mountains & Sky
I am pretty pleased with the palette the tool built. I didn’t even move the circles around.
Mountains & Sky 2
I like some of the colors in the second palette, but I am not as excited about it overall. Peacock and Glacier are two of my favorite Kona solid colors. The others are ok.
This is a fun tool, as I have said, and I could make 50 more palettes with this one photo. Go and make a quilt with this palette.
I spent some time over the weekend working on the Stepping Stones. I am ready to just piece without thinking. It never seems to work out, though. I always have to do some deciding or planning or math.
This past weekend required all three. As you might remember from my last update, I had some HSTs to make and was putting it off. I finally made them when I needed some easy piecing. I made a bunch so I would have some choice when I made a few more blocks to complete the top. After I made the HSTs and completed the leftover partial block, the question of the border came to mind.
Stepping Stones Revised
I sat down to look at the EQ plan I had and found that I hadn’t completed it. I wasn’t 100% happy with the border I designed for the original Stepping Stones quilt. It is in no way terrible, but I wanted to finish off the groups of squares (red 4 patches set in groups of four, above).
Stepping Stones, EQ version
I played around with EQ and came up with a new design. I am not sure it is the final for a couple of reasons:
I don’t know that the groups of red 4 patches in the corners add anything
I am not sure about the blue/green HSTs in the very corner. They add a little something, like breaking up a series of squares, but they don’t have any reference anywhere else in the quilt.
Stepping Stones #2 Border Trial
I am absolutely sure that I am happy with the red points that go into the border to finish off the scrappy lines of red that are made of HSTs throughout the quilt.
I want to get the border settled so I can start putting the whole top together via chunking. For chunking, I need to start in one of the corners.