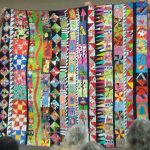
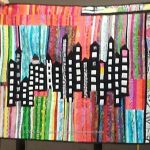
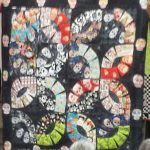
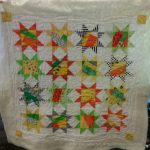
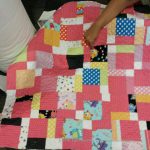
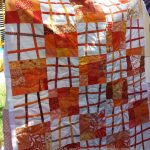
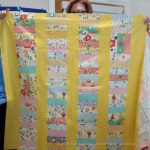
I have been collecting a random assortment of photos of Pulse quilts as I see them posted on Instagram. You can see many, many more by searching the hashtag #quiltsforpulse regularly.
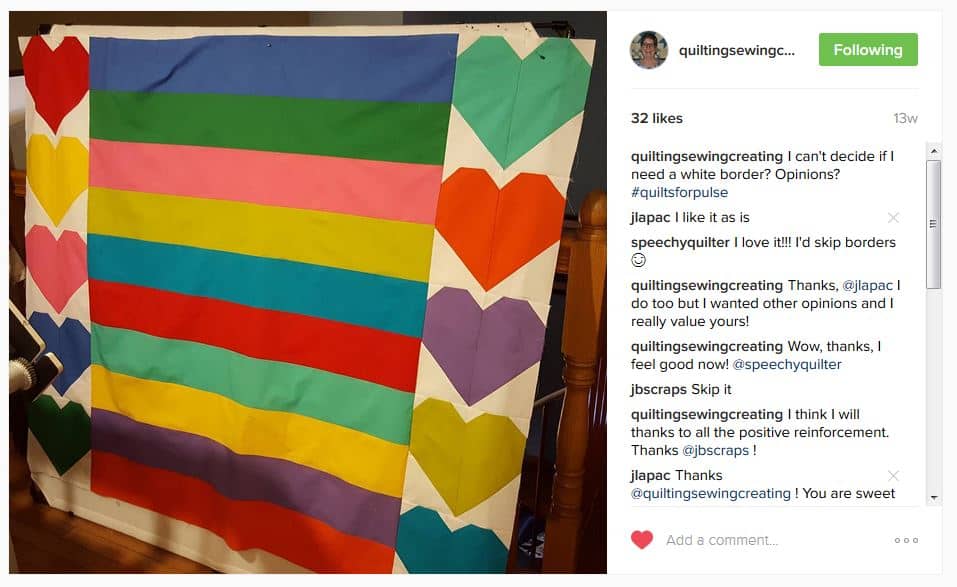
Pulse by Kathy Matthews
Kathy Matthews posted hers. Kathy did a really nice design branching off from the original heart pattern. Kathy’s layout would be a great baby quilt or off-to-college design as well. I can imagine it in blacks and reds. My mind is spinning with the possibilities.
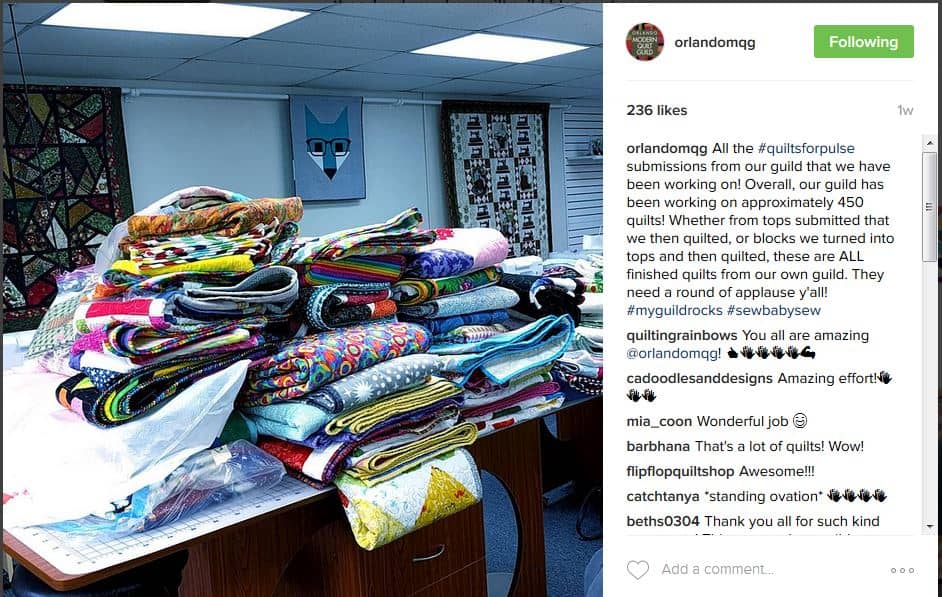
Pulse Quilts waiting for distribution
The Orlando Modern Quilt Guild updated their meeting minutes and included a detailed description of their Pulse Project progress. The scale of this project boggles my mind. I am amazed at what they have accomplished. It is especially moving when the numbers of quilts and what they did to blocks and pieces they received is taken into consideration. The outpouring of love is amazing.
The guild is on schedule and has begun to give out some of the quilts. Click on the hashtag above to see some photos of one of the ceremonies.
BAM Pulse Quilt
BAM Pulse Quilt
BAM sent off two quilts recently and Cheryl posted photos of them.
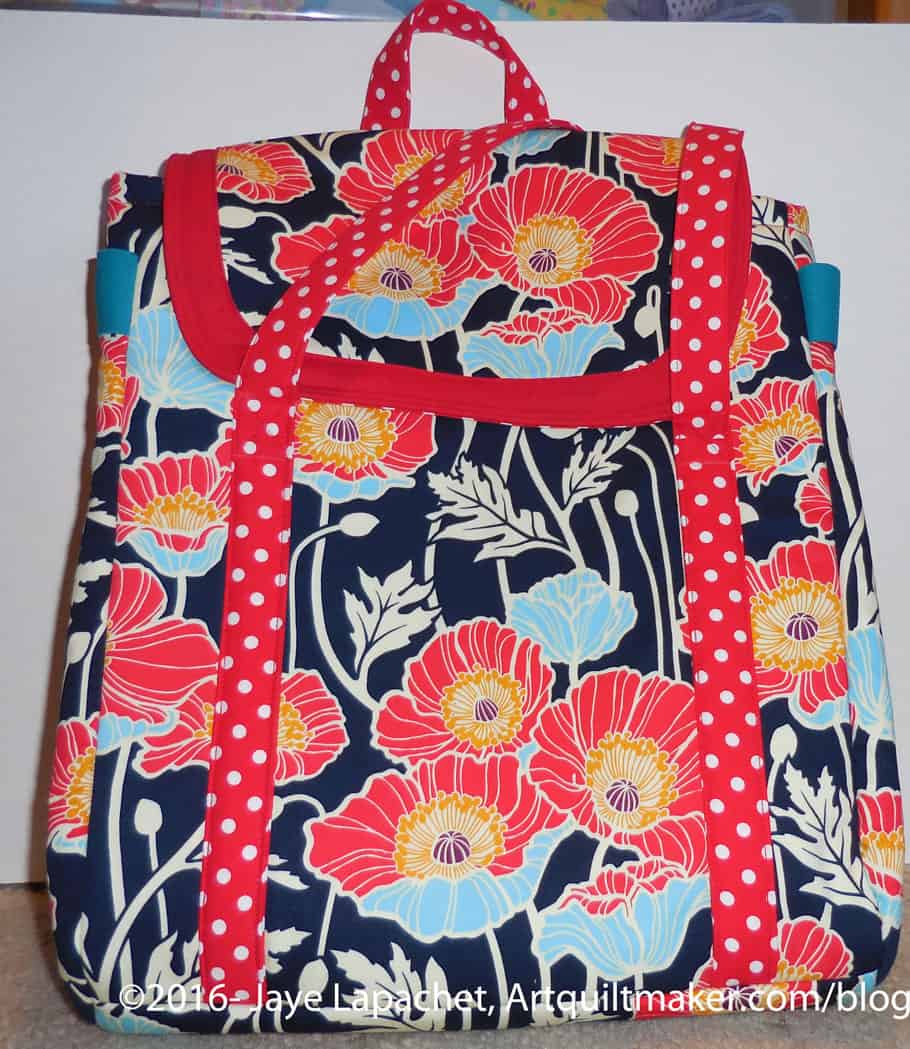
My third Petrillo bag has been on the To Do list for a long time. Before I went on my trip, I decided to sew it, as I mentioned when I enumerated the bag hacks. I also worked on it, because the Peacock was acting like a beast and I wasn’t feeling the quilt love, in general.
I really was almost done cutting it out. I felt kind of stupid the whole time I finished the cutting for letting it lie so long. It took me a few days to sew it, longer than it should have, because I had to rip a few seams and make a new main flap.
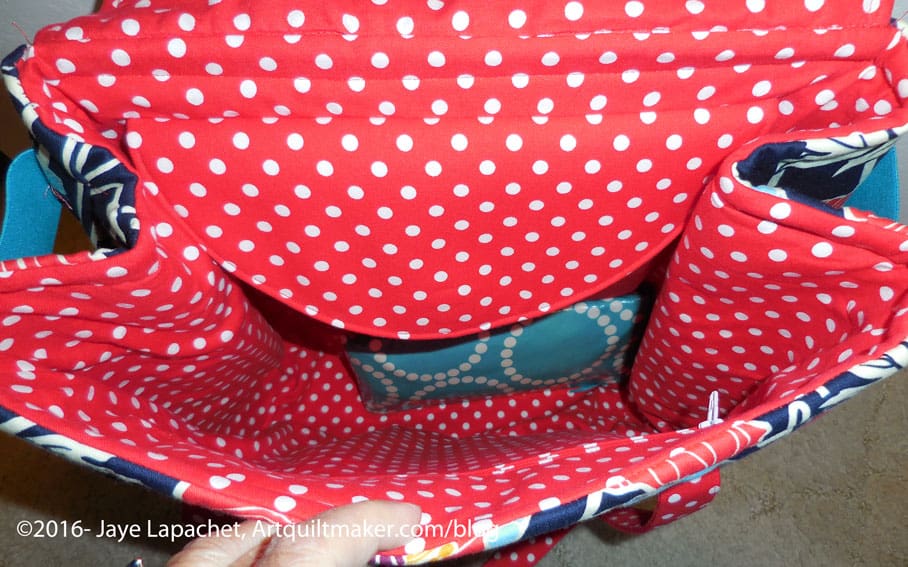
Petrillo Bag #3 Inside
I have used it a few times and am linking it. I haven’t filled it to overflowing, so I don’t know if it will really work for a long conference where I can’t easily return to my hotel, but so far so good.
The hack I sewed to the stabilize pocket makes a huge difference when I carry things around. The zipper pocket doesn’t sag. I am mad at myself for not adding vinyl to the bottom. I have to worry a lot more about where I set it.
At the end of July, I went to a Freddy Moran lecture at the San Francisco Quilter’s Guild. I am not a member, but they do get good speakers, so I try and go once in a while.
End of July? I know. This post has been laying around for awhile.
I like Freddy’s work because it is bright and I like her work because of her collaborations with Gwen Marston. I have heard her speak a few times and have dozens of quilts from the books she has written on my “to make” list. Actually, I want to make quilts as bright as hers more than I want to make the actual patterns. She inspired me to use dots and colors as neutrals.
Freddy is getting quite old (approaching 90) and her husband died last year, which sent her into a tailspin. She talked about the changes in her life affecting her work and methods in the lecture.
Freddy started out her quiltmaking “career” with a sampler quilt, but didn’t feel she was very good at the technical aspects of quiltmaking. She didn’t start until she was over 60 and her kids were grown, which she thought was part of the issue. At some point she made a house block and that sent her off in the direction of multiple house blocks. She made a number of house quilts and found that bright colors were what she liked. She doesn’t think she is particularly good at technique and now doesn’t even sew much.
Freddy Moran Log Cabin
Freddy Moran Basket Quilt
Freddy Moran Row Quilt
Freddy showed a number of quilts, which look different from her house quilts. I could still see the ‘Freddy touch’ when I looked at them as well as the influence of her collaboration with Gwen Marston. I especially like the basket quilt. I’d also love to make a row quilt like hers.
Freddy Moran’s Applique’
She is doing a new collaboration with her quilter now where she glue sticks fabric and motifs to a background fabric and then her quilter “appli-quilts” the pieces to the background.
She has other new pieces which remind me of Mary Mashuta’s “Pushed Neutral” technique, which was so intriguing when I started making art quilts.
Freddy Moran New House Quil
Freddy Moran Double Wedding Ring
I really enjoyed the lecture. I wish I could go and spend time with the various quiltmakers I admire and see what they think of my work.
I took a photo of the last few Flying Geese I made before I went on vacation.
This is a cheerful bunch and I am pleased with them.
My next step is to make a block, per my design, and see if it works. The Round and Round pattern is a genius way to use the Friendship Star and I really like the pattern. Combining it with the Flying Geese will be an interesting challenge.
Yes, I am going to torture you today. I am not really very sorry. It is helping me to remember my trip.
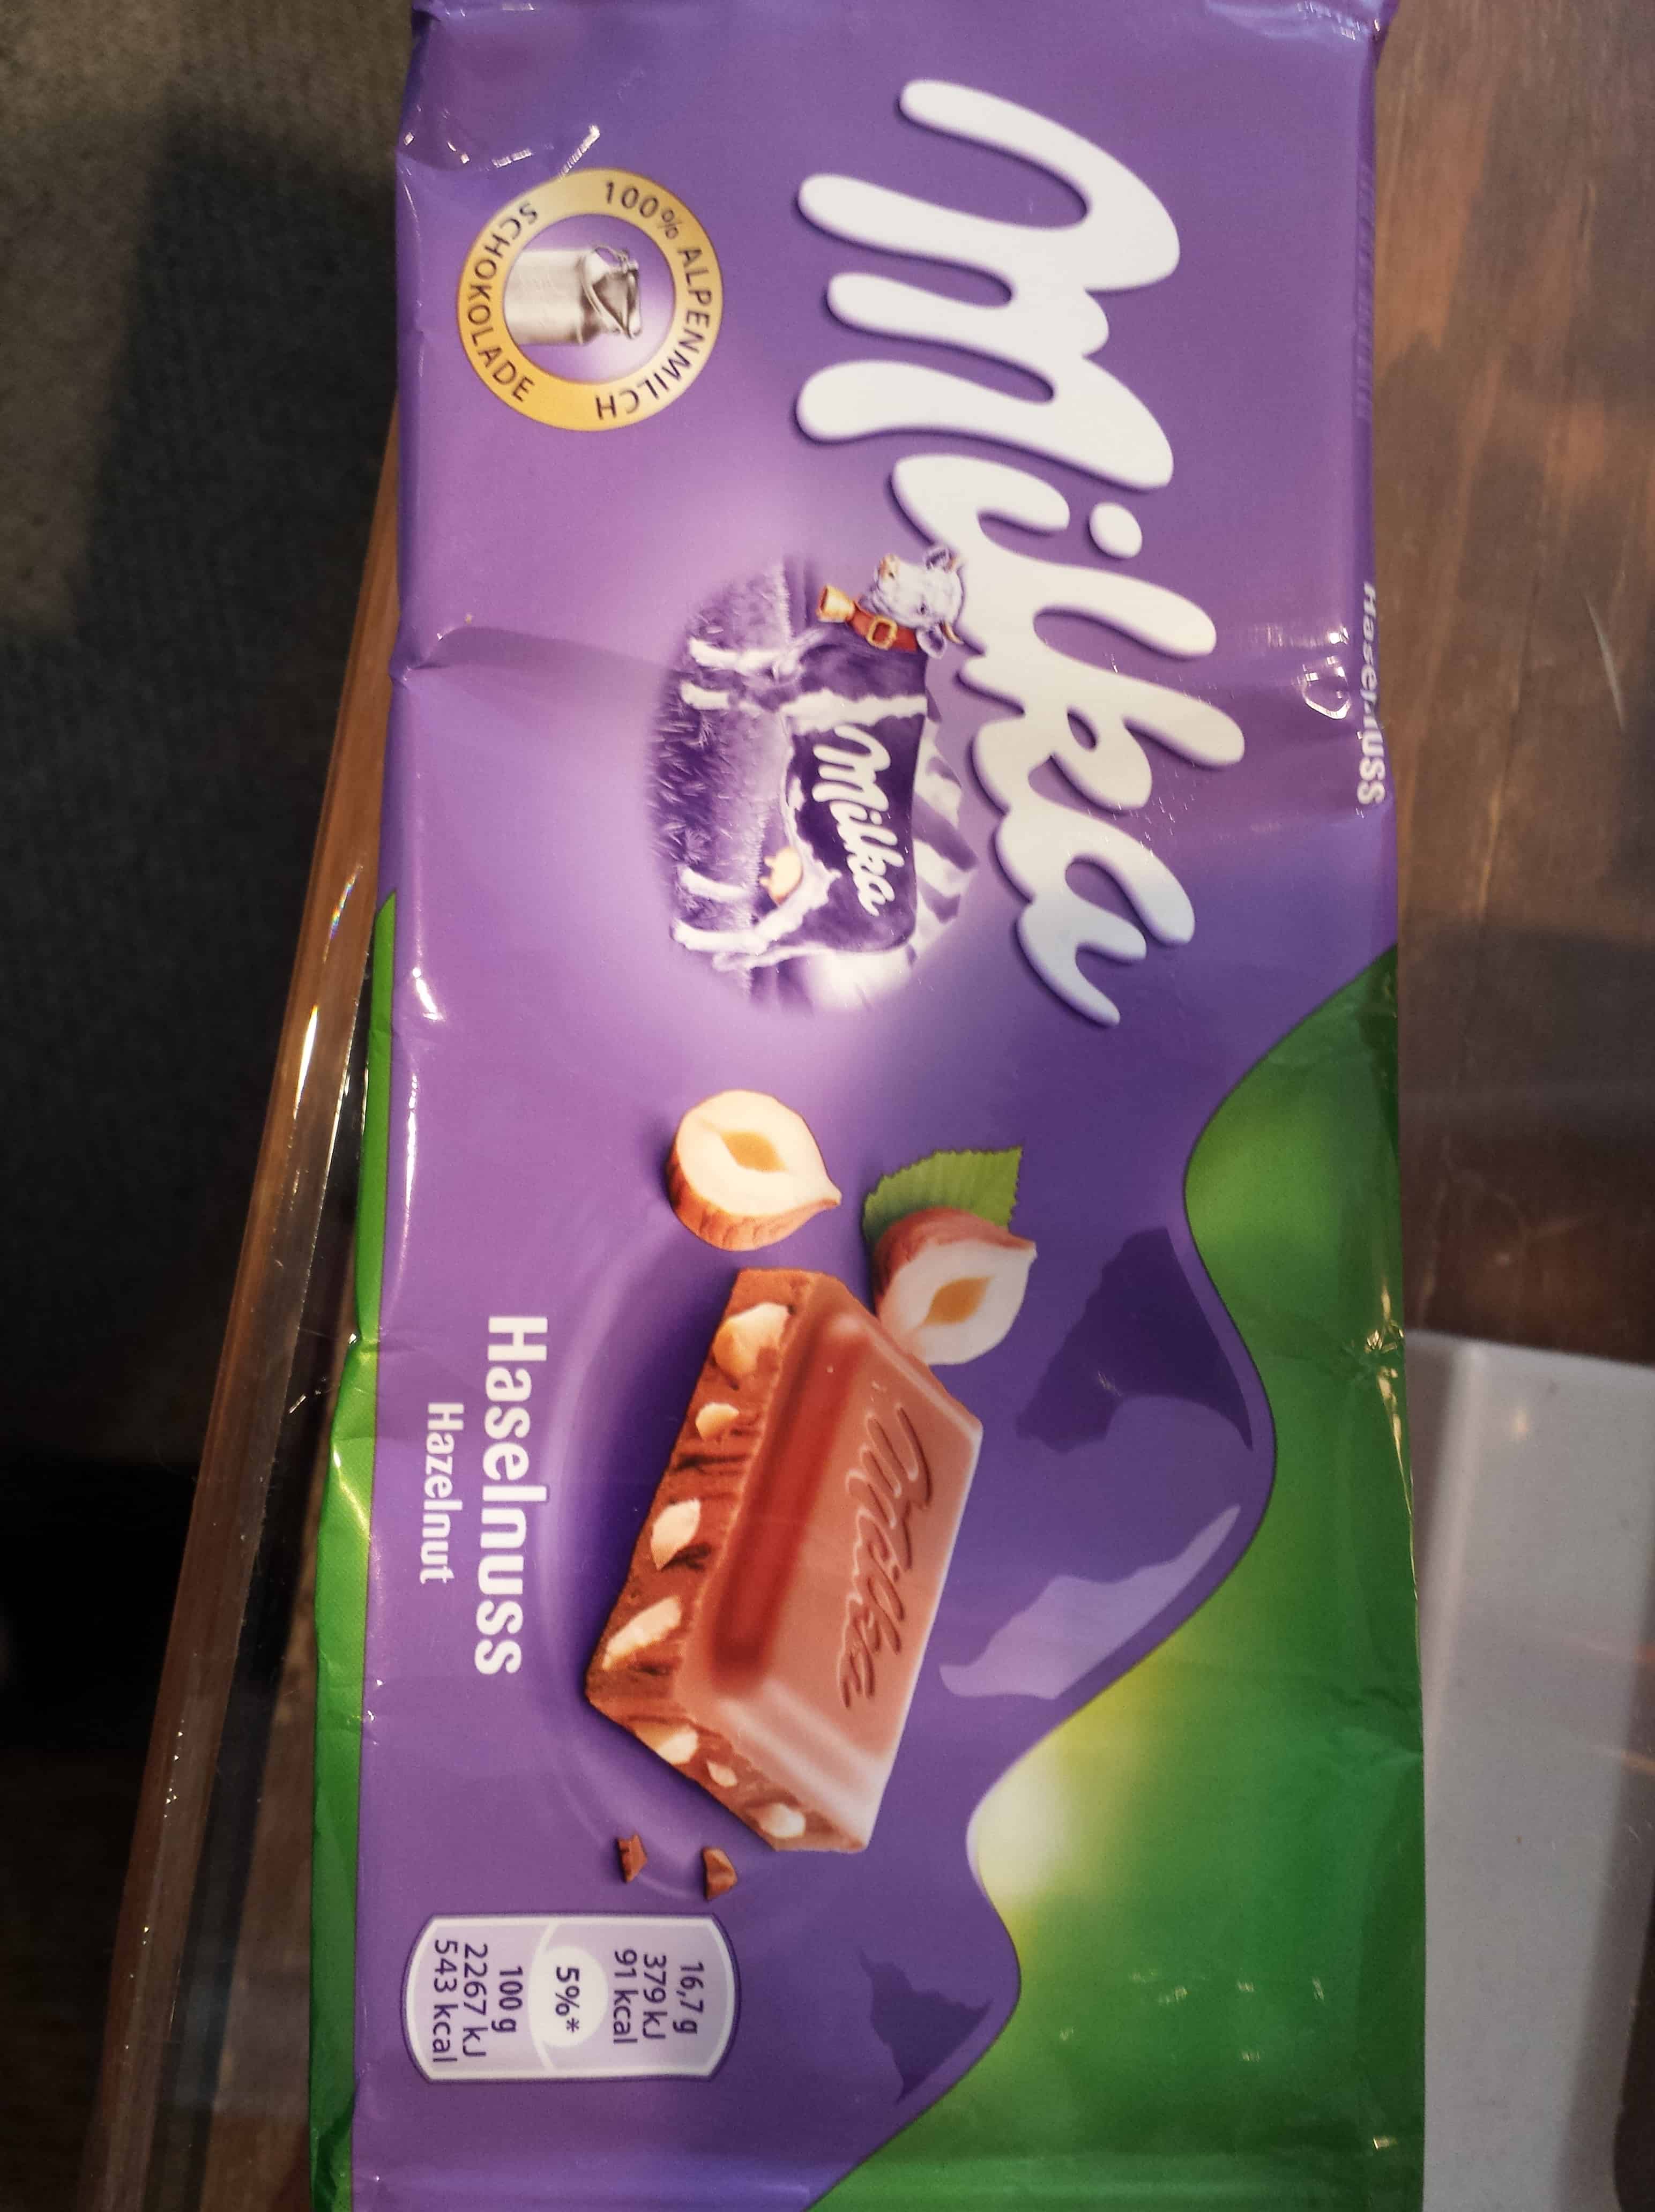
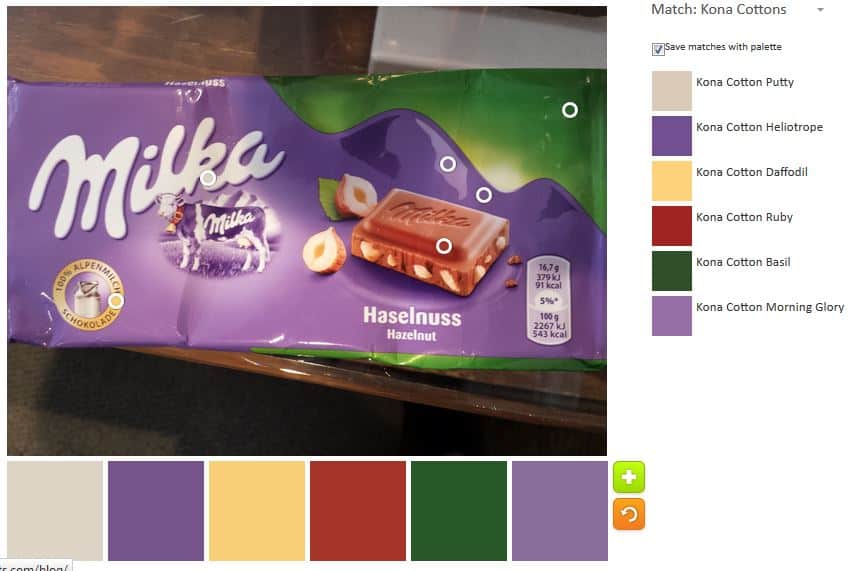
Milka is a brand of chocolate sold in Austria. Occasionally, I can buy it at World Market, but not regularly. It might be sold elsewhere, but it is not widely available here in the US. When I visit friends in Austria, I indulge.
Yes, chocolate snobs are sticking their noses up, because this bar is made from milk chocolate. I am also a dark chocolate fan, but this milk chocolate is no Hershey’s. It is so creamy and rich that it calms fretful children and makes grown men weep when they eat it.
Now that you are frantically rummaging through your desk drawers looking for chocolate crumbs, let’s get to the ColorPlay. 😉
I took the wrapper and ran it through the Palette Builder tool. If you still haven’t tried it, get some colorful photos and have some fun.
Milka ColorPlay
I didn’t crop this photo, but when I ran it through the tool, I moved the circles off the background and focused on the wrapper. Yes, I can control the colors to a certain degree, as you know, by moving the little circles around. The palette above is a little heavy with those particular shades of red and green. Thus, I decided to make a new palette and try to make it lighter.
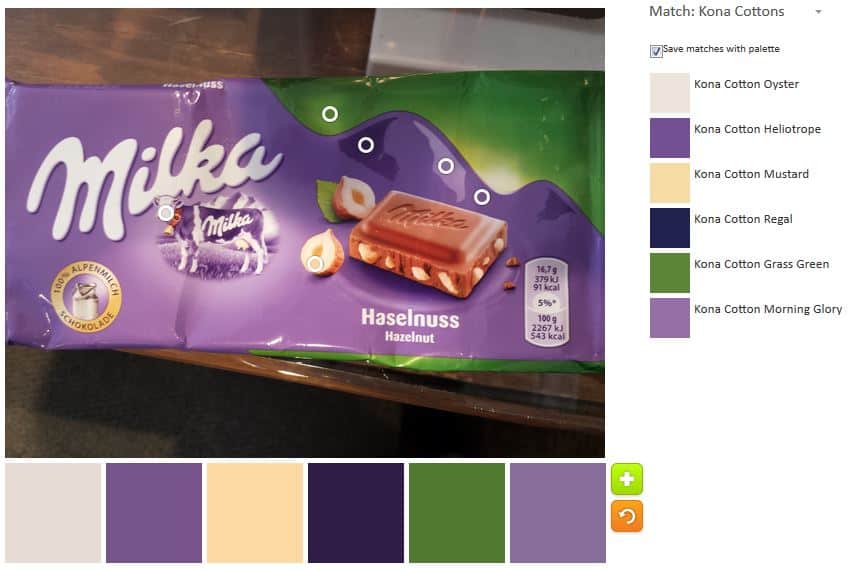
Milka HaselnuB 2
Perhaps the Daffodil and Ruby, in the middle photo above, add to the palette in ways that I cannot imagine without sewing. My favorite, however, is the second palette. Yes, there is a lot of purply tones, but it feels lighter and fresher to me. What do you think?
The whole idea is to give you ideas for palettes for your quilts, so let me know if you create a project with either of these palettes.
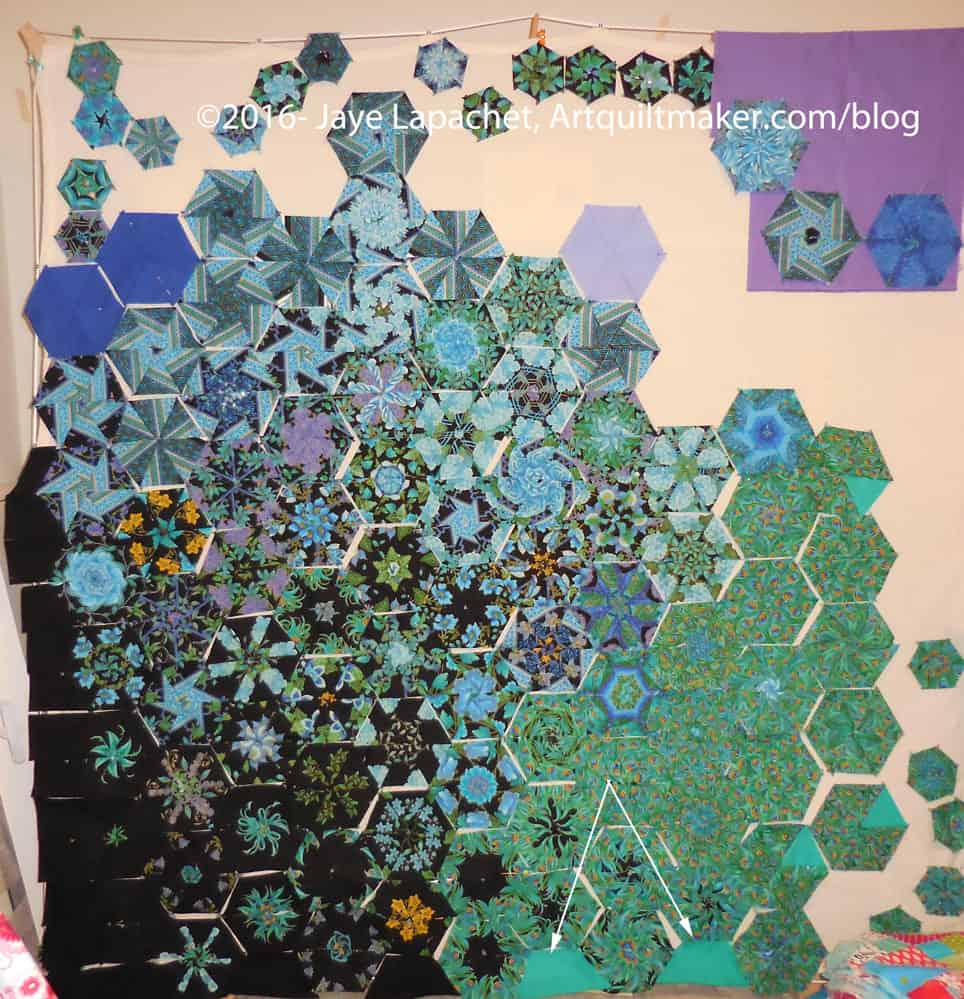
During the past little while, I have been flinging curses at the Peacock as it sits on my design wall, taking up space and glaring smugly at me.
No more.
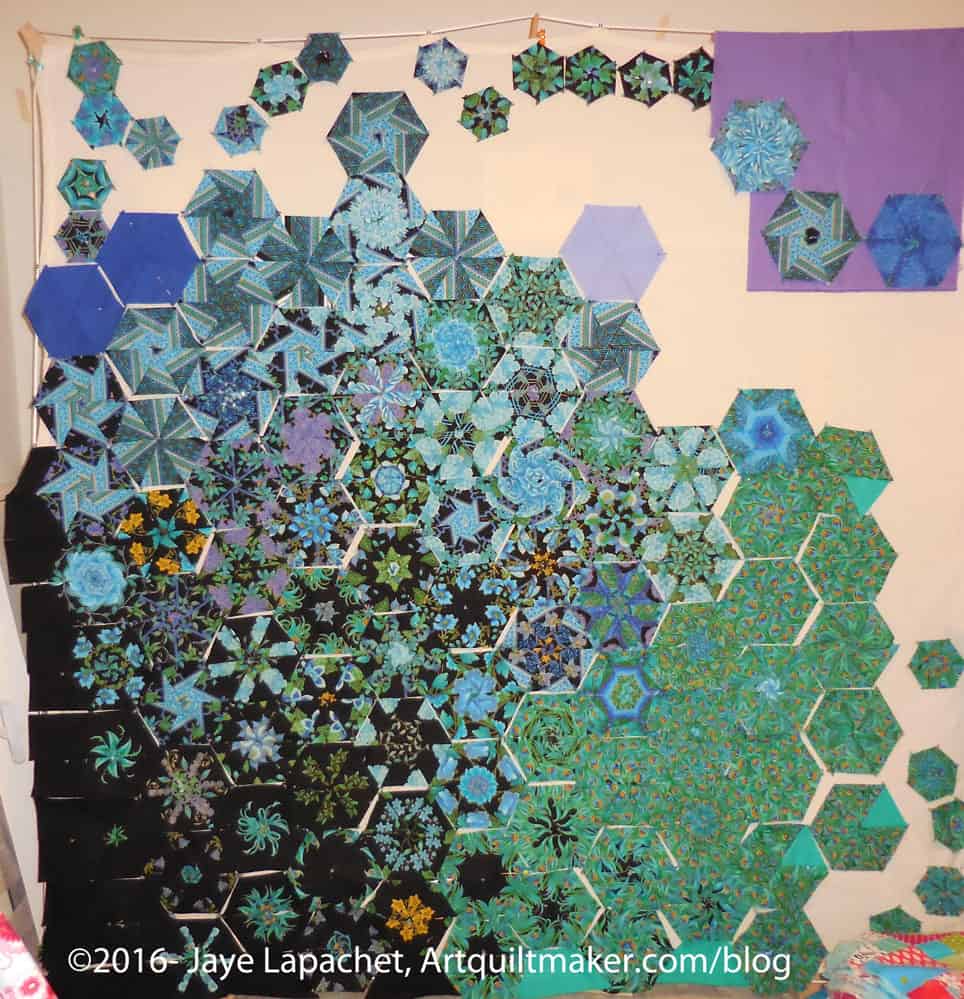
Peacock on Sunday
I made two cuts on Sunday and was off. With those two rotary cut strips, everything changed. Finishing the piecing actually became possible…. no probable. I only had time for a little work on it, but the piece progresses. I am snatching bits of time where I can and making some progress. It is amazing how something can change so quickly. I do think that, more importantly, my attitude about the project changed.
First, I had along rest with absolutely no sewing. The closest I came was visiting a craft shop that carried quilt fabrics and magazines.
Next, solving the problem of squaring up the piece began to rumble around in the back of my mind until I had a solution I wanted to try. Two cuts and I realized that what I wanted to do would work and it was actually a reasonable idea.
The idea was to cut 3.5″ strips (same width as half one of the blocks), cut a 60 degree angle on one side and sew it to the edge blocks. These short strips work. The black, with which I have started, blends nicely in with the very darkest blocks.
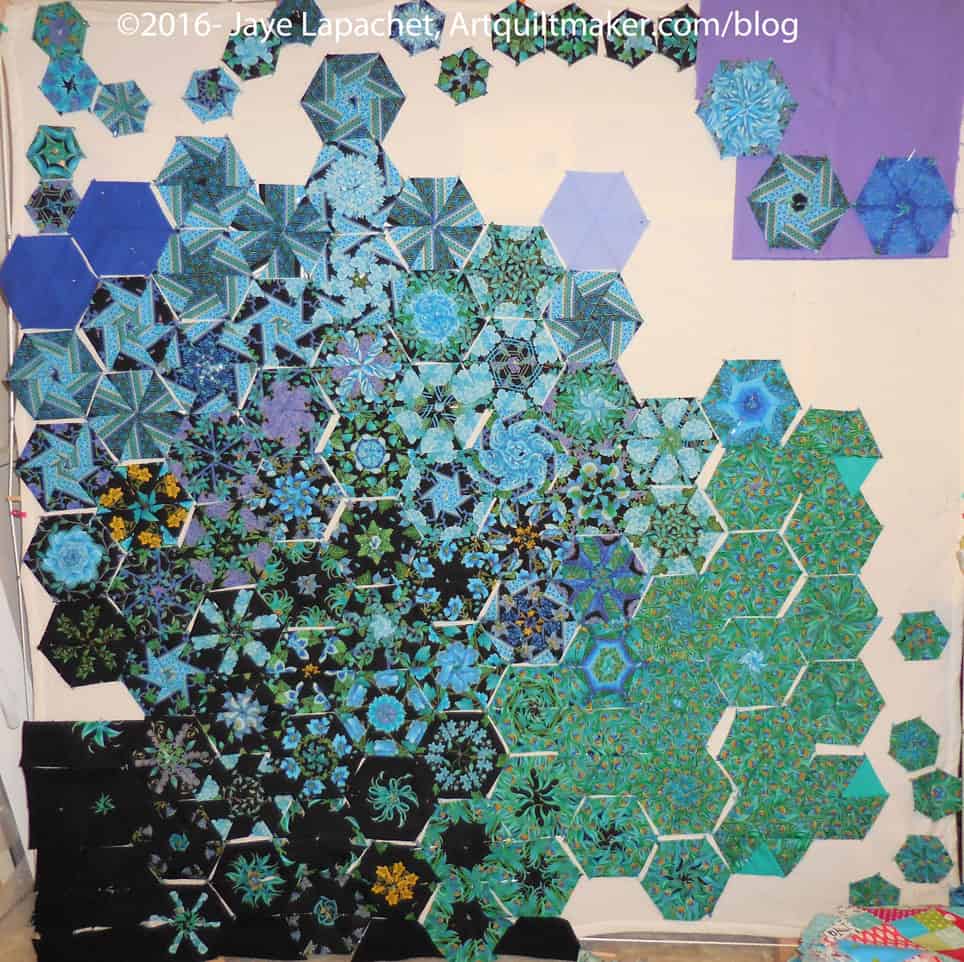
Peacock: More background added
Third, I started to move the blocks around after taking some photos. Some of the blocks looked out of place in the photos. Moving them make the piece come together better.
In the photo, right, I have moved some of the solids around to try and blend the background a little better. I haven’t tried super hard yet and I know I won’t be able to blend as well as I do with the Fabric of the Year quilts, but I want to give the impression of a bit of blending going on. That I immediately started to blend the blocks into an Impressionist look tells me I have much more color blending in my future.
Peacock: Exchanging Black for Green
Most importantly, I have changed out the black on the bottom and used green (see arrows at the bottom). The black was too jarring near some blocks that had no black. The green isn’t a perfect match to those feather blocks, but it is the green I used in the other feather blocks.
I am also trying out some of the blues at the top, but I am thinking they may be too dark and I might try some light blue. I have a stack of solids I can try. I just haven’t tried very hard to find the right one yet.
I plan to have a sort of irregular line of blocks, as the quilt looks now, though the background will make the quilt square. There are still some unknowns. I don’t know what the quilt will look like exactly. I am not sure how I will make the small blocks float around the edges as you see them now. I will let it mull in the back of my mind and see what comes up.
Rhonda and I ducked out of the BAM Retreat to attend the CQFA meeting. They are often conflicting at the moment, which is a challenge. I didn’t want to leave the retreat, however I have missed so many CQFA meetings that I felt bad about missing another. Since Rhonda was going, I decided to go for the meeting, but not stay for the workshop.
Despite my perpetual To Do List item to make ATCs, I didn’t make any. I wasn’t the only one. Poor Virginia had nobody with whom to exchange.
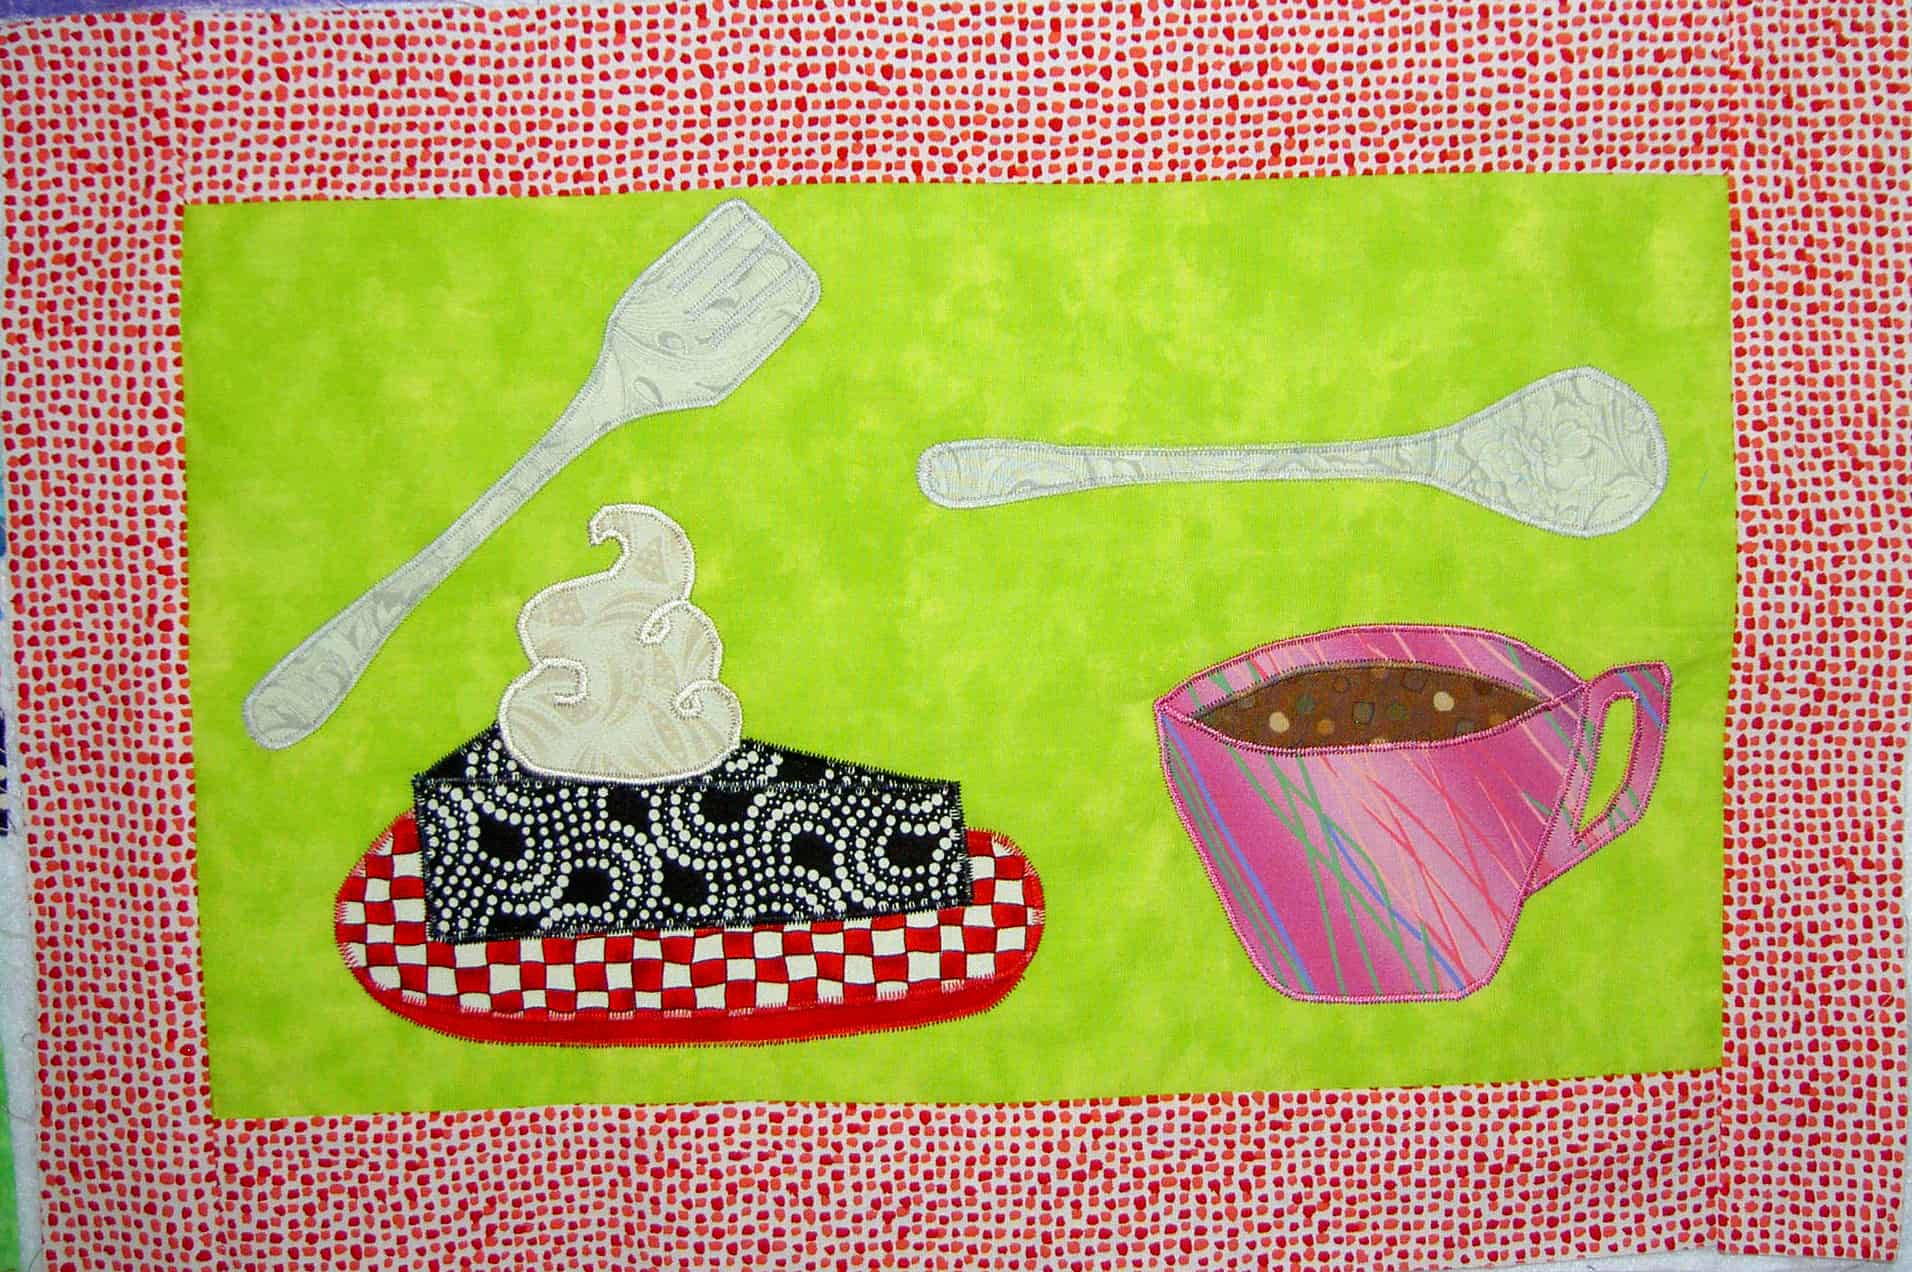
Tea in a Cafe
One of the most exciting things to happen to other guild is that there will be a show either in July 2017 or in 2018. The theme will be “In Conversation.” I immediately got a flash of an idea in my mind and drew it out in my journal. It is loosely based on a picture I took in Austria.
The picture is just the start. I want to add in some hands. I don’t know the angle yet, though straight on sideways or straight from the top would be easier to draw. I do like the angle shown in the picture, but I don’t know if I can do it credible justice. My UFO list is creeping up, but I am excited about this project and wonder if I can get started on it and get it to a good point before I lose interest?
Maureen’s Book
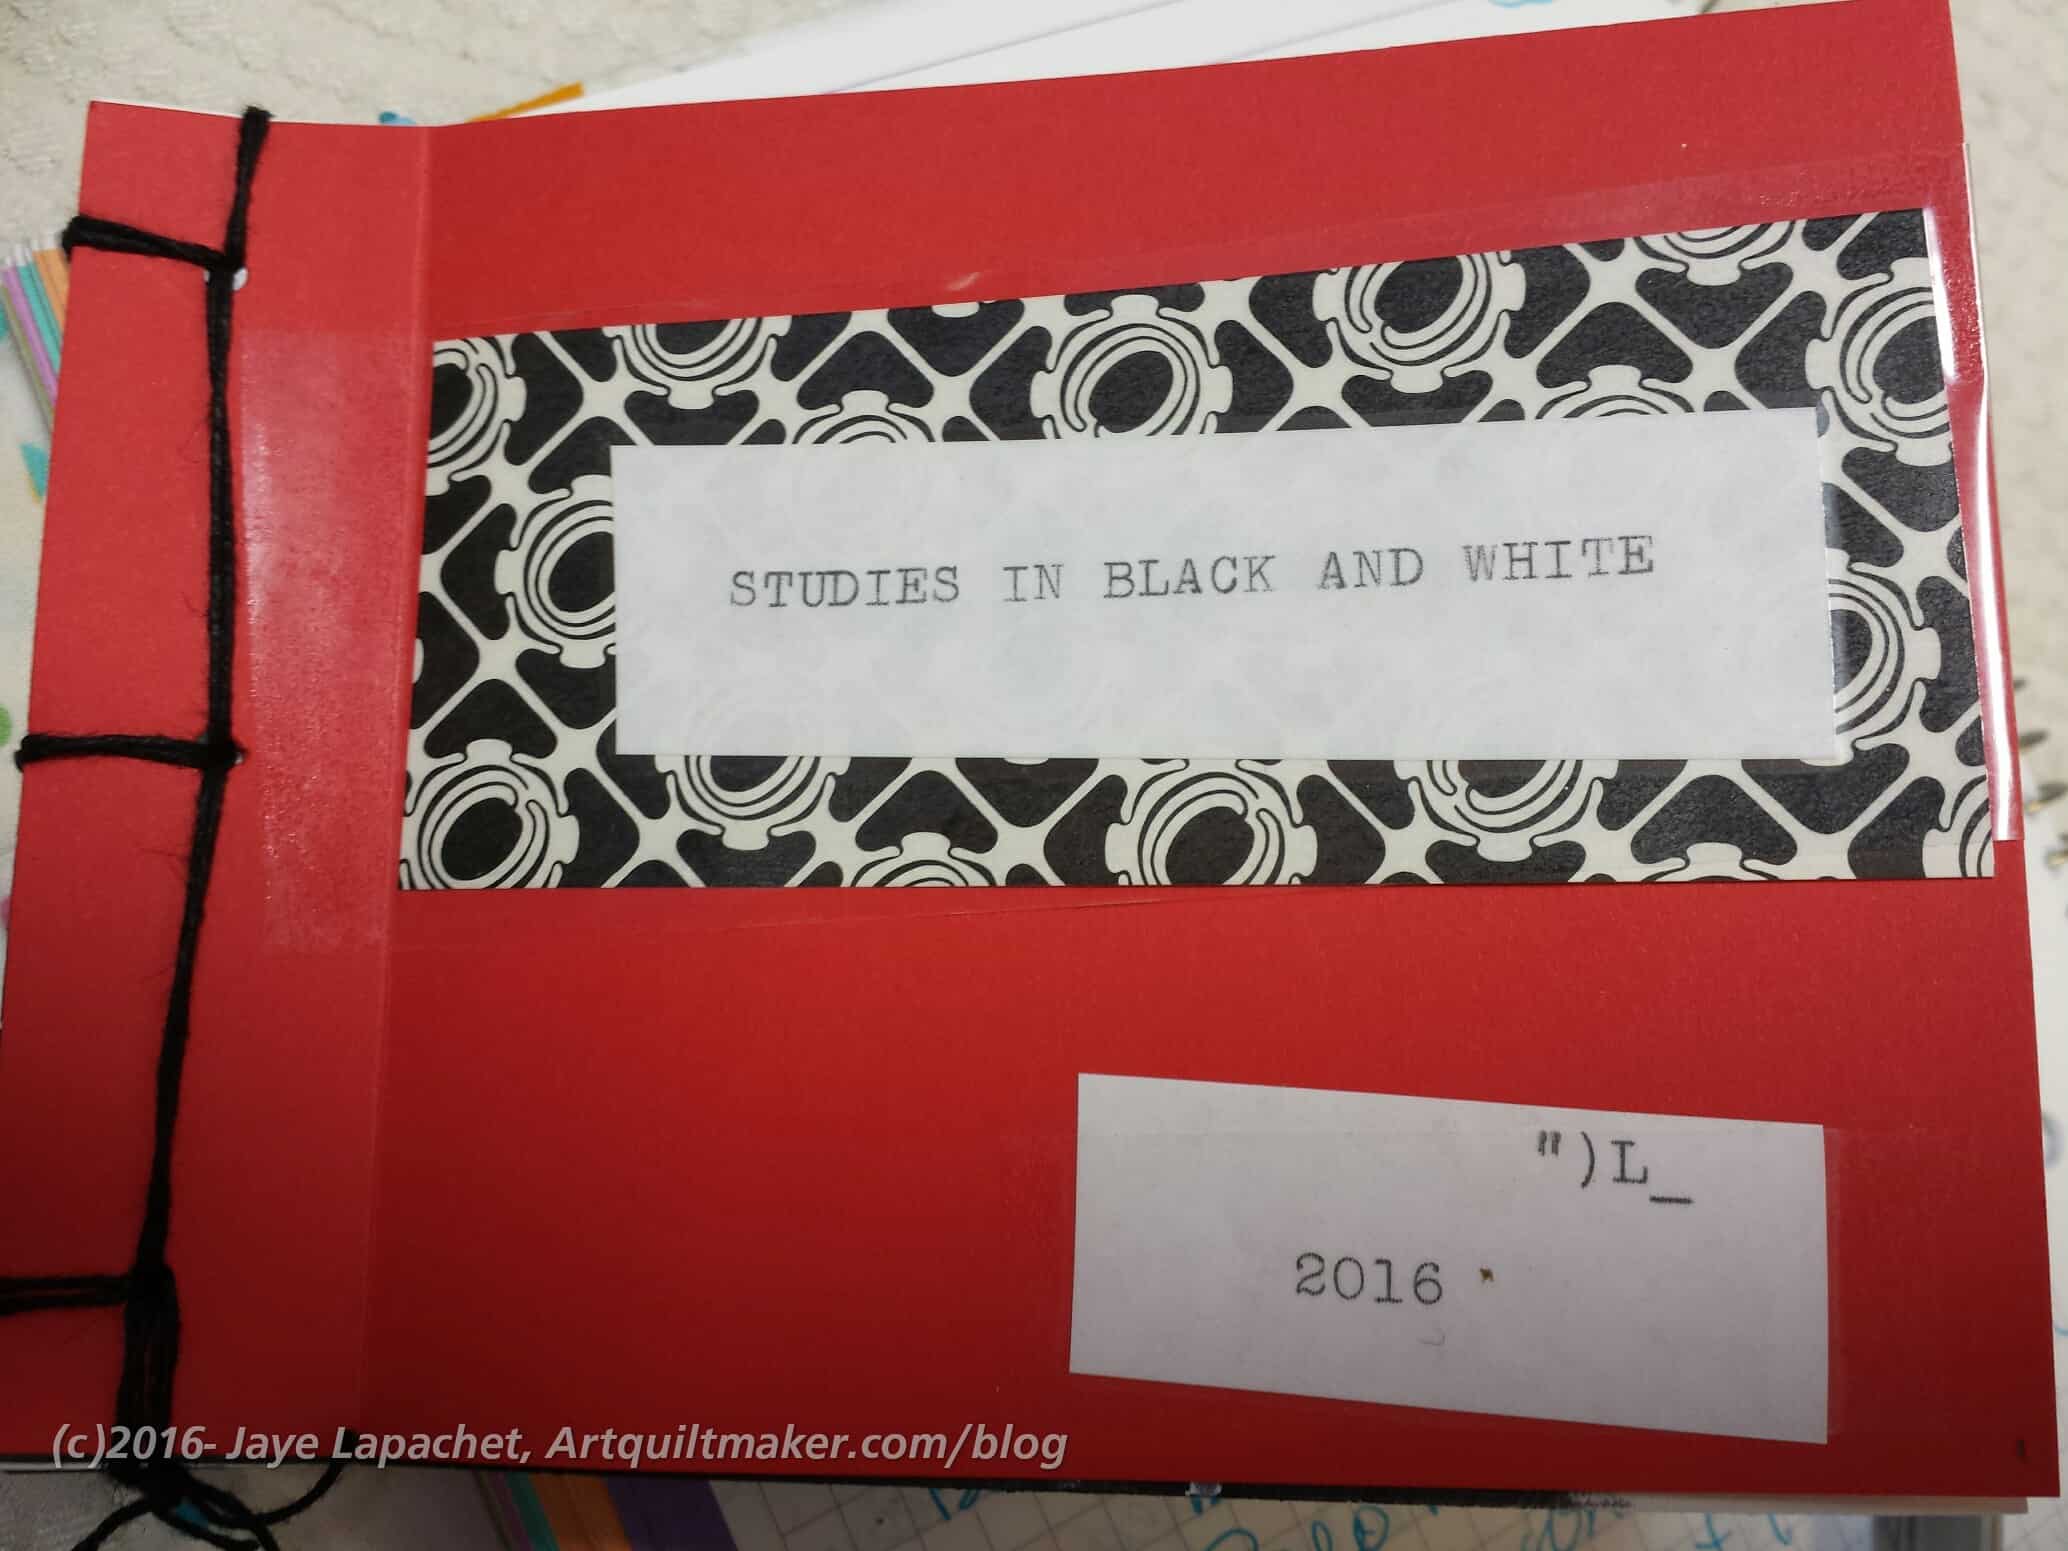
Anyway. Show and Tell was awesome. I was especially inspired by Maureen’s book. She is in a collage group that meets once a week. She has been doing some great stuff in that group. In a recent meeting, she learned about a simple Japanese binding and made a book.
The content/pages are always a problem for me. How many journals does a person need? Maureen had a genius idea to use black and white drawings from a previous class.
Inside Maureen’s Book #2
Inside Maureen’s Book
I love this book! The overall content and structure are great, but the best part is the little surprises inside. She added a window on to the next page. One of the pages has a rounded edge, again providing a glimpse farther in the book. Another page is cut at an angle and the following page is so carefully placed that the reader cannot tell they are two separate pages right away.
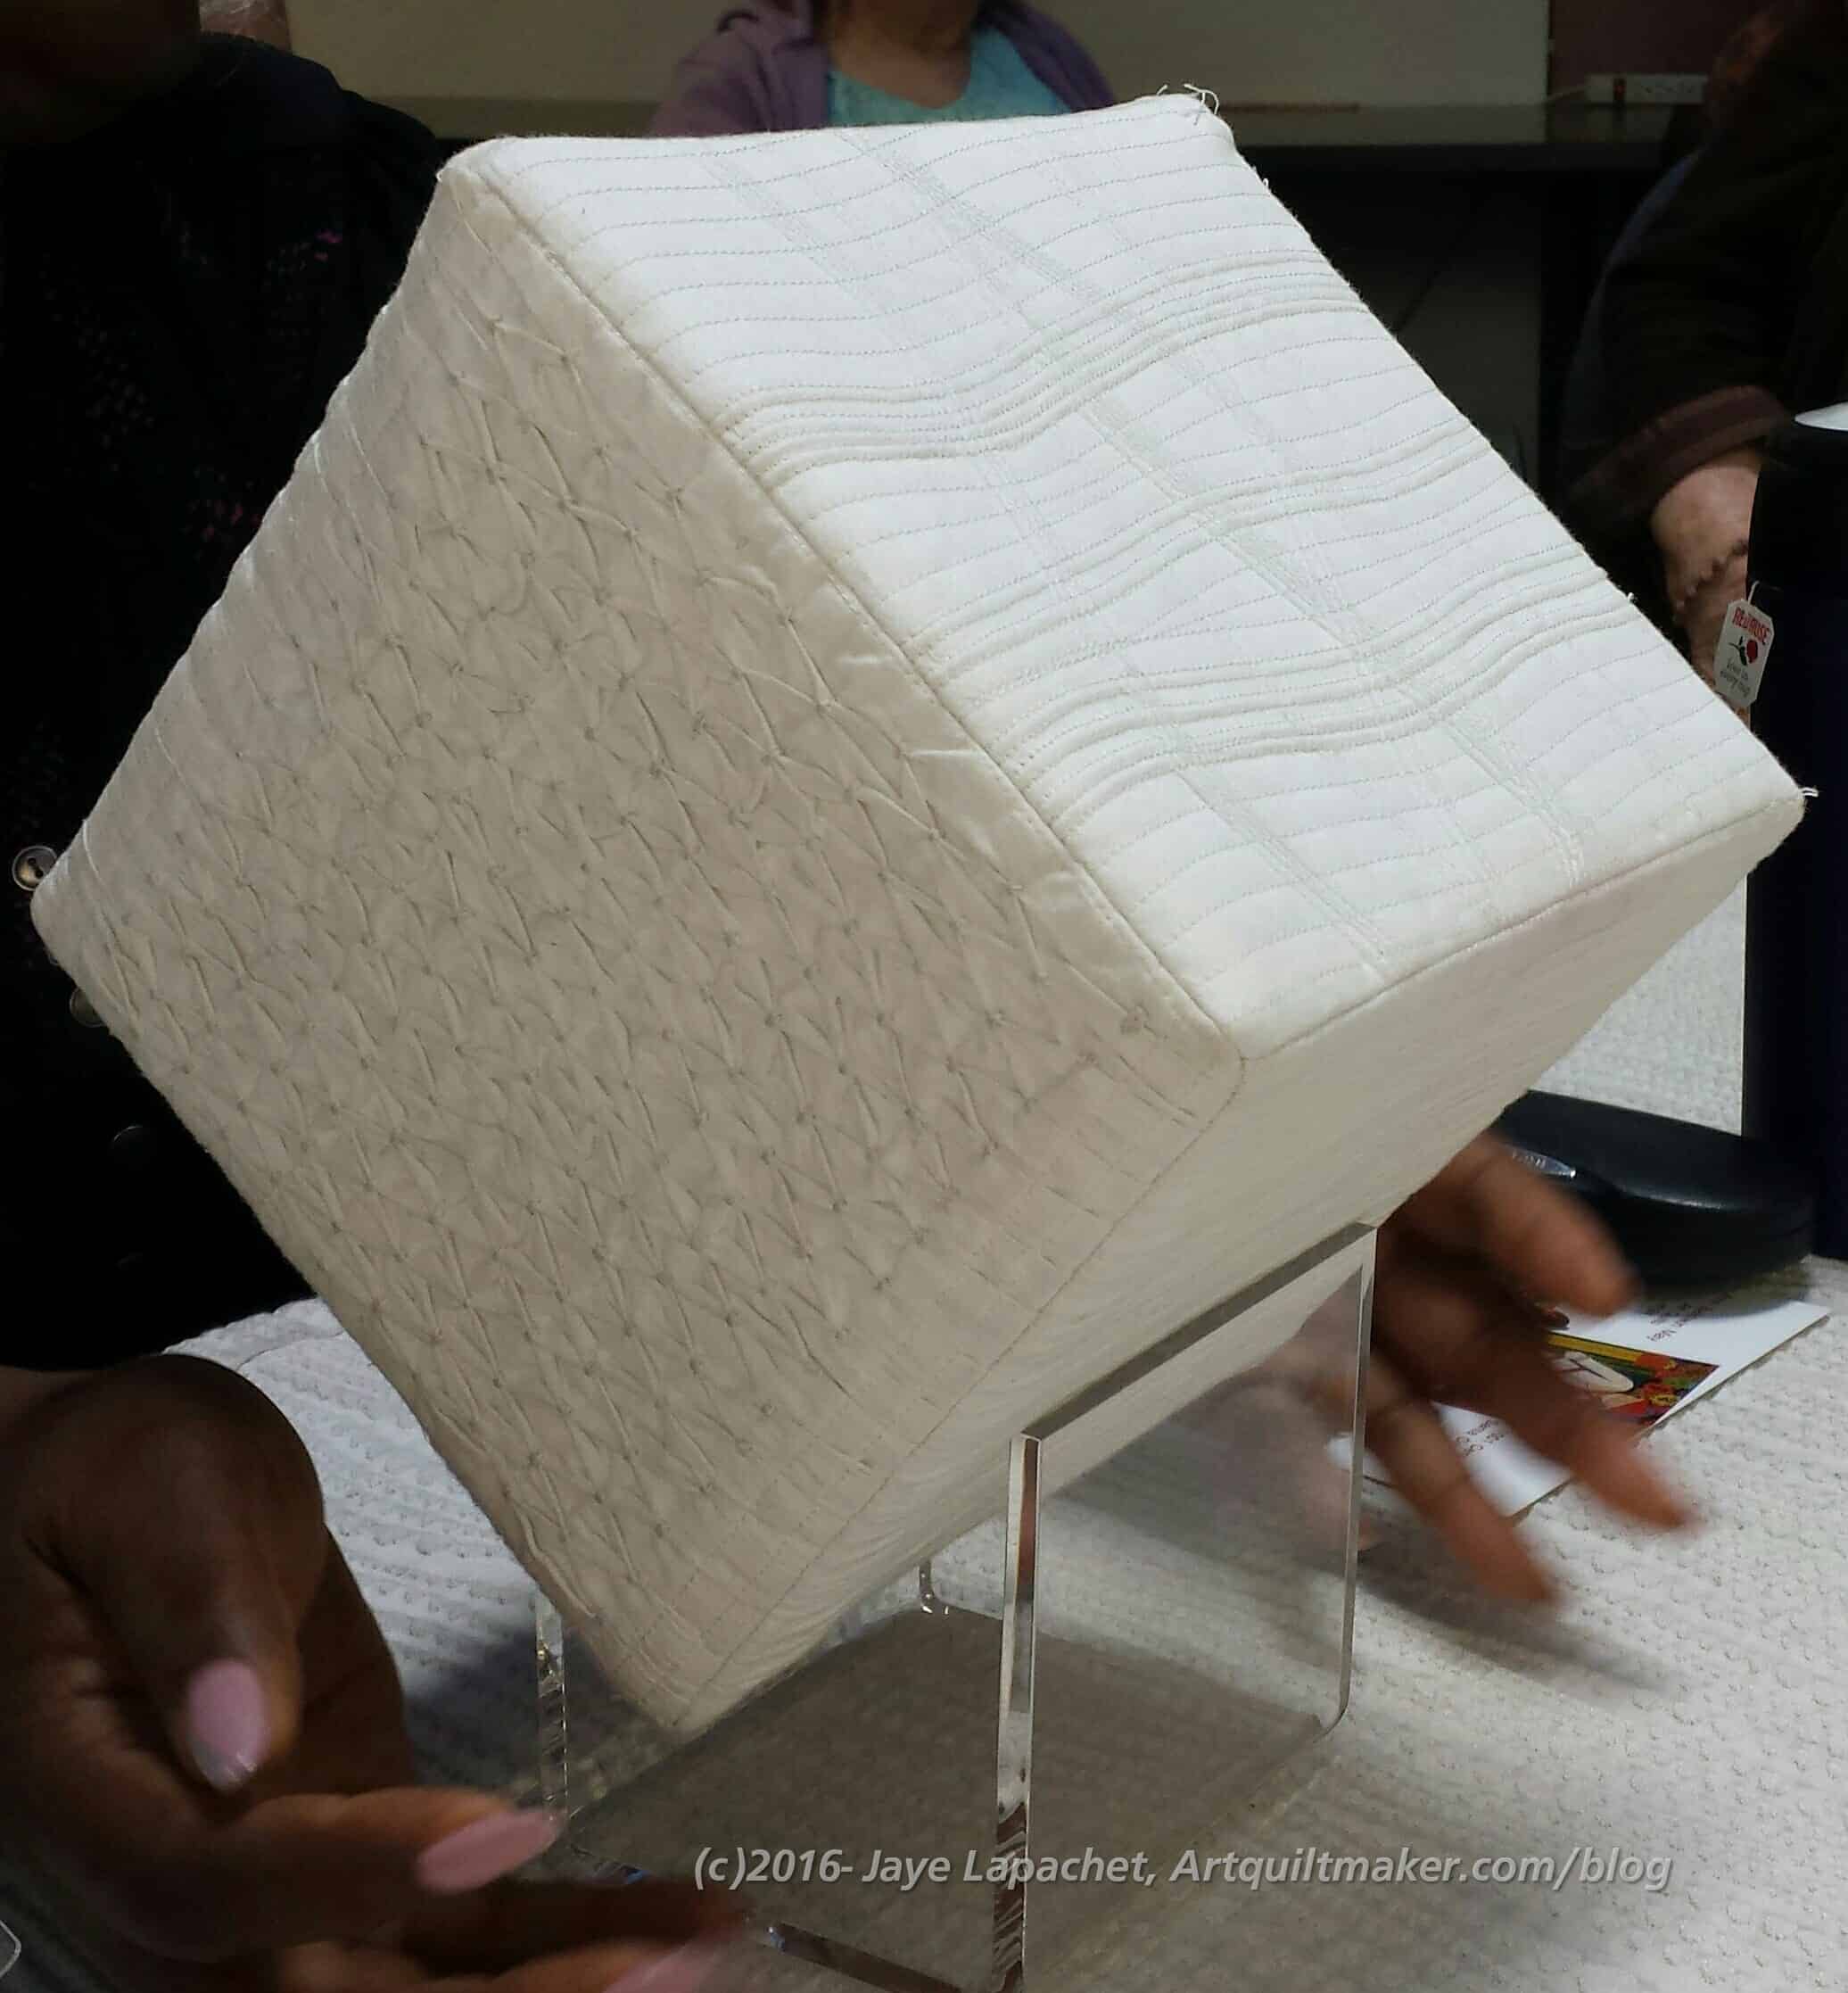
Dolores showed an almost finished fabric sculpture. She has been working on studies to get the process down for awhile. I have seen the smaller ones, but was thrilled to see the large version.
Each side has a different texture. Some of them are achieved through quilting, but others are kind of sewing techniques such as smocking.
I love the textures she achieved, especially from some serious quilting on the sides.
Carol working in solids
Carol’s Tulips
Carol is still working in solids and brought two of her quilts. These are a follow up to the quilt she worked on at the Retreat. I really like the subtle shifts in color in the Tulip quilt. I know that there are depths that tone-on-tones achieve that solids can’t, however I can’t help but love what people can achieve with solids as well.
Jennifer brought more of her felted wool pieces. Nancy brought a journal cover she made using my tutorial. I was pretty excited about that, because someone actually used one of my tutorials! Virginia brought some placemats. Reva made a 3D owl. The list goes on and one. I am always so inspired by the ladies who create and share at CQFA.
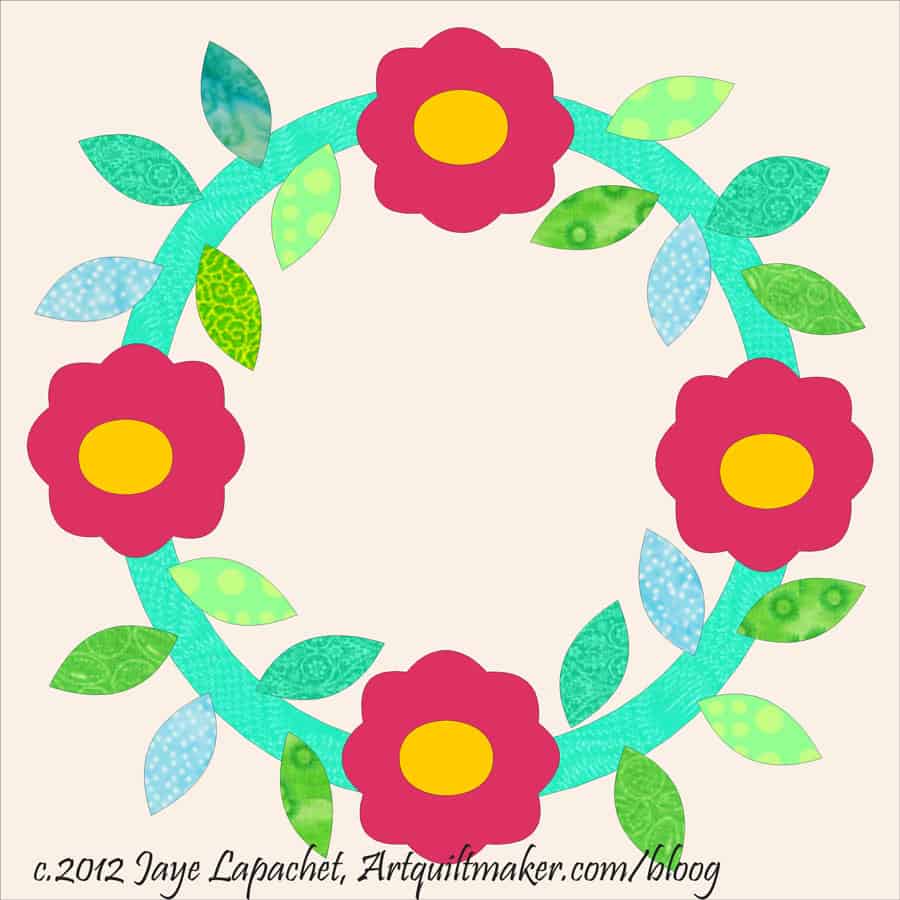
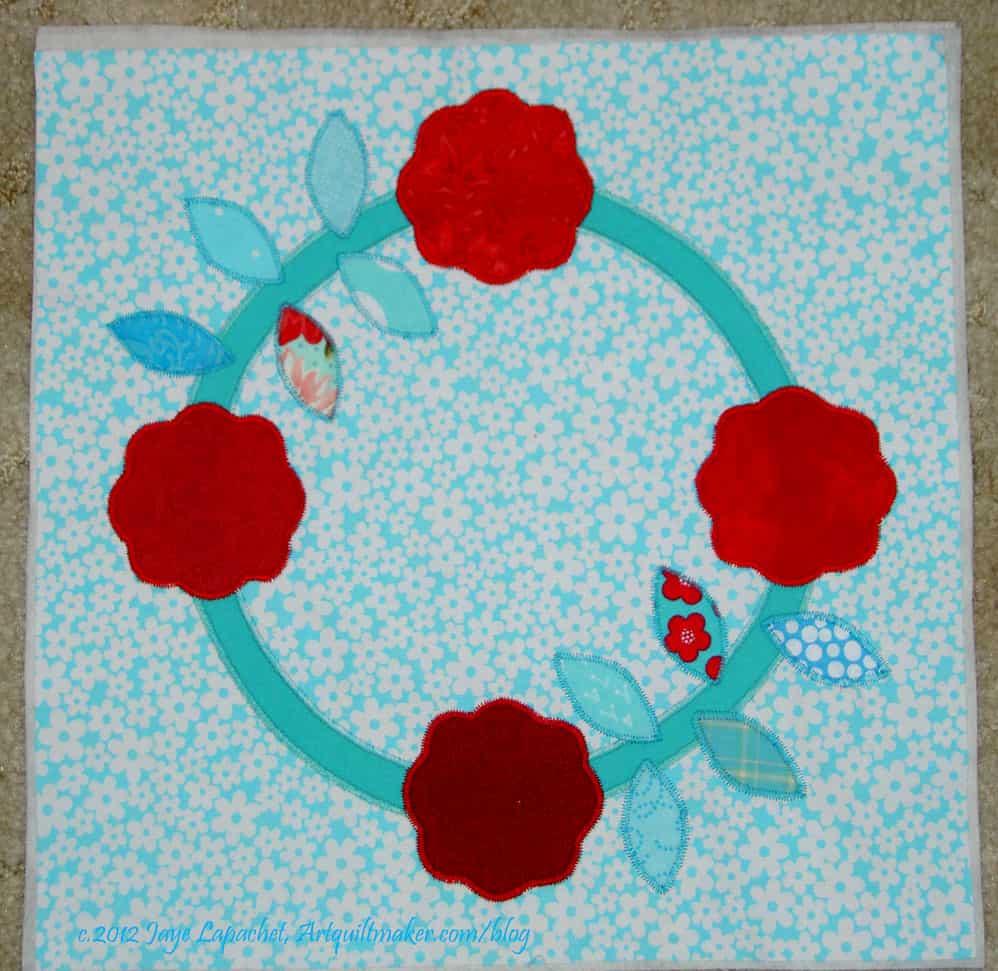
We are making the Flower Wreath block. To find out how to make templates, including the ring, see Part 1 for making templates and Part 2 for making the ring and positioning the ring on the background.
Flower Wreath
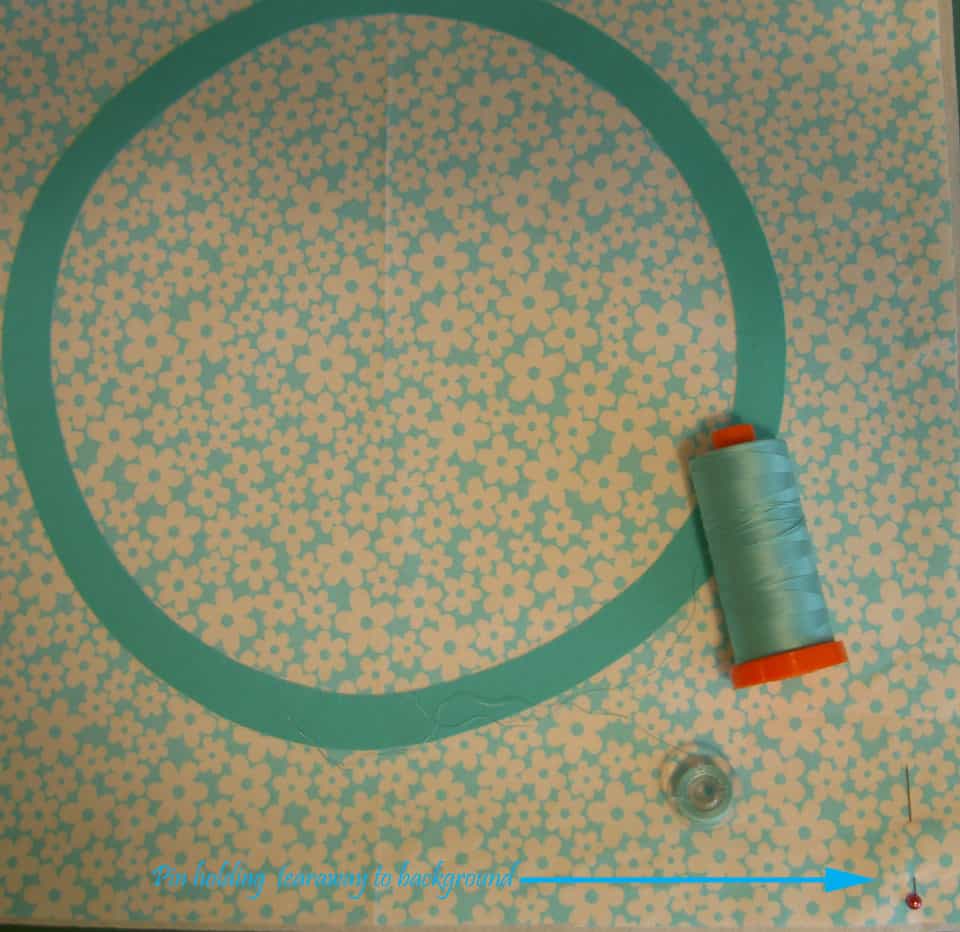
Now we are going to stitch the ring. If you haven’t started, check the Supply List in part 1 and grab your 3″x5″ tearaway backed fabric. Your ring should be applied to the background and ready to stitch. If your ring is not fused and ready to stitch, go back to part 1.
I stitch in layers, so that the stitching is easier, there are fewer starts and stops and the piece looks more finished. Now that you are ready to stitch, it is time to choose your thread.
Choose thread
Whenever you choose thread, you must consider the stitch. If the stitch will be dense like a satin stitch, you should choose the color by looking at the thread wrapped around the whole spool. That will give you a better sense of the color the satin stitch will end up.
It you will be using a straight stitch, you should unreel a bit of the thread and look at one strand on your fabric. You may need to pool a little of the thread together – less dense than the whole spool and more dense than one strand.
Now set up your machine for zig zag stitching. You will need to choose a stitch density. I like a semi-open zig zag that is not too wide. Dense satin stitching, however, can really highlight and outline each piece. I use the following settings on my machine:
Ring: width: 3.0, density: 0.45
Flowers: width: 3.0, density: 0.45
Leaves: width: 2.0, density: 0.5
Flower centers: width: 2.0, density: 0.5
YMMV: Your machine will vary so use the test piece and try out your settings.
Even if I haven’t chosen all the fabric, I like to get the ring stitched down first, so I can audition the other fabric without worrying about the ring. Yes, it is fused and shouldn’t go anywhere, but I still like it to be stitched down.
In order to choose the stitch density, you will need to test. Get the tearaway backed sample piece you have prepared and start testing with the width and densities I have provided above. Stitch lines of zig zag stitching 2-3″ long using a contrasting thread similar to the thread you will be using to stitch the ring. Adjust the width and density on your machine until you are pleased with the look.
Stitch ring
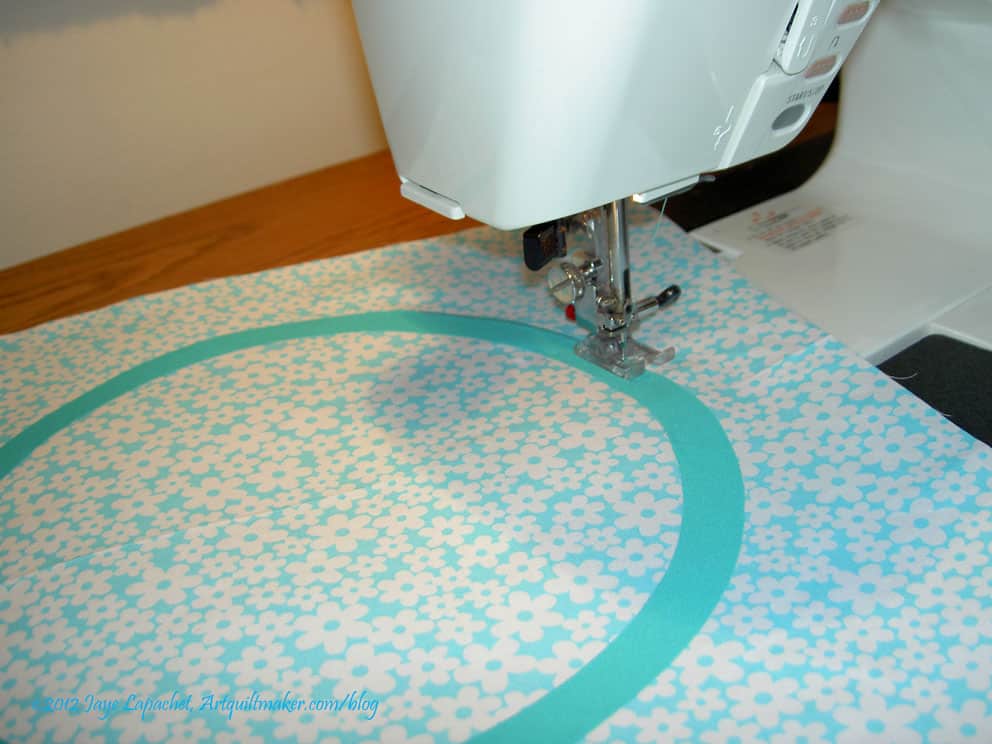
Put the ring on the machine and start stitching. I always leave a long tail that I can pull to the back and tie shut later. My zig zag does not automatically tie the ends. If your machine is more advanced you may not have to tie a knot on the back. I don’t want my zig zag to come out if it gets snagged while the quilt is being used, which is why I tie the ends.
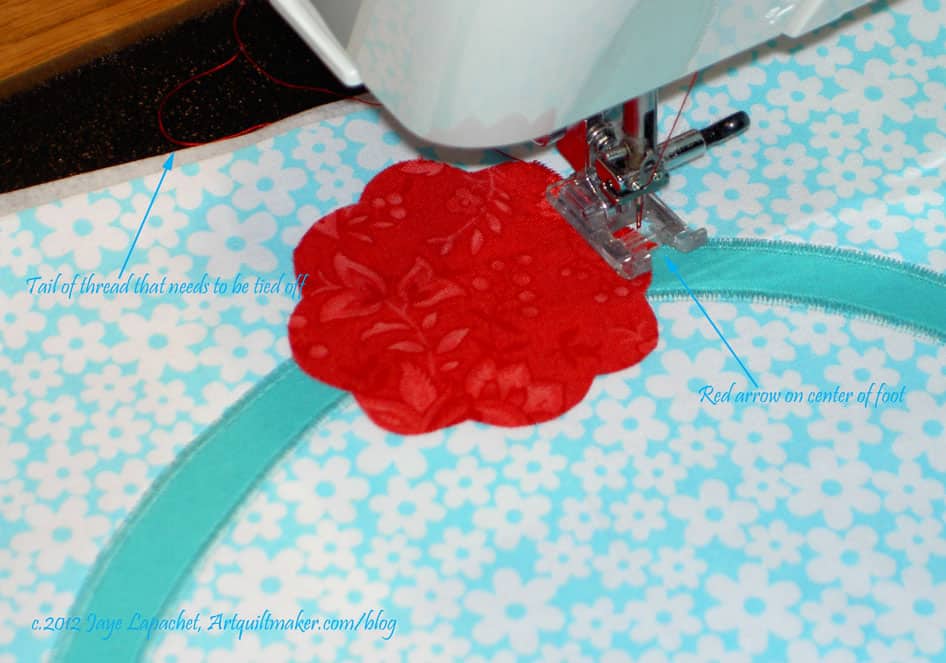
I use my applique’ foot, which has a red arrow in the center to stitch out the zig zag. I place the tip of the red arrow on the raw edge of the ring and follow it around. You want a smooth curve, so you should stitch with needle down or use the hand wheel to put the needle down when you stop. If the center point on your foot gets off the raw edge of your ring, stop and readjust. Stop with the needle down on the outside of the ring’s curve whenever you need to readjust the needle to accommodate the curve. Turn the fabric to the left to get the center point of the foot back on the raw edge of your ring. The stitching will be slightly closer together on the inside of the shape, when the needle punches the fabric to the left, and more open on the outside of the shape or when the needle hits the background.
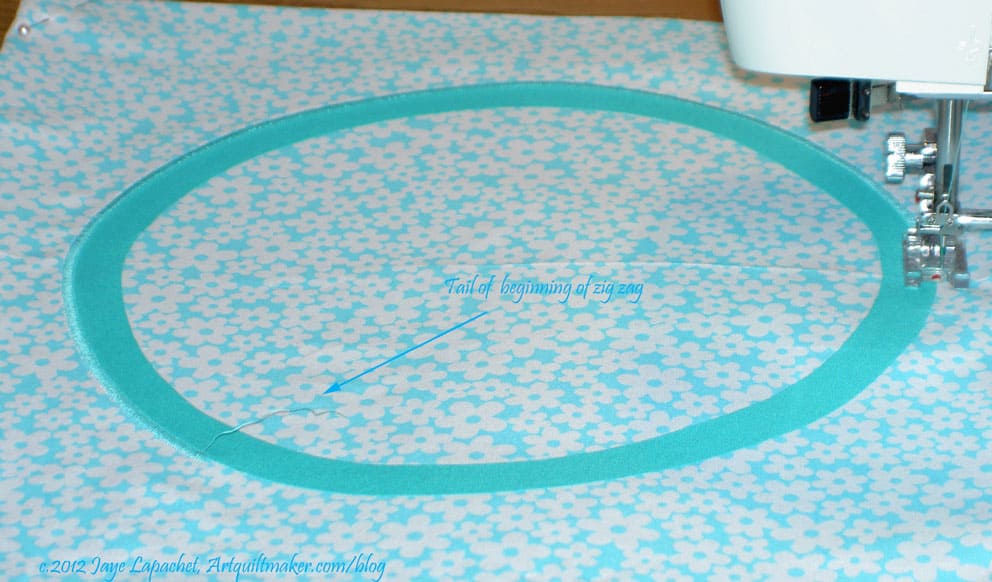
Tail of thread
When you have done about half – 3/4s of the stitching on the ring, stop and pull the beginning thread to the back and tie it off.
I tie the beginning off before I get to the end, because the beginning and ending threads can get tangled up and make it impossible to make small, neat knots. I have tied all four ends together in a pinch, but prefer to make the knots as small as possible.
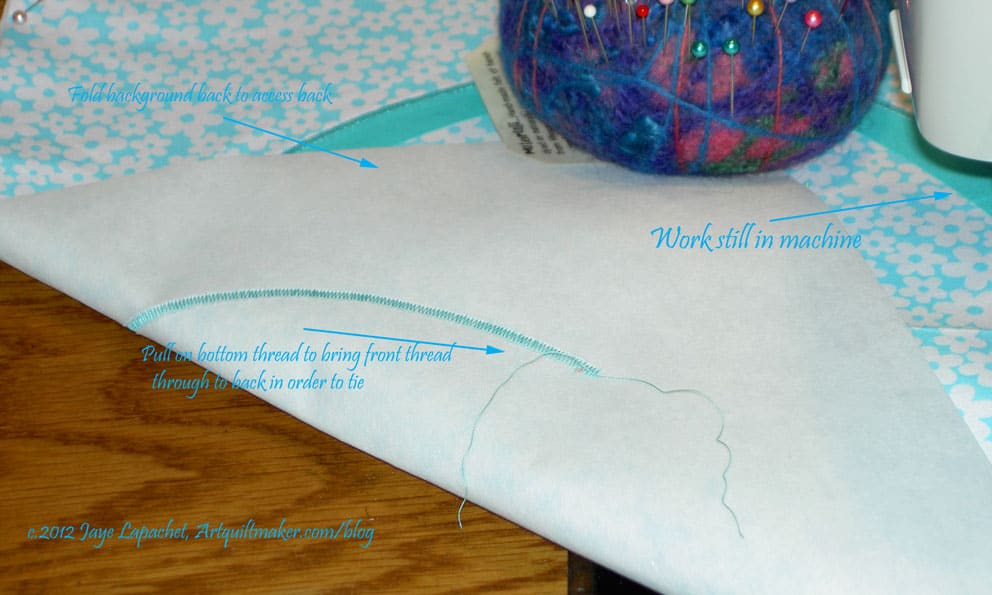
Fold work back to tie
I also use this technique also if I have to stop and pull the work out of the machine because of thread breakage or necessary bobbin refill.
I fold the work back (I only used my pincushion so I could photograph what I was doing. Normally, I just hold it with my wrist as pull the front through to the back and tie the ends together.) I don’t take the work out of the machine unless there is a good reason – like a big knot, or thread breakage, etc.
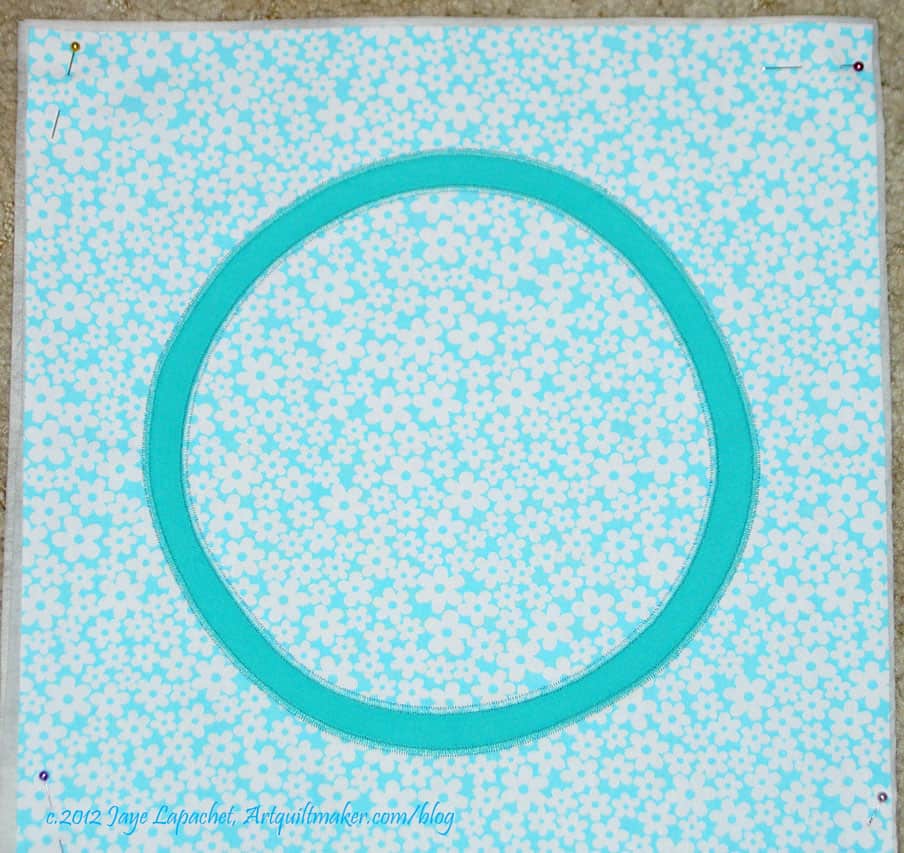
Completely stitched ring
Once your knot is tied, continue stitching to where you started. I don’t overlap much once I get to the beginning, perhaps only a stitch or two, because I don’t want the look of the stitching to be too different.
I pull the work out of the machine and tie off the ending threads. Again, you may not need to do this if your machine does it for you.
Now follow the same steps, but on the inside, to finish stitching down the ring. Once you have stitched both the inside and outside of the rings, your ring will be complete and you will be ready to place the leaves and flowers on the ring.
Choose fabrics by putting scraps on background
If you have not already done so, choose the rest of your fabrics. You will need fabric for the flowers (1-4 fabrics) and leaves (1-20 fabrics). If you have not cut out and fused the wreath to the background, please go back to part 2. The leaves can be the traditional green or you can use something else. If you use one color, you might want to mix up prints to increase interest. You can also use different colors. Make the block your own.
Make visual decisions visually
I thought about making the leaves green to make them more realistic, but decided I still wanted to use a variety of turquoises and aquas and to stay with my quilt’s color scheme. I found more fabrics to use in my scrap basket.
It is important, with my limited color scheme, to make sure the viewer can see the individual leaves. For that, I need to have enough contrast between the various aquas and turquoises. Remember, when choosing your fabrics, to make visual decisions visually. Put your potential fabrics on the background and step back to look at them. From my test piece (right) you can see that there are a variety of tones of aqua and turquoise. Some of them blend a bit into the background. I want movement and interest.
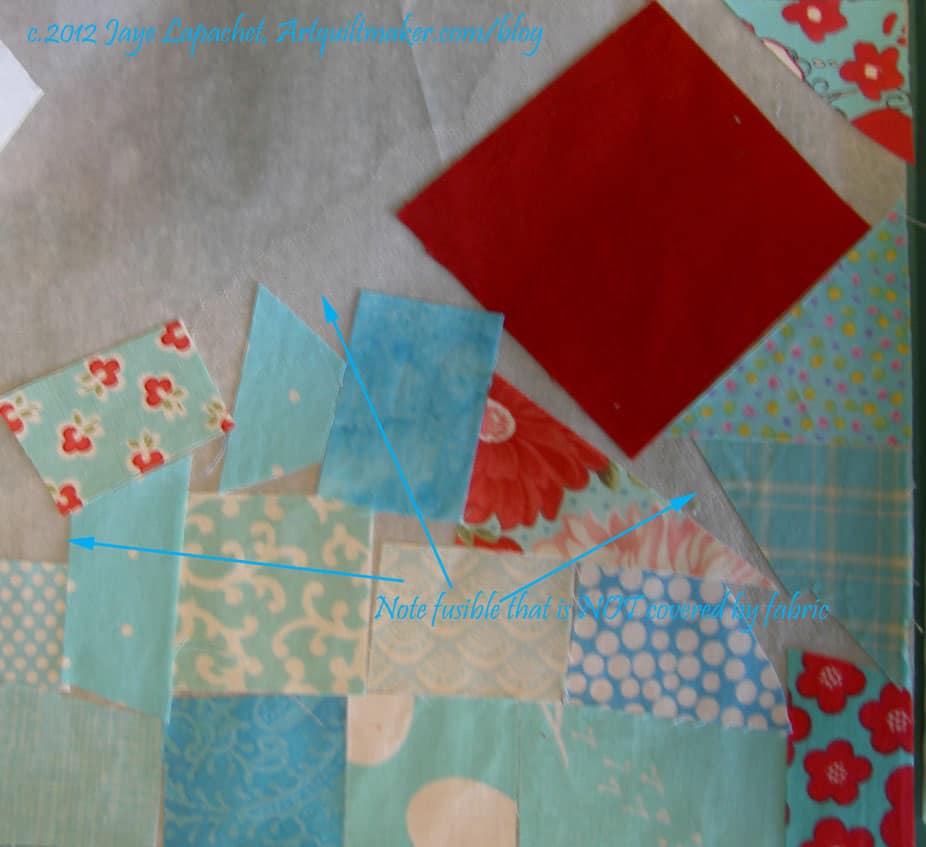
Cover fusible with fabric
Once you have chosen all of your fabrics press the fabric. Add fusible to the wrong sides.
Use the pressing cloth or applique’ pressing sheet to keep the fusible from sticking to your iron.
Follow the directions on your fusible’s packaging.
Trace leaves & Flowers
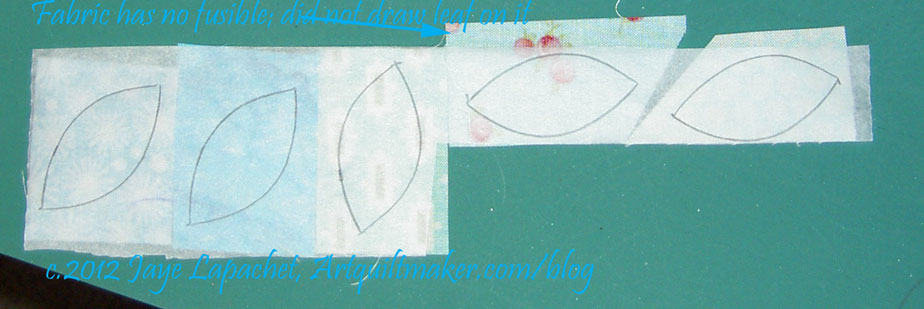
Mark all of your leaves and flowers. Flip the fusible so that paper side is up. You will be able to see your different fabrics through the paper. Place a template face DOWN on the appropriate fabric and trace with a writing implement. I use a Sewline pencil, but you can also use a pen, regular pencil or anything. I wouldn’t use a Sharpie even though I don’t think the paper will allow the marking to bleed through to the fabric.
Once you have traced all pieces**, cut them out right inside the drawn line. You should have 20 leaves, 4 flowers and 4 flower centers.
Take all of your pieces and arrange them the pleasing way. Arrange them into the final position. You are using this try-out to look at the overall effect of the whole block. Once you are pleased with the arrangement, take a photo or sketch out placement.
Fuse & Stitch Flowers
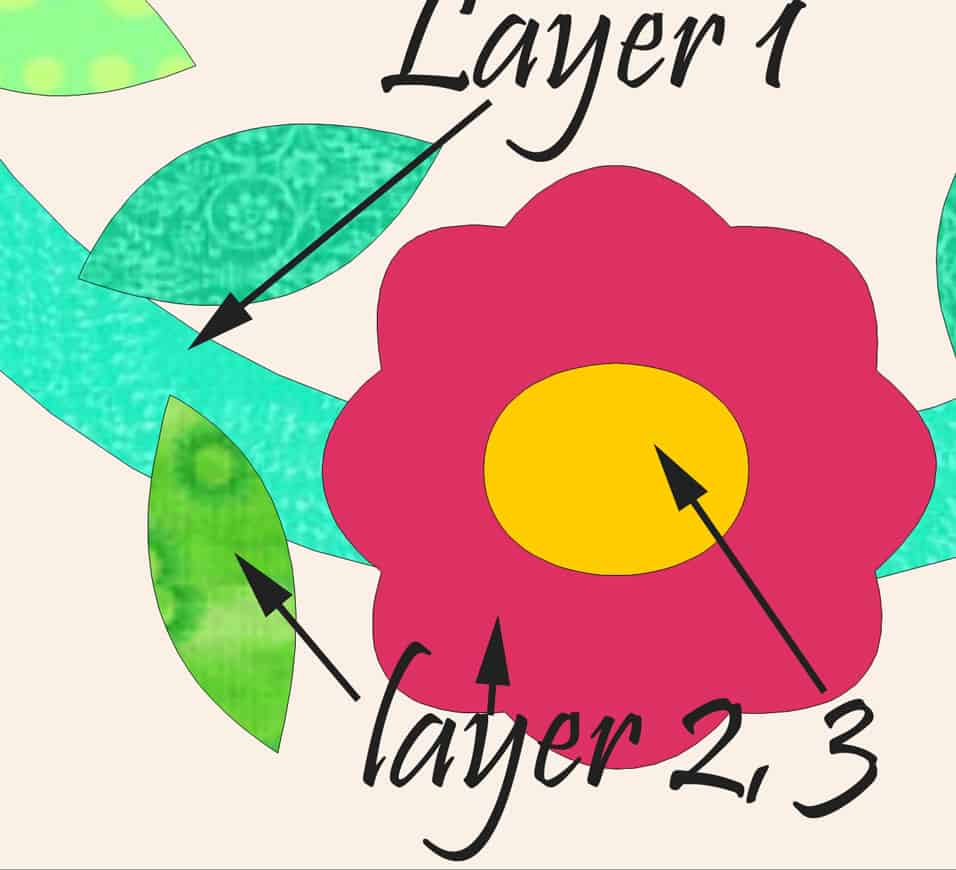
You will need to stitch the flowers first, then the leaves and finally the flower centers. The flowers and leaves are on the same layer, so you can stitch them in any order. Anything that will be covered by another piece will need to be stitched before you fuse the covering piece.
Place the flowers on the ring using the press marks you used to place the ring on the background (or fold the background in quarters and finger press again). Place them symmetrically along the ring, or in a pleasing way to your eye.
Fuse them into place and get ready to stitch. You can also reference the machine applique’ tutorial for more information. Again, pay attention to where the layers of the design are placed. If there are leaves that you want to place under the wreath, you will need to satin stitch them before you fuse the wreath down entirely. For the flowers, you will need to satin stitch down any parts of the design that will be covered by another piece of fused fabric, such as the centers. The design will look better if you satin stitch a layer and then fuse the next piece down.
Place the interfacing under the background. You could use a machine basting stitch to stitch the interfacing (Pellon Stitch & Tear or similar) temporarily to the background, but pinning works fine, too. You will need to zig zag with the interfacing under the background.
Stitching flowers
Satin stitch all the other pieces down using the thread you chose. When you stitch, the middle of the stitch will cover the outside raw edge of each piece. I line up the red arrow on my foot (see photo) with the sharp edge of that raw edge. The pieces you will satin stitch have curves, thus you will need to manipulate the stitch so it is smooth. Stitch with needle down.
Stop stitching to create smooth curves
Stop with the needle down on the outside of the curve for the leaves and flower petals. For the inside point between the flower petals stop above that point on the inside. If you do not have a machine that automatically stops with the needle down, again, you can use the hand wheel to move the needle into the downward position when you stop. Do thisMove the handwheel carefully without moving the fabric. Once the needle is down you will need to assess the way to turn the fabric. Always turn the fabric very slightly to ensure a smooth curve. You may only need to take one stitch before adjusting the fabric again in order to get around the curve smoothly. For the outside curves, generally, you need to turn the fabric to the left to make a smooth curve. (Updated 10/30/2012: My engineer SIL says: You turn it clockwise for outside curves and counter clockwise for inside curves. YMMV) The stitching will be closer together on the inside of the shape and more open on the outside of the shape when you move in this direction. For the inside point of the flower, between the petals, you will need to take a slight adjustment of the background to the right. For the pointy ends of the leaves, stop the needle on the outside of the leaf near the point and adjust the fabric to the right very, very slightly. Take one stitch, stop on the outside of the point again. Adjust very slightly to the right. Your goal should be to get the needle into the same hole on the inside of the leaf until the arrow or line on your machine’s foot is in line with the raw edge of the other side of the leaf. When you move the fabric always keep the needle down. Before starting, take a few of the templates, e.g. a leaf and a flower, make some test pieces and do a test with junk fabric so you get the feel of the procedure. This is not skill you should work on when you are pressed for time.
Arrange leaves
Once you are finished with the flowers, change your thread and adjust the width and density of your stitch, if desired.
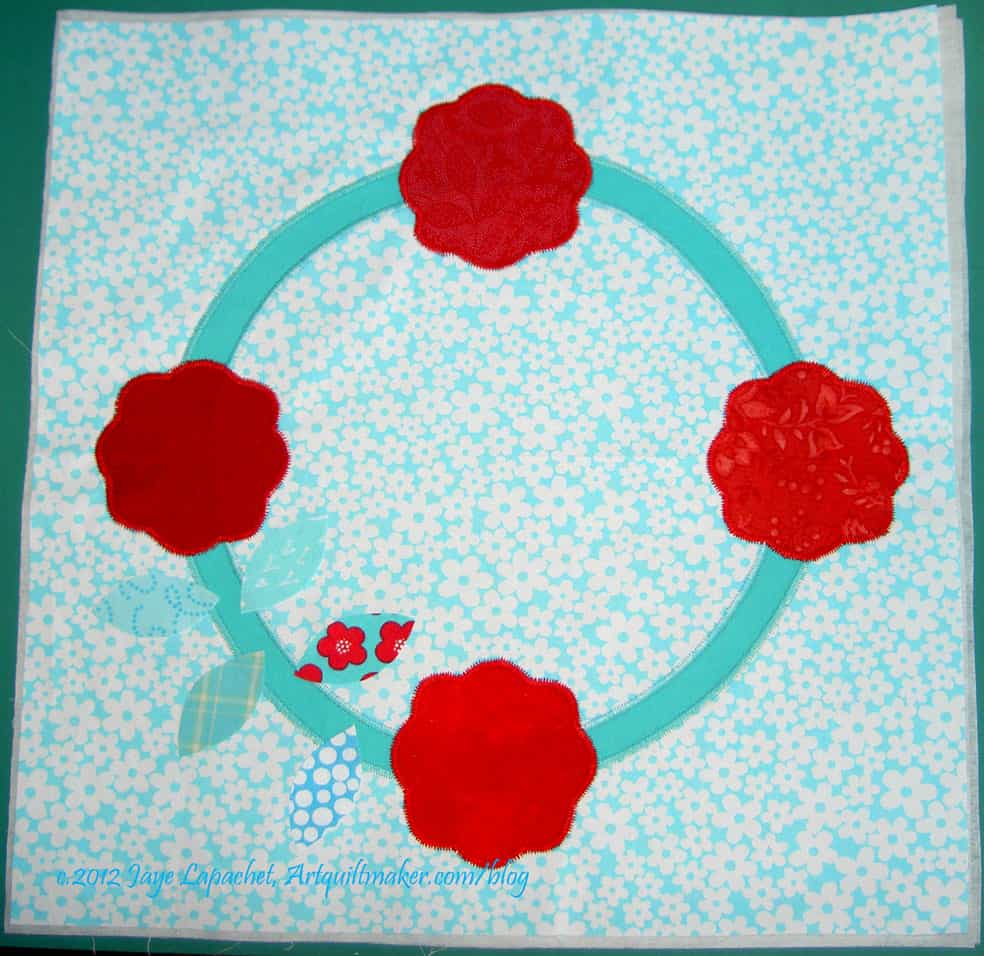
Arrange the leaves in a pleasing manner. I placed 5 at a time on the background and stitched them down.
Stitch leaves
Arrange and stitch all of the leaves. My photo shows only 10 sewn leaves, but I did eventually stitch all of them.
Place the centers on the flowers and stitch them down. Follow all the directions above for tying off and moving the needle to create a smooth curve.
Back of block
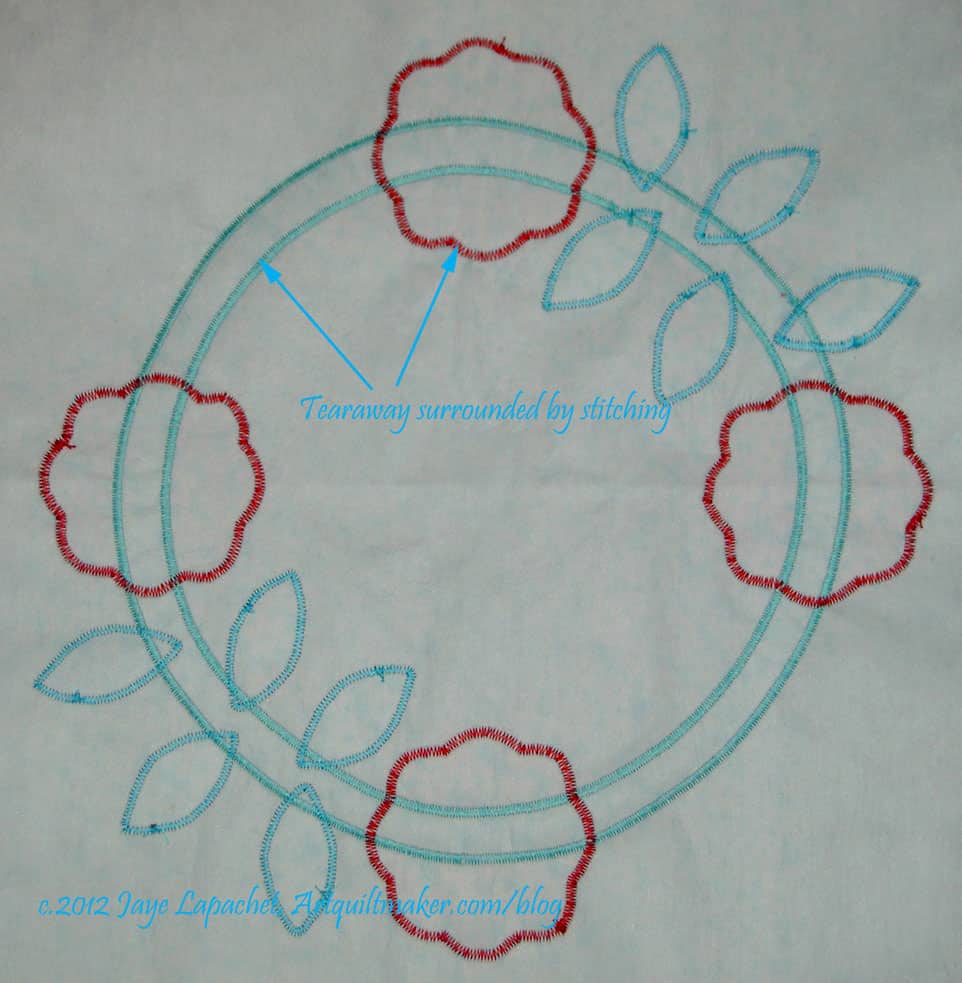
Once you have stitched all the pieces, rip off the tearaway. I use a seam ripper to get the ripping started on pieces that are surrounded by stitching. Try not to distort the block while you are tearing out the stabilizer.
Once you are finished with the entire stitching and ripping out the tearaway, trim the background down to 12.5″
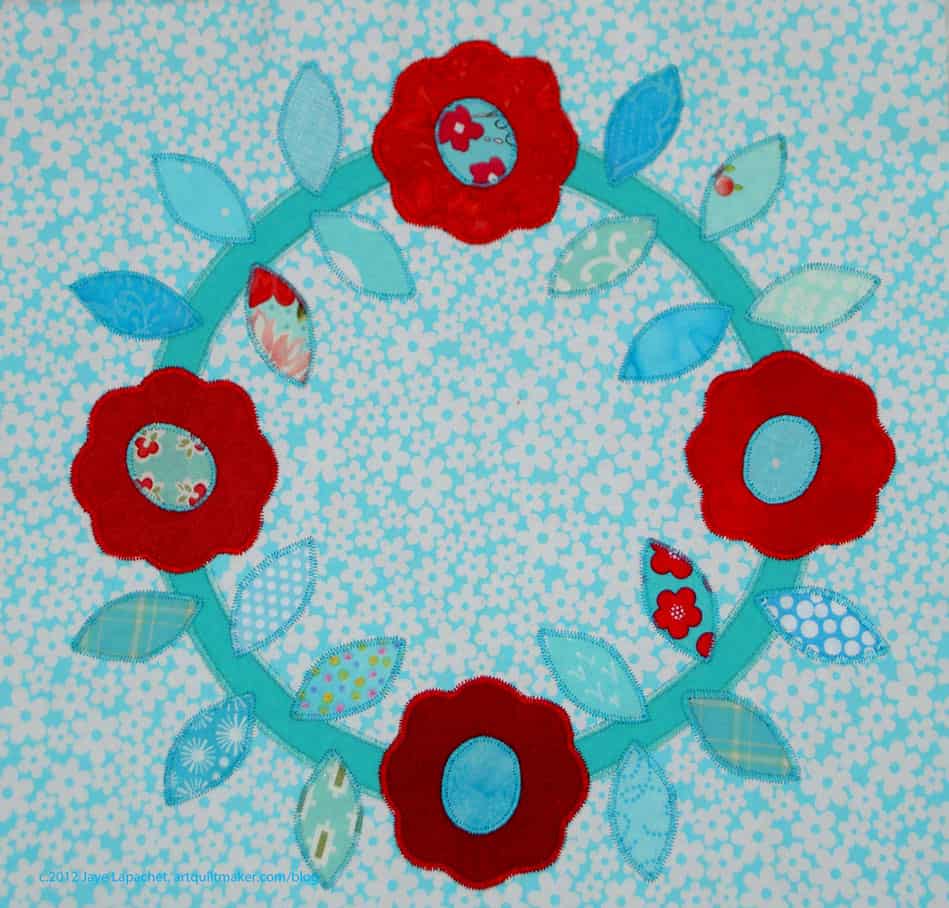
Fusible Machine Applique’ Block
Finished block! Hooray! You did it!
**Nota bene: These pieces have no right direction. You can trace them any way and apply them anyway and they will look fine. Pay attention if you are cutting out letters or another motif that has a special direction. Put the right side down on the paper backed fusible and trace the motif backwards.
As I have mentioned many times, BAM does a lot of charity work. Peggy and Michelle work hard to make it fun. Right before the retreat, the guild was the fortunate recipient of a bonanza of fabric. It wasn’t ugly, crappy fabric that people often try to offload. It was relatively new yardage as well as pre-cuts. There were charm packs, large and small jelly rolls and layer cakes.
BAM Retreat Charity Quilt (Joelle)
BAM Retreat Charity Quilt (Kelly O!)
BAM Retreat Charity Quilt (Annemarie)
BAM Retreat Charity Quilt (Joelle)
BAM Retreat Charity Quilt (Mary C)
BAM Retreat Charity Quilt (Mary C)
As a result a lot of new charity quilts were put together at the retreat. The above is a small sampling. They are generally smaller, but so bright and cheerful! Peggy was pushing the Disappearing 9 Patch pattern, so a few of those showed up using the charm squares.
Retreat Charity Block
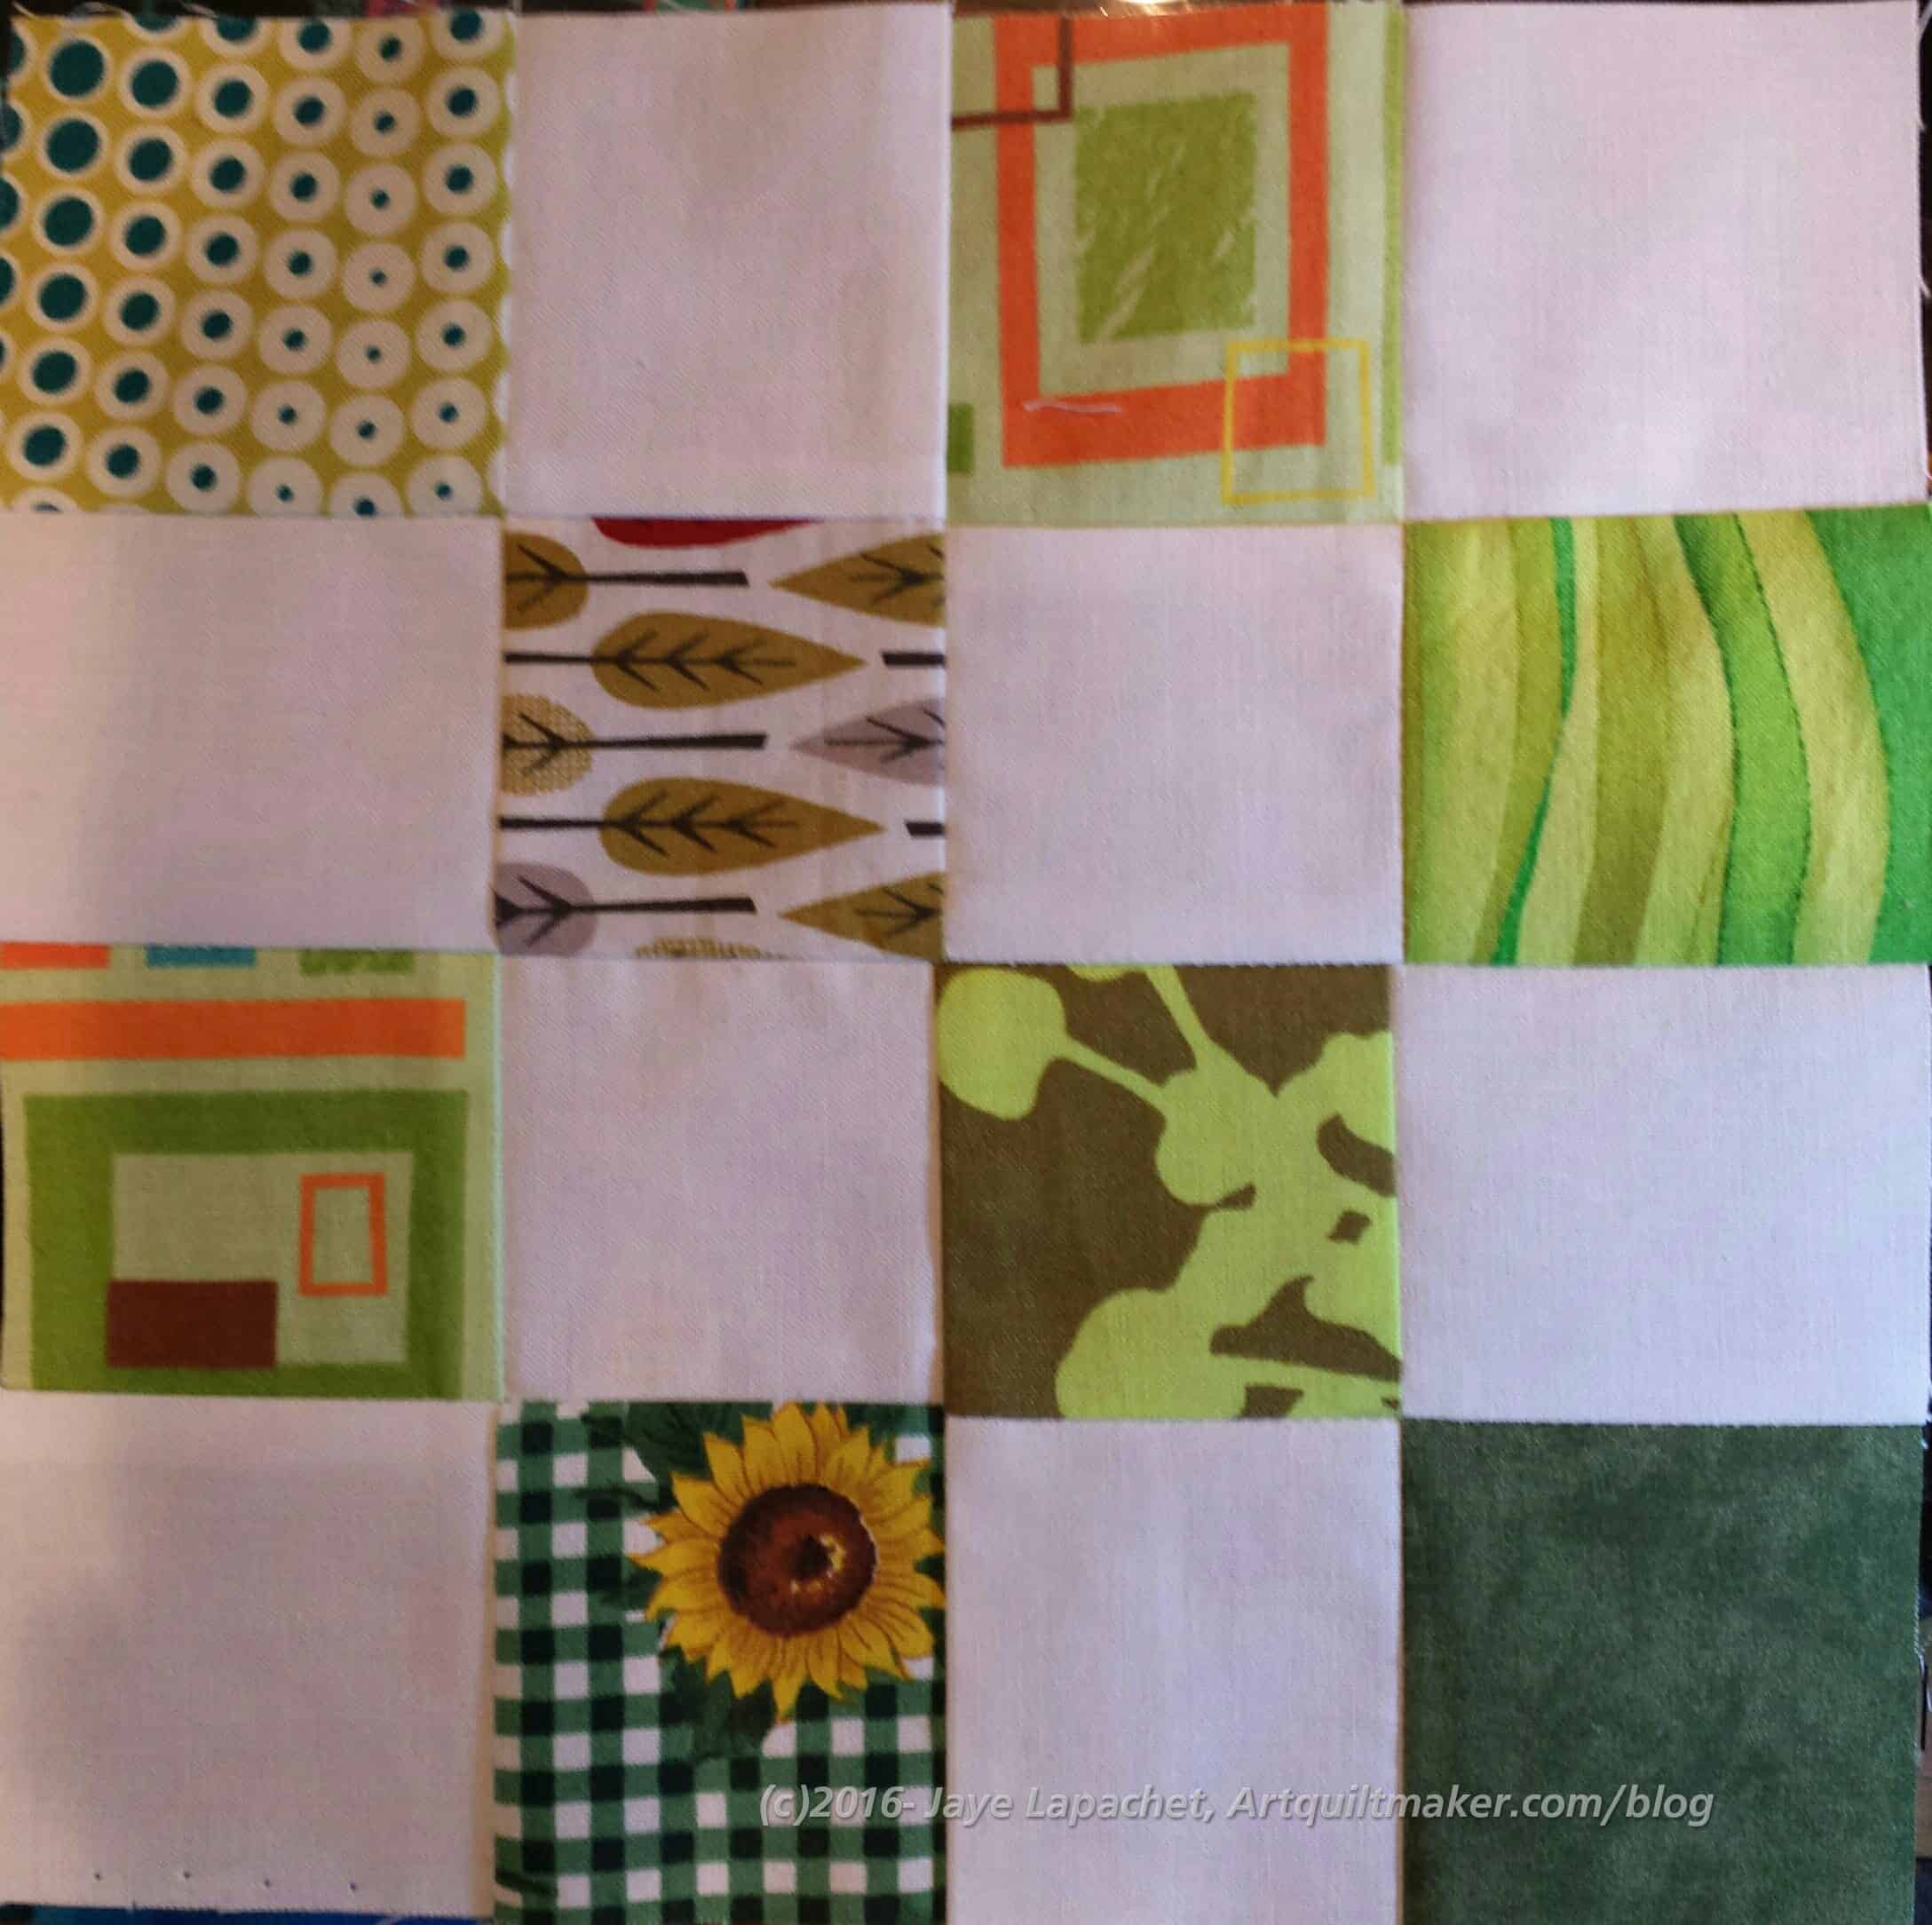
My pathetic effort to the charity endeavor was one block. the Charity Girls had the regular postage stamp kits available, so I took one when I needed some leaders and enders for my City Sampler blocks and made the block.
Choose your fabrics. You will need fabric for the flowers (1-4 fabrics), leaves (1-20 fabrics) and the wreath (1 fabric). The leaves can be the traditional green or you can use something else. If you use one color, you might want to mix up the prints to increase interest. You can also use different colors. Make the block your own.
I used a variety of turquoises and aquas to keep my color scheme in the aqua/turquoise with red range. I have a few of the leaf fabrics picked out from my scrap basket, but need to find more. It is important, with my limited color scheme, to make sure the viewer can see the individual leaves.
Cut piece large enough for ring
The ring is the biggest pain to deal with so I worked on it first before I even really began thinking much about fabrics for the other parts. I decided to use one of the Pat Bravo Pure Elements solids in the turquoise range, but more on the green side. I haven’t used it in this quilt before, but it will complement the other colors. I picked it to highlight the leaves a little more.
Cover fabric with fusible
Now you need to make sure that your fusible will cover your fabric.
I used a package of Steam-a-Seam 2 Lite, but there are many fusibles that will work just fine for this project. As I have said before, my new favorite is Soft Fuse. Use a product with which you are familiar or know how to use. Using what you have on hand is also a good idea.
Tear the paper carefully off of one side of the Steam-a-Seam 2 Lite (or follow directions for your fusible) and stick it to the fabric, smoothing it carefully so there are no puckers or bubbles. The fusible is sticky so you can stick to the fabric and re-position it until you are happy before you fuse it to the fabric.
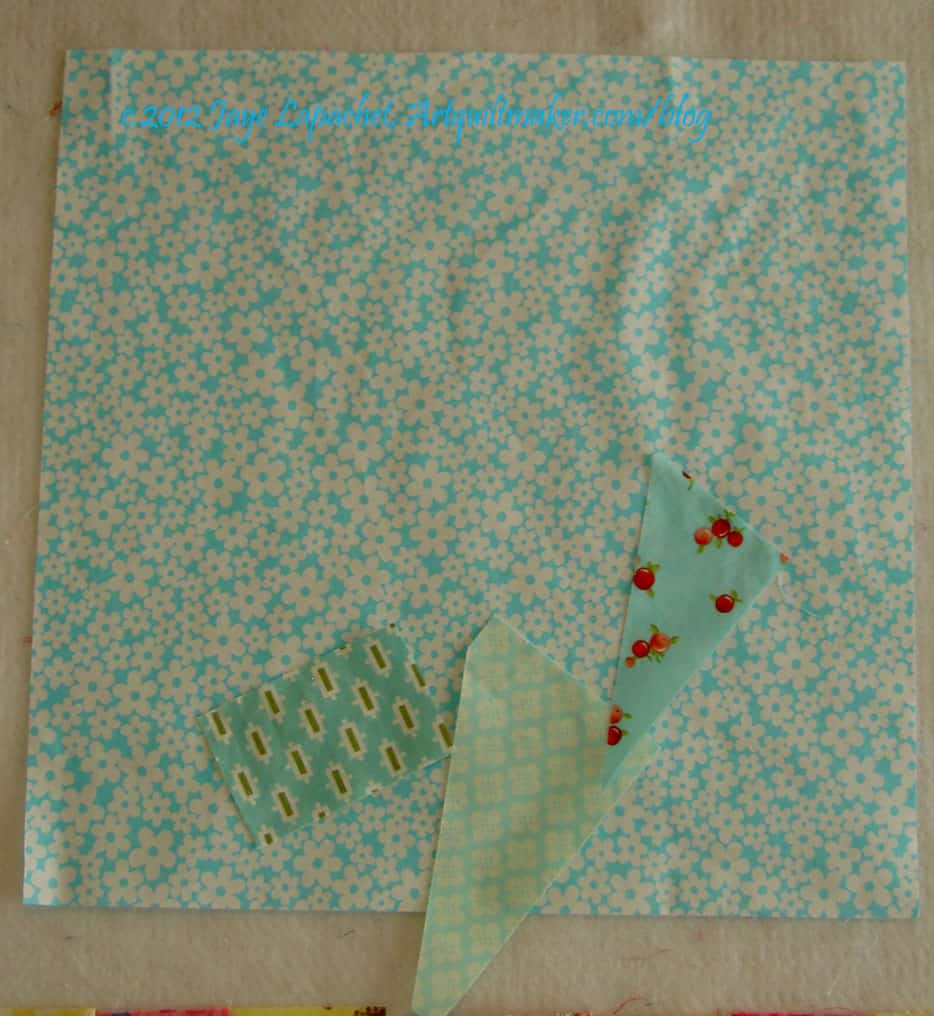
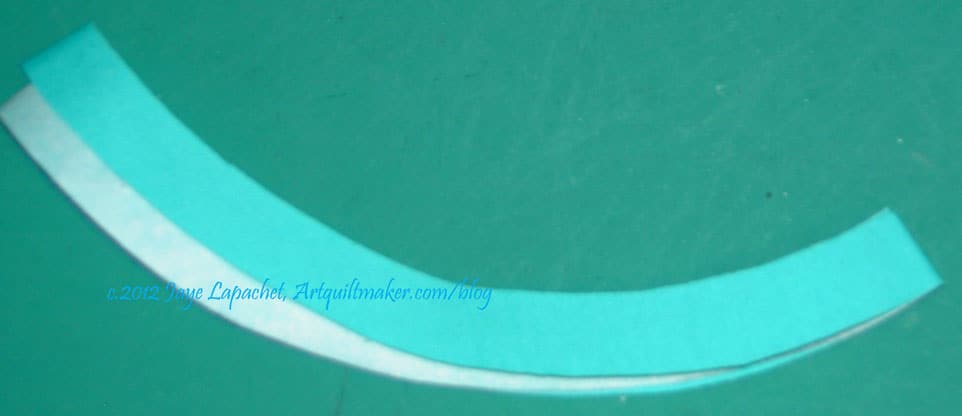
Back of fusible backed fabric
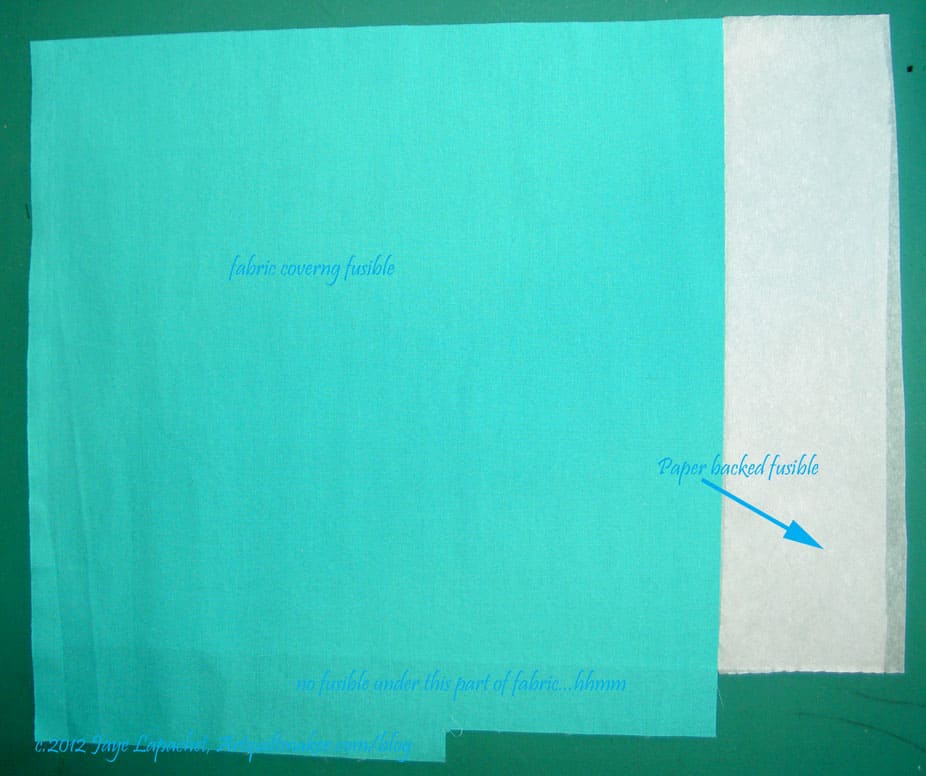
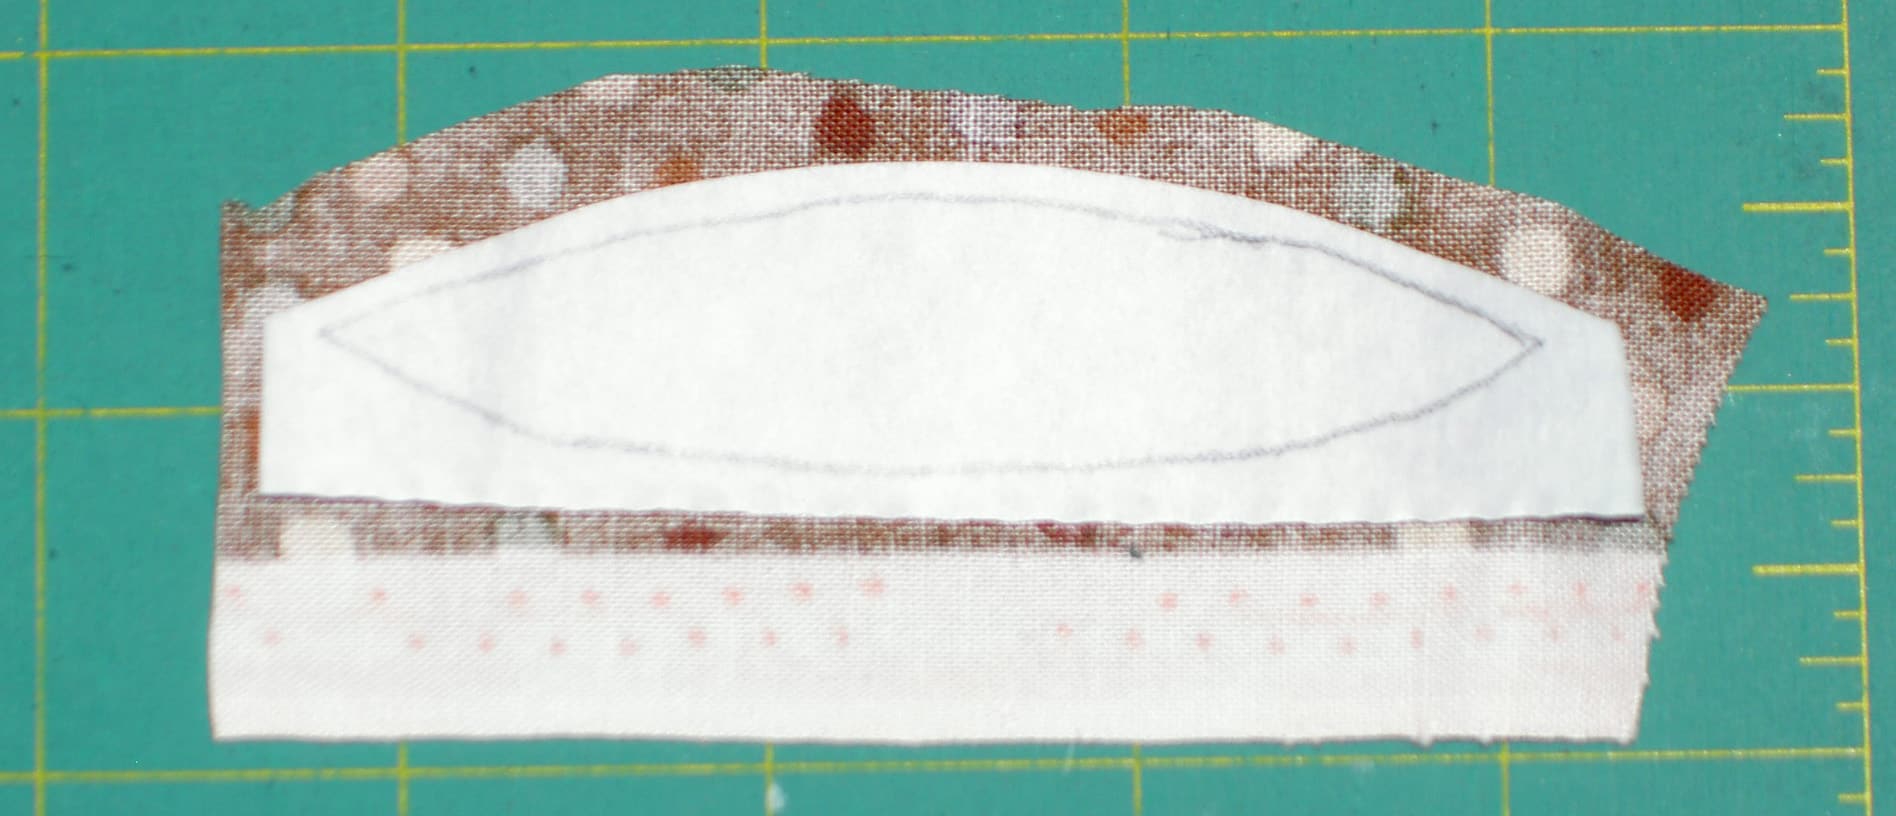
Since the fusible pieces I had were 8.5″x11″, I needed to cover an extra piece (bottom of the photo above) that was wider than the 8.5″ width of the fusible. I cut a piece from the fusible (white part in photo above) and re-positioned it to cover the part of the fabric I need for the size of the template.
Once you are happy, fuse the 2 sided fusible (should have the paper left on one side) to your ring fabric. Follow the directions on the package or website. You may want to cover your ironing board and the piece with an applique’ pressing sheet to keep your iron and ironing surface clean.
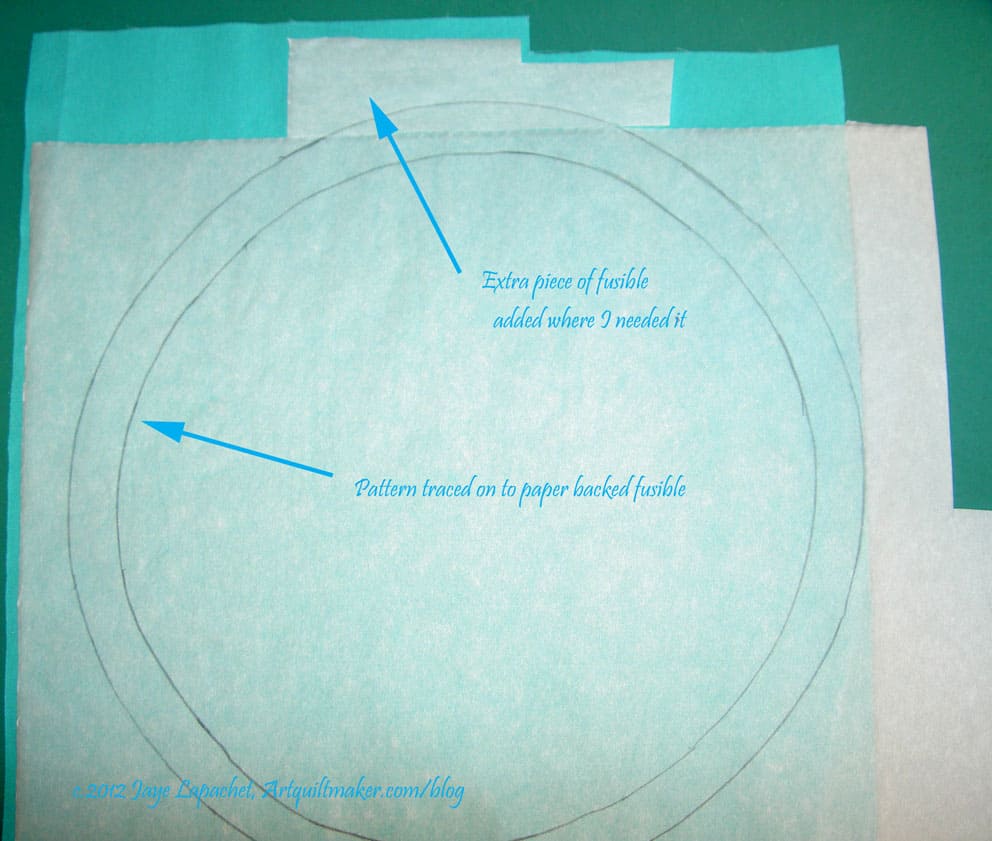
Turn your fusible backed fabric so that the paper left on the fabric is face up, as in the photo above. Place your ring template face down on the paper and trace around it with a pencil.
Ring cut out
Cut out the ring carefully on the line. I used an X-acto knife to start the center. I did use a pair of fabric scissors, but not my Gingher scissors. It is kind of hard to know what to do, because you are cutting both fabric and paper and you need a nice sharp edge. I use a pair of my mid-range scissors and hoped for the best. They still seem sharp even after this type of cutting.
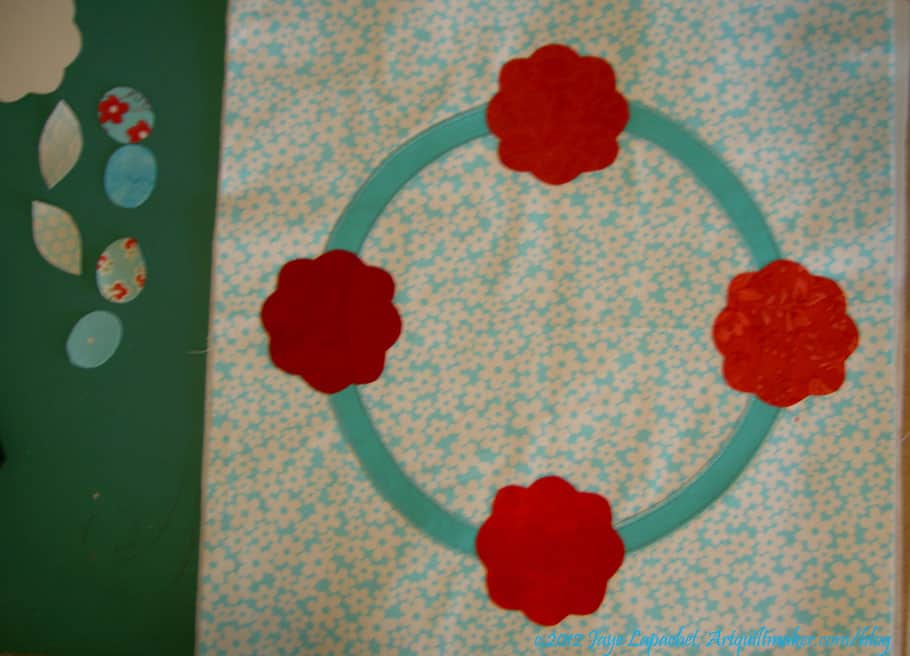
Fold the ring into quarters and finger press lightly. Again you will be lining up the folds to center the ring.
Retrieve your background. Fold the background into quarters and finger press, so you can see the folds.
Line up ring on background
Remove the fusible paper from the ring.
Line up the folds of the ring with the folds of the background. If they are all in alignment, there should be a ring fold snuggled with a background fold evenly. If you want to check, measure from the edge to the ring. You do need an absolutely square block for this to work.
Press the ring with your iron, according to the fusible directions, onto the background so it sticks.
Carefully bring background with the ring stuck to it to the iron. Check to see that your ring is still in place. According to your fusible directions, press the ring into place.
Your ring should now be firmly ironed on to the center of the background.
Leave this piece on the ironing board temporarily.
Retreive the tearaway stabilizer and cut two pieces of tearaway stabilizer a little bit larger than your background fabric. Place your background on top of both pieces of tearaway and pin the background to the tearaway. This will provide stability and prevent the piece from puckering when you zig zag stitch the pieces.
You are now ready to machine applique’ your first part of the block. See part 3 for machine stitching the block.
The next class is about fusible machine applique’. You had a lesson on the basics a few days ago. There are about 3 more tutorials I created to enable you to learn this technique well.
Flower Wreath
Supply List:
Notebook for notes
Pen to take notes 😉
Mechanical Pencil
Fabric (at least 4 different, preferably more greens to create variety in the leaves; scraps work well)
Fabric Scissors
Paper scissors
Small ruler
Glue stick
Template plastic
Dinner plate or compass
Fusible web, such as Misty Fuse or Steam-a-Seam 2 or Steam-a-Seam Lite. My favorite is Soft Fuse.
Applique’ pressing sheet
Tear away stabilizer (the size of your background)
Iron
Ironing surface
3″x5″ piece of fabric backed with 2 layers of tearaway stabilizer
Cut a piece of fabric for the background .5″ to 1″ bigger than the finished size of the block. If you have a regular background fabric, use that, if not use a coordinating fabric. I took a look at my current blocks to help me decide what background I wanted to choose. This is a coordinated scrappy quilt, but I also wanted to find a background that would work well with the applique pieces that I was planning to put on top of it.
After cutting out a background, put it aside for the time being. You will need it after you make the templates and the ring.
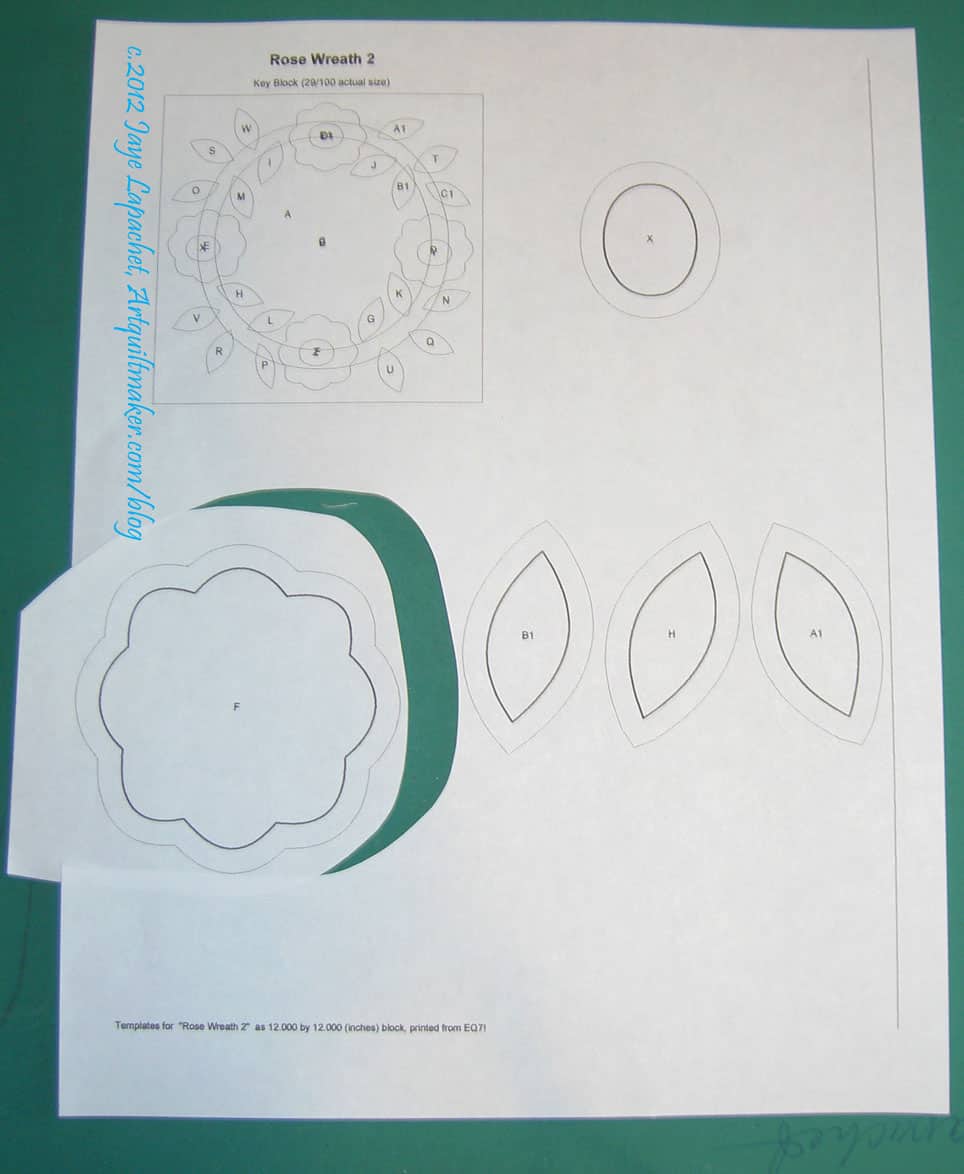
Rough cut pattern out for templates
Rough cut out all the templates from the paperpattern. Feel free to adjust the design of the flowers or leaves, if you want the shapes to be a little different. It is good to make the pattern your own.
All patterns rough cut
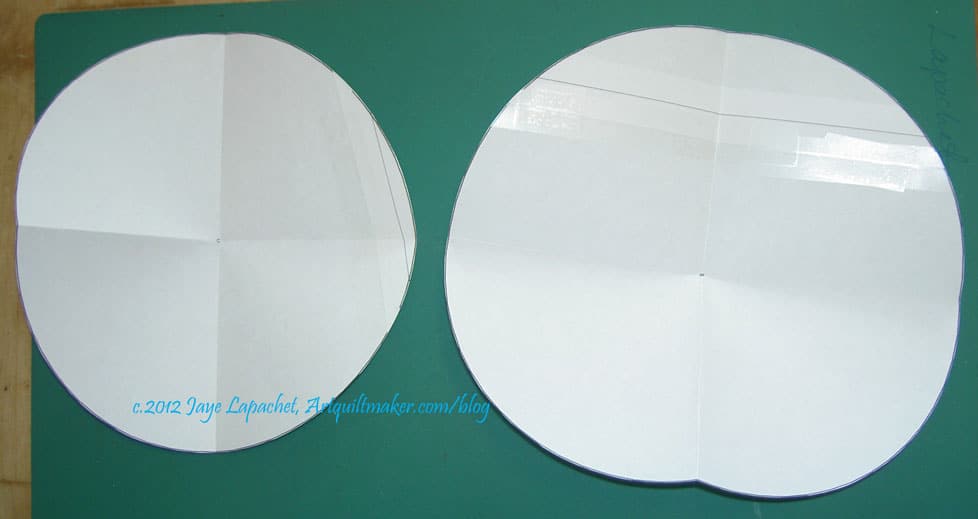
In the photo above, you can see all of them templates rough cut out, except the circles. The circles print from EQ7 on two sheets of paper. You will need to rough cut the two pieces for each circle and then tape them together. In order to tape the pieces together, hold each piece for one circle in a hand up to the light and match them up you. Before you hold them up, have have a small piece of tape ready to tack the pieces together. You can use a light box for this procedure also.
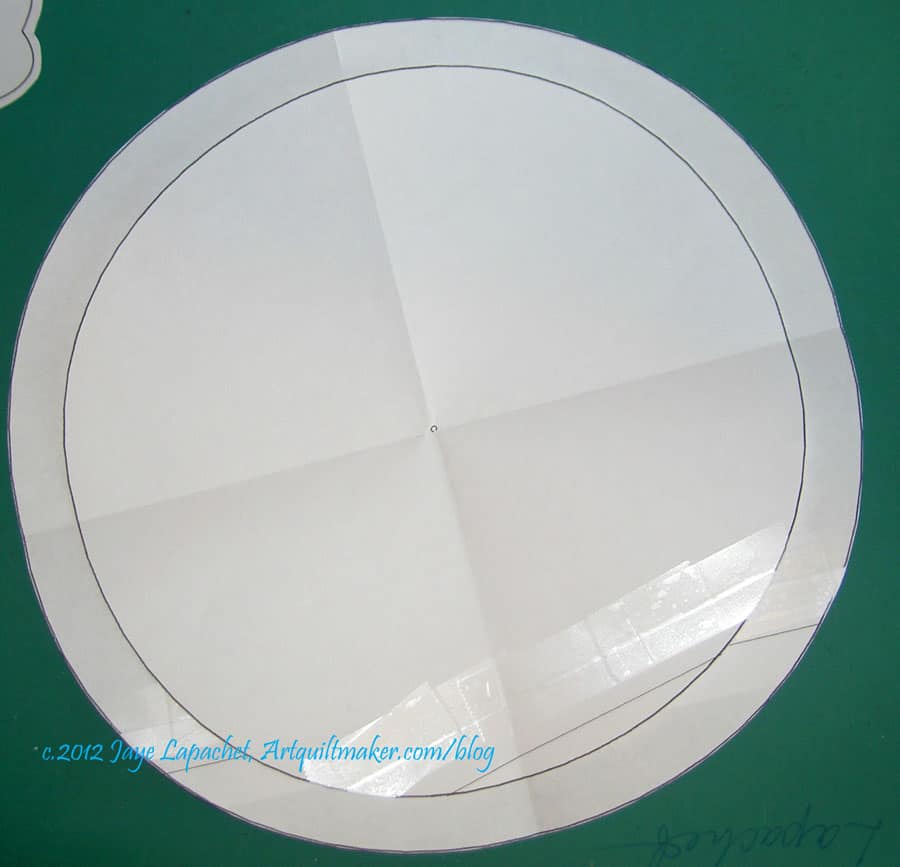
Fold circles in quarters
Fold circles in quarters to make a line down the centers. This will help you line them up to make the ring for the wreath.
I never did this before and had to figure it out, but it works pretty well.
Layer Circles
Using the folds, layer the circles together so you can see the black line of the upper circle. Draw a line around the smaller circle, using the smaller circle as a template. You will be drawing on the larger circle. Use a soft implement (pencil or roller ball pen) that doesn’t skip to draw the circle. Once you have drawn the circle, you can put the smaller circle away with your other templates. I use a zipper bag for all of the pieces and parts.
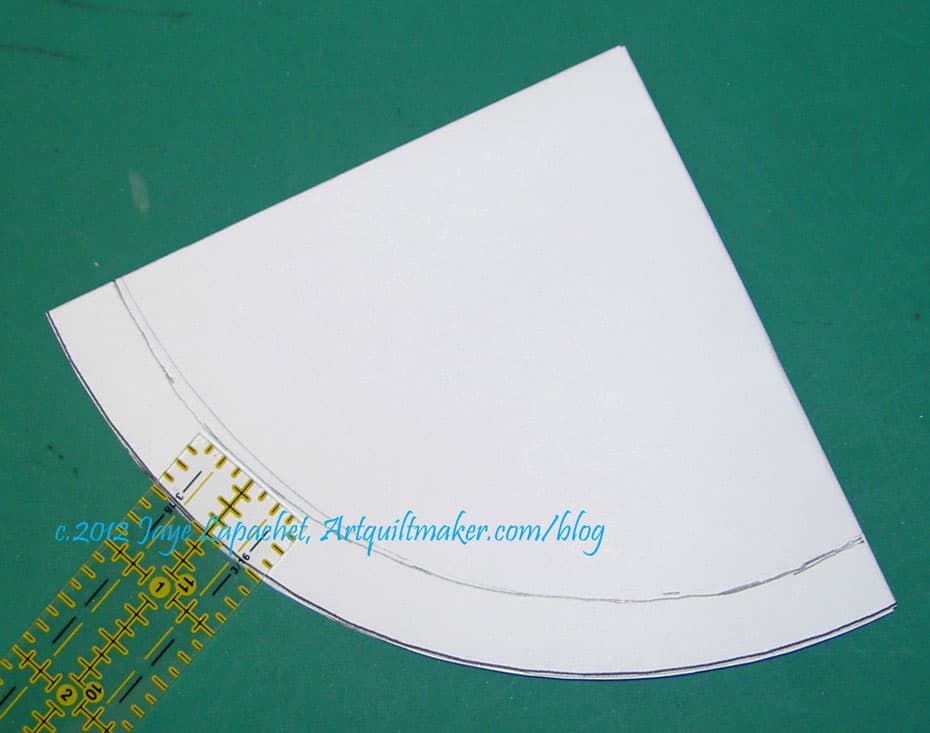
Check width
Fold up the larger circle. Check the width of the ring of the wreath using a small ruler to make sure it is even. Once you are happy with the line. Cut along the line without opening the circle.
Complete Ring Pattern
Once you have cut out the ring, open up the ring.
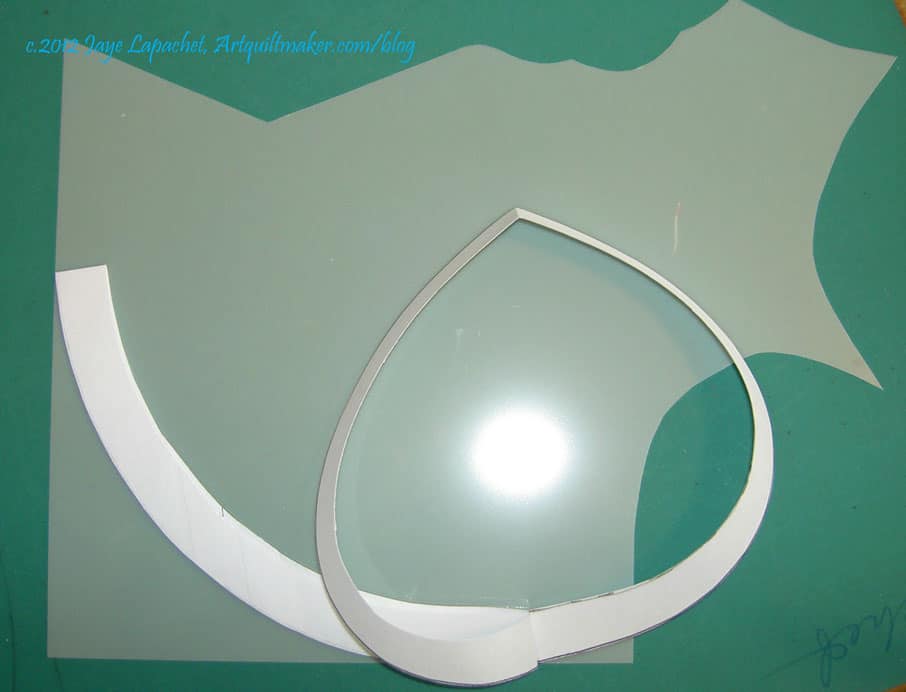
Now you are ready to make the templates. Grab all of your patterns, your template plastic and your glue stick.
Glue the paper templates to the template plastic.
No template plastic on folds
The only tricky part is for the ring. I avoid the folds in the pattern and only put the template plastic on the parts of the ring where the fold isn’t. Why? Because I want to be able to fold this piece and put it in a zipper bag later. Also, by adding the template plastic in quarters you save template plastic and you can use smaller pieces. Finally, you don’t end up with a circle of leftover template plastic.
Trim the templates to the line on the pattern.
Front & back of templates
Depending on the kind of template plastic you have, your templates will look something like the photo above.
Part 2 will talk about choosing fabrics etc.
You can find more detail about machine appliqueing directional motifs, such as letters in a separate tutorial.
“We know that athletes, musicians, and actors all have to practice, rehearse, repeat things until it gets into the body, the ‘muscle memory’, but for some reason, writers and visual artists think they have to be inspired before they make something not suspecting the PHYSICAL ACT of writing or drawing is what brings that inspiration about. Worrying about its worth and value before it exists can keep us immobilized forever. Any story we write or picture we made cannot demonstrate its worth until we write it or draw it. The answer can’t come to us any other way” (Syllabus: Notes from an Accidental Professor, Lynda Barry, pg.163)
As discussed a couple of days ago, I went on the BAM Retreat. I didn’t just have boatloads of fun and eat until I was sick, I also made some valuable progress.
Tablerunner
The Thanksgiving tablerunners have been hanging over my head. Thanksgiving is now 1.5 months away and the hanging became more like the Sword of Damocles than an item on my to do list. I am pleased to say that the two remaining have been quilted. I still need to make and apply the binding, but the quilting part is done. I didn’t get to the tablemat, but I am pleased with my progress.
One thing I did on the pumpkin tablerunner was use Aurifloss (12 wt thread). I used it in the machine with 50 wt Aurifil in the bobbin. There was more breakage than I normally experience with Aurifil. I really like the effect and was pleased that the 50 wt did not show through to the top. I didn’t have to adjust the tension.
City Sampler / Tale of Two Cities Blocks
City Sampler / Tale of Two Cities Blocks
City Sampler / Tale of Two Cities Blocks
I also made a few blocks for the Tula Pink City Sampler/ Tale of Two Cities project. The blocks were a good break from quilting, which I needed after I completed the quilting on the first tablerunner. Julie joined the #100blocks100days challenge on Instagram and, while I have not joined, it is inspiring me to work on them. Also, she is now ahead of me on making blocks! I need to get myself in gear. Michelle S was a good support for this project at the retreat.
I also FINALLY started the Valori Wells Little Cell Phone Wallet pattern. I really, REALLY need something to carry my phone and hotel key when I am wearing dresses with no pockets. REALLY. Since the project was small, it seemed like a good time to work on it. I had some trouble with the directions, which should be no surprise. I did get a good working sample by the time I left the retreat. It isn’t one that I will use for various reasons. I’ll write more about this pattern in another post.
While my descriptions might not seem like a lot, I was busy and working hard the whole time. I am pleased with my progress and will be really pleased when I can finish these various projects and cross them off my list.
This is part of the quilt class, but I will use some different patterns and fabrics to demonstrate.
When I started working on the Tarts Come to Tea after a long break I really could not remember how to machine applique’. It was the strangest feeling. I knew the general principles (trace pattern, iron it on fabric, satin stitch around the shapes), but all the details were hiding in some dark corner of my mind. I felt like I had to start over.
Being a good librarian I looked at some books, but could only find references to needle-turn and raw-edged applique’. I developed the following process. This is an overview. A future tutorial will provide more detail.
Supplies:
pencil
large sketch pad
favorite fusible (I like Soft Fuse)
black marker
paper scissors
fabric
thread
sewing machine
applique’ foot
Cake block pattern
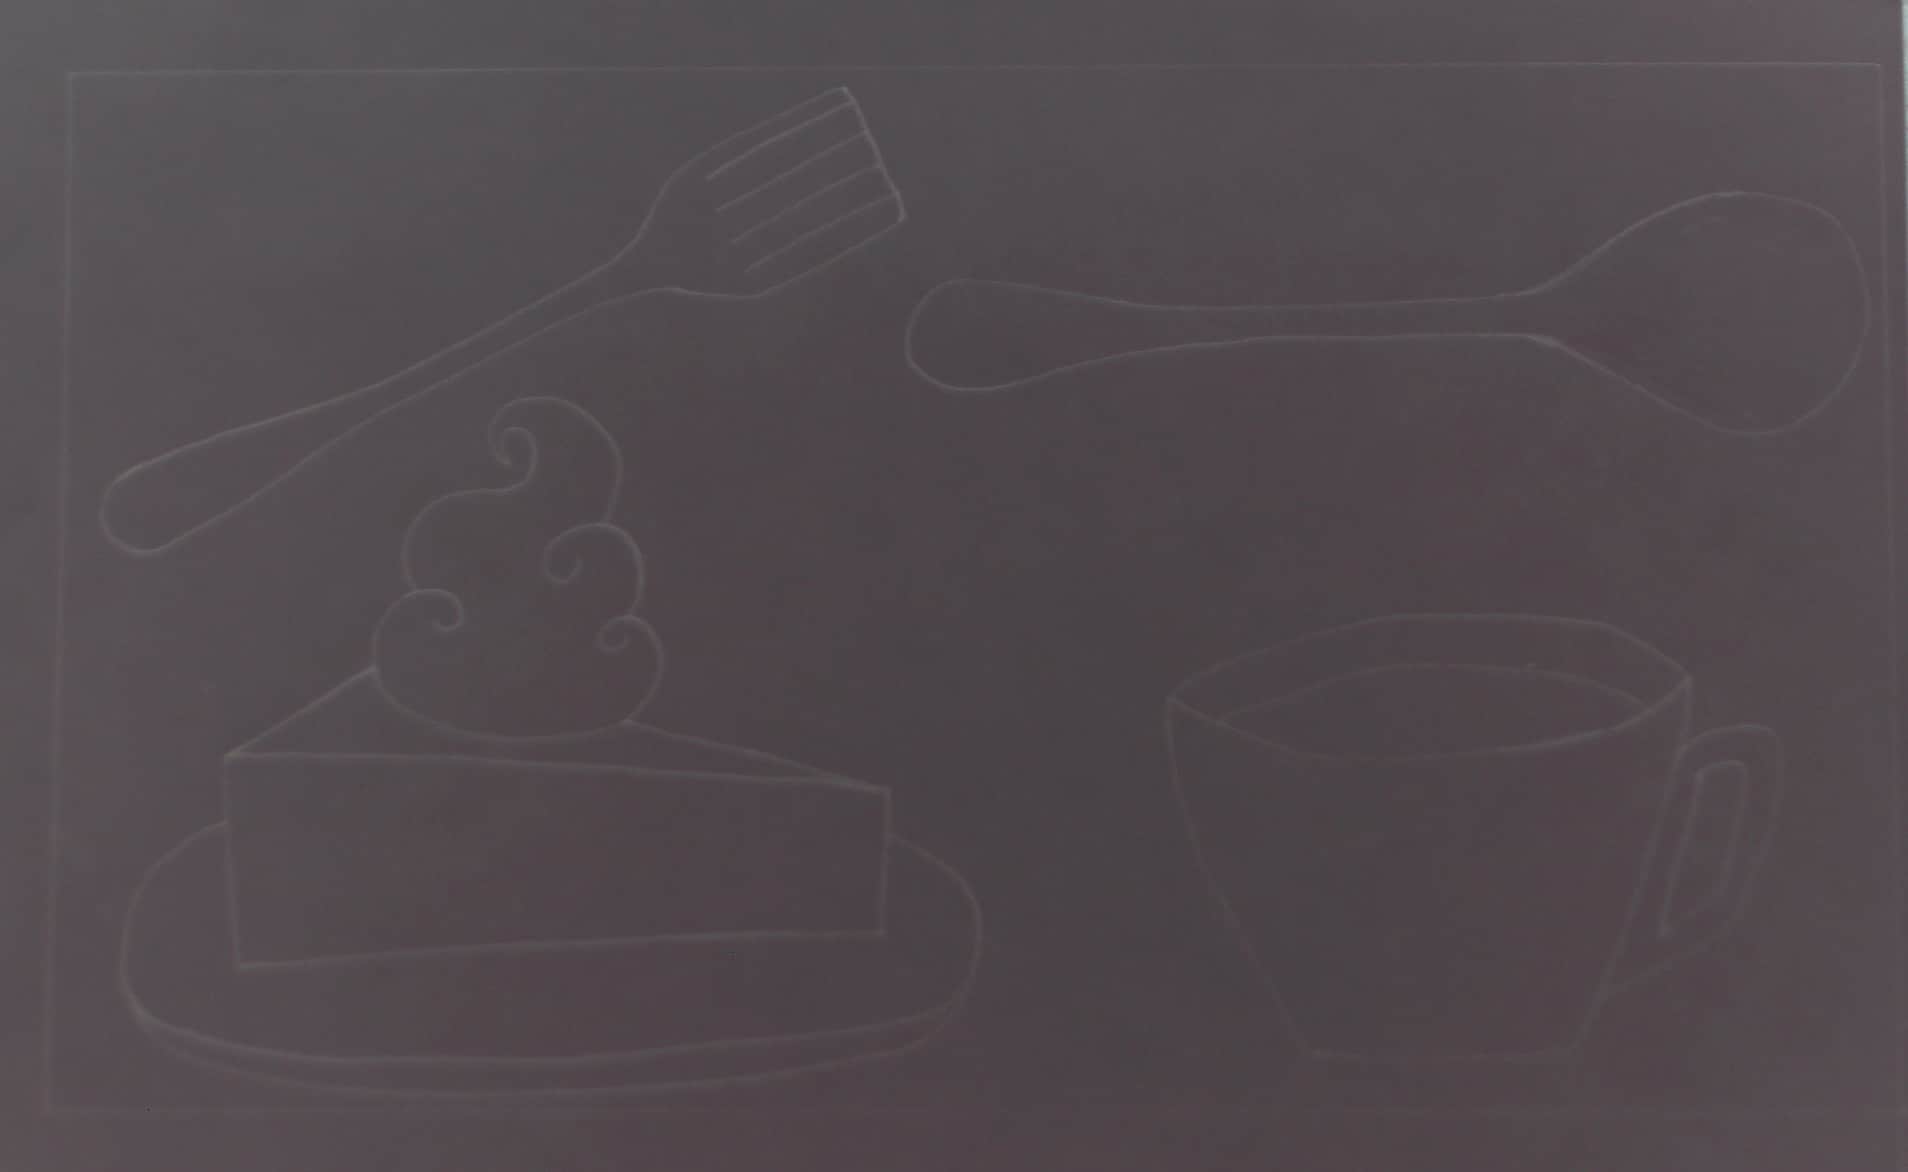
First, I draw the pattern out life size on a white sheet of sketch paper. (I know this doesn’t look like white paper, but see the Weekend Work post for an explanation). I usually draw in pencil to start. When I draw the shapes in pencil I can make small changes until I am satisfied with the shapes.
Machine Applique’ Pattern
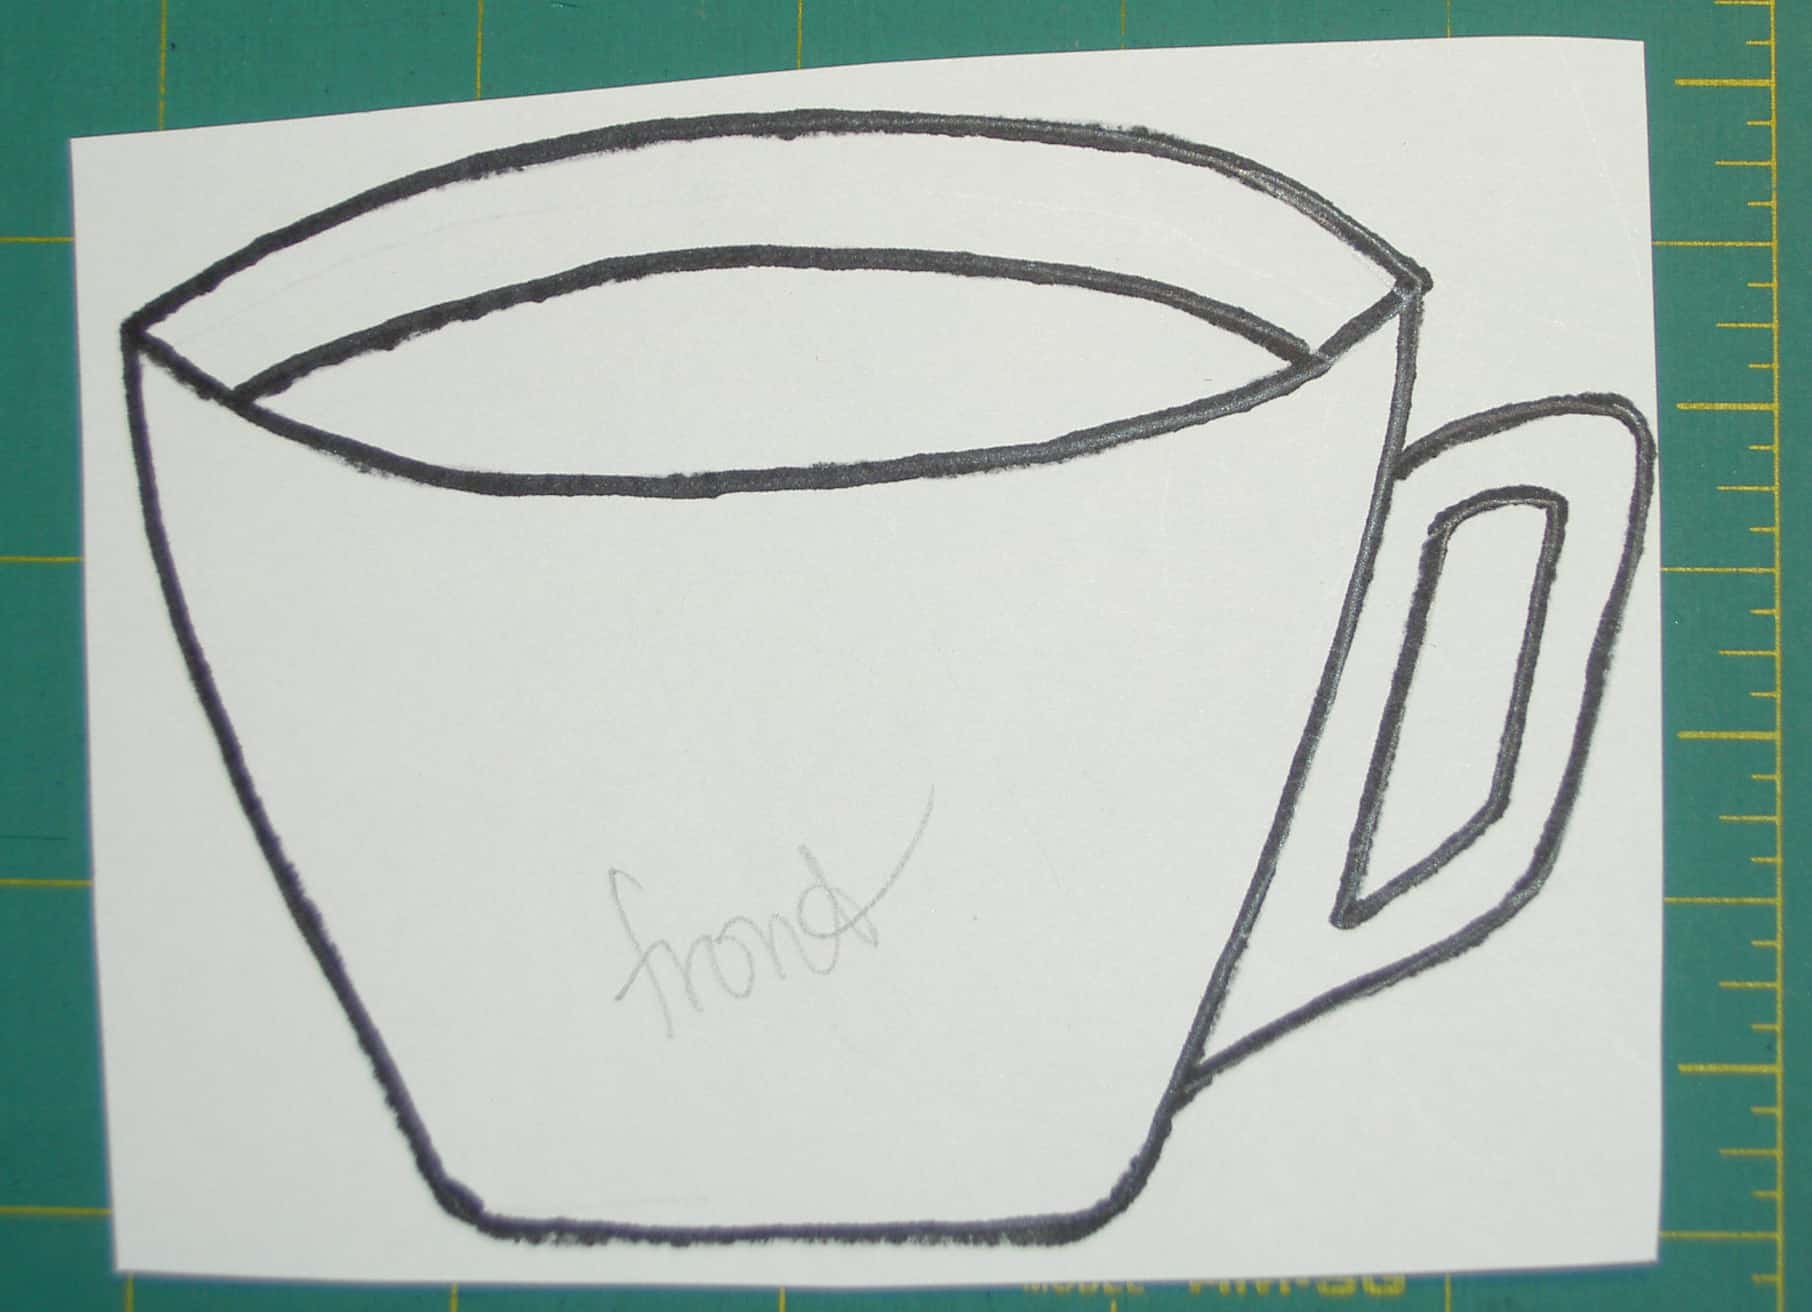
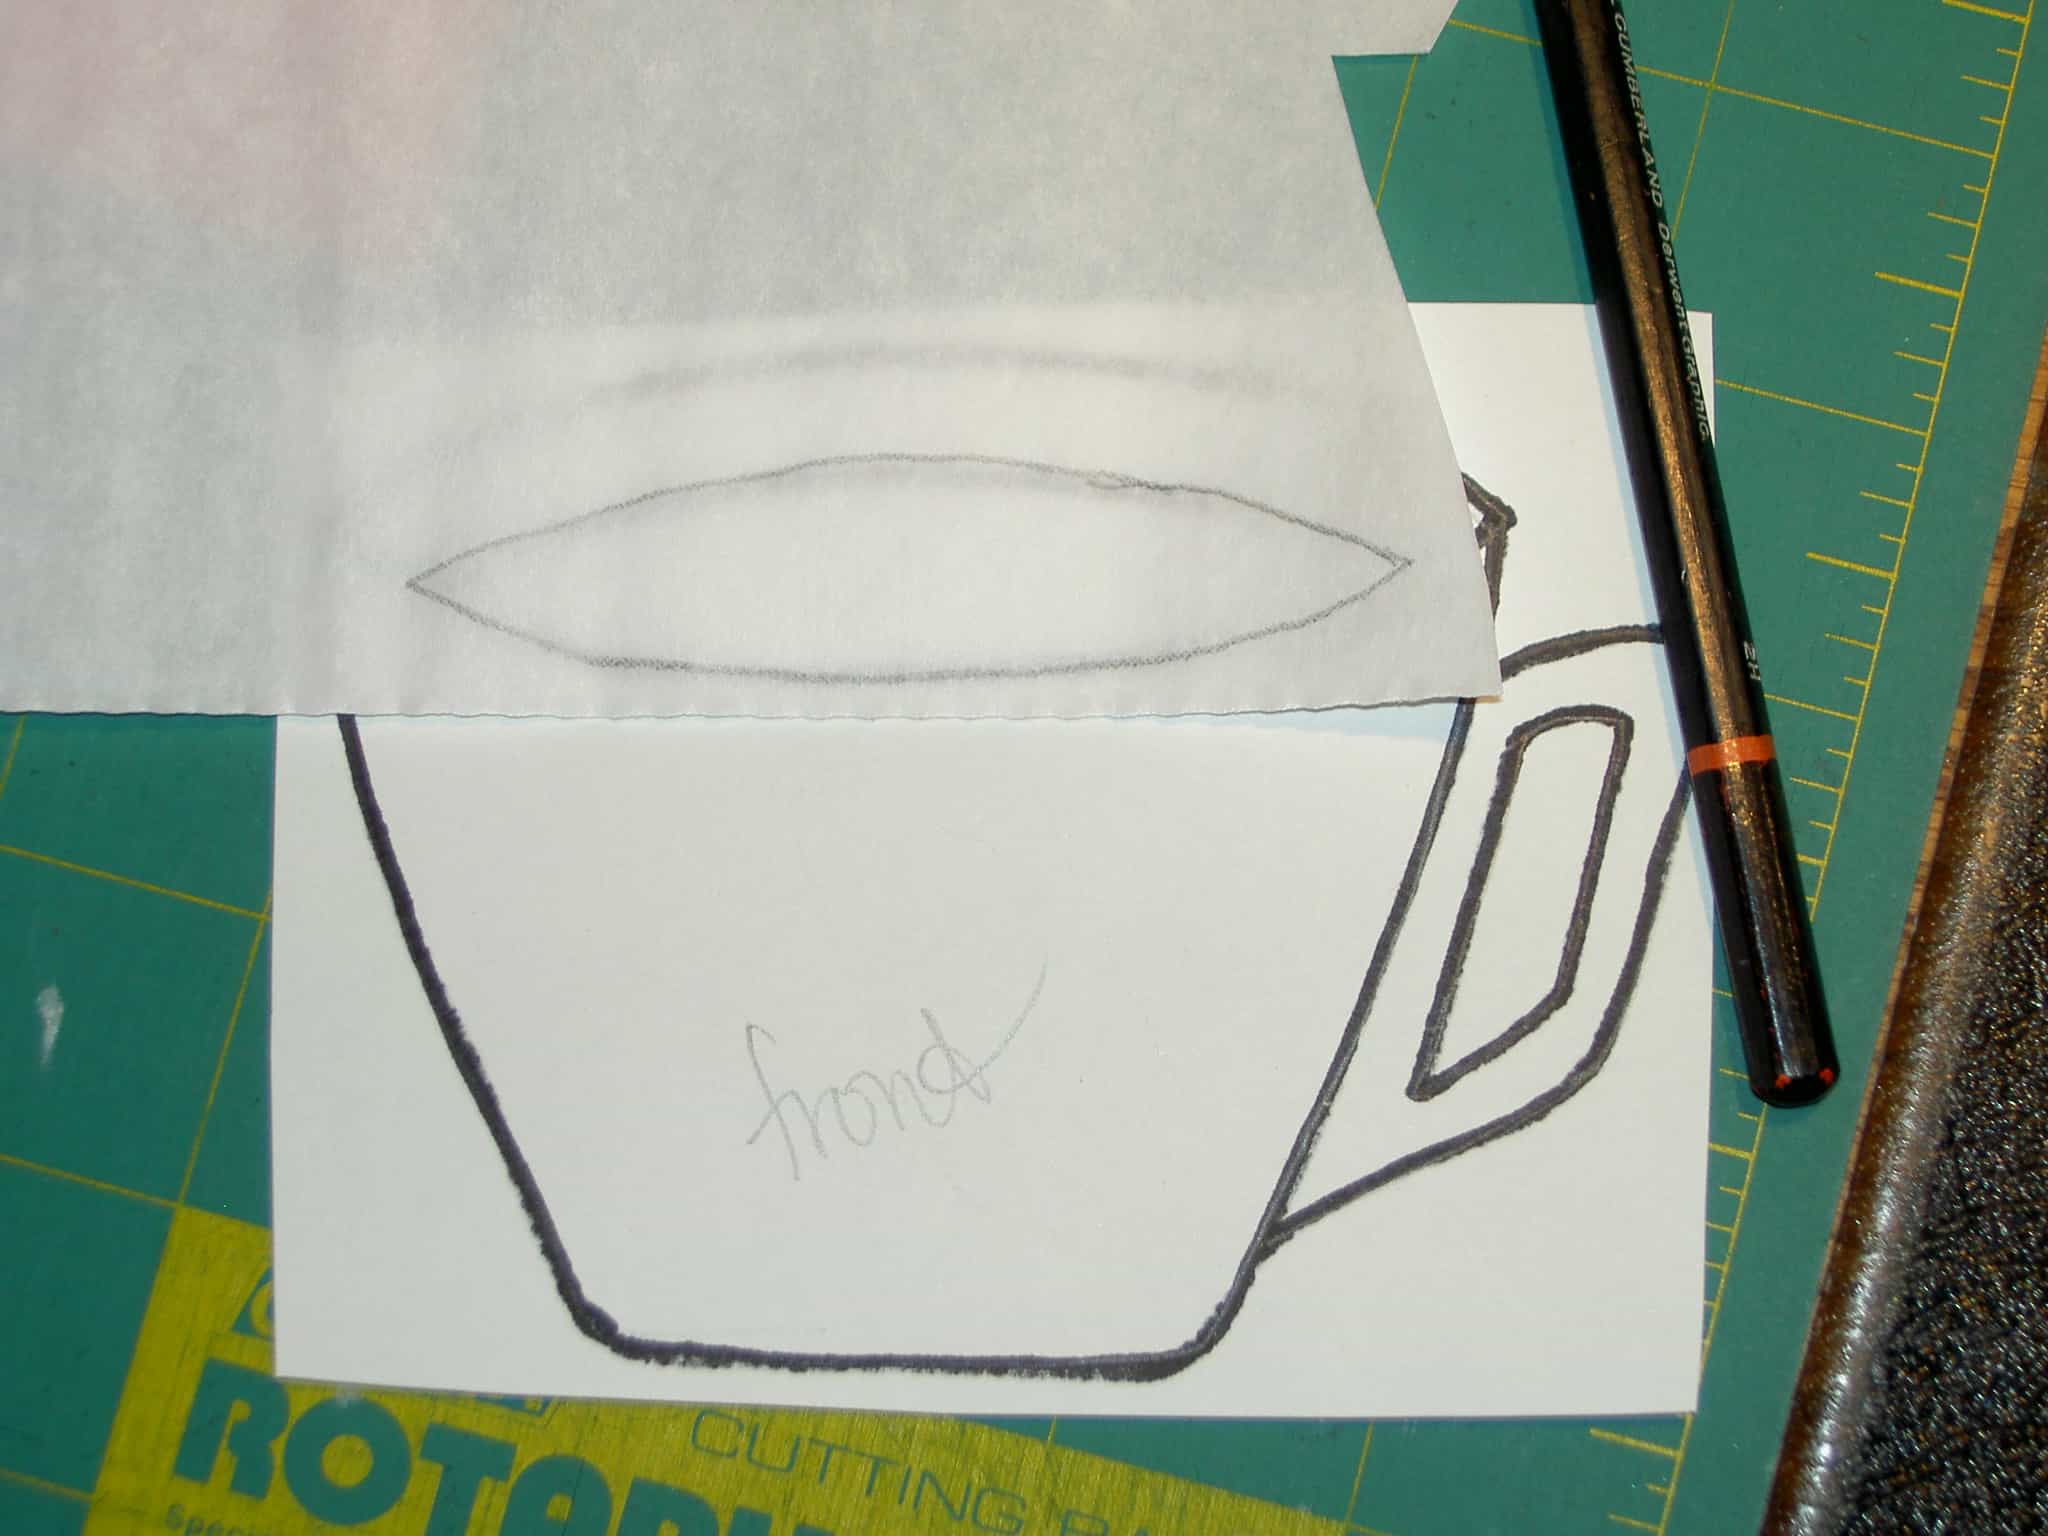
Next I trace the patterns on individual smaller sheets of paper. If there are parts that need to be in different colors or need to be separated for some reason, then I make separate patterns for them. For example, I made a separate pattern each for the main part of the cup, the coffee, the handle and the inside-back of the cup, above.
Tracing Machine Applique’ Pattern
I put the Soft Fuse, or other fusible of your choice, over the pattern and trace the pattern onto Soft Fuse.
Traced Pattern on Fabric
After that is done, I trim the fabric to the approximate size, then press the Soft Fuse (or other appropriate fusible) on to the wrong side of that piece of fabric.
Repeat for all of the parts of your pattern.
Cake block detail
Finally, remove the paper and stick the pieces to the background.
Press the fusible on to the background, according to the directions and satin stitch around the edges.
We are going to take a break from the quilt class and talk about quilt retreats. I may slow down the quilt class just a little to catch you up on some progress I have been making.
I just got back from a quilt retreat. BAM went to Sunnyvale together, had a lot of fun, ate some food, got to know each other better and worked on our projects for 2.5 days. We did a lot and a lot happened, so I might write multiple posts.
It was a great retreat and I had a great time. I felt like I got back in the swing of sewing, at least a little. The Peacock Quilt is still on the design wall taunting me.
Mad for Mod 2016 Sponsors
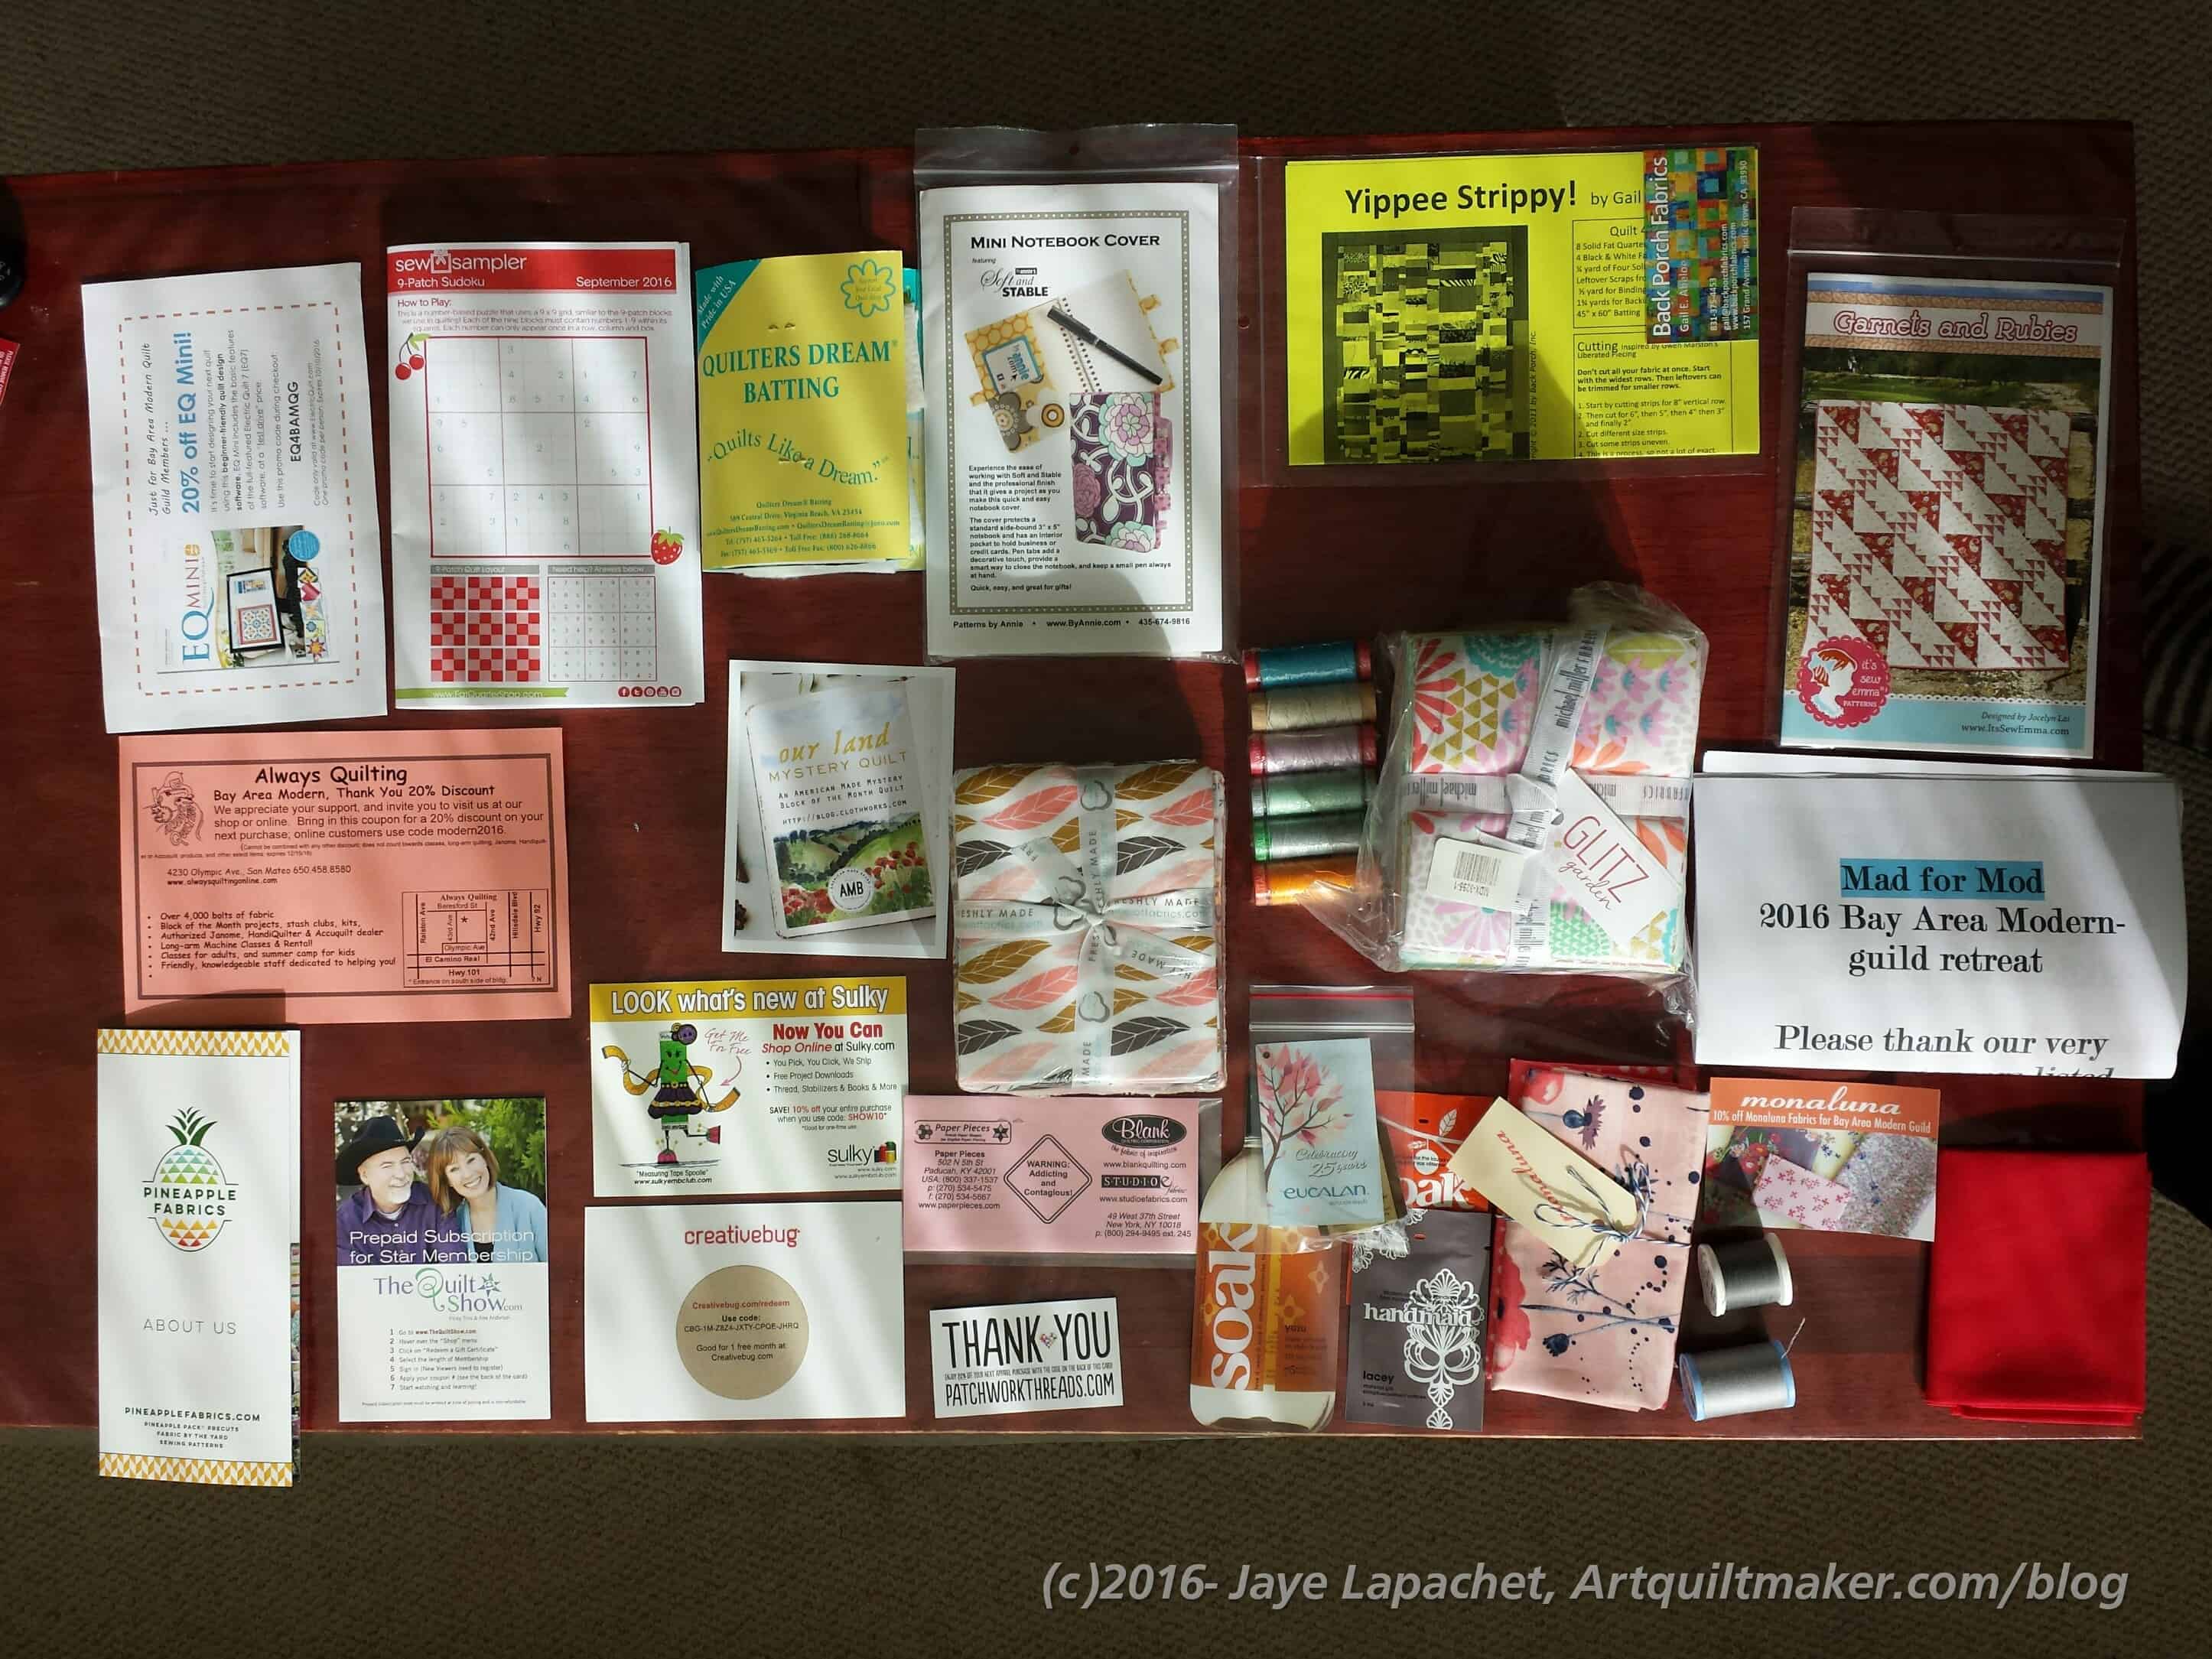
First, the sponsors were fantastic. You wouldn’t believe the gift bags that we got. I finally took everything out and looked at it when I got home and felt like the bag was magic. More and more kept coming out. I was very pleased with what I got, though I didn’t expect such a gift bag.
BAM Retreat Goodies
Not only were there actual things in the gift bags, but also a lot of codes for discounts and free quilt trials. I received two FQ packs of fabric as well as a pack of Aurifloss, a number of patterns, some other thread and many new things to try out. Amy, the vendor chair, worked hard and did a fantastic job.
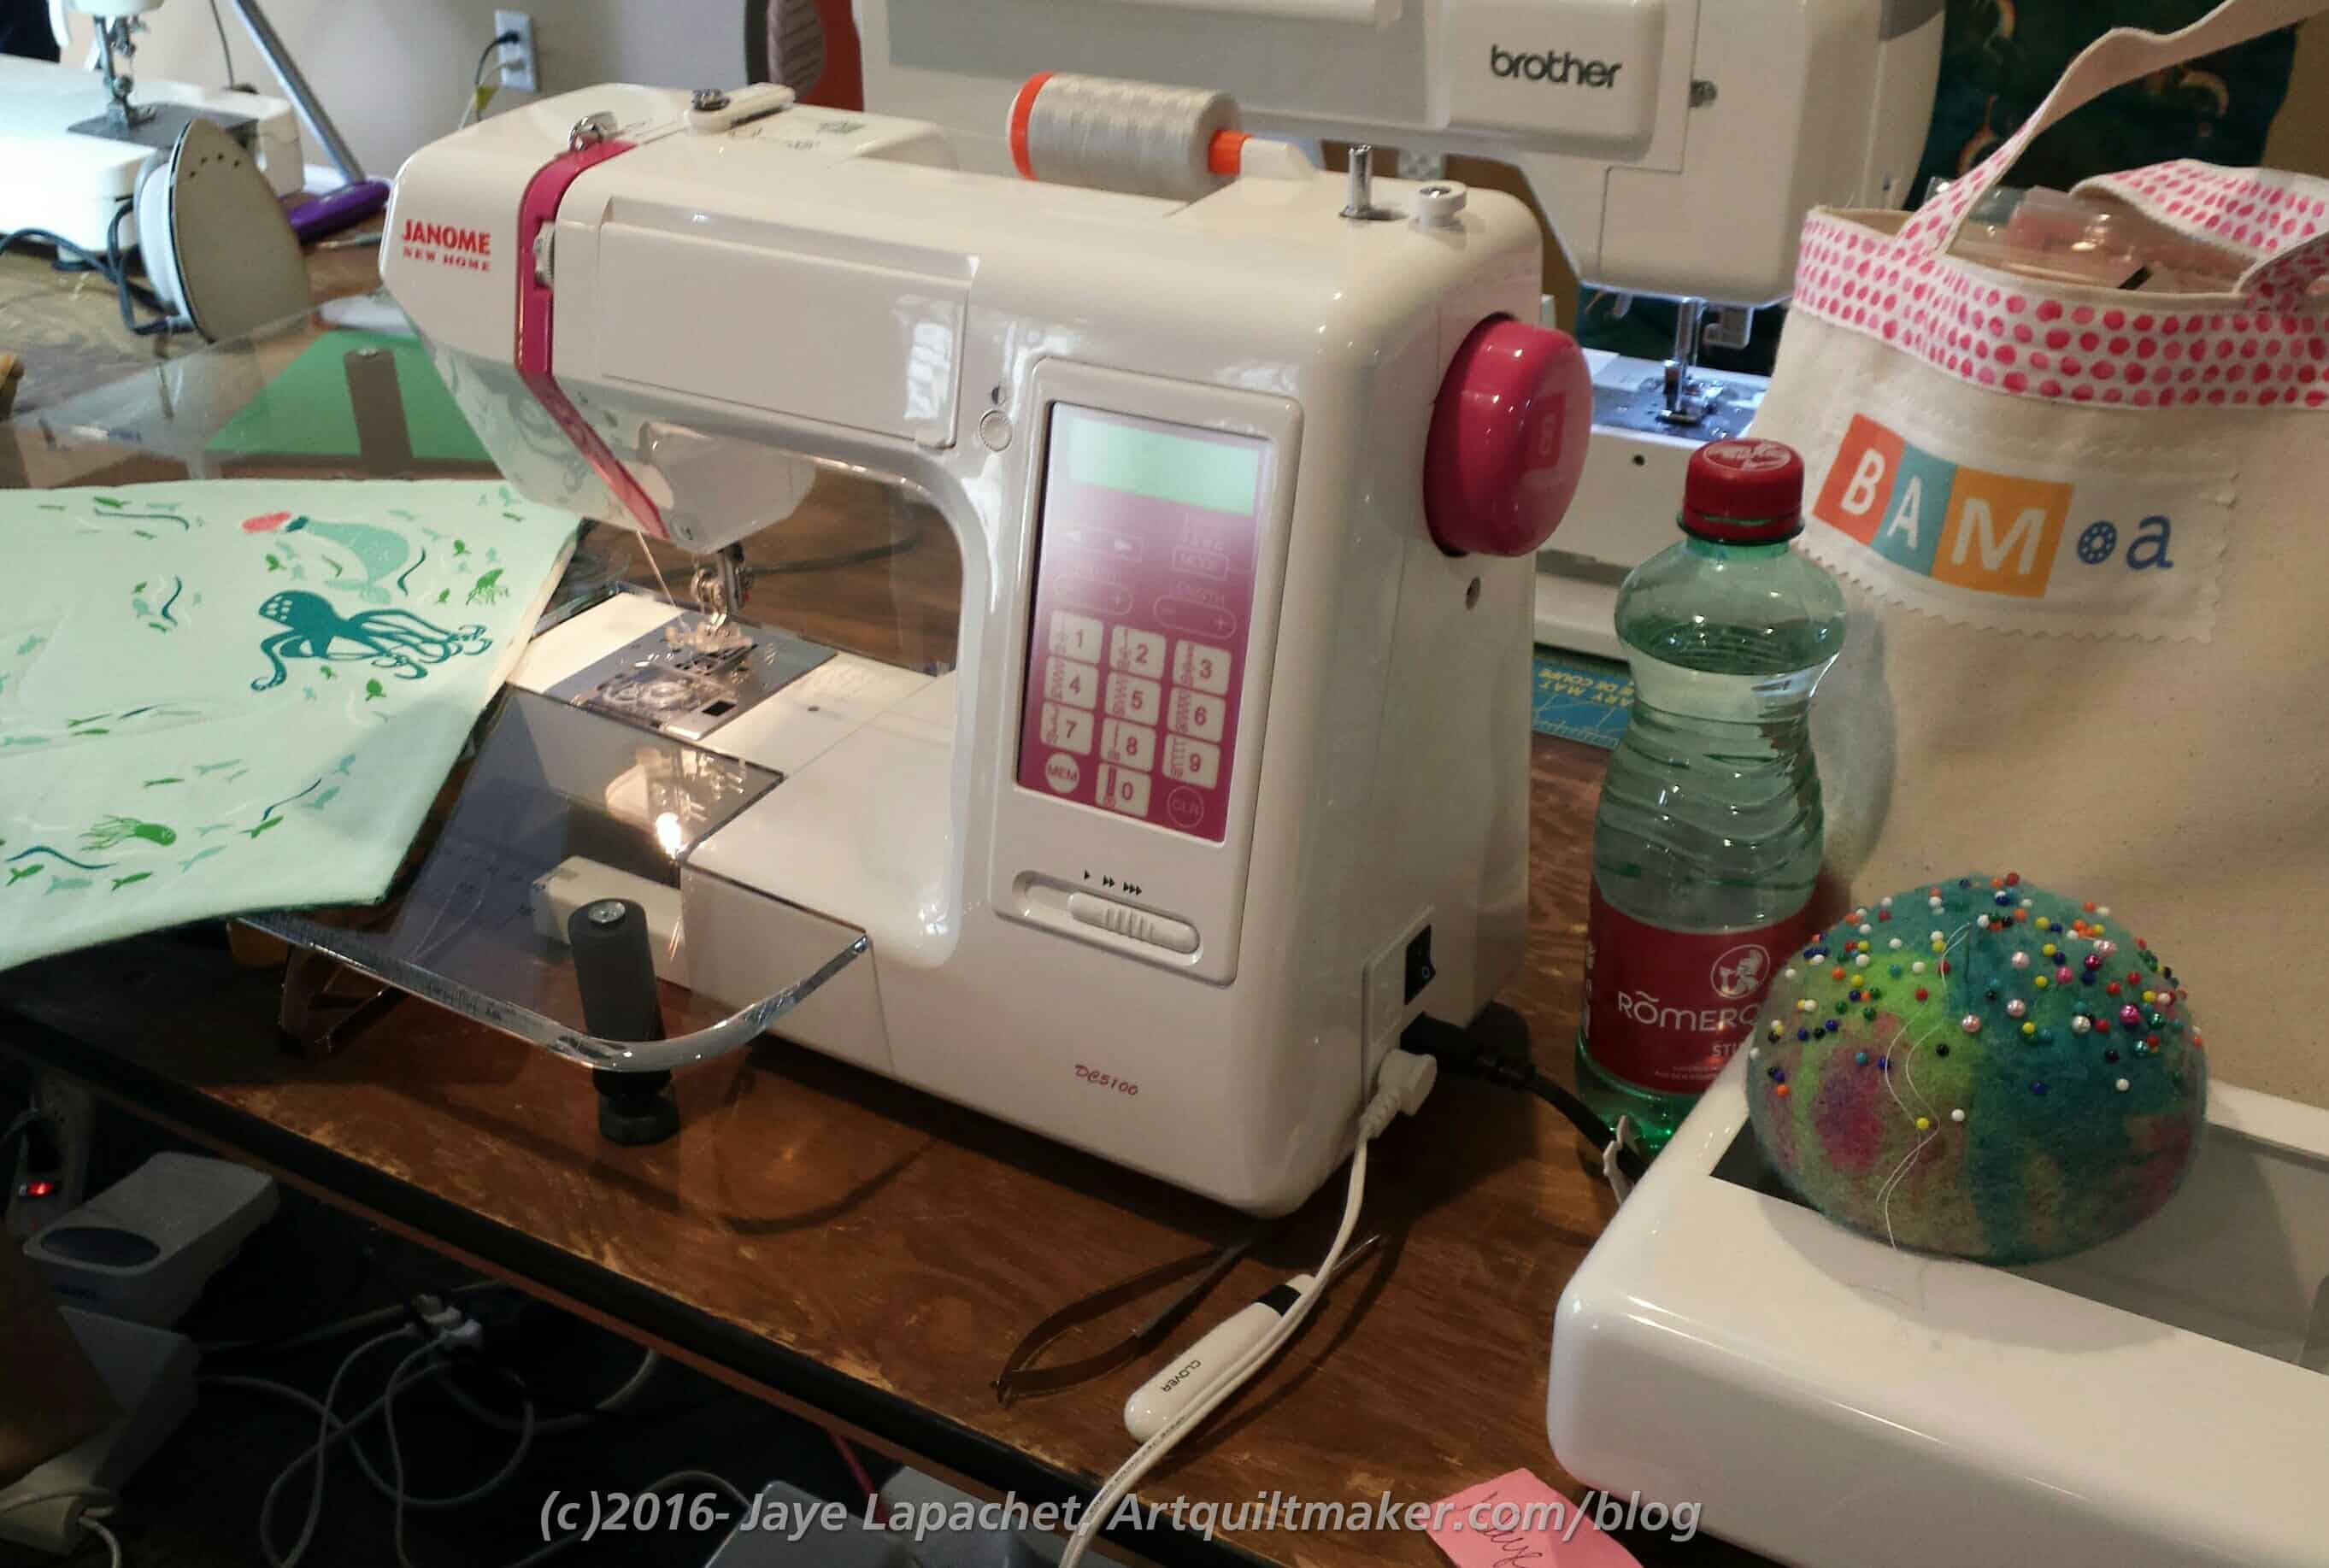
BAM Retreat Sewing Space
My sewing space was small, but adequate. We knew in advance that we would only have a small amount of space so I planned accordingly.
BAM Retreat Sewing Space
The rest of the room was a regular conference room, but there were French doors that led out to a small grassy area, so we had plenty of natural light as well as fresh air and a nice spot to have cocktail hour. 😉
BAM Retreat Cocktail Hour
Meals were included, which didn’t work out super well for me, though I think everyone else enjoyed them. My stomach was still a bit off from my trip and from being sick, so I am blaming those things rather than the caterer. We also had cocktail hour on Friday and Saturday. I didn’t drink, but the snacks were well labeled GF and tasty.
Although I came home on Wednesday and left again right away on Friday, I was glad I attended the retreat. I think it was hard on my poor DH, but perhaps coming home and leaving again two days later gave him a taste of what he had been missing. 😉