I almost didn’t make any donation blocks this month. As mentioned my mom is sick and it is taking up time (time I am glad to have the opportunity to use). I worked on a donation quilt for most of my leaders and enders time. I finished that and did get to a few blocks. Not the 31 I had hoped for, but some is better than none.
Periodically, I revisit the gifts I make for people. I know you have seen the posts about gifts I have made for my sister, my mom, Gerre and Julie. I really do like to give gifts that people will use, though I do give gifts, like the Mega Pinnie that are just fun and unique.
My Mom is staying with me while she recovers from major surgery.
The Take a Stand has art supplies in it. She is using the Poolside Tote like a suitcase for random stuff and the Percheron is where she keeps the complicated crochet project I gave her as a kit gift.
Mom’s Persimmon Pouch
Still, it is not enough. I will need to make her a pouch for her hand quilting supplies. Right now they are in a plastic zipper bag. I know I made her a Persimmon Dumpling and an Inside Outside Pouch, but she didn’t bring either with her.
A Sew Together Bag is the obvious choice. She has one and I don’t want to make another right now. I am thinking about another Cotton Candy pouch. I am also thinking about a Brumby pouch. I haven’t made one of those yet, but recently received the templates as a gift. We will see. I want to look through my various patterns and see what sticks out.
What pouch or bag do you use for hand sewing supplies and tools?
I have finished sewing the pairs together and am starting to make four patches.
As usual, I am rearranging squares as I go along. I think the top will be about 40 in x 40 in.
Yes, I added in a few pinks that snuck into the batch of wrongly cut squares.
The last orange top I made was either Orange You Glad or the Orange Improv. I like both of them very much. They are very cheerful. It must be the oranges that I buy – not as much orangey-brown as orangey-sunshine.
Remember a few weeks ago I said I won a prize from Freespirit? Well, the real prize showed up on the Friday before my birthday and it was good! I feel like the timing was set to coincide with my birthday. The prize came with a lovely note that makes me like FreeSpirit even more than I already did.
FreeSprit prize prints 1
When I opened the prize, I thought it was a bundle of Tula Untamed, but it was more than that! It looks like they selected fabrics that I like from their current line, because there were also some Kaffes, a couple of Anna Marias, a Brandon Mably, a couple of flower prints from my man, Phil, and a bring and happy flower print by a designer whose name was cut off. Most of the cuts are fat quarters, but there was one half yard. I am going to share a couple of the FQs with the guild. Share the wealth, right?
FreeSprit prize prints 2
I’ll definitely use the flower prints somewhere. That Garden party print (above, lower right) is awesome. I have to find some great pattern with which to use it.
I feel so fortunate! This was such an unexpected surprise. Thanks, FreeSpirit!
I know it seems like Christmas is lasting forever on the blog. I made quite a few gifts, but it is also taking some time to post about them all.
Tim admired all the project bags I made last year, so I decided to make him one from Christmas.
I don’t have a lot of dark greens and thought these bright greens would be too much, but he loved the bag and said that he loves all greens.
I am super happy with the way this came out and will make one for myself next. Well, maybe not the next project, but the next time I make a project bag. 😉
Despite taking care of my mom after her surgery, I have been able to get a little sewing in.
Old Town: QSTs
I finished all of the QSTs, which turned out to be mostly the correct size. I used pink instead of red, as mentioned, and am pretty happy with that choice so far. Some of the pinks in this batch are leaning a little more towards the lavender/purple range. I hope they won’t get mixed up in the final layout.
Since I finished all of these QSTs and the Baby Flying Geese, I decided to sew them together as indicated in one of the clues.
FG & QST units
I think this is the first assembly I have done beyond individual units. I got interrupted a bunch of times, but I finished them!
I had a moment of stress when I realized I didn’t have enough of the Baby Flying Geese to sew to the second side of the QSTs. They were neatly bundled in the box in which I am storing all of the units and I hadn’t pulled them out. YAY!
This is a great quilt for learning. I highly recommend Bonnie’s projects, especially the mystery quilts, if you want to practice basic piecing. She takes the time to help makers focus on getting the right sized units. Her clues usually have more than one way to make a unit so it works for you.
I wanted to show you the Martelli No Slip Pad for Foot Pedal** in situ. This foot pedal pad really works! The location in which you see it is where it has been since I received it on Christmas. No joke. It has not moved at all as I sew.
The foot pad is made from the same materials as the machine pad. There is something hard and stiff in the middle. There is, then, a layer of some kind of non-slip rubber on the top and bottom, covering the hard surface. Product Dimensions: 9.0 inches L x 0.3 inch H x 9.0 inches W. The size on the Amazon description varies, FYI, so these are my measurements.
This is the first foot pedal pad that has stayed in place for me. Usually the foot pedal creeps towards the wall until I can’t operate the foot pedal. When the foot pedal ends up under those boxes (on the upper left), I can’t wedge my foot on the foot pedal any more. Then I have to haul it out, reposition it and start over. It is a small thing, but it makes me crazy.
Note: I have hardwood floors in my workroom and have not tried it on carpet.
I have the two previous pedal pads under my table ‘just in case’, but will be getting rid of them soon.
This is a Martelli product. I always thought Martelli only sold their rotary cutters at quilt shows. I went to their website and found they have an amazing number of products. Not only do they have their signature rotary cutters, but they have workstations, a subscription box, the Get a Grip mats and many other items. I wonder if COVID forced them to diversify?
**N. B. : Obviously, you should shop at local quilt shops and small businesses. However, if you are too busy or can’t find what you need there, I use Amazon affiliate links and may be paid for your purchase of an item when you click on an item’s link in my post. There is no additional cost to you for clicking or purchasing items I recommend. I appreciate your clicks and purchases as it helps support this blog.
**N. B. : Obviously, you should shop at local quilt shops and small businesses. However, if you are too busy or can’t find what you need there, I use Amazon affiliate links and may be paid for your purchase of an item when you click on an item’s link in my post. There is no additional cost to you for clicking or purchasing items I recommend. I appreciate your clicks and purchases as it helps support this blog.
I spent some time over the last couple of weekends getting over whatever hump was preventing me from moving forward.
Old Town: 4 patches
First, I finished all the 4 patches, which was a lot! I thought I would never finish and I think that part of what was preventing me from moving forward. Now they are done and I think they look great.
I haven’t incorporated them into any blocks yet, so stay tuned for that.
Old Town: baby Flying Geese
I also finished some Flying Geese. They are the baby Flying Geese that I made using the replacement Wing Clipper** I got for Christmas.
This is the first group of lavender I have added to the quilt. In the photo they look nice. We’ll see how they look combined with the other colors. Fingers crossed it will be ok.
I got going on the QSTs. One of the clues said to combine them with another couple of pieces, so it was time to stop avoiding them.
I was really happy using Bonnie Hunter’s Essential Triangle Tool** to make them. It is a ruler I have had for awhile, but haven’t used much. I found it easy to use and helpful. I just followed Bonnie’s instructions on the clue and it worked perfectly. Well, so far, it is has worked perfectly. I liked the way she said where to put the ruler lines. I haven’t finished sewing the QSTs yet, so I’ll have to wait and see how it works out.
Bonnie put the Reveal up and it is a complicated looking quilt, but also cool. I am eager to see how my replacement of coral with lavender will look. If you are working on it, make sure to download your clues.
**N. B. : Obviously, you should shop at local quilt shops and small businesses. However, if you are too busy or can’t find what you need there, I use Amazon affiliate links and may be paid for your purchase of an item when you click on an item’s link in my post. There is no additional cost to you for clicking or purchasing items I recommend. I appreciate your clicks and purchases as it helps support this blog.
I received Hugs & a Kiss back from Colleen the other day. I am now working hard on binding it.
I want to get it in the mail soon so as to relieve my house of two quilts. This one and the one for the recipient’s brother, the Green & Grey Diagonal 9 Patch.
The quilting looks really nice. The quilt is covered in different sized circles.
I revisited my Christmas pillowcase gifts after seeing some on SIL#4’s bed on Christmas Eve. It occurred to me that there are a few new spouses/SOs for whom I had not made pillowcases. Nobody will know that they don’t have them, but it is only fair, especially if they see their spouse has one.
My tally was in a post from 2015 and there are a lot of new additions to the family, mostly spouses, but a few kids as well. The original tally was confusing, so I have rewritten it.
Well, that’s at least 8 yards of fabric I can use up right away in 2025. I need to check to see what Christmas fabric I have in case I need to get some on sale. I hope I have enough.
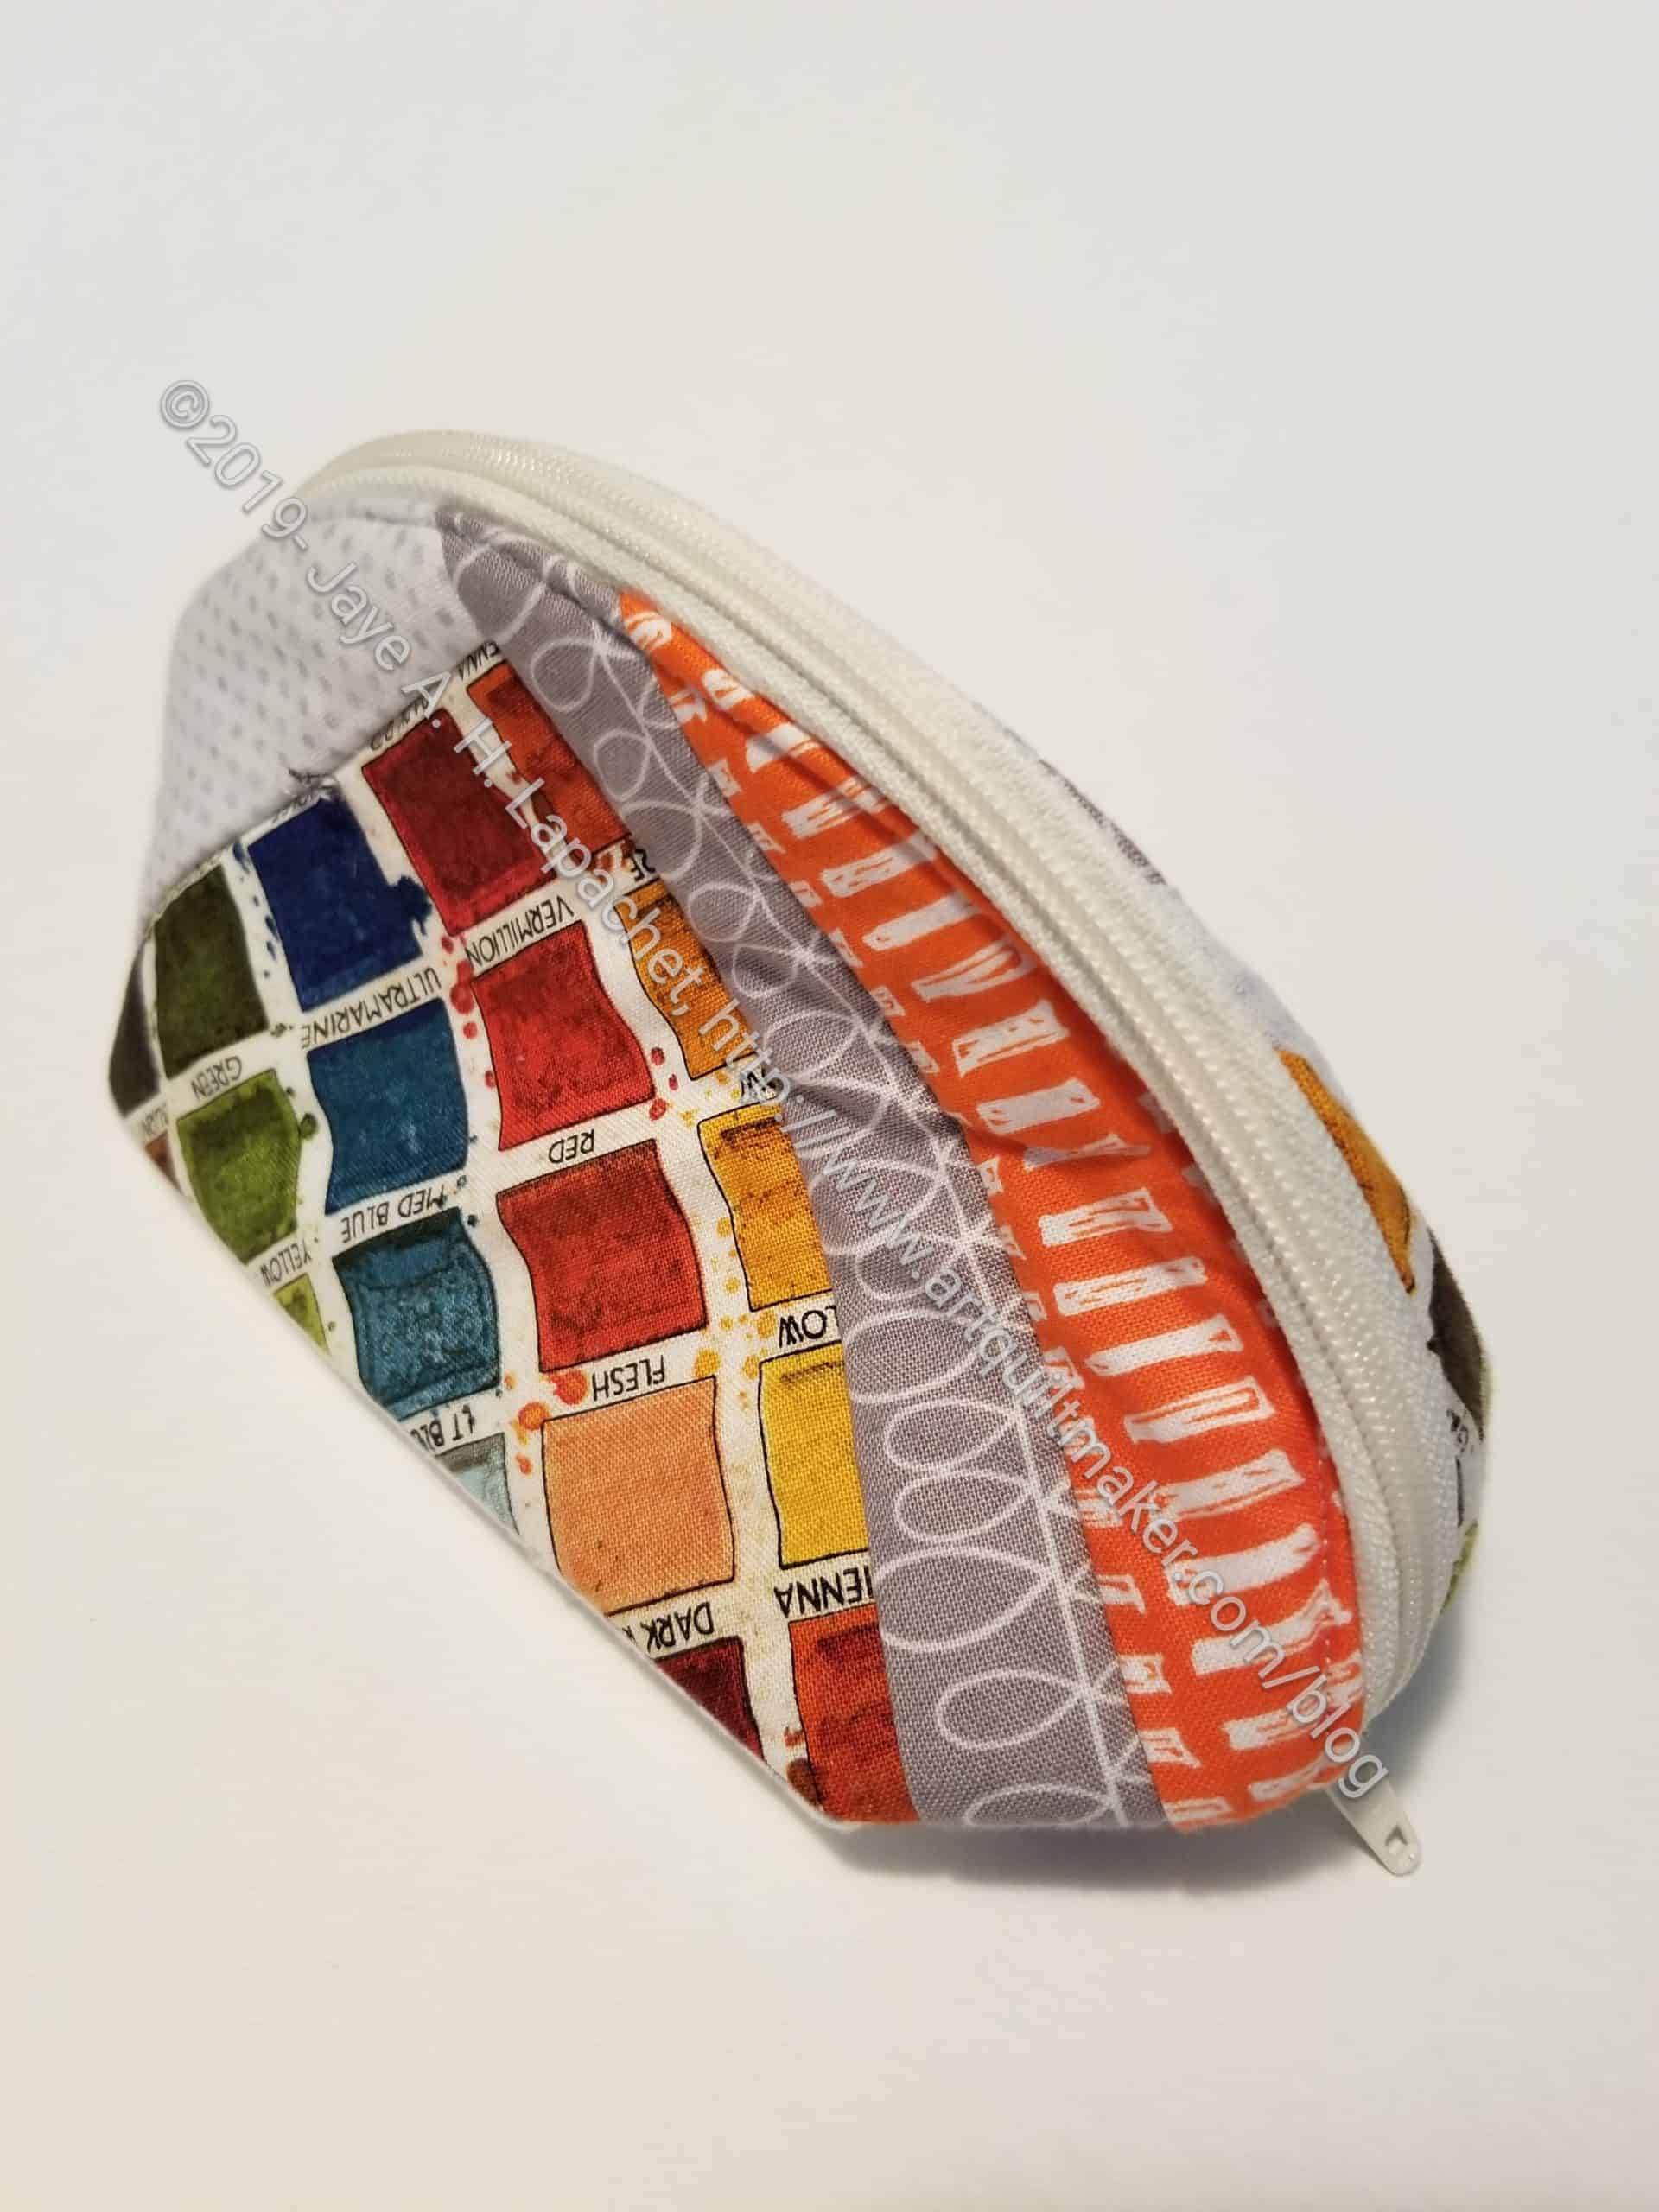
Another project I finished for the holidays was a second Atlas Zipper Case. This one went to SIL#2. She is a Cal (UC Berkeley) alumna so the fabric was appropriate.
As mentioned, the pattern is from Center Street Quilts. The second one went more quickly and came out really well. This is a really good pattern. I want to make more of them.
I didn’t have quite enough of the Cal fabric. I bought 5 yards several years ago and I am down to scraps after this project. I found some yellows and blues that matched the Cal fabric colors perfectly. I went looking for more of this fabric, but aside from Spoonflower options, this particular print is nowhere to be found.
Cal Atlas pouch – open
This pattern requires quilting, as do many of the Center Street Quilts bag patterns. I learned a lot by quilting the other Atlas and applied this knowledge to this bag. As you can see, I only quilted it intensely in a few places, not all over the whole piece. That technique made it a lot more doable. I like very dense quilting for bags, as you know, so I really had to restrain myself.
Cal Atlas pouch – right
I thought about making the privacy pocket (lower right) with vinyl instead, but ended up fussy cutting some of the Cal fabric and keeping it as indicated in the pattern for private items.
The interior fabric on the top vinyl pocket is an older AGF fabric and it is just a little off of the Cal yellow. I like it as an addition so the whole bag too matchy-matchy.
Cal Atlas pouch – left
I think the most useful pocket will be the large vinyl pocket. It has a lot of space for various items.
There are also slip pockets underneath all the pockets described, so flat items can be safely placed there.
I did shorten the tail of the zipper. I had a longer piece than required and thought it would be fine, but it was really too long.
The other day, I wrote about what I accomplished at Sew Day. I worked on cutting up scraps into shapes and sizes I need for future projects. A big blob of unorganized scraps makes me anxious. It also takes up a lot of space on my sewing table.
I generally keep a list of shapes I need/want to cut from scraps and yardage on my cutting table. This list includes shapes I use all the time such as 2.5 inch squares as well as special pieces I need for certain quilts.
As part of my preparation for the 2025 quilt- and bagmaking – year, I looked at my list of shapes. I found that I didn’t update my list in 2023 or 2024. That was the first step. This year, I will cut a variety of shapes for projects known and unknown.
As usual, I will cut 2.5 inch squares. I find I dive into those bins pretty frequently. Old Town needed a bunch of 2.5 inch squares. I didn’t need to cut any, because I had the right colors in my 2.5 inch bin.
In general, however, I cut two sets of 2.5 inch squares. One is for my own projects, like Old Town, and the other is for donation blocks. Often, when I cut from scraps, I cut one for myself and several for donations. It depends on how big the scrap is and how much I like the fabric.
I like the donation quilt I made with 4.5 inch x 8.5 inch rectangles, so I am collecting more of those. I am not cutting those sizes from yardage. I only cut these when I have large scrap. I do get them sometimes.
I am also still cutting 2 inch x 2 inch cool colors for Blueberry Lemonade. I really need to start making that quilt. I probably have enough squares to make two quilts!!
When I find scrap triangles, I make them into HSTs. I have a lot of randomly sized HSTs. I plan to put backgrounds strips around each unit and then put them all together into a quilt.
I also cut 5″ charms. I haven’t dug into them as much, but they also come in useful. I will dig into them to make the sashing for Old Town.
I have to be more diligent about cutting for the Spin Wheel quilt. This pattern is the Fons & Porter Spin Wheel, 1200 series, episode 1201. I need to work on gathering background fabrics, which are the triangles, but I can use squares and then cut the triangles.
2.5 x 4.5 blue rectangles for a Blue Rectangles Gradation quilt. You can see some thoughts about this quilt on a recent ‘Dream’ post.
I also cut 2.5 x 4.5 pink rectangles for a Pink Rectangles Gradation quilt. I have a lot of these rectangles as well, so I should get on this quilt also.
This seems like a lot of work and, to some extent it is, but it is also useful. For me, it is pre-cutting or processing. Cutting is my least favorite part of quiltmaking, so having shapes already cut is great for me.