Part of M3 included Tula’s Skunk fabric. As cute as those skunks are, I am determined not to have animal faces looking at me from La Pass. Still, I want to use the fabric that comes with the Block of the Month since I am paying for it.
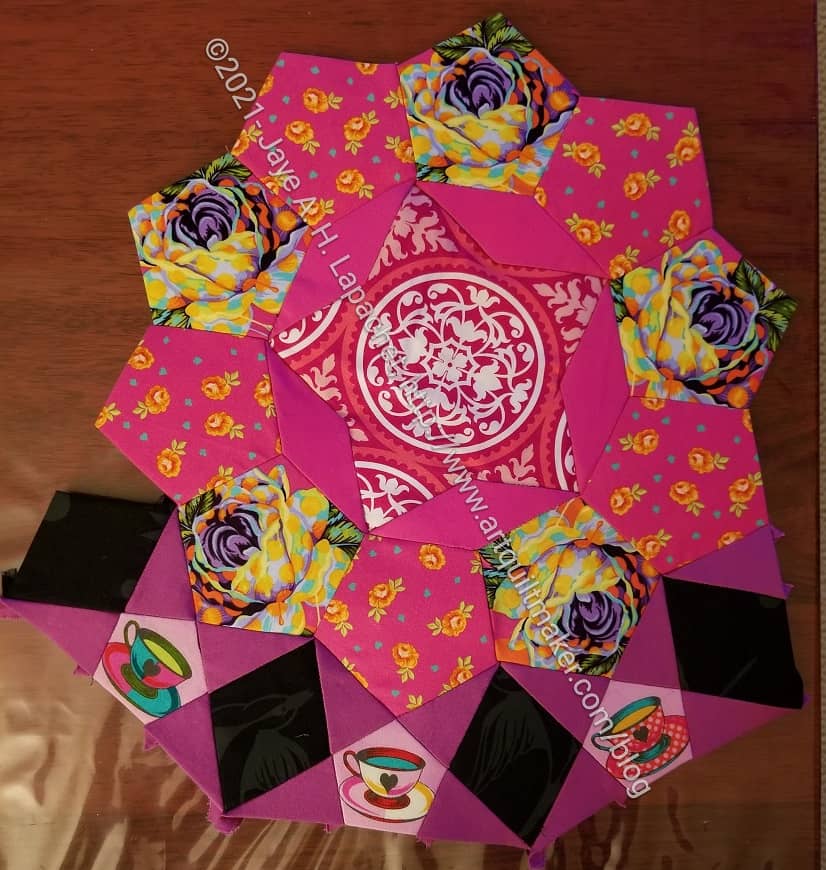
One person used the tails, which looked fantastic. I didn’t think of that before I cut my pieces. I decided to use all of the flowers and arrange them in kind of a rainbow. The colors are subtle., so it doesn’t scream rainbow.
I still have some other pieces to sew on to this rosette, but will finish M5 first.
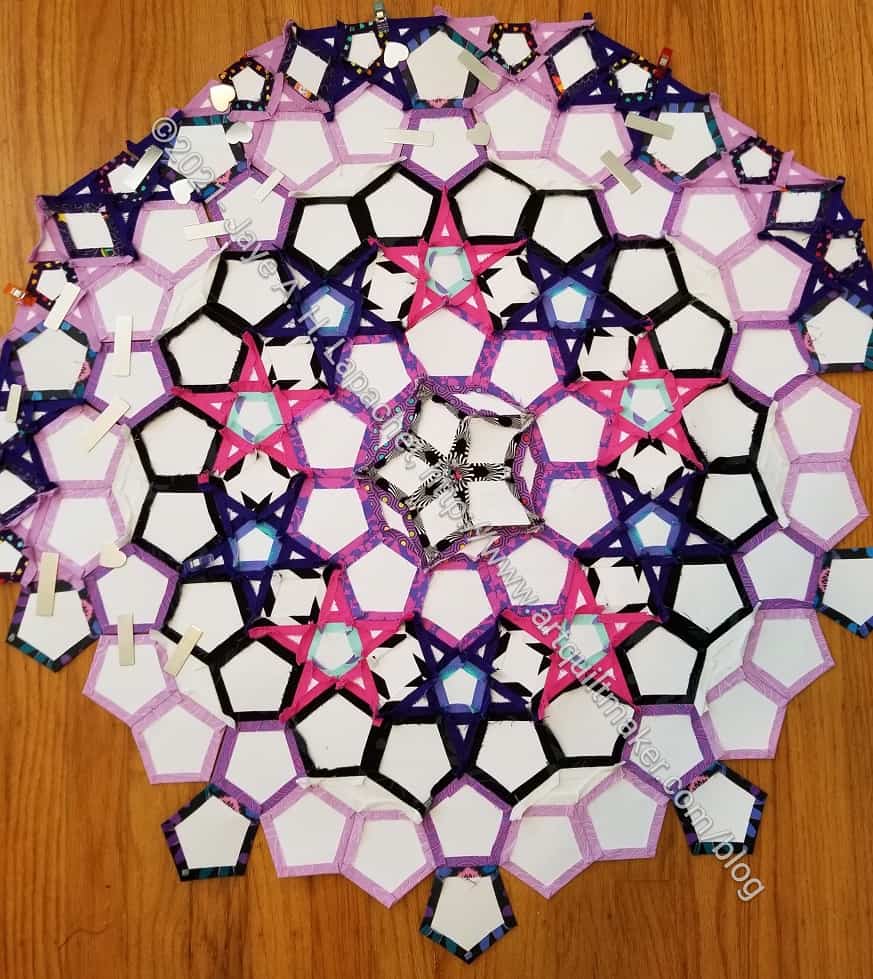
As you saw from the other post, I was able to get this rosette together, but I did really struggle. I couldn’t get the points of the various sections to line up. I am not sure what the problem was.
Yes, I know if someone can’t see it from a galloping horse, I shouldn’t worry about it and, ultimately, I accepted my fate and just did the best I could.
The whole point of EPP, however, is that it is possible to line up complicated designs because all the fabric is stabilized and there is no bias stretch to worry about.
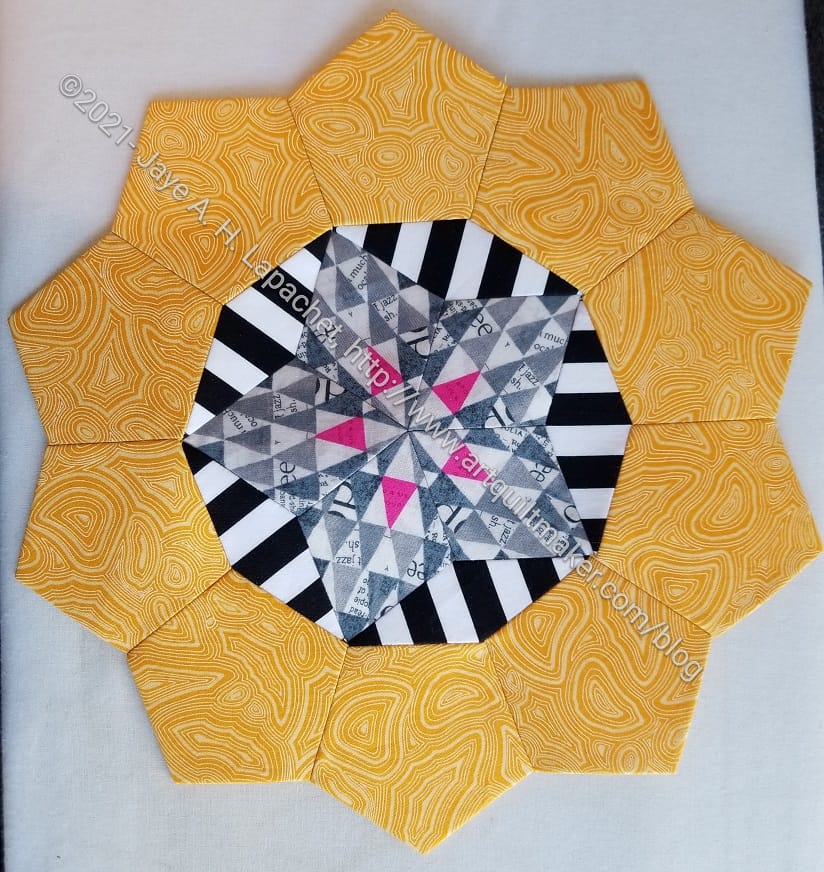
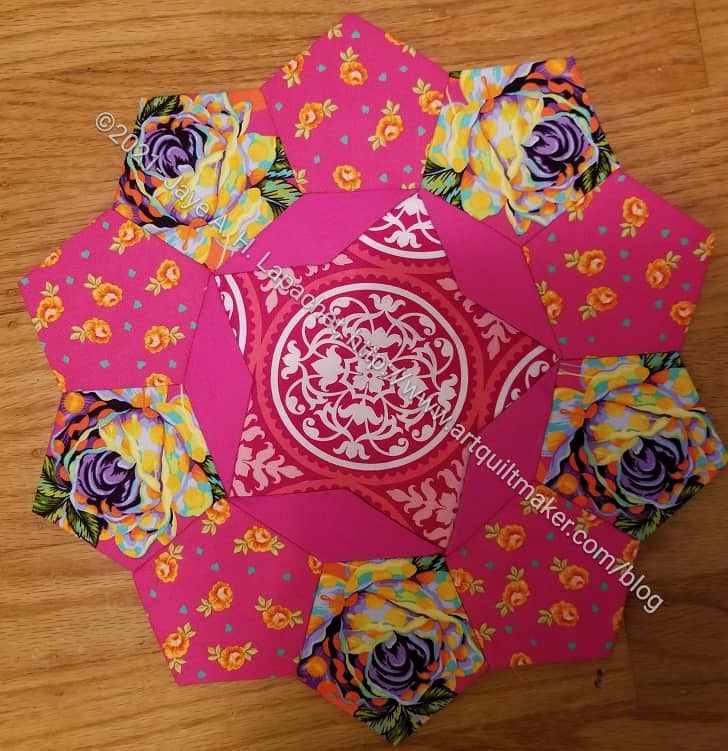
Sections of M5 Yellow/Grey Rosette
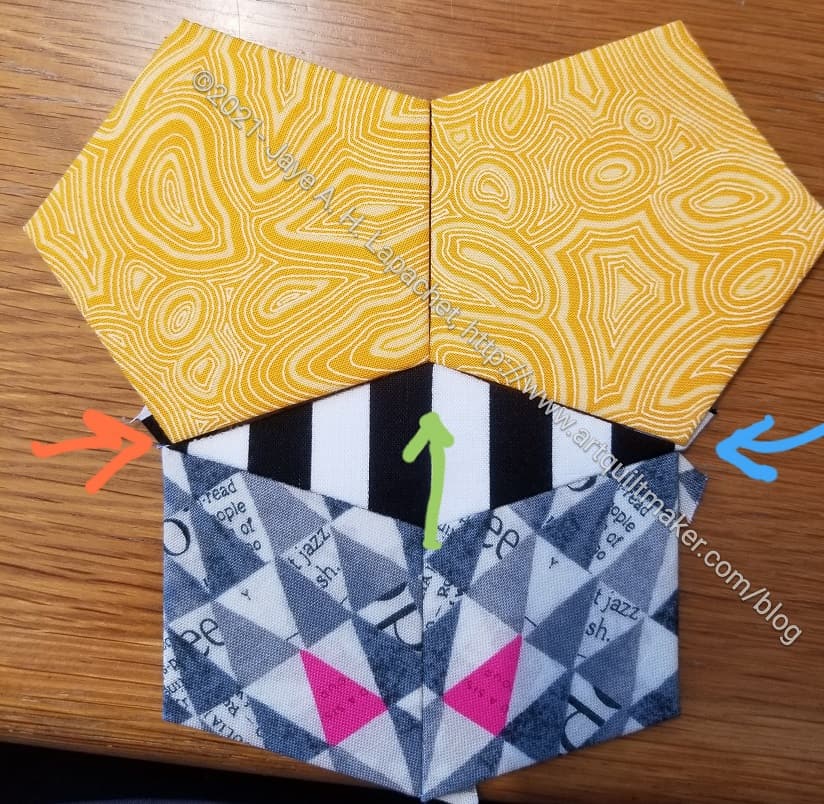
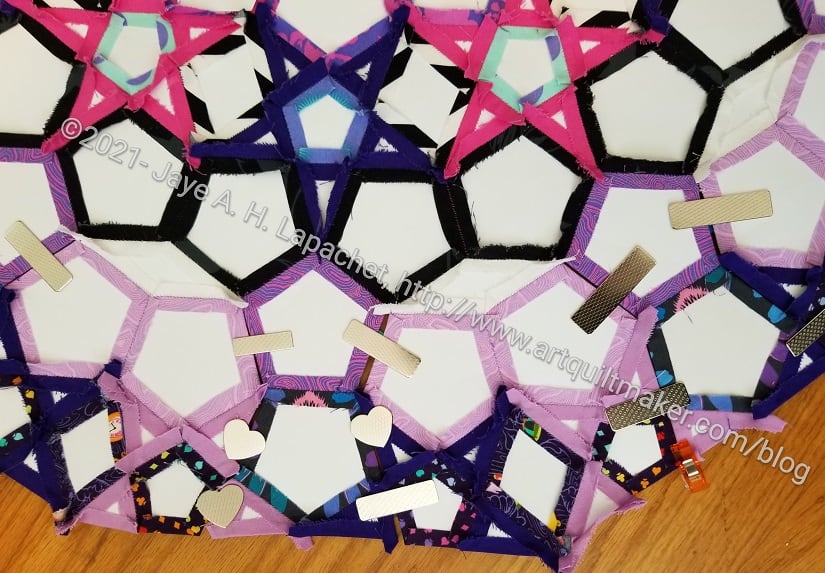
The papers are die cut. I am using quilt shop quality fabric and I wash and press all of the fabric. Still, when I put the first section of the yellow and grey rosette together, the points were off.
I wasn’t as worried about the center point (yellow meets stripes) as I was about the edges (see orange and blue arrows). If there are gaps there, there will be a gap between yellow pentagons.
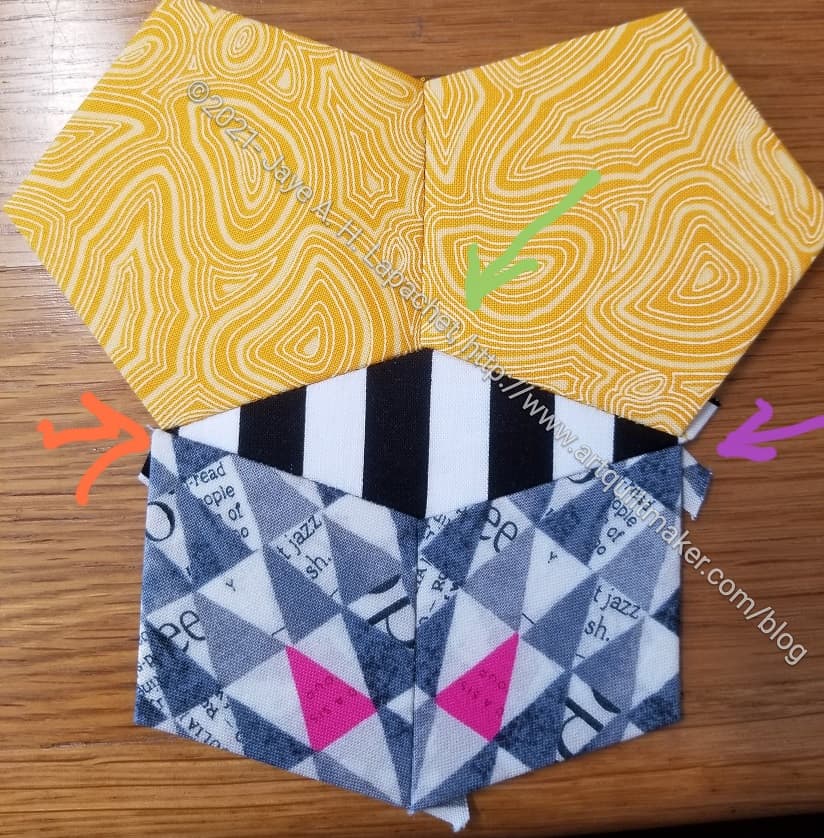
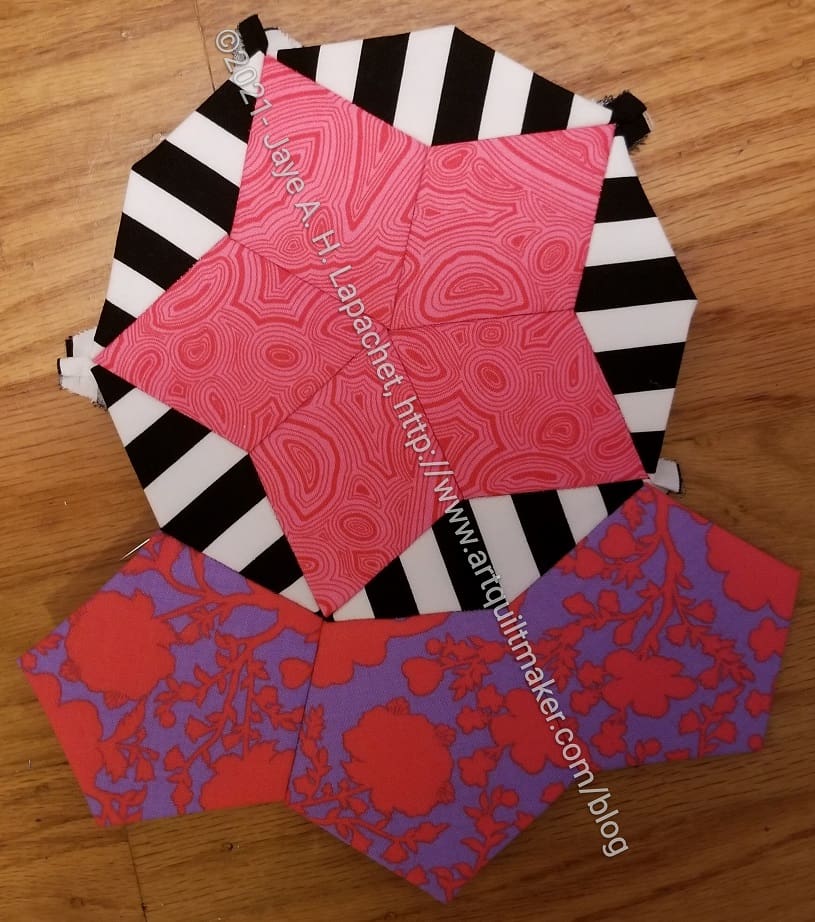
Sections of M5 Yellow/Grey Rosette round 2
In order to try to get the pieces in better alignment, I unpicked what I had sewn and tried again.
I was able to re-center them a little bit so the future gap on the side would be more evenly distributed, but I wasn’t able to get them lined up as perfectly as I would have liked.
Still, I think the Rosette looks good and adding other pieces doesn’t seem to be a problem.
Now that the giant puzzle is put away, I have moved my EPP work back to the living room for after dinner stitching. I am making much more progress. Of course, the living room looks a little messy, but not as bad as it did.
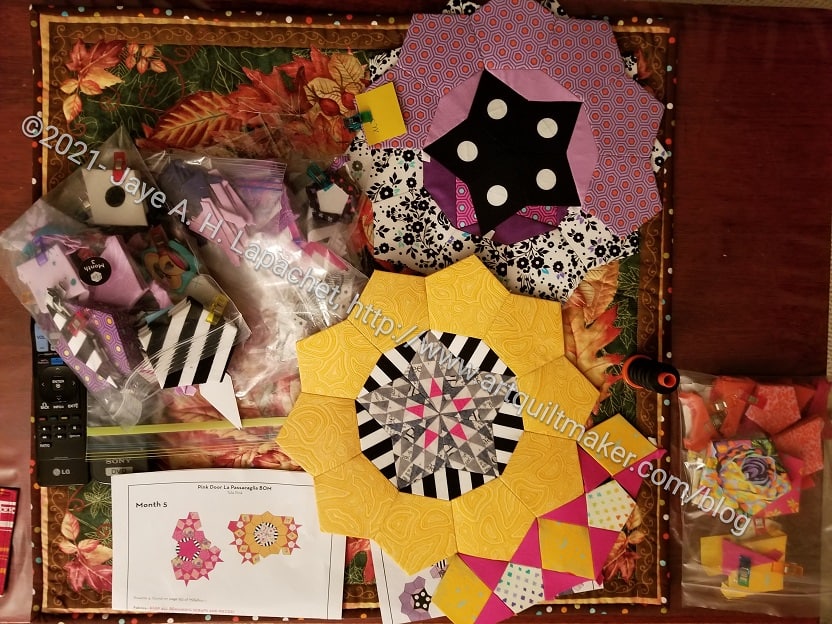
EPP Workspace – Thanksgiving edition
I have all of my pieces laid out on the coffee table so I can just start stitching as soon as I sit down.
I haven’t quite put away Thanksgiving, so you can see the Thanksgiving tablemat I made a few years ago underneath everything.
In this picture, there is a jumble. I am still working on M3 intermittently between finishing other months. Since I am able to spend more time working more on the project, I expect I will be able to finish it in a couple of months. I think I will have a little time work on it once I finish M5, which you can see on top with the yellow ring.
I decided I should use the hat fabric that came with the month 5 shapes and designs. I cut the fabric, I basted the fabric to the papers and kept telling myself that it would be ok.
We all know that means trouble and this set of diamonds just didn’t make my heart sing. Also, it made me feel like I was missing an opportunity for fussy cutting.
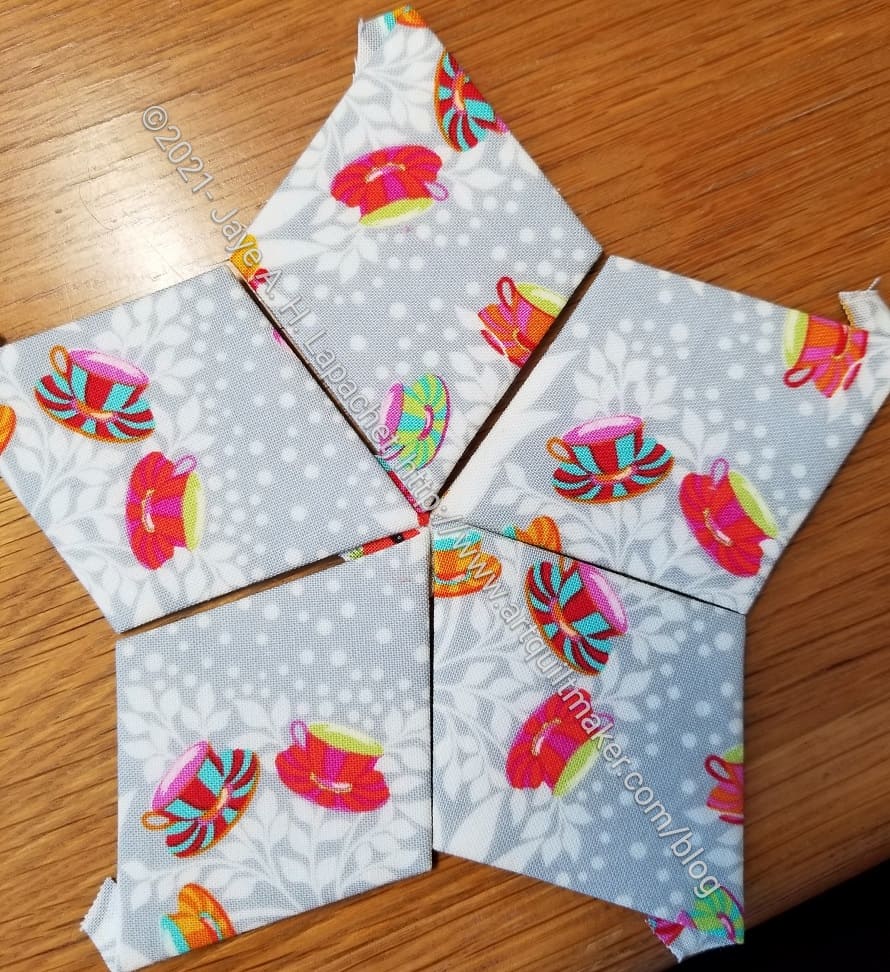
La Pass triangle fabric
I was looking for some other fabric and came across some Carrie Bloomston triangles, which had the right grey plus a spark of pink. It is much better.
I thought about putting the pink at the tip, but then decided it would look great centered a little more. A happy accident is that the pink triangles created a star in the center! I am a lot happier with this fabric.
I never used so much basting glue in my life as I have with M3. To be fair I never used glue for basting until I started La Pass. When I started I used the same refill as I had for M1, M2 and most of M4. I might have refilled once and the sum of those months is around 300 pieces.
So, why did I have to refill at least twice for M3? It kind of scares me, because that means a lot of sewing!
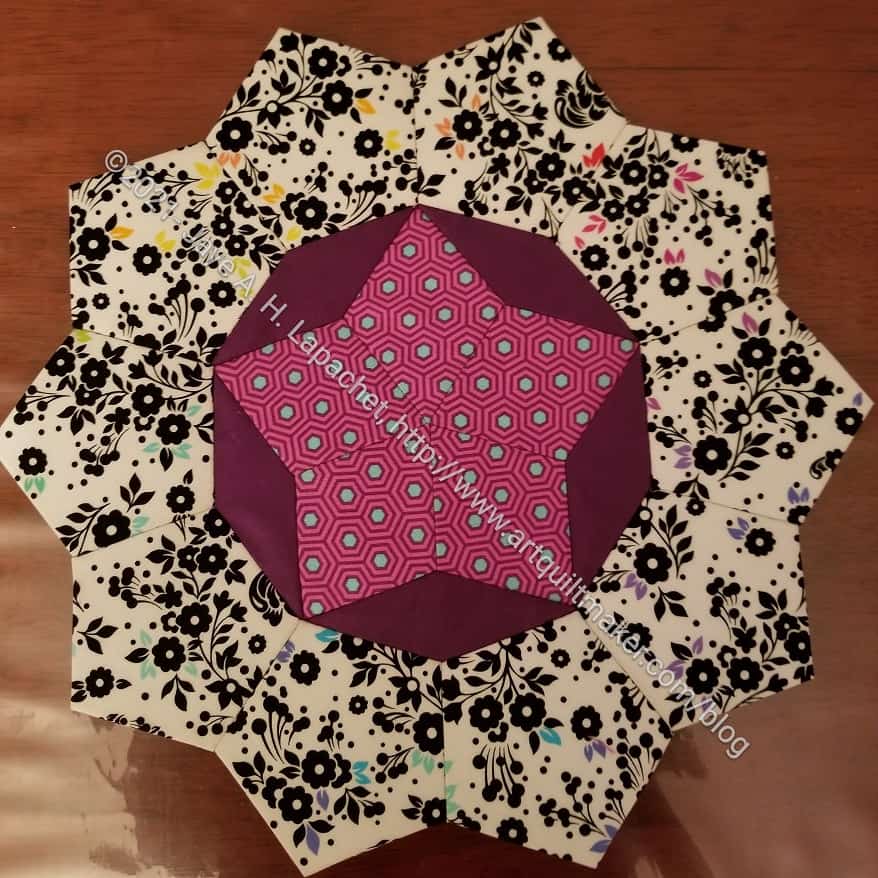
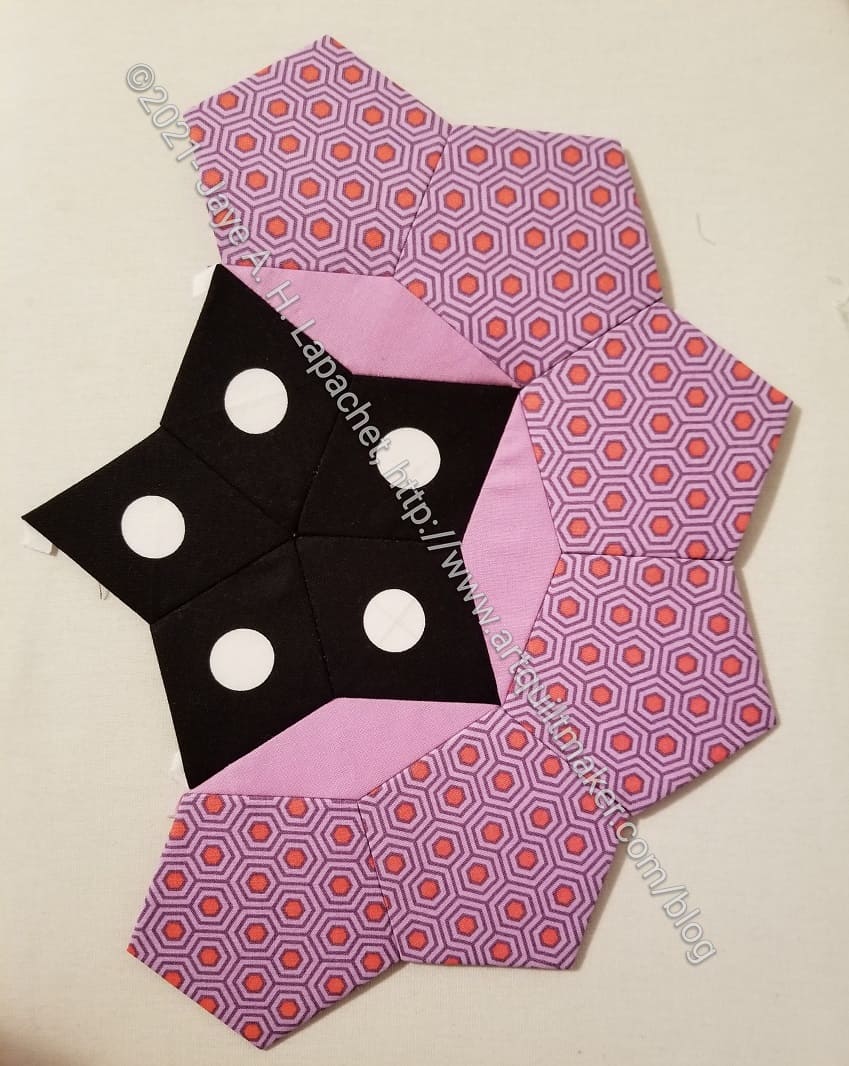
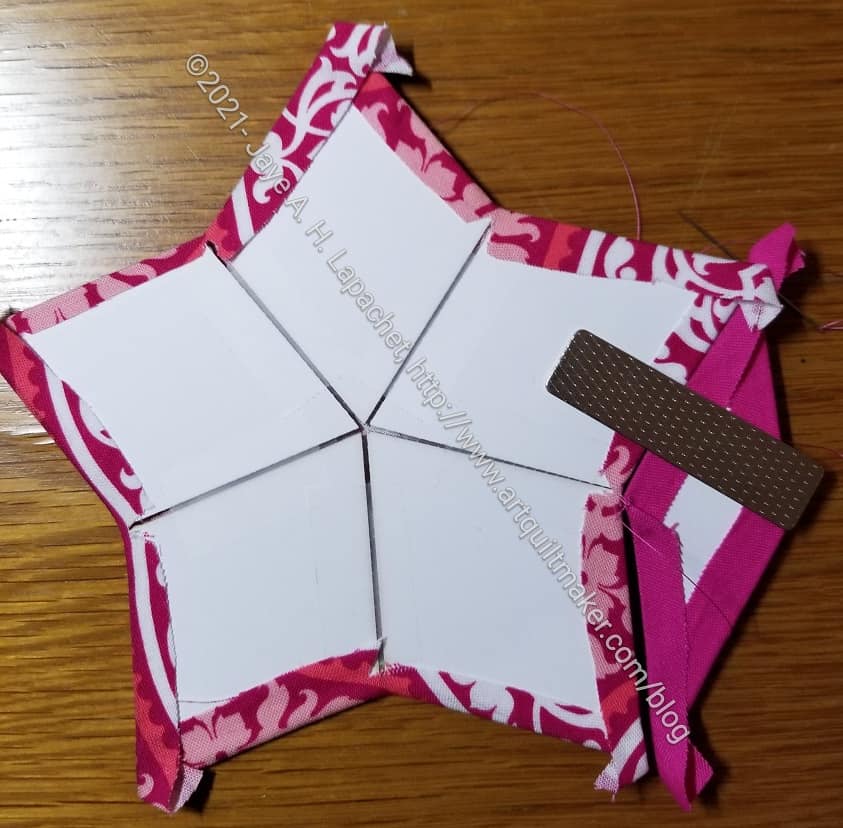
Regardless, M3 is basted (remember I skipped M3 because I had just finished M2 when M4 arrived?) and I have started to sew parts together. There are 3 partial Rosettes that need to be sewn. The first one is above. It is probably the easiest (no damn stars!). I saw someone else line up the polka dots and I liked that idea very much, so I did it, too.
I had a moment of panic when I realized I didn’t have enough of the pentagons to make a ring, then I remembered I was only making partial rings. It is very strange not to be making full circles.
I know it is all about progress right now. I am not finishing a lot except for bags. Stay tuned for a possible apron finish!
After finishing the first M4 rosette, I moved swiftly on to the second for the month and am making good progress on that one as well.
I am only partially done. The border with the black has about double what you see in the photo, so I have more sewing to do. I may be able to finish it tonight. We’ll see.
The center is not Tula Pink fabric, as you may have noticed. I decided 1) I didn’t want zebra faces on my quilt and 2) I wanted to try combining pieces into a larger piece. I talked about this a little bit before.
La Passacaglia M4, Rosette #7 – adding the border
One of the things I have to figure out when I sew each rosette is how to add the pieces. Putting them into chunks and then sewing is much better. Sewing as many straight lines as possible is the best.
The yllow lines show you the segment I put together before I sew the piece to the larger segment. I sometimes sew the three pieces with the teacup and then the three pieces with the black diamond. It depends on my mood.
I know you have been wondering if I gave up on La Pass. Short answer: no.
Long answer:
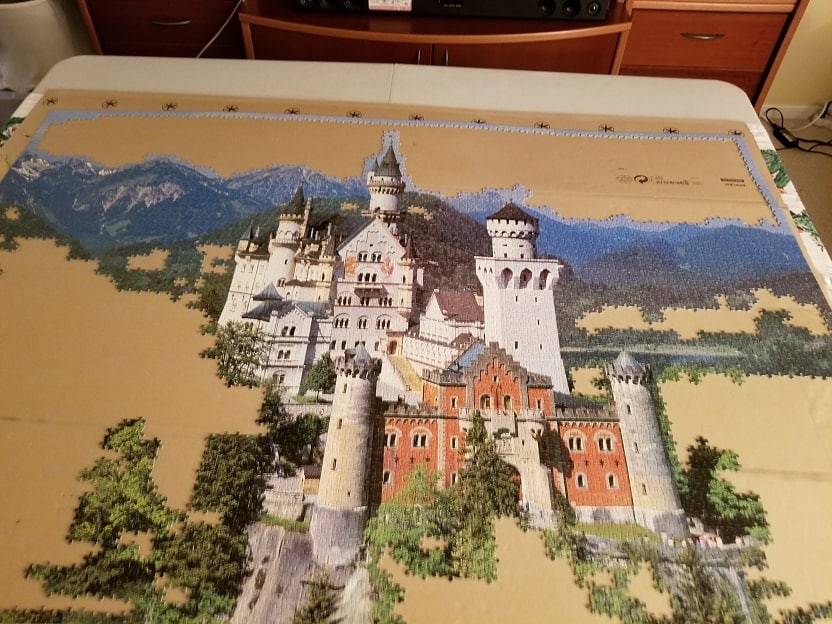
Last year, in September, we started working on a puzzle that DH had bought for me about 15 years ago. We hadn’t done it before last year because we had other things to do (e.g. raising a kid) and the puzzle was 6,000 pieces.
Yes, you read that correctly: SIX THOUSAND.
Clementoni 6,000 piece Neuschwanstein puzzle in progress
I had wanted a Neuschwanstein puzzle and I am pretty good at jigsaw puzzles, but even I was daunted by 6,000 pieces. Additionally, I could see that at least 3000 of the pieces were trees or sky. Not fun. A challenge: yes, but not exactly fun. However, during the pandemic things changed. Also, I tore a ligament in my foot. Sewing not to mention hauling the boot up and down the stairs to my workroom was difficult.
So, we happily started working on the puzzle. The castle part was relatively easy and we finished that in a few months. Then progress slowed to a crawl as we sorted and re-sorted the greens of the trees and the flat blue of the sky. Pretty soon, I felt lucky to put 4-6 pieces in per night. Since we didn’t have anyone over for months, it was no problem that two 6 ft folding tables were taking up space in our living room.
As a result, my normal hand sewing time was usurped by the puzzle. At first this was ok, but now I have two bindings and La Pass to work on. Since I wasn’t making good progress on the puzzle, I was getting annoyed with it. Since we were planning a more normal Thanksgiving this year, we had to decide what to do with the puzzle.
Three person operation (2 shown)
I was all for giving up. I like to finish things as much as the next person, but DH hadn’t worked on the puzzle in a while and I didn’t want it all to fall on me. We debated and I let him win. We transferred the puzzle to a quilt, laid another quilt on top and rolled it up. This was a 3 person operation, not including photography.
Fast forward to post Thanksgiving. Our living room is free. I can see the TV from the couch. I have no puzzle sitting in my living room waiting for me to put locate the one piece I can fit in. YAY!
La Pass M4 Rosette #6
So, I sat down on Friday after Thanksgiving and started sewing EPP pieces like a demon. Leftover chores from hosting still demanded my time and attention. Also, my mom and stepdad came over to see my son, so I had to give them lunch. In between all of this, I sewed and I finished one of the M4 rosettes.
I was kind of shocked at how fast I blew through this. Granted, there is a lot less sewing that the big rosette, but still. Up until the other day, I felt like these took forever.
M5 is in the mail or will be momentarily. I’d love to get M4 done before M5 arrives. I still haven’t done much of M3, but if I can get M4 done soon, then I can work on M3 until M5 arrives and I have some hope of catching up. Fingers crossed!
I made some progress last week on La Passacaglia M4 after awhile of not feeling like I made progress.
Rosettes 6 & 7 are the focus of Month 4, though I am a bit confused, because Month 3 mentions Rosettes 6 & 7 and they are completely different rosettes. I’ll have to clarify.I’ll take a look at the pattern, too, and see if I can tell.
Rosette 6 (?) in process
I combined the center of the top (in the photo) rosette to use that piece of Joel Dewberry fabric.
I thought of using the zebra fabric as the center per the pattern, and even cut it out. In the end, I just didn’t want animal faces looking at me from my quilt, so I tried out the technique of combining paper pieces into one shape. I didn’t get the spacing quite right, so there are places the points don’t meet. I know I will have some leeway when I take out the papers. Also, in the grand scheme, some small technical problems won’t be seen.
Rosette 7 (?) in process
These are all parts of rosettes as they will be sewn to other pieces and look at thought the rest of them are under other rosettes.
I am pleased to be trying something new. I really thought I knew all there was to know about English paper piecing. I am finding it is much more than wrapping fabric around paper and sewing the pieces together.
After quickly cutting all of the pieces for M4, I started sewing them.
I have seen other people in the BOM group combine some paper pieces into a larger piece and use a bigger motif. I decided not to use the zebras in month 4 and using a Joel Dewberry motif seemed like a good option.
I worked on it in the car as I was going to an event so I made good progress.
La Pass M4 Center motif – back
The way this is done is an interesting concept. You have to tape individual pieces together then wrap the fabric around that larger piece.
I thought I knew how to paper piece, but I am learning a lot from this project and the group.
I was able to cut out La Pass M4 the other night during Craft Night. I felt really happy getting this done. I am now in the process of basting and hope to get to sewing ASAP.
I had a few meetings last week in which I could sew. I got a little bit of M3 done before I started in on M4.
Yes, that says Rosette #7 and, no, you aren’t crazy. I haven’t made Rosettes 2-6 yet. We are jumping around.
In the photo, I am showing the back because it is still in progress. I am pretty pleased with the way this rosette is coming together. it is fitting together much better than the M2 part of Rosette #1. It is smaller and that could be a factor.
I have one more seam to finish before the center is done. As I said, I am going to move to M4 and finish M3 catch as catch can.
I feel like I am juggling everything, especially my projects. I know many of you have worked full-time for years. I didn’t. I worked part-time or consulted the whole time my YM was growing up. I was fortunate to be able to do so, but also gave up a lot of stuff, such as cable TV. Now I am working full-time and I like my job, but I don’t like working 40 hours per week. It cuts into my life. Still, needs must.
M2 took a long time, probably because I was trying to piece sections on to a large Rosette, but also, because of time. I took so long that M4 will arrive any minute and I have barely started M3.
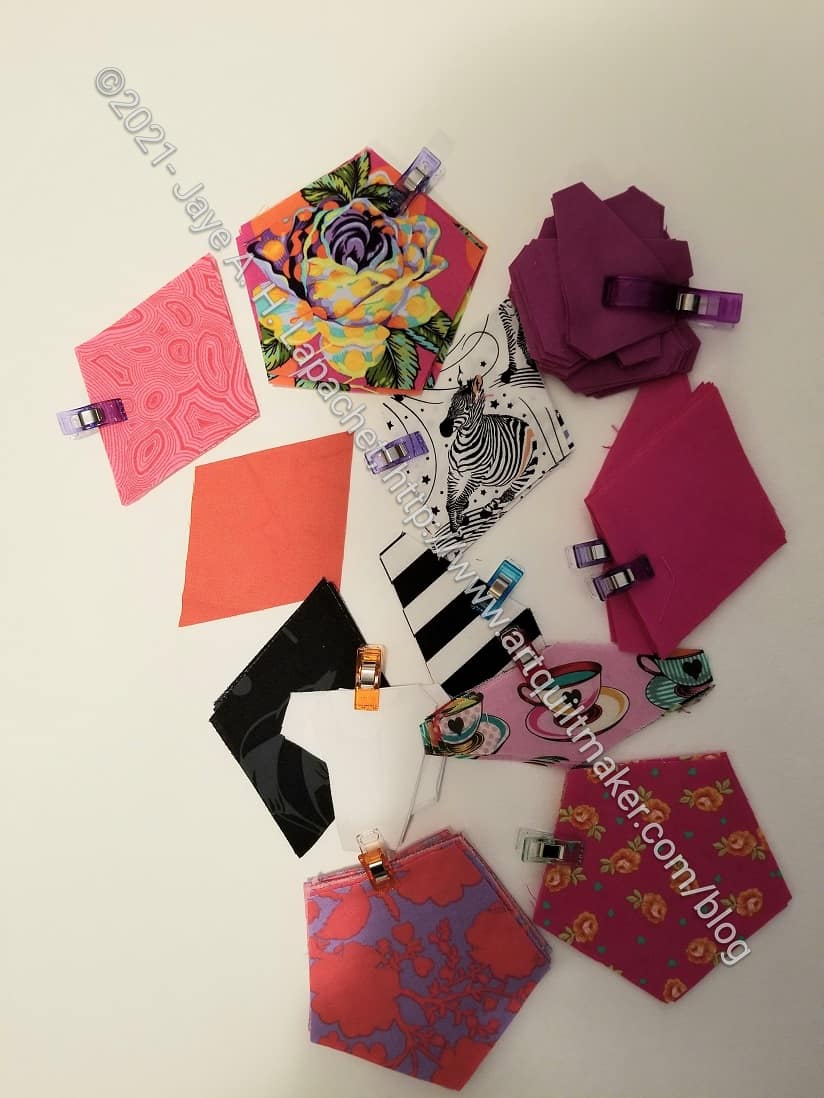
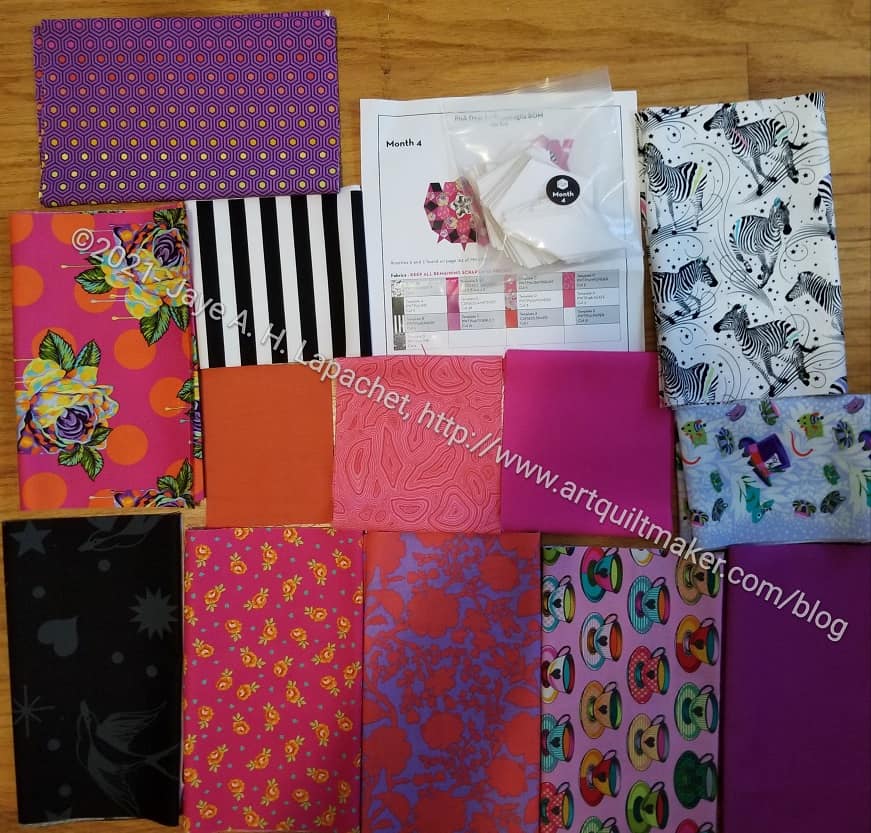
La Passacaglia Month 3 cut pieces
As a result, I am working on cutting pieces for M3. You can see mostly pieces I didn’t have to fussy cut. i did the easy ones first, though a couple required some centering like the teacups.
I used the flower portions of the skunk fabric, because I don’t want skunks on my quilt. I know people think they are cute, but after smelling one, I don’t want to be reminded of that smell. I cut the stripes the way Tula suggested on her EPP video (see, starting at 7:33). Now I have to do the dots and the other pieces.
My plan is to finish all the cutting, then start on Month 4, catching up with Month 3 when I can. I hope to only be behind on one month not all the months. Who knows? I might be able to catch up.
I have been asked several times to see the back of Rosette #1. I thought this was a very odd request, but after about the third time, I am guessing it is simple curiosity.
I have been thinking about this piece and realized that this is a very different piece from most English Paper Piecing.
I think most people are familiar with sewing hexies. This is more complex and very different looking than hexies. Even though 500+ people are working on the Pink Door BOM, that is a small number compared to the number of quiltmakers out int he world. I think my guild is fortunate to have 2 members working on this project. That is A LOT for one small guild.
I have always thought that EPP was a great way to do complex designs and after reading All Points Patchwork, I wasn’t scared of any complexity. Perhaps I should have been a little scared of this project as it is not easy.
As you can see, and as I have shown before, there are a lot of different shapes. The shapes don’t really matter (bias doesn’t really matter) as all of the fabric is stabilized with papers. You can see the white in the photo above. Those are the papers. I could take them out from the pieces that are completely surrounded, as I have a little in the Half Hexie Star project. I want to keep them in as long as possible. I am not sure why. Some are starting to pop out, but I keep shoving them back in.
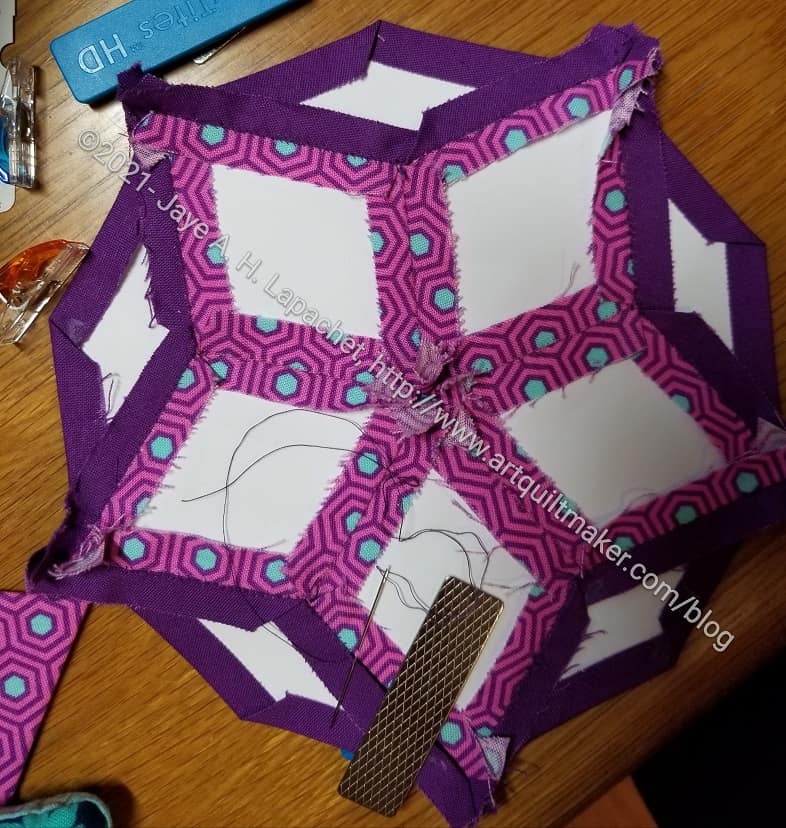
Back of Rosette #1 with M2 in process – detail
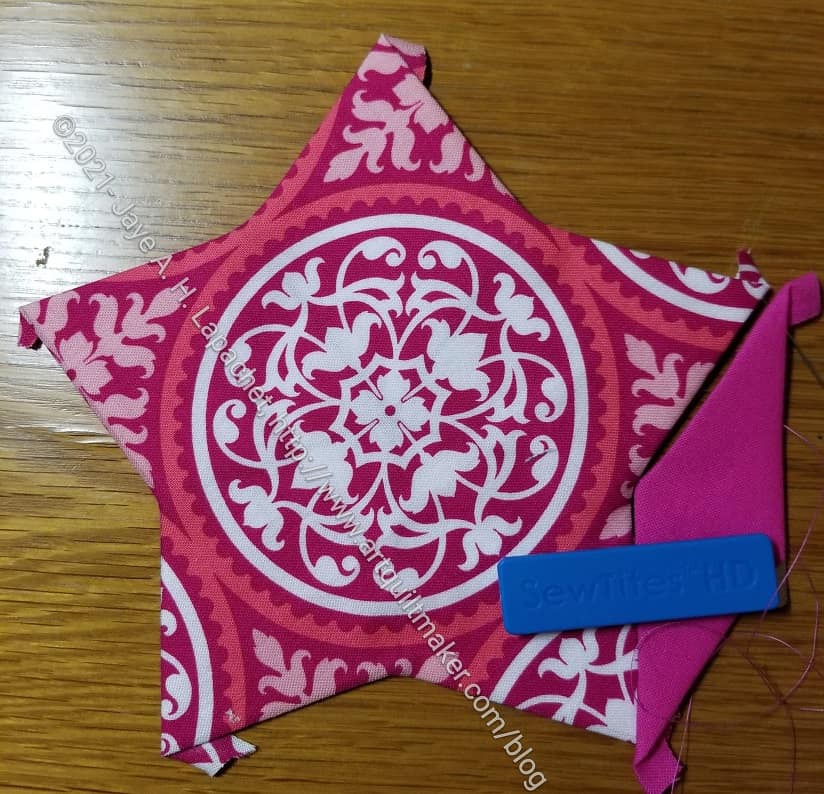
I am using SewTites**, mostly, to keep the pieces together until I can sew them. Fortunately, I have collected a lot of SewTites, because at one point I was using them all.
I try to keep the back neat. This is one of the large rosettes (I think there are 4 large rosettes) and it is a challenge to handle as I sew.
I have gained some skills and developed some strategies, which have helped. I lay the piece on my cutting table and use the table to hold the weight of the piece while I am sewing M2 pieces to Rosette #1.
I also have started sewing joins together before I sew a whole seam. This keeps things in line.
I still have not started M3 and I know the next shipping date is soon. EEEKKK!
**I use affiliate links and may be paid for your purchase of an item when you click on an item link in my post. There is no additional cost to you for clicking or purchasing items I recommend. I appreciate your clicks and purchases as it helps support this blog.