Gazebo Finished

Journey 2 Nebula icon

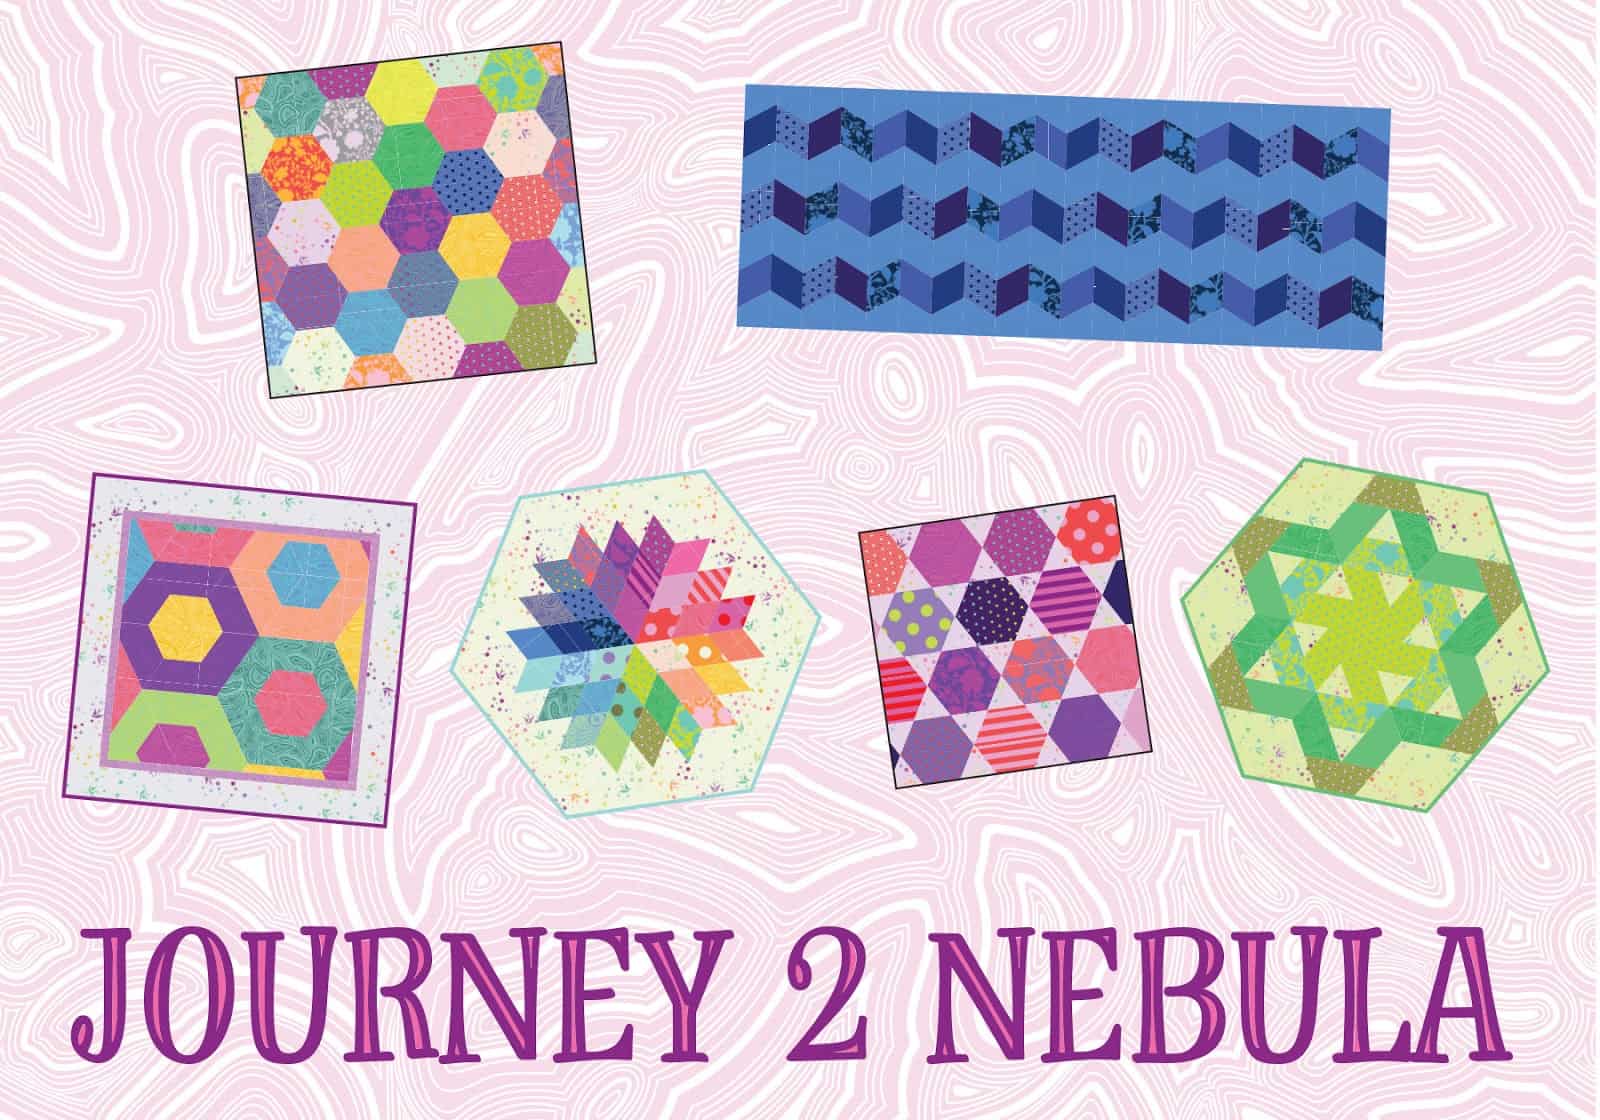
So, the Journey 2 Nebula is finished. I finished all the projects which were part of the ‘Journey’ and the rulers have been returned to Amy. I am not making the Nebula quilt. If you like hexagons, you should try it. It is an interesting design. I am happy with the small projects I made during this Journey 2 Nebula and am moving on to other designs.

Gazebo Finished
Gazebo Finished

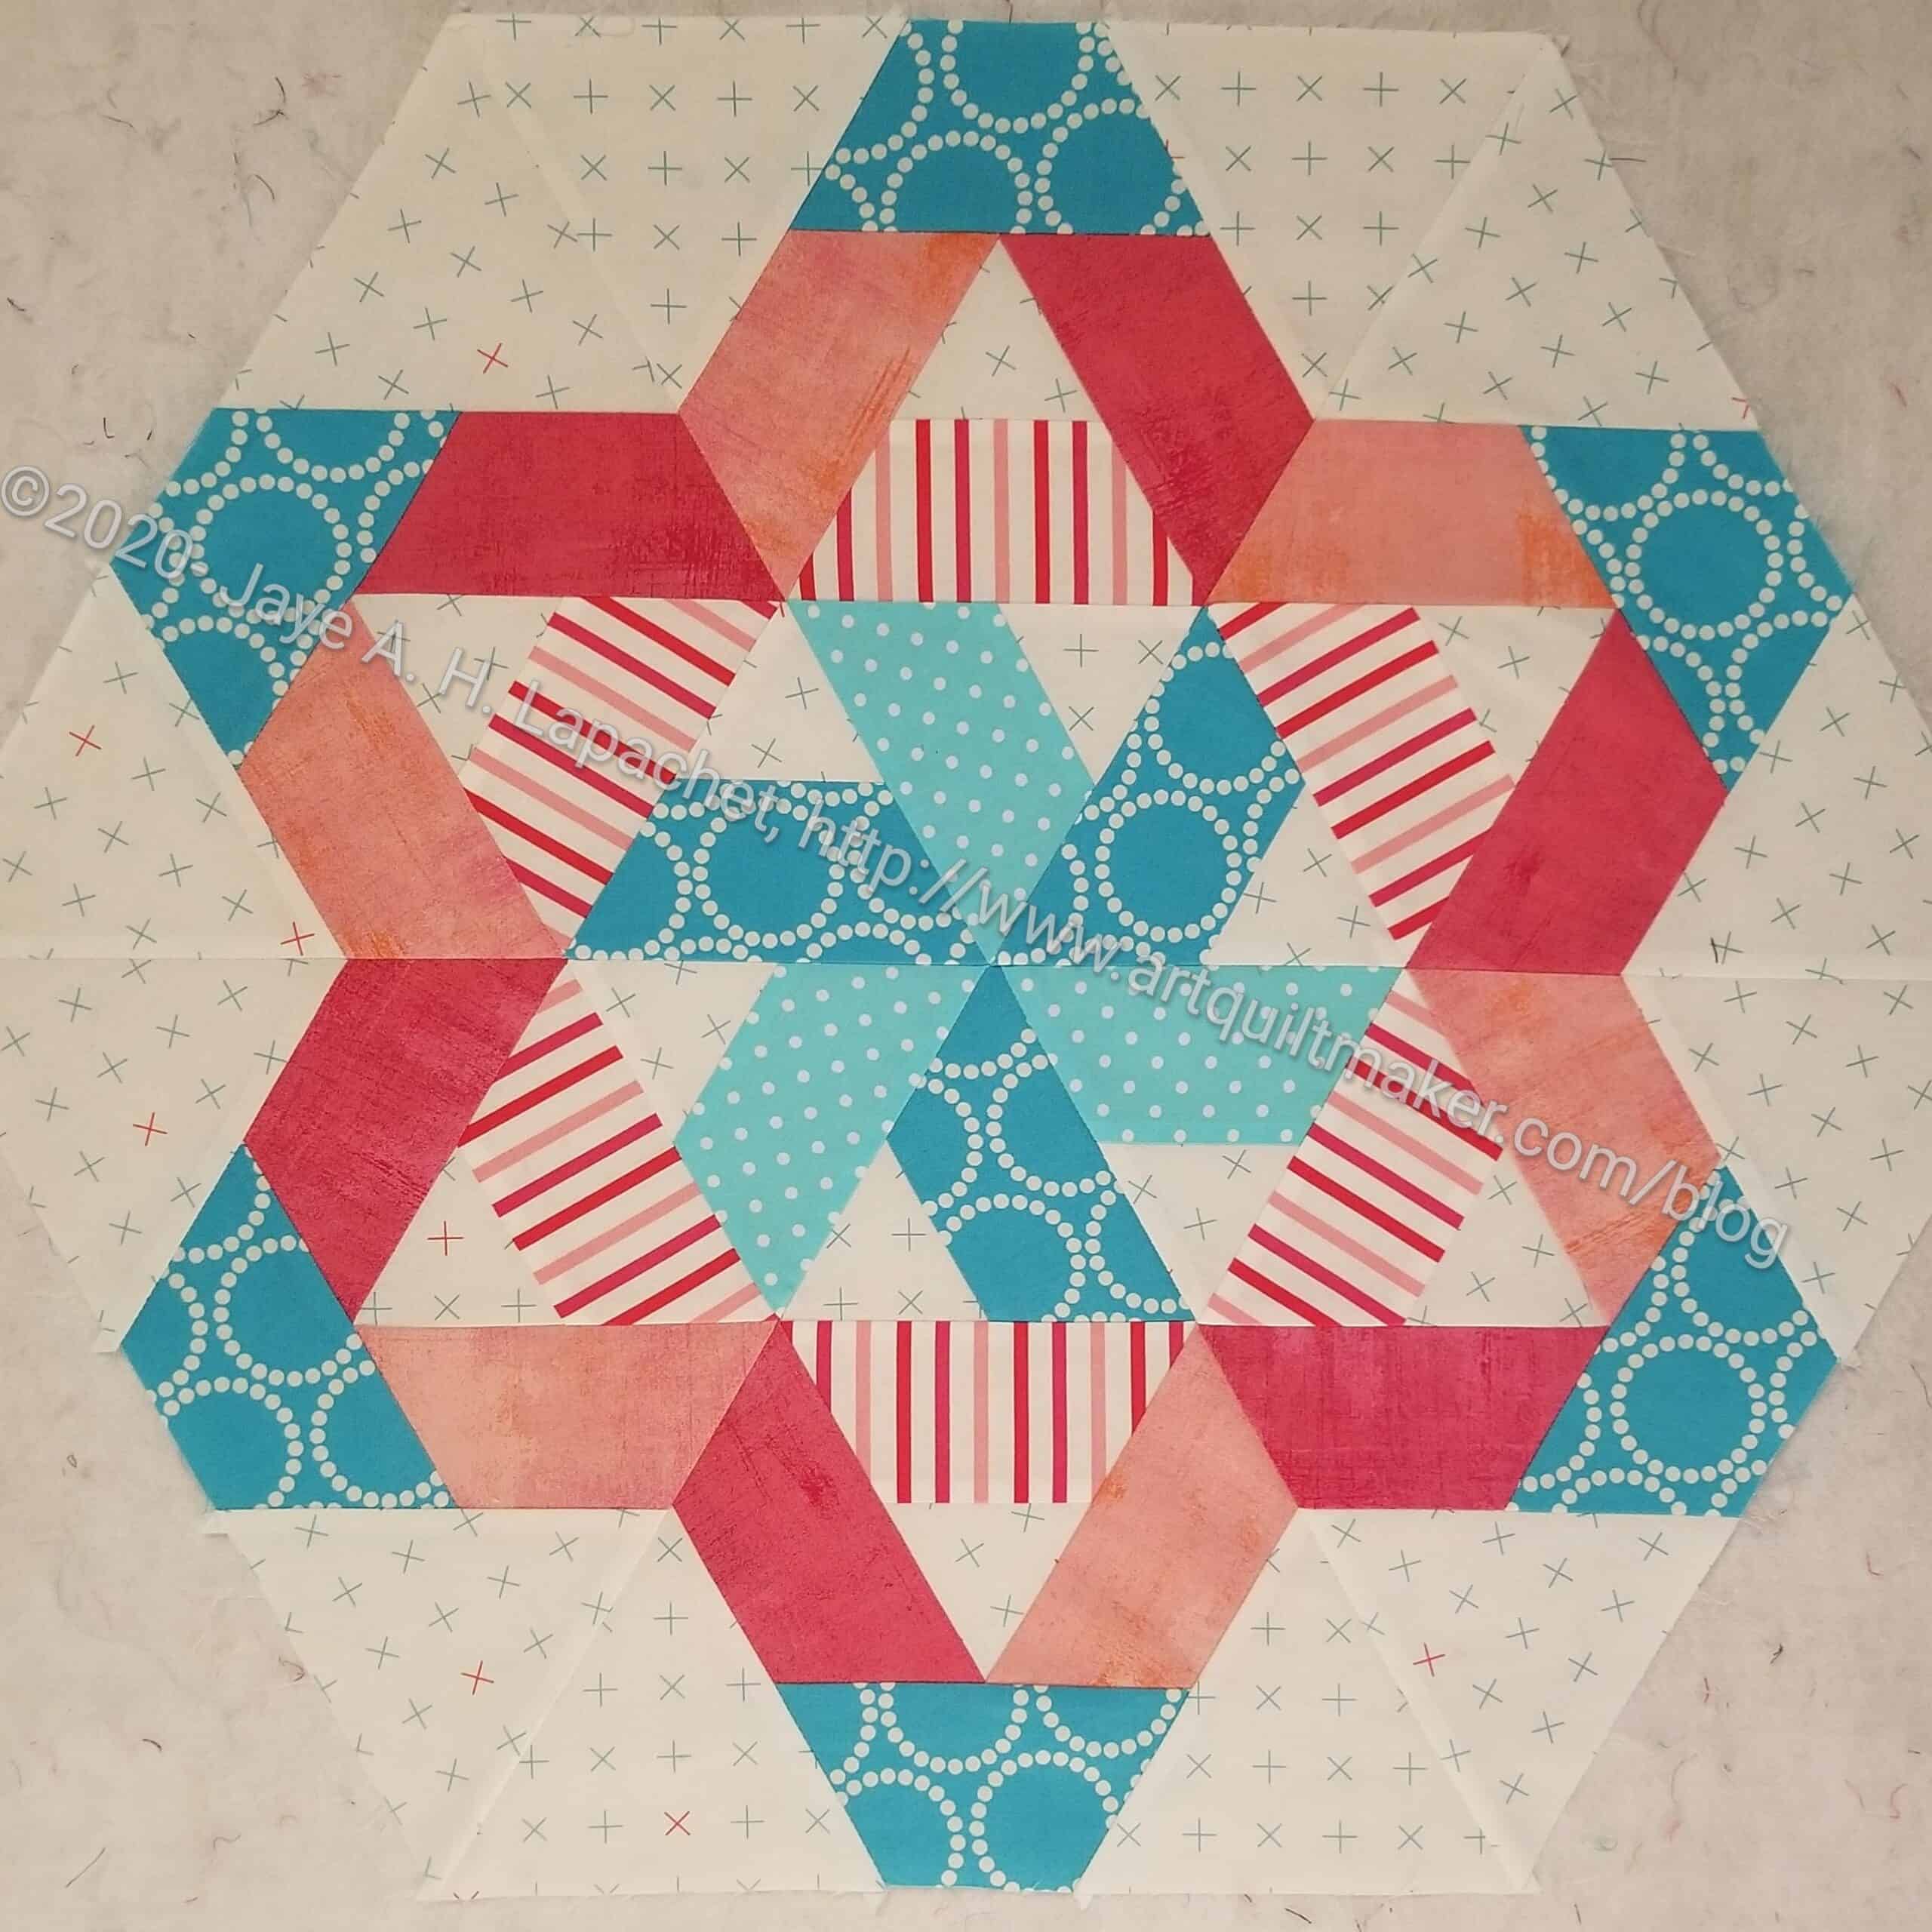
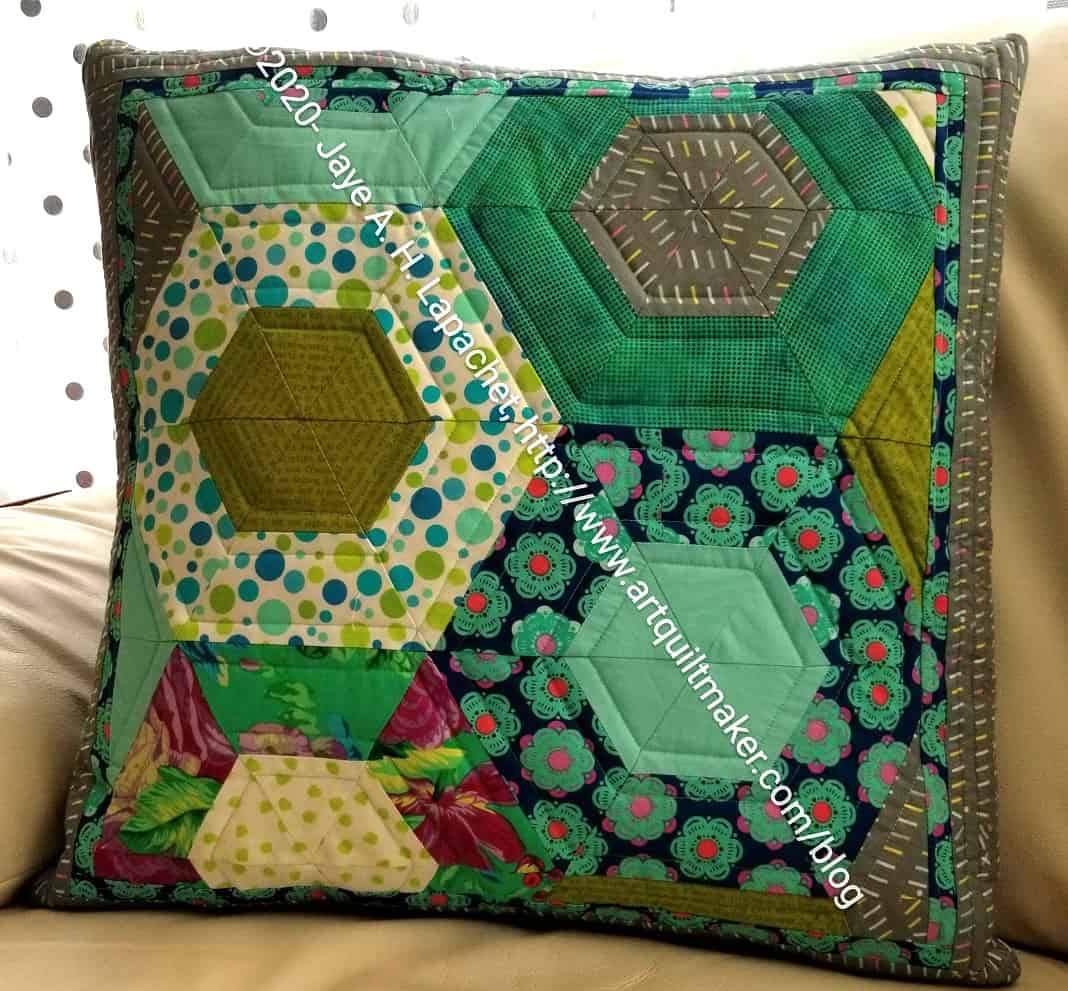
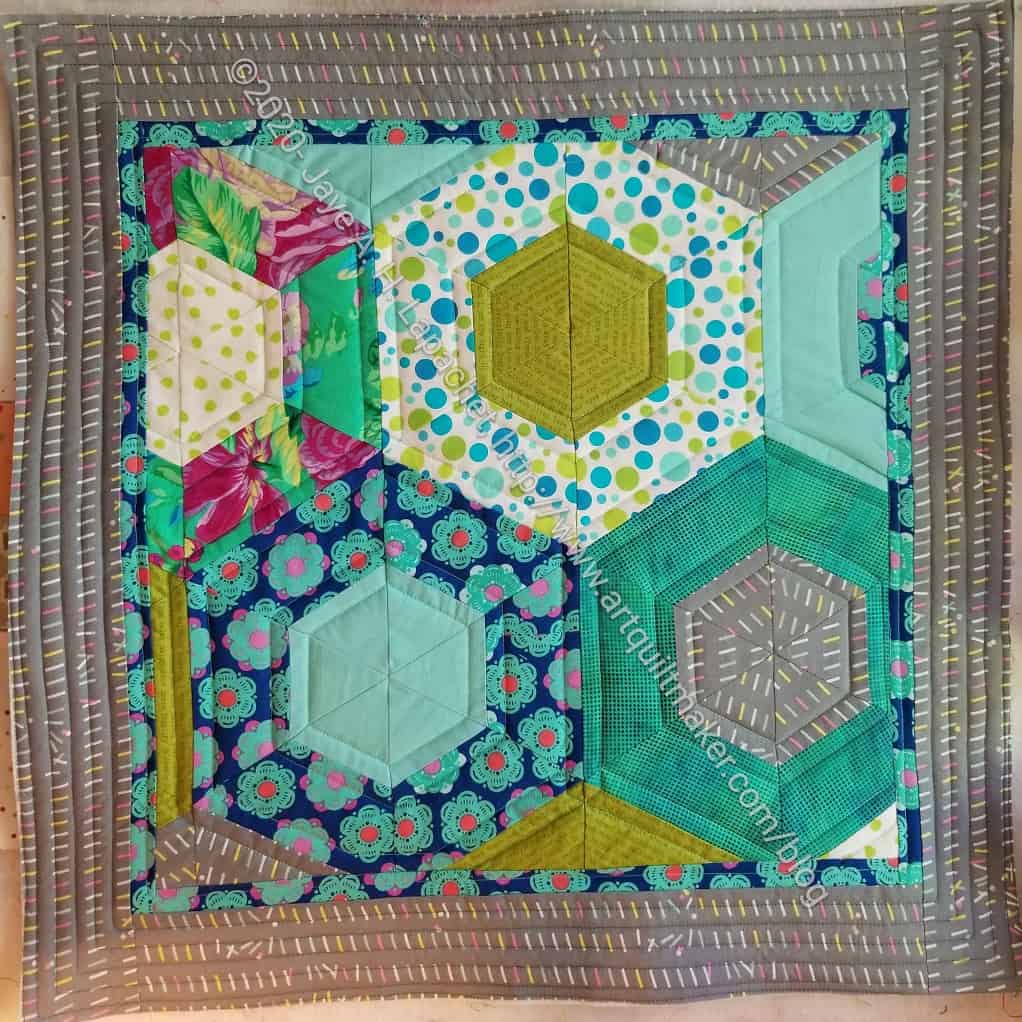
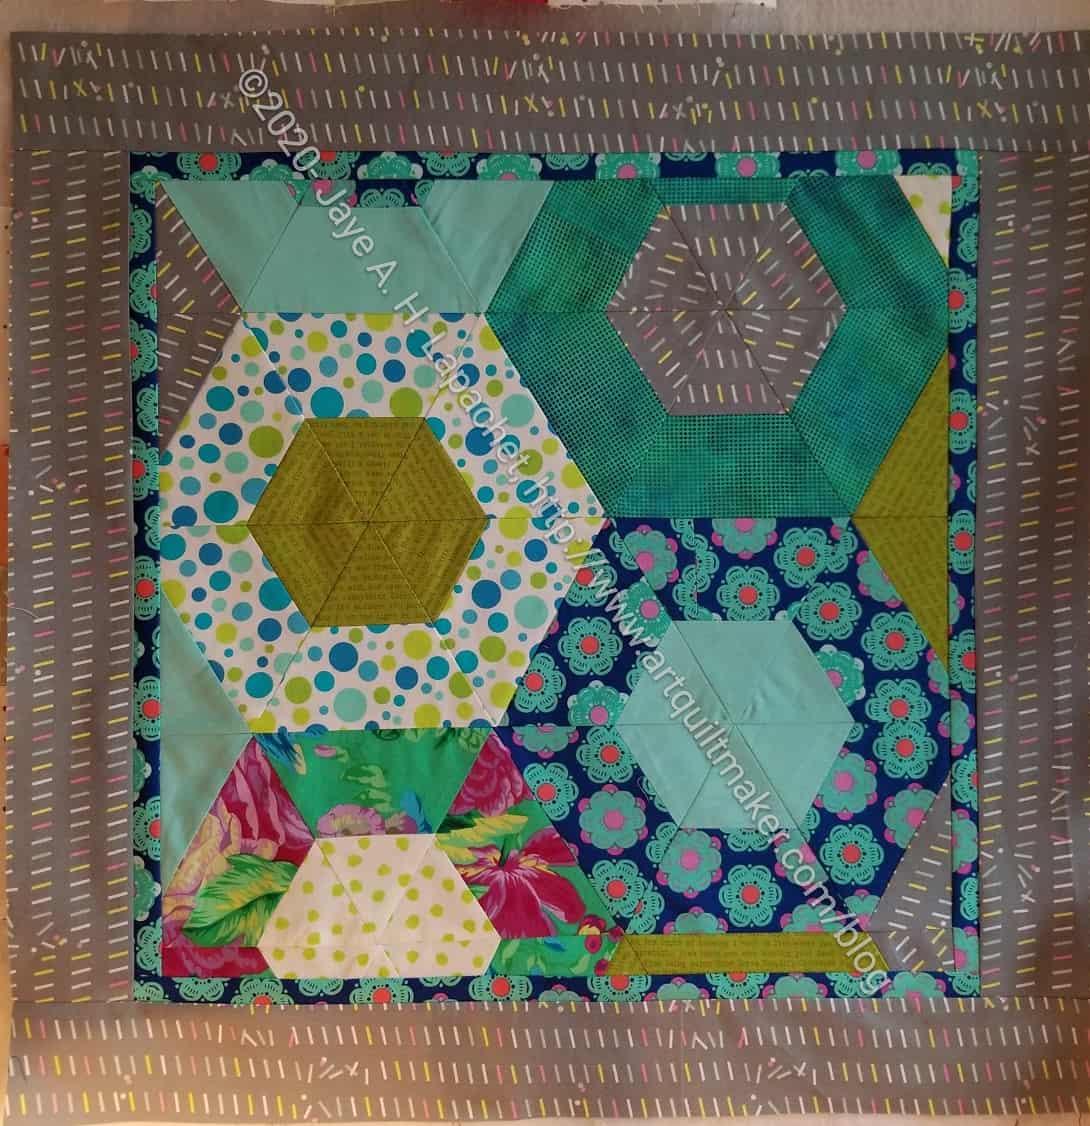
Gazebo, as I mentioned, is the one project about which I was really excited. I did all the projects in order and waited patiently to get to this one.

This project, like all the others, was pretty easy. I was able to start and finish it in less than a day. This is an example of the excellent directions provided by the pattern.


**I use affiliate links and may be paid for your purchase of an item when you click on an item link in my post. There is no additional cost to you for clicking or purchasing items I recommend. I appreciate your clicks and purchases as it helps support this blog

Gazebo Starts

Journey 2 Nebula icon

Last week I decided to finish the last project.

The last Journey 2 Nebula project (except for the bonus project, which I am not doing) is Gazebo. I sort of did the whole project in order to do this one for myself. By the time I finished Candy Dish, I was kind of sick of the whole thing. All of the projects were well received by their recipients, was a relief. I don’t know what my problem was. I enjoyed it until December-ish.

I think life ended up overwhelming me. Big surprise since it was December!

Gazebo Progress
Gazebo Progress

However, I like this design, so I decided just to cut it out and do it. I started after lunch one day. I was able to get the whole thing cut out and pieced by the end of the day. I was also able to make the back and start quilting it.

I worked hard on the fabrics. Since this was for me, I really thought about the look I wanted and am pleased with my choices.

Finished Candy Dish

Candy Dish Finished!

I finally finished Candy Dish!

It is nice to finally have this done. I am kind of over the Journey2Nebula project. It is sad, because I was eagerly anticipating the Gazebo project.

I still plan to make the Gazebo table topper** soon. I want to complete the whole group of projects.


**I use affiliate links and may be paid for your purchase of an item when you click on an item link in my post. There is no additional cost to you for clicking or purchasing items I recommend. I appreciate your clicks and purchases as it helps support this blog.

Jawbreaker in Situ

Jawbreaker in situ
Jawbreaker in situ

My niece received her pillow and sent me a photo of it on her couch. She is in the process of rearranging and refreshing her house. She said the pillow goes very well. I am pleased.

It looks like she could stand a few more cushions. I will keep that in mind as I make other items. 😉

I finished Jawbreaker in mid-October. I sent it off fairly quickly, but it took me awhile to send the pillow form (laziness, disorganization). She sent me a thank you note, but we think the thank you note took a beach vacation, because I received it almost 3 weeks later. My niece is very good about thank you notes.

Candy Dish Progresses

Journey 2 Nebula icon

I finally made progress on the Journey2Nebula projects. I had started Candy Dish right before the Big Blog Blow-up and then didn’t make much progress. I also haven’t started the last project, Gazebo, which is sad. I really like that project and wanted to do that one most.

Candy Dish Cushion Top

I still have to trim Candy Dish and make it into a cushion cover, but I finished the piecing over the weekend in between working on FOTY 2019.

Candy Dish Started

Journey 2 Nebula icon

Rock Candy is finished so I am on to Candy Dish. This will be for my youngest niece since the others have gotten their cushion covers.

Candy Dish Cutting
Candy Dish Cutting

Candy Dish** has two ‘patterns’ included in the little fold up pamphlet. In reality, it is one pattern with two color arrangements. I believe the goal for the Journey2Nebula project is to make both pillows, but I am only making one.

I pulled out my pink bins and started going through them to find the pinks that would create the vision of the pillow that was in my mind. I found I have a lot of peachy pinks, which I no longer enjoy. 🙁 I’ll have to figure out a use for them. Another lesson in using fabrics up sooner than years later. I seem to be getting a lot of these lessons recently.


**I use affiliate links and may be paid for your purchase of an item when you click on an item link in my post. There is no additional cost to you for clicking or purchasing items I recommend. I appreciate your clicks and purchases as it helps support this blog.

Rock Candy Finished

Rock Candy Finished
Rock Candy Finished

I finished Rock Candy over the weekend, but still needed to do the binding. That is always a good hand task to work on at Craft Night, so I finished the binding on Monday night. This has been a banner week for finishes: Rock Candy plus 3 donation tops and backs.

On to Candy Dish, which is the next Journey to Nebula project

Jawbreaker Finished

Journey 2 Nebula icon

After quilting the Jawbreaker pillow top, it didn’t take much time to make it into a pillow. Once again, I used the Spoonflower directions for inserting a zipper. These directions create some flaps to cover the zipper. I haven’t used this tutorial in awhile so there was some ripping and a tiny bit of cursing, but all-in-all, the directions were straightforward and easy to follow.

Jawbreaker cushion cover

I actually like this technique. The seam lines don’t take away from the overall effect like they do in half hexagons. I can’t think of what kind of project I would make with these in the future, but it is a future technique I would like to explore a little more. Perhaps a table runner?

I didn’t like cutting off perfectly good pieced elements, but that was the design so I followed it.


Rock Candy Cut

Journey 2 Nebula icon

I spent some of the very little time I had to sew this week cutting out Rock Candy, the next Journey2Nebula project. It is table mat made with diamonds.

This will be a matching piece to the Seaside table runner.

So far, I am ok with the fabrics I chose. I am not 100% sold on the layout, but I am ok with it. I have seen some in the Facebook group that I really don’t like. I don’t sincerely dislike mine, so I can live with it. We’ll have to see.

Rock Candy - Pieces cut out
Rock Candy – Pieces cut out

I wasn’t very excited about using the rulers for this project. This project requires the Sidekick or Super Sidekick. The directions said to turn the ruler over and cut from the wrong side at certain points. There are no lines on the wrong side and I worry about the distortion. It seemed to work ok.

I also didn’t like the large size of the Super Sidekick for the small-ish diamonds. Amy didn’t have the Sidekick, as I may have mentioned, and I didn’t want to buy it so I had to suck it up. I did try the Creative Grids Lazy Angle ruler she included. I tried it as it is smaller and fits my hand better. Unfortunately, I couldn’t figure out how to use it for cutting these diamonds with the Jaybird pattern. It is configured a little differently and its use wasn’t intuitive. C’est la vie.

According to the schedule, I don’t have to start sewing until Tuesday, but I may sew it together any way. We’ll see.


**I use affiliate links and may be paid for your purchase of an item when you click on an item link in my post. There is no additional cost to you for clicking or purchasing items I recommend. I appreciate your clicks and purchases as it helps support this blog.

Jawbreaker Quilted

Journey 2 Nebula icon

I spent some time earlier this week quilting the Jawbreaker. I made good progress on it, but it took me longer than Lucky Charm. Finally, after a second session, I finished it. i swear I have quilted more this year than in a long time. All the projects are small, but I am still quilting them.

Jawbreaker Quilted
Jawbreaker Quilted

Jawbreaker is evenly quilted, but has less quilting than Lucky Charm. I used the Rotary Even Foot and that worked pretty well. I just did straight line quilting – nothing fancy.

Jawbreaker quilted - detail
Jawbreaker quilted – detail

One thing that made me a little crazy is that the light green thread I used shredded periodically.

Jawbreaker thread shredding

It didn’t shred all the time, but I noticed it at least twice and I found it strange. I very seldom have this issue with Aurifil. In the photo, you can see that the  charcoal was fine, but the light green was shredded.


Jawbreaker Pillow Top

Journey 2 Nebula icon

I worked hard on the next Journey2Nebula project and made good progress over the weekend. Surprisingly, we had two social activities, so I couldn’t spend all weekend sewing.

Jawbreaker Pillow Top

This project is turning out better than I thought it would. I don’t mind the greens too much and think they will be ok for my niece.

The names of the projects are kind of fun.

I think the grey keeps the greens under control.

Now on to quilting.

Jawbreaker Sewn

Journey 2 Nebula icon

I worked on the Jawbreaker pillow top over the weekend in between working on my donation projects. The Journey2Nebula video for  this week’s piecing is available. I didn’t wait for it as I had time and want to keep progressing. Also, I have done this kind of piecing before and will do it when I eventually make the  Spin Wheel quilt. I have done this kind of piecing before.

Jawbreaker pillow top

I should have pressed the way I normally press rather than pressing open partly and pressing to the side partly. I worked out the issues, but bouncing between the two methods wasn’t helpful. My fault.

I think the piece looks good and I will probably be able to finish it this weekend, so I can stay on track with the series.

I was annoyed again at the partial blocks, but watching the video made me understand Julie Herman’s thinking about the design choices. I may even follow the rest of the pattern!

Jawbreaker Start

Journey 2 Nebula icon

I was finally able to start the third Journey2Nebula project last Friday.

Jawbreaker pillow start

I actually like the process even though I had trouble with the rulers again.

My pieces were the right size yet the ruler didn’t line up. 🙁 It doesn’t matter a lot as I can make the piecing work. I just don’t know what is going on and what the problem is and that irritates  me


Lucky Charm Finished

Journey 2 Nebula icon

I finished the Lucky Charm Pillow on Sunday after finishing the quilting on Saturday evening. I ended up using the directions for a zipper pouch and that worked pretty well. The corners by the zipper ends are a little funky, but it looks good.

Lucky Charm Pillow Finished

I was planning on just giving the cover to my niece, but my mom pointed out that she would probably never buy a pillow form for the cover, so I ordered a pillow form.

I am pretty pleased with the way this turned out. I think I will try the Spoonflower zipper closure directions next time as I think they were more appropriate for a pillow. There is another pillow in Journey2Nebula so I can try the directions when I get there.


**I use affiliate links and may be paid for your purchase of an item when you click on an item link in my post. There is no additional cost to you for clicking or purchasing items I recommend. I appreciate your clicks and purchases as it helps support this blog.

Lucky Charm Quilted

Journey 2 Nebula icon
Lucky Charm Quilted
Lucky Charm Quilted

I quilted Lucky Charm over the weekend. I was running up against the Journey2Nebula schedule. I knew I needed (and wanted) to get the thing finished before the next assignment came on Tuesday.

Since this is a small project and I did simple straight line quilting, the process didn’t take that long. I had some trouble, but nothing a seam ripper wouldn’t take care of.

Now I need to make it into a pillow. I think I will do a zipper closure.