Frolic! Clue 3

Frolic! Clue 3: finished mostly

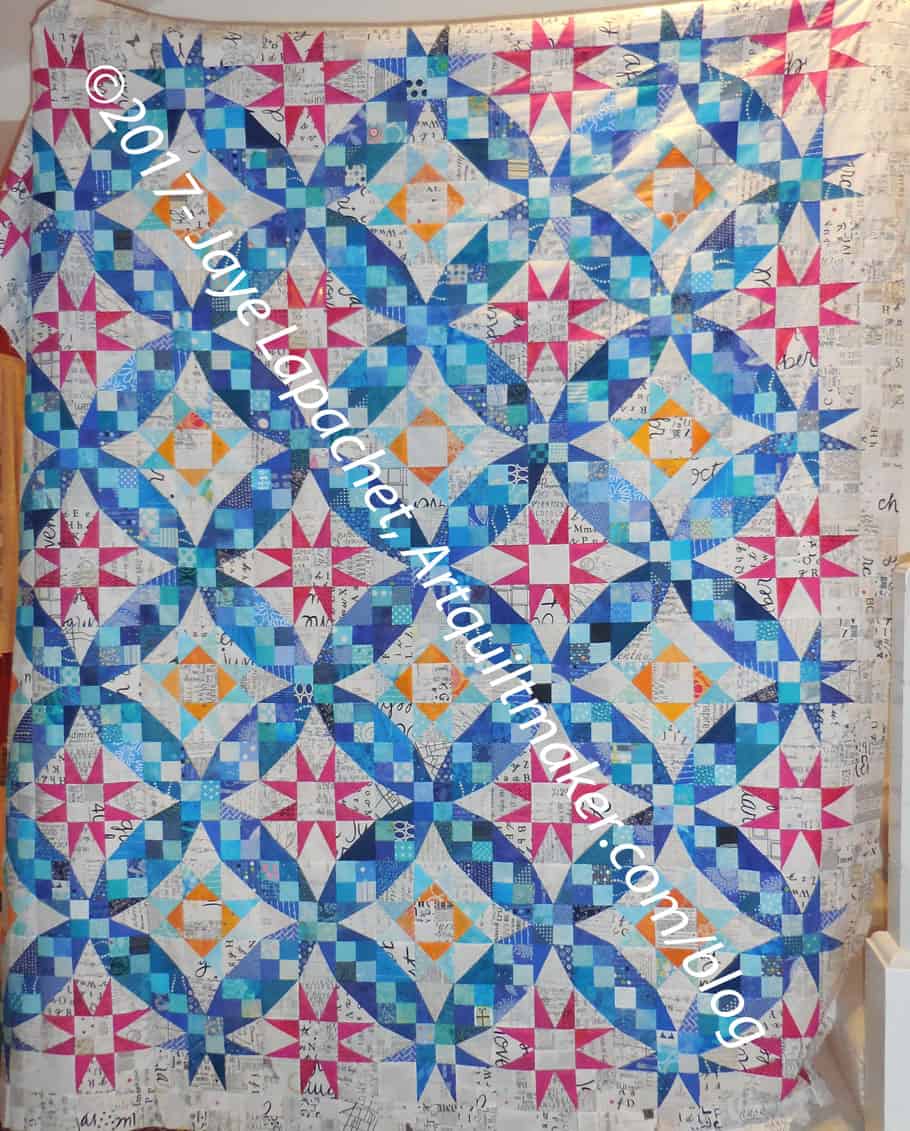
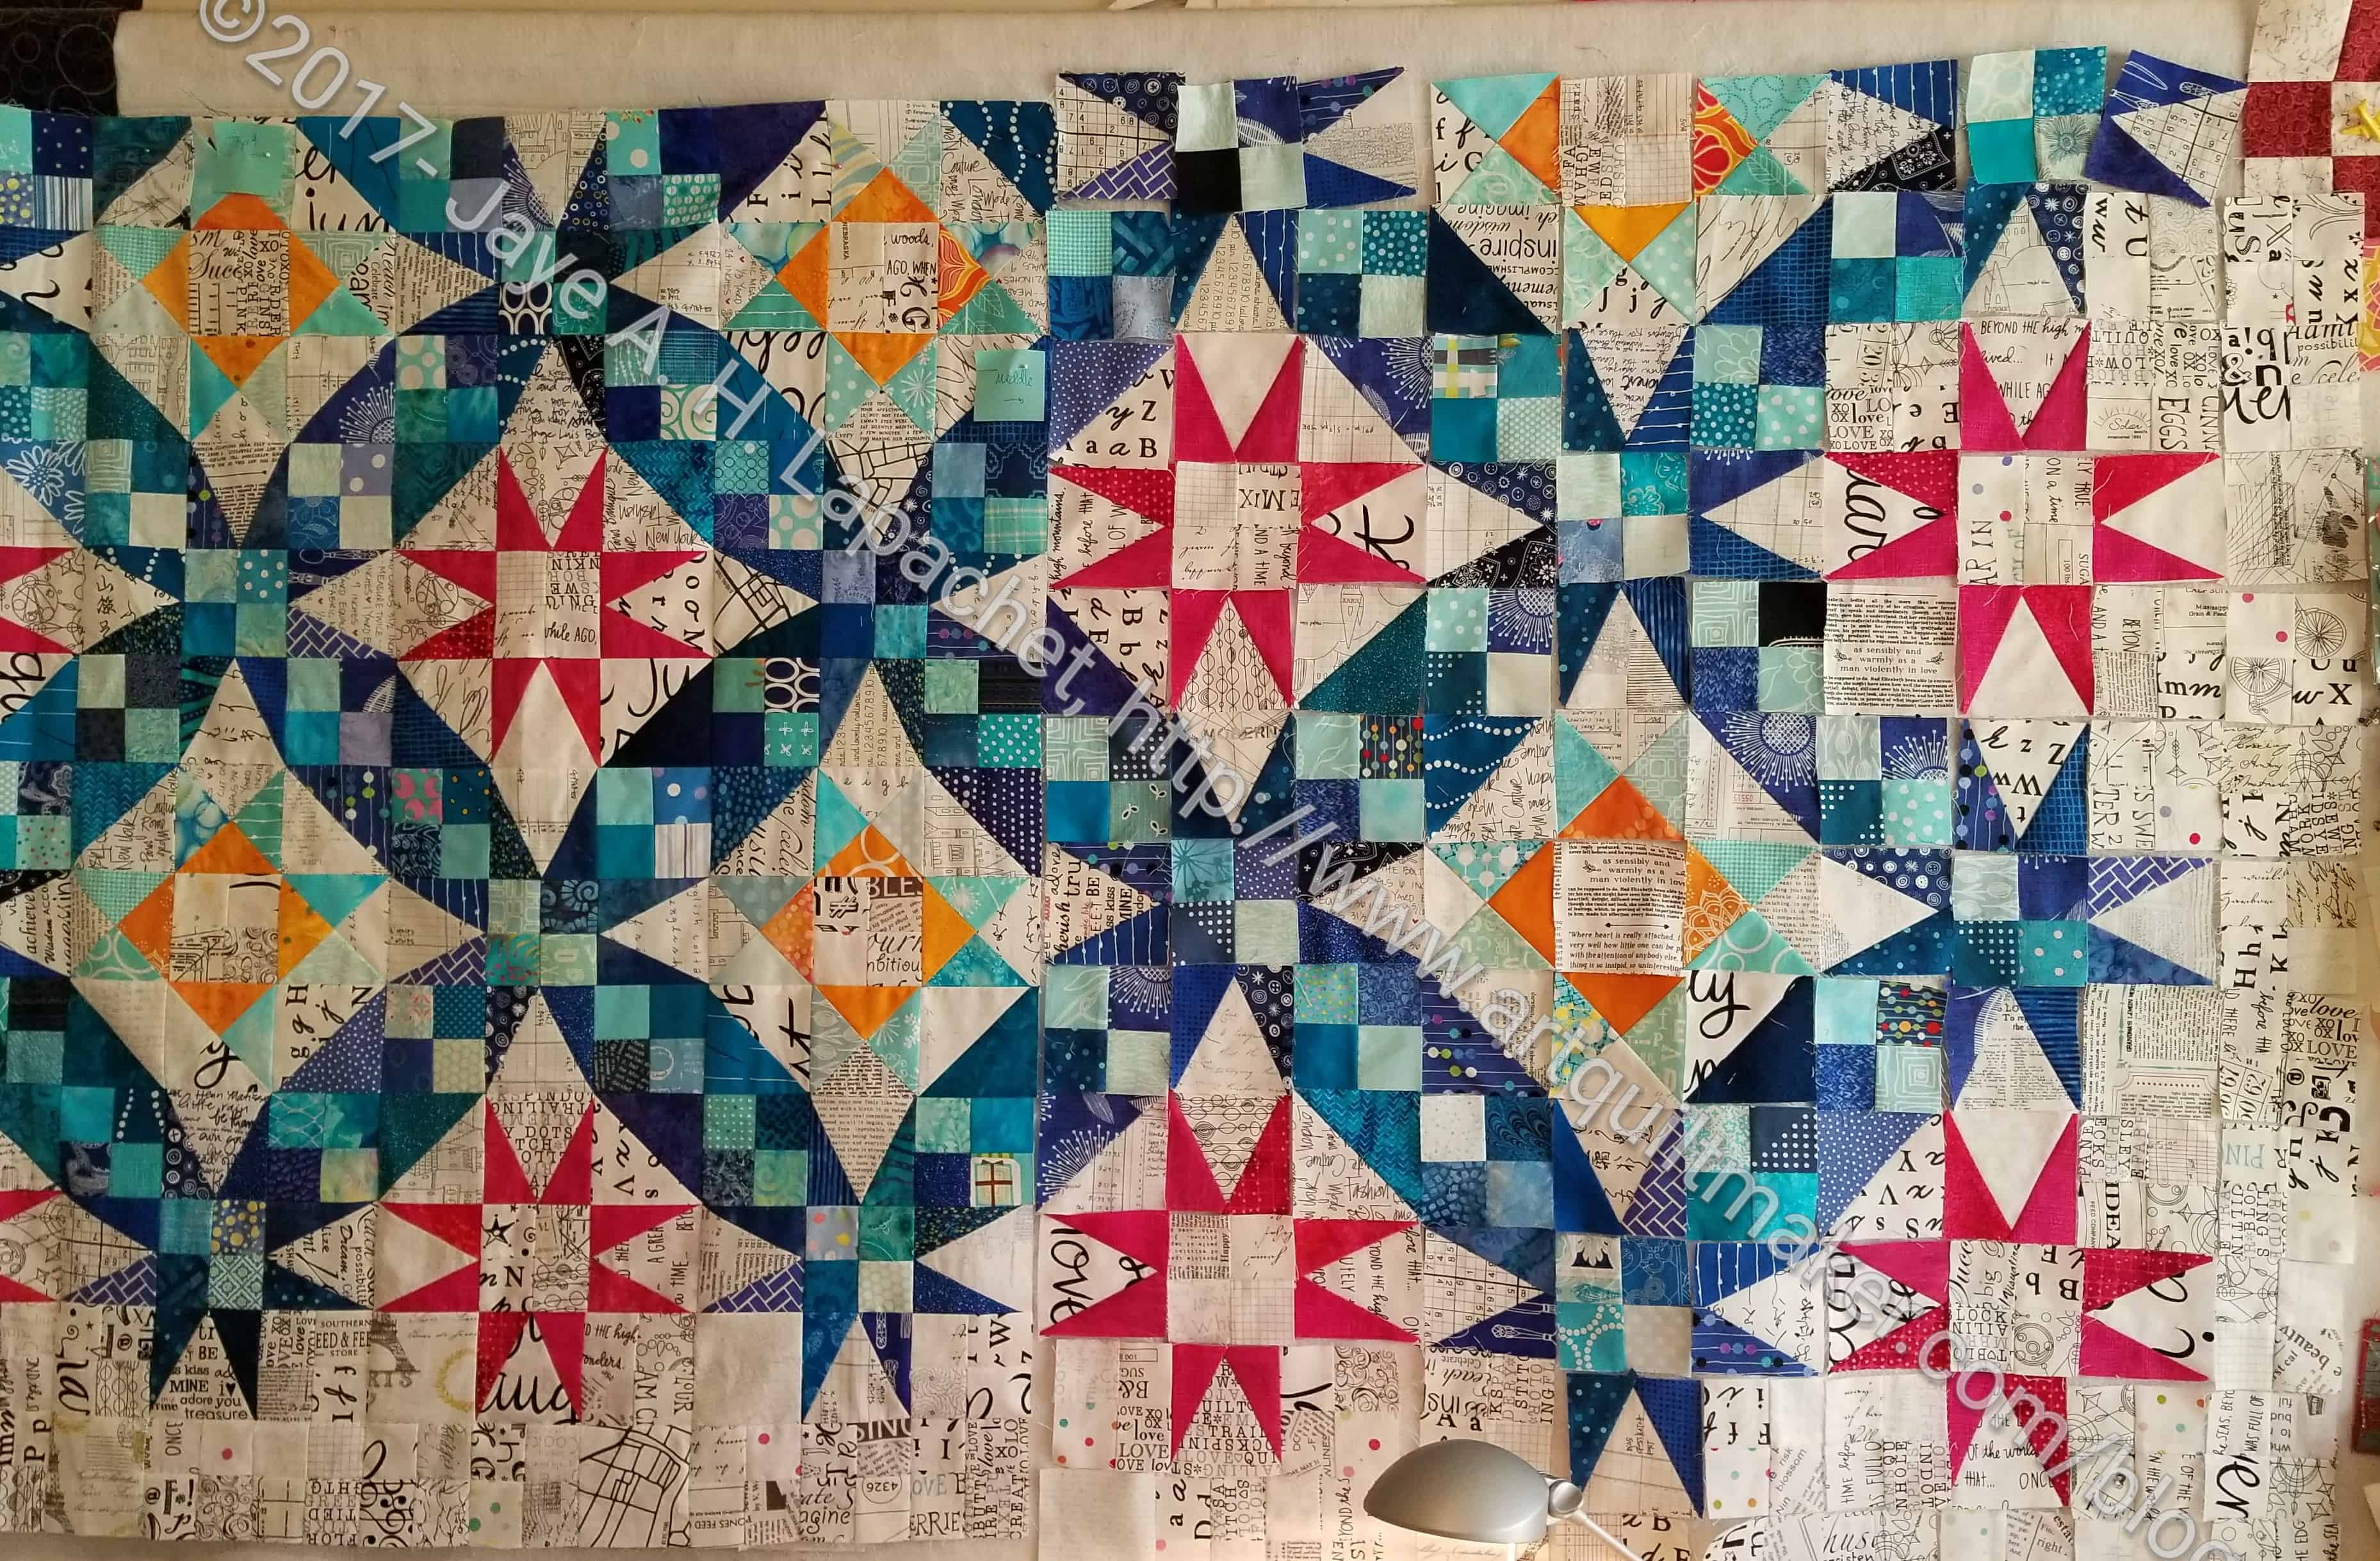
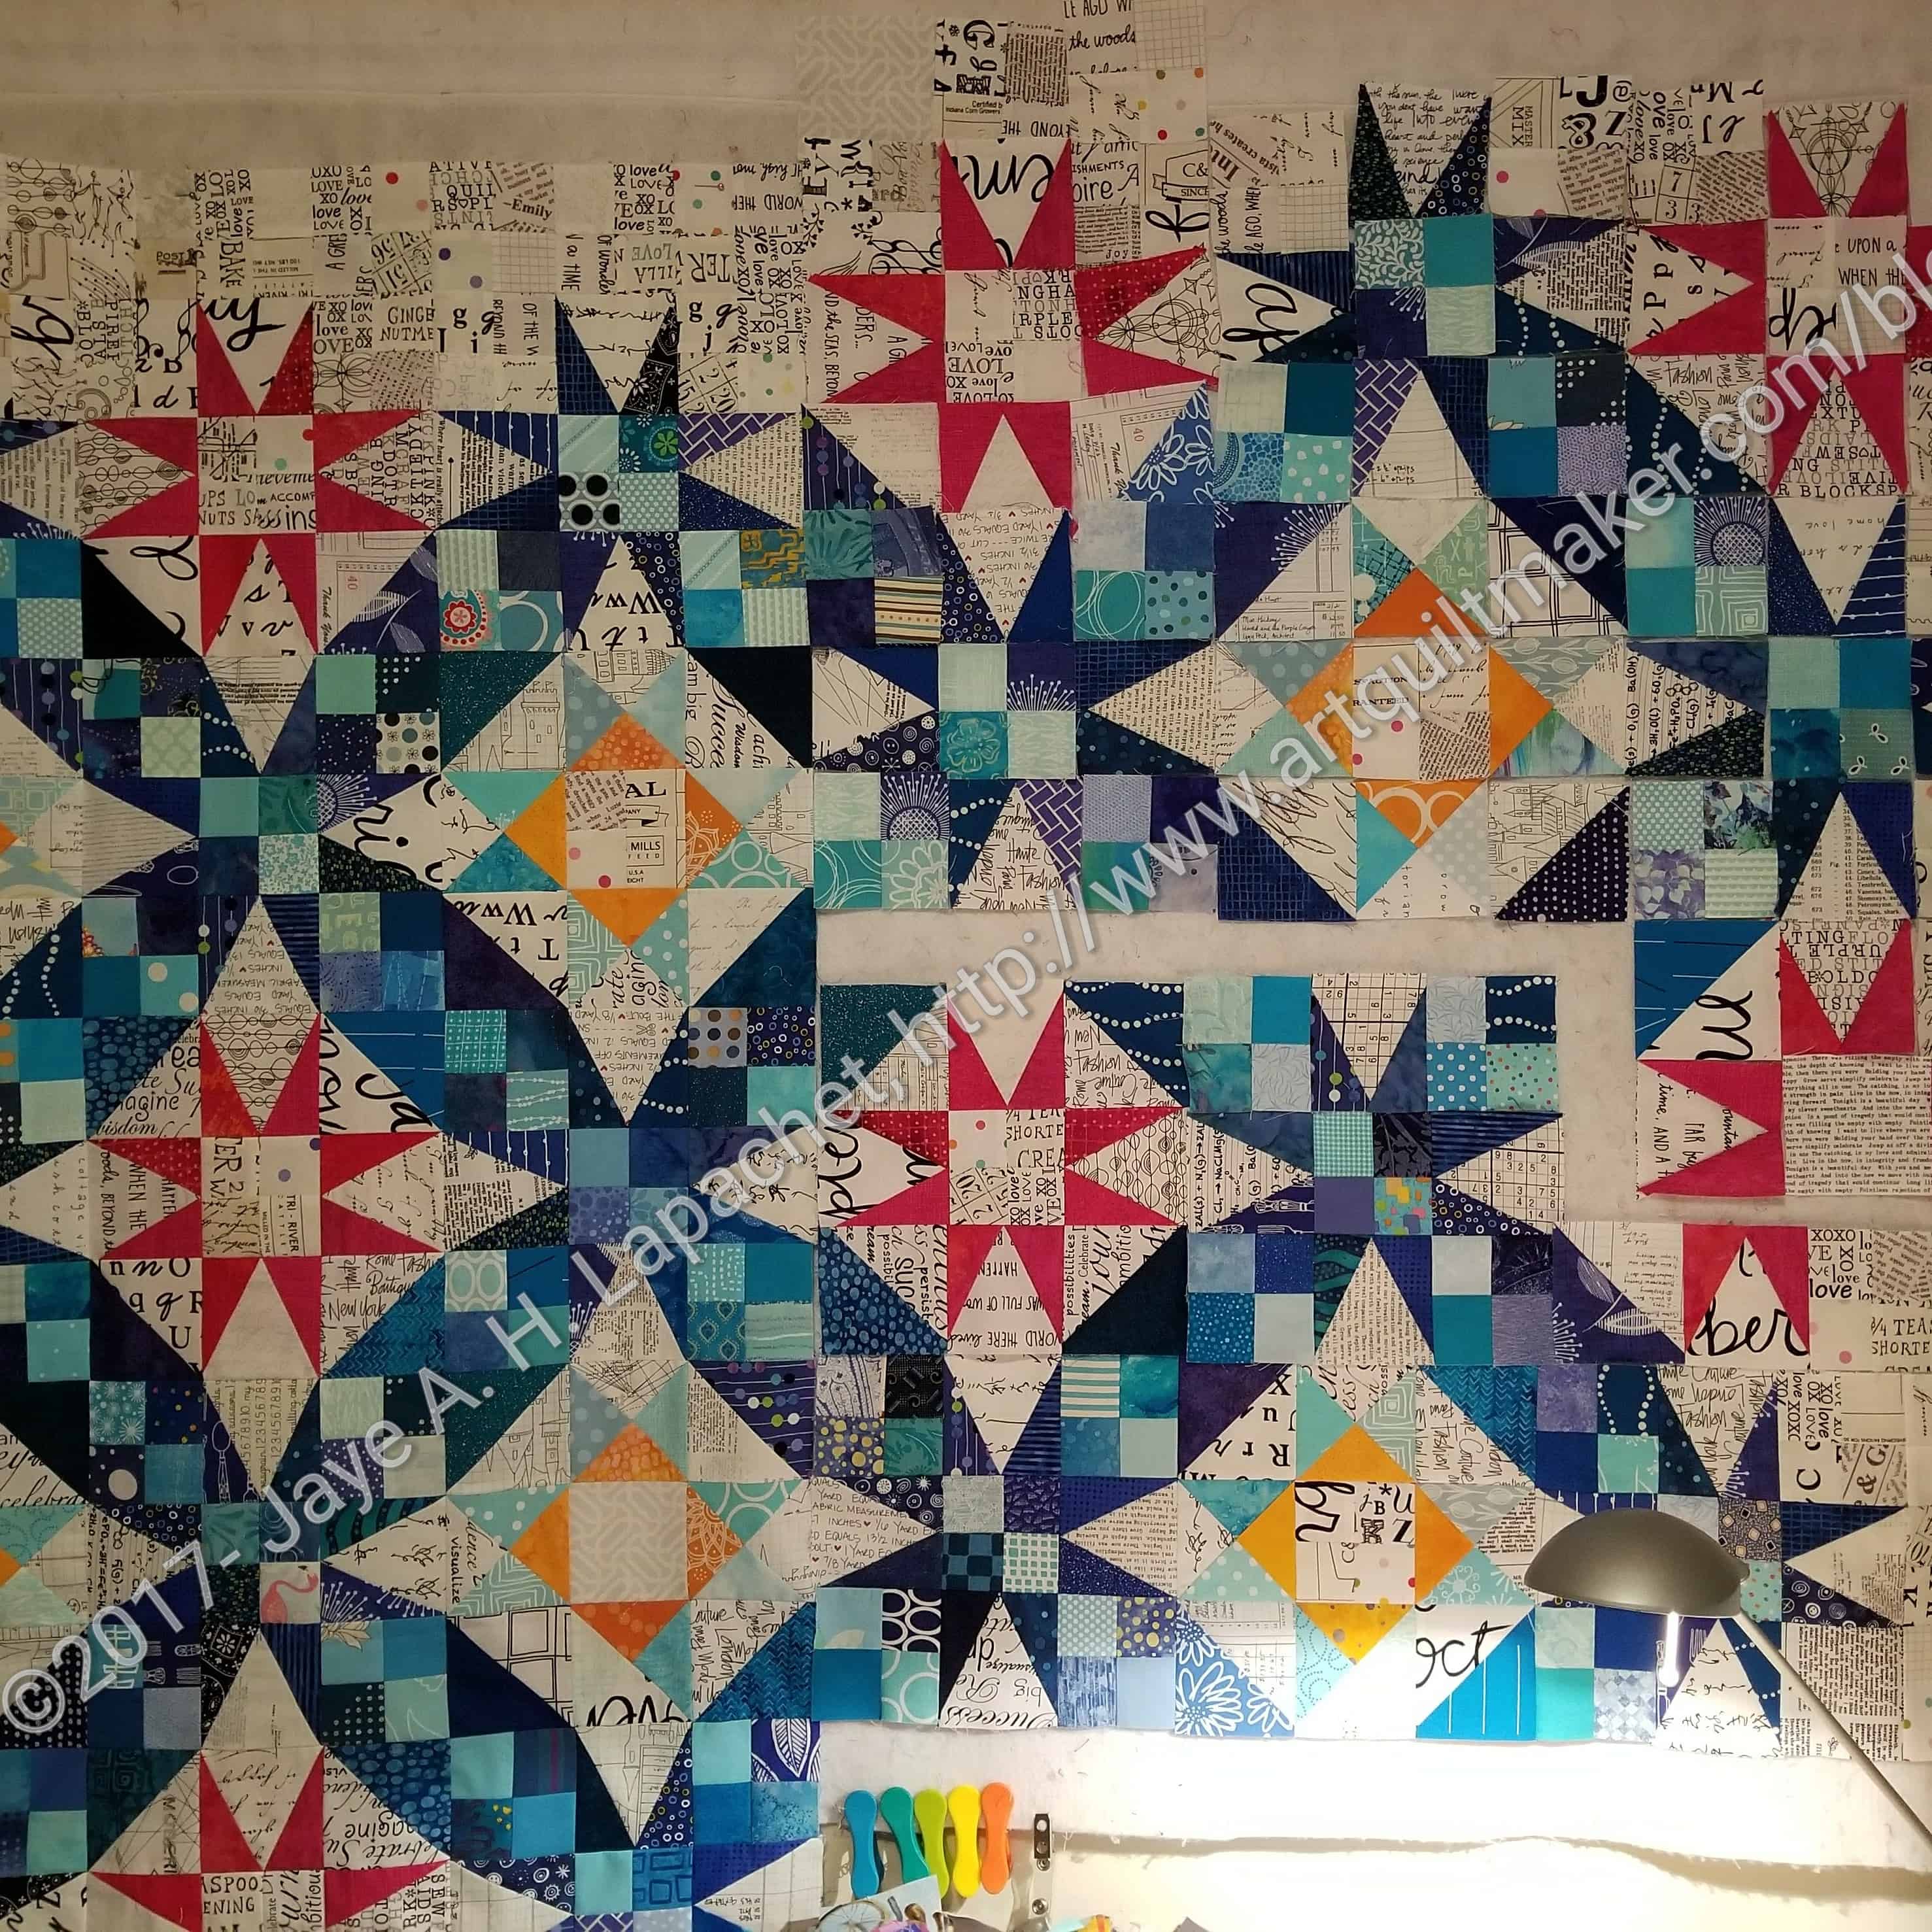
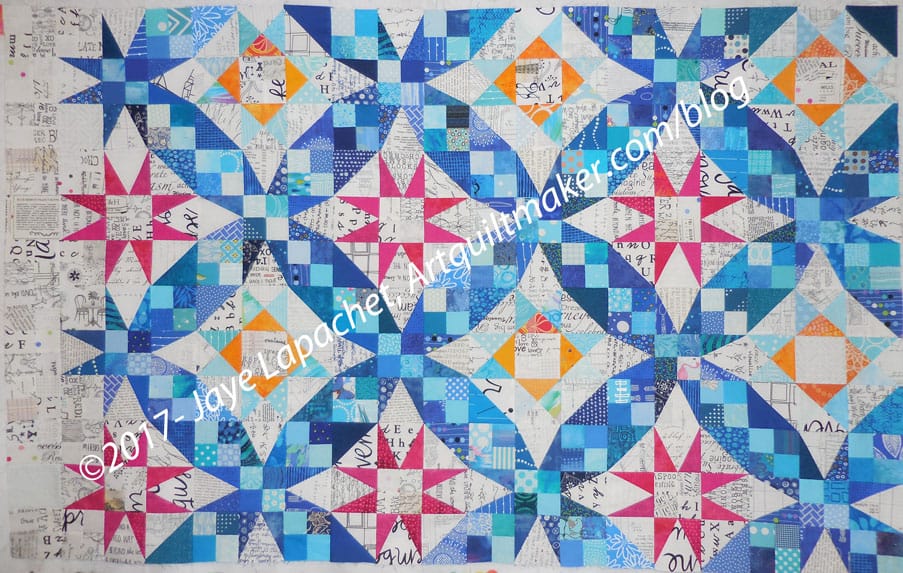
I finished Clue 3 on Saturday after starting it on Friday afternoon. I have to say I am shocked at how fast I am speeding along with these clues. I am not saying that I will be able to keep up the pace, but for now I am pleased that I am not falling behind.

Finished might be overstating just a little. I think I need to make a few more, but I need to check my math.

Frolic! Clue 3 in process

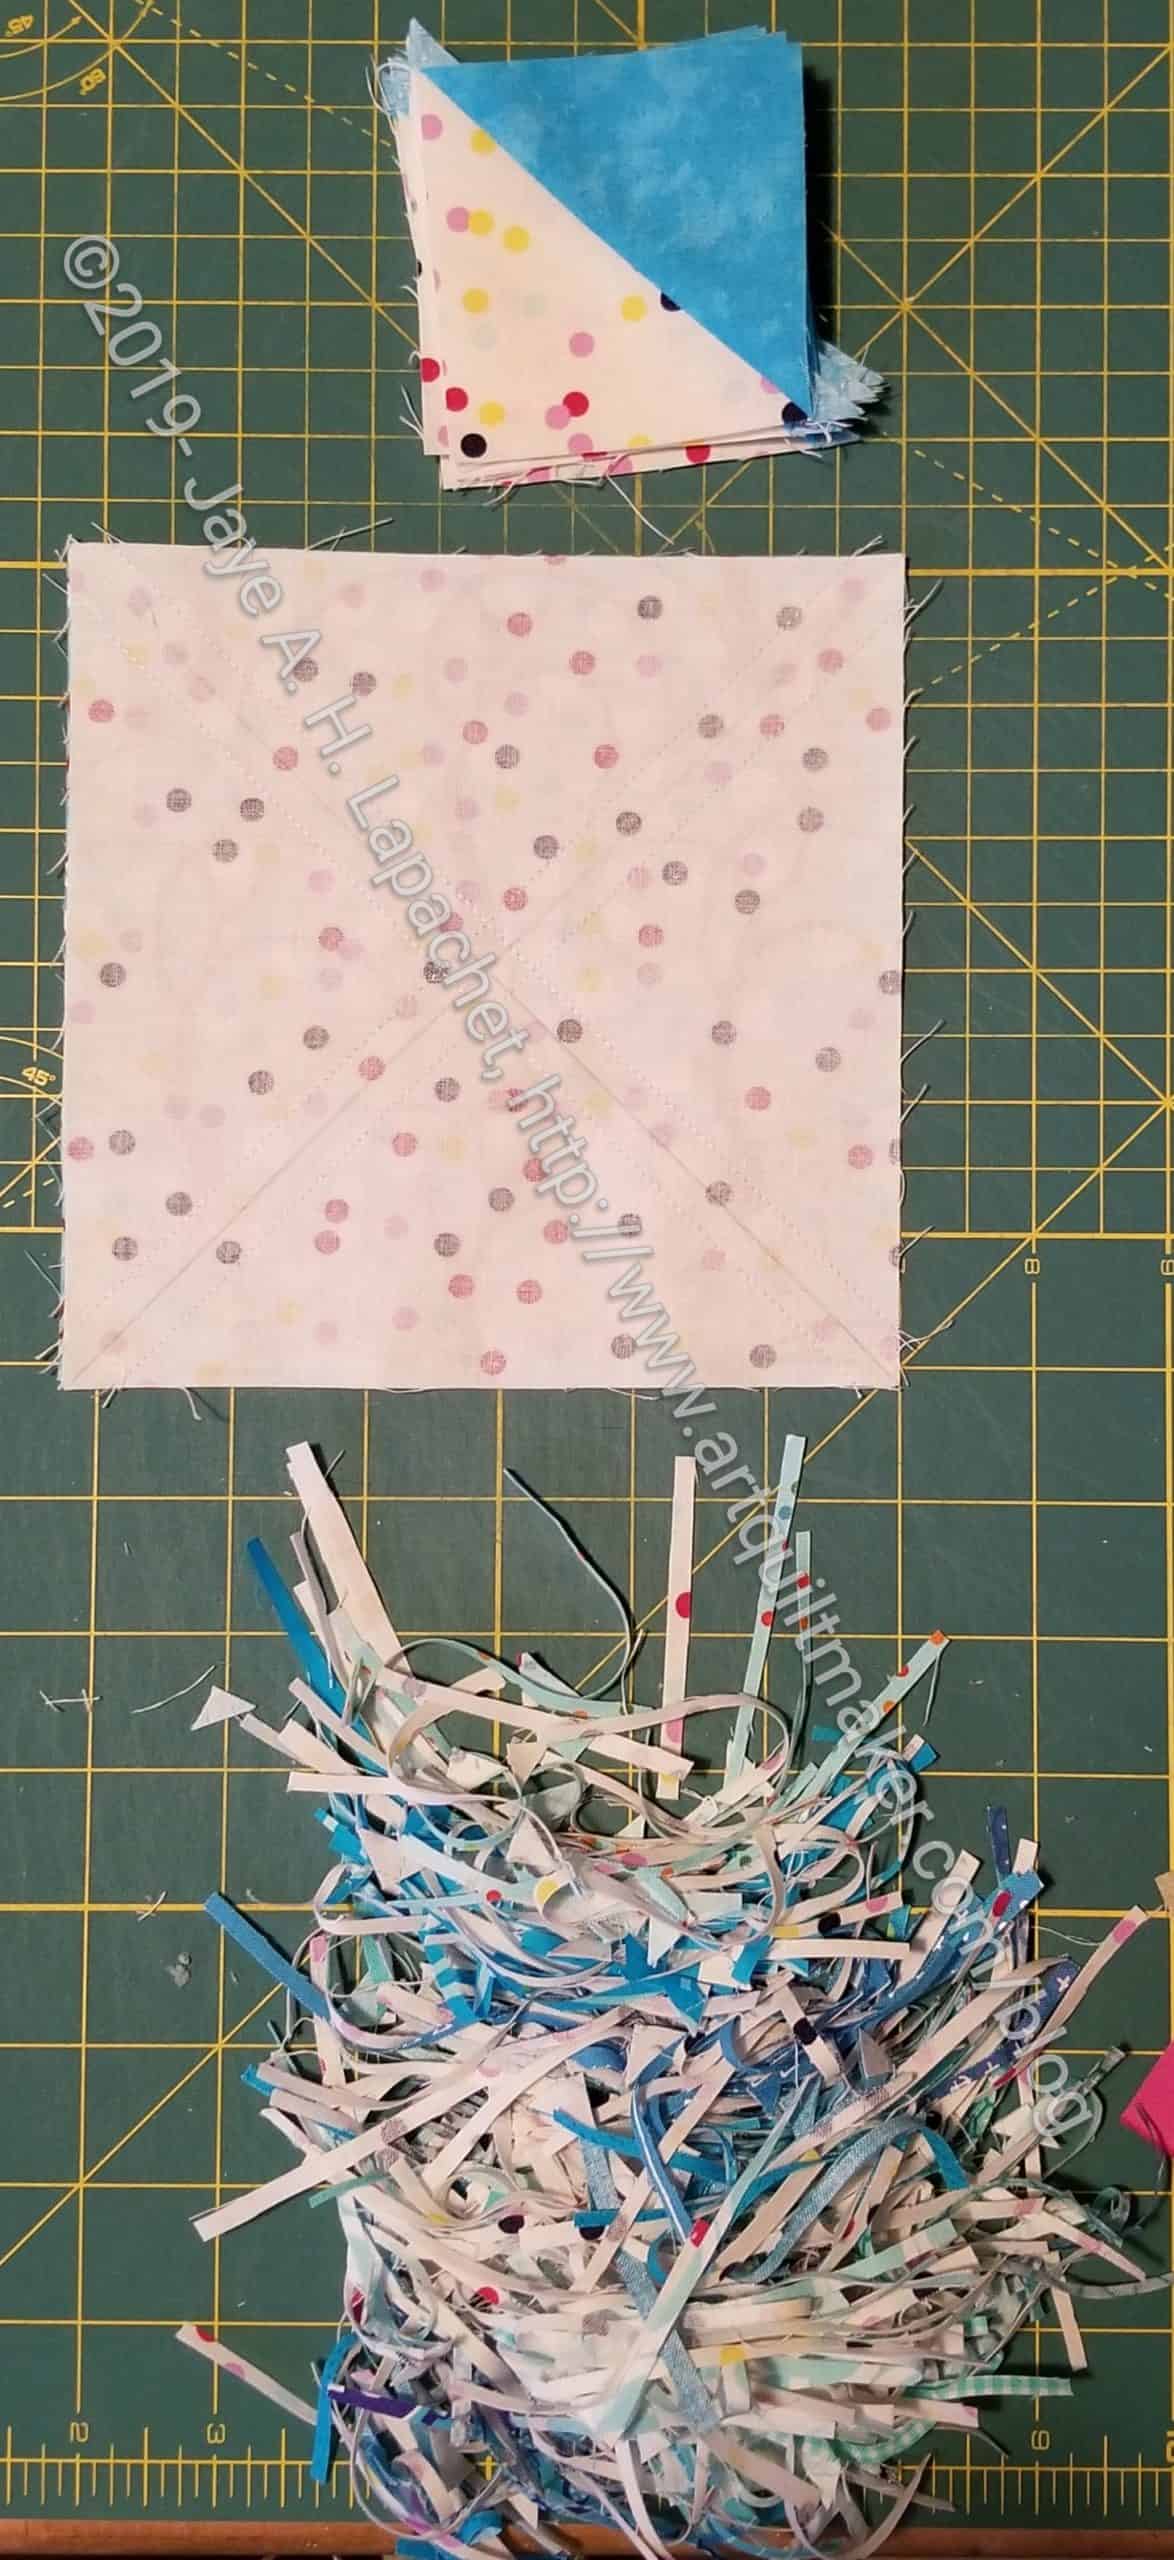
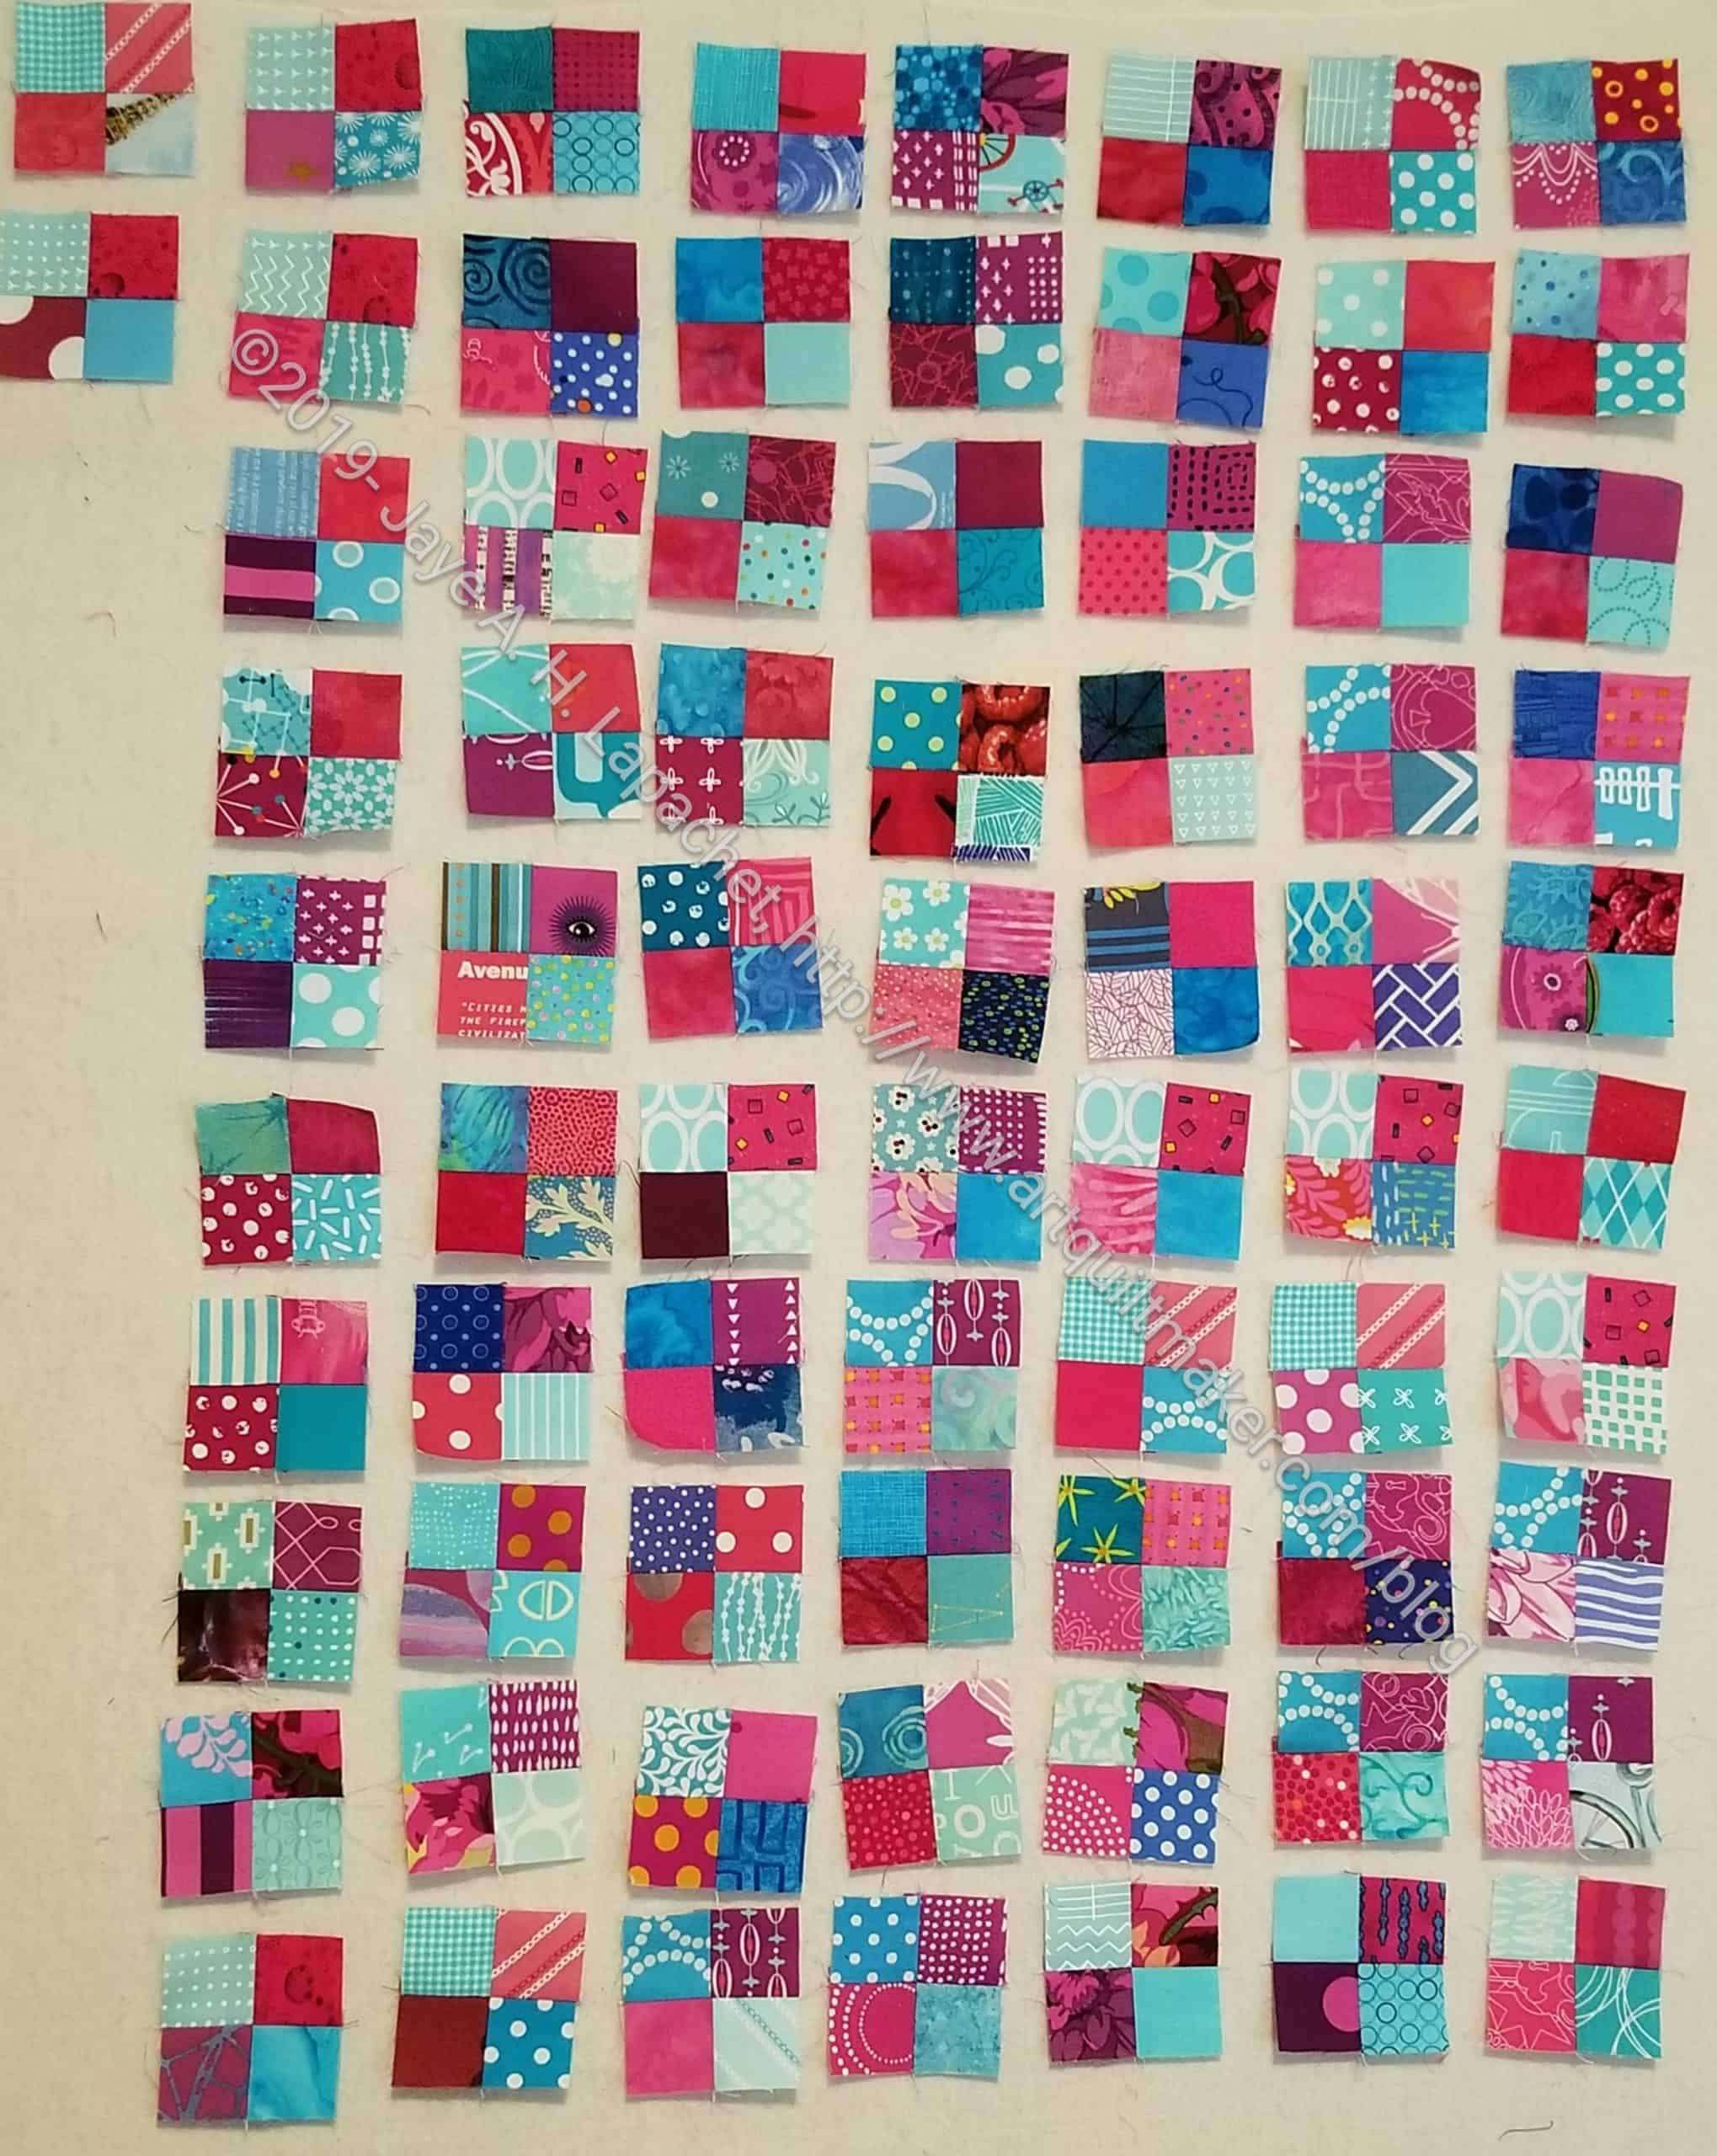
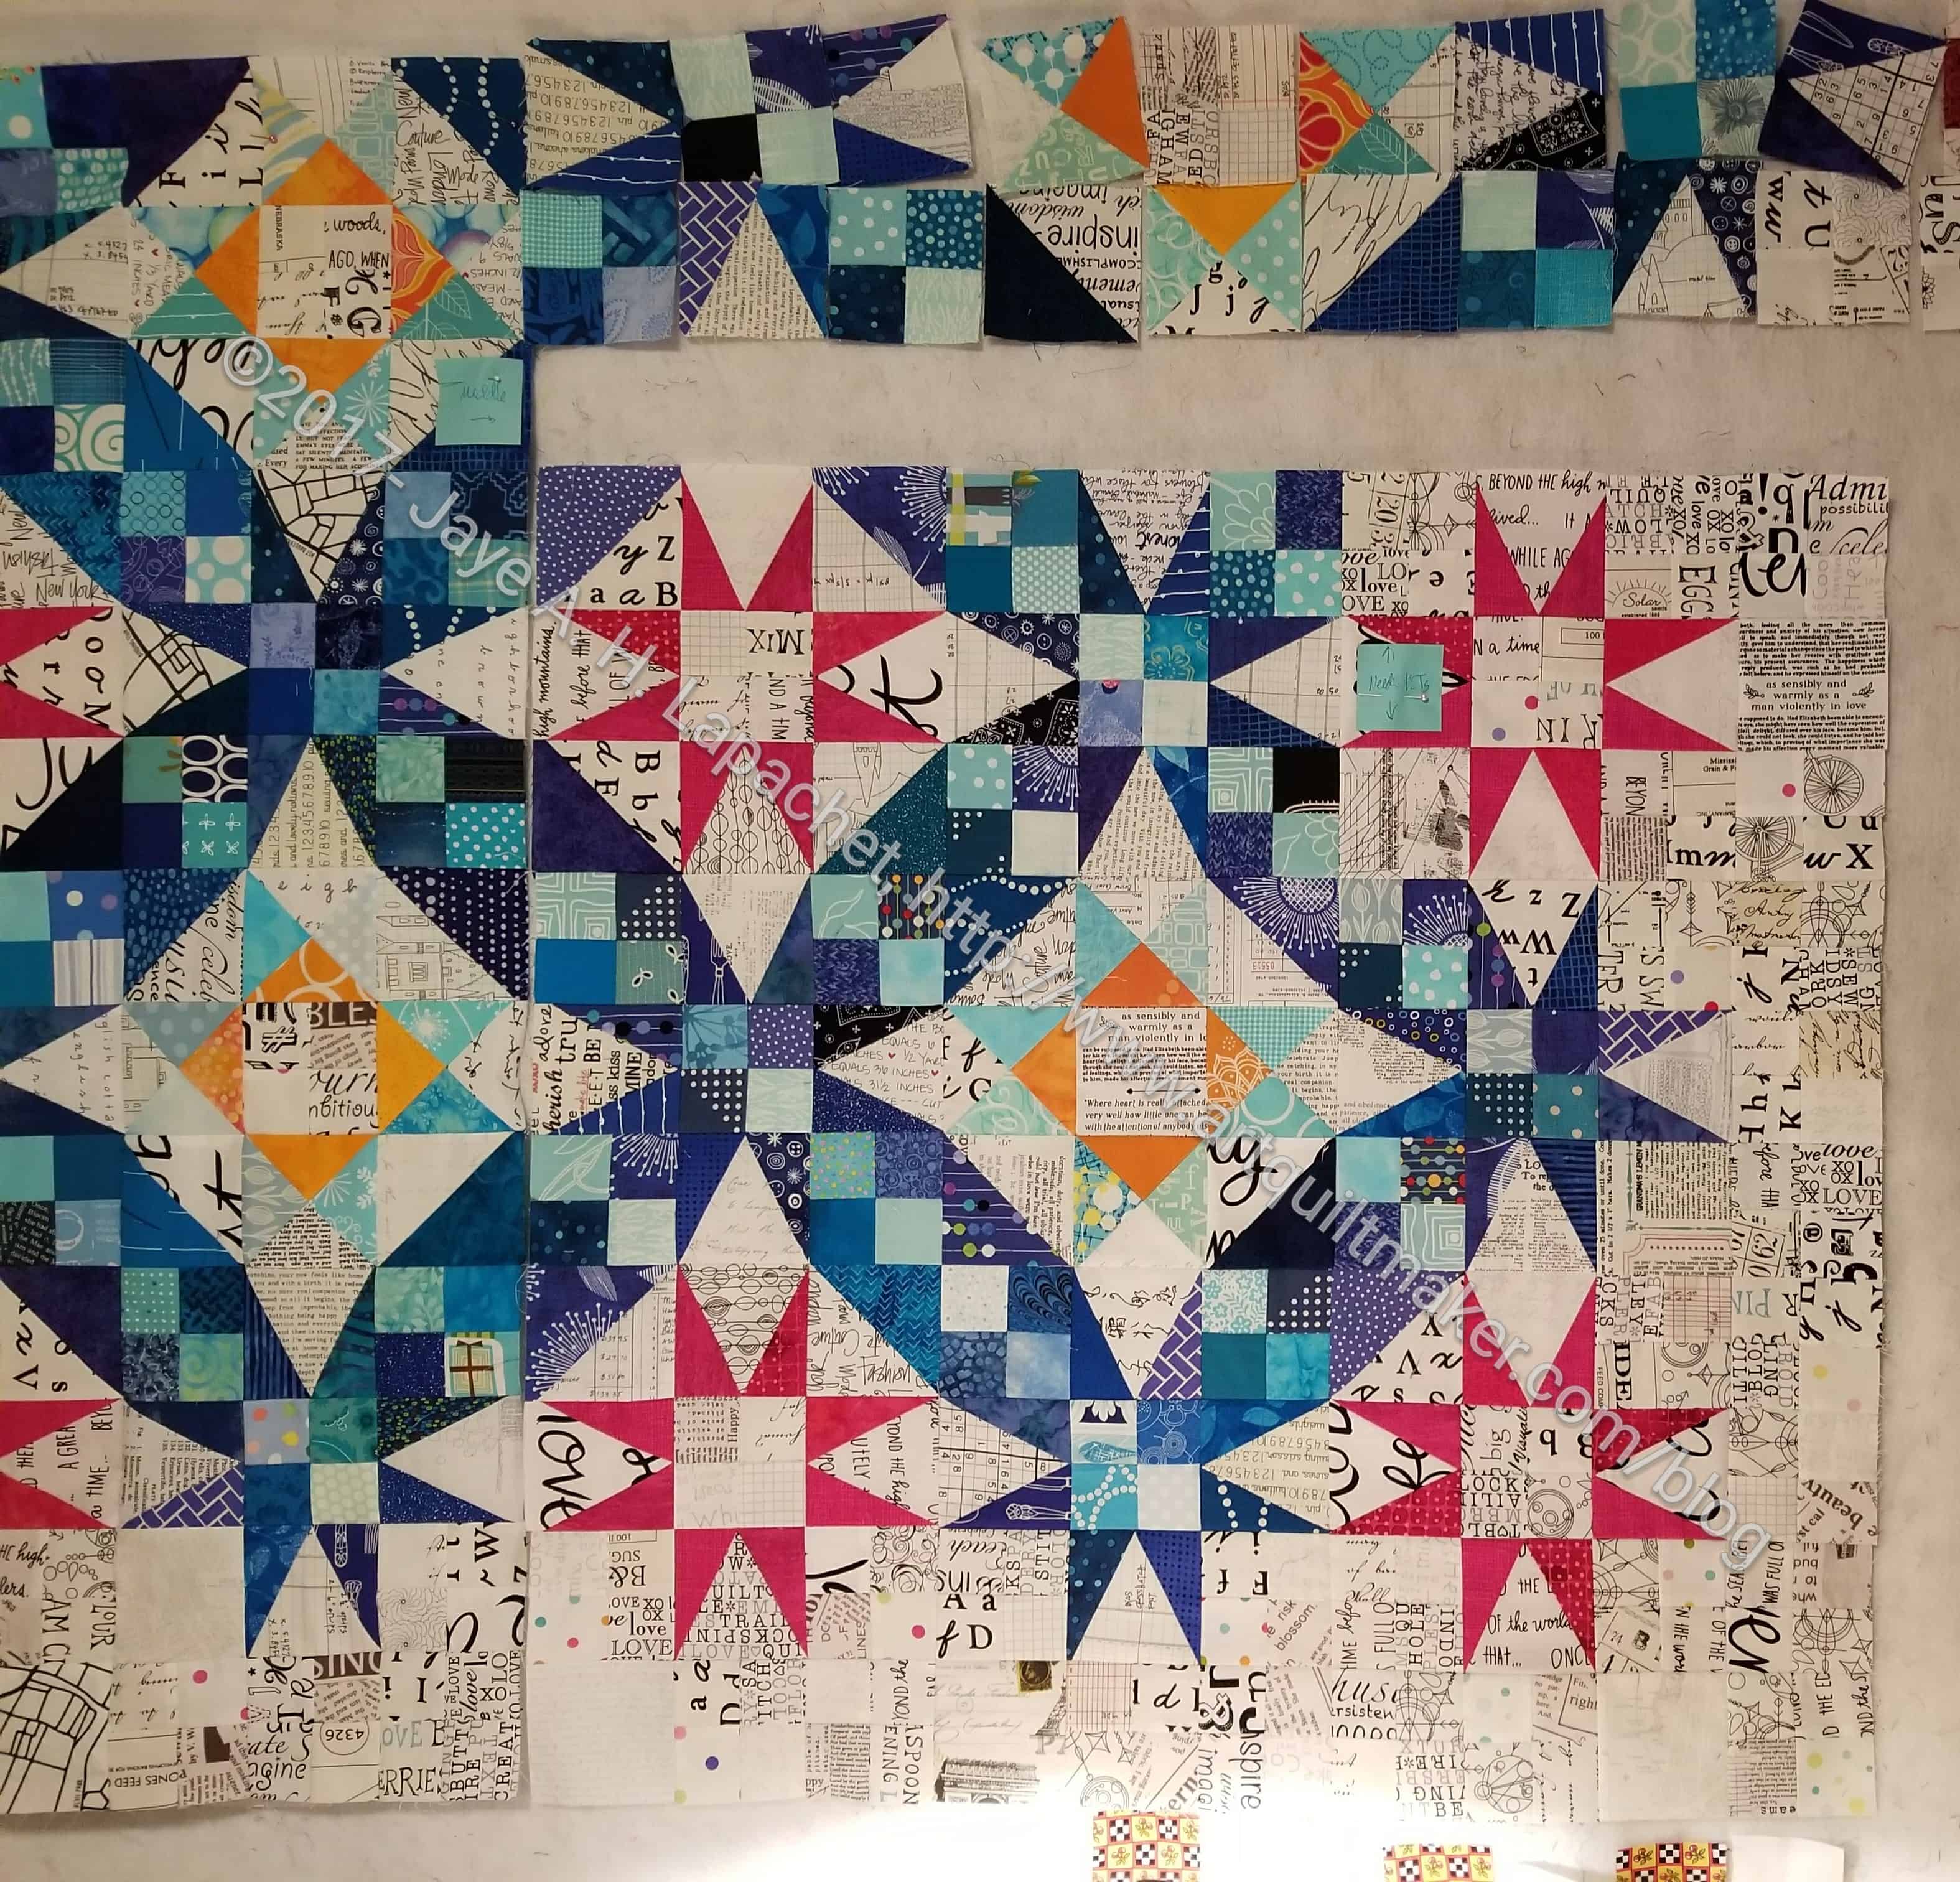
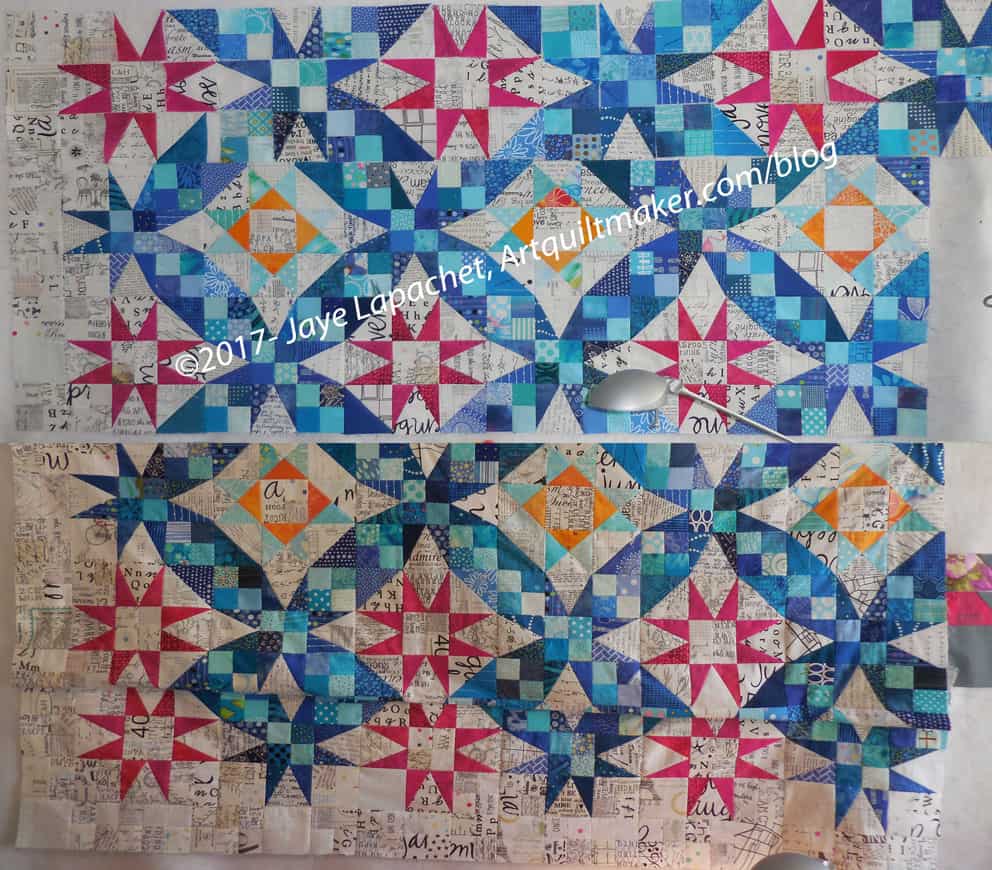
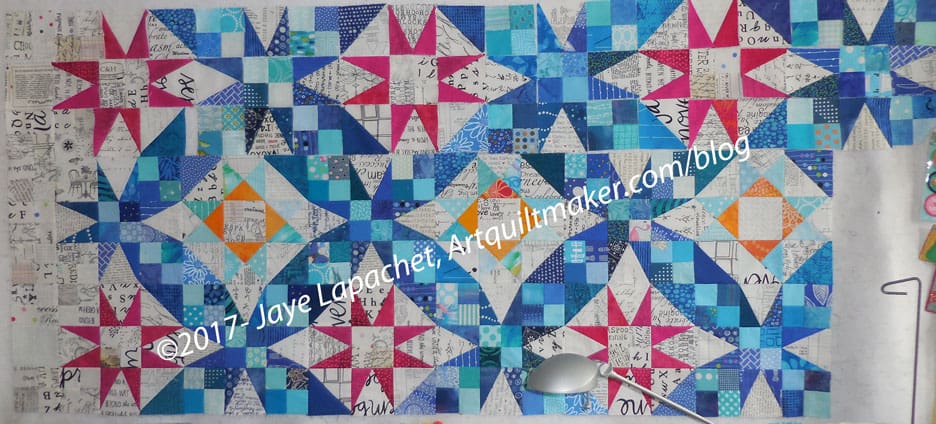
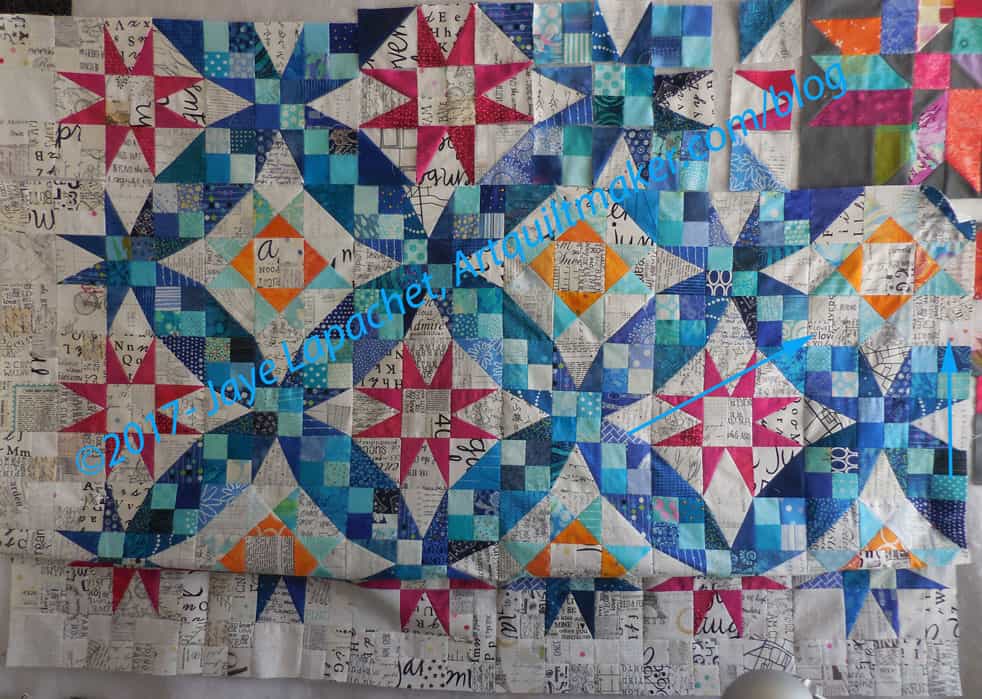
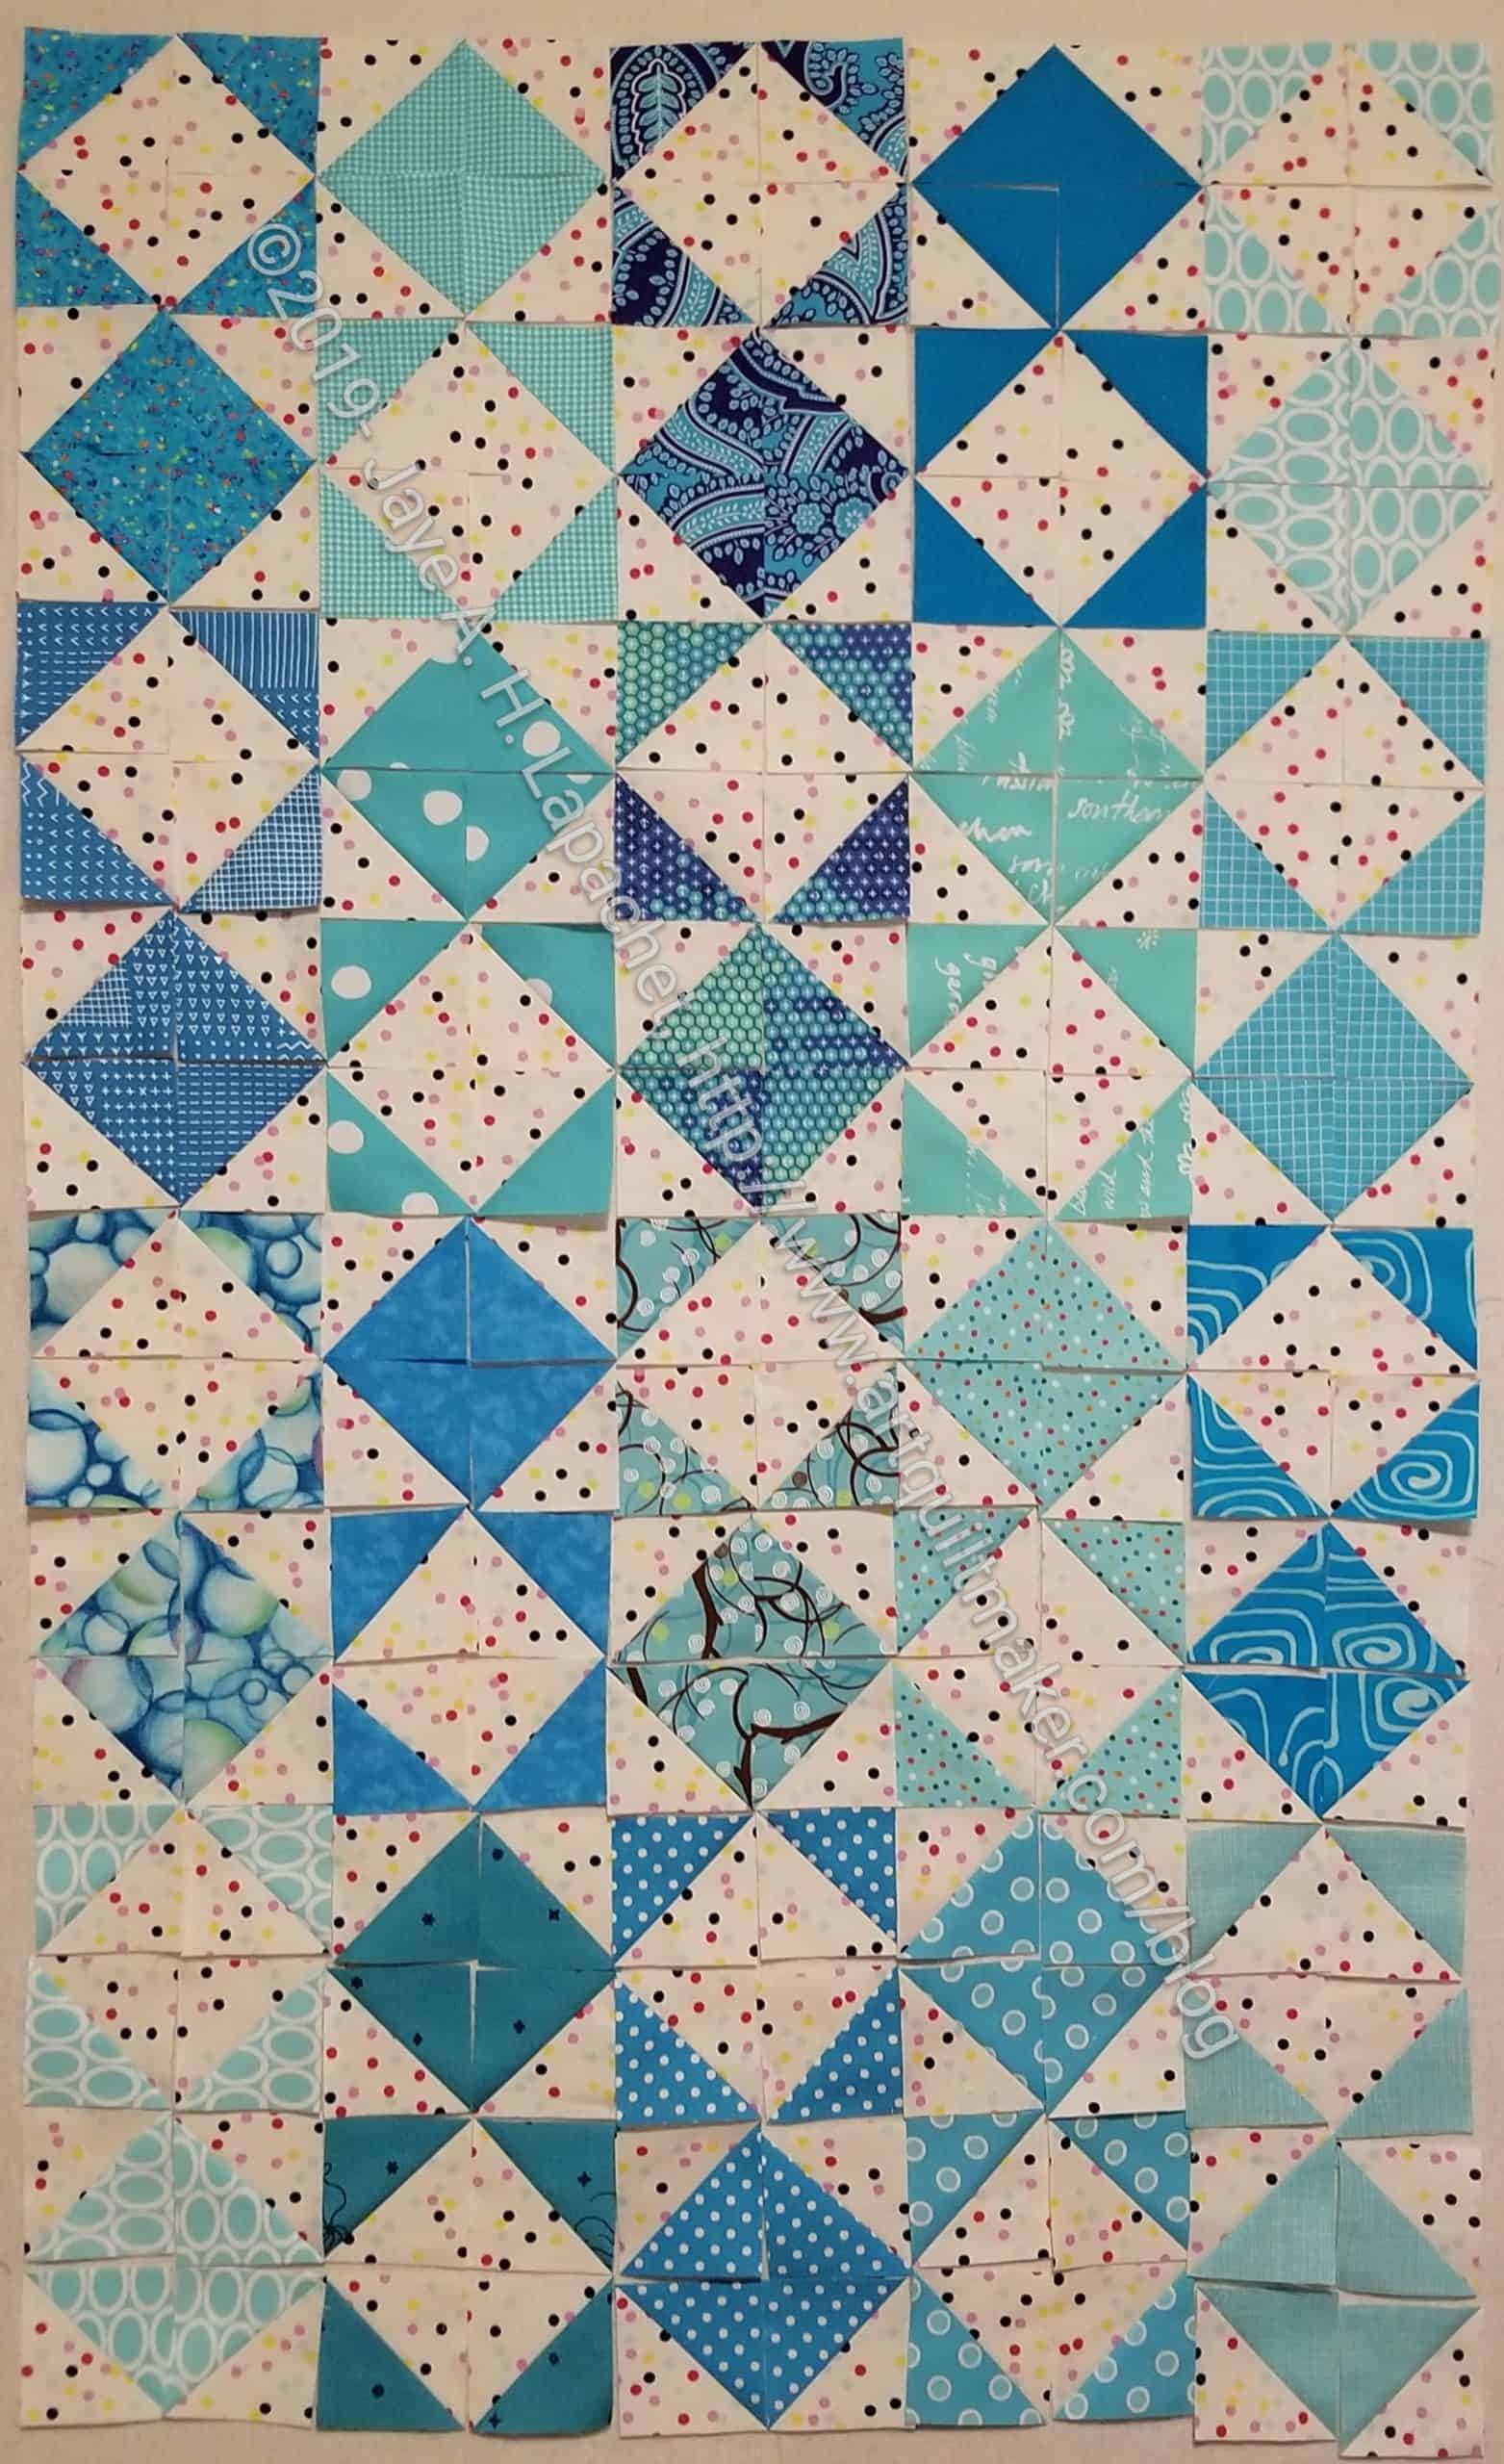
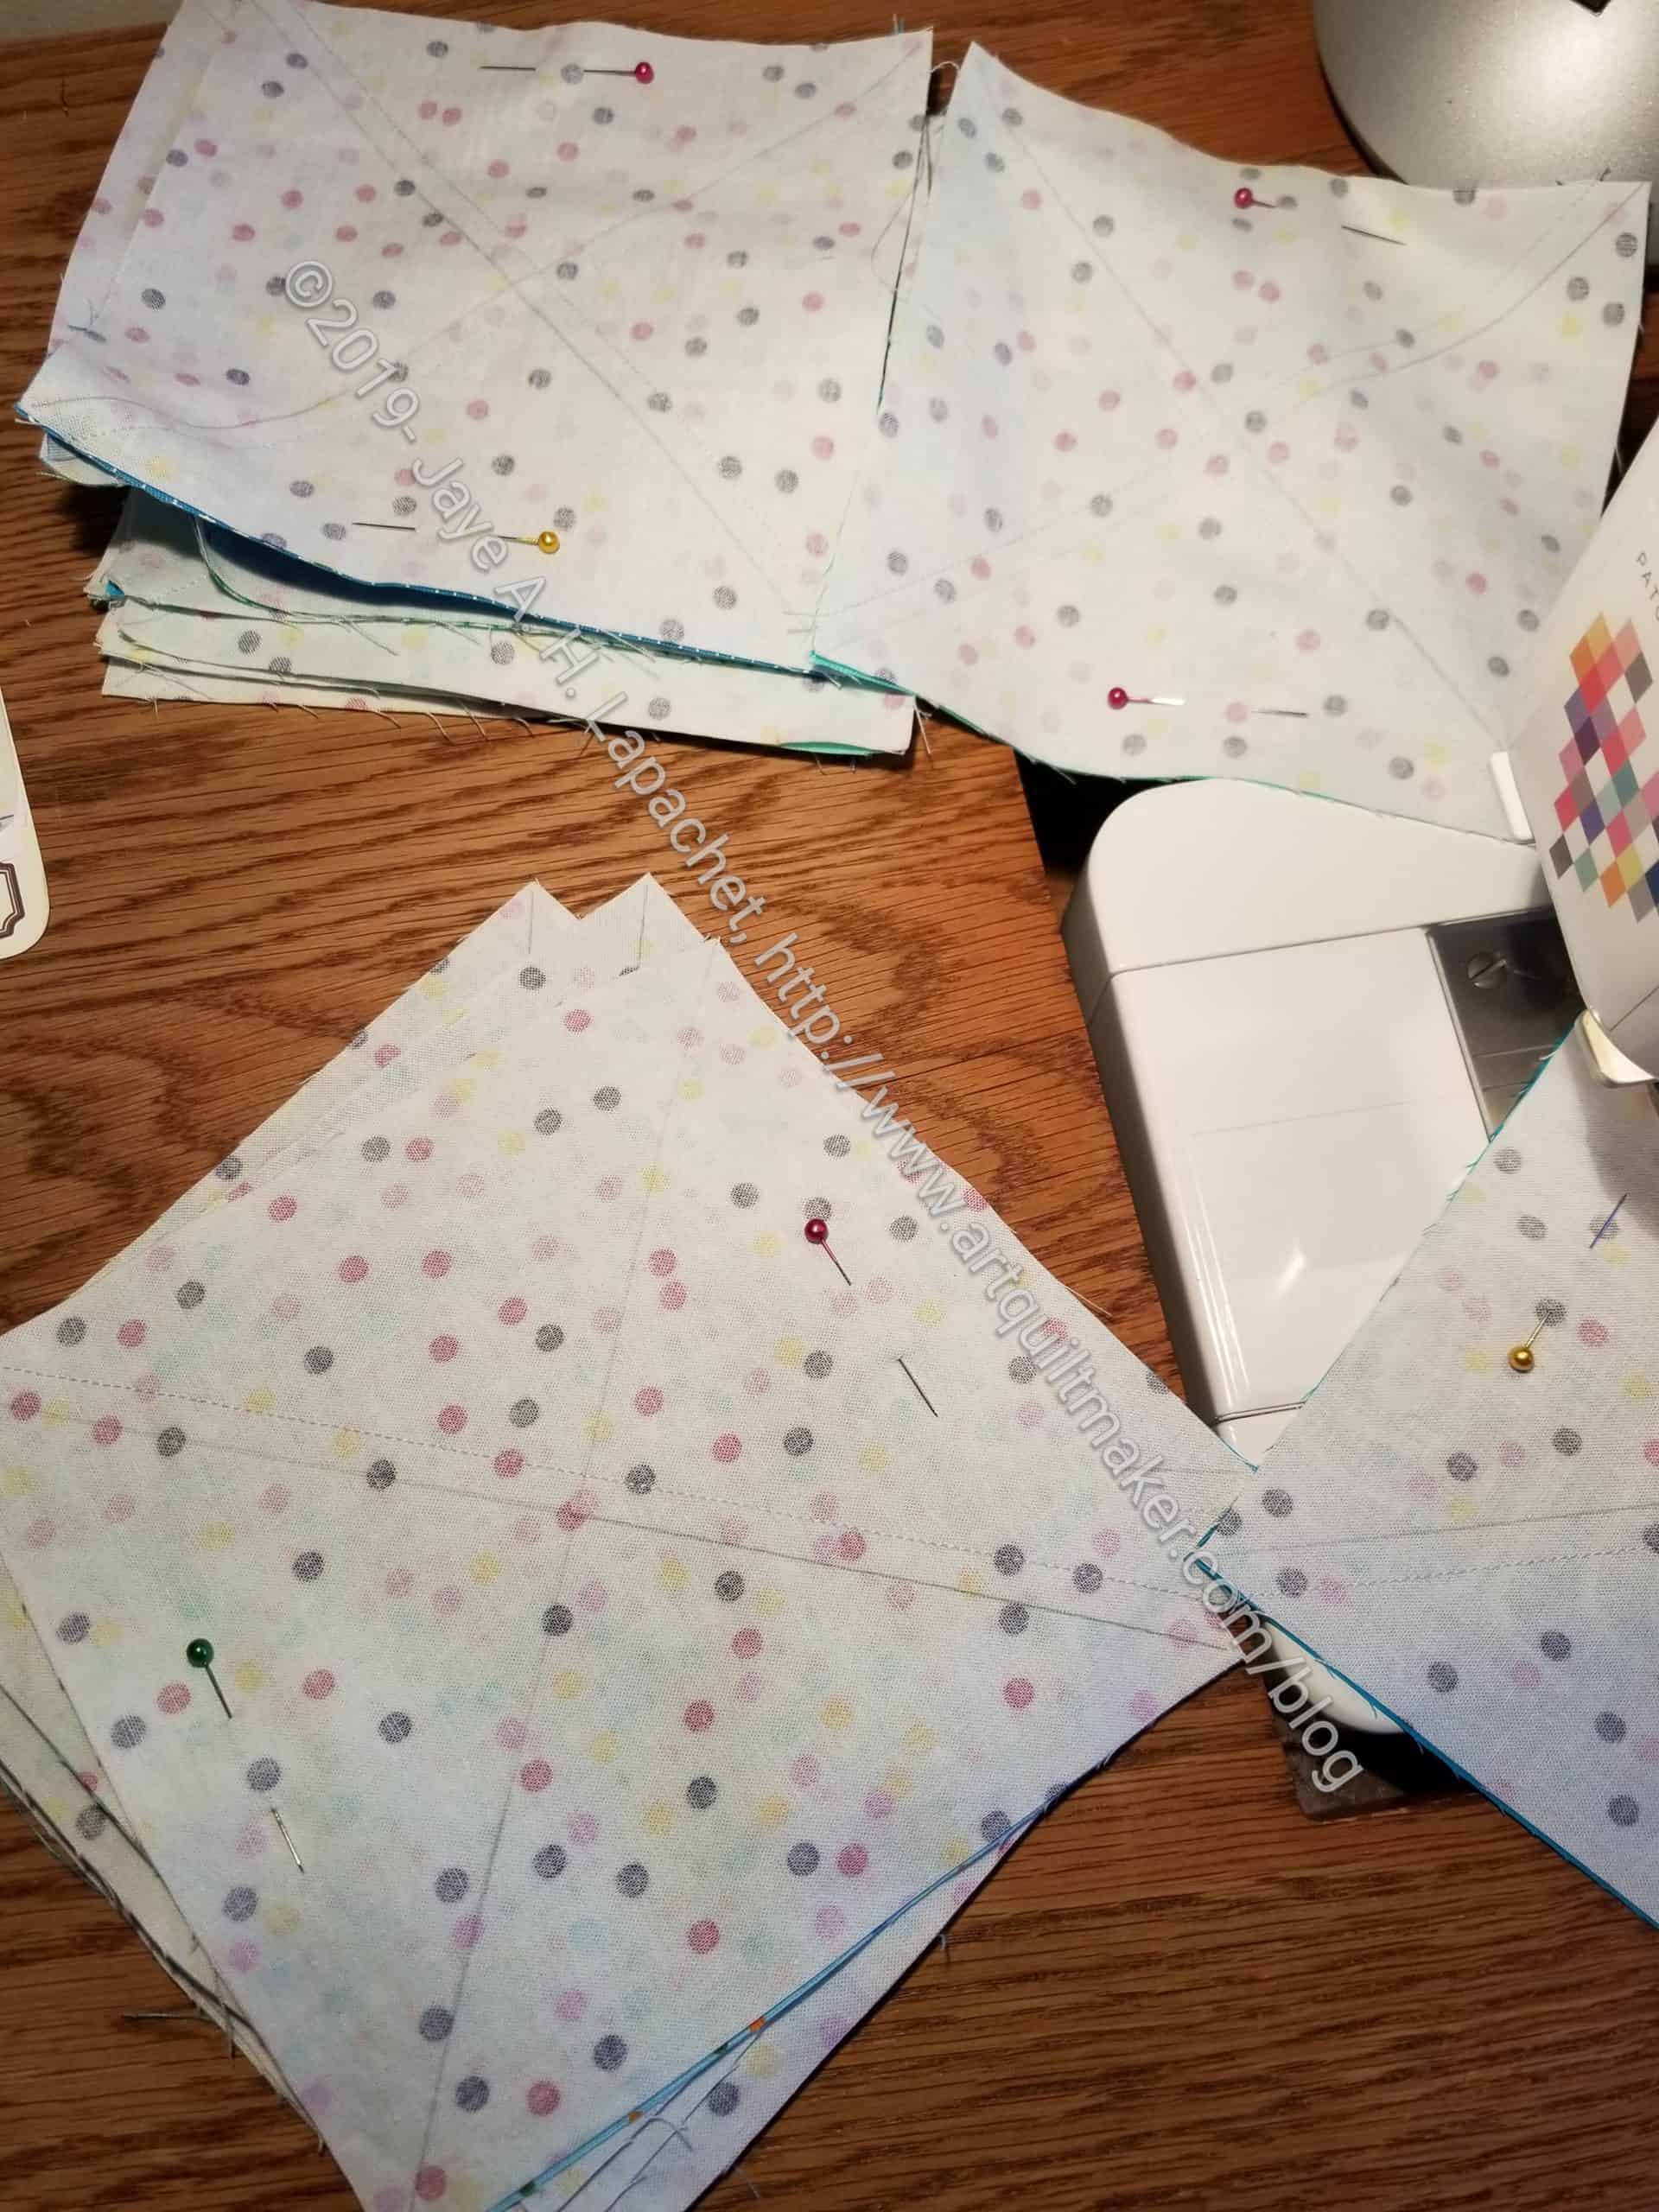
The most recent 3rd clue came out on Friday. Go to Quiltville to find the clue. I am linking directly to it, for better for worse, as the links will expire on Feb.1. I had to make about a bazillion HSTs. As I was finished with my work week, I could start working on the clue late Friday afternoon, which I did. I used my Triangle Technique to make the HSTs. This technique, as I have mentioned, makes 8 of the same triangles at a time, but doesn’t involve actually sewing triangles. It also affords the opportunity to trim, if you want, which I like, despite the work involved.

Triangle Technique in process

I also shamelessly self-promoted this technique on Instagram. It would be nice if more people discovered and read my blog, but I know blogs are fashionable anymore, so I am pleased if you are one of my continuing readers.

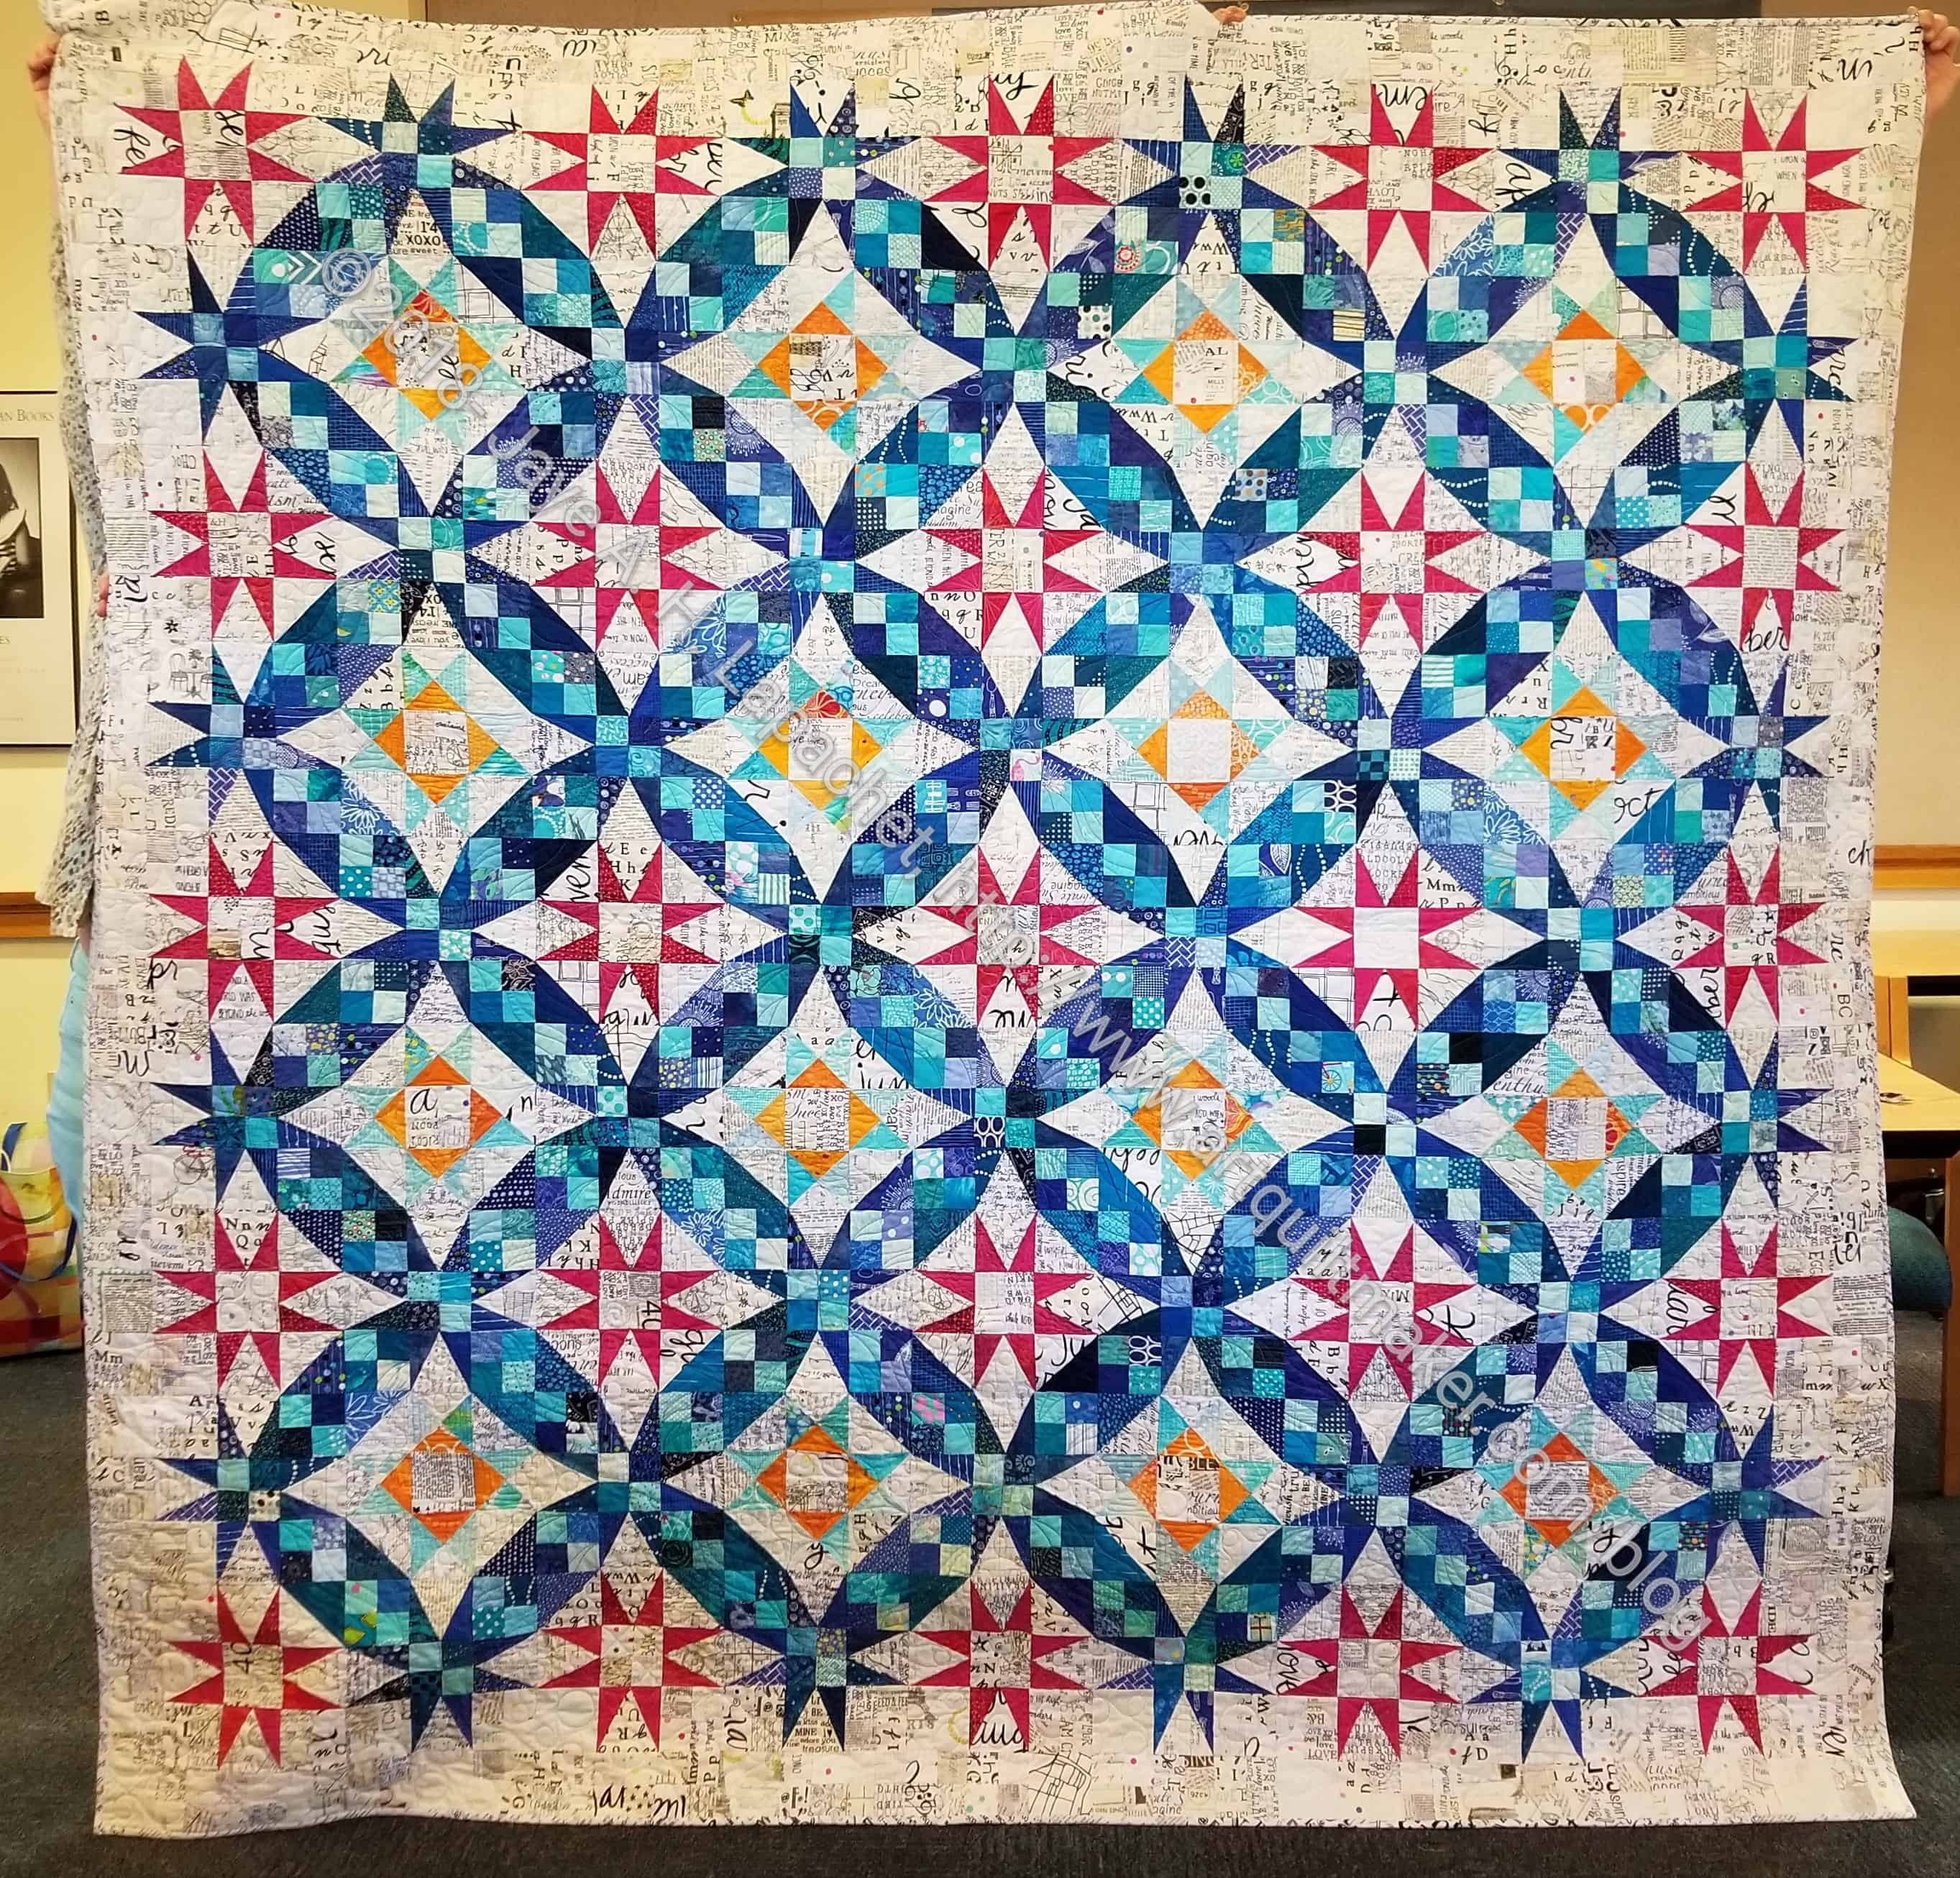
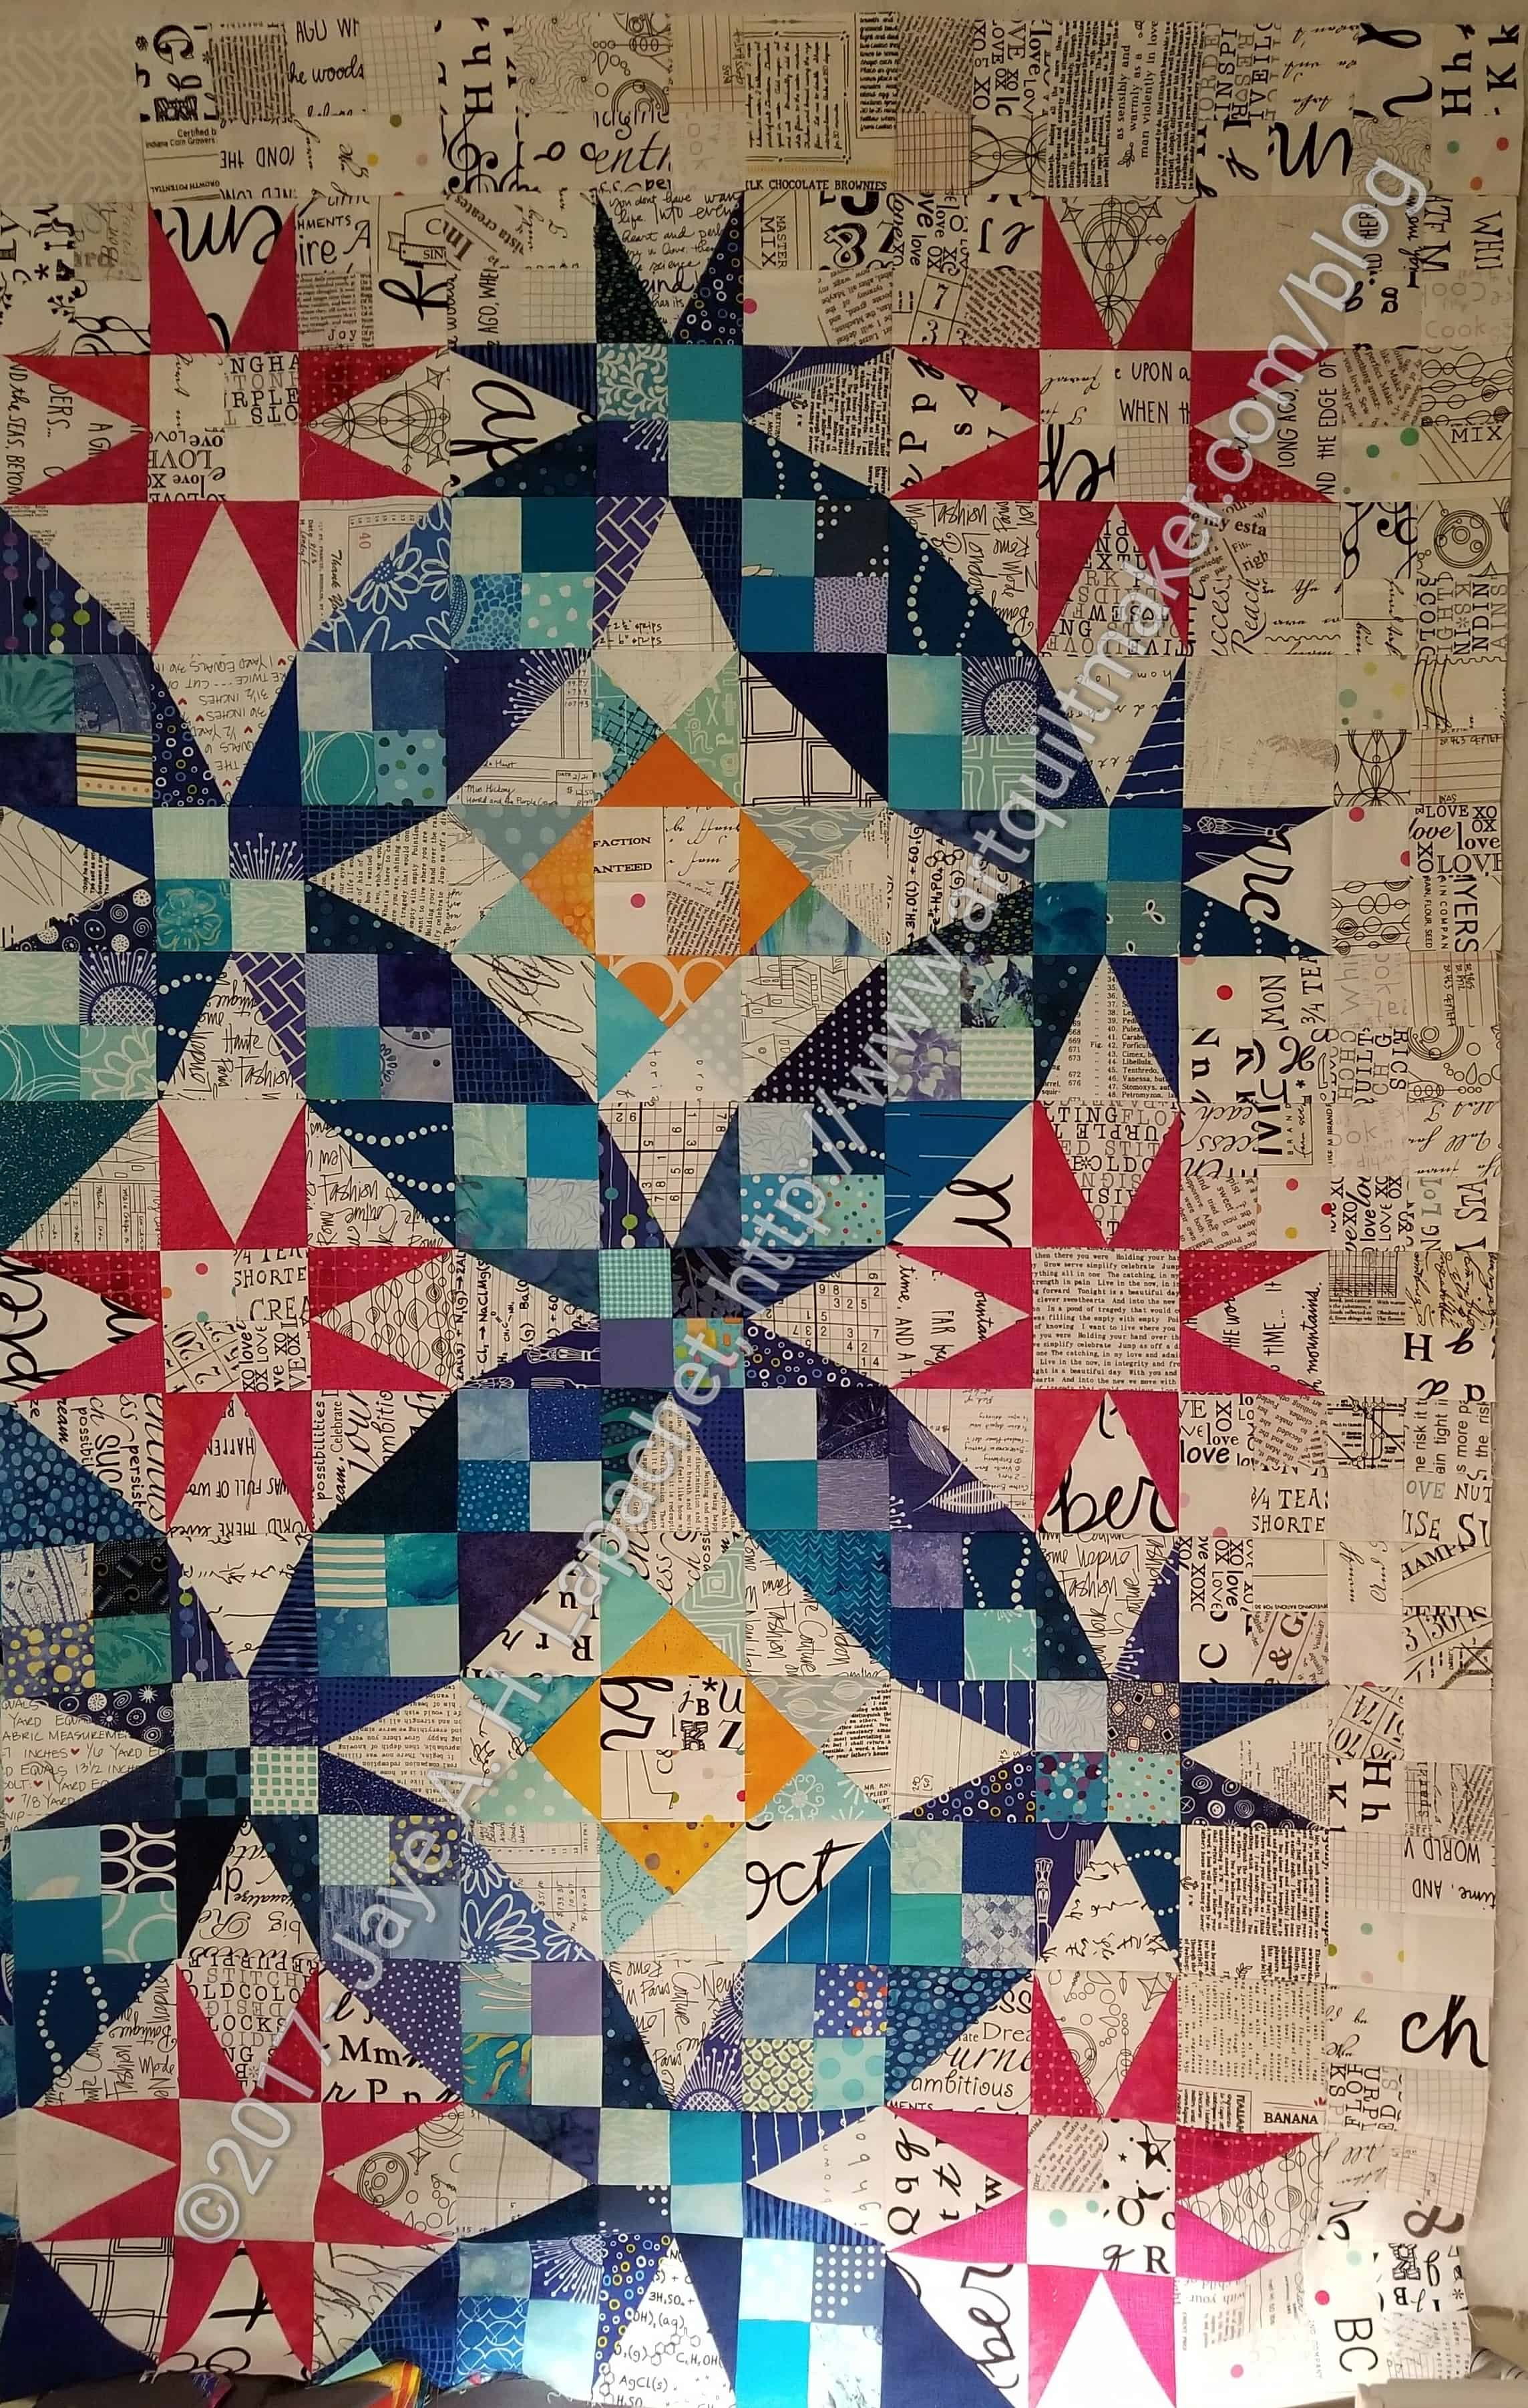
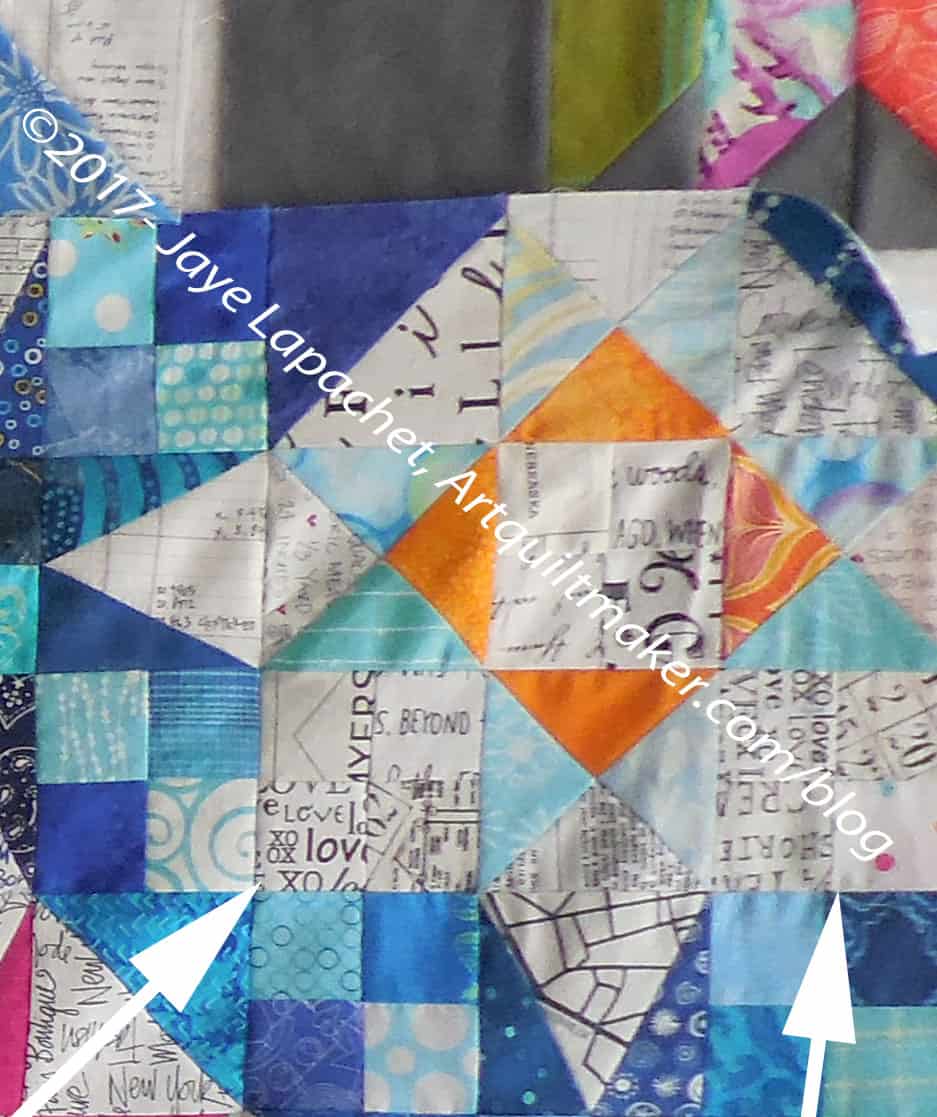
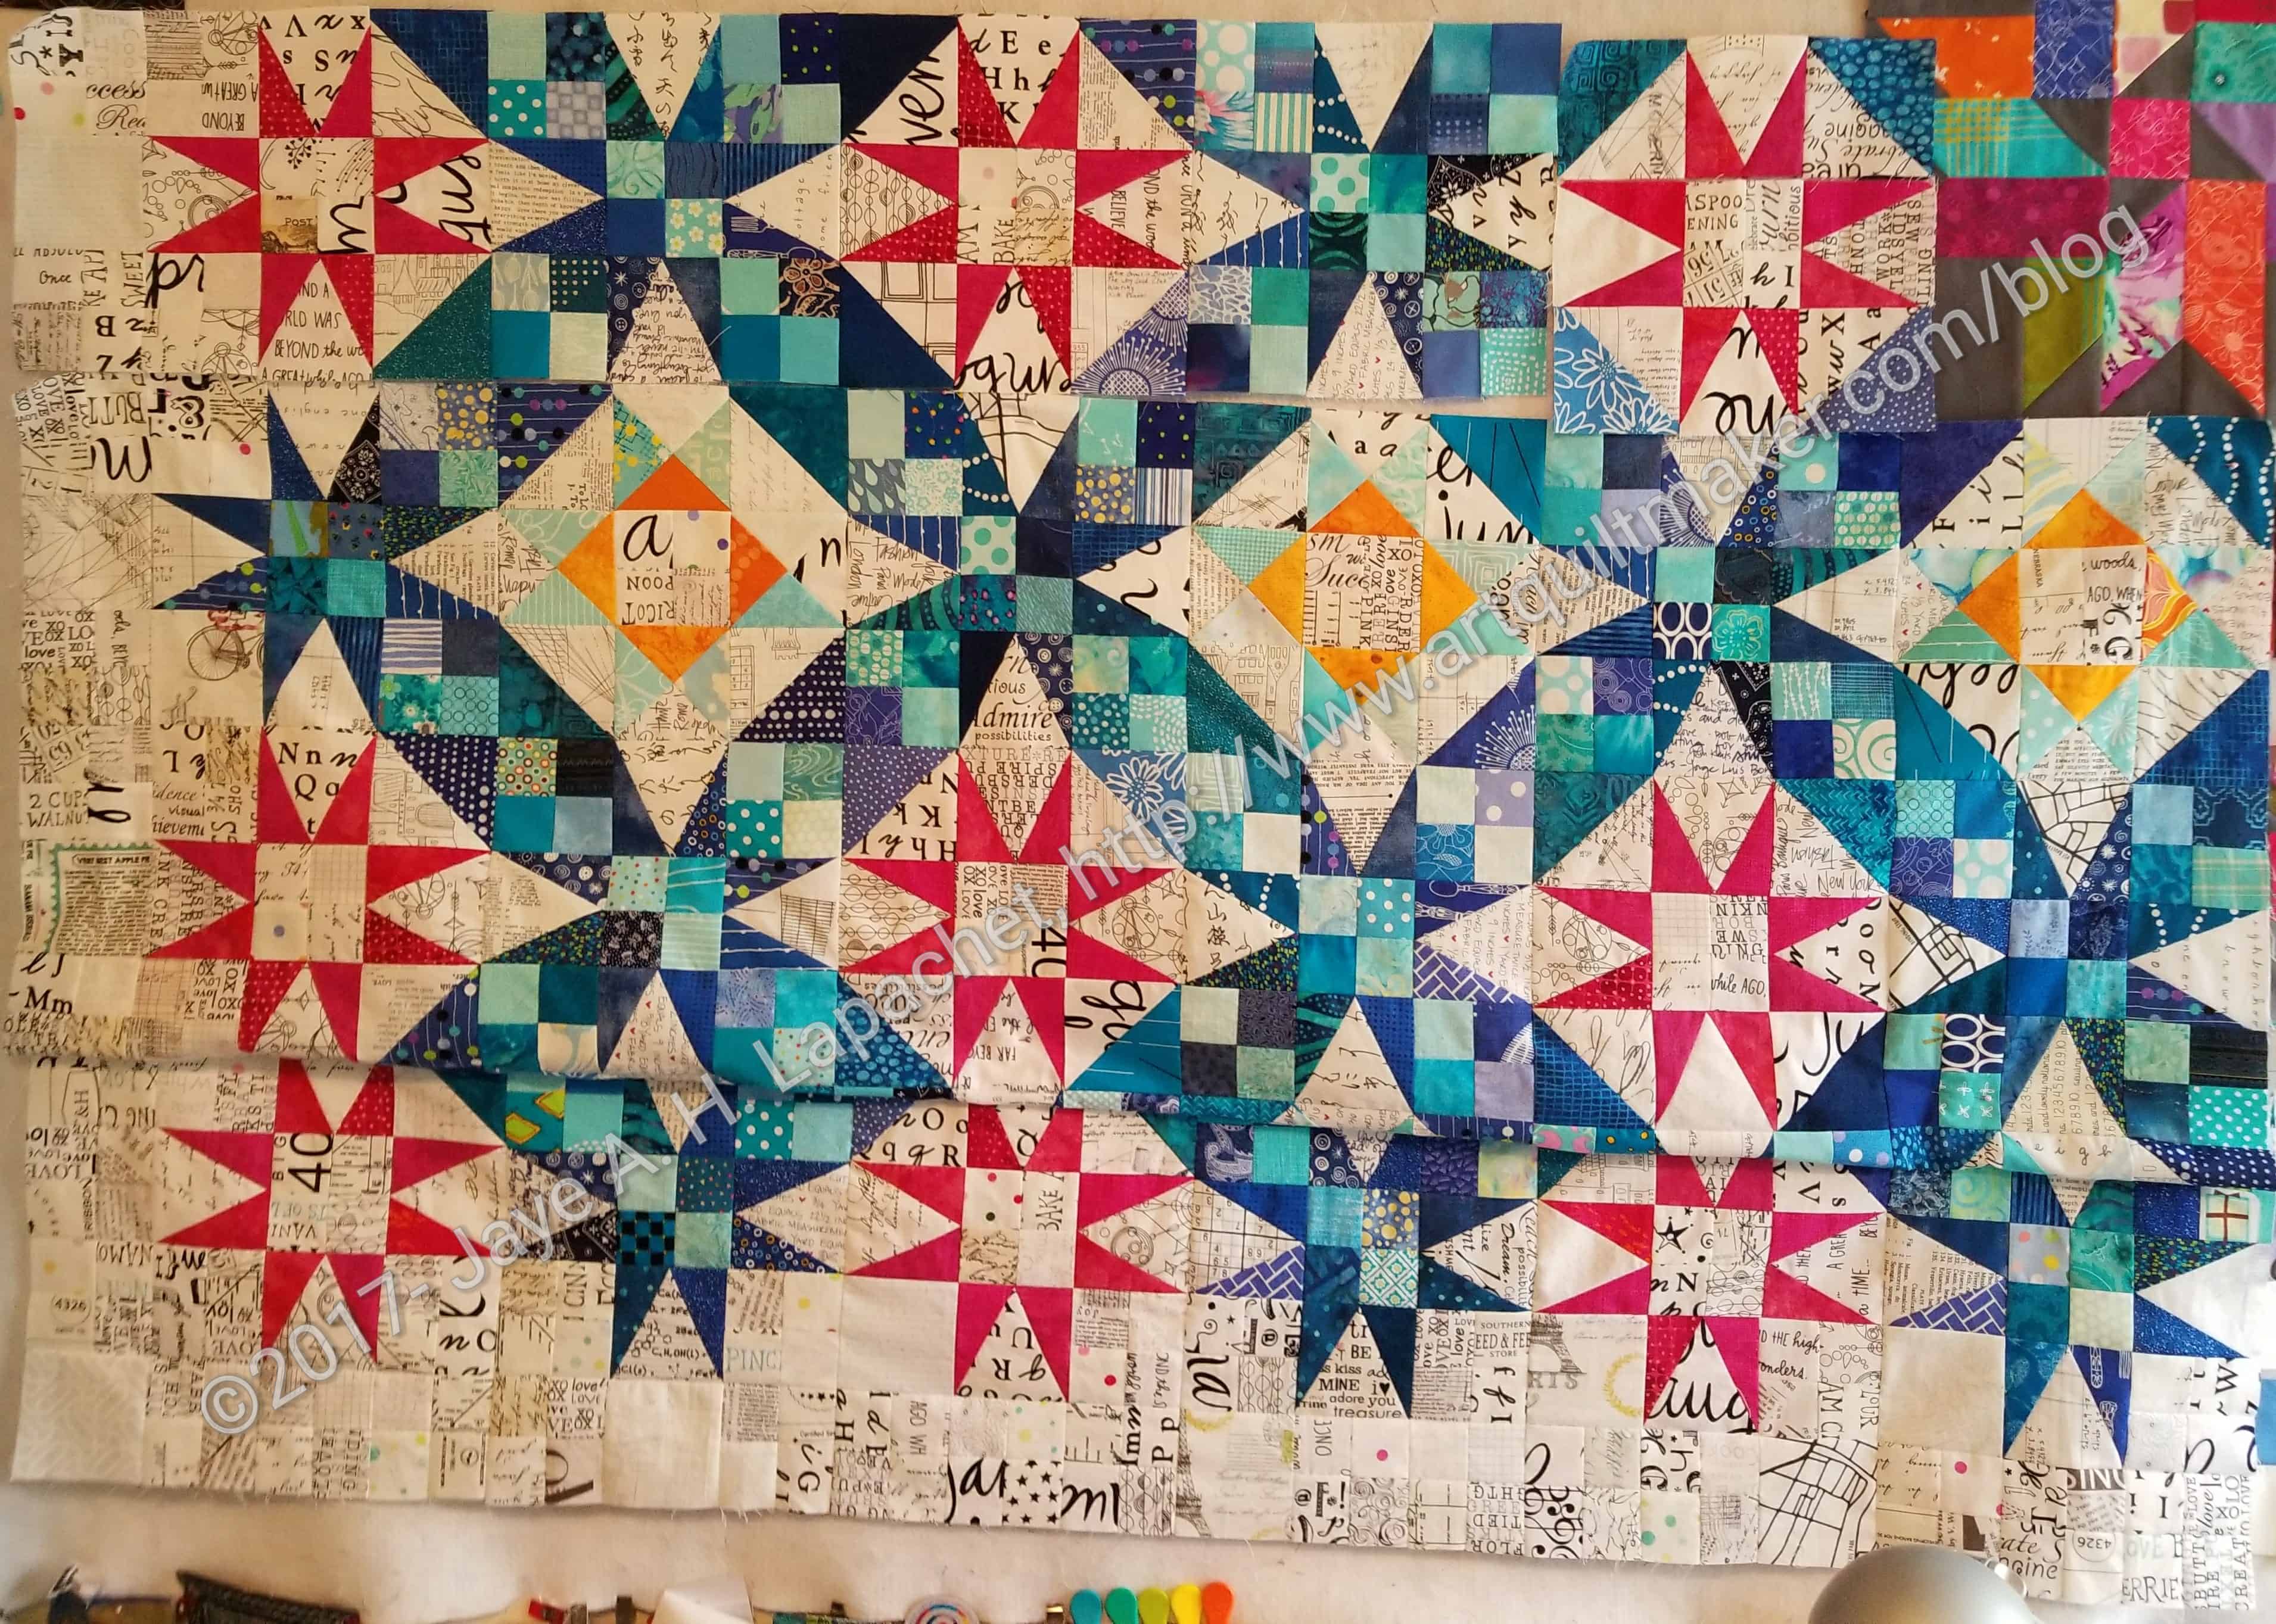
People really like the colors I have chosen. Of course, I like them, but I am surprised that I am getting such feedback. I don’t think they are anything special. Still, I am pleased that I seem to have made good choices.

Frolic! Clue 2

Frolic! Clue 2 finished

I was able to finish Frolic! in record time. I downloaded the clue. When I looked at it I realized that I could do the clue at Sew Day, I sewed strips really quick and took everything to Sew Day to cut up.

This clue was an easy one, but it was done very quickly and it seems like an eternity ago that I did it. I am already working on Clue 3.

Frolic! in Progress

Frolic! Clue #1
Frolic! Clue #1

I am working on the four patches for the first clue. They are taking more time than I would like (WHY am I in such a hurry lately???), but I am doing a couple other things in the process. First. I looked through my pink scrap drawer to find some pieces of raspberry fabric. I cleared a little bit of random bits of scraps out either my tossing them into the “to be pet bed filling” bag. There is slightly more space in my pink scrap drawer, but most of the fabric were not the right raspberry.

I also looked through a lot of fabric. I have bins of fabric, but I also have some stacks of fabric. I looked through all of them to find the right colors. I had to press and cuts small strips of fabric in order to create a lot of variety. I don’t know what the next steps are so I can’t tell if the pieces I have made so far are going to be right for the project overall. I guess we’ll see.

Frolic!

Bonnie Hunter released her 2019 mystery quilt on Friday. All of the clues will be posted on the Frolic! tab on her site. Normally I wait to see what the quilt looks like, but I decided to do it. One reason was that when I read through the whole first group of instructions I was, once again, impressed with Bonnie Hunter. She may not have an MQG aesthetic, but she has sound techniques and good designs.

I am mostly following her color scheme so far. There is only one clue, so that isn’t saying much.

One of the reasons I decided to do this was what Bonnie said about cutting. She said

“When cutting, do NOT leave the ruler line you are measuring by on the mat NEXT to your fabric.  Get it UP ON THE FABRIC.  Be sure the line is ON the fabric, not next to it.  Don’t leave the line on the mat.”

This is something I never have been able to find out. Nobody really taught me to rotary cut, so I never knew where the lines on the rulers went until I read this  post. I should be embarrassed to tell you, but I am not. I make quilts I love and I have good technique. It can always be better and this is me getting better.

Now What?

The worst part of the process is deciding what to do next. I have a Christmas gift to finish, but I don’t have a quilt on my design wall since I took MetroScape to the quilter. I am glad it is off, but I don’t know which project I should work on next. Or if I should start a new project.

I have my WIP list, of course. I also have my dream projects list. It isn’t like there is a shortage of projects waiting to be worked on.

My two big contenders are the Good Fortune Mystery Quilt from Bonnie Hunter and the Crafty Gemini All Rolled Up bag. I have pulled a few fabrics for the mystery quilt, but not enough. I have cut out the All Rolled Up bag, but haven’t watched the videos or done any sewing.

Any opinions?

En Provence Quilt Finished

En Provence Finished

Yes, amazingly enough, I finally finished En Provence a week or so ago. I am so pleased with the finished product. I am sad that I will give it away, but it will go to a good home who will love it very well.

One thing I like about this pattern is that the edges are finished. By that I mean my hard sewn units are not cut off as you see in many quilts with weird edges. I like it that my stars have all of their points.

Also, I want to make another one. 😉 I am not sure when, but I do plan to make another one. If I select a color scheme I can start any time and use leaders and enders to get all of the units made. I haven’t done any sewing yet, as I haven’t selected a color scheme. I really like this color scheme, but want to do something different. How would it be if I reversed the darks and lights?

En Provence back
En Provence back

The back turned out to be very funny. Birds and lobsters? What was I thinking? It is definitely a good conversation starter, that is for sure.

I started this on January 10, 2017. You can see all the posts by clicking on the tag. 14ish months isn’t bad, especially when I know I took a long hiatus somewhere in the middle. Also, made most of this quilt using the leaders and enders technique.

En Provence Top: Finished

En Provence Top Finished

Nobody died.

I have just been really busy and haven’t taken the time to post. It is that time of year and my evenings have been spent writing Christmas cards.

The En Provence Mystery Quilt top is finished. I finished it last weekend, I think, and I am pleased with the way it turned out.

You can only see part of it as I only had one quilt holder available. I hope to get a better shot before I send it off to its new home.

En Provence Almost the end

I made a lot of progress on the En Provence quilt and it is nearing the conclusion.

En Provence -December 2017

I started out Saturday afternoon sewing the two halves of the top together. Then I laid out the quilt to see where I was. It was really great to see almost the whole quilt laid out. I think it looks really great.

After seeing the quilt so close to completion, I was on fire to sew the last 4 rows. I took everything back upstairs and laid on that bottom corner on my design wall.  I didn’t have much more time to do that on Saturday and no time to sew.

En Provence Beginning - Dec. 3, 2017
En Provence Beginning – Dec. 3, 2017

Laying out the last corner was huge, though. I found I was missing a couple of Peaky & Spike blocks, so I had to cut some fabric to finish those. It was good, though, because I could switch out some of the Peaky & Spike blocks that I hadn’t yet sewn.

After we came back from a NSGW event on Sunday afternoon, I put the pedal to the metal on my sewing machine and sewed 3 rows. I know there are only 3 blocks left in each row, but there is still a lot of piecing. I also have to add the border and that makes some of the blocks larger, thus more time consuming to sew.

En Provence - 3 good rows
En Provence – 3 good rows

I ended up with what I thought was 3 good rows.

Standing back really helps and I found a mistake. I stopped after the mistake block. It was really too late for me to be sewing anyway and I’d already had to rip out two sections of that block.

En Provence Ooops
En Provence Ooops

Except for the two pieces, I am pleased with how this quilt came out. It is not insane like Grand Illusion, but it was complex enough to keep me interested and interesting enough to want to continue to look at it.

I’ll fix it next time….whenever that is.

Final Weekend En Provence Progress

En Provence upper right hand quarter - November 26, 2017
En Provence upper right hand quarter – November 26, 2017

I added “Piecing” to the hashtags for this post. Immediately my mind revised that as ‘interminable piecing’. I don’t really feel tired of this project, but there are a LOT of seams and I am ready for this top to be finished. Good thing I made significant progress over the weekend.

The upper right hand corner is finished and this means that I have 4 rows of 3 blocks to finish. If I had 4 days free, I could finish the top by the weekend.

I have been sewing the border on as I go along. Using the ‘self-bordering’ technique makes the border much more precise in terms of matching seams. You also don’t have long seams to sew (and match) or borders to add once the center is done. I use this technique as much as possible. It makes my life so much better.

Thanksgiving Weekend En Provence Progress

We had 24 people over for Thanksgiving, so there was no sewing Monday through Thursday while Thanksgiving prep was taking place. I was also working.  I did, however, make some good progress over the weekend.

En Provence, November 24, 2017

I spent most of the day on Friday sewing. I even declined to watch a movie with the boys in order to sew. They needed some alone time anyway. More than half of En Provence is pieced and I am working on the upper right corner.

I got up and set about sewing pretty soon after that. I usually go for a walk before I sew to get it out of the way, but needed more resting time before I did that. The first thing I worked on was finishing the last/top row of the left hand side.

After coming back from my walk, I laid out the upper right hand side and started piecing. I was able to finish sewing a row and a half of that quarter. I would love to finish this weekend, but doubt that will happen. Bonnie Hunter’s Mystery Quilts require a lot of piecing, which is what makes them such great scrap quilts. Still, I have to sew a lot of short seams and there are a lot more to sew.

More En Provence

En Provence, November 19, 2017

I started out late on Sunday with the piece above. I had finished chopping about a million ingredients for various Thanksgiving dishes and was delighted to find that I had some time to sew.

I had sewn most of the last row together, but had a few more seams, so I put those together and found, suddenly that I was able to layout the last row on the left half of this top. Shocking! I thought I had miles together.

I really don’t know why I keep being surprised by this quilt – how much I have sewn, how much I have left, how well it looks. Perhaps I should call it En Provence Surprise?

En Provence, November 21, 2017

I had to fold down the piece before I could layout the top row. I could have reached, but why? It would have been a stretch every time I sewed two pieces together or checked the pressing. I wasn’t up for it.

It is extremely gratifying to see the top row even if it is just laid out and not sewn yet.

Triple Star is at a stopping point until I lay it out and decide on a final design, so I used donation blocks as leaders and enders. I finished 2.5, which isn’t shabby.

I know it is all En Provence All the Time on the blog these days. It is what I am working on except for gifts, which I am not working on enough and can’t show at the moment any way. You’ll have to bear with me for the time being.

Sticking It All Together

I counted up blocks and rows and units again and found that I am farther along than I thought. It all started when I noticed that I was getting very short of the quarter triangle units. I carefully counted and found that I only have to piece two more rows on the top to finish one whole half of the quilt.

Or so I thought.

Really, I have to piece two blocks top to bottom for the right side. I was shocked that I had so little left to do. I had been sure that I had an equal number of blocks to piece for the right side as I had on the left. I don’t know how I got so turned around, but this is great news! I thought I would never finish piecing this quilt. Yet, I had already done so much.

As a treat, I decided to see how the piece would look once it was stuck together. Sort of.

Merged En Provence Left Half

I put two images together. There are slight differences in lighting, and the bottom is folded up, but you still get the idea. I am thrilled.

I saw another version of the pattern on Instagram. It is by Sylvia, Sommerschiebe. I love how round this circles ended up.

En Provence – More Progress

En Provence - Start of upper left quarter
En Provence – Start of upper left quarter

I made a little progress over last weekend, after fixing my Oops. I was able to take down the bottom quarter of the quilt top and put up the pieces for the top left quarter. In addition to the three rows you see in the image, I have two more rows to sew to complete half the quilt.

I know I am getting ahead of myself, but I am excited to see the progress of this quilt. It is really a lot of piecing. The result is fantastic, from what I can see so far, but it is taking a long time to piece.

The half rows I am piecing have 75 units to sew together to get the 6 block half row. I say units because I have already pieced the units together. Each blue star has 32 pieces and each pink star (not the border blocks) has 24 pieces. I am glad the units are all pieced, I have to say.

En Provence Oops

As if I didn’t have enough piecing to do on En Provence, I had to spend some time un-piecing and re-piecing. It happens, I know, but I was pretty annoyed with myself when I realized my error.

En Provence Oops
En Provence Oops

The alternate blocks that are on the interior of the quilt have a half square triangle at each corner to keep the chain that zigzags across the quilt whole.

Does that block look like it has four HSTs? One at each corner?

No.

The question, then, became could I live with the error or did I need to unpick?

One consideration was that I had already sewed that block into the quilt. If I could live with it, I could save a lot time. However, the block was only sewn on two sides, so I wouldn’t have to rip apart much of the quilt.

En Provence Broken Chain :(
En Provence Broken Chain 🙁

However, I noticed it because the chain was broken, so clearly the error was noticeable.

Also, I would be short of four patches.

Fixed En Provence Oops

I decided I couldn’t live with it and fixed it. I am happier now.

En Provence – Tiny Progress

En Provence - late October 2017
En Provence – late October 2017

I made an effort to make some progress before I went off on my 5 days away from my sewing machine. I was able to get an En Provence column done. In case you can’t tell by comparing my last update photo with this one, it is the column on the right.

I have decided that adding rows and columns isn’t going to work, so now, while I still have the quilt on the design wall, I am laying out a row and sewing it together, but I won’t sew it to the whole piece. I will use it as the first row of the upper quarter. Once the whole quarter is made, then I will sew it to the piece shown above. This will prevent me from having to sew too many long seams.

After the top left quarter is sewn, I will work on the two right quarters and do the same. At the most, I should have 3 long seams.