After FOTY 2016, I put the Stepping Stones n.2 on the wall. I thought of doing the Blue Gradation quilt, but I needed something relatively easy.
HA! I chose wrong. This quilt isn’t difficult and all the center blocks are finished. I need to make all the border blocks and in the design of the border, I am using the self bordering technique. This means that the border is made from blocks that, when viewed together, form a border.
I had completely designed the border, which was good and just needed to make it. I found that I had no green patches, no blue 4.5″ patches and no HSTs. Basically I had to made the whole border from scratch – cutting everything, making the blocks and finally sewing.
No problem, right?
Well, it was a little bit of a problem, because the quilt is too big for my design wall. Sigh. I have to make part of the quilt and then move the quilt over and make the rest. It is a strategy, but not an ideal strategy.
I have about two complete border blocks done, mostly because I needed to see some progress. The style of the quilt requires a lot of different fabrics, so a lot of cutting.
Self-Bordering is a technique that I use pretty frequently, though I don’t always know what I am doing. Basically, self-bordering means that you treat the border blocks the same as the blocks in the main part of the quilt. You piece them in as you would regular blocks rather than as a long row.
I don’t know if I made this technique up. I am sure others have done it. If they have, I am not sure what else it would be called.
There are several advantages to using a self-bordering technique for adding borders:
Precision is improved, because you are adding a block or so at a time
It makes it easier to get the border lined up correctly
Eliminates long lines of stitching
Makes adding pieced borders much easier
This technique works with Chunking. If you are sewing all your blocks, for the whole quilt, together in rows, then don’t bother with Self-Bordering.
En Provence – late October 2017
As you have seen recently, I am working on the En Provence quilt by Bonnie Hunter. The border is optional, but I am putting a pieced border on the quilt using self-bordering technique. In the photo, left, you can see the border on the bottom. It is made up of one row of four patches (or 3.5″ squares) all the way around the quilt.
All the blocks in this quilt are, essentially, nine patches. As I sew the blocks together, I work in threes – I sew three blocks in a horizontal row together. Once I have three rows made up of three patches, I sew two rows together, then I sew remaining row to the set of two I have just sewn together.
On the border, there is an extra 3.5″ piece. It is either a 4 patch or a 3.5″ patch. Instead of sewing 3 rows of three blocks together, I sew 3 rows of 4 blocks together and then sew three rows of four patches together.
En Provence Corner Block
The corner block ends up looking fatter, because of the extra patches. Once the corner and border blocks are integrated into the quilt, they look like blocks and a pieced border.
You cannot tell which way a border was made, if it was well done.
I like this method because I don’t like putting on borders. I also really like pieced borders. Depending on the design, of course, they really add additional interest to a quilt.
En Provence corner block annotated
Once I finish a quilt, there is really no way to tell where the blocks end and the border begins from a quick glance.
The top arrow, left, shows the very edge of the border – the seam line between block and border.
The bottom arrow shows the border.
As I have said, they integrate so well that a casual viewer can’t tell where the border is. I really like that.
En Provence upper right hand quarter – November 26, 2017
I added “Piecing” to the hashtags for this post. Immediately my mind revised that as ‘interminable piecing’. I don’t really feel tired of this project, but there are a LOT of seams and I am ready for this top to be finished. Good thing I made significant progress over the weekend.
The upper right hand corner is finished and this means that I have 4 rows of 3 blocks to finish. If I had 4 days free, I could finish the top by the weekend.
I have been sewing the border on as I go along. Using the ‘self-bordering’ technique makes the border much more precise in terms of matching seams. You also don’t have long seams to sew (and match) or borders to add once the center is done. I use this technique as much as possible. It makes my life so much better.
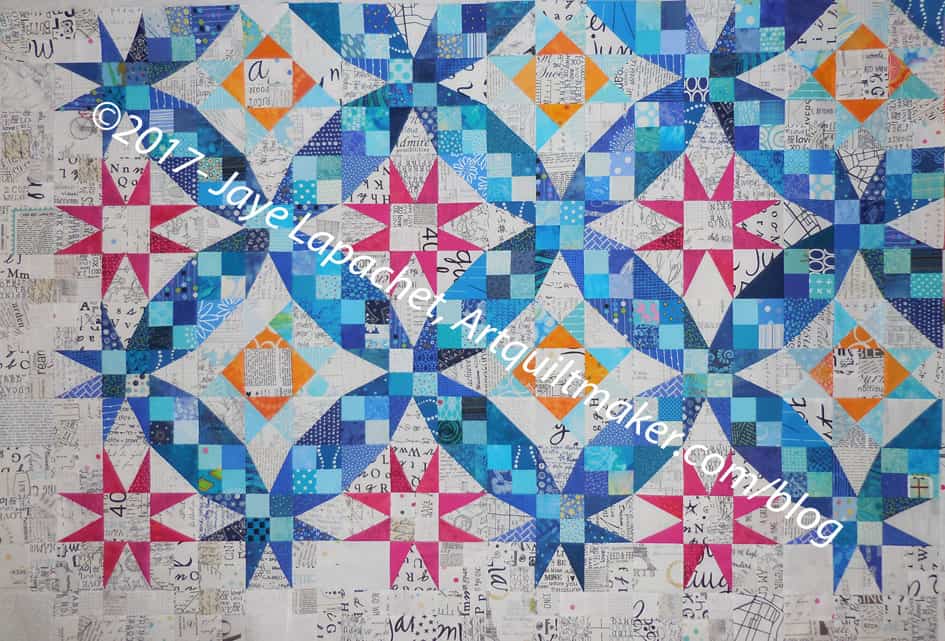
The first order of business this week (after all the cooking and tidying, of course) was to, once and for all, decide how I was going to put the quilt together. Below, you can see I have arranged the ‘blocks’ (two equilateral triangles and a hexagon) two different ways.
On the right the blocks were oriented with the triangles on the top and the bottom of the hexagons (Option A). On the left, the blocks are arranged with one triangle in the upper right hand corner and one triangle in the lower left hand corner (Option B).
I discussed previously that I thought the edge would be a problem. I finally decided that I would go with Option A. Mostly, I decided that I could better figure out how to make the edges straight using the diamonds. With Option B, the side edges seemed like they would really be a problem and I would end up hacking them off, which I didn’t really want to do. You can see the edge that seemed to be a problem on the photo above left.
I stood staring at the above piece for a long time trying to figure out what do next and how to deal with the edges. I decided that I would only hack parts off as a last resort and I was looking at pieces for the edges to see which motifs wouldn’t be compromised if I cut them in half. That still left me with the problem of how to finish the edges so that they could be bound in some normal manner. As the picture above shows, those points on the top and bottom don’t qualify as easy to bind. As an aside, I have no problem with doing difficult bindings, but there has to be a design purpose as in Pink Spider Looking at the Stars from my early days of quiltmaking.
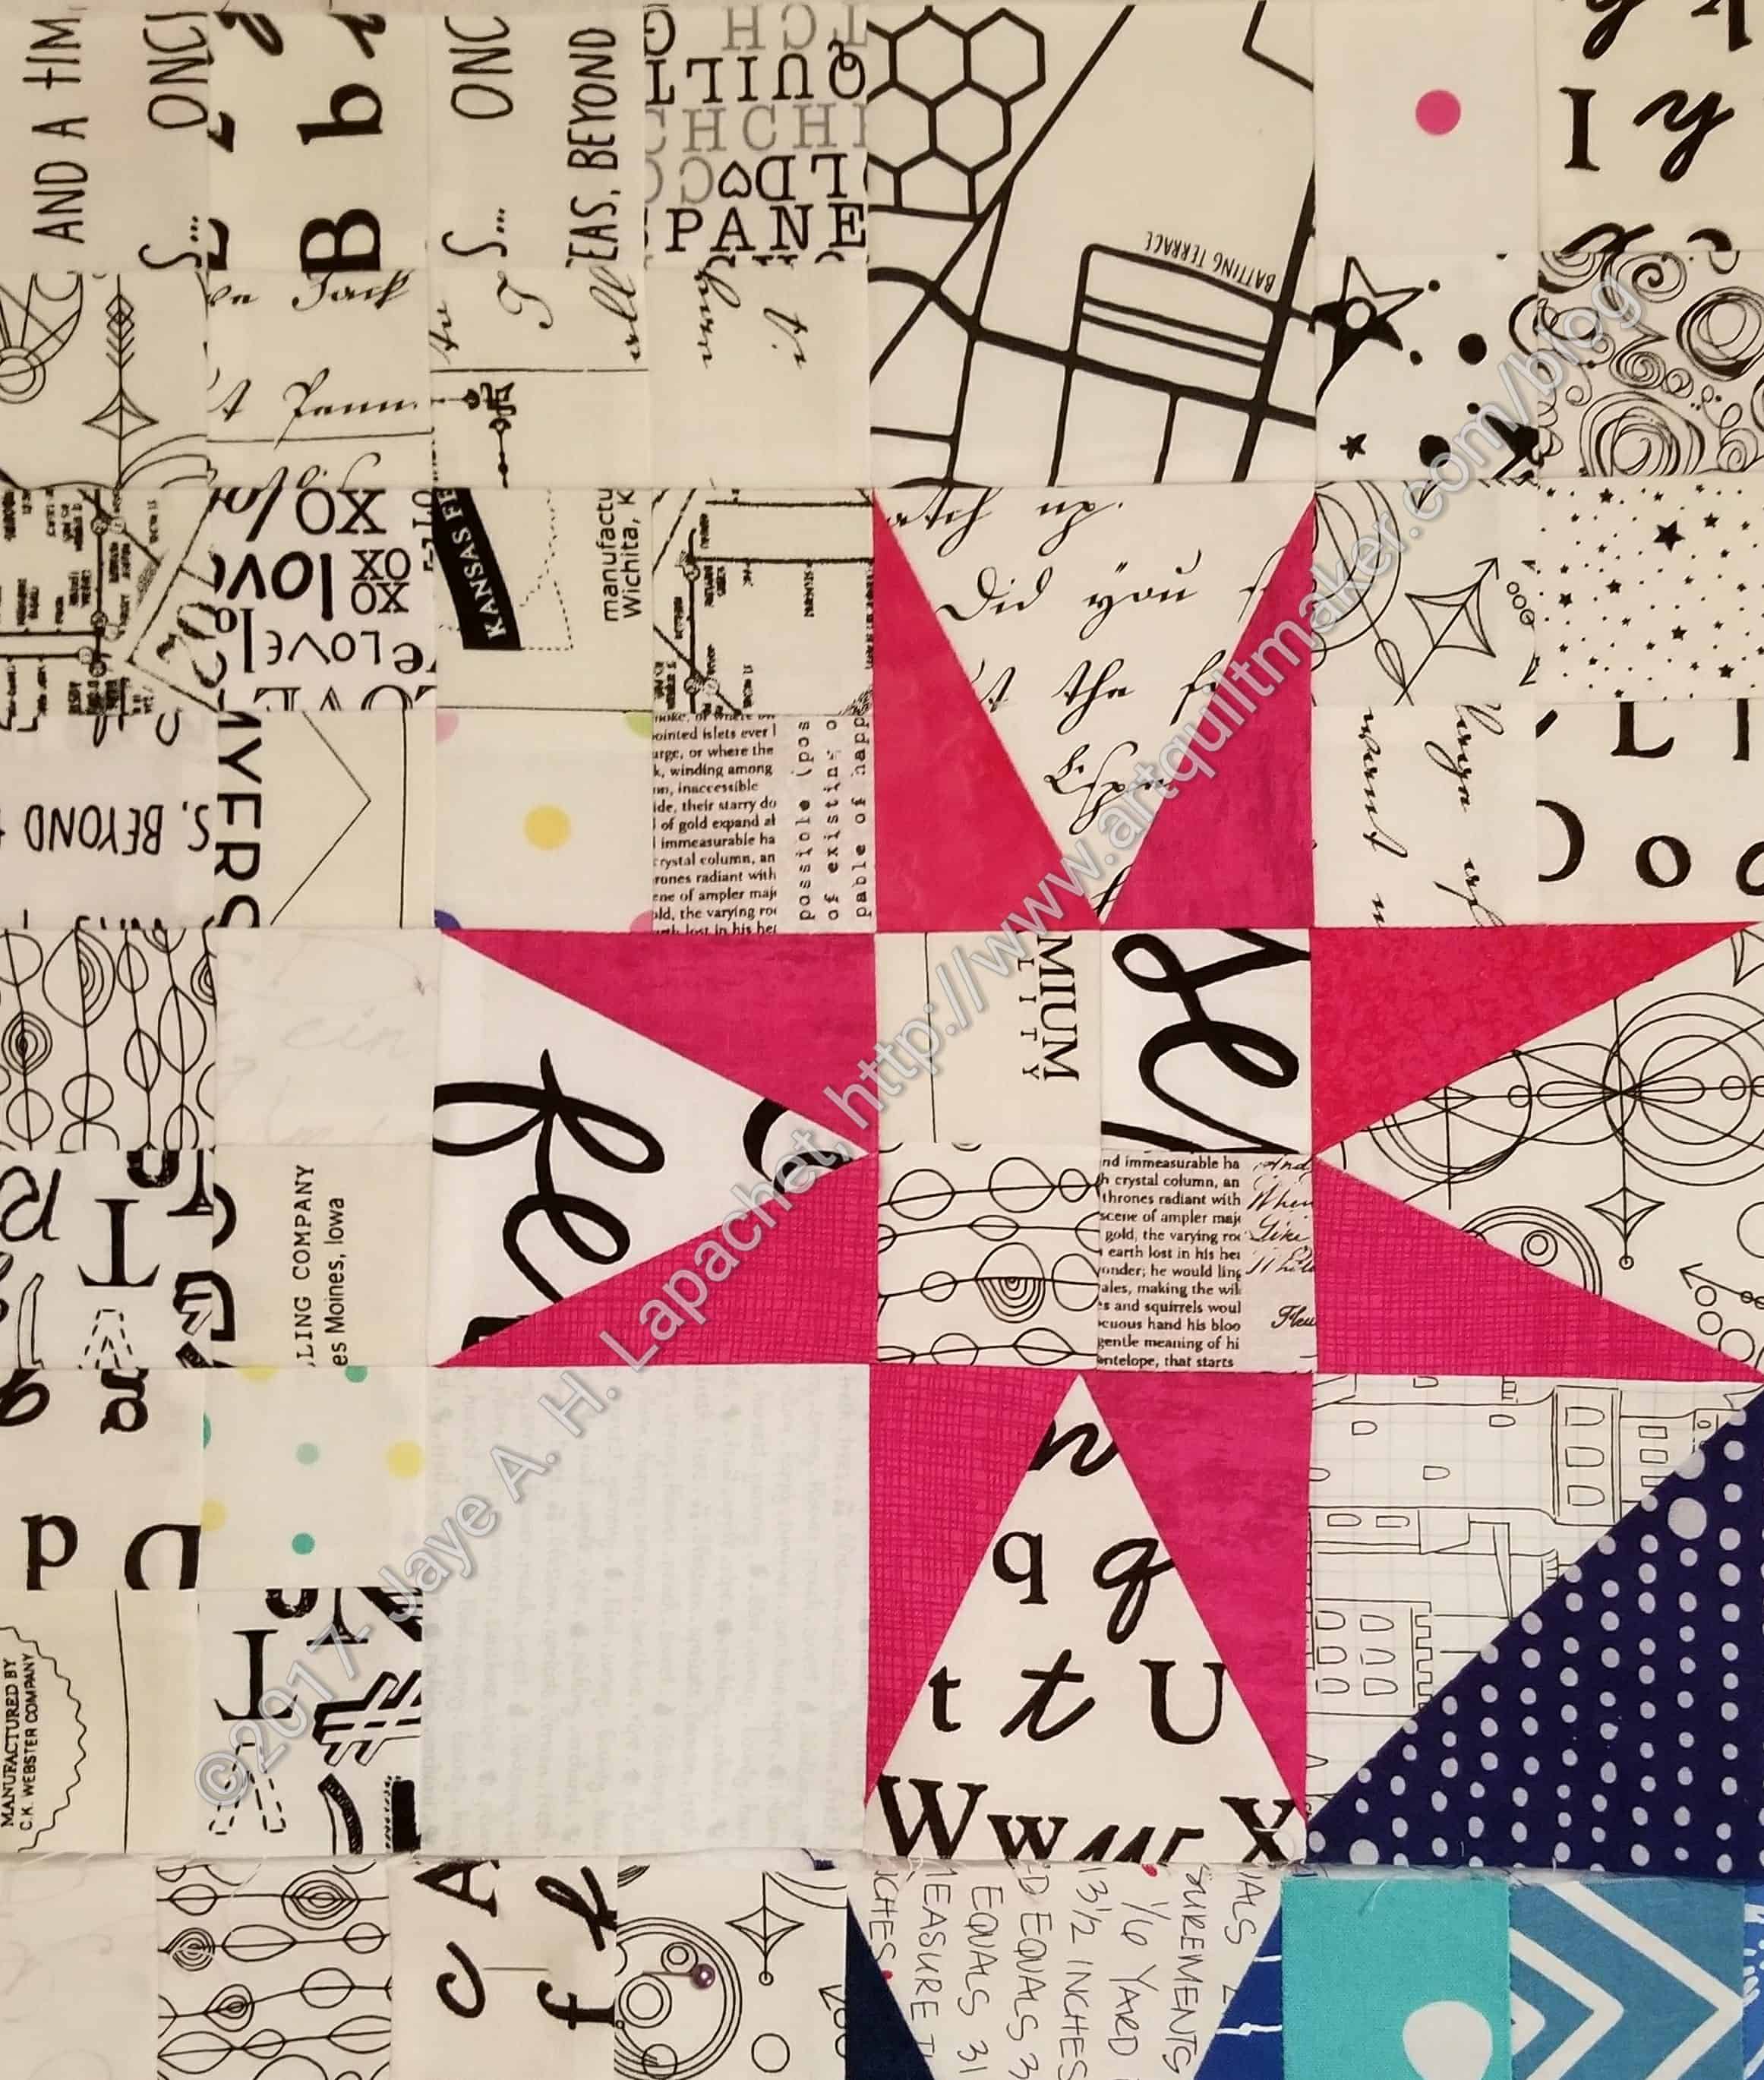
This is a close up of one section so you can better see the connections between the pieces.
This is one unit. After finally deciding on a plan to put the blocks together, I began to look at a unit and see what it needed to create a flat top edge. One thing I did with a hexagon was to sew one triangle to the bottom only. That creates one unit with a flat edge.
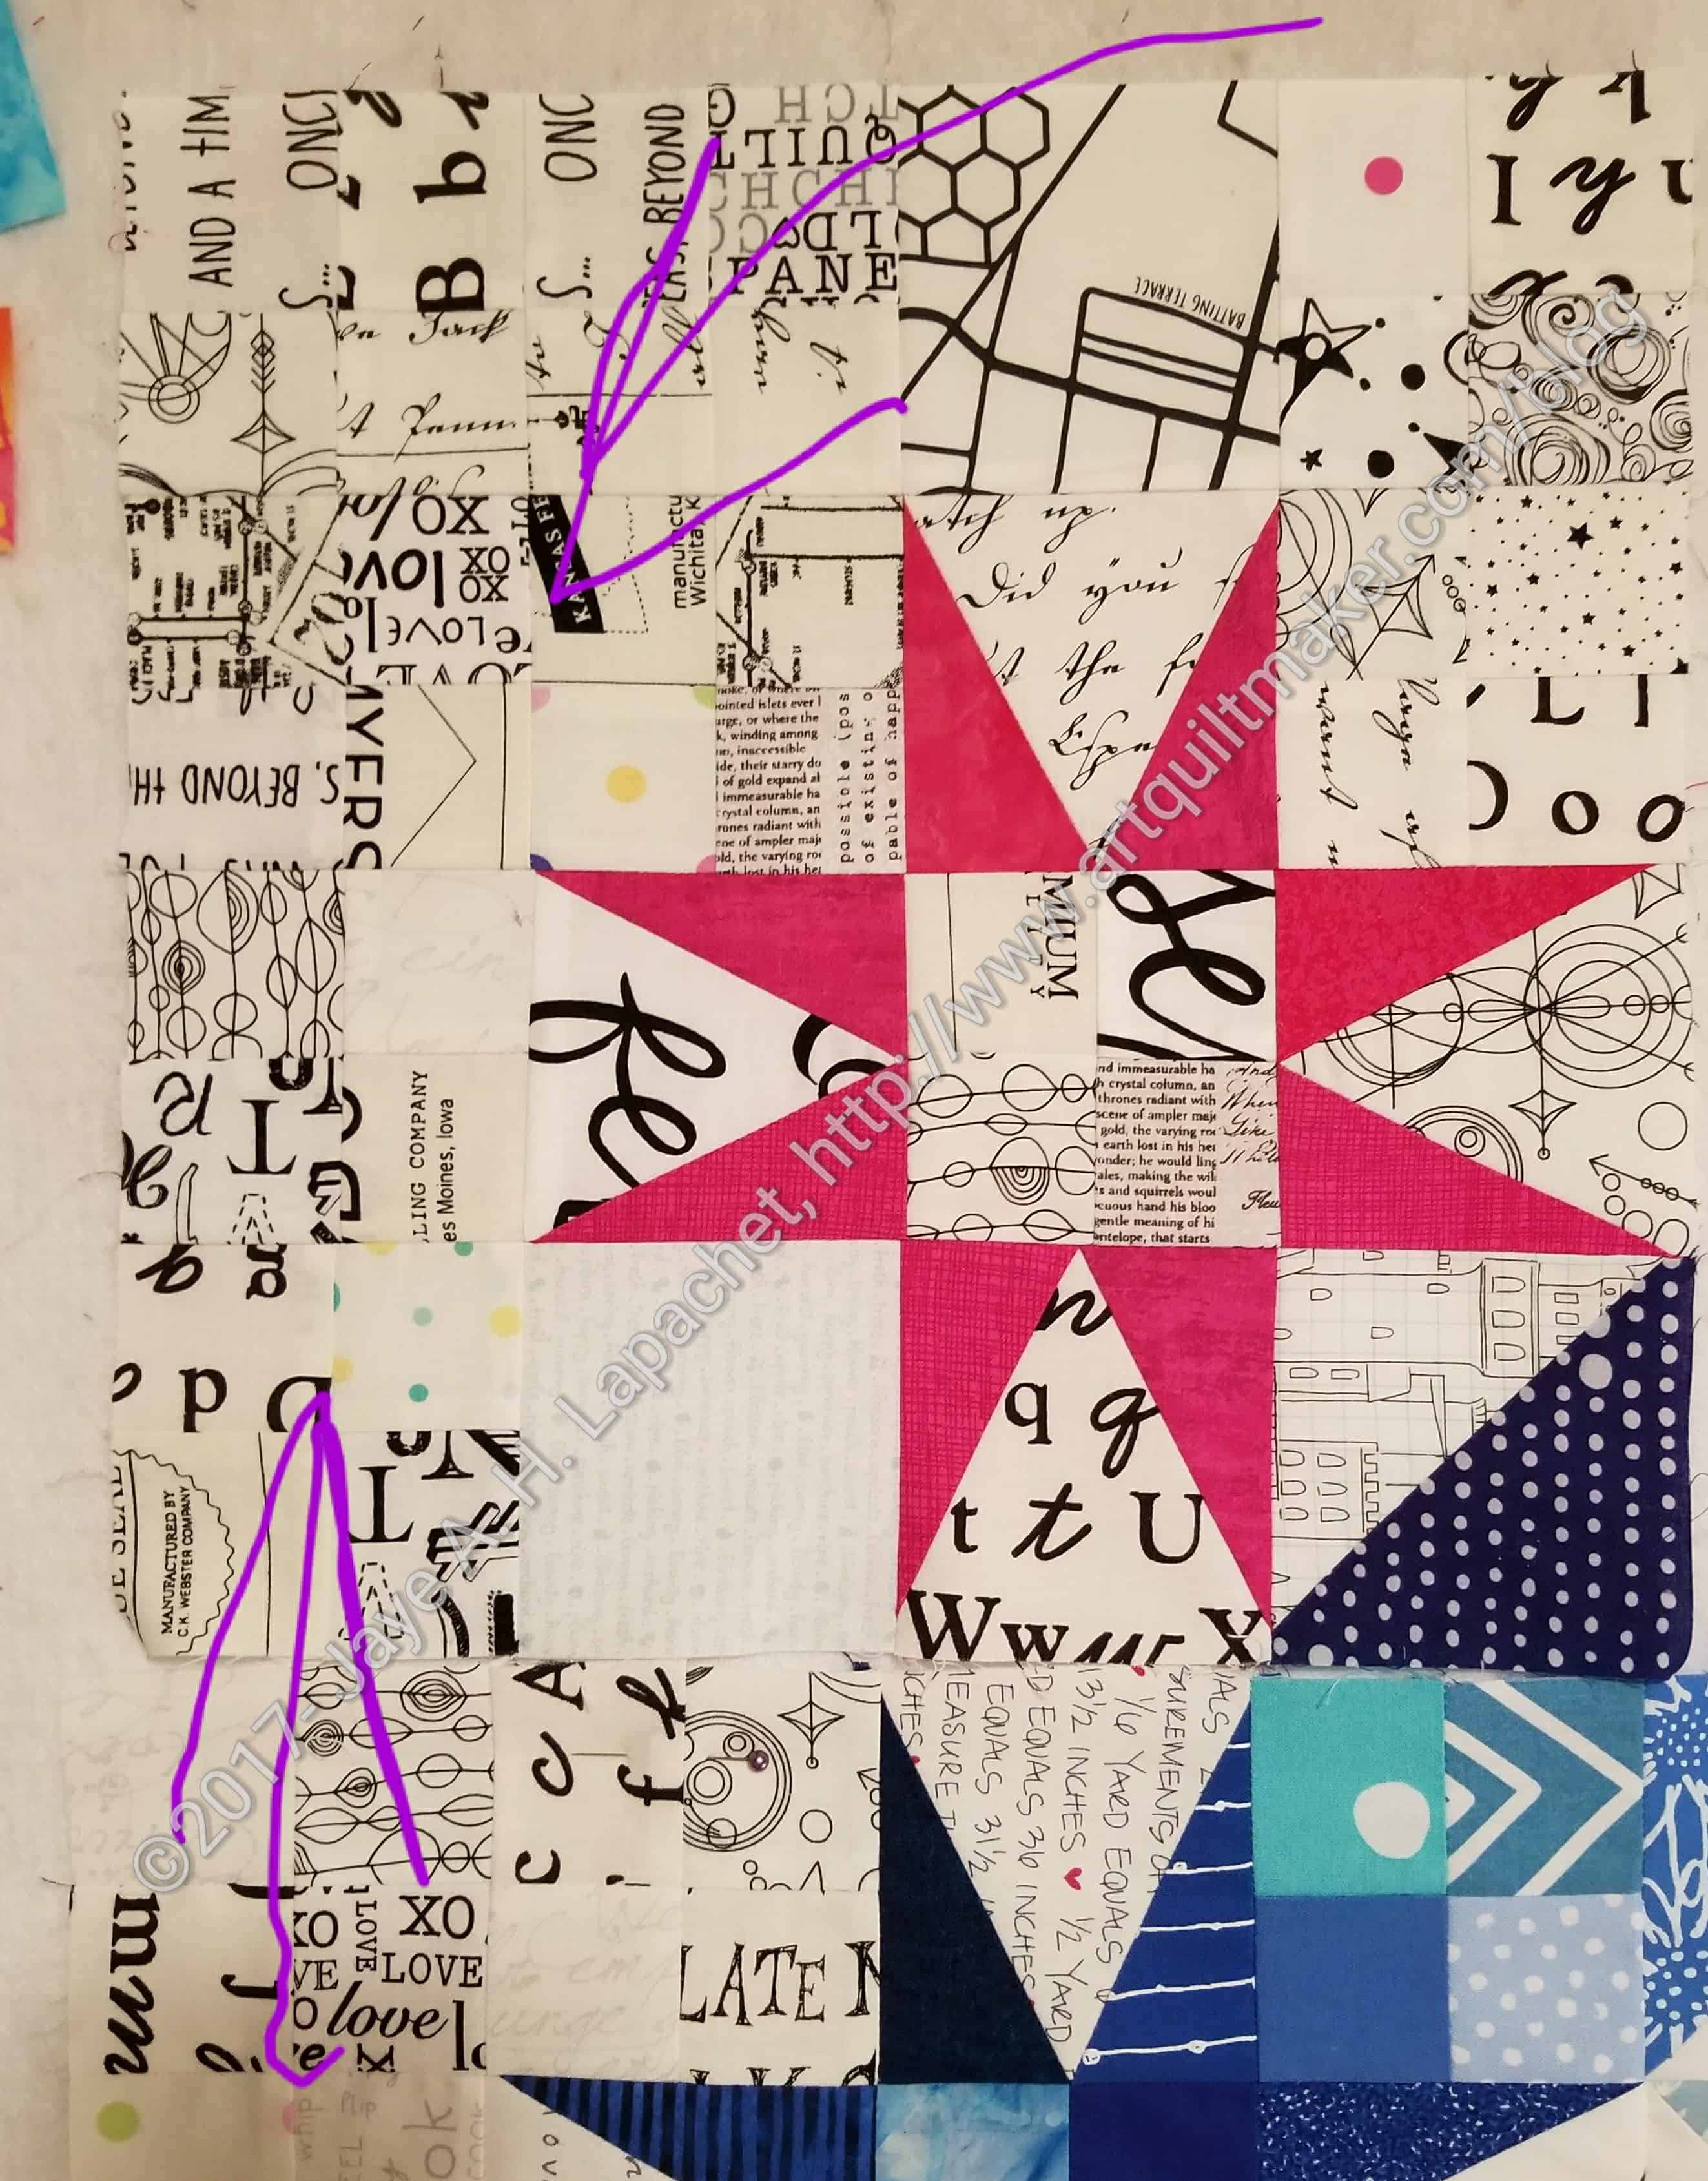
Having successfully created one flat top piece, I sewed a triangle on to the bottom of another. It wouldn’t butt up to the unit I already created, so I sewed a triangle to the side. Doing this made me realize that I needed to decide on which angle I would be sewing the units together. Once I made that decision I would have to strive to sew triangles to the top pieces to make straight lines to match that angle.
By sewing the black and beige unit to the larger diamond unit, I was able to to make the flat top longer and keep the straight line angle for sewing additional units together in place.
My challenges didn’t end there, though. I had to work out the next section. The way I started (above) obviously wouldn’t work if I wanted to avoid set in seams.
In the overall scheme, the above depiction might work, depending on the way I sewed the piece together and how the rows lined up.
I sewed another red triangle on to the opposite side. This gave me a straight line. With this succeeding, I started to realize that I only needed to sew a triangle on to the bottom and the left side of each top piece. You can see how the black and beige piece fits with the tropical drinks patch.
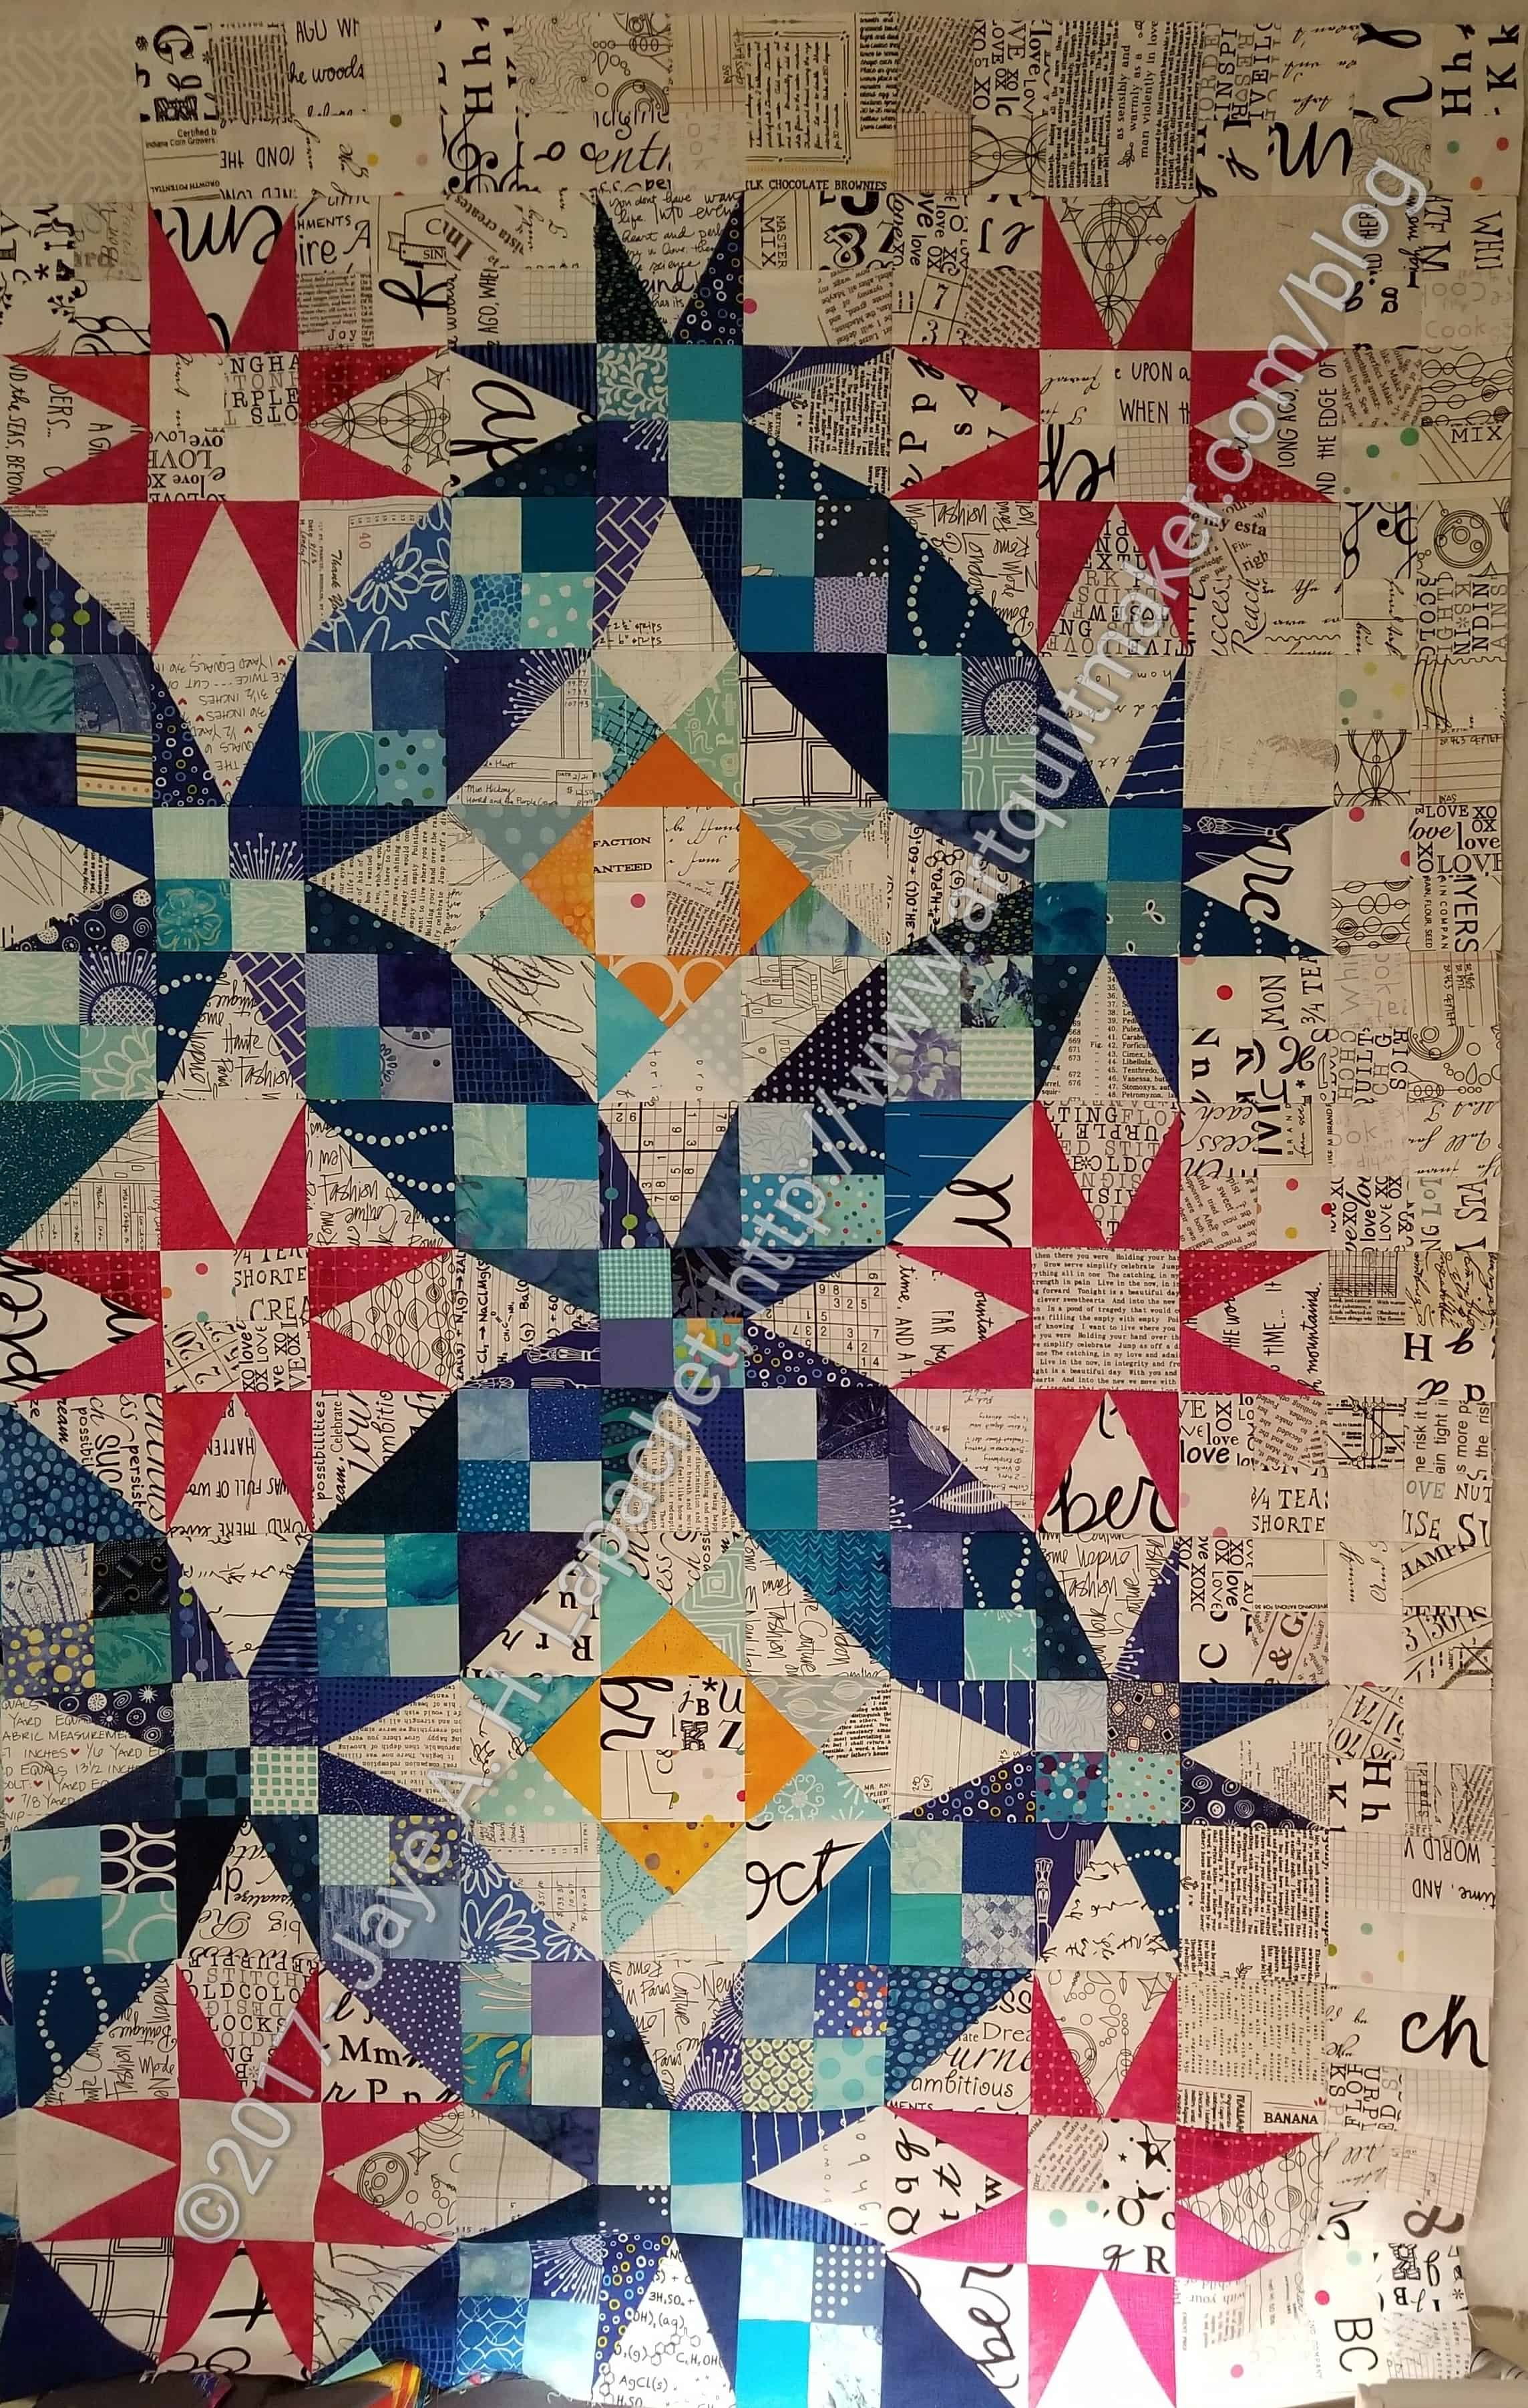
Above you can see the macro view of how I will sew the lines of the units together. I will sew from left to right.
I still have to make the rest of the top and that is what I am working on now. Stay tuned!
This week was kind of crazy week work-wise for us. As I result, last night was the first time I got back to the Eye Spy. I spent the time with a bit of sewing, a bit of cutting and lot of puzzling. I am puzzling through the best way to put it together. As you may know, I like to jump right in and start sewing. This gets me into trouble sometimes, but I do enjoy just sewing. Puzzling through problems isn’t so bad as I can’t always visualize the whole process. Of course, if the problems become too problematic then the quilt pieces usually go back into the closet.
I started working on the sewing on that Sunday where I introduced the piece but I didn’t take the edges into account. I am very much into my self bordering technique and would like to use it here. I used it on the Interlocking Triangles quilts and some others. Essentially it means that I don’t like to hack off bits of a border block to end the quilt.
I attempted to work on this yesterday while I was sewing triangles to hexagons. My dilemma, defined, is that I really don’t want to just randomly hack off the edges to make a straight side. Nor do I want to apply a binding to an edge that needs a miter every two inches.
First, I broke the hexagons I have sewed into two groups. Left, the pieces are arranged in a way where the triangles are pointing up. In this orientation, there are no straight edges. The side edges could be okay with a slightly irregular edge made by putting the piece together in chunks using diamonds (see far left).
The top and bottom edges would be a piecing nightmare, however, because I would have to inset triangles somehow. I can imagine that this would be a top that ended up becoming a permanent member of the UFO/ WIP list.
Right, the hexagons are arranged in a way where the triangles are pointed to the left. This is the way that Simply Quilts suggested putting this top together and what the directions on the package of templates suggest. Still, hacking off the edges to make this work makes me cringe. I was considering putting fabrics that were allover prints on the edges so the mutilation wouldn’t be as brutal. I don’t know.
Options:
Hack off the top & bottom or the sides, depending on layout.
Choose to piece the quilt in chunks using diamonds and do inset piecing to make a straight edge along the top and bottom.
Deal with very uneven edge in the binding process.
Add some other shaped pieces to the edge in a uniform color (more red?) to make the edge square.
Left is a detail of the corner of the piece with the section I have sewn together and arranged with the triangles placed pointing left.
I’ll have to troll the web and look at what others have done.