Next up in the Tote Bag Department

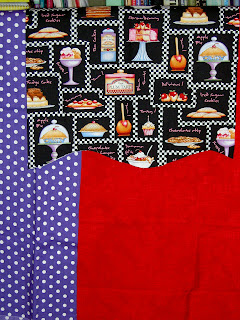
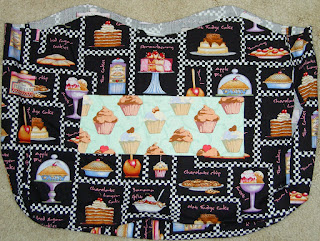
As you may recall, I made this lining for the Cupcake Tote, but ended up not using it.

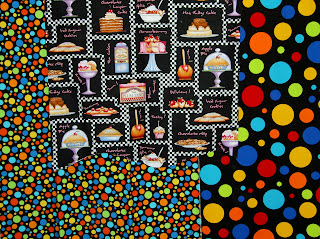
After finishing the Eggplant/Lemon tote and embellishing the Chocolate Flower Tote, I, once again, turned my attention to this troublesome lining. It wasn’t intentionally troublesome, but the colors turned out to be a problem.

I looked through my fabric, not really sure what to pick. I pulled out these dots from the Timeless Treasures Basix collection. I love these dots, though I love the ones with the white backgrounds more. I thought I would use them, but when I looked at the three pieces together, I decided that making visually decisions visually was a good idea. The colors in the cake fabric didn’t go with the dots. No purple or pink in the dots and no turquoise or orange in the cake fabric. Too bad, because I have a lot of black dot fabrics that I haven’t used at all. The outside fabrics had to go with the lining, though.

After looking carefully at the focus fabric and looking through my black and white fabrics, I found this red batik and this violet dot.

This is the grouping that I picked. I wanted the fabrics to all go together without being too matchy-matchy. I also wanted to use some dots. The violet dot is very thin and I don’t like it forpiecing. I don’t have much of that red batik, but think it will be nice as an accent. I completely ignored the aqua pockets that I already sewed to the inside of the lining. Nobody will see them much except the owner.

Stay tuned.

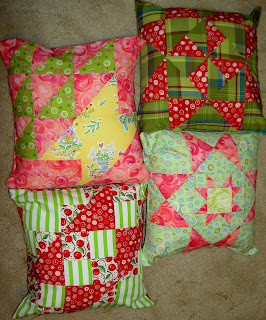
Teacher Pillows 2008


Yes, I made Teacher Pillows again. I know I am going to get flak for reprising the project that made me so insane last year. This year my timing was off (summer, which, as you know, happens NOT to be before the end of school) and they turned out to be a lot easier. Spring was just too crazy with work to be able to get to this project in time for the end of school. I think doing them while I was on vacation and not worrying about regular life was a really good thing. The first day of school is Monday, so the teachers will get a little boost from a gift then.

I decided to make them on vacation so I could get my SIL to give me some pointers. She has 3 boys, two of which are out of the house and college, and a lot of Teacher Pillows under her belt. I thought that if she couldn’t give me some pointers to make the process easier, I would really give up the tradition.

These are 12″ square pillows. That size choice made the whole process easier, because I didn’t have to change the size of the block or add a border and could just use the directions straight out of Around the Block. I have EQ, so another idea is that if I want to make 14″ pillows in the future I could resize one of their blocks and use the directions. They have great rotary cutting directions. (note to self).

SIL also suggested that I made the back two panels 10″ x 12″ each. This size is to prevent gaposis. It was hard to get the pillow forms into the pillow cover, but once they were all in, there was no gaposis.

The only thing I don’t like about this group is that the pillow forms are too puffy in the middle, so the corners aren’t filled out. I am ignoring that this time around. Once the teachers lean on them, I am hoping they will squish down. I will look for squishier pillow forms next time. Last time I got feather pillow forms on sale and those filled out the pillow cover nicely.

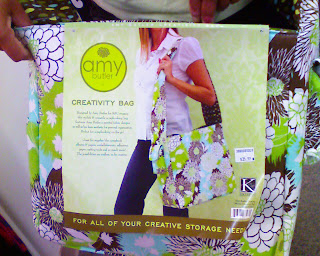
Amy Butler Tote redux

I found the Amy Butler tote on the K&C Company website. It looks really nice and has gotten rave reviews from some people who have emailed and commented. I’ll have to think about it before I buy. I still want the pattern so I can try and make it from my own fabric.

clipped from www.kandcompany.com

Amy Butler Belle Fabric Scrapbooking Tote Bag

Hold everything! Our exclusive, Amy-Butler-Designed craft bags are great for creativity on the go!

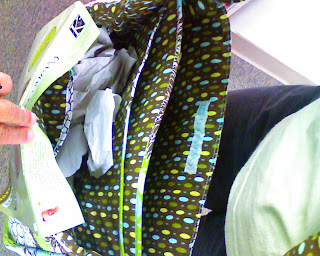
Made of durable, padded canvas, these versatile creativity bags are divided into: one wide 12×12 pocket, one flat 12×12 pocket, one open compartment with three small, wide pockets on each side, and two exterior side pockets that are perfect for photographs or tech gear like a digital camera, cell phone or mp3 player.

Use to hold an album, 12×12 papers, embellishments, paper cutter, fabric, yarn skein, tools, photographs, projects and so much more!

Shell: EVA Foam-Backed 100% Cotton
Lining: 100% Cotton
SPOT CLEAN ONLY

Amy Butler Belle Fabric Scrapbooking Tote Bag
blog it

More Complex Bags

I was at Pacific Fabrics yesterday and saw this great bag from K & C Company and Amy Butler. It is called the Creativity Bag and says it was designed for scrapbooking.

TFQ and I liked it because of the interior dividers. I don’t think I would want to carry it around all the time, but it would make a nice travel bag. Frankly, I would just like to try to make one. Either the design or the fabric is licensed, so, after discussing with TFQ, we are skeptical that they are also selling a pattern. It seems like they would just want to sell the complete bag. I’ll have to look carefully, though, on the Web to be sure.

TFQ found a pattern she bought several years ago, which is similar. It has the dividers inside, but doesn’t have a really good variety of photos of different angles.


Latent Love of Dolls

Deirdre sent me a link to Mimi Kirchner’s blog and it made me start thinking about dolls.

clipped from mimikirchner.com
blog it

I have to admit that I have always loved dolls: Barbie and friends, baby dolls that you could dress and feed, soft huggable stuffed dolls.

I loved dressing up dolls. The dolls always looked glamourous and could walk in their tarty shoes, which wasn’t always the case for me! Dolls always provided an opportunity to play house and have things go my way. Dolls are also a great opportunity for creativity. Now I am too old for dolls and they have been replaced by a family of Mr. Potato Heads on my desk. Yes, I dress them up for the entertainment value.

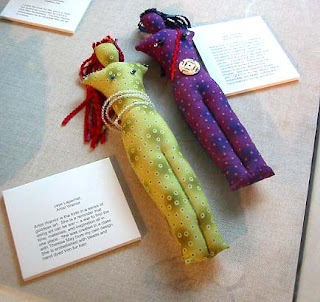
As I have been washing and pressing the fabric from my trip to the East Coast, I have been cutting off schnibbles. I keep thinking to myself what great hair the schnibbles would be, which further makes me think that Art Warrior and Mother Warrior may need a new friend.

Artist Warrior (left). Mother Warrior (right). On display at the last CQFA show.

Mimi’s dolls are really creative and beautiful, and they also have a lot of personality. They are also BIG, and, presumably, huggable.

I am really glad to have the blogosphere accessible to me, because it is just a fountain of creativity that I can dip my toe into whenever I want.

What I Made on My Summer Vacation

I bought the fabric for this tote at Capital Quilts in Gaithersburg, MD. The flower fabric appealed to me even though chocolate is a major color in the fabric. In making this bag, I realized that using three fabrics makes the totes much more interesting than just using two fabrics (outside fabrics including straps, pockets and body, which is separate from the inside fabric).

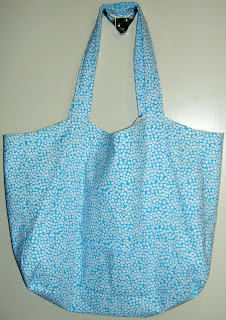
This is a tote that I started, what seems like, months ago. I, finally, was able to finish it in Maryland. I love Love LOVE the turquoise bubble dot fabric. The problem is that the straps and the pocket, which are pictured in the photo above, are camoflaged. I definitely see another tote with this fabric in my future.
This is the inside and I think the turquoise bubble dot fabric looks so much better on the Basix dots.


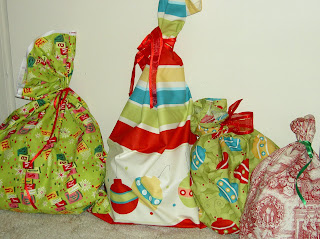
Normally, I don’t buy Christmas fabric. I certainly don’t regularly buy Christmas fabric at full price. I loved these fabrics so much that I couldn’t wait to see if they went on sale after Christmas. The colors and motifs are really fun and cheerful. I wouldn’t exactly classify the toile as fun or cheerful, completely, which is not to say it is ugly or staid and boring. I do love the idea of repurposing the toile idea into something new. As soon as I got home, I sewed the fabrics into Christmas gift bags and am looking forward to using them during future holiday seasons.

I started a cupcake tote made from the fabric I purchased in May at Clementine’s Dry Goods, but have not gotten very far. Photos to follow.

Cleaning up the Junk Drawer of my Blog

The title is paraphrased and re-imagined from a phrase that DebR uses on her blog, Red Shoe Rambling. I have a lot of little bits to pass on and thought this would be a good time to do it.

More on Gabrielle Swain

I forgot my camera on the second day of class. Karen, a fellow student in the Gabrielle Swain class, was kind enough to share her photos with me. We had a little session on features of her camera, which was fun and then we took some pictures. Karen let me look over her shoulder while she took photos.
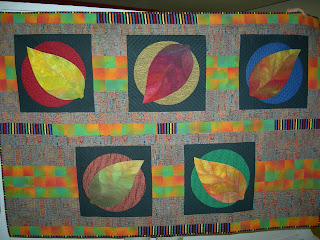

In the above piece, you can see the color placement issue that I described in Gabrielle Swain Class, Day 2. The leaf is made up of separate pieces. If you can see how the veins divide the leaf, know that each of those sections is a separate piece of fabric. In placing the fabric, Swain explained to us how to fussy cut the fabric (using the light box) so that there are no huge breaks in the color of the leaf. I think the above leaf has more color breaks than I would expect there to be in a piece, but since GS did it, there must be a reason.

You can also see the quilting pretty well in the above photo. All of this quilting is done by hand.
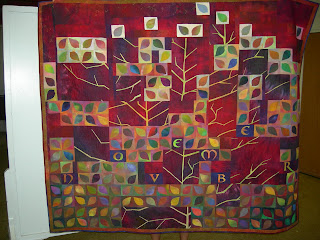
I liked this quilt, because of the way she breaks up the leaves and the branches. I also think the few letters add a lot of interest.
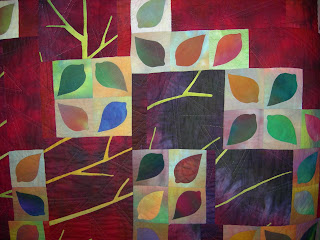
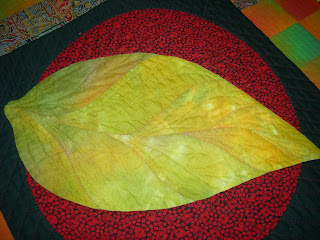
My favorite quilt of Ms. Swain’s was called Even Change (not above, click the link). I think the one on her website might be different than the one she brought to class. Still, I like the idea of temperature that she used in this quilt. The idea was that if she used a cool tone on the background, Swain appliqued a leaf (piece of fabric) in a warm tone on top of that background, then she used a cool tone for the veins. Very successful.

Thinking about Proportion

Periodically, some technique that has been rumbling around in my mind as I try and understand it, clicks into place. What is rumbling around in my mind lately is proportion.
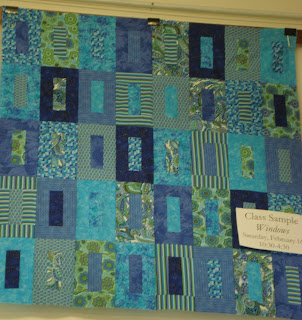
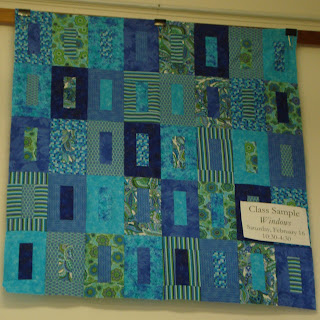
TFQ and I saw this class sample at Black Cat Quilts when she was visiting in April. It is from the Weeks Ringle and Bill Kerr book, Quiltmaker’s Color Workshop: the FunQuilts’ Guide to Understanding Color and Choosing Fabrics. Gretchen was out of the book so I had to buy it from somewhere else. That meant that we couldn’t look at the book or the directions for the quilt.The pattern is pretty easy, so it doesn’t really require a class or a pattern.

I was shocked when I did buy the book, because 1) the colors were a shockingly ugly combination (TO ME). I have little to no appreciation for the colors in quilts made from reproduction fabrics; 2) they put that ugly quilt on the cover; and 3) how small the blocks actually were in the pattern in the book. The above picture shows blocks that are approximately 8″x4″. It was high up on the wall and there wasn’t a ladder available for me to climb and measure the blocks. Also, I forgot my tape measure. Anyway, in the book the pattern directions tell you to create blocks that are about 3″x5″ (the size of an index card). Huh???

Well, obviously, the maker of the class sample was perfectly able to enlarge the pattern. This where I started to think about proportion. I find that the proportion of the blocks in the picture above to be good. I haven’t made one of the smaller blocks, so I can’t say whether I would like that size.*

My thoughts about proportion, which started with this book/class sample encounter, have to do with how to figure out how to find the right proportions (without a lot of complicated math, thanks) of a block. It is easy to say “ok, the pattern says to make this block 3×5, so it would be easy to blow the block up to 6×10”, but what about if I want the block to be 8x something. I have a little fraction to decimal cheatsheet and I want a proportion cheatsheet as well. Let me know if you know of one.

I do have EQ6 and will probably work on it there.

Note we did get permission to take the photo.

*Aside: the smaller blocks might be a good FOTY project.

Prismacolors

At work and personally, I am doing a lot of self examination. In the course of this, we were talking about Myers-Briggs types and how some types don’t like opening gifts in front of people. That brought up a discussion of gifts and how I would really like a super large set of Prismacolors. Gabrielle Swain suggested getting the large set so that I would have every color I ever needed. I have been using a set of colored pencils that were part of my school supplies list when I lived in Austria. They are a few years old, but they have great names like hellgruen and dunkelblau and they do the job. The friend subsequently mentioned that Aaron Bros was having a monster sale and I could get a set for half off. I went to Aaron Bros last night while I was running an errand at Target and looked.

First, I was shocked at how few art supplies Aaron Bros actually has now. Their whole upper floor was filled with framing services and ready made frames. I had no idea frames were such good business.

Anyway, I didn’t buy any Prismacolors, because the 40% off sale was over. Dick Blick has the set of 132 pencils (list $190.00+) for $89. That seems like a good deal.

Swain also mentioned the Prismacolor Art stix. She made them sound like they were some special/new kind of pencil. I looked at them at Aaron Bros and they looked more like pastels to me. I am not into messy, so I don’t know if they are for me. I think I bought a couple last week and will try them out.

I am also interested in the Derwent Inktense pencils. I suppose I should learn some techniques for colored pencils, so I can really test the various pencils in an informed manner.

Making Many Bags

I figured out why it is a GREAT idea to have multiple tote bags hanging around. To date, I have made 6 bags and have 2 or 3 cut out and the fabric ready for at least one more. I have been thinking, and discussing with TFQ, the point of making many bags. The obvious answer is that it is fun to make bags. It is great fun to use large pieces of different fabrics than I wouldn’t normally use for quilts. It is also fun to buy fabrics, such as the cupcake fabric for a purpose. I came across the true answer last Friday, as I prepared to go on a trip.

The true answer is that you need extra bags so you don’t have to clear out the other bag you haven’t unloaded!

Yes, life has been crazy and I haven’t unloaded the dot/flower bag, so when I went to pack for the trip to the lake, my choices were to unload the bag or do something else. I was, as usual, in a rush and late, so I just grabbed the Alexander Henry bag, filled it up and left. Right now, I have two bags laying on the floor of the workroom full of various activities. I guess I am already packed for another trip!

The dot/flower bag also needs to be fixed. I didn’t catch all of the hem when I hemmed the top, so I need to resew that. I started to unsew it and resew it, but haven’t finished.
1000 Journals Project Visits SF

You Tube Video of 1000 Journals Project

I have never been to a film festival that I can remember (my parents took us to a lot of strange and culturally significant places), but I went to the San Francisco Film Festival last night to see the 1000 Journals film. It made me really excited to go and to see an indie film.

I am so lame about celebrities, never knowing who they are and who is sleeping with whom, but at the film festival I felt how other people must feel about TV and movie stars. The director, Andrea Kreuzhage and Someguy were both there. After the movie, there was a Q&A and people asked thoughtful and good questions. Of course, everyone wanted to know where the journals are, but people also asked about whether they kept journals (both do to some extent), the exhibit that Someguy is working on getting together.

Today I went out and bought the book. I haven’t read it yet, of course, but I glanced through it and am already more excited than I was.


There is something about this project that is so great. First of all journals are close to my heart. It isn’t just that I have been stumbling along trying make visual journals for the past little while, but I have kept a journal since high school. They can be really powerful and helpful. It means a lot to me have somewhere that I can just blather on about the stupidities and irritations as well as the triumphs of daily life without worrying about my handwriting, grammar or vocabulary and spelling.

I was excited to be at the movie and see the celebs, because it is a collaborative project that Someguy started in his living room. Someguy works. He is just a regular guy. He looked the same *at* the movie as he did *in* the movie. No tux or entourage. It shows that one person can REALLY touch other people’s lives. It is inspiring. It also showed that people are really creative and can take a project and help. It also showed that people cared about the journals and the project. You can see a lot of other footage about the project on YouTube, including interviews with Someguy (above with Andrea Kreuzhage) and Andrea Kreuzhage.

I think people just want to be part of something greater than themselves.

Towards the end of the Q&A, a woman stood up and said she had one of the journals! She said she had had it, I think, since 2003. She had been giving it to people, but it had continually returned to her. As soon as people started leaving I jumped up and asked Someguy if I could have it. Sadly, someone had beat me to it! She, kindly, offered to send it to me when she was done, so I gave her my address. Life happens so we will see if I ever get one.

Here are some photos from the event.
This is Erin with journal #270 right after she told Someguy that she had the journal to give back to him.


Andrea and Erin with journal #270.Someguy, Erin and Andrea.

Someone was there with a Flat Stanley and wanted to take a picture of Stanley with Someguy and a journal.

Two Bag Day

I had resolved to look at all of the Pineapple blocks yesterday in order to see how many I need to remake in order make progress on the Pineapples. It has been kind of a Pineapple disaster couple of weeks and I wanted to get back to it.

But, I didn’t.

Instead I worked on the easy project and finished a bag and made another whole bag. Yes, start to finish. I am going to use it today.

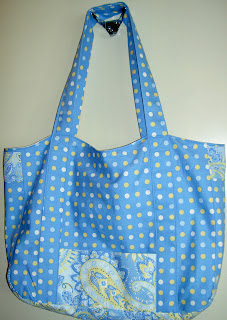
This is the bag that I had been working on. It is kind of part of a small series of bags made from fabric that I bought from Fabric.com. I was going to keep this one for myself, thus the dots, but I don’t think I will. I like it and find it to be well made, but the colors aren’t me. I need a another bag for a gift and will probably use this one as the gift. I also decided that I don’t really like the paisley fabric that much. I was happy with the way I centered that one paisley on the pocket.

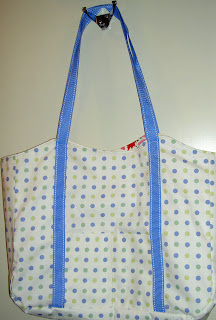
The white dots had been languishing in my sewing room for awhile and I wanted to get them into a bag. I, originally, wanted to make an entire bag out of them, but didn’t have enough of the dot fabric. One of the fabrics I bought on Saturday was destined for the inside of this bag. I also used the webbing straps I bought at Britex for this bag. They made the sewing go REALLY fast. However, I melted one part of a strap and got goo all over my iron, so I may not use them again. I also don’t like the limited color selection. Anyone know of a good source for these straps? How about nice colors and NOT made from plastic?

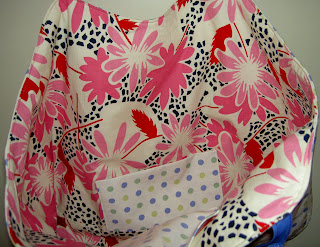
This is the inside of the bag. Isn’t it fun!?! It is a very sedate bag until you open it and then it gives you a little punch. I love this fabric, because it makes me feel cheerful when I look at it. I was shocked to find that it is a Judy Rothermel Aunt Grace fabric!

I cut out the pieces for another bag and will use this cheerful flower fabric for the outside of a bag as well. Yes, I am going bag crazy.

Another One Night Stand, Part 2

At the end of the Nance O’Banion class today, we had to talk about what set us off in the direction we went and the themes we saw emerging our work. Both of my pieces were driven by the beginning of the class when Nance said to be open to serendipity and surprise. Because of the “personal pieces” I chose, the themes that emerged were themes that I had worked with in the past: One Night Stand and the Goddesses.

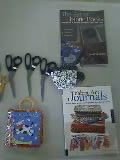
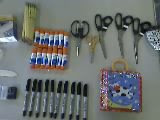
Nance’s class was full of different types of supplies and things to inspire us.

Rubber stamps lined up and ready to use in the books.

The book on the bottom is full of wonderful bits of embroidery and quilted books.

I was intrigued by the way she lined up everything.

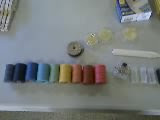
This was waxed linen thread that she offered for our use. I used my own hand dyed thread.

We were supposed to bring three meaningful things with us. I wasn’t quite sure if she meant things we could use in our work or just things in general. I chose the former definition and these are the items I came up with.

Dots, of course.

The little woman figure is very like Desiree and I like her shape.

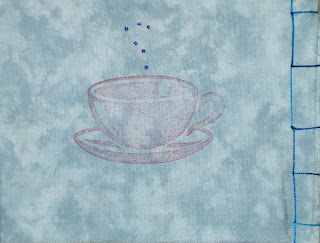
I am really into taking time for tea right now, thus the cup.


Cover: Here is the cover of the finished piece. I made this one MUCH smaller. We had less time for this second book and I wanted to accomplish a lot, if not finish the piece.
Page 1 and Page 2: First I went through and drew all of the figures. I alternated between the shape from the bead and the Desiree shape. The little figure on page 1 said that her name was Paulina. Not sure why or what her goddess responsibilities are, but there you have it.

After I was done drawing the figures, I went back and modified colors, sewed a bit, added beads. I think I want to stiffen the pages on this book as well.

Page 3 and Page 4: I merged the two shapes in the figure on page 3.

Page 5 and Page 6: Page 5 may be Referencia, but may be someone else. She did not reveal herself. The wings are a flash of brilliance, I think. The house in the Little Mother’s tummy is supposed to be a Gwen Marston house.

This is the end. I used a rubber stamp that I bought from Karenlee (finally!). You can also see the binding very well. It is called a stab binding. I still need to sign and date it.

Another One Night Stand

Today I made fast art again, which, on this blog, is called a One Night Stand. Start to finish is all one session. A One Night Stand here has nothing to do with sex.

EBHQ, the East Bay Heritage Quilters, had a workshop with with Nance O’Banion. She is the head of the printmaking department at CCA (formerly the California College of Arts & Crafts) and teaches, among other classes, book making. I mentioned, earlier in the week, that I thought this class would be interesting in the visual journaling department. I was correct.

Nance O’ Banion doesn’t teach many workshops, as she is a full time faculty member at CCA and doesn’t really have the time. She taught this workshop for EBHQ as a special favor and it was fantastic!!! First, of all, we worked quickly. I finished two books today.

Second, we worked with a limited “palette.” It wasn’t a palette in the sense of colors, but a palette in the sense of materials. She gave a us a group of materials and our job was to make something out of the materials she gave us and what we brought. Since I couldn’t bring my entire sewing room, this limited what I had to work with, but it was fine. It was actually great. I think working with rules, even if they are self imposed, makes for more interesting projects/pieces.

Third, Nance was a very nurturing instructor. Not in a gooby, “I want to be your best friend forever” kind of way, but in a “you can do great work and I will support you” kind of way. I would love to take a semester long class with her. She normally teaches bookmaking with paper and I don’t think I would mind taking that with her.

Fourth, she was really organized. She had a packet of stuff that she had prepared for us (magazine pictures, pages ripped from books, blank paper, etc. She also had a schedule, let us k now what it was and stuck to it. I really enjoy working in that kind of environment. I am good with deadlines. I am not bothered by deadlines unless I don’t know what they are.

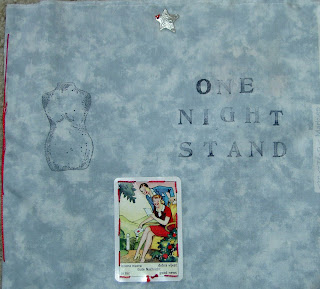
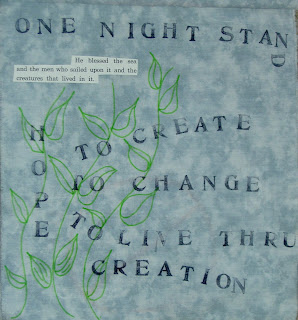
Cover. My book came out a little big for the first exercise, but I used it anyway. I wanted to play a bit with the double meaning of One Night Stand. Remember, I didn’t have much time, so I did what I could. I could always add more to the piece. I think I will shore up the pages with some interfacing as they are very floopy.

Page 1 (left) and page 2 (right): The red and white motifs on page 1 are on the back of the fortune card (Nance’s words) that was in my prepared packet. I didn’t want to lose them by gluing the card onto the page, so I sewed it on with Laura Wasilowski hand-dyed Perl cotton and cut the back out so the motfs would show through. Page 2 just plays more with the meaning of One Night Stand.

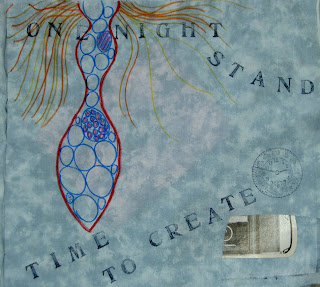
Page 3: Here I wanted to get the reader’s mind out of the gutter and tell them that a One Night Stand is about creating quickly. It allows things to happen with my work that wouldn’t happen if I thought too much about it. I also tried to incorporate a piece of the motif of the iron grille with the shadows I saw in Seattle. I was a also trying to reintroduce the woman shape I used for Desiree. This was the first attempt of the day and she looks a bit wonky. This page had a bit of a problem, because I had cut a piece out of the yardage and didn’t realize it was in the middle of my book until I was well into. I had planned to have the camera peek through, but I didn’t line it up properly. I may leave it but I may fix it somehow (door? sewed on ‘patch’?) . We’ll see.

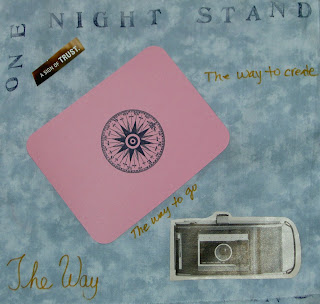
Page 4: At this point, things started to pop into my head and I would write them down. I was feeling like the piece was a bit word heavy, but just went with the flow. The pink card with the compass came in my prepared packet.

Page 5: Here I am back to a little bit of wordplay with the double meaning.

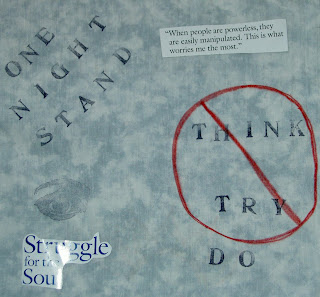
Page 6: The ‘think,’ ‘try,’ ‘do’ are relevant to creativity, I think, but they are also a take off on something that Yoda says to Luke in Star Wars, Episode 6: Return of the Jedi.

Page 7: While you see this page in the same orientation as the other pages it is actually oriented 90 degrees to the right, so you have to turn the book. This is one of my favorite pages, because it just told me what to put on it and I like the layering of the leaves.

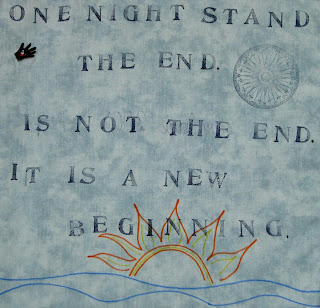
Page 8: I wanted to have a closing credit, so I started on a “The End” page. They I thought of the phoenix rising from the ashes and new beginnings came to mind.

I’ll write about the second book later.

I stopped at New Pieces to see if they had interfacing for the bags and bought, in addition to the interfacing, the following:


The turquoise dots on the bottom will be a bag outside and the pink flowers with the black will be a bag inside for the white dots that I bought from fabric.com.

Weekend Inspiration + Updates

I have been driving around and seeing all the cherry trees blooming and never have my camera with me. This is a photo by my friend, JeanneN (aka TFQ!). I though I would put it up to keep up the tradition of welcoming spring and celebrating these beautiful cherry trees.
This photo, also by TFQ, is the historic dome in the San Francisco Center. It used to be above the restaurant in Emporium Capwell’s. You can see some information about the raising of this dome when the SF Center was remodeled.

We stopped by Black Cat Quilts to look at their fabric.
This is a quilt we saw there. Apparently you can find the pattern in Quiltmaker’s Color Workshop: The FunQuilts’ Guide to Understanding Color and Choosing Fabrics. TFQ commented that the above color choices were better than the one on the cover of the book.

I also finished this bag. It is a gift, but I am making a similar one for myself.

This is the inside of the bag. I love the stripes! In being with TFQ this weekend, we realized that a pocket for a glasses case would be really useful. I may try and add one to the next bag.