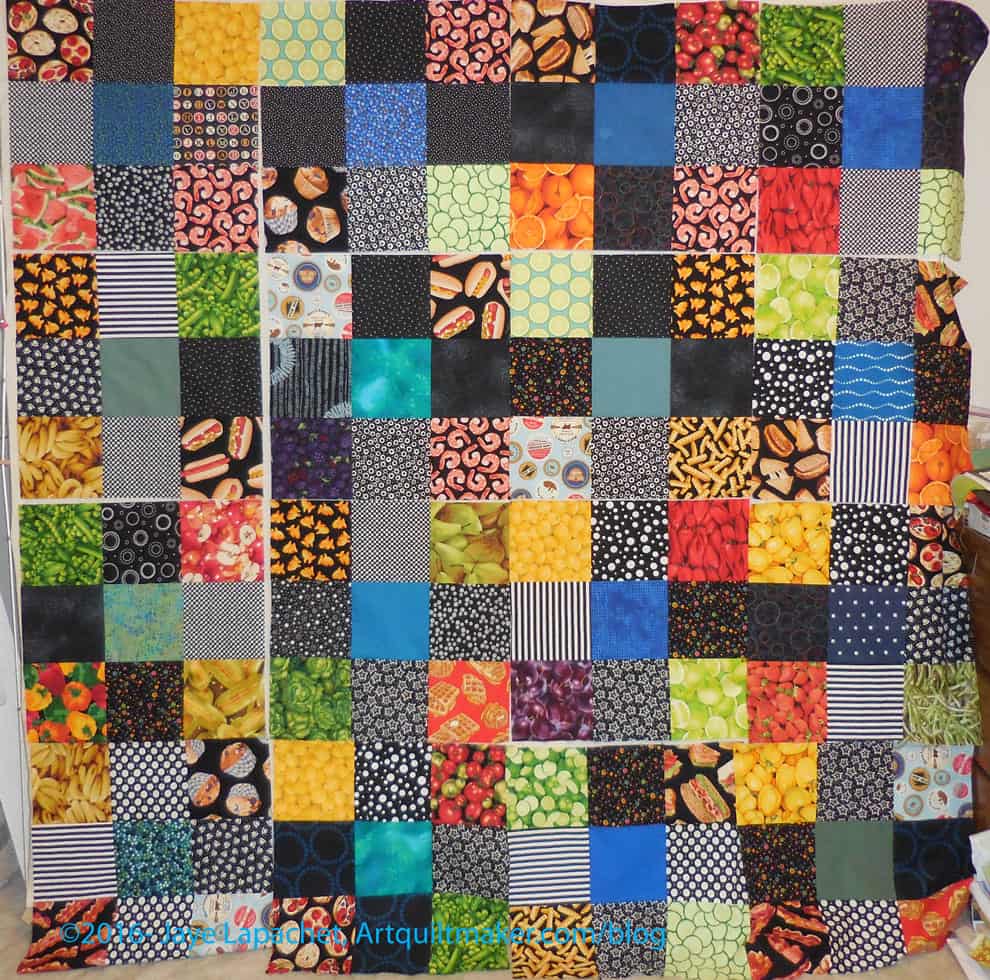
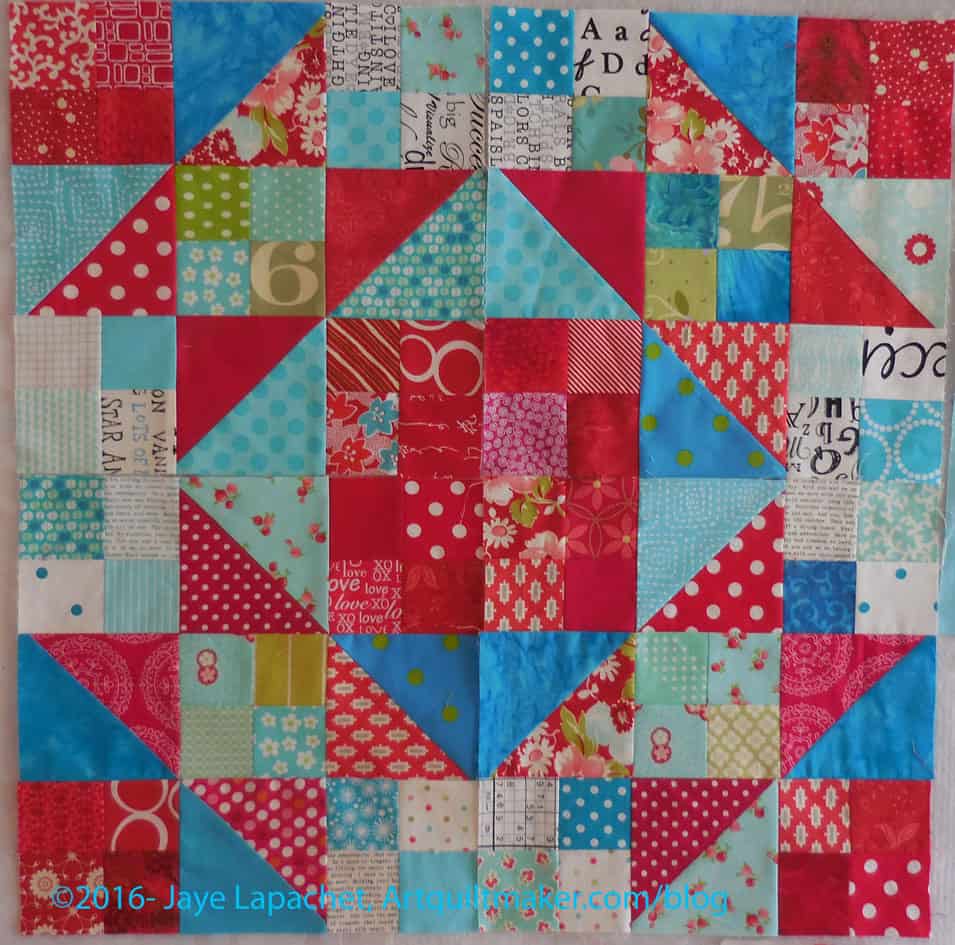
I made a little progress on Food Quilt #3 over last weekend. The center is now done. My next step is to put a thin (not sure how thin) black border around the center and then attach the piano key border to the black border. I have to decide if I want to use a solid back or a white on black. If I use the latter, I want it to have a subtle white design on it.
You may have also noticed that I have broken the bounds of the design wall and the quilt is laying on the floor. Crazy, I know!
I have no idea if this is the last of the blocks. They seem to multiply when I am not looking, so I expect more to turn up.
I do have some pieces left, but they are not in sets for blocks. I had one extra from each block. I think I could match up some of them, but I don’t really know how many will look good enough to include. Thus, I don’t know if I will use them, but we will see.
I made some solid blocks as tests. I don’t know if I will use them in the quilt, but we will see. I’ll have to layout the piece first and see if the solids can fit somewhere.
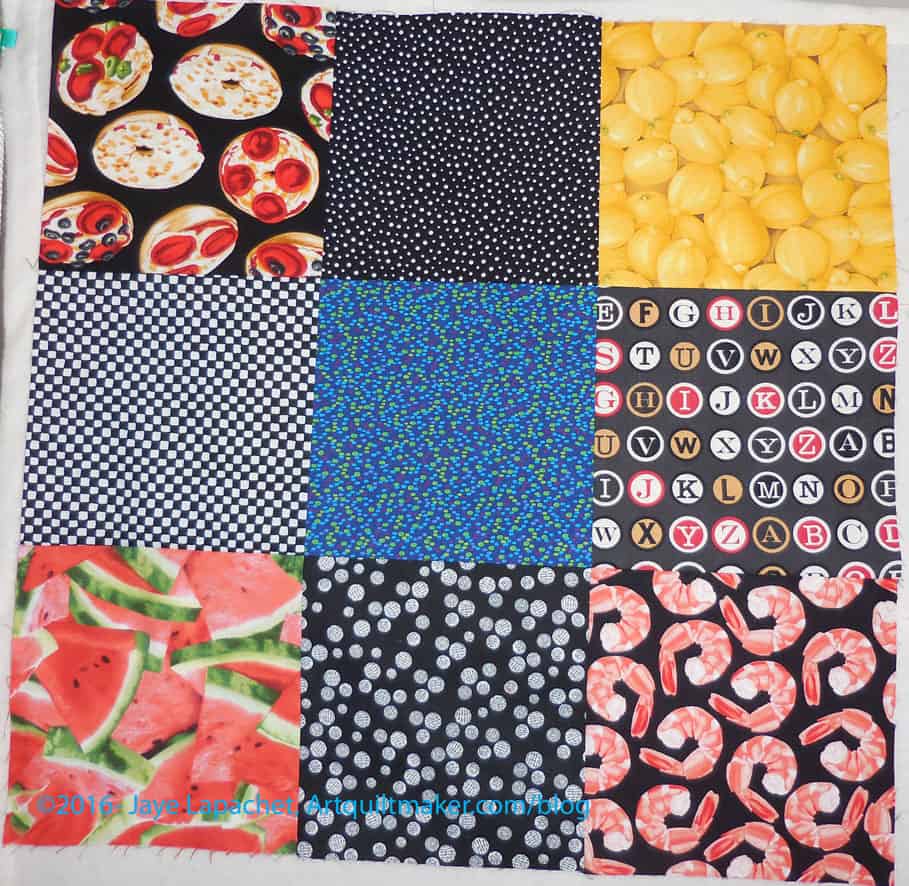
Last Monday was the day to start the latest Food Quilt. The YM wasn’t home and DH was doing his NSGW stuff, so I was pretty much left to entertain myself. 😉 It might be the last Food Quilt, but we will see. After making the binding for FOTY 2015, I started sewing the 9 patches I needed to get this quilt started. I made really good progress.
First Food Quilt 9 Patch6 Food Quilt 9 Patches
The first one was quickly followed by 6 of them.
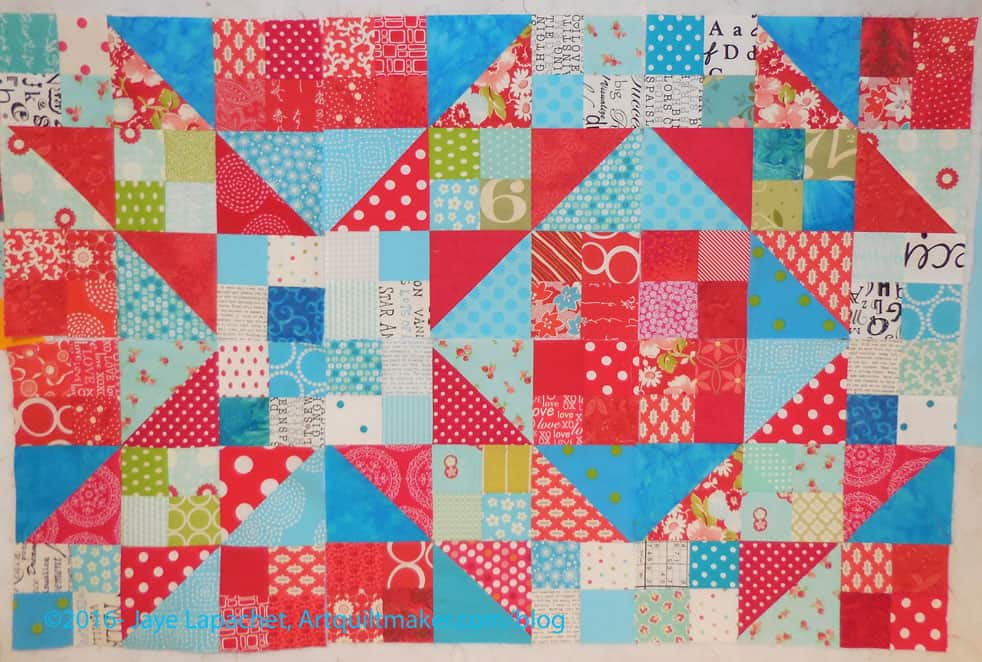
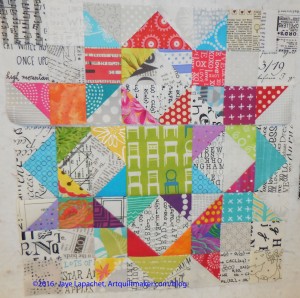
Food Quilt #3- 9 Patches
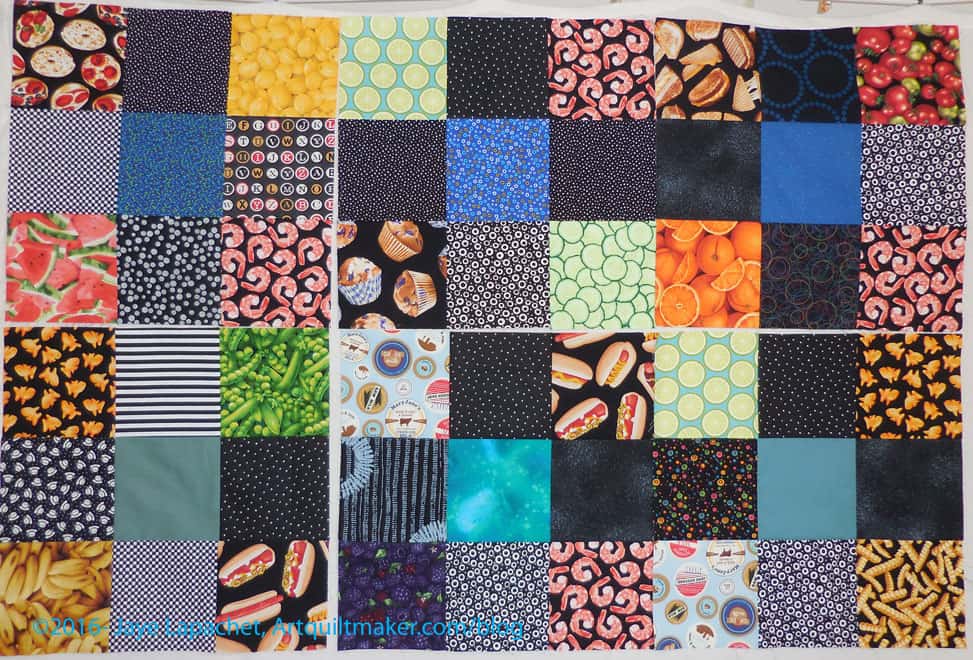
I was shocked to get all of them done in one day. I had some leftover parts. Poor counting. I thought I would use them for the back or for another quilt. Then SIL came over to talk about sewing and we discussed the size. The giftee for this quilt is very tall and would not cover him, so eventually, after discussing rearranging the blocks, I decided to make 4 more blocks. I will use the extra parts as a starting point.
Food Quilt #3 – Blocks Cut
After making all the 9 patches, I decided I would see what cutting the blocks up looked like. That is always a fun exercise. I thought I would do one. In a short amount of time, I did them all.
I’d like to do a different layout than the other two. Food Quilt #2 has a kind of zigzaggy look and Food Quilt #1 has a more traditional one block surrounded by sashing and cornerstones look. I am toying with putting the blues together in the middle. I think it looks good. If I do that layout, I’ll have to repress some of the seams. The one thing I am contemplating is whether I want the food fabrics touching. I plan to look online at some layouts for the Disappearing 9 Patch.
I think I will be able to get this done relatively quickly. After I make the extra blocks, the holdup will be the applique’ on the back and I have a good process in my head for making the templates, so it is a matter of sitting down to do it.
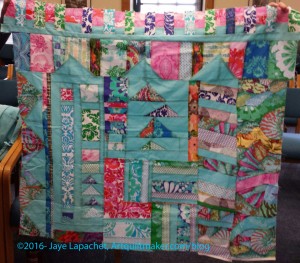
That big project I mentioned yesterday? I finished the Fabric of the Year 2015 top, back and binding over the weekend. The first thing I did Saturday morning (after tidying up, writing in my journal, drinking tea, starting the laundry, walking and making breakfast for the family) was get down to business with FOTY 2015. That thing has been on my wall long enough and I wanted to move on.
FOTY 2015 Top – Finished
I finished the top on Thursday or Friday. I basked in that excitement until Saturday before moving on to the back. After the massive ironing session I did on Friday, I had some nice pieces I wanted to use. I decided to make the back with fabrics that I really liked.
I went back and forth about borders. Borders finish the look of the piece and stabilize it, but this quilt wants a binding, but no border, so I stay stitched the edge and will have to hope for the best in terms of squareness. At the moment it is mostly square, but quilting is the wildcard.
Speaking of quilting, I also had it in my head to quilt it myself. I really want some straight line quilting. After convincing myself that quilting it myself would be a good idea, I backtracked. I’ll take it to Colleen. I have 3 other projects to quilt. Adding another is not a good idea.
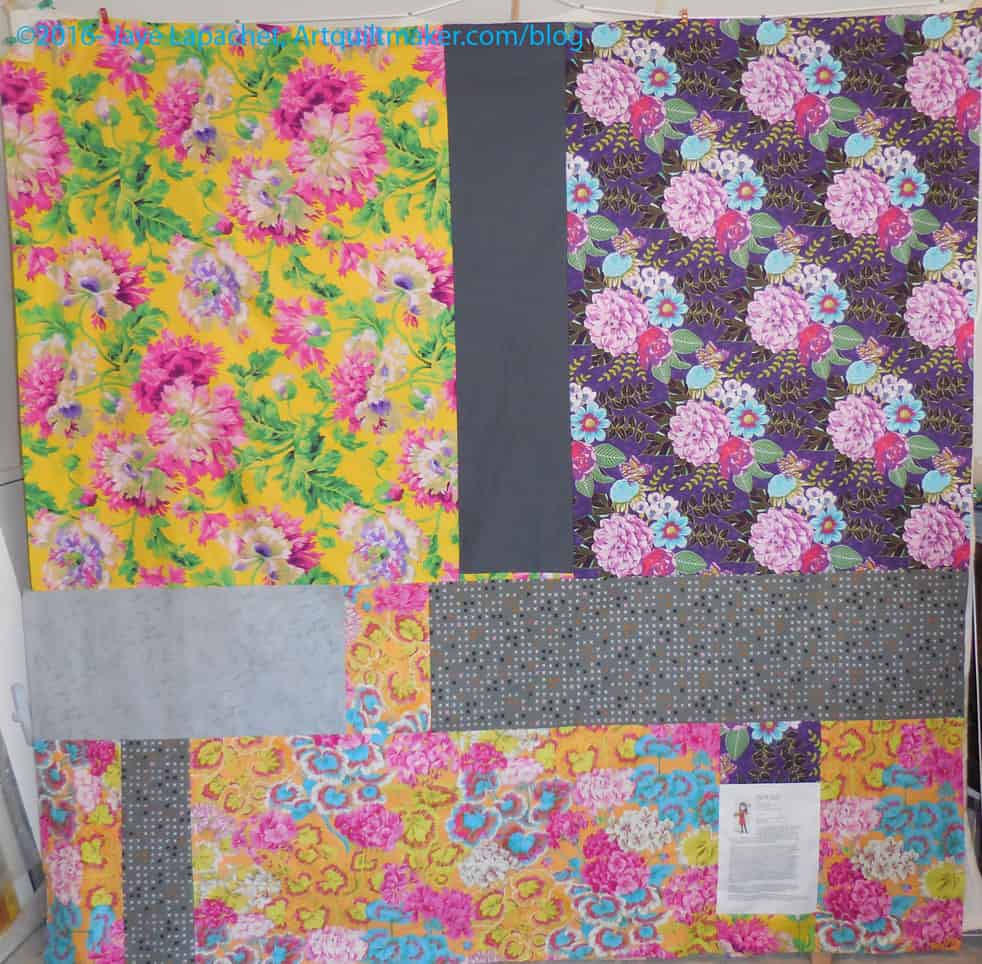
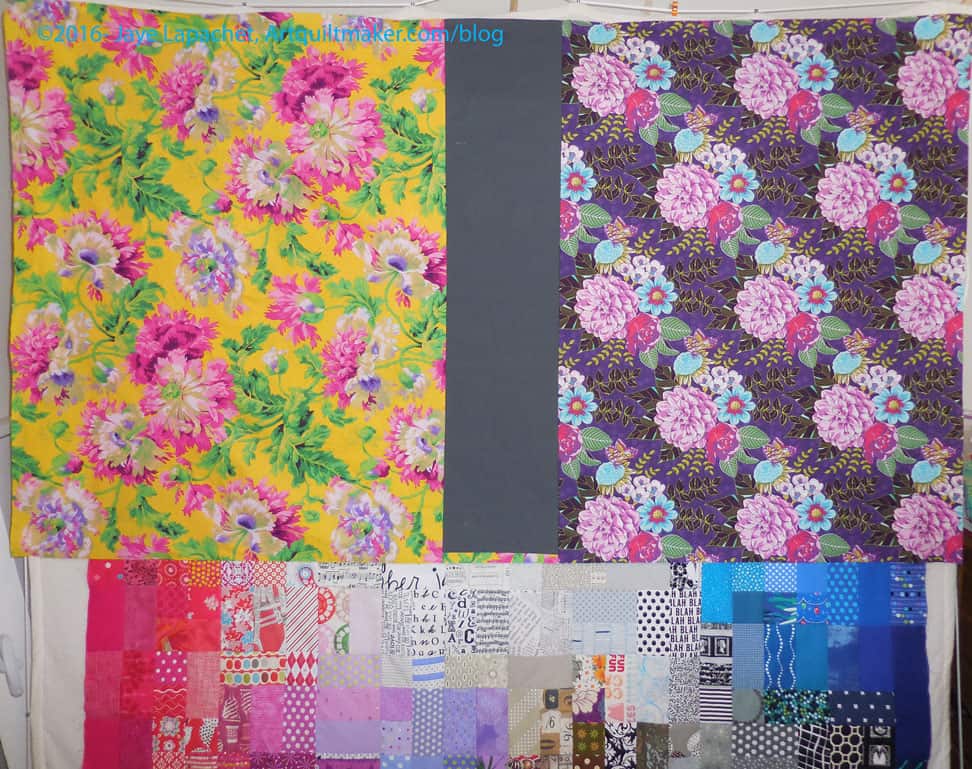
FOTY 2015 Back
So, once those tasks and mind games were over, I made the back. Pressing fabrics the night before was a good idea. I found two pieces that I would love as dresses. I don’t have enough so I decided to make a back with fabrics I love.
As you can see, lots of Philip Jacobs, though that purple is by someone else (Patty Slottinger???). I tried to find more of it, but no luck so far. It was a cursory search. I added in the greys just to give the florals space to breathe.
FOTY 2015 – Half the Back
I started to sew to avoid the label for a little while, but after making half the back, I had to deal with the label. That meant testing the printer. Cyan was out (I know gremlins print while I am not home and use up all my ink), so that meant locating some print cartridges and finding the cyan. I had one cyan left (WHEW!). Once the printer chores were complete, I created the label, printed it on paper and then copied on to fabric.
I think labels are vitally important, but making them and sewing them in is a chore. This time the bottom half of the back went very well. Actually the whole back went very well. There was only one spot where I had to insert a small piece. All the other pieces were fairly large, which made process of the back go relatively quickly.
I made the binding on Monday and now the whole package is ready to go to the quilter.
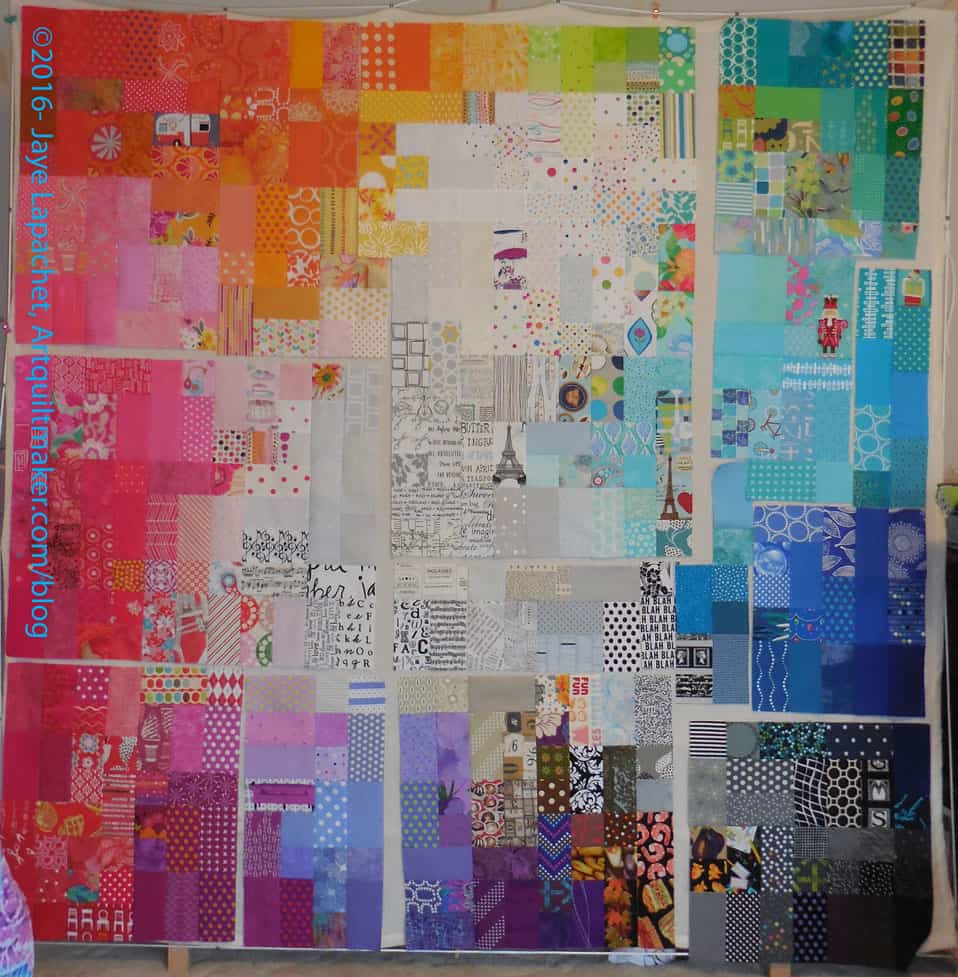
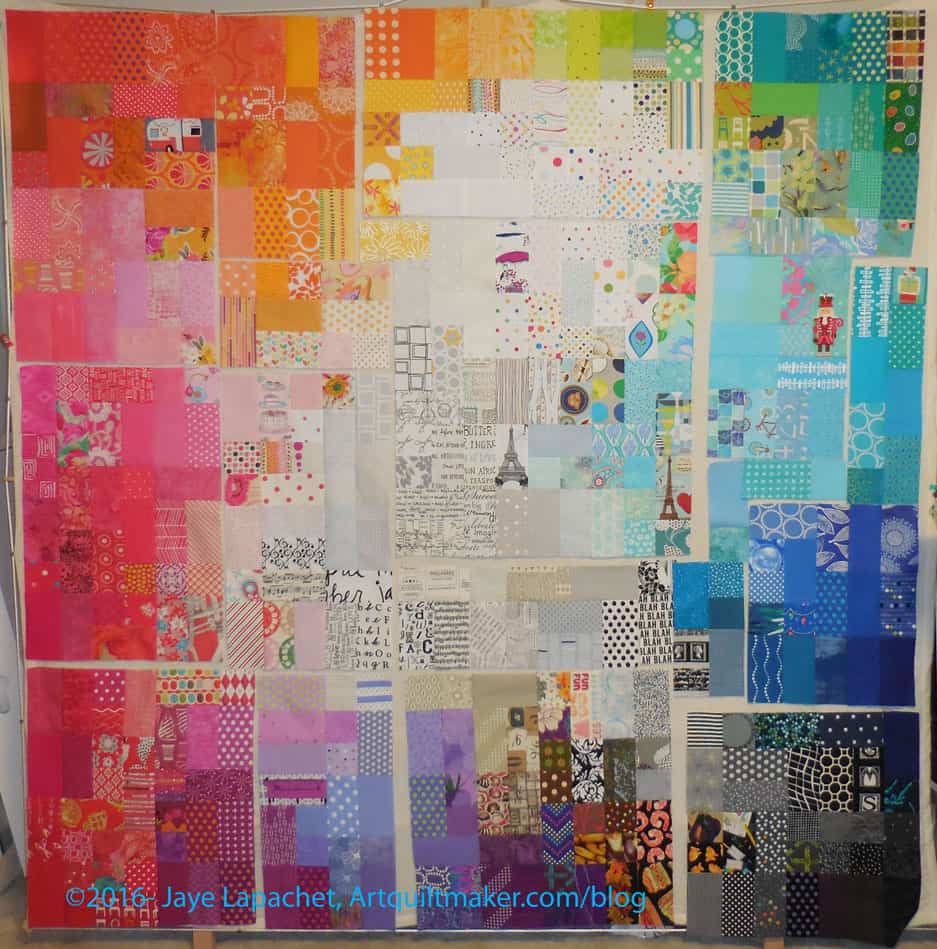
I finally got my ducks in a row and got back to piecing/chunking Fabric of the Year 2015. The last time we talked, the piece was in about 9 sections and I was facing some serious partial seaming (left).
After taking the 9k to the repair person (look for a post on that soon), I did a bunch of work and decided to take some time and work on this piece. I could sew a few seams, avoid the partial seaming until the last second and make some progress.
FOTY 2015 – nearing the end
It was great! I have about 2/3ds of the top piece and nobody died. I didn’t have to rip much and the piece looks great!
I was so pleased at how the partial seaming went. It went as planned and looks normal. No puckers or pleats. I can’t tell you how happy that makes me. I didn’t learn partial seaming in any class. I watched Eleanor Burns do it on TV and went from there. (I know I have to get the lesson ready for the Sampler class. Have no fear! In the near future, I will make sure you and Frances know what I know.)
Of course the hard part of the partial seaming comes next. I can’t sew anymore “large” chunks together because of the blue section, which requires some fancy footwork (or hand as the case may be). I was called away before I could get started and keep looking at the blue section wondering which seam will go next. I think the key will be to just pick a section and go for it. I am also convinced that a bolt of lightning will hit me and I will think, “why didn’t I think of doing that section?”, then the whole last third will come together and I will be finished.
Until the bolt, however, I think the key will be to just pick one and go for it. Ripping might come up, but that won’t kill me.
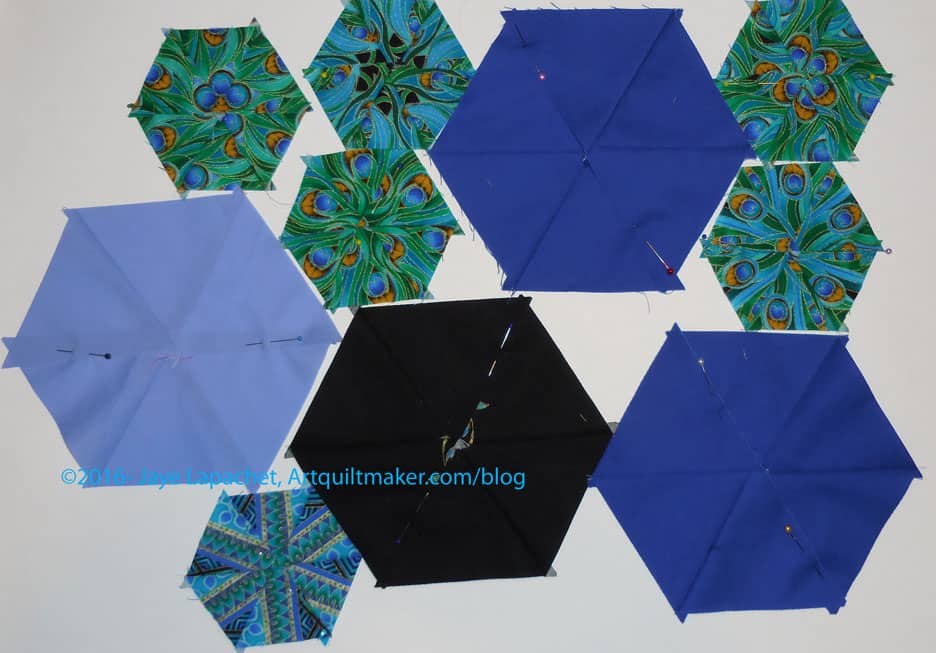
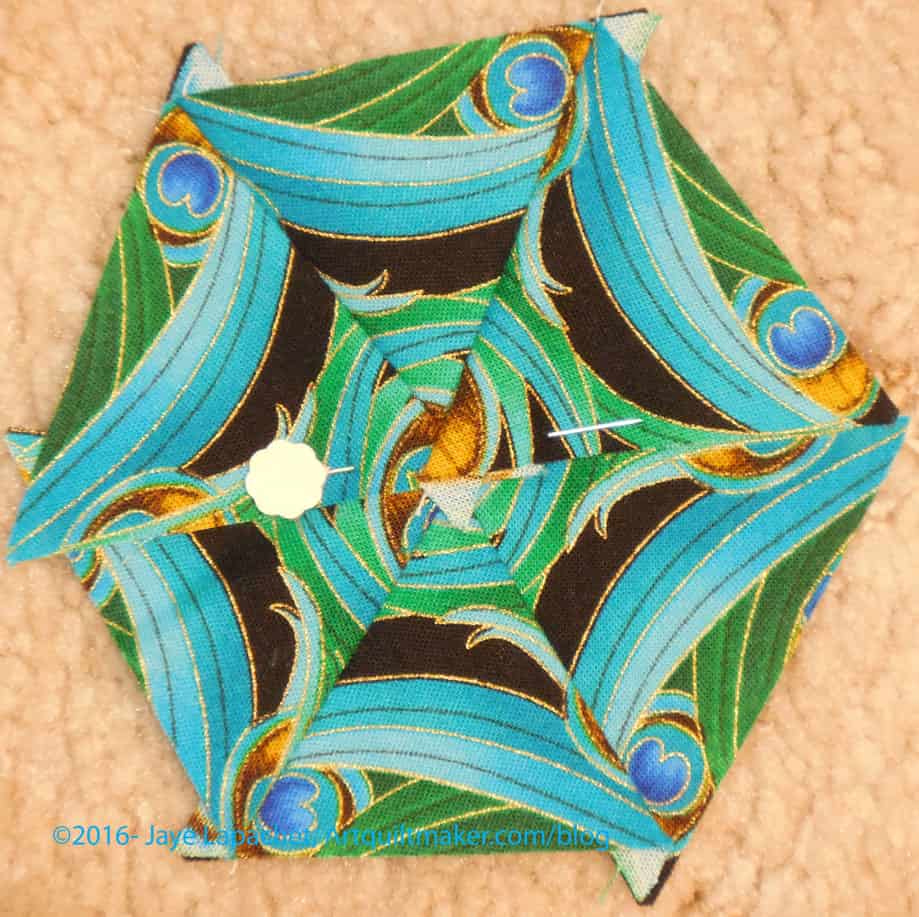
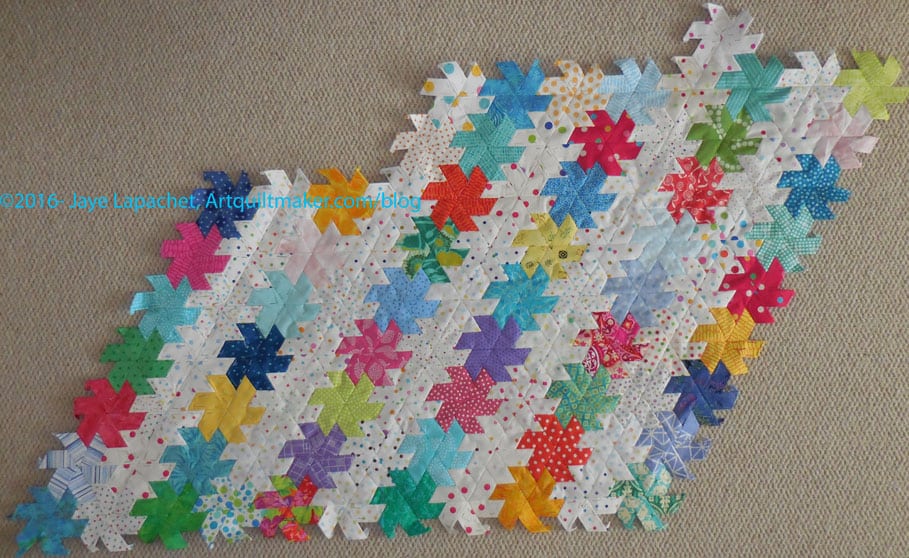
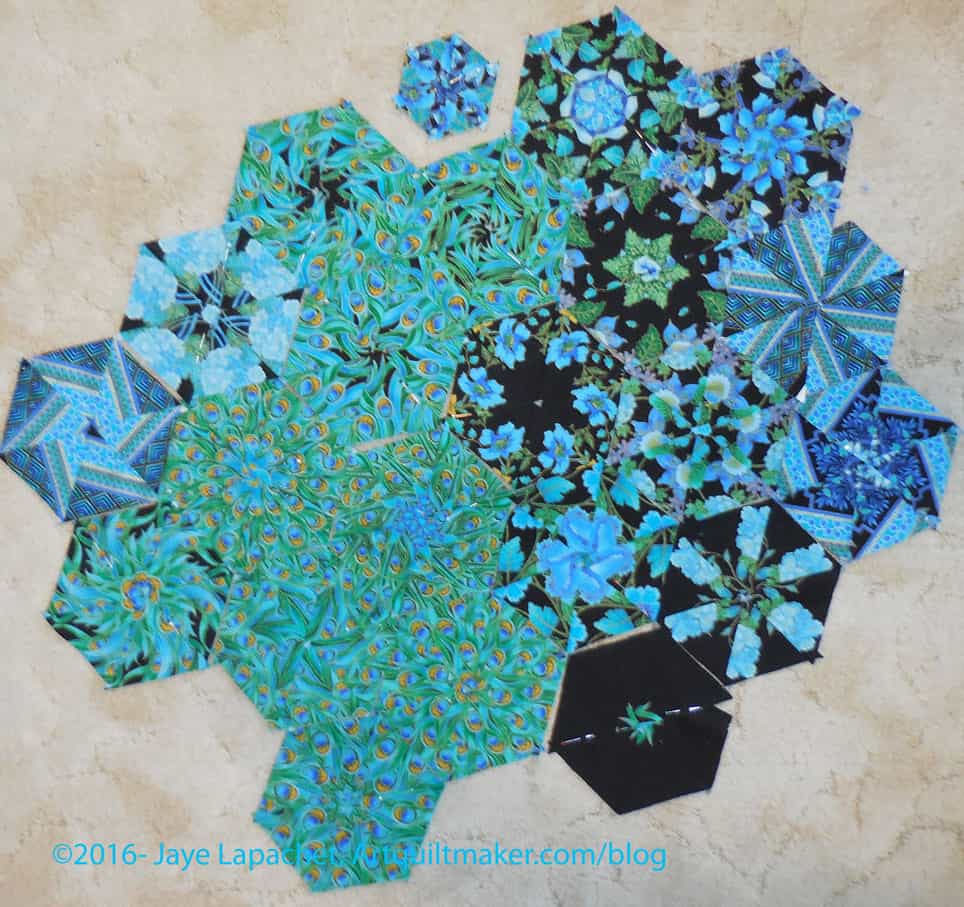
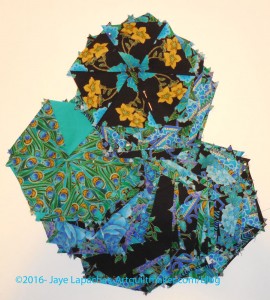
In between sewing FOTY together, I sewed more Peacock blocks. I think the pieces are breeding in my fabric closet. I found more pieces for the large blocks and a ton more of the small pieces. I must have been tired to think I was done.
Peacock blocks, batch #2
Again, in between sewing together FOTY 2015, I sewed Peacock blocks. This batch contains some of the ugly stepchildren. Some are cool. Some will be a challenge to incorporate.
Swirly mini-Peacock
There are a few that I really like. This one looks like draped fabric is at the bottom.
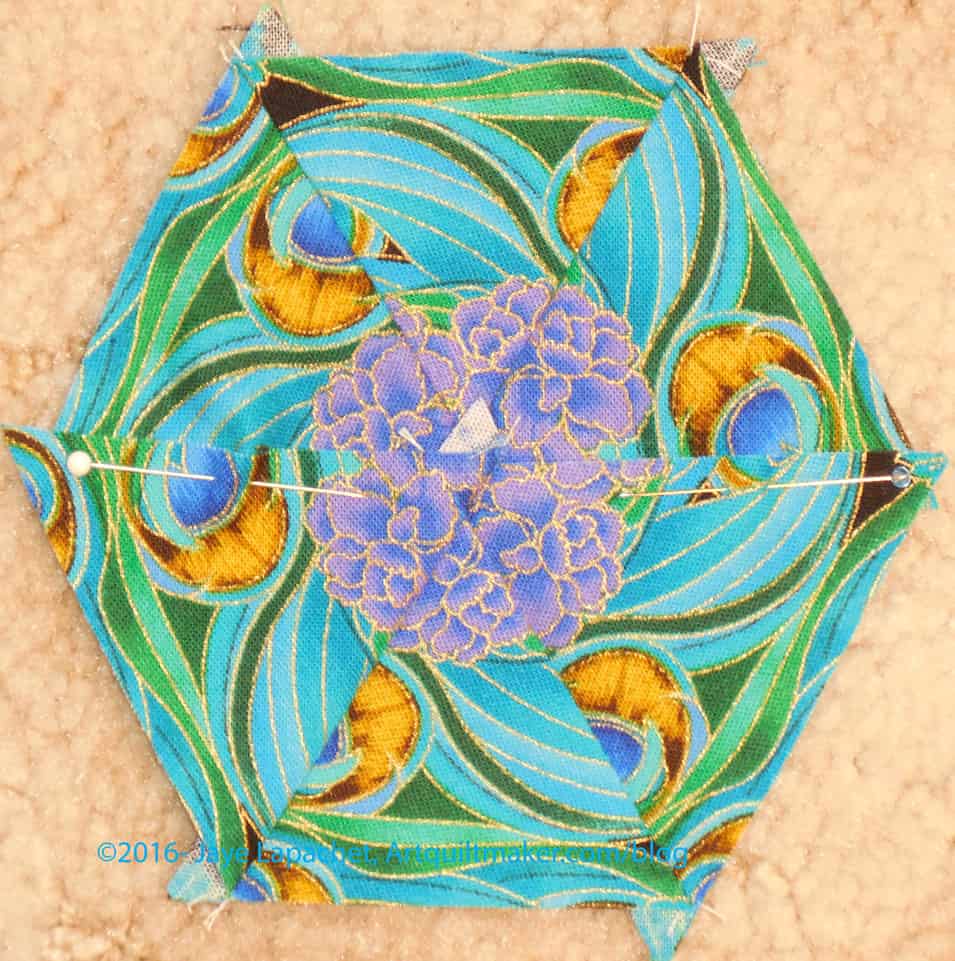
That weird white spot is actually the head of a flower pin. I have not sewn these blocks into hexagons, so that they can be sewed together in rows later and I will avoid the Y Seams. In the meantime, I have used pins to keep the two halves together.
Flower featured Peacock block
Another one I like has some of the flowers featured in the center. The blue and green swirls also look like they are pointing to the flowers or curling around the flowers. Such a cool effect.
I know the last time I talked about this piece was back in February. I have sort of been working on it, though there have been long stretches where I have not worked on it. I got a little fed up because sewing big sections to the big main piece is really a pain and I didn’t want to do it. It made me think twice about La Passacaglia, but that is a tale for another day.
EPP April 2016
Finally, I put a new section on and it is looking good. A little boring and staid, but good.
I am going to try to put one or two stars on the main piece instead of larger secondary pieces. It means more handling of the large piece, but perhaps the duration of dealing with the main section will be less.
I made some progress on getting FOTY 2015 sewn together.
I have big chunks, so ~6 seams and I am done.
Sort of.
I have some problem areas that need partial seams or something. I haven’t quite figured it out yet. Partial seams is the best I can do now, but how is the challenge.
Light area problem child
Problem area #1
I think you will have to enlarge the photo (there still may be a problem with enlarging the photos. Sorry, if that is the case; I am working on it) to see that yellow that lines up nicely with the top chunk.
It doesn’t line up with the bottom chunk.
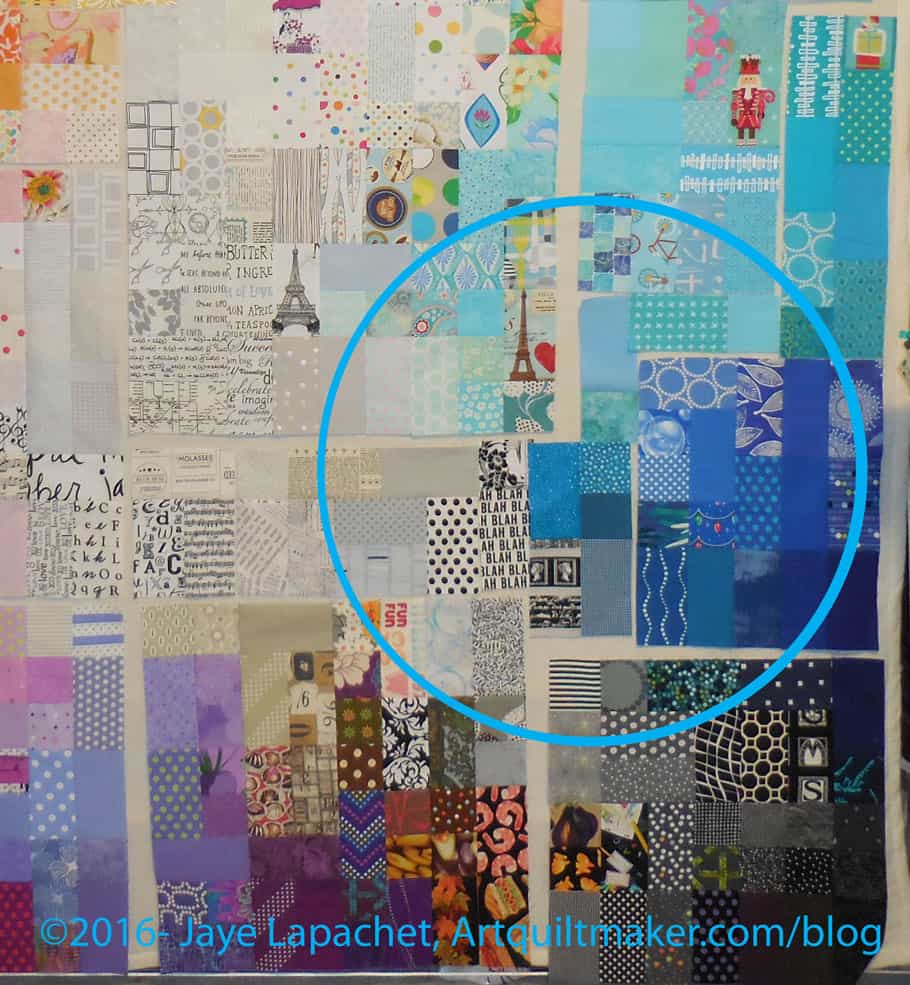
Blue area problem child
Blue Area Problem child #2
This area is a little more difficult. There are more pieces that are problematic and there are more of them.
None of this is mission critical. I will get through it and it won’t be a huge drama. It feels dramatic at this moment. Tomorrow is a new day and things will look different.
I blew through the layout stage and am on to piecing.
Well, relatively anyway.
I gave myself a certain amount of time to do the layout. The time period was about two weeks and during that time, I didn’t take my cutting table or other in-process projects out of the fabric closet. I only allowed myself to work on other projects as leaders and enders and focused on getting this laid out.
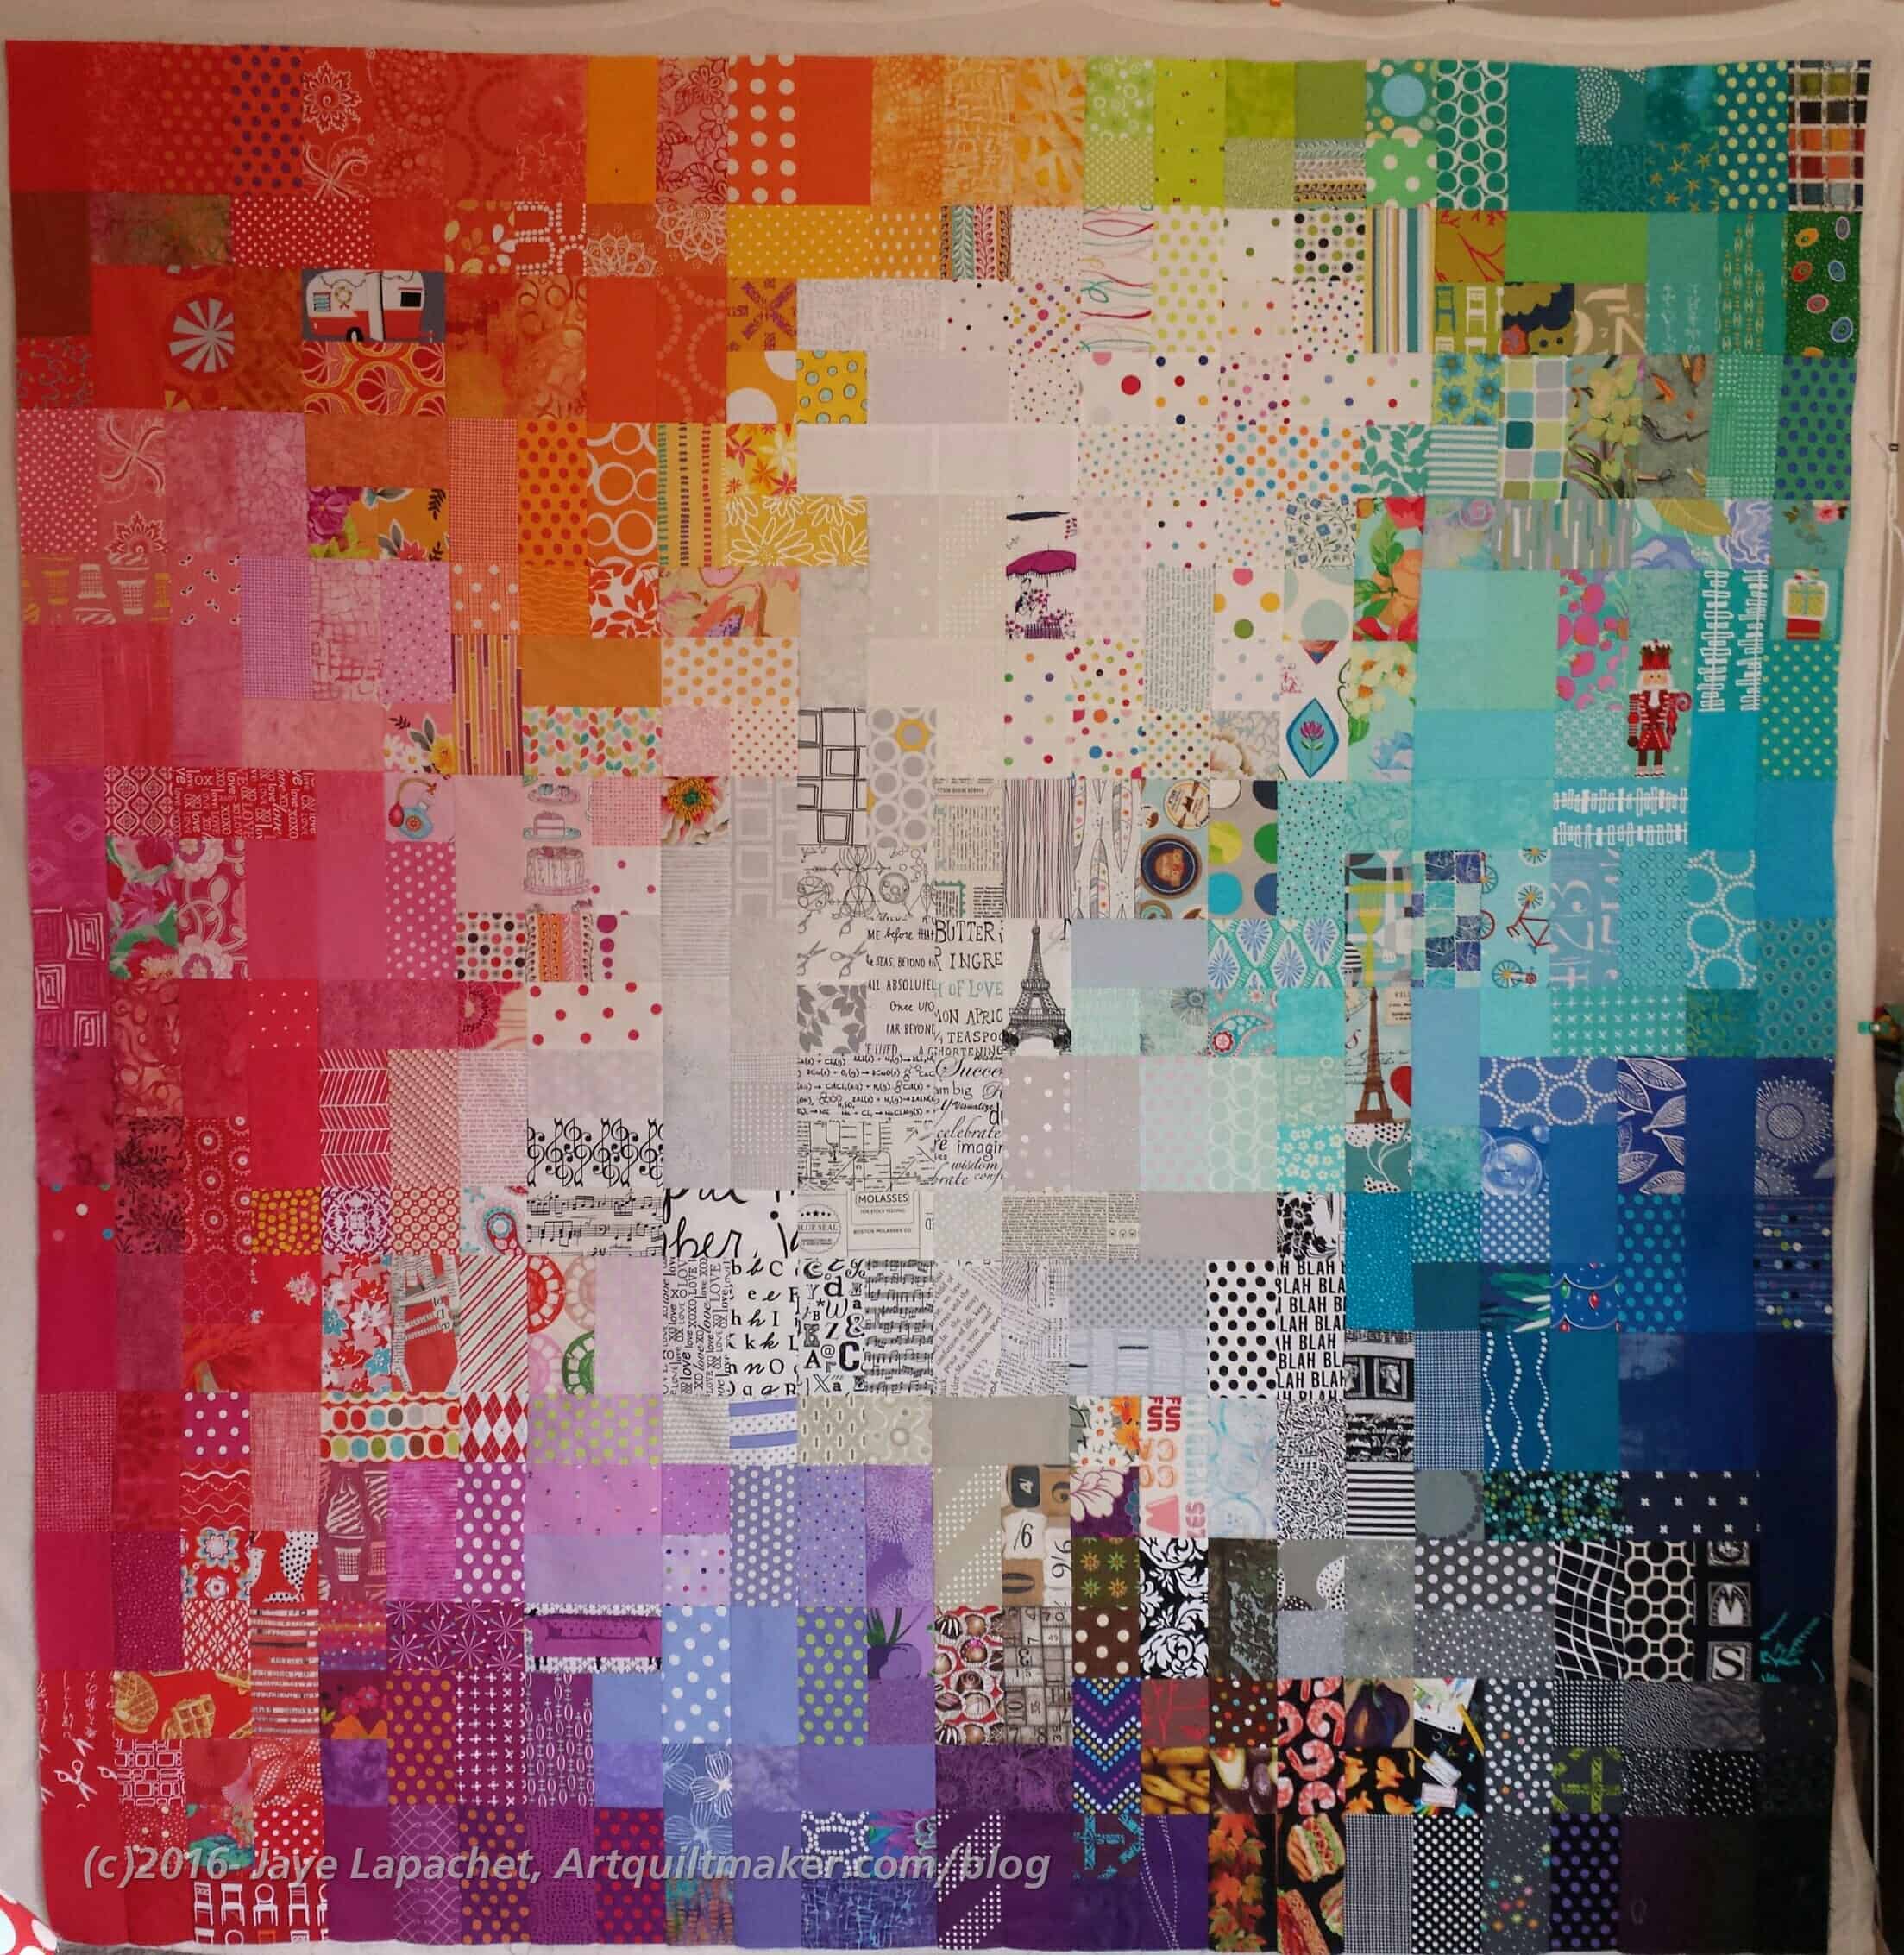
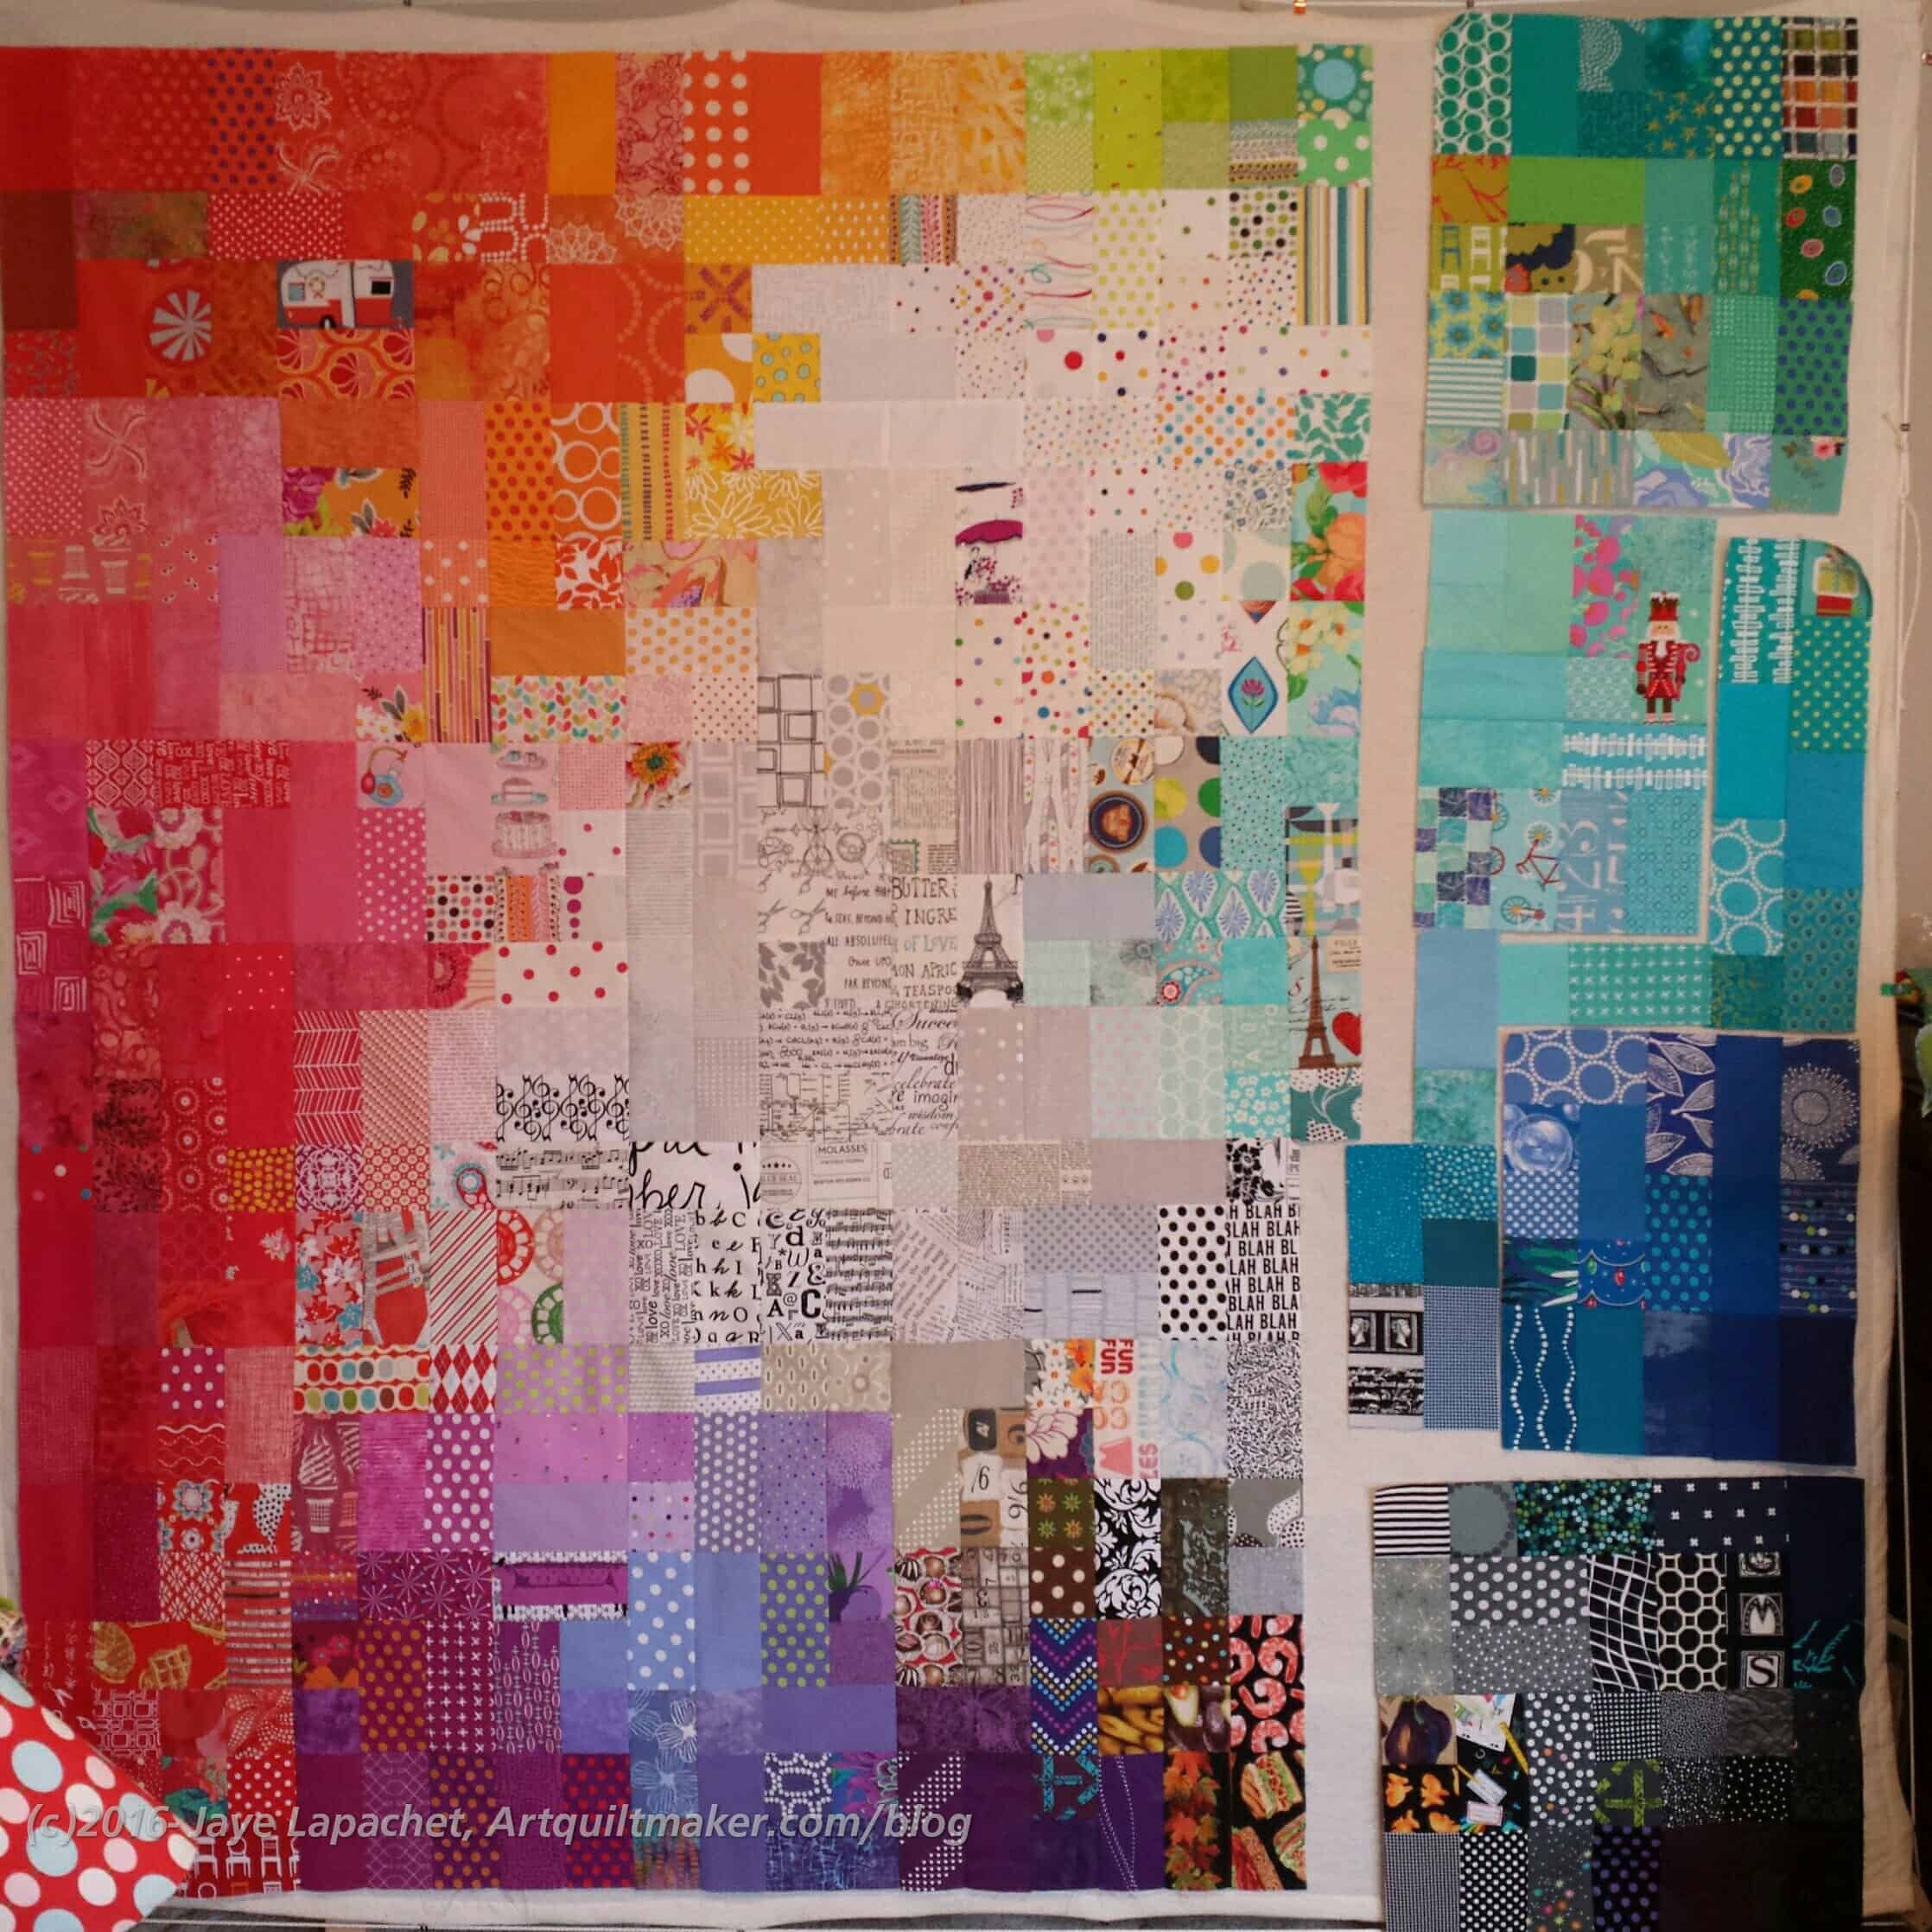
This year’s piece was harder to arrange, because the fabrics I used were really different colors than each other. I am not sure why, because individually they don’t look different. The differences in each hue don’t really show up until you put two oranges or pinks next to each other and try and decide which has a lighter and which has a darker value. It is very strange. If I had thought of it I would have kept track of manufacturers and designers to see if I bought different ones this year than last year. I didn’t know that this would happen. It would have also meant that I would have had to keep track last year as well. More data would be needed.
The too-small design wall was a real problem this year, I think. I did not cut the patches down to accommodate the design wall as I did last year. I just crammed them all on the wall. That means that I found some places where I was short. You can see some white spaces on the bottom (near right hand corner). This problem showed up when some of the fabric was taken up by seam allowances and I was able to line patches up more evenly. I have to rummage through my leftover pieces and find some to fill in.
Most of the piece has been sewn into chunks. The chunks are not even because I had some rectangles arranged horizontally and some arranged vertically. With the squares it made for interesting piecing.
The difficulty was what it was and I got the feeling that it was done at some point and started sewing. I talked a little about the sewing when I posted about the Peacock. It is all about leaders and enders, because I only want two unsewn patches off the wall at a time to ensure the piece stays laid out the way I intended.
As I said the other day in the latest donation blocks post, laying out FOTY 2015 doesn’t make for a lot of tangible production. While I enjoyed making the donation blocks, I did need a little variety and the Stepping Stones parts were handy.
Four Stepping Stones blocks – April 2016
I enjoy these blocks and seeing the way they will be laid out makes me very happy. Turning each on a little bit makes a huge difference.
Even though I may need the squares for the layout of the Carpenter’s Wheel blocks, I have used some of the low volume prints for the white space in these blocks. I have plenty of fabric for the [mythical] Carpenter’s Wheel layout and can always cut more.
6 Stepping Stones blocks – April 2016
Making a few blocks always leads to making more and the six shown give an idea of what the quilt will look like and makes me want to make more.
Based on the layout I devised for my nephew’s Stepping Stones quilt, it looks like I will only need two more blocks and then border blocks for the width. I thought I measured 8 blocks across my bed, which doesn’t account for border blocks. I want to make the border blocks to finish the design. There are two blocks around the whole edge of the previous SS quilt and I could eliminate those if I thought the width was too big. Measuring next, I think.
I am really pleased with how the blocks look. Now to get FOTY 2015 off the wall so I can layout all the blocks I have and see what I am facing. After months of feeling meh about quiltmaking, I am finally excited about several projects! Yay!
As I work on FOTY 2015, I also have to work on another project in between each two patches that I sew. I sew two patches from FOTY rows with two patches from something else. This helps me keep the FOTY pieces in order. If I get too many of them off the wall at once, the order is mixed up and all the work of laying them out is for naught. Of course, even having just two patches off the wall does not guarantee that they won’t get out of order, but I do my best and some ripping does come into play.
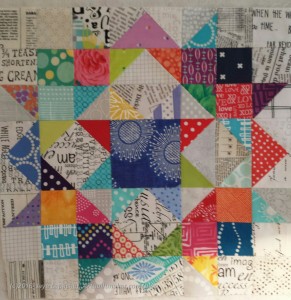
As you know I have been using donation blocks and the Stepping Stones blocks (look for a post soon) as leaders and enders. I got a little tired of the donation blocks and ran out of HSTs for the Stepping Stones, so I turned to the Peacock blocks.
I thought I thought I still had a gazillion seams left to finish the blocks, but since I hadn’t worked on it in over a month, I couldn’t really remember and just focused on getting the gazillion down to a billion. 😉
Last of the Big Peacocks
Amazingly, I really didn’t have that many blocks left to sew and I finished sewing the large blocks yesterday. Above there are 21 “big peacocks” and that is all of them. With the blocks I made last time, I have about 60 “big peacock” blocks.
Baby Peacock
This does not account for the smaller blocks, which I cut from a smaller strip and will see about using in some way. I have more of those to sew, but will do that when I sew the rest of the FOTY 2015 together. It will be nice to be able to leap into laying out another quilt right away.
At least I think it will be nice. It might be too much after the work on FOTY, but at least the blocks will be ready when I am.
I got a brief glance at my Improv Round Robin piece before Ruth whisked it away to work on.
More of the Philip Jacobs print is showing up and that is creating some interesting results. I do think the piece needs more space, so I will add more solid or, perhaps, someone working on it will add more solid.
I made more progress on the Carpenter’s Wheel project over the weekend. I worked on this one in between working on the Cutting Corners donation top. I put in some newer fabrics and that makes me very happy. I am totally in love with that flower print I used for the center. It is by Studio E and that blue is fantastic! Especially since it is not turquoise. 😉
Now I have a dilemma. I now have 10 blocks. That is a very awkward number with which to lay out a quilt. I am going to look at the blocks and see if I can eek out two more unique layouts. If not, I may make two more of my favorites. I will also try to lay the blocks out in different ways to see if there is an interesting layout which will work for this piece.
The change to Daylight Saving Time is a nightmare. What a dumb idea or an idea whose time has passed. I changed the clock by my bed the night before so when I woke up, I saw that it was already later than usual. For some reason I felt awful. It might have been the dread of knowing that I had lost an hour. I got up and got some caffeine and went up to my workroom.
I needed to just sew, so I looked at the projects I had that were at the rote sewing stage. After a very short deliberation, I pulled out the Peacock blocks and started sewing.
Peacock Blocks
I don’t remember how many sets I cut up at the Retreat, but the prep I did there allowed me to just sew pieces and parts together. I now have about 40 blocks. When I say blocks, I mean two halves of blocks because I can’t sew the pieces of the blocks together until I lay out the entire quilt. Once I lay it out, I will sew it together in rows.
It was great to just sew. I only had to sew straight seams. I didn’t have to make a lot of decisions beyond how to press the seams and the stack of blocks got bigger and bigger.
I wanted to do more, but don’t I always? That was the kind of sewing that I needed. I finally feel like I am making progress.