BAMQG Quilt Retreat

I am not sure if I will get through all of the retreat info in one post. It might just be too much. We’ll see.

Retreat Location
Retreat Location

The retreat started on Friday, but I didn’t get there until mid day on Saturday as we were traveling for the Native Sons back from Grand Parlor. I was a commuter, so I drove back and forth. It is about an hour each way, but after the intense people time of Grand Parlor, some quiet time in the car made me more human at home and at the retreat.

Two things that happened right as I got there, practically before I got set up, was that I got a bag of goodies and I won a prize! The CQFA Retreat does not include goodie bags or prizes (someone has to organize all that). It was fun.

Mystery Quilt in process

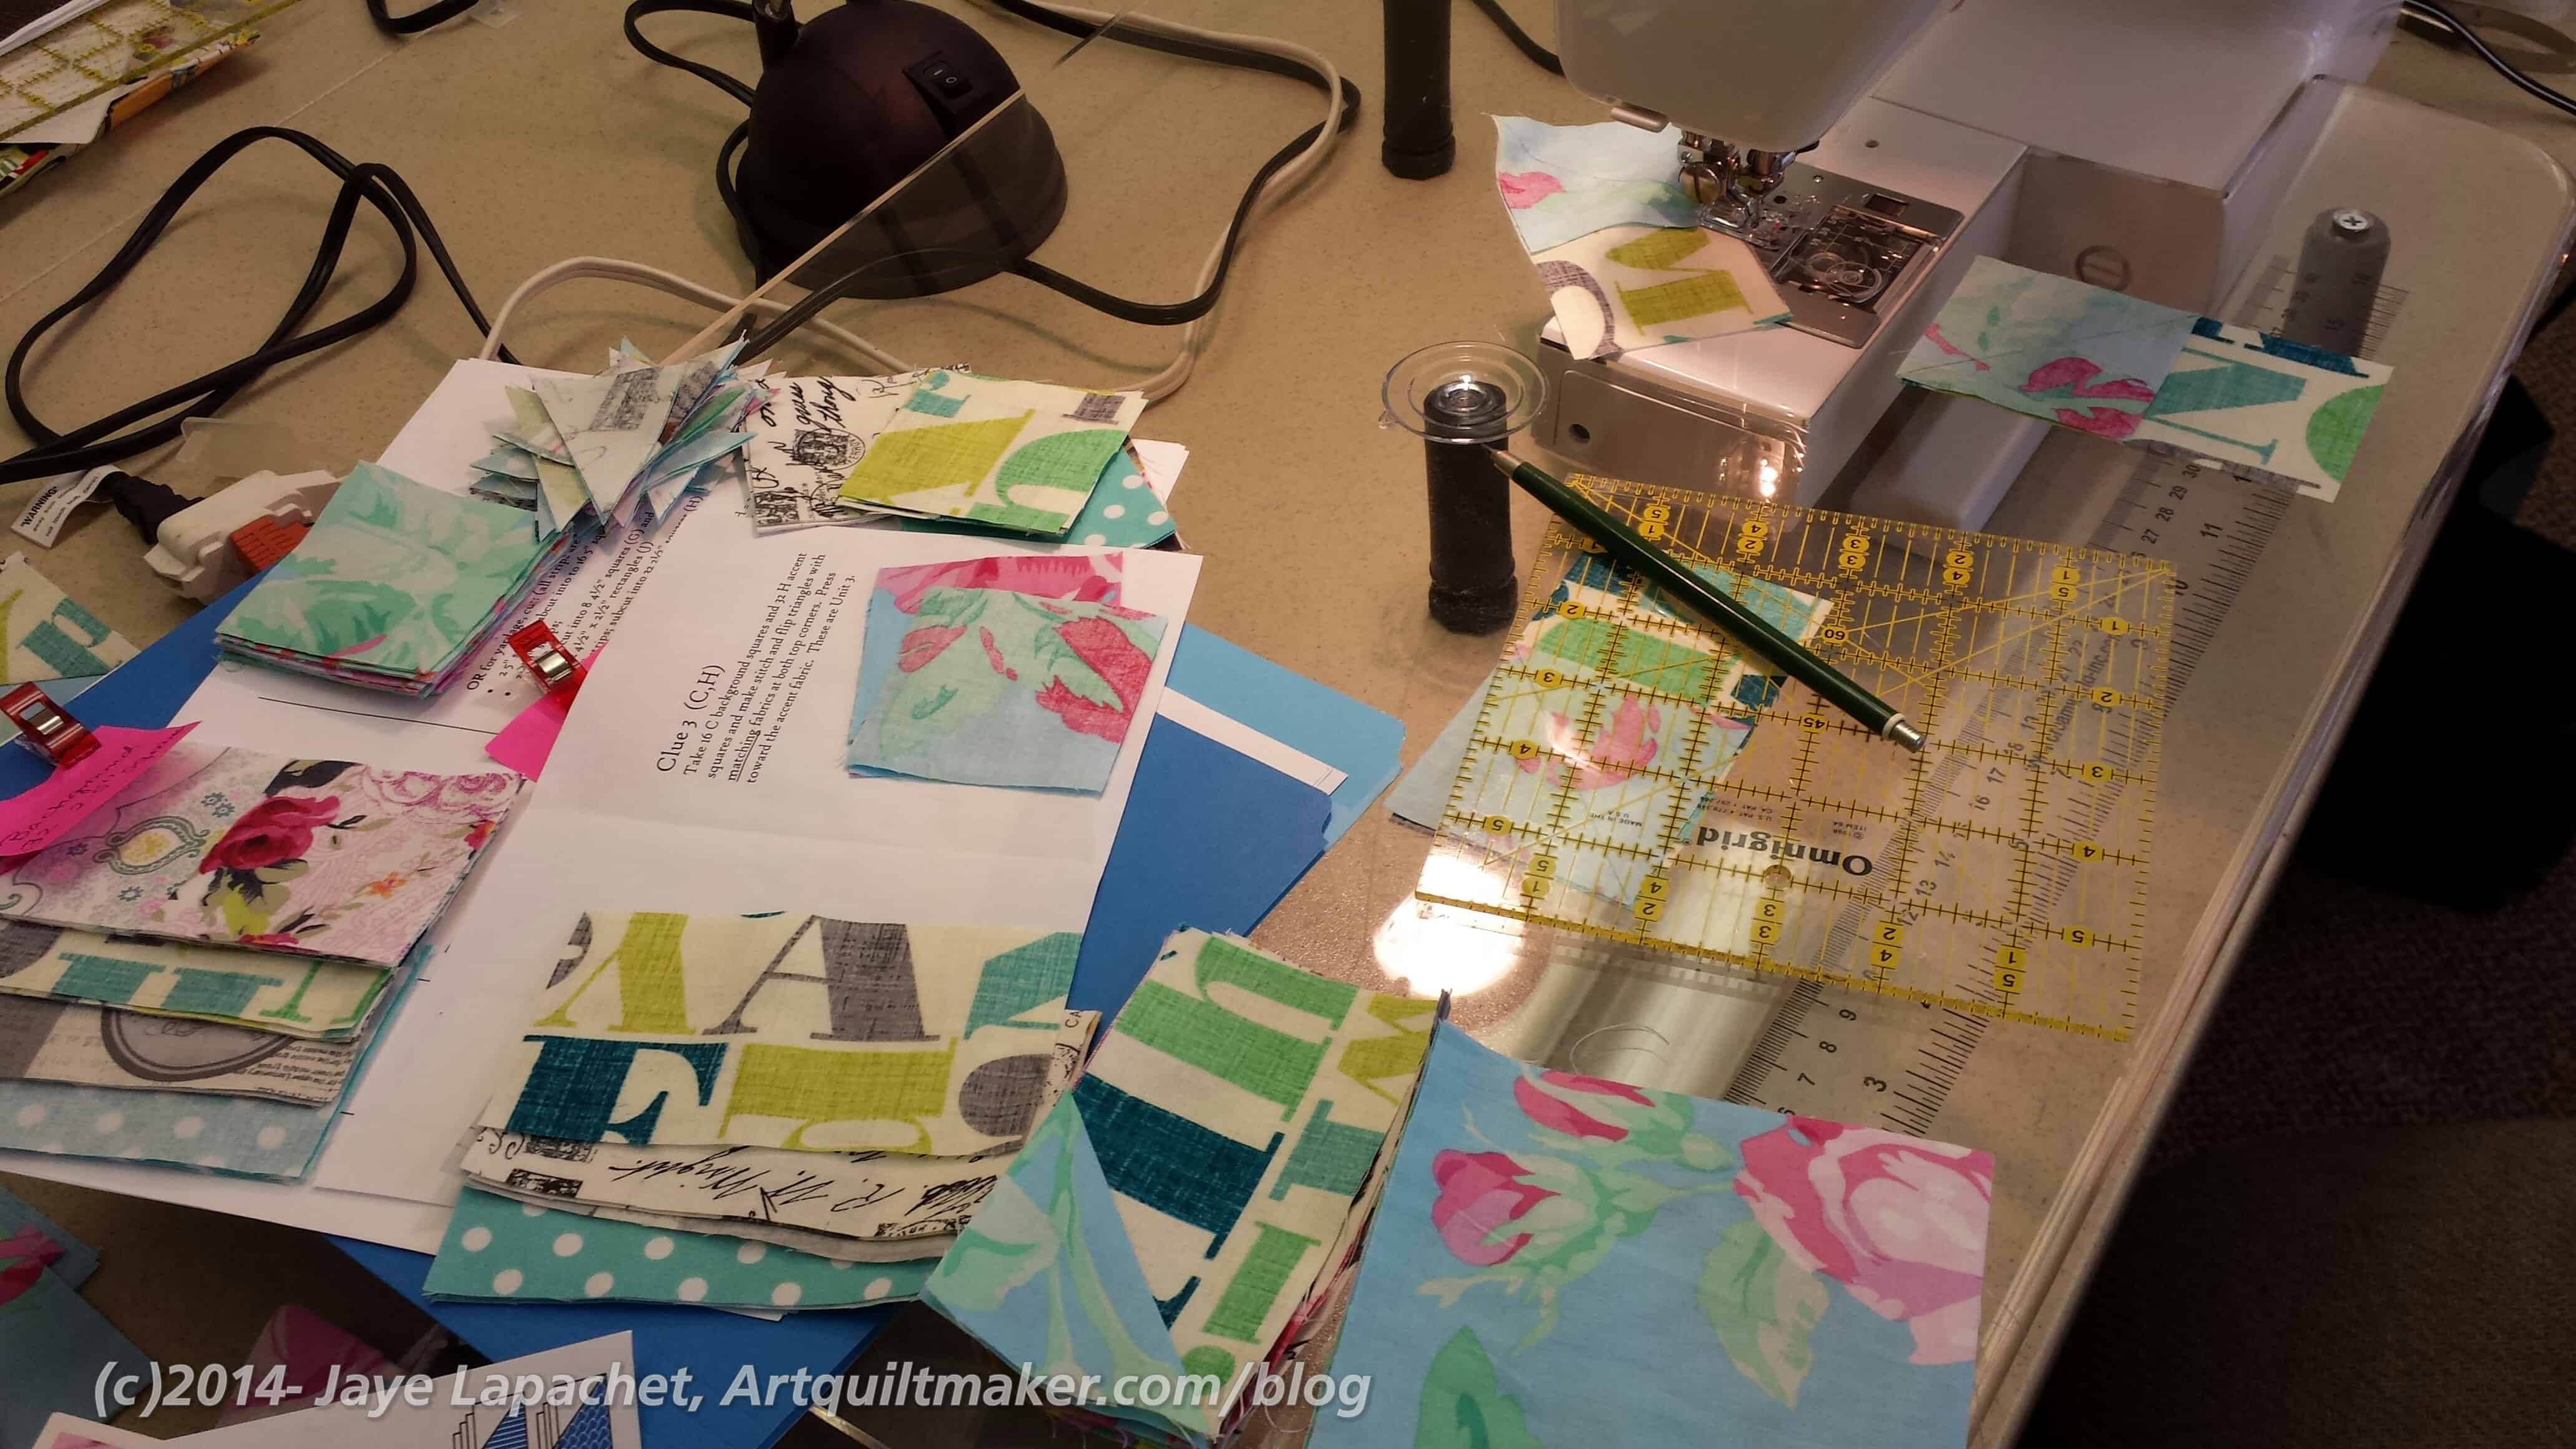
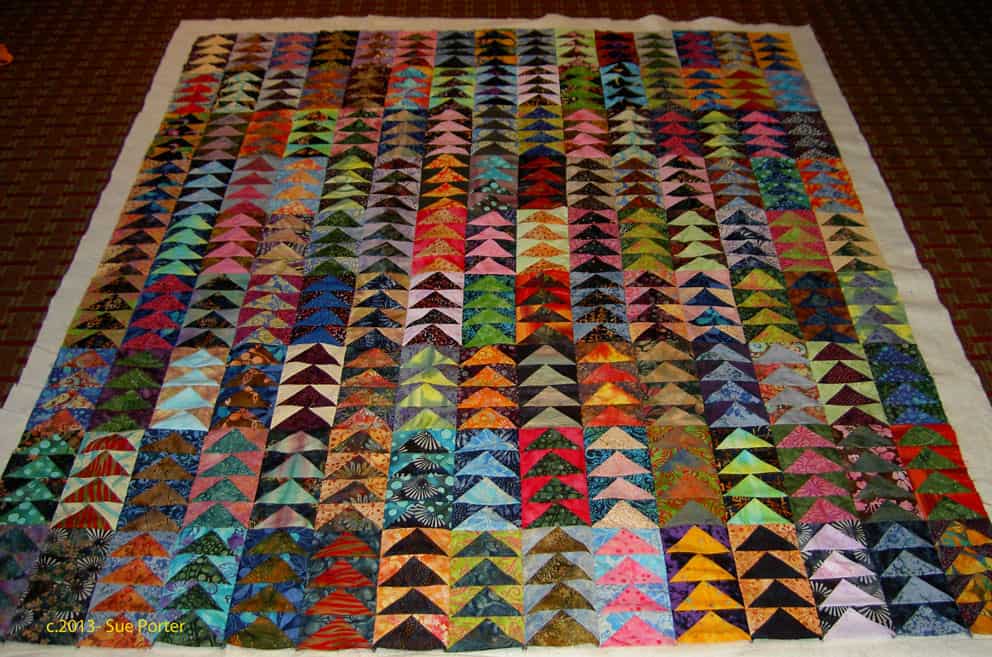
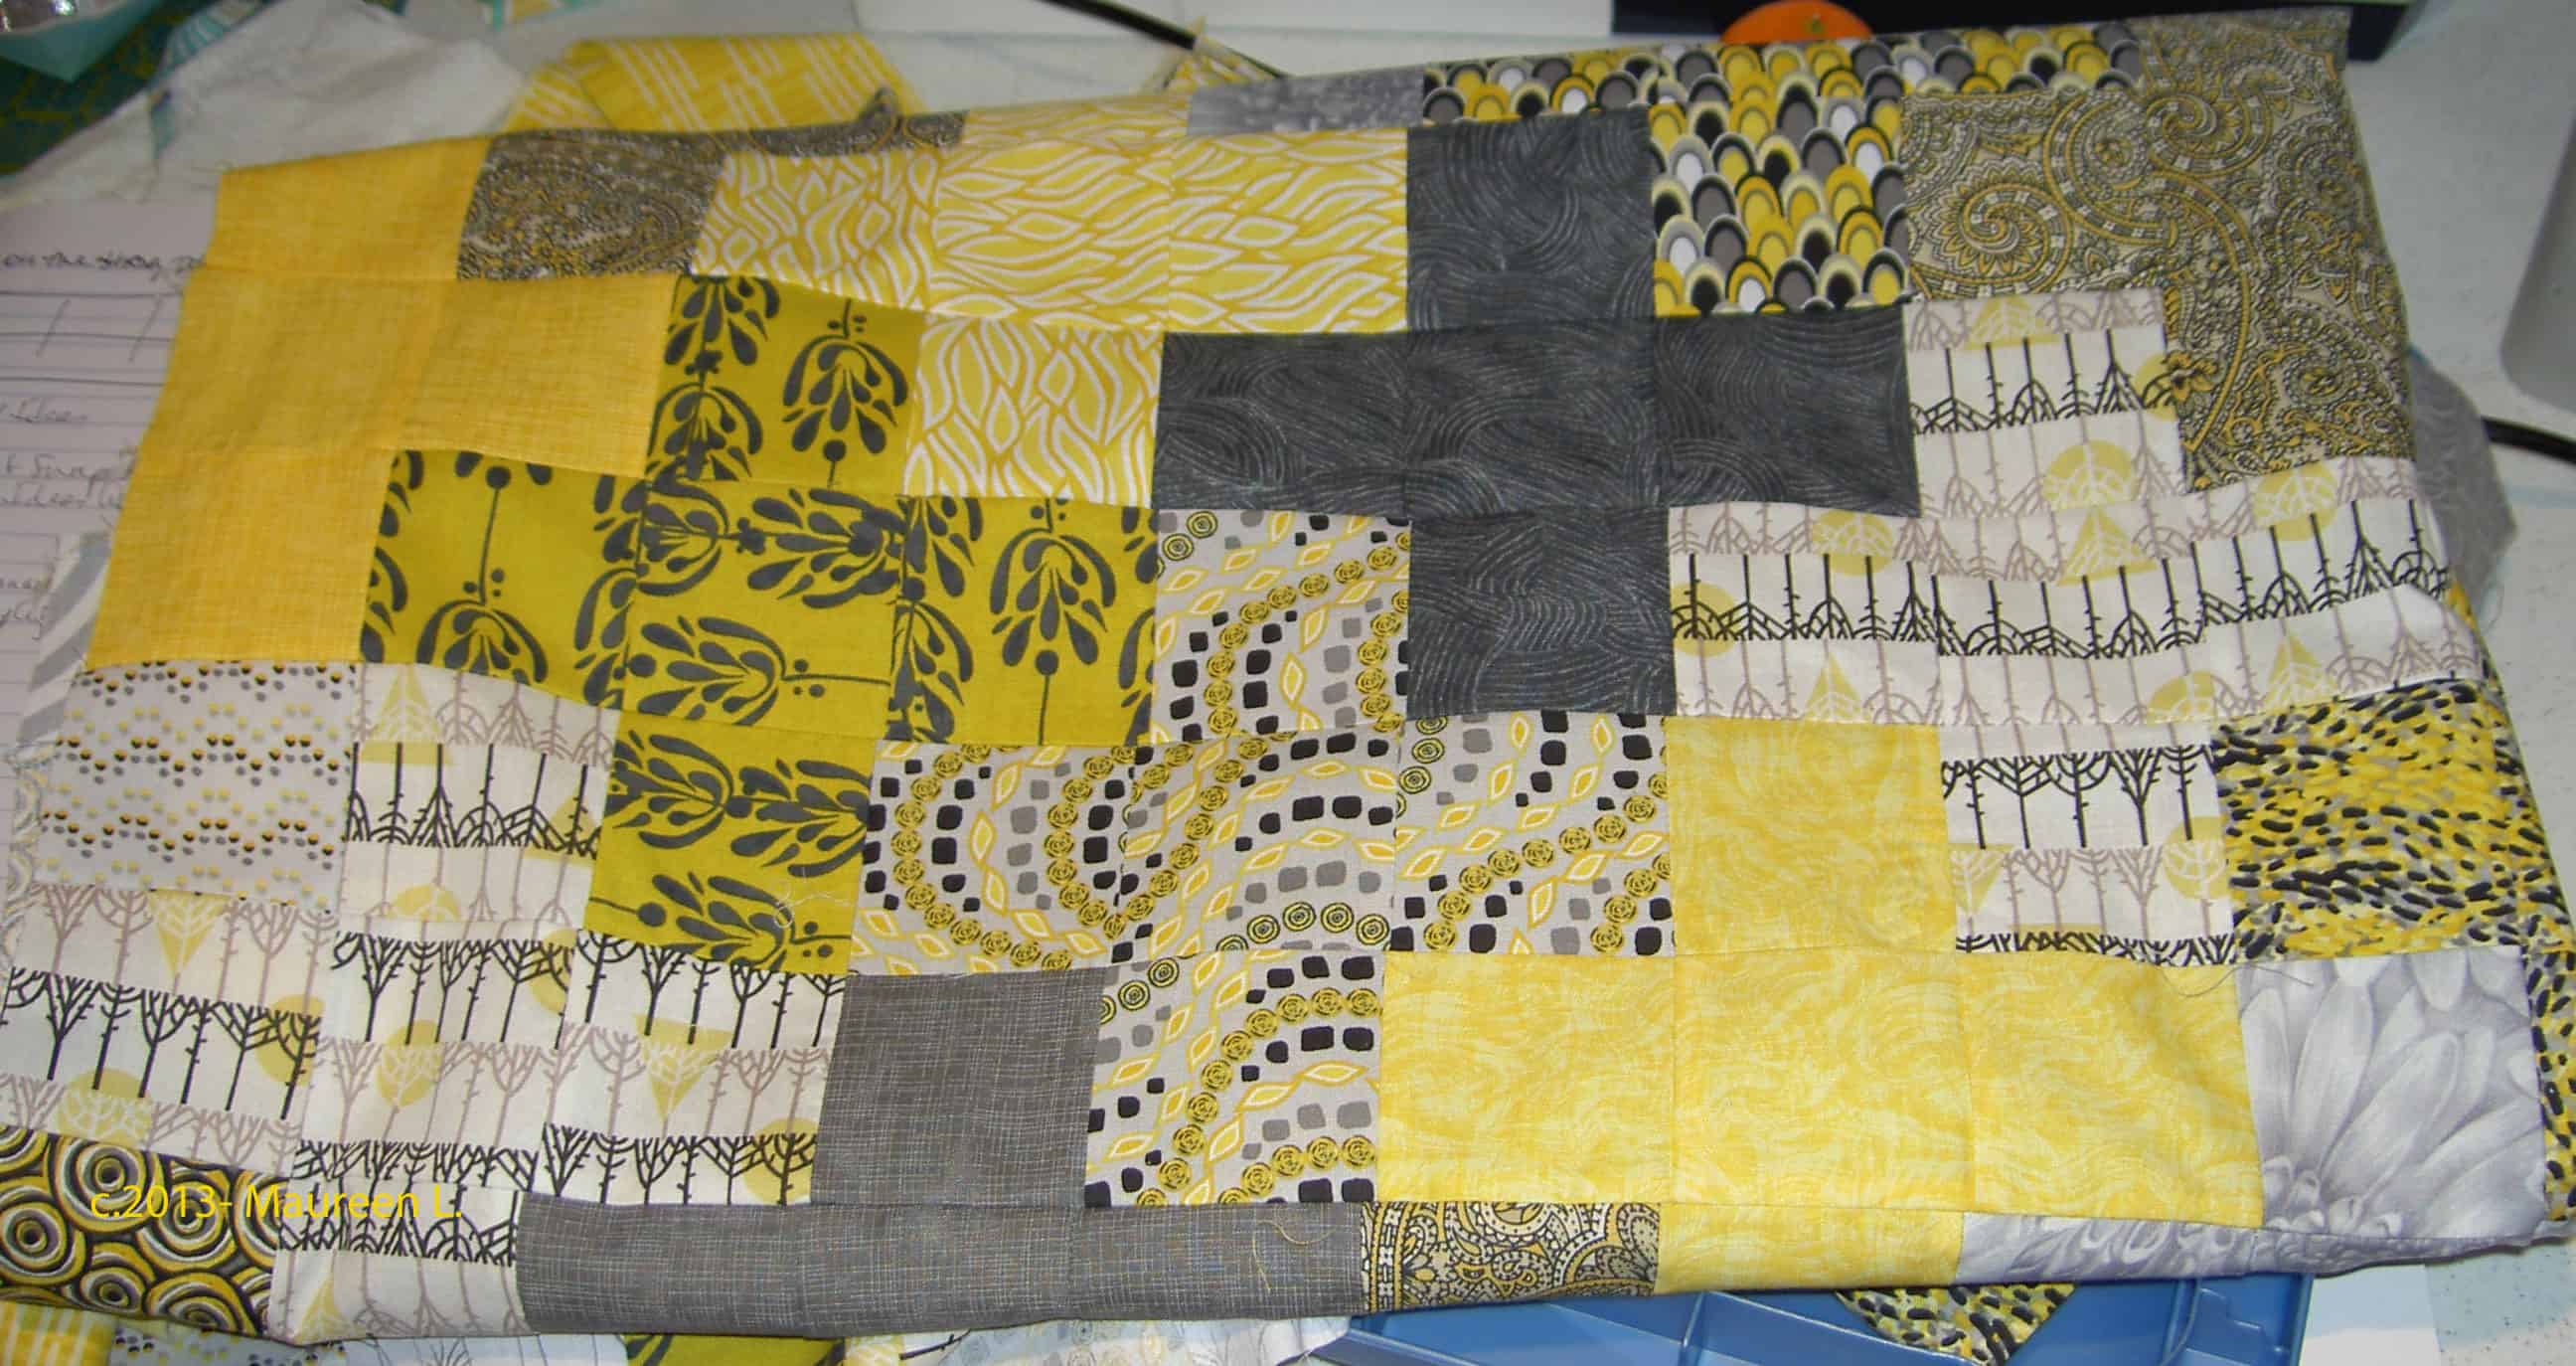
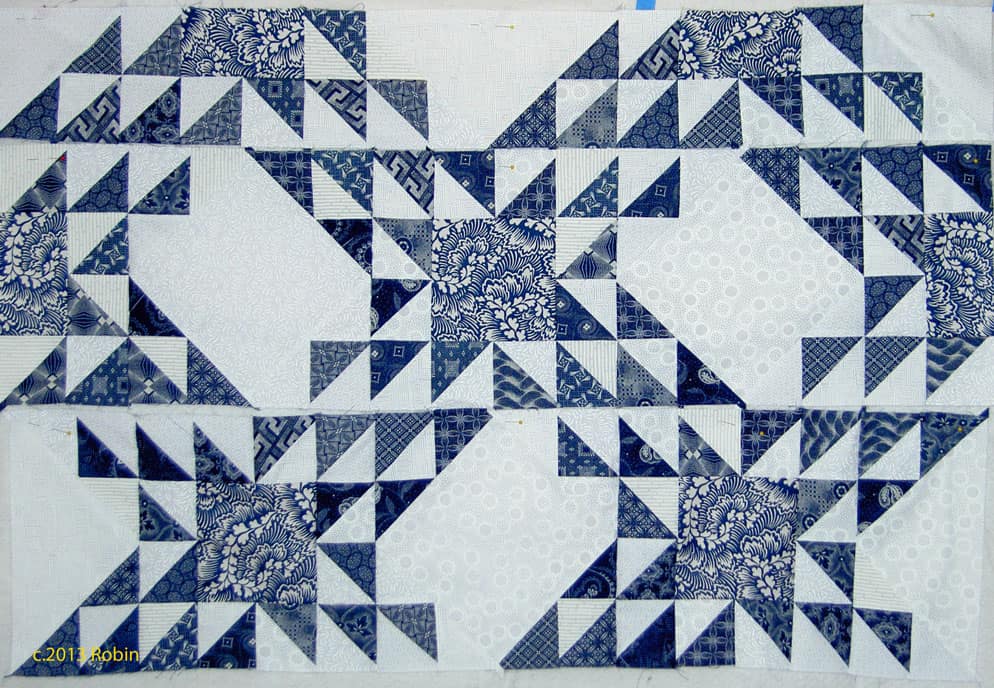
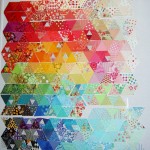
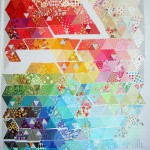
People were working on the mystery quilt and I was 3 clues behind, but they had just gotten Clue 3 when I arrived, so I made those units and used Clue 1 as leaders and enders, so I had most of Clue 1 done as well by the time I got finished with Clue 3. I had my fabric and I had cut out all the pieces, thus I was ready to dive right into sewing, so I got busy on that.

I really liked all of the different fabric choices that people came up with for their mystery quilts. People admired mine, but by the end I wasn’t liking the combination very much. the funnest part of the mystery quilt was working on the same project as everyone else. I enjoyed that with Scrapitude as well.

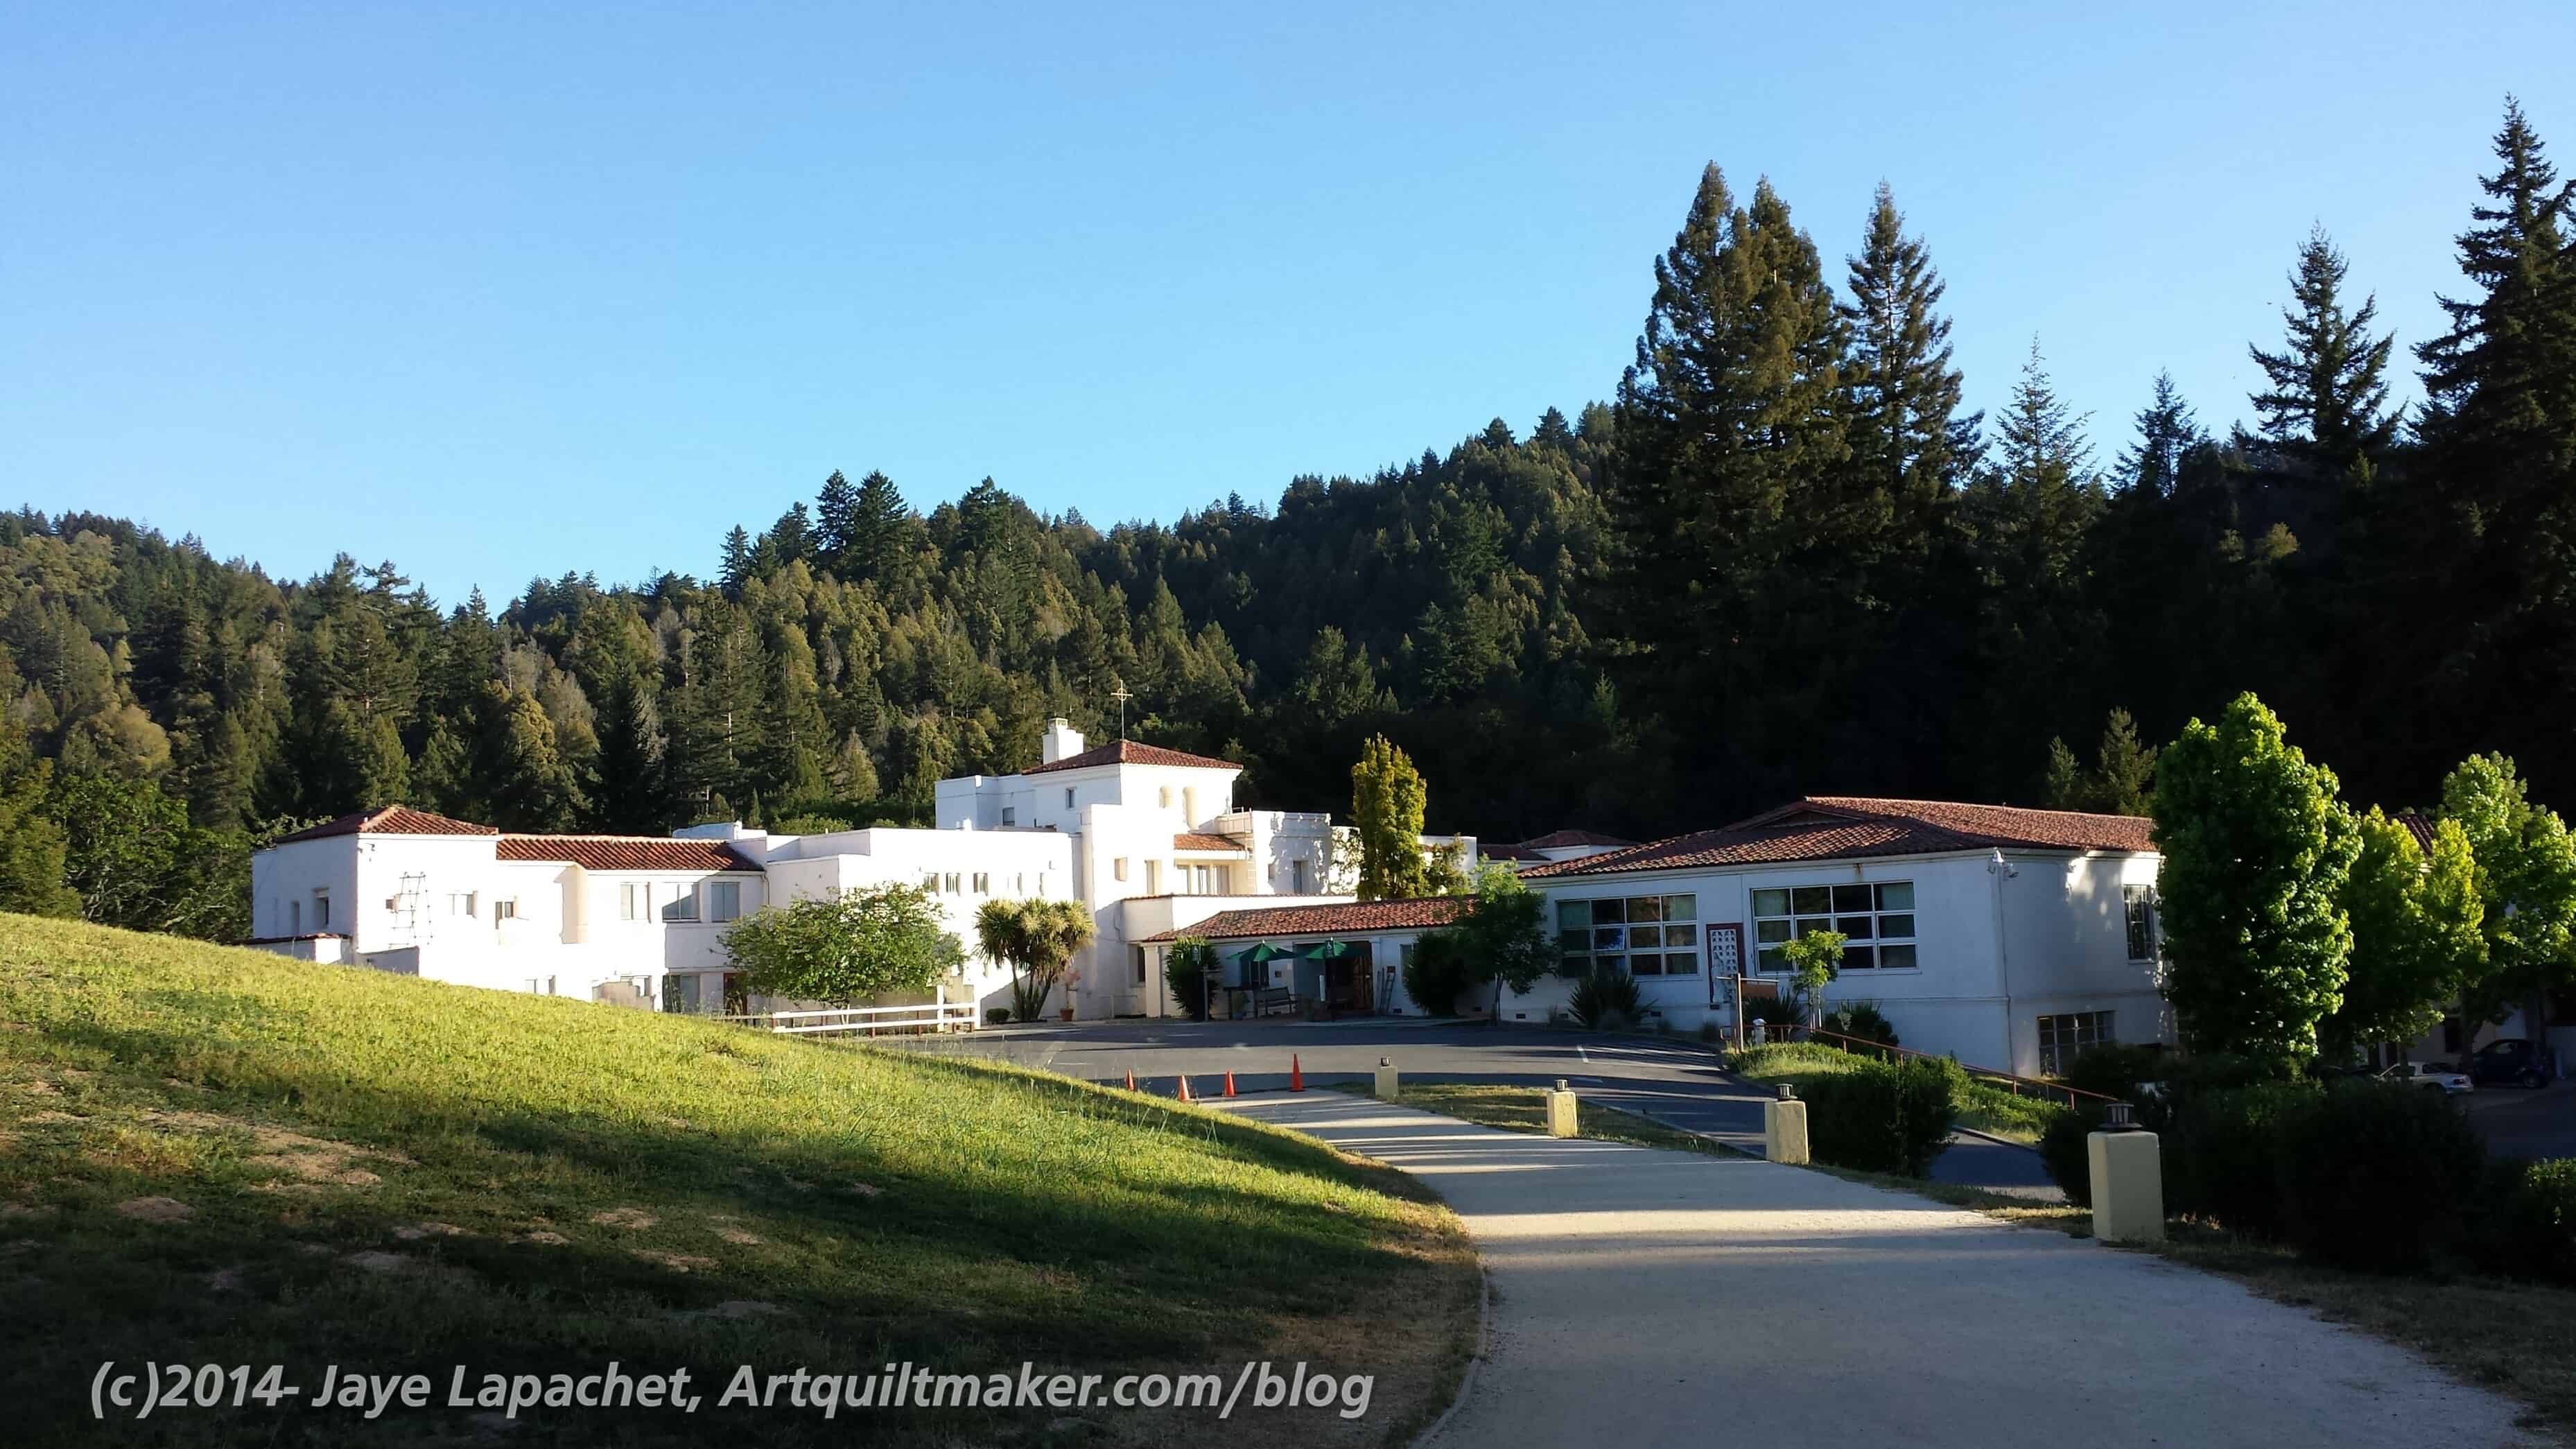
I have only been on CQFA retreats, which are very basic. This retreat was kind of the deluxe edition!

Cutting Room
Cutting Room

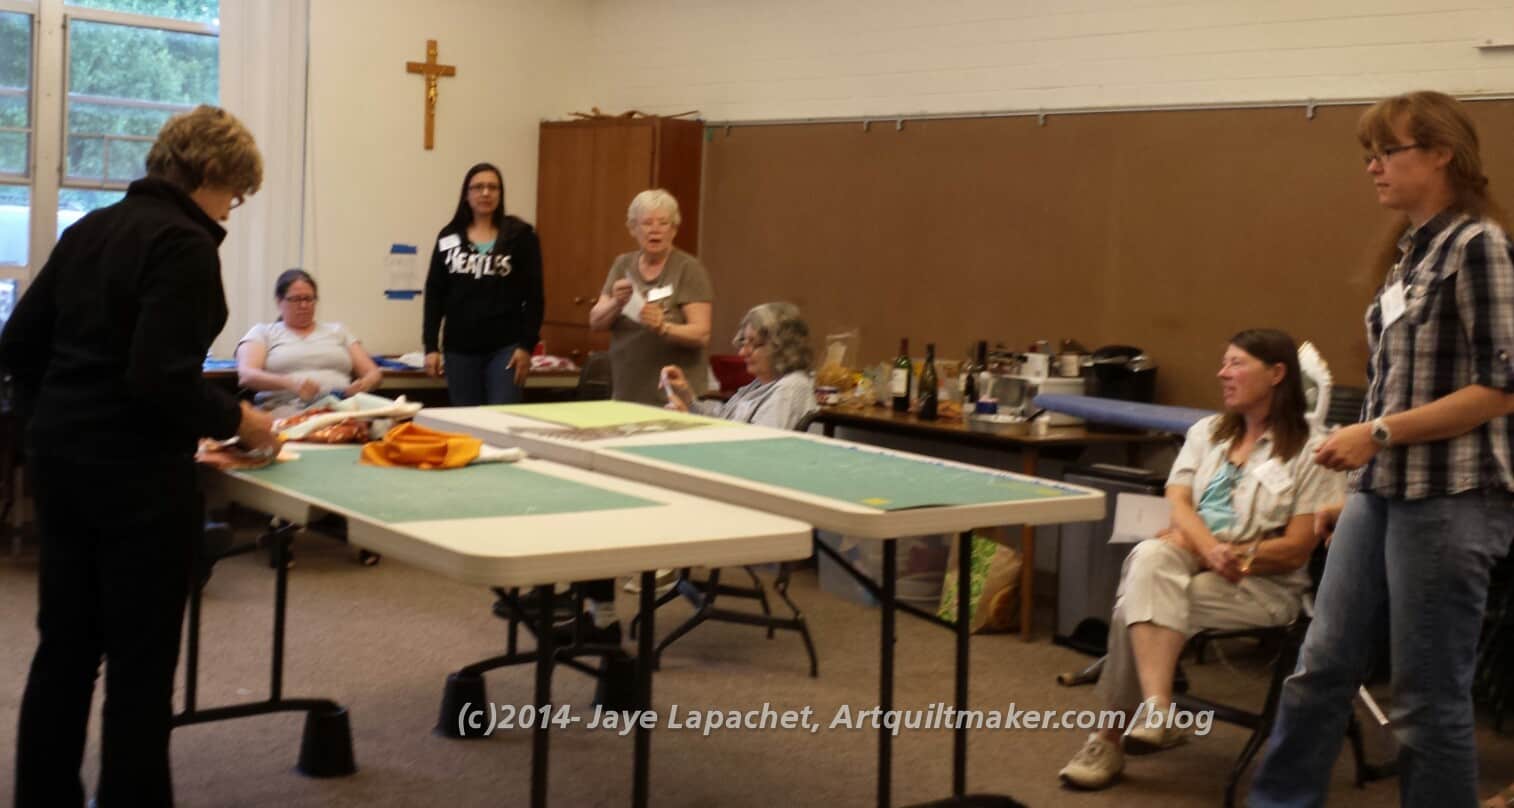
There were 3 rooms we could work in. One room was set up as a cutting and ironing room. We also gathered there for Clues and prizes and the donation blocks were as well. People put their finished blocks there and kits for blocks needed were also available there.

It was great to have those high tables for cutting out large pieces. I used them when I was working on my bag.

Hard at Work
Hard at Work

There were 6 tables set up on each side of the two rooms (room were linked by a very large opening). Ruth set up a design wall at the end of the room (I believe the Steampunk blocks belong to Cheryl). My spot was the spot from where I am taking the photo. People were pretty diligent, but there was a lot of laughter as well. Some of the laughter was fairly crazy.

Design Floor
Design Floor

I sat across from Corky. I don’t think Corky and I had had a chance to talk at a meeting, but we were chatting and borrowing tools like old pals. It was nice to get to know her a little better.

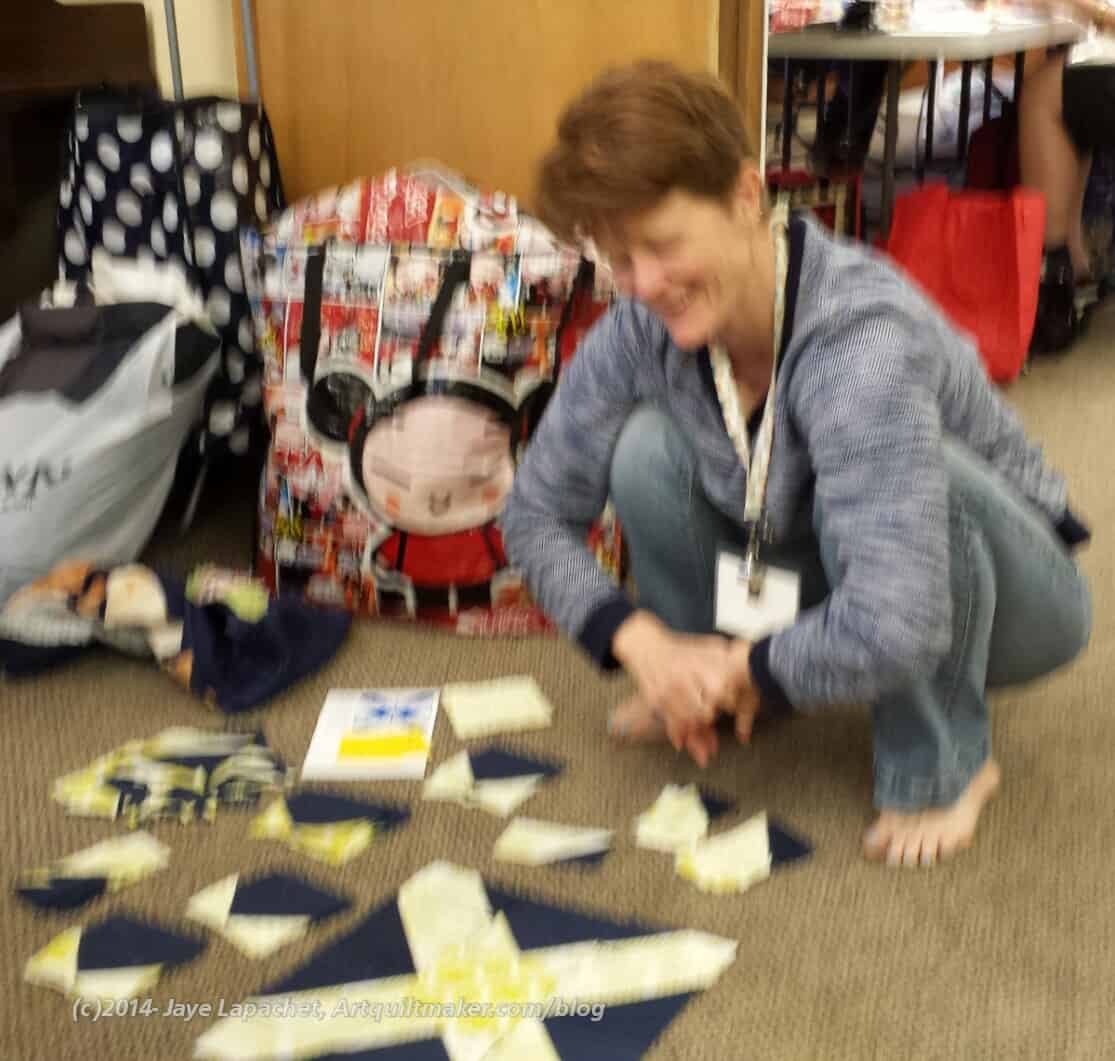
Quilts and quilt parts were everywhere. Any open space was fair game and people just hopped over them and continued on their way. It was awesome, in a way, that people would just take it in stride that quilts were everywhere.

I had my mystery quilt on the floor for awhile while I laid it out.

Special Math
Special Math

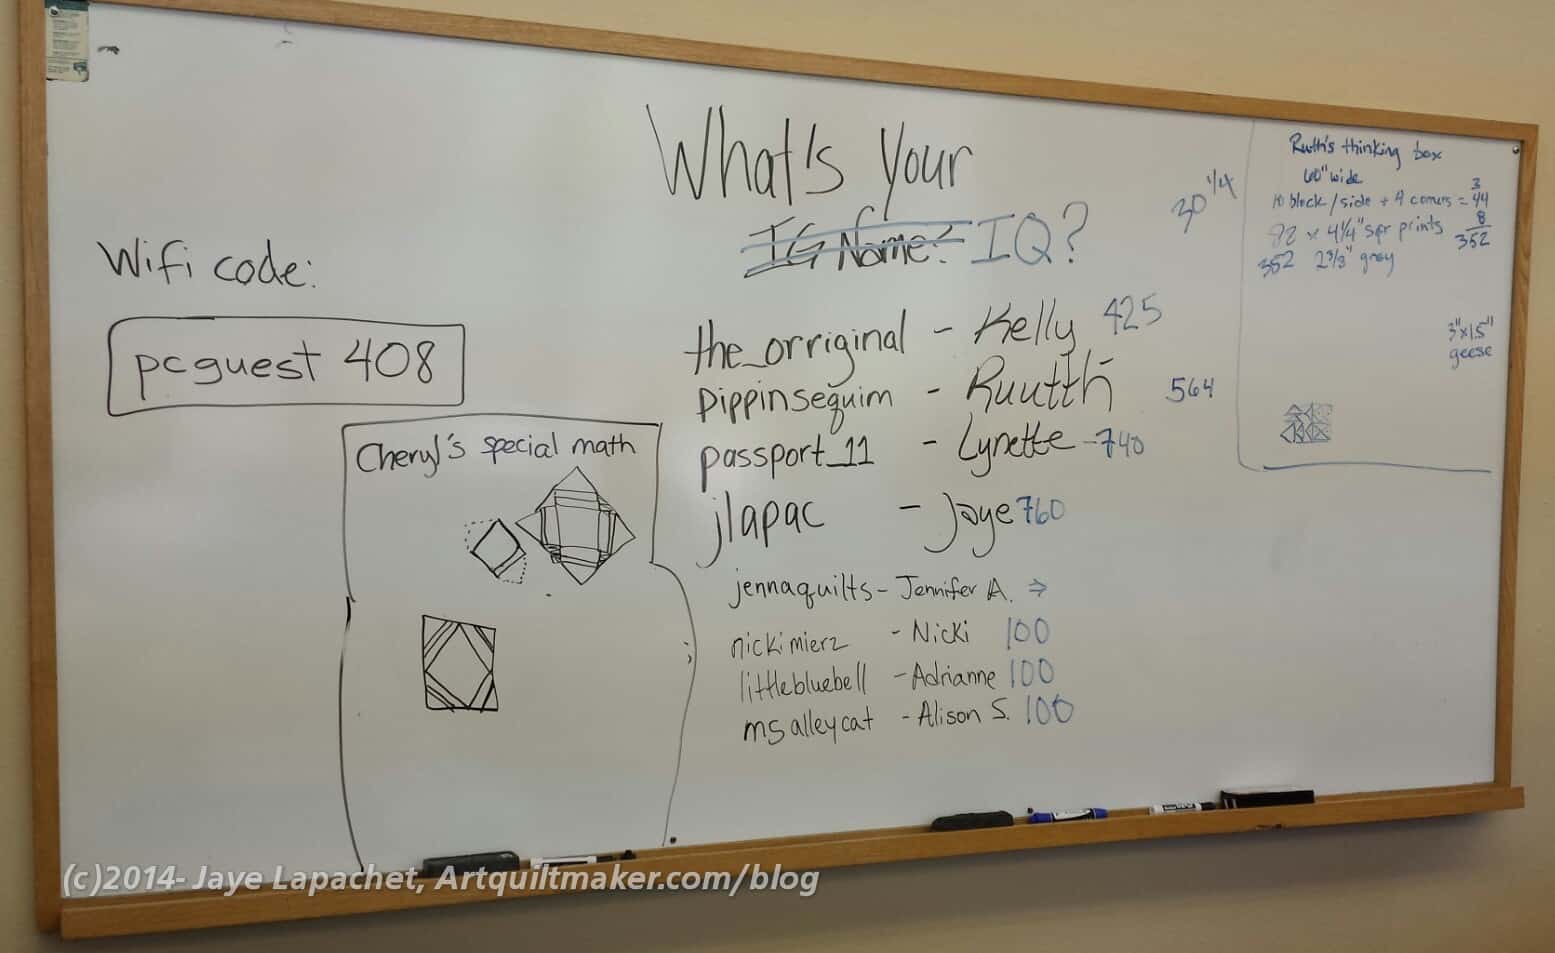
The whiteboard was right across from my workstation. Right after I arrived, Kelly added me to her list of Instagram names. Somehow after that, the Instagram names morphed into IQ. I didn’t say anything about my IQ; I just watched the points increase.

Peggy & Amanda
Peggy & Amanda

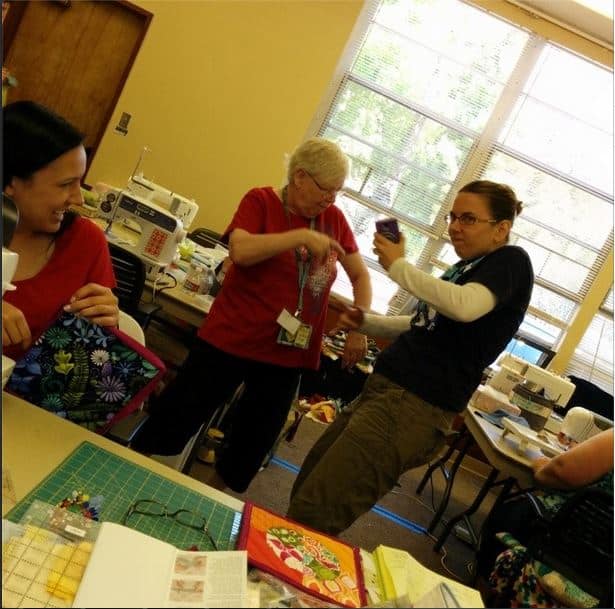
I couldn’t sleep and got up at 5:30. After doing a few of my morning things, I got on the road and was at the retreat by about 8:30. Monday morning found us all a little more punchy than the previous 2-3 days. References to music started coming up and Amanda played songs for us on her phone. One got Peggy and Amanda up and rapping together.

Anyone who thinks that Modern Guilds are for young people only should meet Peggy. Peggy is the most ‘modern’ of anyone in the guild and she has only been quilting for about 5 years. She has a great and inspiring and practical attitude and is also the most prolific charity quilt maker.  I would do well to take after Peggy.

BAMQG 2014 Retreat Group

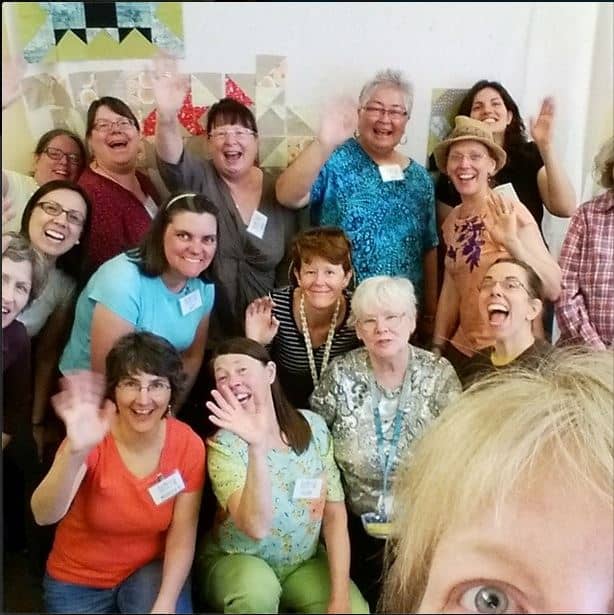
We took a group shot. I am pretty sure not everyone was in it, as ‘everyone’ was hard to wrangle. It was a fun shot, especially that Kelly got herself, or part of herself in it. I stole this version from Kelly’s Instagram.

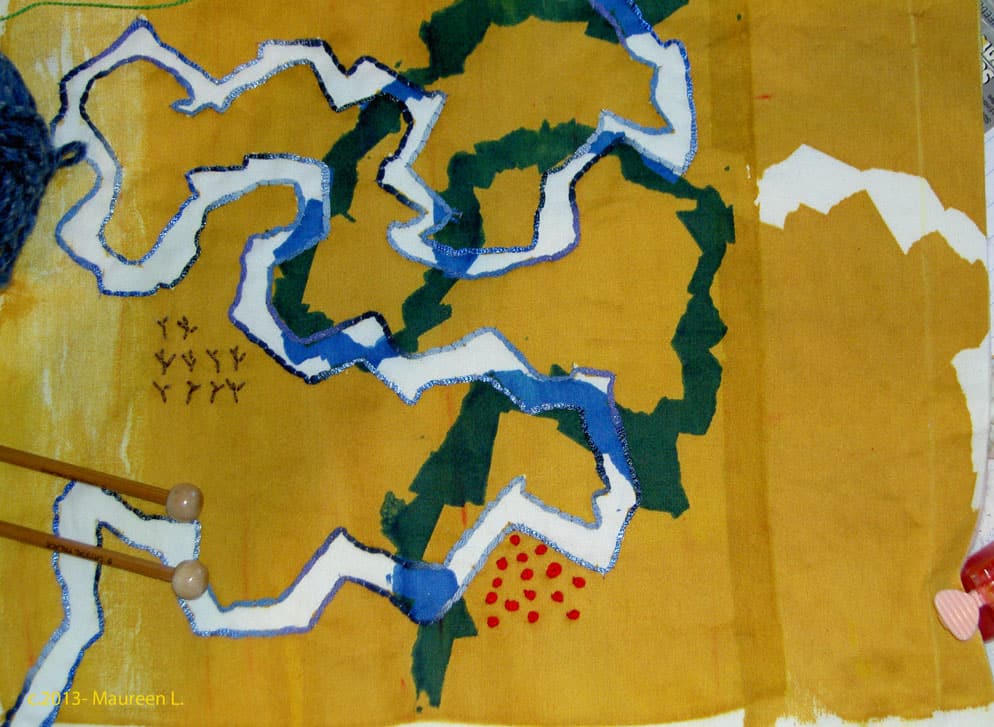
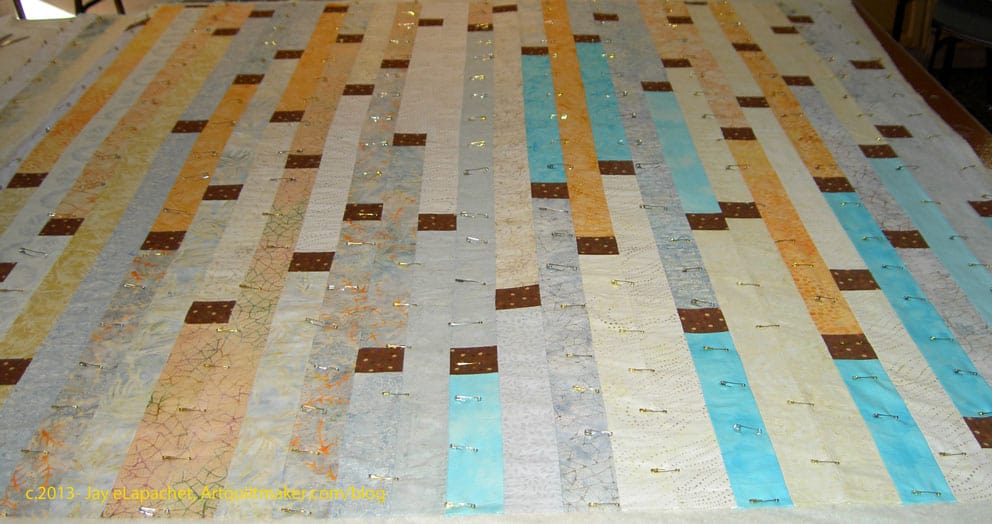
I am always on the lookout for inspiration and I have to say that I was overwhelmed by my choices. there are so many creative people in the group that everywhere I looked, there was something I wanted to try or make or know more about.

I’ll write about actual projects in another post. This one is long enough. I would love to hear about retreats you have attended.

CQFA Retreat Work

Rhonda's A-B-C Challenge
Rhonda’s A-B-C Challenge

The last weekend was spent at the CQFA Retreat. We go to a small town on the coast about half an hour away. It is perfect, because I don’t have to drive very far and it is beautiful.

Rhonda and Angela came to the CQFA Retreat for the first time. It was great, because they were able to get to know the other members better. As I mentioned CQFA and the BAMQG were on the same day so it was hard to stay and socialize. It was also great, because we got to spend much more time with Angela and Rhonda.

Rhonda brought her A-B-C Challenge and was able to work on it a little bit. It really looks great and the CQFAers loved her travel concept.
PICT3101smI really admire people who bring multiple projects to the Retreat and then work on them. I brought two projects for the first and was able to work on both. One of my issues is I can’t organize myself well enough to make sure that I have all of the parts necessary for multiple projects.

Julie, unlike me, has a wonderful spontaneity about her work. As a result, she worked on several different projects. The three parts of this piece are really a good aspect of this piece. Of course, she used her hand dyes.

Dolores' FabMo Piece
Dolores’ FabMo Piece

Dolores likes to plan her pieces and does gorgeous, thoughtful work. At this Retreat, however, Dolores was sitting next to Julie and, without Dolores realizing it,  some of Julie’s spontaneity wore off (infected???)  on Dolores. Dolores took a sample book of linen she got from FabMo and cut the pieces apart. She laid them out on a piece of muslin as a backing and glued them down temporarily.

Her intention was to sew them just enough to hold down the strips until she could embellish them.

The interesting thing about this piece is the texture of the fabric and the fraying of the edges. The colors are earthy with a bit of zing (see the purple?)

Angela's Table Runner
Angela’s Table Runner

Angela came with the SCVQA challenge project. They will be having a show in April and the theme is Oh My Stars!

Along with the show quilts, the organization will have a challenge exhibit and Angela brought her pieces along to work on. She brought fabric and thread and ended up with the piece on the left.

This is a miracle, because there were many, many rules to this challenge. I admire Angela for coming up with this gorgeous piece and still working within the rules of the challenge.

Angela's Table Runner
Angela’s Table Runner

She decided to use the Gwen Marston wonky stars technique. I love this piece. I love the colors (of course!!! Look at that turquoise). I love the embroidery of constellations she did as embellishments. I would love to see Angela make a similar piece but larger.


Sue's Flying Geese
Sue’s Flying Geese

Sue worked, again, with batiks. Her piece from last year was just as gorgeous and when you look at them together, they look like a series.

I also like the juxtaposition of the classic Flying Geese with the contemporary look of the batiks. I know it is weird to say such a thing, but it looks so interesting to me and really stands out to me.

Maureen's Plus Quilt
Maureen’s Plus Quilt

Maureen started out with this Plus type quilt.

I love the fabrics that she chose. Maureen had a Jelly Roll or strip set with these colors. Instead of using rectangles as some of the pieces Maureen used all squares. She told me that starting with this piece made for a very calming beginning to the quilt retreat.

Maureen's Fabric Map
Maureen’s Fabric Map

Maureen started to have some trouble with her sewing machine so she switched to a hand project.

This piece looked like a map. Maureen did a lot of handwork on the piece and was thinking about others. She added French knots and a lot of couching around the edges of the white and blue areas..

Dolores
Dolores
Calm Basting
Calm Basting

This is what Calm looks like during basting. Big Deal, right?

Rhonda's Hand project
Rhonda’s Hand project

Rhonda took a class on different types of handwork. In the picture above we are helping Rhonda chose the colors for the next set of borders.

Robin's Indigo Ocean Waves
Robin’s Indigo Ocean Waves

Robin had some indigo fabrics from her mother. They were from South Africa. She found some great, and perfect, contemporary companion prints to use with the indigos.

The large squares are the contemporary prints. I also like the way these blocks are a bit off. It gives the piece movement.

Sonja's Bicycle
Sonja’s Bicycle

Sonja was working on several pieces as well. She was inspired by some of the activities she does with her family. In addition to the bicycle, she had a scooter as part of the series. It was such great work; I can’t wait to see it finished.

FOTY 2012 Emerges

FOTY 2012 Final Layout

Early last week I posted the final patches I was planning on using for FOTY 2012. The CQFA retreat was this past weekend and I worked on the quilt top all weekend. This is the final layout, or nearly the final layout, of Fabric of the Year 2012. I think of this as a butterfly emerging from a cocoon, in some ways. Perhaps I will call this piece Chrysallis?

In this picture, all the pieces are sewn into groups of 2. By the time I left the retreat center, I had started to sew larger chunks together and the upper right hand corner was nearly all sewn.

As usual, I went through my process of hand wringing and chest beating on Friday followed by sewing and intense rearranging on Saturday.

One of the things I really like about working on this at the retreat (remember last year’s retreat?) is that everyone helps. They don’t help by rearranging, though that goes on a bit, but they come by and give me an opinion, there is always someone around to help with tricky placement and they appreciate my process. By appreciate, I meant they let me engage in my process, which, for this project, involves a fair bit of angst. It was all worth it. I am pleased with the way this is coming out.

I think that I may be over the colorwash technique for these pieces. I like the idea of cutting a piece of fabric from each fabric I use or buy during the year, but I think I have done enough of the colorwash exercise for the time being. I am trying to think of something else for 2013. I have some fragments of ideas, but they haven’t coalesced yet.

CQFA Retreat: My Work

As usual, I started my Fabric of the Year 2011. I made good progress, but I did not finish.

Before I left for the Retreat, I spent time organizing the patches into color families and then from light to dark. Normally, I figure out the size of the finished piece and do more organizational stuff. No time this year and it was fine.

Once at the Retreat, I spent a lot of time – all day Friday – arranging the color gradations. I got opinions from others about the placement of certain patches. I used my camera to look at the patches in a different way and it was a useful tool in my arsenal of work. Above you can see the progression. The top left is pretty soon after I put all the patches on the wall. The last photo, bottom left, is, basically, what I took home.

I had to pin and wrap the pieces in the portable design wall. I set it up in my workroom and am working on it.

I am glad of the progress I made it on it at the Retreat, but I prefer to work in my workroom. As I started work on Monday, I felt an ease come over me and the work began to go very well. I hope to be done sooner rather than later. Stay tuned.


CQFA Retreat Work

The CQFA Retreat was over the weekend. It was a relatively quiet retreat. Several people had to cancel at the last moment, which was a shame. Still, we had a good time and people made good progress on their various progress.

My spot with Julie
My spot with Julie

We were in the same location as last year, which has a separate building in which we are able to sew.

Other sewing space
Other sewing space

This was my view as I sewed. Reva does wonderful work and it was wonderful to watch her, Sue and Robin’s work evolve.

Reva's Black & White Piece
Reva’s Black & White Piece

The black and white piece is made from the fat quarter bundle Reva won from the prizes we got from Fabricworm.

Robin's Blooming 9 Patch
Robin’s Blooming 9 Patch

Robin’s Blooming 9 Patch was made from Kaffe Fassett fabrics. I liked looking at it. I like the pink.

Robin's Blooming 9 Patch 2
Robin’s Blooming 9 Patch 2

Robin added some 4 patches on the ends to make the piece a bit longer.

Sue's Scrap Quilt
Sue’s Scrap Quilt

Sue half square triangle scrap quilt is the kind of project I like to do on the Retreat. Sue had the blocks done and thought to do the rest at home. We encouraged her to use Robin’s design wall to finish the piece. She did so and made good progress. She wanted to use up as many scraps as she could and I think that she did well. Sue is making this quilt for her bed.

Maureen's work
Maureen’s work

I think the pink fabric in the middle left looks like the leaves a tree with the trunk being the piece right below. I mentioned it and Maureen said that we all see what we want to see.

Julie's work
Julie’s work
Julie's Calendar Piece
Julie’s Calendar Piece
Julie's Baggo Piece
Julie’s Baggo Piece

Julie made a lot of progress on various pieces. She started some and made progress on others. I was very impressed with her progress.

The Baggo piece is from a challenge where each person receives a bag of supplies from another and makes something out of it. I was particularly taken with the Baggo piece’s eye stamps. I was even more impressed when Julie told me she carved them herself. I really like the images and encouraged her to make more and sell them. I would be first in line for a set although I don’t do much stamping.

She quilted and bound this piece. She was irritated at the binding, which tinkled every time she worked on it, because of the bells she had added. I told her to stop and do something else in between. By the end of the weekend, the binding was done and Julie was not gnashing her teeth.

Julie
Julie

We went out to dinner on Saturday night together, which was fun. We had the most wonderful waiter who was kind, didn’t complain about any special requests and gave us each individual bills.

Juicy Soul Retreat

A couple of weeks ago I went back to A Work of Heart for a Juicy Soul Retreat. I really had no idea what a juicy soul was or how it could be retreated. I went because I needed a bit of a creative change and Andrea and her good energy were just what I needed.

Andrea
Andrea

It was the right thing to do. I really enjoyed the day, got a lot done and got my head a bit straighter than it was.

Finished Cover + Marker

I thought about the journal I wanted to make and wasn’t sure so I bought a new journal and brought my Purpose journal as well. I was thinking I might be able to add to that one.

One of the things that was different about this class than the other journaling classes I have attended at AWOH was that we all introduced ourselves and shared a little bit about ourselves. Some people shared why they were there-what they hoped to achieve- and others shared something about their art. My friend, though quite young, is staring retirement in the face and she was there to work on figuring out what’s next.

That struck a chord with me and I started working on the new journal. Some of the techniques for making backgrounds were similar to those I had used in other AWOH classes, but there was plenty of new stuff as well. Also, I don’t take notes in Andrea’s classes; I try to absorb the techniques, so I don’t remember some of the nuances from previous classes.

Darcy's Background
Darcy’s Background

I tried to get the backgrounds for the new journal done, but there just wasn’t enough time. It was probably a good thing. I have to remember that it isn’t about the finished product, but about the process.

The Process
The Process
AWOH Hearts
AWOH Hearts

Andrea is revamping half of her studio space and she has some of her work displayed on the new shelves there. I love the hearts. The pink background is such a wonderful pink. It isn’t too sickly sweet or light.

She has a project of her own in which she is creating 1000 houses-images of houses. I love the idea of choosing a shape and creating a series using that shape. The house shape is simple, but has a lot of possibilities. Hearts would also work. A 1000 is an amazing number of pieces of art. It is large enough to be a challenge, but also obtainable. She eventually wants to raffle the collection off to raise money for a charity.

AWOH Houses
AWOH Houses
AWOH Houses
AWOH Houses
AWOH Houses
AWOH Houses
AWOH Houses
AWOH Houses
AWOH Houses
AWOH Houses
AWOH Houses
AWOH Houses

Retreat Stars for San Bruno

I went to a quilt retreat this past weekend and was thrilled to receive 8 more blocks!

Bron's Retreat Stars
Bron’s Retreat Stars

Bron is a star herself and came through with 3 more blocks. These are her best yet, I think! I am fickle, though, because every time she gives me more blocks I like the new ones best.

I like the fabrics she chose. The stars are really bright and cheerful.

I brought some fabric to the retreat to make it easy for people to make blocks. It turns out that I didn’t have much of the really dark blues, which I was hoping to use in the background. I also brought Around the Block to help with the patterns. I thought about reloading Judy Martin’s Star block add-on to EQ7 on my computer, but I didn’t get around to it before I left for the retreat. It ended up not mattering, because people didn’t use the fabric to make blocks anyway!

Diane's Friendship Stars
Diane’s Friendship Stars

Diane also made some pieced and appliqued Friendship Stars. She got up at the crack of dawn yesterday and beavered away on these. I have talked about Diane before. She does wonderful silk painting, but not much piecing beyond borders. I talked about her pear ATCs, which I just love. She said she struggled a bit with the piecing and ended up appliqueing 3 of them. I thought it was very clever! Her blocks are great.

I have been promised some more blocks, so perhaps we are starting to get attention and will have enough to make some nice quilts.

Want to help? I am thrilled at how many people are making a  block or two. Do you want to contribute some blocks?

All star blocks are welcome!

Block background: dark blue
Block design: Yellow star (any pattern, technique, eg. embroidery, painting, silkscreen, etc)
Block size: 8? finished or smaller (we will work with any size)
Remember to sign your block!

Deadline: TBA, probably around the end of March

Contact us through our blogs for mailing instructions. Thanks very much for your generosity!

CQFA Retreat – FOTY 2010

My retreat project, as you know from all of my preparations, was the Fabric of the Year quilt for 2010. I had high hopes that I would get the whole thing pieced. I enjoy doing the colorwork at the retreat, because I can get a lot of different opinions and I like knowing what other people see. Also, I feel like I have more space to spread out.

FOTY Start
FOTY Start

Above is the way I started the FOTY on Friday afternoon.

FOTY 2010 Right Corner detail

Above is the dark corner. Again, I was trying for the a colorwash kind of look across the quilt from right to left.

FOTY 2010 - more of the dark corner
FOTY 2010 – more of the dark corner

As I laid out the piece, it was interesting to see, visually, the amount of darks and colors.

FOTY 2010 - Dark Corner washing towards Red
FOTY 2010 – Dark Corner washing towards Red

This was the first layout. You can see a bit of the red next to the purple. Eventually, I took all the red off of the design board and put blue next to the purple. I did a backwards ROY G BIV working from right to left, though if you look at it when it is finished, the ROY G BIV will read correctly (see below).

FOTY 2010 - Whole Piece in Progress
FOTY 2010 – Whole Piece in Progress

Above, you can see that I have changed out the red for the blue in the center and put the red on the left edge. Most of the diamonds I have to work with for this project are blue. The design wall was not large enough for me to put up all of the patches, so the reds and pinks only got a representative sampling to begin with. As I worked through Friday afternoon and evening, then Saturday, I came to the realization that this piece was going to take longer than I thought. Putting it together was a lot more of an intellectual exercise than I expected. Part of the reason, I think, was that I wanted to put it together in chunks, which made the spaces created by the sewn seam allowances end up in strange places.

FOTY 2010 - Center detail
FOTY 2010 – Center detail

Those seam allowance spaces became unexpectedly large as I sewed, which turned out to make keeping track of where pieces went really difficult.

FOTY 2010 - Blue detail
FOTY 2010 – Blue detail

One challenge was the different amounts of colors I had. Another challenge was that the fabrics mostly did not consist of only one color. I tried to block out all but the background or dominant color in my mind in order to place the patches, it wasn’t always possible.

FOTY 2010 - Blues washing to Yellow
FOTY 2010 – Blues washing to Yellow

Above, which is the upper left hand section,  is the least formed part of the quilt, and still, in the photo above, in quite a bit in flux.

FOTY 2010 - Putting the Piece Together
FOTY 2010 – Putting the Piece Together

In some ways putting the piece together got easier as I sewed larger chunks together. In other ways, it got to be more of a problem, because the spaces, as I mentioned, between the chunks got larger.

FOTY 2010 - Moving Across from Right to Left
FOTY 2010 – Moving Across from Right to Left

The bottom left corner was really my big problem. I don’t know what happened, but something happened early on and I still haven’t completely resolved the problem in that corner. I am working through it, but as I don’t seem to have a photo of the whole piece after I moved the red, it is proving to be a challenge.  I am having to lay out that corner again as I go along. Lots of unsewing is required.

FOTY 2010 - Top Right, Middle
FOTY 2010 – Top Right, Middle

Are you bored yet?

The top right and middle were ok and I was able to sew some large chunks together.

FOTY 2010 - Bottom Right
FOTY 2010 – Bottom Right

No matter what I did with that bottom right corner, there still seemed to be large missing chunks of patchwork. Sigh. At this point, in addition to taking big deep breaths, I realized I wasn’t going to get the piece finished. Not what I wanted to face, but I wanted to do a good job and that was the reality.

It was a bit liberating to admit that, because I felt like I could look at the piece and didn’t have to rush straight to sewing.

FOTY 2010 - Moving to Pink
FOTY 2010 – Moving to Pink

I was able to put a few pinks up as the seam allowances shrank the whole piece, leaving more space. I had faint hope that some miracle would occur and I would finish the piecing.

FOTY 2010 - Adding the Reds
FOTY 2010 – Adding the Reds

I was also able to add some of the reds that didn’t fit when I started.

FOTY 2010 - details of placement
FOTY 2010 – details of placement

The large seam allowances seemed to keep moving as well.

FOTY 2010 - Good Behavior
FOTY 2010 – Good Behavior

This was the well behaved part of the quilt right before I took the whole thing down so I could go home.

FOTY 2010 - Orange and Yellow
FOTY 2010 – Orange and Yellow

IYellows and oranges were ignored, for the most part.

FOTY 2010 - Virginia's Picture
FOTY 2010 – Virginia’s Picture

Virginia took this picture while she was visiting. It is really helpful to see what other people see in my pieces.

FOTY 2010 back at home

Julie helped me roll up the piece in the flannel of the portable design wall so I could bring it home and set it up again. My plan is to chip away at the rest of the layout and piecing. Not finishing puts me behind in my mind’s quiltmaking schedule, but I am sure there is a reason that I didn’t finish. I certainly didn’t expect the intellectual piecing challenge of this project. I am sure it is good for me.

CQFA Quilt Retreat

The CQFA Quilt Retreat was this past weekend. Dolores did a great job organizing it. We went to a new place and it was wonderful. There was a bakery nearby which baked gluten free pastries in addition to regular pastries. That was a really nice treat!

My Creative Mess
My Creative Mess

Above is my workspace, which I shared with Julie. You can see FOTY 2010 in progress. Sonja and Debbie were in the back. The share table is in the middle.

Terri, Dolores & Sue's Workspaces

Sue set up in a corner and made a whole Moon over the Mountain quilt while Terri worked on a Ricky Tims style quilt.

East Side of Room
East Side of Room

It never ceases to amaze me how much of a mess I can make when given the opportunity. My workspace is right at the bottom of the photo. I worked hard over the weekend, so it must be ok. Dolores was in the far corner with Maureen and Robin at the table between Dolores and mine.

Bron & Virginia
Bron & Virginia

Bron and Virginia couldn’t stay and work with us for the weekend, but they did come for the group dinner on Saturday. I love this picture. It shows what lovely people they both are.

Julie's Tumbler
Julie's Tumbler

At the same time I cut the FOTY patches all year, I have also been cutting Tumbler patches for Julie. I think she mentioned liking that shape and I took it upon myself to cut patches for her. I don’t remember exactly how it all came about, but it sounds like something I would do.

It was fun to see the same fabrics that I was working with on my project. Julie worked on sewing rows of her Tumbler quilt together. She is making it for her bed. At one point she laid it on the floor and we laid down on top of it to test and see if the size was large enough. No cameras were available to catch that moment. I was hoping she would sew all the rows on, but she got tired of it after awhile and worked on some different projects.

Another View of Julie's Tumbler

We declined to have Julie crawl on top of table or chair to show the whole piece. It is quite large and above is a different view.

Nancy's Needle felting

Nancy was making a needle felted scarf. I don’t know if she finished, because I don’t know that much about needle felting. I really liked the design she was working on.

Birthday Gifts
Birthday Gifts

Julie also gave me some birthday gifts! We spent a happy hour looking through the two books and talking about the craziness of some of the piecing. She gave me a really nice card, too. 😉

More on the Quilt Retreat

I have a lot of talented colleagues who also attended the quilt retreat. I realized, after I got home, that the pictures I thought I took only were taken in my head. Sigh.

Dolores 2010 #1
Dolores 2010 #1

Dolores, for whom I made the pencil roll, is really making progress in her work. She takes classes deliberately from well respected quiltmakers and works through the techniques and makes it her own. For the past several years, she has worked in neutrals. This year she decided that she was going to add color back into the equation. This piece is from a photograph (right) and some techniques she learned in a class with Caryl Bryer Fallert. Dolores reworked the photo on her computer and then blew up the pattern, transferred it to freezer paper and used Fallert’s method of piecing to create the top.

Sonja, a new CQFAer was working with FabMo fabrics and just playing. She did a fabulous wave piece that I was really sorry not to have taken a picture of.

Sue and I are kindred spirits in that we both like to make quick projects in between our larger quilt projects. She worked on totes, scarves AND basted two quilts!

FabMo also has wallpaper -high end wallpaper – and Jan has been experimenting with folded boxes and bags using pieces of the free wallpaper. They are fabulous. She is also working on a piece based on the view of Nebraska from a plane. She worked on embellishing the circles she was making. Jan was sitting next to me and we talked about color, because she is finding her piece too dull. We discussed colors that would fit with her nature theme.

Julie's Hearts
Julie's Hearts

Julie bought a pack of Moda turnovers and is making a fun and sweet Valentine’s Day quilt. She is trying to limit her need to cut and this was a great way to do it.

Julie's Hearts #1
Julie's Hearts #1

Here is Julie’s quilt before she started on the appliquéd hearts.

Julie's Heart Art
Julie's Heart Art

Above shows her machine applique’ pieces waiting for their turn under the needle as well as the tools that are required for excellent quilting (glasses, rulers and coffee!). 😉

Illuminated Manuscript Heart

I thought that the above block looked like one of the illustrations in an illuminated manuscript.

Good Color Combo Heart

This is a nice color combination. I am not sure the computer intermediation shows the subtlety, but it s great.

Skull Heart
Skull Heart

We talked a lot about this block, because of the skull. It is the block that shows that relationships can be icky and rocky sometimes. Fun fabric, though.

Maureen tried the pencil roll pattern and came up with a nice piece using some of her hand dyes and some FabMo fabric.

Terri worked on getting some tops put together. One was an exchange top that included some really nice batiks.

Debbie was trying to finish her daughter’s college quilt. She was using some very jewel-y turquoise, purples and other blues. It was very rich looking.

Kathy is a member’s daughter. We haven’t seen any of her work before this weekend. It turns out that she does wonderful handwork. She is working on this Piece O’Cake design, do it mostly by hand. I like the color choices she made. They are a bit muted, but not murky.

Kathy's Piece O'Cake

She didn’t like the scallop border that came with the pattern, so she designed this leaf border on her own.

Kathy's Leaf Border
Kathy's Leaf Border

CQFA Retreat 2010

FOTY Top Complete
FOTY Top Complete

This past weekend was our annual CQFA retreat by the beach. I spent the weekend working on the FOTY 2009. I also relaxed a little even though I spent a lot of time hard at hard sewing. My body is rebelling a bit from sitting so much and standing so much.

Last few FOTY blocks

First, I found the last few FOTY blocks on my design wall before I left and I wanted to post a picture of them. I didn’t think I would use the one with the earthy brown (middle row, middle block) on the front, but I ended up using it.

FOTY 2009 in progress

I really worked hard on the piece. As with last year’s piece, there is a lot of sewing and pressing. The process, after I figured out the size and laid the blocks out was to sew two Zanzibar blocks together, press, put back on the design wall, sew two Zanzibar blocks together, press, put back on the design wall and then repeat that process 133 times. Once I sewed sets of blocks together, then I sewed two sets of two blocks together to make a set of four. I did that approximately 67 times. Since I wasn’t in my own workroom I had to walk around my table, past another table and into the corner to get to the iron. The distance was inconvenient, but also good, because it forced me to stretch my body. Putting the top together was a lot of rote sewing, but it was the perfect project for the retreat.

I did a few things differently this year. One was to count up the blocks and try to make a plan as to how I would lay them out before I arrived at the retreat location and was standing in front of my design wall.  I knew I had 225 blocks, so I thought I would lay them out in a 15×15 format. What I didn’t take into the consideration was the size of the portable design wall. If I placed 15 blocks down, 3 of them were on the floor. I didn’t want to work with blocks on the floor even though I could have. It is hard to photograph the in progress piece. It is easy to forget some of the blocks, etc. I reconfigured the layout and ended up with, I believe, 12 down and 19 across. I prefer a rectangular layout anyway so it worked out. I needed another block, however, so the earthy brown one ended up on the front. In the grand scheme, it doesn’t scream brown out of the quilt.

Color Sorting
Color Sorting

I also sorted the blocks. Last year, I think I just put them up in general areas on the design wall and then I had to move them around a lot. This time I sorted the fabrics on the table, put them in Roy G. Biv + white and black order and then put them up on the design wall. This strategy was a lot easier. I didn’t have move such large groups of blocks over and over. I had to move some groups, but the whole process was much easier. Below is a progression of how the piece evolved as I worked on the color:

#1 Blocks on the design wall
#2 Blocks on the design wall
#3 Blocks on the design wall
#4 Blocks on the design wall

Another thing I did differently this year was ask some of the other retreaters if any blocks stood out to them in an “I am out of place in this quilt” kind of way. Many of the CQFAers are really skilled designers, others are skilled colorists. All of them have something wonderful to offer if I remember to ask and listen.

I was looking at FOTY 2008 last week and found that there were some rectangles I really should have moved. It is by no means a horrible quilt, but I should have played with the layout a bit more. Asking for help was a great strategy, because people mostly liked the color work I did and I got lots of kudos, but some of the blocks jumped out at them. Funnily enough the blocks they noticed, for the most part, did not jump out at me. Almost exclusively, these were blocks that were hard to place – multi-color fabrics, conversationals, light backgrounds almost completely covered by various colors, etc. The CQFA group is great, because they helped me place the problematic blocks to their best advantage. In this way, I also learned.

FOTY 2009 Upper left corner
FOTY 2009 Lower left corner
FOTY 2009 Upper right corner
FOTY 2009 Lower right corner

I spent a good portion of the retreat sewing the quilt top together. Open house at school was today, so I had to leave the retreat early and only got some straps for my next Anna Maria Horner Multi-tasker tote done. I really wanted to stay, but am glad I was able to have a chat with various teachers at school as well. There is always so much to do!