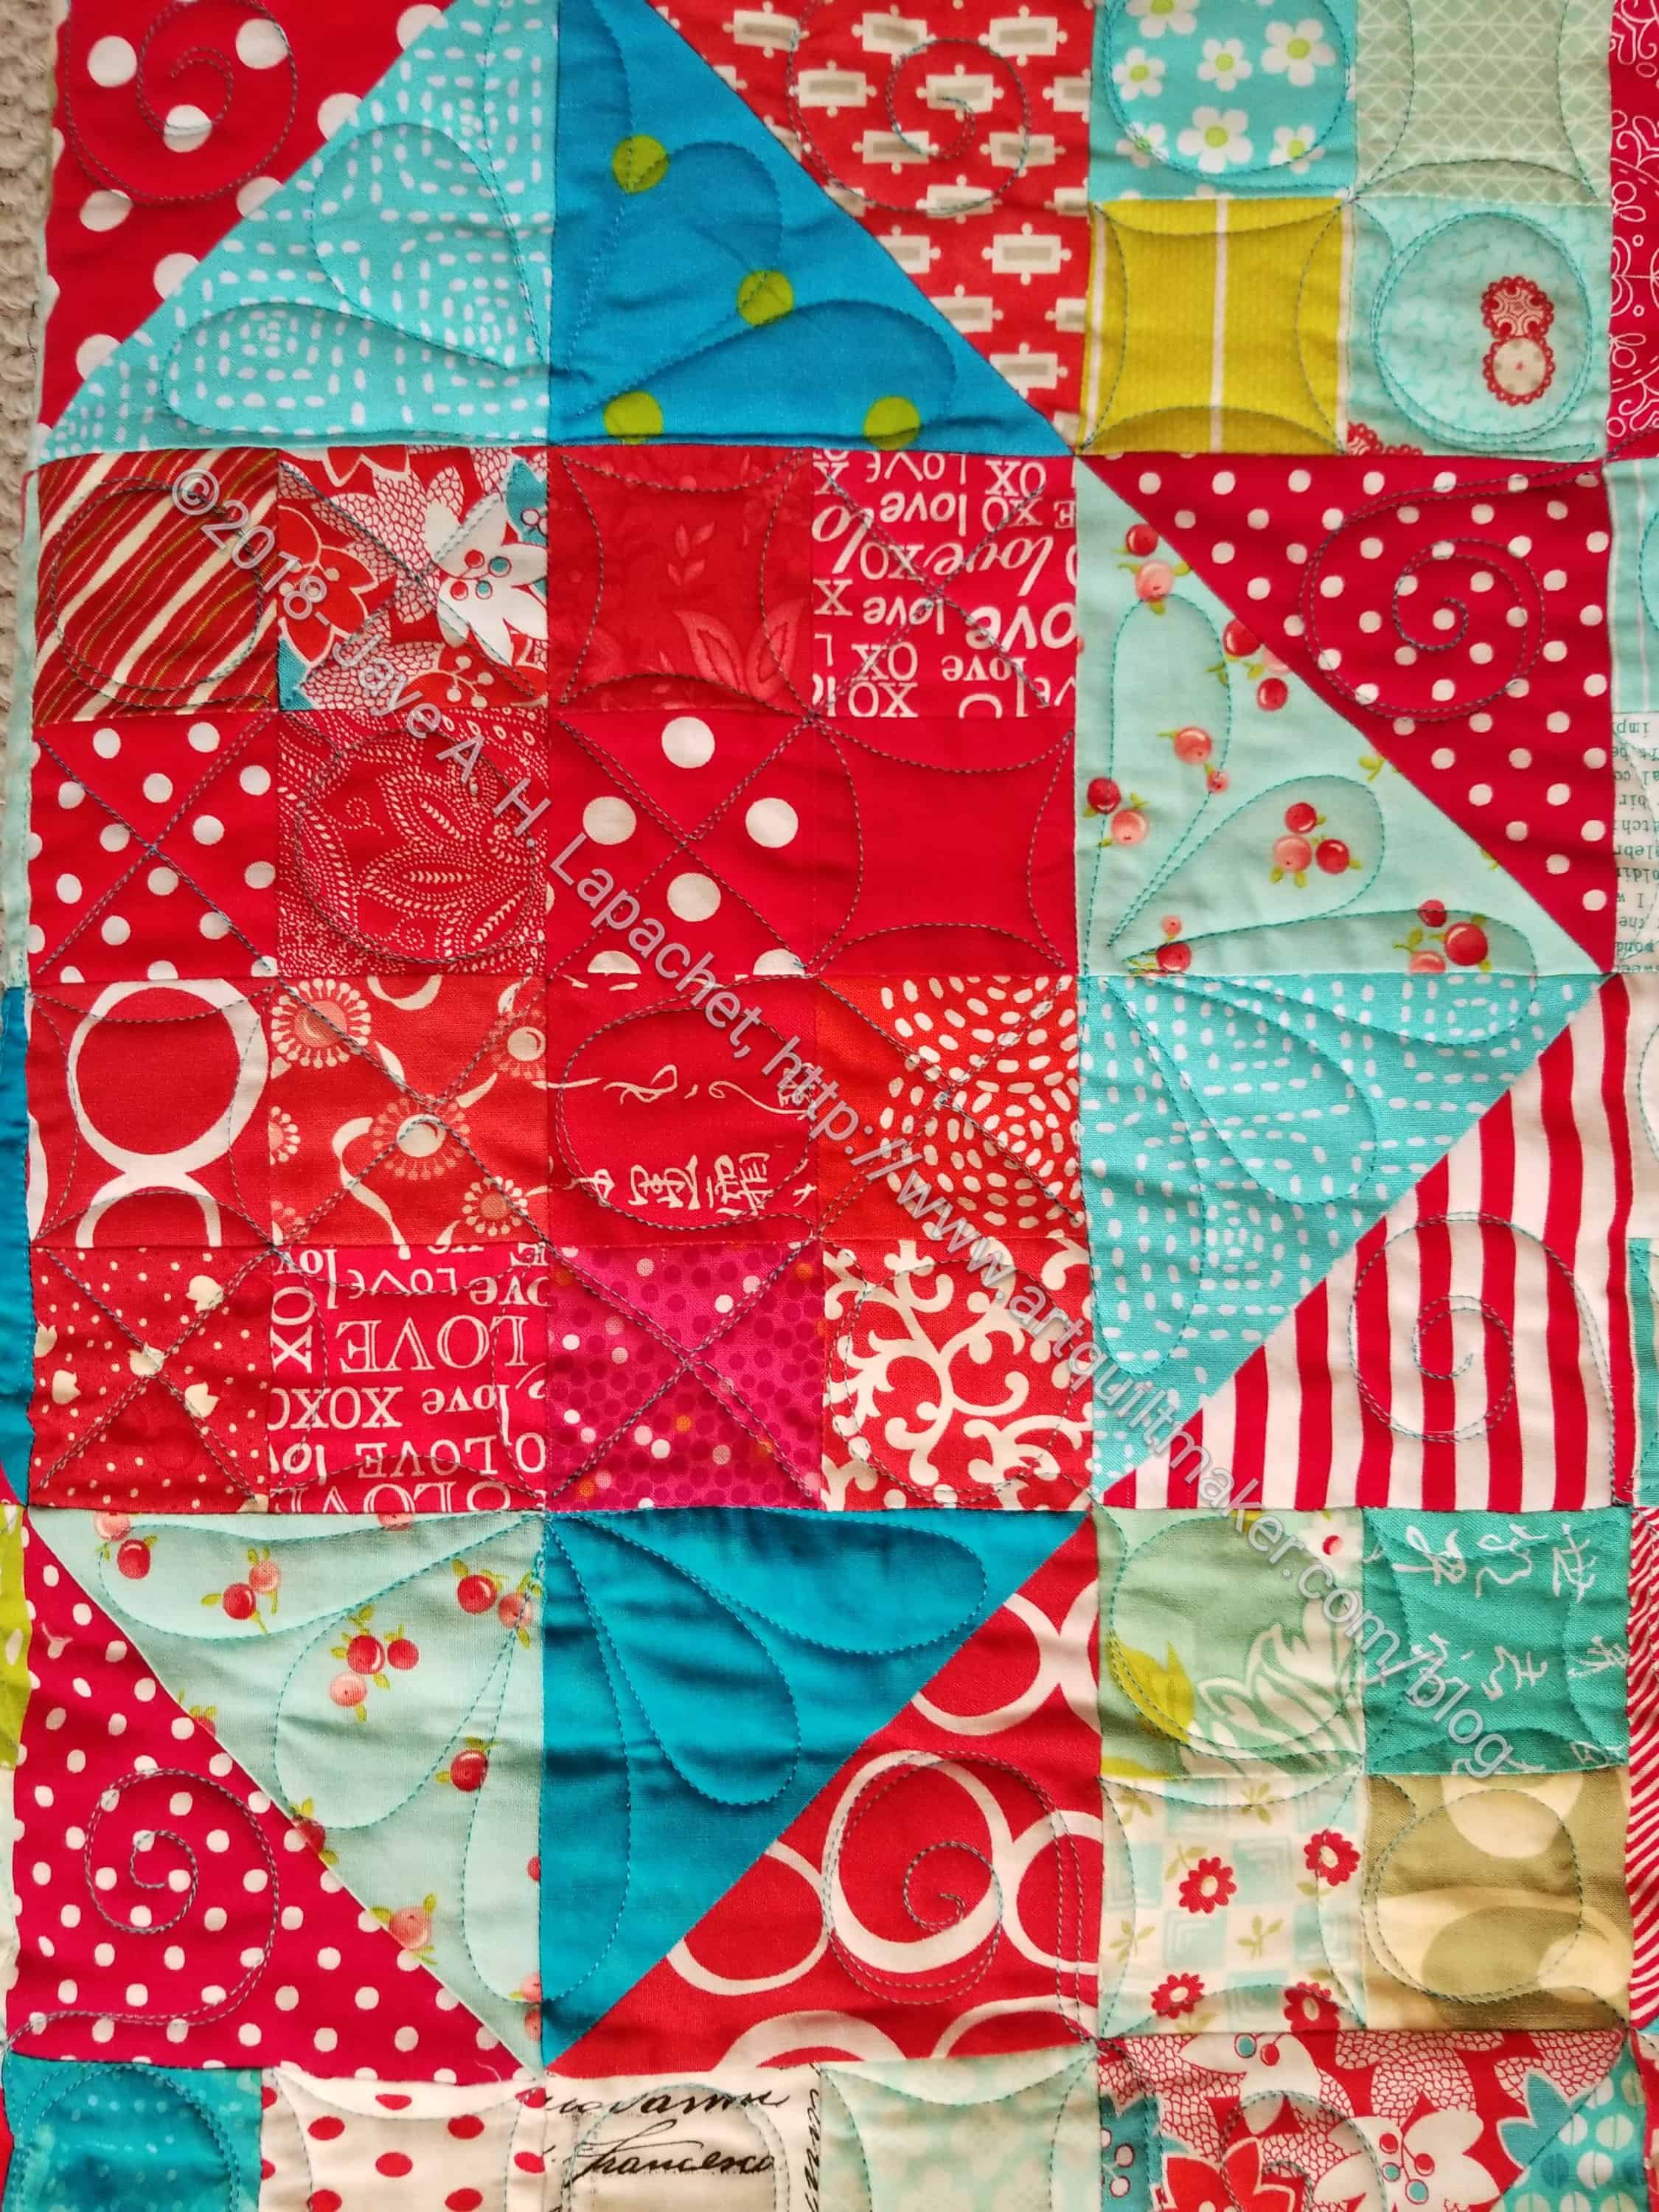
The Stepping Stones n.2 quilt is back from the quilter. I went and got it on Wednesday and am really pleased with the quilting.
I have to, of course, sew down the binding, so stay tuned.
Commentary about works in progress, design & creativity
The Stepping Stones n.2 quilt is back from the quilter. I went and got it on Wednesday and am really pleased with the quilting.
I have to, of course, sew down the binding, so stay tuned.
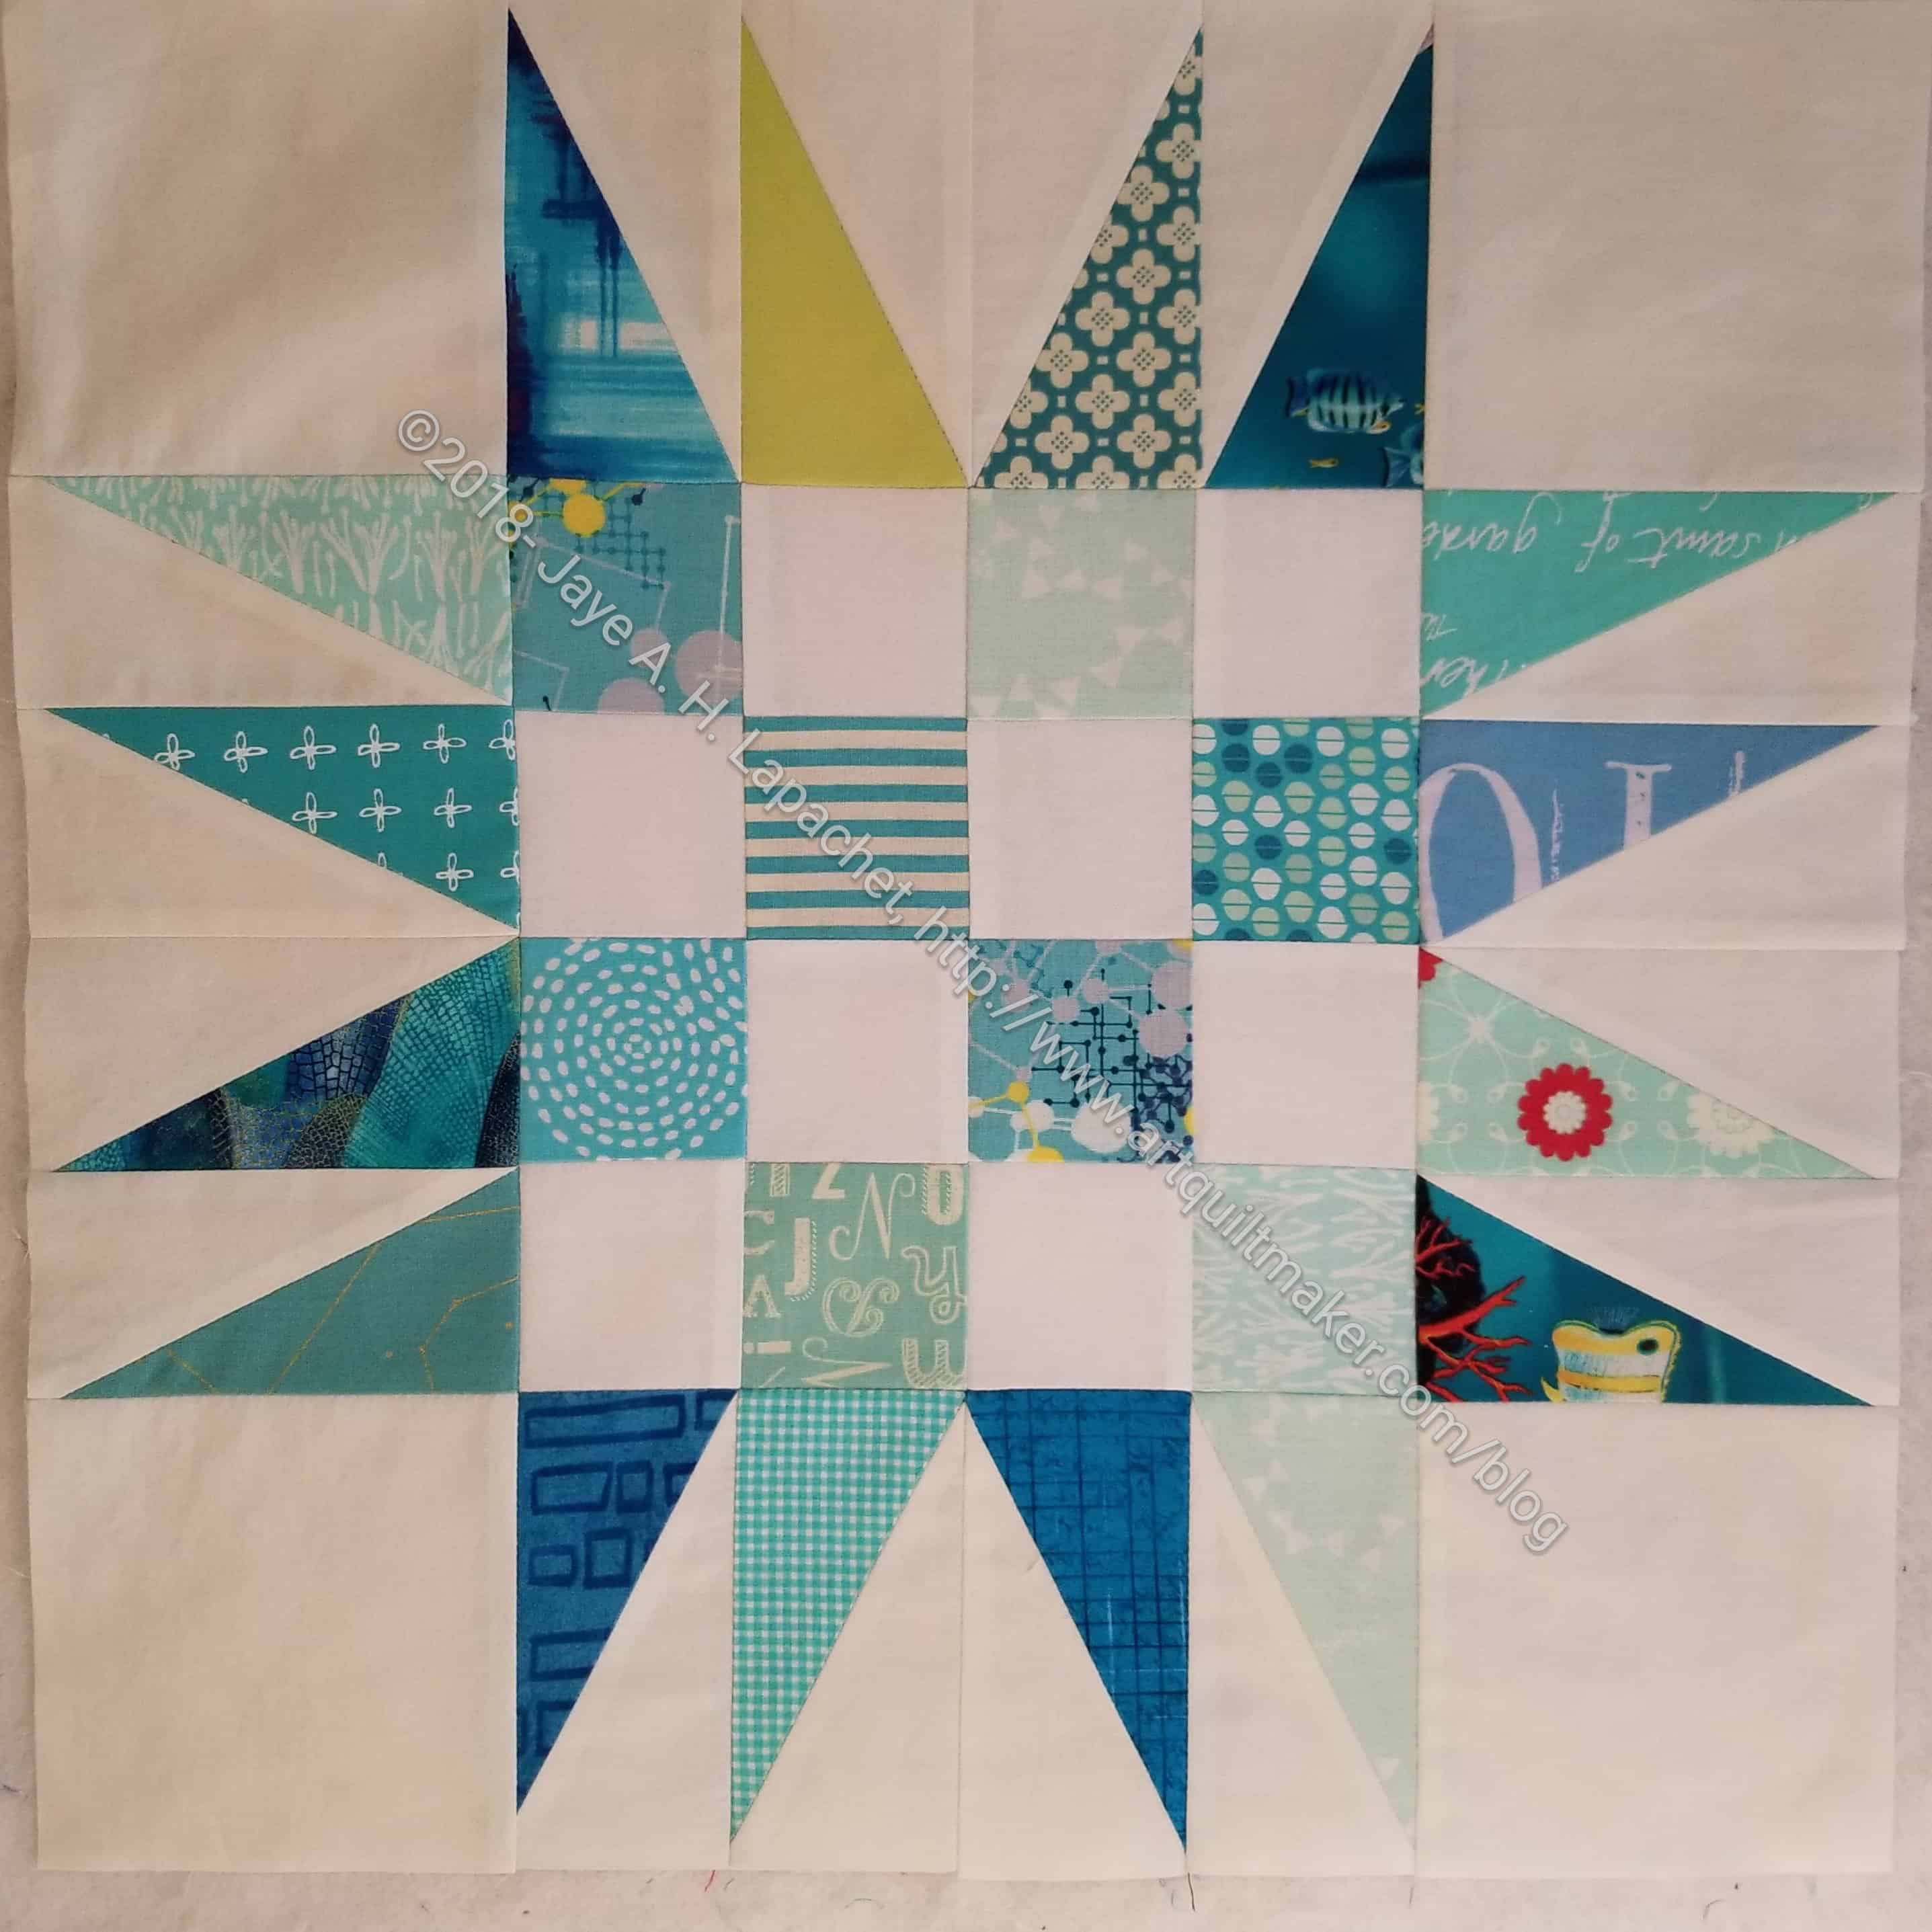
I didn’t have any time to sew at the end of the week and was kind of busy as well. I did manage to finish another Spiky 16 patch donation block.
I might be getting a little tired of these blocks in this color scheme. I know! Crazy, right? I’d kind of like to see a version with more colors. That means making a stash of HRTs in different colors as well.
After putting the used napkins from last week in the wash I pulled out new ones. I had rearranged the napkin drawer in order to circulate in some that hadn’t been used in awhile. One was folded back to front and I immediately had an ugly fabric reaction. It really isn’t hideous fabric, but not my colors. The print is interesting. It is a classic design. I don’t think this particular shade of pink has really ever been my color, but I bought it at some point in the past so I must have liked it or had a use for it.
This napkin brought out a whole slew of ugly fabric feelings and thoughts. I was especially reminded of things I had heard I must do.
-Buy a little ugly fabric.
-Put a piece of ugly fabric in your quilts so your nice fabrics will look better.
-Sew ugly fabrics as backs.
You know how well musts work with most people.
I went through about 5 seconds of buying ugly fabric. Then I decided that, for me, that is a seriously dumb idea. I am not spending my hard earned money on ugly fabric when there is so much great fabric out there. I don’t have enough money to buy the fabric I love (bolts of Philip Jacobs prints, please). I also don’t want to devote precious space to ugly fabrics.
The other thing is that ‘ugly’ is relative. My ugly fabric might be your favorite color. I am not here to tell you what you should or shouldn’t like. Ugly for me will be different than your ugly. Buy your favorites.
Also, what I think is ugly today might not have been ugly to me 10 years ago. Tastes evolve. Also, as a new quiltmaker, you might be trying out different styles to find what suits you. You might also mix what you like. I don’t buy many repro prints, even the cheerful 1930s prints. They just aren’t for me. However, there is a blue in the Civil War arena that I love and periodically I will buy an FQ of one print. I am careful, though to make sure it is more blue than beige.
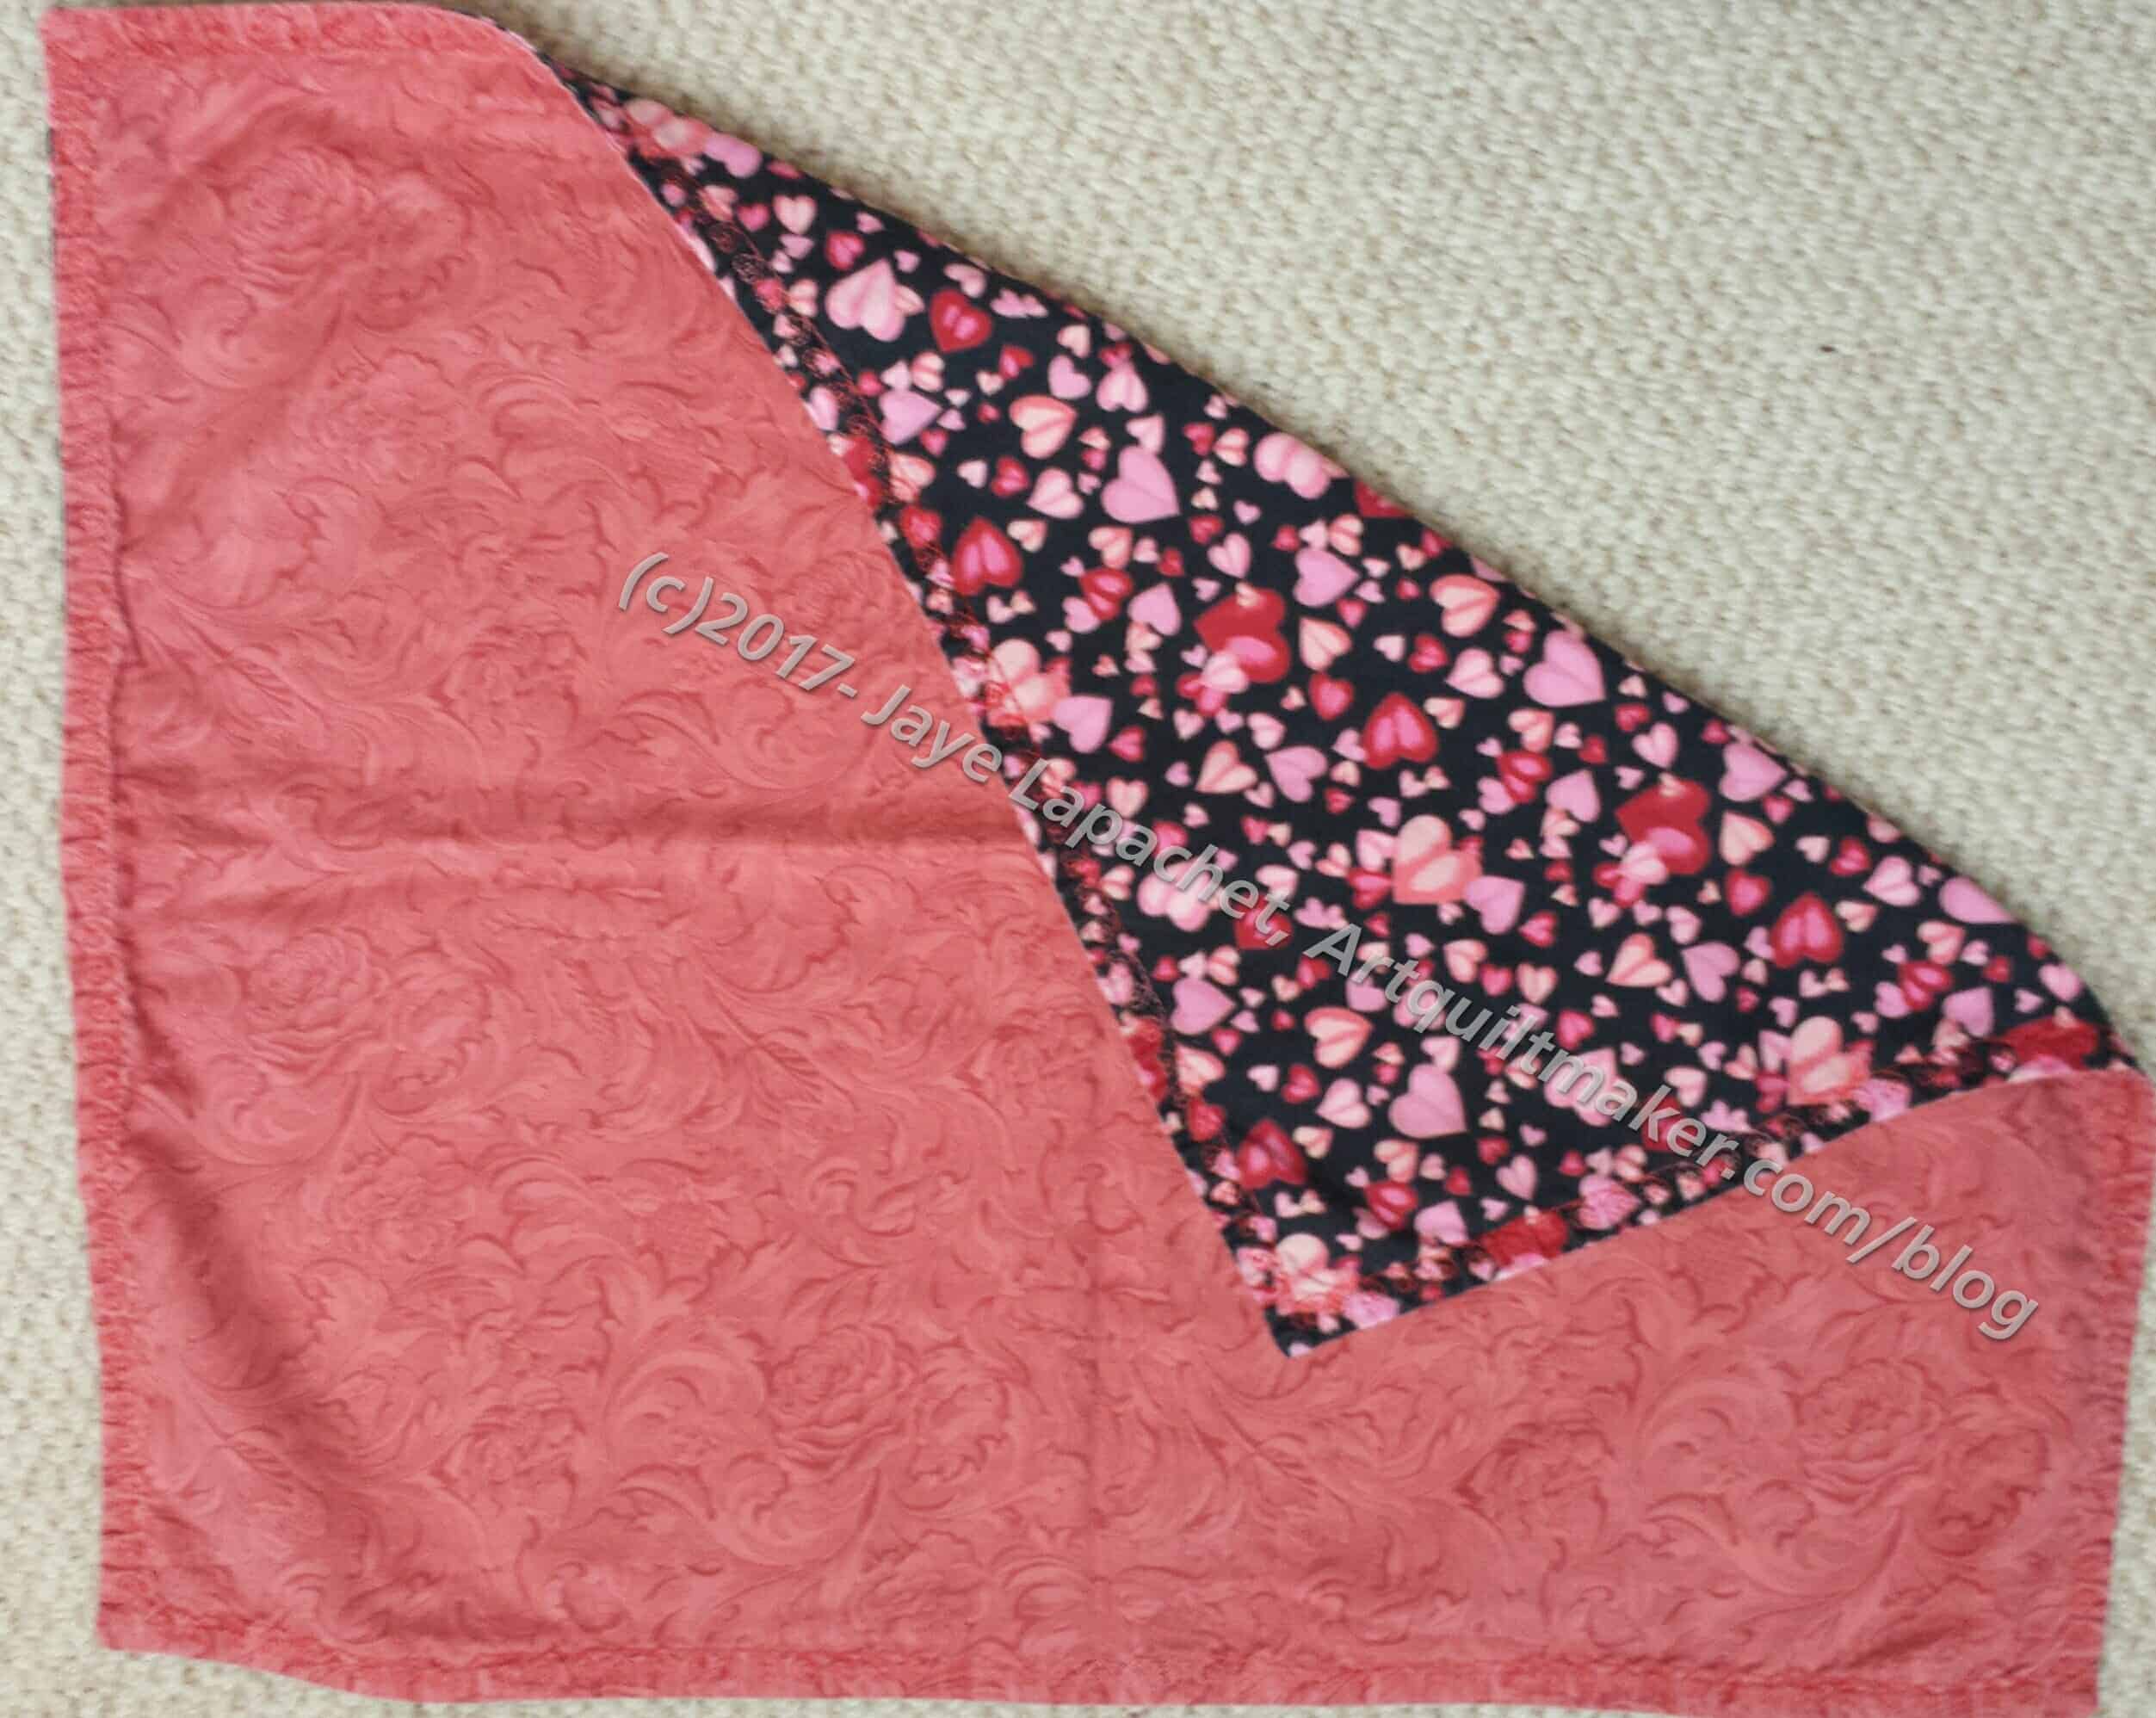
I worked on a quilt called Thoughts on Dots when I was having a big, fat creative block. This quilt was so painful to make, because I was forcing myself to sew. I was forcing myself to work through the creative block.I had a small child who was going through some stuff. DH was going through some stuff. It was a tough time. I moved around 6.5″ squares for weeks. I finished the quilt top and decided to use some ugly fabric for the back. To be thrifty, I decided to use fabric I wasn’t going to use for a front. The ‘ugly’ fabric isn’t hideously ugly, though it is beige. I interspersed the beige with leftover squares, so the back isn’t completely beige and hideous.
We act like we will never see the back so backs can be a dumping ground for ugly fabrics. Thoughts on Dots is on our bed, so I do see the back pretty often and I sincerely dislike it every time I see it. This is why I have used small pieces of beige for donation blocks. I don’t want beige in my fabric closet. This quilt is nearly the sole reason I use a lot of Philip Jacobs prints for my backs. I have decided I want to enjoy backs as much as my fronts. It doesn’t mean that I buy special fabric for the backs. It means I use fabrics I like from my fabric closet. Those Philip Jacobs prints are so well displayed on a back that I can’t possibly NOT use them now.
I also should have realized that being thrifty didn’t mean I had to use that beige fabric. It isn’t as though there has been a shortage of fabric at my house in a while.
My final thought is that everyone should just use the good stuff immediately. Don’t buy it and save it for some other day. That day is today and you will love whatever you make even more if you can see your new favorite fabric immediately.
 Double Vision Quilts: Simply Layer Shapes & Color for Richly Complex Curved Designs by Louisa L. Smith
This is not the first book by Louisa Smith that has intrigued me. She has an interesting style. This one wasn’t on my list, but it intrigued me and I bought it on impulse at Stitch in Ferndale. The first thing that attracted me were the bright colors on the cover. In looking at the cover again, I can imagine using Dale Fleming’s circle technique to make it.
This is a ‘normal sized’ C&T book which includes 94 pages, 11 projects, a gallery and lots of technique information so readers can make the projects their own. After the detailed table of contents (pg.3) and a short introduction (pg.4), the book begins with a section called “how it started” (pg.5-6). Smith discusses her idea, her inspiration, all the while implying the importance of doodling. She goes on to discuss how changes in her design led to other versions and the second section, “Working in a Series” (pg.6).
Working in a Series is all about the ‘what if’ of the creative process – those spin off ideas that pop into your mind as you work on one piece. As you know, I often work in a series because of this reason. See more about my series quilts.
The colors throughout the book continue to be a huge draw for me. As I page through the book, I am kept interested.
In “The Layered Approach” (pg.8-10) she talks about how layers improve/make these quilts. Layering fabric is something I have played with on and off, so I can appreciate the value of such an approach.
This book has basic construction techniques. I don’t mind it because the instructions are related to this specific technique, for the mist part. There is a very brief section on quilting (pg.85) – just commentary. It is not a how-to. She also talks about her method of piecing a back (pg.35). The instructions are brief, but useful. She covers blocking (pg.36), binding and facing (pg.36-38), displaying using stretcher frames and making a sleeve (pg.39).
If you are a beginner expecting full instructions for every step, you will be disappointed and will need another book with basic instructions or check out my quilt class tutorials. The security tips given are specifically dedicated to help you make these quilts.
The 3 methods of construction described are “Using a Grid of Blocks with 1/4 KISSes and No Fusing” (pg.11-12), “Using a Grid and Fusing” (pg.13), “Using an Invisible Grid with Multiple Layers of HUGs and KISSes” (pg.16). Method 2 is split into two parts, thus you see four methods listed.
“Color” (pg.17-25) is a long and valuable section. The author discusses value (pg.17-18), finding a color scheme (pg.19-24) as well as balancing color (pg.24-25) and using a proportional color wheel (pg.25). The section on choosing a color scheme is well developed and includes examples. The examples really help to improve the reader’s color knowledge.
The section on “Machine Applique’ ” (pg.26-29) includes examples of stitches (pg.27), basic applique’ techniques (pg.26) and has a lot of pictures. She suggests experimenting with your machine before starting on your Double Vision quilt. I agree I always do a test of the satin stitch (or whatever applique’ stitch I am using) to figure out the density, whether I like the thread and sheen, etc.
Smith defines Embellishing, another section (pg.30-32), as “…adding something to the quilt top to make it better” (pg.30). I think of embroidering or beading as embellishment. While she talks a bit about machine embroidery (pg.32), most of the section refers to layering on shapes.
“The Gallery” (pg.40-46) is fantastic. The section shows a lot of quilts, tells what method was used to make than as well as the artist. It is a feast for the eyes!
Finally, comes the “Projects” section (pg.47-88). Each pattern has a picture of the quilt on the section’s main page as well as a larger picture on the main project page. As you would expect, the pattern shows fabric requirements. These are a little different because the fabric requirements are divided up into layers. Fabric is followed by cutting and assembling directions. Applique’ and embellishing are included, if applicable to the pattern. The colors throughout the project section are phenomenal. Finally, the book has full sized templates coded to the relevant pattern (pg.89-94).
This book is interesting. It is definitely not the same-old, same-old. It will really stretch the reader, both in skills and in fabrics. This book is definitely worth a look.
I have a box of quilt ‘dreg’ ends. Dreg is an ugly word as it conjures an image of grounds in an empty coffee cup or discarded tea leaves. These are simply pieces and parts that don’t have an immediate need or use. For some reason, I decided to go through the box in which they are stored. I think it’s part of the recent tidying frenzy in which I have been engaging.
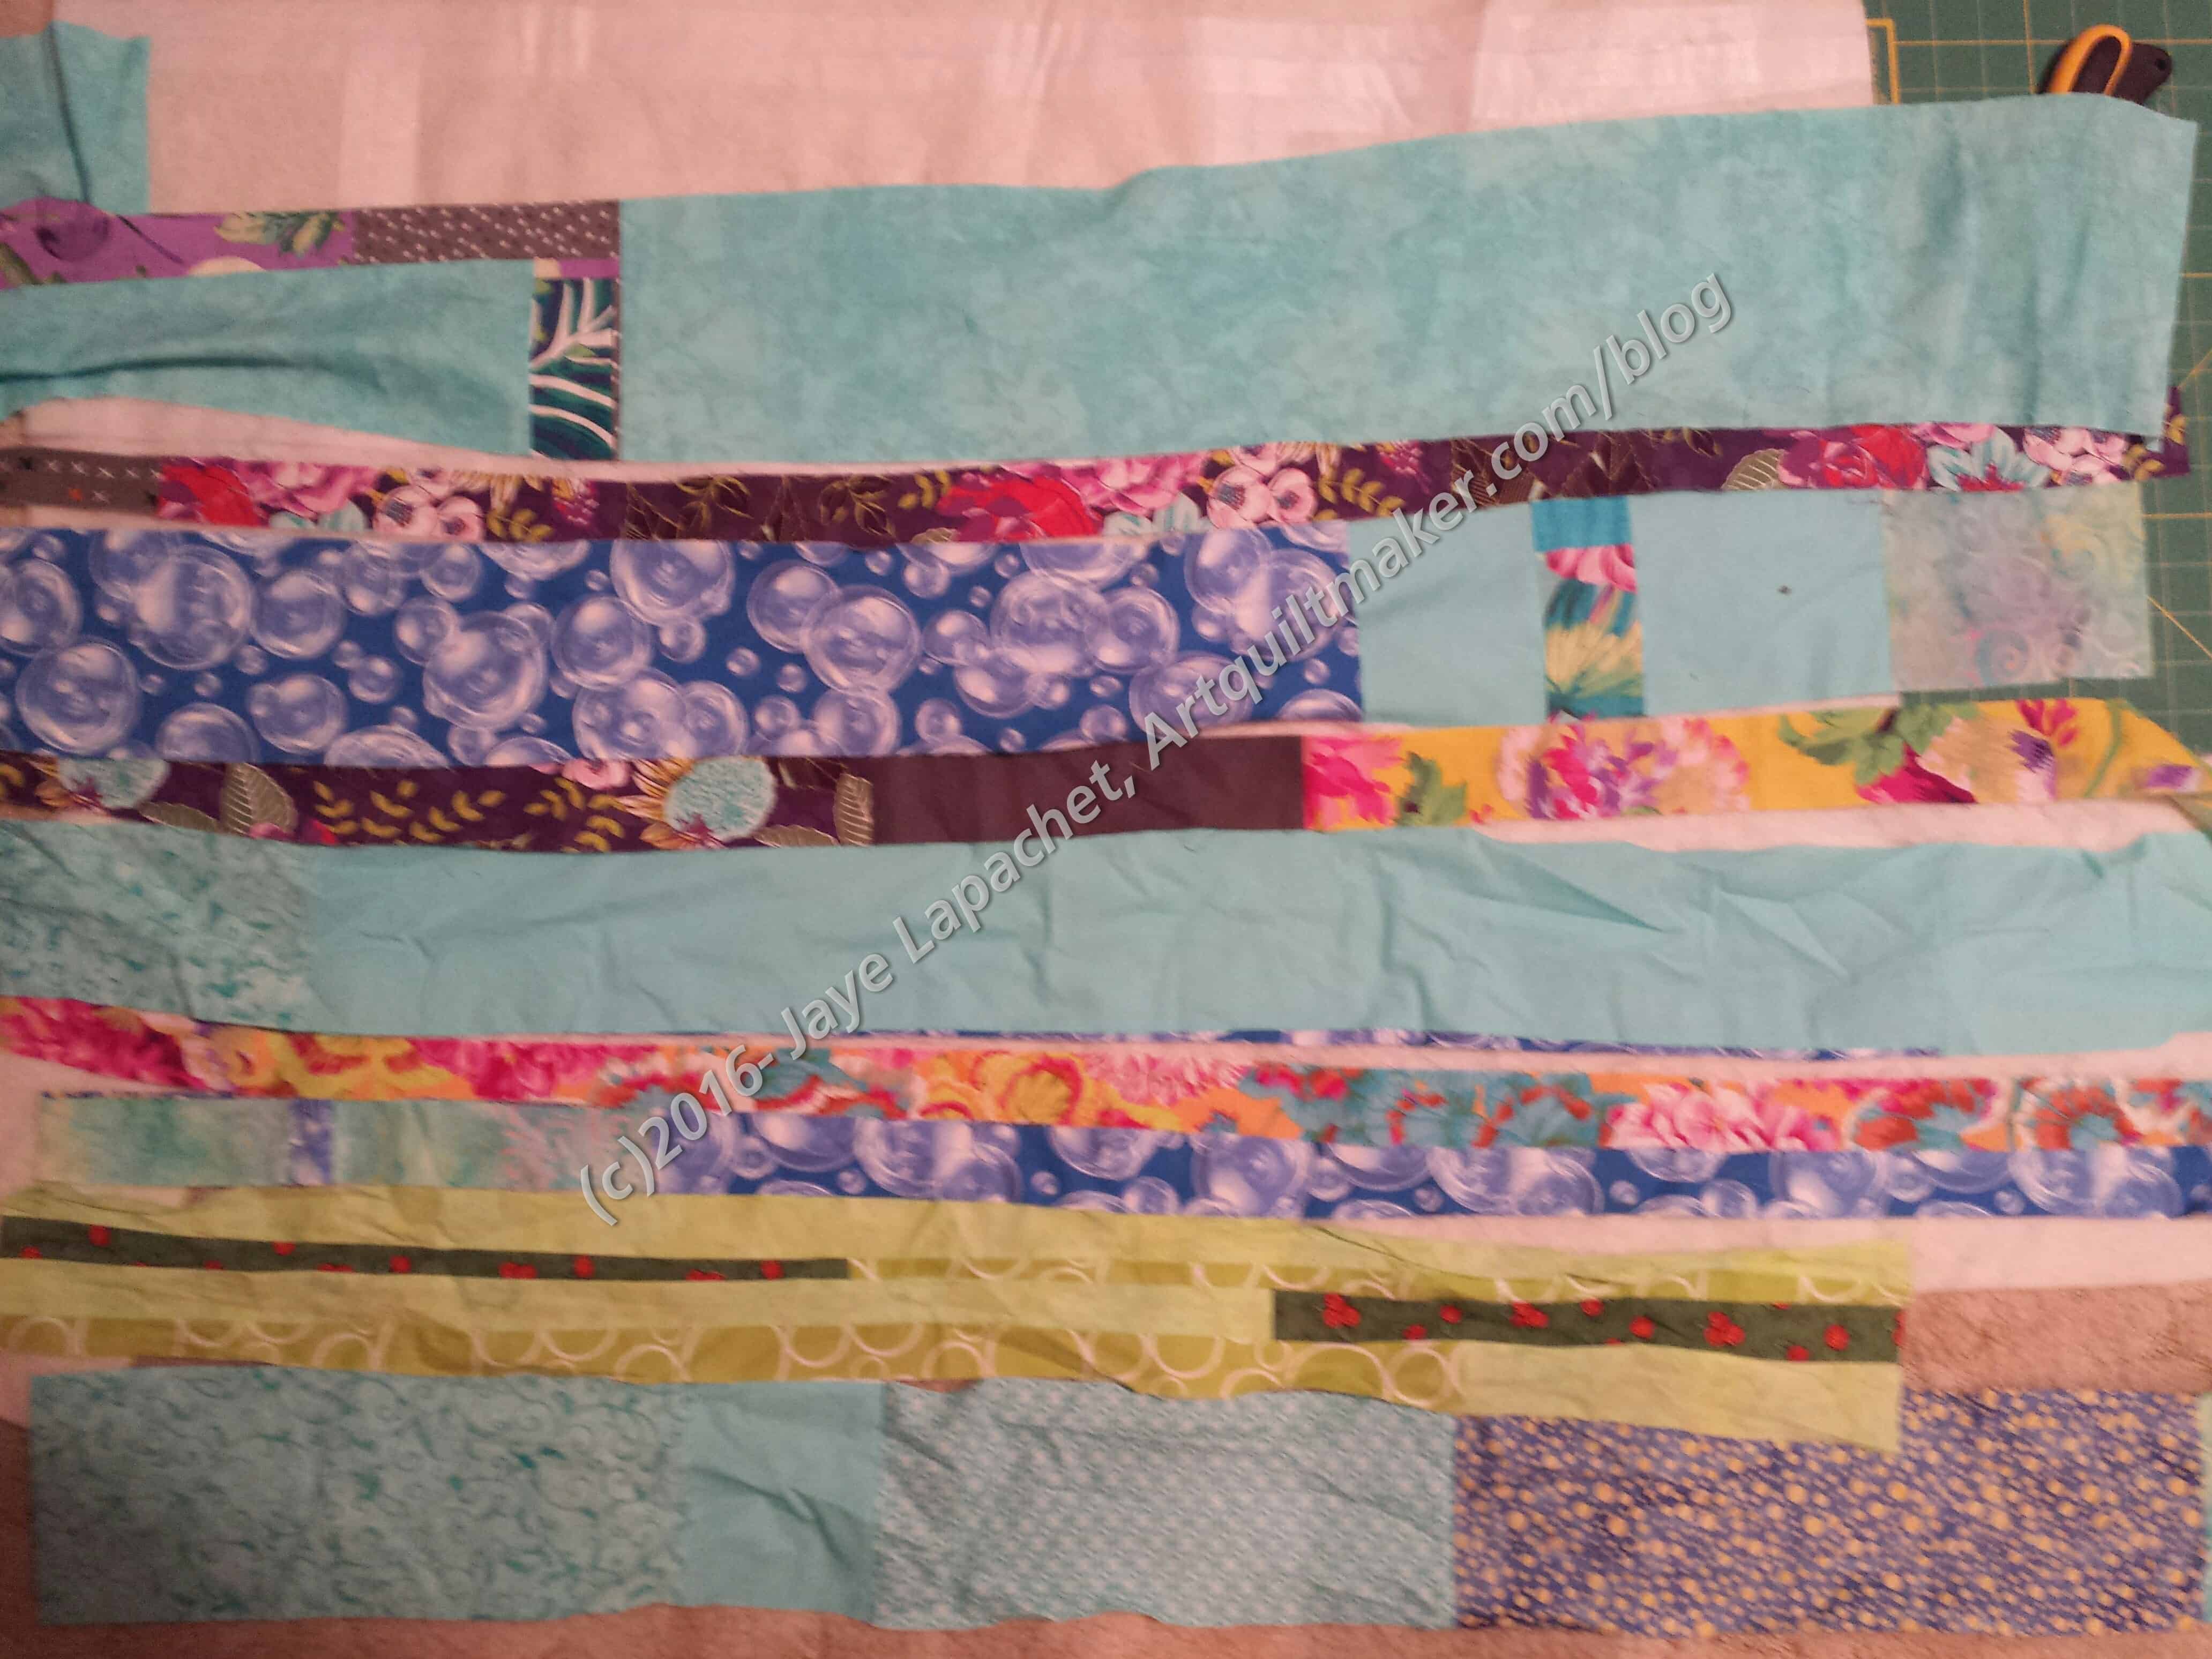
Initially, I thought I would put some batting scraps together to make a baby quilt sized batting. However, I found a bunch of fabric edges. They were cut from past quilts when they were squared up. I started laying out these fabric strips to get them out of the way. At one point, I looked over and saw a kind of improv strip top developing.
The next day I had some free time so I pressed and straightened up the strips. Then, I pinned sets together in preparation for sewing. I still have to sew the strips and see what happens.
Since I didn’t have time to sew, I built up a batting from scraps in preparation for the donation quilt. I don’t know if I will have enough pieces to make a batting for this top. It will be close. I have some long thin strips left. I don’t really want to use the tape up to attach them as it will use so much of the Heat Press. I might just sew them on to make the batting large enough and get the strips out of my house.
It is interesting to see this top develop.
 The New Hexagon: 52 Blocks to English Paper Piece by Katja Marek
I bought this book because it was a block dictionary and the cover was very appealing. I think I also liked the cover’s color and was in a weak mood. Still, I do love block dictionaries and this is a great one for new a way of looking at hexagon blocks. I have never seen a grouping of hexagon ‘blocks’ before and these are really unique. I am really excited about English Paper Piecing right now and can see myself starting several projects using that technique. I am trying to restrain myself, especially since I plan on making the La Passacaglia quilt.
This book was paired with the Marti Michell Perfect Patchwork Templates set G. I thought they would be great for cutting the fabric. The sizes of the rotary templates don’t match the sizes in the book so that is a problem. However, as creative people I know that most of us can adjust the blocks to the size of the templates since they make cutting fabric much easier.
Predictably, the book starts out with a table of contents. After the table of contents, the author presents us with her view of paper piecing. The method I use (thread basting) is considered “truly laborious” (pg.4), though in fairness to the author, I do buy paper templates rather than cutting them out myself. Marek advocates glue basting fabric to cardboard over thread basting.
The author discusses the advantages of EPP, including its portability. I do agree that English Paper Piecing is portable, as you have seen with my half hexie project.
The Tools and Equipment section (pg.6-7) is compact but information filled. I was thrilled to see that Ms. Marek goes to the level of telling her readers what weight of paper (pg.6) she uses to print her EPP papers. This is very useful information if I decide to print templates rather than buying my papers. In addition to the tools, Marek also describes her “on-the-go box” and what it contains. I am a huge fan of Go Bags as having a bag ready to take on trip means I don’t have to rummage for supplies and possibly forget something. It also means I might actually get something done on a travel weekend where I might otherwise get no time with a needle.
The fabric in this book looks like Kate Spain’s Terrain, another appealing aspect to the color scheme of this book. It is well suited to the examples as there is opportunity for fussy cutting from some of the motifs.
English Paper Piecing Techniques (pg.8-11) follows the chapter on tools. This section has everything you need to know about paper piecing. Keep in mind that this is the author’s method and variations you use are not wrong. While I haven’t tried the glue basting method, the complete directions given do encourage me to give it a try. I normally only wash my quilts as needed so I worry about the lasting effects of the glue on the fabric. She talks about removing the papers but not about reusing them or washing the glue out of the fabric.
There is the ubiquitous section on “Quiltmaking Basics” (pg.12-15), over a page of which is concerned with binding the quilt. There is no talk of quilting the quilt beyond following the manufacturer’s instructions. Of course whole books have been written on the subject so I am not surprised.
One of the most interesting chapters is called “Working with Patterns” (pg. 16-18). One thing this section shows is why the reader should prepare the templates in the way the author recommends. “The following is the so-called ‘fine print’ — the little details that are often glossed over. You may never choose to changed the size of the blocks in this book, and you may never need to calculate the height of a hexagon. But when you become inspired to start designing your own quilts using the blocks I have provided, these little tidbits are here to help you. The size of the blocks in this book is determined by measuring the length of one side (in this case 3 inches) (pg.16). Even I, who glosses over directions with wild abandon and to my shame, can see the wisdom in Marek’s words. This section also gives tips on fussy cutting and provides ideas on layouts. Study these pages carefully and you will benefit greatly. I did and found a variation of Jack’s Chain which has my head spinning with thoughts on that layout.
Over 71 pages 52 hexagon blocks are presented (pg.19-52). The author has named all of them with women’s names. Carol is the most basic divided hexagon, being made up of 6 triangles. Most of the other blocks have smaller hexagons and diamonds, some half hexies (Lorraine is similar to my EPP project), triangles, parallelograms, and kite shapes all rearranged into hexagon shapes in very clever ways.
Finally, the book has a few projects. Because of the nature of EPP, I think this is a book that will inspire quiltmakers to design their own quilts. All of the projects, especially those made in Terrain are very appealing. My favorite might be the Rain Chain Nursery Quilt. It reminds me of the modern donation quilt our color group made a few years ago. There is a lot of background, but the layout is very appealing. Sadly, the Jack’s Chain variation is made from unappealing beiges.
There is also a list of resources and a gallery. This book has a lot of scope for inspiration
Yes, this is an Alice in Wonderland-esque post.
Yesterday, after returning from a somewhat intense #politicalwifery weekend, I spent some time with The Peacock.
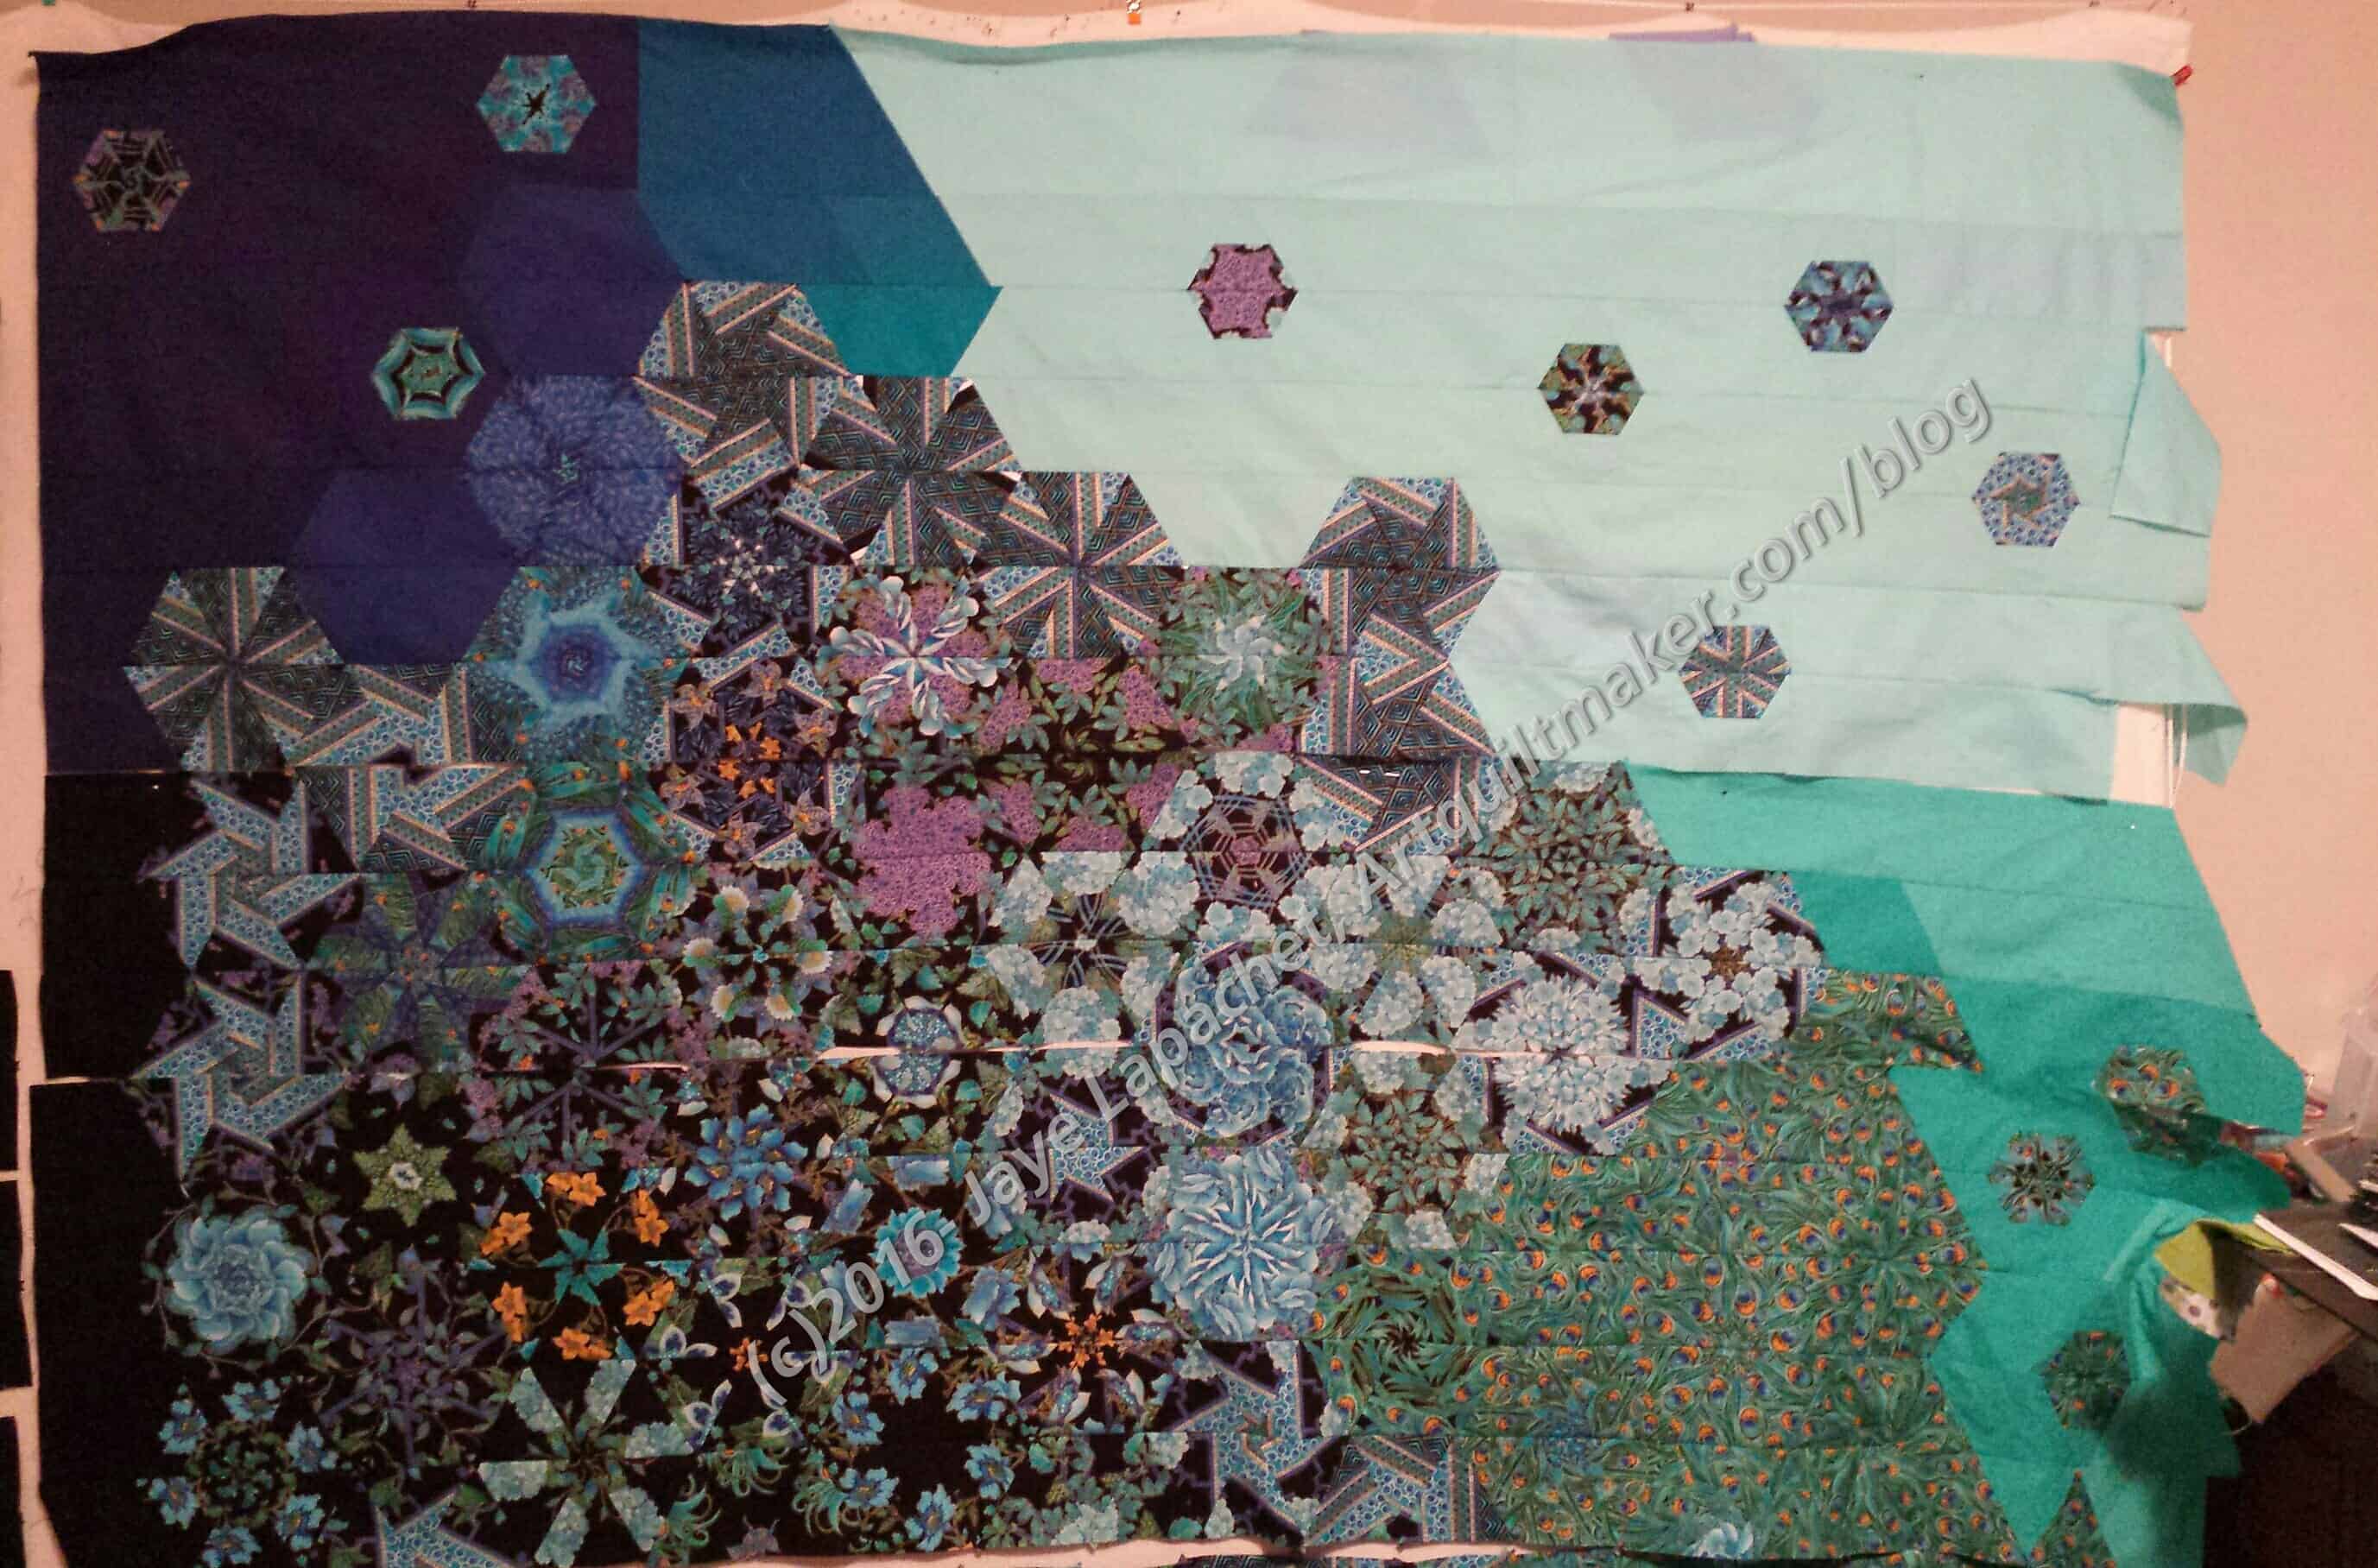
The short version is that I finished the left part of the top. There a couple of long seams I need to sew to other long seams, but I am saving them until the end.
Now I can work on the right side in peace. The first small hexies I added need a lot of attention. I was able to put the 3 rows together after that. I am waiting to see how long the rows with small hexies will be before I trim or add to other rows. At the moment
Progress. Definite progress.
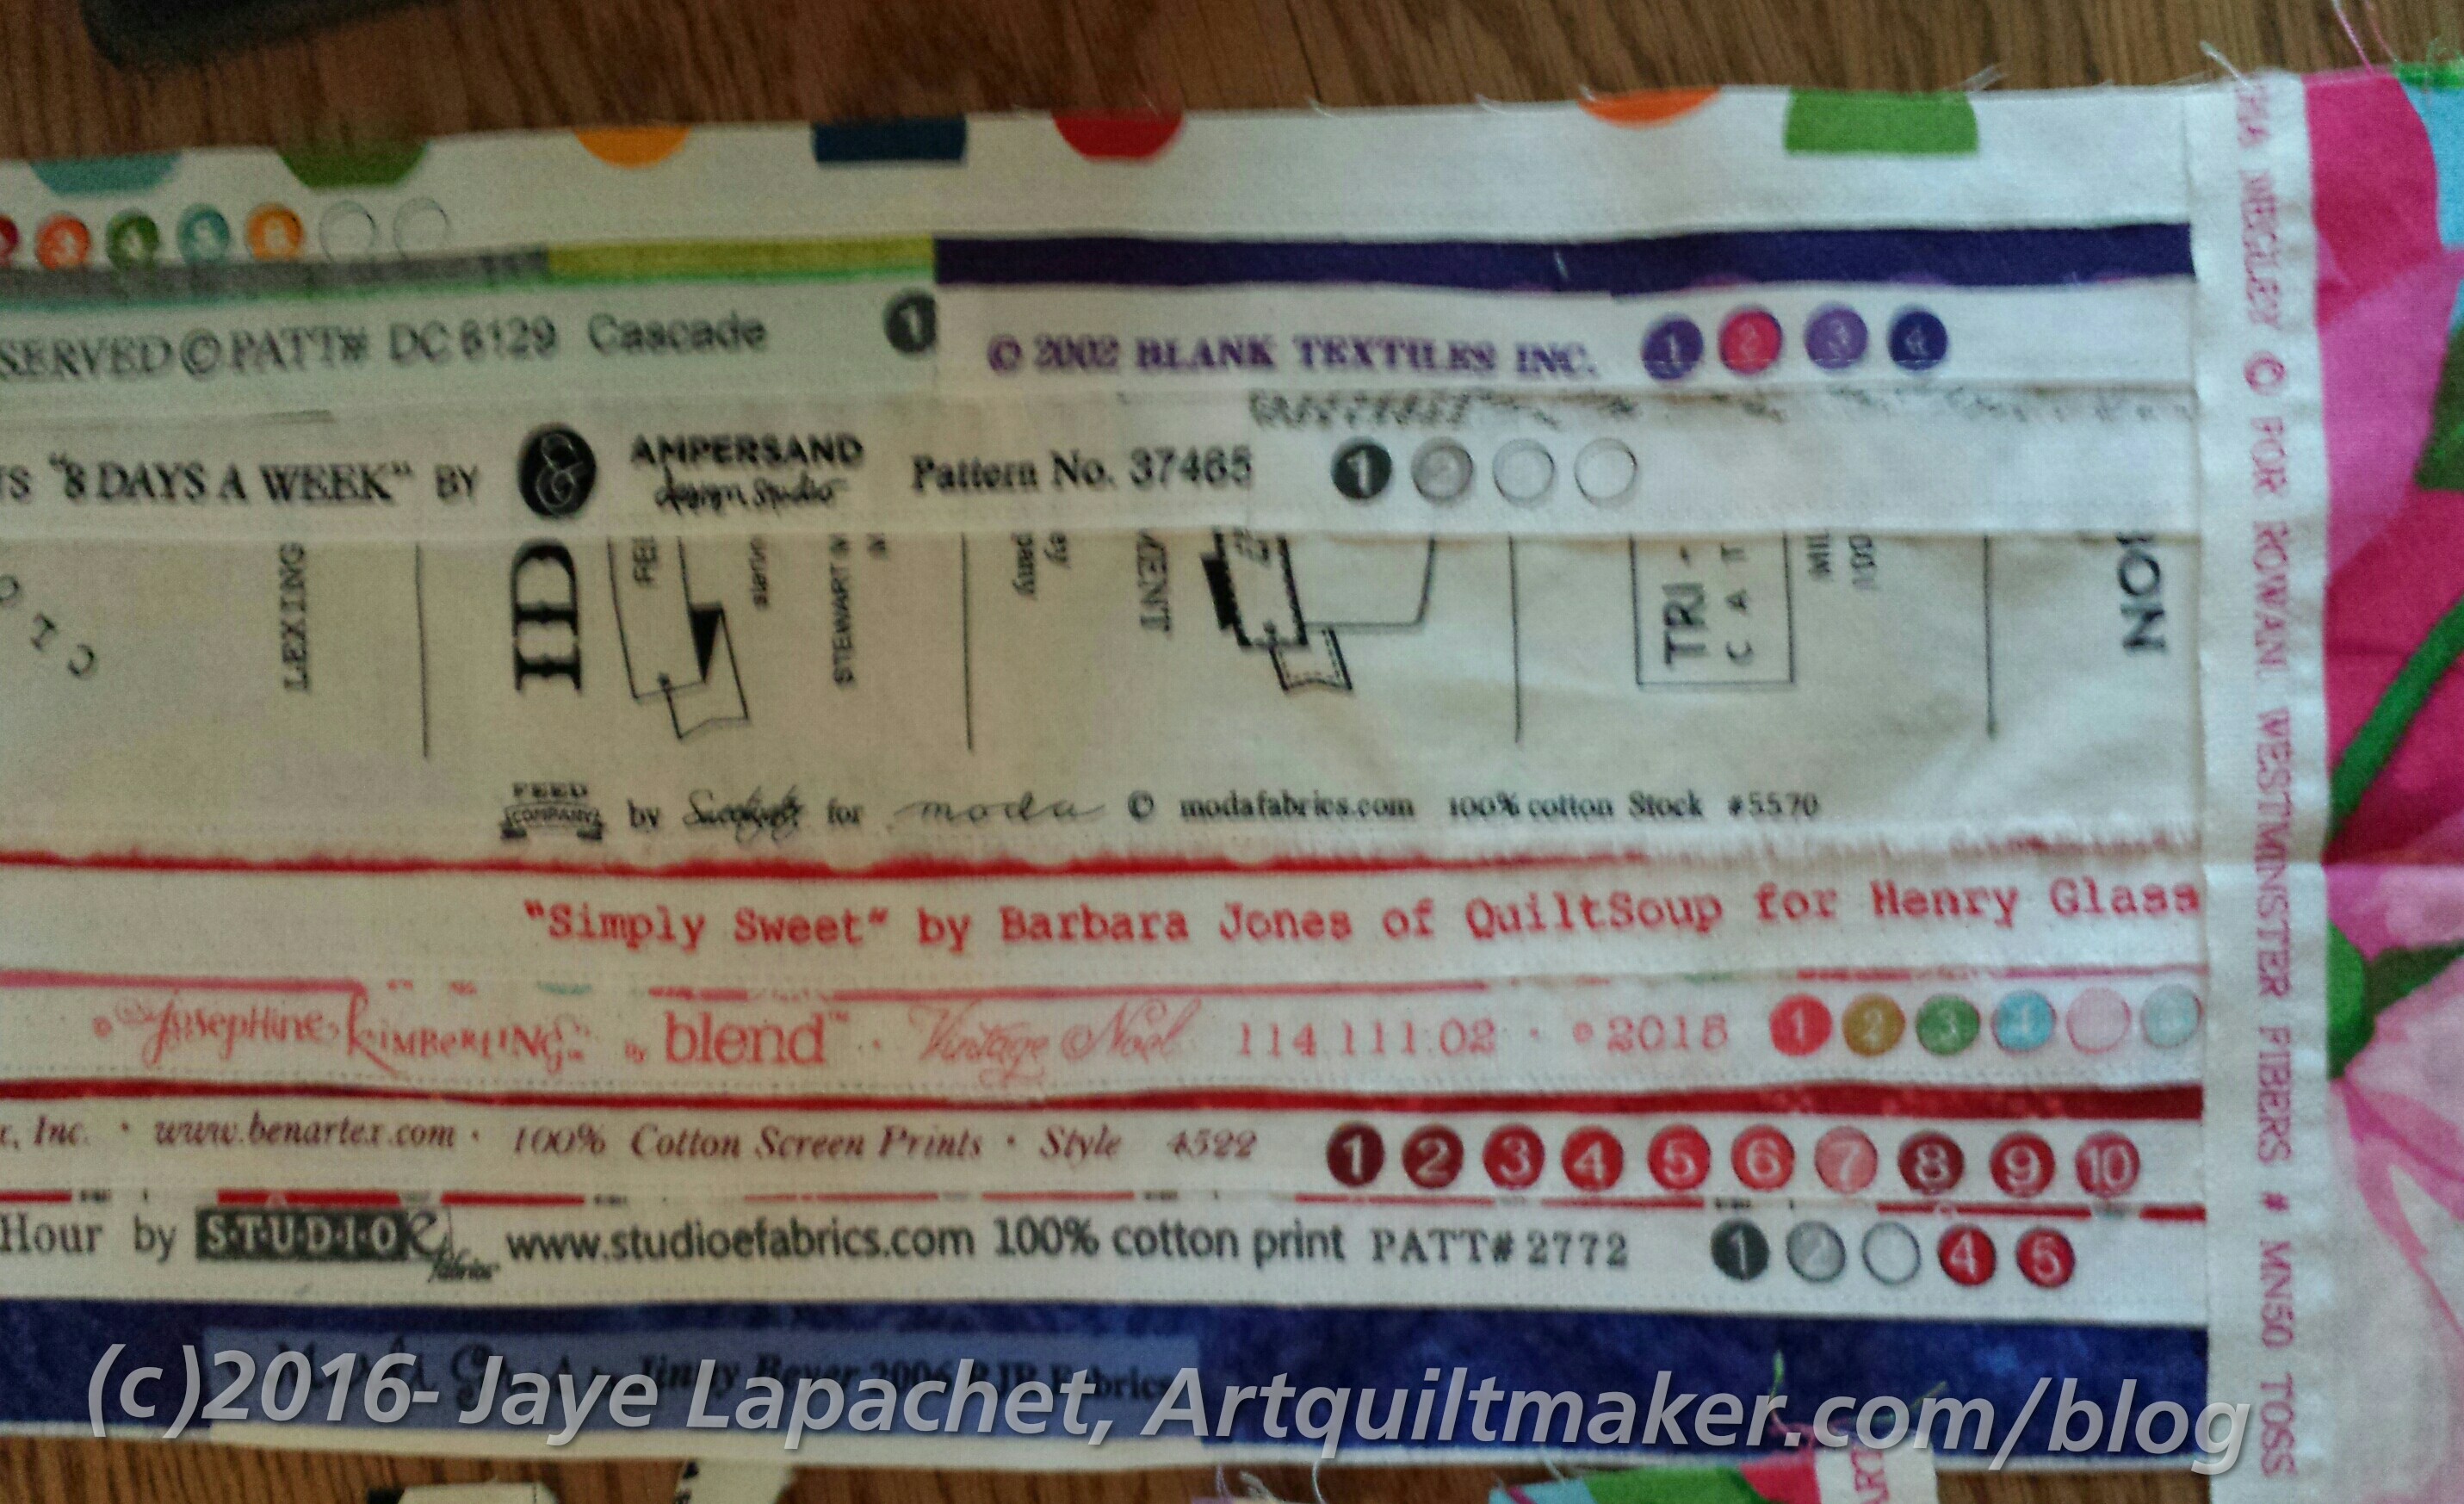
Normally, I save selvedges for Angela. I decided to try a few out myself so I made this piece of selvedge ‘fabric’ with no particular idea in mind.
Last night I got a brainwave and am going to use it for some pincushions. I saw the pattern in Love Patchwork & Quilting.
Angela will still get most of them. This is just a fun little diversion.
 I am hoping that this is the last Carpenter’s Wheel block. My fingers are crossed because it would be nice to finish something AND I want to turn this in for the BAMQG challenge.
As I may have mentioned, I have an idea for the layout and I’d like to get to it. Of course, I have to get the Peacock off the design wall.
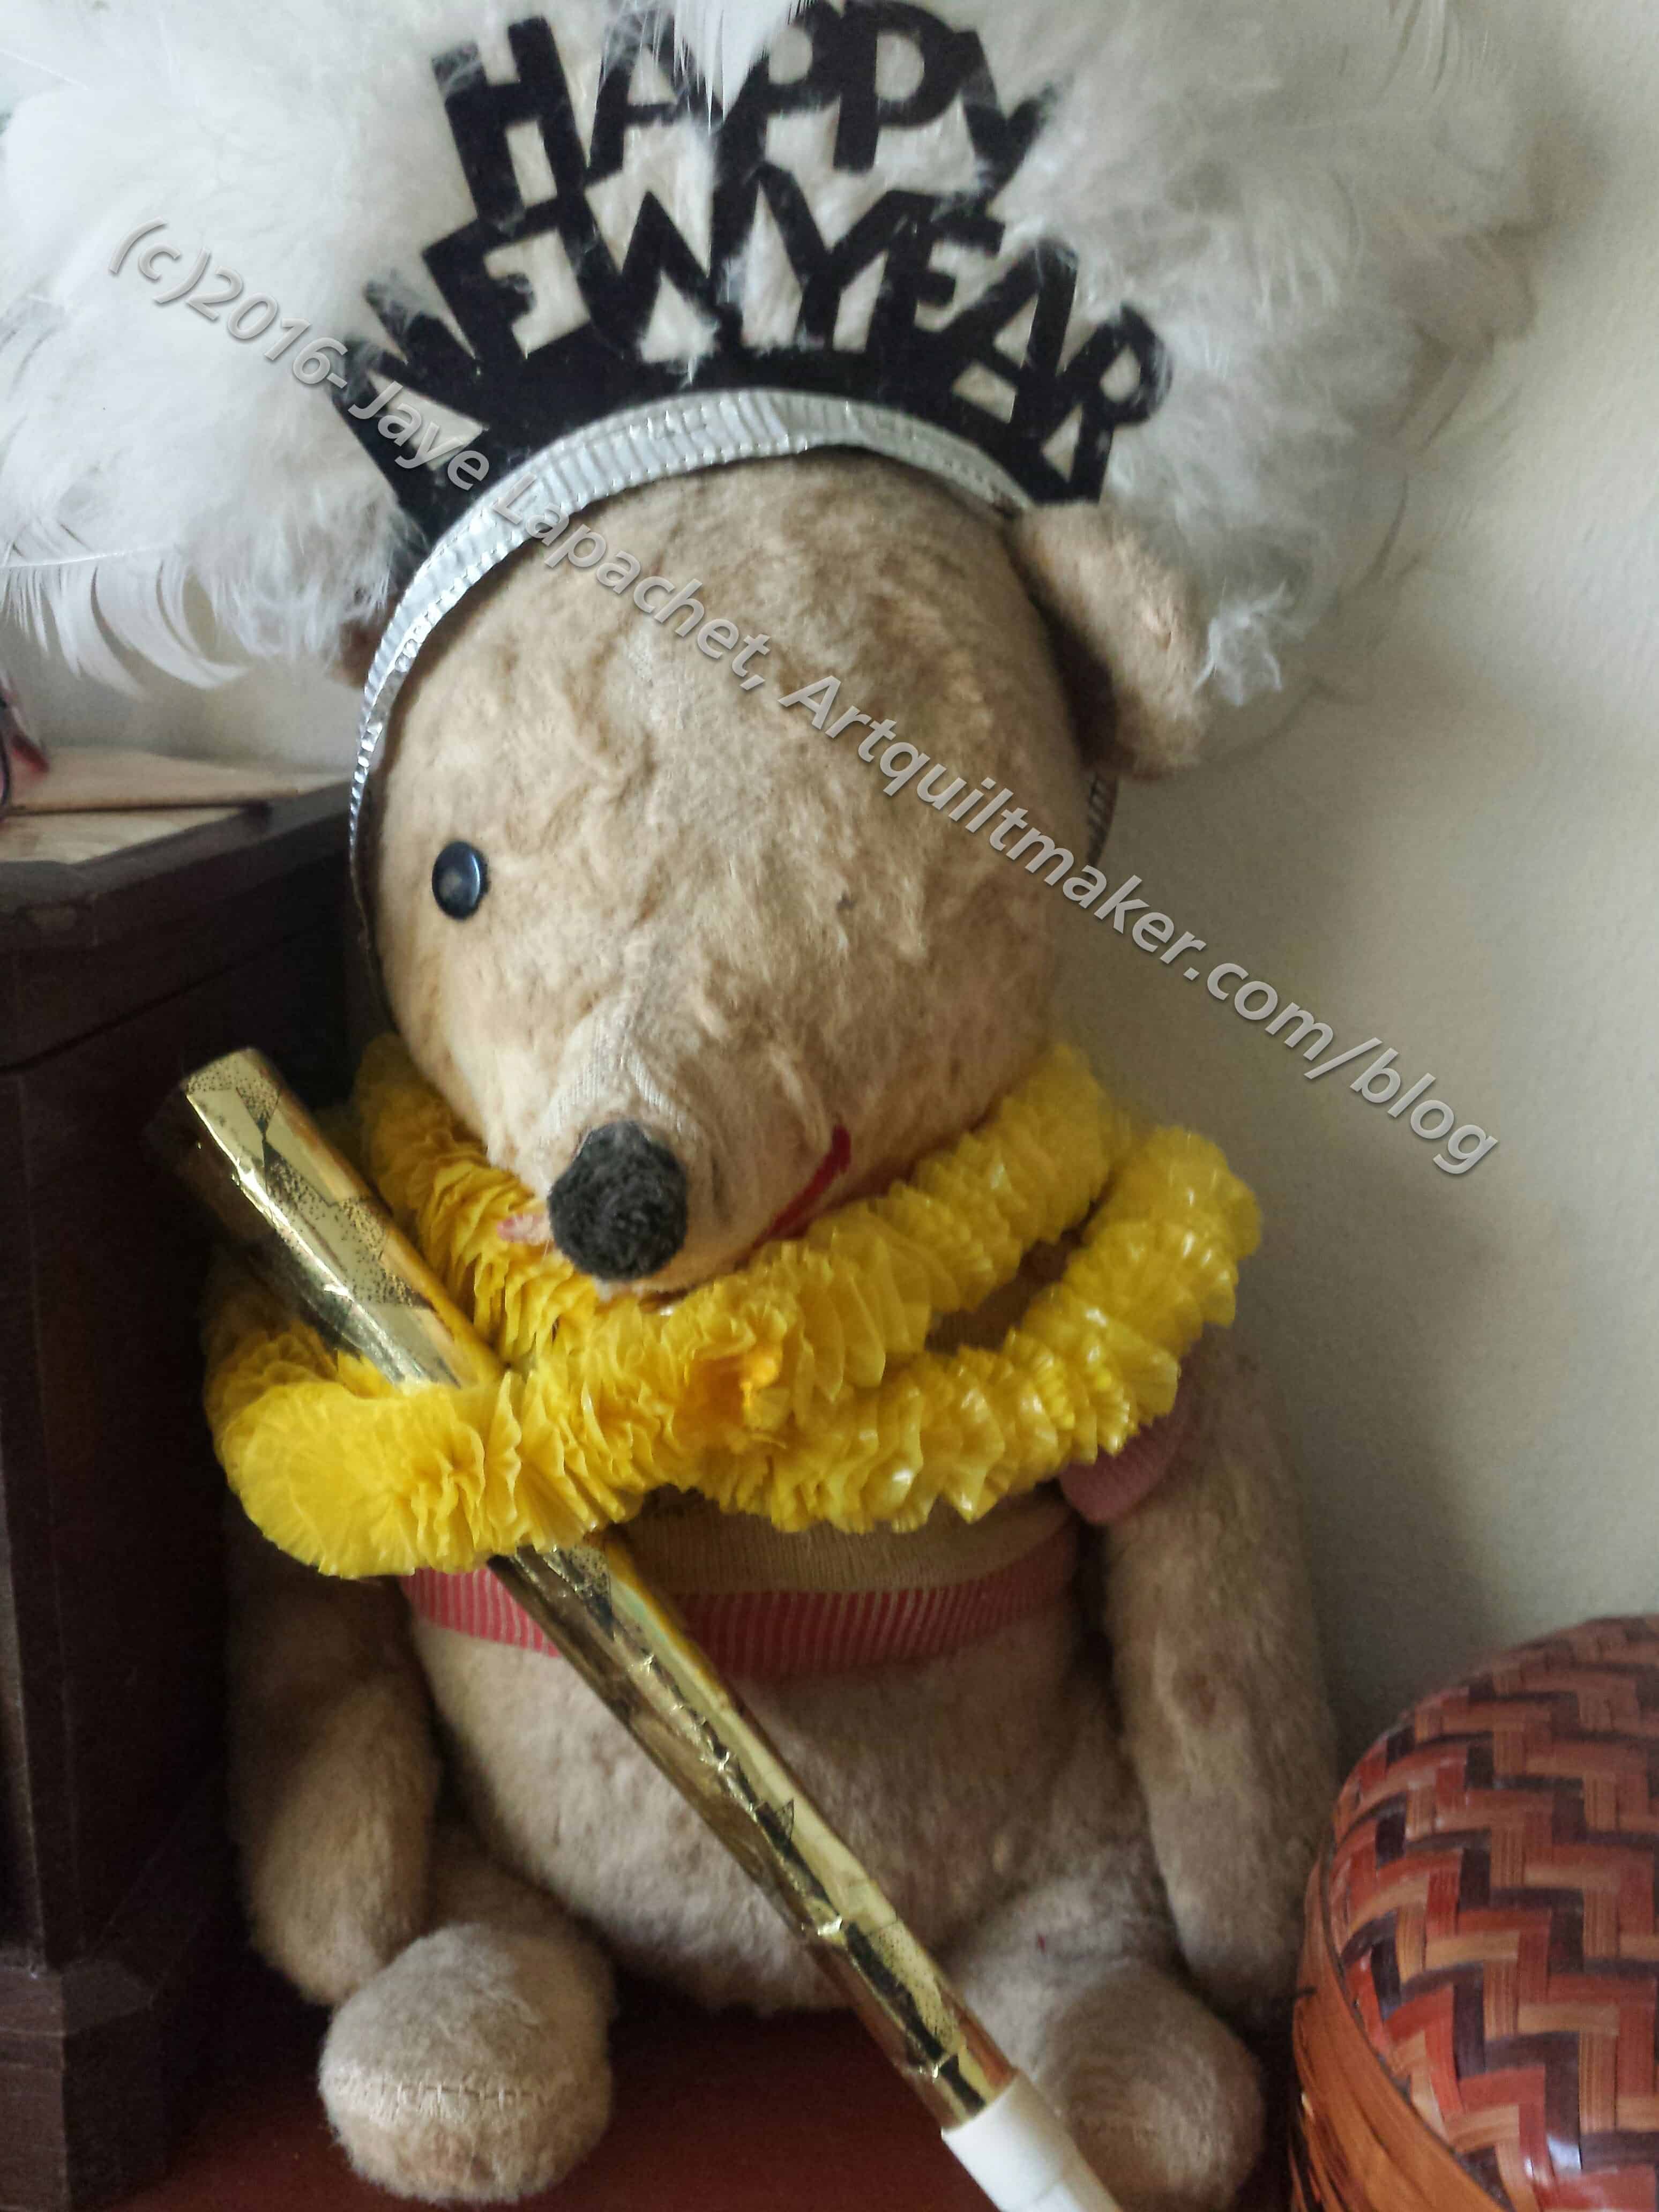
Winnie and I wish you the very best for 2017. Happy quiltmaking!
I feel like I didn’t make a lot this year. The will was there. The need was there, but time and inspiration conspired against me for many months. Still, I have an impressive record:
Number of 2016 Blog Posts: 367
Number of yards of fabric used this year: 178.59
Small and Medium Projects:
Doing Good Projects
I also made a lot of donation blocks that someone else will turn into a quilt.
Quilts
I have made more quilts other years. I have a number of quilt in process, as you know, and those will hopefully turn into quilts next year.
Doing Good
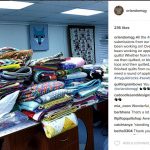
The Orlando Modern Quilt Guild updated their meeting minutes and included a detailed description of their Pulse Project. The scale of the project is mind boggling. I am amazed at what they have accomplished. They also posted some photos of the first distribution on the OrMQG Instagram feed.
If you want an ongoing way to use up scraps by doing some good, take a look at Kat’s Block Drive. She requests blocks every month to make quilts for families who have lost loved ones.
Places
SF School of Needlework and Design opened in September.
I was pleased to get Marsha McCloskey‘s newsletter. I was not so happy to hear that she has been 24/7 caregiver for her very ill husband. Send her good wishes via her website if you have a chance. She mentioned the Stargazing: American Star Quilts exhibit at the Iowa Quilt Museum in Winterset. It runs now until January 24. Her Star of Chamblie Sampler quilt is in the exhibit. I want to make a version of that quilt!
Products
Johanna Bashford, coloring queen, has a line of tech cases for Apple products. Samsung owners, including me, are SOL.
Patterns, Tutorials and Projects
I recently saw a link to the Queen Bee handbag pattern from U-Handbag, a British company owned and operated by Lisa Lam. I love the look and the design, but didn’t really want to deal with British pounds (sorry, UK friends, I am not trying to be an ugly American). I looked around and found the pattern on Craftsy, but without the purse frame and other bits and pieces. Sigh.
My sister, not as well versed in the ways of fabric as some of you, dear readers, but she has a good eye and sent me a link to a fabric rugmaking tutorial. The fabrics used in the tutorial are very appealing. The technique is similar to one in which bowls are made. It is nice and would be a good way to use FabMo scraps.
I love the look of this pieced Pineapple quilt pattern. Tutorials are linked on the page.
I have been talking about making a Lozenge quilt for awhile. While I have a number of projects in process, I think the stars have almost aligned for me to do this. I found a pattern that works with charm packs (5 inch squares) and a layer cake (10 inch squares), which is kind of what I want to use. I got a layer cake of Manor by Victoria Findlay Wolfe and have been looking for a reason to use it. This might be it. Looking back at the page of ideas I gathered, though, makes me wonder if that is the right fabric. I’ll have to dig around in my fabric closet and see if there is a more suitable layer cake. God forbid, I should actually CUT fabric for this project. 😉
Bonnie Hunter has announced her 2016 mystery quilt, En Provence. It is inspired by that region and the photos are worth viewing even if you don’t want to participate.
Other Artists
Christa Watson has a post on a series of black and white quilts she did after choosing black & white for her ‘color of the month’. I really hope she didn’t make all of those quilts in one month. I’ll feel quite lazy if she did! Regardless, Christa has a great design sense. Her Illusions piece moves when you look at it. As she says, black & white quilts have a high impact graphic quality that is hard to beat. Information about the Color Blog Series can be found on Michelle Wilkie’s site.
Marie Webster was active in the early part of the 20th century and owned a pattern and kit company before such things really existed. A lot of her patterns were applique’ and very different from the feedsack and pieced patterns of the 1920s and 1930s. Kathy Matthews wrote an article about an art quilt exhibit responding to Webster’s patterns in a new way. You can read about her in a book.
Media
You might have heard of Frances Dowell’s new book, Birds in the Air. She also has a different site from The Off Kilter Quilt that is all about Quilt Fiction. You know that my librarian heart loves this type of compilation. Frances notes in her recent episode (#199) that the Quilt Fiction site is a still a work in progress. You get a free story if you sign up for her newsletter.
Christa Watson republished an NQA article about QuiltCon on her blog recently.
If you have wanted to start a La Passacaglia quilt, but don’t know where to start, take a look at Dana’s post. First, she has great photos of her “La Pass.” I like the way she approached the project and it has given me ideas for getting started, which I have been avoiding. (N.B. I do have an idea that will help me take the leap). She also has an idea about combining shapes to make a larger space. This is an interesting idea that I might use when I get farther along. Not only is this post helpful, it is also written in a great tone.
Tips and Tricks
Kathy Matthews posted a link to some still relevant vintage tips and then she wrote an article talking more in depth about the tips booklets.
Quilt World News
Sadly, art quilts were stolen off the walls of a church in Vancouver. The article states that the quilts were worth $6 million. The article has a link to photos of the stolen quilts. There are two sites that list lost and stolen quilts, Lostquilt.com and a page for Missing Quilts on Quilter’s Cache. While there is no good in stolen quilts, I am pleased that the quilts are considered art in this instance.
As I mentioned yesterday, I needed a lot of leaders and enders to help me keep the layout of The Peacock in order. In addition to other projects, I made a number of donation blocks.
I picked up a few blue kits at the guild meeting Saturday. My intention was to sew them “sometime” during the next month. Quickly, I realized that I would need leaders and enders while I pieced The Peacock. Very quickly I had the kits out and blocks partially made.

Soon after that, I had 4 blocks made from a combination of my own fabric and the kits. These join the two I made before my trip.
I made several blue blocks with the intention of putting them together into a quilt. I don’t have enough yet, but will will soon. I think I mentioned that the Peacock requires a leader/ender between each seam. One half of the block is in one row and the other half is in the row above. It requires another piece between each Peacock seam so I can keep the different blocks in order. It is a quilt where I will get two quilts out of the piecing.

Previously, I made red and white blocks for a different charity quilt. I like having color themes even if the reds (or whatever colors) aren’t exactly matchy-matchy. I have enough red blocks to make a charity quilt, however, I want to try something new and am waiting to figure out some match and layout before I piece the blocks together. I am still making red blocks as I can pair them with black for boys.

I spent some time on Saturday night and most of the day Sunday trying to make progress on The Peacock. I now have four rows sewn together in a chunk. A fifth is the start of a new chunk.
The piecing is very labor intensive, though not as labor intensive as Y seams. The good part is that I have to put a leader/ender piece between each Peacock seam under the machine. This will equal a lot of additional blocks or, perhaps, a quilt top.
I started to put the small blocks into the ends of some of the rows. That piecing is fiddly and I haven’t gotten all the measurements figured out. Still, I am pleased that I have been able to incorporate those small blocks into the border as I piece. I have more to piece in and have to figure out how to do that.
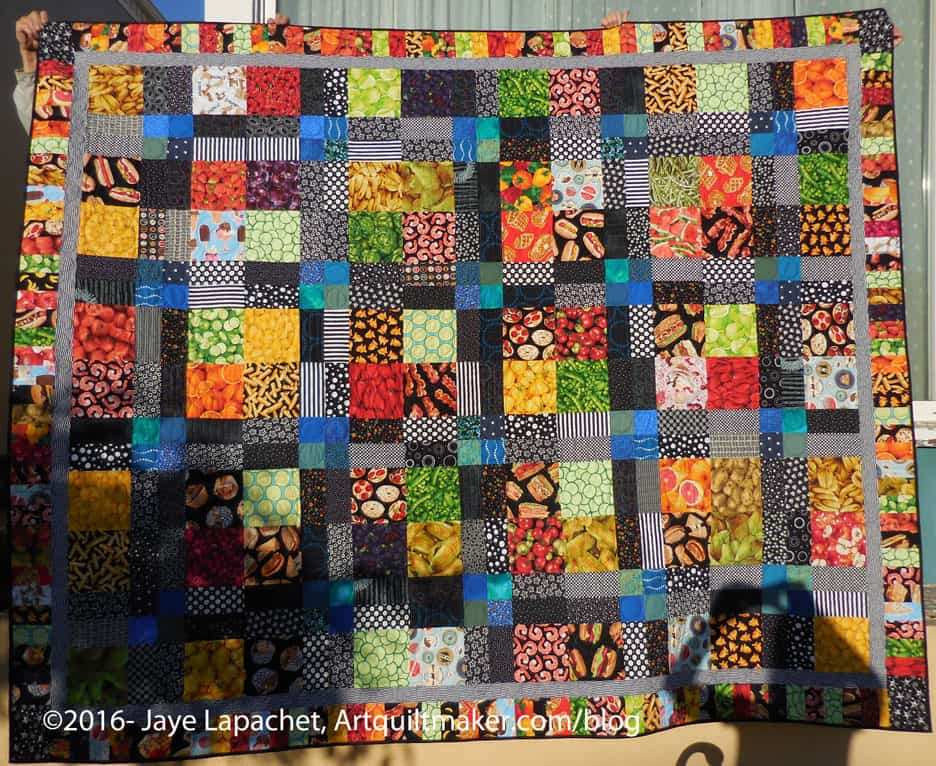
I finished this quilt at the Labor Day Craft Night. This shows the power regular sewing with people who are expecting you to be there.
This quilt is for my nephew who is now a freshman at the University of Michigan. He will need it when winter sets in, California boy that he is.
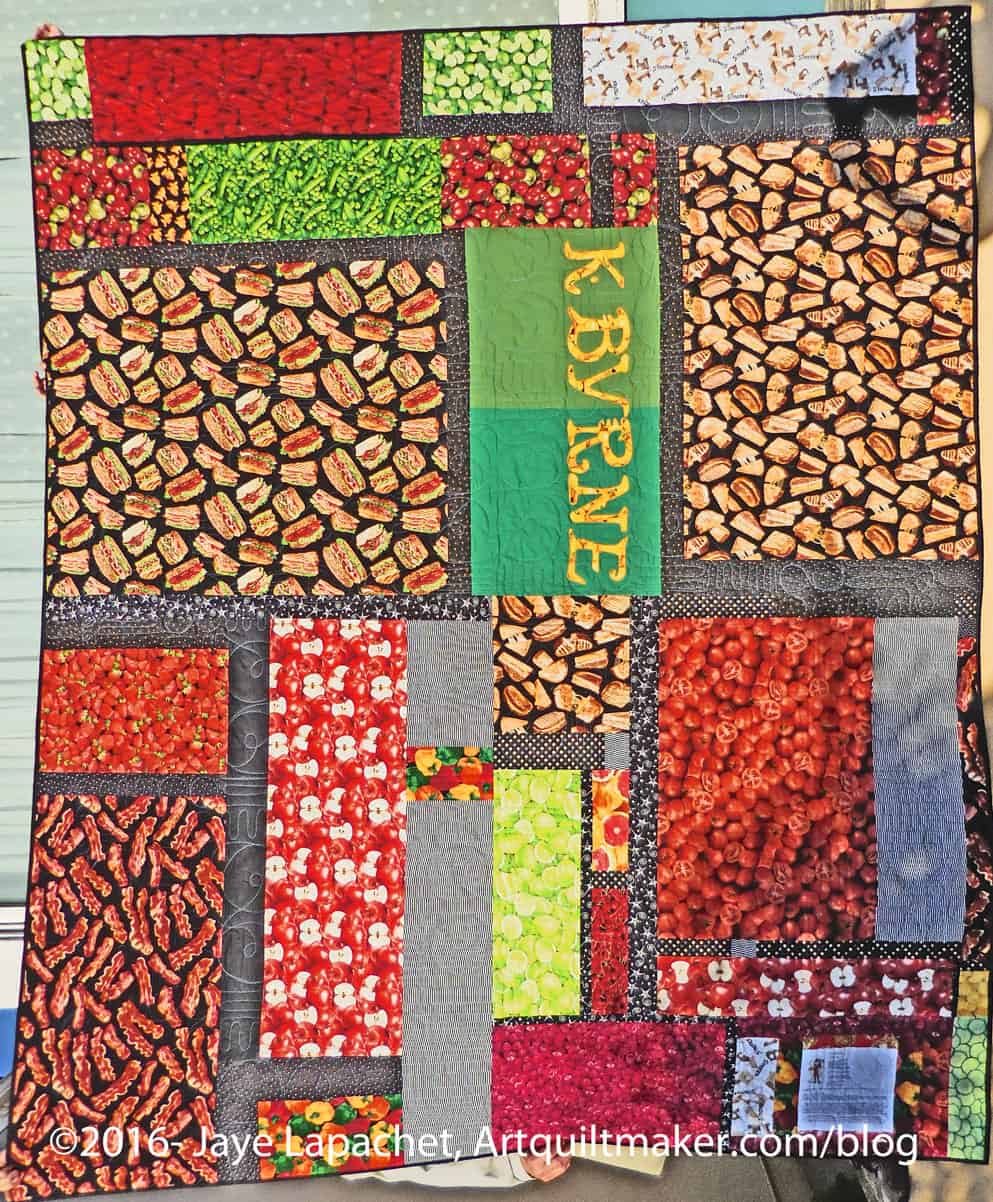
I am pretty sure I am done with food themed quilts. I made an effort to use most of the larger pieces on the back and think I just have a few smallish (up to fat eighth size) left. Someone at the guild asked for the scraps and I may give them to her. I have a few years before the next batch of nephews go off to college and all of them already have quilts, so I don’t feel obliged to make another. However, an excuse to make a quilt is always tempting. For now, I need to focus on the nephews who don’t yet have quilts. One in particular is ripe and I have no idea what to make for him.
The photo isn’t great as I had to take the photo outside late in the day, so the shadows disrupt the look.