This store is RIGHT next door to an ice cream shop. Kids and spouses can have a nice time there while you browse. 😉
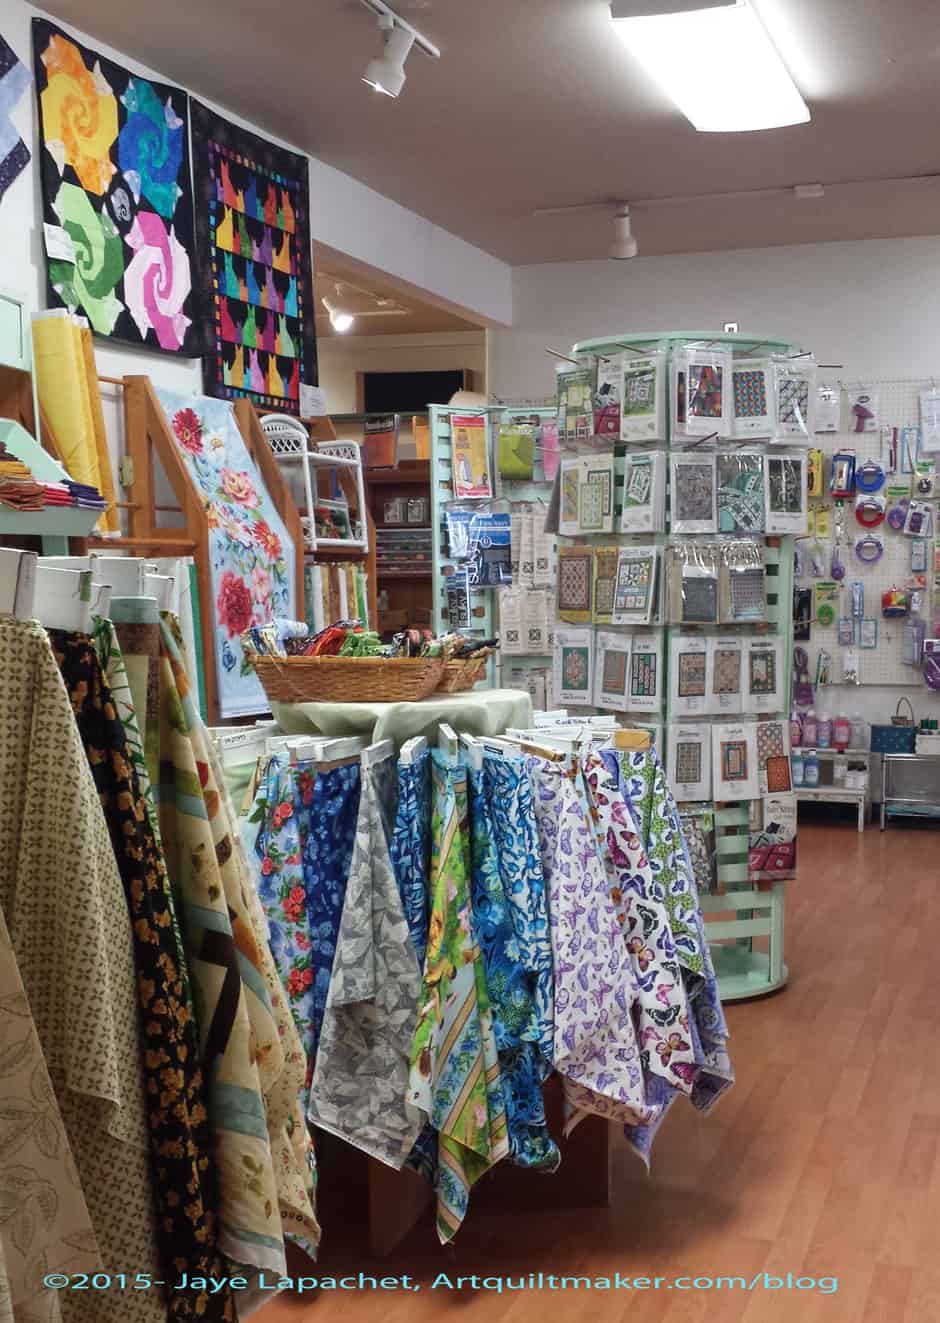
This shop has a lot of panels and kits. A LOT. The panels are great and I bought a couple to make Thanksgiving decorations. I had better get on it!
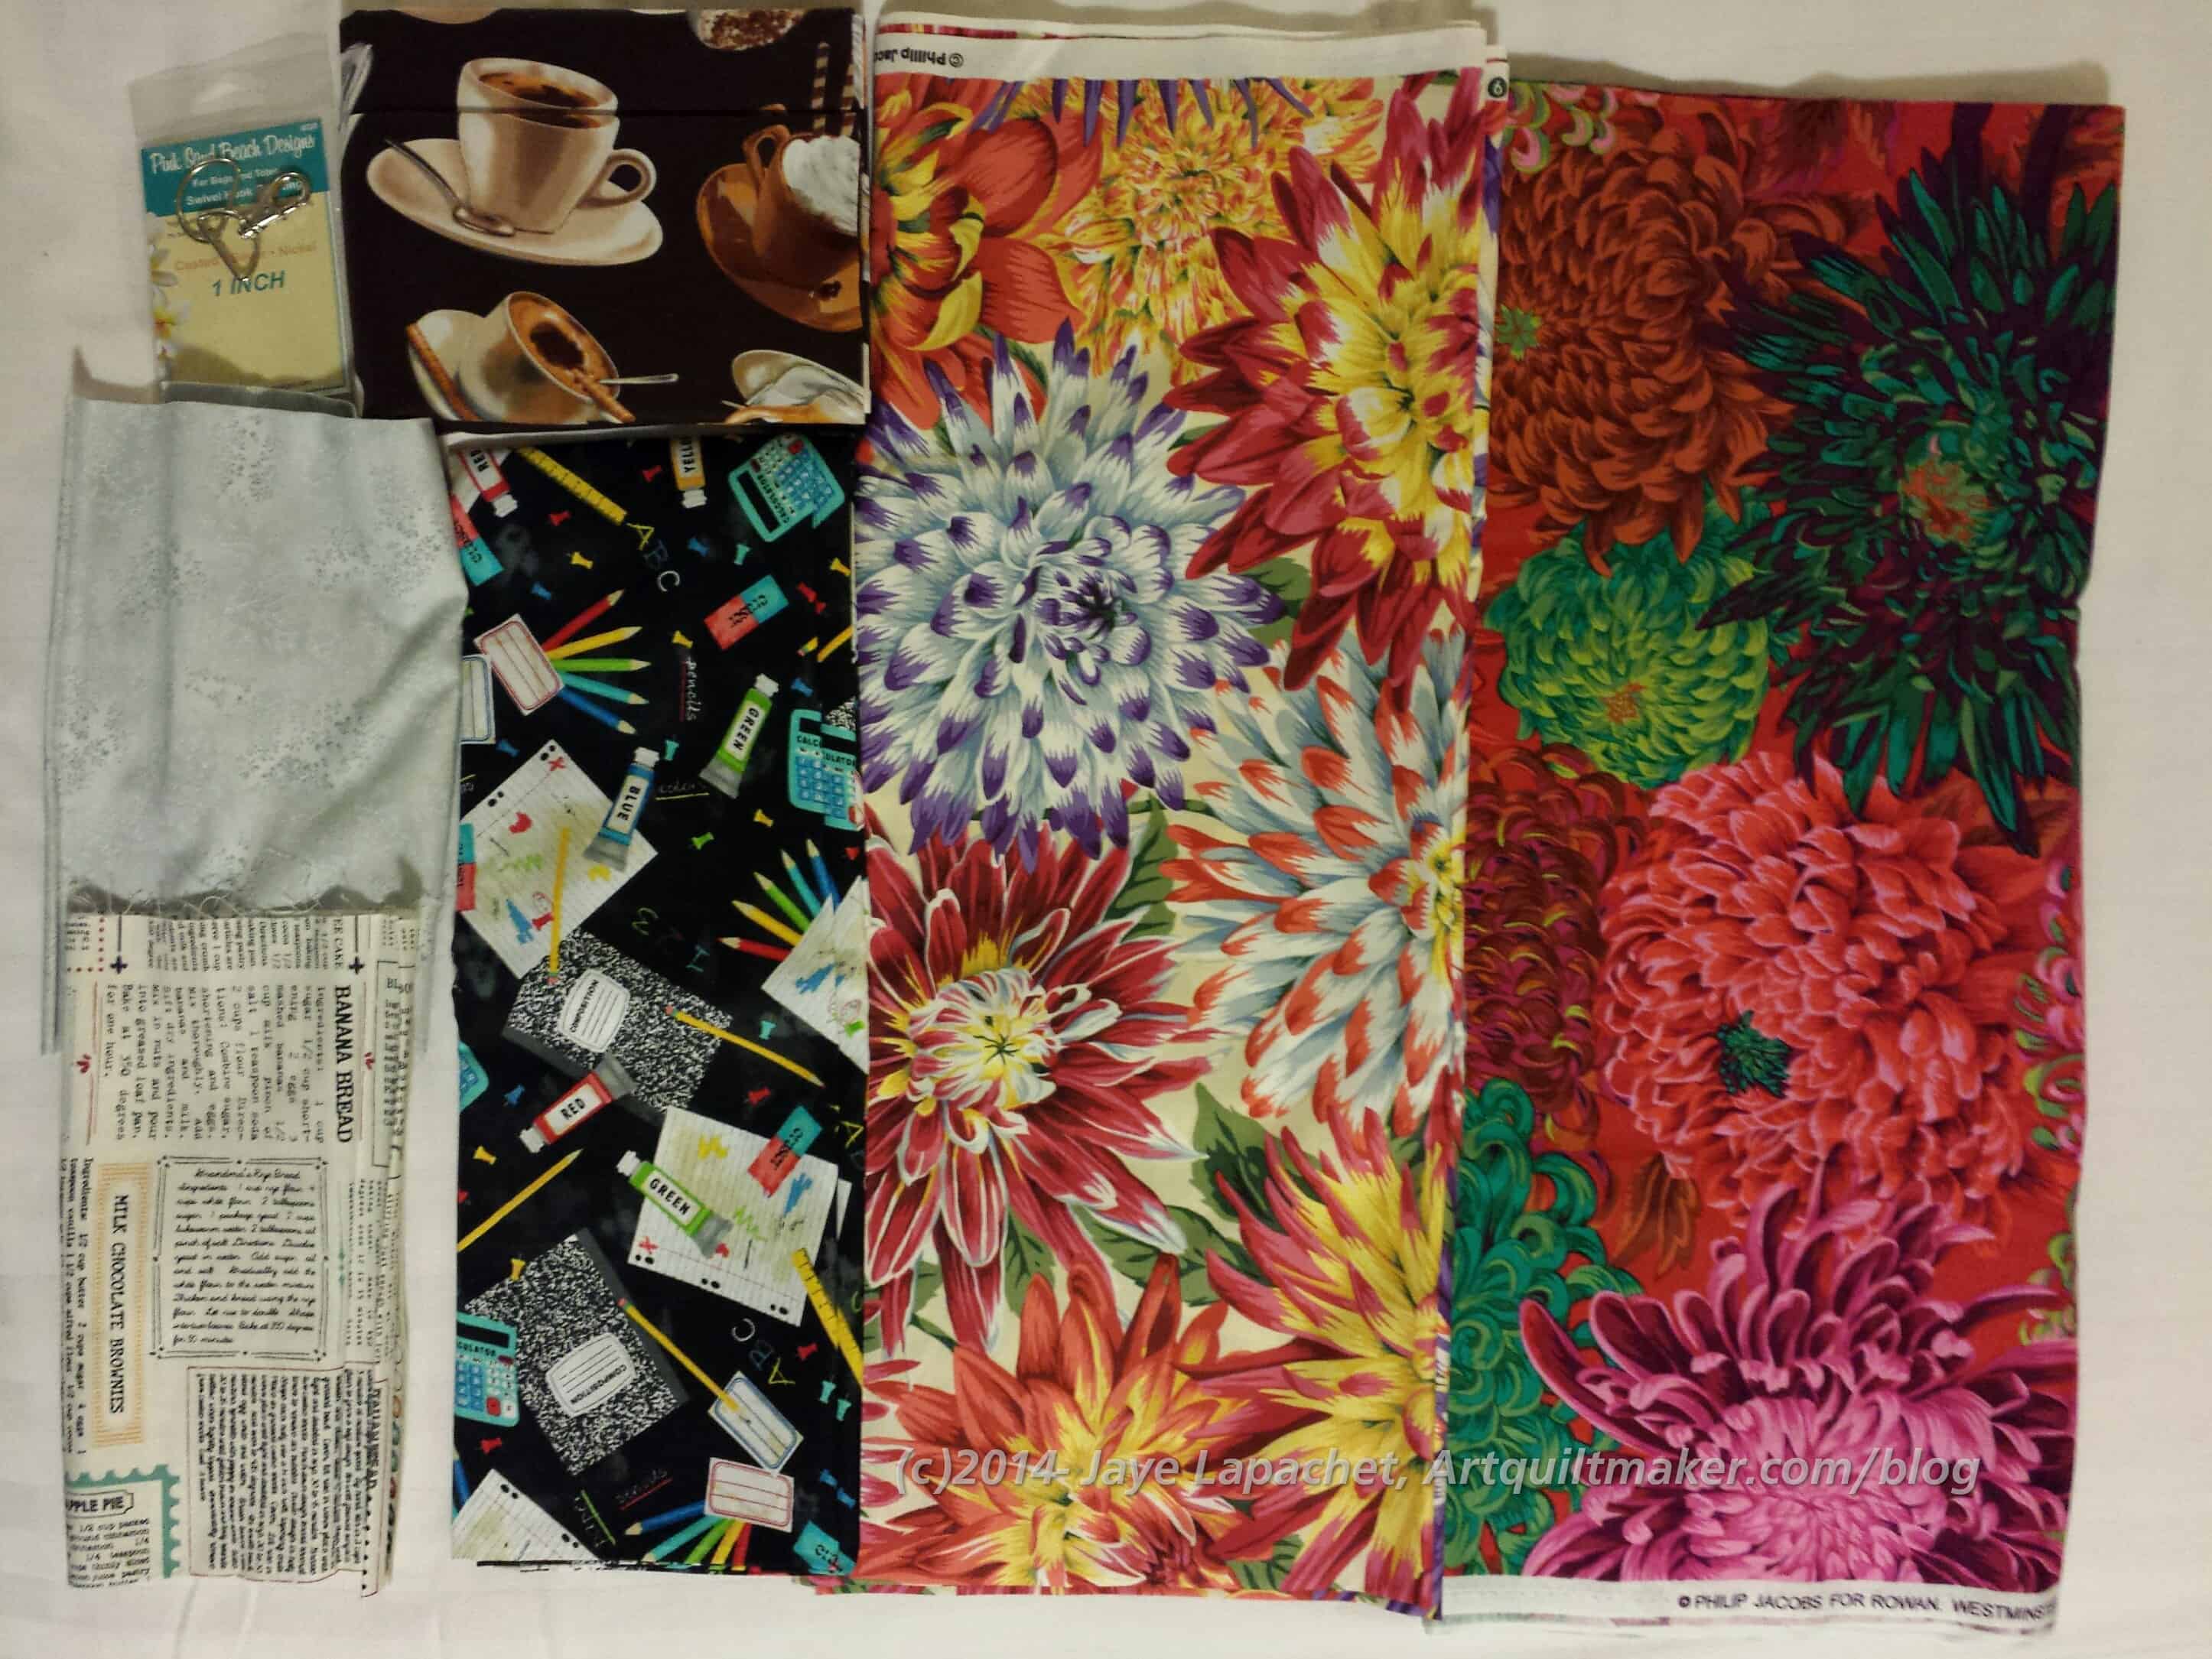
They had fabric, but not the tons that other shops had. I bought a few pieces.
The store has a lot of gifts, which is what tourist town shops have and that was great. Some of the fabrics were novelty sea related fabrics, which I had never seen before.
‘Pastel’ room
The shop also had a lot of interesting patterns.
I think the strength of the shop was really the panels. They had lots and lots of panels, especially in the Thanksgiving realm (it is nice to see that some retail isn’t going straight from Hallowe’en to Christmas!). I bought two panels with which to make some Thanksgiving table runners. Am I trying to fill my time now that my YM is gone? Probably, at least mentally.
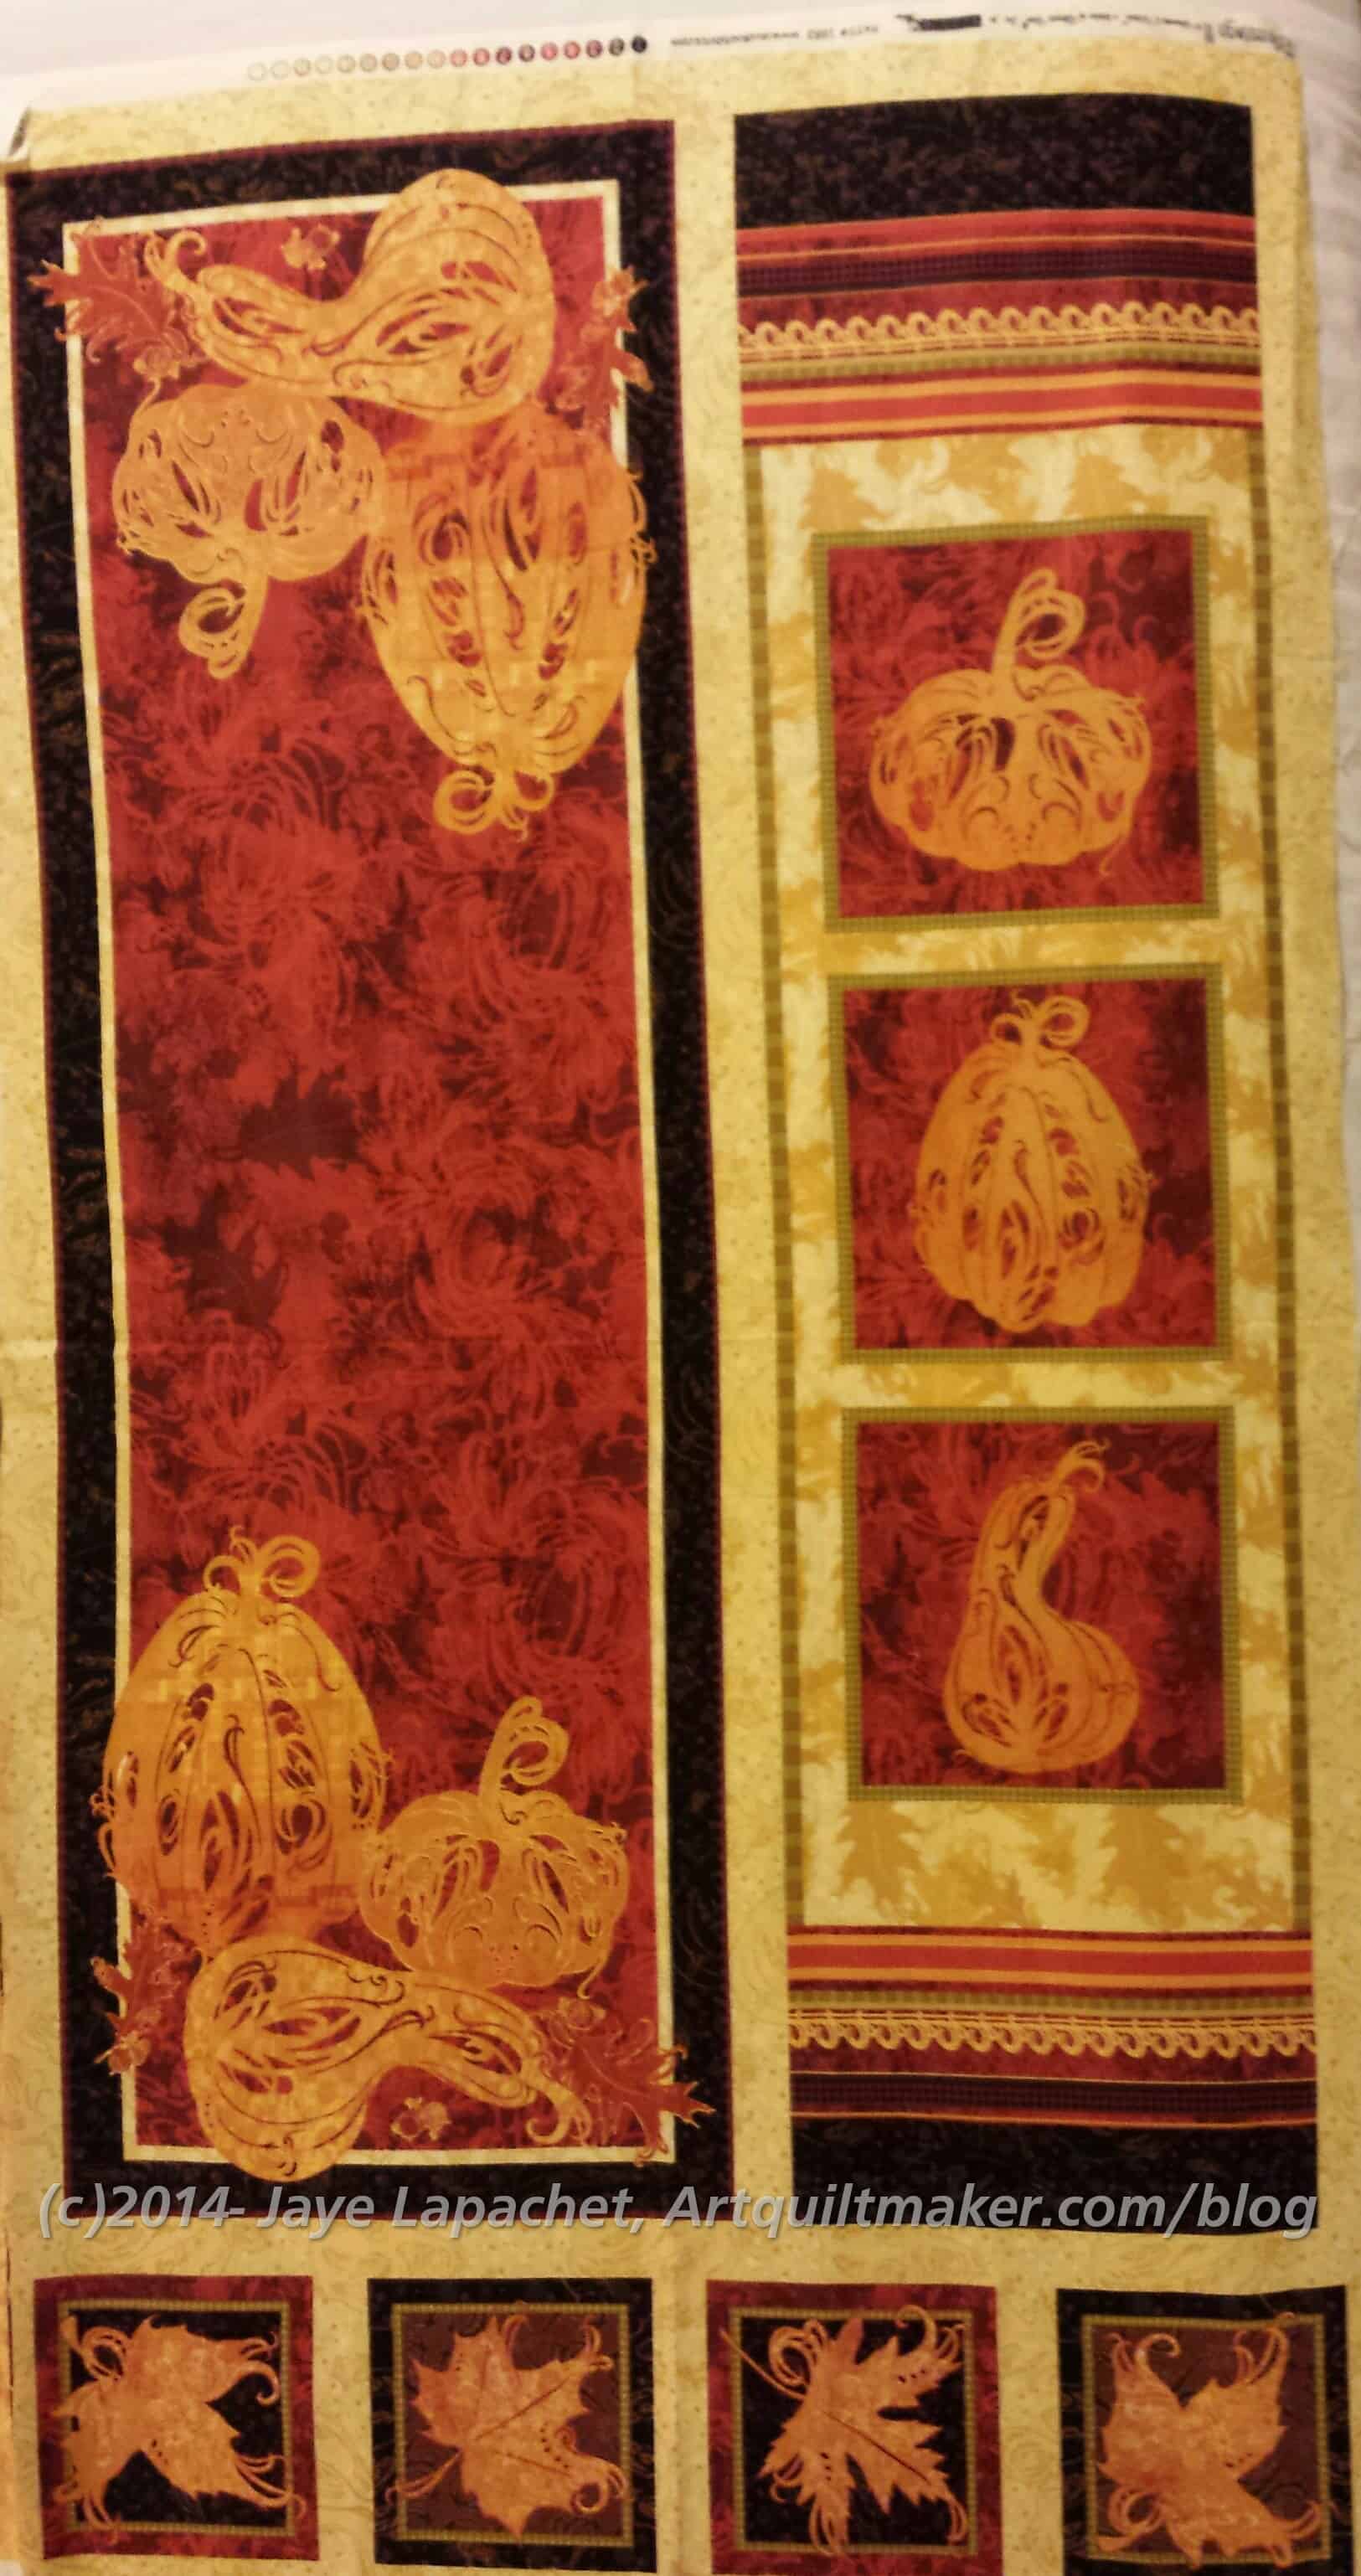
Pumpkins and Gourds tablerunner
Thanksgiving, as you may remember, is ‘my’ holiday in the family. Lately, I have been feeling a bit of a slacker, because I really don’t have any Thanksgiving decorations. One of my SILs sends a flower arrangement every year, which is the sum total of my decorations. I have wanted to make napkins, but the thought of sewing 24+ brown and beige napkins makes me run away from the sewing machine screaming. When I saw the panel with the pumpkins and gourds, I could imagine having it in my house. The colors are a little brighter than normal Thanksgiving colors and it isn’t boring. It is also a bit arty. It also doesn’t need much piecing, so almost all I would need to do is quilt it. STOP laughing! 😉
The one panel will make two table runners. I might piece the leaves to the end of one to make it a little longer. They are supposed to be coasters, but I am not making coasters as we have about 30 sets of coasters. We will see.
Second panel
I set up three tables at Thanksgiving and I don’t want the ‘kids’ table to feel bad, especially since they usually don’t get china, so I bought another panel for them. What I will do with this one is cut off the smaller panels and sew them together in a long line, then quilt it. If I have time, I will quilt the wreath and make it into a table mat for the coffee table.
These panels are already washed so there is hope for me to finish them.
Like some of the other shops Forget Me Knots was participating in the Row by Row Experience. The lady helping pushed us hard to get the kit. Not my jam so I resisted.
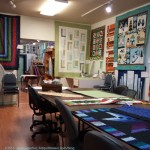
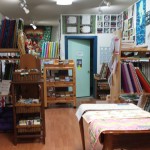
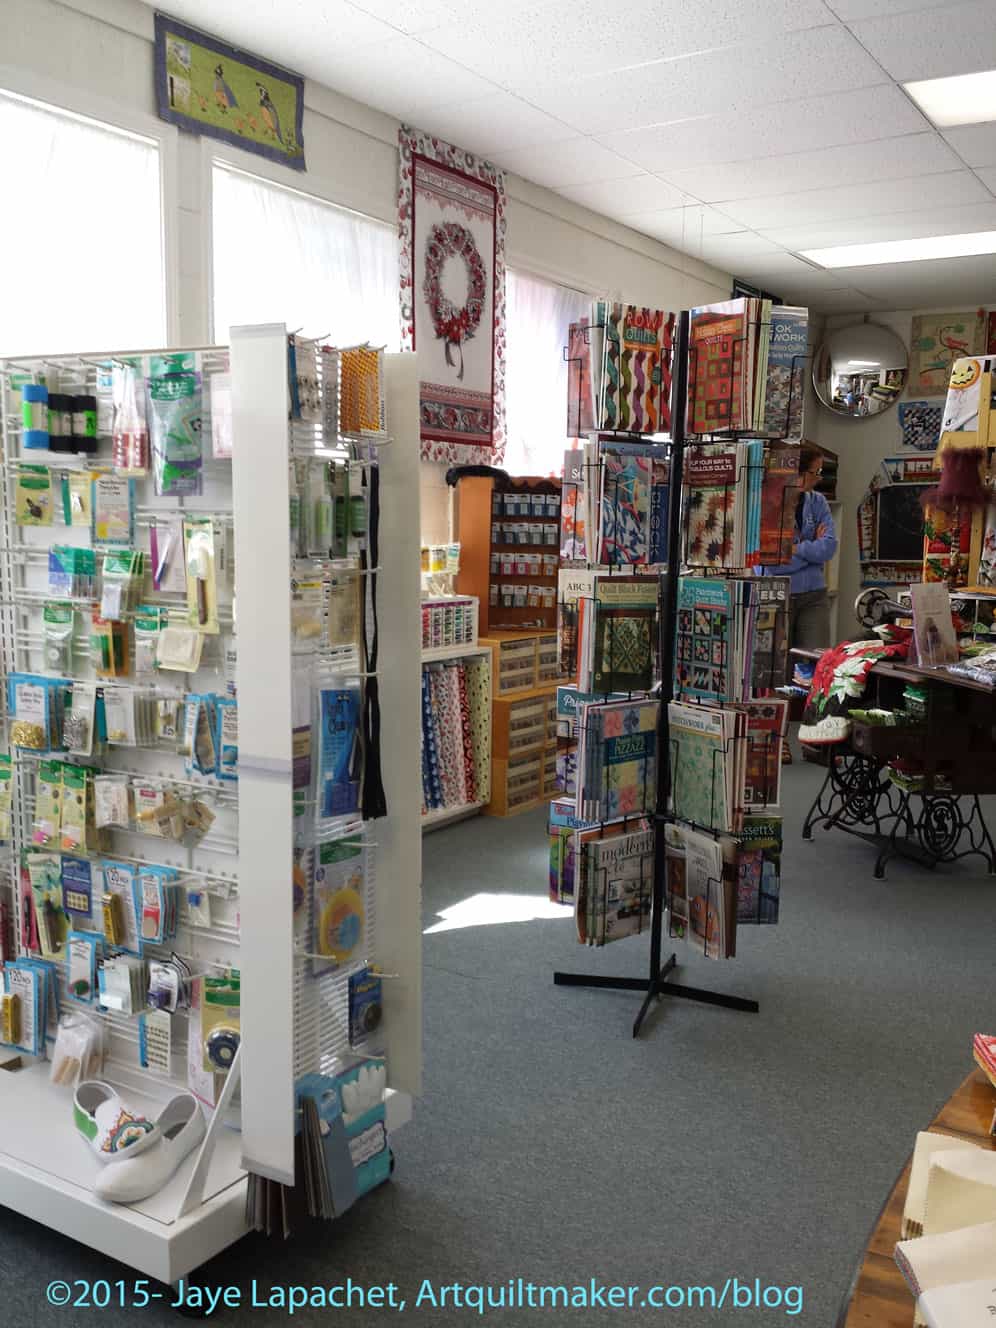
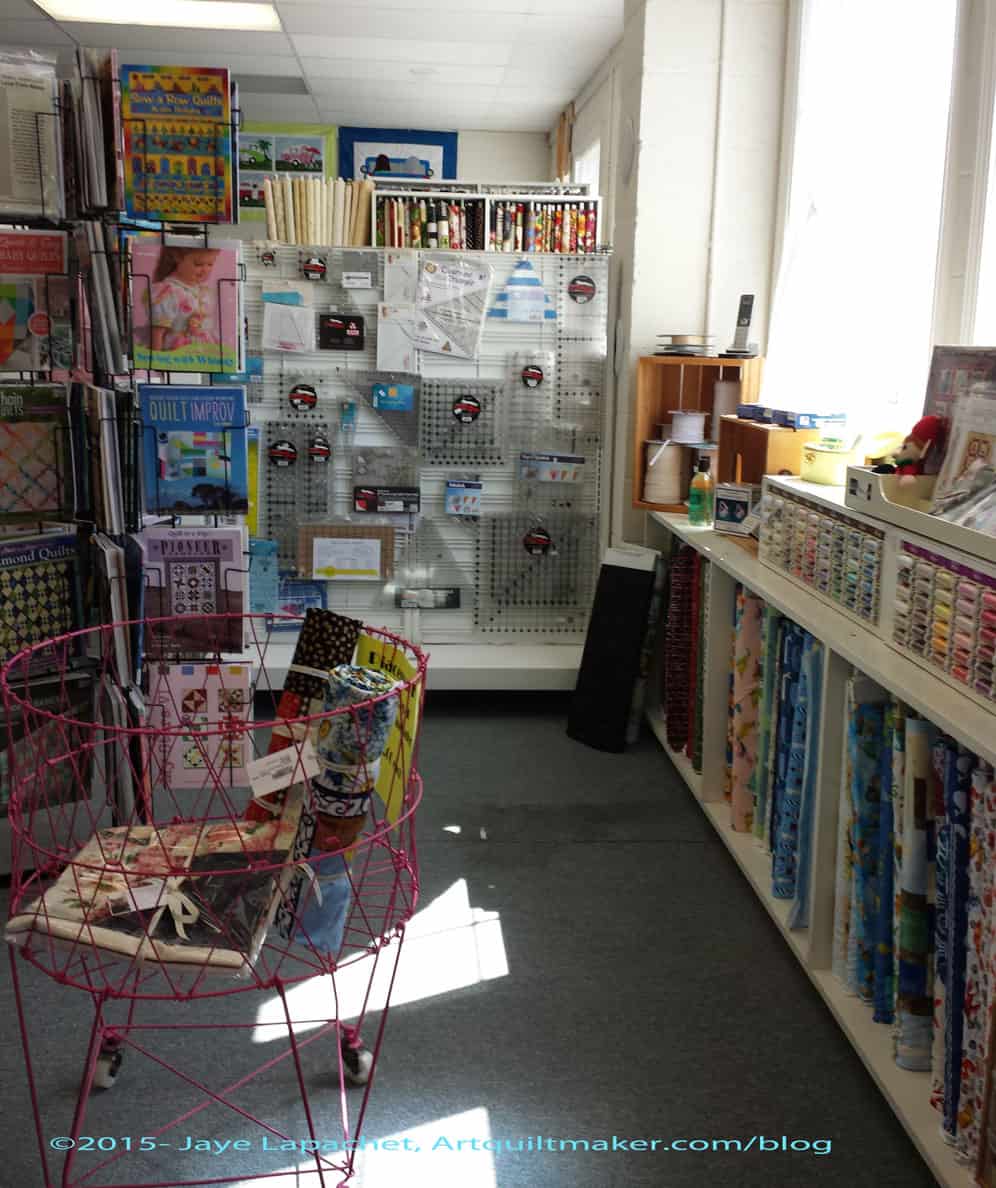
They had a lot of notions, a large classroom and generally a large space. I found this store to have a lot to look at and it took me awhile to figure out that there weren’t as many fabric bolts as I originally thought.
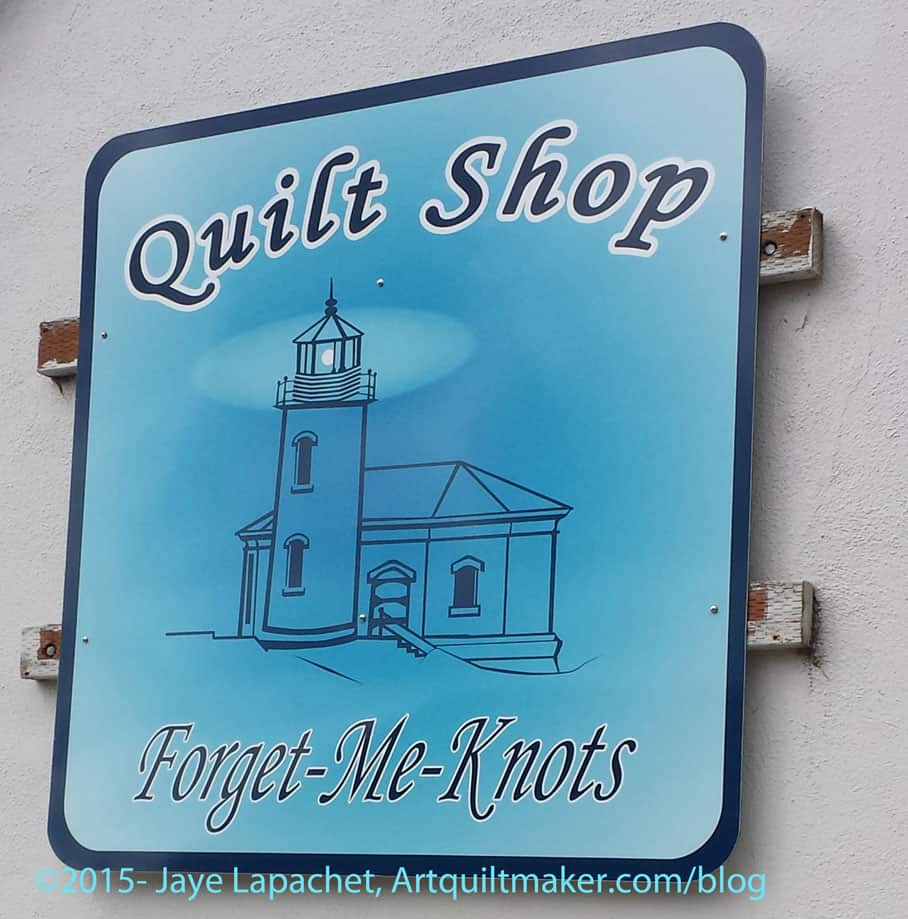
I liked this shop. The lady was friendly, they had fabric and notions I hadn’t seen before and the location was convenient. Look for the ice cream shop. It is huge and that is what we noticed. The quilt shop is in a large building, but they need better signage.
Forget Me Knots interior
Forget Me Knots interior
Forget Me Knots interior
Location: 640 2nd St SE, Bandon, OR 97411
(541) 347-9021
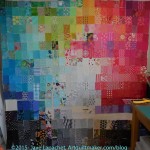
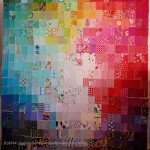
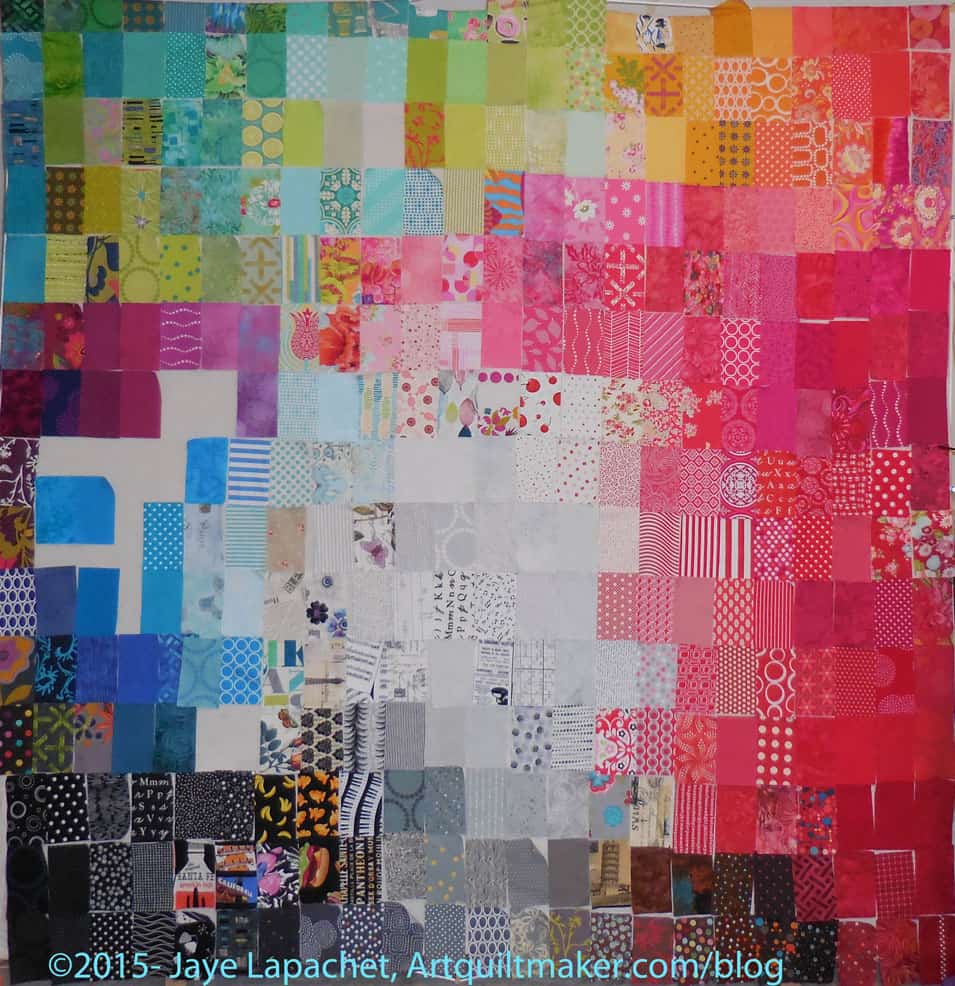
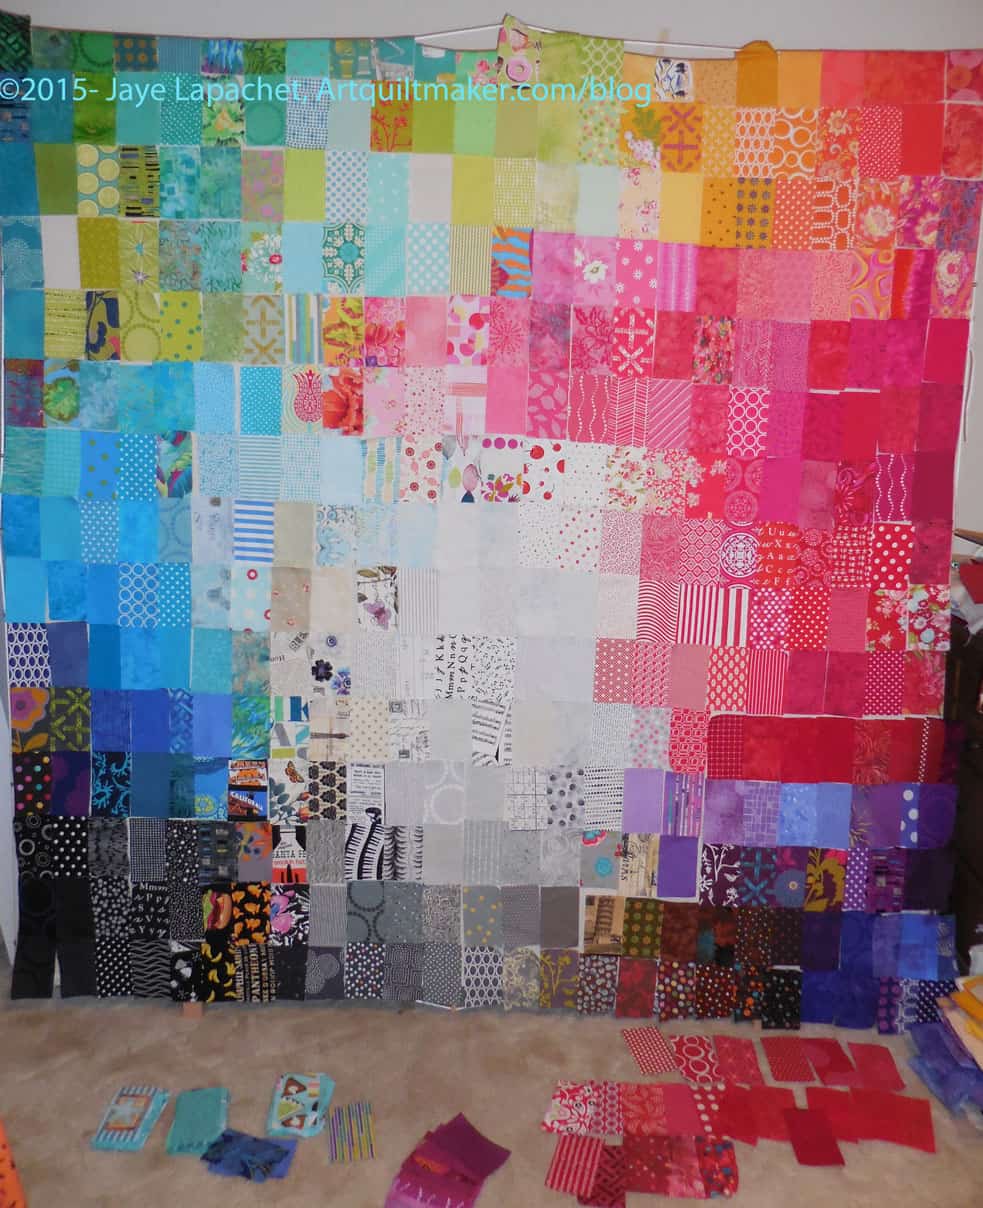
Sometimes a little whining goes a long way. I got down to business after my last FOTY 2014 post and am now sewing the piece together. Yes, the piece is arranged to my satisfaction and I am on to the sewing part.
My driving force: I need all the pieces to be on the design wall. At the moment the very top and very bottom row are hanging off. I also want the whole thing off the design wall and in the hands of Colleen. I need to move on to other projects. I need the design wall for other projects.
Is the piece perfect?
No.
Will I ever make a perfect piece in this series?
Probably not.
Will I keep trying?
Yes.
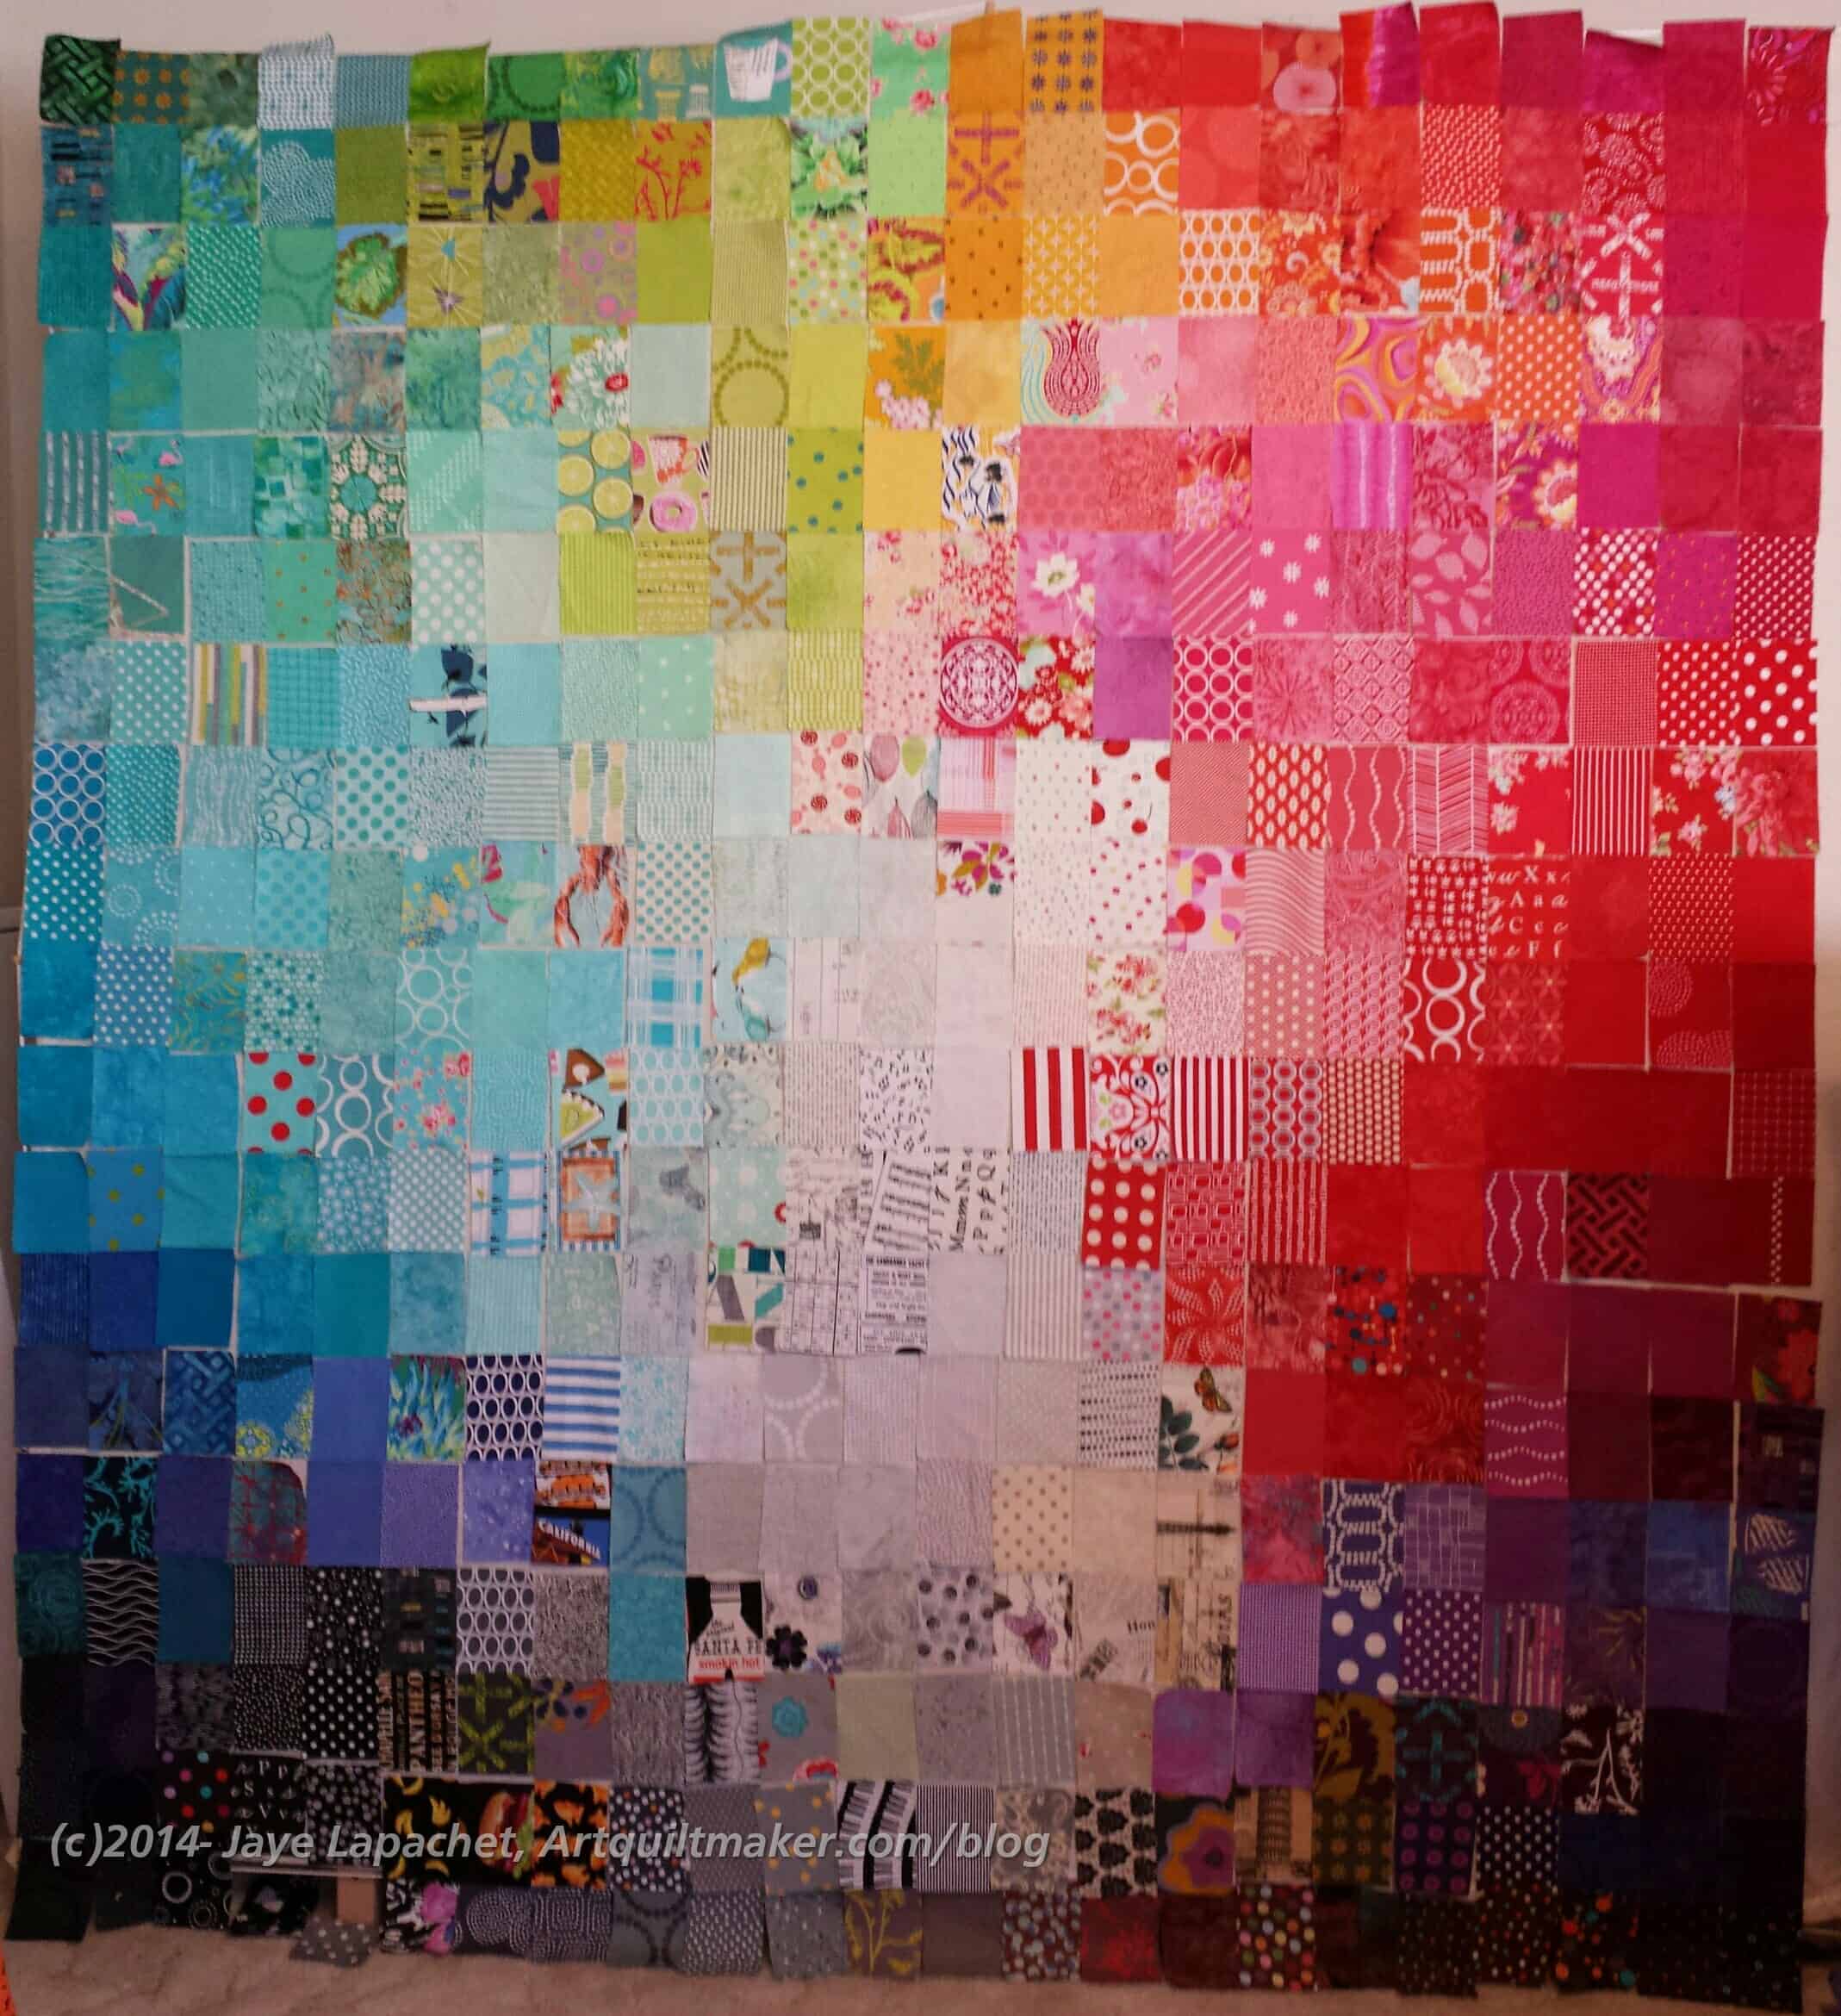
FOTY 2014: Final Layout
Before I started sewing, this photo shows the piece as it was laid out in the configuration in which I decided to piece it.
I worked on the layout for hours yesterday and then after I started making dinner, I deliberately did not look at it.
When I got back to my workroom the following day, I decided to look at it and rearrange the patches.
These quilts will never have a perfect gradation. The nature of the fabric, the color combinations in the fabrics and the motifs as well as contrast make perfect gradation difficult. Still, I have done a good job with the parameters of my challenge and I am pretty happy with the layout.
Some process photos. You have to look carefully to see the differences because they are subtle, but that is part of the process:
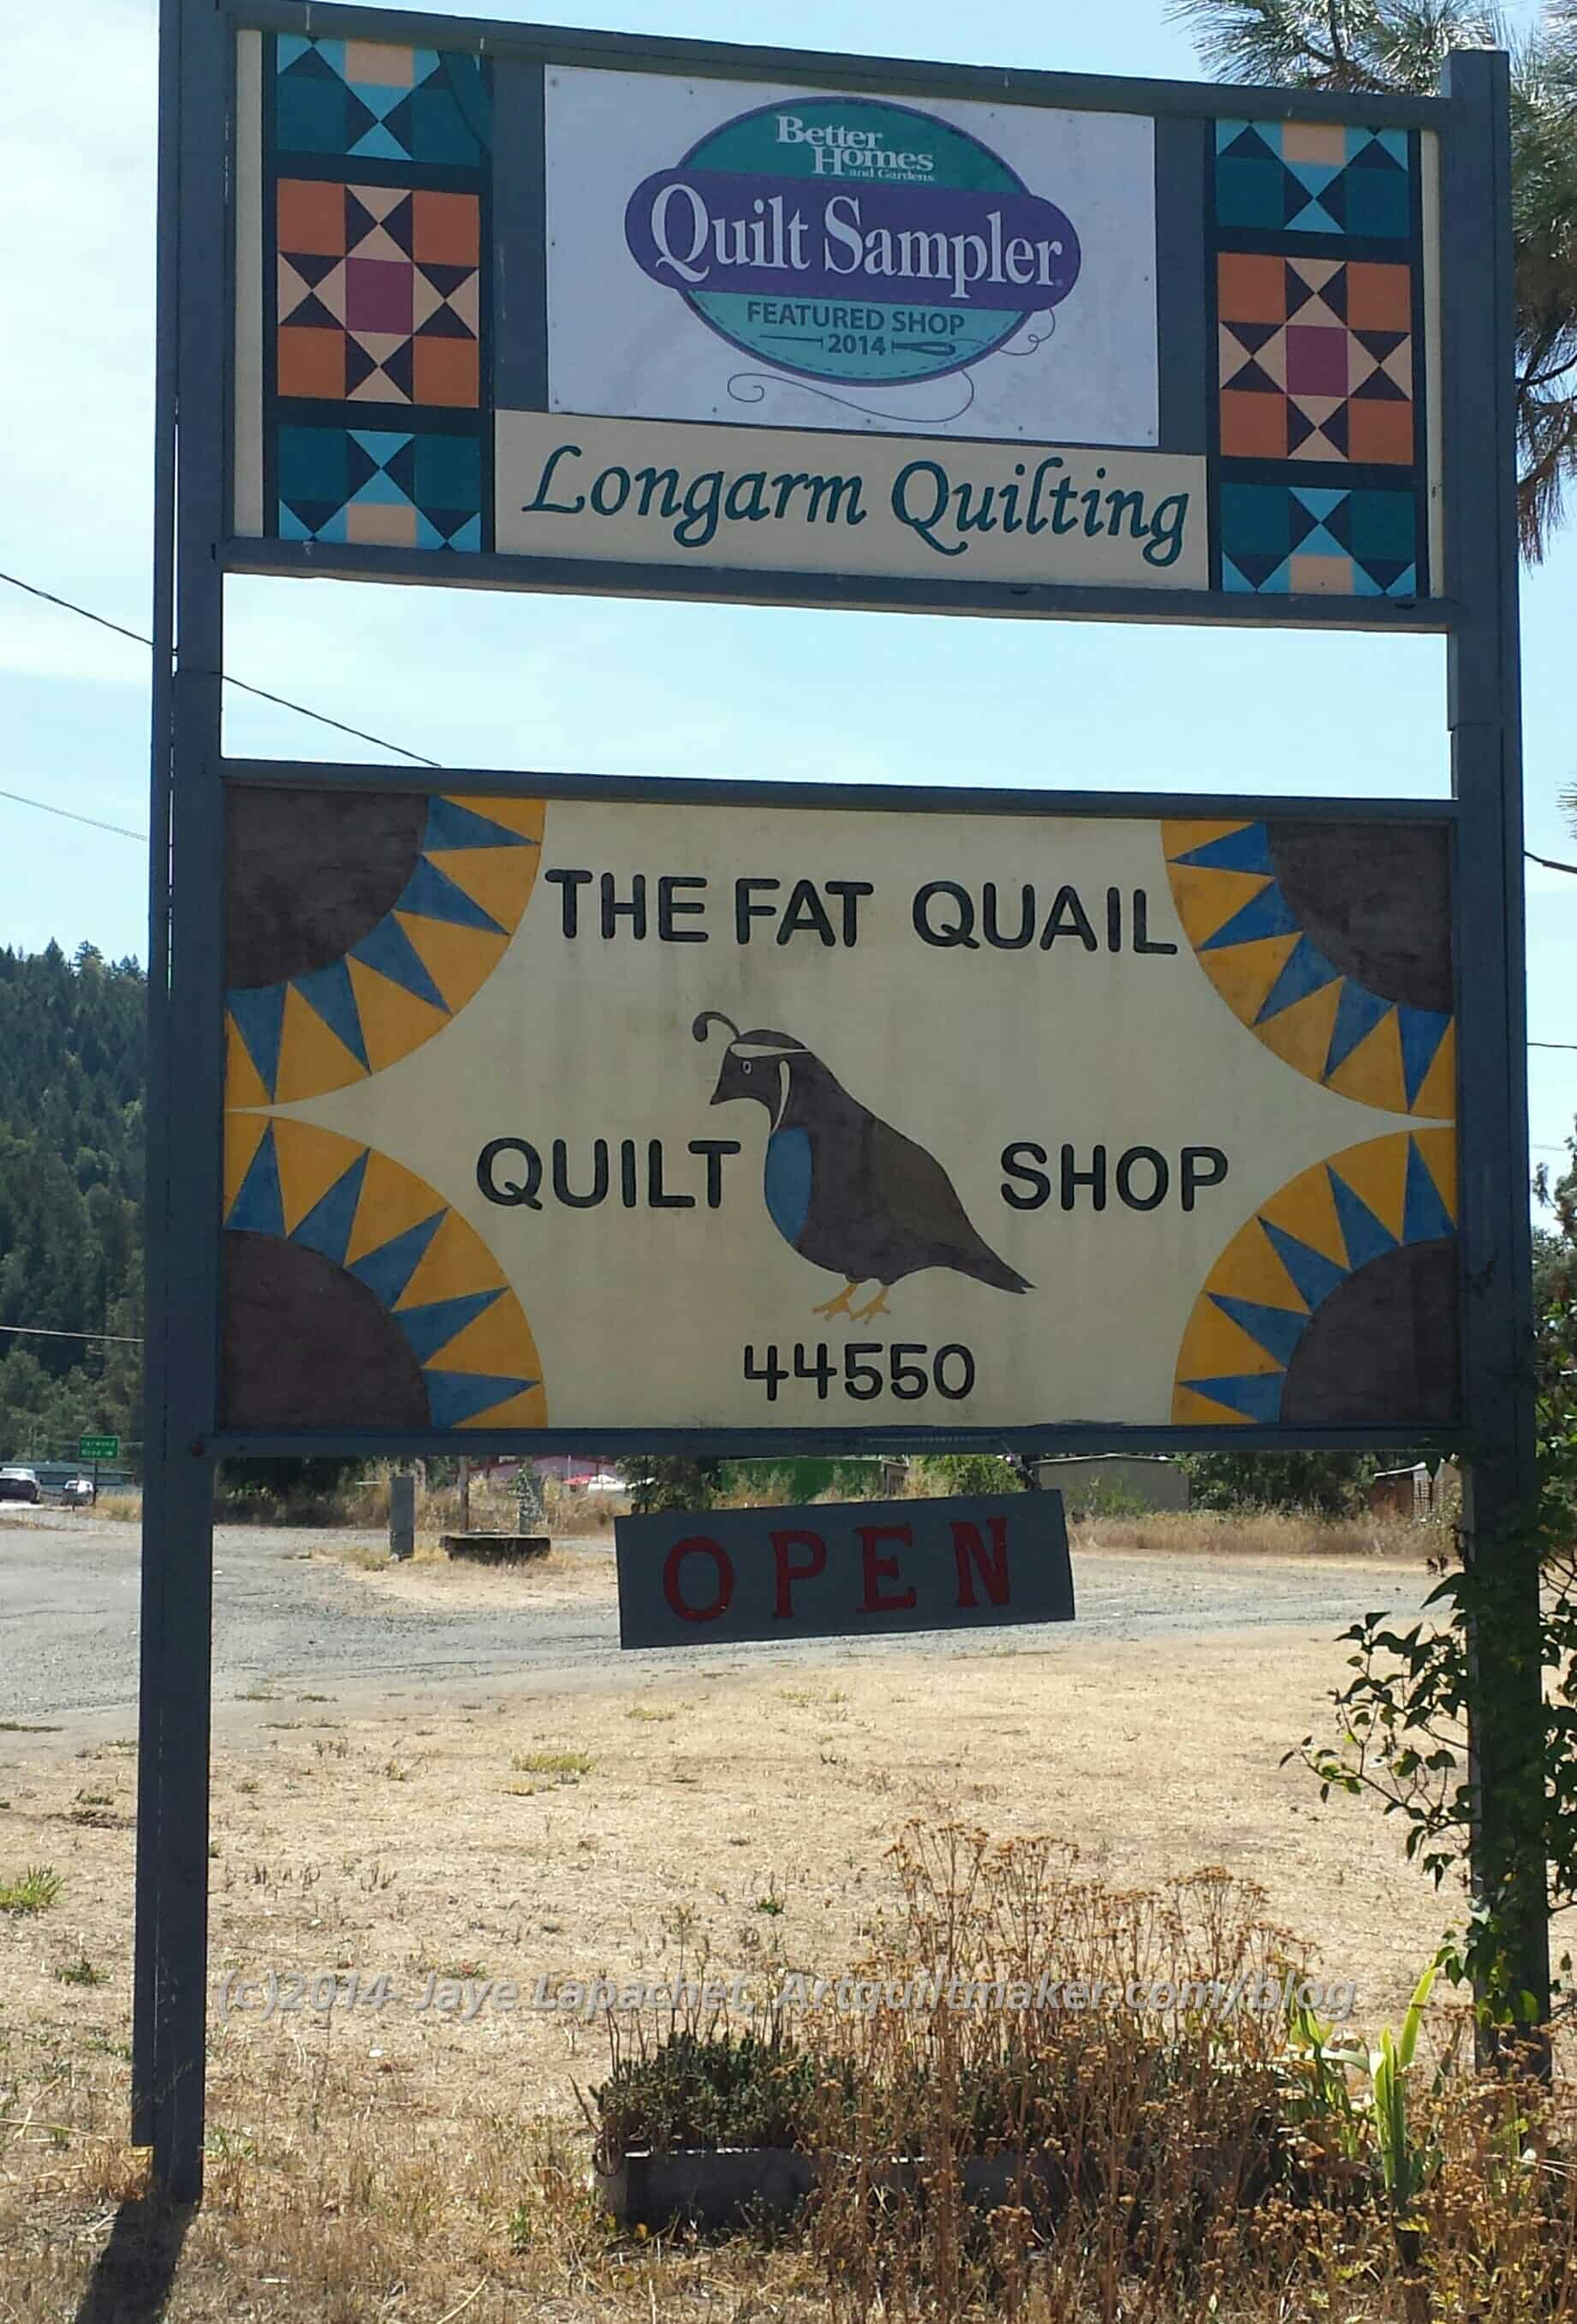
I have visited the Fat Quail Quilt Shop before. The last few times DH and I have driven to the North Coast, we haven’t stopped. Absence makes the heart grow fonder? As Mom and I drove south from Portland it turned out to be a good place to stop for a stretch. Laytonville is a small town after Leggett and before Willets as you drive south on Hwy 101.
When we visited several ladies were having a sew-in. The ladies were sewing away on their own projects and asking for advice as needed (by their own words). I was glad to see that they were there. Those small towns look so small, I always wonder how they can support a quilt population. My mom and I discussed this quite a bit in the car and her theory is that crafts are popular because of the lack of big city distractions. She could be right.
Fat Quail interior
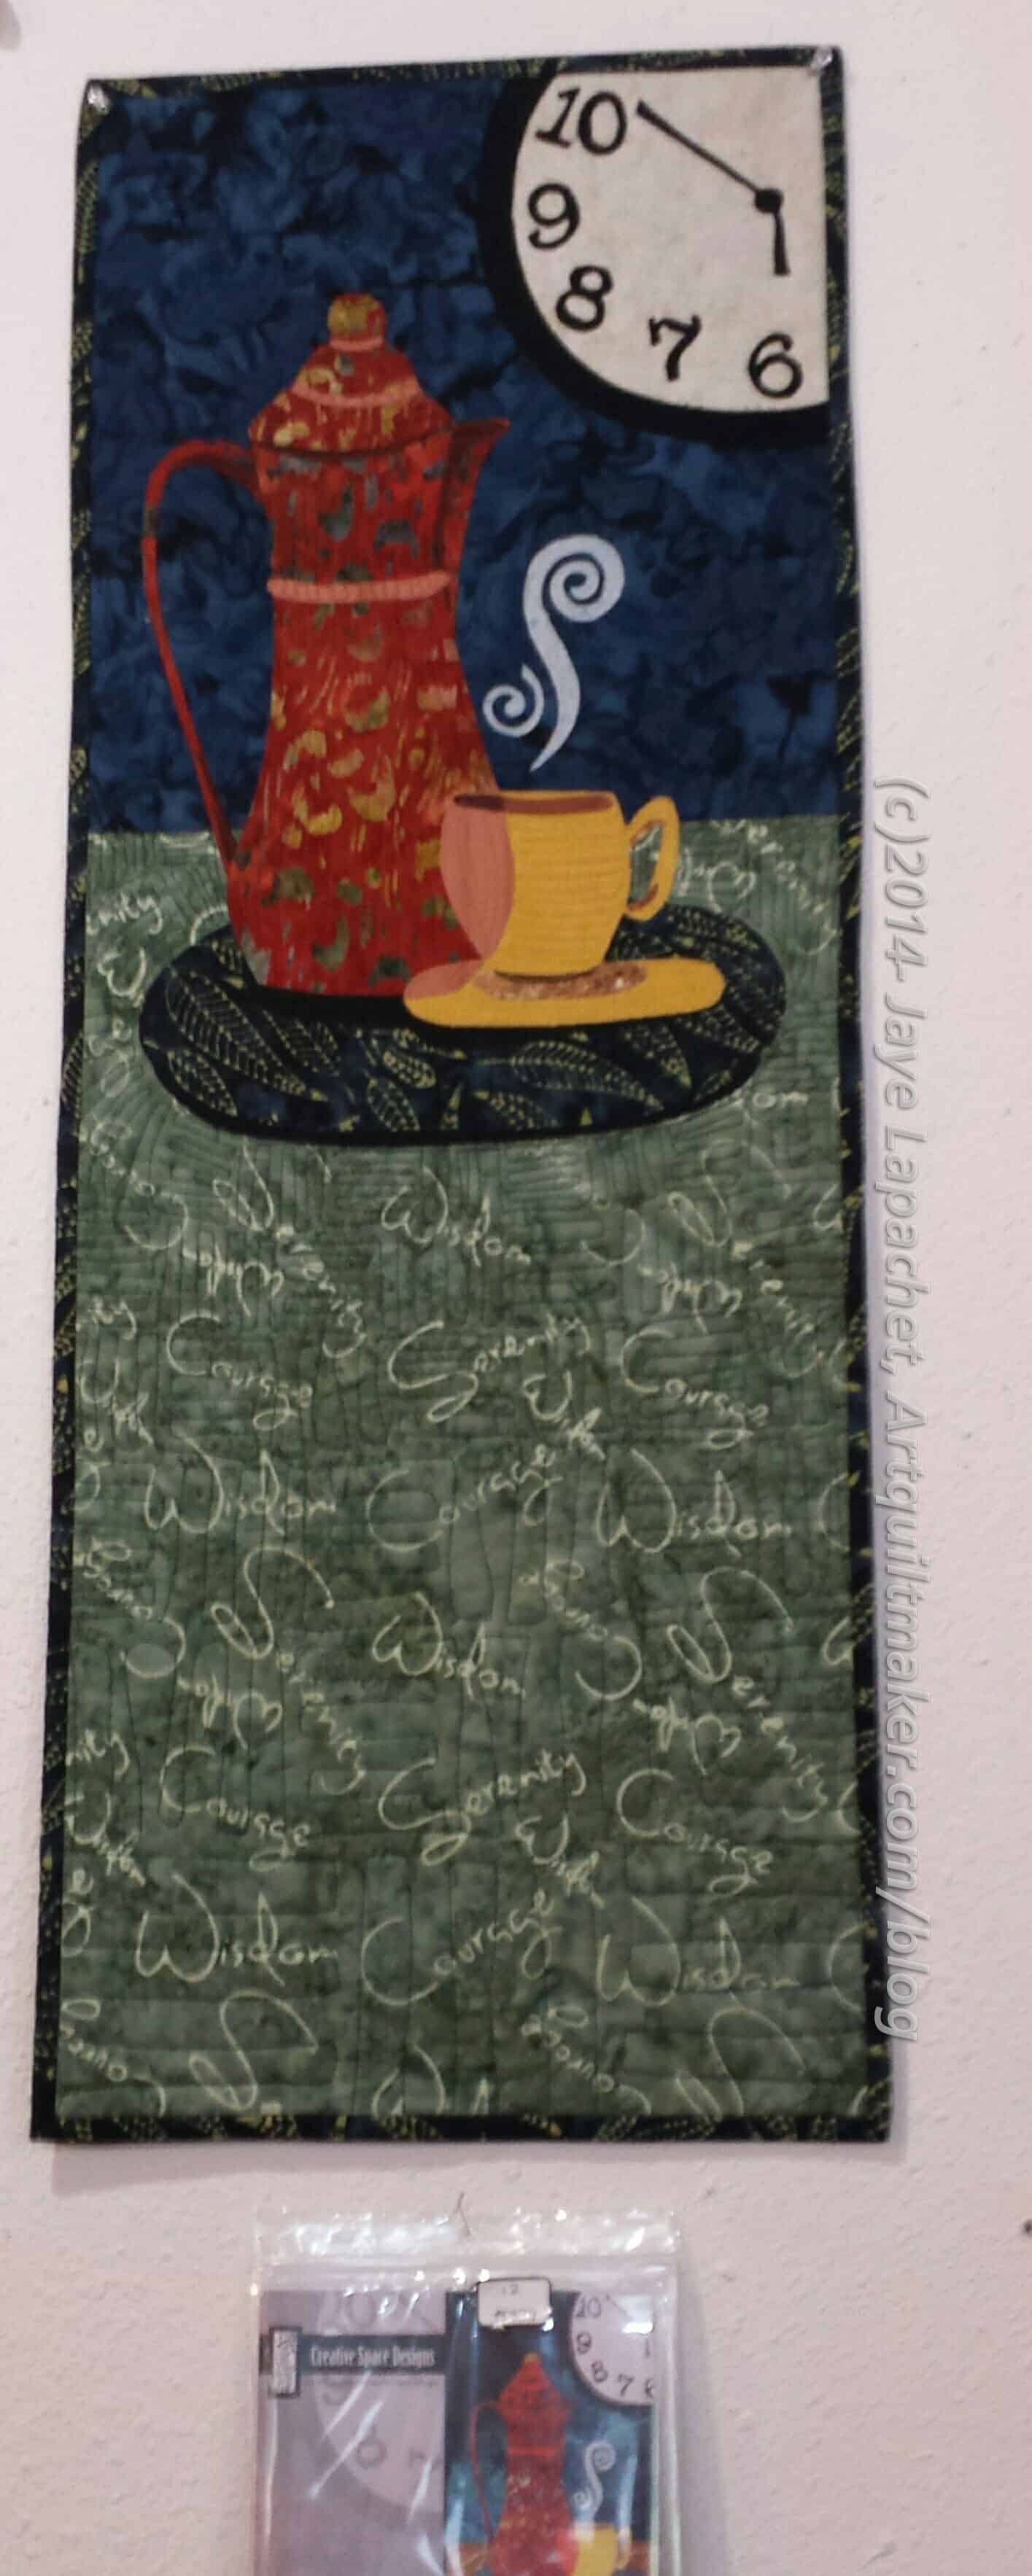
Fat Quail probably has the most ‘country’ style of the stores we visited. The colors of the decor tend more towards sage, beige, cream and rust. The shop is light filled and there are plenty of pinks and turquoises for people like me. They also have some more modern patterns, such as the Time for Tea pattern, which makes me think of the Mad Hatter.
“Time for Tea”
I don’t know that I will make it as a quilt, but I do like the clock being half off the quilt. It is a good reminder that design elements do not need to be complete. I also like the stylized coffee pot. Both are interesting design elements. The pattern is Time For Tea (CSD-110- 13″x 35″) from Creative Space Designs. They have other interesting, including more Mad Hatter-ish, patterns as well as flowers and animals. You can buy it from their website or call Fat Quail.
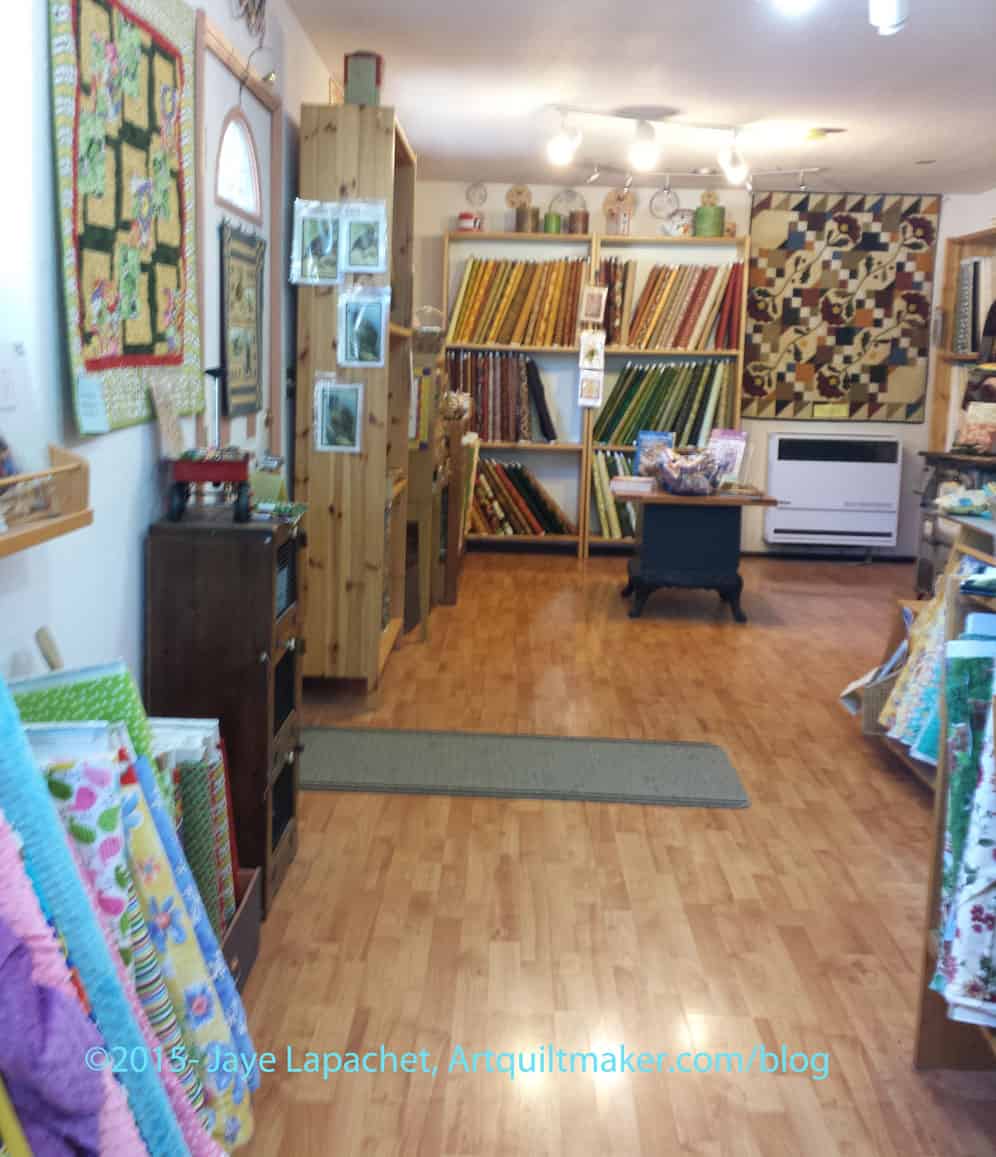
Fat Quail interior
They brightened things up quite a bit from last time. The room with the card catalog drawers holding fat quarters held a lot of Stonehenge last time. This time there was the cat quilt and that green, cream and rust quilt. The room was a lot brighter. No Stonehenge. Sorry Sandy!
I also saw some 1930s fabrics as well as some aqua and turquoise hiding in that room. 😉
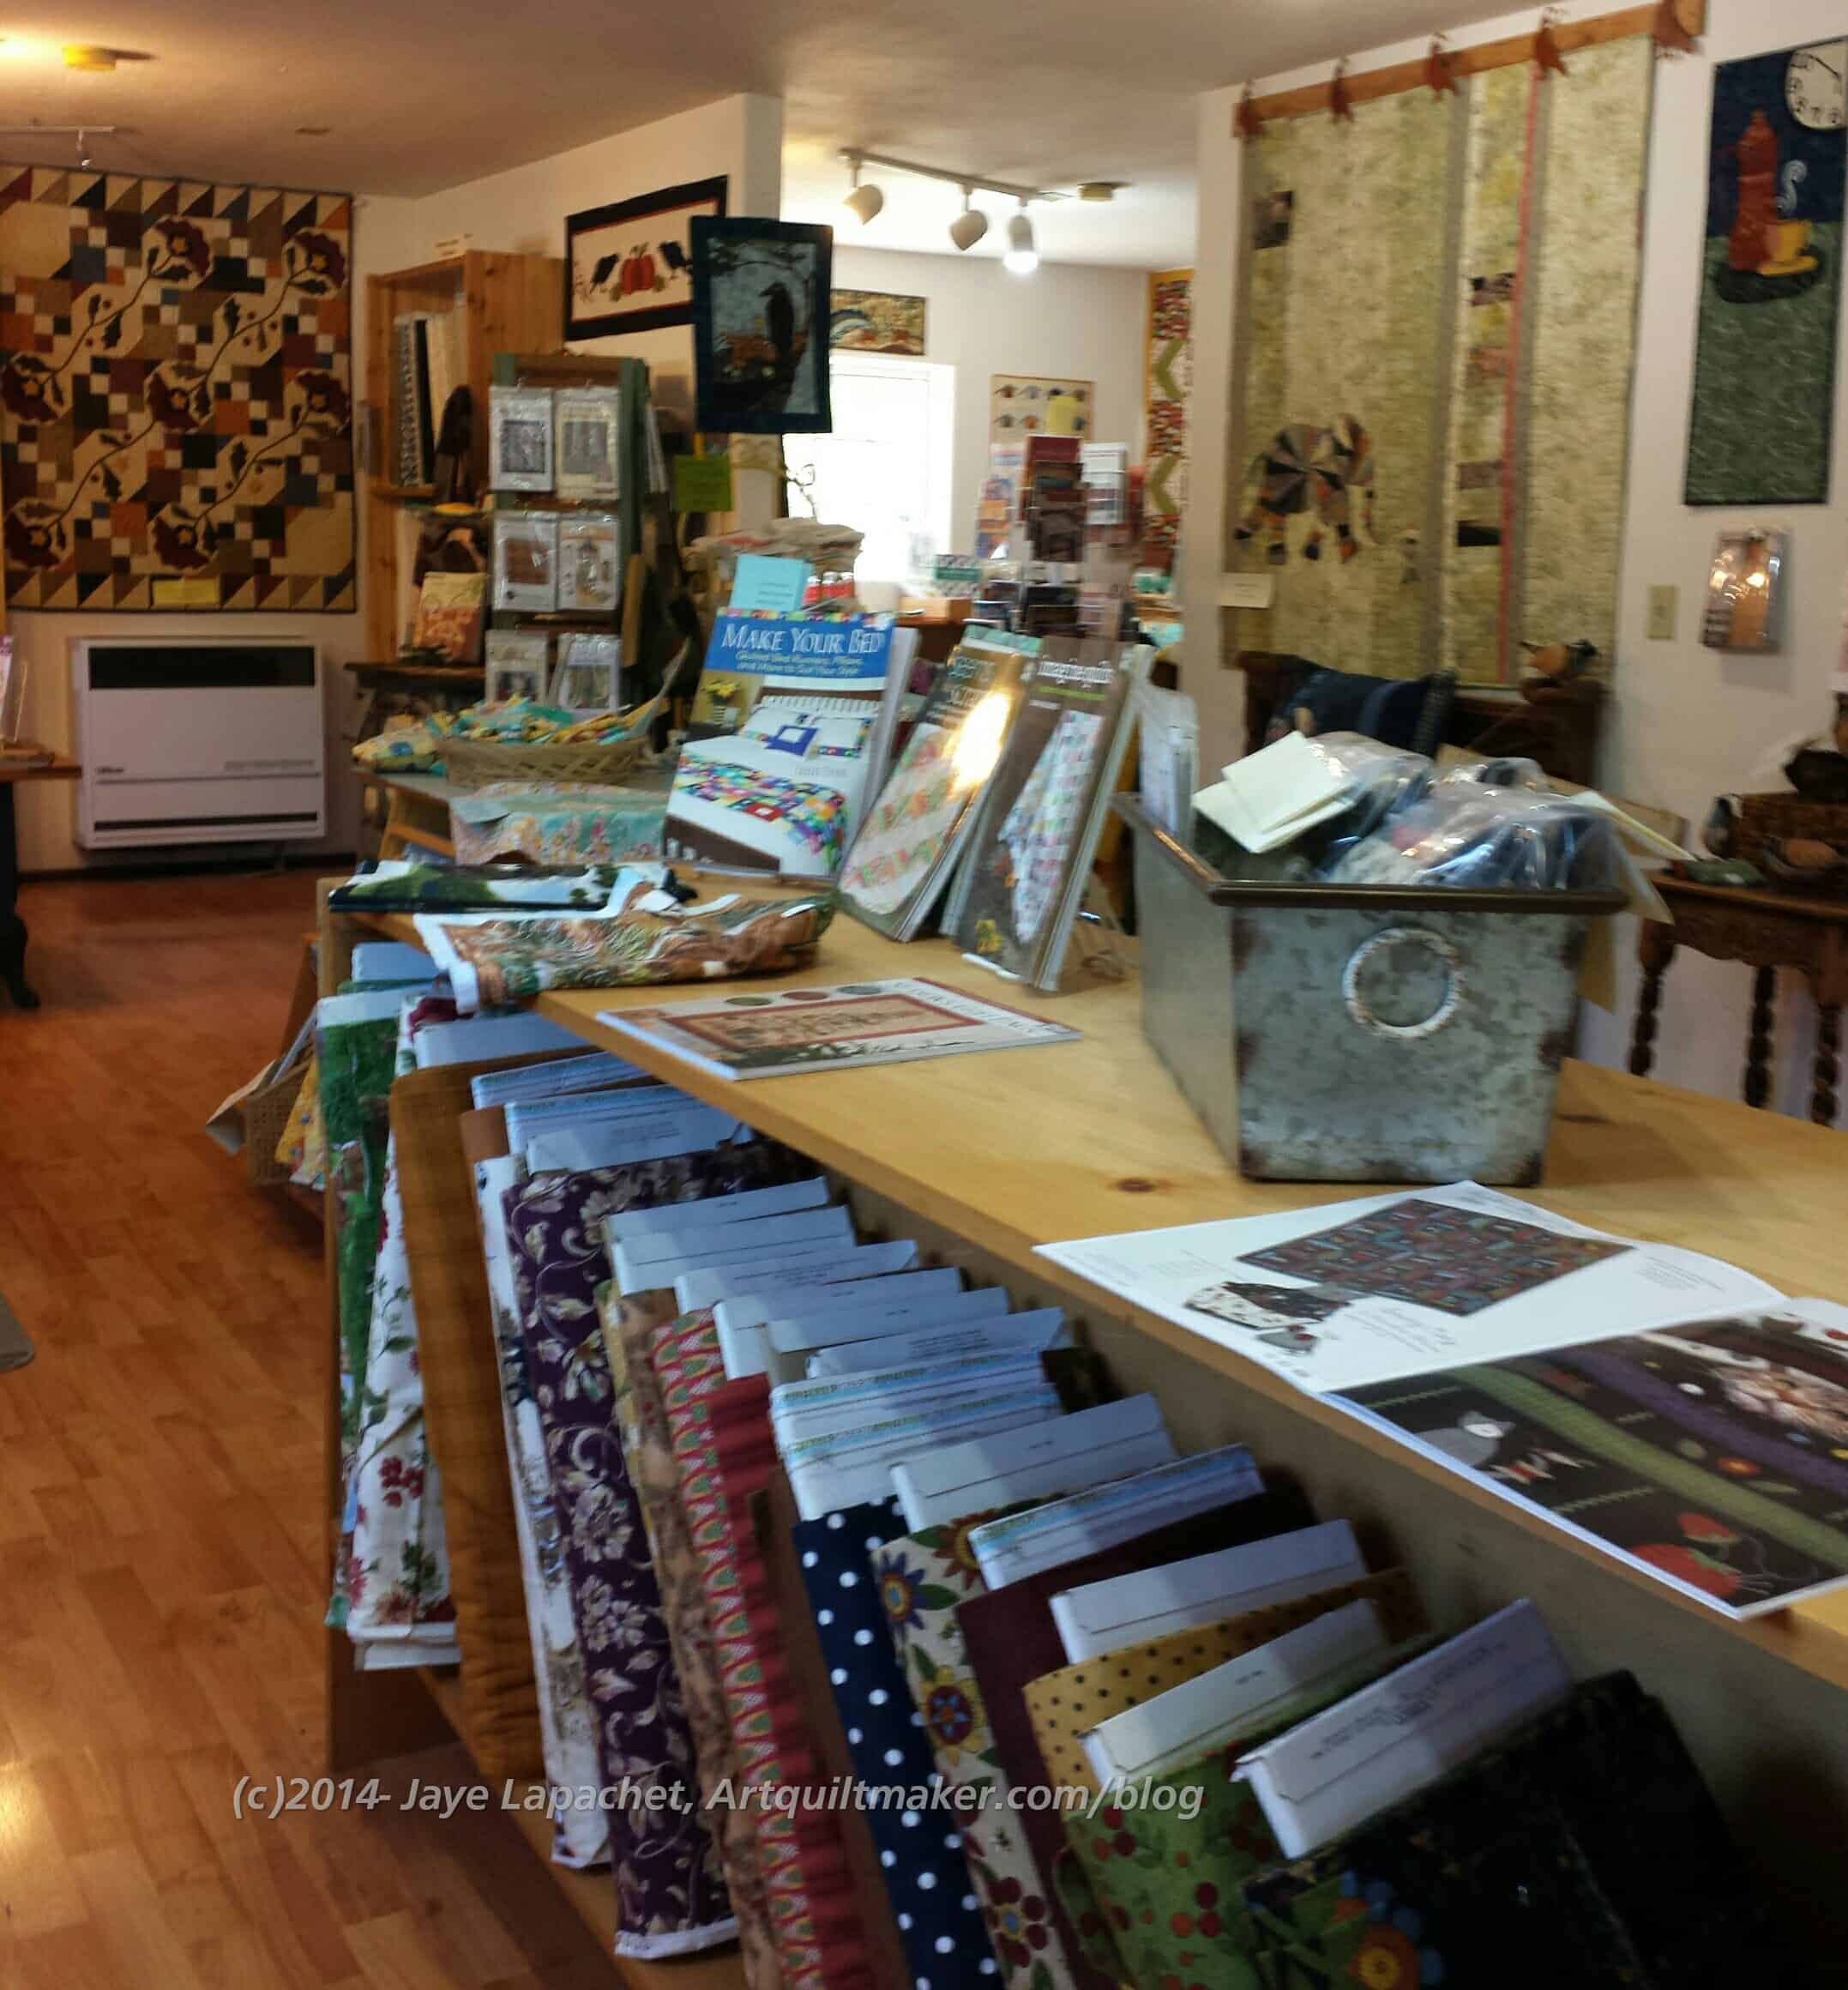
Fat Quail front room
As at the Quilter’s Corner, this shop had some specialty quail items. The quail is the state bird of California and this shop had a pattern for s stuffed version and some prints that could be added to a quilt. You can see them hanging on the fabric shelf to the left in the middle of the picture.
Autumn was in full swing in all of these quilt shops so there was a lot of Thanksgiving: reds, golds and browns. You can see those fabrics on the left in the back of the picture.
Fat Quail front room
While fabric wasn’t everywhere, which I didn’t see in any shop I visited, there was plenty to choose from. I also found that a lot of different styles were represented even if there weren’t samples using every fabric.
I still think this shop is worth a visit and there is a coffee shop down the road a little where the family can relax while you look at fabric
Location:
44550 US-101, Laytonville, CA 95454
(707) 984-6966
I went to a number of shops, but some of them are not getting their own post because I didn’t buy enough, take enough pictures or I had been there before pretty recently.
The best thing about visiting all the quilt shops I visited, aside from being distracted from leaving my Y.M. in a strange city all alone, was that I saw a lot of different stuff. Different colorways, different fabrics, different motifs. It made me realize how much fabric I never see. I suppose that is a good thing.
I found a big list of all the quilt shops in Oregon and we kind of followed that one.
Ocean Waves, Eureka, California
Ocean Waves, Eureka, Calif.
I usually visit this store when I am on the North Coast and this trip was no exception. The last time I visited was in February.
The Young Man and I drove up on Tuesday and we had kind of short driving day. We should have driven farther, but we didn’t. We arrived in Eureka, checked into the hotel and I called the quilt store. They were open for another half and hour so I hightailed over there and looked around. While I was there, I texted the Y.M. with a picture of a not-too-juvenile back-to-school print and asked if he wanted a pillowcase out of it. He said YES so I bought it. I also bought some more dress fabrics. You know those Philip Jacobs will be on body in the not too distant future. 😉
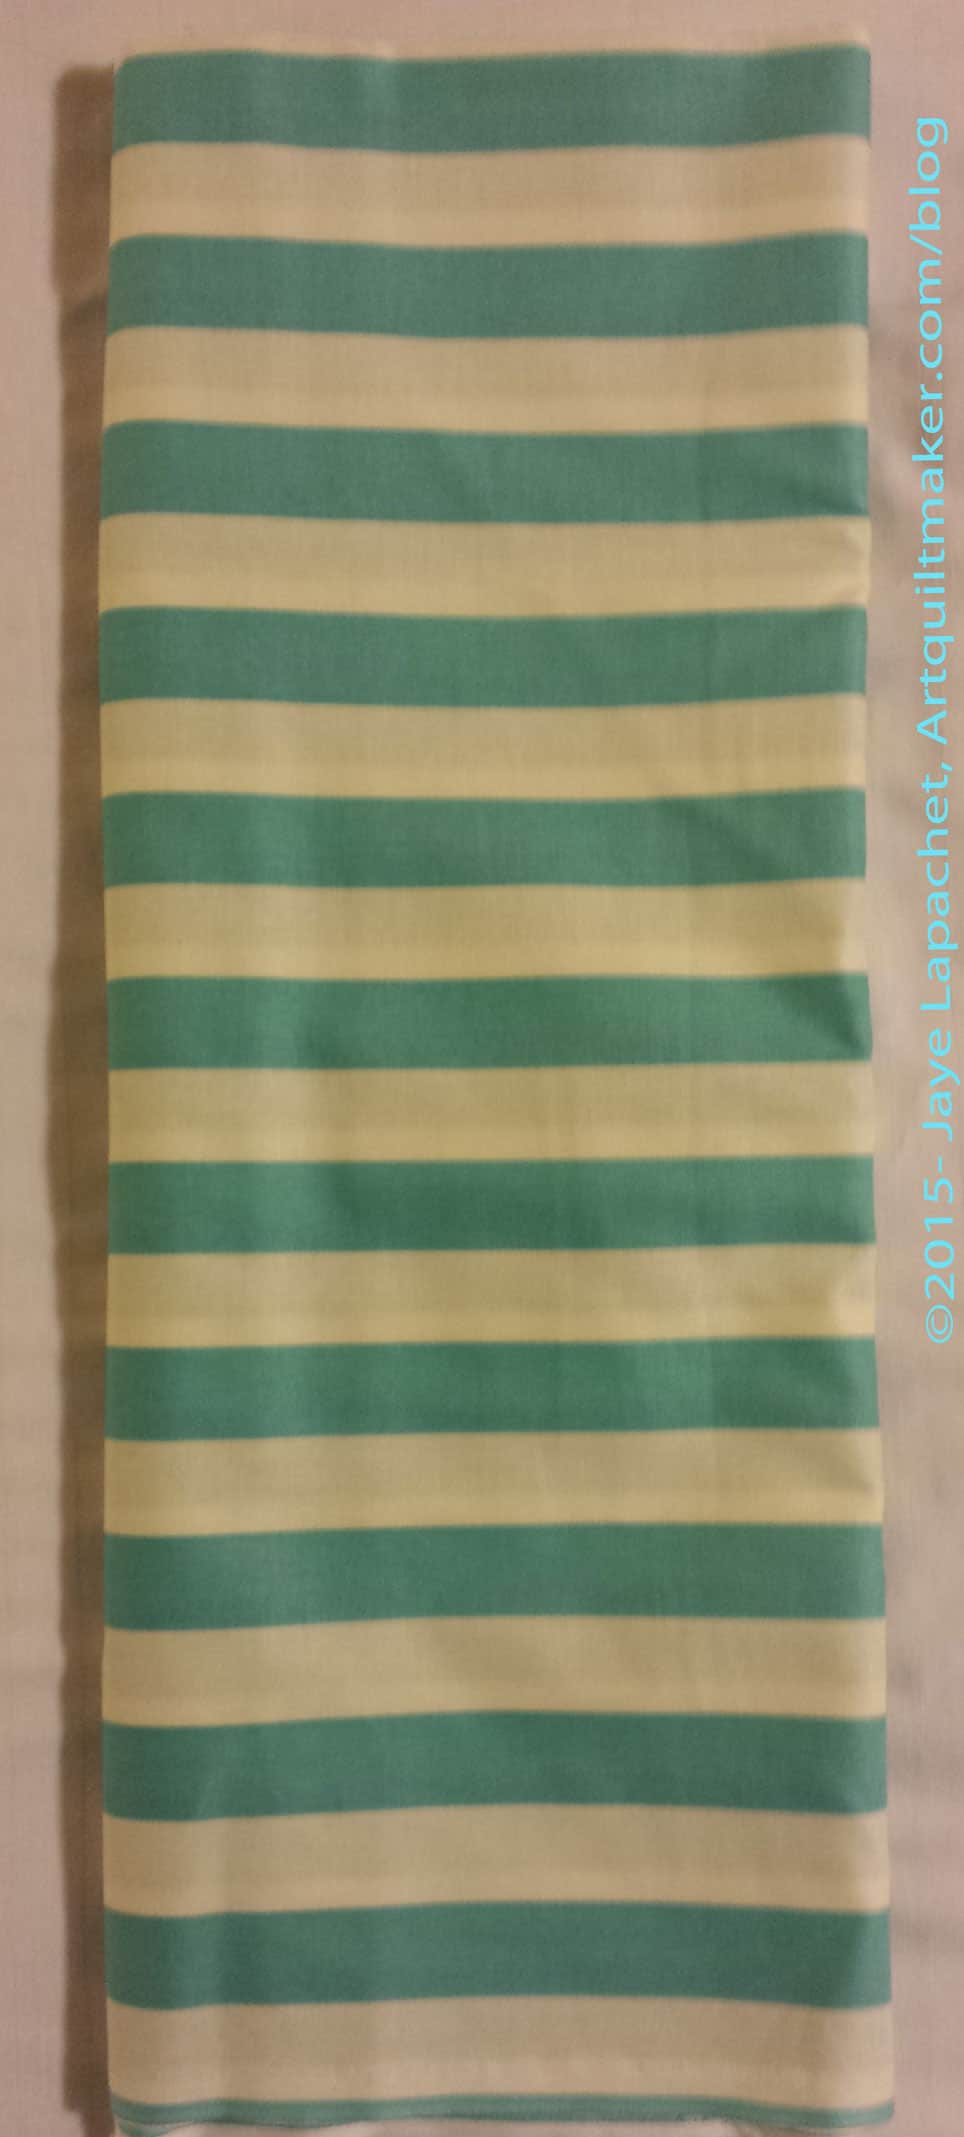
Ruth’s Family Fabric, Waldport, Oregon
Riley Blake Awning Stripe
This is an upholstery shop and quilt fabric store. I may just bring my wing chairs there to be recovered. It will force me to drive by. The price is right and the Fabric Depot in Portland had some great upholstery fabric.
I may have found the perfect fabric at this store. I have never seen this Riley Blake Awning Stripe before. The stripes are about an inch wide. I would upholster an entire room in this fabric if I had a sunroom or a boudoir. I love this fabric so much. It is an older fabric from the La Creme Basics line. This should seriously be in their lineup all the time. And WHY did I have to go to Southern Oregon to find this fabric? Why didn’t I ever see it before? WHY?
It was also in red and another version in black, but I restrained myself. I have to make something that I will use all the time. I don’t know what yet, but something great.
By My Hand, Brookings, Oregon
The lady who was manning the store (pretty sure she was the owner) was super nice. Mom barely looked at anything in this shop because she really hit off with the owner and they just chatted the whole time.
By My Hand light grey
The store is yarn and fabric, but more yarn. I looked for light greys for my Flying Geese project throughout the trip and found a good one here.
This shop was hard to find. It is in a kind of strip mall, but the sign is impossible to see if you are driving. Quilt and fabric shops MUST have a giant sign near the road if they want out-of-towners to visit.
We passed about 3 shops up because we simply couldn’t find them. One was in the same town as this shop and we drove by where it should have been twice and we still couldn’t find it. Another thing, shops should have navigation tips on their websites. If they are near a giant department store their website should say “we are just before Super Giant Department Store if you are going south.”
We did stop at a wonderful cafe in Brookings called Blue Water cafe. It was down by the water and little hard to find, but totally worth it. They had gluten free bread and the service was excellent. The lady was very friendly. The place was also clean and had a very interesting Hawaiian/surfing/tropical theme.
Missed Shops
I drove right by Cool Cotton, Portland. It is, supposedly, a modern quilt shop. I was looking for exit, but didn’t see it. I’ll make it there next time.
Country Keepsakes was impossible to find.
We were shopped out when we passed the Quilted Angel. It isn’t that far from my house so, theoretically, I can go almost any time.
We found a list of Oregon quilt shops ** on the web and used it quite a bit. Mom was really good at directing me to the various shops. I think I have a bit of DH in me (he has trained me, more likely) after all these years of traveling together. I tend to stay in the car far too long whereas mom needs to get out and walk around. I have to say that getting out of the car was easier when we did it more often. I didn’t feel like I needed a crowbar to get myself out of the car.
There are a lot of quilt shops on the Southern Oregon coast! It is amazing that every hour or so you can get out and take a look around a quilt shop.
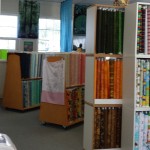
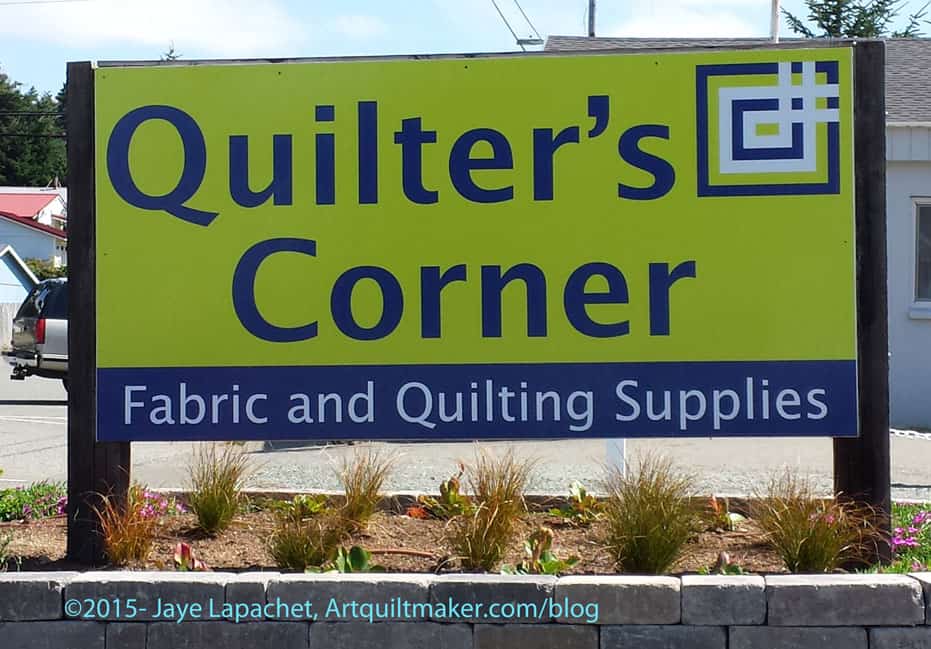
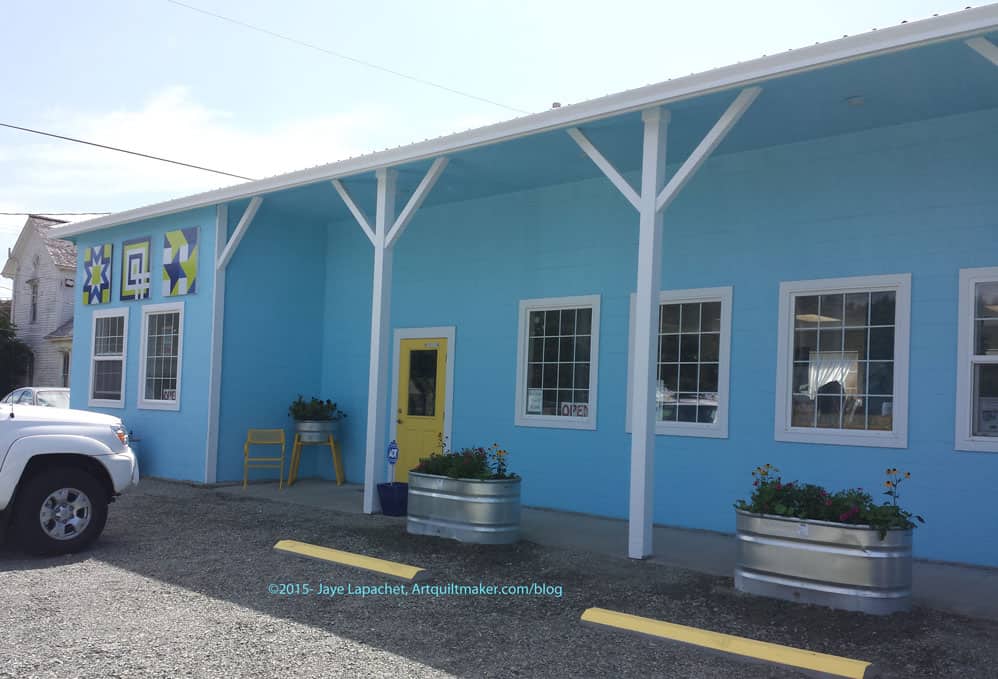
Quilter’s Corner – no life sucking beige
Quilter’s Corner was bright and cheerful. I love the paint on the outside of the shop. I am not particularly fond of the color on its own, but with the white, yellow and stainless steel flower tubs, it really works. It looks so welcoming and cheerful.
The inside of the shop was bright and cheerful as well. The people were friendly. They had a great selection of notions and fabric.
Quilter’s Corner batiks wall
To the left when we walked in was a wall of batiks. There were a lot of bright and cheerful, clear colors.
I think the light along the southern Oregon coast must be similar to the light we have at home, because I didn’t see a lot of country/Civil War themed shops. Most of the shops had bright and cheerful colors. Granted, we did not visit most of the shops on the list.
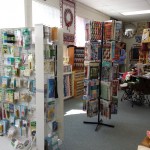
Quilter’s Corner notions etc
You know I love looking at notions and this shop, as I mentioned, had a lot of interesting notions. I had seen, that morning, a post on Instagram from Moda Fabrics about a finger light for handstitching. Before I left I had been working on the Food Quilt #2 binding, and stitching black on black was hard to see, so I was interested. They were on my mind when I was checking out. There was a basket of the lights on the counter, so I picked out one for me and one for my mom. It is so awesome that I didn’t have to hunt around for weeks for one to try. They were only $2 and the counter lady said she liked them. DH has been out of town so I haven’t been sitting with him and stitching, but I will give a full report on this little light later.
Quilter’s Corner books etc
There is a certain ruler for which I am looking. I don’t know if it exists, but it is about 5″ or 6″ x 12″. I looked at all the shops we visited, but haven’t yet found exactly the ruler for which I am looking. They had a good selection of rulers at this shop. I spent some time looking at them and really wanting to get back to the sewing machine. I envy OzzyPip for taking her machine with her on her trips. Of course, I would not have had time to machine sew on this trip. I did have some handwork with me, but as I drove most of the time, I didn’t work on the project (EPP). Not making much progress there.
Quilter’s Corner fabrics
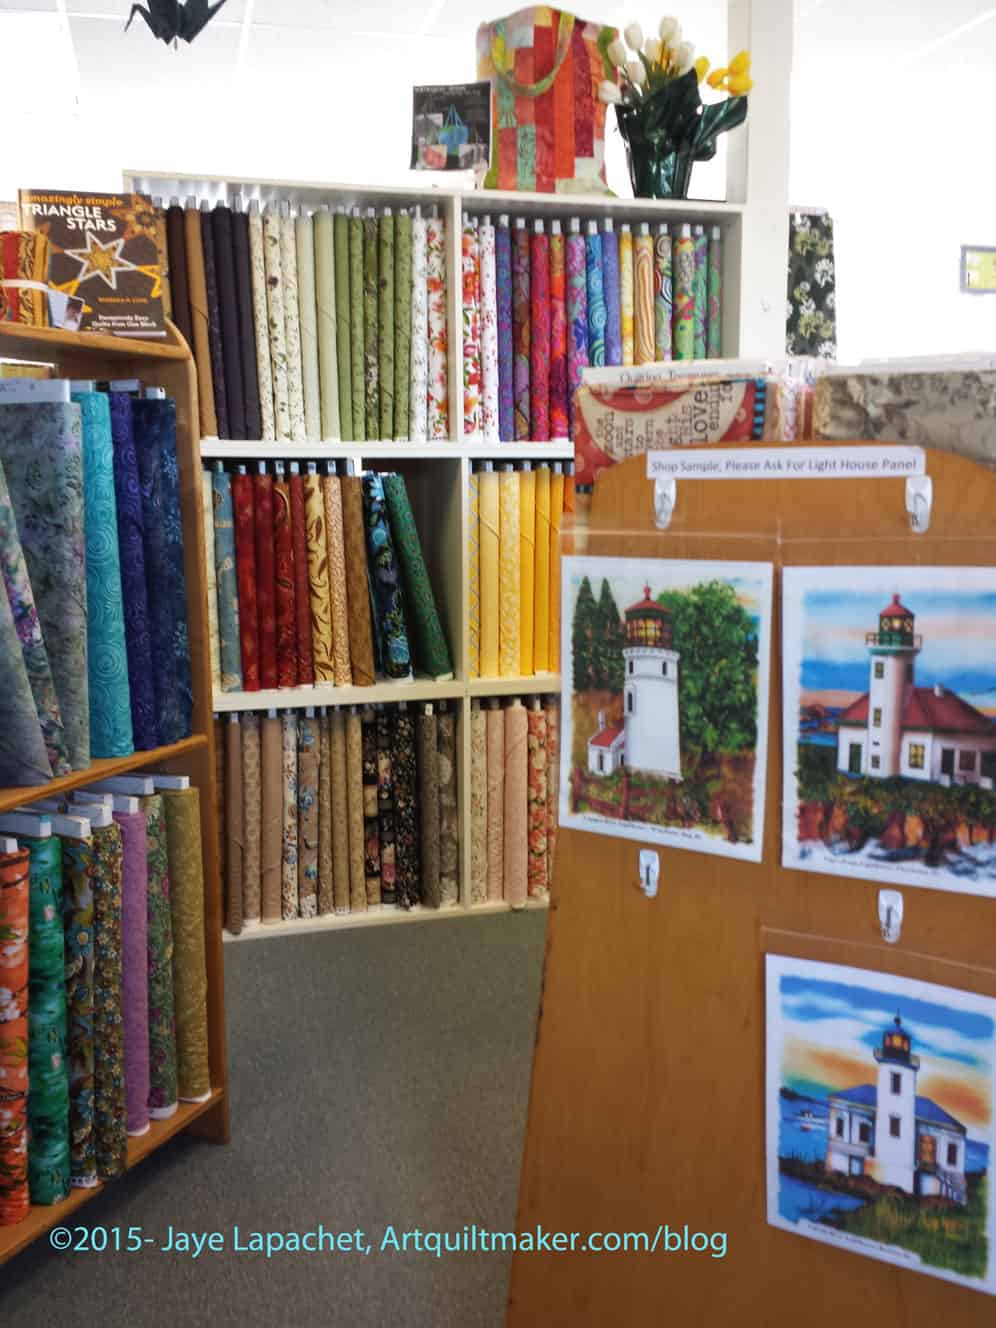
One thing I noticed in a lot of these shops was the sea theme. They didn’t have it all over the shop, but had a section of fabrics with a sea theme or panels (such as the lighthouse panels you see, right). I didn’t buy any of these, but it made me think of the Michael Miller Ocean fabric I bought a few years ago. I think these must be for tourist quiltmakers who come and want a little something to remember their trip.
I also saw the nationwide row by row challenge in full force in many of these Oregon shops. Daisy mentioned this challenge experience in one of her recent podcasts. The theme there is something about the sea and each shop had a pattern for a row. These were free, but they also had kitted up the pattern with fabrics and those seem to run around $15.
I am not one for challenges, but I do like the idea of getting different rows from different shops and putting the rows together in your own way. It seems like a very neighborly thing to do, especially if people were doing it together. I could have collected a lot of rows on this trip, but, again, not my thing.
Quilter’s Corner fabric displays
The shop really had a lot packed into a little space and they still had the opportunity for displays using antiques like the sewing machine. Sometimes I feel like such displays are taking away valuable space from fabric, but I didn’t in this case.
After we had been there for a few minutes other ladies started to trickle in. We found out that the local quilt group was coming to meet and 30 ladies would be there in about 30 minutes. We didn’t rush, but since we were almost done anyway we finished up and got out so someone else could have our parking space. I do like it when quilt shops offer space to quilt groups. It is worth their while as, in this particular instance, several ladies handed over bolts of fabric to be cut and bought fat quarters for an exchange they were having.
I never cease to be amazed at how different quilt shops can look. This shop is well worth a stop if you are heading to the Oregon Coast.
Location: 335 7th St, Port Orford, OR 97465
(541) 332-0502
**Nota bene: both shops on this list in Tualatin are closed, as in no longer exist.
I have almost had enough of this piece. Something drastic has to happen.
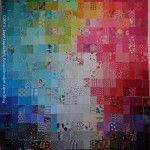
FOTY 2014 -Early September
I had a couple of choices on projects to work on and FOTY 2014 was one of them. I took this picture on Thursday as a baseline for the weekend.
The piece has looked like this for a long time and it isn’t a bad look, but it isn’t finished either.
The red and pink look pretty good. The green area needs a lot of work and the purple is simply missing.
I decided to do one small thing as one small thing often leads to larger things, so I counted up all the patches, then I worked on figuring out how large the piece needed to be. I *think* the piece needs to be 16 rows tall by 26 rows wide. At the moment the piece is 15 rows tall by 24 rows wide. Easy to add two more rows?
No.
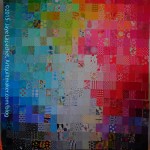
Some FOTY 2014 Work – early Sept.
I got busy and started moving things around until I got to this point. The whole piece is filled in, which is a good thing. The green area still looks terrible, but it could be worse. The bad part is that there are 40+ patches on the floor. I have crammed some into the bottom rows, which is fine, but also not fine. I had to face reality that 26 x16 rows does not fit on this does wall and I need to do something else.
I really need all the pieces on the design wall in order to arrange the pieces the way I want them. I can’t just put the pieces up on the wall and sew them together and have a piece that I like.
I don’t seem to be able to think of very many options except to trim all the piece. The rectangles are large (5″x3″) and if I trim a 1/4″ off each side that will cut the size down and, perhaps, enable me to get all the pieces on the wall. I cut the rectangles that size to have them be 4.5″ x 2.5″ once sewn together and I kind of want them to be that size. I could cut them down to squares and forget my rectangle idea all together. I did squares for FOTY 2013 and I don’t think I want to do them again another year in a row.
Definition: “Vanilla is a flavor derived from orchids of the genus Vanilla, primarily from the Mexican species, flat-leaved vanilla (V. planifolia). The word vanilla, derived from the diminutive of the Spanish word vaina (vaina itself meaning sheath or pod), translates simply as “little pod”.[1]Pre-ColumbianMesoamerican people cultivated the vine of the vanilla orchid, called tlilxochitl by the Aztecs. Spanish conquistador Hernán Cortés is credited with introducing both vanilla and chocolate to Europe in the 1520s.[2]
Initial attempts to cultivate vanilla outside Mexico and Central America proved futile because of the symbiotic relationship between the vanilla orchid and its natural pollinator, the local species of Melipona bee.[3] Pollination is required to set the fruit from which the flavoring is derived. In 1837, Belgian botanist Charles François Antoine Morren discovered this fact and pioneered a method of artificially pollinating the plant. The method proved financially unworkable and was not deployed commercially.[4] In 1841, Edmond Albius, a slave who lived on the French island of Réunion in the Indian Ocean, discovered at the age of 12 that the plant could be hand-pollinated. Hand-pollination allowed global cultivation of the plant.[5]
Three major species of vanilla currently are grown globally, all of which derive from a species originally found in Mesoamerica, including parts of modern-day Mexico.[6] The various subspecies are Vanilla planifolia (syn. V. fragrans), grown on Madagascar, Réunion, and other tropical areas along the Indian Ocean; V. tahitensis, grown in the South Pacific; and V. pompona, found in the West Indies, and Central and South America.[7] The majority of the world’s vanilla is the V. planifolia species, more commonly known as Bourbon vanilla (after the former name of Réunion, Île Bourbon) or Madagascar vanilla, which is produced in Madagascar and neighboring islands in the southwestern Indian Ocean, and in Indonesia.[8][9]Leptotes bicolor is used in the same way in South America.
Vanilla is the second most expensive spice after saffron,[10][11] because growing the vanilla seed pods is labor-intensive.[11] Despite the expense, vanilla is highly valued for its flavor, which author Frederic Rosengarten, Jr. described in The Book of Spices as “pure, spicy, and delicate”; he called its complex floral aroma a “peculiar bouquet”.[12] As a result, vanilla is widely used in both commercial and domestic baking, perfume manufacture and aromatherapy.” (Wikipedia)
Vanilla the Rabbit – a Sonic the Hedgehog character
Vanilla – an Asterix character
Vanilla, Pennsylvania
The Vanilla JS team maintains every byte of code in the framework and works hard each day to make sure it is small and intuitive.
The Vanilla workshop bicycles
Vanilla Bean Frappuccino® Blended Crème
vanilla fudge
Bourbon Vanilla Extract
Vanilla buttercream
vanilla bean
Tahitian vanilla
Vanilla Ice
Absolute Vanilla
Cherry Vanilla soda
Amy Sedaris’s Vanilla Cupcakes
Rapper Vanilla Ice
Post the direct URL (link) where your drawing, doodle, artwork is posted (e.g. your blog, Flickr) in the comments area of this post. I would really like to keep all the artwork together and provide a way for others to see your work and get familiar with your blog or website.
The Creative Prompt Project, also, has a Flickr group, which you can join to post your responses. I created this spot so those of you without blogs and websites would have a place to post your responses.
We are also talking about this on Twitter and Instagram. Use the hashtag #CPP
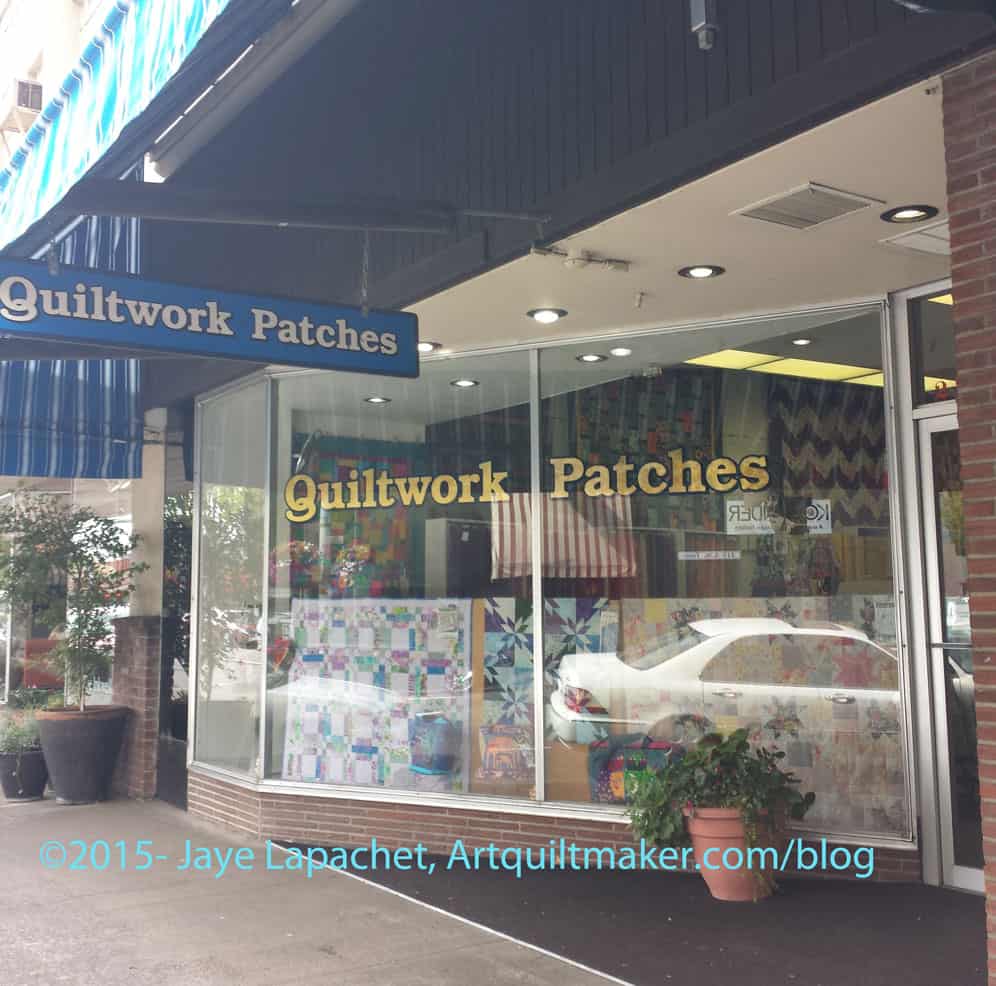
I stopped in Corvallis, Oregon on my way home at a shop called Quiltwork Patches. This wasn’t the largest store I visited, but it was one with a very good selection of fabric etc. Their excellent selection of fabric also included colorways that I hadn’t seen. They had some of the latest Moda charm packs and mini charm packs and really great selection of sale fabrics.
The ladies in the shop were friendly, but not too pushy, so I felt ok looking around, which was great, because I wasn’t feeling that well*.
There was a ton of fabric in this shop and half of it was sale fabric. The other part was really different, as I mentioned.
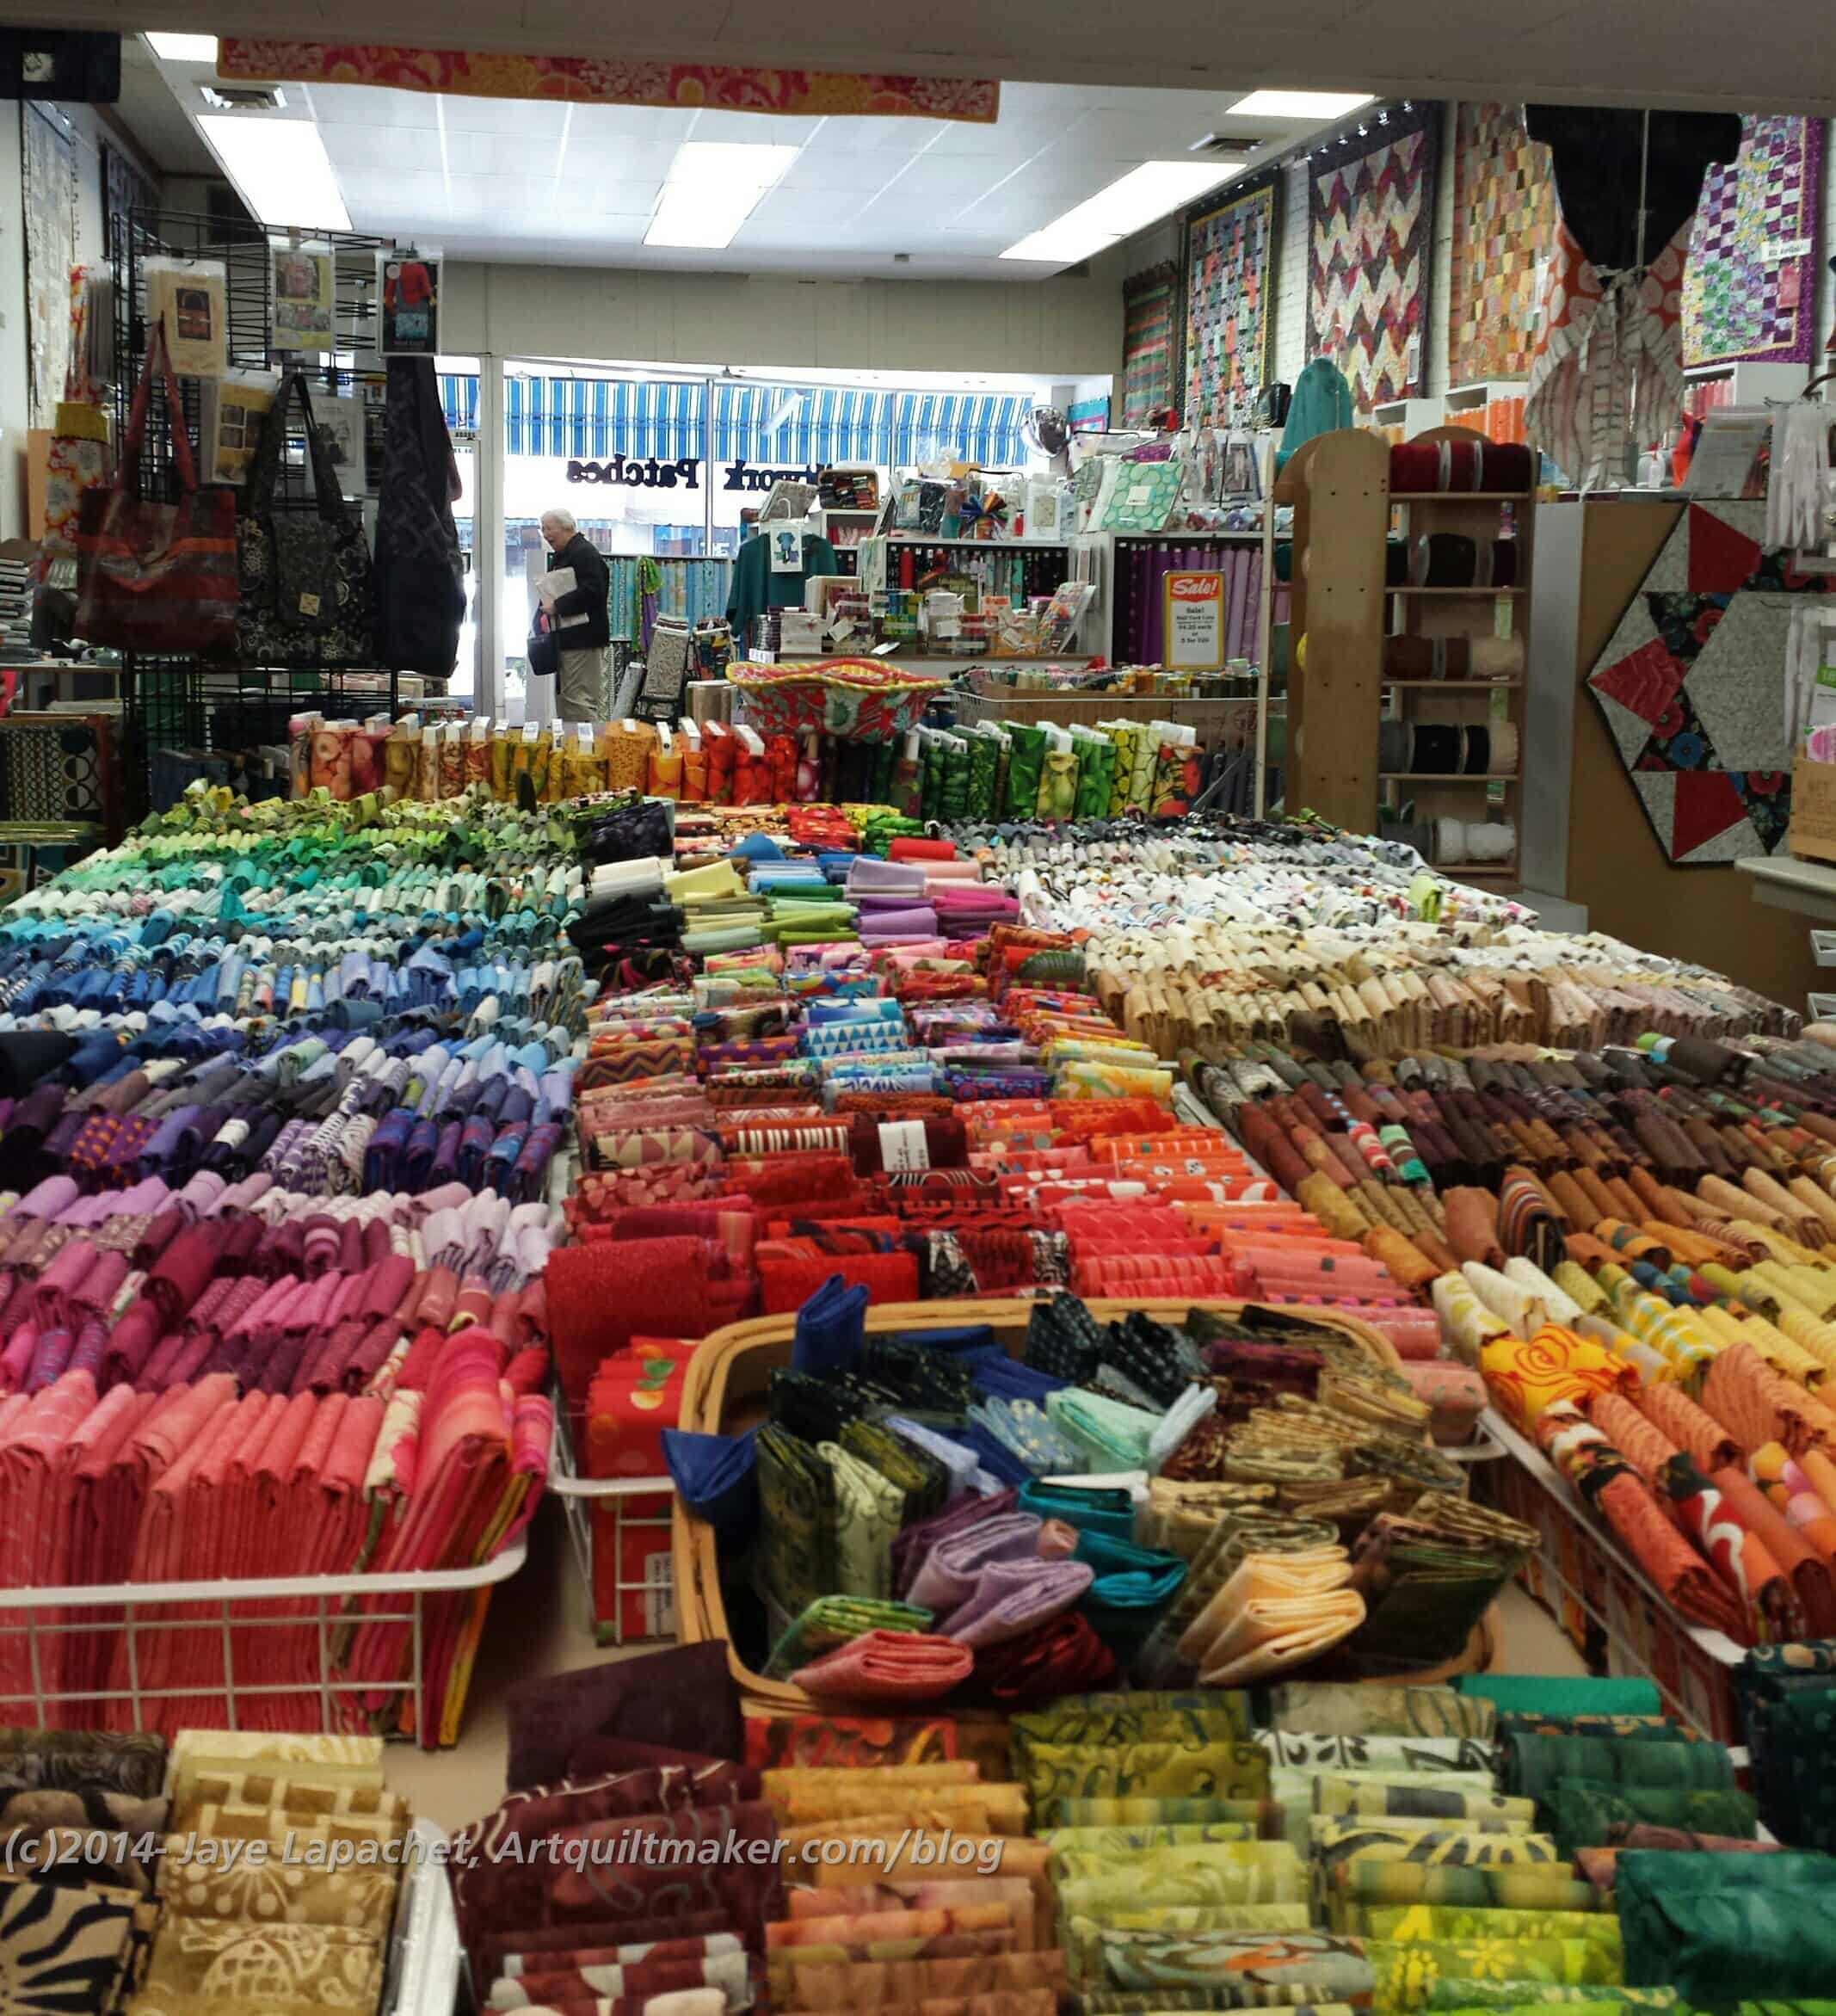
Quiltwork Patches front to back of the store
I liked the displays as well. They weren’t too cutesy and didn’t get in the way of the fabric. The displays facilitated the display of the fabric.
This was the first time I really liked those little benches in a quilt store. They, again, facilitated the display rather than overwhelming the display.
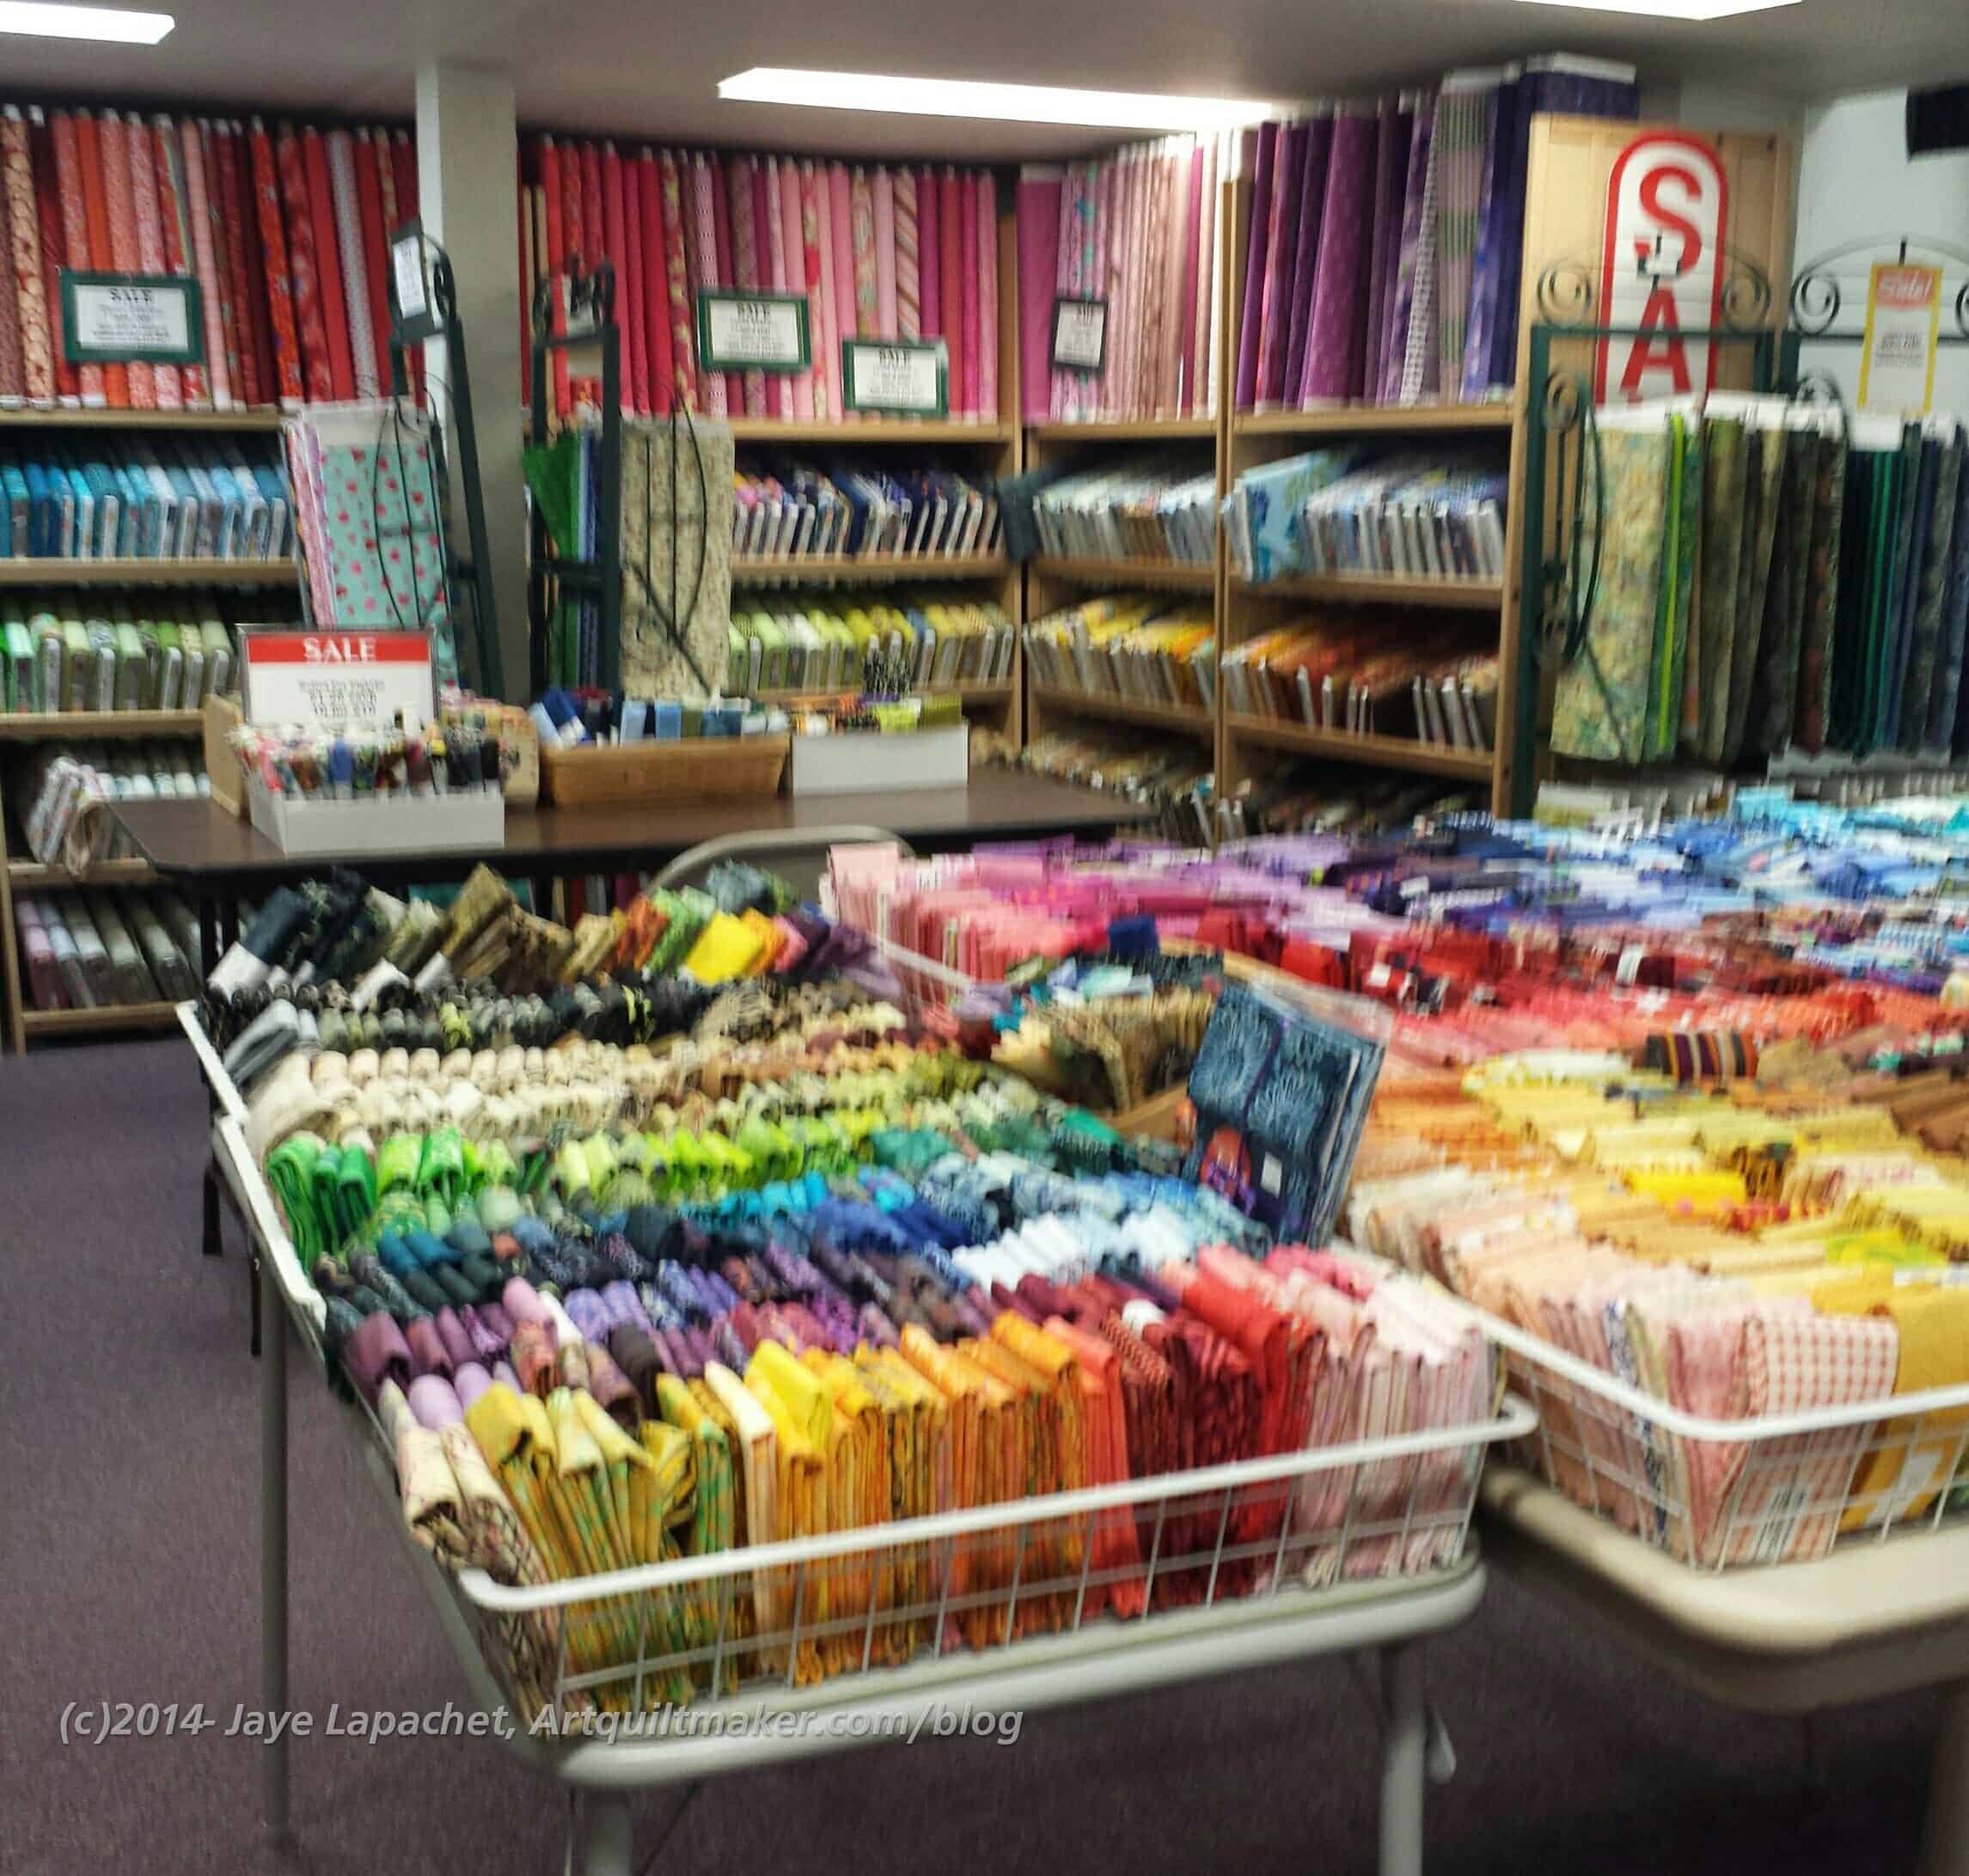
Quiltwork Patches back to front of store
Quiltwork Patches FQs and Sale Fabric
If this looks like a lot of fabric, it is because there was a lot of fabric in this store. Their website says 4000 bolts and I believe it.
Quiltwork Patches across the front of the store
Location:
212 SW 3rd St, Corvallis, OR 97333
(541) 752-4820
I kept catching Mom in my photos!
*Nota bene: Mom and I ended up with what we think was food poisoning. We can’t figure out where we got it, but I was sicker than she and it was unpleasant.
If you have been playing along you know that I was in Portland (Oregon) with my DH over the weekend dropping our Y.M. off at college. It was a whirlwind adventure filled with moving in, then 2 days of orientation, some picking up the slack and then letting him go off on his new adventure living somewhere else and fending for himself. Sending children off to college is weird! One day they live with you and you are telling them to pick up their socks and the next day they live somewhere else.
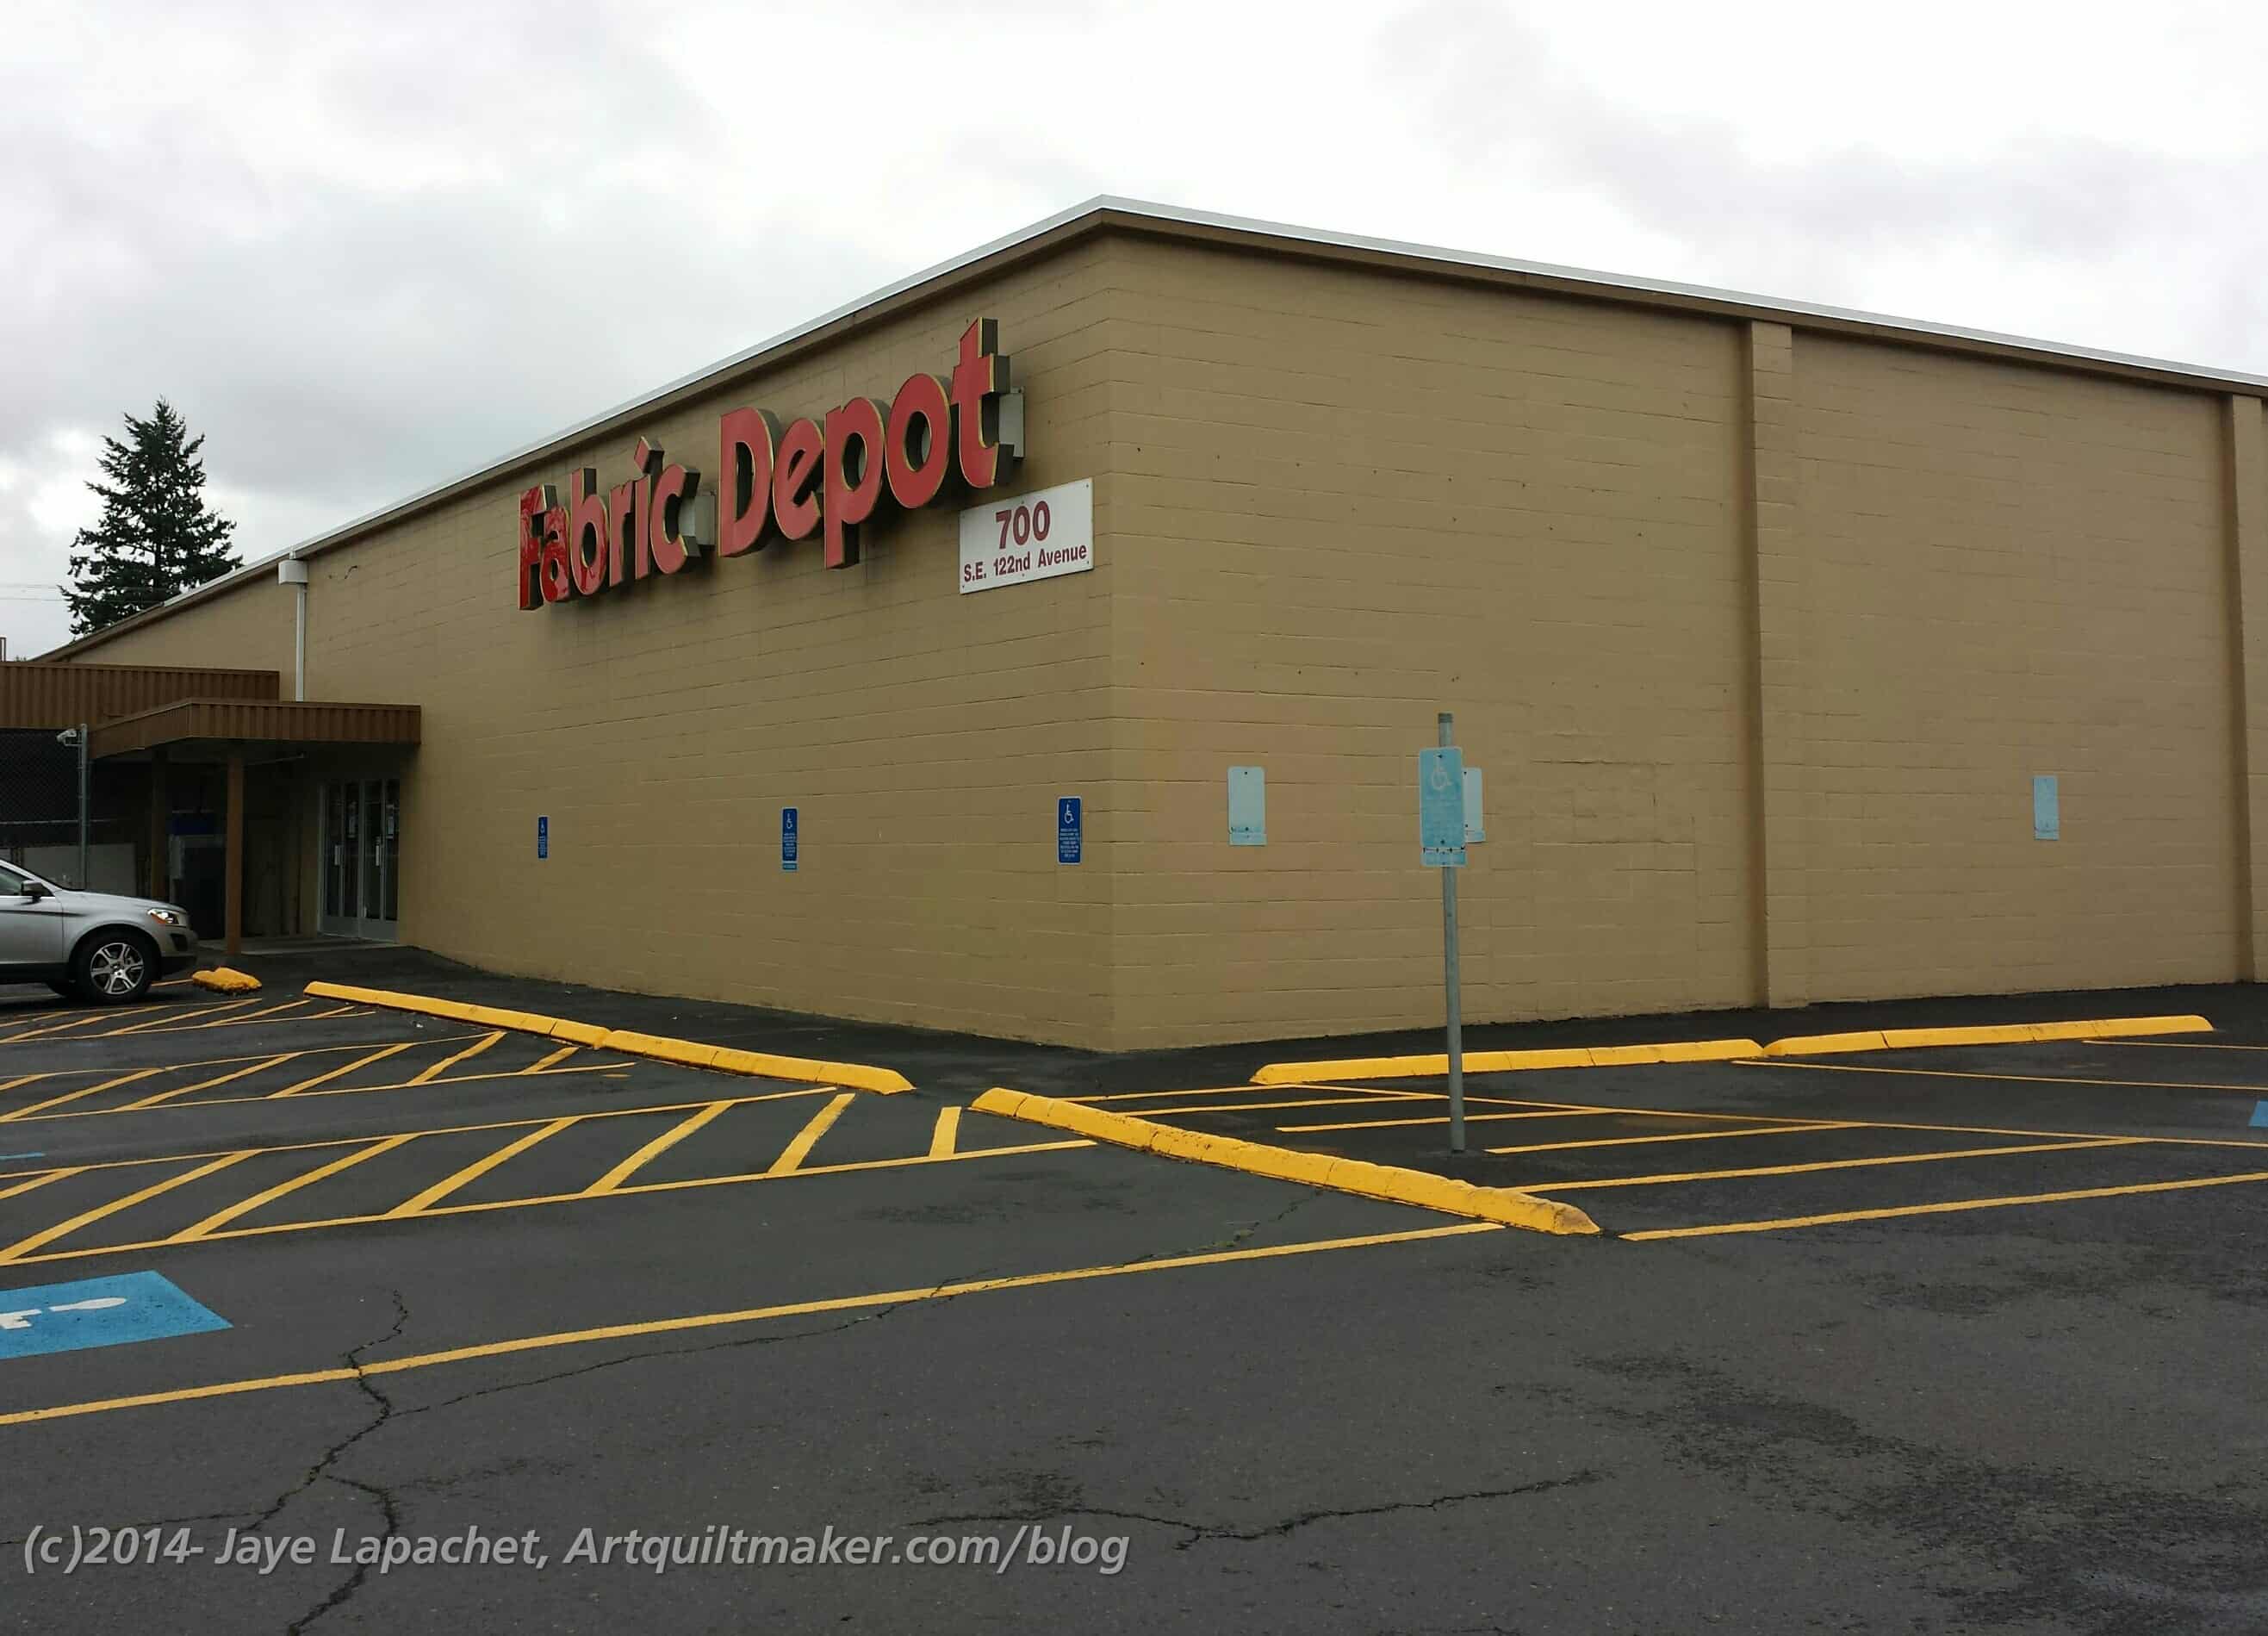
Fabric Depot, Portland, Oregon
My mom flew up to drive back with me and while I was waiting to pick her up at the airport, I went to a shop that Tanesha mentioned, in one of her podcasts, called Fabric Depot.
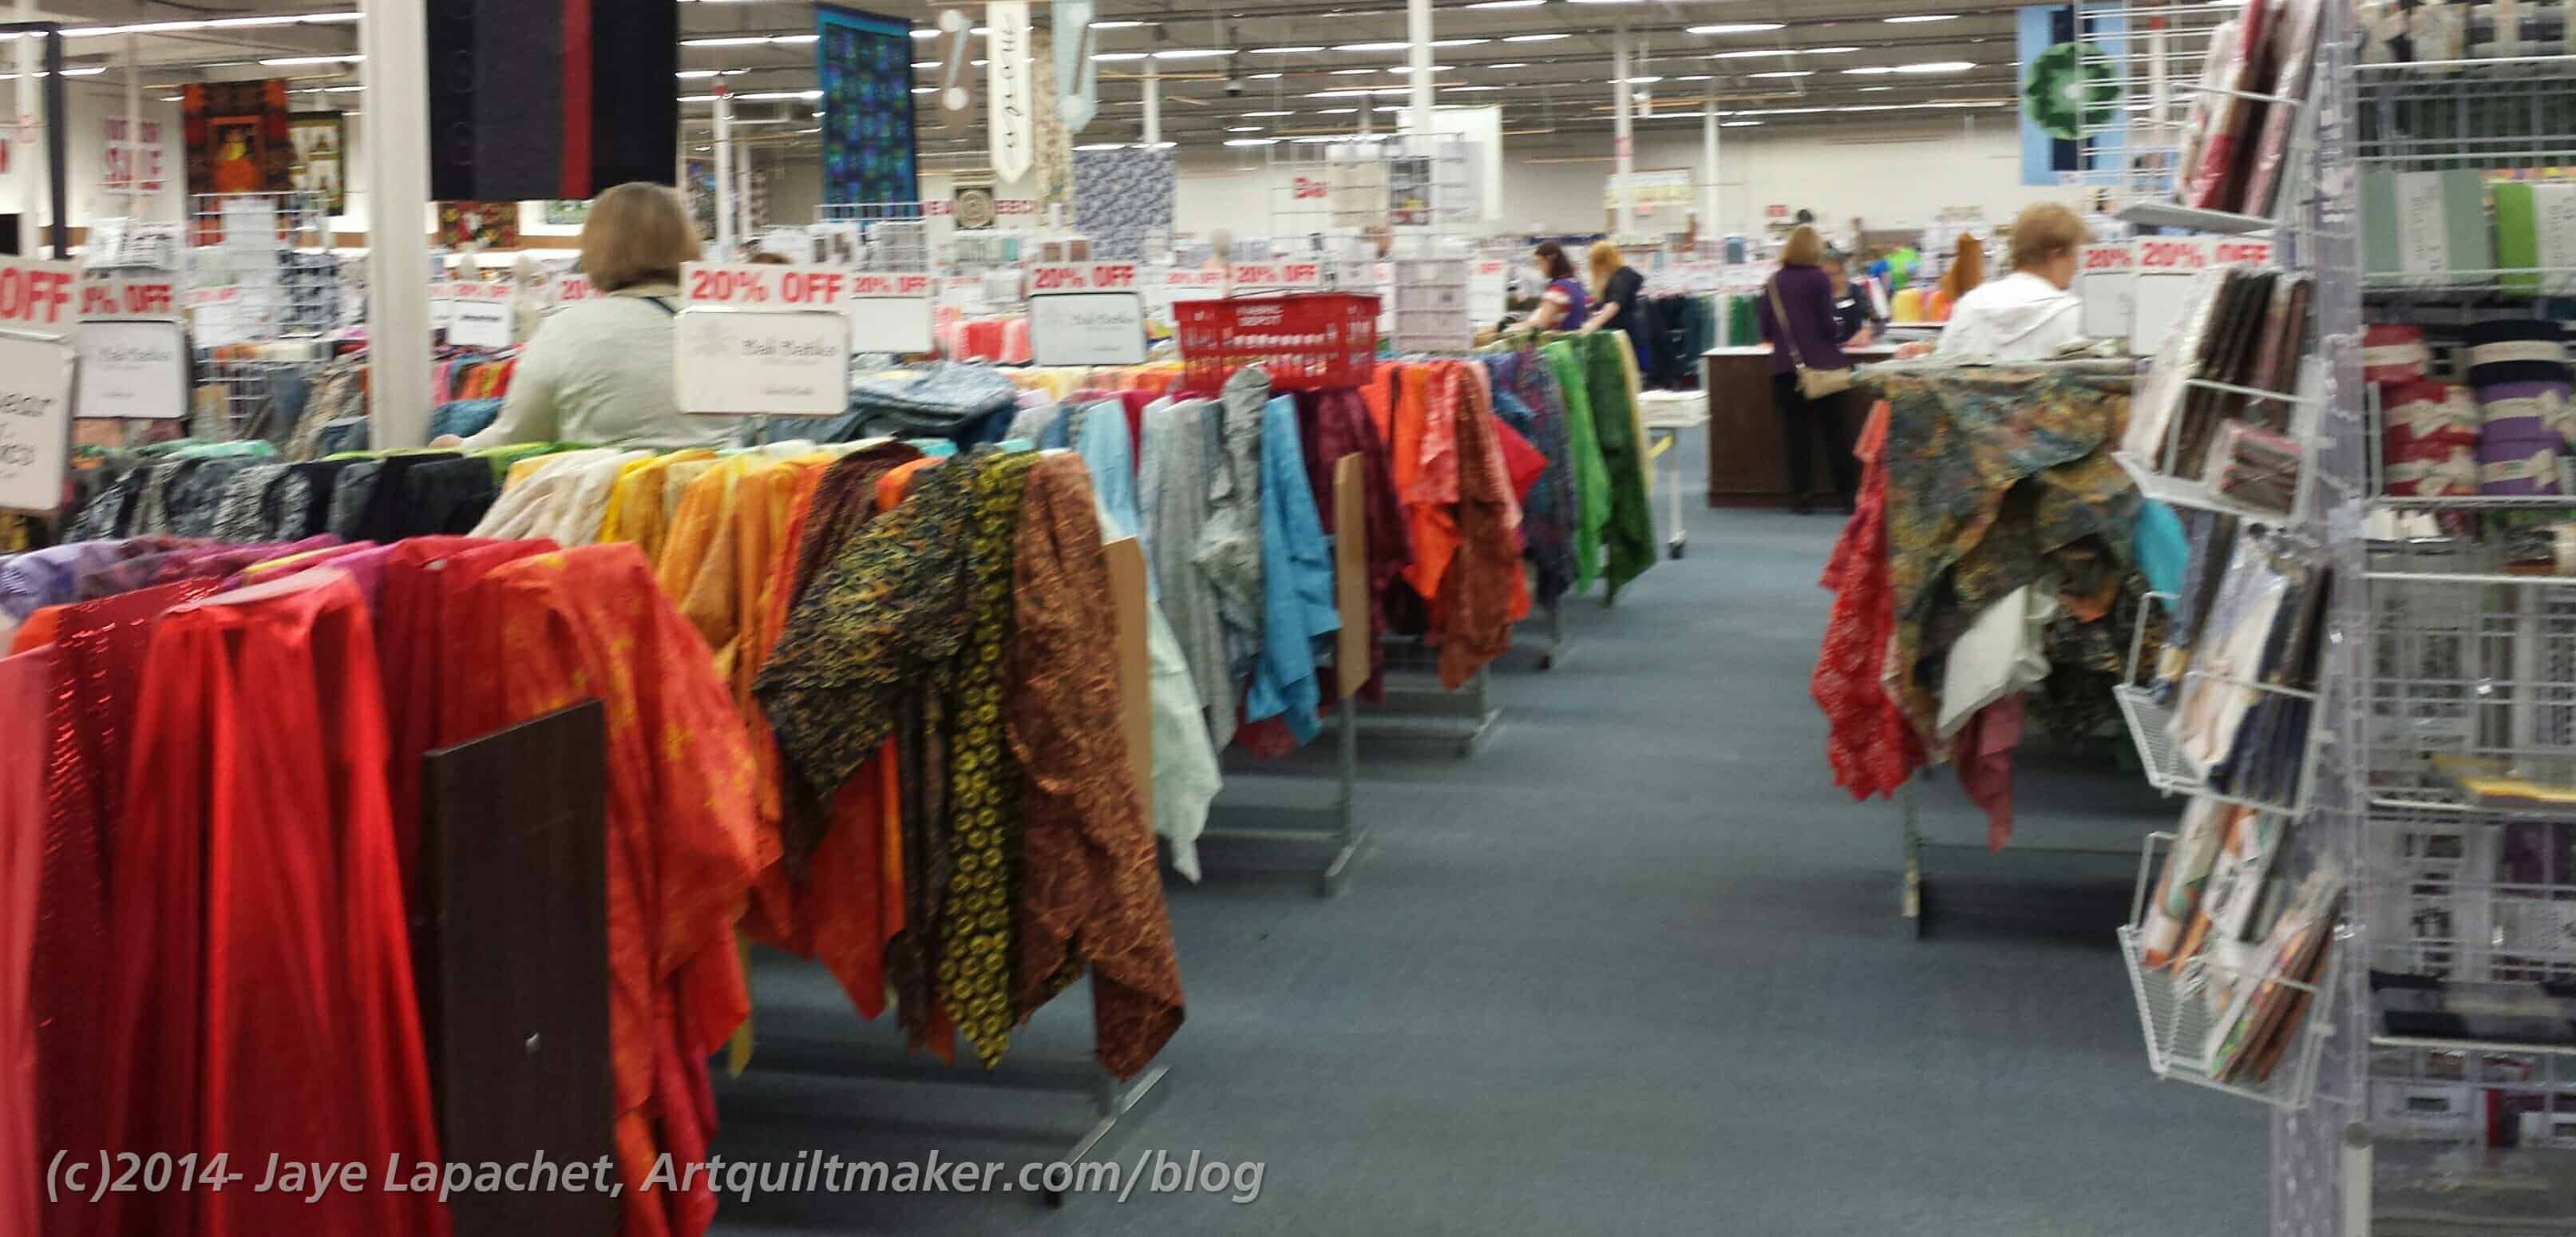
OMG! This place is so enormous, I couldn’t even, while I was in the store, understand how large it was. Conservatively it was the size of 3 Safeways. I think. It was so big that I couldn’t even begin to think about seeing everything. Truly. I am not exaggerating.
Truly enormousTruly enormousTruly enormous
The three pictures above are the view from where I was standing when I walked in and got past the husband area. The three pictures show the vastness of the space. It is a store you have to go to with a bag lunch and plan out to look at one corner, then go back that next week with the same idea in mind.
They had everything new that I have been hearing about. I saw April Rosenthal’s Meadowbrook line, which I thought I would buy, but I ended up not buying any. They had charm packs and layer cakes, but I didn’t like it enough to have the desire to make something with it.
Draping fabric
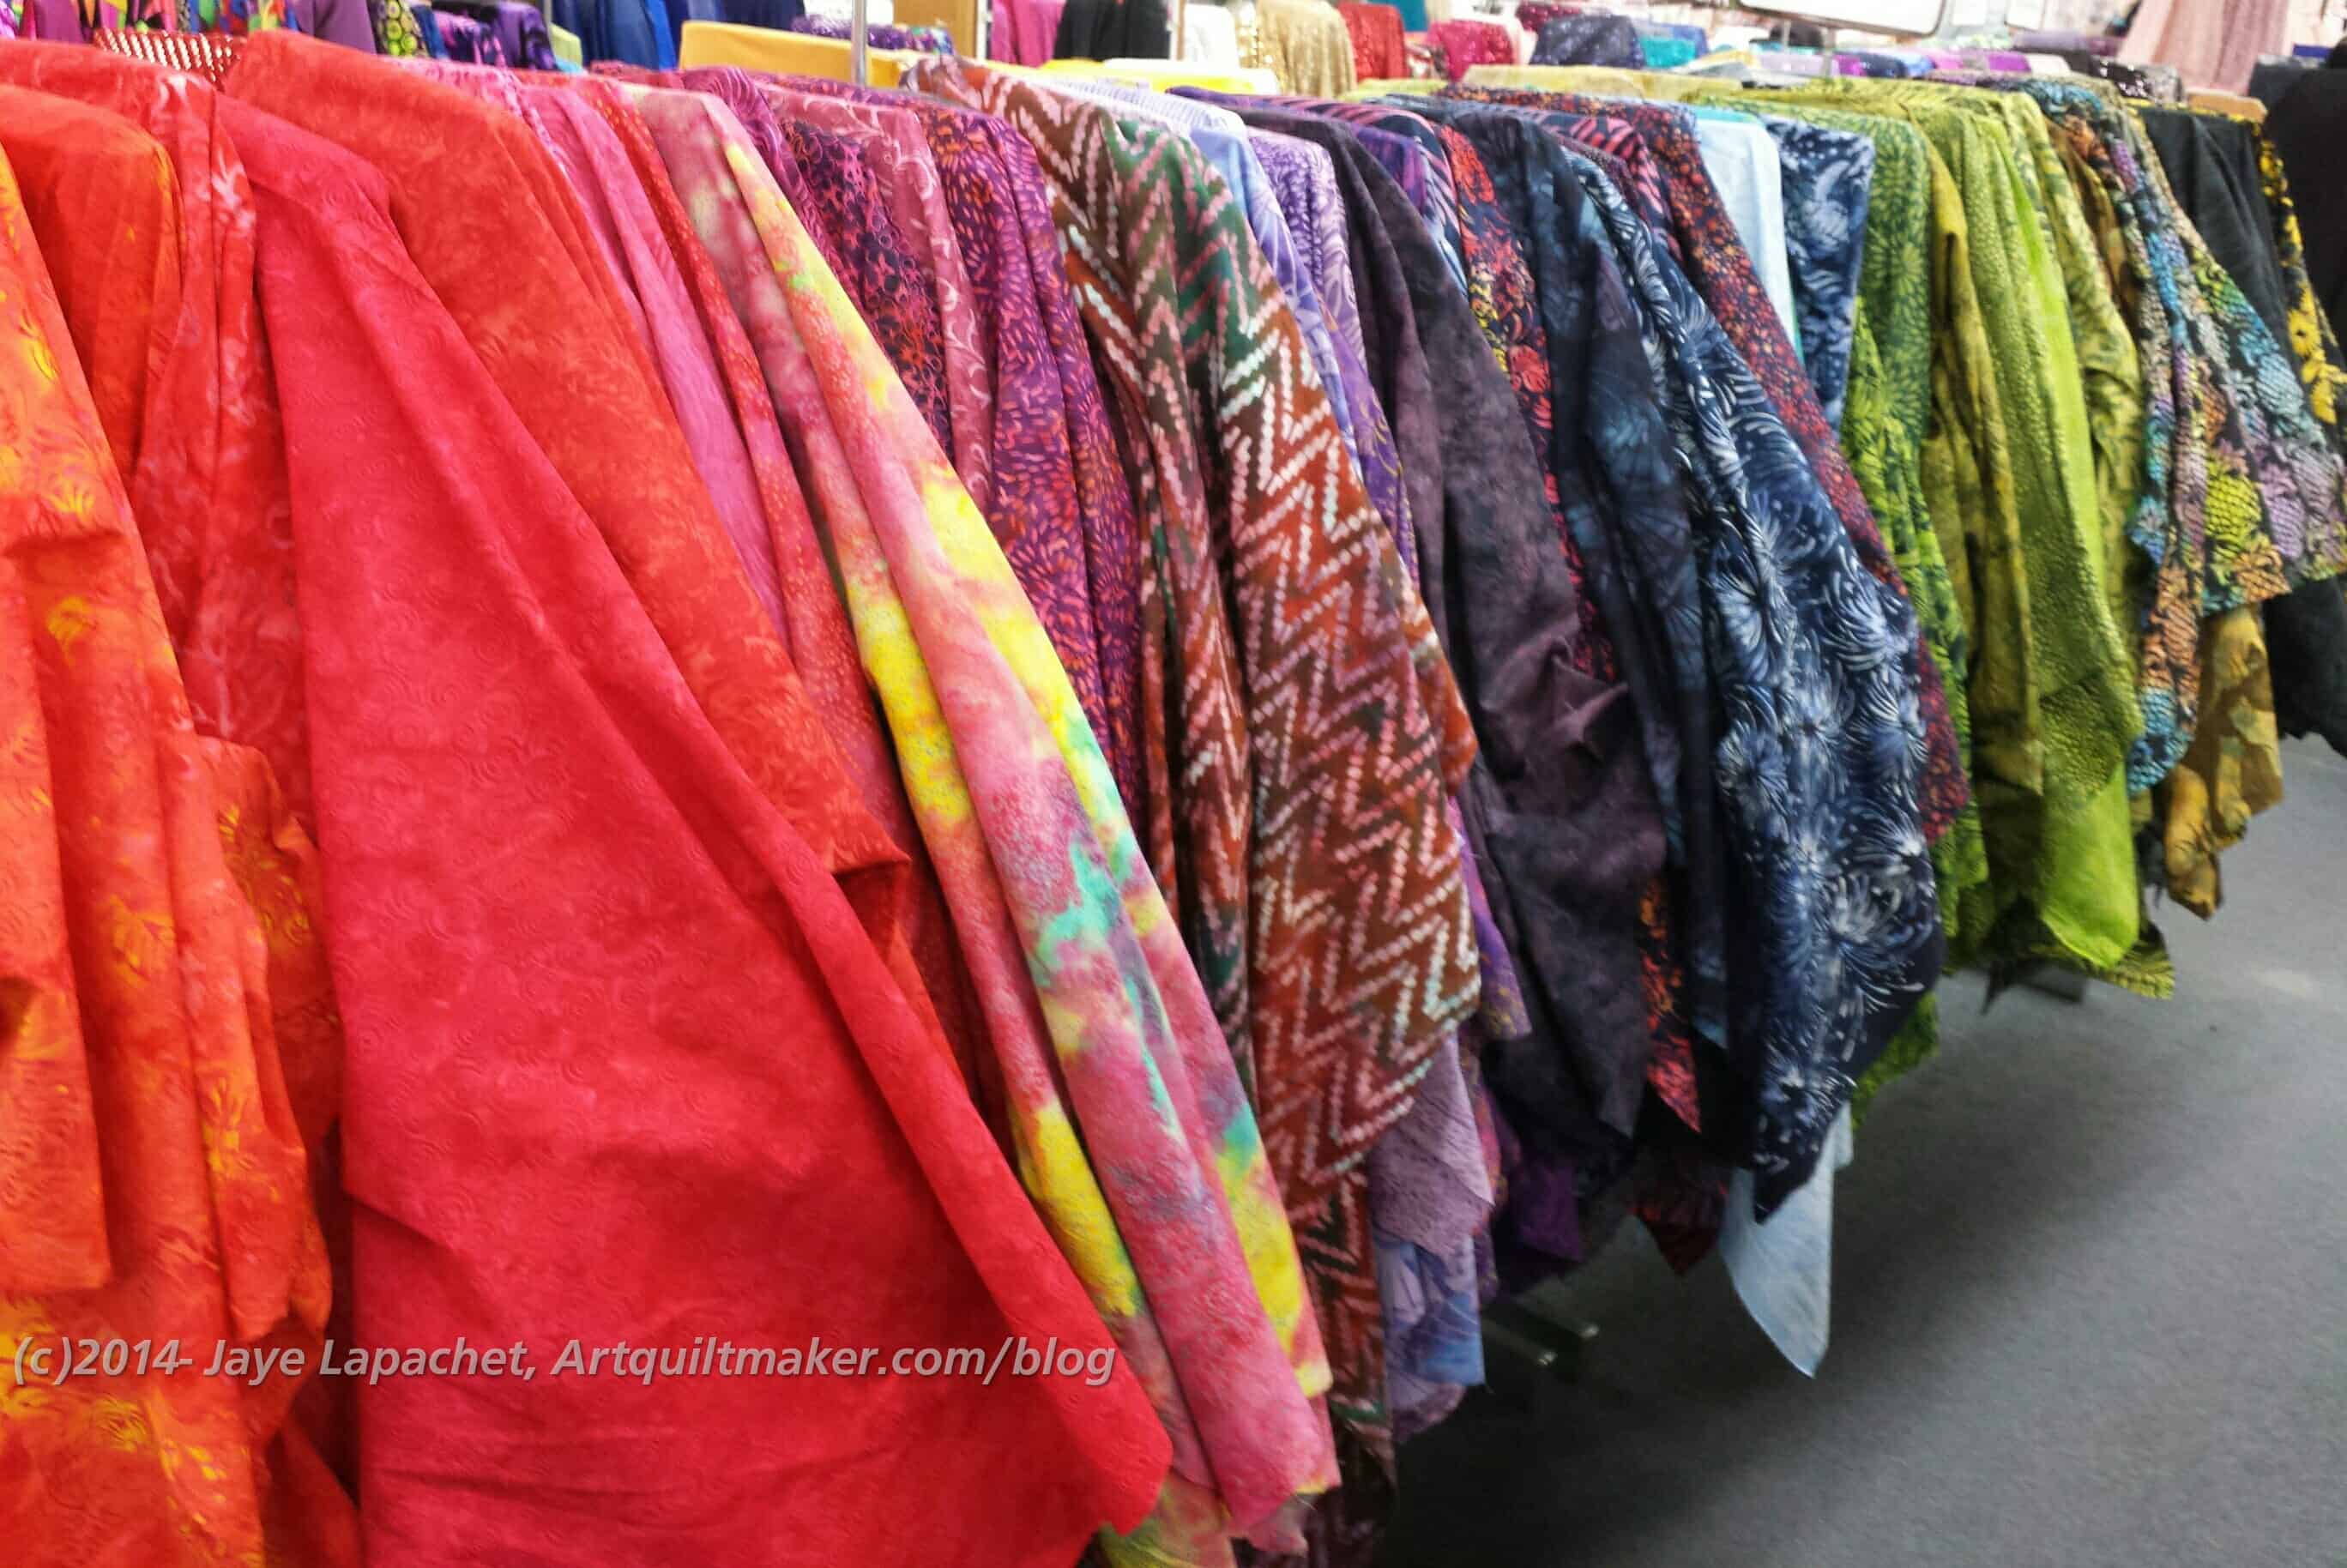
The other thing I noticed is that they drape the fabric like House of Fabrics, etc used to do. It is a great idea, because you can really see a lot of the motifs on the fabric.
The fabric shown left is a row of batiks. There were about 10 rows of batiks that I saw.
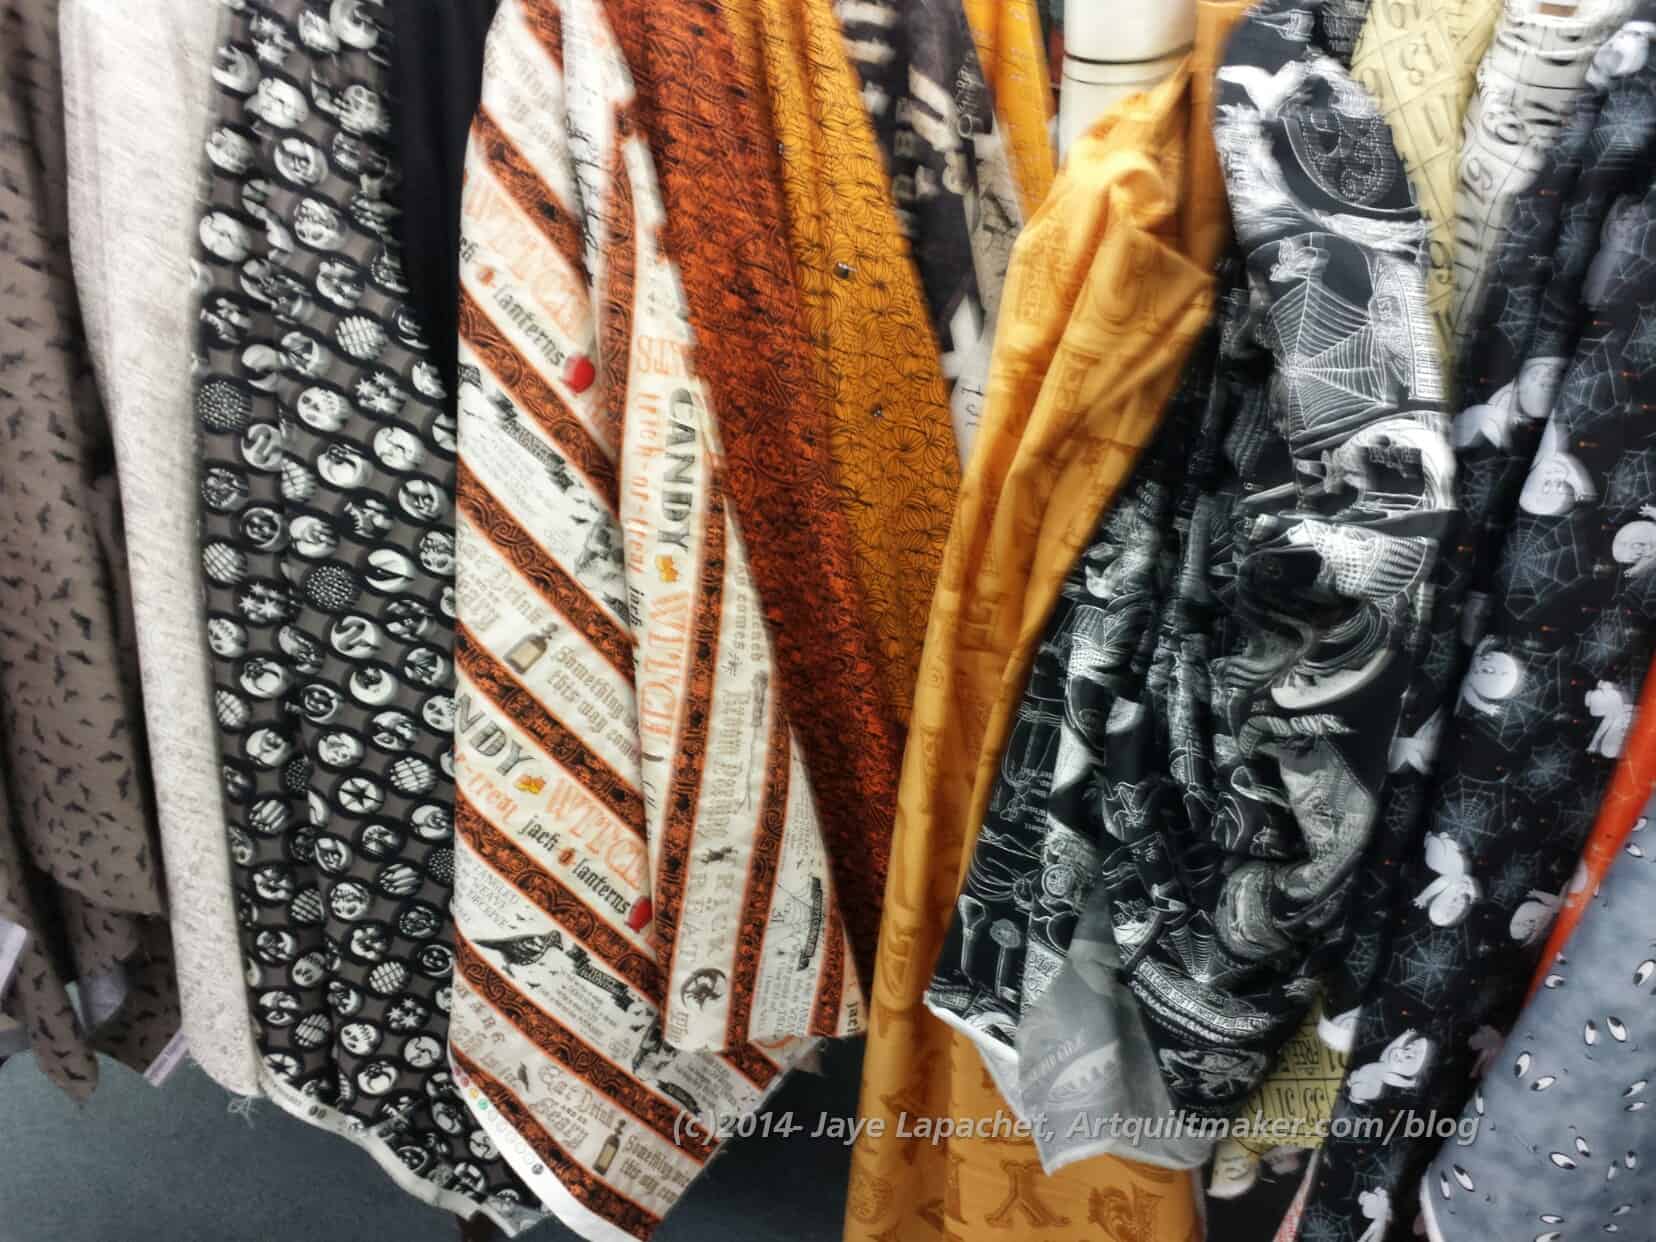
Hallowe’en fabrics
Julie would be thrilled with the Hallowe’en selection they had. I never saw so many interesting Hallowe’en fabrics! I bought some panels to make the Young Man and his two (yes, TWO, count ’em two!) college roommates Hallowe’en pillowcases. I already made the YM a Hallowe’en pillowcase, but hopefully he will change his sheets more than once in October.
There was a little boy with a 4 week old puppy walking around the store showing off his puppy. He wanted everyone to pat the puppy. I got to pat the puppy twice. The boy was about 4. OMG! They were both so cute.
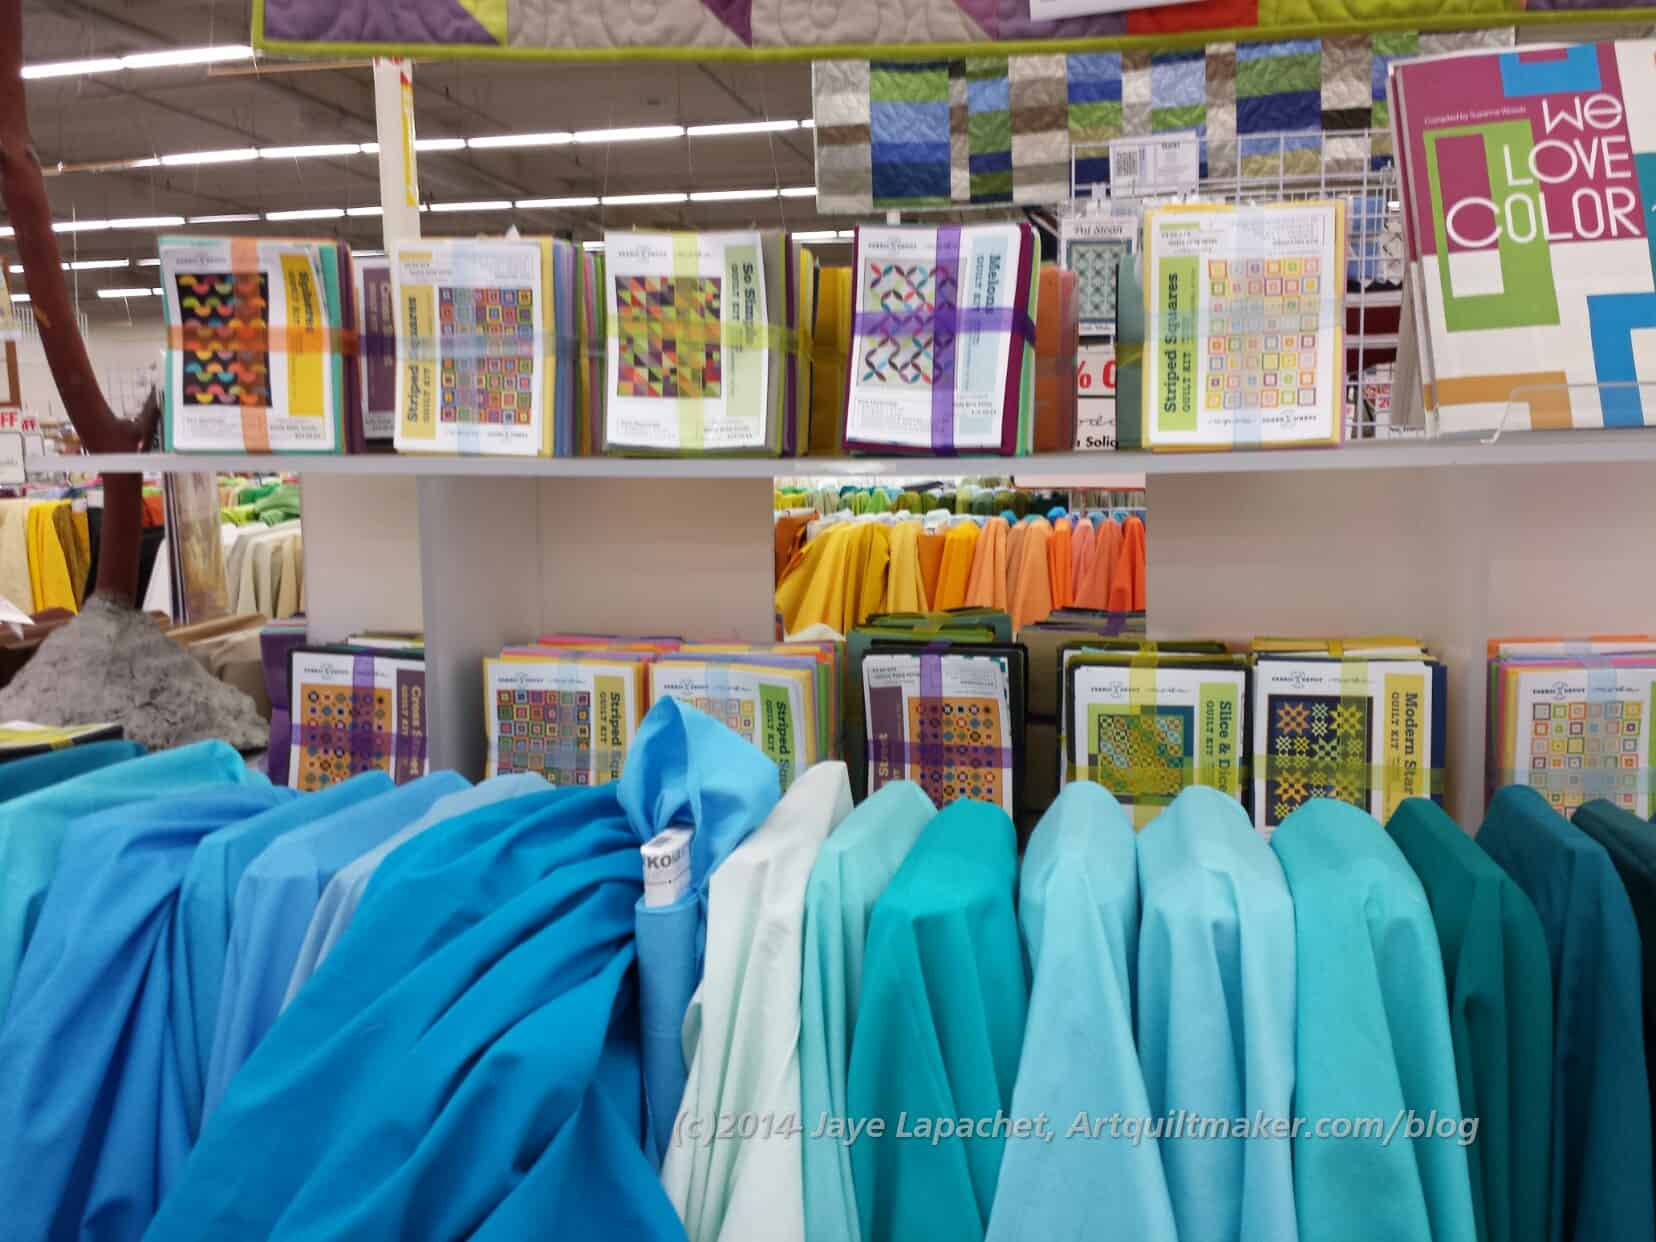
Color Kits
In addition to a zillion pre-cuts, they also kits made up from their own designs or from local designers.
There were a lot of different ideas in this area and they all used solids.
The store had an excellent selection of solids. They had the ubiquitous Moda Bella solids as well as the Kona Solids. They also had the Michael Miller Cotton Couture solids and a few of the American Made Brands solids. It was great to see such a selection of solids.
There were also packs of solid colors with color related patterns prepackaged and ready to grab and go.
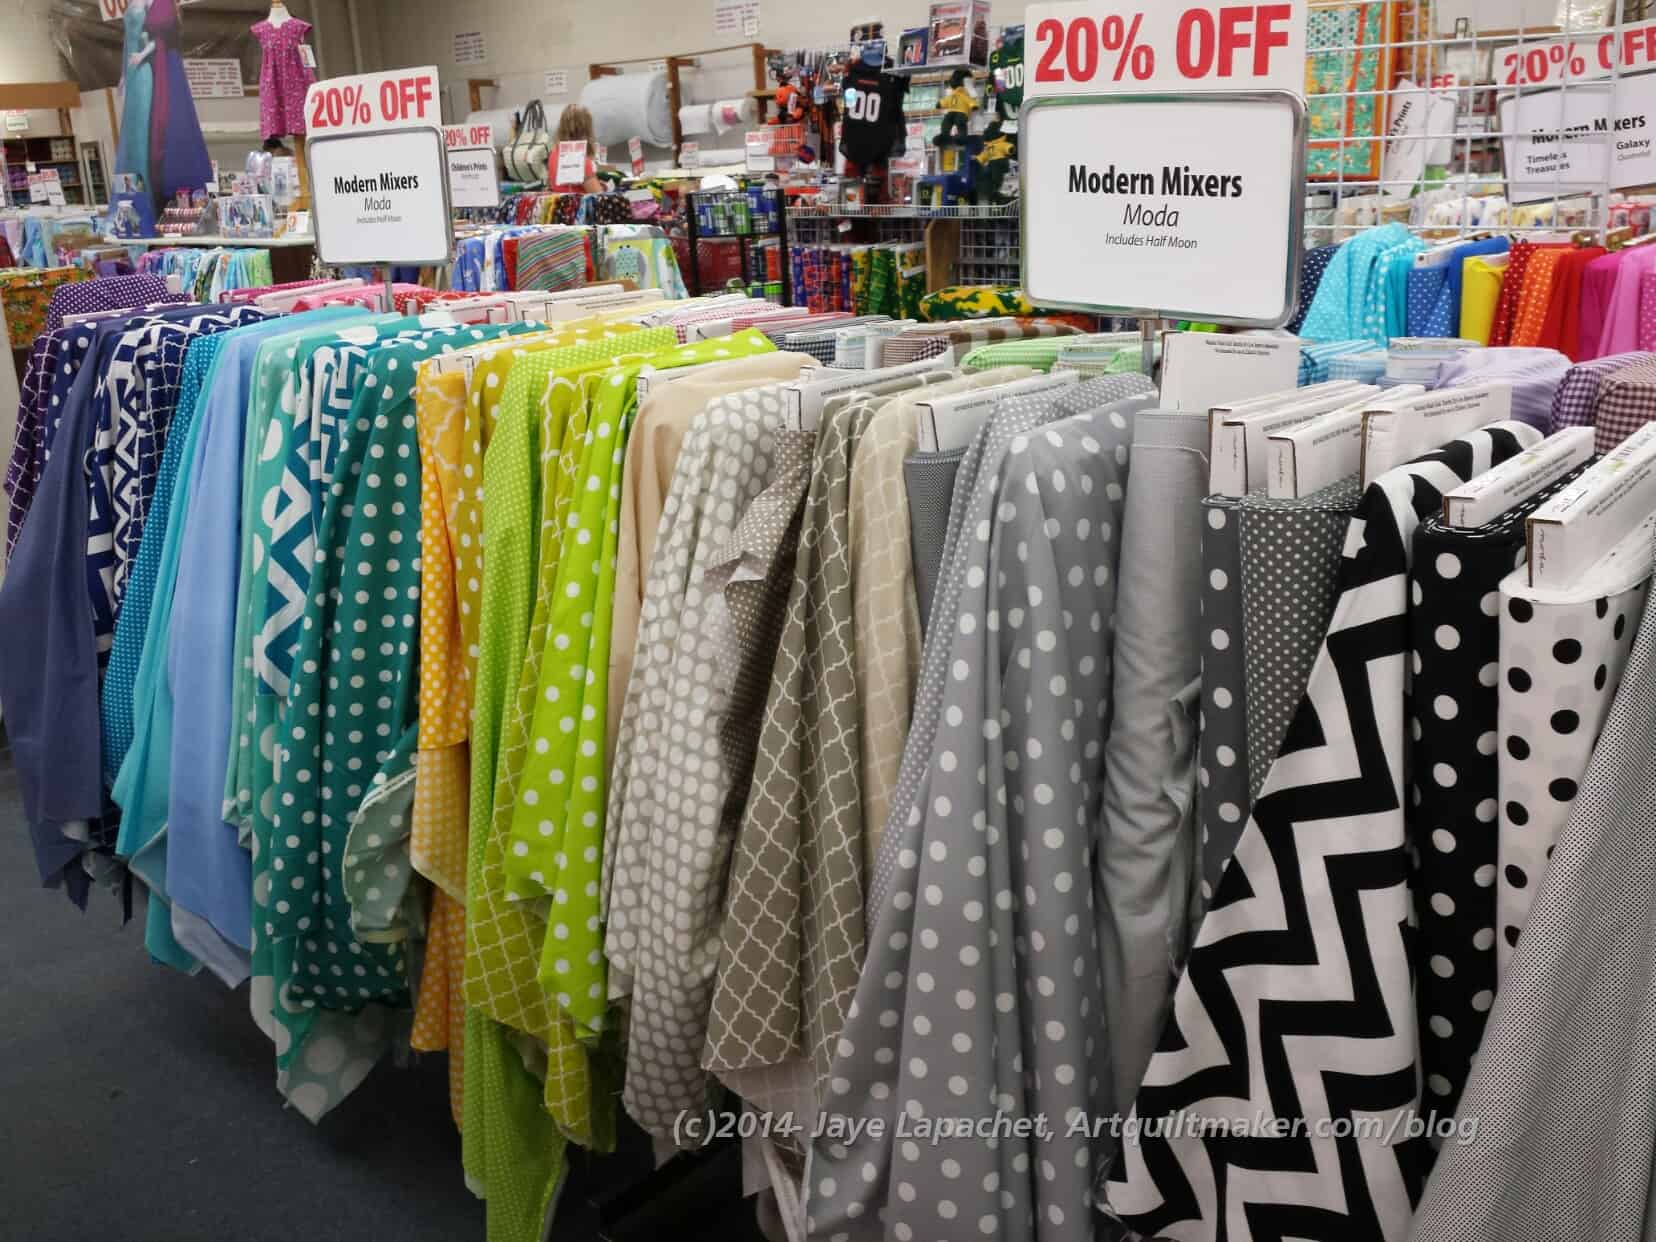
Moda Modern Mixers
I saw a group of fabrics called Modern Mixers. I love the name of these fabrics and wanted them all. They reminded me of Half Moon Modern (and that I have to find something to do with those fabrics!). There may have been some that were in the Half Moon Modern group.
I did buy a couple for some more Political Wifery/work outfits.
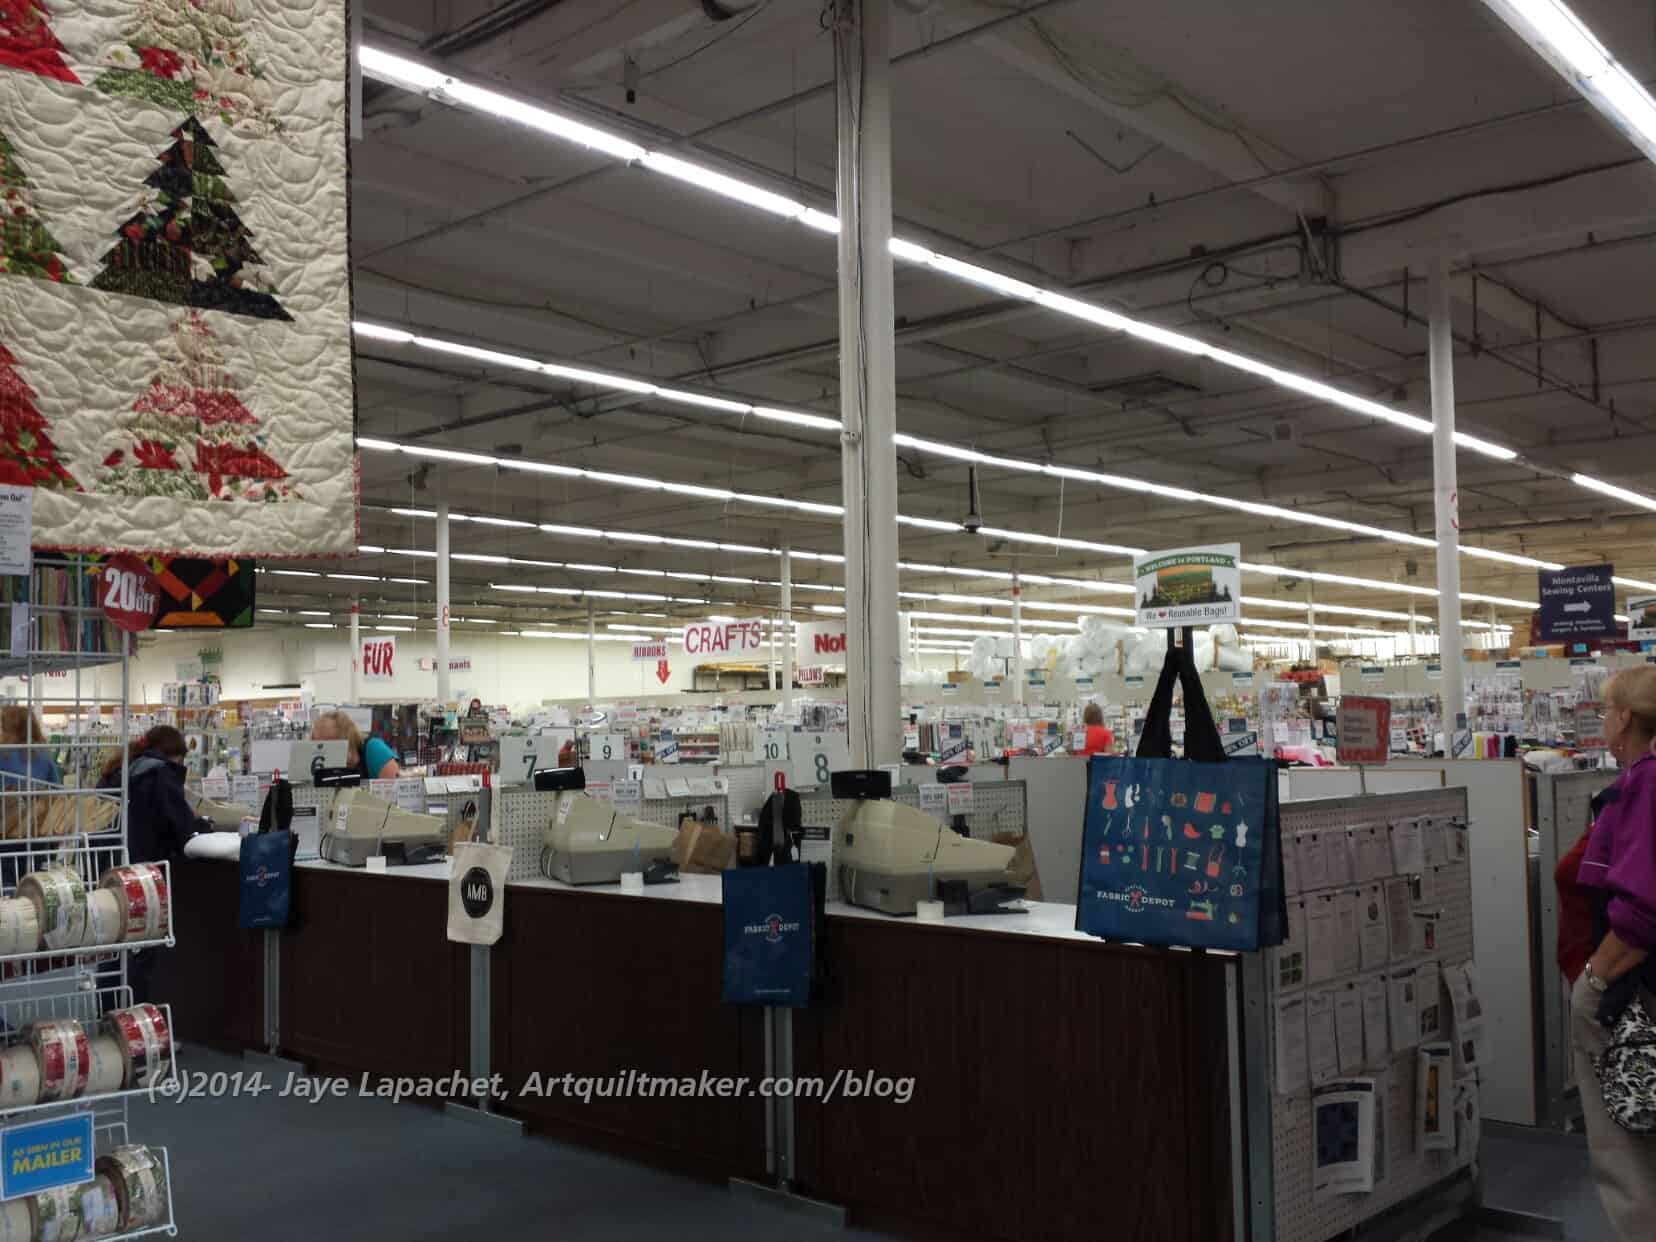
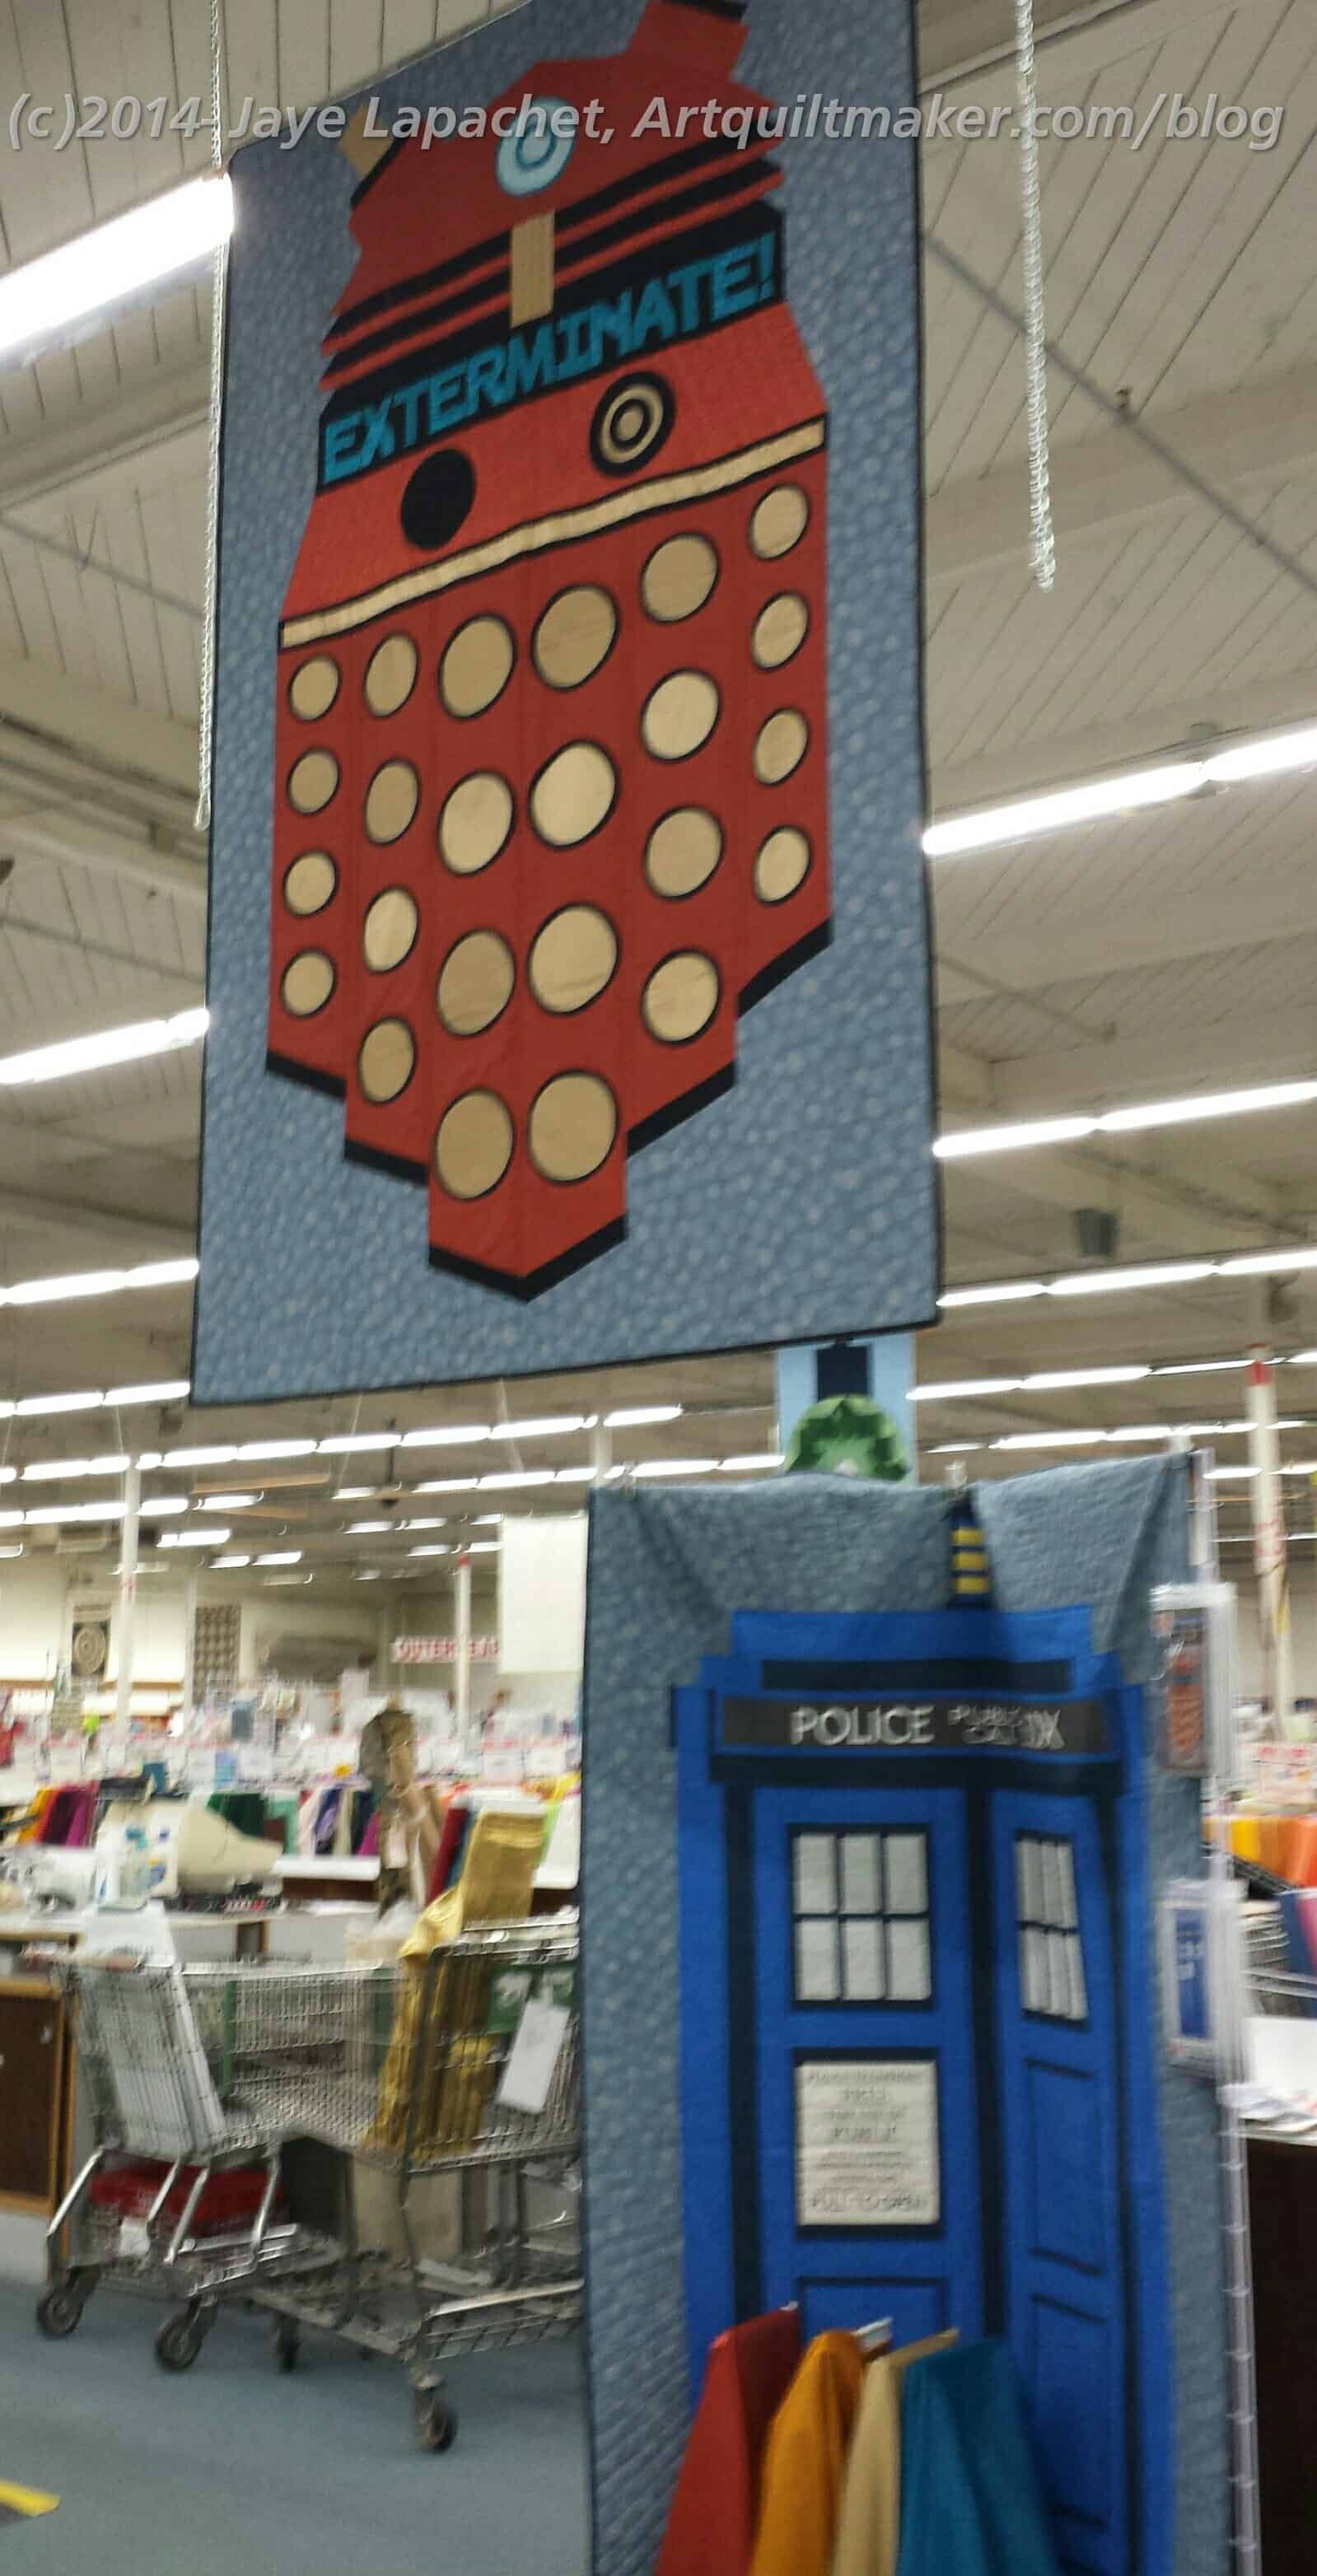
The store also had some great displays. I loved the quilts they had hanging up including one from Dr. Who.
Dr. Who etc Display QuiltsFabric Depot Display Quilts
I have noticed the Jack’s Chain pattern (above quilt with green background) showing up in shops and on the web lately. I have loved that pattern since I saw it in the Cotton Patch a thousand years ago. Perhaps it is time to make it?
Fabric Depot Purchases
I didn’t have a lot of time, but it is probably good since I would have spent more money. I bought a few things, mostly they are earmarked for projects. Fabric Depot had a great selection of zippers, which were on sale. I took the opportunity to stock up on a few for dresses so I don’t have to go rushing around when I need them.
The store was definitely worth a visit and I will go there again when I am in Portland another time.
The Fons & Porter TV show comes and goes on my local PBS station and it is currently available. I watched an episode the other night and the Memory Star block caught my attention. I was excited to share this project with you, because of the way they used the Flying Geese to make chevrons. They have this project on the website and the picture is so terrible that you can’t see the fabric or the design. Very disappointing. It makes me think they are terrified that people will steal the project without buying the pattern. The project is called Fluttering By and it is from the 2100 series. The block is available in EQ.
Mary Fons will be writing for the Quilts Inc website. Check out her first column.
Bonnie Hunter is teaching an online scrap quilt class via Craft University. The class runs Oct 12th 2015 – Nov 23rd 2015. She has a discount code on her website. The timing makes me think she will have her regular quilt-a-long starting the following week as usual.
TQS posted a link to the last 16 years of Pantone Color Choices of the Year. It is really interesting to see them all together. It looks, after an impressionistic glance, that they choose a warm one year followed by a cool color the next year. How do you think a quilt would look using all of these colors?
I am not a fan of this year’s color, Marsala. Looking at all of the colors, I also think Chili Pepper is not one of my favorites. I guess I like the more scarlet-y reds.
Today’s Quilter has an interview with Liza Prior Lucy. She works as a designer with Kaffe Fassett. I am in love with the quilt hanging in front of the armoire and draped on the red wing chair. LOVE it!!!
A friend sent me an article about a quilt shop in Minnesota. It reminds me of the BAMQG in its activities. The article also mentions the Slow Stitching Movement. Thanks to Craig!
I saw a post on Instagram and the image interested me enough to go and look at the blog post. It was a blog post about how the rants of professional quiltmakers can affect their business as well as some paragraphs on the conservatism of quiltmakers. It was an interesting piece to think about and reminded me to be kind. It was in the vein of Abby Glassenberg’s article about Alex Veronelli.
Websites, Blogs, Patterns & Tutorials
Chris C has a couple of posts on her blog about a Craftsy class called Beyond Basic Machine Quilting by Ann Petersen. I believe a couple of the podcasters talked about this class as well. I liked the way Chris talked about what she learned over the course of a few posts.
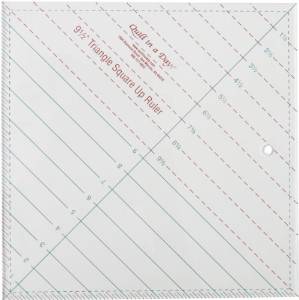
Square Up Ruler
We had a little discussion about squaring up HSTs that started when Valerie mentioned her way (trim before opening or pressing requiring only 2 cuts), which turned out to be new to a lot of us. A big discussion ensued, which led us to a tutorial on this method using Eleanor Burns’ Quilt in a Day Square Up Ruler. The rulers come in 6.5″, 9.5″ and 12/5″. I have had this ruler for awhile I could never understand how to use it. Since I am planning to make a bunch of HSTs from the Ta Dots FQ pack I received a few years ago as a gift, I am planning on trying it out now that I understand how it works.
If you used Threadbias, you have already heard that they shut down on August 30. They could not get the traction they needed and went the way of Tomspoolery and SeamedUp. I was a member and added projects and had followers, but just couldn’t keep up with the blog and that site as well. They are keeping their Quiltcanvas software going.
If you would like to download the Modern Quilt Guild Quilt of the Month August pattern, Altitudnal Ecosystem, you can do so at the site.
The Crafty Magpie has some instructions for creating a thread holder that has space for the matching bobbin as well. This is a great thread holder – the best I have seen, except I would put a clear door over the front to keep the dust out, but allow me to see the colors.
The GenQ Stashed newsletter is out. In addition to have a $400 dollar off offer on a Bernina 550QE sewing machine, they also have an explanation of the new modern category for PIQF. Look for the lunchbag pattern and some information on various exhibits. I gave up my subscription to Quilt Now and may have to see about a GenQ subscription.
Pam, of Hip to be a Square podcast fame, and her friend, Lynn, have a new venture called The Stitch. They have their first episode up as well as a few blog posts. This is a commercial venture so go and take a look to support all the contributions Pam has made to the quiltmaking community.
Barbara posted a cool bookshelf quilt on Facebook. I hope the link works. If not, search for Barbara in the Before & After folder. I shared with the Twilter FB group.
Books, Patterns, Magazines & Projects
The Auribuzz blog had a round up of bags and accessories a couple of weeks ago. There are ten great bags, totes and wallet-like accessories. Many of them use the fabric they chose very well. The Sawyer bag from Sew Sweetness caught my attention. It turns out it is a free project from Sara Lawson. Very Berry Kerry also has a sewing portfolio project, which seems to be a complete free project on the Liberty of London site. Christmas is coming and it would make a good present for a very dear sewing friend. Very dear.
Little Green Bean put a great saying (meme??) up on Instagram. I think it is good advice. It was re-grammed all over the place.
Today’s Quilter is a new magazine by the folks who put out Love of Patchwork and Quilting. They will be revisiting traditional quiltmaking. I don’t know what that means, but you can be in their 1st issue if you take the time to tell them which notion you can’t live without and why. Email todaysquilter@immediate.co.uk You can also get a subscription: 3 issues for £5. I don’t know for sure that that price includes US customers.
Another new magazine is Simply Moderne (yes, with an E). Alex Veronelli pointed it out to me and wrote ” ‘Simply Moderne,’ the new magazine by @quiltmaniaeditions [shows] a Great Wave of pure energy and modern style, tracking the latest tendencies [sic] in the quilting world and celebrating creative fresh new ideas by young designers from all over the world! In this first issue great projects and a portrait of @victoriafindlatwolfe and insights about #quiltcon. Find out much more on their website.
Fabric, Tools, Shops, Supplies & Embellishments
QuiltHome, an online quilt shop with an excellent selection of modern fabrics, also has a product called ‘Surprise Endings‘. These are curated bolt ends from your favorite designers. When I looked at their current selection, I saw Denyse Schmidt, Amy Butler, Joel Dewberry, Heather Bailey and many others. Take a look and see what you need to fill in your fabric collection.
Fabric Collection by The Ornament Girl
I cannot help but like this image, which was posted by Robin of the Ornament Girl on Facebook.
I found an article about how fabric is cut in shops, which highlights the difference between fabric cuts in the UK and fabric cuts in the US. This is a really handy guide.
There is a new website and catalog for buying fabric called Craft of Quilting. It was recommended to me by FreckleMama (Chris).
Exhibits & Events
On Sunday, September 20, 2015, 2-4pm, the San Jose Museum of Quilts & Textiles presents Fiber Sunday in Pacific Grove! Join fellow fiber enthusiasts to see and learn more about recent acquisitions including quilts by Michael James, Jane Sassaman, fiber art by Flo Oy Wong and more. Shown by Curator of Collections Nancy Bavor. Location: Back Porch Fabrics at 157 Grand Avenue, Pacific Grove. Please RSVP to Debbie Aguirre at 408-971-0323 or debbie@sjquiltmuseum.org
Quilting in the Garden is at the end of this month on September 26 and 27, 2015 at Alden Lane Nursery, 981 Alden Lane – Livermore, CA 94550 – (925) 447-0280. This year’s featured artist is Freddy Moran and guest artist is Sally Collins.
The Pacific International Quilt Festival is coming October 15-18, 2015. Have you gotten your badge yet? I ordered mine and got a ‘nice’ letter saying they wouldn’t mail it to me this year, that I would have to visit the registration desk. If you have ever seen the registration desk line, you will know why I am annoyed. I hope they have a separate line for those who pre-registered.
New Quilts of Northern California is a juried exhibit (purported to be an annual favorite) at PIQF. NCQC says you can view the work of Northern California’s most well-known and upcoming quilt makers. This amazing exhibition of recent works is presented by the Northern California Quilt Council and curated by NCQC Board members. I entered my Russian Rubix quilt into this exhibit and it was accepted. I guess I had better finish sewing on the sleeve.
Judy B. Dales’ solo show “Ahead of the Curve” is currently on exhibit at the Shelburne Museum through October 31. There is an article about getting an exhibit in a museum on the SDA Vermont blog. The article talks about Dales’ struggle with the “quick and easy” dilemma, one with which I struggle as well. I was glad to see I was not the only one. I need to absolutely remember this quote “The first, and the most important, is to do the work. Get into your studio and make the work, and keep making it. There will be good pieces, horrible pieces, unfinished pieces, and a few brilliant ones. There will be good days and bad. There will be anxiety, worry and frustration, mixed with a little jubilation and pride. You just have to keep making art if you want to make something of yourself as an artist. You have to do the work. There are no shortcuts.” It is so true, so well said and excellent advice to remember if you don’t remember anything else about this article. Thanks to Ms. Lottie for the tweeted info.
Creativity in other Realms
I, too, have succumbed to the coloring bug. Remember the V& S June post where I mentioned it? I am actually waiting for the YM to leave for college so I can ‘borrow’ his massive set of felt pens. Yes, I have my own but he has more colors! There was an article in Quilt Market’s eInsider. Aside from Johanna Basford, the creator of the Enchanted Forest and the Secret Garden coloring books, the article talks about other options, especially those from Tula Pink and Jamie Fingal. As you know both are quiltmakers. I am planning to ask for Basford’s Lost Ocean as a gift when it is available.
Doing Good
From ResearchBuzz: The Vatican Museums have launched a new app to crowdfund restoration projects. “The Vatican Museums have released a crowdfunding app called Patrum, with the intention of raising money for a series of upcoming restoration projects that include the restitching of an 18th-century French tapestry and the conservation of 13th- and 14th-century Chinese calligraphy scrolls.” I do wonder why the Vatican needs money…
NQR
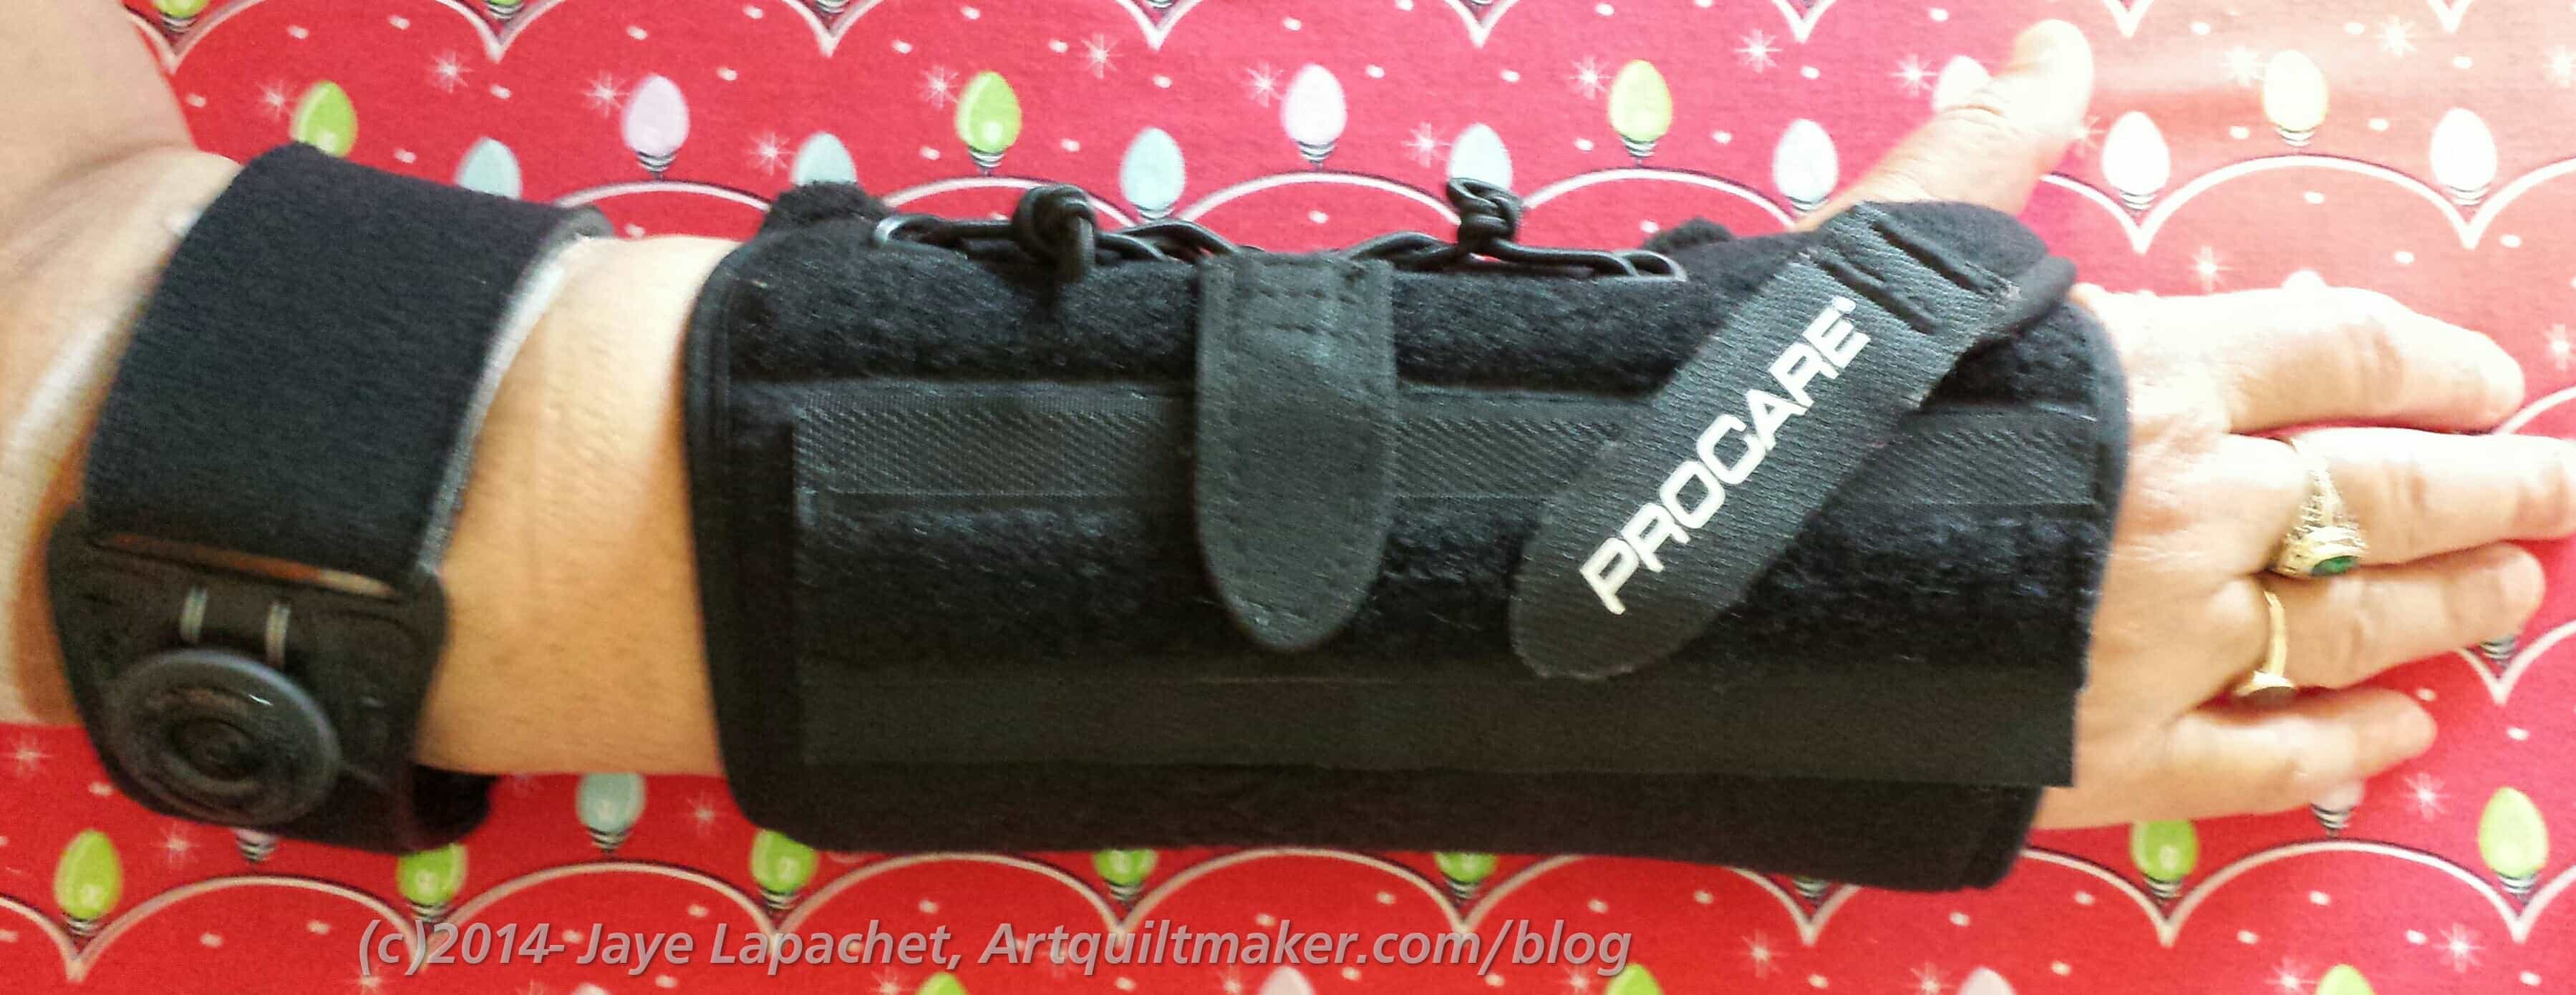
Hampered by Healing
In addition to the general daily drama, I have also been dealing with a flare up of a long standing injury. This is preventing me from doing much hand sewing and no coloring at all (see above) as the brace impairs my fine motor skills.
I was reading Pam’s recent Sunday Stash post after listening to her podcast and thinking that perhaps I should rethink my scrap storage. I bought a little drawer system some time ago, which works pretty well.
Scrap Organization
Still, random sizes of scraps doesn’t work that well except for mosaic piecing. Piles of scraps shoved in a drawer are not fun.
Pam and Bonnie Hunter cut their scraps into certain sizes. Pam has talked about the sizes she uses, which differ from Bonnie’s slightly. Bonnie calls her system the Scrap User’s System, which is a good moniker. I have just never embraced that method, because I never seem to have the right project for some of the sizes. And I don’t want to make projects just because I have certain sizes of patches.
Bonnie Hunter Scrap Saver Systems:
strips in sizes of 1.5″, 2″, 2.5″, 3″ and 3.5″. These are strips 12″ or longer.
Patches 1.5″, 2″, 2.5″, 3.5″ squares
bricks in 2″X3.5″ and 2.5″ X 4.5″
Bonnie Hunter writes “*Note* Just for your information, did you know that you could get three 1.5″ strips, three 2″ strips and three 2.5″ strips all from a 1/2 yard of fabric and it would be out of your nagging stash, into your strip bins and ready to be used? If you really want to slice up larger pieces, this is the way to go. Cut a few slices of different sizes and feed them into their bins! You’ll be using those strips in no time.”
random 2 1/4″ strips (since I got rid of strings I will keep 2 1/4″ wide strings to use for scrappy bindings)
As I was cleaning out my magazine pile, I came across the magazine I bought last year and was reminded of Joan Ford’s system. It is a little different and much simpler than Bonnie Hunter’s. I did a pretty thorough review after I bought the magazine. With this system we have the following sizes:
Of course, I do cut certain sizes from new yardage and have let that practice bleed over to some scraps as I make them. I don’t usually go to the scrap bin later and do a bunch of cutting, though I do think that would be a good idea. Generally, I cut the following out of new fabric:
I do use the scraps from the actual scrap bin for various things. I sew my scraps using the mosaic piecing method to make journal covers and other small items. I also fill in weird places on the backs of quilts using scraps.
If I make a scrap quilt, I want it come out like Scrapitude in its cheerfulness and fun style. I do NOT use Bonnie Hunter’s method of just grabbing any color and using it. I want my quilts to look good and that means choosing pieces carefully. That is designing.
I do believe in using up my fabric. I have a working collection and not just a collection so the above would make sense for fabrics that I like, but aren’t going to be used for a project.
The other sad part is that my scraps are bugging me and I need to do something about them. Pulling all of these systems together
The other day I posted the Origami Starburst tutorial with a second wreath picture at the bottom.
The top picture was made out of paper and very straight forward. After I made several starbursts out of paper, I couldn’t help wondering what would happen if I made one out of fabric.
The Starburst in the photo is made from charm squares from the Fresh Cuts line of fabric. You can use any size square of any 16 fabrics as long as the squares are allthe same size. It took some special maneuvering to get it to work.
You make the legs the same way you do the paper legs except you need to back them with some kind of interfacing like ShapeFlex. The interfacing makes the squares less floopy. Once your 16 Charm Squares have interfacing only to within a 1/4 or 1/8 inch from the edge, spray each square with Mary Ellen’s Best Press, so the squares are quite stiff. Once the squares are stiff, you are ready to start folding each square of fabric per the tutorial. After each fold you will need to press each fold. Press each fold really well and, then, spray each fold with Mary Ellen’s Best Press or something similar to keep them stiff and in place.
Once you start to put the legs together, you need to glue with Aleene’s or Elmer’s glue as you do it, being very careful to only put the glue on the tips of the legs. Let the piece dry thoroughly before trying to pick it up.
The paper starbursts stay together even if not glued, but the fabric starbursts are too heavy and too floopy, so glue them right away.
The fabric starbursts are much more three dimensional, much more fragile and much heavier than their paper counterparts, so decorate with and use them with care. They make great gifts.
After I wrote about this journal in the a blog post, this piece got lost in a big cleanup I did and I didn’t find it again for several weeks after another mini-cleanup. The other morning I decided I needed to make progress and decided that I could finish this journal cover in a short amount of time.
I set to it, getting as far as the second to last step. Then I realized I was out of journals. This would create a panic except that I just started a new journal so I have some time get another. I sewed as much as I could without a journal and will finish when I get one.
There are some pieces I like about this cover. I am finding that I am still learning about what fabrics I like and what fabrics I don’t. Or perhaps that is constantly changing?
I used a piece of Philip Jacobs fabric for the back. I won’t see it all the time, but I will get glimpses of it when I use the journal. I might as well use my good fabric and I only had a small piece of it so it wouldn’t have worked for a backing.
Definition: “A vise or vice (see spelling discussion) is a mechanical apparatus used to secure an object to allow work to be performed on it. Vises have two parallel jaws, one fixed and the other movable, threaded in and out by a screw and lever.” (Wikipedia)
grip like a vise
bench vise
The Wilton ATV All-Terrain Vise mounts to any standard 2-inch tow hitch for jobs away from the workshop.
fly tying vise
Vise magazine
Doris & Harry Vise University Library at Cumberland University
he Vanderbilt Initiative in Surgery and Engineering (ViSE) is an interdisciplinary, trans-institutional center whose mission is the creation, development, implementation, clinical evaluation and commercialization of methods, devices, algorithms, and systems designed to facilitate interventional processes and their outcome.
The center facilitates the exchange of ideas between physicians, engineers, and computer scientists. It promotes the training of the next generation of researchers and clinicians capable of working symbiotically on new solutions to complex interventional problems, ultimately resulting in improved patient care.
Vise captures a hand-blown glass globe within brass claws machined to follow the gentle curvature of the glass.
Vise pocket tool
Wood Vise Screw Kits
The blacksmith leg vise or “solid box vise” is one of the most important tools in the blacksmiths shop.
axle vise
milling vise
Opti-vise IT is a managed services provider that specializes in backup and disaster recovery solutions, Network Management and business continuity.
caught in a vise
Melissa Vise is a historian of medieval Europe with a special interest in the religious and political history of the Italian peninsula.
Daniel de Visé is higher education reporter at the Washington Post and author of the College Inc. blog.
Vise bowling bags
saw vise
Post the direct URL (link) where your drawing, doodle, artwork is posted (e.g. your blog, Flickr) in the comments area of this post. I would really like to keep all the artwork together and provide a way for others to see your work and get familiar with your blog or website.
The Creative Prompt Project, also, has a Flickr group, which you can join to post your responses. I created this spot so those of you without blogs and websites would have a place to post your responses.
We are also talking about this on Twitter and Instagram. Use the hashtag #CPP
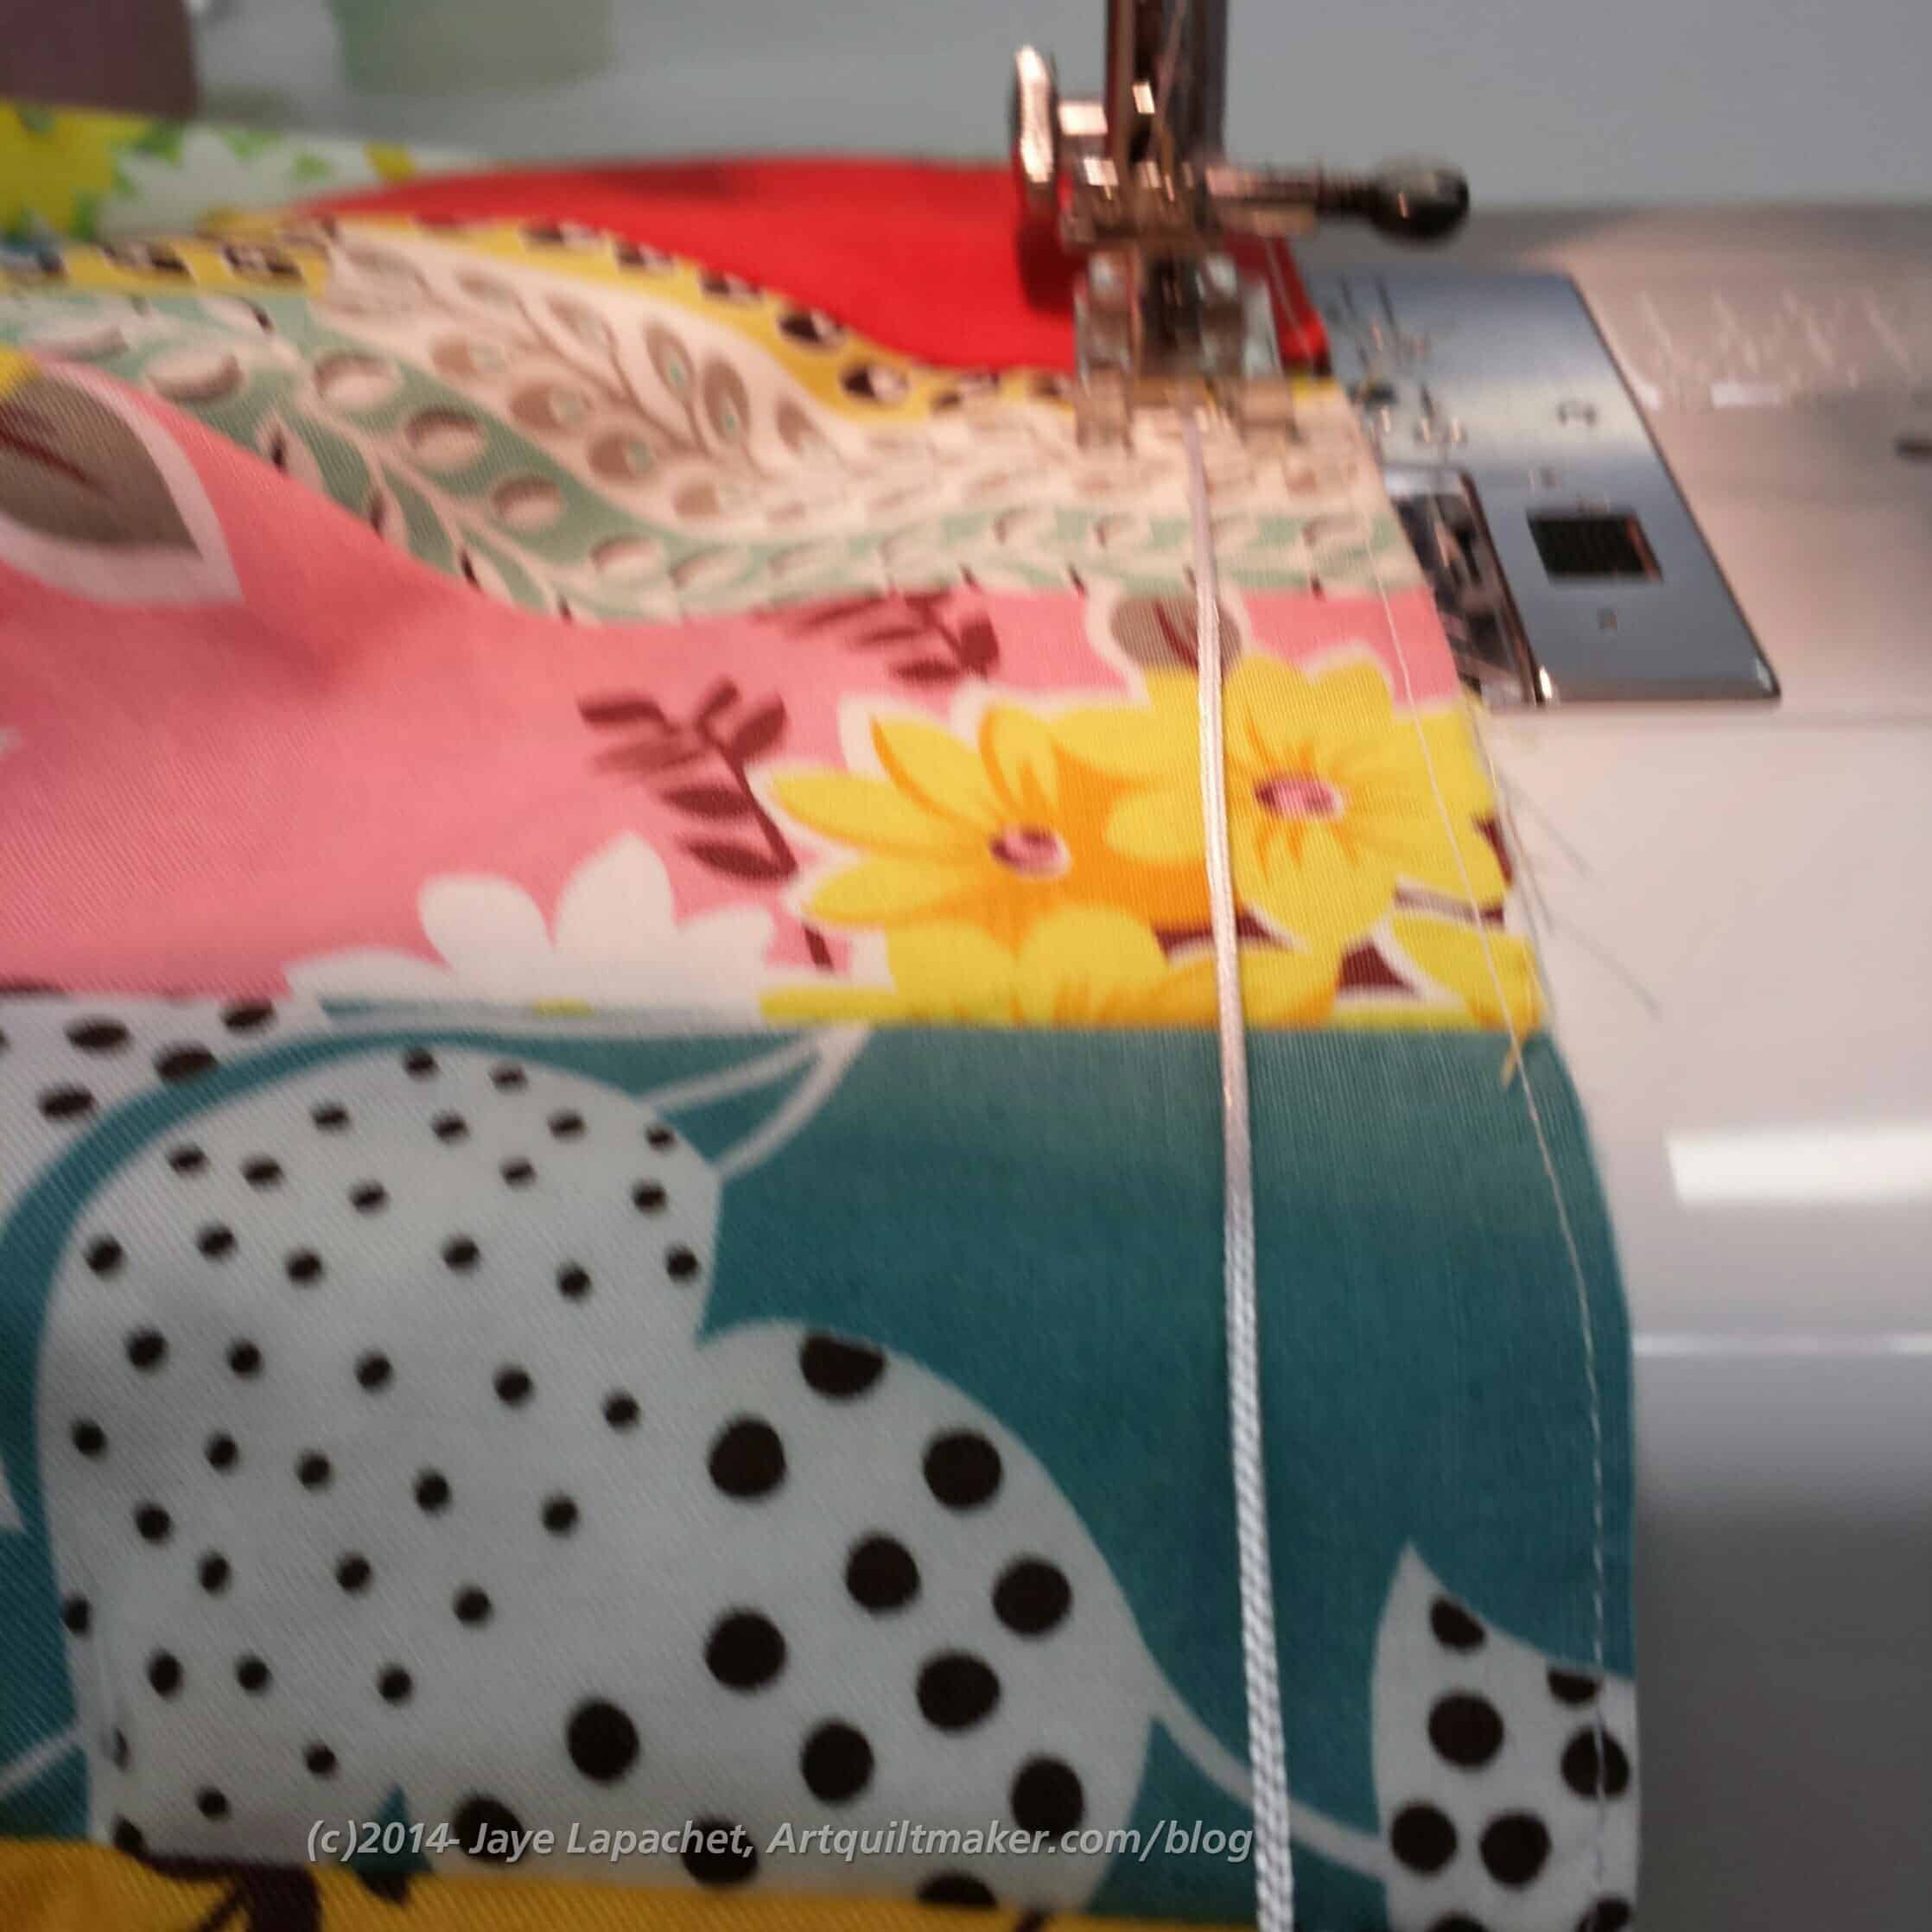
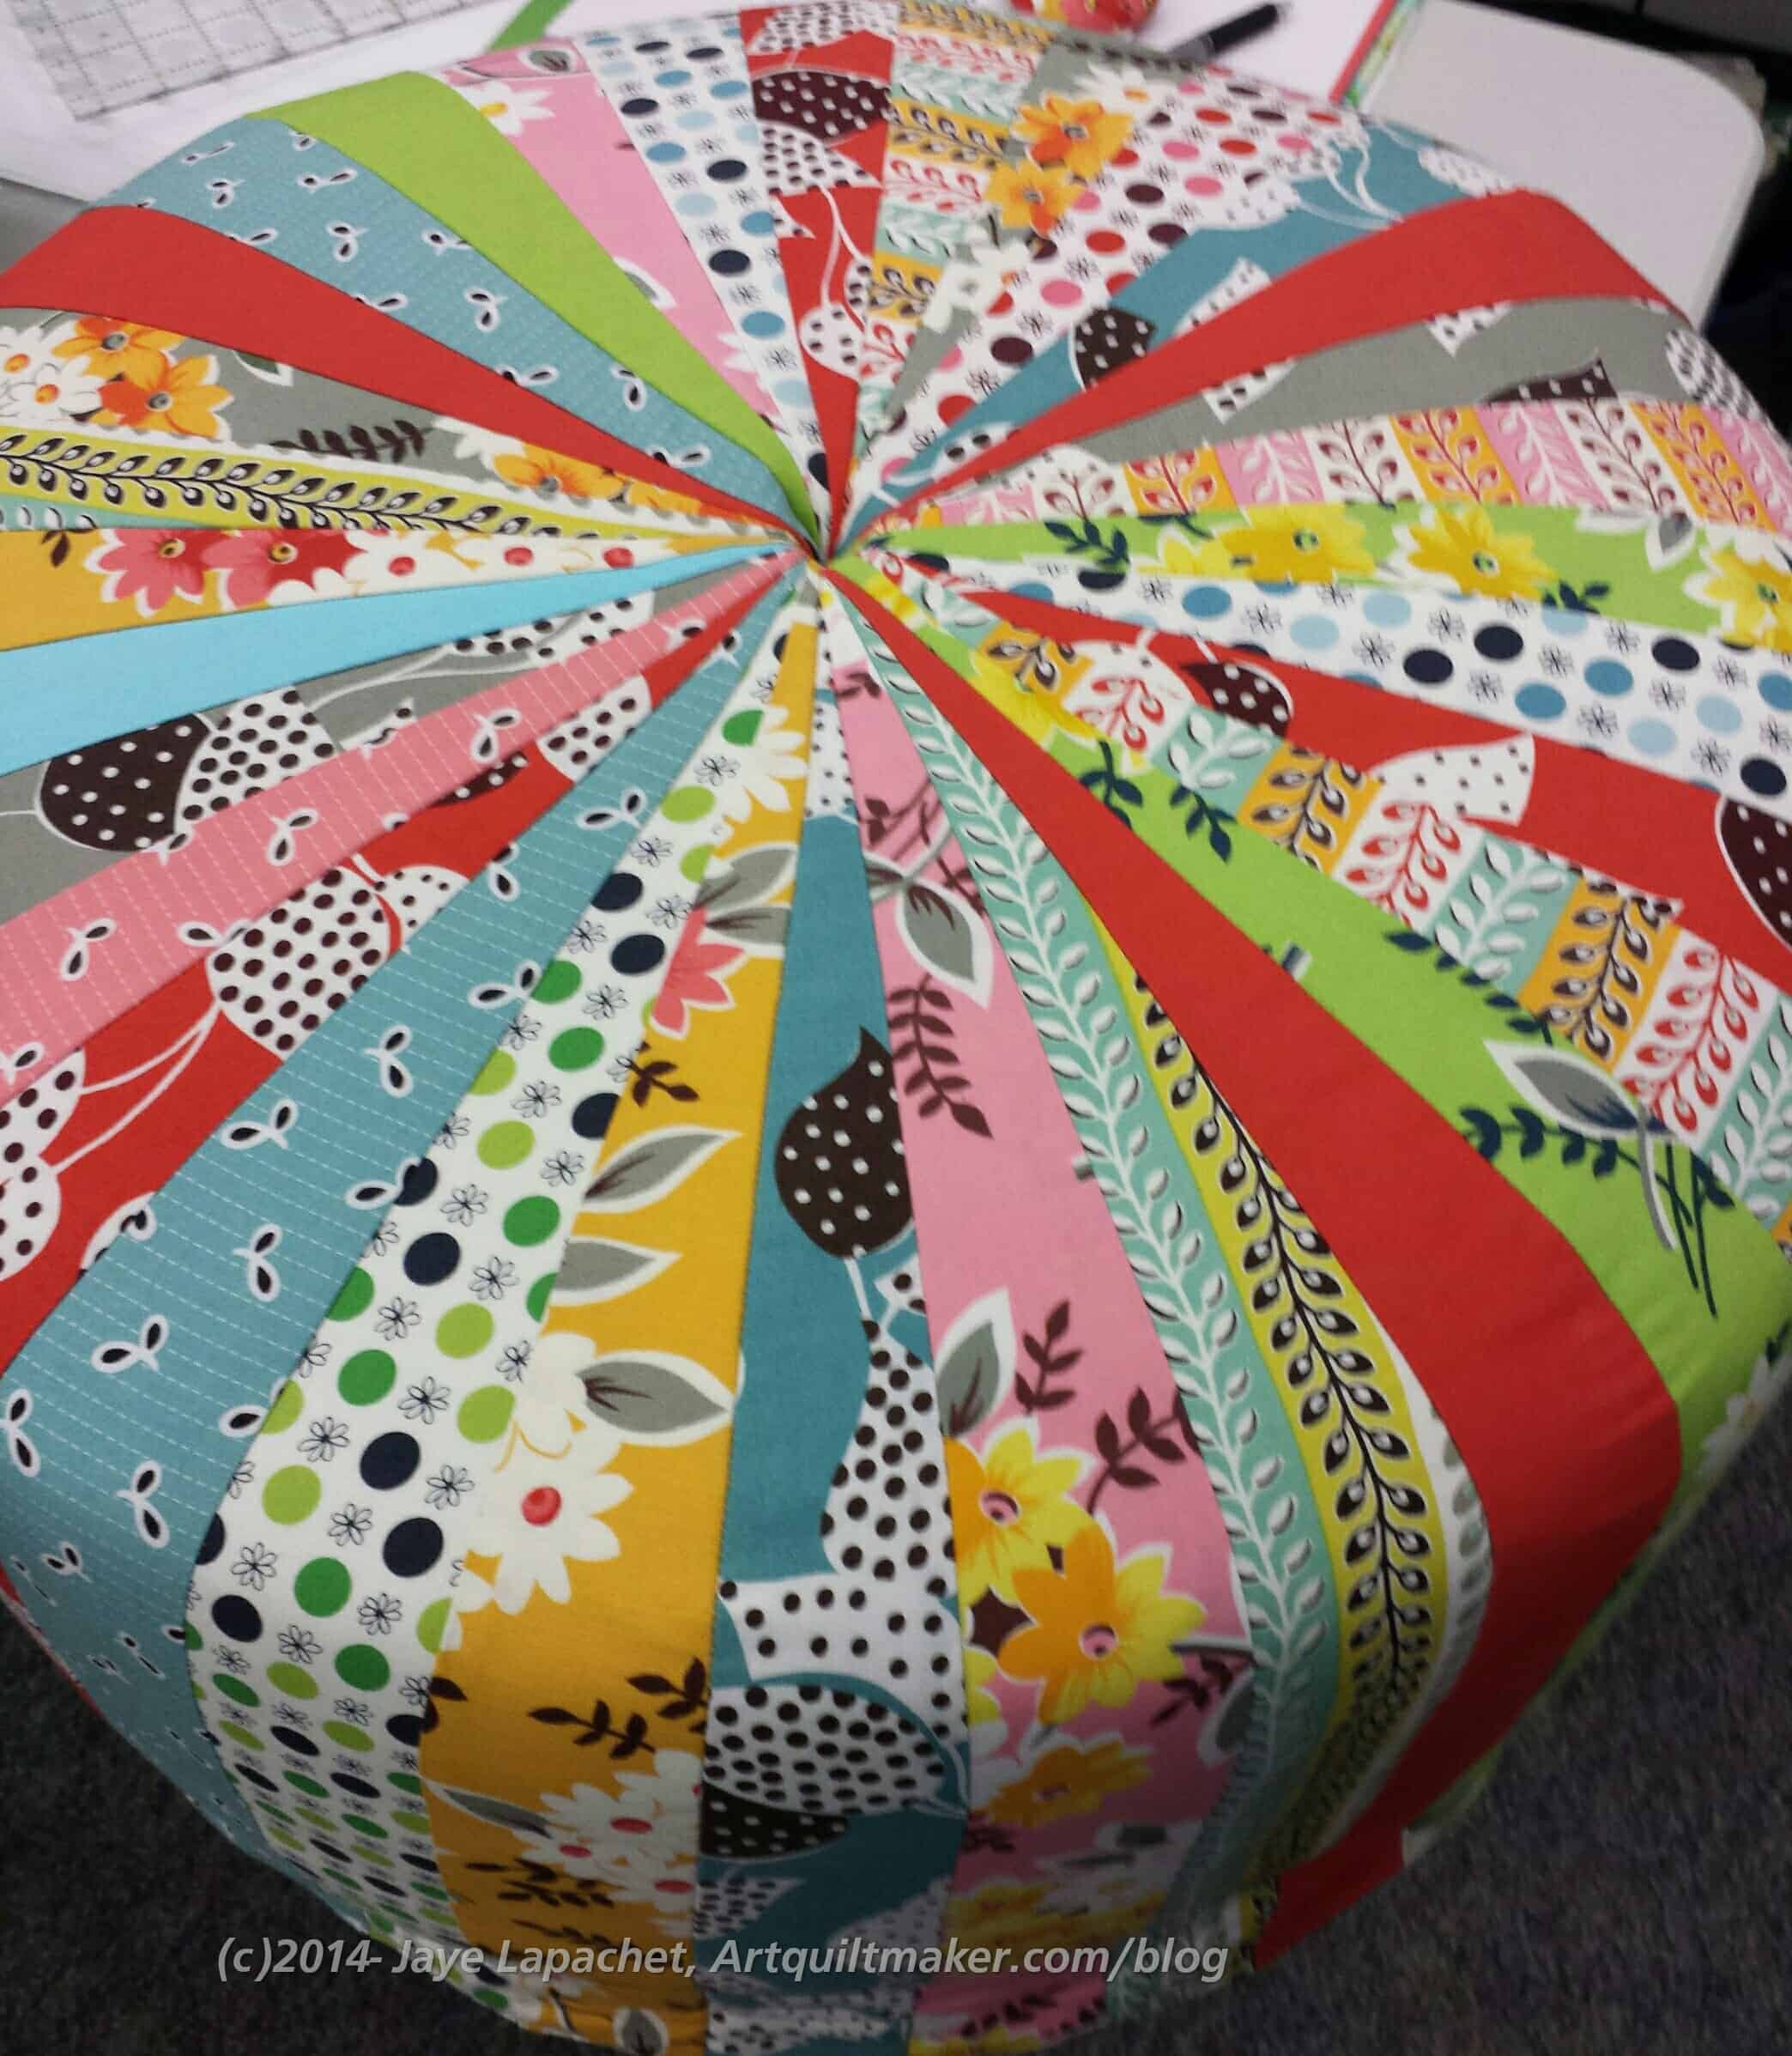
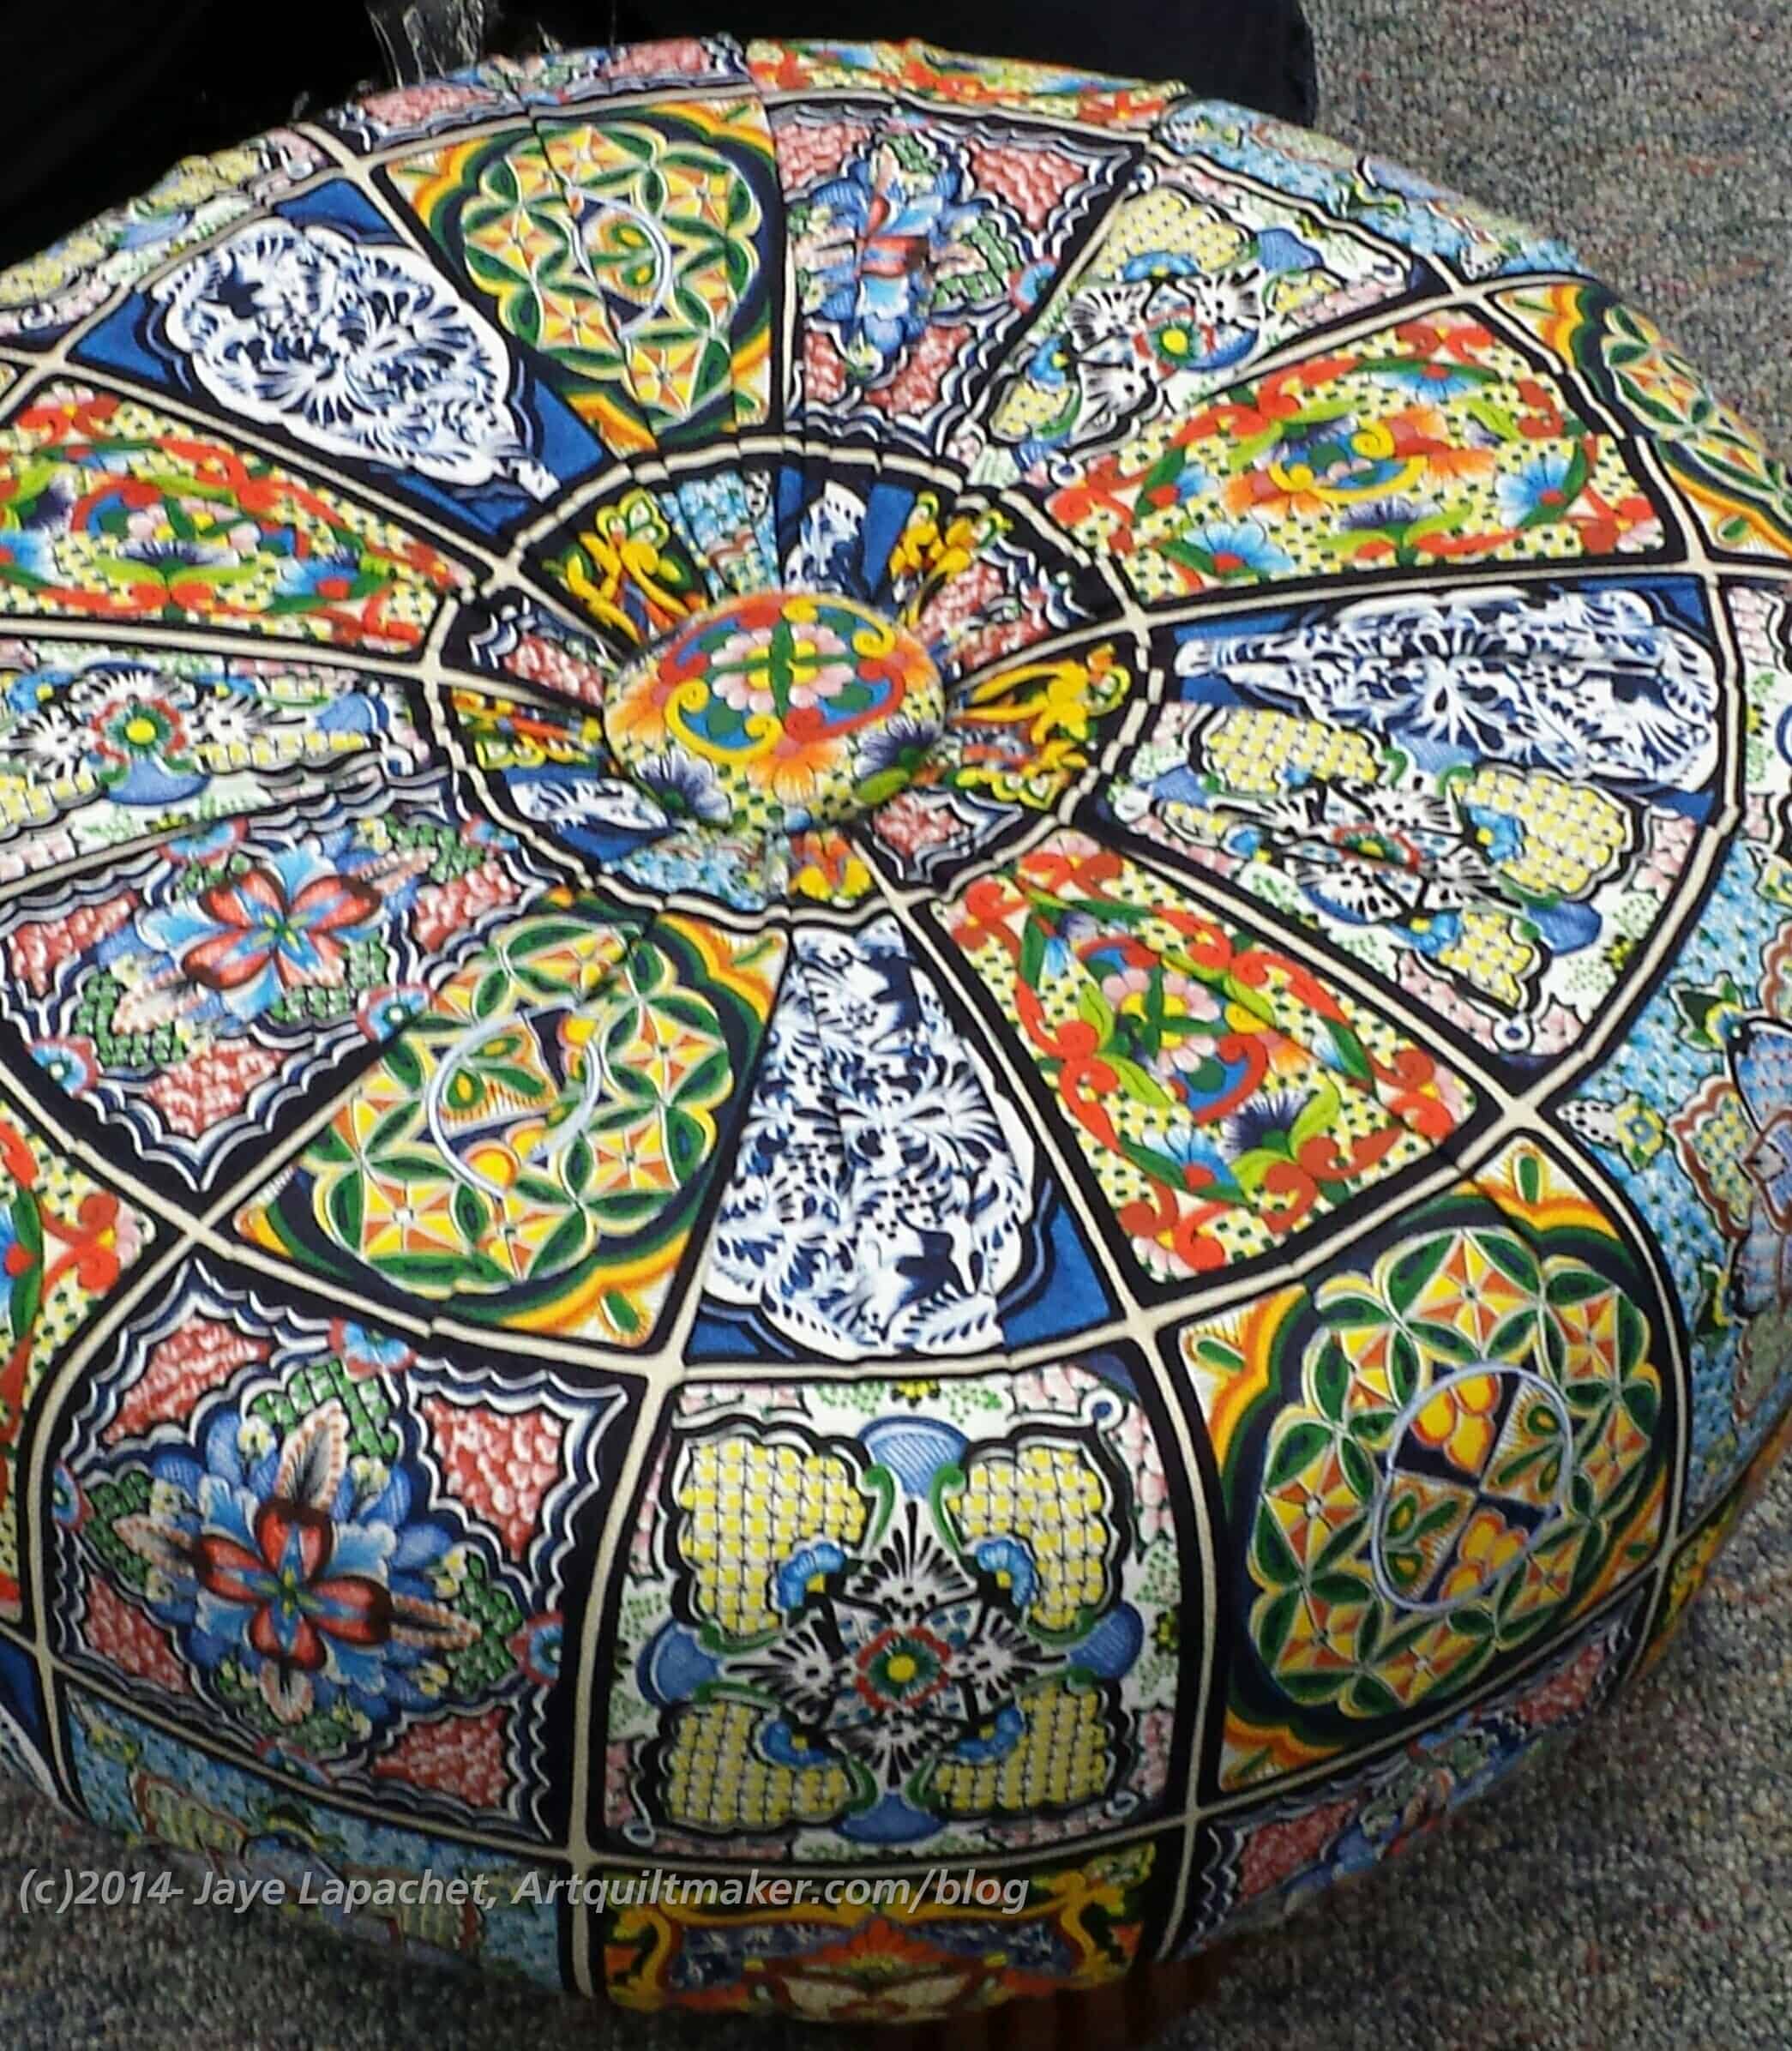
As you may remember, I had a lot of work to do on the tuffet at home in between classes. With some drama, but not major drama, I got the tuffet top together except for the drawstring.
I misunderstood (all me not the teacher) the directions and used the drawstring cording to make the button. This left me short for the drawstring.
I got another piece of cording from Robin and sewed the drawstring in class. I also remade the button, taking out some of the cording and redoing the tightening part with upholstery thread. Robin was very patient with our foibles from between class and that is a great quality in a teacher.
Cover on Tuffet Structure
Once the drawstring was on, I was able to put the top (or cover) over the structure of the tuffet. I know this picture looks the same as the photo I posted in my previous post when I stuffed random bits of batting under the top so the photo would come out better. Trust me when I say that there is a big fat piece of foam and a piece of plywood under that cover (picture right).
Nota bene: Robin was kind enough to put my tuffet structure together. I wasn’t really able to wield a hammer or the staple gun very well with my hand. This was very frustrating for me. If I had known that the class required wielding tools, I might not have taken it, thus I am very pleased that Robin was willing to help me with the difficult parts.
I was completely thrilled when I saw the tuffet like this and would have been, mostly, satisfied with it, but it wasn’t finished and Robin was definitely encouraging us to finish. It wouldn’t have stayed together either.
Tufting the Button
The next step was to add the button and make the tuffet look like an upholstered piece of furniture. Not only is Robin funny and encouraging, but she is also smart and the steps of the class are well thought out. She had an ingenious way of tufting the button through the 2 feet of foam. GENIUS! It was fun and not difficult.
Using the cording (which is like cording for blinds), I made the button look like a jelly fish. After the button was in, I tightened it to correct tufting levels 😉 and tied the button off on the bottom using the jelly fish “arms” and a surgeon’s knot to tie the button and tuft the tuffet. We had some fun talking about ‘jellyfishing’ our buttons. I know that making nouns into verbs is the path to destruction, but the whole class found ‘jellyfishing’ to be quite hilarious and I, at least, couldn’t help laughing over it.
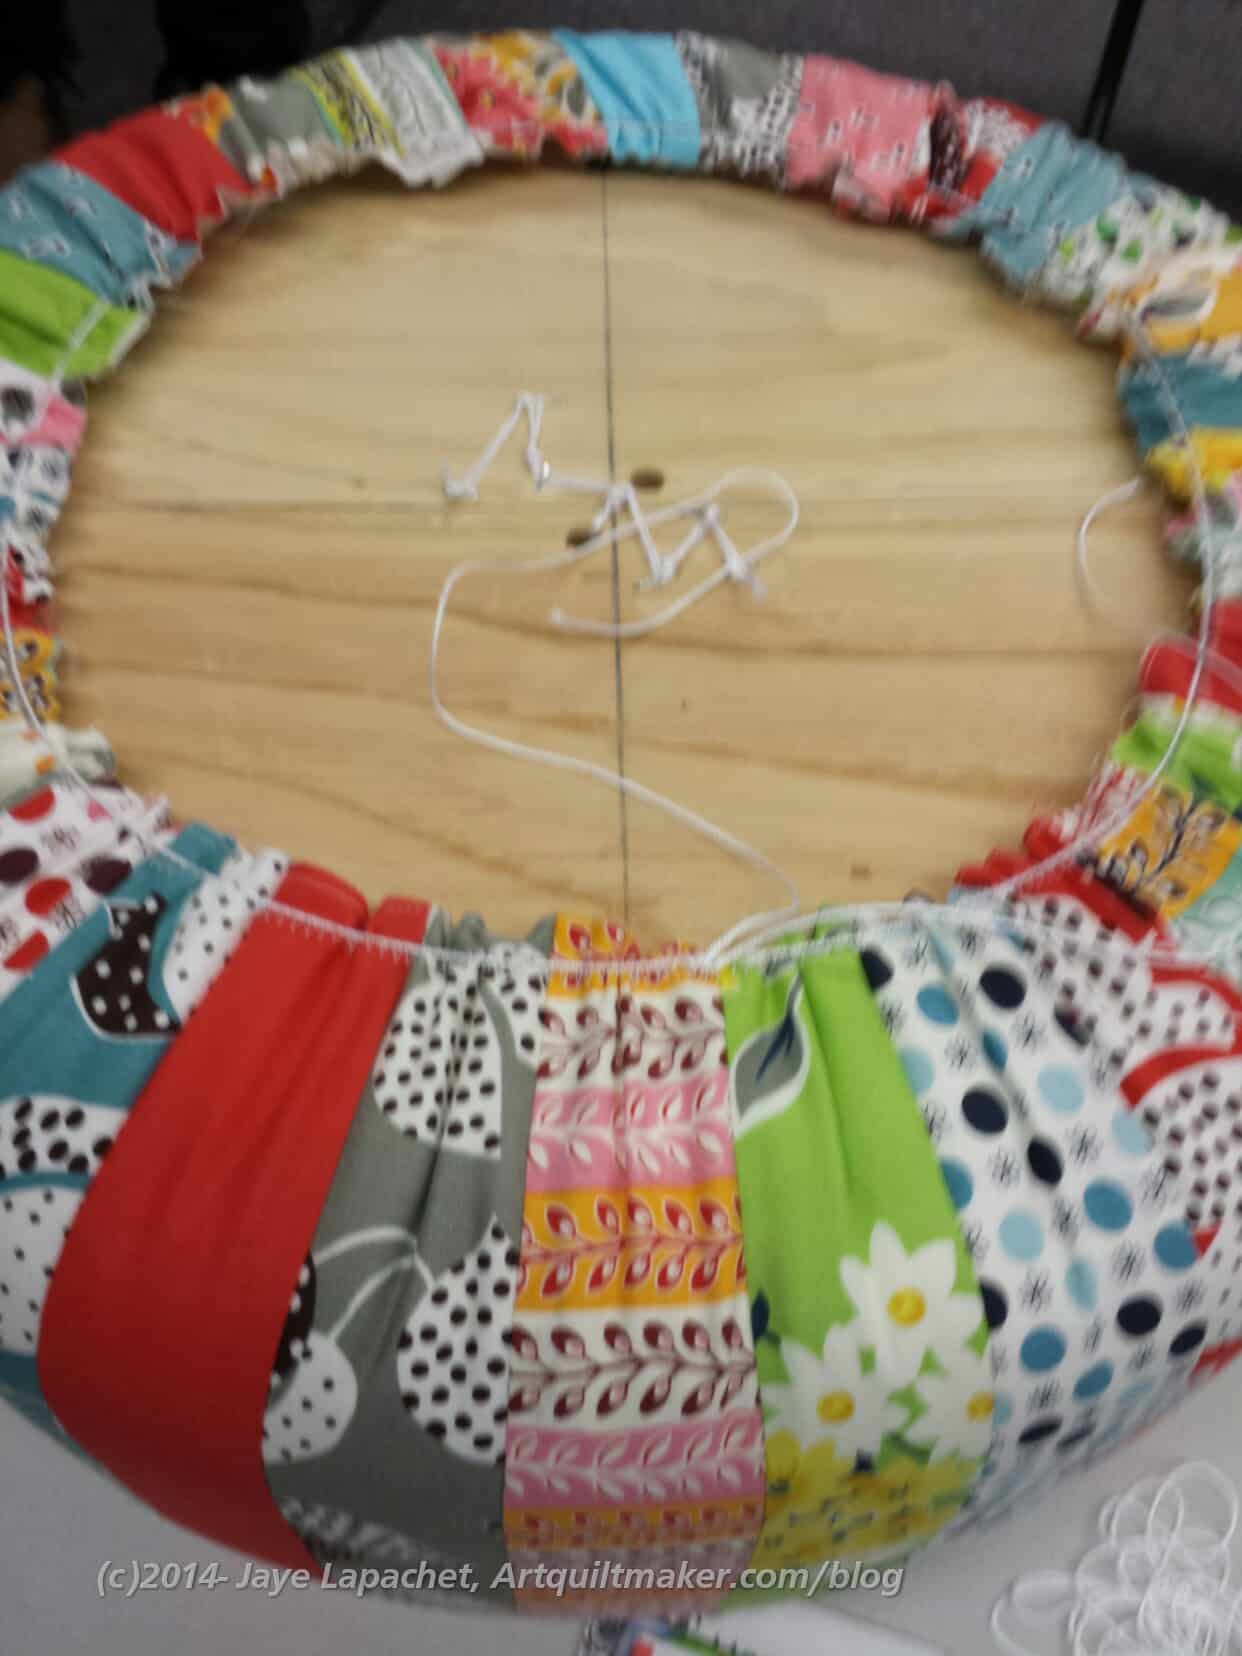
Bottom of Tuffet
Next I tightened the cover and drew up the drawstring to keep it tight. The cover was long enough (intentionally) to fit over the bottom of the tuffet, which was a thick piece of plywood.
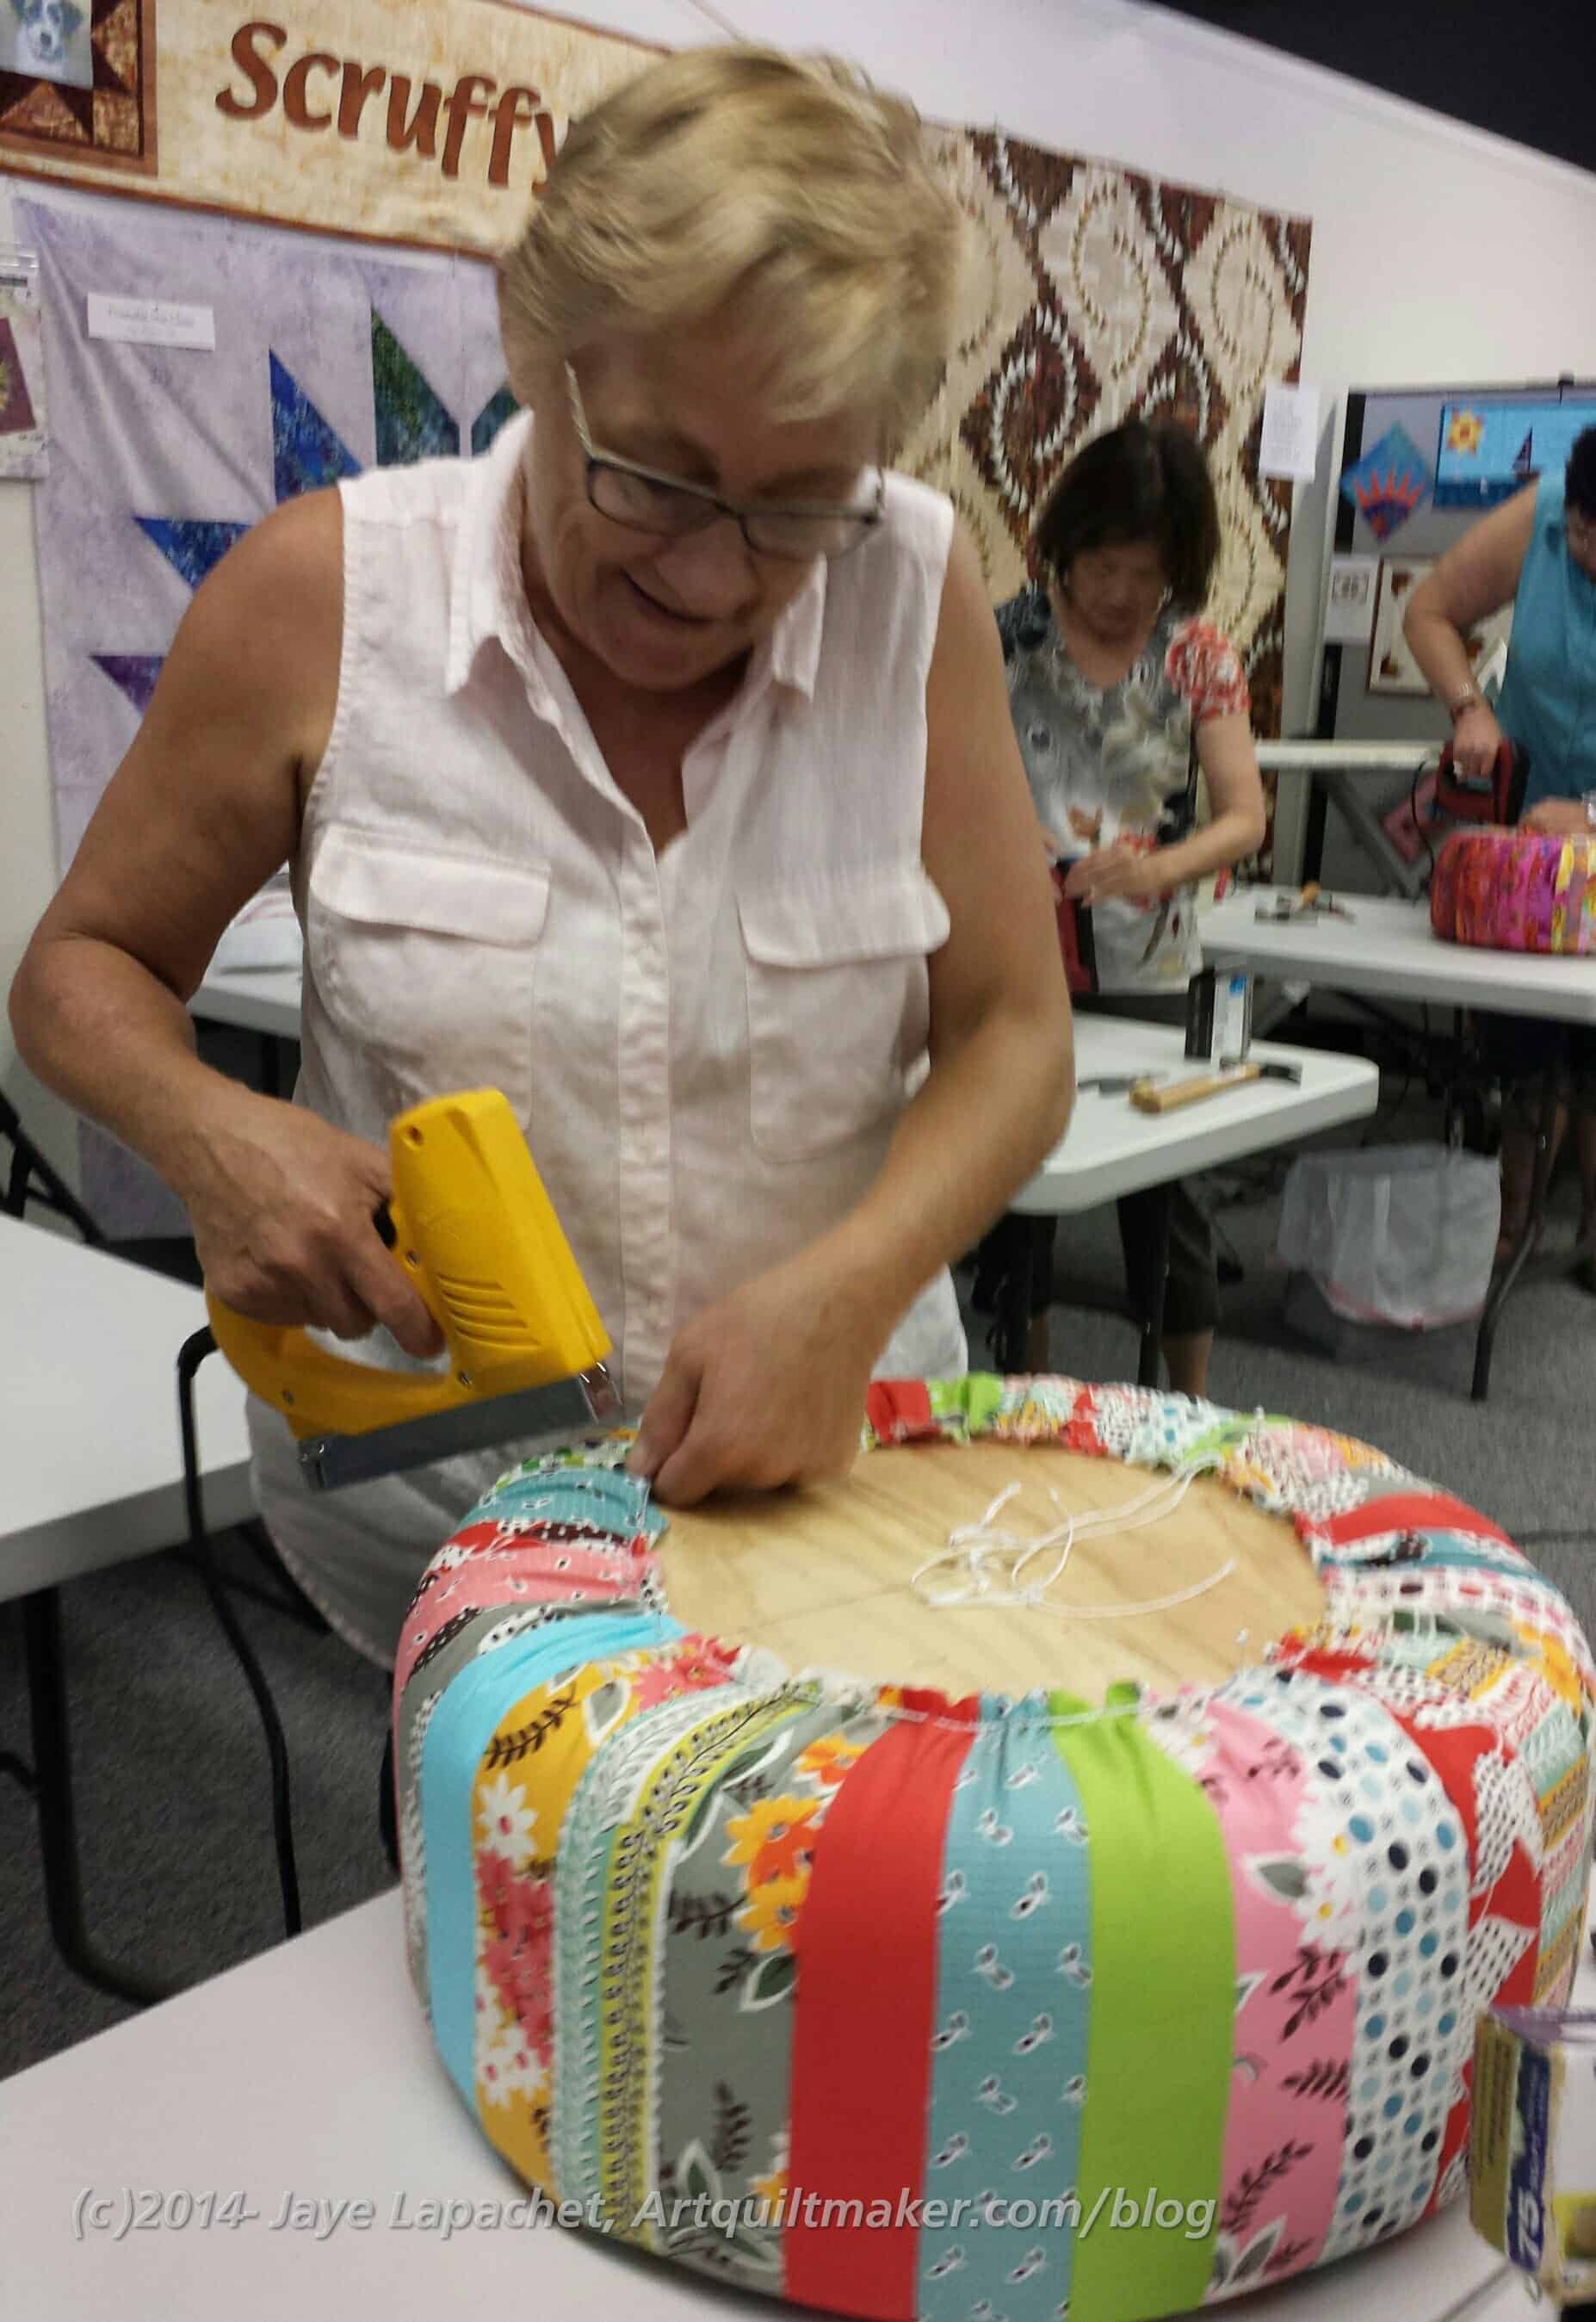
We marked where the feet were to be inserted (there are holes drilled in the plywood that are covered by the tuffet cover) and stapled the cover to the plywood. Robin, again, helped with mine, though I was able to do a bit of the staple gunning (I am right handed, but had to use my left hand, which isn’t as good at tasks as my right, so I was a bit of a danger to myself and the class, thus the assistance. ) Julie helped as well.
Robin Stapling my Tuffet Cover
I am pretty sure that I would have been reluctant to staple through my cover (All that work!!!), so I think it was good that Robin did most of it for me. Nobody died in the stapling of the cover and I lost my feeling of preciousness over it.
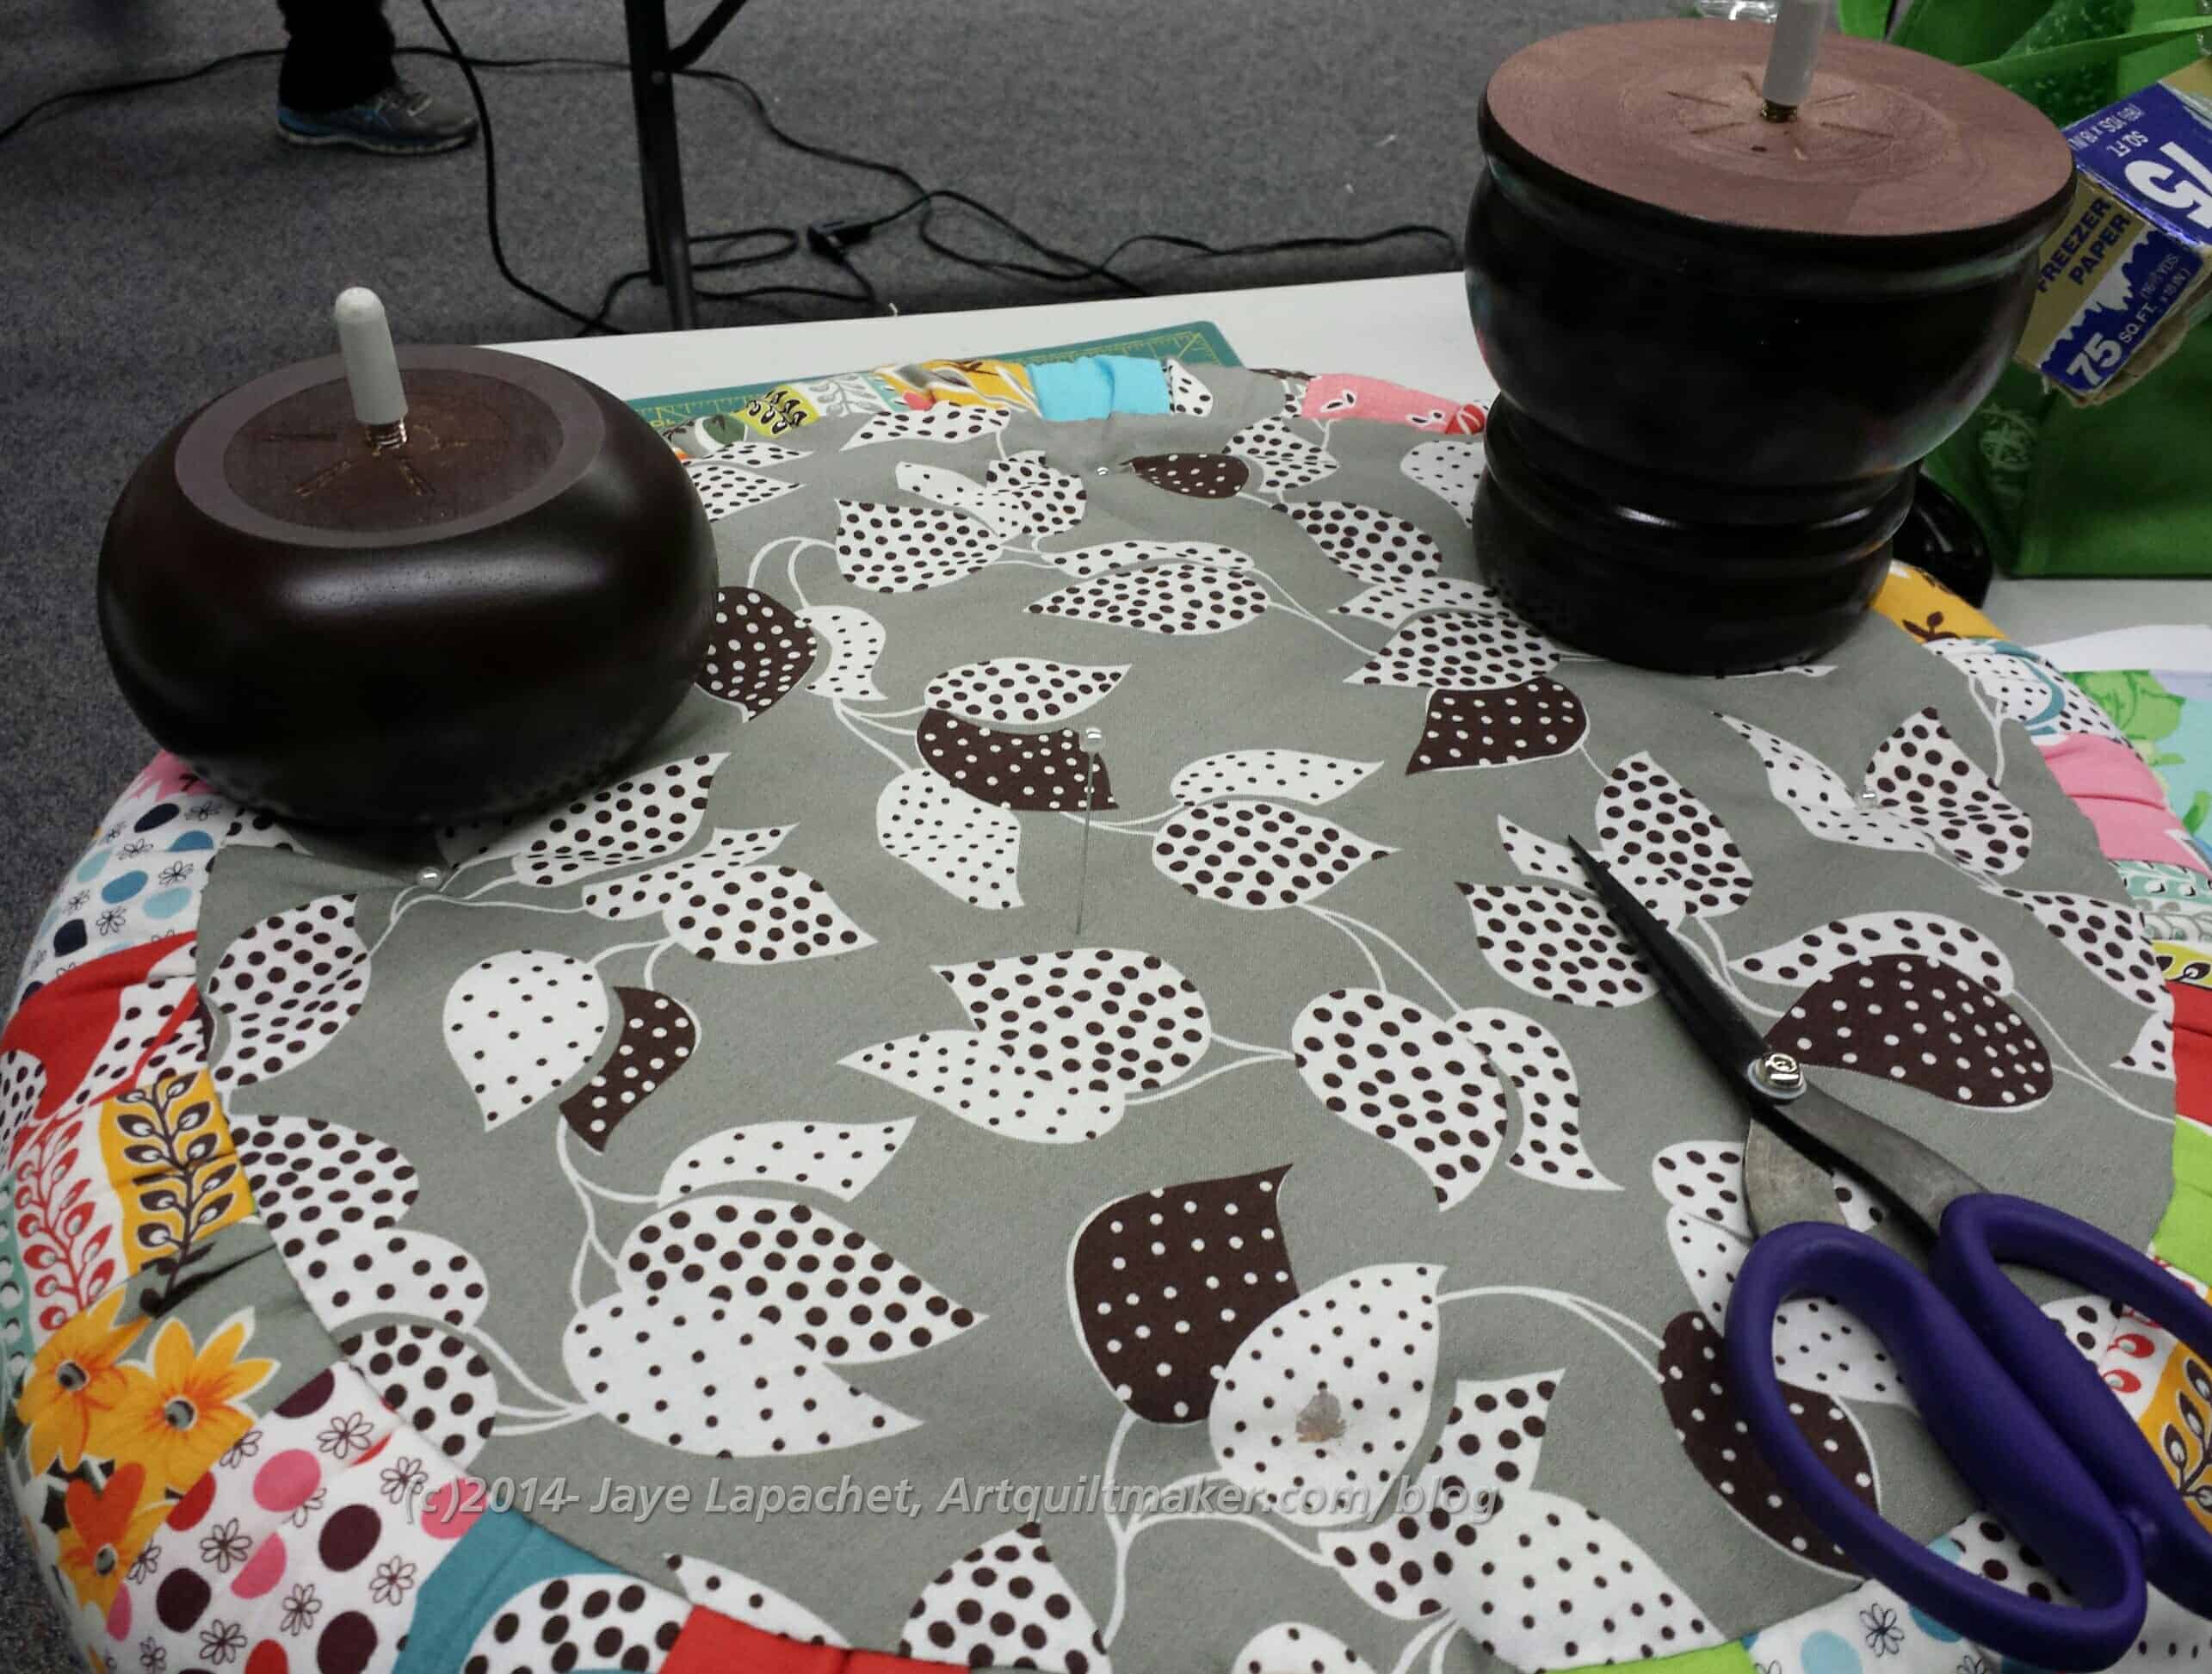
I cut dime sized holes in the cover and cut away the batting and foam so that I could insert the feet.
I also made the bottom. Stitching it down started a long discussion, because many of us were whip stitching our bottoms about various methods of speeding up the whip stitching, which took a lot of time. Katrina, an awesome quiltmaker (I took the Pineapple class from her), who works at Scruffy Quilts suggested that we use Steam-A-Seam in the 1/4″ tape version to keep the bottom in place and then whip stitch at home. Robin hadn’t thought of that and since she is still reviewing the process, to a certain extent, thought that might work, but wanted to try it. I plan to make another tuffet (perhaps two) and will try it. I enjoyed sitting there and stitching, but it is a step I could have easily done at home. One of our classmates tried the Steam-A-Seam and it seemed to work out very well.
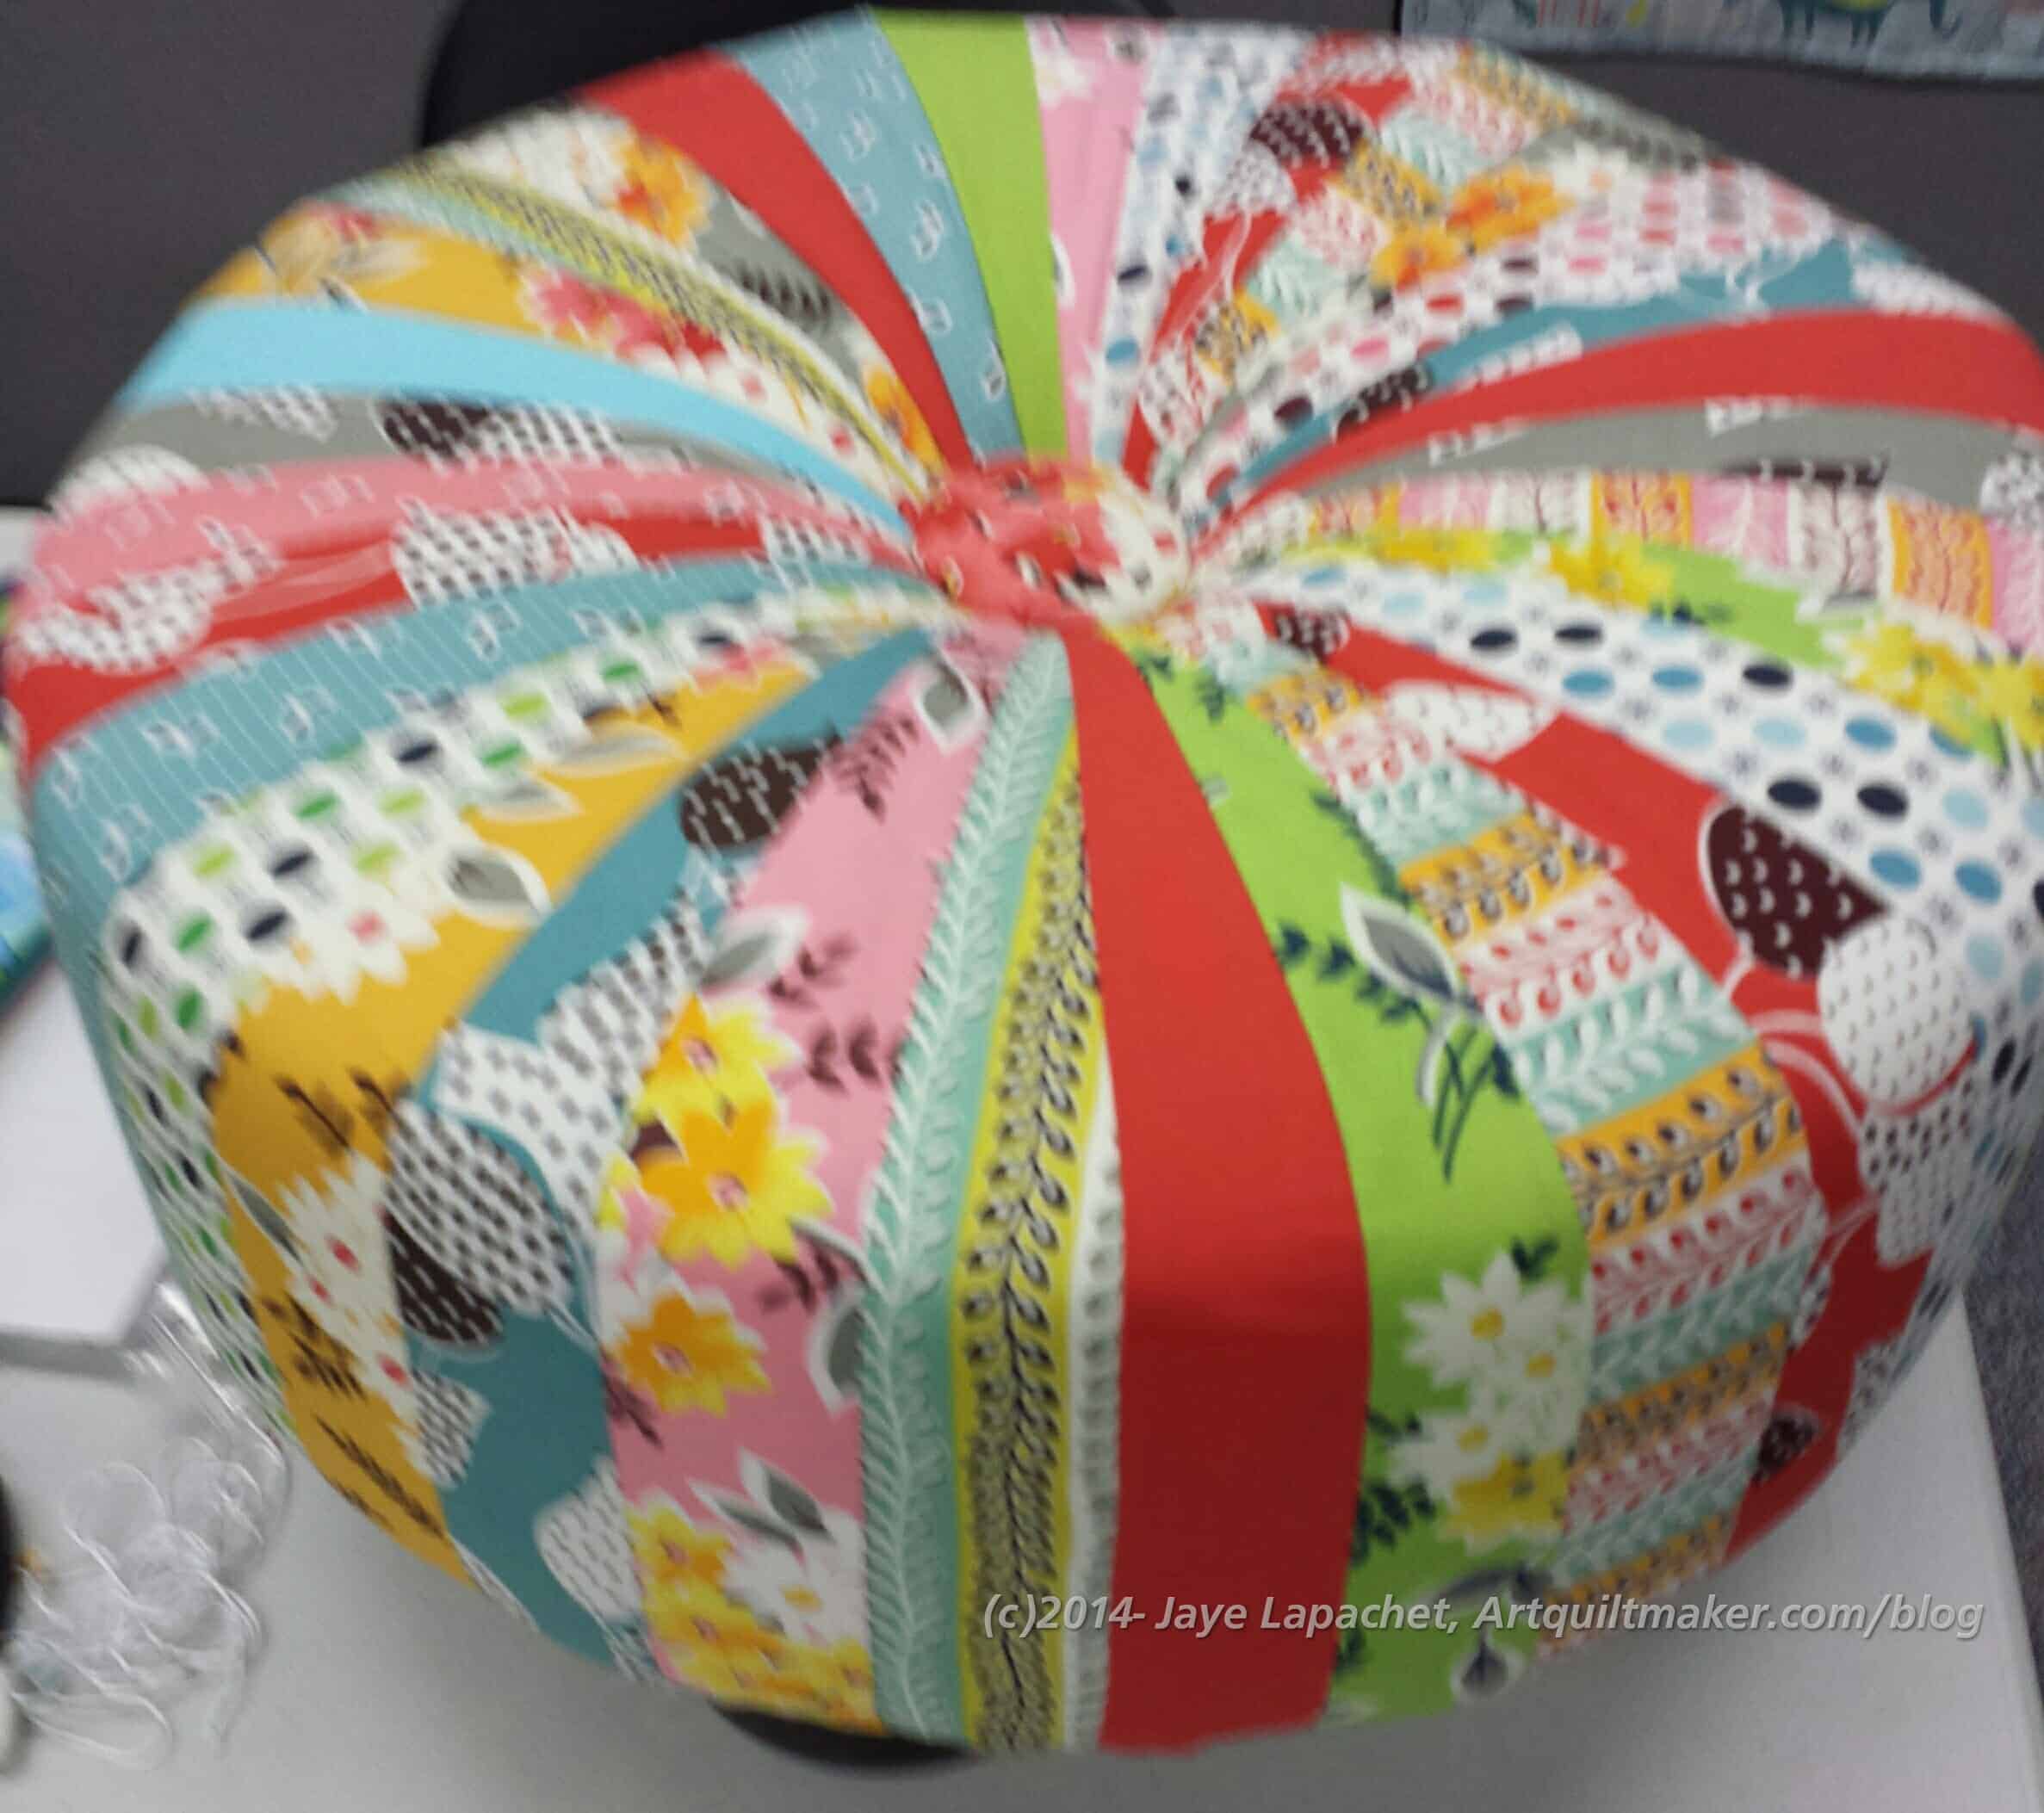
Auditioning Feet
I went back and forth on feet quite a bit. Robin’s source stopped production while they retooled their factory (or something), so her inventory was a bit low. At first, I thought I wanted white feet. That would have meant finishing them myself, which I knew was not going to happen. Then I decided I wanted the feet to match my furniture, which has a cherry color. I took some that were a more beigey brown kind of wood that I thought would match (make visual decisions visually!). I compared them with my other furniture and found that they were not the right color.
Robin didn’t have any that were the exact shade. I looked at all of her feet and finally decided on the bun feet (shown right). They are darker than my furniture, but have a tinge of red and on the bottom of the piece, they are ok.
Once the bottom was on, we carefully put in the feet and the tuffet was finished!
Completed Tuffet
It was such a thrill to take home a completely completed project. That is one bonus of doing the stitching in class: I went home with NO additional work to do.
The class is a little on the expensive side because of the finishing kit, but it is worth it to get the finishing kit from Robin (West Coast Tuffets), because everything is there and in good order and well documented.
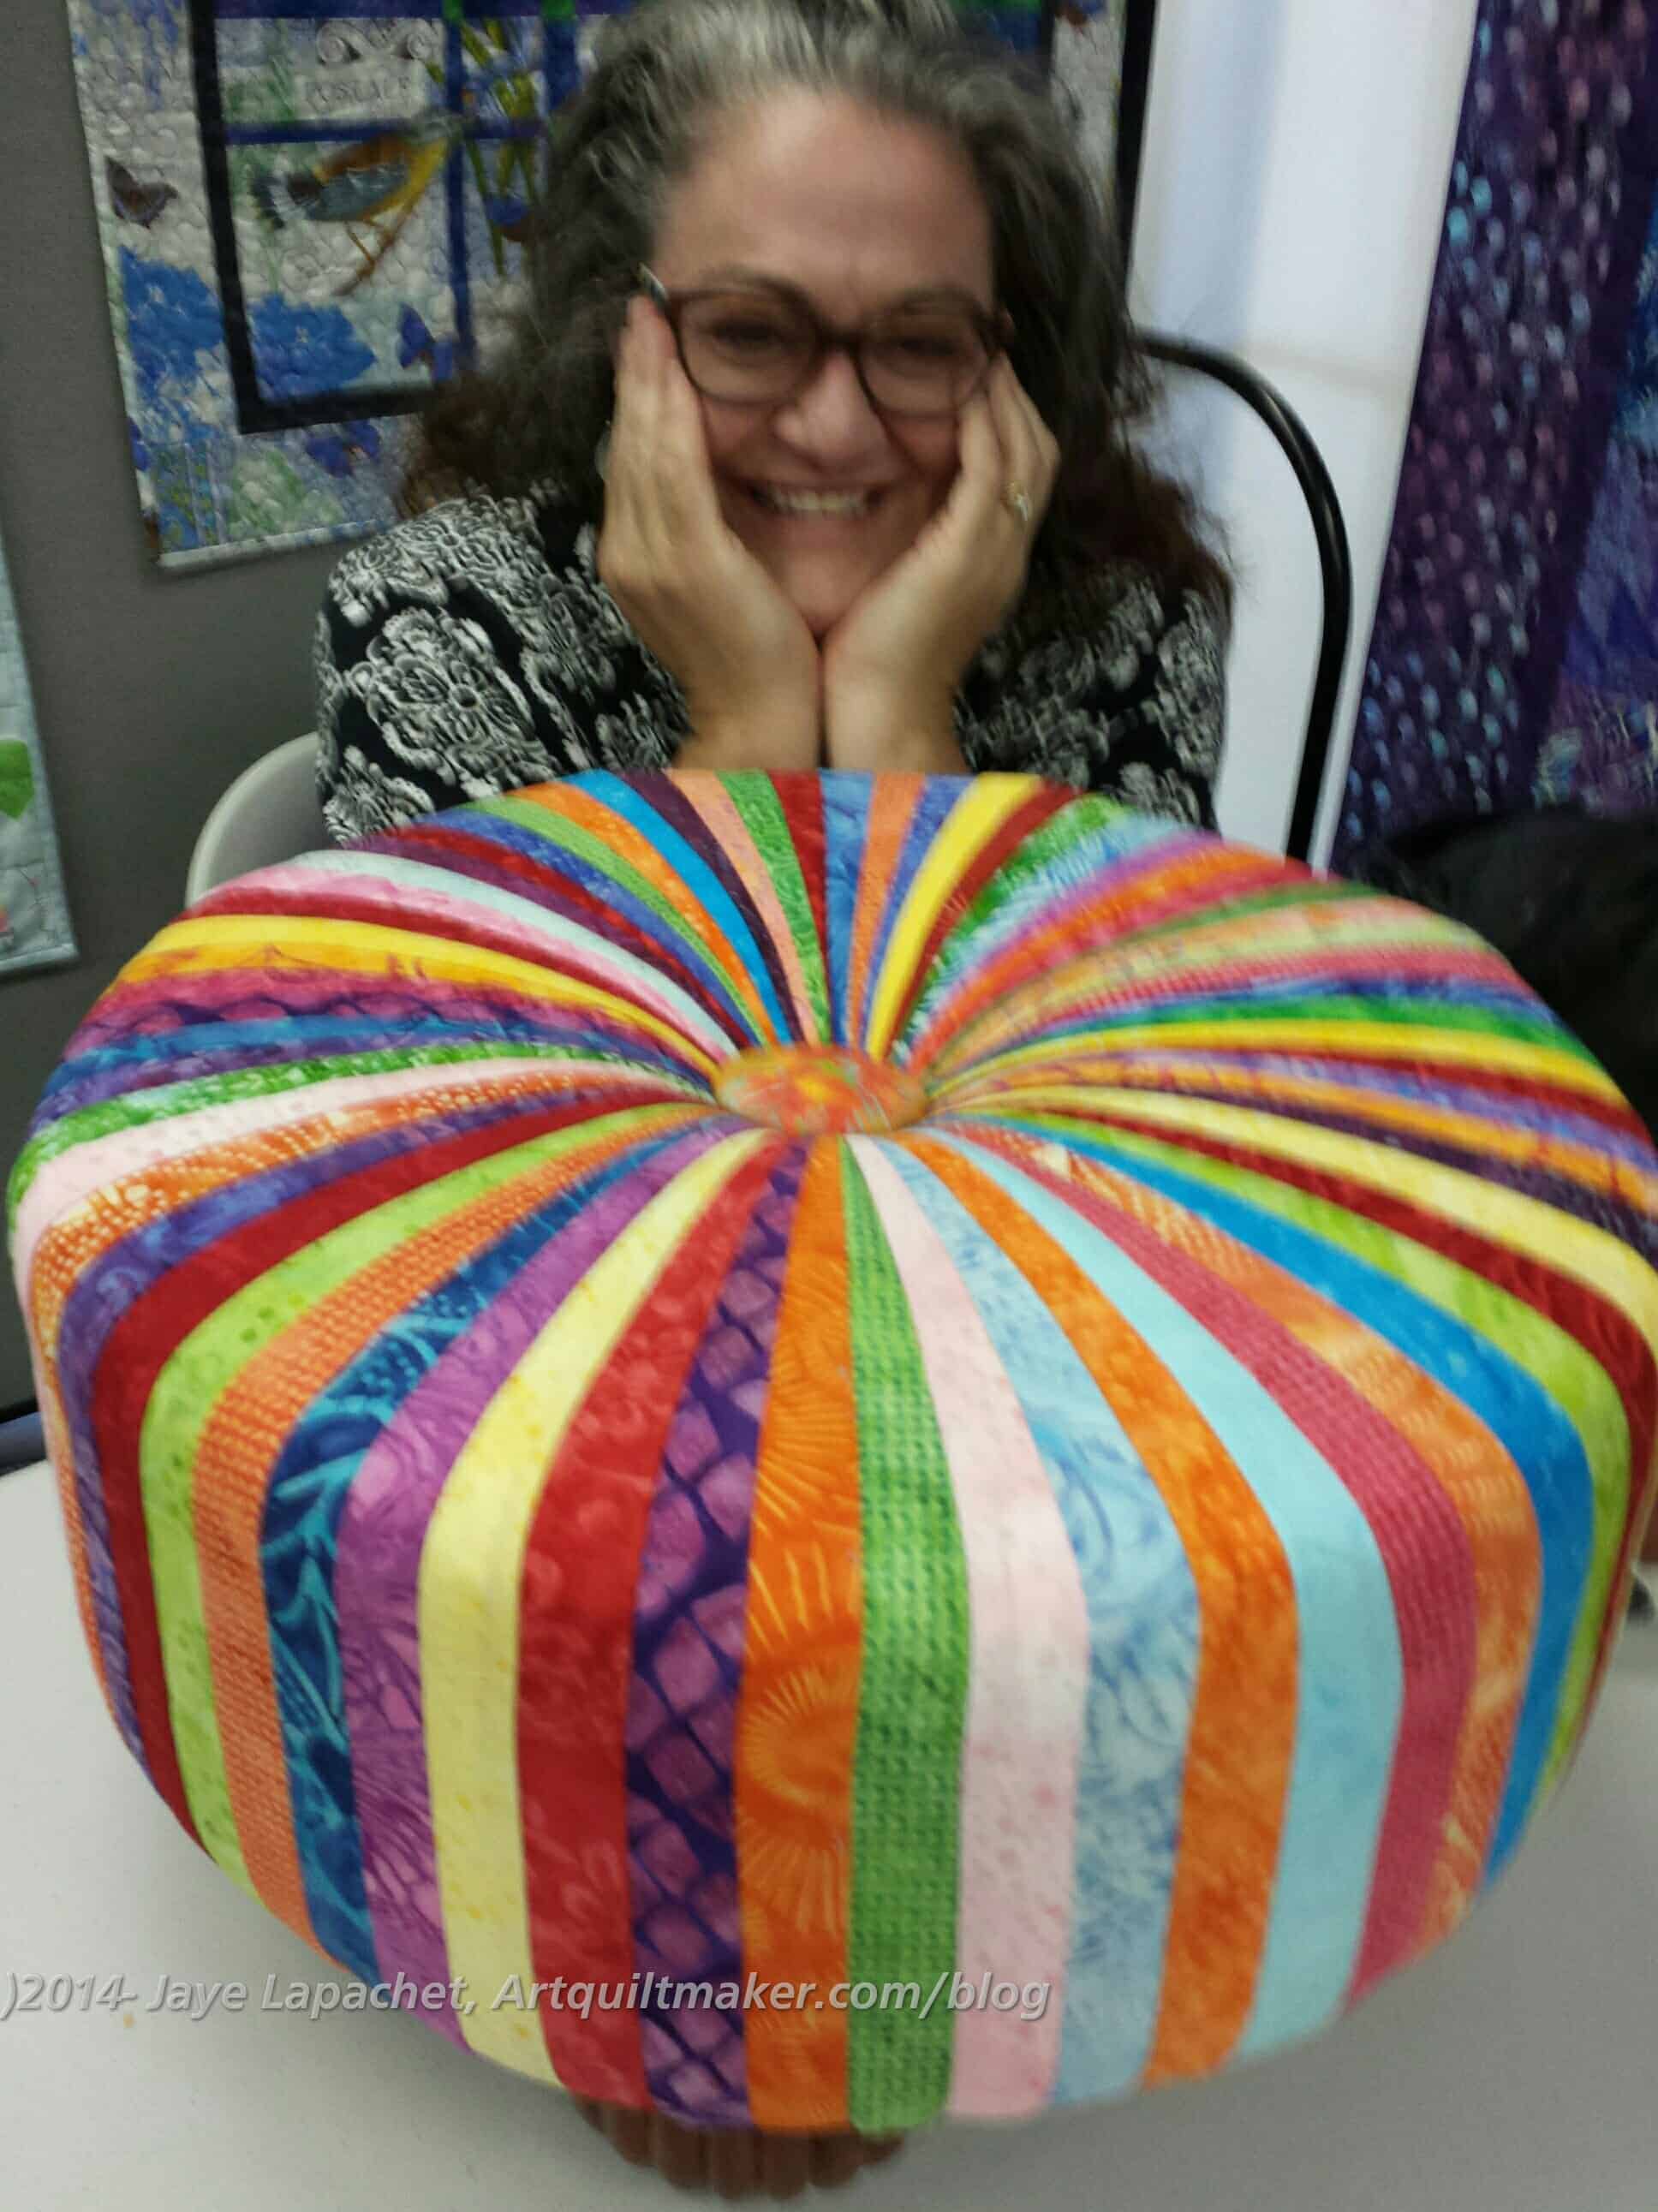
Julie’s Tuffet
I love Julie’s Tuffet. She used a batik jelly roll and it really fits her personality. It is so cheerful and this is a gorgeous picture of her!
Robin’s Tile Tuffet
Robin brought a few tuffets to show us. She made a great, rich looking tuffet from a whole piece of fabric. She gathered the center under the button rather than cutting the fabric into almost-points and it looks really amazing. I think some experience with gathering or making a few tuffets first would be required before doing this kind of tuffet. I do like the idea of whole cloth tuffet. Can you imagine one with some Philip Jacobs fabric?
All in all, I really liked this class and want to take another one. I want to make a tuffet in the colors of the Stepping Stones blocks even though it will do with nothing in my house as well as another for the living room so I can put my feet up.