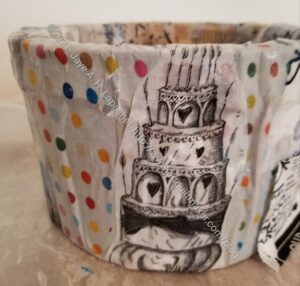
I spent a little time looking through my patterns to try and resolve my scrap organization problem. Once I found a few I decided to make the Desktop Cube from Minikins Season 1. As mentioned, if this doesn’t work, I’ll make a Faithwell Storage Bin and see if that works better. If neither of those work, I’ll rethink.
The Desktop Cube is a pretty easy project and I was able to make it in a few hours while I sewed with Tim. I am also thrilled to make another new-to-me Minikins pattern. It will beef up my Minikins page. ;P
I brought it home and immediately tossed my scraps in it. Of course, they overflowed even the large size I had made right away.
I am undaunted! I need to process the scraps I have now before I decide that the Desktop Cube won’t work.
Note that I used new fabric for the Desktop Cube! I bought that fabric at Boersma’s last month. 😉
While I am thrilled that I was able to complete the Ultimate Carryall Bag, it isn’t working for me as a tote for hauling tools to Sew Days and Retreats. One reason it isn’t working is that I forgot to interface the inside pockets and the quilt weight fabric alone cannot stand up to my hard use.
It occurred to me that the one thing that worked for my old Quiltmaking go bag (going to Sew Days/Retreat system) was that the tote bag I used allowed me to be modular. I could put in my Tupperware box of tools as well as rulers and other things as needed. In the Ultimate Carryall Bag, items have their dedicated space and other, less used, supplies I need have to be crammed in where they can fit. The UCAB is bulging.
Yes, I have the Kit Supply Tote I made to replace the UCAB. My original idea was to make myself a Running with Scissors Tote (RwSt) using some of the quilted fabric/foam that Colleen quilted for me to organize my tools inside the Kit Supply Tote. I still have to measure to make sure the RwSt will fit in the Kit Supply Tote! I just haven’t gotten to the measuring or the making yet. I have the pattern** on my cutting table as a reminder.
This problem has been on my mind for awhile. I have searched through my patterns as well as available patterns to see if I could find another bag that would work. The UCAB is pretty unique in its design as a quiltmaking/sewing tote. I really haven’t seen anything else like it. The All Rolled Up Tote is a great bag, but somehow I have never considered using it for this purpose. Perhaps I should. It currently holds a lot of embroidery supplies.
I was thinking about the problem again as I was organizing the fabric and patterns I bought on my trip.
Awhile ago, I checked Etsy to see what was available as ready made or in pattern form. I found some bags that might work. One was the Crafty Carrier by Ellie Mae Designs. I came across the pattern and pulled it out.
I bought this pattern a long time ago, on a previous trip to Portland, at a shop called A Common Thread. (N.B.: I don’t know if that shop is still business.)
While I have a lot of projects in the queue, I started working on this bag over the weekend. Sometimes I have no self control about what I work on!
I cut out everything and interfaced almost all of the pieces on Saturday. Then Sunday, I started to sew. I am making good progress. The picture shows the exterior (inside out) without the bottom
I am using a lot of canvas and Essex linen-type fabrics. You can see the Echino I bought at PIQF. I am thrilled to be using fabrics so soon after purchase!! It is so fun to buy fabrics and use them right away.
The inside doesn’t have many pockets, so I added two, but also thought about keeping it empty so I could put other carriers inside for the modular idea. I could have put an inside zipper pocket, but I didn’t think of it and it might be a bit too late.
Anyway, progress. I think I’ll have to make the Running with Scissors tote sooner rather than later. Having one with my various tools organized and together would allow me to tuck it into whichever bag I was taking to class, retreat or Sew Day.
**N. B. : Obviously, you should shop at local quilt shops and small businesses. However, if you are too busy or can’t find what you need there, I use Amazon affiliate links and may be paid for your purchase of an item when you click on an item’s link in my post. There is no additional cost to you for clicking or purchasing items I recommend. I appreciate your clicks and purchases as it helps support this blog.
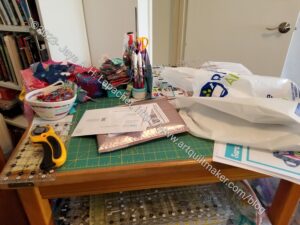
On a good day, my cutting table is small. Tim laughs at the size of my cutting table. His is twice the size. My small cutting table is the reason I do so much cutting at Sew Day. Having space to lay out large pieces of fabric and use big rulers is a luxury. When half of it is covered with scraps and patterns, there is really only a small amount of space to cut.
It only looks this good, because the two giant piles, one of scraps and one of patterns, I had to the right of the tool caddy fell off yesterday. They are still laying on the floor, because something has to change.
This happens, if not frequently, then regularly. I keep walking past the mess and thinking about what to do. I think what I need to do is throw scraps into some kind of bin and then deal with them when the bin gets full.
SueG made me some small bins which I use for thread scraps. A larger size would be great. A One Hour Basket or the Desktop Cube from Minikins Season 1 are both options. The large size of the Desktop Cube is 5-1/2” long x 7-1/2” tall x 5-1/2” wide, so that might be a good starter bin. I also have a Sew Sweetness pattern called the Faithwell Storage Bin. The small size is small circle – 8” diameter x 7” tall, which is slightly larger than the Desktop Cube. What do you use for pre-processed scraps?
I have shown some of the green scrap blocks I have been making in the May Donations blocks post. I am sure you have seen the other blocks and quilts in different colors I have made in other posts.
My scraps start out in a pile on my cutting table. I have talked a little about the processing of scraps that I do. After I cut the pieces I need for future projects, I cut strips and then leave whatever is left and large enough as is. The goal is to not have too many scraps, but the scrap drawers do fill up.
I store my scraps in a cart with rainbow drawers**. This is very handy, because it makes sorting scraps and finding scraps easy. Also, it looks nice. It is on the small side as my workroom is not very large. The drawers can fill up quickly and my process is to work on a drawer that is getting to be too full. I know it is too full when I start to have trouble opening it.
Green is the most recent drawer I have been trying to clear out. I was surprised to find how many green scraps I had. I can really think what I have made with so much green. I made some green donation quilts early on when I had the idea of Color Strip blocks and quilts. Maybe I only made one quilt when I first started? I don’t remember.
Anyway, I have a lot of green scraps and I am getting down to the odd shapes. I have made about 50 green strip and chunk blocks, but the strips don’t last forever. Eventually, I need to make some improv tops with the weird shapes, like I am still working on with the grey and black improv tops. I am at that point, probably with the green. I am still eeking out a block or two, but they are becoming more chunky and less strippy.
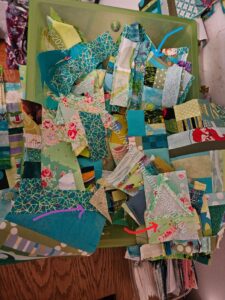
My drawer looks like this. I position the drawer I am working with by my sewing machine so I can grab some pinned pieces as leaders and enders while I work on other projects.
In the photo, I have added some arrows to help you navigate. The blue arrow in the upper right shows pieces that I have sewn, but are not yet pinned to any other pieces. They have already been trimmed and are ready to be pinned to something else.
In the bottom right pile, those are larger pieces that I have pinned together or pieces that probably not going to be used in a green donation quilt, like two triangles that will make a half square triangle and be added to the HST quilt I have in the back of my mind.
The purple arrow, bottom left, also shows pieces that have been pinned together. These are pieces that are generally smaller. They can also be the first two pieces I am sewing together. They will be added to something later. The small pieces get lost easily, so I like to keep them were I can see them.
The area with no arrow on the top left is a pile of pieces that are not yet attached to anything. I can use these to sew to something else.
It seems to take forever to clean out one of these drawers. I haven’t even made a new green quilt yet, though I am still sewing. Soon!
I find that sewing small pieces into larger chunks makes them easier to use. My scraps are really small. What I consider to be yardage, others consider to be scraps. You have to decide what constitutes scraps for you and work out a system that works. These drawers work great for me. I probably couldn’t tolerate more scraps than I have and scraps make great leaders and enders.
**N. B. : Obviously, you should shop at local quilt shops and small businesses. However, if you are too busy or can’t find what you need there, I use Amazon affiliate links and may be paid for your purchase of an item when you click on an item’s link in my post. There is no additional cost to you for clicking or purchasing items I recommend. I appreciate your clicks and purchases as it helps support this blog.
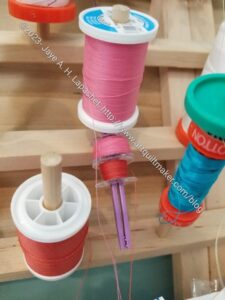
I have never liked storing thread on the wall, but I saw this positive aspect to storing thread on the wall. I know this is an extreme close-up, but the wooden part is a wooden wall mounted storage rack**. The storage rack in the link is not the exact one shown in the photo. The one in the photo is just an example. There is thread on it and a bobbin minder** holding bobbins.
I love the bobbin minder idea! It is really a great way to store bobbins so they stay with your thread. Then when you take the thread to do, you can take the bobbins on their minder and go to class or retreat.
**N. B. : Obviously, you should shop at local quilt shops and small businesses. However, if you are too busy or can’t find what you need there, I use Amazon affiliate links and may be paid for your purchase of an item when you click on an item’s link in my post. There is no additional cost to you for clicking or purchasing items I recommend. I appreciate your clicks and purchases as it helps support this blog.
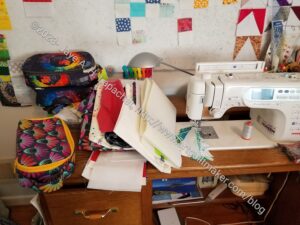
All I can say is what a mess! I have just been dumping projects on my cutting and sewing tables, then leaving them. I have been busy and haven’t had a chance to sew, so the piles just grow.
Part of the problem is that I don’t have enough space store in process projects. That pile of interfacing right next to my sewing machine are some half cut bags that Angela gave me. I know I don’t need to make them, but I really like the design. I should just get them done and out of the way. I haven’t yet.
Any clear surface becomes a dumping ground lately. I try and keep everything clear, but it hasn’t worked for the past little while. I’ll have to tidy up sometime.
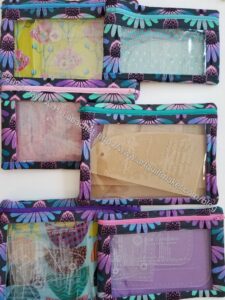
After writing the last I Spy post, I decided to take a look at the I Spy pouches I had made. I didn’t pull all of them as some are in project boxes with the supplies for projects I want to make.
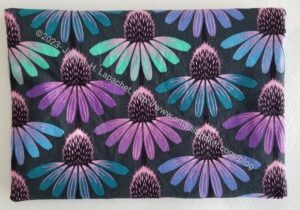
I was surprised to find that most of them were made with the same coneflower colorway. I have other colorways. I thought I had used multiple colorways to make these, but I have stuck mostly to the one. Interesting.
I quickly cut more pieces for another I Spy and finished it over the weekend. I think I have a sewing routine for this pattern down pat now.
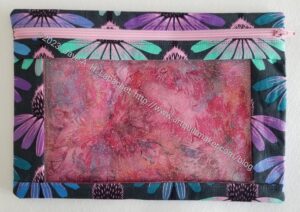
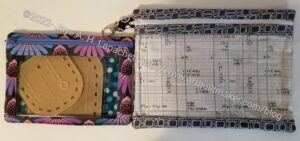
One of the reasons I made this one is that I liked a piece of fabric I pulled for the Pink Strip donation quilt back. I decided to use it for the lining, which shows up nicely through the window. It is a good way to be able to see a fabric I enjoy.
This one will replace the one I gave as a gift. It will hold the Friesan Pouch acrylic templates. I’ll save the Grey Cross I Spy for something else. I kind of like having all of my acrylic templates in pouches that match.
I was pleased to see that I lined up the top strips around the zipper very well.
I just love making these pouches, as I have said a million times.
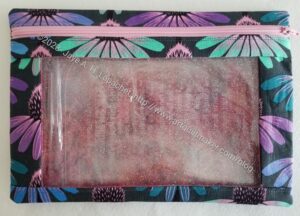
Yes, I made another I Spy pouch. I don’t like this one as much. It doesn’t feel as substantial as the last one and I am not sure why. It has to be the fabric. It is an Art Gallery fabric, which I really like, but I don’t think it is right for this project. Since I am storing acrylic templates in them, then need a little heft.
This doesn’t mean it is terrible or anything and I do like highlighting the lining fabric through the window. It is like a fun prize. I’ll probably use this as a gift.
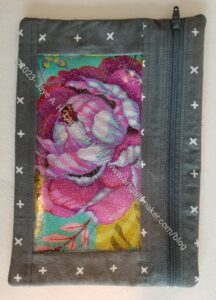
This is the small size. I also use the glitter vinyl. I like that glitter vinyl. Not only is it easier to cut, but it is fun. It does make the peony look a little blurry in the photo. It doesn’t look like that in person.
I went on another organizing rampage this morning. I decided to gather all the fabrics and supplies for several bag projects I have planned. This task has been on my list for awhile, so I decided today was the day. In the course of this effort, I tidied up some project bins that were stuffed full of fabric, patterns, etc.
In one of the project bins I found two of the smaller, completed Crafty Gemini Organizer Club projects. I know I left them there so I could put them together with the last two projects. The last two projects, the Retreat in a Bag and the Ultimate Project Bag have not yet been made, but are on the list. Thus, they were two of the projects for which I gathered supplies and materials.
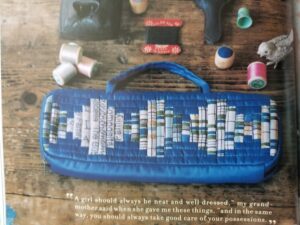
One of the projects I found, which will be clipped into the Ultimate Project Bag was the Roadtrip bag (right, photo above). Seeing this project again made me think of the templates for which I made a number of pouches.
The Roadtrip bag (pouch) was not used for the templates, but it could be. It looks very similar to the I-Spy pouch by Sew Sweetness (left, photo above), which I did use for the templates. Not counting the size differences, the main difference is the side strip on the Sew Sweetness bag. I made several of the I-Spy pouches for acrylic templates.
The reason I am talking about these is that I thought I would make a larger one, adjusting the size, to suit two sets of templates which don’t fit in the sizes given in the pattern.
The Sew Sweetness I-Spy pouch comes in 3 sizes. The largest size is 10.5 in x 8.5 in high, which is great except that it will not fit the larger templates that need a home. I want to make a pouch for the Chickadee Backpack templates I bought last year when the pattern came out. The templates need a pouch that is about 8 in by 19 in.
I know I talked about the bag from Natural Patchwork**, which I still want to make, but I don’t think today is that day. I do like the idea of handles (makes me think of the Grab & Go pattern, also from the Minikins patterns) and I may use foam instead of batting since the templates are quite large and I don’t want them to break.
What did I gain by today’s organizing effort? 1. I have everything ready when I decide to cut new projects out; 2. I have zippers on order, which weren’t already in my bin of zippers; 3. I have more of an idea for securing some templates; 4. Bins with less junk in them.
**Obviously, you should shop at local quilt shops. However, if you are too busy or can’t find what you need at quilt shops, I use affiliate links and may be paid for your purchase of an item when you click on an item’s link in my post. There is no additional cost to you for clicking or purchasing items I recommend. I appreciate your clicks and purchases as it helps support this blog.
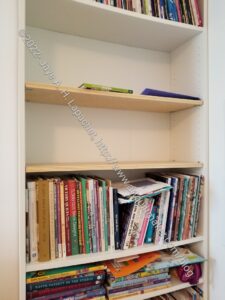
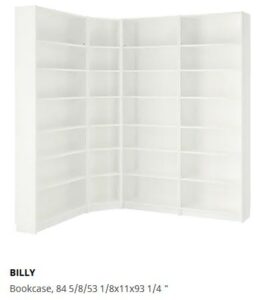
I am disappointed in the IKEA bookcases I bought. The Billy bookcases are very popular with a lot of people. I liked the options, look and feel.
What I found, however, is that the 66 lbs each shelf is supposed to hold isn’t true. The shelf holders are very substandard and have damaged the inside of my bookcase sides.
The shelves involved are the ones I can easily access. Those are the shelves I use for my block dictionaries, class related references and color books. I use these particular volumes all the time.
My DH looked at it and had a plan to fix it. He is really busy, though, so I called my handyman. After taking a look, he brought some new L brackets and some new Fir shelves to try. I installed them. They look ok. Not bright white like I wanted, though we will paint them if we decide they are the ones.
They work ok and the bowing of the outside pieces has stopped, but I lose and inch or two that I need, so I can’t fit the books on one whole shelf. I put the books sideways, but that doesn’t help me much since I can’t see the spines.
DH checked Home Despot for other shelf holders and we have a few options. I am really annoyed that these shelves have only lasted for one year. Yes, I have filled them full, but each shelf is right around the max weight, so they should work fine.
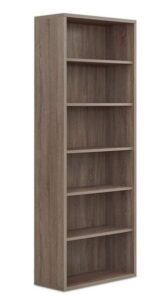
One option I have is to get bookshelves built out of wood rather than particle board. My handyman told me about a place in the City that will make custom shelves. Stay tuned.
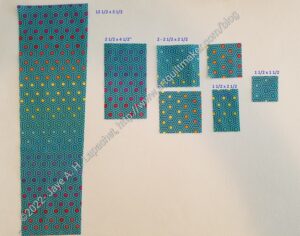
I finally figured out what I was cutting during 2022.
This guide details many fewer pieces than previous years. I have a lot of pieces I have cut and need to make into quilts, so I am scaling back.
3 1/2 x 12 1/2 – this piece is for the Half Hexie Star quilt
2 1/2 x 4 1/2 – blue gradation quilt
2 1/2 x 2 1/2 – FOTY 2022
2 1/2 x 2 1/2 -I cut 2 1/2″ squares to have them handy in case I need them. I can’t seem to give it up.
1 1/2 x 2 1/2 – pieces for another Scrap Dash. I am not sure I am cutting all the pieces I need to be ready.
1 1/2 x 1 1/2 – More for another Scrap Dash
I am not sure what happened to cutting charts for 2020 and 2021. Can we blame that on COVID? Based on my 2019 cutting chart, I may need to cut more for the pink gradation quilt. I also need backgrounds for the Spin Wheel quilt, which I’d like to get off my to do list this year.
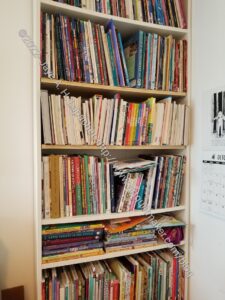
I spent time filling my shelves and emptying boxes. The boxes went out with the recycling (except for some DH hid from me) and my shelves are now filled with my quilt books.
I am really happy that my books are more accessible. Before, some of them were on the floor in big stacks, which was not conducive to browsing.
Last week after I had done some of the work, I spent time leafing through some of the books that were more accessible to me. I also leafed through some while on work calls, though I have to be careful, because I tend to tune out work and focus on quiltmaking, which is not what they pay me for. 🙂
Before this whole workroom redo I had collected books, run out of space which meant all the books on one topic were scattered. As I was putting books in boxes, I made an effort to arrange them so that like books were together. All quilt history in a group of boxes, all art quilt books in other boxes. This made it easier to shelve them all together when I unboxed everything.
The very top shelves are less useful *to me* because I can’t reach them without a stool. I wanted them (the top shelves are add-ons to the Billy bookcases not part of the shelves) for two reasons. First, stuff will get crammed up there anyway, so I might as well have a shelf. Second, dust. I prefer cabinets and bookcases to go to the ceiling because that open space just becomes a dust collector. With these shelves, I put books and stuff up there that I don’t access often. For the books housed there, they may be candidates for weeding in the future. We’ll see.
My shelves are not 100% crammed full, which is great. I am glad to have some growth space. I do feel like there are a few books missing, so there may be another box somewhere.
Next project is to put up the design walls. I want to work on some quilts again soon, not that I am short of bag and other projects, so I can mark some fabric off my ‘fabric used’ list. DH is busy with clearing out his parents’ house (still) so I have to fit this in or get the handyman in.
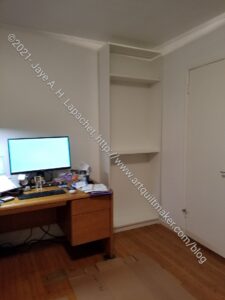
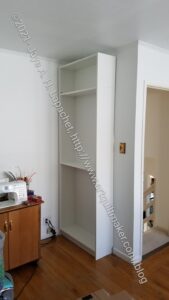
DH came home from the football game Saturday night and put together the second shelf. My room has that new paint or furniture smell again and is a complete wreck.
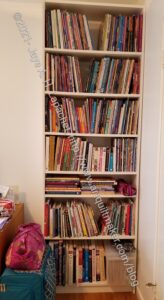
I really like the clean, white look of the bookcase next to my desk. It is beautiful. It is also a lot better than a pile of cardboard boxes.
Cardboard boxes don’t just magically unpack themselves, though I wish they did. The rest of the room is a wreck. I have a lot of work to do reshelving books and arranging stuff on the shelves.
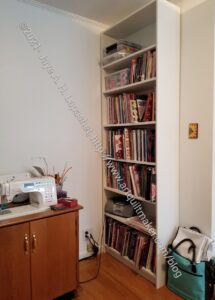
DH has to get some anchors, so I am not allowed to stand in front of the bookshelves during an earthquake for the moment.
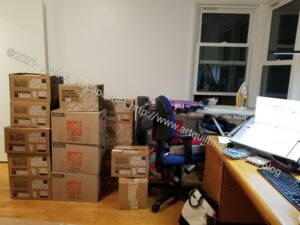
See that computer set up in the picture (above right)? That is where I spend my days. That particular computer is my personal computer. I swap it out for my work laptop at about 8am every morning. One reason I need to clean this area up is that I have to get that blue chair out from the boxes, so I can “go to work” on Monday. Currently, it is stuck behind some of the boxes because we quickly moved the boxes out of the corner of the room so DH could install the second bookshelf.
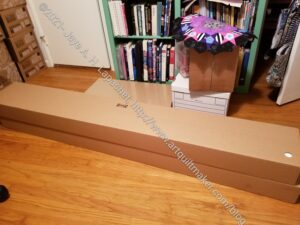
Some progress is being made on my workroom. I retrieved the purchased bookshelves about two weeks ago. It seems like an eternity.
I asked DH if I should get the handyman to put these shelves together. (I am sure they are relatively straightforward to assemble, but my shoulder can’t handle such work.) He said that he would put them together. Time went on, we went to San Bernardino ? for an event (it was a good event, but an icky town) and still he insisted he would put them together.
When DH told me he had to go work at his mom’s house over the weekend, I asked him when he was going to put my shelves together. While I was gone at Sew Day, he put the first one together. Then he came home from the football game later the same day and banged around putting the second one together. He is a really great husband.