2016 seems like a long time ago, well, it is 10 years!. That is what I came up with searching the blog. It makes sense, though as I am not using the Miquelrius journals now. I also have a recollection of making one for an older journal that got lost in the shuffle last year.
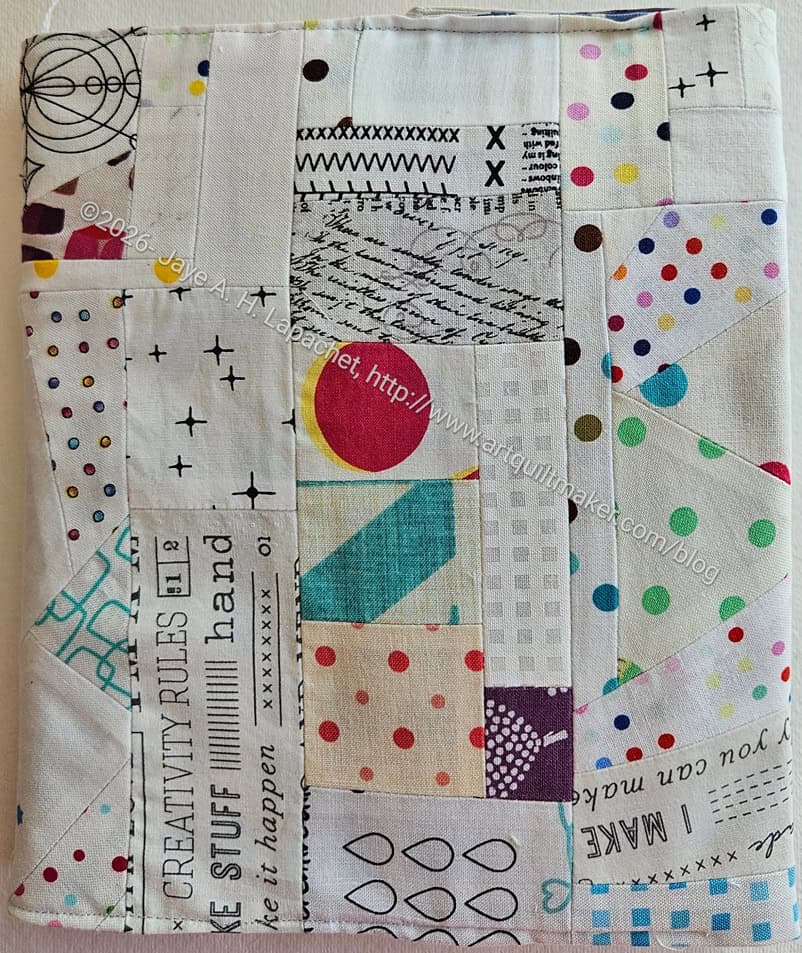
White Journal Cover #2 – back
This journal cover was actually mostly made when I pulled out the white drawer recently. I put a back (inside) on it and stuck the journal in. It was a bit small, but I made it work, since it isn’t going to be entered for any prizes. I wasn’t in the mood to rip it apart. I the fabric will stretch anyway.
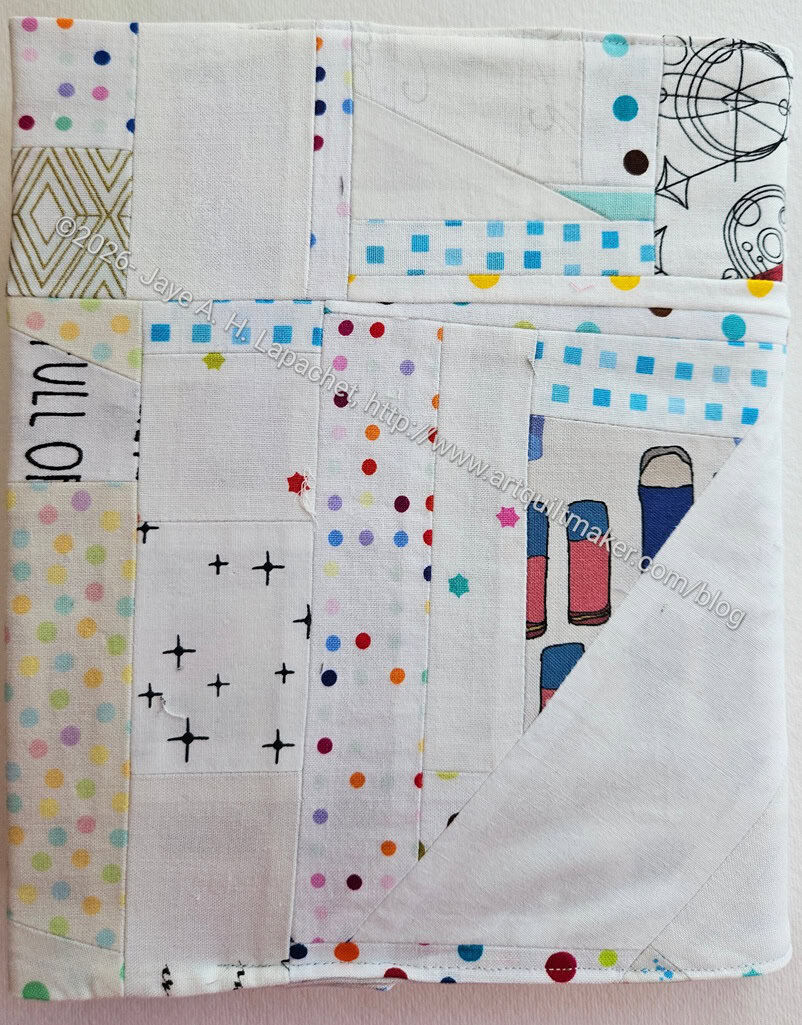
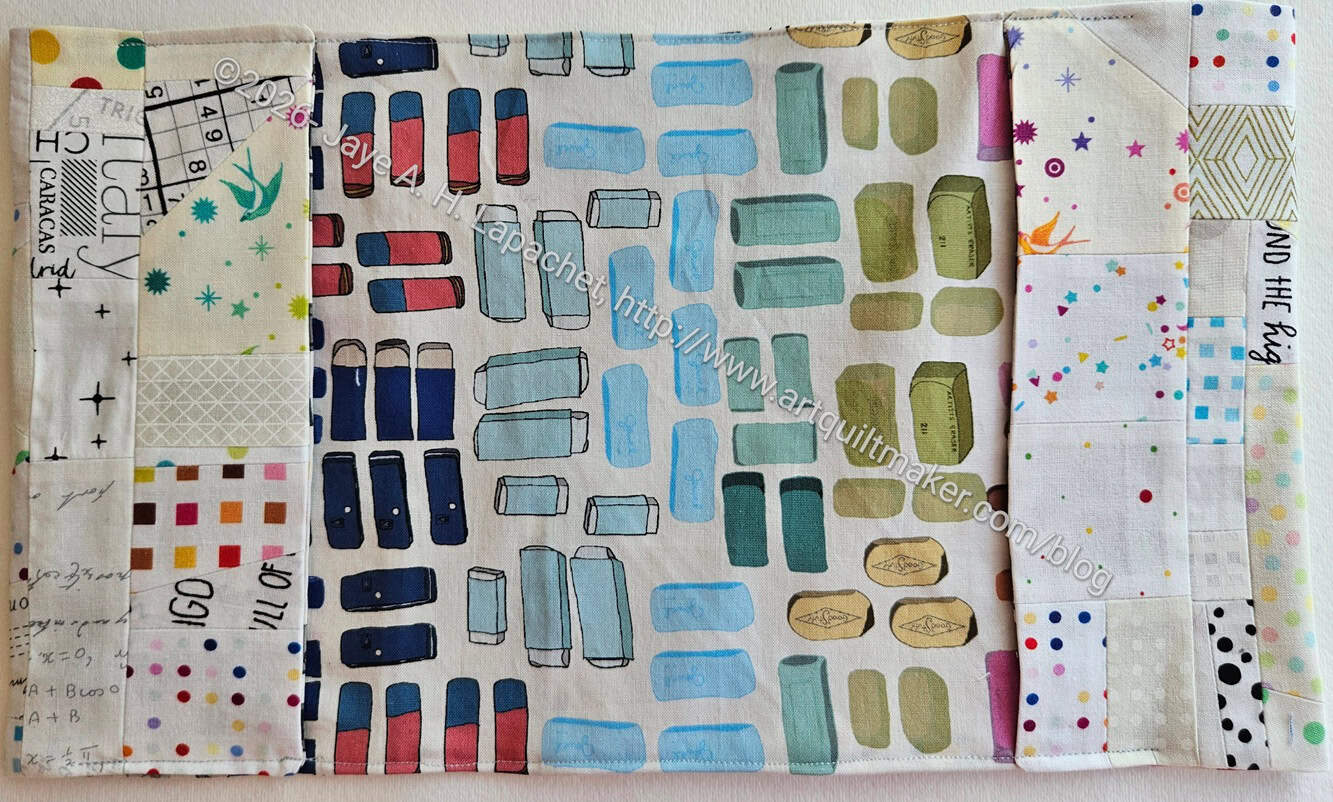
White Journal Cover #2 – inside
The inside fabric was a large piece of Crimson Tate eraser fabric that was in my scrap bin for some reason. I don’t usually put large pieces like that in my scrap bin. Who knows?
My day started off early with rain. It has been raining on and off for days. I am not complaining as we always need the rain, though I am thinking of the SoCal people who may be impacted by post-fire floods.
I didn’t frame the photo and make it IG worthy. I just snapped a quick picture to share with DH. There have bee a few indications like this one that 2026 might be better than 2025, though the news to which I woke up wasn’t one of them.
Lupine Clue 7 pieces
I had a multitude of projects with me on which to work, but I started with Lupine Clue 7. I had enough of the blue to cut all of the squares….I thought.
I thought I had gotten over not being able to count and measure, but not yet. When I got home I realized I needed sets of 8 not sets of 4, so I had to cut more squares. I used up all of the blue. I found another Ruby Star blue I bought recently while in Portland. Fortunately, the blues were the same, though the motifs were different. The new fabric was designed by Rashida Coleman Hale while the dots are by Melody Miller. I am not trying to be matchy-matchy or limit the fabrics, but I do like that blue and wanted to carry it on.
The Lupine pieces didn’t take long, so I moved on to cutting for the Enigma pouches I want to make. I only cut the foam on Saturday as I was derailed by the guild UFO Challenge drawing. I added two projects to my list, the Catalan Storage Cube and the Pandora Charisma. The Pandora Charisma is probably the hardest project on my list for a couple of reasons: 1) I haven’t made a bag by Sewfisticated before and 2) It is complicated. It is a cool bag, though and I gambled that it wouldn’t be the first one chosen. It was the first one chosen! I am sure I can at least get it started, but not sure about finishing. I am not scared of the actual sewing. I am just worried about not being familiar with the pattern or designer. Now you know why I don’t gamble with actual money.
Scraps cutting
After reading through the Pandora Charisma pattern, I started in on my scraps. My Desktop Cube for scraps is overflowing, once again. I did make progress, but my Desktop Cube is still overflowing. When I was putting all the cut scraps away, I noticed that my pink scrap drawer needs to be cleaned out. A problem for another day.
Bonnie’s Friendship Stars
There were a lot of busy people (17) at Sew Day. Bonnie was working on the BAM BOM. She was using something like the interfacing I used for the Mondo Bag. I really like her layout. It looks like scattered stars. I think having background in the center of the Friendship Stars makes them more appealing. A lot of them, though, is better than one.
Anna’s BAM BOM
Anna had her BAM BOM blocks up on the design wall as well. I think she was working on letters, too, but I didn’t get a chance to ask.
The day really flies by and I am always too ambitious about what I think I can get done.
BAM donation quilt – Jan 2026
Finally, Claire was working on a donation quilt for the guild’s community quilt project. I thought the fabric looked like men’s dress shirt fabrics. I wouldn’t be surprised as Claire is a master upcycler. The blues of the shirt fabrics is very appealing.
All in all, a good day.
N.B. Bonnie will remove the posts to which I have linked from her blog sometime in February 2026. Download or save the clues now if you want to make this quilt.
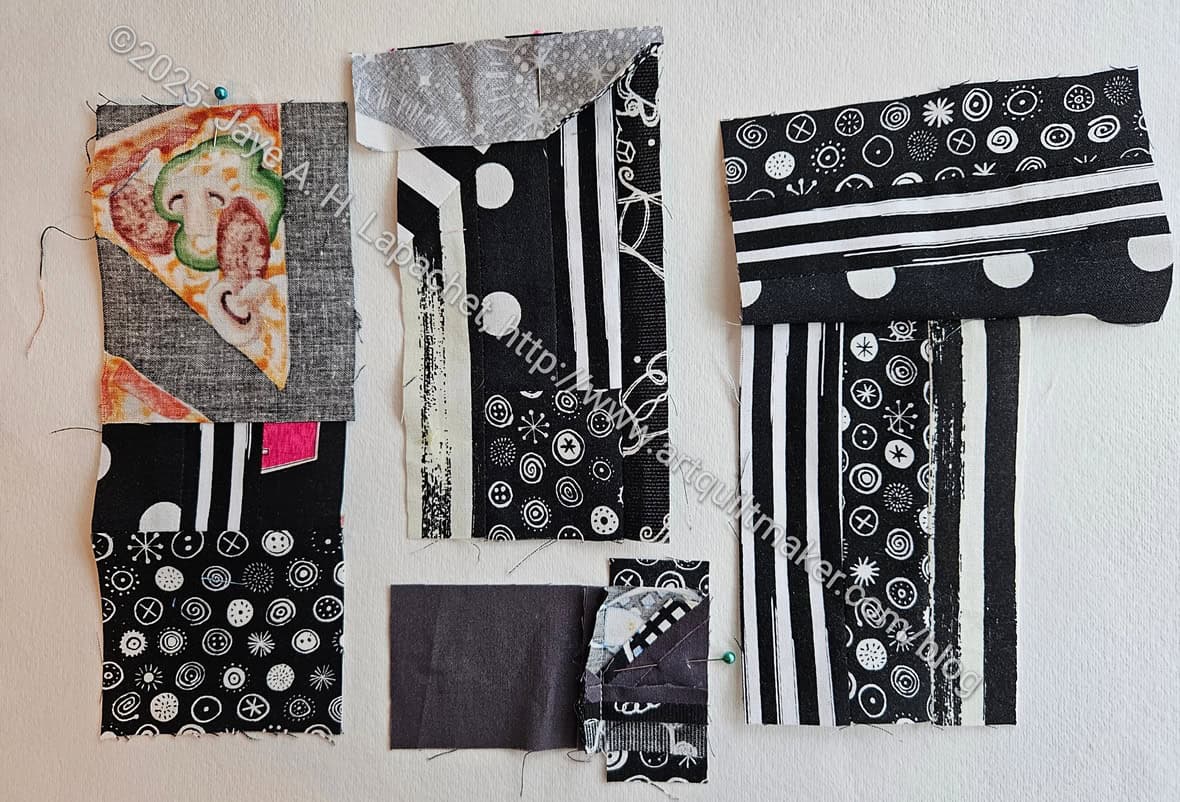
I have been working diligently on the Black Improv. Surprisingly it is getting quite large. Not king-sized or anything, but large for one of my donation quilts.
After having this piece languish for a long time, I thought it would be a chose to finish it. Even though I am not finished yet, I am having fun working on it. So many stripes!!
I am using the strips I cut for color strip blocks to make the quilt bigger and to make the piecing a little easier. I know I will make more black scraps at some point, so why not?
At the widest and tallest points in the photo above, the piece is 38w x 35l. It is getting to be the size I like giving to the Community Giving project.
Amy and I survived being MaryC yesterday! It took us longer to do the setup than it takes Mary; thank the quiltmaking goddesses that Friend Julie came early to help as well.
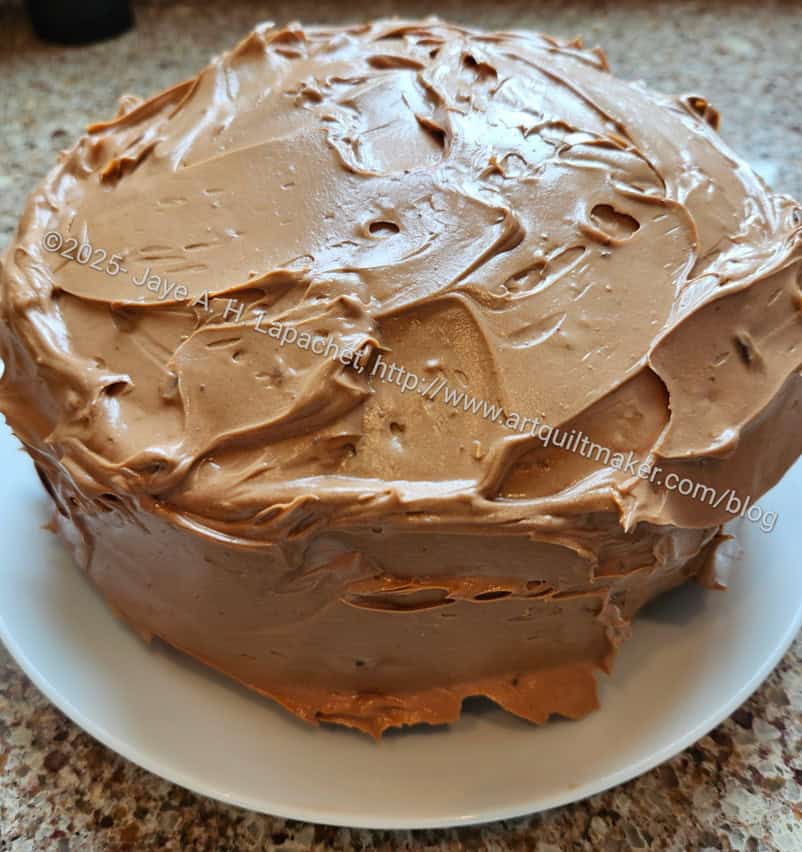
Beatty Cake September 2025
Sew Day for me actually started on Thursday. I wanted a piece of Beatty Cake and that meant making one. I did the baking of the layers on Thursday and frosted it on Friday. Friday was also the day I decided on projects.
I didn’t work on all the projects I brought along.
It occurred to me that I still hadn’t made v.2 of the hat I planned. The fabric and new pattern were already in the bag so that was one project. I also thought about working on one of the Patchwork Palooza blocks I need to make to catch up. In went the fabrics for that project (I need to clear out one of my project bags!). I also put my scrap bin, well overflowing scrap bin, in the bag. Finally, I put a few Half Hexie Star strips in so I could cut some Four Patch Fun patches.
Scrap cutting – Sept 2025
Of all of those projects, I cut out the Four Patch Fun units and worked on clearing out my scrap bin.
I made good progress on cutting the strips and random shapes I use for the Color Strip and Color Improv quilts. This time I toss out more pieces than I have in the past. I did this more at the end of the day as I was getting tired. I did it mostly with plain white fabrics. My white scrap bin is close to overflowing and the plain white fabrics aren’t interesting. I wouldn’t have done it if I didn’t know the scraps were going to fill Cubies for kids.
I also trimmed a few HSTs that I will use for something.
Scraps regular shapes – Sept 2025
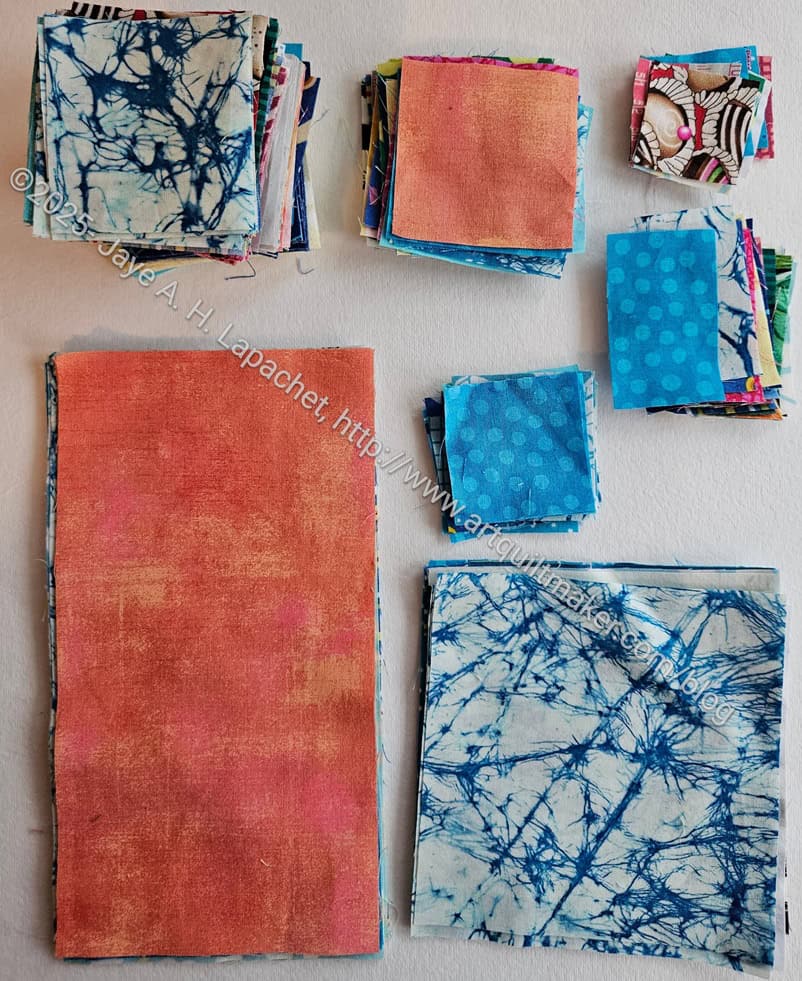
I also had large enough pieces to cut some of the regular shapes I add to my stash.
I have a tidy stack of 5″ squares which replace the ones I used for a new EPP ball. I also cut some 2.5 inch squares for my use later (left) and for donation blocks (right). Between the two stacks of 2.5 inch squares are a small stack of 2″ squares for Blue Lemonade and a 1.5 inch stack for the next Scrap Dash quilt. I did cut a stack of 1.5 x 2.5 inch squares also for Scrap Dash, but I couldn’t find them when I was ready to take the photo. I need a tray or something for transport.
I forgot to bring the donation top and back that I finished. I’ll bring it to the next event, but that is a disappointment. I wanted to keep up my streak of handing in a quilt top at each Sew Day. Oh well, at least it is made.
Cyndi’s goat quilt
Cyndi stopped by with her goat quilt. She was on the way the shower, but wanted to show us all. This quilt had 50+ pieces in each block. Cyndi used some more colorful language to describe the number of pieces. LOL!
The goats are wearing pajamas and some of the pajama fabrics have motifs that are special to the couple and will have some meaning for the baby.
The Free table was also full. Peggy brought more of Rhonda’s things to give away. I picked up some more bag hardware and may have to start focusing my bag projects on what hardware I have.
It was a fun day and I talked to a lot of people. We even had a visitor, which was nice. I hope she joins.
I knew that I wouldn’t be able to focus on cutting out a project or anything more complicated with the Community Sew Day project going on, so I brought scraps to cut. My scrap bin is more than overflowing and it was a good opportunity to fit in some scrap ‘processing’ time between working on the community quilt.
In general, I feel like I didn’t make much progress, at least from the amount of scraps in my scrap bin. What I cut doesn’t look like much, but the stack of 2.5 inch squares in the upper left is about 50 pieces and that isn’t nothing.
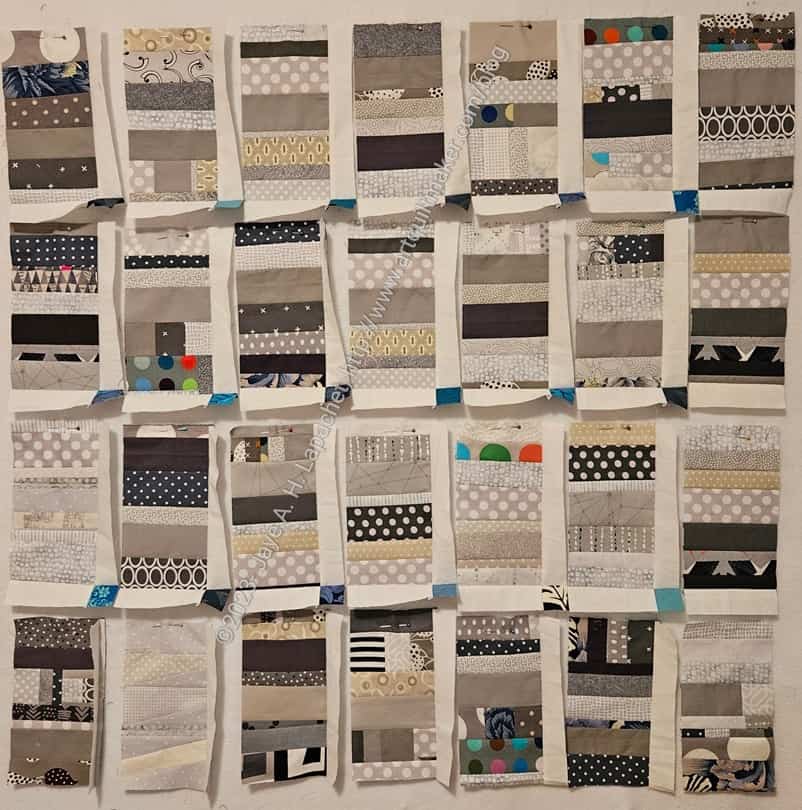
Sew Day leaders and enders
I focused on getting the blacks out of the bin so I can use them to enlarge the Black Improv top. I’ll use that as leaders and enders for a bit so that I can get it off the wall at some point in the not too distant future. I was able to make a few pieces while working on the blocks, so I am on my way.
Strips ready for Color Strip tops
As I cut, I also create strips that I will use for the Color Strip donation quilts at some point. The white bin in filling up again, even after I made White Strips #2 recently that I am going to have to delve into that bin again soon. The red and pink bins are not far behind.
You can see some of the random scraps as well, which will eventually become Color Improv tops. A white one might be next since I didn’t make one after making White Strips #2.
I always have a lot of questions when I do scrap processing. People lament their many bins of scraps. I had that, too, but had to get them all organized. It has taken me since 2011 to get into a routine where scraps go from leftovers from a project to quilts. It takes time and dedication. The joy comes from seeing how the Color Strip and Color Improv quilts come out. To date I have made 21 Color Strip and Chunk tops and 9 Improv tops. FROM SCRAPS!! That is not nothing. It’s a commitment.
I was really pleased to see this quilt come back from quilting and binding. Lee Ann did the binding. I was pretty unhappy with this quilt when I finished it, but I think it came out really well in the end.
I used the leftovers from the Angel Family pillowcases and some scraps from Melinda. I was pleased to be able to use up as much of the fabric I bought as possible.
Mom came along, but I didn’t have to do as much for her. She is moving slowly, but moving around a lot more. It is great to see her progress.
Superbloom 3 & 4 pieces
The first thing I did was cut out pieces for my next Superbloom totes. I was able to, mostly, cut out the larger pieces. That is super helpful, because of my small cutting table.
I thought I had everything in a project bag, but I didn’t check before I left. It turned out that I forgot ShapeFlex, Soft & Stable and lining for one of the bags. Oh well! I cut out as much as I could, so that is some progress. Definitely better than nothing.
I also worked on Old Town a bit. I had to line up and mark the pieces for a million Flying Geese, so I did that.
March Sew Day scraps cut
Finally, I worked on my scrap bin some more. Did I make as much progress as I wanted? No, but I never do. I had about 2 zipper bags of scraps. Now I have 1.5, so some progress.
First, I cut all the shapes I need for various projects. Not tons, but quite a few.
Scrap strips
Next, I cut strips, which will be used for quilts like the white color strip top I discussed the other day.
For some reason, I have a lot of orange. I also have a lot of grey, which will add to the grey improv top sitting on my design wall. I know they are strips and I should make some color strip blocks with them, but I want to get that grey improv top to the community quilt people. It has been hanging around for an eternity.
I also found some triangles, which I will make into HSTs for that mythical HST quilt I have on my mind.
Not bad for a Sew Day. I would have liked to have gotten more done, but what can I do?
Mary C’s baby quilt
Mary put a baby quilt together. It is Playmat – newborn size and made from two charm packs.
Mom worked on the binding of her first (!!!) quilt while chatting with Friend Julie’s mom who joined us also. The quilt has been finished except for the binding for years. I am glad she is working on it. I am also glad she has something on which to work.
Another month, another Sew Day. I spent another Sew Day cutting up scraps, just like last time. I cut a big pile and made a dent, but I didn’t finish cutting up all of my scraps. I spent about 5 hours. My scraps are still not limited to the Desktop Cube I made for the purpose, which is disappointing. They need to be contained since my cutting table is small enough without it being overrun by scraps.
Mom and Jaye
My mom came with me. Yay! She was well enough to spend the whole day out! I kept her supplied with pain medications and food. She said it went well. I kept her quiet and at home the next two days and she is doing ok. I was so relieved that she didn’t have a complete relapse. It sound ridiculous, but I can’t help but worry about her.
Tim’s Jittery Wings quilt
Tim just got back from a retreat with Mitzi of Jittery Wings. He came over the other day to use my design wall and continued that work at Sew Day. His quilt is a whole bunch of HSTs and Flying Geese. Sounds like Old Town, right? LOL!
One thing I love about HSTs is how many different designs quiltmakers can sew using only HSTs. Of course, as I said, Tim’s quilt has whole bunch of HSTs and Flying Geese.
Mary’s Crisp Blue quilt
Mary was working on a quilt for a friend going into the hospital and it looks so crisp.
This is a simple Rail Fence design. She used a couple of jelly rolls she had and it looks so great! I also like how complex it looks. I just love block quilts. 😉
The guild was having a Community Sew Day. People worked on a variety of different designs. I cut up my scraps, as noted above, and didn’t participate there. I couldn’t bring Mom and my machine. I just wasn’t up for it. I did, however, bring Orangeade and several donation blocks. I definitely want to contribute but I don’t need to do it at Sew Day.
One of the quilt tops they worked on was similar to the Infinity Quilt I made for one of my nephews.
Community 9 Patch quilt
Claire is a great one for rescuing usable fabric. She had a group of men’s shirts and people were working on 9 patches out of that beautiful fabric. The fabric was very soft and had a nice weave. I don’t know what the ultimate design will be, but it will work very well for a boy or man once it is finished.
Mom was sitting across from Lynette who was working on these blocks. I wanted her to sit at the other table so she had some new people with whom to talk. I am sure it is boring just talking to me all day.
Community quilt design
The other design was similar to Mary’s Rail Fence. I couldn’t figure out why this was a such a weird shape. I think the rectangles were actually made in two parts, but I really don’t know.
Anyway the Community quilt team did a great job prepping for the event. There were a lot of people at Sew Day, which was nice. Mostly, I was pleased that Mom had a good time and was able to get out and see the world.
The other day, I wrote about what I accomplished at Sew Day. I worked on cutting up scraps into shapes and sizes I need for future projects. A big blob of unorganized scraps makes me anxious. It also takes up a lot of space on my sewing table.
I generally keep a list of shapes I need/want to cut from scraps and yardage on my cutting table. This list includes shapes I use all the time such as 2.5 inch squares as well as special pieces I need for certain quilts.
As part of my preparation for the 2025 quilt- and bagmaking – year, I looked at my list of shapes. I found that I didn’t update my list in 2023 or 2024. That was the first step. This year, I will cut a variety of shapes for projects known and unknown.
As usual, I will cut 2.5 inch squares. I find I dive into those bins pretty frequently. Old Town needed a bunch of 2.5 inch squares. I didn’t need to cut any, because I had the right colors in my 2.5 inch bin.
In general, however, I cut two sets of 2.5 inch squares. One is for my own projects, like Old Town, and the other is for donation blocks. Often, when I cut from scraps, I cut one for myself and several for donations. It depends on how big the scrap is and how much I like the fabric.
I like the donation quilt I made with 4.5 inch x 8.5 inch rectangles, so I am collecting more of those. I am not cutting those sizes from yardage. I only cut these when I have large scrap. I do get them sometimes.
I am also still cutting 2 inch x 2 inch cool colors for Blueberry Lemonade. I really need to start making that quilt. I probably have enough squares to make two quilts!!
When I find scrap triangles, I make them into HSTs. I have a lot of randomly sized HSTs. I plan to put backgrounds strips around each unit and then put them all together into a quilt.
I also cut 5″ charms. I haven’t dug into them as much, but they also come in useful. I will dig into them to make the sashing for Old Town.
I have to be more diligent about cutting for the Spin Wheel quilt. This pattern is the Fons & Porter Spin Wheel, 1200 series, episode 1201. I need to work on gathering background fabrics, which are the triangles, but I can use squares and then cut the triangles.
2.5 x 4.5 blue rectangles for a Blue Rectangles Gradation quilt. You can see some thoughts about this quilt on a recent ‘Dream’ post.
I also cut 2.5 x 4.5 pink rectangles for a Pink Rectangles Gradation quilt. I have a lot of these rectangles as well, so I should get on this quilt also.
This seems like a lot of work and, to some extent it is, but it is also useful. For me, it is pre-cutting or processing. Cutting is my least favorite part of quiltmaking, so having shapes already cut is great for me.
I was over at Tim’s the other day for an impromptu Sew Day. Yes, I have a million holiday related things on my to do list, but who cares? It’s sewing! How could I say no?
He was tidying up after finishing a couple of quilts while I cut out more bags that will be gifts. In the process, he found a lot of scraps.
Tim’s chips
He described creating “chips” to me. This is a method to use up scraps. It is based on strips and called Stashbuster #7 on the Just Get It Done Patterns page. He created some ‘chips’ while I was there. (photo, left) . The process went pretty fast, because he found pieces with straight edges and sewed them together. Like everyone, Tim has a palette, so with a little juggling of fabrics, his strip sets went together well.
More of Tim’s chips
He sent me a photo the next day with a few more chips. I think he is close to having enough for a baby quilt. I don’t have a good sense of the sizes, so it is hard to tell.
I think this process can be done as leaders and enders while you are working on something else.
What I noticed about the Just Get It Done Patterns page is that there is a pattern as well as a video AND a coloring page. Perhaps you just want to color and relax that way? Great idea.
Tim commented “I sew the pieces together and trim them to 1.75 x 4. [To do that,] … I measure 1.5 from the seam and trim before I open and iron. More accurate.” This is interesting. I never thought of measuring before I opened and pressed the strip sets. Interesting. I’ll definitely try it when I made one of these quilts.
This might be the perfect project when you are busy or can’t concentrate on something complicated. It looks complicated, however, so it satisfying.
Tim’s finished chips quilt -2019
Tim showed me the finished version he made back in 2019 or so for friends.
I like the addition of the squares. It breaks up the rectangles.
This is the great thing about being a member of a guild. As much as I try, I can’t watch every video or see every pattern. Having quilt friends do some of the work is a boon.
Back in April I started cleaning out my green scrap drawer. While I didn’t work exclusively on this project, it was a constant companion. I made progress through the summer. Finally, I have cleaned out my green scraps as much as I can. The pieces left, which I have sewn together, are not big enough to make anything, but will be the basis for a Journal Cover or the next Color Improv donation quilt.
Of course, this clean and clear state of affairs won’t last for long. As I work through other projects, this drawer will fill up again in a never ending cycle. It’s the nature of the beast, I guess.
Green Strips Donation top #2
Green Strips #3 donation top
Green Improv #2 (The Swamp Thing) top
The good part is that I made a few quilts, mostly from the scraps in this drawer, for people in the community. These aren’t super large quilts (approximately 40×40 inches), but there are still three of them. These three help me meet my goal of 12 donation tops for the year.
In another part of the never ending cycle, I need to decide which color is next. I might want to work with blue, for example, but really need to choose the drawer that is the fullest.
Slowly, but surely I am making progress on this green improv donation quilt. I am exclusively using it as leaders and enders so I can finish it for the guild Community Quilts project.
It is about 40 inches wide and I want to make it that long as well. That is about the minimum useful size for a baby quilt, I think.
It is fun to remember quilts and bags I have made with the various fabrics in this piece. I am pleased to be cleaning out the random bits of green, but it is hard going. Piecing ‘made’ fabric takes time.
I am making good progress on the Green Strips donation top. It might be a little hard to see, but I am sewing sashing strips to the blocks. I have some of the top sashing cut, but haven’t decided what color to use for the cornerstones. I keep thinking red as that is opposite to green on the color wheel, but I don’t want a Christmas look at all. These blocks remind me of a leafy green tree and I want to keep that feeling. More green, I think. Or a blue tending towards green.
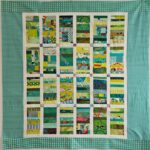
I have shown some of the green scrap blocks I have been making in the May Donations blocks post. I am sure you have seen the other blocks and quilts in different colors I have made in other posts.
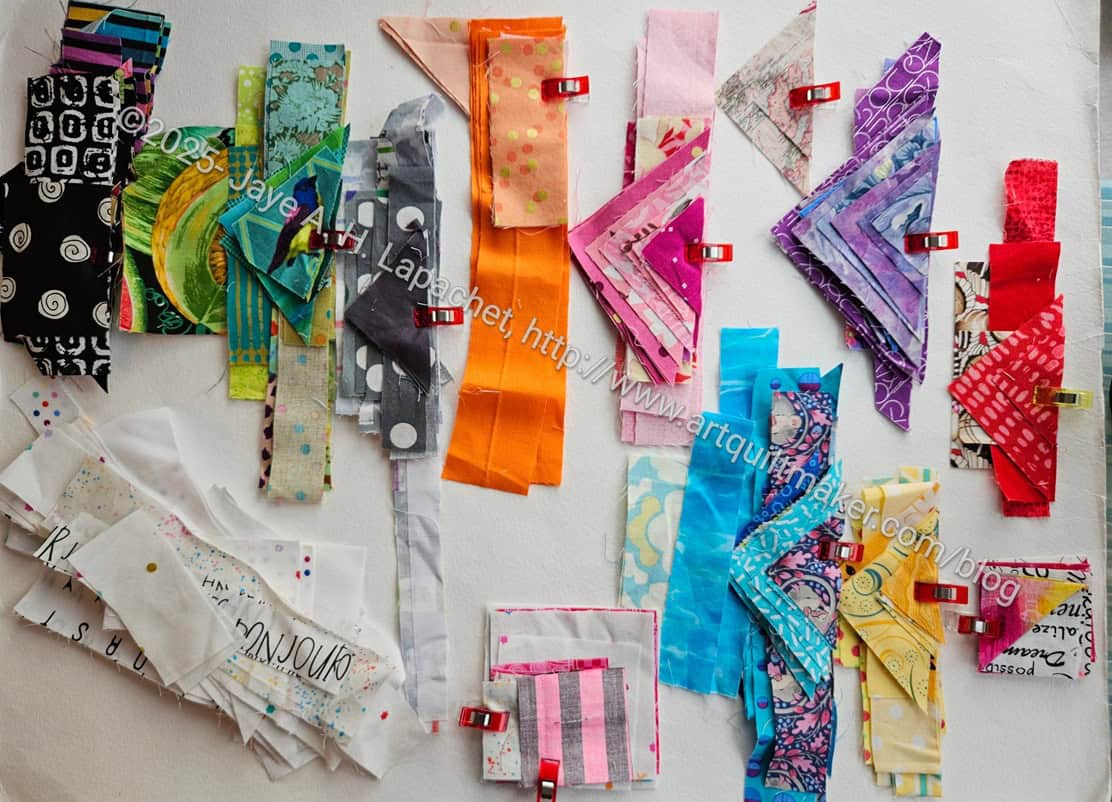
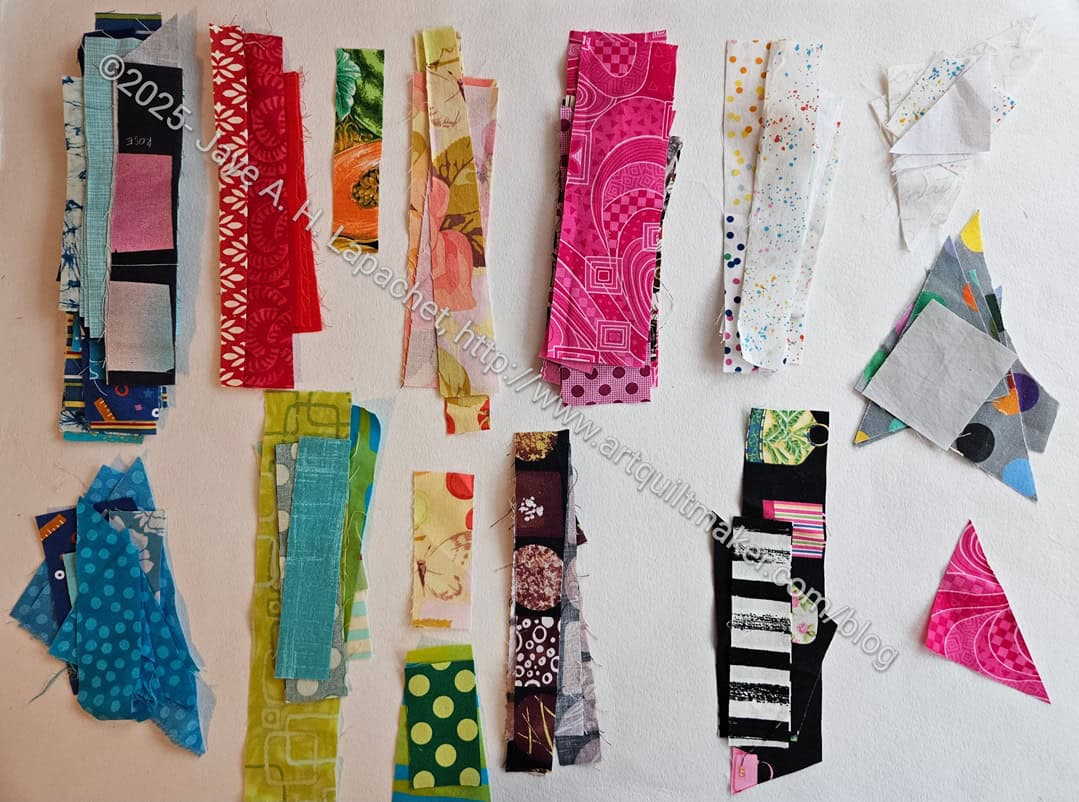
My scraps start out in a pile on my cutting table. I have talked a little about the processing of scraps that I do. After I cut the pieces I need for future projects, I cut strips and then leave whatever is left and large enough as is. The goal is to not have too many scraps, but the scrap drawers do fill up.
Rainbow Cart Double – 16 x 10.8 x 26.5 inches
I store my scraps in a cart with rainbow drawers**. This is very handy, because it makes sorting scraps and finding scraps easy. Also, it looks nice. It is on the small side as my workroom is not very large. The drawers can fill up quickly and my process is to work on a drawer that is getting to be too full. I know it is too full when I start to have trouble opening it.
Green is the most recent drawer I have been trying to clear out. I was surprised to find how many green scraps I had. I can really think what I have made with so much green. I made some green donation quilts early on when I had the idea of Color Strip blocks and quilts. Maybe I only made one quilt when I first started? I don’t remember.
Anyway, I have a lot of green scraps and I am getting down to the odd shapes. I have made about 50 green strip and chunk blocks, but the strips don’t last forever. Eventually, I need to make some improv tops with the weird shapes, like I am still working on with the grey and black improv tops. I am at that point, probably with the green. I am still eeking out a block or two, but they are becoming more chunky and less strippy.
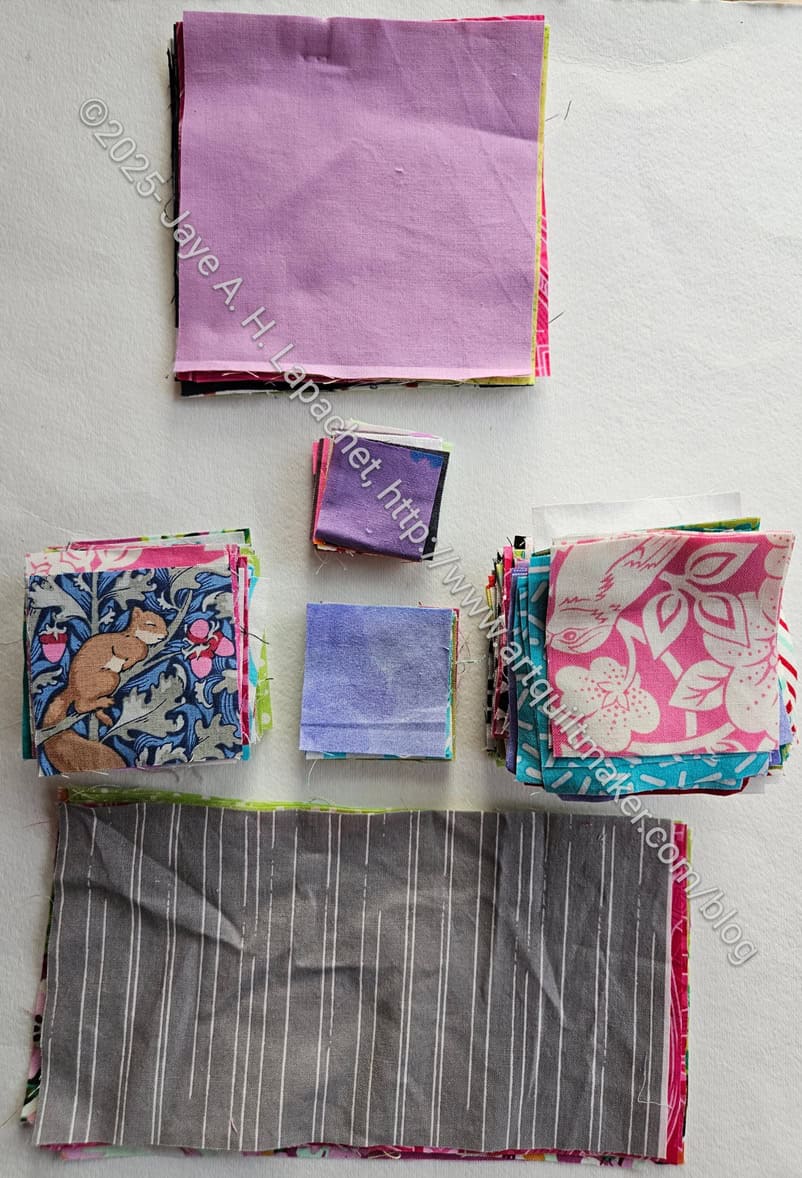
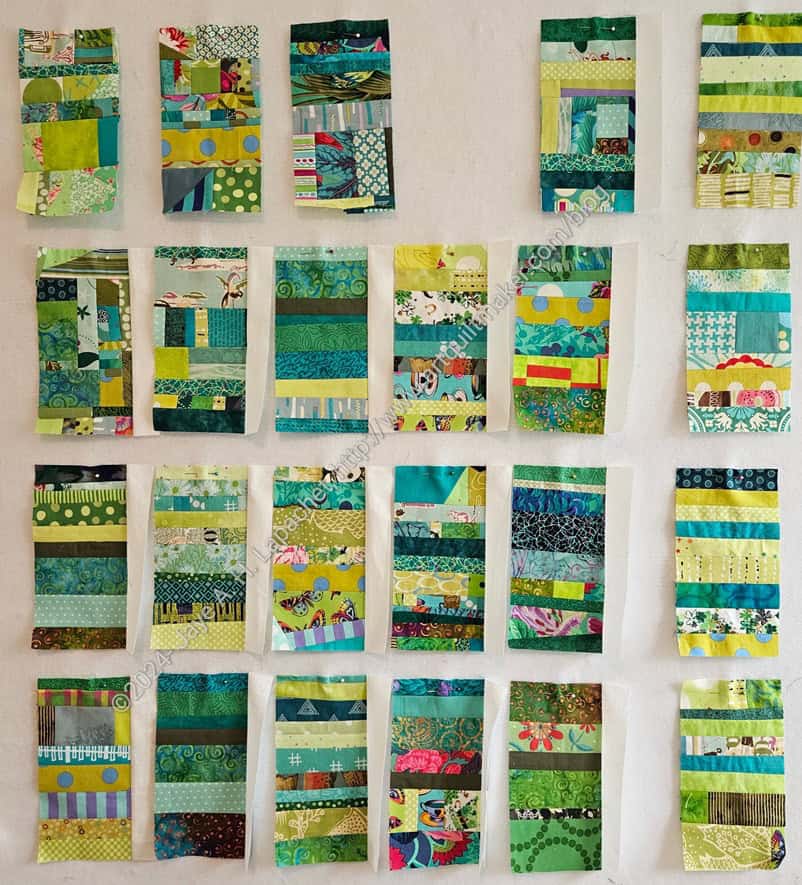
Green scrap drawer – June 2024
My drawer looks like this. I position the drawer I am working with by my sewing machine so I can grab some pinned pieces as leaders and enders while I work on other projects.
In the photo, I have added some arrows to help you navigate. The blue arrow in the upper right shows pieces that I have sewn, but are not yet pinned to any other pieces. They have already been trimmed and are ready to be pinned to something else.
In the bottom right pile, those are larger pieces that I have pinned together or pieces that probably not going to be used in a green donation quilt, like two triangles that will make a half square triangle and be added to the HST quilt I have in the back of my mind.
The purple arrow, bottom left, also shows pieces that have been pinned together. These are pieces that are generally smaller. They can also be the first two pieces I am sewing together. They will be added to something later. The small pieces get lost easily, so I like to keep them were I can see them.
The area with no arrow on the top left is a pile of pieces that are not yet attached to anything. I can use these to sew to something else.
It seems to take forever to clean out one of these drawers. I haven’t even made a new green quilt yet, though I am still sewing. Soon!
I find that sewing small pieces into larger chunks makes them easier to use. My scraps are really small. What I consider to be yardage, others consider to be scraps. You have to decide what constitutes scraps for you and work out a system that works. These drawers work great for me. I probably couldn’t tolerate more scraps than I have and scraps make great leaders and enders.
**N. B. : Obviously, you should shop at local quilt shops and small businesses. However, if you are too busy or can’t find what you need there, I use Amazon affiliate links and may be paid for your purchase of an item when you click on an item’s link in my post. There is no additional cost to you for clicking or purchasing items I recommend. I appreciate your clicks and purchases as it helps support this blog.