Mrs. K’s Spiky Top

Mrs. K's Spiky 16 Patch Top
Mrs. K’s Spiky 16 Patch Top

I told you about Mrs. K’s Spiky 16 Patch blocks some time ago. Not long after, she sent me a photo of the quilt she finished.

I love it! I wouldn’t have chosen that gold, but it is fabulous. did you notice the triangles forming a circle around the center – or suggesting the center? I love that!

Also the corners are highlighted, which is fantastic as well. Great job all around.

I need to get back to my units. I have a bunch of 16 patch blocks and HRTs made and haven’t made anymore of the spiky blocks.

Finished Quilting: Christmas Mat

Christmas mat quilted

As mentioned the other day, I finished longarming the Christmas Mat.

I am pleased with the design and pleased that all I have to do is bind. Friend Julie thinks that a red binding would work. I agree, which means rummaging around in the my reds to find the right one.

Now I have two things to which I need to make and apply binding.

Christmas mat detail

Undercover Maker Mat Finished

Undercover Maker Mat finished

Hooray! The Undercover Maker Mat is complete!

My plan is to use this mat at Retreats and Sew Days. I tend to put the tools I am using on the right side of the machine so they are easily at hand and don’t interfere with the fabric ‘products’ on the left. This works relatively well, but at Retreats, things can get knocked off the table or I don’t really have space to put tools in their usual location.  It won’t really work at home because I have a cabinet even though I could use it since I don’t have a lot of space on the right side of my cabinet.

Undercover Maker Mat with portable table finished

I didn’t adjust the size at all, though I thought about it. The size of the mat, as you can see, fits my machine pretty exactly. I decided that my portable table didn’t need a mat underneath it. I also didn’t want a giant thing. It is usually better for me to make adjustments after I have made the project according to the pattern at least once.

I think that this item will be a good gift as well.

Bubble Pod

Mrs. K's Bubble Pod
Mrs. K’s Bubble Pod

Mrs. K, an avid and valued reader of this blog, gave me a gift last week. It is kind of  thread catcher. She called it a bubble pod.

Mrs. K said that the pattern is by Beth Studley. She is, apparently, a UK designer, but the pattern is PDF, so easily downloadable even if you have pay in pounds. With holiday swaps coming up, this would be a great choice for a small project.

Bubble Pod, close-up

It is really cute and great for catching threads. I think it would work on a sewing machine mat instead of the cup shapes that are often suggested.

She chose some very fun fabrics – the grey is a Tula Pink and the inside is a wonderful.

Thanks, Mrs. K!

Longarming Again

Last year I bought fabric to make a Christmas mat. The intention is that we will lay this mat on the floor and put our Christmas tree on it.

HQ Amara
HQ Amara

I was supposed to work on it and finish it last year, but stuff happened and I didn’t do it. I was able to use a friend’s longarm last week and I got the thing quilted. It isn’t finished.

My friend has a new HQ Amara on a large frame. I was excited, but also apprehensive as it has been a long time since I longarmed anything.

Quilting the Christmas Mat

My intention was to free motion, but I ended up decided on a computerized pattern. Since the fabric is just one length of yardage – no piecing it didn’t seem necessary to spend a bunch of time on it. I thought choosing a computerized pattern would make the process go faster. Overall it took us about 2.5 hours to quilt a 41 x 44 inch sandwich. My friend is still learning and the software isn’t as intuitive as I expected it to be*.

Quilting the Christmas Mat

We both worked on it and I was finally getting the hang of moving the quilt from a finished line of quilting back to the right to start the next line (no, it doesn’t do it itself) when we finished. I was glad to finish, because it was exhausting. I am VERY grateful to my friend for helping me quilt the thing and also for just getting another project quilted.


*SIL n.2 and I have discussed how longarm computer software manufacturers don’t have the market to make really great software. If longarm software sold as much as something like Microsoft Word, then there would be more development, but the market just isn’t that large. It is a shame, but business is business.


Undercover Maker Mat Continues

I spent some time away sewing this past week with Friend Julie. I didn’t get to sew as much as I thought I would because I had some social and professional obligations to conduct as well. Still, I made progress and that is a good thing.

As mentioned the other day, I started the Undercover Maker Mat along with the sew-a-long going on @Lillyellasworld. Julie worked on it, too, and spurred me along. I always feel discombobulated when I sew somewhere else, but I got myself together and started working on the pockets.

Undercover Maker Mat fabric tryouts

I had dome some work on them, but hadn’t finished the big pocket piece. I threw in a bunch of fabrics, so I would have some options if what I thought would work didn’t end up working. That was a good idea as I had to play around with fabrics until I got a combination I liked. My first group of fabrics is shown above. Somehow I found it to be too light or too much of the Michael Miller London Portfolio fabric. I also wasn’t sure about the turquoise binding.

Test group of fabric for Undercover Maker Mat

I decided on the above combination. It has a good amount of London Portfolio, but some dots and Martha Negley as well. I did not make the foundation pieced center. I forgot to make it at home and don’t really like foundation piecing anyway, so it was easy to decide to fussy cut instead.

Kathleen's Undercover Maker Mat
Kathleen’s Undercover Maker Mat

I was surprised that Kathleen knew the pattern, but she had made one and was using it for her longarm head. I shouldn’t be surprised She knows and makes all of the most popular modern patterns. She used some really nice fabrics.


To Nest or Not to Nest

I got a question about nesting seams from a guild member the other day. She wanted to know whether she should nest seams or not. Nesting seams has a purpose. You don’t just press seams open because the Modern Quilt Guild or someone else says you should.

Press seams open when you want to reduce bulk. This is often used in garment sewing.

Nesting seams is used to line up your seams. You will get better and easier precision if you use this technique. Caroline of SewCanShe writes on her blog post “Nesting your seams will help you get your perpendicular joints matched up and with practice the intersections will be perfect looking…. most of the time. :)” People say they don’t care if their seams are aligned. I care and so I nest seams unless there is so much bulk that it is impossible.

If you press seams open you are also in danger of developing holes in the quilting process. I press my seams open when I make pieced backs to reduce bulk. When I press my seams open I backstitch at the beginning and end of each seam line to prevent holes.

Sometimes, like in a Four Patch block, there can be quite a bit of bulk in the areas where the four patches meet. You can ‘pop’ the seam to also reduce bulk. Check out the tutorial on how to do this with images illustrating the technique.

I find it easier to get good precision when I put my quilts together using ‘Chunking’. Check out the tutorial.

Resources:

  • American Quilting “Pop the Seams”tutorial
  • Patchwork Posse Nesting Seams and Other Tricks – good information and some pictures that illustrate the topic.
  • Quick Tips for Quilters – nesting seams tutorial
  • SewCanShe Nesting Seams Basic tip tutorial

And many others


The creativity posts I have been posting on Fridays will return soon.

FOTY 2018 AGAIN…Finally

FOTY 2018 -October 2018

I finally got enough squares to make an interesting post for you. The last time I posted was in August, so not horrific, but long enough. I am not cutting up fabric and the pace I should be. I keep just piecing.

You’ll notice the MetroScape fabrics mostly missing. I am waiting to finish the top before I cut up many squares, because I’d rather have those fabrics missing from FOTY 2018 than not be able to finish the MetroScape quilt. I think I’ll have plenty.

Metro Scape Block n.8

MetroScape Block n.8

I finished another block over the weekend. I like the foreground fabric. That light green (sage or light aqua??) is really nice and unusual.

I have 8 of these now and cut the rest of the foregrounds, so I could spread out the colors. I have enough of the dots so that each foreground will be unique unless I decide to make extra blocks. We’ll see how large I want this quilt to be.

Undercover Maker Mat Begins

As mentioned the other day, Nicole over at Lillyella’s World is leading a Sew-a-long making the Undercover Maker Mat. I’ll be heading out for a few days of sewing next week, so I wanted to get a few of the fiddly bits done and lessen the amount of stuff I needed to bring.

Undercover Maker Mat small pocket

I started making the selvedege pockets. I am not sure I wanted to use selvedges, but the pockets on the sample look really cute. I thought I would try it out. I can always cut some fabric and use that if I decide I don’t like it.

I am still on the fence about selvedges. They can be pretty and fun, but I don’t see myself making a selvedge quilt or using them in a large way. Small touches, yes.

For the small pocket, I tried to pick selvedges that I really liked or meant something to me. I also wanted a little bit of color. I don’t know what I will get when I sew the pocket into the whole piece.

Undercover Maker Mat large pocket

For the large pocket, I followed the directions and put the selvedges on the diagonal.

Now both pockets are on the design wall and I am looking at them. I want to make sure I like them both.

The other thing is the size. I think I need to make mine a little bigger, because my machine is 19 inches wide. I think it would better just slightly bigger. I am thinking about how to do that.

EPP Stars

Hexie Stars -Big Piece

I haven’t talked about this project in a long time. I have been working on bunches of EPP stars. It wasn’t until last week that I actually put some of them together in groups and then attached them to my big piece.

I also laid the whole piece out on the bed and found that I have to double the size to make it even begin to fit our bed. I am feeling a little daunted by that effort with all of the other hand projects I have. Still, my friend Faye said that I have to think about this project as a long term, slow project.

Hexie Stars -Big Piece detail

There is a certain amount of satisfaction in getting even a few bits of this top done. When I add 4 stars to the larger piece, it feels good. It feels like I am making progress.

This is another project where I find that there are not enough colors in the rainbow. I guess I’ll have to think of it as a design challenge.

Sewing Machine Table Mats

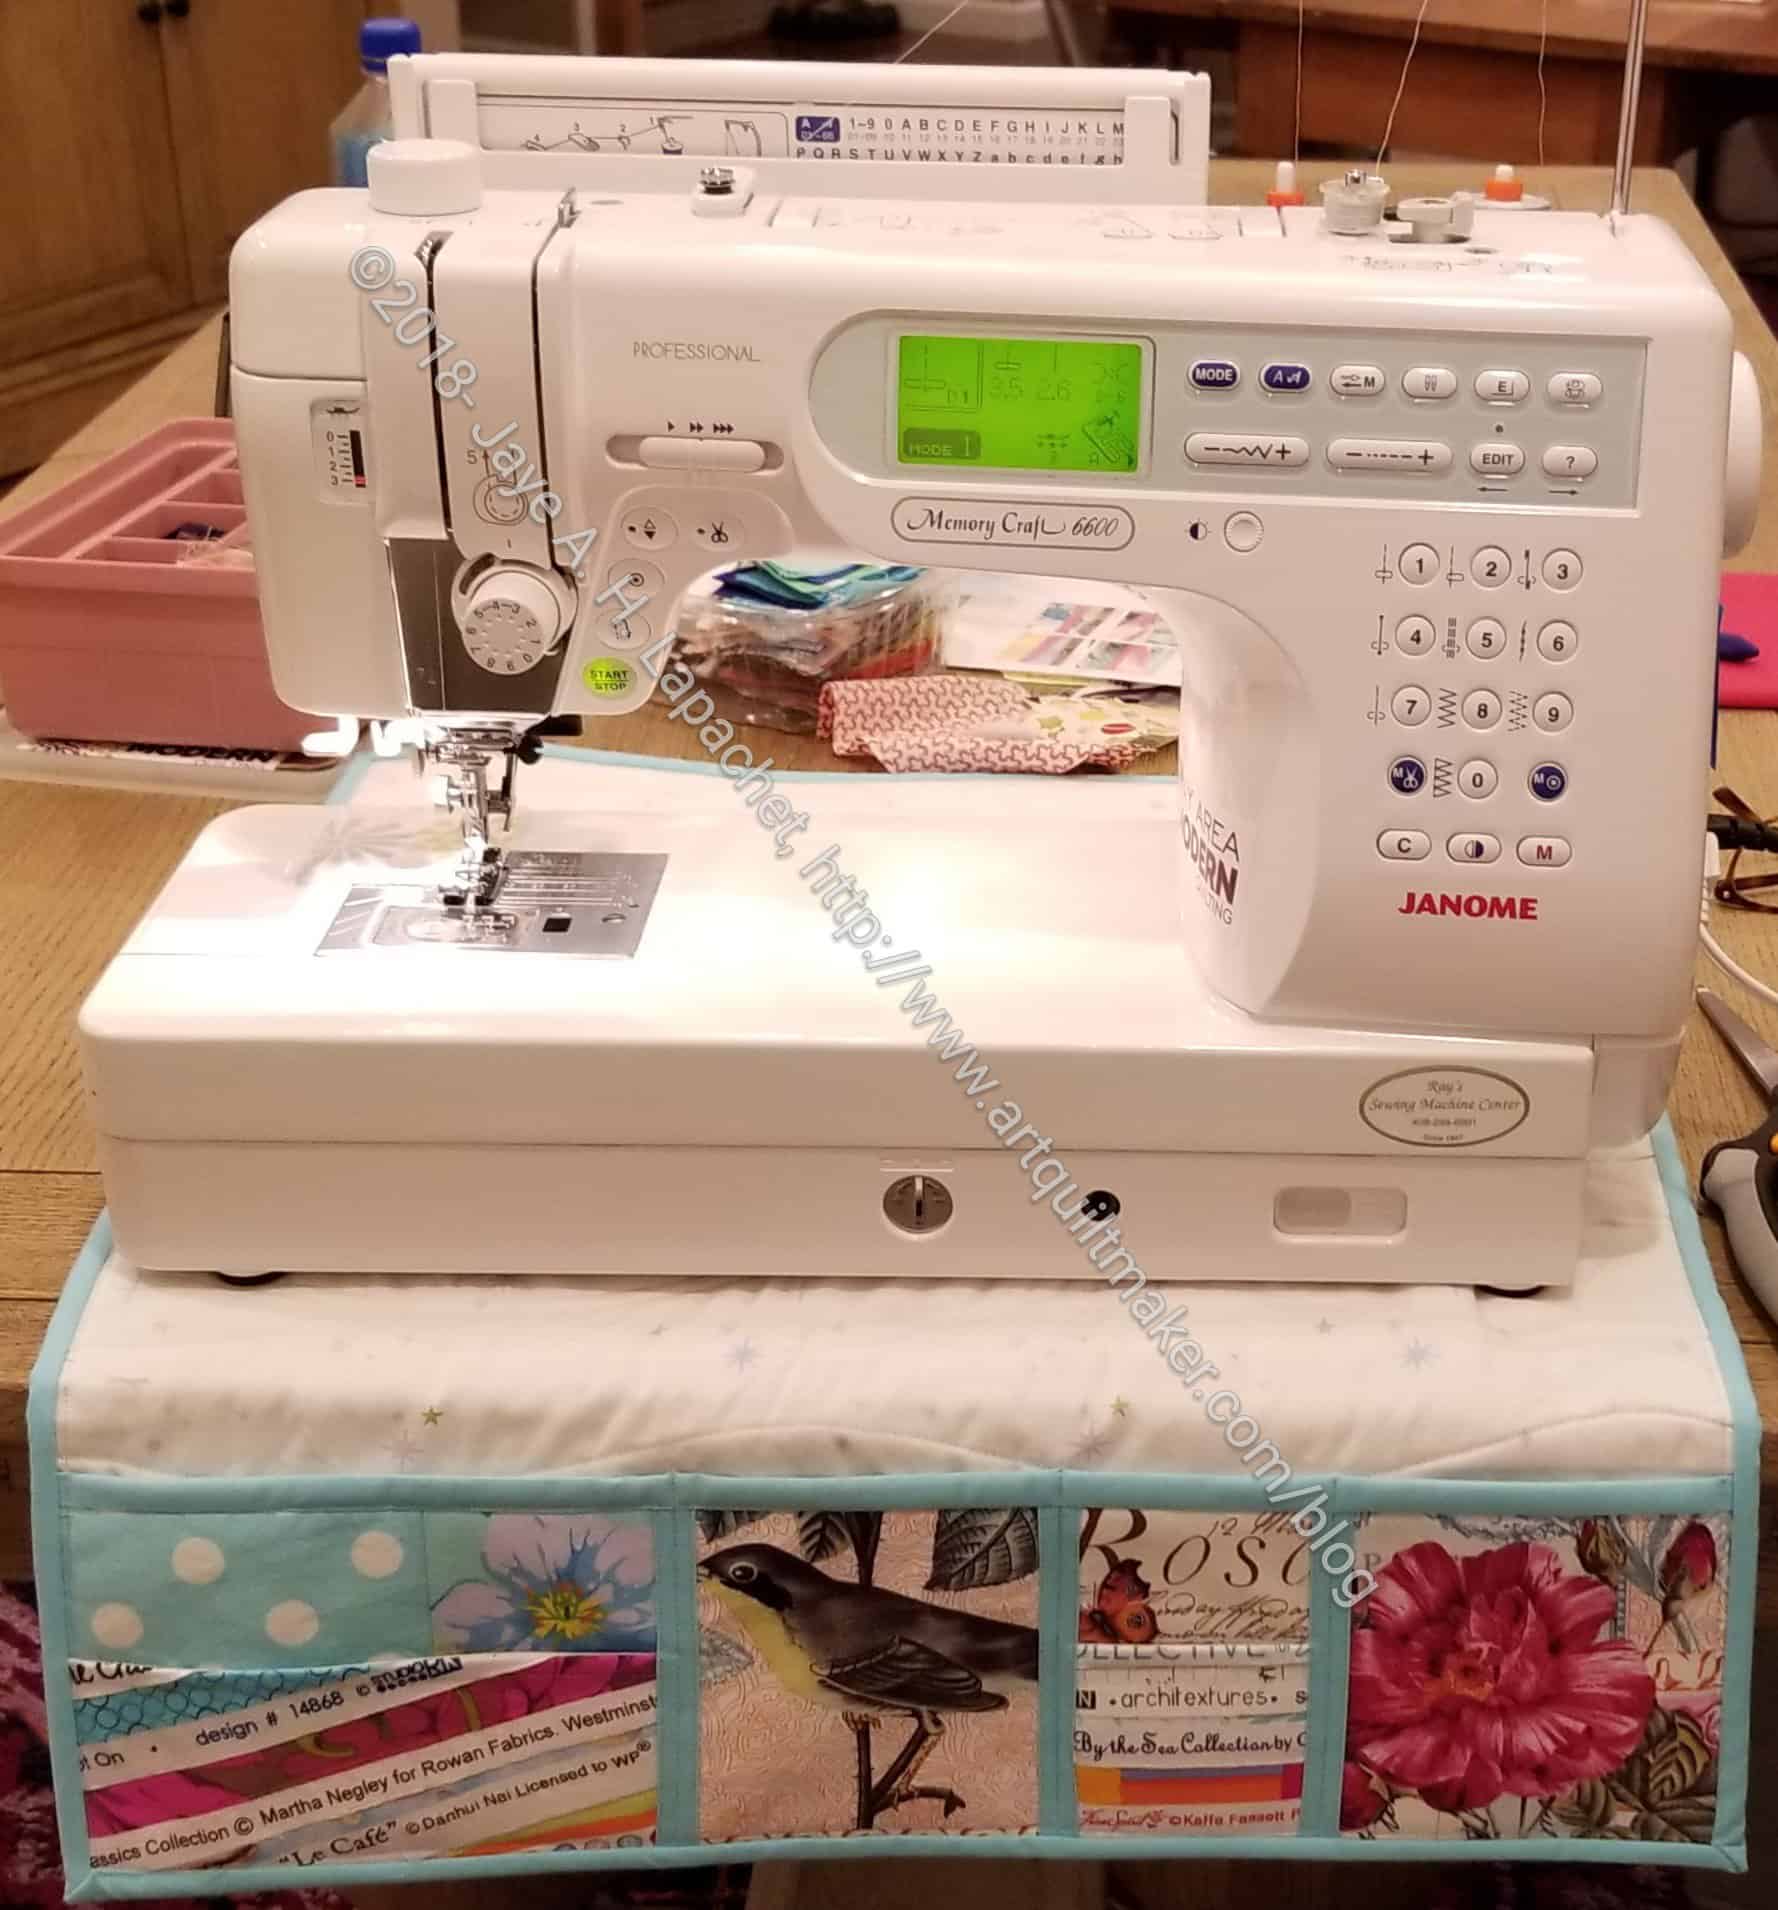
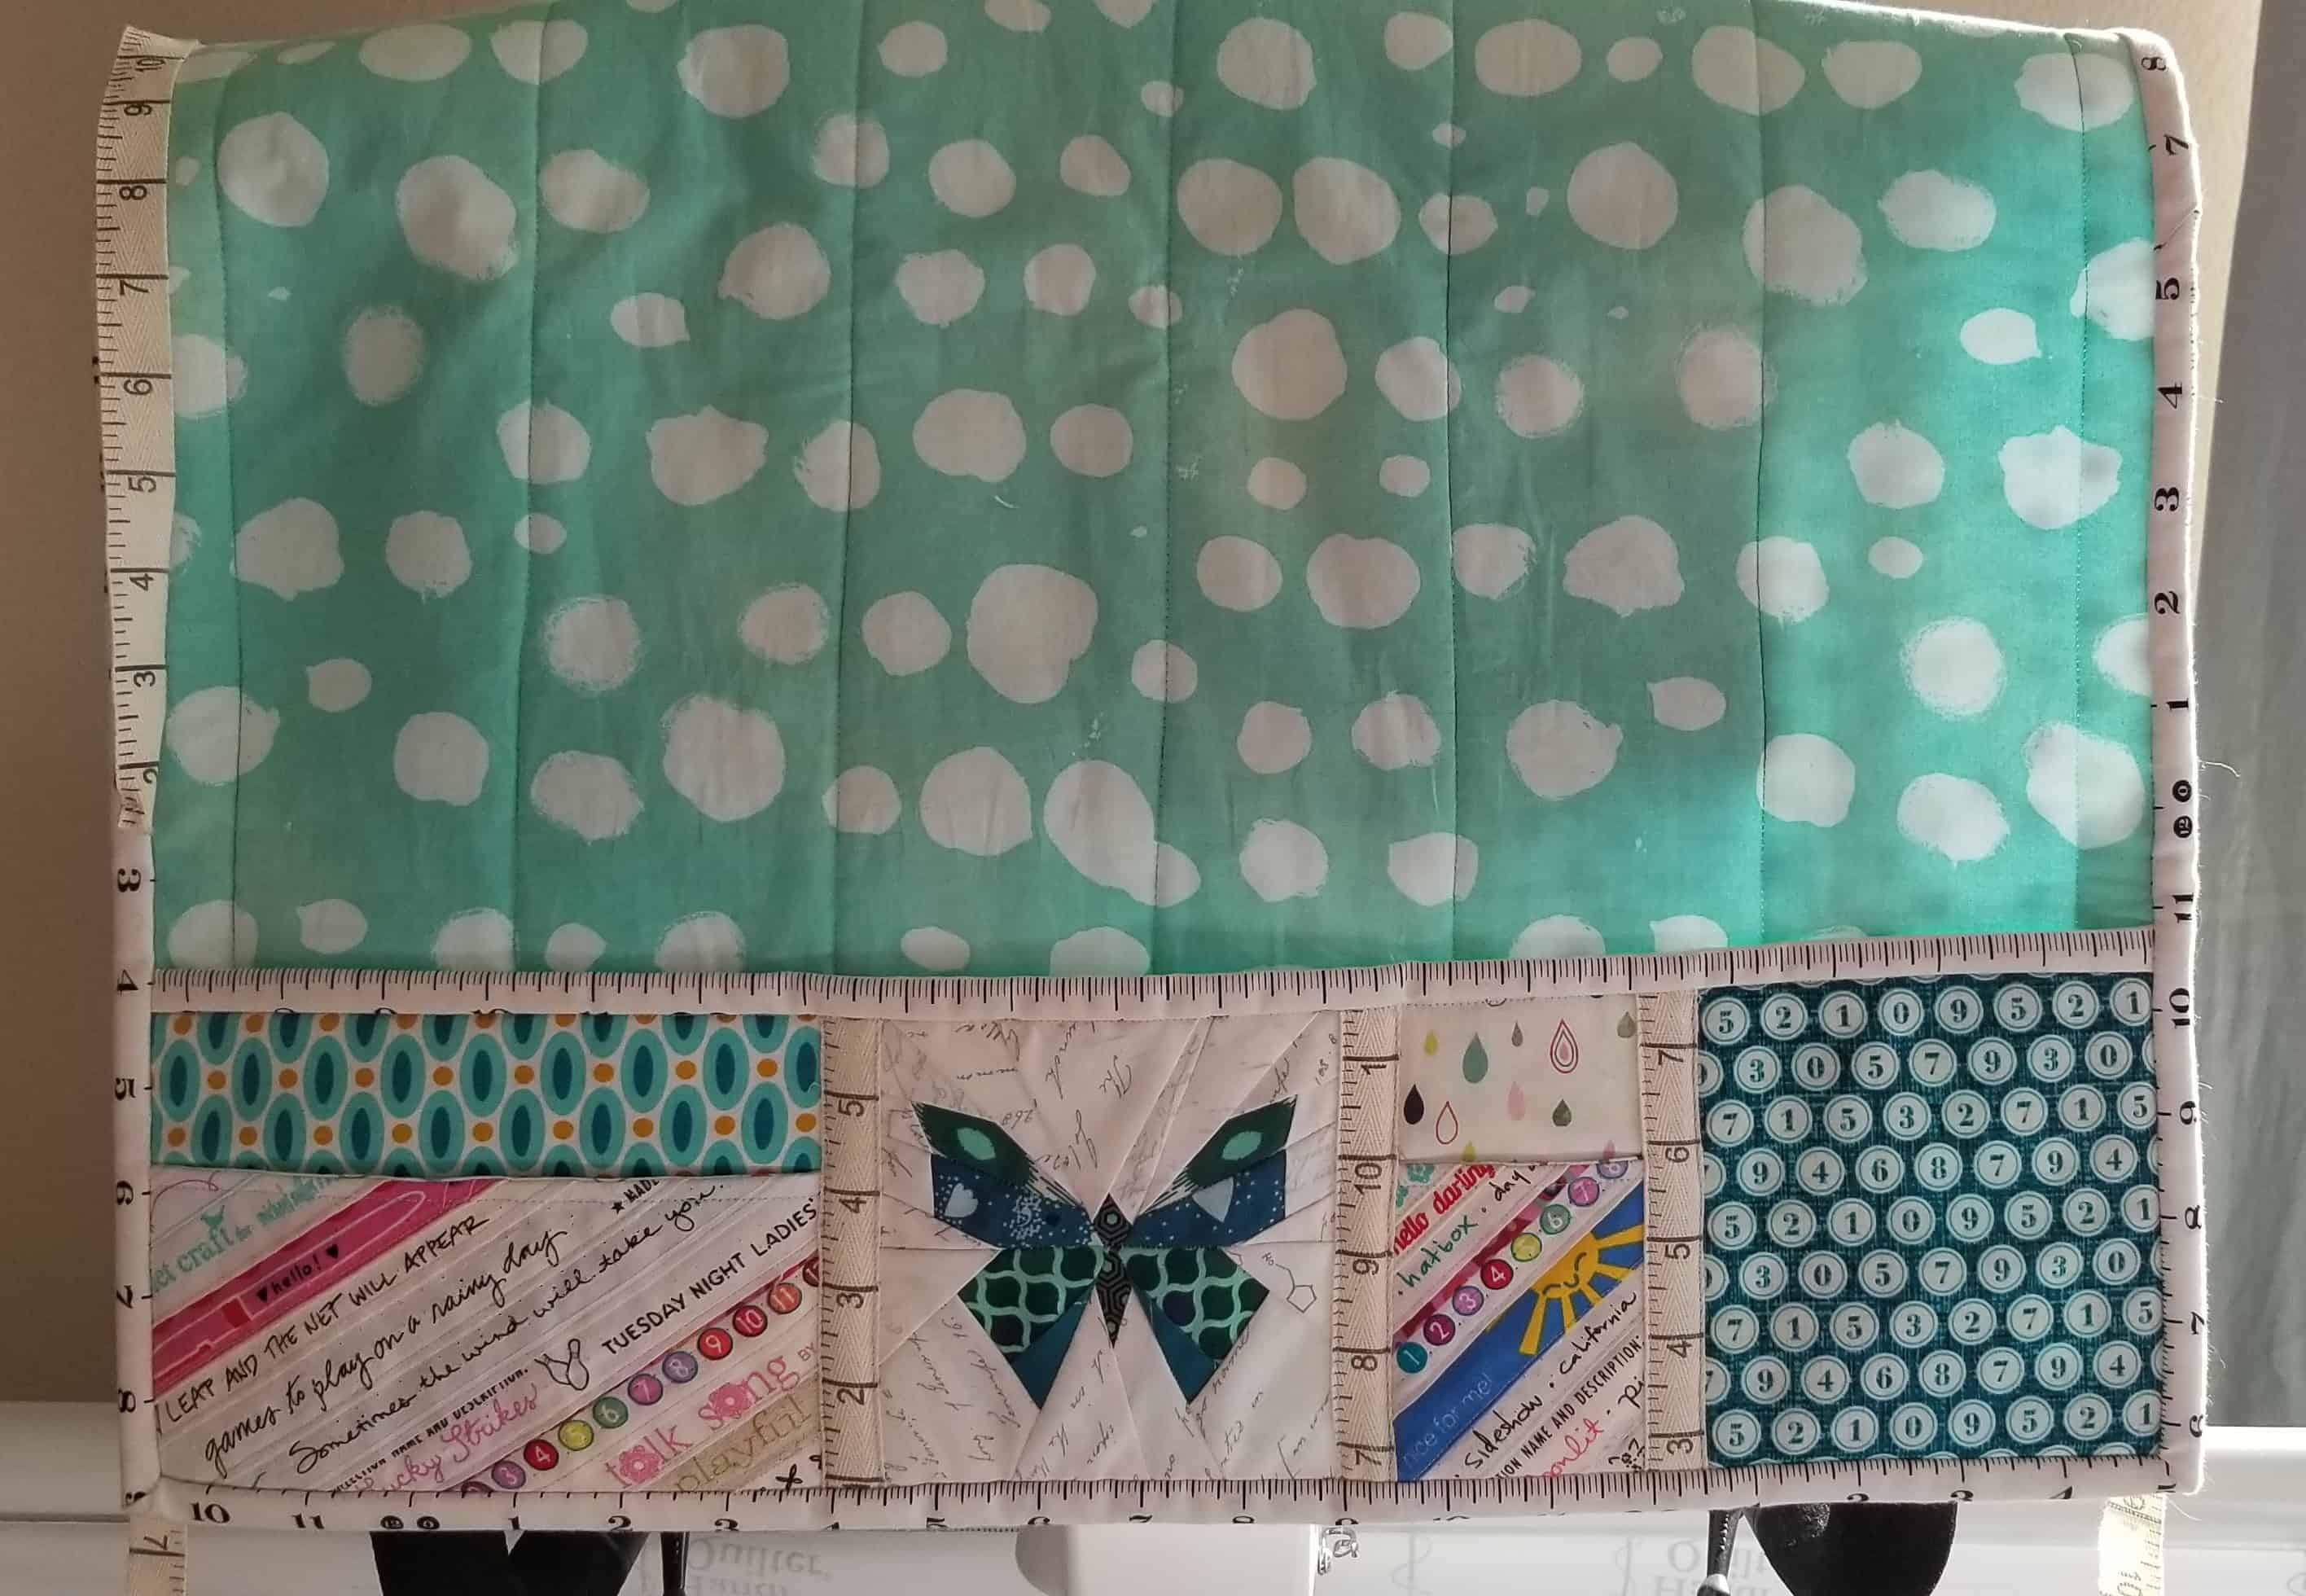
On Instagram, @Lillyellasworld has a sew-a-long happening for the Undercover Maker’s Mat. The pattern is free. People have made the whole mat and they are showing some great versions of this pattern. I also saw one with a heart instead of a butterfly. Despite the foundation piecing, I am thinking of making one for retreats. I can’t see using it at home, but it would be really useful to keep everything organized while I am away.

As a result, I was thinking about sewing machine mats in general. Before I madethe Undercover Maker’s Mat, I wanted to see what else what out there.  As I am wont to do, I did an image search. I found a lot. Still, after sifting through the duplicates, I found a few that were interesting.

I know you are wondering about the Crafty Gemini Sewing Machine Table Mat & Organizer. I made it (and am not showing  it to you yet, because it will be a gift, so stay tuned) and am not super happy with it. I didn’t do a crappy job and it isn’t ugly, but it isn’t for me. It’s possible I won’t like the Undercover Maker’s Mat either in which case I will try one of the other free tutorials that are available.

One that was interesting was a tutorial from Michelle of Creatively Blonde. I like the way it looks tailored and hangs down in the front of the machine.

I also like the way the We All Sew tutorial has a long length. I also like the rainbow.

Katie from Katie’s Quilting Corner has a tutorial that clearly shows how to customize the tutorial for the size of your sewing machine.

The thing that is great about the Crafty Mummy pattern is the scissor loop.

I like the pattern in issue 35 of Love Patchwork & Quilting – free pattern not available. I like the way the front hangs down. I don’t know that I would put all vinyl in the front, but I know why the vinyl is used.

And then, I found that someone did a list of table mats already.

More Bulk Cutting

More bulk cutting
More bulk cutting

Craft Night was at my house again on Monday. Nothing about my scrap bins has changed. They are still overflowing and I need to refresh my Blue Lemonade stash of squares. That meant that I hauled the Accuquilt downstairs and cut up scraps.

I didn’t get through my entire bin of blue, which was a disappointment, but not a surprise. Still I made good progress in adding to the 2 inch and 2.5 inch squares.

I found that I saved a lot of really tiny scraps. They went into the pet bed.

Allison's Blocks
Allison’s Blocks

I also found that I had a lot of strips. Alison showed some blocks a few months ago made from strips. I want to make some of them to make a donation quilt, but now it is not the time.

Continuing to Sparkle

With Spark #30, we finished working our way through Carrie Bloomston’s book, The Little Spark. Buy it. Support the artist. Our journey here is done, but the posts will remain and you can work through the book and my comments at your own pace. There is much more to each spark than what I wrote. The original chapters will help you.

Included on the very last page of the book was a list of books and movies that Carrie suggests we read. I am listing some of them:

I haven’t read any of the books listed above. I have seen a couple of the books she lists, but would watch them again. Go buy Carrie Bloomston’s book, so you get the full benefit of her fabulousness!